1
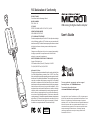
FCC Declaration of Conformity
PRODUCT NAME:
Turtle Beach Audio Advantage Micro II
MODEL NUMBER:
TBS-����-�� V�
FCC RULES:
TESTED TO COMPLY WITH FCC PART ��, CLASS B
OPERATING ENVIRONMENT
FOR HOME OR OFFICE USE
FCC COMPLIANCE STATEMENT:
This device complies with part �� of the FCC rules. Operation is subject
to the following conditions. (�) This device may not cause harmful
interference and (�) This device must accept any interference received
including interference that may cause undesired operation.
CAUTION:
Changes or modifications to this unit not expressly approved by
the party responsible for compliance could void the user’s
authority to operate the equipment.
PARTY RESPONSIBLE FOR PRODUCT COMPLIANCE:
Voyetra Turtle Beach, Inc.
��� Clearbrook Road, Suite ���, Elmsford, NY �����
Tel: (���) ���-���� Fax: (���) ���-����
Information To User:
This equipment has been tested and found to comply with the limits
for a Class B digital device, pursuant to Part �� of FCC rules. These
limits are designed to provide reasonable protection against harmful
interference in a residential installation. This equipment generates,
uses, and can radiate radio frequency energy and, if not installed
and used in accordance with the instructions, may cause harmful
interference to radio communications. However, there is no guarantee
that interference will not occur in a particular installation. If this
equipment does cause harmful interference to radio or television
reception, which can be determined by turning the equipment off
and on, the user is encouraged to try to correct the interference by
one or more of the following measures: (�.) Reorient or relocate the
receiving antenna. (�.) Increase the separation between the equipment
and receiver. (�.) Connect the equipment into an outlet on a circuit
different from that to which the receiver is connected. (�.) Consult
the dealer or an experienced radio TV technician for help.
RoHS
COMPLIANT
USB Analog & Digital Audio Adapter
User’s Guide
®
For more products, accessories, and our support
knowledge base, visit TurtleBeach.com
For warranty information please
visit www.turtlebeach.com/support
Copyright © 2010, Voyetra Turtle Beach, Inc. (VTB). All rights reserved.
No part of this document may be reproduced without permission. Turtle
Beach, the Turtle Beach logo and Audio Advantage are registered
trademarks of VTB. Inc. Windows and Vista are registered trademarks of
Microsoft Corporation. Mac is a registered trademark of Apple, Inc. All
other trademarks are properties of their respective companies and are
hereby acknowledged. Product features, visual design, package
contents and specifications are subject to change without notice.
Product# TBS-1150-01 V1
Setup Instructions
To use the Audio Advantage Micro II with a
Windows® PC/laptop or Mac®, simply plug it into a
USB socket and the LED on the unit should light
up, indicating that it’s powered. The Windows or
Mac operating system will automatically detect
the device and inform you when it’s ready to use.
The Micro II’s �.�mm stereo analog output jack
can be used to connect headphones and powered
speakers. Once the Micro II is set up, as described
below, you can use headphones or speakers by
plugging them into the jack.
Using the Micro II
with Windows® XP
Using the Digital Optical
Audio Output
After the Micro II has been detected, you can
check if it has been set up as a USB audio device by
clicking Start > Control Panel > Sounds and Audio
Devices.
To use the digital optical output, insert the included
S/PDIF digital adapter into the audio output jack and
connect a TOSLINK digital optical cable (not included)
to transfer the digital audio signal to external devices.
Then click on the Audio tab and click on the drop
down menu in the Sound Playback section to see
if USB Sound Device is listed.
To use the Micro II as your default audio device,
select it from the list and then click “OK”.
Inserting the included TOSLINK adapter into the
jack converts it to an optical digital output. This
adapter works with a standard optional fiber optic
cable (available at www.Turtlebeach.com) to
connect external digital devices to the Micro II.
Using the Micro II
with Windows � & Vista®
If your Mac or PC/laptop has more than one USB
socket, you should always try to use the same
socket for plugging in the Micro II. This will assure
that it will always be recognized as the same
device by the operating system.
After the Micro II has been detected, you can
check if it has been set up as a USB audio device
by clicking Start (circular Windows logo) >
Control Panel > [Win �: Sounds and Audio
Devices] > Sound .
PLEASE NOTE: Some USB hubs may have problems
providing a consistent data stream for digital
audio and may cause data stream packet loss. This
could result in clicks or distortions on the USB
audio from the Micro II.
In the Playback tab, the Micro II should appear
in the list as Speakers: USB Sound Device.
If you experience this problem when the Micro II is
connected to your USB hub, do not use the hub
and instead connect the Micro II directly to the
USB port on your Mac or PC/laptop.
[Windows � specific instructions will be in italics]
To use the Micro II as your default audio device,
right-click on USB Sound Device and select “Set
as Default Device”. A green circle with a check
mark will appear to indicate that this is now
your default sound device.
S/PDIF Digital Adapter (included)
Insert this adapter into the audio
output jack to connect a TOSLINK
digital optical cable when using
the digital audio output.
TOSLINK Digital Optical Cable (not included)
Insert a TOSLINK digital optical cable into the S/PDIF adapter to
connect the digital output to external audio equipment.
(The TOSLINK Digital Optical Cable may be purchased at
TurtleBeach.com.)
The digital audio output may be used to transfer
multi-channel audio to an external system with
built-in �.� decoder for Dolby® Digital or DTS™
formats. DVD playback of Dolby Digital or DTS
signals requires a software DVD player that
transmits this audio format.
Using the Micro II
on a Mac
After the Micro II has been detected, you can
check if it has been set up as a USB audio device
by clicking on the Apple menu icon and go to
System Preferences > Sound. Select the Output
tab and you should see USB Sound Device listed.