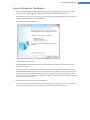
1
TuneUp Utilities
User Manual
Microsoft, Windows, Windows XP, Windows Vista, Windows 7, Office, Outlook, Windows Logo, MSN, Windows Messenger and Internet Explorer are products,
registered trademarks or protected names of Microsoft Corporation in the USA and/or in other countries. Firefox is a product and registered trademark of
the Mozilla Foundation in the USA and/or other countries. Safari is a product and registered trademark of Apple Inc. in the USA and/or other countries.
Opera is a product and a trademark of Opera Software ASA. Other products and brand names can be products and/or brands of their respective owners.
TuneUp Utilities Manual
Table of Contents
1. Welcome to TuneUp Utilities
5
New Features in this Version
6
System Requirements
7
Help & Support
7
2. The Start Center
The Tuning Status
3. Status & Recommendations
8
10
12
1-Click Maintenance and Automatic Maintenance
14
Increasing Performance
18
Fixing Problems - Details
22
Configuring Live Optimization
23
4. Optimizing the System
26
Disabling Programs
27
Displaying and Uninstalling Programs
31
Disabling Startup Programs
34
Configuring Turbo Mode
38
Cleaning the Registry
43
Defragmenting the Registry
50
Removing Broken Shortcuts
53
Accelerating System Startup and Shutdown
55
Defragmenting the Hard Disk
58
5. Gaining Disk Space
62
Cleaning the Hard Disk
63
Finding and Deleting Large Amounts of Data
67
Securely Deleting Data
74
6. Fixing Problems
77
Fixing common problems
77
Checking the Hard Disk for Errors
79
Managing Running Processes
82
Restoring Deleted Files
85
Showing System Information
88
3
TuneUp Utilities Manual
7. Customizing Windows
Changing Windows Appearance
90
91
Modifying Windows Settings
109
8. Overview of All Functions
132
Editing the Registry
136
Undoing Changes
138
Checking for Updates
141
Displaying the TuneUp Optimization Report
143
9. Rating Function for Programs
144
10. The TuneUp Utilities Gadget
146
11. TuneUp Utilities in taskbar notification area
148
12. Index
149
4
TuneUp Utilities Manual
1. Welcome to TuneUp Utilities
Congratulations on choosing TuneUp Utilities! You have just acquired a comprehensive collection of over
30 different tools to optimize your PC. Use this software to revitalize PCs, notebooks or netbooks with a minimum of effort!
With TuneUp Utilities can also automatically run important maintenance tasks, such as cleaning up your
hard disk and registry, for you, or you can run them yourself manually. A slow and untidy computer is now a
thing of the past for you. TuneUp Utilities recognizes whether there are any problems on your system and
offers simple solutions. You can also use TuneUp Utilities to customize the appearance of your Windows
system to your personal requirements.
This version's new feature is the TuneUp Program Deactivator™. You can use the brand new TuneUp Programs-on-Demand Technology™ to fully disable programs and thereby reduce system load, without having to uninstall them completely.
We hope you enjoy using TuneUp Utilities and your new, revitalized PC!
The TuneUp Team
5
TuneUp Utilities Manual
New Features in this Version
With TuneUp Utilities you can make sure your PC, notebook or netbook is in the best of health – all without
any expensive upgrades! Below is an overview of the most important new features in this version:
TuneUp Program Deactivator with TuneUp Programs-on-Demand Technology™
Now, for the first time, you can completely disable programs and reduce their load on your PC: the services,
startup programs, background processes or planned tasks of a disabled program are inactive until you need
them again. This prevents a loss of performance following numerous program installations.
Improved TuneUp Turbo Mode
The TuneUp Turbo Mode now gives you an even greater performance boost whenever you need it. It now
shuts off nearly 80 hindering factors in the background to provide greater performance for your work, more
fluid gameplay and full control over the hindering background activities.
The New TuneUp Tuning Status
Thanks to the clear graphs, the TuneUp Tuning Status shows you at a glance how well you are using
TuneUp Utilities to optimize your PC. You are shown any remaining potential here by the relevant notifications.
The New Rating Function for Programs
TuneUp Utilities now gives you the option of rating the usefulness of programs and seeing the ratings of
other TuneUp Utilities users. This may help you to decide which programs you really need. So that you can
apply this new-found knowledge immediately, the Rating function for programs is directly integrated in
the TuneUp Program Deactivator, TuneUp StartUp Manager and TuneUp Uninstall Manager modules.
The New-Look Start Center
TuneUp Utilities gives you full control of and access to the most important tuning steps, as well as a clear
overview. The new Start Center is now even more intuitive to operate. Thanks to the arrangement into categories, you will find the function you are looking for more easily and can check on the current status of
your PC at any time.
The New Overview of all Functions
TuneUp Utilities now has an Overview of all functions on the Start Center which gives you an overview
sorted by application area and quick access to all functions and settings.
6
TuneUp Utilities Manual
System Requirements
l
l
l
l
l
l
l
Windows XP (Service Pack 2 or higher), Windows Vista or Windows 7 (all 32-bit or 64-bit versions)
Min. 300 MHz processor
256 MB RAM
Screen resolution at least 1024x600 pixels
Online version: at least 80 MB of free disk space
CD version: at least 300 MB of free disk space (and CD-ROM or DVD drive)
Internet Explorer 6 or higher
If you have bought the CD version of TuneUp Utilities, but your netbook doesn't have a CD-ROM drive, you
can download our trial version from www.tuneup-software.co.uk and activate it using the product key
given on the CD case.
Help & Support
TuneUp Utilities has been designed to be as user-friendly and intuitive as possible. This manual provides
you with an overview of TuneUp Utilities. Taking the layout of the Start Center as a guide, it explains what
the many different functions do and how to access and use them.
Online at www.tuneup-software.co.uk, you will find more information, tips & tricks, the Program Help in
PDF format with lots of additional pictures, frequently asked questions about TuneUp Utilities and TuneUp
Support.
You can reach TuneUp Support by calling +49 6151 4938610 (Mon - Fri, 8 am - 6 pm, GMT) or via the
TuneUp Support Website www.tuneup-software.co.uk/support. It will help support staff greatly if you
know your TuneUp Utilities version number. You can find this by going to the Help & Support menu in the
Start Center and selecting About.
7
TuneUp Utilities Manual
2. The Start Center
The TuneUp Utilities Start Center has been completely redesigned and is now even more user-friendly, providing central access to all functions.
The five categories
The main area in the TuneUp Utilities Start Center comprises five categories, giving you fast access to the
key features of TuneUp Utilities sorted by topic.
Status & Recommendations
The Status & recommendations category shows you an overview of the current condition of your system
and gives you recommendations on how you can improve the system's health. To the far right of the categories, you can see the status of your TuneUp Live Optimization and can adjust it to suit your needs
simply by clicking Configure Live Optimization.
(For more information, see Status & Recommendations, p. 12.)
Optimizing the System
Under Optimize system, you can disable or uninstall unwanted programs and clean up your system and
your data.
(For more information, see Optimizing the System, p. 26.)
Gain disk space
Under Gain disk space, you can delete unnecessary data systematically from your system.
(For more information, see Gaining Disk Space, p. 62.)
Fixing Problems
Under Fix problems, you will find simple solutions to any problems that might occur.
(For more information, see Fixing Problems, p. 77.)
Customizing Windows
Under Customize Windows, you have many opportunities to customize your working environment to suit
you.
(For more information, see Customizing Windows, p. 90.)
8
TuneUp Utilities Manual
Overview of All Functions
To the right of the categories, you will see the Overview of all functions. This lists all the functions that are
available in TuneUp Utilities - clearly sorted by application area.
Turbo Mode
The improved version of TuneUp Turbo Mode, which is now even more powerful, provides an immediate
performance boost whenever you need it. When you put your computer into Turbo Mode, an analysis is performed to see which of those programs and functions currently running in the background are not strictly
necessary. These programs are stopped or slowed down, allowing the additional processing power gained
to be used exclusively by the programs you are actually running.
Tuning Status
The TuneUp Tuning Status is your personal indicator of optimization progress, i.e. it shows you how well
you are already using TuneUp Utilities and where there is still potential to optimize your system further. The
Tuning Status shows you details of both the Completed optimizations and the potential you have
exploited. The Tuning Status also helps you to recognize the remaining Unused potential and make use of
it.
The Menu Bar
The menu bar gives you access to TuneUp Utilities configuration dialogs and information on the program.
The "Settings" Menu
Use the Settings menu to go to the most important TuneUp Utilities configuration dialogs. Here you can
customize the program to suit your needs, apply maintenance settings, and configure TuneUp Live Optimization, TuneUp Turbo Mode and the update check.
The "Help & Support" Menu
The Help & Support menu provides you with access to the extensive program help with detailed instructions and program information. You can also click the link there and go to the TuneUp website directly
(www.tune-up.com). Clicking on Check for updates starts the TuneUp Update Wizard module, which
checks whether there are any new updates for your TuneUp Utilities.
If you are using a trial version of TuneUp Utilities and already have a product key, click here on Activate
product and enter your product key. If you do not yet have a product key, you can click Buy product to go
directly to the TuneUp Shop website and buy a full version.
If you want to register your product, click Register product after you have successfully activated it. Enter
your name and your e-mail address.
The Footer
Clicking on the Undo changes button in the footer takes you to the TuneUp Rescue Center module, which
you can use to monitor and undo changes that you have made to your system with TuneUp Utilities. You
can also manage restore points and thereby undo system changes that you did not make using TuneUp Utilities.
9
TuneUp Utilities Manual
The Tuning Status
The Tuning Status uses a graph and associated notifications to show you how extensively you are already
using the options of TuneUp Utilities to increase performance and maintain the system and what potential
for optimization still remains.
You can find the TuneUp Tuning Status on the TuneUp Utilities Start Center beside Turbo Mode. The Tuning Status is your personal indicator of optimization progress, i.e. it shows you how well you are already
using TuneUp Utilities and where there is still potential to optimize your system further.
The Graph
In the graph, the blue sections on the left represent the modules you have used to make your optimization
progress so far, and the dark gray area on the right represents open optimization options. Each section of
the graph has a message assigned to it: the letters in white boxes above the graph represent messages about
optimizations completed, the dark gray under the graph represents messages about untapped potential.
The Turbo Mode segment to the right of the graph shows you how many Turbo Mode options you have
turned on. If you have not yet configured Turbo Mode, this segment is empty. If the segment lights up
green, Turbo Mode is on.
Messages
To the right of the graph, you will see the current messages about optimizations already completed and
about untapped potential. If you click on the blue underlined text in the messages under Unused potential,
this opens the precise TuneUp Utilities module that you can use to achieve the unused potential.
Use the arrow to click through the individual messages. If you click on the blue underlined text between the
arrows, a window opens with an overview of all Tuning Status messages. This displays a complete overview
with all of the current messages on both the Completed optimizations and Unused potential areas
together with the corresponding graph sections and letters.
Even if your system is perfectly optimized today, anything could change tomorrow that could
present areas for optimization, e.g. the installation of new programs or a change to system settings.
Pay attention to the messages on unused potential in order to keep your system optimized for the
long term and therefore maintain a good Tuning Status.
10
TuneUp Utilities Manual
What is Used to Calculate the Tuning Status?
TuneUp Utilities performs an analysis to see which optimizations it can perform on your system. This potential is displayed in a graph showing you how close your system is to having 100% optimization. You will
achieve 100% – the perfect Tuning Status and therefore a fully filled out graph – when you implement the
recommended optimization potential for your system as much as possible.
The graph is made of different sections. The sections on the left-hand side represent optimizations completed and the sections on the right-hand side show optimization potential still remaining. The Tuning
Status is calculated based on the analysis results of the following sections:
Automatic Maintenance, 1-Click Maintenance and Manual Maintenance
For this section to be considered as optimized, one of the following conditions must be fulfilled:
l
l
l
Automatic Maintenance must be activated with all the necessary maintenance tasks enabled or
TuneUp 1-Click Maintenance is carried out within 14 days of use with all the necessary maintenance
tasks or
TuneUp Registry Cleaner and TuneUp Shortcut Cleaner are run within 14 days and Temporary files
are deleted within 14 days of use.
To delete Temporary files, open the Gain disk space category in the Start Center. Click on Unnecessary files
under Clean hard disk and check the Temporary files box.
Live Optimization
For this section to be considered as optimized, the two Live Optimization options should be enabled. These
two options have the same weighting.
Increasing Performance - Details
Please note that you must answer the questions on your profile in order to receive appropriate recommendations for your system.
For this section to be considered as optimized, the following condition must be fulfilled:
l
You have either accepted or hidden all recommendations.
Recommendations that you have hidden for 30 days will cause the status to be reclassified when this period
expires and the recommendation will be displayed again.
Fixing Problems - Details
For this section to be considered as optimized, the following condition must be fulfilled:
l
You have either fixed or hidden all problems.
Problems that you have hidden for 30 days will cause the status to be reclassified when this period expires
and the problem will be displayed again.
Program Deactivator and StartUp Manager
The Tuning Status analyzes how many of your existing programs are using up your system's resources and
recommends that you optimize these through TuneUp Program Deactivator or TuneUp StartUp Manager.
In doing so, the Tuning Status takes into account the fact that you have classified some of your programs
as important despite their system load and that they should remain active. Therefore this section of the
graph is considered as optimized after a certain number of programs have been disabled.
Temporary Performance Boost from Turbo Mode
The Turbo Mode is not considered when the current Tuning Status is calculated. The Turbo Mode segment
to the right of the graph shows you the current status of Turbo Mode. When Turbo Mode is on, the segment is green.
11
TuneUp Utilities Manual
3. Status & Recommendations
The Status & recommendations category shows the current status for the three key functional areas that
TuneUp Utilities has to offer. In the event of warnings or recommendations, you can use the Show details
link to immediately address the problem behind the warning or view the recommendations.
"Maintain System" Area
The status in the Maintain System area shows how often your computer is maintained.
This takes into account whether Automatic Maintenance is carried out regularly with
the most important maintenance tasks or whether you have manually run 1-Click Maintenance recently.
Beneath the status display, you will see two options: Change maintenance settings
and 1-Click Maintenance.
If you click on Change maintenance settings, a window opens in which you can specify maintenance tasks that must be carried out by Automatic Maintenance and 1-Click Maintenance. For
Automatic maintenance you can specify when it should be carried out.
If you click on Start 1-Click Maintenance, 1-Click Maintenance will be carried out with the default TuneUp
Utilities settings or the changes to the maintenance settings made by you.
"Increase Performance" Area
The status field in the Increase performance area shows whether TuneUp Utilities has
determined opportunities for increasing your computer's performance. For example,
you may receive recommendations for increasing the speed of your Internet connection, uninstalling programs that haven't been used for a while or upgrading your
hardware.
However, in order to get the most out of performance recommendations that are personalized to your requirements, you must first answer some questions regarding your
usage profile. Click Create profile.
If there are recommendations, you can view these by clicking Show details or the link to the recommendations. Each recommendation has a detailed description and you can apply most recommendations
with just a click of the mouse. You can also hide individual recommendations. Once all recommendations
have been applied or hidden, the status for this area reverts to green.
12
TuneUp Utilities Manual
"Fix Problems" Area
The status in the Fix problems area shows whether everything is working fine on your
computer or whether critical problems have been detected which may affect the system's health. For example, a check can be carried out to see if key Windows settings
have been configured correctly, if there is enough free space on your system drive or
whether important security programs have been installed.
If problems have been found, click Show details. For each problem, you will receive a
description and can choose if you want to solve it now or hide it until later. Once all
problems have been solved or hidden, the status of this area reverts to green.
Configuring Live Optimization
On the far right in the category, you will see the status of your TuneUp Live Optimization. Simply click Configure Live Optimization to customize the feature to suit you.
13
TuneUp Utilities Manual
1-Click Maintenance and Automatic Maintenance
All modifications to your system will be monitored by TuneUp Rescue Center and can be undone if
necessary.
Maintenance Tasks
1-Click Maintenance and Automatic Maintenance make sure that your computer is always kept clean, so
that the system runs quickly and reliably.
As its name suggests, Automatic Maintenance regularly and automatically performs the most important
maintenance work on your system to ensure that Windows remains fast and stable. 1-Click Maintenance
does the same - except that just one click is necessary: The link for starting 1-Click Maintenance can be
found in the status field of the Maintain system category in the Start Center.
The Automatic Maintenance is particularly useful for all users who would rather sit back or do other things
than worry about the maintenance of their computer.
1-Click Maintenance is particularly suited to those users who would rather set the time for maintenance
themselves and wish to monitor its progress. After maintenance has been performed by 1-Click Maintenance, further details on any problems found are also displayed.
By default, 1-Click Maintenance performs the following tasks for you:
14
TuneUp Utilities Manual
1-Click Maintenance ...
... cleans your registry
Over time, the central Windows registry becomes filled with hundreds of superfluous entries. These include
references to non-existent files, backlogs of programs deleted long ago and faulty entries. Your registry is
cleaned, making your Windows system fast and problem-free. For more information, see Cleaning the Registry, p. 43.
... defragments your registry
Even after the registry has been cleaned as described above, it is not automatically smaller because the disk
space that is freed up is not released. This feature compresses the registry by deleting these gaps. For more
information, see Defragmenting the Registry, p. 50.
... removes broken shortcuts
1-Click Maintenance checks whether there are any broken shortcuts on your desktop or in the Start menu
or Quick Launch taskbar and then automatically deletes them. At the same time, a search is also made for
faulty entries in the history lists of various programs such as Windows Media Player or Microsoft Office. For
more information, see Removing Broken Shortcuts, p. 53.
... gains disk space by deleting unnecessary files
So-called "temporary" files are something of a nuisance. Windows and programs create temporary files on
the hard disk, in order to temporarily store certain settings or data. If the program in question is closed,
these files should really be deleted from the program. However, the program in question often "forgets" to
clean up after itself so that over time your hard disk can be filled with a lot of unnecessary data. 1-Click
Maintenance reliably deletes all temporary files and folders from your hard disk. For more information, see
Cleaning the Hard Disk, p. 63.
... optimizes system startup and shutdown
Some programs that are run each time you start your system slow down the startup process to an unnecessary extent. Such known programs that are definitely not required are turned off here. For more information, see Accelerating System Startup and Shutdown, p. 55.
... defragments your hard disk
In the background, TuneUp Utilities changes the arrangement of files and folders so that they can be read
more quickly. Regular defragmentation is paramount - especially if the data structure of your hard disk
changes frequently, for example because you move or delete files or install new programs. Defragmentation
is, however, only carried out when necessary. And you can even choose whether - if it was determined that
defragmentation was necessary - a thorough or a quick defragmentation should take place, or whether this
should depend on the result of the analysis. For more information, see Defragmenting the Hard Disk, p. 58.
The Automatic Maintenance function is also configured so that it performs all these maintenance tasks.
However, it is run in the background and only the notifications tell you when it was carried out.
15
TuneUp Utilities Manual
How to Make Maintenance Settings
In the Start Center, click on the Change maintenance settings link in the Maintain system area of the Status
& recommendations category. A configuration dialog opens containing one tab for Automatic Maintenance and one for 1-Click Maintenance respectively. Configure your settings here.
Alternatively, you can open the maintenance settings window by going to Overview of all functions in the
Start Center and selecting the Configure maintenance entry under TuneUp settings.
Performing Maintenance
You can specify whether and when Automatic Maintenance should run automatically in the background.
You can even have automatic maintenance run only in idle mode, i.e. it only starts when you are not currently working on your computer and no programs are required in the background. This way Automatic
Maintenance will never interrupt your work. If you select this option, following the number of days specified by you, maintenance will be attempted as soon as your computer is in idle mode. Three days is selected
by default.
If, after a period of a week, it was not possible to perform full maintenance because your computer was not
in idle mode for long enough then - if you enable this option - maintenance will be carried out anyway. This
prevents your computer from not being maintained over a long period of time.
If you choose scheduled maintenance, the procedure is similar: If your computer is not switched on at the
time of scheduled maintenance, Automatic Maintenance is performed 5 minutes after you next start your
PC. This option can also be disabled.
16
TuneUp Utilities Manual
Maintenance Tasks
Because TuneUp Utilities preferably wants to provide comprehensive maintenance for your computer, all
maintenance tasks are activated by default for both Automatic Maintenance and 1-Click Maintenance.
However, if you do not want certain maintenance tasks to be performed, you can exclude them from maintenance. For example, if you would rather defragment your hard disk manually, simply clear the Defragment hard disks checkbox.
Tools
If the notification that appears after maintenance disturbs you, you can switch it off here. Simply uncheck
the Show maintenance report as notification checkbox.
If you work with a portable computer, you can also specify - in addition to the other options - that you
don't want maintenance to be performed when the computer is running off the battery, so as not to reduce
the battery life unnecessarily. This option is enabled by default.
17
TuneUp Utilities Manual
Increasing Performance
In the following chapters, you will find out why it is important to do so and how you can use Increase performance to increase the performance of your system, by turning off unnecessary tasks and services.
All modifications to your system will be monitored by TuneUp Rescue Center and can be undone if
necessary.
Increasing Performance - Introduction
You can improve your system performance by turning off tasks and services that run in the background
and that you rarely, if ever, need for your day-to-day work. For tablet PC compatibility (i.e. the option of
operating the computer by moving a stylus across the screen) or network server technologies. You can also
increase the performance of your computer by uninstalling programs. A search is therefore run for programs
that have not been used for a long time - programs that you may not even remember you had and which
slow down your system unnecessarily. TuneUp Utilities also recognizes when your computer hardware is
not powerful enough.
Your Internet settings can prevent Windows from using the bandwidth of your Internet connection optimally. Downloading two files at once or downloading data from websites can be slowed down by Windows
default settings. You will also be shown the potential for optimization here too.
Should your computer be slowed down by superfluous visual effects, this will be identified.
TuneUp Utilities checks your computer for such performance-sapping visual effects and provides recommendations for increasing performance.
To enable TuneUp Utilities to provide you with comprehensive recommendations, you must complete the
profile before running the software for the first time. The way is then clear to a rapid and simple performance boost.
All modifications to your system will be monitored by TuneUp Rescue Center and can be undone if
necessary.
18
TuneUp Utilities Manual
How to Increase the Performance of Your Computer
You can find out if you have any recommendations by going to the Status & recommendations category
in the Start Center and looking at the status fields of the Increase performance area. If you have hidden
some recommendations, these do not impact the status any more. Open the details window by clicking on
the Show details link.
When you open this window for the first time, you must answer the short questions from the profile wizard,
so that the optimization can be precisely tailored to your situation and needs (see Increase performance Profile, p. 19).
Overview
The details window opens on the Overview tab, where you can find out whether there is any potential for
increasing performance. In the areas Internet settings and Visual effects, you can perform all the optimization recommendations found by clicking Optimize all. This will not restrict any of your important functions.
The recommendations in the Hardware and software area on the other hand depend heavily on your usage
behavior. This is why you can only apply them one at a time.
Switching tabs
Click on a recommendation or on the Details button to move to the other tabs, where you can view the
details of each recommendation. Alternatively, you can click on the name of the tab you want.
Applying Recommendations
In the Internet settings and Visual effects tabs you can perform all the optimization recommendations
found by clicking Optimize all. Alternatively, you can click on a recommendation in the left column. In the
right-hand area of the window, a detailed description will appear and you can apply the recommendation
by clicking on the button on the bottom right.
In the Hardware and software tab you must answer a few simple questions on each recommendation in
order to receive suitable options to continue. If you can't answer a question or want to postpone the decision, you can hide the recommendation by clicking on Hide recommendation on the bottom right.
Please note that you cannot of course simply accept the recommendations concerning your hardware, but
can only hide them.
Hiding and Showing Recommendations
If you do not want to accept a recommendation, click Hide recommendation. Now you can select whether
you want to hide it permanently or only for 30 days. The number of hidden recommendations is always displayed in the taskbar on the right. By clicking on the number displayed, you can easily show these recommendations again.
Changing a profile
Selecting Change profile on the top right takes you to the profile, which shows the basis for your optimization recommendations (see Increase performance - Profile, p. 19).
Increase performance - Profile
The first time you use TuneUp Utilities, you are prompted to complete a profile, so that it can provide you
with tailored recommendations for increasing performance. This profile contains the following questions:
19
TuneUp Utilities Manual
How is your computer usually connected to the Internet?
Select the type of connection from the list so that your network, Internet and browser settings (for example
packet sizes) can be adapted as best as possible to your Internet connection.
What criteria should be used to optimize visual effects?
If you select Maximum performance (irrespective of display quality), all effects and the colorful Luna
theme are turned off. This is highly recommended, especially for slower computers, because the display of
these sophisticated interfaces really eats up resources.
If you select Maximum performance (irrespective of display quality), all effects including the Aero glass
theme are turned off. This is highly recommended, especially for slower computers, because the display of
these sophisticated interfaces really eats up resources.
If the interface on your computer flickers and it takes a while for windows to open, choose the option A balance between performance and display quality. The attractive interfaces are retained but the performancesapping effects are switched off.
If you have a high-performance graphics card, your system performance will not be improved by
turning off the Windows Vista Aero desktop experience.
How Many Days Should a Program Remain Unused Before We Recommend
Removing it?
Your computer is checked for programs that have not been used for a long time. These are then displayed
with the recommendation that they are removed so that they do not slow down your computer unnecessarily. Based on your user behavior, you specify here after how many days a program that has not been
used is considered to be potentially unnecessary and displayed with the recommendation that it is removed.
20
TuneUp Utilities Manual
Changing a Profile
You can change your profile settings at any time later by going to the Start Center and selecting Change profile under Increase performance in the Status & recommendations category.
Alternatively, you can click on the Change profile button at the top left of the Increase performance details window.
Note that you cannot confirm your profile until you have entered all the necessary information.
21
TuneUp Utilities Manual
Fixing Problems - Details
In the following section you will find out how to use the Fix problems – Details feature and why it is important to do so to remove problems that are negatively affecting your system's health.
All modifications to your system will be monitored by TuneUp Rescue Center and can be undone if
necessary.
How to Fix Problems
To find out whether there are problems affecting your system's health, go to the Start Center in the Status &
recommendations category and look at the Fix problems status field.
For example, checks are made to see if key settings have been set correctly in Windows, if there is enough
free memory on your system drive, if important security programs are installed and if there are any new Windows updates. If you have hidden some problems, these do not impact the status any more. Open the
details window by clicking on Show details.
Overview
The details window lists the problems found. When you select a problem from the list, the detail panel gives
you a short description of the problem and a suggestion for a solution.
Fixing Problems
For each problem, you can decide whether you want to solve it straightaway or hide it. The easiest way is to
fix problems by clicking on the link for the suggested solution.
Hiding Problems
If you don't want to fix a problem immediately, click Hide problem. Now you can select whether you want
to hide it permanently or only for 30 days.
22
TuneUp Utilities Manual
Configuring Live Optimization
In the following chapters, you will find out how and why you can increase the performance of your computer by turning on TuneUp Live Optimization.
Introduction
TuneUp Live Optimization consists of two intelligent optimization methods that monitor the load your computer is under in real time and can thereby intervene if necessary to avoid sudden drops in performance.
Both optimization methods work to accelerate performance - one increases the computer's response rate,
the other the speed at which programs start up - but only when necessary.
This is done by intelligently prioritizing the programs that are running. If your computer is already working
at near full capacity and you start a program, this program will start more rapidly if it is briefly assigned a
higher priority. And if a background program suddenly gets carried away and requires a particularly high
amount of computing power, it will be assigned a lower priority so that the programs you are currently
using will run more smoothly. This enables work to be carried out quickly, even at high capacity.
23
TuneUp Utilities Manual
How to Configure Live Optimization
Start the TuneUp Live Optimization module by going to the Start Center and clicking on the Configure Live
Optimization entry on the right-hand side of the Status & recommendations category.
Alternatively, you can open the module by going to Overview of all functions in the Start Center and selecting the Configure Live Optimization entry under TuneUp settings.
Here you can select the two optimization methods. Since both of these are intelligent optimizations in real
time, they do not always take effect immediately. Rather you specify here that from now on the load under
which the computer operates is to be monitored so that both optimizations can apply if the need arises.
Select here the optimization methods to be carried out where necessary:
Increasing the Response Rate
This optimization method monitors all background processes and gives them lower priority if they take up
too much computer power. This ensures an optimal response rate and prevents juddering by windows or
programs. This intelligent optimization identifies need and ensures that the computer's response rate is
always optimum.
The following pictures represent the inside of your computer before and after the Increase response rate
option is enabled. Here you can see how the load on your PC is reduced:
24
TuneUp Utilities Manual
In addition to those programs that you are currently using (green), many others are also running in the background that are really not that important for your work (blue). If such background processes suddenly start
to require a great deal of processing power, they are assigned a lower priority so that your other programs
can continue to run smoothly.
Speed up the startup of my programs
This optimization method intervenes if you start up a program manually when the computer is already under
heavy load. For a short period immediately after the program has started, processing power is temporarily
redistributed, giving the program in question a separate performance boost. This boost is achieved by temporarily prioritizing the program in question.
The following pictures represent the inside of your computer before and after the Accelerate program startups option is enabled. Here you can see how a newly started program receives a particular performance
boost:
For a short period immediately after the program is started (orange) the processing power of the computer
is temporarily redistributed, giving the program in question a separate performance boost. This boost is
achieved by temporarily prioritizing the program in question. No other programs (green and blue) are
affected.
How do I know when Live Optimization was enabled?
The great thing about Live Optimization is that it works intelligently in the background. Whenever one of
these two optimization methods is improving the performance of your PC in the background, this is also
indicated by the icon in the notification area of the taskbar.
25
TuneUp Utilities Manual
4. Optimizing the System
Your computer does not always work quite how you would like it to. Often it seems to take an eternity to
call up individual programs or to save files and you start to doubt the performance capabilities of your computer. But in many cases this has nothing to do with the hardware. The problem is caused by the programs
that are started, without you being aware of them, or remnants of programs that were not completely
removed from your computer during an uninstallation process.
Reducing System Load
The Reduce system load area is devoted to dealing with your installed programs and services. Its functions
extend from disabling startup programs that have no impact whatsoever on the actual program, and manually uninstalling individual programs, to automatically turning off entire function areas. But that is not all!
In this area, you will also find a link to an unprecedented function. Have you ever had an intelligent alternative to uninstallation? Now you do – TuneUp Program Deactivator, the unique module that uses our patented TuneUp Programs-on-Demand Technology™, p. 27.
Manually Running Maintenance Tasks
Being able to disable or uninstall programs is an important criterion for optimizing system performance. But
this may not achieve a great deal if your Windows system is still full of "relics", i.e. remnants of programs
that were uninstalled long ago but were not fully removed. You can use our cleanup program to only keep
entries on the computer that really belong there - then complete your tidying with a more intelligent
arrangement of the system entries and data to ensure a quicker startup of programs and files.
26
TuneUp Utilities Manual
Disabling Programs
In the following chapters, you will find out how you can use the TuneUp Program Deactivator module to
disable programs that place a load on your system at various times (at system startup, during operation and
at shutdown) and why it is useful to do so.
All modifications to your system will be monitored by TuneUp Rescue Center and can be undone if
necessary.
Introduction
Until now, users only had two options for dealing with unnecessary programs: They could either remove
them from the system completely or accept that their background programs would continue to slow it
down. After a program is uninstalled, there is always the risk that files that were dependent on it will no
longer be able to be started. If the program is left on the computer, it is always available if it is needed, but
continues to impair system performance.
TuneUp Program Deactivator not only reduces the load of programs at system startup, but also during normal operation and at shutdown, where the load is a result of services and tasks belonging to one program.
TuneUp Programs-on-Demand Technology™
Thanks to the TuneUp Programs-on-Demand Technology™ there is now a third option: Disable programs
that are no longer required first and see if you can continue to work without them. If you notice that you
need a program again, it is no longer a problem. You can start the program as usual - the TuneUp Programs-on-Demand Technology™ reactivates the program in the background, as if you had never disabled
it.
Design of TuneUp Program Deactivator
TuneUp Program Deactivator is divided into three areas: the All installed programs area, the Load from
installed programs area and the Details area.
All installed programs
In the All installed programs area, you can see an overview list of all the programs installed on your system
together with their load status. In the Name column, the programs are sorted according to their load: high,
medium or low. Programs that do not place any load on the system have the status "none" and are not
listed by name. The value for the load is always the highest value for startup, operation or shutdown. In the
Status column, you can see the current status of the programs.
Load from installed programs
In the Load from installed programs area, you will find three graphs that are designed to give you a visual
overview of the load on your system: The left-hand graph shows you the load on system startup, the centre
one the load during normal operation of your PC and the right-hand one the load when shutting down. A
legend with explanations is provided underneath the graphs. If a program is selected in the list, this is
shown by a program icon next to the graph.
Details
In the Details area, you can see the name of the selected program, its current status and the load on the system from that program. You can use the switch to enable or disable the program. If no program is selected,
you will see an overview here showing how many programs are enabled/disabled or relevant to the system.
If several programs are selected, the details area shows the number of programs with the various statuses.
The status shown next to the switch is the predominant status.
27
TuneUp Utilities Manual
Possible Statuses of Programs
In TuneUp Program Deactivator, there are five different statuses for programs:
l
l
l
l
l
Enabled: The program is fully functional.
Disabled: The services of the program that run continuously in the background have been turned off.
System-relevant: This is a program that TuneUp Utilities has classified as relevant for the security or
proper operation of your system and the disabling of which could have serious consequences.
Disabling pending: The program cannot be turned off during normal operation; TuneUp Utilities will
disable it automatically the next time the system is restarted.
No impact: The program cannot be disabled because it does not have a negative impact on your system.
28
TuneUp Utilities Manual
How to Disable Programs
Launch the TuneUp Program Deactivator module by going to the Optimize System category in the Start
Center and selecting Disable programs under Reduce system load.
Alternatively, you can start the module by going to Overview of all functions in the Start Center and selecting the Disable entry under Installed programs.
Before the program starts, the startup screen may appear for the Rating function for programs.
Here you can decide whether to enable this feature and click OK (read more about this under How
to Turn On the Rating Function, p. 145).
The TuneUp Program Deactivator module uses TuneUp Programs-on-Demand Technology™, p. 27, which
reduces the load on your system and thereby increases system performance.
How to Disable Programs
1. Select a program in the list that has the status Enabled.
2. Disable the program using the switch in the status column or in the details area or click on the Disable
button in the toolbar.
How to Enable Programs
1. Select a program in the list that has the status Disabled.
2. Enable the program using the switch in the status column or in the details area or click on the Enable
button in the toolbar.
How to Enable or Disable More than One Program
If you select more than one program at the same time, the possible action depends on the predominant
status. For example, if two selected programs are disabled and one is enabled, you can only enable the programs. However, with two enabled and one disabled program, you can only disable the programs.
Following the action, a window is shown in the display area to the left informing you of the result of your
action.
29
TuneUp Utilities Manual
Load Points - What Are They and How Are They Calculated?
The TuneUp Programs-on-Demand Technology™ calculates the load on your system based on an internal
points system. For this, TuneUp Utilities determines the background programs associated with each program, i.e. the programs or services that were installed together with the actual program and are then continually run without the user's knowledge, "stealing" processing power. The more background programs
there are for a program, the more this program burdens the computer. The TuneUp Programs-on-Demand
Technology™ The display in the Load column takes the highest of these three values.
30
TuneUp Utilities Manual
Displaying and Uninstalling Programs
In the following chapters, you will find out how you can use TuneUp Uninstall Manager to display the programs installed on your computer, why you might want to uninstall them and how to do so.
Introduction
Over time, you accumulate a large number of programs on your computer, many of which you probably do
not even use. So that your Windows system can run quickly and smoothly, you should regularly remove
unused or unnecessary programs.
Each time you install a program on your computer, it becomes deeply anchored in the Windows system
where it remains until you uninstall it completely. If you no longer require a program, it is not enough just to
delete the program folder or the desktop icon that you use to open it.
Most programs distribute their files across several locations on your hard disk and also make entries in the
Windows registry.
TuneUp Uninstall Manager lets you rapidly determine what programs you rarely use or which take up an
especially large amount of space. You can show all installed programs sorted according to different aspects
and then, using the useful additional information about when you installed the program and how often you
use it, decide whether you still need it or should uninstall it.
31
TuneUp Utilities Manual
How to Uninstall Programs
1.
Launch the TuneUp Uninstall Manager module by going to the Optimize System category in the
Start Center and selecting Uninstall unneeded programs in the Reduce system load area.
Alternatively, you can start the module by going to Overview of all functions in the Start Center and
selecting the Uninstall entry under Installed programs.
Before the program starts, the startup screen may appear for the Rating function for programs. Here you can decide whether to enable this feature and click OK (read more about
this under How to Turn On the Rating Function, p. 145).
TuneUp Uninstall Manager shows you a list of all installed programs. In the menu bar, click Organize
to sort the table by column or select a filter under View to display only selected programs. This will
help you quickly identify what programs you no longer use or which take up the most space.
2.
If you select an entry from the list, additional information on the program is displayed in the Details
area on the right.
You will see details of the manufacturer, installation date, date of last use, size of program files on
your hard disk, system usage and rating of the program.
If, despite the statistical data that TuneUp Uninstall Manager shows you, you are not sure whether
you wish to uninstall a program because you do not know what it contains, click on Online search in
the toolbar. A web page opens displaying the results of the search for the program selected in the list.
This page provides detailed information on the program. This information will also help you to decide
whether you should uninstall a program or not.
The Rating column is also helpful for your decision-making process. This provides you with information on how useful you and/or other users of TuneUp Utilities found the program. If you have not
yet provided a rating, you can rate it now. The ratings of other users are called up by TuneUp Utilities
from a serverdatabase and displayed. These ratings are automatically updated regularly.
3.
Click Uninstall to remove a program.
To remove a program correctly from your computer, highlight the entry and click Uninstall. You can
also double-click on the entry.
32
TuneUp Utilities Manual
The uninstall routine that is now called varies from program to program. None of these programs
merely deletes the files from the hard disk - they also remove all desktop icons, the entries in the Start
Menu and the entries in the registry. Follow the instructions for the uninstallation procedure to complete the process.
If you do not want to uninstall a program and you wish to be sure that it does not appear in this list in
the future, select Remove entry from the context menu of an entry. You will then no longer be able
to uninstall the program using TuneUp Uninstall Manager. Note that this does not uninstall the program.
33
TuneUp Utilities Manual
Disabling Startup Programs
In the following chapters, you will find out how you can use the TuneUp StartUp Manager module to
speed up the startup and working speed of your computer and why it is important to do so.
All modifications to your system will be monitored by TuneUp Rescue Center and can be undone if
necessary.
Introduction
Many programs start automatically in the background when you turn on your computer. This makes perfect
sense for important functions and services like the virus scanner or the configuration console of your sound
card.
However, programs often start automatically in the background that you require only very occasionally or
never.
Every time a program starts automatically not only does it slow down the Windows system startup but the
individual program parts that are always running in the background also slow down your computer. Some
of these programs can also irritate you by displaying advertising messages.
More Information About Startup Programs
When installed, some startup programs are entered in the Start Menu from where they can be easily
removed. However, most startup programs enter themselves directly in the registry and are not to be found
in the startup folder. Often during system startup and user logon, scheduled tasks are used to start programs automatically.
TuneUp StartUp Manager finds all startup programs, regardless of how well hidden their start command is.
For every startup program it also supplies a detailed description and an evaluation of the necessity of starting this program automatically.
TuneUp StartUp Manager does not just allow you to enable or disable startup programs, it also tells you
about the individual programs and provides recommendations for every startup entry.
Note that disabling startup does not remove the program itself. It only disables the startup and
therefore speeds up system startup and the speed of your computer.
34
TuneUp Utilities Manual
How to Configure Your System Startup
Start the TuneUp StartUp Manager module by going to the Start Center in the Optimize system category
and selecting Disable startup programs in the Reduce system load area.
Alternatively, you can start the module by going to Overview of all functions in the Start Center and selecting the Disable startup programs entry under Installed programs.
Before the program starts, the startup screen may appear for the Rating function for programs.
Here you can decide whether to enable this feature and click OK (read more about this under How
to Turn On the Rating Function, p. 145).
When TuneUp StartUp Manager starts up a list of all Startup programs opens. When you use the module
for the first time, all entries are enabled. This means that these programs will automatically start in the background every time the system is started.
In TuneUp StartUp Manager you can choose from the following functions:
Disabling Automatic Program Startup
This prevents the program from starting automatically in the background when you next start up the system. The entry remains in the list however, meaning that you can turn automatic startup back on at any
time.
1. Select a startup program from the list.
2. Disable it using the button or from the toolbar.
If, despite our Tips for Optimizing System Startup, p. 36 you are not sure whether or not you should disable
startup, we recommend that you disable one startup program only, restart your computer and start the programs you use in the usual way. This helps you find out whether the automatic startup really is unnecessary.
If something doesn't work properly the next time you start Windows, select the check box again. If everything is working as it should, you can disable the next startup program.
Enabling Automatic Program Startup
This starts the program automatically in the background when you next start the system.Afterwards, you
can disable automatic startup at any time again.
1. Select a startup entry from the list.
2. Disable it using the button or from the toolbar.
35
TuneUp Utilities Manual
Adding a startup program
To have the system automatically run additional programs on system startup, simply add them to the list.
1. On the toolbar select the Add button. Alternatively you can right-click to open the context menu and
select the Add program entry.
2. From the list, select the program that is to start automatically each time the system is started. If this does
not happen, click Browse and select the program you want from the list that opens.
Removing a startup program from the list
If you are sure that you do not want a program to be started automatically, you can remove it from the list.
You can add it back to the list at a later stage by clicking Add or using TuneUp Rescue Center.
1. Select a startup program from the list.
2. On the toolbar, select the Delete button. Alternatively you can right-click to open the context menu
and select Delete.
Tips for Optimizing System Startup
As the name suggests, a startup program is one that automatically starts up every time you start up your
computer. For this reason, it is always active in the background and occupies your system's resources, even
if you never use the program. This makes perfect sense with a virus scanner, for example. On the other hand,
some other startup programs could place an unnecessary load on your system.
The fewer the programs that start up automatically in the background, the faster your system will start up. In
addition, your computer will run faster if there are no unnecessary programs active in the background.
What Guidance Does TuneUp StartUp Manager Offer?
For each program, decide based on the following information whether it should start automatically in the
background on startup.
Evaluation
For most startup programs, TuneUp StartUp Manager provides an evaluation showing you whether an
automatic startup of the program is necessary, unnecessary or optional. Thanks to a database maintained
by the TuneUp team, all security-related programs, for example, will be classified as necessary. Well-known
unnecessary startup programs will be classified as unnecessary. Other programs that appear incorrectly in
the list will also be considered as unnecessary. This is the case, for example, if an entry in the list refers to a
program that has already been uninstalled.
This classification can result in many programs being classified as optional. In this case, the decision is
based on your usage behavior. The description, online search or the Rating function for programs will
help you further with this.
Read more here about how the Rating function for programs can help you make the decision:
l
Rating Function for Programs, p. 144
Description
If you select a startup program in the list, the database will supply a description of the program to make the
decision easier for you.
In the case of very unusual programs, TuneUp StartUp Manager might not recognize a program. If so, you
can obtain information on this program by searching online via a link.
In addition, you can also help ensure that a description of this program appears here in future, by providing
TuneUp with information on this program via the Report program link.
36
TuneUp Utilities Manual
Rating
The Usefulness column provides you with information on how useful you and/or other users of TuneUp Utilities found the program. If you have not yet provided a rating, you can rate it now. The ratings of other users
are called up by TuneUp Utilities from a serverdatabase and displayed. These ratings are automatically
updated regularly.
If you are still unsure, despite our guidance, whether you should disable a startup program, we recommend
that you disable just one startup program, reboot the computer and start up the programs you use in the
usual way.
If something does not work properly following the restart, all you have to do is select the checkbox again. If
everything is fine, you can disable the next entry and enjoy a faster system startup.
37
TuneUp Utilities Manual
Configuring Turbo Mode
In the following chapters, you will find out when it can be useful to do so and what exactly happens when
you turn on the TuneUp Turbo Mode. On top of that, you will receive instructions on how to switch on
and configure TuneUp Turbo Mode.
Introduction
TuneUp Turbo Mode provides an immediate performance boost whenever you need it. When you put your
computer into Turbo Mode, an analysis is performed to see which of those programs and functions currently running in the background are not strictly necessary. These programs are stopped or slowed down,
allowing the additional processing power gained to be used exclusively by the programs you are actually
running.
When should I switch on Turbo Mode?
Turbo Mode can speed up computer games, improve work with demanding programs or prevent shuddering when playing videos. Note however
that when you enable Turbo Mode you also switch off some functionalities that will not be available again until you switch off Turbo
Mode.
How does Turbo Mode work?
The following graphics illustrate the internal workings of your PC with
the programs that you are currently using (green) and those running in the background (blue). Here you
can see how your PC is assisted as soon as you enable Turbo Mode:
The green circles represent those programs that you wish to accelerate using the Turbo Mode. The blue diamonds on the other hand are all those programs and functions that you do not need at all when Turbo
Mode is enabled (see How to Configure Your Own TuneUp Turbo Mode, p. 39). These are therefore turned
off so that all of the PC's processing power is available to the required programs.
In addition to those programs that you are currently using (green), many others are also running in the background that are really not that important for your work (blue). If such background processes suddenly start
to require a great deal of processing power, they are assigned a lower priority so that your other programs
can continue to run smoothly.
38
TuneUp Utilities Manual
How to Switch on Turbo Mode
TuneUp Utilities provides you with several options for switching on Turbo Mode and giving your Windows
an immediate performance boost.
In order to provide you with an easy option of speeding up your Windows with Turbo Mode, the TuneUp
Utilities Start Center also provides you with a Turbo Mode switch. This is located on the bottom left in the
Start Center. Once you click on this switch, the computer is put into Turbo Mode.
Alternatively, you can start Turbo Mode by going to Overview of all functions in the Start Center and
selecting the Turn on Turbo Mode entry under Windows.
When you start Turbo Mode for the first time, a wizard will appear to help you create your own customized
Turbo Mode.
Another alternative way of switching on Turbo Mode can be found in the Turbo Mode switch in the
TuneUp Utilities Gadget.
l
TuneUp Utilities Gadget - Introduction, p. 146
How to find out if Turbo Mode is switched on:
If Turbo Mode is switched on, a TuneUp Utilities icon appears in the taskbar notification area (in the bottom right-hand corner beside the time), which tells you that Turbo Mode is switched on.
How to Configure Your Own TuneUp Turbo Mode
Start the TuneUp Turbo Mode configuration wizard by going to the Tuning area of the Start Center and
clicking on the small wrench icon next to the Turbo Mode switch. Alternatively, in the Start Center, click in
the Settings menu on the Turbo Mode entry.
Alternatively, you can start the wizard by going to Overview of all functions in the Start Center and selecting the Configure Turbo Mode entry under TuneUp settings.
Set up your own Turbo Mode in six easy steps - simply select which tasks, programs and functions can be
disabled temporarily to give a performance boost while Turbo Mode is enabled. The more you allow to be
switched off, the better the gain in performance will be. You can always temporarily turn off all functions
and tasks suggested here. None of your software features for Internet security or virus protection will be
turned off.
39
TuneUp Utilities Manual
More about your settings options
Step 1: Postpone automatic maintenance tasks until later
Maintenance measures that start automatically in the background are important for the maintenance of
your computer, but are not usually urgent. They can be carried out at a later date to free up the resources
needed for your programs.
In this step, you can configure the following settings:
Postpone scheduled defragmentation: This will prevent the scheduled hard disk defragmentation by Microsoft or other well-known manufacturers from starting when Turbo Mode is on.
Postpone scheduled maintenance tasks: This will prevent automatic maintenance tasks and scheduled
tasks for Microsoft and other manufacturers from being carried out when Turbo Mode is on. This includes
TuneUp Automatic Maintenance and the automatic creation of backups.
Postpone automatic updates: If you select this option, you will be notified that program updates are available but these will not be automatically downloaded or installed while Turbo Mode is on.
Step 2: Limit connection with external devices
Every computer has many services running in the background that detect connected devices and provide
you with the necessary functions to use these devices. You can limit this support and have more resources
available for your programs.
In this step, you can configure the following settings:
Turn off synchronization with mobile devices: This setting will prevent synchronization of addresses, emails, music files, etc. with your cell phone or portable media player and the related program will not start
automatically when the device is connected while Turbo Mode is on.
Limit support for digital cameras and scanners: When Turbo Mode is on, you cannot import images from
your digital camera or scan images.
Step 3: Reduce visual effects
Visual effects provide a graphical display of Windows but take up valuable space in the memory. Particularly
with a low performance graphics card you can increase the computer's performance by turning off visual
effects.
Tip: This is a popular way of increasing the performance of netbooks on a sustained basis.
In this step, you can configure the following settings:
Disable the use of Aero designs for older programs: This setting prevents the appearance of older programs from being converted into the new style of Windows Vista and Windows 7 when Turbo Mode is on.
Switch to classic window design: This setting uses the classic Windows design for the appearance of windows, menus and buttons when Turbo Mode is on, and transparency effects and thumbnails of windows in
the taskbar are disabled.
Switch to classic window design: This setting uses the classic Windows design for the appearance of windows, menus and buttons when Turbo Mode is on, and the colorful Windows XP interface is disabled.
40
TuneUp Utilities Manual
Step 4: Configure computer resources for optimal performance
Your computer's resources are in demand. A clever sharing solution for the resources will help increase your
computer's performance enormously.
Tip: Since this does not limit any functions, this setting is also highly recommended for the long term.
Ensure optimum performance regardless of energy use: This setting uses the "high performance" Windows energy-saving plan when Turbo Mode is on. This ensures maximum performance regardless of the
amount of energy used.
Step 5: Disable background functions
The operating system performs many more tasks than most users are aware of. Many programs and services
run permanently in the background, although they are not strictly necessary and use valuable resources. If
you never use some of these functions you can disable them and permanently increase your computer's performance.
Disable media library share in local network: This setting ensures that other network devices cannot access
your images, videos or music in the media library when Turbo Mode is on. However, Turbo Mode does not
affect the share of folders in the network.
Disable Windows search indexing function: This setting ensures Windows does not create any indexes of
your files or e-mails when Turbo Mode is on.
Turn off error reporting: This setting ensures that no data will be gathered regarding errors and there will
be no communication with Microsoft about crashed programs or other errors when Turbo Mode is on.
Turn off support for virtual machines: (This option is only available if your computer has software for virtual machines installed on it.)This setting turns off background functions for the use of virtual machines
when Turbo Mode is on.
Step 6: Additional performance boost
Every time Windows starts up, it starts up services that are used rarely or never. These services can occupy a
large amount of the system's resources and slow down your PC. To prevent these services from not working
when you need them, you should only turn them off temporarily for an added performance boost.
Turn off rarely used services: This setting turns off services that are only needed in specific circumstances
(e.g. company networks) or situations (e.g. installation of new programs) when Turbo Mode is on.
Turn off special encryption services: When Turbo Mode is on, this setting turns off services for logging
onto a domain.
Turn off network communication services: When Turbo Mode is on, this setting turns off network communication services that are rarely used, e.g. fax or peer-to-peer services.
41
TuneUp Utilities Manual
How long should Turbo Mode stay switched on?
The Turbo Mode can either be switched off automatically when the computer is shut down, or stay on until
you switch it off manually. If you leave Turbo Mode on constantly, this can also speed up the startup process.
However, please note that for the system performance increase, the features that you selected in the configuration wizard must be switched off. If, when Turbo Mode is on, you are missing a required feature, turn
Turbo Mode off and modify your settings so that when you restart Turbo Mode, this feature is available
again.
Click Finish to close this wizard.
42
TuneUp Utilities Manual
Cleaning the Registry
In the following chapters, you will find out how you can use the TuneUp Registry Cleaner module to clean
the registry and why it is important to do so.
All modifications to your system will be monitored by TuneUp Rescue Center and can be undone if
necessary.
Introduction
The registry is the heart of a Windows system. It is where Windows continuously stores entries (values and
keys). In addition, each newly installed program and every newly connected hardware item is entered in the
registry where it records keys and values. When you start up a program, Windows does not call up this program directly. Instead it opens the program using a key in the registry, which was created there when the
program was installed. This entry must also be deleted from the registry when the program is uninstalled
since it is no longer required. It is often the case, however, that Windows does not delete these entries properly, which is why a great many invalid entries build up over time.
These entries are not just created when programs are installed, but also during many other tasks. For example, the history list of recently used documents in the Start menu works using the entries in the registry.
These references become invalid when you move or delete a document. Since Windows does not clean the
registry regularly, we recommend you do it yourself with TuneUp Registry Cleaner.
By cleaning Your registry regularly your whole system and all your programs will be more stable. This is why
this is one of the functions that TuneUp Utilities can also run regularly as part of the Automatic Maintenance.
43
TuneUp Utilities Manual
How to Clean the Registry
1.
Start the TuneUp Registry Cleaner module by going to the Optimize system category in the Start
Center and selecting Clean registry from the Manually run maintenance area.
Alternatively, you can start the module by going to Overview of all functions in the Start Center and
selecting the Clean entry under Registry.
2.
First, your registry must be checked for problems. Select one of the two types of scan:
Full Scan
We recommend the complete scan because this checks the whole registry for problems.
For information on what exactly is checked can be found under: What is Checked?, p. 46
Custom scan
For more information about what areas you can select for this can be found under: What is Checked?,
p. 46
Scanning the registry can take several minutes. While the scan is in process, you can monitor its progress.
3.
If problems are found, you have two options:
Show Problems
Click Show problems to display detailed descriptions and exclude any individual problems from the
cleanup (see Additional Functions in TuneUp Registry Cleaner Main Menu, p. 48).
44
TuneUp Utilities Manual
Fix Problems Immediately
Select Fix problems immediately and click Next to fix all detected problems immediately. Your registry is now free from all unnecessary ballast and your system is more stable.
If after the cleanup has finished, the Check Again button appears, find out more information here:
Check Again
Sometimes, the Check Again button appears and the wizard recommends that you check your system
again. This always happens if new entries in the registry have been made invalid by the cleanup. This
is not an error in the module, but a chain reaction that can occur in the Program components and
File types areas.
Example:
In the registry, entry A points to entry B, which in turn points to the missing file X. In the first scan,
TuneUp Registry Cleaner determines that entry B is invalid because file X cannot be found. Entry B is
deleted during cleanup. This in turn makes entry A invalid, as it points to the now deleted entry B.
1. Click Check Again.
These two categories alone will be analyzed again.
2. Click Finish to close the wizard.
Repeat the cleanup as often as required. As soon as no new problems are found, you can exit the
module - with the confidence that you have removed a great deal of junk from your system.
If no problems have been found, click Finish. This takes you to the TuneUp Registry Cleaner main window.
45
TuneUp Utilities Manual
What is Checked?
The following table shows you what areas of the registry TuneUp Registry Cleaner checks during the full
scan. You can select from these during the user-defined scan.
Area
Description
For certain system or program events such as error messages, sound files are played. These
Audible Sigare played by accessing the corresponding entries in the registry; however these entries are
nals
invalid once the sound files no longer exist.
Many programs start automatically together with Windows (e.g. virus scanner). This takes
Startup Proplace via entries in the startup section of the registry. When such programs are uninstalled,
grams
these entries are often not deleted.
File Types
Entries in this area of the registry link one or more file extensions (e.g. .txt or .doc) with various information (such as the program that should be used to open them). Such entries can
become invalid through the uninstallation of programs, for example.
Database
Drivers
During installation, some programs store entries on database drivers and data sources in the
registry. These entries can become invalid through the uninstallation of these programs or
the moving or deletion of individual data sources. Often, invalid entries are created during
installation itself.
Common
Files
This part of the registry contains references to files and program libraries (DLLs), to which
several programs normally require access. When such programs are uninstalled, these
entries are often not deleted.
Help Files
Many programs record in the registry the location of their help files. When such programs
are uninstalled, these entries are often not deleted.
Every program leaves behind an entry in this area of the registry. The list of all programs in
Installed Prothe Control Panel is compiled from these entries. When programs are uninstalled, these
grams
entries are often not deleted and inconsistencies arise in this list.
Each program installed on the computer can create entries with program-specific inforProgram Setmation in the registry (e.g. data or program paths). When programs are uninstalled, these
tings
entries are often not deleted.
Program
Extensions
This area of the registry contains references to extensions such as audio and video codecs
or Internet Explorer add-ons that enhance the functionality of individual programs (e.g.
with new menu entries or new toolbar entries). If these programs or extensions are uninstalled, these entries are often not deleted.
Many Windows programs access ActiveX and COM components using entries in this area of
Program
the registry. These entries are created when programs like this are installed, but are often
Components not deleted during uninstallation. Some programs even create invalid entries during installation.
Program
Paths
The installation folders of some programs are stored in the registry to allow these programs to be run directly via "Start -> Run". When such programs are uninstalled, these
entries are often not deleted.
Fonts
Windows stores entries in this area of the registry for all fonts installed on your computer.
Since these entries are often not deleted when fonts are uninstalled, Windows tries in vain to
load these fonts every time the system starts up.
Windows and many programs have history lists, which log, for example, which files you
History Lists were last working on. These are stored in the registry as references. By deleting or moving
the files, these entries become invalid.
Windows
Firewall
The Windows firewall saves the programs that may accept incoming network connections
and stores an entry for each one in the registry. These entries can become incorrect or
invalid if, for example, one of these programs is uninstalled.
46
TuneUp Utilities Manual
It should be clear therefore that deleted files can leave behind a lot of "ghosts" in the registry. TuneUp Registry Cleaner finds all of these orphaned entries and can delete them in a targeted fashion. We therefore recommend that you perform the full scan.
47
TuneUp Utilities Manual
Additional Functions in TuneUp Registry Cleaner Main Menu
Displaying Details and Excluding Problems from the Cleanup
If you click through the various areas in the left column, you will see a detailed Explanation in the top part
of the window, describing how problems can occur in the area in question.
If problems are found in an area, a list of the individual problems also appears with further information.
Select an entry in the list in order to display a more extensive analysis of the problem.
Here you can also exclude certain problems from the cleanup by unchecking the relevant checkboxes.
If the problem descriptions do not appear, click on Details.
Running the cleanup
To start cleanup from the TuneUp Registry Cleaner main window, click Start cleaning. If you have excluded
problems from the cleanup, these will not be fixed.
If after the cleanup has finished, the Check Again button appears, find out more information here:
48
TuneUp Utilities Manual
Check Again
Sometimes, the Check Again button appears and the wizard recommends that you check your system again.
This always happens if new entries in the registry have been made invalid by the cleanup. This is not an error
in the module, but a chain reaction that can occur in the Program components and File types areas.
Example:
In the registry, entry A points to entry B, which in turn points to the missing file X. In the first scan, TuneUp
Registry Cleaner determines that entry B is invalid because file X cannot be found. Entry B is deleted during
cleanup. This in turn makes entry A invalid, as it points to the now deleted entry B.
1. Click Check Again.
These two categories alone will be analyzed again.
2. Click Finish to close the wizard.
Repeat the cleanup as often as required. As soon as no new problems are found, you can exit the module - with the confidence that you have removed a great deal of junk from your system.
Functions for advanced users
If you are sure that you want to exclude individual areas from cleanup, or want to look at the entries in the
registry or even edit them, you will find the following functions useful:
Ignore Problems
You can remove individual problems from the list so that they are not found by the analysis.
Just proceed as follows:
1. Select a problem from the list of corresponding areas.
2. In the Edit menu, select Ignore problem.
You can also get to this function using the list entry context menu.
Include ignored problems again
If you no longer wish to ignore a problem, you can add it back to the analysis.
Just proceed as follows:
1. In the File menu, select Ignored problems.
2. Highlight it in the list and click Remove.
Show entries in the registry
From the detailed problem list for an area, you can go straight to the relevant entry in the registry for every
problem.
Just proceed as follows:
1. Select a problem from the list.
2. In the Edit menu, select Problem details and Go to key.
You can also get to this function using the list entry context menu.
Edit the registry
In the toolbar, click Registry Editor to directly call up the TuneUp Utilities module for editing the registry.
49
TuneUp Utilities Manual
Defragmenting the Registry
In the following chapters, you will find out how you can use the TuneUp Registry Defrag module to reduce
the size of the registry by defragmenting it and why it is important to do so.
Introduction
The registry is the heart of a Windows system. It is where Windows continuously stores entries (values and
keys). In addition, each newly installed program and every newly connected hardware is entered in the registry where it records keys and values.
This causes the registry to get bigger and bigger. However, the bigger the registry, the longer the system
needs to find certain information requested at any given moment by a program - Windows then becomes
slower. When a program is uninstalled or when the registry is cleaned up, these keys and values are usually
deleted, but despite this the registry does not get any smaller. Why is this? The space previously taken up by
a deleted key continues to exist in the registry - even if it is no longer used. At some point your registry then
looks like a piece of Swiss cheese - full of holes.
This is a real waste of space at the expense of system performance - not just on the hard disk but also in the
memory. TuneUp Registry Defrag is able to compress the registry so that it becomes much smaller. This
function increases the stability of your Windows system.
TuneUp Registry Defrag analyzes the registry and creates a completely new version of it containing only
the intact data, in the correct order. The old registry is deleted following this step and automatically
replaced with the new version when the computer is restarted.
50
TuneUp Utilities Manual
How to Defragment the Registry
1.
Start the TuneUp Registry Defrag module by going to the Optimize system category in the Start
Center and selecting Defragment registry in the Manually run maintenance tasks area.
Alternatively, you can start the module by going to Overview of all functions in the Start Center and
selecting the Defragment entry under Registry.
An introductory screen is displayed.
2.
Click Next to start the analysis.
TuneUp Registry Defrag determines how heavily fragmented the registry is and whether an optimization is necessary.
3.
Before the analysis, a message appears advising you to close all other programs. During the analysis,
TuneUp Registry Defrag turns the screen gray and displays a wait dialog. A small clock flashes in the
upper left corner of this window showing you that the module is still working. A progress bar is also
shown to inform you of the progress of the analysis. There is no need to worry if the progress bar does
not move for several minutes.
4.
Choose when you want to perform the optimization.
The module shows you the analysis results. If there is potential for optimization, you can find out here
by how many percent and how many kilobytes the size of the registry can be reduced.
51
TuneUp Utilities Manual
TuneUp Registry Defrag cannot rewrite the registry when it is running, but only immediately after
Windows has started up. Now choose whether you would like to restart the computer now or
whether you would prefer to allow the optimization to run automatically next time Windows starts
up. Please note that optimization can take several minutes.
If you immediately decide against the optimization or were only interested in the analysis results from
the outset, you can exit the program by clicking Cancel.
52
TuneUp Utilities Manual
Removing Broken Shortcuts
In the following chapters, you will find out why it is important to do so and how you can use the TuneUp
Shortcut Cleaner module to clean up your system by removing invalid shortcuts and references.
All modifications to your system will be monitored by TuneUp Rescue Center and can be undone if
necessary.
Introduction
The TuneUp Shortcut Cleaner module helps you quickly and easily to "restore order" to your computer. The
module checks all shortcuts on your Desktop, in the start menu and in the Quick Launch bar. If a shortcut
references a program that no longer exists or a deleted file, you can easily remove it. Empty folders in the
Start menu are also identified, which mostly arise after you have rearranged the Start menu manually.
In addition, TuneUp Shortcut Cleaner analyses the file history lists from Microsoft Office programs, OpenOffice©, Windows Media Player and Nero©. These lists contain references to the files most recently
accessed in the programs. These entries will also be checked here. If some point to files that no longer exist
or which have been moved, you can delete them.
This means that your system is free from unnecessary ballast; it also means that you no longer have to waste
time trying to call up broken links.
53
TuneUp Utilities Manual
How to Remove Broken Shortcuts
1.
Start the TuneUp Shortcut Cleaner module by going to the Optimize system category in the Start
Center and selecting Remove broken shortcuts from the Manually run maintenance tasks area.
Alternatively, you can start the module by going to Overview of all functions in the Start Center and
selecting the Remove broken shortcuts entry under Windows.
Your interface (Desktop, Start Menu, Quick Launch bar) and the history lists of some programs are
checked for broken shortcuts and entries. This analysis can last several minutes.
After the analysis TuneUp Shortcut Cleaner shows you a list of all broken shortcuts and references.
If no broken entries have been found, you will only receive a list of the places that were searched. In
this case, click Close to exit this function.
2.
You decide whether to delete all broken shortcuts or not.
Clear the checkboxes of those invalid references that you do not want to delete. The standard setting
is for all invalid references to be deleted.
3.
Click Cleanup.
The cleanup process normally lasts just a few seconds. Afterwards you receive a short status report on
the number of references and shortcuts removed.
4.
Click Finish to exit TuneUp Shortcut Cleaner.
54
TuneUp Utilities Manual
Accelerating System Startup and Shutdown
In the following chapters, you will find out how to accelerate the startup and shutdown of your computer in
next to no time.
All modifications to your system will be monitored by TuneUp Rescue Center and can be undone if
necessary.
Introduction
Here you receive recommendations for disabling unnecessary startup programs. These recommendations
help to accelerate system startup and shutdown.
For example, common startup services that are not needed immediately after system startup are simply
scheduled to start up at a later time. This still ensures that you will not lose these functions, but they no
longer delay system startup unnecessarily. The waiting time for services to shut down is also reduced. Services will therefore close faster when shutting down and the shutdown procedure itself will be faster.
You can either apply all of these recommendations immediately, or look at the detailed descriptions first and
then decide one by one.
55
TuneUp Utilities Manual
How to Accelerate System Startup and Shutdown
Launch the TuneUp StartUp Optimizer tool by going to the Optimize system category in the Start Center
and selecting Accelerate system startup and shutdown from the Run maintenance tasks manually area.
The TuneUp StartUp Optimizer window is displayed.
Alternatively, you can start the module by going to Overview of all functions in the Start Center and selecting the Accelerate system startup and shutdown entry under Recommendations.
You may first have to enter information for your profile at this point in order to obtain tailored recommendations.
Which services and devices do you use on this computer?
Here you can switch off functions that you do not use. It identifies which functions and services you have
already set up and only recommends those that are not being used.
For example, if you never use a printer, you can turn off all background programs that are related to print
control. Simply specify this here.
If you never need to access a company network or domain, you can turn off all related background programs and services. Simply select the applicable answer from the list.
The more unnecessary features you disable here, the quicker your computer will start up and work, because
- after this optimization - Windows will no longer run these background programs that start up automatically and are constantly active.
You can change the setting you make here at any time by clicking on "Change profile" at the top right of
TuneUp StartUp Optimizer.
Overview
This view provides you with an overview of any optimization recommendations found. You can apply them
all by clicking once on Optimize all.
56
TuneUp Utilities Manual
Details
Click on a recommendation or on the Details link to see detailed descriptions of the individual recommendations. Alternatively, switch to the Details tab. Here you can apply all recommendations by clicking
once on Optimize all.
Click on a recommendation in the "Optimization recommendations" column. A description of the program
and the recommendation are displayed in the right-hand area of the window. If you wish to allow the optimization, click on Apply recommendation at the bottom right.
Hiding and Showing Recommendations
If you do not want to accept a recommendation, click Hide recommendation. Now you can select whether
you want to hide it permanently or only for 30 days. The number of hidden recommendations is always displayed in the taskbar on the right. By clicking on the number displayed, you can easily show these recommendations again.
57
TuneUp Utilities Manual
Defragmenting the Hard Disk
In the following chapters, you will find out why it is important to do so and how you can use the TuneUp
Drive Defrag module to defragment your hard disks.
Introduction
There are many reasons why a computer may become noticeably slower over time. One of them is the gradual fragmentation of the hard disk. This can be described as follows:
New files are first saved as a block to an empty hard disk one after the other. If you then, for example,
deleted a file in the middle, there would be a gap in the hard disk. Windows uses this gap later to store the
next file that you save to the hard disk. If this gap is not big enough, Windows then splits the file and stores
the second half at another location. Over time, more and more gaps are created and more and more files are
fragmented into pieces (fragments), i.e. the degree of fragmentation increases.
This really slows down the performance of your computer: Every time you call up a file, this has to be read
from the hard disk, which would of course happen faster if the file was stored in one place. In technical
terms: If fragmentation is high, the hard disk reading heads must always be realigned in order that they can
load the individual fragments of a file.
A simple way to speed up your system is therefore to defragment the hard disk. As the conventional defragmentation often takes a long time, TuneUp Drive Defrag offers you two different modes. You either decide
for yourself how defragmentation should take place, or allow TuneUp Drive Defrag to make the decision
for you.
Find out below what exactly happens during the two defragmentation modes:
Thorough Defragmentation
This defragmentation mode arranges the newly sorted files particularly intelligently: system files that are
used frequently are stored at the start of the hard disk, so that Windows can find them again in no time at
all.
It is clear that this defragmentation mode will take longer than simply consolidating the files. TuneUp Drive
Defrag is therefore also carried out with particularly low priority so that you can continue working almost
undisturbed. This procedure speeds up the booting of Windows considerably. Frequently used programs
also start faster. This noticeably increases the performance of the computer.
Fast Defragmentation
This defragmentation mode consolidates all files again so that they can be read noticeably faster.
The advantage of this method is the speed with which it is carried out: The performance of your hard disk is
increased in no time at all.
58
TuneUp Utilities Manual
How to Defragment Your Hard Disk
1.
Launch the TuneUp Drive Defrag module by going to the Optimize system category in the Start
Center and selecting Defragment hard disk under Manually run maintenance tasks.
Alternatively, you can start the module by going to Overview of all functions in the Start Center and
selecting the Defragment entry under Hard disk.
2.
Select which hard disks should be checked for optimization potential.
3.
Select how defragmentation should take place according to the analysis.
TuneUp Drive Defrag offers you two different ways to defragment (see Introduction, p. 58) so here
you choose which analysis option suits best before the defragmentation.
Out of the four options, the first one is preselected because it gives you a personal recommendation
after the analysis and you can decide for yourself how the defragmentation should be carried out.
For the other three options, defragmentation starts as soon as the analysis is complete. If, however,
the analysis determines that the degree of defragmentation is very low, defragmentation will not be
carried out for these three options because TuneUp Drive Defrag deems it unnecessary.
Wait for result and then decide
We recommend this option for you. Once analysis is complete, you decide for each hard disk whether
you would like to run a fast or thorough defragmentation. You can also decide here to go without
defragmentation.
Automatically as recommended
TuneUp Drive Defrag makes the decision for you and defragments each hard disk as soon as the analysis is complete using the mode suited to the degree of fragmentation.
Automatically thorough
You optimize your hard disk performance down to the last detail, even if this lasts a bit longer - regardless of the analysis result.
Automatically fast
You would like to save time and defragment each hard disk particularly quickly, regardless of the
degree of fragmentation.
59
TuneUp Utilities Manual
If you have selected the Wait for result and then decide option, you will see a dialog where you can
select how each hard disk should be defragmented. For all other options, you don't need to do anything else, as defragmentation will run automatically after the analysis.
4.
Select a hard disk in the top area and select a defragmentation mode.
TuneUp Drive Defrag determines the relationship between speed and the benefits to be gained and
provides you with a recommendation based on this.
5.
Ensure that you have selected a defragmentation mode for each hard disk.
6.
Click Next to start the defragmentation.
During defragmentation, you can monitor each hard disk in real time and see how the usage map
changes. You can also look at the progress bar and determine the progress and how long the defragmentation has left.
60
TuneUp Utilities Manual
Tip: NTFS Compared with FAT
Hard disks can either use the NTFS file system, as set in current Windows versions as preference, or the old
FAT system as supported by the first Windows versions. Analysis of drives before defragmentation is substantially faster on NTFS drives. For FAT systems, users must wait considerably longer and can take the popular coffee break. This is just one of several reasons why the old FAT system should be converted to the
modern NTFS system.
The NTFS file system (NTFS = New Technology File System) is the file system of Windows NT and its successors (e.g. Windows 2000, Windows XP, Windows Vista) up to Windows 7. It offers an intelligently devised
access protection to file levels, allows flexible management of privileges, accommodates file sizes above 4
GB, offers automatic error correction of the file system and can utilize the storage space of today's standard
hard disk sizes in a considerably more efficient manner.
If your hard disks still use the FAT file system, you can carry out a very simple conversion.
Although conversion is considered very secure, you should make a backup of your saved data
before attempting this.
Click the Windows Start icon to open All Programs, go to Accessories and click on Command Prompt. If
you enter CONVERT.EXE C:/FS:NTFS in the command line, conversion will start.
Replace C: with another drive letter to convert a different partition. If the system partition is changed, the
computer will need to be restarted. In this case, follow the instructions on your screen.
61
TuneUp Utilities Manual
5. Gaining Disk Space
In the same way as your home can get cluttered, your computer can also get clogged up with unnecessary
ballast, which uses up valuable disk space. We recommend that you carry out some spring cleaning from
time to time and delete unnecessary files from your system.
The "Clean Hard Disk" Area
In the Clean hard disk section, you can select the drives that you want to clean. After you have selected
these, TuneUp Utilities runs a quick analysis in the background and informs you how many Unnecessary
files, Old backups and Windows functions there are on the drives and how much disk space they are taking
up. You can now decide which files you want to delete and/or which Windows functions you want to disable.
The "Analyzing Storage Usage and Deleting Data" Area
Here you can go a step further and search drives systematically for unnecessary data and securely delete
any sensitive data.
Use the TuneUp Disk Space Explorer module to find large files and folders on your system. You can then
archive this data or delete it fully if you are sure you will not need it again in the future. This is a way of freeing up valuable disk space in one go.
The TuneUp Shredder module allows you to securely remove sensitive data. You can use three intelligent
deletion methods to ensure that even a professional could not restore your data.
62
TuneUp Utilities Manual
Cleaning the Hard Disk
In the following chapters, you will find out how you can free up valuable space on your hard disks under
Clean hard disk and why it is useful to do so.
Under Clean hard disk, you can see old backups, unnecessary files and unnecessary Windows functions that
can be safely removed from the hard disk without any negative impact on your system.
Introduction
TuneUp Utilities searches for many types of potentially unnecessary files that can be deleted without causing problems. It then shows you how much space can be freed up. First you will receive a list of all files in
question and you can then decide yourself which of them you would like to delete.
Particular attention is paid to security: As a result, in contrast to conventional procedures that "blindly"
comb through the hard disk using certain patterns, no unpleasant surprises such as sudden error messages
or non-functioning software occur.
The elements recommended for deletion are divided into three categories:
Unnecessary files
For example, temporary files, the contents of the browser cache, temporary thumbnail views and automatically generated log files and the contents of your Recycle Bin are all suggested for deletion.
These files take up valuable disk space that you can easily share. Of course you will have the chance to view
these files again before deletion.
Old backups
Backups are suggested for deletion that would usually be used to restore an earlier status of your system.
These include restore points and Windows Update backups. Of course you will have the chance to view
these backups again before deletion.
The most recently created restore point is always stored so you can restore the system to a previous status at
any time.
Windows functions
Three optional functions from Windows are displayed. If you do not use these (maybe you didn't know that
they existed), you can turn them off and thereby gain valuable space on your hard disks. This includes the
Windows Desktop Search, Windows Messenger and the hibernation file.
63
TuneUp Utilities Manual
How to Gain Disk Space
Select the Gain disk space category from the Start Center.
Under Clean hard disk, select the drive on which you wish to gain disk space.
A bar chart shows you how much free space you have on the selected drive. You can also see how much
disk space you could free up by deleting the individual data types.
You can now remove unnecessary files and old backups and also remove or disable Windows functions.
Removing unnecessary files or old backups
1. Click Unnecessary files or Old backups.
A clearly arranged list of the files found or old backups is opened. You see at a glance how much space
you could gain. To exclude individual file or backup types from being cleaned up, uncheck the relevant
checkboxes.
For each file or backup type you can also view a description in the right-hand window area by selecting
it.
2. Click Cleanup.
Cleanup may take several minutes. While the cleanup is taking place, very occasionally it can appear
that TuneUp Utilities is not reacting. This is for technical reasons and is no cause for concern. As soon
as the cleanup is complete, operations will continue normally, and a message indicating that the
cleanup was successful will be displayed. You can close this dialog.
64
TuneUp Utilities Manual
Disabling or Removing Windows Functions
Click Windows functions to view the status of the individual functions.
For every function you receive a description that helps you decide how to proceed. The system shows you
how much disk space is taken up by an activated function.
You can disable or remove the following optional Windows functions:
Hibernation File
Hibernation mode is when your computer is shutdown without needing to close any windows, programs or
documents that may be open first. All data in the memory of the computer is saved to the hard disk. If the
computer is turned back on again, you can continue from the point at which you broke off your work. All
previously opened windows, programs and documents are immediately restored.
Even if you do not require hibernation mode, the hibernation file takes up valuable disk space. It is exactly
the same size as your computer's memory. If, for example, your computer has 4 gigabytes of memory, the
hibernation file will also take up 4 gigabytes of space on your hard disk. This is because in hibernation mode
the entire content of the memory must be saved.
If you do not use hibernation mode, you can disable it here and thereby gain the disk space it would otherwise use. You can of course reactivate it at any time.
Windows Messenger
Windows Messenger is a program that lets you exchange instant messages with friends. If you do not use
Windows Messenger, you can easily remove it from your computer here.
Should you need it again in the future, you can download Windows Messenger for free at any time, for
example from the TuneUp Support page, and reinstall it.
Index for Windows Desktop Search
Desktop Search is a Windows function that allows you to find files and folders quickly. It creates a search
index with entries for each file and folder. When you search for something (in Windows Explorer or Outlook,
for example) , you search only this index instead of searching the entire hard disk. This makes the process
much quicker. Depending on the number of files on your hard disk, this index can be quite large and may
require lots of memory.
If you do not use Windows Desktop Search, then you can not only gain disk space by disabling the feature,
but also increase your computer's performance.
65
TuneUp Utilities Manual
What Types of File are Suggested for Deletion?
TuneUp Utilities searches for the following types of file which can normally be deleted from your hard disk
without causing problems.
Type
Description
Saved lost
clusters
Repair programs like CHKDSK search your hard disk for lost clusters and save them.
These backups are usually never used by users.
Google Earth™
Cache Files
Google Earth™ uses this cache to save image data.
Internet
Explorer,
Mozilla Firefox,
Opera and
Safari Cache
All images, text and animations that you view in Internet Explorer while surfing the Internet are saved to the cache. If you visit a website again, the text and images can be
loaded from the cache more quickly than from the Internet. However, it is advisable to
empty your cache from time to time.
Thumbnails
Thumbnails of images are used by various programs to provide a quick preview. The
thumbnail views used by Windows, ACDSee™ and Google Picasa™ are taken into consideration.
Recycle Bin
All files in the Recycle Bin can be deleted if you really do not need them.
Log files
Many programs write log files that can be used to analyze their behavior. This can be
helpful, for example, when trying to solve problems. Any log files that you do not plan
on evaluating can be deleted.
Backups
Many programs automatically create backups of your files. These can be deleted if you
do not need them.
Memory dump
files
When problems with an application occur, for troubleshooting purposes Windows
saves the portion of the memory used by the application in question to a file. These files
are unnecessary and can be deleted.
Temporary files
Many programs create files to temporarily store data that should normally be deleted by
the program after its tasks are complete. These files can always be deleted.
Temporary help
files
Windows creates temporary help files so that it can display the help files more quickly.
These files can be deleted without hesitation.
Temporary
installation files
Many Microsoft installation programs create installation files to store data temporarily
that should normally be deleted by the program after its tasks are complete. These files
can always be deleted.
Windows error
report files
When a program crashes, Windows saves data about the program. If this service has
been disabled or if settings do not allow for information to be sent to the manufacturer,
these files can be deleted.
What Type of Backups are Suggested for Deletion?
Type
Description
Windows XP, Windows Vista
and Windows 7 Update and
Service Pack Backups
When Windows is updated, backup files are created.
Restore points
Restore points are used to save the status of system files on the computer.
They are created by the System Restore service at specified intervals and
when changes are made to the computer.
66
TuneUp Utilities Manual
Finding and Deleting Large Amounts of Data
In the following chapters, you will find out how you can use the TuneUp Disk Space Explorer module to
obtain a rapid overview of the space taken up on your hard disks, in order to clean them up quickly and efficiently.
Introduction
The capacity of modern hard disks and memory cards has increased tremendously over the last several
years. At the same time, the needs of the user have also increased to the point where we still manage to completely fill up even the new larger drives.
Obviously, this development hasn't exactly made it easier to keep track of these huge quantities of data.
With so many files and nested folders, how is it possible to determine where the most space is being taken
up (and possibly wasted)?
TuneUp Disk Space Explorer helps you find the largest files. You can then archive them onto a CD, DVD or
an external hard disk, for example. It might be a good idea to make sure that you do not need these files any
more and decide to delete them instead. In this way, you can free up a vast amount of valuable disk space in
one go.
First, you need to run an analysis of your disk space. Then you can use many functions from TuneUp Disk
Space Explorer.
67
TuneUp Utilities Manual
How to Run an Analysis
1.
Launch the TuneUp Disk Space Explorer module by going to the Gain disk space category in the
Start Center and selecting Find and delete large amounts of data from the Analyze storage usage
and delete data area.
Alternatively, you can start the module by going to Overview of all functions in the Start Center and
selecting the Find and delete large amounts of data entry under Disk space.
2.
Choose what to analyze.
Analyzing drives
From the list of all of the drives attached to your computer, select those that should be included in the
search for huge files. The wizard shows the total size of each drive and the free space available. It is
especially important to analyze the drives that have little free space remaining.
Analyzing folders
You can save a lot of time by analyzing individual folders. If you want to analyze an individual folder,
you must enable Analyze folders. Click Select to open a tree structure of all your folders, from which
you can select just one folder by highlighting it and clicking OK.
3.
Click Next to start the analysis.
The analysis may take a while depending on the size and usage of the selected drives or folders. As
soon as the analysis is complete, click Finish to display the results in the main window.
68
TuneUp Utilities Manual
Analysis Results
Folder structure
After the analysis, the TuneUp Disk Space Explorer main window opens. This is divided into two categories.
In the left-hand area of the window, there is a tree view of your drives and folders, the same as in Windows
Explorer. The data for the location selected in the tree view is displayed in the right-hand area of the window. By default, the most recently analyzed drive is displayed first.
If you have decided against the analysis and clicked Cancel, the main window still opens, but you will not
see any information on the individual drives. You can also start an analysis from here, but only for one drive
each.
Display of information
To display information in the right-hand area of the window, you can choose between several views by clicking on the respective tab at the top edge.
In each view, you will receive a list, and you can sort the columns into ascending or descending order easily
by clicking on the column name. Sorting according to size in particular will give you a quick overview of
your biggest files.
The following views are available for displaying the disk space allocation.
69
TuneUp Utilities Manual
Overview
The default view Overview is an ideal first step when cleaning up your drives. The most important information from all of the other views is combined to give you a general overview.
You can always find information about the selected element in the folder tree at the top of the window, in
the area with a colorful background. The size and percentage of space used is displayed for each drive.
If, however, a folder is selected, this area will show you the size of the folder including all its files and subfolders. You also receive information on the creation date of the folder and when it was last used.
In the lower area of the window, you will see the following tables:
My Computer
With regard to the first table, My Computer represents an exception. Instead of an overview of the largest
files and folders, it will show the occupied space for each drive.
Computer
With regard to the first table, the Computer view represents an exception. Instead of an overview of the
largest files and folders, it will show the occupied space for each drive.
Computer (Windows XP: My Computer)
With regard to the first table, the Computer (or My Computer) view represents an exception. Instead of an
overview of the largest files and folders, it will show the occupied space for each drive.
Overview of the largest folders and files
Here you can see a graphical overview of the space on the selected drive or folder in the form of a pie chart.
The size and percentage of space occupied is shown here for up to 10 folders and files. If you would like to
see more than the 10 elements that are displayed, simply click on the link Show Contents to switch to the
Contents view.
File types
This table organizes the files contained in the selected element based on file types and shows you at a
glance which types of files (documents, music files, videos or images) are taking up the most disk space.
Please note that this view does not just include the files that are directly located in the selected drive or
folder, but also includes all files in subfolders. You can limit the amount of information being displayed by
moving a level lower in the folder tree on the left.
If you would like to see the individual files included in a given file type, simply click on the name of the file
type in the table. This will directly open the correct category in the file types view.
Top 10 Files
This table is particularly useful in acute disk space shortages. It shows a list of the top 10 files that take up
the most disk space. As with the last table, this view does not just include the files that are directly located in
the selected drive or folder, but also includes all files in subfolders. If you click on one of the files in the
table or on the link Show top 100 files, the corresponding Top 100 files view will open. There you can
move, archive or delete files.
Contents
This view shows the contents of the selected element in the folder tree on the left. In addition to basic information such as name and type, as in Windows Explorer, each element has a field that displays its size and
the percentage of disk space that it takes up. A graphical representation with bars allows you to recognize at
a glance which files and folders are taking up the most space.
Double-click on a folder to move a level down and to show the contents of the folder.
70
TuneUp Utilities Manual
File types
Overview and file types
By default, a practical overview of your file types opens, showing you at a glance which ones take up the
most disk space.
The top edge of the window displays buttons for Images, Documents, Compressed files, Music files, Video
files and Other. Click on one of these buttons or on the respective entry in the overview to display all files of
the respective file type.
Advanced: Which file extensions are included?
Each file type category includes files with many different file extensions. Images, for example, includes the
file extensions .bmp, .jpg, .gif, .tif and .png. The exact list of file extensions included is adapted to suit your
system automatically by TuneUp Disk Space Explorer. Click Advanced on the top right of your window to
display this list. You can customize this easily by unchecking the checkbox.
The Other category shows you all other files that do not belong to any of the other file types.
This is where the list of extensions displayed after clicking Advanced is particularly helpful, as you can configure which files should be shown in the list shown below.
In the context menu (displayed after right-clicking on the list of file extensions), you can quickly select
everything or reverse the current selection.
Explore your own hard drive and use the available views to look for ways that you can gain more disk space.
Sorting the list by file size or date of last access can also help you discover interesting files. Simply use the
mouse to click on the column's gray highlighted title.
Cleanup tip
Sorting files by the date of last access in combination with limiting a view to certain file types allows you to
find objects such as older MP3 files or videos that you may not want to listen to or watch any more.
Top 100 files
For most users, this is the most interesting view. This shows you the 100 largest files in the selected location
of the folder tree, clearly organized by file size. As the contents of all subfolders are included, this view
allows you to free up hundreds of megabytes or even several gigabytes with a few clicks, depending on the
size of your system.
Settings
TuneUp Disk Space Explorer provides you with some options for personalizing the appearance of your system. To customize the available options, click File and then Settings.
General
On the General tab, the section Hidden Files and Folders allows you to determine whether hidden files and
folders should be shown in TuneUp Disk Space Explorer or not. The Windows Explorer settings are
accepted by default. If you want to configure different settings to the Windows Explorer settings, simply
click Configure your own settings and tailor the options to your needs. By default, TuneUp Disk Space
Explorer protects all elements in system folders to prevent you from accidentally deleting or moving important system files. If you know your system perfectly, you can disable this protection in the Protected system
elements section. Check the checkbox beside Permanently disable protection (not recommended).
Deletion method
On the Deletion method tab, you can specify how TuneUp Disk Space Explorer should proceed by default
in order to delete files and folders for you. The standard deletion method Move to Recycle Bin is particularly recommended for beginners, as accidentally deleted files can be restored.
71
TuneUp Utilities Manual
However, please note that the Windows Recycle Bin can only hold a limited amount of data. If the storage
limit of the Recycle Bin is exceeded or if Windows needs more space, the oldest files in the Recycle Bin will
be permanently deleted over time.
If the deletion method Permanently delete is selected, the Windows Recycle Bin will be bypassed and the
files will be deleted directly. Restoring these files at a later time is only possible with luck and special software such as TuneUp Undelete.
The three other deletion methods use TuneUp Shredder to make restoring the deleted files practically
impossible.
You can find more information on these deletion methods and their settings under Introduction, p. 74 and
Deletion Methods, p. 76.
72
TuneUp Utilities Manual
How to Archive Files
Archiving Files with TuneUp Disk Space Explorer
If, when browsing through your computer, you find some files that you don't actually need any more but
still don't want to delete, TuneUp Disk Space Explorer has a great solution to this problem:
Thanks to the smooth cooperation with Windows Explorer you can copy these files to a USB stick or external
hard disk before deletion, for example.
1.
Click on the selected file(s) and select Copy from the Edit menu or use the shortcut Ctrl+C.
2.
Open the selected target drive in Windows Explorer and paste the copied files using the Paste menu
item or the shortcut Ctrl+V.
Thanks to support for all major burning programs, you can also easily burn files to a CD or DVD.
Simply drag the files you want by holding down the mouse key ( Drag & Drop) directly to the burn list
in your burning program.
Deleting Archived Files with TuneUp Disk Space Explorer
After successfully archiving the files, you can delete them safely in TuneUp Disk Space Explorer and
thereby free up valuable disk space. Select a file and then click Delete in the toolbar.
73
TuneUp Utilities Manual
Securely Deleting Data
In the following chapters, you will find out how you can use the TuneUp Shredder module to permanently
delete files, folders and the Recycle Bin and why it is important to do so.
Securely Deleting Data Afterwards
If you deleted a sensitive file in a "normal" way, you cannot subsequently delete it with TuneUp Shredder.
However we have a tip for you:
When you defragment hard disks, any deleted files are normally overwritten and cannot be recovered afterwards. Simply use TuneUp Drive Defrag to subsequently increase the security of a normal deletion method (see How to Defragment Your Hard Disk, p. 59).
Introduction
When you delete a file, it generally ends up in the Recycle Bin. In Windows, this Recycle Bin is simply a
folder that collects files for deletion. Retrieving a file from the Recycle Bin is child's play and therefore many
users regularly empty the Recycle Bin or delete their files without sending them to the Recycle Bin, in order
to feel that the file has been securely deleted.
Note however that when you delete a file, Windows does not actually remove it altogether - its entire content remains on the hard disk. Windows merely marks the file as "deleted" from the file system and releases
the space taken up by the file so that it can be used again. Until this disk space is used again, it is very easy
to restore this file (for example using TuneUp Utilities -> Restoring Deleted Files, p. 85).
However, if you want to be absolutely sure that even professionals could not restore your sensitive data, use
TuneUp Shredder to irreversibly delete files, folders and the Recycle Bin. There are three different Deletion
Methods, p. 76 and you can choose the one that suits you best.
How to Securely Delete Data
Launch the TuneUp Shredder module by going to the Gain disk space category in the Start Center and
selecting Securely delete data from the Analyze storage usage and delete data area.
Alternatively, you can start the module by going to Overview of all functions in the Start Center and selecting the Securely delete data entry under Hard disk.
74
TuneUp Utilities Manual
What would you like to delete?
Files
1. Select Files.
This option lets you search for files on your computer to select them for deletion.
2. Click Add to add a file to be deleted to the list.
The Explorer opens. Double-click on a file to be deleted to add it to the list. Alternatively, you can drag a
file from your opened Explorer or from the Desktop to the list (using Drag & Drop). Select a file with the
mouse and drag it into the list.
The Delete allocated free disk space option overwrites the space that becomes free through deletion,
thereby increasing security of deletion.
If you add a file to the list by mistake, you can remove it again by selecting the entry and clicking
Remove.
3. Click Next to confirm your selection.
You can now select the desired deletion method (see Deletion Methods, p. 76).
Folders
1. Select Folders.
This option lets you search for folders on your computer to select them for deletion. When a folder is
deleted, all the files it contains will also be deleted. When you select a folder for deletion, the program
detects whether this contains subfolders and you have the opportunity to exclude these from the
search.
2. Click Select.
A tree structure opens in your folder. Select here a folder to be deleted and click OK. Alternatively, enter
into the text field the full path of the folder to be deleted.
The Delete allocated free disk space option overwrites the space reserved for the files in the selected
folder, thereby increasing deletion security.
If the selected folders have subfolders, here you can remove them from the search. Do this by unchecking the Include subordinate folders checkbox.
3. Click Next to confirm your selection.
You can now select the desired deletion method (see Deletion Methods, p. 76).
75
TuneUp Utilities Manual
Recycle Bin
1. Select Recycle Bin.
This option shows you the Recycle Bin, so that you can empty it. You receive information on the
number of files it contains and the amount of disk space taken up by the Recycle Bin. You can also display the content before deleting it.
2. Click Show contents.
You receive information on the size of the Recycle Bin and the number of files it contains. To ensure
that there are no important files in the Recycle Bin, you can display the content before deletion takes
place.
The Delete allocated free disk space option overwrites the reserved free space of files in the Recycle
Bin, thereby increasing security of deletion.
3. Click Next to confirm your selection.
You can now select the desired deletion method (seeDeletion Methods, p. 76).
Deletion Methods
TuneUp Shredder provides the following three deletion methods that differ in terms of length of deletion
and security of deletion. Each of these deletion methods can be increased by repeating the deletion process.
Note however, that the deletion process then takes longer.
Fast deletion
Files will be overwritten with a single character. The original text of the files will be replaced with endless columns of a certain letter.
Secure deletion in accordance with DoD 5220.22-M
A procedure developed by the United States Department of Defense (Regulation DoD 5220.22-M) will be
used. Prior to deletion, the files are overwritten with special data patterns multiple times, destroying the original contents so effectively that even expensive examinations of the magnetic structure of the disk in a special laboratory would not allow the data to be recovered.
Secure deletion, Gutmann method
This method, named after its inventor Peter Gutmann, overwrites the files to be deleted 35 times with random values in a special pattern and then deletes them. This method is considered the most secure way to
delete files with software, but also takes the longest time.
76
TuneUp Utilities Manual
6. Fixing Problems
Unfortunately, things sometimes don't go quite as you expected when you are working with a computer.
With Fix problems, TuneUp Utilities offers you various functions for discovering and rectifying any problems that occur. In addition, the program helps you to recover accidentally deleted files. Advanced users
have the option of managing running processes or displaying system information.
Fixing common problems
In the following chapters, you will find out why it is important to do so and how you can use the TuneUp
Repair Wizard module to fix common problems easily. Simply select the problems in question and TuneUp
Repair Wizard will fix them for you.
All modifications to your system will be monitored by TuneUp Rescue Center and can be undone if
necessary.
Introduction
You keep having problems with your computer. Without warning, Windows suddenly displays the wrong
icons, hides the taskbar or shortcuts on the desktop disappear.
If you discover problems like these on your computer but do not know how to describe them, you will find
this function very useful. You select the problems that are occurring from a list of typical computer problems, and TuneUp Repair Wizard fixes them immediately.
77
TuneUp Utilities Manual
How to Fix Common Problems
1.
Start the TuneUp Repair Wizard module by going to the Fix problems category in the Start Center
and selecting Fix common problems.
Alternatively, you can start the module by going to Overview of all functions in the Start Center and
selecting the Fix common problems entry under Windows.
2.
Select the problems you have for repair.
TuneUp Repair Wizard shows you a clearly arranged list of common Windows problems. After you
select an entry in the list, a detailed explanation of this problem appears in the right-hand window
area. Select the checkbox for every problem that you are experiencing.
3.
Click Next to start the repair.
This opens a list of the selected problems opens that you must confirm by clicking again on Next. The
repairs are now carried out.
4.
Click Finish to close the module.
78
TuneUp Utilities Manual
Checking the Hard Disk for Errors
In the following chapters, you will find out how you can analyze your drives using the TuneUp Disk Doctor
module and why it is important to do so.
Introduction
When working with your computer, files are constantly being read and written – regardless of whether you
are editing a text document, looking at pictures or simply starting an application. Windows places all files in
special file systems to allow quick access to all necessary information at any time.
More information on system files
File systems keep track of every file and folder on a drive and save information about these objects such as
their name, size, date of last access, location and much more.
The file systems used by Windows for hard drives, USB flash drives, memory cards (such as those used by
digital cameras) and diskettes are called FAT and NTFS. The newer of the two file systems, NTFS, allows you
to save additional information such as access authorizations and is better suited for the size of modern disks
than FAT.
Over time, errors may occur in these complicated systems - due to defects in the drives being used, power
outages or program crashes. If these errors are not found and corrected quickly, this can lead to error messages, problems with programs and, in the worst case, total loss of important data.
TuneUp Disk Doctor performs a thorough analysis of your drives and their file systems. If any errors are
found during analysis, they can be repaired automatically. This is how you guard against data loss.
79
TuneUp Utilities Manual
How to Check your Hard Disk
1.
Start up the TuneUp Disk Doctor module by going to the Fix problems category in the Start Center
and selecting the Check hard disk for errors entry.
Alternatively, you can start the module by going to Overview of all functions in the Start Center and
selecting the Check for errors entry under Hard disk.
2.
Select the drive to be checked by TuneUp Disk Doctor and click Next.
3.
Select Normal analysis or Thorough analysis.
Because the Thorough analysis can take a long time for large drives, the Normal analysis of the
selected drive is sufficient in most cases – this usually takes 1-2 minutes.
However, if errors occur on your system or Windows reports problems with reading or writing data, a
Thorough analysis is recommended.
For more information on the analysis procedure, see: Normal vs. Thorough Analysis, p. 81
4.
Click Next to start the analysis.
During the analysis, TuneUp Disk Doctor provides you with a graphical display of the progress. The
boxes displayed represent the space usage of the drive being examined.
5.
If no errors have been found, click Finish to exit the module.
In some cases it is necessary to restart your computer in order to successfully complete the analysis or
repair process. This can happen, for example, when active programs or Windows itself are using the
selected drive and thus prevent TuneUp Disk Doctor from having exclusive access.
If a system restart is necessary, TuneUp Disk Doctor will show you a corresponding message. You can
then decide if the necessary restart should be performed immediately or if you would like to restart
the system yourself at a later time.
80
TuneUp Utilities Manual
Normal vs. Thorough Analysis
Normal analysis
Normal analysis takes approx. 1-2 minutes and is generally sufficient.
Normal analysis is carried out in several phases. The table below shows explanations of all possible steps
(only the first three lines are performed during the normal analysis).
Thorough Analysis
Thorough analysis covers all of the steps of the normal analysis. In addition, it checks your drives for physical defects.
Storage space on drives is divided into "sectors", each of which is usually 512 bytes in size. In order to detect
physical defects on a drive, the thorough analysis checks each of these sectors.
The length of this analysis depends on several factors, including the size of the drive and the degree of fragmentation. You should allow at least 5 to 20 minutes.
The following table explains all possible steps.
Analysis
step
Explanation
Normal and thorough analysis
Checking
files and
folders
(NTFS and
FAT)
Every element in the file system is checked. The program ensures that the structures of all files
and folders are correct.
Checking
indexes
(NTFS
only)
Indexes are references to folders in the NTFS file system. If any of these indexes are damaged,
the associated folders will not be displayed in the file system.
If any of your files or folders have suddenly "disappeared", there is a good chance that they
will be recovered after repairing the file system.
Checking
security
Files and folders in the NTFS file system are usually protected by security descriptors that predescriptors vent access by unauthorized users. During analysis, errors in these descriptions are found and
(NTFS
corrected.
only)
Thorough analysis only
Checking
file data
(NTFS
only)
All sectors of the drive that currently contain data will be checked. This ensures that no read
errors take place when working with files. If sectors are found that require multiple read
attempts to successfully read the data, the file data contained will be moved to a sector that is
free of errors. The sector is then marked as defective. This prevents future problems.
Checking
free space
(NTFS and
FAT)
All drive sectors that do not contain any files will be checked for error-free readability. If
errors occur during this analysis, the sector in question will be marked as defective to prevent
files from being saved there in the future.
81
TuneUp Utilities Manual
Managing Running Processes
In the following chapters, you will find out how you can use the TuneUp Process Manager module to monitor and manage running processes, system capacity and open files and why it is important to do so.
Introduction
TuneUp Process Manager gives you constant control over the programs and processes that are running on
your system and allows you to monitor your system activity.
You can find out how much memory is being used by which processes, view numerous details and terminate unwanted processes with a single mouse click.
The tool also offers real-time graphs for processor and memory usage and provides up-to-date information
on what your computer is doing at any given time.
82
TuneUp Utilities Manual
How to Manage Running Processes
Start the TuneUp Process Manager module by going to the Fix problems category in the Start Center and
selecting the Display and close running processes entry under Check system and fix problems.
Alternatively, you can start the module by going to Overview of all functions in the Start Center and selecting the Display and close running processes entry under Windows.
TuneUp Process Manager provides a great deal of information on the current status of your system. This
information is divided into three tabs:
Processes
After launching the module, the 'Processes' tab shows all of the currently running programs and processes.
The table shows you the names of the processes together with their priority and CPU usage. The module
also shows you how much memory space the individual processes are taking up.
If you select a process from the list you can view more information on each application with Show details.
Select End process to close an application. This is a somewhat drastic measure, but is sometimes necessary
to close a program that has crashed, or if you want to stop an unwanted dialer.
When User Account Control is enabled, it is possible that only the processes started by you are displayed. To
see the processes started by other users and by the system, click Show all processes at the bottom of the
window.
If you have selected a process in the list, you can click Edit and then Set Process Priority to specify how
much processing power Windows should assign to this process.
83
TuneUp Utilities Manual
Open Files
In the Open Files tab, you will have an overview of the files and folders that are currently open. The table will
show you what the file type is, where the file or folder is and which process has opened it at that time.
You should not be surprised when some files are shown in the list more than once. Files and folders can be
opened by more than one process at the same time. It is also normal when files that are obviously "open"
cannot be found in the list. Applications like Microsoft Word and the text editor Notepad only open a file
briefly to read its contents or to save it, but do not keep it open the entire time you are working on it.
Tip: If you try to delete a file and you get an error message telling you that it is currently in use, you can use
this tool to find out what process is using the file and end it. This will then let you delete the file.
Performance
The 'Performance' tab provides you with various information on the system.
You can view the current processor usage in percent, and a graph of the processor usage for the last several
seconds. A similar graph also shows memory usage for the last several seconds. You can also view the current usage of the page file and the physical memory in kilobytes.
There is also a menu bar and a toolbar. Some of the functions here adjust the content of the active tab.
These are described in the sections above. The general functions of the File, Tools and Help menus are
always displayed.
General menu bar functions
"File" Menu
In the File menu, you can use the New Task entry to call up the well-known Windows Run dialog to start a
new application or open a file. Click Exit Windows to shut down or restart the computer so that new settings can take effect.
A function of particular interest is Replace Task Manager, which works by replacing Windows Task Manager on your system with TuneUp Process Manager. This means you can call it up using the Ctrl+Alt+Del
shortcut, or right-click in a free area of the taskbar to select it. If you want to use the Windows Task Manager again, simply select the same menu item to remove the check mark in front of it.
"Tools" Menu
In the Tools menu you can configure how TuneUp Process Manager is to be displayed on your computer.
You can keep it always in the foreground, e.g. to monitor the processor usage for your system's uptime. You
can also display TuneUp Process Manager in the notification area on the bottom right of your desktop
when you minimize the window. There is an icon there, which you can click any time in order to maximize
the window again in no time at all.
"Help" Menu
In the Help menu you can call up the program help at any time, visit the TuneUp website, check TuneUp
Utilities for updates or display information on your version of TuneUp Utilities.
84
TuneUp Utilities Manual
Restoring Deleted Files
In the following chapters, you will find out how you can use the TuneUp Undelete module to restore accidentally deleted files.
Introduction
Have you accidentally deleted an important file and want to restore it? Perhaps you already looked in the
Recycle Bin but it wasn't there?
Then you will be pleased with the functions offered by TuneUp Undelete.Here you can restore deleted files,
provided Windows has not yet overwritten the drive space that these files took up.
Valuable tips for rescuing data
The following rule of thumb applies: The longer ago a file was deleted and the more you have worked on
your computer since then, the smaller the chance of complete restoration. Therefore, as soon as you realize
that the file should not have been deleted, try to rescue it with TuneUp Undelete.
Never install software for recovering deleted files on your system if the mishap has already occurred. You
could overwrite important data irrevocably precisely by installing such software.
Even if you install the application on a different drive, deleted data is still at risk from temporary installation
files. Data recovery software like TuneUp Undelete should therefore always be installed and ready for use in
advance. This means you are always fully equipped to deal with an emergency situation, should one occur.
Background Info: What Happens when Files are Deleted?
You can find more information about this in the How Secure is Deleting a File? section in Introduction, p.
74. This section also provides information on how to delete confidential files securely so that they cannot be
restored even with TuneUp Undelete.
85
TuneUp Utilities Manual
How to Search for Deleted Files
1.
Start up the TuneUp Undelete module by going to the Fix problems category in the Start Center and
selecting the Restore deleted files entry.
Alternatively, you can start the module by going to Overview of all functions in the Start Center and
selecting the Restore files entry under Hard disk.
2.
Select the drives you want to scan for deleted files.
Even if you want to recover a file on an external storage medium (for example a USB flash
drive), this option will still be displayed.
If you can no longer remember where the files were stored, you can also browse all drives.
3.
Restrict your search.
You can refine your search through the entry of search terms. This is recommended if you can
remember the name of the file or even just part of the name.
Search tip: Use the wildcards * and ?
When entering your search terms you can use wildcards. These function in exactly the same way as in
many standard search engines.
The use of wildcards when searching is useful if you cannot remember the precise name of the file or
only wish to search for a certain file extension.
* and ? can be used as wildcards, whereby * represents multiple characters and ? stands for an individual character.
Examples for the use of wildcards
l
l
l
l
A search using photo* will find all files whose name starts with photo, and of all file types i.e.
photo_01.jpg, photo.bmp, photo_paris.tif, etc.
A search for photo.* or for photo (no wildcard) will find all files called photo and of all file
types, i.e. photo.jpg, photo.doc, photo.tif, etc.
A search for *.doc will find all files with the extension .doc.
A search for photo_?? finds all files whose name starts with photo_ and which have two further
characters in their name, and of any file type, i.e. photo_01, photo_09, etc.
86
TuneUp Utilities Manual
Why should I search for 0 byte files?
0 byte files consist solely of the file name. It is impossible to restore the content of such files. If, for
example, you have deleted a file with a strictly confidential file name and want to be sure that this file
can never be found again, you can include 0 byte files in the search.
Why should I only search for files in good condition?
With files that are in good condition you stand a good chance of recovering the file in full.
4.
Click Next to start the search.
TuneUp Undelete searches every selected drive in turn. For large hard disks and if you have not
entered any search terms, the search can take quite a long time.
Search result displays the file name, the original storage location (folder), the size, file type, date last
changed and an estimate of the condition of the file.
File Restoration
Condition of a deleted file
For every deleted file, TuneUp Undelete determines its probable condition. This is of course the most important information at this point: you receive a very accurate prediction of whether a file can be restored again
in full.
Good condition
If the condition of a file is likely to be good, the place the file originally took up on the hard disk will not yet
have been replaced with another file. It is therefore highly probable that the file can be successfully
restored.
Poor condition
If the condition of a file is likely to be poor, this means that the place that it once took up on the hard disk,
will have been partly overwritten by other files. However, there is still a chance that at least some of the file
can be restored. The precise result of the restoration cannot at this time be determined for certain, however.
Restoring files
1.
Select the files that you wish to restore.
Use Ctrl-click to select multiple files.
2.
Click Restore to start the recovery attempt.
3.
Specify whether the files should be restored to the original folder or to another location.
If you wish to select a different location, the folder hierarchy appears and you can select a folder or
create a new folder. Click OK to confirm your entry.
TuneUp Undelete now restores the selected files to the location specified.
You can also exit the dialog at any time by pressing Cancel.
Was the recovery successful?
As soon as restoration has finished, you can try to open the file. If this works, the file was successfully
restored. If this doesn't work, the file had probably already been overwritten by another file.
If you now wish to use another program to recover deleted files, so as to be sure that you have
tried everything, we strongly urge you not to install this on the same hard disk as the file was
stored on.
87
TuneUp Utilities Manual
Showing System Information
In the following chapters, you will find out how you can use the TuneUp System Information module to
display system information.
Introduction
TuneUp System Information looks into your computer and collects all sorts of facts and information about
your hardware and software and your computer's performance.
This information is important if you wish to upgrade your computer or if an engineer asks you whether certain components are installed on your computer.
How to Show System Information
Start the TuneUp System Information module by going to the Fix problems category in the Start Center
and clicking on Show system information.
Alternatively, you can start the module by going to Overview of all functions in the Start Center and selecting the Show system information entry under Computer.
The facts about your system are displayed on the following nine tabs:
Overview
The overview displays summarized information on the most important components of your computer. This
quickly shows you what processor is installed, the system RAM, the graphic card performance, the mouse in
use, and any available information regarding the disk drives.
Windows
Here you can find out what version of Windows and of Internet Explorer you are using and when you last
booted your computer.
Display
All important information, including the supported display modes and the abilities of your monitor and
graphics card can be found here.
88
TuneUp Utilities Manual
Memory
Here you see current memory usage and also how much memory is being used by each of the applications
that are currently loaded.
Performance
Shown here are all facts on processor usage, physical memory and the size of the page file. This information
is displayed in three real-time graphs.
Drives
For each drive, here you are shown information on use of storage space and hardware. You can also find
information about how your drives are organized under File system.
I/O Devices
This lists all the important ports, the installed printers and the audio devices.
Communication
When a dial-up connection is open, two real-time graphs show how much data is being sent and received
in kilobytes per second.
System devices
Information on the processor and BIOS memory is displayed here. Click the link Processor details to view
detailed information on the features of your processor.
89
TuneUp Utilities Manual
7. Customizing Windows
Using the Customize Windows category, you can specifically configure how your Windows should look
and function, thereby personalizing your computer. Under Frequently used settings, you will find the elements and areas of Windows that you often personalize and you can open these with a simple click.
The "Change Windows Appearance" Area
Under Personalize the appearance of Windows, you will find the TuneUp Styler module, which you can
use to design the Windows user interface entirely to your personal taste. For example, settings such as
icons, the logon screen, the appearance of windows and buttons and much more can be very easily modified.
If you would like a completely new design, you can download entire design packages from the Internet at
www.tuneup-software.co.uk/services/styler. Simply click on the link to download new Windows themes
for free.
The "Modify Windows Settings" Area
Under Personalize options and behavior, you will find the TuneUp System Control module, which you can
use to adapt the visual effects, user logon, desktop and much more to your personal needs and preferences.
90
TuneUp Utilities Manual
Changing Windows Appearance
In the following chapters, you will find out how to change the appearance of Windows with the TuneUp
Styler module.
Please note that the "Boot screen" and "Startup logo" categories can only be used on Windows Vista.
Introduction
Windows would not be very useful without its graphical user interface. The importance of an attractive interface is demonstrated by the new design of Windows Vista and Windows 7: the whole system feels immediately fresher and more modern.
But just as in fashion, it is easy to tire of the new design, not to mention those who from the beginning
never liked the "candy" look.
With TuneUp Styler, you can change the appearance of numerous elements in Windows to suit your personal taste. You'll be pleasantly surprised at how many changes you can make here.
91
TuneUp Utilities Manual
How to Change Windows Appearance
1.
Start the TuneUp Styler module by going to the Customize Windows category in the Start Center and
clicking on the Personalize the appearance of Windows entry in the Change Windows appearance
area.
Alternatively, you can start the module by going to Overview of all functions in the Start Center and
selecting the Change Windows appearance entry under Windows.
The TuneUp Styler start page opens from which all adjustment options of the module can be quickly
reached.
2.
Click on the area in which you wish to make changes.
3.
Give your creativity free reign and design your Windows system completely to your own tastes.
92
TuneUp Utilities Manual
"Boot Screen" Category
Please note that this function is not available in Windows 7, as Windows 7 does not use a boot screen.
Introduction
When you boot up Windows, a black screen is displayed as standard. TuneUp Styler lets you switch this
boot screen for a different one with just a few clicks. Or let your imagination run wild and create your own
boot screen with your favorite vacation photo, for example.
This is how it works:
1.
Start the TuneUp Styler module by going to the Customize Windows category in the Start Center
and selecting Personalize the appearance of Windows under Change Windows appearance.
2.
On the navigation bar, click in the left-hand window area on Boot screen.
TuneUp Styler lists all available boot screens. When you use the module for the first time, you will
only see the default Windows screen here.
3.
You can add new boot screens to the list before finally accepting them. To do so you have the following options:
To select an existing boot screen in the list, proceed with step 4.
Downloading previously created boot screens
1. In the top left, click Add under Boot screens.
2. Select the entry Download Boot Screens from TuneUp Online.
This takes you to TuneUp Website, where you find a wide range of different boot screens, which
you can use to customize the start process to suit you.
3. Click on a boot screen.
This is automatically opened with TuneUp Styler and added to the list.
93
TuneUp Utilities Manual
Adding Boot Screens from a File
1. In the top left, click Add under Boot screens.
2. Select Load boot screen from a file.
An Explorer window opens and you can select any given file on your computer. The following formats are supported:
Type
File extension
Description
TuneUp
boot screen
.TBS
The individual format of TuneUp Styler
Stardock
Bootskin
.BOOTKSKIN
The format of many boot screens on websites such as www.wincustomize.com
Images
.BMP; .PNG; If you select an image in one of these formats, the Create boot
.GIF; .JPG;
screen dialog is automatically called up with this image, allow.JPEG
ing you to make additional adjustments.
Ntoskrnl.exe
.EXE
files
The system kernel of Windows XP, in which a boot screen was
incorporated. TuneUp Styler extracts the boot screen from this
EXE file and saves it in Styler format.
3. Select a new boot screen and give it a name under which it will appear in the TuneUp Styler list.
You can also enter the name of an author. The newly added boot screen now appears in the list.
You can add additional boot screens.
Creating your Own Boot Screen
1. Under Boot screens click Create new.
A wizard appears with which you can search for and adapt an image. You can select an image on
your computer or on an external storage device.
You also have the option of first transferring an image from a camera or scanner or starting a
Google™ image search directly from TuneUp Styler. In both cases, you save the required image to
a location that you can easily find again and click on Search local drives to load the saved image.
2. Optimize the appearance of your new image.
Please note that the available alignment options are only effective if the picture is not yet the correct size for a boot screen (640 x 480 pixels). Under Background, you can specify the color to be
used for areas not covered by your image.
For technical reasons, this includes the background of the progress bar. You can also set position,
foreground color and edge color to suit your individual taste. Position the progress bar at a location that does not interfere with the overall picture.
For more information, see: Tips for Attractive Boot screens (Windows XP only) , p. 96
3. Save the new boot screen to the TuneUp Styler list under a name of your choosing.
You can also enter the name of an author. The boot screen you added now appears in the list.
94
TuneUp Utilities Manual
Restoring the Default
If you no longer like your new boot screen, you can restore the default Windows screen at any time.
1. Click on the Restore Defaults button.
The default screen is then automatically selected from the list and a preview opens.
2. Click Apply to apply it.
Steps 4 and 5 do not apply.
4.
Select the visual style you want from the list to preview it.
5.
Click Apply.
TuneUp Styler accepts the new boot screen.
95
TuneUp Utilities Manual
Tips for Attractive Boot screens (Windows XP only)
For technical reasons, all boot screens in Windows XP may only have 16 colors, of which some are prescribed (e.g. black). TuneUp Styler therefore has to reduce the full range of colors in your composition (normally 16.7 million) to a very few when you click Save boot screen.
TuneUp Styler uses a sophisticated algorithm for this to automatically determine the best 16 colors for your
picture. If the image contains too many different colors, the results of this conversion may not be satisfactory.
Experience has shown that the best boot screens are those that use only a few different colors. This means
that an image that consists predominantly of different blue shades and only a few contrasting colors will
probably make an attractive boot screen.
Set the foreground color of the progress bar to a color that is contained in your image. This way, you do not
use one of the precious 16 colors in the progress bar only. Wherever possible, avoid skin tones in your boot
screen. Images with skin tones normally cannot be displayed correctly with only 16 colors (ask any graphic
artist). Of course, you may be lucky. The best thing to do is try!
96
TuneUp Utilities Manual
"Startup Logo" Category
Please note that this function is only available on Windows Vista because neither Windows XP nor Windows
7 use the startup logo.
Please note that this feature is not available on Windows 7 because Windows 7 does not use the startup
logo.
Introduction
Just before logon, a small, animated Windows logo appears. With TuneUp Styler you can replace this
startup logo without making risky interventions in the system.
This is how it works:
1.
Start the TuneUp Styler module by going to the Customize Windows category in the Start Center and
clicking on the Personalize the appearance of Windows entry in the Change Windows appearance
area.
2.
On the navigation bar, click in the left-hand window area on Startup logo.
TuneUp Styler lists all available startup logos. You can now add additional predesigned startup logos
or create your own startup logo.
3.
You can add new startup logos to the list before you accept it finally. You have the following options
for this:
To select an existing startup logo in the list, proceed with step 4.
Downloading Previously Created Startup Logos
1. In the top left, under Startup logos, click Add.
2. Select the entry Download Startup Logos from TuneUp Online.
This takes you to the TuneUp Website, where you can find a wide selection of different startup
logos with which you can improve the appearance of the startup process exactly how you want.
3. On the TuneUp website simply click on a startup logo. This is then automatically opened with
TuneUp Styler and added to the list.
These attractive startup logos can also be stored as a file (with extension .tla) to a USB flash drive.
You can then transfer these startup logos to any computer on which TuneUp Utilities is installed
by clicking Add and Load startup logo from a file.
Adding Startup Logos from a File
1. In the top left, under Startup logos, click Add.
2. Select the entry Load startup logo from a file.
An Explorer window opens and you can select any image on your computer to be used in place of
the animated startup logo. For best results, your image should be in 300x300 pixel format.
3. Select a new startup logo and give it a name under which it will be included in the TuneUp Styler
list.
You can also enter the name of an author. The startup logo you added now appears in the list.
You can add additional startup logos.
97
TuneUp Utilities Manual
Creating your Own Startup Logo
1. Under Startup logos click Create new.
An Explorer window opens and you select an image on your computer or an external storage
medium.
2. Save the new startup logo to the TuneUp Styler list under a name of your choosing.
You can also enter the name of an author. The startup logo you added now appears in the list.
Restoring the Default
If you no longer like your new startup logo, you can restore the Windows default at any time.
1. Click on Use default.
The default startup logo is then automatically selected from the list and a preview opens.
2. Click Apply to apply it.
4.
To preview the startup logo you want, select it in the list.
You can even animate the preview by clicking on the Play button.
5.
Click Apply.
TuneUp Styler uses the new startup logo.
98
TuneUp Utilities Manual
"Logon Screen" Category
Introduction
If you share your computer with other users, or if you use a password to protect your account, you will be
familiar with the Windows logon screen. TuneUp Styler lets you change the logon screen to suit your personal taste.
This logon screen shows a list of all user accounts. Users must select their account from this list, enter their
password (if one is set) and are then logged on to the system.
This is how it works:
1.
Start the TuneUp Styler module by going to the Customize Windows category in the Start Center and
clicking on the Personalize the appearance of Windows entry in the Change Windows appearance
area.
2.
On the navigation bar, click in the left-hand window area on Logon screen.
TuneUp Styler lists all available logon screens. The first time you use the module, the only screen in
the list will be the default Windows boot screen.
3.
You can first add new logon screens to the list before you accept it finally. You have the following
options for this:
To select an existing logon screen from the list, proceed with step 4.
Downloading previously created logon screens
1. Click Add in the top left under Logon screens.
2. Select the entry Download Logon Screens from TuneUp Online.
This takes you to the TuneUp Online where you will find a wide selection of different logon
screens which you can use to give your system an individual style.
3. Click on a logon screen.
This is automatically opened with TuneUp Styler and added to the list.
Adding Logon Screens from a File
1. Click Add in the top left under Logon screens.
2. Select the entry Load logon screen from a file.
An Explorer window opens and you can select a file on your computer. However, only files in
TuneUp Styler format (with the .TLS extension) are supported.
In addition, all available logon screens can be directly installed with the file Logonui.exe or in Stardock LogonStudio format (LOGONXP).
3. Select a new logon screen and give it a name under which it should appear in the TuneUp Styler
list.
You can also enter the name of an author. The newly added boot screen now appears in the list.
You can add additional logon screens.
99
TuneUp Utilities Manual
Creating your Own Logon Screen
1. Please note that this feature is not available on Windows XP.
Under Logon screens, click Create new.
A wizard appears with which you can search for and adapt an image. You can select an image on
your computer or on an external storage device.
You also have the option of first transferring an image from a camera or scanner or starting a
Google™ image search directly from TuneUp Styler. In both cases, you save the required image to
a location that you can easily find again and click on Search local drives to load the saved image.
Please note that images found using the Google™ image search may be protected by copyright.
You must only use those images that are not protected by copyright.
2. Optimize the appearance of your new image.
Please note that the available alignment options are only effective if the picture is not yet the correct size for a logon screen (640 x 480 pixels). Under Background, you can specify the color to be
used for areas not covered by your image.
3. Save the new boot screen to the TuneUp Styler list under a name of your choosing.
You can also enter the name of an author. The boot screen you added now appears in the list.
Restoring the Default
If you no longer want to use your new welcome screen, you can naturally restore the default Windows
screen at any time.
1. Click on the Restore Defaults button.
The default screen is then automatically selected from the list and a preview opens.
2. Click Apply to apply it.
Steps 4 and 5 do not apply.
4.
Select the desired logon screen from the list to preview it.
5.
Click Apply.
Not all logon screens are in English. After installing a new screen, your Windows may greet you in a
different language the next time you start your computer. For example, instead of "Click on your user
name to log on," the screen might read "Klicken Sie auf Ihren Benutzernamen, um sich anzumelden."
In this case, you may be asked if you want to use the texts in the selected logon screen, or if you want
to use the texts from the default logon screen in your system language.
TuneUp Styler applies the new logon screen.
You can test the logon screen by simultaneously pressing Ctrl + Alt + Del.
100
TuneUp Utilities Manual
"System Elements" Category
Introduction
In this category you can swap typical Windows icons for new ones.
Here's how it works:
1.
Start the TuneUp Styler module by going to the Customize Windows category in the Start Center and
clicking on the Personalize the appearance of Windows entry in the Change Windows appearance
area.
2.
In the navigation bar in the left window area, click under Icons on System elements.
TuneUp Styler shows you on the right-hand side tabs for the following areas, in which you can
change system elements:
You change the icons for all elements in the Desktop, Start menu, Explorer and Control Panel. You can
also adjust the icons for the display of file types.
For some elements you can even specify new names (e.g. the Recycle Bin or My Network Places).
If you are missing the term "My Computer" from Windows XP, you could for example rename the element now called "Computer" in Windows Vista to "My Computer".
3.
Click through the individual tabs and select an element that you wish to change.
4.
Click Replace icon.
The icon library opens in which the current icon of the selected element appears. This is usually a
library that was already installed with Windows. If you have your own icon library on your computer,
you can import its content using Browse.
5.
Select an icon to mark it for replacement.
Your changes will initially be indicated by a small orange asterisk next to the relevant elements in the
list.
Any change that has not yet been accepted can be discarded at any time by selecting an element
marked with such an asterisk in the list and clicking on Discard unsaved changes made to this element.
6.
At the bottom right of the window, click Accept to carry out the change.
How to undo changes
You can discard any changes not yet accepted for an element by selecting them in the list and clicking on
Discard unsaved changes made to this element.
Any changes already made to an element can be undone by selecting the element and clicking Reset element to Windows default. Please note that this link is only displayed if the element does not currently correspond to the Windows default.
If you should want to undo changes made to multiple items, you can click Reset category or Reset all categories. The first link only resets the elements of the currently selected tab, the second all system elements
that can be changed with TuneUp Styler.
101
TuneUp Utilities Manual
When you click on either link, a dialog appears where you can choose whether you want to reset all elements to the Windows default or whether you only wish to discard any unsaved changes for these elements.
The second option is only available if there are changes that have not yet been applied.
102
TuneUp Utilities Manual
Managing Icon Packages
Introduction
It is of course a very laborious task to change every Windows icon individually. TuneUp Styler therefore
allows you to swap all old-fashioned Windows icons for new ones in one fell swoop.
Adding an Icon Package
1.
In the TuneUp Styler the left area of the window under Icons, click System elements. Then click Icon
packages at the bottom.
A new window opens that shows all the available icon packages. Now you can add new icon packages to the list or install an existing one (continue to step 4).
2.
Click Add.
This allows you to add additional icon packages to the list. You have the option of using an icon package from your computer or downloading a new package from TuneUp Online. Here you can download numerous creatively designed icon packages.
On the web pages, just click on an icon package and open it with TuneUp Styler. After just a few seconds the package is displayed in the list.
Creating a new icon package
As an alternative, you can create your own icon package from your current icon set and either back it up or
share it with friends.
1.
Click Create new package at the top of the list.
A wizard opens to guide you through the process of creating an icon package.
2.
Information about the author: Here you can immortalize yourself, if you want, and enter your name,
e-mail address and website address.
3.
Package name and description: Enter a meaningful package name here. If you wish, you can add additional information on the package in the Description field.
4.
Optimize package size: Use the options in this step to ensure that your package is not too large, so
that it can be sent via e-mail without problems.
5.
Creating icon package: The icons are now collected and optimized if necessary, after which they are
saved together in an icon package.
6.
Finishing the wizard: The icon package has now been successfully created and will be added to the list
of icon packages when you click Finish. Clicking Open folder takes you to the icon package folder in
TuneUp Styler, so that you can copy the icon package to a different location or attach it to an e-mail.
103
TuneUp Utilities Manual
"File System" Category
Introduction
Windows assigns a default icon to every drive, every folder, every Start menu folder and every entry in Favorites.
Here's how it works:
1.
Start the TuneUp Styler module by going to the Customize Windows category in the Start Center and
selecting Personalize the appearance of Windows under Change Windows appearance.
2.
In the navigation bar in the left-hand window area, click under Icons on File system.
A tree structure of your drives and folders opens. Click through the individual elements of the tree
structure to select those elements to which you would like to assign a more individual icon.
Ideas and tips
Under the first node, you could assign the drive containing your games an especially funky
icon, but a more serious one to the drive with your office programs.
l You can proceed in the same way for folders - a few well-chosen icons help you to keep track
of things, even if your drives are really full.
l The icons on the Start menu can also be swapped for more meaningful icons.
l You can even give your favorites in Internet Explorer their own icon. This will help you to find
your most favorite favorites from a usually very long list.
Click through the individual elements of the tree structure and select an element to which you would
like to assign a more creative icon.
l
3.
4.
Click Replace icon.
Please note that this is not possible for the three elements Computer, Start menu and Favorites.
The icon library opens in which the current icon of the selected element appears. This is usually a
library that was already installed with Windows. If you have your own icon library on your computer,
you can find its content using Browse...
5.
Select an icon.
6.
Click OK to apply your changes immediately.
Undoing individual changes
To undo a change, select an item in the list and click Reset element to Windows default.
Undoing multiple changes
If you want to undo several changes at once, you may find the Restore backup of an old session link useful.
It starts TuneUp Rescue Center and enables you to undo the changes carried out with TuneUp Styler on a
certain date.
104
TuneUp Utilities Manual
"Icon Display" Category
Introduction
Here you can change the appearance of icons on the desktop.
Here's how it works:
1.
Start the TuneUp Styler module by going to the Customize Windows category in the Start Center and
clicking on the Personalize the appearance of Windows entry in the Change Windows appearance
area.
2.
In TuneUp Styler in the left area of the window under Icons, click Icon display.
TuneUp Styler provides a preview of some items on your desktop that you can personalize.
3.
Specify how big the gap between items on the desktop should be and whether a shortcut should be
indicated by an arrow.
Specify the size of items on the desktop, specify how big the gap between them should be and
whether a shortcut should be indicated by an arrow.
105
TuneUp Utilities Manual
"Repair" Category
Introduction
It can be fun to change the Windows icons and to make a few personal settings here and there. However, it
is possible that the desired icons are suddenly not displayed correctly or are even swapped. TuneUp Styler
has two repair functions.
This is how it works:
1.
Start the TuneUp Styler module by going to the Customize Windows category in the Start Center and
selecting Personalize the appearance of Windows under Change Windows appearance.
2.
In TuneUp Styler, click Repair under Icons in the left-hand area of the window.
3.
Click Reload Icons.
This function usually clears up any problems and allows you to continue restyling your Windows system. If reloading the icons does not resolve matters, there may be a serious problem with your icon
cache. If this is the case, continue with step 4.
4.
Click Repair Icon Cache.
The icon cache is a file in which Windows stores all loaded icons, for faster loading in the future.
Should an error occur with this file, all icons could be corrupted. Luckily, this error can be repaired
directly from TuneUp Styler.
Note that you may need to restart your computer or log on again for this repair to take effect.
106
TuneUp Utilities Manual
"Visual Style" Category
Introduction
This is where you can personalize the visual style. This defines the appearance of windows and Windows buttons.
Here's how it works:
1.
Start the TuneUp Styler module by going to the Customize Windows category in the Start Center and
clicking on the Personalize the appearance of Windows entry in the Change Windows appearance
area.
2.
In TuneUp Styler in the left-hand window area under Interface, click Visual Style.
TuneUp Styler displays a list of all available visual styles. On the right, you can see a preview and
other details of the style selected in the list.
3.
You can add new visual styles to the list before finally accepting them. You have the following
options for this:
To select an existing visual style from the list, proceed with step 4.
Download Visual Styles From TuneUp Online
1. In the top left under Visual Styles click Add.
2. Select the entry Download Visual Styles from TuneUp Online.
This takes you to the TuneUp Online website where you can choose from a wide range of visual
styles that you can download for free at any time.
3. Click on a visual style that you particularly like.
This is automatically opened with TuneUp Styler and added to the list.
107
TuneUp Utilities Manual
Adding Visual Styles From a File
1. In the top left under Visual Styles click Add.
2. Select Load visual styles from a file...
An Explorer window opens and you can select a visual style on your computer or an external storage media, if you have already saved one. TuneUp Styler recognizes and supports almost every
common format:
Type
File extenDescription
sion
TuneUp Vis.TVS
ual Styles
The individual format of TuneUp Styler
Microsoft
This Microsoft format often includes additional files that can be
.MSSTYLES
Visual Styles
found in the same folder or in subfolders.
Compressed
.RAR, .ZIP
archives
Archives are searched for all file types in this list, and decompressed automatically if such files are found.
Self-extract.EXE
ing archives
These files are searched for compressed archives in RAR or ZIP format, which are treated according to the description of the Compressed Archive file type.
3. Select a new visual style and give it a name under which it will appear in the TuneUp Styler list.
You can also enter the name of an author. The visual style you added now appears in the list.
Restoring the Default
If you no longer like your new visual style, you can restore the default Windows style at any time.
1. Click on the Restore Defaults button.
The default visual style is then automatically selected from the list and the preview changes
accordingly.
2. Click Apply.
Steps 4 and 5 do not apply.
4.
Select the visual style you want from the list to preview it.
5.
Click Apply.
The display is now temporarily darkened while TuneUp Styler activates the new visual style for you.
After this brief moment, your Windows system shines with a new brilliance.
Deleting a Visual Style
If you want to remove a visual style from your computer entirely, select it and click Delete.
108
TuneUp Utilities Manual
Modifying Windows Settings
In the following chapters, you will find out how to modify your Windows system settings with the TuneUp
System Control module.
All modifications to your system will be monitored by TuneUp Rescue Center and can be undone if
necessary.
Introduction
TuneUp System Control is a type of control center that allows you to quickly and easily adapt your Windows system to your own requirements.
Regardless of whether you want to change the visual effects, the desktop, the way users log on, the security
of your system or memory management, TuneUp System Control lets you configure and optimize any setting, down to the smallest detail.
The program protects your privacy by disabling, on request, Internet features that send data about your surfing habits.
Simply browse through the individual categories - you will be surprised by how many interesting and useful
settings options there are.
109
TuneUp Utilities Manual
How to Modify Windows Settings
Start the TuneUp System Control module by going to the Customize Windows category in the Start Center
and clicking on the Personalize options and behaviors entry in the Modify Windows settings area.
Alternatively, you can start the module by going to Overview of all functions in the Start Center and selecting the Modify Windows settings entry under Windows.
On the left-hand side of the TuneUp System Control window, you can see the various categories that are
available for the settings options.
Each category contains subcategories. If you click on these, tabs open on the right-hand side containing
the individual settings options.
Here you will find detailed information on all settings options, sorted by the categories in the left-hand window area:
"Display" Category
Here you specify exactly which of the Windows visual effects you wish to use, configure how file types are
handled and specify how folder windows and the Explorer should look and act.
"Usage" Category
Here you can enter a range of mouse and keyboard options, adapt the items of the Start menu and the
speed at which submenus open, and determine the appearance and behavior of the taskbar.
"Communication" Category
Here, you can configure the behavior of Windows in the network, personalize Internet Explorer and Outlook
Express and/or Office Outlook, speed up web surfing and protect your privacy by preventing data about
your surfing habits from being sent.
"Administration" Category
Here you can set many internal system settings for Windows. For example, you can adapt the startup process and user logon, configure automatic CD playing, system paths and user data, and adapt the default settings of the command prompt.
110
TuneUp Utilities Manual
"Wizards" Category
Here you will find the Copy settings wizard.It copies your settings to other user accounts and to the Windows logon screen.
111
TuneUp Utilities Manual
"Display" Category
Here you specify exactly which of the Windows visual effects you wish to use, configure how file types are
handled and specify how folder windows and the Explorer should look and act.
Here you will find detailed descriptions of your settings options, sorted by subcategory in the left side of the
window:
Animations and Effects
Effects
Here you can change settings that relate to the display and operation of the Windows user interface.
Under Settings, there are numerous options that you can enable or disable using the checkboxes.
To learn more about an option, simply select it with your mouse. Several lines of explanatory text open
under Description.
Depending on the performance capabilities of your system, switching off unwanted effects can improve
speed. Click Best appearance to select all the options that will give Windows an outstanding visual appearance. If the performance is more important to you, select Best performance. Selecting Default settings
restores the Windows default settings.
Animations
Under Window and message animation, specify whether windows or tooltips should be animated. Here
you can switch on the animation when minimizing and maximizing windows.
If the Animate tooltips with the following effect is switched on, you can select the effect you want from
the selection list.
Under Animation of elements, you can specify for which display and control elements scrolling and opening should be animated. You can turn on the three options list & tree view, list boxes and dropdown lists.
Click Best performance to turn off all the options that only serve to provide showy effects. Selecting
Default settings restores the Windows default settings.
Menu Appearance
Under Animation you specify whether menu items are to be hidden after the menu is accessed. You can
also select a display effect from the list.
Under Effects, you can specify whether Windows should use flat 2D menus or whether a small 3D shadow
should be displayed beneath an open window.
Font Smoothing
To improve the legibility of text on your computer, here you can select your preferred font smoothing
method. The font smoothing type ClearType merits special attention: it is particularly suitable for flat-screen
monitors (TFT and LCD) and makes use of their so-called subpixels to effectively smooth the edges of even
small fonts. Select ClearType and click ClearType Settings to obtain the optimal adjustment of ClearType
smoothing to your screen.
112
TuneUp Utilities Manual
File Types
Menu Operations
In the Drives and folders section you configure their context menus.
The Show "command prompt here" opens the command prompt at the desired location. You can execute
DOS commands via the command prompt.
Under Files and folders you can specify what commands are to be shown in the context menus of files and
folders. Here, the four commands Send to, Move to folder, Copy to folder and Encrypt/Decrypt can be displayed. The checkbox is active for commands that are already enabled.
Selecting Default settings restores the Windows default settings.
"New" Menu
Here you can select which file types should be shown in the New submenu of the context menu for the
desktop, Explorer and the "Save" dialog. Use the checkboxes to set which file types should be displayed.
Select Remove to remove a selected entry from the list. Select Add... to include other file types in the list.
Under Options, you can specify whether the "New" menu should appear in the context menu of the desktop and the free area of folder windows.
Opening Files
Here you can select how Windows should proceed when opening files with unknown extensions. Under
Default application, you can specify that either the "Open with" dialog is displayed or that a file is automatically accessed with a certain program (for example with Notepad). To do so, write the start name of the
desired program in the field. Alternatively, select a program via Edit.
Advanced
Windows XP:
Here you can specify whether a new link should be automatically marked as such. By default the name of
the shortcut is prefixed with a "Shortcut to".
In the Windows Picture and Fax Viewer section, you can decide whether double-clicking on images and
fax files automatically loads them into the Windows Picture and Fax Viewer.
Windows Vista and Windows 7:
Here you can specify whether a new link should be automatically marked as such. By default, the text "
shortcut" is added to the end of the shortcut name.
113
TuneUp Utilities Manual
Folder Options
View
Here you can determine how folder windows and the elements they contain are to be displayed.
Windows XP:
In the Window section you specify whether the tree view of directories in a folder window is always to be
visible, whether the folder window last opened on logon is to be restored, whether compressed ZIP files are
to be displayed as folders, and whether a detailed list is to be displayed.
Under View settings you can use the slide control to determine how many folder views should be stored.
Windows Vista and Windows 7:
Under Window, you specify whether the menu bar in a folder window should always be visible, whether
compressed ZIP files should be displayed as folders and whether a details bar should be shown. In Windows
Vista, you can also specify whether the most recently opened folder window should be restored at logon.
List
Here you adjust the display of additional information in a folder window to suit your specific requirements.
The Pop-ups with detailed information section determines whether a tooltip displaying additional information should be shown when the mouse cursor is moved over a file or folder in a folder window.
Under Icon arrangement, you specify whether the files should only be sorted alphabetically or whether
they should be arranged logically according to numerical values and the alphabet.
Under Encrypted and compressed files you can specify that both file types be marked with a certain color.
By default, compressed files are blue and encrypted files are green.
Only Windows XP and Windows Vista:
In addition you can define the color assignment to suit your needs via the Edit button.
Thumbnails
Windows XP:
In a given folder, Windows can show thumbnail images as appropriate for a collection of photos. Here you
determine the size and quality of these preview images. The standard size is 96 pixels. You can enter a different value if you wish. You specify the quality using the slide control.
The higher the picture quality, the more disk space the thumbnails take up. Under Cache, you specify
whether these thumbnails should be temporarily saved to a file called THUMBS.DB. This file is also stored in
the folder and allows the thumbnails to be loaded particularly quickly in the future.
Selection
Here you can set the color of the selection rectangle that should be used in folder windows. This rectangle
shows the movement of the clicked mouse button if you select multiple files simultaneously.
Only Windows Vista and Windows 7:
You can also decide whether a checkbox should be displayed for selecting elements, allowing multiple files
and folders to be selected with the mouse without the need to use the Ctrl or Shift keys.
Advanced
Here you can set what elements are to be displayed on the Desktop and under My Computer. You can
easily hide entire drives and specify how the address bar in Explorer, Internet Explorer and the Run dialog
should behave.
114
TuneUp Utilities Manual
"Usage" Category
Here you can enter a range of mouse and keyboard options, adapt the items of the Start menu and the
speed at which submenus open, and determine the appearance and behavior of the taskbar.
Here you will find detailed descriptions of your settings options, sorted by subcategory in the left side of the
window:
Input options
Mouse functions
Under Swap mouse buttons you can swap the left and right mouse button. You would then click with the
right-hand button and open the context menu with the left-hand button.
Many mice now come with a scroll wheel. In accordance with Microsoft Intellimouse and similar models,
under Scroll wheel you can specify what should happen when this wheel is used. The standard setting is
scroll by 3 lines. You can change the number of lines, increase the scrolling setting to a full screen page or
turn it off completely.
Under Set pointer automatically you can specify that the cursor automatically moves to the highlighted
button when a dialog box opens so that you can click this button right away.
Mouse Sensitivity
Under Double clicking and dragging you can specify how much you can move the mouse when double
clicking and how far you have to move the mouse to start dragging an object. The values are given in pixels.
Tip: Try out your new settings on the Test icon.
Under Hover effect you can change the movement tolerance and the hover time of the mouse cursor for
the display of the Hover effect. This takes effect as soon as the cursor hovers over an item for a certain
length of time.
Tip: Here too you can try out the setting on a Test icon. It lights up as soon as the mouse pointer is placed
over it.
Active Window Tracking
Here, you can activate a little-known Windows function that could entirely change the way you work with
windows: Active window tracking.
If you enable this feature, all you need to do is move the mouse pointer over an inactive window to activate
it so that you can work with that program. You then no longer need to click on a window in order to enable
it.
You can turn on the option in the Foreground section in order to pull the active window immediately to the
top.
115
TuneUp Utilities Manual
Keyboard
Under Flashing cursor you can set how the cursor flashes at the point at which data is to be input (e.g. in a
word processing program).
Tip: Look in the small preview to the right of your current settings and the changes made.
Use the slide control to specify the frequency of flashing. If desired, you can also set the cursor width to
your liking and enter a value in pixels.
Modern keyboards are made with a special Windows key with the Windows logo printed on it. This key is
used to open the Windows Start menu and it can also be used in combination with other keys to initiate special functions, e.g. maximizing all windows (Windows + M) or showing the Desktop or, since Windows Vista,
the Computer (Windows + E).
If you do not need these key combinations or sometimes hit them by accident due to the layout of your keyboard, you should turn this option off.
116
TuneUp Utilities Manual
Start Menu
General
Under Opening submenus you specify whether the submenus should open automatically as soon as the
mouse points to the menu entry in question or whether a click is also necessary. you specify whether submenus are to open automatically as soon as the cursor points to the menu item, or whether you must click
first. There are great differences here between the various operating systems, about which we would like to
go into further detail.
Windows XP:
If you opt for Display when pointed to, you can set for how long the mouse pointer must be positioned over
the item before the menu opens.
Under Users you can specify whether your user name should be displayed in the upper area of the start
menu. In addition to the Shut down button, you can also display or remove a Log off button by which to
switch users.
Windows 7:
Under Exit a session, you can specify which action should be taken when you click the Exit a session button. By default, the computer is shut down.
For the Hibernate and Power save modes, the current status, including all opened documents and programs, is preserved so that after switching your computer back on you can continue working right where
you left off. Whereas power save mode still requires a small amount of power, in hibernate mode the computer can be completely disconnected from the power supply. However, putting the computer into hibernate mode and then "waking" it will take much longer.
Alternatively, you can specify here that this button causes the computer to restart, the computer to be
locked, the current user to be logged off, or that the user should be changed. Simply decide based on your
preferences.
Note than when an update is ready for installation, this button is temporarily assigned to the Shut down
computer function (until the update has been installed). This ensures that key program updates are not accidentally forgotten.
Windows Vista:
Under Power off button you can set what action is to be carried out when you click on the Power off button. By default, the computer is put into Power save mode.
If you would prefer to shut down your computer quickly (or you are missing this function entirely in Windows Vista), you are advised to select Shut down computer. This saves you from having to open the submenu and selecting Shut down there. The third option is to put your PC into hibernate mode.
For the Hibernate and Power save modes, the current status, including all opened documents and programs, is preserved so that after switching your computer back on you can continue working right where
you left off. Whereas power save mode still requires a small amount of power, in hibernate mode the computer can be completely disconnected from the power supply. However, putting the computer into hibernate mode and then "waking" it will take much longer.
You can find the Launch TuneUp Styler option in both Windows 7 and Windows Vista. It opens the TuneUp
Styler tool in a new window. Here you can personalize the appearance of Windows to suit you, e.g. adjust
the icons of folders and menu items.
117
TuneUp Utilities Manual
Recently Used
Use the Default settings button to restore the Windows default settings.
Windows XP:
Under Recently used files you can set whether recently used files are to appear under Documents in the
Start Menu. You can also define the exact number of documents to be displayed. When logging off, you
can also automatically clear the list.
Windows Vista and Windows 7:
Under Recently used files you can set whether recently used files appear in the Start menu under Recently
used. You can also delete the content of the list.
Under Recently used programs you can specify whether recently used programs should appear in the Start
menu. On Windows Vista you can also use Settings to specify which programs you want to be displayed in
the Start menu. common dialogs. The default setting is for Windows to show all recently used programs
here.
Shortcuts
Under Move and edit shortcuts you can set whether the moving of shortcuts is allowed.
From here you can also start TuneUp Shortcut Cleaner to remove all invalid shortcuts from your Start
Menu.
Advanced
Windows XP:
Here you can open the TuneUp Styler tool in a new window and thereby personalize the appearance of Windows to suit you, e.g. change the icons for folders and menu items.
Taskbar
Flashing Buttons
While entering text and other content, the activation of other windows is prohibited. A flashing icon in the
taskbar alerts you to the fact that other software is trying to communicate with you. If this flashing is to be
retained, the option Enable flashing taskbar buttons must be turned on.
Under Flashing speed you specify how rapidly the button on the taskbar should flash. You have two options
to choose from: The first one lets a window button in the taskbar flash until it is clicked again. The second
option restricts flashing to a certain number specified by you. The default setting is 7.
Under General, you can specify how long Windows should wait after your last key press before windows
from other programs are allowed to appear again.
Button View
Here you can specify whether and if so which windows should be represented by buttons on the taskbar.
Under Display you specify the desired maximum width of buttons in pixels. The default value is 154 pixels. If
you disable the option Show animated buttons, Windows will no longer animate the taskbar button when
a window is opened. This leaves more computing power available for other tasks.
Under Grouping you can specify whether and in which cases several windows of a program are to be represented by a shared button on the taskbar.
118
TuneUp Utilities Manual
Minimized Windows
Sometimes, after the windows of a program have been minimized, only the title bar remains which is then
automatically positioned at the base of the window.
Under Position and alignment you determine the exact target position of these bars. The default setting is
on the bottom left, where several bars are displayed side by side.
Under Spacing, you can specify how many pixels there should be between the individual bars.
Advanced
Notifications are often shown in the (next to the clock) to inform you of important events or ask you to perform various tasks, such as removing unused shortcuts from the desktop. Here you can specify different
options for these reminders.
Here you can also disable the "New hardware found" notification. If you turn off the Show notification
area option, the entire notification area will be hidden, including the notifications.
119
TuneUp Utilities Manual
"Communication" Category
In this category, you can configure the behavior of Windows in the network, personalize Internet Explorer
and Outlook Express and/or Office Outlook, speed up web surfing and protect your privacy by preventing
certain programs from automatically sending data about your surfing habits.
Here you will find detailed descriptions of your settings options, sorted by subcategory in the left side of the
window:
Network
My Network Places
Here, you can configure a number of settings that affect the display of shares under My Network Places.
Among other things you can prevent your computer from being displayed in My Network Places of other
computers and that (using your password) all drives on your computer can be accessed, although you did
not specify any shares.
Advanced
In the Universal Plug & Play section you can turn off the Windows service for automatically detecting network devices. This function is a potential security risk and should be disabled if you do not need it.
Under Quality of Service (QoS), you can prevent Windows from reserving part of your Internet connection
bandwidth for important packets. Disable Reserve bandwidth if you always want to have your full bandwidth for surfing.
Passwords
Windows XP:
Saving your passwords means that you don't have to enter your password every time you dial into the Internet, access protected shares, etc. However, hackers may be able to access and misuse these passwords. You
can therefore disable the automatic saving of passwords here.
Internet Time
Here you can set the clock on your computer to be synchronized regularly with an atomic clock over the
Internet, to ensure your computer always shows the correct time. The following option must be enabled
first: Automatically synchronize with an Internet time server.
The Available time servers section lists some popular reference clocks. If you know other servers, you can
enter their online addresses into the list by clicking Add.
Internet
Here you can determine how an existing dial-up connection behaves when a user logs off, and you can disable the integrated Windows firewall.
Only Windows XP:
By clicking on the Settings button you can also set various advanced options for your Internet connection.
In the window that appears, click on the underlined links to obtain additional information about the individual options.
Internet Explorer
Explorer Bars
Here you can set how the toolbars in Internet Explorer should behave. For example, you can set Google™ as
the default search engine in the search bar or enable the Autocomplete feature in the address bar.
View
Under Title bar, enter the text you would like to be displayed in the Internet Explorer title bar.
120
TuneUp Utilities Manual
Favorites
Here you can show and hide favorites folders and their contents andthereby hide unwanted folders. Please
note that the contents of the favorites folders is not shown here and only the available folders are listed.
You can also sort the folders by name.
Menu
This is where you can customize the Internet Explorer menu bar and use the Settings button to add many
useful commands to the context menu that is called up when you right-click on any web page.
Under Show source code you can specify whether, when you select Show source code, the website should
be opened with Internet Explorer or with a different program, e.g. the Windows editor (notepad.exe).
Navigation
In the Website behavior section, you can specify how Internet Explorer should react when links are called
up. For example, you could specify that pop-ups or links opened in other programs can be opened in a new
tab in the current window.
Under Start pages, specify which websites should automatically open when Internet Explorer is launched.
Several sites can be selected for this. Use the Move up and Move down buttons to change the order of the
pages.
Security
This section concerns security settings in the Internet Explorer.
In the User Agent String section, specify how Internet Explorer identifies with the websites you visit.
Under Download confirmation, you can specify whether Internet Explorer is permitted to download certain
file types such as videos or music files without confirmation. If you wish to be asked before such files are
downloaded, you must select Always confirm before downloading files.
Performance
Here you specify the profile that corresponds most closely to the bandwidth of your Internet connection. In
the Maximum number of connections section, you can specify how many server connections can be established.
Mozilla Firefox
General
This is where you can make the following general settings for Mozilla Firefox Internet browser.
Under Text animations you can turn off annoying text effects, e.g. constant flashing or horizontally scrolling text (marquees). By enabling the Disable flashing text and Disable scrolling text (marquees) options
you can disable potentially annoying effects.
Under Error messages you can specify whether error messages regarding a failed connection attempt to a
web server should be shown as a window (dialog) or as a web page in the browser window.
Under Sidebar position you can specify whether the sidebar should appear on the right or left side of the
browser window. The sidebar can contain your bookmarks, history and downloads.
121
TuneUp Utilities Manual
Usage
This is where you can make changes regarding the usage of Mozilla Firefox.
Under Address bar you can specify that addresses will be automatically completed in the address bar, i.e.
Internet addresses appear automatically in the address bar after you have entered the first few letters of the
address (provided that you have already visited this website).
For Mozilla Firefox 2 and more recent versions, you can also specify whether the Load address button
should appear beside the address bar.
Under Open submenus you can specify how long before a submenu automatically opens when you hover
over it with the cursor.
Windows
This is where you can specify how popup windows and links should be displayed in Mozilla Firefox and how
much influence websites can have on the display of the popup window.
In the Opening links section, you can specify whether, after clicking on a link, the contents should be displayed in the current window or in a new window.
In the Javascript section, under Permitted window manipulations, you can limit changes that websites are
allowed to make to popup windows. Some websites try to hide the navigation bars in a popup window so
that it looks like a Windows message dialog. You can prevent this here.
Tabs (Mozilla Firefox 2 or later versions)
Here you can make the settings for the Mozilla Firefox tabs.
In the "Close" button section, you can specify where the Close button for the tabs should appear. There are
four different positions.
In the Minimum width section, you can specify the minimum width of the tabs, from Mozilla Firefox 2
onwards. If more than one tab is open, the width of each tab will be automatically reduced until the minimum width set here has been reached. If further tabs are opened, a scrollbar will be shown on the righthand side of the screen by which you can scroll to the tabs that are not visible.
Under Color of active tab you can use the Highlight with color option to specify which color should be
used to highlight the tab currently active in the browser. Click on the Change button to change the color
used to highlight the top and bottom borders of the active tab.
Performance
Here you can enable the pipelining feature of Mozilla Firefox. Pipelining is an experimental function
through which the web browser sends multiple download requests to a web server over a single connection.
This is not supported by all web servers.
Opera
Title Bar
Here you can configure the settings for displaying the Opera title and logo.
Under Window title, enter in the Title field the text you want to appear in Opera's title bar. If you leave the
field empty and click on Accept or OK, the field is automatically filled with the default entry Opera.
In the Opera icon section, in place of the red "O" opera icon you can select a different icon from your hard
disk. The selected icon is then displayed in the Windows taskbar and in the Opera window.
If the icon file you select is valid, the icon is displayed immediately. If the icon file you select is invalid, the
standard Opera icon is reinstated.
122
TuneUp Utilities Manual
Usage
This is where you can make changes regarding the usage of Opera.
Under Autocomplete for web addresses you can specify that addresses will be automatically completed in
the address bar, i.e. Internet addresses appear automatically in the address bar after you have entered the
first few letters of the address. If, for example, you enter just one word only, then top-level domain suffixes
like ".net" and ".com" are added to the end and the prefix "www." to the beginning. Disabling this function
can speed up Opera a little.
Under Show source code you can specify whether, when selecting Show source code the internal editor of
Opera should be used in the website context menu or another program, e.g. Windows editor (notepad.exe).
Performance
You can turn on fast navigation again here, which is set to automatic mode by default in Opera 9 onwards.
By selecting Automatic mode, you can specify that the web server setting should be taken into account
when you navigate through the browser history, which informs the browser whether a site can be loaded
from the cache using "Back" or "Forward" or whether the website should be downloaded anew each time.
The latter is necessary for certain shop pages to function correctly. However the server often demands that
the page be downloaded again from the web server when it is not necessary.
By selecting Compatibility mode you can specify that, regardless of how the server is set, the sites are never
downloaded from the browser cache when you navigate through the browser history, but are always downloaded anew from the website. This setting is generally not required and is not recommended for fast surfing.
By selecting Fast mode, you can specify that the websites already on your computer are always loaded from
the cache. This not only has the advantage that the back and forward functions are suddenly very fast
again, but also that a lower data volume needs to be downloaded over the Internet connection. Furthermore, entries you have made into form fields are generally retained during navigation in a browser. For
websites to function correctly with active site contents, it may however be necessary to manually refresh the
websites regularly (e.g. using F5).
Search
Here you can set which search engine Opera should use in general and for speed dial and how the speed
dial should be displayed.
Under Default search engine you can specify which search engine Opera uses. This is automatically
selected in the search field, in the address bar, when "Search" is selected in the context menu of selected
text and when entering several words in the address bar.
Under Speed dial default search engine you can change the search engine that is displayed by default in
the speed dial page in a new empty tab.
E-Mail and Chat
Outlook Express
Windows XP:
You can change the font here which is displayed in the application title bar. You can also decide whether
the application should show a splash screen when starting up.
Here you can also configure the security function that blocks executable e-mail attachments. If you do not
wish to block these attachments, you can disable this function. But please note that such attachments may
also contain malware such as viruses that are run when you click them.
123
TuneUp Utilities Manual
Windows Mail
Windows Vista:
You can change the font here which is displayed in the application title bar. You can also decide whether
the application should show a splash screen when starting up.
Here you can also configure the security function that blocks executable e-mail attachments. If you do not
wish to block these attachments, you can disable this function. But please note that such attachments may
also contain malware such as viruses that are run when you click them.
Office Outlook
Windows 7:
Under Minimize Outlook you can select whether Outlook 2003/XP should, when minimizing the window,
create an icon either in the taskbar or in the taskbar notification area (beside the clock). If you opt for the
notification area, turn on the Minimize Outlook to the notification area option.
Under E-Mail Attachment Security click the Settings button to open a window in which you can specify
which file attachment types are automatically blocked.
Windows Messenger
Windows XP:
Under Run, you can specify whether and for which events Windows Messenger should open automatically.
If you want to prevent Windows Messenger from running entirely, select Disable Windows Messenger.
If you do not use Windows Messenger at all, you can also remove it from your system entirely. Simply use
the Uninstall option for this.
Privacy
General
Here you can configure settings for your privacy and security when working with your computer.
Under Automatic Windows Updates you can specify whether Windows should automatically establish a
connection with Microsoft or not. If Enable automatic Windows Updates is activated, Windows may then
establish automatic contact with the Microsoft server as soon as there is an Internet connection, in order to
check if there are any updates for your system.
The Notify before downloading updates option should be enabled if you want to be asked permission
before Windows downloads available updates from the Internet.
Cover Tracks
Here you can configure settings to cover your tracks when working with documents and surfing the Internet.
Under Delete history lists you can click Delete now to clear the list of recently opened files in the Start
menu.
Under Clear Internet Explorer cache enable the Clear Internet Explorer cache when closing option if the
web browser should clear its cache as soon as it closes. You should only select this option when maximum
security is important to you and you do not wish others to be able to find out which sites you visited on the
Internet by viewing the cache.
124
TuneUp Utilities Manual
Internet Explorer
This is where you determine your privacy security settings.
Under Integrated SmartScreen filters you can enable the SmartScreen filters to ensure that Internet
Explorer checks the websites accessed for suspicious and known scam websites.
Under Integrated Windows authentication, you can enable the Disable integrated Windows authentication option to ensure that Internet Explorer no longer automatically attempts to log on to websites
using Windows authentication.
Windows Media Player
Here you can configure your privacy settings for Windows Media Player.
Windows Media Player communicates frequently with the Internet. Under Settings, you can specify that
neither the list of recently played media files nor information about playback media or music files should be
saved. Click Highest security to turn all options on in one go.
Click Advanced to proceed to the data protection settings for Windows Media Player. Here you can block
script commands from running, prevent the automatic purchase of licenses, disable the automatic download of codecs and block Internet sites from identifying the player.
Advanced
Here you can make additional privacy settings.
Under Paging file you can click Go to "Memory management" to specify that the Windows paging file
should be deleted automatically when the system shuts down.
Under Internet Time you can disable the automatic synchronization of the Windows system clock with an
Internet reference clock.
Under Error reporting you can specify whether Windows should send an error report with your system configuration to Microsoft following a crash. Use the Error reporting button to open the various reports and
disable them with a click of the mouse.
125
TuneUp Utilities Manual
"Management" Category
This category of TuneUp System Control gives you control over many internal system settings. For example,
you can adapt the startup process and user logon, configure automatic CD playing, system paths and user
data, and adapt the default settings of the command prompt.
Here you will find detailed descriptions of your settings options, sorted by subcategory in the left side of the
window:
User Logon
General
Windows XP:
Here you can choose between the Welcome screen and the logon prompt. The default setting in Windows
XP is the Welcome screen. This shows a list of available user names, which can be selected with a mouse
click. Alternatively, you can select the option Use the old logon dialog. This brings up the secure logon
dialog, where you are required to enter your logon data manually.
You can also specify here additional settings concerning the behavior and appearance of the logon screen.
Windows Vista and Windows 7:
Here you can adjust the behavior and appearance of your logon screen and the logon dialog. Click on the
Adjust button to set individual options.
Automatic Logon
To skip logging on to the system a user can be logged onto the system automatically. If you wish to do this,
select the Enable automatic logon option and enter your logon data in the placeholders below.
Under Security you specify whether or not logon can be skipped using the Shift key. You can also have the
system carry out a logon immediately after a logoff.
Messages
Under Notification before logon, you can set a predefined notification that is displayed to all users before
logon - for example a warning from the boss not to surf the Internet during office hours. To do so, first enable the Show notification before logon option and then enter the title and actual text of the notification in
the input fields.
Under Error search during logon and logoff, you can specify that detailed status messages should be
shown during the logon and logoff process.
Tour
Windows XP:
First-time users can go on a tour of Windows XP following system startup. During this tour, the user is
shown all important Windows XP modules. Deselect the Show the Windows Tour after logon option if you
do not want the tour option to be displayed following system startup. Under Scope, you can specify
whether this option only applies to the current user or to all users.
Welcome Center (Windows Vista) / Getting Started (Windows 7)
New users can be shown the Welcome Center (in Windows Vista) or the Getting Started window when the
system is started up, which is designed make it easier to set up the system and shows links to further information and offers on the Internet. You can turn this display on or off here.
126
TuneUp Utilities Manual
Drives
General
Windows XP:
Here you make certain settings concerning your hard drives. For example you can enable UDMA66 support,
which can speed up access to your drives.
Under NTFS file system, you can set two options that relate to the new Windows NTFS file system: Save the
date of the last access to a file and Save short (DOS) file names. We recommend that you leave both
options enabled, as disabling them may have negative side effects on the efficiency of hard disk defragmentation and on compatibility with older software.
Disk Space
Windows automatically sounds the alarm if there is only a small amount of disk space remaining on a drive.
If this warning disturbs you, you can disable the Display warning about low disk space option.
AutoPlay
Under Monitoring media changes, you can turn on the Monitor CD drives for change of media option. If
you do so, Windows monitors the CD drives. As soon as a new data carrier is inserted, Windows reads it and
tries to launch its content automatically.
Under AutoPlay, you can click on Advanced to open a window in which you can specify autoplay settings
for various data carriers, such as music CDs.
Advanced
Under TuneUp Styler, you can click on Start TuneUp Styler to call up the tool and use it to change the
icons of individual drives.
Under TuneUp Drive Defrag, you can click on Start TuneUp Drive Defrag to open the tool for defragmenting drives and for optimally arranging files on the drives.
Windows XP:
Under My Computer, you can click on Settings to specify which drives are displayed in the Windows My
Computer.
Windows Vista and Windows 7:
Under Computer, you can click on Settings to specify which drives are displayed in the Windows My Computer.
Memory and Cache
Memory Management
This includes settings for managing the physical and virtual memory.
Under Virtual memory, you can specify that drivers and the Windows system core can be replaced if necessary or are always kept in the RAM.
Under Paging file, you can specify that TuneUp Utilities always overwrites the content of the Windows paging file with zeros, thereby deleting it when the system is shut down.
Clicking on Recommended accepts the settings recommended by TuneUp Utilities.
Memory Usage
Here you can set whether the computer should reserve more RAM for the programs or for the system cache.
127
TuneUp Utilities Manual
Advanced
Clicking on the corresponding buttons here, takes you to the TuneUp StartUp Manager and TuneUp Process Manager modules, which you can use to configure the system startup and manage running programs.
Startup and Maintenance
System Startup
Here you can make general settings about how Windows should proceed when starting up the system.
Under Boot defragmentation, you can enable the Enable boot defragmentation option to specify that files
required for booting should be arranged on the hard disk so that they can be found particularly quickly.
Under Boot logo and error messages you can enable the Do not display original boot logo and error messages option to specify that Windows should not only suppress the boot logo display but also the display of
error messages during startup.
Under Waiting time for drive check, you can specify how long the user should be given to decide against
running the CHKDSK scan program. This program is launched automatically if the computer was not shut
down properly and checks the integrity of the data on the hard disks.
Exit
Windows XP:
Here, you specify what Windows should do if individual programs have crashed.
Under Waiting time without response, you can specify the time in milliseconds that the system gives the
program to show a response. It will then be ended in the Task Manager or when the computer is shut down.
Under End programs automatically, you can set whether applications should be closed automatically or
whether the End program dialog should be shown.
Desktop and Taskbar
Here you can make settings regarding the stability of the desktop and taskbar.
Under Desktop & taskbar in separate process, you can enable the Run desktop and taskbar in a separate
process option to increase the stability of the system if Explorer crashes. This increases stability, but requires
an additional 8 MB of disk space.
Under Restart desktop & taskbar automatically, you can enable the options to ensure that both the desktop and taskbar are restarted again automatically if they should crash. This means that the system remains
operational.
Errors
Here you can specify how the system should behave in the event of errors.
Under Audible error message, you can enable the Give audible signal for errors option to specify that the
system should make a sound if there is an error message or incorrect entry.
Under System errors, you can select from the dropdown list what should happen if the system has been
stopped due to a critical system error. You can also specify that the event should be entered in the system
log.
Under Error reporting, you can specify whether Windows should send an error report to Microsoft following a crash. This will communicate not only information about the error but also information about your
system.
128
TuneUp Utilities Manual
System
General
Under Windows registration, you can change the name and company of the user who registered the current Windows version. Here you can also see the serial number and product ID of your Windows license.
Under Windows Installer - user data, enter the name and company name that should be automatically
entered into the user information when new software is installed.
Under Support information, you can use the Settings button to open a configuration window in which
you can modify the information shown in the system properties.
Common Dialogs
Here you specify the appearance of the common dialogs for opening and saving files.
In the File name section you can specify whether, in common dialogs, a selection field containing the files
most recently used is to be displayed instead of a single input field.
Only Windows XP:
Under Folder navigation, you specify which navigation elements should be shown for simplified operation
in common dialogs. You can also determine if the "Back" button should be displayed and if a navigation bar
should be displayed on the left-hand side of the common dialog.
Search
Windows XP:
Here you can define the appearance and the behavior of the search dialog.
The Disable Indexing service option prevents the system from automatically indexing the contents of your
files when the computer is idle.
The Use classic search in Explorer option replaces the modern style search dialog with the classic style.
Under Searched file types, you use the File types button to specify which text file types can be searched for
a specific content.
Special Folders
Here you specify the physical paths to which special folders such as "My Documents" should link. Highlight
a predefined path and click on Change to change it to your requirements.
Command Prompt
You can configure the appearance and behavior of the command prompt here.
Under completion, you can specify thekey combinations to be used to complete file and folder names.
Under Advanced settings, you can click on the Advanced button to open a window where you can specify
the visual appearance and start folder of the command prompt.
Security
General
Under Screensaver password prompt you can specify how long the screensaver has to be running before
the password protection is activated (if this option is selected). The default value is 5 seconds.
129
TuneUp Utilities Manual
User Account Control
Windows Vista and Windows 7:
The User Account Control feature ensures that no unauthorized changes are made to the computer. It does
this by asking whether a user has administrator rights to allow any changes to be made to the system. If User
Account Control is enabled, a standard user will always be asked to enter an administrator password to
make such changes.
You can specify here how a user logged on as an administrator is to be informed of potential changes to the
computer and prompted for confirmation.
This is how Windows differentiates between changes that the user makes himself (e.g. security-related settings) and the startup of programs that can carry out changes. You can set here in detail, which changes
must require confirmation first and whether a password must be entered beforehand.
Because this is a security-relevant setting, it is advisable to leave the user account control activated and
select at least Confirmation prompt without password entry (for Windows Vista) or For changes by programs, without password entry (for Windows 7).
One aim of User Account Control is to ensure that no programs start in the background without the user
being aware of it. At every program startup, Windows determines whether this program will make changes
to the computer. If this is the case and User Account Control is enabled, the user will be prompted to have
an administrator confirm the program startup. This feature is a key security step in case an unknown (and
potentially harmful) program starts up without the user having initiated it himself.
Security Center (Windows Vista) / Maintenance Center (Windows 7)
The Security Center or Maintenance Center, as it is called in Windows 7, regularly runs in the background to
check the security status of your computer and displays warnings if a possible security problem is determined.
If these warnings are displayed on your computer in error or you do not want to be shown warnings from
the Security/Maintenance Center, you can switch the warnings off here.
Advanced
Under Screensaver password prompt, you can specify how long the screensaver has to be running before
the password protection is activated (if this option is enabled). The default value is 5 seconds.
130
TuneUp Utilities Manual
"Wizards" Category
In this category you will find the Copy settings wizard. It copies your settings to other user accounts and to
the Windows logon screen.
Copy settings
You can use TuneUp System Control to make a number of settings by which to change the appearance and
the behavior of the system to suit your requirements. However, these settings are only normally valid for
your current user account.
Use the Copy settings wizard to copy your settings to other user accounts and to the Windows logon
screen.
The wizard shows you a list of settings that can be copied. Make your selection and click Next.
Now you can choose where the selected settings should be copied to. A possible target (depending on the
selected settings) is the logon screen. If you have several users set up, all other users are also shown as possible destinations. Select the destinations you want and click Next to start the copy process.
After successfully completing the copy process, close the wizard by clicking Finish.
131
TuneUp Utilities Manual
8. Overview of All Functions
On the far right of the Start Center, you will see the Overview of all functions menu. Opening this menu
gives you a list of all functions that TuneUp Utilities offers - clearly sorted according to application area.
Installed Programs
Disable
Allows you to deactivate programs that you are not currently using, but do not wish to uninstall.
(See also How to Disable Programs, p. 29).
Disabling startup programs
Allows you to disable programs that are automatically started in the background when the system starts up,
so as to speed up the system startup.
(See also How to Configure Your System Startup, p. 35).
Uninstall
Shows all the programs installed on your PC with detailed information about them, and allows you to select
programs to uninstall.
(See also How to Uninstall Programs, p. 32).
Hard Disk
Defragment
Rearranges blocks of data on your hard disk, providing more disk space and quicker loading times for documents and programs.
(See also How to Defragment Your Hard Disk, p. 59).
Check for errors
Checks the surface of your hard disk and your file system structure for errors and fixes them to prevent data
loss.
(See also How to Check your Hard Disk, p. 80).
132
TuneUp Utilities Manual
Securely delete data
Gives you three options for deleting your files or folders so that they cannot be restored, even by professionals.
(See also How to Securely Delete Data, p. 74).
Restore deleted files
Searches your hard disk and mobile data carriers for deleted files and restores them.
(See also How to Search for Deleted Files, p. 86).
Disk Space
Gain disk space
Searches for old backups, unnecessary files and unnecessary Windows features, which can be safely
removed from the hard disk without any negative impact on your system.
(See also How to Gain Disk Space, p. 64).
Finding and Deleting Large Amounts of Data
Allows you to find and delete large amounts of data on your storage media, so as to create more disk space.
(See also How to Run an Analysis, p. 68).
Registry
Defragment
Rewrites the central database of your Windows system (the registry), eliminating gaps and structural errors
to create a more stable system.
(See also How to Defragment the Registry, p. 51).
Clean
Specifically searches for faulty entries in the central database of your Windows system (the registry) and
repairs or removes them to create a more stable system.
(See also How to Clean the Registry, p. 44).
Edit
Allows you to search quickly and easily for keys and values in the registry and make changes (for experienced users only).
(See also How to Edit Your Registry, p. 136).
Computer
Start 1-Click Maintenance
Checks your system for optimization options and then allows you to implement these optimizations directly.
(See also How to Make Maintenance Settings, p. 16).
Showing System Information
Shows you important information about your hardware and software and the performance of your computer.
(See also How to Show System Information, p. 88).
133
TuneUp Utilities Manual
Windows
Turn on Turbo Mode
Allows you to temporarily turn off unnecessary background programs or maintenance processes to give
your computer a performance boost.
(See also How to Switch on Turbo Mode, p. 39).
Fixing Common Problems
Shows you a list of common Windows problems and allows you to easily remedy your problems.
(See also How to Fix Common Problems, p. 78).
Modifying Windows Settings
Allows you to modify visual effects, browser options, the desktop, the user logon and much more to your
personal requirements.
(See also How to Modify Windows Settings, p. 110).
Changing Windows Appearance
Allows you to change the Windows user interface to your personal wishes and requirements.
(See also How to Change Windows Appearance, p. 92).
Removing Broken Shortcuts
Searches your system for shortcuts and references that are no longer valid and deletes them. This prevents
error messages when these references are called up.
(See also How to Remove Broken Shortcuts, p. 54).
Displaying and Closing Running Processes
Allows you to view your running processes and open files and to exit or close these in the event of problems.
(See also How to Manage Running Processes, p. 83).
Recommendations
Increase performance
Shows you recommendations for increasing your system performance by making modifications to hardware
and software, Internet settings and visual effects.
(See also How to Increase the Performance of Your Computer, p. 19).
Fixing Problems
Shows you existing problems that have a negative impact on your system's health and suggests solutions
for remedying these problems.
(See also Fixing Problems - Details, p. 22).
Accelerating System Startup and Shutdown
Checks your computer for recommendations for accelerating system startup and shutdown, e.g. disabling
unnecessary startup programs.
(See also How to Accelerate System Startup and Shutdown, p. 56).
134
TuneUp Utilities Manual
TuneUp Settings
General Settings
Allows you to customize TuneUp Utilities to suit your needs, apply maintenance settings, and configure Live
Optimization, Turbo Mode and the updates check for TuneUp Utilities.
Configure Maintenance
Allows you to specify maintenance tasks that should be run automatically at regular intervals.
(See also How to Make Maintenance Settings, p. 16).
Configuring Live Optimization
Allows you to activate two optimization measures for increasing the response rate and system startup speed.
(See also How to Configure Live Optimization, p. 24).
Configuring Turbo Mode
Allows you to specify the background programs and maintenance processes that should be temporarily
turned off for a performance boost.
(See also How to Configure Your Own TuneUp Turbo Mode, p. 39).
TuneUp Utilities
Undoing Changes
Allows you to reverse changes made with TuneUp Utilities or to resort to Windows restore points.
(See also How to Undo Changes, p. 138.)
Checking for Updates
Checks whether new updates are available for your TuneUp Utilities and installs them.
(See also How to Check for Updates, p. 141).
Showing the Optimization Report
Shows you what TuneUp Utilities has optimized on your computer to date.
(See also How to Display the TuneUp Optimization Report, p. 143.)
135
TuneUp Utilities Manual
Editing the Registry
In the following chapters, you will find out how you can edit the registry using the TuneUp Registry Editor
module.
Please note that this feature is only intended to be used by experienced users.
Introduction
The Windows registry is in effect a huge central database. Every new item of hardware or software you
install is "registered" here. Over time, the registry gets larger and larger, making it increasingly difficult to
keep a handle on things.
Experts in these matters searching for a suitable tool with which to get inside Windows and change a
number of settings by hand should use the TuneUp Registry Editor. It also offers the protection of the
TuneUp Rescue Center, which enables you to undo the changes you made at any time.
How to Edit Your Registry
Start the TuneUp Registry Editor module by going to Overview of all functions in the Start Center and
selecting the Edit entry under Registry.
The registry is the very heart of your Windows system. Please note that you should be sure you
know what you are doing before making any changes here.
In the left-hand column the Editor displays the registry in a tree structure. The registry consists of countless
keys broken down by subject matter into different categories. These categories are represented by different
folders and subfolders.
Showing a key
Double-click on a folder in the left-hand column to display its subfolders. When you get to the end of the
hierarchy chain, the individual keys are displayed on the right.
136
TuneUp Utilities Manual
Editing a key
In the context menu of a key, select the different editing functions. You can delete keys, rename them, and
copy them to the clipboard. You can also edit the values of a key.
In the context menu of a folder, select New to create a new key.
Browsing the registry
From the Context menu of a folder in the tree structure, select Search to begin searching within the registry.
TuneUp Registry Editor offers you comprehensive search options here.
Showing a bookmark and setting a bookmark
Select Set bookmark from the context menu of a folder in the tree structure so that you can find individual
folders more quickly in the future.
Additional Functions
In the menu bar, you will find numerous additional functions for editing your registry. For example you can
export or print individual areas or indeed the entire registry. You can also edit the registry using the entries
in the toolbar.
137
TuneUp Utilities Manual
Undoing Changes
The following chapters explain how to use the TuneUp Rescue Center module to undo changes that you
made with TuneUp Utilities.
You can also use TuneUp Rescue Center to perform system recoveries, i.e. undo changes that you did not
make with TuneUp Utilities.
Introduction
Since you can make comprehensive changes and edits to your system with TuneUp Utilities, it can often
happen that you want to undo a change at a later time.
You can do this with the TuneUp Rescue Center.
System recovery
The TuneUp Rescue Center even lets you undo changes made not by TuneUp Utilities but by other applications. TuneUp Rescue Center offers integration with the Windows system recovery function for this.
Windows regularly creates restore points. Should your system stop behaving as it should, you can revert at
any time to one of the restore points. The previous system status is then restored and any changes made
after this point are lost.
Where do I find the TuneUp Rescue Center?
The TuneUp Rescue Center is always within reach: To access the TuneUp Rescue Center, press Undo
changes at the bottom left of the TuneUp Utilities Start Center. This button is also found in the individual
modules.
How to Undo Changes
To start the TuneUp Rescue Center tool, at the bottom left of the Start Center, click Undo changes.
Alternatively, you can start the module by going to Overview of all functions in the Start Center and selecting the Undo changes entry under TuneUp Utilities.
138
TuneUp Utilities Manual
Undoing Changes
In the right column, TuneUp Rescue Center shows you a list of all saved backups arranged by module or
date and specifies for each entry the number of modified settings, time of change and the disk space freed
up by the changes.
Showing details
The Details button takes you to an exact log of the changes carried out. However you can only view this
log. You cannot undo only selected changes. For this reason you may have to restore a number of superfluous files before you can use just one file again that you deleted by accident.
Delete
If you are quite sure that you no longer need a backup, you can delete it permanently using this button.
Restore
Use this button to restore the system to its status before the selected backup.
System Restore
In the right-hand column, TuneUp Rescue Center shows you a list of all stored backups and also the time at
which each entry was changed.
For more information, see: Introduction, p. 138
Create Backup
Use this button to create a system restore point. Give this point a name by which to remember this system
status at a later time.
Since a system restore point saves the status of your configuration and system files, before making any significant changes to the system (such as installing a program) you are advised to create a system restore
point. If something goes wrong during installation or your computer no longer works the way it used to,
you can always restore it back to its original status at any time.
Delete
If you are quite sure that you no longer need a backup, you can delete it permanently using this button.
Restore
Use this button to restore the system to its status before the selected backup. You will need to restart your
system.
This function is useful if your computer no longer functions properly following a change to the system.
First, select a restore point that is as recent as possible, in order to avoid undoing too many system
changes.
Changing Settings
You can change some of the settings of the TuneUp Rescue Center. In TuneUp Rescue Center, click on the
Settings button.
Alternatively, you can enter these settings from the Start Center. In the Settings menu select General and
open the Rescue Center tab.
139
TuneUp Utilities Manual
Rescue Center Protection
Every TuneUp Utilities module is protected by TuneUp Rescue Center as standard. You can disable this support for individual modules by clearing the relevant checkboxes.
Backups
Here you can set for how long the individual backups of TuneUp Rescue Center should be stored. The
standard setting is for backups to be automatically deleted after two weeks and for a maximum of 60 backups to be stored.
Do not restrict the TuneUp Rescue Center protection too much in order to save disk space. In the event of
problems, the protection function is very useful as a last resort and generally more important than saving a
small amount of space on your hard disk.
140
TuneUp Utilities Manual
Checking for Updates
In the following chapters, you will find out how you can use the TuneUp Update Wizard module to keep
your TuneUp Utilities up to date and why it is important to do so.
Introduction
TuneUp Utilities is constantly being developed: individual features are expanded or adapted to suit the
latest technology and any errors are fixed. When a new version is available it will be made available to you
on the Internet.
You have the option of automatically checking for updates or manually checking for updates.
Changing Settings
To change the update check settings, go to the menu bar and click Settings, General and then Updates.
Here you can decide whether TuneUp Utilities should regularly check for updates automatically. You can
also specify here how often you should be informed of updates that have been found.
Checking for Updates Manually
If you do not want TuneUp Utilities to check for updates automatically, you can turn this function off. In
this case we recommend that you regularly check for updates yourself.
How to Check for Updates
Start up the TuneUp Update Wizard module by going to the Overview of all functions category in the
Start Center and selecting the Check for updates entry under TuneUp Utilities.
Alternatively, you can start the module by clicking on Help & Support in the menu bar of the Start Center
and then selecting Check for updates.
TuneUp Update Wizard starts and establishes a connection to the Internet to check for updates.
141
TuneUp Utilities Manual
If updates exist
You receive a list of the available updates with a short description of the new or modified functions.
Click Next to install the updates.
If no updates exist
If there are no updates, your TuneUp Utilities is already up to date and you can close the wizard by clicking
Finish.
142
TuneUp Utilities Manual
Displaying the TuneUp Optimization Report
In the following chapters, you will find out how you can use the TuneUp Optimization Report to keep a
constant overview of the extent to which you have optimized your computer to date with TuneUp Utilities.
Introduction
The TuneUp optimization report summarizes all of the optimization steps already performed by TuneUp
Utilities. This report is particularly relevant if you use the numerous automatic background optimizations of
TuneUp Utilities. Here you can check at any time to what extent TuneUp Utilities has optimized your computer so far.
How to Display the TuneUp Optimization Report
Display the TuneUp optimization report by going to Overview of all functions in the Start Center and selecting Display optimization report under TuneUp Utilities.
This opens a clear summary of the optimizations already performed with TuneUp Utilities and the benefits
that these have provided.
If you hold your cursor over an optimization, a small information window opens that displays details on the
benefit of the optimization or details on the individual optimizations.
You can display this optimization report for the last seven days, the last 30 days or for the entire period since
installation. To do so, simply switch to the relevant tabs.
143
TuneUp Utilities Manual
9. Rating Function for Programs
You can turn on the useful Rating function for programs in the TuneUp Program Deactivator, TuneUp
StartUp Manager and TuneUp Uninstall Manager modules. It shows you how useful other users of
TuneUp Utilities found the programs that you have installed. You can use the rating function to help you
decide which programs you really need in your day-to-day work.
Often, you are faced with a decision about which of your installed programs you really need for your dayto-day work: that is why the Rating function for programs was developed.
The experiences of numerous TuneUp Utilities users will help you to make your decisions in the TuneUp
Program Deactivator, TuneUp StartUp Manager and TuneUp Uninstall Manager modules. The rating
function for programs shows you which programs have been classified as useful and helps you to decide
which startup programs you want to disable and which programs you want to disable or uninstall.
Please note: you need to have an active Internet connection to use the rating function.
Display of the Rating Function in the Modules
If you have switched on the rating function, it is integrated into the TuneUp Program Deactivator, TuneUp
StartUp Manager and TuneUp Uninstall Manager modules as a separate column in the program list. You
can identify your ratings by the blue stars in the Usefulness column. If you have not yet given your own rating, the column displays the average rating that other TuneUp Utilities users have given the program. If no
ratings have been given, the column is blank.
If you hover the mouse cursor over the column, a tooltip is displayed showing your rating and the rating of
other TuneUp Utilities users.
144
TuneUp Utilities Manual
How to Turn On the Rating Function
Start either the TuneUp Program Deactivator, TuneUp StartUp Manager or TuneUp Uninstall Manager
modules. The Rating function for programs dialog is displayed. Click OK.
If you do not want to make a decision just now, you can click on Decide later. The module is started without the rating function. You can enable the rating function at any time by clicking on Turn on rating function in the toolbar and this time clicking OK in the dialog that appears.
How to Turn Off the Rating Function
In the toolbar, click Rating function and select Turn off. In the dialog that opens, you can decide whether
you wish to archive your ratings for any subsequent use of the function. The ratings of other users are
deleted from the database on your PC and will have to be downloaded again from the server if you switch
the function back on.
How to Submit a Rating
1.
Move the mouse cursor over the Usefulness column. When you rate a program, you must give it at
least one star. A maximum of 5 stars can be awarded.
2.
Click on the number of stars that you wish to award the program. So, if you wish to give three stars,
click on the third star.
3.
Your rating is automatically saved and transferred to the TuneUp Utilities server.
If you wish to change your rating, you can proceed in exactly the same way as for the initial rating.
145
TuneUp Utilities Manual
10. The TuneUp Utilities Gadget
Another function of TuneUp Utilities is the gadget. This is not supported by Windows XP and is therefore
only available to you with Windows Vista and Windows 7.
The practical gadget can be displayed on the desktop. It keeps you constantly informed
of the status of your computer. You no longer need to start TuneUp Utilities to find out
whether potential for optimization has been identified in the Maintain system, Increase
performance and Fix problems categories. What is more, you can start TuneUp Utilities and also turn on Turbo Mode from the gadget.
TuneUp Utilities Gadget - Introduction
Please note that gadgets are not supported in Windows XP, so unfortunately you cannot enjoy this
function unless you have Windows Vista or Windows 7.
What is a Gadget?
Gadgets (or widgets) are small programs that are permanently displayed on the desktop and which provide
the user with up-to-date information.
What is the TuneUp Utilities Gadget for?
The TuneUp Utilities Gadget tells you the status of your computer at all times, without you needing to start
TuneUp Utilities separately. The gadget is integrated in TuneUp Utilities and informs you of the current
status of the three areas of the Status & recommendations category:
Clicking on one of the three buttons in the gadget opens Status & recommendations in the TuneUp Utilities Start Center. Here you can address the problems or recommendations directly.
You can update the gadget display at any time using the small refresh button.
Turbo Mode
The TuneUp Utilities Gadget also gives you the option of turning on the TuneUp Turbo Mode.
You can see that the TuneUp Utilities Gadget is a continuously visible source of information on the status
of your computer. In addition it offers practical direct access to the Start Center of TuneUp Utilities.
146
TuneUp Utilities Manual
How to Display the TuneUp Utilities Gadget
You can display the TuneUp Utilities Gadget on your desktop at any time.
In Windows Vista, proceed as follows:
l
l
l
Open the Accessories folder under All Programs in the Windows Start menu.
Then click on Windows Sidebar. A list of all the gadgets installed on your computer is shown.
Activate the TuneUp Utilities gadget by double-clicking on it.
In Windows 7, proceed as follows:
l
l
Right-click on a free space on the desktop and select Gadget from the context menu.
Select TuneUp Utilities Gadget and enable it with a double-click.
147
TuneUp Utilities Manual
11. TuneUp Utilities in taskbar notification area
The notification area is the area on the right-hand side of the Windows taskbar. This displays, for example,
the time, status icons or program shortcuts. TuneUp Utilities has a notification area icon, which displays
information on the status of your system at any time and provides an entry point to TuneUp Utilities.
When you double-click on the notification area icon, TuneUp Utilities starts up.
You can configure if, how and about what TuneUp Utilities you would like to be informed in the taskbar
notification area.
System Status
Under System status, you can see whether the TuneUp Utilities Start Center currently shows the optimization potential. You can open the Start Center using the Start TuneUp Utilities link.
You can find further information on the Start Center under: The Start Center, p. 8
Live Optimization
Under Live Optimization, you can see the most recent activities of the two Live Optimization methods. A
link takes you to the Live Optimization configuration dialog.
You can find further information on Live Optimization under: How to Configure Live Optimization, p. 24
Automatic maintenance
Under Automatic Maintenance, you can see when automatic maintenance was last performed. A link takes
you to the Automatic Maintenance configuration dialog.
You can find further information on Automatic Maintenance under: How to Make Maintenance Settings, p.
16
Turbo Mode
Under Turbo Mode, you can see whether Turbo Mode is currently on and use the switch to turn it on or off
as necessary. A link also takes you to the configuration wizard.
You can find further information on Turbo Mode under: How to Configure Your Own TuneUp Turbo Mode,
p. 39
Settings
You can configure if, how and about what TuneUp Utilities you would like to be informed in the taskbar
notification area. Just proceed as follows:
If the icon is displayed on your computer, simply right-click on it. Now select Configure notification area
settings in the context menu that appears. This takes you to the configuration dialog, where you can configure your settings. In addition to the icon, you can choose to have messages displayed in the form of balloons.
If the icon is not displayed on your computer, call this dialog up by going to the TuneUp UtilitiesSettings
menu in the Start Center and selecting General, then the Notification area tab.
148
TuneUp Utilities Manual
12. Index
1-Click Maintenance
Accelerate Program Startups
14, 16
25
149
File System
104
Files Types
46, 113
Finding and Deleting Large Amounts of Data
67
Firewall
46
Fix common problems
77-78
Animations
112
Fix Problems
22
Animations and Effects
112
Fixing Common Problems
77
Archiving Files
73
Fixing Problems
Audible Signals
46
Flashing Buttons
118
Automatic Maintenance
14
Flashing Cursor
116
Boot Screen
93
Folder Options
114
Button View
118
Folder view
114
Cache
127
13, 77
Folder Window
114
Change Windows Appearance
90-92
Font Smoothing
112
Check for updates
9, 141
Fonts
Checking for Updates
141
Gadget
46
146
Checking Hard Disks for Errors
79-80
Gain disk space
62
Cleaning the Hard Disk
62-63
Gain Disk Space
64
Hard Disk, Defragmenting
58
Cleaning the Registry
Common files
Communication
Computer resources
43-44, 46, 48
46
110, 120
41
Help
9
Help Files
46
Hibernation File
65
34, 36
History Lists
46
Customizing Windows
90
Hover effect
115
Database Drivers
46
Configuring System Startup
Icon Cache
106
Defragmentation, Registry
50-51
Icon Packages
103
Defragmenting the Hard disk
58-59
Increase Performance
Defragmenting the Registry
Defragmenting, Hard disk
Degree of fragmentation
Deletion method
Destroying Data
Disabling Programs
50
58-59, 61
58
71, 76
76
27, 29
Increasing Performance
19
12, 19
Increasing Performance, Details
18
Increasing the Response Rate
24
Input options
Installed Programs
115
46
Internet
120
Disabling Startup Programs
34
Internet Explorer Menu
121
Disk Space Allocation
69
Internet Explorer Navigation
121
Internet Explorer Security
121
Display
105
Displaying and uninstalling programs
32
Internet Explorer View
120
Displaying and uninstalling Programs
31
Internet Time
120
Drives
127
Keyboard
116
E-Mail and Chat
123
List Options
114
Editing the Registry
136
Live Optimization
Effects
112
Load points
30
Explorer Bars
120
Logon Screen
99
Fast Defragmentation
58
Maintenance
14
File Restoration
87
23-24
TuneUp Utilities Manual
Maintenance Center
Maintenance Tasks
Management
Managing running programs
Manually Running Maintenance Tasks
130
14, 17
126
82-83
26
150
Reducing System Load
26
Registry
44
Remove broken shortcuts
53-54
Restoring Deleted Files
85-86
Scroll wheel
115
Memory Management
127
Security
129
Memory Usage
127
Security Center
130
Menu Appearance
112
Settings
Menu Bar
9
Shortcuts
Menu Operations
113
Showing System Information
Minimized Windows
119
Showing the Optimization Report
Modify Windows Settings
90, 109-110
9, 148
118
88
135
Speed up the startup of my programs
25
Mouse functions
115
Start Center
6, 8
Mouse Pointer
116
Start Menu
117
Mouse Sensitivity
115
Start process
35
Mozilla Firefox
121
Startup
36
My Network Places
120
Startup and Maintenance
Network
120
Startup Logo
New Menu
113
Startup programs
Normal analysis
Notification area of the taskbar
NTFS vs. FAT file system
Old backups
Open Files
81
119
128
97
34-36, 46
Support
7, 9
System Elements
101
61
System Maintenance
14
63-64, 66
System requirements
7
84, 113
System Restore
139
Opera
122
System Startup
35
Optimization Report
143
Taskbar
Optimizing System Startup and Shutdown
Optimizing the System
Organizing Files and Folders
Overview of All Functions
Passwords
55-56
26
68-69
6, 9, 132
120
Thorough Analysis
81
Thorough Defragmentation
58
Thumbnails
96
TuneUp 1-Click Maintenance
14
16
TuneUp Disk Doctor
Postpone automatic maintenance tasks
40
TuneUp Disk Space Explorer
124
114
Tips for Boot Screens
Performing Maintenance
Privacy
128, 148
79-80
62, 67-69, 73
TuneUp Drive Defrag
58-59, 61
Processes
83
TuneUp Live Optimization
Processor usage
82
TuneUp Optimization Report
Profile
19
TuneUp Process Manager
Program Components
46
TuneUp Program Deactivator
Program Extensions
46
TuneUp Programs-on-Demand Technology™
Program Paths
46
TuneUp Registry Cleaner
Program Settings
46
TuneUp Registry Defrag
Programs-on-Demand-Technology
27
TuneUp Registry Editor
Rating function for programs
Recently Used Files
23
143
82-83
6, 27, 29
27, 30
43-44, 46, 48
43, 50-51
136
6, 144
TuneUp Repair Wizard
77-78
118
TuneUp Rescue Center
9, 138-139
TuneUp Utilities Manual
TuneUp Shortcut Cleaner
TuneUp Shredder
53-54
62, 74, 76
TuneUp StartUp Manager
34-36
TuneUp StartUp Optimizer
55-56
TuneUp Styler
90-92
TuneUp System Control
TuneUp System Information
90, 109-110
88
TuneUp Tuning Status
6
TuneUp Turbo Mode
38
TuneUp Undelete
85-87
TuneUp Uninstall Manager
31-32
TuneUp Update Wizard
9, 141
TuneUp Utilities Gadget
146
Tuning Status
Turbo Mode
Undo changes
Undoing Changes
Unnecessary files
User Account Control
User Logon
Visual effects
9-11
9, 38-39
9, 138-139
135
63-64, 66
129-130
126
40
Visual Style
107
Widget
146
Window Tracking
115
Windows Desktop Search
Windows functions
Windows Messenger
Windows Picture and Fax Viewer
65
63, 65
65
113
151