1
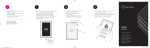
Before using the automatic food
dispenser:
1. Insert the batteries into the battery compartment.
2. Switch on the main switch next to the battery com-
partment. The pet feeder will now complete a test
run.
3.Fill the number of bowls according to the number of
mealtimes. Remove all three lids to do so. In order to
lift the top lid, grasp underneath the rim and pull
strongly. Then you can lift the top lid with compart-
ment as well as the cover of each single food bowl.
Do not overfill the food bowls.
4. After the bowls have been filled, replace the lids as
follows:
* Firstly, arrange the lid on the compartment so that
it is placed tightly in the notch.
* Then put the small lid for the individual bowl over
the uncovered food bowl. The loop must be placed
over the small hook on the other lid.
* The final lid must be positioned exactly over the lid
with the compartment and carefully pressed into
place until it clicks.
5.1f you want to use the topmost compartment for wa-
ter, remove the upper lid so that the water is acces-
sible at all times.
6. If the topmost compartment is not used as water
bowl, you can put an icepack or ice cubes into this
compartment to keep the food cool.
1. Setting the time:
While the time is displayed, press and hold the SET
button for 2 seconds until the hour digits flash. Press
the MODE button to select the correct time. Press
the SET button to save the hour and to continue to
the minutes. Use the MODE button to select the
correct number of minutes and press SET to save. The
hour and minutes will both flash and you can choose
between the 12 and 24 hour clock. Save the
programmed time by pressing SET.
2.Setting the mealtimes:
Press the MODE button to enter a mealtime. The first
number indicates the feeding and the second number
indicates the time (full hour).
Press and hold the SET button for at least 2 seconds
until the second number flashes. The desired meal-
time can be adjusted with the MODE button. After
confirming it with the SET button the next mealtime
can be entered. Repeat until each mealtime has
been entered (maximum 4 times).
Automatic Food Dispenser 7X4 Plus
Item no. 24382
Programming options:
1. 4 separate mealtimes on 1 day
2. 2 separate mealtimes per day at the same time on
2 days
3. 1 mealtime per day at the same time on 4 days.
After setting all 4 mealtimes the clock will be dis-
played again.
3.Recording a voice message:
Press and hold the REC button to record and save
your personal voice message. Listen to the recorded
message with the PLAY button.
4. Starting the feeding programme:
The feeding programme can now be started:
* Pressing the START NOW button means: feeding
programme starts immediately.
* Pressing the START TOM button means: feeding
programme starts the next day at the programmed
time.
After pressing one of the above buttons, the feeding
bowl will move into the starting position, your saved
personal voice message will be played back once and
a bell symbol will appear on the display. If all bowls
are filled with food, move the small lid directly over
the opened food bowl after the automatic pet feeder
has been set into the starting position.
KM
TRIXIE Heimtierbedarf GmbH & Co. KG - D-24963 Tarp - www.trixie.de
© Vor der Benutzung des Futter-
automaten:
1. Legen Sie die Batterien in die auf der Unterseite
vorgesehenen Batteriefächer ein.
2.Schalten Sie den Hauptschalter neben den Batterie-
fachern auf ,ON". Der Futterautomat macht nun
einen Probelauf.
3. Befiillen Sie nun, je nach Anzahl der Mahlzeiten, die
Näpfe. Nehmen Sie hierfür alle drei Deckel ab. Um die
obere Abdeckung zu lösen, greifen Sie unter den Rand
und ziehen Sie kräftig. Danach können Sie den Deckel
mit dem Fach und die kleine Abdeckung für den Ein-
zelnapf einfach abheben. Beachten Sie, dass das
Futter nicht über den Napfrand gefüllt werden darf.
4.Sind die Näpfe gefüllt, werden die Deckel in folgender
Reihenfolge wieder auf den Futterautomaten gesetzt:
* Positionieren Sie als erstes den Deckel mit dem
Fach so auf dem Futterautomaten, dass er fest in
der Aussparung sitzt.
* Setzen Sie danach die kleine Abdeckung fiir den
Einzelnapf auf den nicht abgedeckten Napf. Die Ose
muss über den kleinen Haken des andern Deckels
gelegt werden.
* Der letzte Deckel wird genau über dem Deckel mit
dem Fach positioniert und vorsichtig zusammen
gedriickt, bis er einrastet.
5. Falls Sie das obere Fach jedoch als Wassernapf nut-
zen, entfernen Sie den oberen Deckel, damit das
Wasser jederzeit zugänglich ist.
6. Wird das obere Fach nicht als Wassernapf genutzt,
kann zum Kühlen des Futters Eis oder ein Coolpack
hinein gelegt werden.
Benutzung:
1. Einstellen der Uhrzeit:
Während die Uhrzeit angezeigt wird, die SET-Taste
mindestens 2 Sekunden gedrückt halten, bis die
Stundenanzeige blinkt. Durch Drücken der MODE-
Taste können Sie nun die aktuelle Stunde eingeben.
Danach bestätigen Sie mit SET und stellen nun mit
der MODE-Taste die Minuten ein und bestätigen
Sie diese wieder mit der SET-Taste. Jetzt blinken die
Stunden- und Minutenanzeige: Durch Drücken der
MODE-Taste können Sie nun von der 12- auf die
24-Stunden-Anzeigeform wechseln.
2.Einstellen der Fütterungszeit:
Durch Drücken der MODE-Taste können Sie die
Fütterungszeit einstellen. Die erste Zahl steht für die
Fütterung und die zweite Zahl für die Uhrzeit (volle
Stunde).
Futterautomat 7X4 Plus
Art.-Nr. 24382
Halten Sie die SET-Taste mindestens 2 Sekunden ge-
drückt, bis die zweite Zahl blinkt. Mit der MODE-
Taste können Sie die gewünschte Zeit einstellen und
mit der SET-Taste bestätigen. Danach erscheint die
nächste Fütterungszeit. Dies wiederholen Sie so oft,
bis alle Fütterungszeiten eingestellt sind (max. 4 Mal).
Programmiermöglichkeiten:
1. Ein Tag mit 4 verschiedenen Fütterungszeiten
2. Zwei Tage mit jeweils 2 Fütterungen zu den glei-
chen Uhrzeiten
3. Vier Tage mit einmaliger Fütterung pro Tag zur
gleichen Uhrzeit
Nach der Eingabe aller 4 Mahlzeiten erscheint wieder
die Uhrzeit.
3.Aufnahme der Sprachnachricht:
Um Ihre persönliche Sprachnachricht zu speichern,
halten Sie die REC-Taste bis zum Ende der gespro-
chenen Nachricht gedrückt. Mit PLAY können Sie die
aufgenommene Nachricht abspielen.
4.Starten des Fütterungsprogramms:
Das Fütterungsprogramm kann nun wie folgt gestar-
tet werden:
* Mit der Taste START NOW: Fütterungsprogramm
beginnt sofort.
* Mit der Taste START TOM: Fútterungsprogramm
beginnt am náchsten Tag zur eingestellten Uhrzeit.
Nach dem Driicken einer dieser beiden Tasten
fáhrt der Napf in Startposition, Ihre gespeicherte
Sprachnachricht wird einmal abgespielt und das
Glocken-Symbol erscheint im Display. Falls Sie alle
Näpfe gefüllt haben, schieben Sie den kleinen Deckel
über den offenen Napf, nachdem der Futterautomat
in Startposition gegangen ist.
e
TRIXIE Heimtierbedarf GmbH & Co. KG - D-24963 Tarp - www.trixie.de
Distributeur automatique de nourriture 7X4 Plus
(® Avant l'utilisation du distributeur:
1. Introduire les batteries dans le compartiment prévu
sous l'appareil.
2. Appuyer sur la touche principale ON qui se trouve a
côté du compartiment des batteries. Le distributeur
automatique de nourriture effectue un essai.
3. Remplir les diverses gamelles selon les quantités sou-
haitées pour chaque repas. Pour cela, enlever les trois
couvercles. Pour détacher le couvercle de protection
du dessus, saisissez le rebord et tirer fortement. En-
suite vous pouvez soulever le couvercle avec le com-
partiment et la petite protection pour repas unique.
Faire très attention à ne pas remplir les gamelles au-
delà du rebord.
4. Les gamelles remplies, les couvercles seront replacés
sur le distributeur automatique de nourriture selon
l'ordre suivant:
* Positionnez tout d'abord le couvercle avec le com-
partiment sur le distributeur automatique de nour-
riture de telle sorte qu'il soit bloqué dans le socle.
Placez ensuite la petite protection pour repas uni-
que sur la gamelle non couverte. La boucle doit être
placée sur le petit crochet de l'autre couvercle.
Positionnez le dernier couvercle exactement au
dessus du couvercle avec le compartiment. Appuyez
avec précaution jusqu'à ce qu'il s'emboite.
5. Dans le cas ou vous utilisez le compartiment du
dessus comme écuelle d'eau, enlevez le couvercle du
dessus pour permettre l'accès à l'eau au moment
voulu.
6. Il est possible de placer un sachet réfrigérant (glace)
ou un accumulateur de froid a l'intérieur du compar-
timent pour garder la nourriture au frais si le compar-
timent du dessus n'est pas utilisé comme écuelle d'eau.
Utilisation:
1. Réglage de l'horloge:
Appuyer sur la touche SET pendant au moins 2 sec.
jusqu'à ce que l'indicateur de l'heure commence à cli-
gnoter. En appuyant sur la touche MODE vous pouvez
entrer l'heure actuelle et confirmez avec la touche
SET; réglez ensuite avec la touche MODE les minutes
et confirmez avec la touche SET. Les indications
de l'heure et des minutes clignotent: en appuyant
sur la touche MODE vous pouvez choisir le mode
d'indication de l'horloge, soit 12 ou 24 heures. L'heure
choisie doit être confirmée avec la touche SET.
2.Programmation de l'heure du repas:
Avec la touche MODE vous pouvez régler les horaires
des repas. Le premier chiffre correspond au repas à
Ww
Art.-N° 24382
donner, le deuxième à l'heure du repas (sans indica-
tion des minutes). Appuyer sur la touche SET pendant
au moins 2 sec. jusqu'à ce que le deuxième chiffre clig-
note. Avec la touche MODE vous pouvez programmer
l'heure souhaitée du repas, confirmez avec la touche
SET. Ensuite, apparaît le chiffre pour la prochaine
heure du repas et vous continuez à programmer les
horaires souhaités jusqu'à ce que toutes les heures des
repas soient programmées (max. 4 repas).
Possibilités de programmation:
1. Un jour avec 4 différentes horaires de distribution
de repas.
2. Deux jours avec 2 alimentations chaque fois à la
même heure.
3. Quatre jours avec une seule alimentation par jour à
la même heure.
Après la programmation de tous les 4 repas réappa-
raît l'heure de l'horloge.
. L'enregistrement du message (l'appel vocal):
Pour enregistrer votre message personnalisé, appuyez
sur la touche REC jusqu'à la fin de votre enregistre-
ment de message. Vous pouvez l'écouter en appuyant
sur PLAY.
4.Départ du programme de la distribution de
nourriture:
Le programme de la distribution de nourriture peut
être déclenché comme suit:
< Avec la touche START NOW: La distribution com
mence tout de suite.
Avec la touche START TOM: Le programme d'alimen-
tation commence le jour suivant à l'heure réglée.
Après avoir pressé l'une de deux touches, la gamelle
se mettra en position, votre message sera envoyé et
le symbole de la cloche apparaîtra sur l'écran. Dans le
cas ou toutes les gamelles sont remplies, faites glisser
le petit couvercle au dessus de la gamelle ouverte
après avoir mis le distributeur automatique de nourri-
ture en position de marche.
EZ
TRIXIE Heimtierbedarf GmbH & Co. KG - D-24963 Tarp - www.trixie.de
CD Prima di utilizzare il distributore
automatico:
1. Inserire le batterie nell'apposito scompartimento.
2. Accendere l'interruttore principale che si trova vicino
alle batterie. Il distributore fara un primo giro a vuoto.
3. Prima di utilizzare le ciotole, rimuovere i 3 coperchi.
Per togliere la protezione principale, bloccare da
sotto il bordo e tirare con forza. Quindi sollevare la
sezione ed il coperchio di ogni singola ciotola di cibo.
Ora riempire le ciotole in base al numero dei pasti
necessari. Fare attenzione a non mettere troppo cibo
all'interno!
4.Dopo aver riempito le ciotole, rimettere i coperchi
seguendo questa sequenza:
* Prima di tutto posizionare il coperchio con la sezio-
ne nel distributore automatico in modo che si
inserisca nella dentellatura corrispondente.
* Successivamente posizionare il piccolo coperchio
della singola ciotola di cibo ancora scoperta. Il foro
deve essere infilato in corrispondenza del gancetto
dell'altro coperchio.
* Infine, agganciare l'ultimo coperchio direttamente
sopra il coperchio delle sezioni. Premere con atten-
zione finché non si sente uno scatto.
5. Nel caso in cui il contenitore extra venga utilizzato
come ciotola per l'acqua, rimuovere il coperchio
superiore del distributore in modo che l'animale
abbia possibilita di bere in ogni momento.
6.Se, invece, il contenitore extra non é impiegato per
l'acqua, potrebbe diventare una borsa per il ghiaccio
e potrebbe essere semplicemente riempito per man
tenere il cibo fresco.
Operazioni:
1. Utilizzare il timer:
Con l'orario visualizzato, tenere premuto il tasto SET
per almeno 2 secondi finché l'ora inizia a lampeggiare.
Utilizzando il tasto MODE é possibile inserire l'ora
esatta che va confermata schiacciando il tasto SET.
Successivamente inserire i minuti sempre con il tasto
MODE e confermare con il tasto SET. A questo punto,
l'ora ed i minuti dovrebbero lampeggiare. Utilizzando
il tasto MODE si puó scegliere tra le 12 ore o le 24
ore. L'orario deve essere definitivamente confermato
con il tasto SET.
2.Regolare i pasti:
E' possibile inserire l'orario dei pasti tenendo premuto
il tasto MODE . Il primo numero indica il pasto
mentre il secondo l'orario (ora intera). Mantenere
premuto il tasto SET per almeno 2 secondi, finché
Distributore automatico 7X4 Plus
Art. n. 24382
il secondo numero lampeggia. L'orario desiderato
va regolato utilizzando il tasto MODE e confermato
con il tasto SET. Quindi, é possibile inserire il pasto
successivo. E' importante ripetere queste operazioni
per ciascun pasto (4 volte al massimo).
Possibilita di programmazione:
1. Un giorno con 4 pasti diversi
2. Due giorni con 2 pasti diversi ciascuno agli stessi
orari del giorno
3. Quattro giorni con solamente 1 pasto ciascuno allo
stesso orario del giorno
Dopo aver inserito i 4 pasti, l'orario comparira
nuovamente.
3.Registrazione del messaggio vocale:
Per registrare la voce, mantenere premuto il tasto
REC fino alla fine del messaggio. E' possibile riascol-
tare la frase registrata premendo il tasto PLAY.
4.Inizio del programma di nutrizione:
Il programma di nutrizione pud iniziare come segue:
* Premendo il tasto START NOW, il programma inizia
immediatamente.
* Premendo il tasto START TOM, il programma
iniziera il giorno successivo all'orario programmato.
Dopo aver premuto uno dei due tasti, la ciotola
del cibo andra nella posizione iniziale, il messaggio
con la voce personale sara riavvolto e il simbolo di
una campanella apparira nello schermo. Se tutte le
ciotole sono state riempite di cibo, subito dopo che
il distributore automatico si é posizionato, muovere
il piccolo coperchio direttamente sopra la ciotola di
cibo aperta.
oa, |
TRIXIE Heimtierbedarf GmbH & Co. KG - D-24963 Tarp - www.trixie.de