1
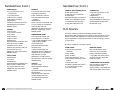
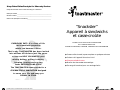
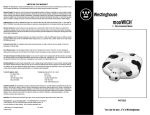
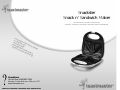
Snackster
Snack n’ Sandwich Maker
RECIPE BOOK USE AND CARE GUIDE
MODELS TSM2032T, TSM2SAN, TSM2SANT AND TSM2SANCAN
•H
• C ot sna
o
c
• N ol-tou ks/fu
o
• A n-stic ch ca ll mea
s
u
ls i
• S toma k grid e
nm
tan
t
s
i
inu
c
ds
t
tes
on her m
end
ost
for at co
n
eas
y st trol
ora
ge
?
Questions
Call toll free 1-800-947-3744
Monday – Friday, 8:00 a.m. - 5:30 p.m. CST
www.toastmaster.com
TSM2032T, TSM2SAN, TSM2SANT AND TSM2SANCAN
IMPORTANT SAFEGUARDS
When using electrical appliances, basic safety precautions should
always be followed, including the following:
◆ Read all instructions.
◆ Do not touch hot surfaces. Use handles or knobs. Use oven mitts
or potholders.
◆ To protect against electrical shock do not immerse cord, plug or
appliance in water or other liquid.
◆ Close supervision is necessary when any appliance is used by or
near children.
◆ Unplug from outlet when not in use and before cleaning. Allow to
cool before putting on or taking off parts, and before cleaning the
appliance.
◆ Do not operate any appliance with a damaged cord or plug or
after the appliance malfunctions, or has been damaged in any
manner. Contact Consumer Service for examination, repair or
adjustment.
◆ The use of accessory attachments not recommended by the
appliance manufacturer may cause injuries.
◆ Do not use outdoors.
◆ Do not let cord hang over edge of table or counter, or touch hot
surfaces.
◆ Do not place on or near a hot gas or electric burner, or in a
heated oven.
◆ Extreme caution must be used when moving an appliance
containing hot oil or other hot liquids.
◆ To disconnect, remove plug from wall outlet.
◆ Do not use appliance for other than intended use.
SAVE THESE INSTRUCTIONS
For Household Use Only
1.
ADDITIONAL IMPORTANT
SAFEGUARDS
CAUTION HOT SURFACES: This appliance generates heat and escaping
steam during use. Proper precautions must be taken to prevent the risk of
burns, fires, or other injury to persons or damage to property.
CAUTION: This appliance is hot during operation and retains heat for
some time after turning off. Always use oven mitts when handling hot
materials and allow metal parts to cool before cleaning. Do not place
anything on top of the appliance while it is operating or while it is hot.
◆ All users of this appliance must read and understand this Use and
Care Guide before operating or cleaning this appliance.
◆ The cord to this appliance should be plugged into a 120V AC
electrical outlet only.
◆ If this appliance begins to malfunction during use, immediately
unplug the cord. Do not use or attempt to repair the
malfunctioning appliance.
◆ Do not leave this appliance unattended during use.
Polarized Plug
Some models have a polarized plug (one blade is wider than the
other). To reduce the risk of electrical shock, this plug is intended to
fit into a polarized outlet only one way. If the plug does not fit fully in
the outlet, reverse the plug. If it still does not fit contact a qualified
electrician. Do not attempt to modify the plug in any way.
Grounded 3-Conductor Plug
Short Cord Instructions
A short power-supply cord is provided to reduce the risk resulting
from becoming entangled in or tripping over a longer cord.
Do not use an extension cord with this product.
Electric Power
If the electrical circuit is overloaded with other appliances, your
appliance may not operate properly. It should be operated on a
separate electrical circuit from other appliances.
Conditioning Cooking Surfaces
The cooking surfaces should be conditioned before each heating that
follows a cleaning. To condition, lightly coat the cooking surfaces with
solid vegetable shortening. Do not use spray-on oil products. Plug into
any 120 V ~ 60 Hz outlet. The red power on light will come on and stay
on during use. The green light will come on indicating that the unit is
heating (for models TSM2SAN and TSM2SANCAN). Allow to preheat
approximately 5 minutes. For models TSM2032T and TSM2SANT, the
green light will come on when unit is preheated. The green light will
continue to come on and go off during use. When the green light turns
off, unit is preheated (for models TSM2SAN and TSM2SANCAN). The
cooking surfaces are ready to use.
To protect the premium quality non-stick surfaces, use only plastic,
nylon or wooden utensils. Carefully follow suggested cleaning
procedures. After a time, if sandwiches show signs of sticking,
carefully recondition your unit.
Some models have a 3-prong grounded-type plug. This plug will only fit
into an electrical outlet made for a 3-prong plug. This is a safety feature. If
the plug should fail to fit the outlet, contact an electrician to replace the
obsolete outlet. Do not attempt to defeat this safety feature.
2.
Snackster Snack n’ Sandwich Maker Use and Care Guide
3.
Using Your Snackster
CAUTION: Never place any part of appliance in water or other liquids.
1. Before using your Snackster for the first time, wipe the cooking
surfaces with a damp cloth to remove all dust and dry. Follow
instructions for CONDITIONING COOKING SURFACES.
2. Unwrap cord completely from unit, close lid and plug into a 120 V
60 Hz outlet. The red power on light will come on and stay on during
use. The green light will come on indicating that the unit is heating
(for models TSM2SAN and TSM2SANCAN). Allow to preheat
approximately 5 minutes. For models TSM2032T and TSM2SANT, the
green light will come on when unit is preheated. The green light will
continue to come on and go off during use. Initially, some smoking
may occur. This is normal for newly manufactured appliances and
will not occur after the first few uses. When preheated, the green
light will turn off (for models TSM2SAN and TSM2SANCAN). The
cooking surfaces are ready to use.
CAUTION: Appliance surfaces are hot during use.
3. Follow directions in each section for individual recipe: flavored
butters, roll-ups, sandwiches, or hot snacks.
4. Close the lid and latch ONLY if recipe directions indicate to do so.
Do not force shut. Do not latch if recipe contains uncooked eggs or
will increase in volume when cooked; allow it to expand with lid
unlatched.
5. Refer to recipe for cooking time and special instructions.
6. Cooking time is 2-6 minutes for most recipes. Lift the lid to check
for doneness. Leave in longer to toast darker or cook until done.
7. Remove snack with plastic, nylon, or wooden utensil to protect the
non-stick surface. Never use a sharp, metal object. You may make
1-4 snacks at a time.
CAUTION: Allow sandwiches, hot snacks and roll-ups to cool
before eating as filling becomes very hot.
8. When finished, unplug from the wall outlet and allow to cool
before cleaning. See Care and Cleaning.
4.
Snackster Snack n’ Sandwich Maker Use and Care Guide
Hints
◆ Bread will toast better if the outside is buttered, but the butter may
be omitted.
◆ Food needs to be cooked before placing between bread slices.
◆ Avoid using processed cheese as it tends to ‘run’ under high
temperatures.
◆ Use a pizza cutter to cut pockets apart.
◆ Four slices of bread will make 4 snacks. Recipes may be cut in half.
User Maintenance Instructions
This appliance requires little maintenance. It contains no user
serviceable parts. Do not try to repair it yourself. Contact a qualified
appliance repair technician if the product requires servicing.
Care and Cleaning
CAUTION: Unplug from electrical outlet and allow to cool thoroughly
before cleaning. Never immerse appliance in water or other liquids.
1. Brush cooking surfaces with clean, soft pastry brush or cloth.
2. Do not use steel wool or coarse scouring pads. Remove stubborn
stains with a plastic mesh puff or pad. For best results, use only
products with directions stating that it is safe for cleaning non-stick
cooking surfaces.
3. The exterior finish should be cleaned with a non-abrasive cleaner
and a soft, damp cloth; dry thoroughly.
4. When finished cleaning, close latch and wrap cord around the tabs
(models TSM2SAN and TSM2SANCAN) or the Cord Wrap on bottom
of Snack n’ Sandwich Maker (model TSM2032T and TSM2SANT).
Stand on end for storage.
Flavored Butters
Combine ingredients and spread the flavored butter inside or outside
of the bread. Add filling and toast. The butters are perfect for adding
flavor to any roll-up or sandwich. All recipes make 1⁄2 cup.
5.
Flavored Butters (Cont.)
LEMON BUTTER
1
⁄2 cup butter, softened
1 tsp lemon rind
2 tsp lemon juice
cayenne pepper
HERB BUTTER
1
⁄2 cup butter, softened
1 tsp chives, chopped
1 tsp parsley, chopped
1
⁄2 tsp rosemary, chopped
salt and pepper
GARLIC BUTTER
1
⁄2 cup butter, softened
1 clove garlic, crushed
salt and pepper.
CHEESE BUTTER
1
⁄2 cup butter, softened
1
⁄2 cup Cheddar cheese,
shredded
1
⁄2 tsp prepared mustard
Use as a filling only in roll-ups
or sandwiches.
Roll-Ups
Flavorful roll-ups may be served as hors d’oeuvres. Close lid and latch,
toast for 11⁄2-21⁄2 minutes or until done.
SHRIMP
1 cup cooked shrimp, chopped
1
⁄4 cup mayonnaise
1
⁄2 cup carrots, grated
1
⁄2 tsp lemon juice
salt and pepper
24 bread slices
Combine ingredients. Trim
crusts from bread. Spread two
teaspoons of filling on bread.
Roll up and butter outside.
ASPARAGUS AND CHEESE
1
⁄2 cup mayonnaise
1
⁄4 cup parmesan cheese, grated
2 15-ounce cans asparagus
spears
24 bread slices
Combine mayonnaise and
cheese. Trim crusts from bread
and flatten with a rolling pin.
6.
Spread one teaspoon filling on
bread. Place a spear of
asparagus on one end and roll
up. Butter outside.
CRAB RANGOON
1
⁄2 cup cream cheese, softened
1 cup cooked crab meat,
shredded
4 tsp onion, minced
24 bread slices
Combine ingredients. Trim
crusts from bread. Spread two
teaspoons of filling on bread.
Roll up and butter outside.
Snackster Snack n’ Sandwich Maker Use and Care Guide
Sandwiches
Recipes for sandwich pockets are made with a filling between two
slices of bread. Round top and large slices of bread will seal around
the edges of the sandwich better, but any type and flavor of bread may
be used. To make sandwiches, butter one side of two slices of bread.
Place buttered sides together. Follow recipe directions to spread the
filling over unbuttered side of bread OR to add two tablespoons of
fillings in two opposite corners of the unbuttered side of bread. DO
NOT OVERFILL. Place the top slice of bread with filling onto
sandwich maker with buttered side down (position filling over
pockets). Repeat for other sandwiches. Then carefully place second
slice of bread on top with buttered side up. Close lid and latch, toast
for 11⁄2-21⁄2 minutes or until done. If too much filling is used, the excess
will run out of the snack while cooking. If too little filling is used, the
design will not develop on your snack.
FRENCH TOAST
3 eggs
1
⁄4 cup milk
1
⁄2 tsp cinnamon
8 slices cooked bacon
8 bread slices
Mix together eggs, milk and
cinnamon. Dip one side of bread
into egg mixture and place egg
side down onto sandwich maker.
Do not saturate bread. Place
cooked bacon on top of bread.
Dip one side of second slice of
bread into mixture and place egg
side up on top; do not saturate
bread. Serve with butter, syrup,
preserves or powdered sugar.
CUCUMBER
1 cup cucumber, finely
chopped
1 tsp lemon juice
1
⁄4 cup cream cheese, softened
1 tsp mustard
8 bread slices
Combine ingredients and add
two tablespoons of filling per
pocket between bread.
SCRAMBLED EGG
4 eggs
2 TBL milk
salt and pepper
1 TBL butter
8 bread slices
Combine eggs, milk, salt and
pepper. Melt butter in sauce pan
and cook eggs until done. Add
two tablespoons per pocket
between bread.
BACON, EGG AND TOMATO
4 slices bacon, chopped
2 medium eggs, beaten
salt and pepper
1
⁄2 cup tomato, chopped
8 bread slices.
Fry bacon in saucepan and
remove. Add eggs, salt, pepper
and cook until done. Combine
bacon, eggs and tomato. Add
two tablespoons of filling per
pocket between bread.
7.
Sandwiches (Cont.)
TUNA SALAD
1 cup cooked tuna or any
cooked meat
1
⁄4 cup mayonnaise
1 TBL onions, chopped
1 TBL celery, chopped
8 bread slices
Combine ingredients and add
two tablespoons per pocket
between bread.
FRANKS
4 frankfurters
1
⁄4 cup onions, minced
1
⁄4 cup relish
2 TBL ketchup
2 TBL mustard
8 bread slices
Split frankfurter lengthwise and
then cut in half crosswise.
Combine onions, relish,
ketchup and mustard. Add one
portion frank and one
tablespoon mixture per pocket
between bread.
CHILI DOGS
4 frankfurters
1
⁄2 cup chili
8 bread slices
Split frankfurter lengthwise and
then cut half crosswise. Add
one portion frank and one
tablespoon chili per pocket
between bread.
8.
Sandwiches (Cont.)
REUBEN
8 oz corned beef lunch meat
4 oz Swiss cheese slices
8 TBL sauerkraut, drained
8 tsp thousand island salad
dressing
16 bread slices
Layer 2 ounces corned beef and
1 ounce cheese on unbuttered
side of bread. Add one
tablespoon sauerkraut and one
teaspoon dressing per pocket
between bread.
HAMBURGER PIZZA
1 lb cooked hamburger OR
1 cup pepperoni, chopped
1
⁄2 cup cooked vegetables: onion,
green pepper, tomato
1
⁄3 cup pizza sauce
8 slices Mozzarella cheese
16 bread slices
Combine hamburger and
vegetables. Spread 2 teaspoons
of pizza sauce on unbuttered
side of bread. Add two
tablespoons of meat mixture
per pocket and a slice of cheese
between bread.
TURTLE
24 pecan halves
16 squares plastic wrapped
caramels
8 pieces chocolate candy kisses
8 bread slices
Add three pecan halves, two
caramel squares and one
chocolate kiss per pocket
between bread.
Snackster Snack n’ Sandwich Maker Use and Care Guide
PEANUT BUTTER AND JELLY
8 TBL peanut butter
4 TBL jelly, jam or preserves
8 bread slices
Spread 2 tablespoons of peanut
butter and 1 tablespoon of jelly
on unbuttered side of bread.
Cover with bread and toast.
CHERRY PIE
1 cup cherry pie filling, or any
flavor pie filling
8 bread slices
powdered sugar icing
Add two tablespoons filling per
pocket between bread; toast.
Drizzle with icing.
Hot Snacks
Condition cooking surfaces and preheat sandwich maker.
Recondition after each batch of hot snacks. These recipes do not use
bread. Combine the ingredients or follow special instructions. Add
amount specified in recipe per pocket and cook according to recipe
or until done.
DO NOT OVERFILL. DO NOT LATCH.
CRAB CAKES
2 cups cooked crab meat,
shredded
2 eggs, beaten
1 TBL mustard
2 TBL Worcestershire® sauce
1 tsp Old Bay® seasoning or salt
pepper
2 cups bread cubes
Combine ingredients and add 1⁄3
to 1⁄2 cup filling per pocket.
Cook 3-5 minutes.
PANCAKE PUFFS
Mix pancake batter using
boxed mix or home-made
recipe. Add approximately
1
⁄4 cup batter into each pocket,
cook 2-3 minutes. Serve with
butter and syrup.
CORN BREAD/MUFFIN MIX
Mix according to package or
recipe directions. Add
approximately 1⁄4 cup batter into
each pocket. Bake 3-4 minutes.
9.
Sandwiches (Cont.)
TUNA SALAD
1 cup cooked tuna or any
cooked meat
1
⁄4 cup mayonnaise
1 TBL onions, chopped
1 TBL celery, chopped
8 bread slices
Combine ingredients and add
two tablespoons per pocket
between bread.
FRANKS
4 frankfurters
1
⁄4 cup onions, minced
1
⁄4 cup relish
2 TBL ketchup
2 TBL mustard
8 bread slices
Split frankfurter lengthwise and
then cut in half crosswise.
Combine onions, relish,
ketchup and mustard. Add one
portion frank and one
tablespoon mixture per pocket
between bread.
CHILI DOGS
4 frankfurters
1
⁄2 cup chili
8 bread slices
Split frankfurter lengthwise and
then cut half crosswise. Add
one portion frank and one
tablespoon chili per pocket
between bread.
8.
Sandwiches (Cont.)
REUBEN
8 oz corned beef lunch meat
4 oz Swiss cheese slices
8 TBL sauerkraut, drained
8 tsp thousand island salad
dressing
16 bread slices
Layer 2 ounces corned beef and
1 ounce cheese on unbuttered
side of bread. Add one
tablespoon sauerkraut and one
teaspoon dressing per pocket
between bread.
HAMBURGER PIZZA
1 lb cooked hamburger OR
1 cup pepperoni, chopped
1
⁄2 cup cooked vegetables: onion,
green pepper, tomato
1
⁄3 cup pizza sauce
8 slices Mozzarella cheese
16 bread slices
Combine hamburger and
vegetables. Spread 2 teaspoons
of pizza sauce on unbuttered
side of bread. Add two
tablespoons of meat mixture
per pocket and a slice of cheese
between bread.
TURTLE
24 pecan halves
16 squares plastic wrapped
caramels
8 pieces chocolate candy kisses
8 bread slices
Add three pecan halves, two
caramel squares and one
chocolate kiss per pocket
between bread.
Snackster Snack n’ Sandwich Maker Use and Care Guide
PEANUT BUTTER AND JELLY
8 TBL peanut butter
4 TBL jelly, jam or preserves
8 bread slices
Spread 2 tablespoons of peanut
butter and 1 tablespoon of jelly
on unbuttered side of bread.
Cover with bread and toast.
CHERRY PIE
1 cup cherry pie filling, or any
flavor pie filling
8 bread slices
powdered sugar icing
Add two tablespoons filling per
pocket between bread; toast.
Drizzle with icing.
Hot Snacks
Condition cooking surfaces and preheat sandwich maker.
Recondition after each batch of hot snacks. These recipes do not use
bread. Combine the ingredients or follow special instructions. Add
amount specified in recipe per pocket and cook according to recipe
or until done.
DO NOT OVERFILL. DO NOT LATCH.
CRAB CAKES
2 cups cooked crab meat,
shredded
2 eggs, beaten
1 TBL mustard
2 TBL Worcestershire® sauce
1 tsp Old Bay® seasoning or salt
pepper
2 cups bread cubes
Combine ingredients and add 1⁄3
to 1⁄2 cup filling per pocket.
Cook 3-5 minutes.
PANCAKE PUFFS
Mix pancake batter using
boxed mix or home-made
recipe. Add approximately
1
⁄4 cup batter into each pocket,
cook 2-3 minutes. Serve with
butter and syrup.
CORN BREAD/MUFFIN MIX
Mix according to package or
recipe directions. Add
approximately 1⁄4 cup batter into
each pocket. Bake 3-4 minutes.
9.
Hot Snacks (Cont.)
LIMITED ONE YEAR WARRANTY
STUFFING
1 small box dry stuffing mix
2 TBL milk
1 egg, beaten
Cook stuffing according to
package directions and then
add milk and egg.
Toss to moisten. Add 1⁄3 to 1⁄2
cup filling per pocket.
Cook 3-5 minutes.
FRIED EGGS
8 eggs
salt and pepper
1 teaspoon butter
Melt 1⁄8 teaspoon butter in each
pocket. Break one egg into
each pocket and pierce each
yolk with a fork. Add salt and
pepper.
Cook 2-3 minutes.
BISCUITS
1 7.5-ounce tube refrigerator
biscuits (10)
Place one biscuit into each
pocket. Bake 2-3 minutes. Serve
with butter and jelly.
CAKE MIXES
Mix cake batter according to
package or recipe directions.
Add 1⁄4 cup batter into each
pocket. Bake 2-3 minutes.
Warranty: This Toastmaster® product is warranted to be free from defects in materials or workmanship for a period of (1)
year from the original purchase date. This product warranty covers only the original consumer purchaser of the product.
Warranty Coverage: This warranty is void if the product has been damaged by accident in shipment, unreasonable use,
misuse, neglect, improper service, commercial use, repairs by unauthorized personnel, normal wear and tear, improper
assembly, installation or maintenance abuse or other causes not arising out of defects in materials or workmanship. This
warranty is effective only if the product is purchased and operated in the USA, and does not extend to any units which
have been used in violation of written instructions furnished with the product or to units which have been altered or
modified or to damage to products or parts thereof which have had the serial number removed, altered, defaced or
rendered illegible.
Implied Warranties: ANY IMPLIED WARRANTIES WHICH THE PURCHASER MAY HAVE ARE LIMITED IN DURATION TO
ONE (1) YEAR FROM THE DATE OF PURCHASE. Some states do not allow limitations on how long an implied warranty
lasts, so the above limitation may not apply to you.
Warranty Performance: During the above one-year warranty period, a product with a defect will be either repaired or
replaced with a reconditioned comparable model (at our option) when the product is returned to the Repair Center, or the
purchase price refunded. The repaired or replacement product will be in warranty for the balance of the one-year
warranty period and an additional one-month period. No charge will be made for such repair or replacement.
Service and Repair: Should the appliance malfunction, you should first call toll-free 1 (800) 947-3744 between the hours
of 9:00 am and 5:00 pm Central Standard Time and ask for CONSUMER SERVICE stating that you are a consumer with
a problem. Please refer to model number TSM2032T, TSM2SAN, TSM2SANT or TSM2SANCAN when you call.
In-Warranty Service (USA): For an appliance covered under the warranty period, no charge is made for service or
postage. Call for return authorization (1 800 947-3744).
Out-of Warranty Service: A flat rate charge by model is made for out-of-warranty service. Include $ 8.00 (U.S.) for return
shipping and handling. We will notify you by mail of the amount of the charge for service and require you to pay in advance
for the repair or replacement.
For Products Purchased in the USA, but Used in Canada: You may return the product insured, packaged with sufficient
protection, and postage and insurance prepaid to the USA address listed below. Please note that all customs duty /
brokerage fees, if any, must be paid by you and we will require you to pay the cost of customs duty / brokerage fees to
us in advance of our performing any service.
Risk During Shipment: We cannot assume responsibility for loss or damage during incoming shipment. For your
protection, carefully package the product for shipment and insure it with the carrier. Be sure to enclose the following
items with your appliance: any accessories related to your problem, your full return address and daytime phone number,
a note describing the problem you experienced, a copy of your sales receipt or other proof of purchase to determine
warranty status. C.O.D. shipments cannot be accepted.
To return the appliance, ship to:
Attn: Repair Center
Salton Inc.
708 South Missouri Street
Macon, MO 63552
Email: [email protected]
To contact us, please write to or call:
Salton Inc.
P.O. Box 6916
Columbia, MO 65205-6916
1 (800) 233-9054
Limitation of Remedies: No representative or person is authorized to assume for us any other liability in connection with
the sale of our products. There shall be no claims for defects or failure of performance or product failure under any
theory of tort, contract or commercial law including, but not limited to negligence, gross negligence, strict liability, breach
of warranty and breach of contract. Repair, replacement or refund shall be the sole remedy of the purchaser under this
warranty, and in no event shall we be liable for any incidental or consequential damages, losses or expenses. Some
states do not allow the exclusion or limitation of incidental or consequential damages, so the above limitation or exclusion
may not apply to you.
Legal Rights: This warranty gives you specific legal rights, and you may also have other rights which vary from state to
state.
© 2003 Toastmaster Inc.
All Rights Reserved
10.
Snackster Snack n’ Sandwich Maker Use and Care Guide
P/N 60923 Rev.02
Printed in China
11.
Keep Dated Sales Receipts for Warranty Service.
Keep this booklet. Record the following for reference:
Date purchased _______________________________________________
Model number _______________________________________________
Date code (stamped on bottom)________________________________
“Snackster”
Appareil à sandwichs
et casse-croûte
EVERYBODY EATS. It’s a fact of life.
But sometimes preparing
GUIDE D’UTILISATION ET D’ENTRETIEN
ET LIVRE DE RECETTES
MODELES TSM2032T, TSM2SAN, TSM2SANT ET TSM2SANCAN
meals can become a chore.
That’s why TOASTMASTER has been invited
into millions of kitchens just like yours
◆ Casse-croûte chauds/repas complets en quelques minutes
so we can HELP YOU MASTER your
◆ Caisson de l’appareil à toucher froid
mixing, baking, grilling, toasting,
◆ Plaques antiadhérentes
brewing, heating and serving
◆ Bouton de thermostat automatique
tasks WITH EASE AND STYLE.
◆ Se range à la vertical pour un stockage facile
The TOASTMASTER name stands for a
CELEBRATION of INNOVATION designed
to serve your life and keep you
COOKIN’ IN STYLE.
12.
Snackster Snack n’ Sandwich Maker Use and Care Guide
13.
Snackster
Snack n’ Sandwich Maker
RECIPE BOOK USE AND CARE GUIDE
MODELS TSM2032T, TSM2SAN, TSM2SANT AND TSM2SANCAN
•H
• C ot sna
o
c
• N ol-tou ks/fu
o
• A n-stic ch ca ll mea
s
u
ls i
• S toma k grid e
nm
tan
t
s
i
inu
c
ds
t
tes
on her m
end
ost
for at co
n
eas
y st trol
ora
ge
?
Questions
Call toll free 1-800-947-3744
Monday – Friday, 8:00 a.m. - 5:30 p.m. CST
www.toastmaster.com
TSM2032T, TSM2SAN, TSM2SANT AND TSM2SANCAN