1
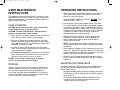
FS12B_IB.qxp
5/4/2007
4:05 PM
Page 1
LIMITED ONE-YEAR WARRANTY
Warranty Coverage: This product is warranted to be free from defects in materials
or workmanship for a period of one (1) year from the original purchase date. This
product warranty is extended only to the original consumer purchaser of the product
and is not transferable. For a period of one (1) year from the date of original purchase of the product, our Repair Center will, at its option, either (1) repair the product
or (2) replace the product with a reconditioned comparable model. These remedies
are the purchaser's exclusive remedies under this warranty.
Warranty Service: To obtain warranty service, you must call our warranty service
number at 1-800-233-9054 for return instructions on how to deliver the product, in
either the original packaging or packaging affording an equal degree of protection to
the Repair Center specified below. You must enclose a copy of your sales receipt or
other proof of purchase to demonstrate eligibility for warranty coverage.
To return the appliance, ship to:
ATTN: Repair Center
708 South Missouri Street
Macon, MO 63552 USA
To contact us, please write to, call, or email:
Consumer Relations Department
PO Box 7366
Columbia, MO 65205-7366 USA
Phone: 1-800-233-9054
Email: [email protected]
What Is Not Covered: This warranty does not cover damage resulting from misuse,
accident, commercial use, improper service or any other damage caused by anything
other than defects in material or workmanship during ordinary consumer use. This
warranty is invalid if the serial number has been altered or removed from the product. This warranty is valid only in the United States and Canada.
LIMITATION ON DAMAGES: THERE SHALL BE NO LIABILITY FOR ANY INCIDENTAL OR CONSEQUENTIAL DAMAGES FOR BREACH OF ANY EXPRESS OR
IMPLIED WARRANTY OR CONDITION ON THIS PRODUCT.
DURATION OF IMPLIED WARRANTIES: EXCEPT TO THE EXTENT PROHIBITED
BY APPLICABLE LAW, ALL IMPLIED WARRANTIES AND CONDITIONS, INCLUDING, WITHOUT LIMITATION, IMPLIED WARRANTIES AND CONDITIONS OF
MERCHANTABILITY AND FITNESS FOR A PARTICULAR PURPOSE OR USE
ON THIS PRODUCT ARE LIMITED IN DURATION TO THE DURATION OF THIS
WARRANTY.
Some jurisdictions do not allow the exclusion or limitation of incidental or consequential damages, or allow limitations on how long an implied warranty lasts, so the above
limitations or exclusions may not apply to you. This warranty gives you specific legal
rights and you may have other rights under the laws of your jurisdiction.
For more information on our products, visit our website:
www.maxim-toastmaster.com.
Farberware is a registered trademark of Farberware Licensing Company, LLC.
Manufactured and sold pursuant to a license from Farberware Licensing
Company, LLC.
©2007 Farberware Licensing Company, LLC. All rights reserved.
Made in China
5/07
USE & CARE INSTRUCTIONS
Electric Skillet
FS12B
FS12B_IB.qxp
5/4/2007
4:05 PM
Page 3
IMPORTANT SAFEGUARDS
NOTES
When using electrical appliances, basic safety precautions should
always be followed, including the following:
1. Read all instructions.
2. Do not touch hot surfaces. Use handles or knobs. Use oven
mitts or potholders.
3. To protect against electrical shock, do not immerse cord or
plugs in water or other liquid.
4. Close supervision is necessary when any appliance is used
near children.
5. Unplug from outlet when not in use and before cleaning.
Allow to cool before putting on or taking off parts, and before
cleaning the appliance.
6. Do not operate any appliance with a damaged cord or plug or
after the appliance malfunctions, or has been damaged in
any manner. Contact Consumer Service for examination,
repair or adjustment.
7. The use of accessory attachments not recommended by the
appliance manufacturer may cause injuries.
8. Do not use outdoors.
9. Do not let cord hang over edge of table or counter, or touch
hot surfaces.
10. Do not place on or near a hot gas or electric burner, or in a
heated oven.
11. Extreme caution must be used when moving an appliance
containing hot oil or other hot liquids.
12. Always attach plug to appliance first, then plug cord in the
wall outlet. To disconnect, turn any control to “OFF”, then
remove plug from wall outlet.
13. Do not use appliance for other than intended use.
SAVE THESE INSTRUCTIONS
FOR HOUSEHOLD USE ONLY
1
14
FS12B_IB.qxp
5/4/2007
4:05 PM
Page 5
NOTES
ADDITIONAL
IMPORTANT SAFEGUARDS
CAUTION HOT SURFACES: This appliance generates heat and
escaping steam during use. Proper precautions must be taken to
prevent the risk of burns, fires, or other injury to persons or damage to property.
CAUTION: This appliance is hot during operation and retains
heat for some time after turning off. Always use oven mitts when
handling hot materials and allow metal parts to cool before cleaning. Do not place anything on top of the appliance while it is operating or while it is hot.
1. All users of this appliance must read and understand this
Owner’s Manual before operating or cleaning this appliance.
2. The cord to this appliance should be plugged into a 120V AC
electrical outlet only.
3. If this appliance begins to malfunction during use, immediately unplug the cord. Do not use or attempt to repair the malfunctioning appliance.
4. Do not leave this appliance unattended during use.
13
2
FS12B_IB.qxp
5/4/2007
4:05 PM
Page 7
GROUNDED 3-CONDUCTOR PLUG
This appliance is equipped with a grounded-type 3-wire cord (3prong plug). This plug will only fit into an electrical outlet made for
a 3-prong plug. This is a safety feature. If the plug should fail to fit
the outlet, contact an electrician to replace the obsolete outlet. Do
not attempt to defeat this safety feature.
SHORT CORD INSTRUCTIONS
A short power-supply cord is provided to reduce the risk resulting
from becoming entangled in or tripping over a longer cord.
BRAISING CHART
Food/Preheat
Temperature
Cooking
Method
Time
If desired, pound 1/4 to 1/2 cup flour into
meat. Use 1/4 cup fat heated to 350°F
to brown meat 5 - 10 min. on each side.
Add 2 - 3 cups of liquid. Turn Temperature Control Dial down to 200°F. Cover.
Cook for 45 min. to 1 hour, or until
tender. Add more liquid as necessary.
55 min.
to 1 hr.
20 min.
total
BEEF
Chuck Steak,
London Broil etc.
2-inches thick
350°F brown
200°F finish
Do not use an extension cord with this product.
CHICKEN
PLASTICIZER WARNING
CAUTION: To prevent Plasticizers from migrating from the finish
of the countertop or tabletop or other furniture, place NON-PLASTIC coasters or placemats between the appliance and the finish
of the countertop or tabletop.
Failure to do so may cause the finish to darken, permanent blemishes may occur, or stains can appear.
ELECTRIC POWER
If the electrical circuit is overloaded with other appliances, your
appliance may not operate properly. It should be operated on a
separate electrical circuit from other appliances.
Chicken Pieces If desired, coat chicken with seasoned
350°F brown
flour. Using 1/4 cup fat for every 2 - 3 lbs.
200°F finish
of chicken, brown on all sides for 15
min. at 350°F. Add 2 - 3 cups of liquid.
Turn Temperature Control Dial down to
200°F. Cover and cook for 30 min. or
until done. Add more liquid as necessary.
45 min.
total
LAMB
Lamb Chops
1/2-inch to
1-inch thick
350°F brown
200°F finish
Use 2 tbsp. of fat heated to 350°F
to brown meat 5 min. on each side.
Add 2 - 3 cups of liquid. Turn Temperature Control Dial down to 200°F. Cover.
Cook for 20 - 30 min. or until tender.
Add more liquid as it necessary.
30 to
40 min.
total
Use 2 tbsp. of fat heated to 350°F to
brown meat 5 - 10 min. on each side.
Add 2 - 3 cups of liquid. Turn Temperature Control Dial down to 200°F. Cover.
Cook for 30 - 40 min. or until tender and
completely cooked. Add more liquid
as necessary.
40 min.
to 1 hr.
total
Use 1/4 cup of fat heated to 350°F to
brown meat 5 min. each side. Add 2 - 3
cups of liquid. Turn Temperature Control
Dial down to 200°F. Cover. Cook for 20 30 min. or until tender. Add more liquid
as necessary.
30 to
40 min.
total
PORK
Pork Chops
1/2-inch to
1-inch thick
350°F brown
200°F finish
VEAL
Veal Chops
1/2-inch to
1-inch thick
350°F brown
200°F finish
3
12
FS12B_IB.qxp
5/4/2007
4:05 PM
Page 9
FRYING CHART (CONTINUED)
Food/Preheat
Temperature
Cooking
Method
Time
With or without extra fat
Medium: 19-21 min. total
Well: 24-26 min. total
LAMB
Lamb Chops
1/2-inch thick
350°F
PORK
Pork Chops
350°F
With or without extra fat
1/2-in. thick: 15-20 min. total
1-in. thick: 30-40 min. total
Bacon Slices
350°F
Start in a
cold pan
5-7 min. total
Sausage Links
300°F
Turn sausage 20 min. total
on all sides to
brown. Should
be well done
with no trace
of pink.
Brown ‘N’ Serve
300°F
Sausage Patties
1/2-inch thick
300°F
Turn sausage 7-8 min. total
on all sides to
brown.
Turn sausage 6-7 min. total
on all sides to
brown. Should
be well done
with no trace
of pink.
TEMPERATURE CONTROL PROBE
The Temperature Control Probe is the nerve center and brain of
the Electric Skillet. Treat it carefully. Dropping or banging it could
change its calibration and make the temperature settings inaccurate.
Select the temperature as called for in the recipe. Allow Skillet to
cool before removing the Temperature Control Probe.
To clean the Temperature Control Probe, simply wipe down with a
soft, damp cloth. Make sure you dry it thoroughly before using
again.
NOTE: The Temperature Control Probe is not immersible.
CAUTION: Use only the Temperature Control Probe (P/N
22739) supplied with this product. Using any other type of
Temperature Control Probe may cause fire, electric shock, or
injury.
BEFORE FIRST USE
Read all instructions carefully. Remove the Temperature Control
Probe from the Electric Skillet and set it aside.
Wash the Electric Skillet and Glass Lid in hot, sudsy water. Rinse
and dry thoroughly.
VEAL
Cutlets, Chops
1/8 to 1/2-in. thick
350°F
Use 2-3 tbsp.
of fat
3-5 min. each side
(cutlets)
5-10 min. each side
(chops)
Use 3-4 tbsp.
of fat
3-5 min. each side
FISH
Fish Fillet
1/2-inch thick
350°F
11
4
FS12B_IB.qxp
5/4/2007
4:05 PM
Page 11
GETTING TO KNOW YOUR
ELECTRIC SKILLET
SUGGESTED
COOKING CHARTS
Product may vary slightly from illustration.
NOTE: The USDA recommends that meats such as beef and lamb,
etc. should be cooked to an internal temperature of 145°F/63°C.
Pork should be cooked to an internal temperature of 160°F/71°C
and poultry products should be cooked to an internal temperature of
170°F/77°C - 180°F/82°C to be sure any harmful bacteria has been
killed. When reheating meat/poultry products, they should also be
cooked to an internal temperature of 165°F/74°C.
2.
1.
3.
FRYING CHART
Food/Preheat
Temperature
4.
Cooking
Method
Time
Hamburgers
1/2-inch thick
350°F
With or without extra fat
Medium well: 3-4 min.
each side
Well: 4-5 min. each side
Liver
1/2-inch thick
350°F
Use 2 tbsp.
of fat
4-5 min. each side
Sandwich Steaks
1/4-inch thick
350°F
Use 2 tbsp.
of fat
Rare: 1 min. each side
Medium: 1-1/2 min. each side
Well: 2 min. each side
Steak - Chuck
1-inch thick
400°F
With or without extra fat
Rare: 4 min. each side
Medium: 8 min. each side
Well: 11 min. each side
Chicken Breasts
(boneless)
350°F
Use 3-4 tbsp.
fat,turn often
10-20 min. total
Pieces
350°F
Use 3-4 tbsp.
fat, turn often
25-30 min. total
BEEF
5.
9.
8.
7.
6.
CHICKEN
1. Glass Lid
6. Indicator Light
(P/N 22745)
7. Temperature Control Dial
2. Lid Knob (P/N 22746)
8. Probe Socket
3. Adjustable Steam Vent
9. Non-Stick Skillet
4. Handle (P/N 22747)
EGGS
5. Temperature Control Probe
Fried
300°F
(P/N 22739)
5
Use 1 tbsp.
3-5 min. total
fat per 2 eggs
10
FS12B_IB.qxp
5/4/2007
4:05 PM
Page 13
USER MAINTENANCE
INSTRUCTIONS
This appliance requires little maintenance. It contains no user
serviceable parts. Do not try to repair it yourself. Any servicing
that requires disassembly must be performed by a qualified
appliance repair technician.
OPERATING INSTRUCTIONS
1. Make sure that the Temperature Control Dial is turned to the
“OFF” position then plug the Temperature Control Probe
securely into the Probe Socket.
ALWAYS INSERT PROBE INTO SKILLET BEFORE PLUGGING INTO WALL OUTLET.
2. Plug the power cord into any standard 120V AC wall outlet.
CARE & CLEANING
CAUTION: Do not immerse the cord, plug or Temperature
Control Probe in water or any other liquid.
CAUTION: To avoid accidental burns, allow the Electric
Skillet to cool completely before cleaning.
1. When cooking is completed, unplug the cord from the wall
outlet. Allow the Electric Skillet to cool completely.
2. Remove the Temperature Control Probe from the Probe
Socket. If necessary, wipe the Temperature Control Probe
with a damp, soft cloth. Dry the Temperature Control Probe
completely, and then set it aside.
3. Immerse the Electric Skillet and Glass Lid in hot, sudsy
water. Clean thoroughly using a sponge or soft cloth. Rinse
in hot water then dry completely.
For stubborn food particles: Loosen stuck-on food with a
plastic cleaning pad. Avoid hard scouring on the non-stick
finish as this may cause the surface to scratch.
DO NOT use steel wool, scouring pads, or abrasive
cleaners on any part of the Electric Skillet.
3. Turn the Temperature Control Probe to the desired temperature and allow the Electric Skillet to preheat before cooking
(unless otherwise stated in recipe). The Indicator Light on the
Temperature Control Probe will illuminate as soon as the Dial
is rotated. The Indicator Light will then go out once the
selected temperature has been reached.
4. Add food and cook according to recipe or cooking charts.
Liquids such as broth, water, etc. may be added to the
Electric Skillet during cooking. Adjust the Temperature
Control Dial as necessary.
NOTE: During cooking, the Indicator Light will cycle on and
off indicating that the Electric Skillet is maintaining the proper
temperature.
5. When cooking is complete, turn the Temperature Control Dial
to the “OFF” position. The Indicator Light on the Temperature
Control Probe will go out. Unplug the cord from the wall outlet
and allow the Electric Skillet to cool completely.
6. Once the unit has cooled, remove the Temperature Control
Probe from the Probe Socket and follow the Care & Cleaning
Instructions.
ADJUSTING THE STEAM VENTS
STORAGE
Unplug the unit and allow it to cool completely before storing.
Store the appliance in its box or in a clean, dry place. Never
store the Electric Skillet while it is hot or still plugged in.
Never wrap cord tightly around the appliance. Do not put any
stress on cord where it enters the Temperature Control Probe,
as this could cause cord to fray and break.
The Glass Lid has two Adjustable Steam Vents located beneath
the Lid Knob. These are designed to allow excess steam to
escape during cooking.
To open the steam vents: Rotate the Lid Knob clockwise so
that the Steam Vents are lined up with the “OPEN” markings
on the Glass Lid.
To close the steam vents: Rotate the Lid Knob counterclockwise so that the Steam Vents are lined up with the
“CLOSE” markings on the Glass Lid.
9
6
FS12B_IB.qxp
5/4/2007
4:05 PM
Page 15
COOKING METHODS
FRY/SAUTÉ
Cooking food rapidly in an open
skillet using a small quantity of fat.
Add oil, shortening, butter or margarine to the Electric Skillet and
preheat to the desired temperature (350°F). The amount of fat
used will vary accordingly to recipe and type or amount of food to
be prepared. See the SUGGESTED COOKING CHARTS for
more information.
PAN-BROIL
Cooking food over high heat in an
open skillet using little or no fat.
Add little or no oil, shortening, butter or margarine to the Electric
Skillet and preheat to the desired temperature (400°F). Place food
in the hot Electric Skillet. Brown the food, turning it often. Remove
excess fat as it accumulates.
BRAISE
STEAM
Cooking food by exposing it
to steam in a covered skillet.
Place a small amount of water in the bottom of the Electric Skillet.
Add vegetables or other foods then cover with the Glass Lid. Turn
the Temperature Control Dial to about 250°F and steam the food
until it is done. Check often, adding more water as necessary.
DO NOT LET SKILLET BOIL DRY.
WARM
Gradually bringing cooked and cooled
food back up to serving temperature.
Preheat the Electric Skillet with the Temperature Control Dial set
to about 200°F. Place the food to be warmed in the Electric Skillet
then cover with the Glass Lid. Heat until the food is warm, turning
or stirring occasionally.
Searing food in hot fat until brown, then simmering in a covered skillet with liquid added.
Add a small quantity of fat to the Electric Skillet and preheat to
350°F. Brown the food well on all sides. Add specified amount of
liquid, then cover with the Glass Lid and turn the Temperature
Control Dial down just until the Indicator Light goes out (simmer
point). Cook as specified in recipe or until the food is tender.
Check during cooking and add more liquid as necessary.
DO NOT LET SKILLET BOIL DRY. See the SUGGESTED
COOKING CHARTS for more information.
SIMMER
Gently cooking food in a liquid
just below boiling temperature.
Add oil, shortening, butter or margarine to the Electric Skillet and
preheat to the desired temperature. If required, brown the food on
all sides. Add liquid or make sauce as directed in recipe. With the
Temperature Control Dial set to about 250°F (or slightly higher),
bring the liquid to a boil. Turn Temperature Control Dial down just
until the Indicator Light goes out; this is the simmer point. Cover
with the Glass Lid. Simmer food for the directed length of time or
until the food is done. Check periodically during cooking and add
more liquid as necessary.
DO NOT LET SKILLET BOIL DRY.
7
8
FS12B_IB.qxp
5/4/2007
4:05 PM
Page 13
USER MAINTENANCE
INSTRUCTIONS
This appliance requires little maintenance. It contains no user
serviceable parts. Do not try to repair it yourself. Any servicing
that requires disassembly must be performed by a qualified
appliance repair technician.
OPERATING INSTRUCTIONS
1. Make sure that the Temperature Control Dial is turned to the
“OFF” position then plug the Temperature Control Probe
securely into the Probe Socket.
ALWAYS INSERT PROBE INTO SKILLET BEFORE PLUGGING INTO WALL OUTLET.
2. Plug the power cord into any standard 120V AC wall outlet.
CARE & CLEANING
CAUTION: Do not immerse the cord, plug or Temperature
Control Probe in water or any other liquid.
CAUTION: To avoid accidental burns, allow the Electric
Skillet to cool completely before cleaning.
1. When cooking is completed, unplug the cord from the wall
outlet. Allow the Electric Skillet to cool completely.
2. Remove the Temperature Control Probe from the Probe
Socket. If necessary, wipe the Temperature Control Probe
with a damp, soft cloth. Dry the Temperature Control Probe
completely, and then set it aside.
3. Immerse the Electric Skillet and Glass Lid in hot, sudsy
water. Clean thoroughly using a sponge or soft cloth. Rinse
in hot water then dry completely.
For stubborn food particles: Loosen stuck-on food with a
plastic cleaning pad. Avoid hard scouring on the non-stick
finish as this may cause the surface to scratch.
DO NOT use steel wool, scouring pads, or abrasive
cleaners on any part of the Electric Skillet.
3. Turn the Temperature Control Probe to the desired temperature and allow the Electric Skillet to preheat before cooking
(unless otherwise stated in recipe). The Indicator Light on the
Temperature Control Probe will illuminate as soon as the Dial
is rotated. The Indicator Light will then go out once the
selected temperature has been reached.
4. Add food and cook according to recipe or cooking charts.
Liquids such as broth, water, etc. may be added to the
Electric Skillet during cooking. Adjust the Temperature
Control Dial as necessary.
NOTE: During cooking, the Indicator Light will cycle on and
off indicating that the Electric Skillet is maintaining the proper
temperature.
5. When cooking is complete, turn the Temperature Control Dial
to the “OFF” position. The Indicator Light on the Temperature
Control Probe will go out. Unplug the cord from the wall outlet
and allow the Electric Skillet to cool completely.
6. Once the unit has cooled, remove the Temperature Control
Probe from the Probe Socket and follow the Care & Cleaning
Instructions.
ADJUSTING THE STEAM VENTS
STORAGE
Unplug the unit and allow it to cool completely before storing.
Store the appliance in its box or in a clean, dry place. Never
store the Electric Skillet while it is hot or still plugged in.
Never wrap cord tightly around the appliance. Do not put any
stress on cord where it enters the Temperature Control Probe,
as this could cause cord to fray and break.
The Glass Lid has two Adjustable Steam Vents located beneath
the Lid Knob. These are designed to allow excess steam to
escape during cooking.
To open the steam vents: Rotate the Lid Knob clockwise so
that the Steam Vents are lined up with the “OPEN” markings
on the Glass Lid.
To close the steam vents: Rotate the Lid Knob counterclockwise so that the Steam Vents are lined up with the
“CLOSE” markings on the Glass Lid.
9
6
FS12B_IB.qxp
5/4/2007
4:05 PM
Page 11
GETTING TO KNOW YOUR
ELECTRIC SKILLET
SUGGESTED
COOKING CHARTS
Product may vary slightly from illustration.
NOTE: The USDA recommends that meats such as beef and lamb,
etc. should be cooked to an internal temperature of 145°F/63°C.
Pork should be cooked to an internal temperature of 160°F/71°C
and poultry products should be cooked to an internal temperature of
170°F/77°C - 180°F/82°C to be sure any harmful bacteria has been
killed. When reheating meat/poultry products, they should also be
cooked to an internal temperature of 165°F/74°C.
2.
1.
3.
FRYING CHART
Food/Preheat
Temperature
4.
Cooking
Method
Time
Hamburgers
1/2-inch thick
350°F
With or without extra fat
Medium well: 3-4 min.
each side
Well: 4-5 min. each side
Liver
1/2-inch thick
350°F
Use 2 tbsp.
of fat
4-5 min. each side
Sandwich Steaks
1/4-inch thick
350°F
Use 2 tbsp.
of fat
Rare: 1 min. each side
Medium: 1-1/2 min. each side
Well: 2 min. each side
Steak - Chuck
1-inch thick
400°F
With or without extra fat
Rare: 4 min. each side
Medium: 8 min. each side
Well: 11 min. each side
Chicken Breasts
(boneless)
350°F
Use 3-4 tbsp.
fat,turn often
10-20 min. total
Pieces
350°F
Use 3-4 tbsp.
fat, turn often
25-30 min. total
BEEF
5.
9.
8.
7.
6.
CHICKEN
1. Glass Lid
6. Indicator Light
(P/N 22745)
7. Temperature Control Dial
2. Lid Knob (P/N 22746)
8. Probe Socket
3. Adjustable Steam Vent
9. Non-Stick Skillet
4. Handle (P/N 22747)
EGGS
5. Temperature Control Probe
Fried
300°F
(P/N 22739)
5
Use 1 tbsp.
3-5 min. total
fat per 2 eggs
10
FS12B_IB.qxp
5/4/2007
4:05 PM
Page 9
FRYING CHART (CONTINUED)
Food/Preheat
Temperature
Cooking
Method
Time
With or without extra fat
Medium: 19-21 min. total
Well: 24-26 min. total
LAMB
Lamb Chops
1/2-inch thick
350°F
PORK
Pork Chops
350°F
With or without extra fat
1/2-in. thick: 15-20 min. total
1-in. thick: 30-40 min. total
Bacon Slices
350°F
Start in a
cold pan
5-7 min. total
Sausage Links
300°F
Turn sausage 20 min. total
on all sides to
brown. Should
be well done
with no trace
of pink.
Brown ‘N’ Serve
300°F
Sausage Patties
1/2-inch thick
300°F
Turn sausage 7-8 min. total
on all sides to
brown.
Turn sausage 6-7 min. total
on all sides to
brown. Should
be well done
with no trace
of pink.
TEMPERATURE CONTROL PROBE
The Temperature Control Probe is the nerve center and brain of
the Electric Skillet. Treat it carefully. Dropping or banging it could
change its calibration and make the temperature settings inaccurate.
Select the temperature as called for in the recipe. Allow Skillet to
cool before removing the Temperature Control Probe.
To clean the Temperature Control Probe, simply wipe down with a
soft, damp cloth. Make sure you dry it thoroughly before using
again.
NOTE: The Temperature Control Probe is not immersible.
CAUTION: Use only the Temperature Control Probe (P/N
22739) supplied with this product. Using any other type of
Temperature Control Probe may cause fire, electric shock, or
injury.
BEFORE FIRST USE
Read all instructions carefully. Remove the Temperature Control
Probe from the Electric Skillet and set it aside.
Wash the Electric Skillet and Glass Lid in hot, sudsy water. Rinse
and dry thoroughly.
VEAL
Cutlets, Chops
1/8 to 1/2-in. thick
350°F
Use 2-3 tbsp.
of fat
3-5 min. each side
(cutlets)
5-10 min. each side
(chops)
Use 3-4 tbsp.
of fat
3-5 min. each side
FISH
Fish Fillet
1/2-inch thick
350°F
11
4
FS12B_IB.qxp
5/4/2007
4:05 PM
Page 7
GROUNDED 3-CONDUCTOR PLUG
This appliance is equipped with a grounded-type 3-wire cord (3prong plug). This plug will only fit into an electrical outlet made for
a 3-prong plug. This is a safety feature. If the plug should fail to fit
the outlet, contact an electrician to replace the obsolete outlet. Do
not attempt to defeat this safety feature.
SHORT CORD INSTRUCTIONS
A short power-supply cord is provided to reduce the risk resulting
from becoming entangled in or tripping over a longer cord.
BRAISING CHART
Food/Preheat
Temperature
Cooking
Method
Time
If desired, pound 1/4 to 1/2 cup flour into
meat. Use 1/4 cup fat heated to 350°F
to brown meat 5 - 10 min. on each side.
Add 2 - 3 cups of liquid. Turn Temperature Control Dial down to 200°F. Cover.
Cook for 45 min. to 1 hour, or until
tender. Add more liquid as necessary.
55 min.
to 1 hr.
20 min.
total
BEEF
Chuck Steak,
London Broil etc.
2-inches thick
350°F brown
200°F finish
Do not use an extension cord with this product.
CHICKEN
PLASTICIZER WARNING
CAUTION: To prevent Plasticizers from migrating from the finish
of the countertop or tabletop or other furniture, place NON-PLASTIC coasters or placemats between the appliance and the finish
of the countertop or tabletop.
Failure to do so may cause the finish to darken, permanent blemishes may occur, or stains can appear.
ELECTRIC POWER
If the electrical circuit is overloaded with other appliances, your
appliance may not operate properly. It should be operated on a
separate electrical circuit from other appliances.
Chicken Pieces If desired, coat chicken with seasoned
350°F brown
flour. Using 1/4 cup fat for every 2 - 3 lbs.
200°F finish
of chicken, brown on all sides for 15
min. at 350°F. Add 2 - 3 cups of liquid.
Turn Temperature Control Dial down to
200°F. Cover and cook for 30 min. or
until done. Add more liquid as necessary.
45 min.
total
LAMB
Lamb Chops
1/2-inch to
1-inch thick
350°F brown
200°F finish
Use 2 tbsp. of fat heated to 350°F
to brown meat 5 min. on each side.
Add 2 - 3 cups of liquid. Turn Temperature Control Dial down to 200°F. Cover.
Cook for 20 - 30 min. or until tender.
Add more liquid as it necessary.
30 to
40 min.
total
Use 2 tbsp. of fat heated to 350°F to
brown meat 5 - 10 min. on each side.
Add 2 - 3 cups of liquid. Turn Temperature Control Dial down to 200°F. Cover.
Cook for 30 - 40 min. or until tender and
completely cooked. Add more liquid
as necessary.
40 min.
to 1 hr.
total
Use 1/4 cup of fat heated to 350°F to
brown meat 5 min. each side. Add 2 - 3
cups of liquid. Turn Temperature Control
Dial down to 200°F. Cover. Cook for 20 30 min. or until tender. Add more liquid
as necessary.
30 to
40 min.
total
PORK
Pork Chops
1/2-inch to
1-inch thick
350°F brown
200°F finish
VEAL
Veal Chops
1/2-inch to
1-inch thick
350°F brown
200°F finish
3
12
FS12B_IB.qxp
5/4/2007
4:05 PM
Page 5
NOTES
ADDITIONAL
IMPORTANT SAFEGUARDS
CAUTION HOT SURFACES: This appliance generates heat and
escaping steam during use. Proper precautions must be taken to
prevent the risk of burns, fires, or other injury to persons or damage to property.
CAUTION: This appliance is hot during operation and retains
heat for some time after turning off. Always use oven mitts when
handling hot materials and allow metal parts to cool before cleaning. Do not place anything on top of the appliance while it is operating or while it is hot.
1. All users of this appliance must read and understand this
Owner’s Manual before operating or cleaning this appliance.
2. The cord to this appliance should be plugged into a 120V AC
electrical outlet only.
3. If this appliance begins to malfunction during use, immediately unplug the cord. Do not use or attempt to repair the malfunctioning appliance.
4. Do not leave this appliance unattended during use.
13
2
FS12B_IB.qxp
5/4/2007
4:05 PM
Page 3
IMPORTANT SAFEGUARDS
NOTES
When using electrical appliances, basic safety precautions should
always be followed, including the following:
1. Read all instructions.
2. Do not touch hot surfaces. Use handles or knobs. Use oven
mitts or potholders.
3. To protect against electrical shock, do not immerse cord or
plugs in water or other liquid.
4. Close supervision is necessary when any appliance is used
near children.
5. Unplug from outlet when not in use and before cleaning.
Allow to cool before putting on or taking off parts, and before
cleaning the appliance.
6. Do not operate any appliance with a damaged cord or plug or
after the appliance malfunctions, or has been damaged in
any manner. Contact Consumer Service for examination,
repair or adjustment.
7. The use of accessory attachments not recommended by the
appliance manufacturer may cause injuries.
8. Do not use outdoors.
9. Do not let cord hang over edge of table or counter, or touch
hot surfaces.
10. Do not place on or near a hot gas or electric burner, or in a
heated oven.
11. Extreme caution must be used when moving an appliance
containing hot oil or other hot liquids.
12. Always attach plug to appliance first, then plug cord in the
wall outlet. To disconnect, turn any control to “OFF”, then
remove plug from wall outlet.
13. Do not use appliance for other than intended use.
SAVE THESE INSTRUCTIONS
FOR HOUSEHOLD USE ONLY
1
14
FS12B_IB.qxp
5/4/2007
4:05 PM
Page 1
LIMITED ONE-YEAR WARRANTY
Warranty Coverage: This product is warranted to be free from defects in materials
or workmanship for a period of one (1) year from the original purchase date. This
product warranty is extended only to the original consumer purchaser of the product
and is not transferable. For a period of one (1) year from the date of original purchase of the product, our Repair Center will, at its option, either (1) repair the product
or (2) replace the product with a reconditioned comparable model. These remedies
are the purchaser's exclusive remedies under this warranty.
Warranty Service: To obtain warranty service, you must call our warranty service
number at 1-800-233-9054 for return instructions on how to deliver the product, in
either the original packaging or packaging affording an equal degree of protection to
the Repair Center specified below. You must enclose a copy of your sales receipt or
other proof of purchase to demonstrate eligibility for warranty coverage.
To return the appliance, ship to:
ATTN: Repair Center
708 South Missouri Street
Macon, MO 63552 USA
To contact us, please write to, call, or email:
Consumer Relations Department
PO Box 7366
Columbia, MO 65205-7366 USA
Phone: 1-800-233-9054
Email: [email protected]
What Is Not Covered: This warranty does not cover damage resulting from misuse,
accident, commercial use, improper service or any other damage caused by anything
other than defects in material or workmanship during ordinary consumer use. This
warranty is invalid if the serial number has been altered or removed from the product. This warranty is valid only in the United States and Canada.
LIMITATION ON DAMAGES: THERE SHALL BE NO LIABILITY FOR ANY INCIDENTAL OR CONSEQUENTIAL DAMAGES FOR BREACH OF ANY EXPRESS OR
IMPLIED WARRANTY OR CONDITION ON THIS PRODUCT.
DURATION OF IMPLIED WARRANTIES: EXCEPT TO THE EXTENT PROHIBITED
BY APPLICABLE LAW, ALL IMPLIED WARRANTIES AND CONDITIONS, INCLUDING, WITHOUT LIMITATION, IMPLIED WARRANTIES AND CONDITIONS OF
MERCHANTABILITY AND FITNESS FOR A PARTICULAR PURPOSE OR USE
ON THIS PRODUCT ARE LIMITED IN DURATION TO THE DURATION OF THIS
WARRANTY.
Some jurisdictions do not allow the exclusion or limitation of incidental or consequential damages, or allow limitations on how long an implied warranty lasts, so the above
limitations or exclusions may not apply to you. This warranty gives you specific legal
rights and you may have other rights under the laws of your jurisdiction.
For more information on our products, visit our website:
www.maxim-toastmaster.com.
Farberware is a registered trademark of Farberware Licensing Company, LLC.
Manufactured and sold pursuant to a license from Farberware Licensing
Company, LLC.
©2007 Farberware Licensing Company, LLC. All rights reserved.
Made in China
5/07
USE & CARE INSTRUCTIONS
Electric Skillet
FS12B