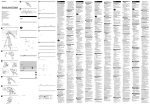
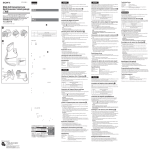
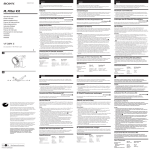
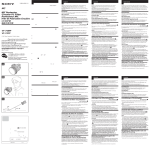
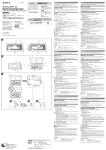
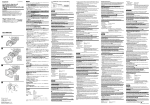
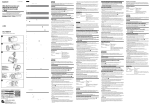
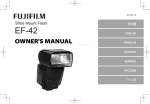
1
English
Français
Deutsch
3-862-589-13 (1)
Thank you for purchasing the Sony Video Camera Polarizing Filter Kit.
Before operating this unit, read this manual thoroughly and retain it for future
reference.
Video Camera
Polarizing Filter Kit
Features
• This PL (Polarizing) filter is effective for removing light reflections from glass
and water surfaces, as well as brightening the hue and enhancing the colour
contrast when filming outdoor scenery.
• This MC protector is multi coated (MC) on both sides to prevent damage.
Danke, daß Sie sich für das Sony-Polarisationsfilterset für Videokameras
entschieden haben.
Lesen Sie diese Anleitung vor Inbetriebnahme des Geräts bitte genau durch, und
bewahren Sie sie zum späteren Nachschlagen sorgfältig auf.
Caractéristiques
Merkmale und Funktionen
• Ce filtre PL (polarisant) supprime efficacement les légers reflets sur le verre et
l’eau, rend les teintes plus lumineuses et renforce le contraste des couleurs
lorsque vous réalisez des prises de vue en extérieur.
• Cette protection MC est traitée multicouches (Multi Coated/MC) sur les deux
faces de façon à prévenir tout dommage.
Attaching the PL filter/MC protector
Operating Instructions
Mode d’emploi
Bedienungsanleitung
Manual de instrucciones
Gebruiksaanwijzing
Istruzioni per l’uso
See illustration A.
Attach and tighten the PL filter or MC protector onto the screw threads of the
camera lens accessory position of the camcorder.
Installation du filtre PL/protection MC
Voir illustration A.
Montez et serrez le filtre PL ou la protection MC sur le filetage du porteaccessoires de l’objectif de la caméra ou du caméscope.
Using the PL filter
• Because the exposure increases by three to four times with the PL filter on, the
image may be slightly out of focus. In this case, manually adjust the focus.
• The most effective angle for removing surface reflections is 30˚ to 40˚ with the
PL filter on. Other angles (for example: 90˚ –– directly in front of the reflected
surface) are not effective. See illustration B.
• To darken the blue sky for filming scenery with the PL filter on, shooting an
object with the sun behind you is most effective. When you shoot into the
sun, the effect becomes weaker.
• This PL filter is a processed filter with polarizing film on the optical glass;
therefore, do not leave the filter in a place subject to heat, humidity, or direct
sunlight. (High temperatures may cause colour change.) Be careful in
handling.
• The four corners of the screen may be clipped (eclipsed) when you attach the
wide conversion lens to the MC protector. In this case, press the T side of the
zoom button a little, and delete the eclipsed portions.
• When you put the PL filter into the case, make sure to put the filter face down,
with the screw threads upward. See illustration C.
• This PL filter cannot be used with wide conversion or other lenses.
VF-37PK S
Sony Corporation © 1998 Printed in Japan
A
Cleaning the PL filter/MC protector
Brush off the dust on the surface of the lens with a blower brush or soft brush.
Wipe off fingerprints or other smears with a soft cloth slightly moistened with a
mild detergent solution.
Specifications
Screw diameter
Dimensions
Maximum diameter
Height
Mass
Supplied accessories
B
• Mit dem PL-Filter (Polarisationsfilter) können Sie Lichtreflexionen bei Glasund Wasseroberflächen vermeiden sowie bei Außenaufnahmen die Farbtöne
aufhellen und den Farbkontrast verstärken.
• Der MC-Schutzfilter ist auf beiden Seiten mehrfach beschichtet (MC = Multi
Coated), um Schäden zu vermeiden.
Anbringen des PL-Filters/MC-Schutzfilters
Siehe Abbildung A.
Bringen Sie den PL-Filter oder MC-Schutzfilter auf dem Zubehörgewinde am
Kameraobjektiv des Camcorders an, und drehen Sie ihn fest.
Der PL-Filter
While looking into the view finder (EVF) or the LCD screen of the camcorder,
rotate the rotor ring of the PL filter. At the point the light reflection disappears or
the blue sky becomes deeper and scenery stands out clearly, stop rotating the
rotor ring and begin shooting.
Notes
PL filter
M37 × 0.75
MC protector
M37 × 0.75
Approx. ø 40 mm (1 5/8 in.) Approx. ø 41 mm (1 5/8 in.)
Approx. 8.5 mm (11/32 in.)
Approx. 7 mm (9/32 in.)
Approx. 11 g (0.4 oz)
Approx. 9 g (0.3 oz)
Case (1)
Operating Instructions (1)
Español
30˚ – 40˚
Nous vous remercions d’avoir fait l’acquisition de ce kit de filtre polarisant pour
caméra vidéo Sony.
Avant de faire fonctionner cet appareil, veuillez lire attentivement le présent
mode d’emploi et le conserver pour toute référence ultérieure.
Utilisation du filtre PL
Tout en regardant dans le viseur (EVF) ou sur l’écran LCD du caméscope, faites
tourner la bague rotative du filtre PL. Dès que les reflets lumineux disparaissent
ou que le bleu du ciel devient plus profond et que le sujet ressort clairement,
cessez de tourner la bague et démarrez votre prise de vue.
Schauen Sie durch den Sucher (EVF) oder auf den LCD-Bildschirm des
Camcorders, und drehen Sie den Rotorring des PL-Filters. Wenn die
Lichtreflexion verschwindet bzw. das Blau des Himmels dunkler wird und die
Kontraste deutlich hervortreten, drehen Sie den Rotorring nicht mehr weiter und
beginnen mit der Aufnahme.
Hinweise
Remarques
• Etant donné que l’exposition augmente d’un facteur de deux à quatre lorsque
le filtre PL est installé, il se peut que l’image soit légèrement floue. Dans ce cas,
réglez manuellement la mise au point.
• Le meilleur angle de prise de vue pour éliminer les reflets est compris entre 30
et 40˚ avec le filtre PL installé. Les autres angles (par exemple: 90˚ ––
directement face à la surface réfléchie) sont inefficaces. Voir illustration B.
• Pour assombrir le bleu du ciel ou réaliser des prises de vue avec le filtre PL
installé, vous obtiendrez les meilleurs résultats si vous vous placez avec le soleil
dans le dos. L’effet est moins marqué lors des prises de vue avec le soleil de face.
• Ce filtre PL a été traité par application d’un film polarisant sur du verre
optique; par conséquent, ne laissez pas le filtre dans un endroit exposé à la
chaleur, l’humidité ou au rayonnement direct du soleil. (Des températures
élevées peuvent entraîner une décoloration.) Manipulez-le avec précaution.
• Il se peut que les quatre angles de l’image soient éclipsés (vignetage) lorsque
vous montez le convertisseur grand-angulaire sur la protection MC. Dans ce
cas, appuyez légèrement sur le côté “T” de la commande du zoom de façon à
faire disparaître le vignetage.
• Lorsque vous rangez le filtre PL dans son étui, placez-le avec le côté filtre vers
le bas et la monture filetée vers le haut. Voir illustration C.
• Ce filtre PL ne peut être sélectionné avec un convertisseur grand-angulaire ou
d’autres objectifs.
• Wenn der PL-Filter angebracht ist, wird die Belichtung um das Drei- bis
Vierfache erhöht. Aus diesem Grund kann das Bild leicht unscharf werden.
Stellen Sie in diesem Fall den Fokus von Hand ein.
• Der geeignetste Winkel zum Vermeiden von Oberflächenreflexionen liegt bei
30° bis 40°, wenn der PL-Filter angebracht ist. Andere Winkel (z. B. 90° ––
direkt vor der reflektierten Oberfläche) sind nicht geeignet. Siehe Abbildung
B.
• Wenn Sie den PL-Filter angebracht haben und das Blau des Himmels für die
Aufnahmen sehr kräftig gestalten wollen, ist es am besten, wenn sich die
Sonne beim Aufnehmen des Motivs hinter Ihnen befindet. Wenn Sie gegen die
Sonne aufnehmen, wird der Effekt abgeschwächt.
• Dieser PL-Filter ist ein beschichteter Filter mit Polarisationsfilm auf der Linse.
Lassen Sie den Filter aus diesem Grund nicht an einem Ort, an dem er Hitze,
Feuchtigkeit oder direktem Sonnenlicht ausgesetzt ist. Hohe Temperaturen
können Verfärbungen verursachen. Gehen Sie vorsichtig mit dem Filter um.
• Die vier Ecken des Bildschirms werden möglicherweise abgeschnitten, wenn
Sie den Weitwinkelkonverter an den MC-Schutzfilter anbringen. Drücken Sie
in diesem Fall leicht auf die T-Seite der Zoom-Taste, und eliminieren Sie die
abgeschnittenen Bereiche.
• Wenn Sie den PL-Filter in den Behälter legen, legen Sie ihn unbedingt mit dem
Schraubengewinde nach oben. Siehe Abbildung C.
• Dieser PL-Filter kann nicht zusammen mit Weitwinkelkonvertern oder
anderen Konversionsobjektiven eingesetzt werden.
Nettoyage du filtre PL/protection MC
Reinigen des PL-Filters/MC-Schutzfilters
Chassez la poussière de la surface de l’objectif à l’aide d’une soufflette. Essuyez les
traces de doigts et autres souillures à l’aide d’un chiffon doux légèrement
imprégné d’une solution détergente neutre.
Entfernen Sie Staub auf der Oberfläche mit einem Staubbläser oder einem
weichen Pinsel. Entfernen Sie Fingerabdrücke oder andere Flecken mit einem
weichen Tuch, das Sie leicht mit einem milden Reinigungsmittel angefeuchtet
haben.
Spécifications
Diamètre de vissage
Dimensions
Diamètre maximum
Hauteur
Masse
Accessoires fournis
Filtre PL
M37 × 0,75
Protection MC
M37 × 0,75
Env. ø 40 mm (1 5/8 pouces) Env. ø 41 mm (1 5/8 pouces)
Env. 8,5 mm (11/32 pouces) Env. 7 mm (9/32 pouces)
Env. 11 g (0,4 oz)
Env. 9 g (0,3 oz)
Etui (1)
Mode d’emploi (1)
Nederlands
Technische Daten
Gewindedurchmesser
Abmessungen
Maximaler Durchmesser
Höhe
Gewicht
Mitgeliefertes Zubehör
PL-Filter
M37 × 0,75
MC-Schutzfilter
M37 × 0,75
ca. ø 40 mm
ca. ø 41 mm
ca. 8,5 mm
ca. 7 mm
ca. 11 g
ca. 9 g
Behälter (1)
Bedienungsanleitung (1)
Italiano
30˚ – 40˚
C
With the screw
threads upward
Avec la monture
filetée vers le haut
Mit dem
Schraubengewinde
nach oben
Con la rosca hacia
arriba
Met de schroefdraad
naar boven
Con le filettature
rivolte verso l’alto
This mark indicates that this product is a genuine accessory for
Sony video products. When purchasing Sony video products,
Sony recommends that you purchase accessories with this
“GENUINE VIDEO ACCESSORIES” mark.
Cette marque indique que le produit est un accessoire
authentique destiné aux produits vidéo Sony. Lorsque vous
achetez des produits vidéo Sony, il est recommandé d’acheter les
produits affichant ce logo “GENUINE VIDEO ACCESSORIES”.
Diese Markierung gibt an, daß dieses Produkt ein
Originalzubehörteil für Sony-Videoprodukte ist. Beim Kauf von
Sony-Videoprodukten empfiehlt Sony, daß Sie Zubehör mit dem
Zeichen „GENUINE VIDEO ACCESSORIES” kaufen.
Esta marca indica que este producto es un componente original
de nuestros equipos de vídeo. Al realizar la compra de
componentes de equipos de vídeo Sony, se recomienda adquirir
productos con la marca “GENUINE VIDEO ACCESSORIES”.
Dit merkteken geeft aan dat dit een origineel accessoire is voor
Sony videoprodukten. Bij aankoop van Sony video-apparatuur
raadt Sony u dan ook aan accessoires met dit “GENUINE VIDEO
ACCESSORIES” merkteken te kopen.
Questo marchio indica che il prodotto è realmente compatibile
con le apparecchiature Sony. Quando si acquistano prodotti
video Sony, si raccomanda di acquistare gli accessori con il
marchio “GENUINE VIDEO ACCESSORIES”.
Gracias por adquirir el kit de filtro polarizador de videocámara de Sony.
Antes de utilizar la unidad, lea detenidamente este manual y consérvelo para
futuras consultas.
Dank u voor uw aankoop van dit polariserend filter voor Sony camcorders.
Lees deze gebruiksaanwijzing aandachtig vooraleer u met het toestel gaat
werken en bewaar ze zodat u ze achteraf nog kunt raadplegen.
Características
Kenmerken
• Este filtro PL (polarizador) resulta eficaz para eliminar reflejos de luz de las
superficies de vidrio y agua, así como para intensificar el matiz y mejorar el
contraste entre los colores al fotografiar paisajes exteriores.
• Este protector MC lleva un revestimiento múltiple (Multi Coated/MC) en
ambos lados para evitar daños.
• Dit PL (polariserend) filter is bijzonder geschikt om lichtreflecties van glas- en
wateroppervlakken tegen te gaan en het kleurcontrast te verhogen bij filmen
buitenshuis.
• Deze MC beschermer is aan weerszijden meervoudig gecoat (Multi Coated/
MC) om beschadiging te voorkomen.
Conexión del filtro PL/protector MC
PL filter/MC beschermer aanbrengen
Consulte la ilustración A.
Zie illustratie A.
Fije y apriete el filtro PL o protector MC sobre las roscas de los tornillos en la
posición para accesorios del objetivo de la videocámara.
Bevestig het PL filter of de MC beschermer op de schroefdraad van de
camcorderlens.
Uso del filtro PL
Gebruik van het PL filter
Mientras observa el visor electrónico (EVF) o la pantalla LCD de la videocámara,
gire el anillo rotativo del filtro PL. En el punto donde desaparece el reflejo de luz
o donde el color del cielo azul y el paisaje adquieren más nitidez, deje de girar y
empiece a filmar.
Kijk door de beeldzoeker of naar het LCD-scherm van de camcorder en draai aan
de ring van het PL filter. Wanneer de lichtreflectie verdwijnt of de lucht dieper
blauw wordt en de contouren scherp omlijnd zijn, stopt u met draaien en begint
u te filmen.
Notas
Opmerkingen
• Puesto que la exposición aumenta tres o cuatro veces al utilizar el filtro PL, es
posible que la imagen se desenfoque ligeramente. En este caso, ajuste el
enfoque de forma manual.
• El ángulo más eficaz para eliminar los reflejos de las superficies es de 30˚ a 40˚
con el filtro PL puesto. Otros ángulos (por ejemplo: 90˚–– justo delante de la
superficie reflejada) no resultan eficaces. Consulte la ilustración B.
• Para oscurecer el color azul del cielo al filmar paisajes con el filtro PL puesto,
es preferible colocarse con el sol a sus espaldas para filmar un objeto. El efecto
es menos pronunciado al filmar con sol.
• Este filtro PL es un filtro procesado con una película polarizadora sobre el
vidrio óptico; por tanto, no debe dejarse en lugares expuestos al calor, la
humedad o la luz solar directa (las temperaturas altas pueden producir
cambios de color). Tenga cuidado al manipularlo.
• Las cuatro esquinas de la pantalla pueden quedar tapadas (eclipsadas) al
conectar el objetivo de conversión panorámica al protector MC. En este caso,
presione ligeramente sobre el lado T del botón de zoom y borre las partes
eclipsadas.
• Al colocar el filtro PL en el estuche, asegúrese de situar la cara del filtro hacia
abajo, con las roscas de los tornillos hacia arriba. Consulte la ilustración C.
• Este filtro PL no puede emplearse con objetivos de conversión panorámica ni
con otros objetivos.
• Doordat de belichting met het PL filter drie tot vier maal groter is, kan het
beeld ietwat onscherp zijn. Stel dan handmatig scherp.
• De meest efficiënte hoek om reflecties te verwijderen is 30˚ tot 40˚ met het PL
filter aan. Andere hoeken (bijvoorbeeld 90˚ –– vlak voor het reflecterend
oppervlak) zijn niet efficiënt. Zie illustratie B.
• Voor een diepblauwe lucht bij het filmen met het PL filter aan, filmt u het best
met uw rug naar de zon gekeerd. Bij filmen met tegenlicht is het effect
zwakker.
• Dit PL filter is een behandeld filter met glas dat is voorzien van een
polariserende film; laat het filter dan ook niet achter op een plaats waar het is
blootgesteld aan warmte, vocht of directe zonnestraling. (Hoge temperaturen
kunnen kleurverschillen veroorzaken.) Behandel het filter voorzichtig.
• De vier hoeken van het scherm kunnen zijn afgesneden wanneer u de
groothoeklens op de MC beschermer plaatst. Druk dan op de T-zijde van de
zoomknop tot de hoeken weer zichtbaar zijn.
• Plaats het PL filter altijd met de voorkant naar beneden en de schroefdraad
naar boven in de houder. Zie illustratie C.
• Dit PL filter kan niet worden gebruikt met groothoek- of andere lenzen.
Limpieza del filtro PL/protector MC
Quite el polvo de la superficie del objetivo con un cepillo soplador o un cepillo
suave. Limpie las huellas u otras marcas con un paño suave ligeramente
humedecido con una solución detergente poco concentrada.
Especificaciones
Diámetro del tornillo
Dimensiones
Diámetro máximo
Altura
Masa
Accesorios suministrados
Filtro PL
M37 × 0,75
Protector MC
M37 × 0,75
Aprox. ø 40 mm Aprox. ø 41 mm
Aprox. 8,5 mm Aprox. 7 mm
Aprox. 11 g
Aprox. 9 g
Estuche (1)
Manual de instrucciones (1)
Complimenti per avere acquistato il kit del filtro polarizzante (PL) Sony per
videocamere.
Prima di far funzionare questo apparecchio, leggere attentamente tutto il
manuale di istruzioni e conservarlo per riferimenti futuri.
Caratteristiche
• Questo filtro PL (polarizzante) serve per eliminare i riflessi di luce da vetri e
superfici d’acqua, come pure per esaltare le tinte e i contrasti di colore durante
le riprese in esterni.
• Questa protezione MC (MC, Multi Coated) è dotata di più strati su entrambi i
lati per evitare danneggiamenti.
Installazione del filtro PL o della protezione MC
Vedere la figura A.
Installare e stringere il filtro PL o la protezione MC nelle filettature della
posizione accessoria dell’obiettivo della videocamera.
Utilizzo del filtro PL
Mentre si guarda nel mirino (EVF) o nello schermo a cristalli liquidi della
videocamera, ruotare l’anello del filtro PL. Quando scompare il riflesso della luce
o il blu del cielo diventa più scuro e le immagini più chiare, bloccare la rotazione
dell’anello e cominciare la ripresa.
Note
PL filter/MC beschermer reinigen
• Dal momento che il tempo di esposizione aumenta di tre o quattro volte con il
filtro PL installato, l’immagine potrebbe risultare leggermente sfuocata. In
questo caso, regolare il fuoco manualmente.
• L’angolo più adeguato per eliminare i riflessi di superficie va dai 30° ai 40° con
il filtro PL installato. Altri angoli, come quello di 90°, direttamente davanti alla
superficie riflessa, non sono adeguati. Vedere la figura B.
• Per scurire il blu del cielo per uno scenario da filmare con il filtro PL installato,
la procedura migliore consiste nel riprendere un soggetto avendo il sole alle
spalle. Se si riprende contro luce, l’effetto è minore.
• Questo filtro PL è un filtro trattato con pellicola polarizzante su vetro ottico;
pertanto si consiglia di non lasciare il filtro in luoghi soggetti a calore, umidità o
esposti alla luce diretta del sole, in quanto temperature elevate possono provocare
un cambiamento di colore. Si consiglia inoltre di maneggiarlo con cura.
• I quattro angoli dello schermo potrebbero venire parzialmente coperti nel
momento in cui si installa l’obiettivo di conversione ampia nella protezione
MC. In questo caso, premere leggermente il lato T del tasto zoom ed eliminare
le parti coperte.
• Quando si ripone il filtro PL nella custodia, assicurarsi che il filtro sia rivolto
verso il basso e le filettature verso l’alto. Vedere la figura C.
• Questo filtro PL non può essere utilizzato con obiettivi di conversione ampia o
con altri obiettivi.
Verwijder stof van de lens met een blazer of een zachte borstel. Verwijder
vingerafdrukken of ander vuil met een zachte doek die lichtjes is bevochtigd met
een mild zeepsopje.
Pulizia del filtro PL o della protezione MC
Technische gegevens
Togliere la polvere dalla superficie dell’obiettivo con una spazzola a soffietto o
con una spazzola morbida. Pulire le impronte o le altre macchie con un panno
soffice inumidito con una soluzione detergente leggera.
Schroefdiameter
Afmetingen
Maximum diameter
Hoogte
Gewicht
Meegeleverde accessoires
PL filter
M37 × 0,75
MC beschermer
M37 × 0,75
Ong. ø 40 mm Ong. ø 41 mm
Ong. 8,5 mm
Ong. 7 mm
Ong. 11 g
Ong. 9 g
Houder (1)
Gebruiksaanwijzing (1)
Caratteristiche tecniche
Diametro della vite
Dimensioni
Diametro massimo
Altezza
Peso
Accessori in dotazione
Filtro PL
M37 × 0,75
Protezione MC
M37 × 0,75
Circa ø 40 mm Circa ø 41 mm
Circa 8,5 mm
Circa 7 mm
Circa 11 g
Circa 9 g
Custodia (1)
Istruzioni per l’uso (1)
Svenska
Video Camera
Polarizing Filter Kit
Bruksanvisning
Manual de instruções
Инструкция по эксплуатации
#######
######
VF-37PK S
A
Português
Tack för att du visade oss förtroendet att välja Sony Video Camera Polarizing
Filter Kit.
Innan du börjar använda enheten bör du läsa denna handbok noggrant och spara
den för framtida bruk.
Obrigado por ter adquirido o kit de filtros de polarização para câmaras de vídeo
da Sony.
Antes de utilizar o aparelho, leia este manual até ao fim e guarde-o para
consultas futuras.
Благодарим Вас за приобретение поляризующего фильтра фирмы Sony для
видеокамеры в комплекте.
Прежде чем пользоваться изделием, внимательно прочтите эту инструкцию и
сохраните ее на случай, если она понадобится в будущем.
Funktioner
Funções
Описание
• Detta PL-filter (polariserande) tar effektivt bort ljusreflexer från glas- och
vattenytor. Det gör även färgerna klarare och framhäver färgkontraster när du
filmar utomhus.
• Detta MC-skydd har många skyddande lager (Multi Coated - MC) på båda
sidor för att förhindra skador.
• Este filtro PL (Polarização) é eficiente a eliminar o reflexo da luz na água ou
nos vidros, bem como a dar maior luminosidade às cores e a melhorar o
respectivo contraste quando se filmam cenas de exterior.
• Este protector MC está revestido com várias camadas (MC - Multi Coated) em
ambos os lados para evitar danos.
• Поляризующий фильтр предназначен для устранения отблесков стеклянных
и водных поверхностей, а также для получения более ярких тонов и
повышения цветовой контрастности при съемках под открытым небом.
• Для предотвращения повреждений защитная насадка имеет многослойное
покрытие (Multi Coated/MC) с обеих сторон.
Sätta fast PL-filtret/MC-skyddet
Montar o filtro PL/protector MC
Присоединение поляризующего фильтра/защитной
насадки
См. иллюстрацию A.
Se bild A.
Monte e aperte o filtro PL ou o protector MC nas roscas da posição acessórios da
lente da câmara de video.
Använda PL-filter
Utilizar o filtro PL
Пользование поляризующим фильтром
Samtidigt som du tittar i sökaren (EVF) eller LCD-skärmen på kameraspelaren
vrider du på inställningsringen på PL-filtret. Då ljusreflexerna försvinner eller
den blå himlen verkar djupare och landskapet framträder tydligare avbryter du
inställningen och börjar filma.
Olhando através do visor electrónico (EVF) ou do ecrã de LCD da câmara de
video, rode o anel do filtro PL. Logo que desaparecer a reflexão da luz ou
quando o céu azul ficar mais profundo e a cena sobressair nitidamente, pare de
rodar o anel e comece a filmar.
Глядя в видоискатель или на жидкокристаллический дисплей видеокамеры,
вращайте кольцо поляризующего фильтра. Когда световые блики исчезнут или
когда будут получены более глубокие тона неба и повышенная контрастность
пейзажа, прекратите вращение и начинайте съемку.
Observera
Notas
• Eftersom exponeringstiden ökar tre till fyra gånger när PL-filtret är på, kan
bilden bli något oskarp. Ställ i så fall in fokus manuellt.
• I vinkel på 30˚ till 40˚ tar du mest effektivt bort ytreflexer med PL-filtret på.
Andra vinklar (t ex: 90˚ –– mitt framför den reflekterande ytan) ger inte lika
bra resultat. Se bild B.
• Om du vill ha en mörkare blå himmel då du filmar landskap med PL-filtret
på, får du bäst resultat om du har solen bakom dig. När du filmar mot solen
blir effekten inte lika stor.
• Detta filter är ett behandlat filter med ett polariserande skikt på det optiska
glaset. Förvara det därför inte på plaser där det kan usättas för hetta, fukt eller
direkt solljus. (Höga temperaturer kan orsaka färgförändringar.) Hanteras
varsamt.
• Det kan hända att bildskärmens fyra hörn klipps bort (blir mörka) när du
ansluter vidvinkelkonvertern till MC-skyddet. Om så är fallet, tryck lätt på Tsidan på zoomknappen och radera de mörka fälten.
• Se till att du lägger PL-filtret med framsidan nedåt och skruvgängorna uppåt
då du lägger det i väskan. Se bild C.
• Du kan inte använda det här PL-filtret tillsammans med andra
vidvinkelkonvertrar eller andra linser.
• Como a exposição aumenta três ou quatro vezes com o filtro PL montado, a
imagem pode ficar ligeiramente desfocada. Se isso acontecer, regule
manualmente a focagem.
• O ângulo mais eficiente para eliminar as reflexões das superfícies é de 30˚ a 40˚
com o filtro PL montado. Os outros ângulos não são eficientes (por exemplo:
um ângulo de 90˚ –– directamente em frente da superfície reflectida). Consulte
a figura B.
• Se quiser escurecer o céu azul a fim de filmar cenas com o filtro PL montado, é
melhor filmar um objecto com o sol por trás. Se filmar virado para o sol, o
efeito fica mais fraco.
• O filtro PL é fabricado com uma película de polarização no vidro óptico;
assim, não o deixe num local exposto ao calor, humidade ou à luz solar
directa. (As temperaturas elevadas podem provocar alterações na cor.) Tenha
cuidado ao manusear o filtro.
• Os quatro cantos do ecrã podem ficar cortados (encobertos) quando montar a
grande angular no protector MC. Se isso acontecer, carregue levemente no
lado T do botão de zoom e apague as partes encobertas.
• Quando colocar o filtro na caixa, coloque-o voltado para baixo e com as roscas
voltadas para cima. Consulte a figura C.
• O filtro PL não pode ser utilizado com grandes angulares ou outras lentes.
Borsta av dammet på linsens yta med en blåsborste eller en mjuk borste. Torka
av fingeravtryck eller andra fläckar med en torr, mjuk duk eller en mjuk duk lätt
fuktad med en mild rengöringslösning.
Tekniska data
Skruvdiameter
Mått
Maxdiameter
Höjd
Vikt
Medföljande tillbehör
30˚ – 40˚
30˚ – 40˚
C
Med skruvgängorna
vända uppåt
Com as roscas
voltadas para cima
Резьбой вверх
Detta märke visar att produkten är ett Sony-originaltillbehör. När
du köper Sonys videoutrustning rekommenderar vi att du enbart
köper tillbehör försedda med märkningen “GENUINE VIDEO
ACCESSORIES”.
Esta marca indica que este produto é um acessório genuíno para
equipamento de vídeo Sony. A Sony recomenda-lhe que, quando
adquirir equipamento de vídeo Sony, adquira também acessórios
com o logótipo “GENUINE VIDEO ACCESSORIES”.
Настоящий знак указывает, что данная продукция является
подлинной принадлежностью видеопродукции Sony. Если
Вы покупает видеопродукцию Sony, то мы рекомендуем,
чтобы Вы покупали принадлежности со знаком “GENUINE
VIDEO ACCESSORIES”.
Consulte a figura A.
Skruva fast PL-filtret eller MC-skyddet på platsen för kameralinstillbehör på
kameraspelaren.
Rengöra PL-filtret/MC-skyddet
B
Русский
PL-filter
M37 × 0,75
MC-skydd
M37 × 0,75
Ca. ø 40 mm
Ca. ø 41 mm
Ca. 8,5 mm
Ca. 7 mm
Ca. 11 gr
Ca. 9 gr
Väska (1)
Bruksanvisning (1)
Плотно наверните поляризующий фильтр или защитную насадку на резьбовый
фланец объектива видеокамеры.
Примечания
Limpar o filtro PL/protector MC
Limpe o pó da superfície da lente com um soprador ou uma escova macia.
Limpe as dedadas ou outras manchas com um pano macio humedecido numa
solução de detergente suave.
• Поскольку при использовании поляризующего фильтра экспозиция
увеличивается в три-четыре раза, это может вызывать расфокусировку
изображения. В подобных случаях резкость следует подстраивать вручную.
• Поляризующий фильтр лучше всего устраняет поверхностные отблески при
съемке под углом 30° - 40°. При других углах съемки (например, 90°, т.е. прямо
напротив отражающей поверхности) он менее эффективен. См. рис. B.
• Для получения более темного фона неба съемку с поляризующим фильтром
удобнее всего вести спиной к солнцу. При съемке против солнца
эффективность применения фильтра снижается.
• Поляризующий фильтр изготовлен путем особой обработки оптического
стекла с нанесением на него поляризующей пленки; его не следует
подвергать длительному воздействию высоких темератур, чрезмерной
влажности или прямого солнечного света (нагревание фильтра может
привести к изменению его окраски). При обращении с фильтром следует
соблюдать осторожность.
• При использовании защитной насадки в сочетании с широкоугольным
конверсионным объективом углы изображения могут оказаться обрезанными
(затемненными). В этом случае устраните затемненные участки легким
нажатием на сторону Т кнопки управления трансфокатором.
• Помещайте поляризующий фильтр в футляр только стеклом вниз, а резьбой
наружу. См. рис. C.
• Данный поляризующий фильтр не может использоваться с широкоугольными
конверсионными или другими объективами.
Уход за поляризующим фильтром/защитной
насадкой
Очищайте поверхность линзы от пыли продувающей щеточкой или мягкой
кисточкой. Отпечатки пальцев и другие пятна стирайте мягкой салфеткой,
слегка смоченной слабым раствором моющего средства.
Características
Diâmetro das roscas
Dimensões
Diâmetro máximo
Altura
Peso
Acessórios fornecidos
Filtro PL
M37 × 0,75
Protector MC
M37 × 0,75
Aprox. ø 40 mm Aprox. ø 41 mm
Aprox. 8,5 mm Aprox. 7 mm
Aprox. 11 g
Aprox. 9 g
Caixa (1)
Manual de instruções (1)
Технические данные
Диаметр резьбы
Габариты
Максимальный диаметр
Высота
Масса
Комплектующие принадлежности
Поляризующий
фильтр
М37 × 0,75
Защитная
насадка
М37 × 0,75
Около ø 40 мм
Около 41 ø мм
Около 8,5 мм
Около 7 мм
Около 11 г
Около 9 г
Футляр (1)
Инструкция по эксплуатации (1)