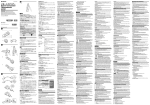
1
4-452-077-01(1) Adjusting the level 2 1 1 2 3 a ˎ WARNING ˎ Remote control Tripod Trépied à télécommande Before operating the product, please read this manual thoroughly and retain it for future reference. 1 ˎ 3 Operating Instructions Mode d’emploi Bedienungsanleitung Manual de instrucciones Gebruiksaanwijzing Istruzioni per l’uso This product has been tested and found compliant with the limits set out in the EMC regulation for using connection cables shorter than 3 meters. 360° 1 2 For Customers in the U.S.A. 3 4 4 5 c 8 6 ˎ ˎ ˎ b VCT-VPR1 ©2013 Sony Corporation To reduce the risk of fire or electric shock, 1) do not expose the unit to rain or moisture. 2) do not place objects filled with liquids, such as vases, on the apparatus. Printed in China d TI MULTI 13 1 2 L MU POWER/REC (e) 1 2 3 14 15 16 17 18 19 20 21 22 4 5 6 7 8 POWER START/STOP POWER/REC 9 24 10 25 26 11 2 2 ˎ 1 4 5 1 6 ON/OFF ON/OFF 2 3 5 4 a b c OFF 2 d ˎ ON/ ˎ B PHOTO PUSH RELEASE f g T W A POWER PHOTO START/STOP GRID LINE ˎ ˎ SLOW ZOOM PUSH RELEASE b OFF POWER/REC GRID LINE (g) GRID LINE * POWER 1 2 a 3 4 5 3 1 2 (a) 1 3 4 (c) 3 kg 360 90 55 4 POWER PHOTO T/W START/STOP PUSH RELEASE GRID LINE SLOW ZOOM 1 465 mm (b) 480 mm 800 mm 260 mm 265 mm ˎ 2 ˎ ˎ 0 (d) The VCT-VPR1 is a tripod provided with Remote Commander functions for cameras. ˎˎYou can use the built-in Remote Commander in the pan handle to operate cameras that are equipped with the Sony Multi Terminal. This tripod may not be compatible with all cameras with Multi Terminal. Please visit the Sony website for the compatible models. ˎˎThe Remote Commander functions include basic recording functions (POWER ON/OFF, video/still image recording and zooming) and also SLOW ZOOM ON/OFF and grid line display ON/OFF functions. Identifying the Parts 2 2 When you attach a camera to the tripod or remove it, firmly tighten and fix the tilt lock lever. Do not attach accessories to the camera after mounting it on the tripod head. Otherwise, the tripod head could tilt and damage the camera. Features GRID LINE ˎ * Attaching and removing the camera ˎˎWhen the tripod becomes dirty, clean it with a soft cloth lightly moistened with a mild detergent solution. Then, wipe the tripod clean with a dry cloth. ˎˎAfter using the tripod on the beach or in places subject to sea breezes, wipe it clean with a dry cloth. C Notice for the customers in the countries applying EU Directives The manufacturer of this product is Sony Corporation, 1-7-1 Konan Minato-ku Tokyo, 108-0075 Japan. The Authorized Representative for EMC and product safety is Sony Deutschland GmbH, Hedelfinger Strasse 61, 70327 Stuttgart, Germany. For any service or guarantee matters please refer to the addresses given in separate service or guarantee documents. Cleaning ˎ 1 This symbol on the product or on its packaging indicates that this product shall not be treated as household waste. Instead it shall be handed over to the applicable collection point for the recycling of electrical and electronic equipment. By ensuring this product is disposed of correctly, you will help prevent potential negative consequences for the environment and human health, which could otherwise be caused by inappropriate waste handling of this product. The recycling of materials will help to conserve natural resources. For more detailed information about recycling of this product, please contact your local Civic Office, your household waste disposal service or the shop where you purchased the product. Precautions on Use C ˎ a ON (h) SLOW ZOOM B (d) PUSH RELEASE SLOW ZOOM POWER/REC 1 2 3 4 5 h (f) (f) e PHOTO ˎ Install a battery pack, memory card, etc. in the camera before mounting it on the tripod. Caution When attaching a camera other than a video camera to the tripod, position it so that it does not to touch the pin for video cameras. 3 While pulling the camera mounting shoe lock lever fully to the right, attach the camera mounting shoe to the tripod head. Then, push the camera mounting shoe lock lever to the left to lock it. 4 Connect the multi connector (c) to the Multi Terminal of the camera. If the cable is too long, clamp the cable with a cable clamper (b). Caution ˎˎThe multi connector must be inserted the right way up. Be careful not to connect it upside down or you may damage the tripod or camera. ˎˎThere are two types of camera multi terminal. ˎˎWhen connecting the Connecting cable for Multi Terminal to the multi terminal of the camera (shaped as in (d)), align the mark on the plug with the mark on the multi terminal. Forcing the plug in the wrong way round will cause a malfunction. Adjusting the Height of the Elevator 1 Loosen the elevator lock lever. 2 Adjust the height by turning the elevator height adjustment crank. 3 Tighten the elevator lock lever. PHOTO 11 22 33 44 55 66 77 88 99 111 111 111 111 111 111 111 111 111 111 222 222 222 222 222 222 222 222 12 (b) ˎ ˎ 3 1 While pulling the camera mounting shoe lock lever fully to the right, slide out the camera mounting shoe from the tripod head. 2 Attach the camera mounting shoe to the camera. Tighten the camera mounting screw firmly. When you attach a video camera, align the pin with the positioning hole (a). Disposal of Old Electrical & Electronic Equipment (Applicable in the European Union and other European countries with separate collection systems) PHOTO ˎ Caution ˎˎOrientate plug “a” as illustrated and insert it into the remote commander. ˎˎHold the plug when detaching the cable. Pulling the cable itself could damage the connector. ˎˎThe tripod and the connecting cable for Multi Terminal are included together at the time of purchase. Note: This equipment has been tested and found to comply with the limits for a Class B digital device, pursuant to Part 15 of the FCC Rules. These limits are designed to provide reasonable protection against harmful interference in a residential installation. This equipment generates, uses, and can radiate radio frequency energy and, if not installed and used in accordance with the instructions, may cause harmful interference to radio communications. However, there is no guarantee that interference will not occur in a particular installation. If this equipment does cause harmful interference to radio or television reception, which can be determined by turning the equipment off and on, the user is encouraged to try to correct the interference by one or more of the following measures: ––Reorient or relocate the receiving antenna. ––Increase the separation between the equipment and receiver. ––Connect the equipment into an outlet on a circuit different from that to which the receiver is connected. ––Consult the dealer or an experienced radio/TV technician for help. A ˎ 27 1 PHOTO Attach the Connecting cable for Multi Terminal to the Remote Commander. Mounting the Camera For the Customers in Europe START/STOP 3 (a) Attaching the connecting cable CAUTION You are cautioned that any changes or modifications not expressly approved in this manual could void your authority to operate this equipment. The supplied interface cable must be used with the equipment in order to comply with the limits for a digital device pursuant to Subpart B of Part 15 of FCC Rules. (c) POWER/REC ˎ 23 VCT-VPR1 Adjust the length of the legs so that the air bubble in the level stays in the red circle. 40 1.3 Kg 1 1 1 2 3 4 5 6 7 8 9 10 11 12 13 14 15 16 17 18 19 20 21 22 23 24 25 26 27 Camera mounting screw Pin Camera mounting shoe Tripod head Pan lock lever Tilt lock lever Elevator Level Elevator lock lever Elevator height adjustment crank Leg Stay Tripod head lock lever Camera mounting shoe lock lever Cable clamper Connecting cable for Multi Terminal POWER/REC lamp Strap hole POWER button PHOTO button START/STOP button GRID LINE button Zoom lever Pan handle SLOW ZOOM switch PUSH RELEASE button Leg length adjustment lock lever Setting the Tripod 1 Spread the legs. 2 Press the stay down. 3 Release the leg length adjustment locks. 4 Adjust the length of the legs. 5 Set the leg length adjustment locks. Panning and Tilting Before panning and tilting, make sure that the elevator lock lever is locked firmly. If it is not locked firmly, the camera will shake. Panning You can pan 360° when shooting pictures. 1 Loosen the pan lock lever. 2 Adjust the position of the camera by moving the pan handle left/ right. 3 Tighten the pan lock lever. Caution If you pan the camera suddenly, the camera mounting screw could become loose. Check the screw from time to time to make sure that it is not loose. Tilting You can tilt your camera up/down when shooting pictures. 4 Loosen the tilt lock lever. 5 Adjust the position of the camera by moving the pan handle up/ down. 6 Tighten the tilt lock lever. Changing the Angle of the Tripod Head You can switch the tripod head from a horizontal recording position to a vertical recording position. Loosen the tripod head lock lever, stand the tripod head to the right, then tighten the lever. Caution You may not be able to fix the tripod head to your desired position or the tripod may become unstable, depending on the center of gravity of the camera. Using the Remote Commander See the operating instructions of the camera for further information. Turning on the power 1 Turn on the power of the camera and set it to standby mode. The POWER/REC lamp (e) of the Remote Commander lights in green. 2 Set the camera to the movie or still image mode. Caution If you leave the camera in standby mode for a while, the camera turns off automatically. To resume standby mode, turn on the camera, pressing the POWER button (a) of the remote commander. To record a moving image Press the START/STOP button (c). The POWER/REC lamp lights in red and recording starts. To stop recording, press the START/ STOP button again. The POWER/REC lamp lights in green. The camera is set to standby mode. To record a still image Half-press the PHOTO button (b) to bring the camera into focus, and then press the button all the way. Locking function (A) During bulb shooting or continuous shooting, you can set the PHOTO button so that it is held down. With the PHOTO button fully pressed down, slide it in the direction of the arrow. ˎˎWhen the PHOTO button is locked during bulb shooting, the shutter is open. ˎˎWhen the PHOTO button is locked during continuous shooting, the shutter continues to open and close. Caution ˎˎNot all cameras support bulb shooting or continuous shooting. See the operating instructions of your camera for details. ˎˎDo not press the PHOTO button with excessive force or the Remote Commander may break. ˎˎDo not leave the PHOTO button locked. Dethatching remote commander (B) When shooting still photos, you can prevent camera shake by detaching the remote commander from the tripod before pressing the PHOTO button. To detach the remote commander, pull it out while holding the tripod and pressing the PUSH RELEASE button (f). To attach the remote commander, slowly slide the remote commander on while holding the tripod until the PUSH RELEASE button (f) clicks out. les limites relatives à un dispositif numérique conformément à la Sous partie B de l’article 15 du Règlement de la FCC. Zooming Pour les clients en Europe Tilt the zoom lever (d). T side (telephoto): Subject appears closer. W side (wide angle): Subject appears farther away. The zooming speed changes depending on the angle of zoom lever when you tilt it. Traitement des appareils électriques et électroniques en fin de vie (Applicable dans les pays de l’Union Européenne et aux autres pays européens disposant de systèmes de collecte sélective) Slow zooming Set the SLOW ZOOM switch (h) to ON. Regardless of the tilt angle of zoom lever, zooming is always performed at slow speed. To cancel the slow zooming function, set the SLOW ZOOM switch to OFF. Caution ˎˎThe slow zooming speed varies depending on a camera. ˎˎWhen the POWER/REC lamp flashes in red, a warning message is displayed on the camera. Check the message on the screen of the camera. To display the grid line (C) Press the GRID LINE button (g). A horizontal/vertical grid line appears on the camera screen. Adjust the legs of the tripod and tilt angle of your camera in accordance with the grid line. You can choose multiple grid lines depending on your camera model. You can set the grid lines by pressing the GRID LINE button. See the operating instructions of your camera for details. To cancel the grid line display, press the GRID LINE button again. *The photograph is just an example of the screen. The actual screen to be displayed may be different. After recording Press the POWER button of the remote commander to turn off the camera. Folding the Tripod 1 Remove the camera from the tripod. 2 Loosen the pan lock lever and tilt lock lever and fold down the pan handle. Put back the elevator height adjustment crank into its holding position. 3 Tighten the pan lock lever and tilt lock lever. 4 Loosen the leg length adjustment lock lever of the three legs and fold the legs. 5 Tighten the leg length adjustment lock lever to hold the legs in place. Carrying the tripod Make sure to carry the tripod in its carrying case. Caution Never carry the tripod with the camera attached to it. Specifications Maximum load 3 kg (6 lb. 10 oz.) Panning angle 360 degrees Tilting angle 90 degrees down, 55 degrees up Leg extension Each leg has 4 telescoping shafts. Remote Commander functions POWER button, PHOTO button, START/STOP button, zoom lever (T/W), GRID LINE button, PUSH RELEASE button, SLOW ZOOM switch Dimensions Maximum height: Approx. 1 465 mm (57 3/4 inches) (Legs spread and elevator fully extended) Minimum height: Approx. 480 mm (19 inches) Remote Commander cable length Approx. 800 mm (31 1/2 inches) Pan handle length Approx. 260 mm (10 1/4 inches) Elevator stroke Approx. 265 mm (10 1/2 inches) Operating temperature range 0 °C to 40 °C (32 °F to 104 °F) Mass Approx. 1.3 kg (2 lb. 14 oz.) Supplied accessories Carrying case (1) Connecting cable for Multi Terminal (1) Set of printed documentation Design and specifications are subject to change without notice. Avant de faire fonctionner ce produit, lisez attentivement ce mode d’emploi et conservez-le pour toute référence ultérieure. AVERTISSEMENT Pour réduire les risques d’incendie ou d’électrocution, 1) n’exposez pas l’appareil à la pluie ou à l’humidité ; 2) ne placez pas d’objets remplis de liquides (vases, etc.) sur l’appareil. Cet appareil a été testé et jugé conforme aux limites établies par la Réglementation EMC visant l’utilisation de câbles de raccordement de moins de 3 mètres. À l’intention des clients aux É.-U. AVERTISSEMENT : Par la présente, vous êtes avisé du fait que tout changement ou toute modification ne faisant pas l’objet d’une autorisation expresse dans le présent manuel pourrait annuler votre droit d’utiliser l’appareil. Note : L’appareil a été testé et est conforme aux exigences d’un appareil numérique de Classe B, conformément à la Partie 15 de la réglementation de la FCC. Ces critères sont conçus pour fournir une protection raisonnable contre les interférences nuisibles dans un environnement résidentiel. L’appareil génère, utilise et peut émettre des fréquences radio; s’il n’est pas installé et utilisé conformément aux instructions, il pourrait provoquer des interférences nuisibles aux communications radio. Cependant, il n’est pas possible de garantir que des interférences ne seront pas provoquées dans certaines conditions particulières. Si l’appareil devait provoquer des interférences nuisibles à la réception radio ou à la télévision, ce qui peut être démontré en allumant et éteignant l’appareil, il est recommandé à l’utilisateur d’essayer de corriger cette situation par l’une ou l’autre des mesures suivantes : ––Réorienter ou déplacer l’antenne réceptrice. ––Augmenter la distance entre l’appareil et le récepteur. ––Brancher l’appareil dans une prise ou sur un circuit différent de celui sur lequel le récepteur est branché. ––Consulter le détaillant ou un technicien expérimenté en radio/ téléviseurs. Le câble d’interface fourni doit être utilisé avec l’appareil pour satisfaire Ce symbole, apposé sur le produit ou sur son emballage, indique que ce produit ne doit pas être traité avec les déchets ménagers. Il doit être remis à un point de collecte approprié pour le recyclage des équipements électriques et électroniques. En vous assurant que ce produit sont mis au rebut de façon appropriée, vous participez activement à la prévention des conséquences négatives que leur mauvais traitement pourrait provoquer sur l’environnement et sur la santé humaine. Le recyclage des matériaux contribue par ailleurs à la préservation des ressources naturelles. Pour toute information complémentaire au sujet du recyclage de ce produit, vous pouvez contacter votre municipalité, votre déchetterie locale ou le point de vente où vous avez acheté le produit. Avis aux consommateurs des pays appliquant les Directives UE Ce produit a été fabriqué par ou pour le compte de Sony Corporation, 1-7-1 Konan Minato-ku Tokyo, 108-0075 Japon. Toutes les questions relatives à la conformité des produits basées sur la législation européenne doivent être adressées à son représentant, Sony Deutschland GmbH, Hedelfinger Strasse 61, 70327 Stuttgart, Allemagne. Pour toute question relative au Service Après-Vente ou à la Garantie, merci de bien vouloir vous référer aux coordonnées qui vous sont communiquées dans les documents « Service (SAV) » ou Garantie. Précautions d’emploi Pose et dépose de la caméra Lorsque vous posez la caméra sur le trépied ou la déposez, serrez bien le levier de blocage de l’inclinaison et fixez-le. Ne rattachez pas d’accessoires à la caméra après l’avoir installée sur la tête de trépied. Sinon, la tête de trépied pourrait basculer et endommager la caméra. Nettoyage ˎˎQuand le trépied est sale, essuyez-le avec un chiffon doux légèrement imprégné d’une solution détergente faible. Puis, essuyez le trépied avec un chiffon sec. ˎˎSi vous utilisez le trépied à la plage ou à un endroit exposé aux embruns marins, nettoyez-le avec un chiffon sec. Caractéristiques Le VCT-VPR1 est un trépied présentant des fonctions de télécommande pour caméras. ˎˎVous pouvez utiliser la télécommande incorporée à la poignée de pan pour les caméras équipées de la multiprise Sony. Ce trépied peut ne pas être compatible avec toutes les caméras équipées d’une multiprise. Veuillez consulter le site de Sony pour les modèles compatibles. ˎˎLes fonctions de la télécommande comprennent les fonctions essentielles d’enregistrement (POWER ON/OFF, enregistrement de films/photos et zooming), et aussi les fonctions SLOW ZOOM ON/OFF et d’affichage de la grille ON/OFF. Identification des éléments 1 2 3 4 5 6 7 8 9 10 11 12 13 14 15 16 17 18 19 20 21 22 23 24 25 26 27 Vis de montage de caméra Goupille Sabot de montage de caméra Tête de trépied Levier de blocage du pan Levier de blocage de l’inclinaison Élévateur Niveau Levier de blocage de l’élévateur Manette de réglage de la hauteur de l’élévateur Pied Étai Levier de blocage de la tête de trépied Levier de blocage du sabot de montage de caméra Serre-câble Câble de raccordement pour multiprises Témoin POWER/REC Trou de sangle Touche POWER Touche PHOTO Touche START/STOP Touche GRID LINE Levier de zoom Poignée de pan Commutateur SLOW ZOOM Touche PUSH RELEASE Levier de blocage du réglage de la longueur du pied Réglage du trépied 1 Écartez les pieds. 2 Appuyez sur l’étai. 3 Relâchez les verrous du réglage de longueur des pieds. 4 Ajustez la longueur des pieds. 5 Fermez les verrous du réglage de longueur des pieds. Réglage du niveau Ajustez la longueur des pieds de sorte que la bulle d’air dans le niveau reste dans le cercle rouge. Branchement du câble de raccordement Branchez le câble de raccordement pour multiprises sur la télécommande. Attention ˎˎOrientez la fiche « a » de la façon illustrée et insérez-la dans la télécommande. ˎˎTenez la fiche pour détacher le câble. Le connecteur pourrait être endommagé si vous tirez sur le câble proprement dit. ˎˎLe câble de raccordement pour multiprises est livré avec le trépied lors de l’achat. Montage de la caméra Installez une batterie, une carte mémoire, etc. dans la caméra avant de la monter sur le trépied. 1 Tournez le levier de blocage du sabot de montage de caméra complètement vers la droite, retirez le sabot de montage de caméra de la tête du trépied. 2 Rattachez le sabot de montage de caméra à la caméra. Serrez bien la vis de montage de caméra. Si vous rattachez un caméscope, alignez la goupille sur le trou (a). Attention Lorsque vous rattachez une caméra autre qu’un caméscope au trépied, positionnez-la de sorte qu’elle ne touche pas la goupille destinée aux caméscopes. 3 Tout en tirant le levier de blocage du sabot de montage de caméra complètement vers la droite, rattachez le sabot de montage de caméra de la tête du trépied. Ensuite, repoussez le levier de blocage du sabot de montage de caméra vers la gauche pour le verrouiller. 4 Raccordez le multiconnecteur (c) à la multiprise de la caméra. Si le câble est trop long, fixez-le avec le serre-câble (b). Attention ˎˎLe multiconnecteur doit être inséré dans le bon sens. Veillez à ne pas le brancher à l’envers sinon vous risqueriez d’endommager le trépied ou la caméra. ˎˎIl existe deux types de multiprise sur les appareils photo/caméscopes. ˎˎLorsque vous raccordez le câble de raccordement pour multiprise à la multiprise de la caméra (forme indiquée dans (d)), alignez le repère sur la fiche et le repère sur la multiprise. Insérer la fiche dans le mauvais sens en forçant peut causer une défectuosité. Réglage de la hauteur de l’élévateur 1 Desserrez le levier de blocage de l’élévateur. 2 Réglez la hauteur en tournant la manette de réglage de la hauteur de l’élévateur. 3 Serrez le levier de blocage de l’élévateur. Pan et inclinaison Avant d’effectuer des mouvements horizontaux ou verticaux, assurezvous que le levier de blocage de l’élévateur est bien bloqué. S’il n’est pas bien bloqué, la caméra sera instable. Pan Vous pouvez effectuer des mouvements horizontaux de 360° pendant la prise de vue. 1 Serrez le levier de blocage du pan. 2 Réglez la position de la caméra en bougeant la poignée de pan vers la gauche ou la droite. 3 Serrez le levier de blocage du pan. Attention Si les mouvements du pan sont trop brusques, la vis de montage de caméra peut se desserrer. Assurez-vous de temps à autre que la vis n’est pas desserrée. Inclinaison Vous pouvez incliner la caméra vers le haut ou le bas pendant la prise de vue. 4 Serrez le levier de blocage de l’inclinaison. 5 Réglez la position de la caméra en bougeant la poignée de pan vers le haut ou le bas. 6 Serrez le levier de blocage de l’inclinaison. Changement de l’angle de la tête de trépied La tête de trépied qui est normalement en position d’enregistrement horizontal peut être mise en position d’enregistrement vertical. Desserrez le levier de blocage de la tête de trépied, levez la tête de trépied vers la droite, puis serrez le levier. Attention Vous ne pourrez peut-être pas mettre la tête de trépied à la position souhaitée, ou le trépied peut devenir instable, selon le centre de gravité de la caméra. Utilisation de la télécommande Reportez-vous au mode d’emploi de la caméra pour plus d’informations. Mise sous tension 1 Mettez la caméra sous tension puis en mode de veille. Le témoin POWER/REC (e) de la télécommande s’allume en vert. 2 Mettez la caméra en mode film ou photo. Attention Si vous laissez la caméra en mode de veille pendant un certain temps, elle s’éteindra automatiquement. Pour revenir au mode de veille, allumez l’appareil photo, tout en appuyant sur la touche POWER (a) de la télécommande. Pour filmer Appuyez sur la touche START/STOP (c). Le témoin POWER/REC s’allume en rouge et l’enregistrement commence. Pour arrêter l’enregistrement, appuyez une nouvelle fois sur la touche START/ STOP. Le témoin POWER/REC s’allume en vert. La caméra se met en mode de veille. Pour prendre une photo Appuyez à mi-course sur la touche PHOTO (b) pour faire la mise au point sur la caméra, puis appuyez à fond sur la touche. Fonction de verrouillage (A) Pendant la prise de vue en pose B ou en rafale, la touche PHOTO peut être réglée pour rester enfoncée. La touche PHOTO étant complètement enfoncée, faites-la glisser dans le sens de la flèche. ˎˎLorsque la touche PHOTO est verrouillée pendant la prise de vue en pose B, l’obturateur est ouvert. ˎˎLorsque la touche PHOTO est verrouillée pendant la prise de vue en rafale, l’obturateur continue de s’ouvrir et de se fermer. Attention ˎˎToutes les caméras ne prennent pas en charge la prise de vue en pose B ou en rafale. Reportez-vous au mode d’emploi de votre caméra pour le détail. ˎˎN’appuyez pas trop fort sur la touche PHOTO sinon la télécommande pourrait se briser. ˎˎNe laissez pas la touche PHOTO verrouillée. Dépose de la télécommande (B) Quand vous prenez des photos, vous pouvez éviter de bouger la caméra en détachant la télécommande du trépied avant d’appuyer sur la touche PHOTO. Pour détacher la télécommande, tirez dessus tout en retenant le trépied et appuyant sur la touche PUSH RELEASE (f). Pour fixer la télécommande, faites-la glisser lentement sur la poignée tout en tenant le trépied jusqu’à ce que la touche PUSH RELEASE (f) ressorte. Zooming Inclinez le levier de zoom (d). Côté T (téléobjectif) : le sujet apparaît plus près. Côté W (grand-angle) : le sujet apparaît plus loin. La vitesse du zooming change selon l’angle d’inclinaison du levier de zoom. Zooming lent Réglez le commutateur SLOW ZOOM (h) sur ON. Quel que soit l’angle d’inclinaison du levier de zoom, le zooming est toujours lent. Pour annuler le zooming lent, réglez le commutateur SLOW ZOOM sur OFF. Attention ˎˎLa vitesse du zooming lent dépend de la caméra. ˎˎLorsque le témoin POWER/REC clignote en rouge, un message d’avertissement apparaît sur la caméra. Vérifiez le message qui apparaît sur l’écran de la caméra. Pour afficher la grille (C) Appuyez sur la touche GRID LINE (g). Une grille aux lignes verticales et horizontales apparaît sur l’écran de la caméra. Réglez les pieds du trépied et l’angle d’inclinaison de la caméra en utilisant la grille comme guide. Selon le modèle de caméra, vous pouvez avoir le choix entre plusieurs types de grilles. Vous pouvez afficher la grille en appuyant sur la touche GRID LINE. Reportez-vous au mode d’emploi de votre caméra pour le détail. Pour annuler l’affichage de la grille, appuyez sur la touche GRID LINE jusqu’à ce que la grille soit masquée. *La photographie n’est qu’un exemple d’écran. L’écran réellement affiché peut être différent. Après l’enregistrement Appuyez sur la touche POWER de la télécommande pour mettre la caméra hors tension. Pliage du trépied 1 Détachez la caméra du trépied. 2 Desserrez le levier de blocage du pan et le levier de blocage de l’inclinaison et rabattez la poignée de pan vers le bas. Remettez la manette de réglage de la hauteur de l’élévateur dans sa position d’origine. 3 Serrez le levier de blocage du pan et le levier de blocage de l’inclinaison. 4 Desserrez les leviers de blocage du réglage de longueur des trois pieds et pliez les pieds. 5 Serrez les leviers de blocage du réglage de longueur des pieds pour maintenir les pieds en place. Transport du trépied Veillez à transporter le trépied dans son étui de transport. Attention Ne transportez jamais le trépied avec la caméra dessus. Spécifications Charge maximale 3 kg (6 li. 10 on.) Angle de pan 360 degrés Angle d’inclinaison 90 degrés vers le bas, 55 degrés vers le haut Extension des pieds Chaque pied a 4 tubes télescopiques. Fonctions de la télécommande Touche POWER, touche PHOTO, touche START/STOP, levier de zoom (T/W), touche GRID LINE, touche PUSH RELEASE, commutateur SLOW ZOOM Dimensions Hauteur maximale : Environ 1 465 mm (57 3/4 pouces) (Pieds écartés et élévateur complètement allongé) Hauteur minimale : Environ 480 mm (19 pouces) Longueur du câble de télécommande Environ 800 mm (31 1/2 pouces) Longueur de la poignée de pan Environ 260 mm (10 1/4 pouces) Course de l’élévateur Environ 265 mm (10 1/2 pouces) Plage de température de fonctionnement 0 °C à 40 °C (32 °F à 104 °F) Poids Environ 1,3 kg (2 li. 14 on.) Accessoires fournis Étui de transport (1) Câble de raccordement pour multiprises (1) Jeu de documents imprimés La conception et les spécifications peuvent être modifiées sans préavis. 3 Lesen Sie diese Anleitung vor Inbetriebnahme des Produkts bitte genau durch und bewahren Sie sie zum späteren Nachschlagen sorgfaltig auf. WARNUNG Um Feuergefahr und die Gefahr eines elektrischen Schlags zu vermeiden, 1) setzen Sie das Gerät weder Regen noch sonstiger Feuchtigkeit aus, 2) stellen sie keine mit Flüssigkeiten gefüllten Gegenstände, wie z. B. Vasen, auf das Gerät. Dieses Produkt wurde geprüft und erfüllt die EMV-Vorschrift, sofern Verbindungskabel mit einer Länge von weniger als 3 Metern verwendet werden. Für Kunden in Europa Entsorgung von gebrauchten elektrischen und elektronischen Geräten (anzuwenden in den Ländern der Europäischen Union und anderen europäischen Ländern mit einem separaten Sammelsystem für diese Geräte) Das Symbol auf dem Produkt oder seiner Verpackung weist darauf hin, dass dieses Produkt nicht als normaler Haushaltsabfall zu behandeln ist, sondern an einer Annahmestelle für das Recycling von elektrischen und elektronischen Geräten abgegeben werden muss. Durch Ihren Beitrag zum korrekten Entsorgen dieses Produkts schützen Sie die Umwelt und die Gesundheit Ihrer Mitmenschen. Umwelt und Gesundheit werden durch falsches Entsorgen gefährdet. Materialrecycling hilft, den Verbrauch von Rohstoffen zu verringern. Weitere Informationen zum Recycling dieses Produkts erhalten Sie bei Ihrer Gemeindeverwaltung, den kommunalen Entsorgungsbetrieben oder dem Geschäft, in dem Sie das Produkt gekauft haben. Hinweis für Kunden in Ländern, in denen EU-Richtlinien gelten Dieses Produkt wurde von oder für Sony Corporation, 1-7-1 Konan Minato-ku Tokio, 108-0075 Japan hergestellt. Bei Fragen zur Produktkonformität auf Grundlage der Gesetzgebung der Europäischen Union kontaktieren Sie bitte den Bevollmächtigten Sony Deutschland GmbH, Hedelfinger Strasse 61, 70327 Stuttgart, Deutschland. Für Kundendienst oder Garantieangelegenheiten wenden Sie sich bitte an die in den Kundendienstoder Garantiedokumenten genannten Adressen. Vorsichtsmaßregeln zur Verwendung Anbringen und Abnehmen der Kamera Wenn Sie eine Kamera am Stativ anbringen oder davon abnehmen, müssen Sie den Neige-Verriegelungshebel sicher festziehen und sperren. Bringen Sie keine Zubehörteile an der Kamera an, nachdem diese am Stativkopf angebracht wurde. Andernfalls kann sich der Stativkopf neigen und die Kamera kann beschädigt werden. Reinigung ˎˎWenn das Stativ verschmutzt wird, reinigen Sie es mit einem weichen, leicht mit mildem Haushaltsreiniger angefeuchteten Tuch. Dann wischen Sie das Stativ mit einem trockenen Tuch ab. ˎˎNach der Verwendung des Stativs am Strand oder an Orten, die salziger Seeluft ausgesetzt sind, wischen Sie es mit einem trockenen Tuch ab. Merkmale und Funktionen VCT-VPR1 ist ein Stativ mit Fernbedienungsfunktionen für Kameras. ˎˎSie können die eingebaute Fernbedienungseinheit im Profigriff des Stativs dazu verwenden, Kameras zu bedienen, die mit der Sony Multi-Buchse ausgestattet sind. Dieses Stativ ist möglicherweise nicht mit allen Kameras mit MultiBuchse kompatibel. Bitte besuchen Sie die Sony-Website für kompatible Modelle. ˎˎDie Fernbedienungsfunktionen umfassen grundlegende Aufnahmefunktionen (POWER ON/OFF, Video-/StandbildAufnahme und Zoomen) und auch SLOW ZOOM ON/OFF und Gitterlinienanzeige ON/OFFFunktionen. Identifikation der Teile 1 2 3 4 5 6 7 8 9 10 11 12 13 14 15 16 17 18 19 20 21 22 23 24 25 26 27 Kameramontageschraube Stift Kameramontageschuh Stativkopf Schwenk-Verriegelungshebel Neige-Verriegelungshebel Mittelsäule Wasserwaage Mittelsäulen-Verriegelungshebel Mittelsäulen-Höheneinstellkurbel Bein Strebe Stativkopf-Verriegelungshebel Sperrhebel des Kameramontageschuhs Kabelclip Verbindungskabel für MultiBuchse POWER/REC-Lämpchen Riemenloch POWER-Taste PHOTO-Taste START/STOP-Taste GRID LINE-Taste Zoomhebel Profigriff SLOW ZOOM-Schalter PUSH RELEASE-Taste Beinlängen-EinstellVerriegelungshebel Einstellen des Stativs 1 Spreizen Sie die Beine aus. 2 Drücken Sie die Strebe nach unten. 3 Lösen Sie die BeinlängenEinstell-Verriegelungshebel. 4 Stellen Sie die Beinlänge ein. 5 Stellen Sie die BeinlängenEinstell-Verriegelungen ein. Anpassen des Niveaus Passen Sie die Länge der Beine so ein, dass die Luftblase in der Wasserwaage im roten Kreis ist. Anbringen des Verbindungskabels Bringen Sie das Verbindungskabel für Multi-Buchse an der Fernbedienung an. Vorsicht ˎˎRichten Sie den Stecker „a“ aus und setzen ihn in die Fernbedienung ein, wie in der Abbildung gezeigt. ˎˎHalten Sie den Stecker beim Abnehmen des Kabels. Wenn Sie am Kabel selber ziehen, kann das Anschlussteil beschädigt werden. ˎˎDas Stativ und das Verbindungskabel für die Multi-Buchse werden beim Kauf zusammen geliefert. ˎˎLassen Sie nicht die PHOTO-Taste verriegelt. Anbringen der Kamera Beim Aufnehmen von Standbildern können Sie Verwackeln vermeiden, indem Sie die Fernbedienung vom Stativ abnehmen, bevor Sie die PHOTO-Taste drücken. Zum Abnehmen ziehen Sie die Fernbedienung heraus, während Sie das Stativ halten und die PUSH RELEASE-Taste (f) drücken. Setzen Sie einen Akku, eine Speicherkarte usw. in die Kamera ein, bevor Sie diese am Stativ anbringen. 1 Während Sie den Sperrhebel des Kameramontageschuhs ganz nach rechts, schieben Sie den Kameramontageschuh vom Stativkopf ab. 2 Bringen Sie den Kameramontageschuh an der Kamera an. Ziehen Sie die Kameramontageschraube fest an. Wenn Sie eine Videokamera anbringen, richten Sie den Stift mit dem Positionierloch (a) aus. Vorsicht Beim Anbringen einer anderen Kamera als einer Videokamera am Stativ stellen Sie dieses so auf, dass es nicht den Stift für Videokameras berührt. 3 Während Sie den Sperrhebel des Kameramontageschuhs ganz nach rechts, bringen Sie den Kameramontageschuh am Stativkopf an. Dann drücken Sie den Sperrhebel des Kameramontageschuhs nach links, um ihn zu verriegeln. 4 Verbinden Sie den MultiAnschluss (c) mit der MultiBuchse der Kamera. Wenn das Kabel zu lang ist, ziehen Sie das Kabel mit einem Kabelband (b) fest. Vorsicht ˎˎDer Multi-Stecker muss mit der richtigen Seite nach oben weisend eingesteckt werden. Achten Sie darauf, ihn nicht umgekehrt einzustecken, andernfalls kann das Stativ oder die Kamera beschädigt werden. ˎˎEs gibt zwei Typen von Kamera-Multi-Buchsen. ˎˎBeim Anschließen des Verbindungskabel für MultiBuchse an die Multi-Buchse der Kamera (wie in (d) geformt), richten Sie die Markierung am Stecker mit der Markierung an der Multi-Buchse aus. Wenn der Stecker gewaltsam in falscher Richtung eingesteckt wird, werden Fehlfunktionen verursacht. Einstellen der Höhe der Mittelsäule 1 Lösen Sie den MittelsäulenVerriegelungshebel 2 Justieren Sie die Höhe durch Drehen der MittelsäulenHöheneinstellkurbel 3 Ziehen Sie den MittelsäulenVerriegelungshebel fest. Schwenken und Neigen Vor dem Schwenken und Neigen stellen Sie sicher, dass der Mittelsäulen-Verriegelungshebel fest gesperrt ist. Wenn er nicht fest gesperrt ist, wackelt die Kamera. Schwenken Sie können beim Aufnehmen von Bildern um 360°C schwenken. 1 Lösen Sie den SchwenkVerriegelungshebel. 2 Passen Sie die Position der Kamera durch Bewegen des Profigriffs nach links/rechts an. 3 Ziehen Sie den SchwenkVerriegelungshebel fest. Vorsicht Wenn Sie die Kamera plötzlich schwenken, könnte sich die Kameramontageschraube lockern. Prüfen Sie die Schraube gelegentlich, um sicherzustellen, dass sie nicht locker ist. Neigen Sie können Ihre Kamera beim Aufnehmen von Bildern nach oben/ unten neigen. 4 Lösen Sie den NeigeVerriegelungshebel. 5 Passen Sie die Position der Kamera durch Bewegen des Profigriffs nach oben/unten an. 6 Ziehen Sie den NeigeVerriegelungshebel fest. Ändern des Winkels des Stativkopfs Sie können den Stativkopf aus einer horizontalen Aufnahmeposition in eine vertikale Aufnahmeposition umschalten. Lösen Sie den StativkopfVerriegelungshebel, stellen Sie den Stativkopf nach rechts, und ziehen Sie den Hebel fest. Vorsicht Sie können möglicherweise nicht den Stativkopf in die gewünschte Position bringen, oder das Stativ kann instabil werden, je nach dem Schwerpunkt der Kamera. Verwendung der Fernbedienungseinheit Weitere Informationen finden Sie in der Bedienungsanleitung der Kamera. Einschalten der Stromversorgung 1 Schalten Sie die Stromversorgung der Kamera ein und stellen Sie sie auf Standby. Das POWER/REC-Lämpchen (e) der Fernbedienung leuchtet grün. 2 Stellen Sie die Kamera auf Videooder Standbildmodus. Vorsicht Wenn Sie die Kamera längere Zeit im Standby-Modus lassen, schaltet sie automatisch aus. Zum Zurückschalten auf den Standby-Betrieb drücken Sie die POWER-Taste (a) auf der Fernbedienung, um die Kamera einzuschalten. Zum Aufnehmen bewegter Bilder Drücken Sie die START/STOP-Taste (c). Das POWER/REC-Lämpchen leuchtet rot, und die Aufnahme beginnt. Zum Stoppen der Aufnahme drücken Sie die START/STOP-Taste erneut. Das POWER/REC-Lämpchen leuchtet grün. Die Kamera ist im Standby-Modus. Zum Aufnehmen eines Standbildes Drücken Sie die PHOTO-Taste (b) halb ein, um die Kamera zu fokussieren, und drücken Sie die Taste dann vollständig ein. Verriegelungsfunktion (A) Bei Langzeitbelichtung oder kontinuierlicher Aufnahme können Sie die PHOTO-Taste so einstellen, dass sie eingedrückt bleibt. Wenn die PHOTO-Taste ganz eingedrückt ist, schieben Sie sie in Pfeilrichtung. ˎˎWenn die PHOTO-Taste bei Langzeitbelichtung verriegelt wird, bleibt der Verschluss offen. ˎˎWenn die PHOTO-Taste bei kontinuierlicher Aufnahme verriegelt wird, öffnet und schließt der Verschluss fortgesetzt. Vorsicht ˎˎNicht alle Kameras unterstützen Langzeitbelichtung oder kontinuierliche Aufnahme. Einzelheiten siehe Bedienungsanleitung Ihrer Kamera. ˎˎDrücken Sie nicht die PHOTO -Taste gewaltsam, andernfalls kann die Fernbedienung beschädigt werden. Abnehmen der Fernbedienung (B) Zum Anbringen der Fernbedienungseinheit schieben Sie die Fernbedienungseinheit langsam heraus, während Sie das Stativ halten, bis die PUSH RELEASE-Taste (f) mit Klickgeräusch herausspringt. Zoomen Neigen Sie den Zoomhebel (d). T-Seite (Tele): Das Motiv erscheint näher. W-Seite (Weitwinkel): Das Motiv erscheint weiter entfernt. Die Zoomgeschwindigkeit wechselt je nach dem Winkel des Zoomhebels beim Neigen. Langsamer Zoom Stellen Sie den SLOW ZOOMSchalter (h) auf ON (Ein). Ungeachtet des Neigungswinkels des Zoomhebels wird Zoomen immer mit niedriger Geschwindigkeit ausgeführt. Zum Abbrechen der LangsamZoomen-Funktion stellen Sie den SLOW ZOOM-Schalter auf OFF (Aus). Vorsicht ˎˎDie Langsam-ZoomGeschwindigkeit ist je nach Kamera unterschiedlich. ˎˎWenn das POWER/REC-Lämpchen rot blinkt, wird eine Warnmeldung an der Kamera angezeigt. Prüfen Sie die Meldung auf dem Bildschirm der Kamera. Zur Anzeige der Gitterlinie (C) Drücken Sie die GRID LINE-Taste (g). Eine horizontale/vertikale Gitterlinie erscheint auf dem Kamerabildschirm. Passen Sie die Beine des Stativs und den Neigewinkel Ihrer Kamera entsprechend der Gitterlinie an. Sie können mehrere Gitterlinien je nach Ihrem Kameramodell wählen. Sie können die Gitterlinien einstellen, indem Sie die GRID LINE-Taste drücken. Einzelheiten siehe Bedienungsanleitung Ihrer Kamera. Zum Abbrechen der Gitterlinienanzeige drücken Sie die GRID LINE-Taste, bis die Gitterlinienanzeige verschwindet. *Das Foto dient nur als Beispielansicht des Bildschirms. Die aktuelle Bildschirmansicht kann anders sein. Nach der Aufnahme Drücken Sie die POWER-Taste der Fernbedienung, um die Kamera auszuschalten. Einklappen des Stativs 1 Nehmen Sie die Kamera vom Stativ ab. 2 Lösen Sie den SchwenkVerriegelungshebel und den Neige-Verriegelungshebel und klappen Sie den Schwenk-Griff ein. Setzen Sie die MittelsäulenHöheneinstellkurbel zurück in ihre Halteposition. 3 Ziehen Sie den SchwenkVerriegelungshebel und den Neige-Verriegelungshebel fest. 4 Lösen Sie den BeinlängenEinstell-Verriegelungshebel der drei Beine und falten Sie die Beine ein. 5 Ziehen Sie den BeinlängenEinstell-Verriegelungshebel fest, um die Beine festzuhalten. Tragen des Stativs Tragen Sie das Stativ immer in seinem Transportbehälter. Vorsicht Tragen Sie das Stativ nie mit daran angebrachter Kamera. Technische Daten Maximale Last 3 kg Schwenkwinkel 360 Grad Neigewinkel 90 Grad nach oben, 55 Grad nach unten Beinauszug Jedes Bein ist mit 4 Teleskopschäften ausgestattet. Fernbedienungsfunktionen POWER-Taste, PHOTO-Taste, START/STOP-Taste, Zoomhebel (T/W), GRID LINE-Taste, PUSH RELEASE-Taste, SLOW ZOOMSchalter Abmessungen Maximale Höhe: Ca.1 465 mm (Beine gespreizt und Mittelsäule voll ausgezogen) Minimale Höhe: Ca. 480 mm Fernbedienungskabellänge Ca. 800 mm Profigrifflänge Ca. 260 mm Kurbelhub Ca. 265 mm Betriebstemperaturbereich 0°C bis 40°C Gewicht Ca. 1,3 kg Mitgeliefertes Zubehör Transportbehälter (1) Verbindungskabel für MultiBuchse (1) Anleitungen Änderungen bei Design und technischen Daten bleiben ohne vorherige Ankündigung vorbehalten. Antes de utilizar el producto, lea cuidadosamente este manual y conservelo para futuras referencias. AVISO Para reducir el riesgo de incendios o descargas eléctricas, 1) no exponga la unidad a la lluvia o la humedad. 2) no coloque sobre el aparato objetos que contengan líquidos como, por ejemplo, jarrones. Este producto ha sido probado y cumple con los límites establecidos en el Reglamento de EMC para el uso de cables de conexión de menos de 3 metros de longitud. Para los clientes en Europa Tratamiento de los equipos eléctricos y electrónicos al final de su vida útil (aplicable en la Unión Europea y en países europeos con sistemas de tratamiento selectivode residuos) Este símbolo en el equipo o en su embalaje indica que el presente producto no puede ser tratado como residuos doméstico normal. Debe entregarse en el correspondiente punto de recogida de equipos eléctricos y electrónicos. Al asegurarse de que este producto se desecha correctamente, usted ayuda a prevenir las consecuencias potencialmente negativas para el medio ambiente y la salud humana que podrían derivarse de la incorrecta manipulación en el momento de deshacerse de este producto. El reciclaje de materiales ayuda a conservar los recursos naturales. Para recibir información detallada sobre el reciclaje de este producto, póngase en contacto con el ayuntamiento, el punto de recogida más cercano o el establecimiento donde ha adquirido el producto. Aviso para los clientes de países en los que se aplican las directivas de la UE Este producto ha sido fabricado por, o en nombre de Sony Corporation, 1-71 Konan Minato-ku Tokyo, 108-0075 Japón. Las consultas relacionadas con la conformidad del producto basadas en la legislación de la Unión Europea deben dirigirse al representante autorizado, Sony Deutschland GmbH, Hedelfinger Strasse 61, 70327 Stuttgart, Alemania. Para cualquier asunto relacionado con el servicio o la garantía, por favor diríjase a la dirección indicada en los documentos de servicio o garantía adjuntados con el producto. Precauciones para la utilización Montaje y desmontaje de la cámara Cuando monte una cámara en el trípode o la desmonte de él, apriete firmemente y fije la palanca de bloqueo de panoramización vertical. No fije accesorios a la cámara después de haberla montando en la cabeza del trípode. De lo contrario, la cabeza del trípode podría inclinarse y dañar la cámara. Limpieza ˎˎCuando el trípode se ensucie, límpielo con un paño suave ligeramente humedecido en una solución de detergente poco concentrado. Después, frótelo con un paño seco. ˎˎDespués de haber utilizado el trípode en una playa o en lugares sometidos a brisas marinas, frótelo con un paño seco. Características El VCT-VPR1 es un trípode provisto de funciones de controlador remoto para cámaras. ˎˎPuede utilizar el controlador remoto incorporado en el mango de panoramización horizontal para controlar cámaras Sony equipadas con terminal múltiple. Este trípode puede no ser compatible con todas las cámaras que posean terminal múltiple. Con respecto a los modelos compatibles, visite en sitio web de Sony. ˎˎLas funciones del controlador remoto incluyen las básicas de grabación (POWER ON/OFF, grabación de vídeo/imágenes fijas, y zoom), y también las funciones SLOW ZOOM ON/OFF y visualización ON/OFF de línea de rejilla. Identificación de partes 1 2 3 4 5 6 7 8 9 10 11 12 13 14 15 16 17 18 19 20 21 22 23 24 25 26 27 Tornillo de montaje de cámara Pasador Zapata de montaje de cámara Cabeza del trípode Palanca de bloqueo de panoramización horizontal Palanca de bloqueo de panoramización vertical Elevador Nivel Palanca de bloqueo del elevador Manivela de ajuste de la altura del elevador Pata Abrazadera Palanca de bloqueo de la cabeza del trípode Palanca de bloqueo de la zapata de montaje de cámara Abrazadera para cable Cable conector para terminal múltiple Lámpara POWER/REC Orificio para correa Botón POWER Botón PHOTO Botón START/STOP Botón GRID LINE Palanca de zoom Mango de panoramización horizontal Selector SLOW ZOOM Botón PUSH RELEASE Palanca de bloqueo de ajuste de longitud de las patas Ajuste del trípode 1 Despliegue las patas. 2 Presione la abrazadera hacia abajo. 3 Libere los bloqueos de ajuste de la longitud de las patas. 4 Ajuste la longitud de las patas. 5 Fije los bloqueos de ajuste de la longitud de las patas. Ajuste del nivel Ajuste la longitud de las patas de forma que la burbuja del nivel permanezca dentro del círculo rojo. Fijación del cable conector Fije el cable conector para terminal múltiple al controlador remoto. Precaución ˎˎOriente la clavija “a” como se muestra en la ilustración e insértela en el controlador remoto. ˎˎSujete la clavija cuando desconecte el cable. Si tirase del propio cable podría dañar el conector. ˎˎEl trípode y el cable conector para terminal múltiple se incluyen juntos en el momento de la adquisición. Montaje de la cámara Instale una batería, tarjeta de memoria, etc., en la cámara antes de montarla en el trípode. 1 Tirando de la palanca de bloqueo de la zapata de montaje de la cámara completamente hacia la derecha, deslice la zapata de montaje de la cámara hacia afuera de la cabeza del trípode. 2 Fije la zapata de montaje de la cámara a la cámara. Apriete firmemente el tornillo de montaje de cámara. Cuando monte una videocámara, alinee el pasador con el orificio de posicionamiento (a). Precaución Cuando instale una cámara que no sea videocámara en el trípode, colóquela de forma que no toque el pasador para videocámaras. 3 Tirando de la palanca de bloqueo de la zapata de montaje de la cámara completamente hacia la derecha, fije la zapata de montaje de la cámara en la cabeza del trípode. Después, empuje la palanca de bloqueo de la zapata de montaje de la cámara hacia la izquierda para bloquearla. 4 Conecte el conector múltiple (c) al terminal múltiple de la cámara. Si el cable es demasiado largo, sujételo con una abrazadera de cable (b). Precaución ˎˎEl conector múltiple deberá insertarse con el lado correcto hacia arriba. Tenga cuidado de no conectarlo al revés ya que podría dañar el trípode o la cámara. ˎˎHay dos tipos de terminal múltiple de cámara. ˎˎCuando conecte el cable conector para terminal múltiple en el terminal múltiple de la cámara (en forma como en (d)), alinee la marca de la clavija con la marca del terminal múltiple. La inserción de la clavija por la fuerza al revés causará un mal funcionamiento. Ajuste de la altura del elevador 1 Afloje la palanca de bloqueo del elevador. 2 Ajuste de la altura girando la manivela de ajuste de la altura del elevador. 3 Apriete la palanca de bloqueo del elevador. Panoramización horizontal y vertical Antes de panoramizar horizontal y verticalmente, cerciórese de que la palanca de bloqueo del elevador esté firmemente bloqueada. De lo contrario, la cámara sufrirá sacudidas. Panoramización horizontal Puede realizar una panoramización horizontal de 360° cuando esté tomando imágenes. 1 Afloje la palanca de bloqueo de panoramización horizontal. 2 Ajuste de la posición de la cámara moviendo el mango de panoramización horizontal hacia la izquierda/derecha. 3 Apriete la palanca de bloqueo de panoramización horizontal. Precaución Si realiza una panoramización horizontal brusca, el tornillo de montaje de la cámara puede aflojarse. Compruebe de vez en cuando el tornillo para asegurarse de que no esté flojo. Panoramización vertical Puede realizar una panoramización vertical hacia arriba/abajo cuando esté tomando imágenes. 4 Afloje la palanca de bloqueo panoramización vertical. 5 Ajuste de la posición de la cámara moviendo el mango de panoramización horizontal hacia la arriba/abajo. 6 Apriete la palanca de bloqueo panoramización vertical. Cambio del ángulo de la cabeza del trípode Puede cambiar la posición de grabación de la cabeza del trípode de vertical a horizontal. Afloje la palanca de bloqueo de la cabeza del trípode, coloque la cabeza hacia la derecha y, a continuación, apriete la palanca. Precaución Dependiendo del centro de gravedad de la cámara, es posible que no pueda fijar la cabeza del trípode en la posición deseada o que el trípode se vuelva inestable. Utilización del controlador remoto Para más información, consulte el manual de instrucciones de la cámara. Conexión de la alimentación 1 Conecte la alimentación de la cámara y póngala en el modo de espera. La lámpara POWER/REC (e) del controlador remoto se encenderá en verde. 2 Ponga la cámara en el modo de película o imagen fija. Precaución Si deja la cámara en el modo de espera durante cierto tiempo, su alimentación se desconectará automáticamente. Para reanudar el modo de espera, conecte la alimentación de la cámara pulsando el botón POWER (a) del controlador remoto. Para grabar imágenes en movimiento Pulse el botón START/STOP (c). La lámpara POWER/REC se encenderá en rojo y se iniciará la grabación. Para detener la grabación, pulse de nuevo el botón START/STOP. La lámpara POWER/REC se encenderá en verde. La cámara entrará en el modo de espera. Para grabar una imagen fija Pulse el botón PHOTO (b) hasta la mitad para enfocar la cámara, y después púlselo a fondo. Función de bloqueo (A) Para la toma con obturación manual o la toma continua, puede ajustar el botón PHOTO de forma que se mantenga pulsado. Con el botón PHOTO pulsado a fondo, deslícelo en el sentido de la flecha. ˎˎCuando el botón PHOTO esté bloqueado para la toma con obturación manual, el obturador estará abierto. ˎˎCuando el botón PHOTO esté bloqueado para la toma continua, el obturador continuará abriendo y cerrándose. Precaución ˎˎNo todas las cámaras admiten la toma con obturación manual o la toma continua. Con respecto a los detalles, consulte el manual de instrucciones de su cámara. ˎˎNo pulse el botón PHOTO con demasiada fuerza porque podría romper el controlador remoto. ˎˎNo deje el botón PHOTO bloqueado. Desmontaje del controlador remoto (B) Cuando tome fotografías, podrá evitar que la cámara sufra sacudidas desmontando el controlador remoto del trípode antes de pulsar el botón PHOTO. Para desmontar el controlador remoto, tire de él hacia afuera mientras sujete el trípode y pulse el botón PUSH RELEASE (f). Para fijar el controlador remoto, deslícelo lentamente mientras sujete el trípode hasta que el botón PUSH RELEASE (f) salga con un clic. Utilización del zoom Incline la palanca del zoom (d). Lado T (telefoto): el motivo aparecerá más cerca. Lado W (gran angular): el motivo aparecerá más alejado. La velocidad del zoom varía en función del ángulo con el que se inclina la palanca del zoom. Zoom lento Ponga el selector SLOW ZOOM (h) en ON. Independientemente del ángulo de inclinación de la palanca del zoom, éste se realizará siempre a baja velocidad. Para cancelar la función de zoom lento, ponga el selector SLOW ZOOM en OFF. Precaución ˎˎLa velocidad del zoom lento varía dependiendo de la cámara. ˎˎCuando la lámpara POWER/ REC parpadee en rojo, en la cámara aparecerá un mensaje de advertencia. Compruebe dicho mensaje en la pantalla de la cámara. Para mostrar la línea de rejilla (C) Pulse el botón GRID LINE (g). En la pantalla de la cámara aparecerá una línea de rejilla horizontal/vertical. Ajuste las patas del trípode y el ángulo de inclinación de su cámara de acuerdo con la línea de rejilla. Puede elegir múltiples líneas de rejilla dependiendo del modelo de su cámara. Puede ajustar las líneas de rejilla pulsando el botón GRID LINE. Con respecto a los detalles, consulte el manual de instrucciones de su cámara. Para cancelar la visualización de la línea de rejilla, pulse el botón GRID LINE hasta que desaparezca. *La fotografía muestra un ejemplo de la pantalla. Es posible que la pantalla que aparezca en realidad sea distinta. Después de la grabación Pulse el botón POWER del controlador remoto para desconectar la alimentación de la cámara. Plegado del trípode 1 Retire la cámara del trípode. 2 Afloje la palanca de bloqueo de panoramización horizontal y la de bloqueo de panoramización vertical y pliegue el mango de panoramización horizontal. Devuelva la manivela de ajuste de la altura del elevador a su posición de retención. 3 Apriete la palanca de bloqueo de panoramización horizontal y la de bloqueo de panoramización vertical. 4 Afloje la palanca de bloqueo de ajuste de la longitud de las tres patas y pliegue éstas. 5 Apriete la palanca de bloqueo de ajuste de la longitud de las patas para que permanezcan en su sitio. Transporte del trípode Asegúrese de transportar el trípode en su funda de transporte. Precaución No transporte nunca el trípode con la cámara instalada en él. Especificaciones Carga máxima 3 kg Ángulo de panoramización horizontal 360 grados Ángulo de panoramización vertical 90 grados hacia abajo, 55 grados hacia arriba Extensión de las patas Cada pata tiene 4 ejes telescópicos. Funciones del controlador remoto Botón POWER, botón PHOTO, botón START/STOP, palanca del zoom (T/W), botón GRID LINE, botón PUSH RELEASE, selector SLOW ZOOM Dimensiones Altura máxima: Aprox. 1 465 mm (patas desplegadas y elevador completamente extendido) Altura mínima: Aprox. 480 mm Longitud del cable del controlador remoto Aprox. 800 mm Longitud del mango de panoramización horizontal Aprox. 260 mm Recorrido del elevador Aprox. 265 mm Gama de temperaturas de funcionamiento 0 °C a 40 °C Peso Aprox. 1,3 kg Accesorios suministrados Funda de transporte (1) Cable conector para terminal múltiple (1) Juego de documentación impresa El diseño y las especificaciones están sujetos a cambio sin previo aviso. Voordat u het product gebruikt, moet u deze gebruiksaanwijzing aandachtig doorlezen. Bewaar de gebruiksaanwijzing voor het geval u deze later als referentiemateriaal nodig hebt. WAARSCHUWING Verklein het gevaar van brand of elektrische schokken en 1) Stel derhalve het apparaat niet bloot aan regen of vocht. 2) Plaats beslist geen met vloeistof gevulde voorwerpen, bijvoorbeeld vazen, op het apparaat. Dit product is getest en voldoet aan de beperkingen die zijn uiteengezet in de EMC-regulering voor het gebruik van een verbindingskabel van minder dan 3 meter. Voor de klanten in Europa Verwijdering van oude elektrische en elektronische apparaten (van toepassing in de Europese Unie en andere Europese landen met gescheiden inzamelingssystemen) Dit symbool op het product of op de verpakking wijst erop dat dit product niet als huishoudelijk afval mag worden behandeld. Het moet echter naar een inzamelingspunt worden gebracht waar elektrische en elektronische apparatuur wordt gerecycled. Als u ervoor zorgt dat dit product op de correcte manier wordt verwerkt, helpt u mogelijke negatieve gevolgen voor mens en milieu die zouden kunnen veroorzaakt worden in geval van verkeerde afvalbehandeling te voorkomen. Het recycleren van materialen draagt bij tot het behoud van natuurlijke bronnen. Voor meer details in verband met het recyclen van dit product, kan u contact opnemen met de gemeentelijke instanties, de organisatie belast met de verwijdering van huishoudelijk afval of de winkel waar u het product hebt gekocht. Kennisgeving voor klanten in de landen waar EU richtlijnen van toepassing zijn Dit product werd geproduceerd door of in opdracht van Sony Corporation, 1-7-1 Konan Minato-ku Tokyo, 108-0075 Japan. Vragen met betrekking tot product conformiteit gebaseerd op EU-wetgeving kunnen worden gericht aan de gemachtigde vertegenwoordiger, Sony Deutschland GmbH, Hedelfinger Strasse 61, 70327 Stuttgart, Duitsland. Voor service- of garantiezaken verwijzen wij u door naar de adressen in de afzonderlijke service of garantie documenten. Voorzorgsmaatregelen bij gebruik De camera bevestigen en verwijderen Wanneer u de camera aan het statief bevestigt of ervan verwijdert, dient u de kantelvergrendelhendel stevig vast te maken. Bevestig geen accessoires aan de camera nadat u deze heeft gemonteerd op de statiefkop. Anders kan de statiefkop kantelen en de camera beschadigen. Reinigen ˎˎWanneer het statief vuil wordt, dient u deze te reinigen met een zachte doek die lichtjes is bevochtigd met een mild reinigingsmiddel. Veeg het statief daarna af met een droge doek. ˎˎNadat u het statief heeft gebruikt op het strandop op plaatsen die onderhevig raken aan zeebriezen, dient u deze te reinigen met een droge doek. Kenmerken VCT-VPR1 is een statief met een afstandsbedieningsfunctionaliteit voor camera’s. ˎˎU kunt de ingebouwde afstandsbediening in het panhandvat gebruiken om camera’s te bedienen die zijn uitgerust met de Sony Multi Terminal. Dit statief is mogelijk niet compatibel met alle camera’s met Multi Terminal. Ga naar de Sony-website voor de compatibele modellen. ˎˎDe afstandsbedieningsfuncties omvatten basis opnamefuncties (POWER ON/OFF, opnemen van video/foto en zoomen) en SLOW ZOOM ON/OFF en rasterweergave ON/OFF-functies. Overzicht van de onderdelen 1 2 3 4 5 6 7 8 9 10 11 12 13 14 15 16 17 18 19 20 21 22 23 24 25 26 27 Cameramontageschroef Pen Cameramontageschoen Statiefkop Panvergrendelhendel Kantelvergrendelhendel Lift Hendel Liftvergrendelhendel Afstelkruk lifthoogte Poot Stag Vergrendelhendel van de statiefkop Vergrendelhendel van de cameramontageschoen Kabelklem Aansluitkabel voor Multi Terminal POWER/REC-lampje Riemgat POWER-knop PHOTO-knop START/STOP-knop GRID LINE-knop Zoomhendel Panhandvat SLOW ZOOM-schakelaar PUSH RELEASE-knop Vergrendelhendel voor het afstellen van de pootlengte Het statief instellen 1 Spreid de poten. 2 Druk op blijf omlaag. 3 Ontgrendel de vergrendelingen voor het afstellen van de pootlengte. 4 Stel de lengte van de poten af. 5 Stel de vergrendelingen voor het afstellen van de pootlengte in. Waterpas stellen Pas de lengte van de poten zo aan dat de luchtbel aan de waterpas aan de rode cirkel blijft. De aansluitkabel aansluiten Bevestig de aansluitkabel voor Multi Terminal aan de afstandsbediening. Let op ˎˎRicht stekker "a" zoals afgebeeld en steek hem in de afstandsbediening. ˎˎHoud de stekker vast als u de kabel losmaakt. Trekken aan de kabel zelf kan schade veroorzaken aan de aansluiting. ˎˎHet statief en de aansluitkabel voor Multi Terminal zijn ten tijde van de aankoop meegeleverd. De camera monteren Installeer een accu, geheugenkaart etc. in de camera voordat u deze monteert op het statief. 1 Schuif de camera, terwijl u de vergrendelhendel van de cameramontageschoen helemaal naar rechts trekt, uit de cameramontageschoen van de statiefkop. 2 Bevestig de cameramontageschoen aan de camera. Draai de cameramontageschroef stevig vast. Wanneer u een videocamera bevestigd, dient u de pen uit te lijnen met het positiegat (a). Let op Wanneer u een andere camera dan een videocamera op het statief monteert, dient u deze zo te plaatsen dat het niet de pen voor videocamera’s raakt. 3 Bevestig de camera, terwijl u de de vergrendelhendel van de cameramontageschoen helemaal naar rechts trekt, de cameramontageschoen aan de statiefkop. Duw vervolgens de vergrendelhendel van de cameramontageschoen naar links om deze te vergrendelen. 4 Sluit de multi connector (c) aan op de Multi Terminal van de camera. Als de kabel te lang is, klemt u de kabel met een kabelklem (b). Let op ˎˎDe multi-connector moet met de juiste kant omhoog worden ingestoken. Let erop dat u hem niet ondersteboven aansluit anders kunt u het statief of de camera beschadigen. ˎˎEr zijn twee type camera multi terminals. ˎˎBij het aansluiten van de aansluitkabel voor multi terminal op de multi terminal van de camera (als een (d) gevormd), lijnt u het -teken op de stekker uit met het -teken op de multi terminal. Het met kracht verkeerd om plaatsen van de stekker, veroorzaakt een storing. De hoek van de statiefkop wijzigen U kunt de statiefkop wisselen van een horizontale opnamepositie naar en verticale opnamepositie. Maak de vergrendelhendel van de statiefkop los, zet de statiefkop naar rechts en maak de hendel vast. Let op U kunt de statiefkop mogelijk niet in uw gewenste positie vastzetten, of het statief kan instabiel worden, afhankelijk van het zwaartekrachtpunt van de camera. De afstandsbediening gebruiken Zie de gebruiksaanwijzing van de camera voor meer informatie. Het apparaat aanzetten 1 Zet de camera aan en zet hem in de standby-stand. Het POWER/REC-lampje (e) van de afstandsbediening gaat groen branden. 2 Zet de camera op film of fotomodus. Let op Indien u de camera enige tijd in standby-stand houdt, dan gaat de camera automatisch uit. Om standbystand te hervatten, zet u de camera aan en drukt op op de POWER-knop (a) van de afstandsbediening. Een filmbeeld opnemen Druk op de START/STOP-knop (c). Het POWER/REC-lampje gaat rood branden en het opnemen begint. Druk opnieuw op de START/STOPknop om het opnemen te stoppen. Het POWER/REC-lampje gaat groen branden. De camera is op standbymodus gezet. Een foto opnemen Druk de PHOTO-knop (b) halverwege in om de camera te laten scherpstellen en druk de knop dan helemaal in. Vergrendelingsfunctie (A) U kunt tijdens enkele opnamen of doorlopende opnamen de PHOTOknop zo instellen dat hij omlaag blijft. Schuif de PHOTO-knop als deze volledig is ingedrukt in de richting van de pijl. ˎˎWanneer de PHOTO-knop is vergrendeld tijdens enkele opnamen, dan is de sluiter open. ˎˎWanneer de PHOTO-knop is vergrendeld tijdens doorlopende opnamen, dan gaat de sluiter steeds open en dicht. Let op ˎˎBij het maken van foto´s kunt u het bewegen van de camera voorkomen door de afstandsbediening los te maken van het statief voordat u de PHOTO-knop indrukt. ˎˎDruk niet te hard op de PHOTOknop omdat de afstandsbediening anders kan breken. ˎˎZorg dat de PHOTO-knop niet vergrendeld blijft. Afstandsbediening (B) losmaken Bij het maken van foto´s kunt u het bewegen van de camera voorkomen door de afstandsbediening los te maken van het statief voordat u de PHOTO-knop indrukt. Om de afstandsbediening los te maken, trekt u deze eruit terwijl u het statief vasthoudt en op de PUSH RELEASE-knop (f) drukt. Voor het bevestigen van de afstandsbediening schuift u de afstandsbediening er langzaam op terwijl u het statief vasthoudt tot de PUSH RELEASE-knop (f) eruit klikt. Zoomen Kantel de zoomhendel (d). T-kant (voor tele): het onderwerp lijkt dichterbij. W-kant (groothoek): het onderwerp lijkt verder weg. De zoomsnelheid is afhankelijk van de hoek van de zoomhendel wanneer u deze kantelt. Langzaam zoomen Zet de SLOW ZOOM-schakelaar (h) op ON. Ongeacht de kantelhoek van de zoomhendel, wordt zoomen altijd uitgevoerd op lage snelheid. Om de langzame zoomfunctie te annuleren, zet u de SLOW ZOOMschakelaar op OFF. Let op ˎˎDe langzame zoomsnelheid verschilt, afhankelijk van de camera. ˎˎWanneer het POWER/REClampje rood knippert, wordt een waarschuwingsbericht weergegeven op de camera. Controleer het bericht op het scherm van de camera. Het rooster weergeven (C) Druk op de GRID LINE-knop (g). Er verschijnt een horizontaal/verticaal rooster op het scherm van de camera. Stel de poten van het statief af en de kantelhoek van uw camera volgens het rooster. U kunt meerdere roosterlijnen kiezen afhankelijk van uw cameramodel. U kunt het rooster instellen door te drukken op de GRID LINE-knop. Zie voor meer informatie de bedieningsinstructies van uw camera. Om het rooster op de weergave te annuleren, drukt u op de GRID LINE-knop totdat de roosterweergave uit gaat. *De foto is slechts een voorbeeld van het scherm. Het feitelijke scherm dat wordt weergegeven kan anders zijn. Na het opnemen Druk op de POWER-knop van de afstandsbediening om de camera uit te zetten. Het statief invouwen Zorg dat de liftvergrendelhendel stevig vast zit voordat u gaat pannen en kantelen. Als deze niet stevig vast zit, zal de camera bewegen. 1 Haal de camera van het statief. 2 Maak de panvergrendelknop en de kantelvergrendelknop los en vouw het panhandvat omlaag. Zet de afstelkruk voor de lifthoogte terug in de houdpositie. 3 Maak de panvergrendelhendel en de kantelvergrendelhendel vast. 4 Maak de vergrendelhendel voor het afstellen van de pootlengte van de drie poten los en vouw de poten in. 5 Maak de vergrendelhendel voor het afstellen van de pootlengte vast om de poten op hun plaats te houden. Pannen Het statief dragen Stel de hoogte van de lift af 1 Maak de liftvergrendelhendel los. 2 Stel de hoogte af door de afstelkruk voor de lifthoogte te draaien. 3 Maak de liftvergrendelhendel vast. Pannen en kantelen U kunt 360° pannen bij het maken van opnamen. 1 Maak de panvergrendelhendel los. 2 Stel de stand van de camera af door het panhandvat links/rechts te bewegen. 3 Maak de panvergrendelhendel vast. Let op Indien u de camera plotseling gaat pannen, kan de cameramontageschroef los raken. Controleer de schroef af en toe om er zeker van te zijn dat deze niet los raakt. Kantelen U kunt de camera omhoog/omlaag kantelen tijdens het maken van opnamen. 4 Maak de kantelvergrendelhendel los. 5 Stel de stand van de camera af door het kantelhandvat omhoog/ omlaag te bewegen. 6 Maak de kantelvergrendelhendel vast. Zorg dat u het statief in de draagtas draagt. Let op Draag het statief nooit als de camera er nog aan bevestigd is. Technische gegevens Maximale belasting 3 kg Afmetingen Maximale hoogte: Ongeveer 1 465 mm (poten gespreid en lift volledig uitgetrokken) Minimale hoogte: Ongeveer 480 mm Kabellengte van de afstandsbediening Ongeveer 800 mm Panhandvatlengte Ongeveer 260 mm Liftslag Ongeveer 265 mm Bereik bedrijfstemperatuur 0°C tot 40°C Gewicht Ongeveer 1,3 kg Meegeleverde accessoires Draagtas (1) Aansluitkabel voor Multi Terminal (1) Handleiding en documentatie Wijzigingen in ontwerp en technische gegevens voorbehouden, zonder kennisgeving. Prima di utilizzare il prodotto, leggere attentamente il presente manuale e conservarlo per eventuali riferimenti futuri. AVVERTENZA Per ridurre il rischio di incendi o scosse elettriche, 1) non esporre l’apparecchio a pioggia o umidità, 2) non collocare sull’apparecchio oggetti contenenti liquidi, quali ad esempio vasi. Il presente prodotto è stato testato ed è risultato conforme ai limiti stabiliti dalla normativa EMC relativa all’uso di cavi di collegamento di lunghezza inferiore a 3 metri. Per gli utenti in Europa Trattamento del dispositivo elettrico o elettronico a fine vita (applicabile in tutti i paesi dell’Unione Europea e in altri paesi europei con sistema di raccolta differenziata) Questo simbolo sul prodotto o sulla confezione indica che il prodotto non deve essere considerato come un normale rifiuto domestico, ma deve invece essere consegnato ad un punto di raccolta appropriato per il riciclo di apparecchi elettrici ed elettronici. Assicurandovi che questo prodotto sia smaltito correttamente, voi contribuirete a prevenire potenziali conseguenze negative per l’ambiente e per la salute che potrebbero altrimenti essere causate dal suo smaltimento inadeguato. Il riciclaggio dei materiali aiuta a conservare le risorse naturali. Per informazioni più dettagliate circa il riciclaggio di questo prodotto, potete contattare l’ufficio comunale, il servizio locale di smaltimento rifiuti oppure il negozio dove l’avete acquistato. In caso di smaltimento abusivo di apparecchiature elettriche e/o elettroniche potrebbero essere applicate le sanzioni previste dalla normativa applicabile (valido solo per l’Italia) Avviso per i clienti residenti nei paesi che applicano le direttive UE Questo prodotto è stato fabbricato da o per conto di Sony Corporation, 1-7-1 Konan Minato-ku Tokyo, 108-0075 Giappone. Eventuali richieste in merito alla conformità del prodotto in ambito della legislazione Europea, dovranno essere indirizzate al rappresentante autorizzato, Sony Deutschland GmbH, Hedelfinger Strasse 61, 70327 Stuttgart, Germania. Per qualsiasi informazione relativa al servizio o la garanzia, si prega di fare riferimento agli indirizzi riportati separatamente sui documenti relativi all’assistenza o sui certificati di garanzia. Precauzioni per l’uso Applicazione e rimozione dell’apparecchio video/ fotografico Quando si applica un apparecchio video/fotografico al treppiede o quando lo si rimuove, stringere saldamente e fissare la leva di blocco dell’inclinazione. Non applicare accessori all’apparecchio video/ fotografico dopo averlo montato sulla testa del treppiede. In caso contrario la testa del treppiede potrebbe inclinarsi e danneggiare l’apparecchio video/fotografico. Pulizia ˎˎSe il treppiede si sporca, pulirlo con un panno morbido leggermente inumidito con una soluzione detergente leggera. Passare quindi sul treppiede un panno asciutto. ˎˎDopo aver utilizzato il treppiede sulla spiaggia o in luoghi soggetti a brezza marina, pulirlo con un panno asciutto. Caratteristiche VCT-VPR1 è un treppiede dotato di funzioni di telecomando per apparecchi video/fotografici. ˎˎÈ possibile utilizzare il telecomando nell’impugnatura di controllo per azionare gli apparecchi video/ fotografici dotati di terminale multiplo Sony. Il treppiede potrebbe non essere compatibile con tutti i modelli di apparecchio video/ fotografico dotati di terminale multiplo. Per i modelli compatibili, visitare il sito web di Sony. ˎˎLe funzioni del telecomando includono le funzioni base di registrazione (POWER ON/OFF, registrazione video/foto e zoom) e anche le funzioni SLOW ZOOM ON/OFF e visualizzazione griglia ON/OFF. Identificazione delle parti 1 2 3 4 5 6 7 8 9 10 11 12 13 Panhoek 360 graden 14 Kantelhoek 90 graden omlaag, 55 graden omhoog 15 16 Pootverlenging Elke poot heeft vier telescopische schachten. 17 18 19 20 21 22 23 24 25 26 27 Afstandsbedieningsfuncties. POWER-knop, PHOTO-knop, START/STOP-knop, zoomhendel (T/W), GRID LINE-knop, PUSH RELEASE-knop, SLOW ZOOMschakelaar Vite di montaggio dell’apparecchio video/ fotografico Perno Slitta di montaggio per apparecchio video/fotografico Testa del treppiede Leva di blocco della panoramica Leva di blocco dell’inclinazione Elevatore Livella Leva di blocco dell’elevatore Manovella di regolazione dell’altezza dell’elevatore Gamba Puntello Leva di blocco della testa del treppiede Leva di bloccaggio della slitta di montaggio per apparecchio video/fotografico Fermacavi Cavo di collegamento per terminale multiplo Spia POWER/REC Foro per cinghia Tasto POWER Tasto PHOTO Tasto START/STOP Tasto GRID LINE Leva zoom Impugnatura di controllo Interruttore SLOW ZOOM Tasto PUSH RELEASE Leva di bloccaggio della regolazione lunghezza gamba Impostazione del treppiede 2 Impostare l’apparecchio video/ fotografico sulla modalità filmato o foto. 1 Allargare le gambe. 2 Abbassare il puntello. 3 Rilasciare le leve di bloccaggio della regolazione lunghezza gamba. 4 Regolare la lunghezza delle gambe. 5 Bloccare le leve di bloccaggio della regolazione lunghezza gamba. Attenzione Se si lascia l’apparecchio video/ fotografico in modalità di standby a lungo, l’apparecchio video/fotografico si spegne automaticamente. Per ripristinare la modalità di standby, accendere l’apparecchio video/ fotografico premendo il tasto POWER (a) del telecomando. Regolazione della messa in piano Regolare la lunghezza delle gambe in modo che la bolla d’aria rimanga nel cerchio rosso. Applicazione del cavo di collegamento Applicare il cavo di collegamento per terminale multiplo al telecomando. Attenzione ˎˎOrientare la spina “a” come illustrato e inserirla nel telecomando. ˎˎTenere la spina mentre si scollega il cavo. Se si tira il cavo, il connettore potrebbe danneggiarsi. ˎˎIl treppiede e il cavo di collegamento per il terminale multiplo sono inclusi assieme al momento dell’acquisto. Applicazione dell’apparecchio video/fotografico Inserire un pacco batteria, la scheda di memoria, ecc. nell’apparecchio video/fotografico prima di montarlo sul treppiede. 1 Spostando la leva di blocco della slitta di montaggio per apparecchio video/fotografico completamente a destra, far scorrere la slitta di montaggio per apparecchio video/fotografico per estrarla dalla testa del treppiede. 2 Applicare la slitta di montaggio per apparecchio video/fotografico all’apparecchio video/fotografico. Stringere saldamente la vite di montaggio dell’apparecchio video/fotografico. Quando si applica una videocamera, allineare il perno con il foro di posizionamento (a). Attenzione Se si applica al treppiede un apparecchio diverso da una videocamera, posizionarlo in modo che non tocchi il perno per le videocamere. 3 Spostando la leva di blocco della slitta di montaggio per apparecchio video/fotografico completamente a destra, applicare la slitta di montaggio per apparecchio video/fotografico alla testa del treppiede. Spingere quindi la leva di blocco della slitta di montaggio per apparecchio video/fotografico a sinistra per bloccarla. 4 Collegare il connettore multiplo (c) al terminale multiplo dell’apparecchio video/ fotografico. Se il cavo è troppo lungo, fissarlo con un fermacavi (b). Attenzione ˎˎIl connettore multiplo deve essere inserito nel verso giusto. Fare attenzione a non collegarlo capovolto. In caso contrario si potrebbe danneggiare il treppiede o l’apparecchio video/ fotografico. ˎˎIl terminale multiplo dell’apparecchio video/ fotografico può essere di due tipi. ˎˎQuando si collega il cavo di collegamento per terminale multiplo al terminale multiplo dell’apparecchio video/ fotografico (sagoma (d)), allineare il segno sulla spina con il segno sul terminale multiplo. Se si forza l’inserimento della spina nel verso sbagliato si causeranno malfunzionamenti. Regolazione dell’altezza dell’elevatore 1 Allentare la leva di bloccaggio dell’elevatore. 2 Regolare l’altezza girando la manovella di regolazione dell’altezza dell’elevatore. 3 Stringere la leva di bloccaggio dell’elevatore. Panoramica e inclinazione Prima di utilizzare le funzioni di panoramica e inclinazione, accertarsi che la leva di blocco dell’elevatore sia bloccata saldamente. Se non è bloccata saldamente, l’apparecchio video/fotografico si muove. Panoramica È possibile effettuare una panoramica di 360° durante la ripresa di immagini. 1 Allentare la leva di bloccaggio della panoramica. 2 Regolare la posizione dell’apparecchio video/fotografico spostando l’impugnatura di controllo a destra/sinistra. 3 Stringere la leva di bloccaggio della panoramica. Attenzione Se si esegue improvvisamente una panoramica, la vite di montaggio dell’apparecchio video/fotografico potrebbe allentarsi. Controllare periodicamente la vite per assicurarsi che non sia allentata. Inclinazione È possibile inclinare l’apparecchio video/fotografico in alto e in basso durante la ripresa di immagini. 4 Allentare la leva di bloccaggio dell’inclinazione. 5 Regolare la posizione dell’apparecchio video/fotografico spostando l’impugnatura di controllo in alto/in basso. 6 Stringere la leva di bloccaggio dell’inclinazione. Modifica dell’angolazione della testa del treppiede Per registrare un’immagine in movimento Premere il tasto START/STOP (c). La spia POWER/REC si illumina di rosso e la registrazione ha inizio. Per interrompere la registrazione, premere di nuovo il tasto START/ STOP. La spia POWER/REC si illumina di verde. L’apparecchio video/fotografico è impostato in modalità di standby. Durante le riprese con esposizione prolungata o lo scatto continuo , è possibile impostare il tasto PHOTO in modo che rimanga abbassato. Tenendo il tasto PHOTO completamente premuto, farlo scorrere in direzione della freccia. ˎˎQuando il tasto PHOTO viene bloccato durante le riprese con esposizione prolungata, l’otturatore è aperto. ˎˎQuando il tasto PHOTO viene bloccato durante lo scatto continuo, l’otturatore continua ad aprirsi e chiudersi. Attenzione ˎˎNon tutti gli apparecchi video/ fotografici supportano la funzione di esposizione prolungata o scatto continuo. Per informazioni particolareggiate a questo riguardo consultare le istruzioni per l’uso dell’apparecchio video/fotografico. ˎˎNon premere il tasto PHOTO con troppa forza per evitare di rompere il telecomando. ˎˎNon lasciare bloccato il tasto PHOTO. Rimozione del telecomando (B) Quando si scattano foto è possibile evitare il tremolio dell’apparecchio video/fotografico rimuovendo il telecomando dal treppiede prima di premere il tasto PHOTO. Per rimuovere il telecomando, estrarlo mentre si tiene il treppiede e si preme il tasto PUSH RELEASE (f). Per inserire il telecomando, far scorrere lentamente il telecomando in sede mentre si tiene il treppiede fino a quando il tasto PUSH RELEASE (f) scatta verso l’esterno. Zoom Inclinare la leva dello zoom (d). Lato T (teleobiettivo): il soggetto appare più vicino. Lato W (grandangolare): il soggetto appare più lontano. La velocità dello zoom cambia in base all’angolazione della leva dello zoom quando viene inclinata. Zoom lento Portare l’interruttore SLOW ZOOM (h) su ON. Indipendentemente dall’angolo di inclinazione della leva dello zoom, lo zoom viene sempre eseguito a velocità rallentata. Per annullare la funzione di zoom lento, portare l’interruttore SLOW ZOOM su OFF. Attenzione ˎˎLa velocità dello zoom lento varia in base all’apparecchio video/ fotografico. ˎˎQuando la spia POWER/REC lampeggia con luce rossa, viene visualizzato un messaggio di avviso sull’apparecchio video/fotografico. Controllare il messaggio sullo schermo dell’apparecchio video/ fotografico. Per visualizzare le linee della griglia (C) Premere il tasto GRID LINE (g). Viene visualizzata una griglia di linee orizzontali/verticali sullo schermo dell’apparecchio video/fotografico. Regolare le gambe del treppiede e l’angolo di inclinazione dell’apparecchio video/fotografico seguendo le linee della griglia. È possibile scegliere più linee di griglia in base al modello dell’apparecchio video/fotografico. Per impostare le linee della griglia, premere il tasto GRID LINE. Per informazioni particolareggiate a questo riguardo consultare le istruzioni per l’uso dell’apparecchio video/fotografico. Per annullare la visualizzazione delle linee della griglia premere il tasto GRID LINE fino a quando le linee della griglia si disattivano. Accessori in dotazione Custodia di trasporto (1) Cavo di collegamento per terminale multiplo (1) Corredo di documentazione stampata 1 2 3 Disegno e caratteristiche tecniche sono soggetti a modifiche senza preavviso. * 4 5 2 3 4 5 1 2 1 2 3 4 5 6 7 8 9 10 11 12 13 14 15 16 17 18 19 20 21 22 23 24 25 26 27 1 2 3 4 5 Dopo la registrazione Premere il tasto POWER del telecomando per spegnere l’apparecchio video/fotografico. 1 6 *La fotografia è solo un esempio dello schermo. Lo schermo effettivo da visualizzare potrebbe essere diverso. Ripiegare il treppiede 1 Rimuovere l’apparecchio video/ fotografico dal treppiede. 2 Allentare la leva di blocco della panoramica e la leva di blocco dell’inclinazione, quindi ripiegare l’impugnatura di controllo. Reinserire la manovella di regolazione dell’altezza dell’elevatore nella posizione di fermo. 3 Stringere la leva di blocco della panoramica e la leva di blocco dell’inclinazione. 4 Allentare la leva di blocco della regolazione delle tre gambe e ripiegare le gambe. 5 Stringere la leva di blocco della regolazione della lunghezza delle gambe per mantenerle bloccate. Trasporto del treppiede 1 2 3 Accertarsi che il treppiede sia nella propria custodia di trasporto. Attenzione Non trasportare mai il treppiede con l’apparecchio video/fotografico applicato ad esso. 4 Caratteristiche tecniche Estensione delle gambe Ogni gamba è dotata di quattro aste telescopiche 1 Accendere l’alimentazione dell’apparecchio video/fotografico e impostarlo in modalità di standby. La spia POWER/REC (e) del telecomando si illumina di verde. Peso Circa 1,3 kg Funzione di blocco (A) Attenzione A seconda del baricentro dell’apparecchio video/fotografico, potrebbe non essere possibile fissare la testa del treppiede nella posizione desiderata, oppure il treppiede potrebbe diventare instabile. Accensione dell’alimentazione Range temperatura di utilizzo Da 0°C a 40°C Premere fino a metà corsa il tasto PHOTO (b) per mettere a fuoco l’apparecchio video/fotografico, quindi premere a fondo il tasto. Carico massimo 3 kg Consultare le istruzioni per l’uso dell’apparecchio video/fotografico per ulteriori informazioni. Per registrare una foto È possibile spostare la testa del treppiede dalla posizione di registrazione orizzontale a verticale. Allentare la leva di blocco della testa del treppiede, impostare la testa del treppiede a destra, quindi stringere la leva. Utilizzo del telecomando Lunghezza impugnatura di controllo Circa 260 mm Corsa elevatore Circa 265 mm Angolo di panoramica 360 gradi Angolo di inclinazione 90 gradi in basso, 55 gradi in alto Funzioni del telecomando Tasto POWER, tasto PHOTO, tasto START/STOP, leva zoom (T/W), tasto GRID LINE, tasto PUSH RELEASE, interruttore SLOW ZOOM Dimensioni Altezza massima: Circa 1 465 mm (gambe allargate ed elevatore completamente alzato) Altezza minima: Circa 480 mm Lunghezza cavo telecomando Circa 800 mm * 1 2 3 1 2