1
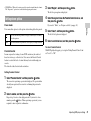
Instruction Manual
SCPH-70002
SCPH-70003
Before using this product, carefully read this manual and retain it for future reference.
2-187-122-23(1)
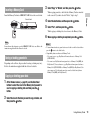
WARNING
To prevent fire or shock hazard, do not expose the console to
rain or moisture.
To prevent fire or shock hazard, do not place a container filled
with liquids on top of the console.
Read carefully before operating your
PlayStation®2 console
A few people may experience epileptic seizures when viewing flashing lights or
patterns in our daily environment. These persons may experience seizures while
watching TV or playing video games, including DVD-Videos or games played on
the PlayStation®2 console. Players who have not had any seizures may nonetheless
have an undetected epileptic condition. Consult your physician before operating the
PlayStation®2 console if you have an epileptic condition or experience any of the
following symptoms while watching TV programs or playing video games: altered
vision, muscle twitching, other involuntary movements, loss of awareness of your
surroundings, mental confusion, and/or convulsions.
NOTICE FOR CUSTOMERS IN THE UNITED KINGDOM
To avoid electrical shock, do not open the cabinet. Refer
servicing to qualified personnel only.
Caution
The use of optical instruments with this product will increase
eye hazard. As the laser beam used in this unit is harmful to
eyes, do not attempt to disassemble the cabinet.
Refer servicing to qualified personnel only.
A moulded plug complying with BS1363 is fitted to this equipment for your safety
and convenience.
Should the fuse in the plug supplied need to be replaced, a 5 AMP fuse approved by
ASTA or BSI to BS1362, (i.e., marked with or mark) must be used.
If the plug supplied with this equipment has a detachable fuse cover, be sure to attach
the fuse cover after you change the fuse. Never use the plug without the fuse cover.
If you should lose the fuse cover, please contact the appropriate PlayStation®
customer service helpline which can be found within every PlayStation® and
PlayStation®2 format software manual.
A limited number of PlayStation® format software titles may not play or play
differently on the PlayStation®2 computer entertainment system. This is primarily
due to design variations in PlayStation® format software. For further information on
individual software titles, please contact the appropriate PlayStation® customer
service helpline which can be found within every PlayStation® and PlayStation®2
format software manual.
This appliance is classified as a CLASS 1 LASER product.
This equipment has been tested and found to comply with the
limits set out in the EMC Directive using a connection cable
shorter than 3 metres (9.8 feet).
2
WARNING
Where you see this symbol on any of our electrical products or packaging, it indicates
that the relevant electrical product should not be disposed of as general household
waste in Europe. To ensure the correct waste treatment of the product, please dispose
of it in accordance with any applicable local laws or requirements for disposal of
electrical equipment. In so doing, you will help to conserve natural resources and
improve standards of environmental protection in treatment and disposal of electrical
waste.
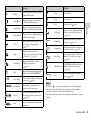
Table of contents
WARNING .................................................................................... 2
Precautions ..................................................................................... 4
Preparation
Getting started ................................................................................ 7
Part names ...................................................................................... 8
Connecting to a TV ........................................................................ 9
Connecting digital audio equipment ............................................ 12
Connecting the controller............................................................. 12
Connecting the AC adaptor and AC power cord ......................... 13
Turning the console on and off .................................................... 14
Games
Main menu
Displaying the main menu............................................................35
Using the Browser screen.............................................................35
Using the System Configuration menu.........................................36
Using the Version Information screen..........................................39
Networking
Connecting to a network...............................................................42
Creating network settings .............................................................44
Additional information
Compatible software.....................................................................45
Accessories ...................................................................................46
GUARANTEE..............................................................................47
Specifications ...............................................................................49
Troubleshooting............................................................................50
Playing a game ............................................................................. 15
Using Memory Cards ................................................................... 18
Audio CDs
Playing an audio CD .................................................................... 20
DVDs
Watching a DVD.......................................................................... 22
Using the playback modes ........................................................... 26
Adjusting DVD player settings .................................................... 28
Table of contents
3
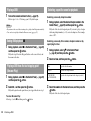
Health
Precautions
This product has been designed with the highest concern for safety. However, any
electrical device, if used improperly, has the potential for causing fire, electrical
shock or personal injury. To help ensure accident-free operation, follow these
guidelines:
• Observe all warnings, precautions and instructions.
• Stop use and unplug the AC power cord from the electrical outlet immediately if
the device functions in an abnormal manner or produces unusual sounds or smells.
• Contact the appropriate PlayStation® customer service helpline which can be
found within every PlayStation® and PlayStation®2 format software manual if the
device does not operate properly.
Safety
• Do not remove the console exterior or disassemble the console. The laser beam
emitted from the lens of this unit may be harmful to the eyes.
• Do not use the console near water.
• Keep the console and all connecting cords and cables out of the reach of children.
• Do not touch the plug of the AC power cord with wet hands.
• Do not touch the console or connected accessories during an electrical storm.
• Do not touch the console or AC adaptor for extended periods of time while the
console is turned on as extended contact may cause low-temperature burns.
• Do not place the console and connected accessories on the floor or in a place where
they may cause persons walking by to trip or stumble.
• Adjust the settings of the DVD player according to the instructions provided before
playing a DVD. If the settings are not correct, a loud sound may be emitted,
possibly injuring your ears or damaging the speakers.
• Do not touch a disc while it is spinning as personal injury or damage to the disc
may result.
• Do not close the disc cover in a way that could pinch your hand or fingers as
personal injury or damage to the console may result.
4
Precautions
• Stop using the console immediately if you experience any of the following
symptoms. If the condition persists, consult a doctor.
– Lightheadedness, nausea, or a sensation similar to motion sickness
– Tired, uncomfortable or aching hands or arms
– Tired, dry or aching eyes
• When operating the unit, play in a well-lit room and keep a safe distance from the
TV screen.
• Avoid prolonged use of the console. Take a break of about 15 minutes during every
hour of play.
• Do not use the console when you are tired or short of sleep.
• Listening to sound continuously for a long time with a high volume may adversely
affect the ears. Be careful especially when using headphones. Adjust the volume
so that surrounding sounds can be heard.
Use and handling
AC adaptor and AC power cord use
• Do not throw or drop the console or accessories, or expose them to strong physical
shock.
• Do not place the console or accessories on surfaces that are unstable, tilted or
subject to vibration.
• Do not expose the console or accessories to high temperatures, high humidity or
direct sunlight (use in an environment where temperatures range from 5 °C to
35 °C).
• Do not place the console or accessories in locations subject to sudden temperature
change (for example, changes of 10 °C per hour or more).
• Do not leave the console or accessories in a car with its windows closed
(particularly in summer).
• Do not place the console in locations of poor ventilation such as small, enclosed
areas, directly against a wall or on a thick carpet or bedding.
• Do not expose the console to dust, smoke or steam. This can cause the console to
malfunction.
• Do not allow liquid or small particles to get into the console.
• Do not put any objects on the console.
• Do not touch or insert foreign objects into the connectors of the console or
accessories.
• Do not place the console close to magnetic fields produced by magnets or
loudspeakers.
• Do not set the console other than in the vertical or horizontal position. When
placing in the vertical position, use the Vertical Stand (for PlayStation®2) (sold
separately) that is compatible with this console. Also, do not change the position
while the console is turned on.
• Do not place any rubber or vinyl materials on the console exterior for an extended
period of time.
• To help ensure safe operation, regularly inspect the AC adaptor and AC power
cord. If damaged, stop use immediately and contact the appropriate PlayStation®
customer service helpline which can be found within every PlayStation® and
PlayStation®2 format software manual.
• Do not use a power cord other than the supplied AC adaptor and AC power cord.
• Check that there is no dust or lint on the power plug before inserting into an
electrical outlet. If the plug becomes dirty, wipe it off with a dry cloth before
connecting.
• Unplug the AC power cord from the electrical outlet before cleaning or moving the
console, or when you do not intend to use the console for an extended period of
time. When disconnecting, grasp the power cord by the plug and pull straight out
of the electrical socket. Never pull by the cord and do not pull out at an angle.
• Do not connect the AC adaptor and/or AC power cord to a voltage transformer or
inverter.
Notes on safety when using the Analog Controller
(DUALSHOCK®2)*
• Stop using the console immediately if you begin to feel tired or if you experience
discomfort or pain in your hands or arms while operating the Analog Controller
(DUALSHOCK®2). If the condition persists, consult a doctor.
• The Analog Controller (DUALSHOCK®2) is intended for use with the hands only.
Do not bring it into contact with your head, face or the bones of any other part of
the body.
• The vibration function of the Analog Controller (DUALSHOCK®2) can aggravate
injuries. Do not use the vibration function if you have any ailment or injury to the
bones, joints or muscles of your hands or arms. Note that some PlayStation®2 and
PlayStation® format software titles set the vibration function to "On" by default. In
most cases, the vibration function can be set to "Off" in the options menu of the
software. Do not play such titles using the Analog Controller (DUALSHOCK®2)
unless you have set the vibration function to "Off".
• Avoid prolonged use of the Analog Controller (DUALSHOCK®2). Take a break
at about 30-minute intervals.
* These notes also apply to other controllers.
Precautions
5
Connecting with a network cable
Moisture condensation
Do not connect network cables or telephone cords of the following types to the
network connector:
• Standard residential telephone lines
• Network cables not appropriate for use with a 10Base-T/100Base-TX network
• Any ISDN (digital) compatible phone or data line
• PBX phone lines
• Other "unknown" types of telephone lines
If the console or disc is brought directly from a cold location to a warm one, moisture
may condense on the lens inside the console or on the disc. Should this occur, the
console may not operate properly. In this case, remove the disc and turn off and
unplug the console. Do not put the disc back in until the moisture evaporates (this
may take several hours). If the console still does not operate properly, contact the
appropriate PlayStation® customer service helpline which can be found within every
PlayStation® and PlayStation®2 format software manual.
Disc handling
Cleaning
• Do not touch the disc surface when handling a disc; hold it by the edges.
• Do not stick paper or tape onto discs and do not write on discs.
• Fingerprints, dust, dirt or scratches on the disc can distort the picture or reduce
sound quality. Always handle carefully and make sure discs are clean before use.
• Do not leave discs near a heat source, in direct sunlight or in high humidity.
• Store discs in their cases when not in use - scratched and damaged discs will not
function correctly.
• Clean discs using a soft cloth, lightly wiping from the centre outwards.
Do not use solvents such as benzine, commercially available cleaners not intended
for CDs or anti-static spray intended for vinyl LPs.
• Do not leave a disc in the console when moving or changing the position of the
console.
• Do not use irregularly shaped discs (for example, heart- or star-shaped discs) or
damaged, re-shaped or repaired discs.
• For safety reasons, before cleaning the console or connected accessories, 1) turn
off the console, 2) disconnect the power plug for the console from the electrical
outlet, and 3) remove the network cable from the network connector.
• If the exterior of the console becomes dirty, soak a soft cloth in a mild detergent
solution diluted with water, tightly squeeze the cloth to remove the excess liquid,
wipe the affected area of the exterior, and finish by wiping with a dry cloth.
• Do not use solvents or other chemicals to clean the console exterior, since these
may damage the surface. When using a chemically-treated cleaning cloth, follow
the usage instructions supplied with the cloth.
• When dust accumulates in the console vents, remove the dust with a low-powered
vacuum cleaner.
• Do not touch the lens located inside the disc cover. To help protect the lens from
dust, keep the disc cover closed except when inserting or removing discs.
Never disassemble the console or supplied accessories
Use the PlayStation®2 console and accessories according to the instructions in this
manual. No authorisation for the analysis or modification of the console, or the
analysis and use of its circuit configurations, is provided. There are no userserviceable components inside the PlayStation®2 console. Disassembling the
console will void the guarantee. Additionally, there is a risk of exposure to laser
radiation as well as to electrical shock hazards.
When connecting the console to a plasma or projection* TV
Do not leave a still image on the TV screen for an extended period of time, as this
may leave a faint image permanently on the screen.
* Except LCD screen types.
6
Precautions
Preparation
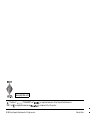
Note
Checking the package contents
Check that you have all of the following items. If any items are missing,
contact the appropriate PlayStation® customer service helpline which can
be found within every PlayStation® and PlayStation®2 format software
manual.
s AC adaptor...1
s Analog Controller
(DUALSHOCK®2)...1
Preparation
You first need to remove the protective tape before
using the console.
Getting started
s PlayStation®2 console...1
Protective tape
Positioning the console
You can place the console in either the horizontal or vertical position.
Horizontal position
Set the console horizontally.
Vertical position
When setting the console in the vertical
position, use the SCPH-70110 E Vertical
Stand (for PlayStation®2) (sold separately).
s AV Cable (integrated
audio/video)...1
Note
s AC power cord...1
s Euro-AV connector plug
(supplied with SCPH-70003)...1
Some Vertical Stands (for PlayStation®2) cannot be used with this model of the
page 46). Choose the SCPH-70110 E when purchasing a
PlayStation®2 console (
Vertical Stand.
(supplied with SCPH-70002)
s Instruction Manual...1
(supplied with SCPH-70003)
Getting started
7
Caution
Do not place the console in locations where it may be exposed to the following
conditions:
• Places subject to excessive cigarette smoke or dust. Cigarette smoke residue
or dust build-up on the internal components, such as the lens, may cause the
console to malfunction.
• Places subject to extreme temperatures, in direct sunlight, near a heat source,
or in a car with its windows closed (particularly in summer). These conditions
may warp the exterior of the console or cause the console to malfunction.
• Places close to magnetic fields, such as those produced by magnets or
loudspeakers.
• Places subject to vibration.
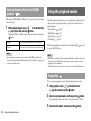
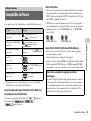
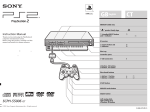
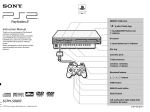
Part names
PlayStation®2 console front
Disc cover
]/1 (on/standby) indicator
A (open) button
]/1 (on/standby)/RESET button
MEMORY CARD slot 2
MEMORY CARD slot 1
"
" product family logo*
RESET
IR receiver
Controller port 1
Front vent
Controller port 2
USB connector
* The "
" product family logo can be rotated to match the horizontal or vertical
positioning of the console.
Note
You can connect USB devices that are compatible with the PlayStation®2 console.
Note, however, that not all USB-compatible products work with the PlayStation®2
console. Refer to the instructions supplied with the device to be connected for more
information.
8
Part names
PlayStation®2 console rear
Preparation
Connecting to a TV
Rear vent
Before connecting
! DC IN 8.5V
NETWORK connector
DIGITAL OUT (OPTICAL)
connector
• Do not plug the AC power cord for the console into the electrical outlet
until you have made all other connections.
• Check that the TV is turned off.
connector
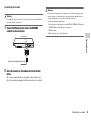
Connecting to a TV using the supplied AV Cable
AV MULTI OUT connector
Connect the console to the TV as shown below.
Console rear
Note
For part names of the Analog Controller (DUALSHOCK®2), see "Using the Analog
page 17).
Controller (DUALSHOCK®2)" (
Audio and video inputs of the TV
VIDEO
Yellow
White
L-AUDIO-R
Red
Do not use when
connecting to a
monaural TV.
To the AV MULTI
OUT connector
AV Cable (integrated audio/video)
Connecting to a TV
9
Caution
If you display a still image on a plasma or projection* TV screen for an extended
period of time, "ghosting" may occur. This is a characteristic of these types of
TVs. Static, non-moving images, such as console setting menus, DVD menus or
paused images, may leave a faint image permanently on the TV screen if left on
for an extended time. Refer to the instructions supplied with your TV for details.
* except those of LCD screen types.
Connecting to a TV with a Euro-AV connector
using the Euro-AV connector plug (SCPH-70003)
Connect your PlayStation®2 console to the Euro-AV connector (SCART)
on the TV using the Euro-AV connector plug and AV Cable (integrated
audio/video), making sure you match the colour-coded plugs of the AV
Cable to the matching jacks of the connector plug.
Console rear
Note
The console can be connected to a VCR or an integrated TV/VCR. Note, however,
that if you play a DVD with copy-protection encryption, picture quality may be
reduced.
Euro-AV
connector plug
To Euro-AV
connector
To AV MULTI
OUT connector
AV Cable (integrated audio/video)
After connecting
Set your TV to the appropriate video input mode. Refer to the Instruction
Manual of your TV.
10
Connecting to a TV
Notes
When using cables sold separately
TV
Cable type
A TV with S VIDEO inputs
S VIDEO Cable (SCPH-10060 E)
A TV without video inputs
RFU Adaptor (SCPH-10072 C)
(for SCPH-70002)
RFU Adaptor (SCPH-10072 B)
(for SCPH-70003)
A TV with Euro-AV (SCART)
connector
Euro-AV Cable (SCPH-10142)
(for SCPH-70003)
A TV with component video
input connectors
Component AV Cable (for PlayStation®2)
(SCPH-10100 E)
Picture quality scale
Preparation
Picture quality differs depending on the type of cable used. Use the
information below to determine the best connection method.
If you use a cable sold separately, refer to the instructions supplied with the
cable.
• The DVD player's progressive scan mode is only available when playing a disc
recorded in NTSC format, and viewed on a TV that supports progressive scan
(480p).
• You cannot connect the console to a TV with component video inputs that are
exclusively for HDTV use (Y PB PR). Refer to the instructions supplied with your
TV for details.
High quality
x AV Cable (supplied) x S VIDEO Cable x Component AV Cable
x RFU Adaptor
This scale is intended only as a reference. Depending on the product or
condition of your TV, the picture quality may be different.
When using the Euro-AV Cable, picture quality may vary depending on your
TV's AV connection.
For optimum picture quality, connect your Euro-AV cable to an RGBcompatible socket on your TV. Refer to the instructions supplied with your TV
for details.
Connecting to a TV
11
Connecting digital audio
equipment
Connecting the controller
1
Insert the Analog Controller (DUALSHOCK®2) into a controller
port of the console.
By using a commercially available optical digital cable, you can enjoy
surround sound with the effect of being in a movie theatre or a concert hall.
When connecting the console to audio equipment with digital connectors,
refer to the instructions supplied with the device to be connected.
Console front
MEMORY CARD
Console rear
Connected device
DIGITAL IN
OPTICAL
Analog Controller
(DUALSHOCK®2)
Commercially available optical
digital cable
Notes
• If you connect the console to audio equipment using an optical digital cable, it may
affect the audio output of some PlayStation®2 format software with the result that
no sound is produced. If this happens, use a cable such as the supplied AV Cable
(integrated audio/video) and connect it to the console's AV MULTI OUT
connector. Do not use an optical digital cable.
• After connecting digital audio equipment, set "Digital Out (Optical)" to "On" in the
System Configuration menu. For details, see "Digital Out (Optical)" (
page 37).
12
Connecting digital audio equipment
Note
Some software titles designate a specific controller port to be used. Refer to the
instructions supplied with the software for details.
3
Plug the AC power cord into the electrical outlet.
Console rear
Preparation
Connecting the AC adaptor and
AC power cord
Warning
AC power cord
Do not plug the AC power cord for the console into the electrical outlet until you
have made all other connections.
1
To the electrical outlet
Some regions and countries may
use a different electrical outlet
plug from the one illustrated.
Connect the AC power cord to the AC adaptor.
AC adaptor
AC power cord
2
The =/1 (on/standby) indicator on the console front will light up in red
to indicate that the console is in standby mode.
RESET
Plug the connector of the AC adaptor into the ! DC IN 8.5V
connector on the console rear.
]/1 indicator
Console front
Console rear
! DC IN 8.5V connector
AC adaptor
Connecting the AC adaptor and AC power cord
13
Turning the console on and off
Before turning on the console
Do not turn on the console until you have finished these steps. Refer to the
instructions supplied with your TV for details.
• Turn on the TV.
• Change your TV setting to display output from the line to which the
console is connected.
2
1
Press and hold the =/1/RESET button on the console front for
more than a second.
=/1/RESET button
Check that the =/1 (on/standby) indicator on the console
front is lit up in red.
RESET
Console front
=/1 indicator
Press the =/1 (on/standby)/RESET button on the console
front.
The =/1 indicator on the console front will turn green and output from
the console will be displayed on the TV.
=/1/RESET button
RESET
Console front
14
Turning off the console
The =/1 indicator will turn red to indicate that the console has entered
standby mode.
Turning on the console
1
Notes
• The first time you turn on the console after purchase, screens for setting
"Language", "Time Zone" and "Daylight Savings Time (Summer Time)" will be
displayed. Follow the on-screen instructions to complete the settings.
• If you connect the console to a wide-screen TV, set "Screen Size" in the System
Configuration menu (
page 37).
Turning the console on and off
=/1 indicator
Warning
The power is not completely turned off when the console is in standby mode. If
you do not plan to use the console for an extended period of time, unplug the
AC power cord from the electrical outlet.
Games
Playing a game
Games
Place the disc in the console with the label
side facing up.
Disc cover
Place the disc so that all three tabs
are above the disc's surface.
A (open) button
Before playing a game
Check that the connections to the TV and audio equipment are correct and
that the precautions have been met.
• "Precautions" ( page 4)
• "Connecting to a TV" ( page 9)
• "Connecting the controller" ( page 12)
• "Connecting the AC adaptor and AC power cord" ( page 13)
Note
=/1/RESET button
Starting a game
1
Turn on the console (
page 14).
The main menu is displayed (
2
page 35).
Press the A (open) button on the console front.
The disc cover opens.
3
Place the disc in the console.
Set the disc in the disc holder with the label side facing up.
To play online games, you first need to connect to and set up a network. See
"Connecting to a network" (
page 42) for details.
Playing a game
15
4
Close the disc cover.
2
Push the middle of the disc cover. After the disc cover is closed, the
game will start.
Remove the disc.
Hold down the black centre part of the disc holder, and then lift the
disc by the edges.
Push the middle of the disc cover.
Press the black centre part
of the disc holder.
Notes
• You can also start a game from the Browser screen (
page 35).
• If you turn on the console after inserting a disc, the game will start automatically.
To reset a game
Press the \/1 (on/standby)/RESET button on the console front. Do not
accidentally press the @/1/RESET button while playing a game, as doing
so will cause the game to reset.
3
Close the disc cover.
4
Press the =/1/RESET button.
The main menu is displayed (
Changing game discs
1
When removing a disc, check that the disc has stopped completely. Do not touch
the disc if it is spinning, as doing so may cause injury, damage to the disc or
console malfunction.
1
16
Press the A button on the console front.
Playing a game
Open the disc cover and remove the disc.
When removing a disc, hold down the black centre part of the disc
holder and then lift the disc by the edges.
Ending a game
Caution
page 35).
2
Insert a new disc.
3
Close the disc cover and reset the console.
The new game will start.
Note
You do not need to turn off the console when changing games.
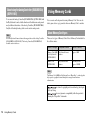
Using the Analog Controller (DUALSHOCK®2)
The ANALOG mode button can be used to switch between two modes.
Switch to the appropriate mode for use. Note, however, that some software
titles make this adjustment automatically.
Digital mode
(indicator: off)
Part names
SELECT button
Analog mode
(indicator: red)
Games
The Analog Controller (DUALSHOCK®2) is equipped with a pressuresensitive button function. It also has a vibration function.
About mode switching
START button
L2 button
R2 button
L1 button
R1 button
button
Directional
buttons
button
button
button
Right analog stick/ R3 button*
Mode indicator
Left analog stick/ L3 button*
ANALOG mode button
* The left and right analog sticks, or the L3 and R3 buttons, function only in analog
mode (indicator: red).
* The L3 and R3 buttons function when the analog sticks are pressed.
Note
Before using the Analog Controller
(DUALSHOCK®2), with the console turned on,
rotate the left and right analog sticks once with your
thumbs before starting a game. Do not twist the
analog sticks, but rotate as if drawing a circle as
shown in the diagram.
Notes
• When using the Analog Controller in digital mode, the left and right analog sticks
do not function. Also, the pressure-sensitive button function is turned off.
• Depending on the software, you may not be able to switch modes even if you press
the ANALOG mode button.
About analog controls
• When playing a PlayStation®2 format software title, you can use all
buttons in analog mode except for the START, SELECT, L3 and R3
buttons.
• When playing a PlayStation® format software title, only the left and right
analog sticks can be used in analog mode.
Note
Depending on the software, the buttons for use in analog mode may be limited. Refer
to the instructions supplied with the software for details.
About the vibration function
The vibration function can be set to ON or OFF in the software options
menu.
Note
Depending on the software, the vibration function may be set to "On" automatically.
Playing a game
17
About using the Analog Controller (DUALSHOCK®)
(SCPH-110 E)
You can use the Analog Controller (DUALSHOCK®) (SCPH-110 E) with
the PlayStation®2 console, but the functions of the buttons in analog mode
may be different from those of the Analog Controller (DUALSHOCK®2).
Only the left and right analog sticks can be used in analog mode.
Note
Not all PlayStation®2 format software titles support the use of the Analog Controller
(DUALSHOCK®) (SCPH-110 E). The Analog Controller (DUALSHOCK®2)
should be used in such cases.
Using Memory Cards
You can save and load game data using a Memory Card. You can also
delete game data or copy game data from one Memory Card to another.
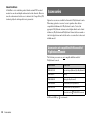
About Memory Card types
There are two types of Memory Cards. Select a Memory Card suitable for
the software in use.
Memory Card type
Compatible software
Amount of memory
Memory Card (8MB)
(for PlayStation®2)
(SCPH-10020 E)
PlayStation®2 format
software
Approx. 8 MB
Memory Card
(SCPH-1020 E)
PlayStation® format
software
15 memory blocks
(approx. 120 KB)
Note
The Memory Card (8MB) (for PlayStation®2) uses "MagicGate", a technology that
helps protect copyrighted content through data encryption and hardware
authentication.
is a term of copyright protection technology developed
by Sony Group.
does not guarantee compatibility with other products
bearing the "MagicGate" trademark.
18
Using Memory Cards
3
Inserting a Memory Card
button.
When copying game data, check that two Memory Cards are inserted
in the console. If you have selected "Delete", skip to step 5.
Insert the Memory Card into a MEMORY CARD slot on the console front.
4
Select the destination, and then press the
5
Select "Yes", and then press the
button.
MEMORY CARD
button.
Games
Console front
Select "Copy" or "Delete", and then press the
While copying or deleting data, do not remove the Memory Cards.
6
Note
Some software titles designate a specific MEMORY CARD slot to use. Refer to the
instructions supplied with the software for details.
Saving or loading game data
Depending on the software, the procedure for saving or loading may vary.
Refer to the instructions supplied with the software for details.
When copying or deleting is completed, press the
button.
Notes
• To view information about a game data item, select the icon for the data and then
press the
button to check the details.
• Compatibility between software and Memory Cards:
– You cannot save or copy PlayStation®2 format software to a Memory Card
(SCPH-1020 E).
– You cannot save PlayStation® format game data to a Memory Card (8MB) (for
PlayStation®2). You can, however, copy PlayStation® format game data from a
Memory Card (SCPH-1020 E) to a Memory Card (8MB) (for PlayStation®2) for
storage purposes. Note that such game data cannot be loaded directly from a
Memory Card (8MB) (for PlayStation®2).
Copying or deleting game data
1
At the Browser screen ( page 35), use the directional
buttons to select the icon for the Memory Card you want to
use for copying or deleting data and then press the
button.
2
Select the icon for the data you want to copy or delete, and
then press the
button.
Using Memory Cards
19
Audio CDs
Operating the CD player during playback
Playing an audio CD
Using the directional buttons, select the icon for the desired track and then
press the
button.
Playing a CD
1
Turn on the console and insert the disc (
page 15).
Follow steps 1 to 4 of "Starting a game".
The track numbers are displayed.
2
Using the directional buttons, select the track number you
want to play and then press the
button.
Playback begins.
Notes
• If you turn on the console after inserting a disc, the track numbers are displayed
automatically.
• You can also start playback from the Browser screen (
page 35).
Icon (button*)
Function
. (L1 button)
Go to the beginning of the current or previous track
m (L2 button)
Fast reverse
M (R2 button)
Fast forward
> (R1 button)
Go to the beginning of the next track
N
(START button)
Start playback
X
(START button)
Pause playback
x
(SELECT button) Stop playback
* You can operate directly by pressing the buttons of the Analog Controller
(DUALSHOCK®2).
Note
You can also use the DVD Remote Control (for PlayStation®2) (sold separately).
Caution
To play an audio CD recorded in DTS format, you must connect a device with
a DTS decoder to the DIGITAL OUT (OPTICAL) connector (
page 12).
Note that an extremely loud noise may be emitted if the device does not have a
DTS decoder or if it is connected to the AV MULTI OUT connector.
Ending audio CD playback
1
Using the directional buttons, select x and then press the
button.
Playback stops. Press the A (open) button on the console front to
remove the disc.
20
Playing an audio CD
5
Playing in various modes
1
6
Plays tracks as recorded on the CD
Program
Plays tracks in a specified order
Shuffle
Plays tracks in a random order
Off
Does not play the CD repeatedly
All
Plays all tracks repeatedly
1
Plays a track repeatedly
Select the desired track, and then press the
button.
Playback begins.
Notes
• You can also access the Play Options screen from the screen displaying the tracks
by selecting the Audio CD icon in the upper left corner of the screen and pressing
the
button.
• You can set "Play Mode" and "Repeat" at the same time.
Audio CDs
Repeat
Normal
button.
The track numbers are displayed, and the setting option is shown in the
lower left of the screen.
You can set for "Play Mode" and "Repeat".
Play Mode
Select the audio CD icon, and then press the
At the Browser screen ( page 35), use the directional
buttons to select the audio CD icon and then press the
button.
The Play Options screen is displayed.
2
Select "Play Mode" or "Repeat", and then press the
button.
3
Select the desired setting, and then press the
button.
If you select "Program", the screen for specifying track order will be
displayed. Select the tracks you want to play.
4
Press the
button.
The Browser screen is displayed.
Playing an audio CD
21
DVDs
Watching a DVD
You can operate the DVD player using the following methods.
• Using the on-screen Control Panel
• Operating directly using the Analog Controller (DUALSHOCK®2)
• Using the DVD Remote Control (for PlayStation®2) (sold separately)
Using the Control Panel
1
Start playback of the DVD (
2
Press the SELECT button.
page 24).
The Control Panel is displayed. If you press the SELECT button again,
the display will change its position on the screen.
The following instructions assume use of the Control Panel to operate the
DVD player. Some operations may be different depending on the method
used.
Notes
• For details about playing a DVD, refer to the instructions supplied with the DVD.
• The PlayStation®2 console plays disc content as recorded in the DVD software.
Note that not all features are available on all DVDs.
3
Using the directional buttons, select an icon and then press
the
button.
Note
To turn off the Control Panel, press the SELECT button (once or twice), or press the
button.
Control Panel item list
You can access the following options in the Control Panel.
Icon
22
Watching a DVD
Function
Menu
Displays the DVD-Video menu
Top Menu
Displays the DVD-Video menu
Icon
O
Function
Icon
Return
Returns to the previously selected screen
within the DVD's menu
N
Play
Starts playback
Displays and changes audio options on
DVDs with multiple audio tracks
X
Pause
Pauses playback
Audio Options
x
Stop
Stops playback (
Angle Options
Displays and changes viewing angles on
DVDs recorded with multi-angle options
A-B Repeat
Subtitle Options
Displays and changes subtitle options on
DVDs with subtitle options
Specifies a scene for playback, and starts
playback of the scene that has been set
(
page 27)
Shuffle Play
Go To
Skips to the selected title, chapter or the
specified time, and starts playback
(
page 24)
Begins playback of titles or chapters in a
random order (
page 27)
Program Play
Begins playback of titles or chapters in a
programmed sequence (
page 26)
Setup
Displays and changes options for
language, picture quality, Parental Control
level, audio, etc. (
page 28)
Repeat Play
Selects repeated playback of all the titles
on the disc, or one title or one chapter
(
page 27)
Displays the current title or chapter
number, the elapsed time, etc.
(
page 25)
Help
Displays the direct button functions of the
Analog Controller (DUALSHOCK®2)
0~9
Go to Chapter
Used to enter the number of a chapter you
want to play (
page 24)
./ >
Previous/Next
Returns/skips to the beginning of the
current, previous or next chapter
/
Search
Fast reverses/forwards playback on the
screen to help you find a particular scene
(
page 25)
/
Slow
Changes to playback/reverse playback in
slow-motion
page 24)
DVDs
Time Display
Function
For DVD-RW discs (VR mode), selects
Original/Play List Original or Play List content to play
(
page 26)
Clear
Clears selected numbers or playback
modes (
page 28)
Notes
• You can use " " to check the options that can be accessed directly using the
buttons of the Analog Controller. To access the options directly using the
controller, you must clear the Control Panel from the screen.
• Depending on the playback mode, some options may not be available or cannot be
adjusted.
Watching a DVD
23
Playing a DVD
1
Selecting a specific scene for playback
Turn on the console and insert a disc (
page 15).
Selecting a scene by chapter number
Follow steps 1 to 4 of "Starting a game". Playback begins.
1
Notes
Playback of the selected chapter begins. If you want to play a chapter
with a single digit number (i.e. 1-9), enter a leading zero. For example,
enter as "01".
• If you turn on the console after inserting a disc, playback will begin automatically.
• You can also start playback from the Browser screen (
page 35).
Ending DVD playback x
1
During playback, select the desired chapter number in the
Control Panel ( page 22) and then press the
button.
Selecting a scene by title number, chapter number or by
specifying the time
During playback, select x in the Control Panel (
and then press the
button.
page 22)
Playback stops. Press the A (open) button on the console front, and
then remove the disc.
Playing a DVD from the last stopping point
(Resume Play)
1
During playback, select x in the Control Panel (
and then press the
button.
2
Select N, and then press the
page 22)
button.
Playback begins from the point where you stopped the disc in step 1.
1
During playback, select
in the Control Panel
( page 22) and then press the
button.
2
Select an item, and then press the
Title
Specifies the title number
Chapter
Specifies the chapter number
C XX:XX:XX
(or T XX:XX:XX)
Specifies the elapsed time for the chapter (or title)
3
Select the numbers for the desired scene, and then press the
button.
Playback of the selected chapter begins.
To clear Resume Play
After step 1, select x and then press the
24
Watching a DVD
button.
button.
Finding a particular point on a DVD (Search)
You can search either forwards or backwards to quickly locate a particular
point on a DVD.
During playback, select
or
in the Control Panel
( page 22) and then press and hold the
button.
Search speed changes as shown below when you press either the up or
down directional button while holding down the
button.
•
•
•
•
2
Search 3
Search 2
Search 1
Slow
You can display information such as the current title number or elapsed
time.
1
During playback, select
in the Control Panel
( page 22) and then press the
button.
The display changes as shown below each time you press the
button.
Title X
Chapter X
Title number and chapter number
Title X
Chapter X C XX:XX:XX
Elapsed time of current chapter
Title X
Chapter X C - XX:XX:XX
Remaining time of current chapter
Title X
Chapter X T XX:XX:XX
Elapsed time of current title
Release the
button when you reach the point you are
searching for.
Title X
Chapter X T - XX:XX:XX
Remaining time of current title
Playback returns to normal speed.
(Off)
DVDs
1
Displaying playback information
Note
To use the Analog Controller to Search during playback, press and hold down the L2
or R2 button to begin searching. Use the directional buttons to change speeds.
Release the L2 or R2 button when you reach the point you are searching for.
Watching a DVD
25
Selecting Original or Play List for DVD-RW
playback
When using a DVD-RW disc (VR mode), you can select the type of titles
you want to play.
1
With playback stopped, select
( page 22) and then press the
in the Control Panel
button.
Original and Play List will be selected in turn each time you press the
button.
Original
Plays content in the originally recorded sequence
Play List
Plays edited content. Play List is the default setting.
Notes
• Slow-motion play in reverse is not available for DVD-RW discs (VR mode).
• You cannot use this function with Resume Play. Clear Resume Play (
page 24)
before selecting this feature.
Using the playback modes
Using the various playback modes, you can play titles or chapters in the
order you want or repeat playback of a specific scene. There are four
playback modes:
• Program Play ( page 26)
• Shuffle Play ( page 27)
• Repeat Play ( page 27)
• A-B Repeat ( page 27)
The following instructions assume use of the Control Panel (
to operate the DVD player.
page 22)
Notes
• You can play combinations of Program Play, Shuffle Play, and Repeat Play. Note,
however, that some Shuffle Play or Repeat Play options may not be available
depending on the combination.
• The PlayStation®2 console plays disc content as recorded in the DVD software.
Program Play
You can create programmes to play titles and chapters in any order.
1
During playback, select
in the Control Panel
( page 22) and then press the
button.
2
Select a programme number, and then press the
button.
If no programmes have been set, the only option will be "1. Title".
3
26
Using the playback modes
Select the title number, and then press the
button.
4
5
Select the chapter number, and then press the
button.
Repeat Play
To play all the chapters, select "All". Repeat steps 2 to 4 to set other
titles or chapters.
You can set this option to play titles or chapters repeatedly.
Press the START button.
1
Program Play begins.
page 22), and then
Shuffle Play
You can set this option for random playback of all titles or chapters
recorded on a disc. Playback order will be different each time Shuffle Play
is used.
in the Control Panel (
button.
page 22), and then
The display changes as shown below each time you press the
button.
z
Disc Repeat
Repeats playback of all titles
Title Repeat
Repeats playback of one title
Chapter Repeat
Repeats playback of one chapter
Repeat Off
Clears Repeat Play
2
Select N, and then press the
DVDs
Note
Select
press the
in the Control Panel (
button.
The display changes as shown below each time you press the
button.
The setting will not be cleared after Program Play finishes.
1
Select
press the
button.
A-B Repeat
You can set a specific scene to be played repeatedly.
Title Shuffle
Plays titles in random order
Chapter Shuffle
Plays chapters in random order
Shuffle Off
Clears Shuffle Play
1
During playback, select
in the Control Panel
( page 22) and then press the
button at the point you
want to start repeated playback.
The starting point (point A) is set.
2
Select N, and then press the
button.
2
Press the
playback.
button at the point you want to end repeated
The ending point (point B) is set, and repeated playback of the section
from A to B begins.
Using the playback modes
27
Clearing playback modes
Adjusting DVD player settings
Clears playback modes to allow normal playback.
1
Select
press the
in the Control Panel (
button.
page 22), and then
A message stating, "Play mode contents cleared", is displayed and the
console returns to normal playback.
Note
If multiple playback modes have been set in a combination, all playback modes are
cleared.
You can use the Control Panel to adjust DVD player settings, such as the
language for subtitles, audio language, and Parental Control level.
Notes
• Some DVDs do not support all settings. The PlayStation®2 console plays disc
content as recorded in the DVD software. If the DVD does not support the features
listed, you will not be able to change the settings.
• The following options are not available during playback or Resume Play
(
page 24). Clear Resume Play before changing these settings.
– "Menu", "Audio" and "Subtitles" in Language Setup
– "TV Type" and "Progressive" in Screen Setup
– "Parental Control" in Custom Setup
– "DTS" and "Audio Track Auto Select Mode" in Audio Setup
You can change DVD player settings using the following procedure:
1
Select
in the Control Panel (
the
button.
page 22), and then press
The Setup icon bar is displayed.
2
Select the icon for the setting you want to change, and then
press the
button.
The current setting for each item is displayed.
3
Select the desired item, and then press the
The menu option becomes active and can be selected.
28
Adjusting DVD player settings
button.
4
Select the desired setting, and then press the
button.
The setting of the item is completed. For details, see the instructions
for each item ( pages 29 to 34).
Setting TV display options
In the Screen Setup menu, you can set the screen size (aspect ratio) and
other options that affect picture quality.
Notes
Setting language options
TV Type
You can set the aspect ratio to match the screen of the connected TV.
16:9
Select this option when using a wide-screen TV or a standard
TV with special 16:9/wide-screen functionality.
4:3 Letter Box
Select this option when using a standard TV. This setting
displays a wide picture with margins on the upper and lower
portions of the screen.
4:3 PAN SCAN
Select this option when using a standard TV. This setting
displays a picture adjusted to the height of the screen, cutting
off portions at left and right that do not fit.
In "Language Setup" you can choose the language for the DVD's menu,
audio and subtitles. Note that if you select a language that is not recorded
on the DVD, one of the recorded languages is selected automatically.
Menu
Selects the language for the DVD's menu
Audio
Selects the language for the DVD's audio track
Subtitles
Selects the language for the DVD's subtitles
DVDs
• The default setting for each menu item is underlined in the explanations below.
• To return to the Control Panel after making settings, press the SELECT button.
• Settings are saved when you do any of the following:
– Stop playback (including stopping Resume Play)
– Open the disc cover
Note
Note
When you set "Progressive" to "On", "TV Type" is automatically set to "16:9".
If you select "Audio Follow" for subtitles, the subtitle language will automatically be
set to match the language selected for the DVD's audio track.
Adjusting DVD player settings
29
DNR (Digital Noise Reduction)
Progressive
You can use this setting to help reduce roughness in the on-screen image
and produce a cleaner picture.
You can display an image in which the picture updates all the lines in one
pass. In most cases, this results in a clearer, flicker-free image. This feature
is available only if your TV and AV Cable* support progressive scan
(480p).
Off
DNR is not used.
DNR1
Increases picture quality
DNR2
Increases picture quality (maximum)
* The Component AV Cable (for PlayStation®2) (sold separately) is compatible
with progressive scan.
On
Select this option when the console is connected to a TV that supports
progressive scan (480p).*
Off
Select this option when the console is connected to a standard TV.
Notes
• "DNR2" is more effective for reducing image roughness than "DNR1", but in some
cases an afterimage may appear. If this occurs, select "Off".
• The DNR function may produce limited results on some DVDs.
• When you set "Progressive" to "On", "DNR" is automatically turned off and cannot
be turned on.
Notes
Outline Sharpening
You can sharpen or soften the outline of the on-screen image. The higher
the value, the sharper the outline. Normally, select "0".
• -2
• -1
•0
• +1
• +2
Note
Depending on the DVD, Outline Sharpening may produce limited results.
Display
During playback, you can display playback status information in the top
right corner of the screen for a few seconds.
30
On
Playback status information is displayed for a few seconds.
Off
Playback status information is not displayed.
Adjusting DVD player settings
* The DVD player's progressive scan mode is only available when playing a disc
recorded in NTSC format, and viewed on a TV that supports progressive scan
(480p).
• If picture quality is reduced or no image is displayed, set "Progressive" to "Off"
when the console is connected to a TV without the necessary equipment. If you
accidentally set this option to "On" for such a TV, picture quality may be reduced
or the picture may not be displayed. To clear the setting, follow these steps:
1 Check that you have a DVD in the console.
2 Press the \/1 (on/standby)/RESET button on the console front.
Then press and hold down the START button of the Analog Controller
(DUALSHOCK®2) in controller port 1 until the DVD picture is displayed.
The "Progressive" setting is returned to "Off", allowing the DVD-Video to
be displayed as normal. You can also cancel this setting using the "Clear
Progressive Setting" (
page 40) option in the Version Information
screen.
• DVDs can contain video-based and film-based material, which use different frame
rates. When playing video-based material using progressive scan, some images
may appear unnatural. If this occurs, set "Progressive" to "Off" and view in
standard interlace mode.
• When you set "Progressive" to "On", "TV Type" (
page 29) is automatically set
to "16:9".
• DVD-RW disc (VR mode) content can only be viewed in standard interlace format.
The "Progressive" option is not available when playing such content.
3
Select "Region", and then press the
button.
The list of region options is displayed.
4
Setting viewer options
Select the region to base the Parental Control level on, and
then press the
button.
If you select "Other", see "Region code list" (
Pause mode
Auto
A picture with moving elements is displayed without jitter. Normally
select this position.
Frame
A picture without moving elements can be displayed at high resolution.
5
Select "Level", and then press the
DVDs
You can use this option to set the picture status when playback is paused.
page 32).
button.
The list of level options is displayed.
6
Select a restriction level, and then press the
button.
To clear Parental Control
Parental Control
In some regions, the viewing of some DVD content may be restricted
based on viewer age or other factors. You can use the Parental Control
feature to restrict the level of content that may be viewed through your
console.
The lower the value, the stricter the restriction.
With DVD playback stopped, go to step 6 in "Setting Parental Control" and
set "Level" to "Off".
Setting Parental Control
1
Select "Parental Control", and then press the
button.
The screen for registering a password is displayed. If a password has
already been registered, the screen for confirming the password is
displayed.
2
Select a number, and then press the
button.
Repeat step 2 to enter a four-digit password. If you want to clear a
number, press the
button. When registering a password, you are
required to enter it again for confirmation.
Adjusting DVD player settings
31
Region code list
Changing your password
To enter a Parental Control region code, select "Other" in step 4 of "Setting
Parental Control" ( page 31). Use the directional buttons to select the
first letter, and then press the right directional button. Then select the next
letter and press the
button.
In step 2 of "Setting Parental Control" (
following steps:
1
page 31), complete the
Using the directional buttons, select "Change Password" and
then press the
button.
The screen for changing the password is displayed.
Region
Code
Region
Code
Austria
AT
Malaysia
MY
Belgium
BE
Netherlands
NL
Canada
CA
Norway
NO
China
CN
Philippines
PH
Playing a disc restricted by Parental Control
Denmark
DK
Russia
RU
1
Finland
FI
Singapore
SG
France
FR
Spain
ES
Germany
DE
Sweden
SE
Hong Kong
HK
Switzerland
CH
Indonesia
ID
Taiwan
TW
Italy
IT
Thailand
TH
Japan
JP
United Kingdom
GB
Korea
KR
2
Select a number, and then press the
button.
Repeat step 2 to enter a four-digit password. You are required to enter
it again for confirmation.
Start playback of the DVD (
page 24).
You will be prompted to temporarily change the Parental Control level
to allow playback. This usually occurs immediately at disc start-up but
may also occur at different times depending on the DVD.
2
Using the directional buttons, select "Yes" and then press the
button.
The screen for entering the password is displayed.
3
Select a number, and then press the
button.
Repeat step 3 to enter the four-digit password. After entering the
password, playback will begin again. When DVD playback is stopped,
the Parental Control level returns to the original setting.
Notes
• If you forget your password, see "Troubleshooting" (
page 53).
• If you do not set a password, you cannot change the Parental Control settings.
• Some DVDs with the Parental Control feature do not allow use of playback modes
(
pages 26 to 27).
32
Adjusting DVD player settings
Dolby Digital
Setting sound options
This option sets Dolby Digital as the output signal for the DIGITAL OUT
(OPTICAL) connector.
Audio Digital Out
You can switch the method of outputting the audio signal when you
connect the following audio devices to the DIGITAL OUT (OPTICAL)
connector.
Select this option when the console is connected to an audio device
with a built-in Dolby Digital decoder.
Off
Select this option when the console is connected to an audio device
without a built-in Dolby Digital decoder.
Caution
When the console is connected to an audio device without a Dolby Digital, DTS
or MPEG decoder, set "Dolby Digital", "DTS" and "MPEG" to "Off". If you set
these options to "On" without the necessary decoder, you may have no sound or
an extremely loud noise may be emitted.
DTS
This option sets DTS as the output signal for the DIGITAL OUT
(OPTICAL) connector.
On
Select this option when the console is connected to an audio device
with a built-in DTS decoder.
Off
Select this option when the console is connected to an audio device
without a built-in DTS decoder.
Digital Out (Optical)
This option sets the type of output for the DIGITAL OUT (OPTICAL)
connector.
On
Off
Select this option when you want sound (audio signal) to be output
through the DIGITAL OUT (OPTICAL) connector.
Settings for "Dolby Digital", "DTS" and "MPEG" are displayed.
Select this option when you do not want sound to be output through the
DIGITAL OUT (OPTICAL) connector.
Settings for "Dolby Digital", "DTS" and "MPEG" are not displayed.
DVDs
On
MPEG
This option sets MPEG AUDIO as the output signal for the DIGITAL
OUT (OPTICAL) connector.
On
Select this option when the console is connected to an audio device
with a built-in MPEG decoder.
Off
Select this option when the console is connected to an audio device
without a built-in MPEG decoder.
Adjusting DVD player settings
33
Audio Track Auto Select Mode
This setting gives priority to the audio track that contains the highest
number of channels when you play a DVD on which multiple audio
formats (PCM, Dolby Digital, DTS or MPEG) are recorded. If PCM,
Dolby Digital, DTS and MPEG have the same number of channels, the
console selects PCM, Dolby Digital, DTS and MPEG audio tracks in that
order.
On
Priority given
Off
No priority given
Notes
• If you set "DTS" to "Off" in "Audio Digital Out" (
page 33), the DTS audio
track is not played.
• Depending on the DVD, the audio channel with priority may be predetermined. In
this case, the audio track will be selected based on the DVD's order of priority.
DVD Volume
You can set this option if the audio output level of the DVD is low. You
can set this only when "Digital Out (Optical)" is set to "Off" in "Audio
Digital Out" ( page 33).
+2
Turns up the volume (maximum)
+1
Turns up the volume
Standard
Normally select this option.
Caution
If you set this option to "+1" or "+2", the sound may become distorted. If this
happens, change the setting to "Standard". Also note that if you set the volume
too high, it may harm your hearing or damage the speakers.
34
Adjusting DVD player settings
Main menu
Using the Browser screen
Displaying the main menu
1
Turn on the console (
page 14).
You can do the following from the Browser screen:
• Copy or delete game data saved on a Memory Card
• Start a game
• Start playback of an audio CD
• Start playback of a DVD
1
Display the main menu (
2
Using the directional buttons, select "Browser" and then
press the
button.
The main menu is displayed. Note that it may take some time for the
main menu to be displayed.
page 35).
Main menu
From the main menu, you can access information and change various
settings. You can also move to the following screens from the main menu.
The main menu is displayed when you turn on the console without a disc
inserted.
• Browser screen ( page 35)
• System Configuration menu ( page 36)
• Version Information screen ( page 39)
The Browser screen is displayed.
3
Insert a disc or Memory Card.
the inserted item is displayed on the Browser screen.
\
Note
If you turn on the console with a disc inserted, the main menu will not be displayed.
To display the main menu, press the A (open) button on the console front and
remove the disc. Then press the =/1 (on/standby)/RESET button to reset the console.
Displaying the main menu
35
4
Select an icon, and then press the
button.
• When you select the Memory Card icon, icons for data saved on the
Memory Card are displayed. To copy or delete saved game data, see
"Copying or deleting game data" ( page 19).
• If you select the icon for a PlayStation®2 or PlayStation® format
software disc, the game will start.
• When you select the icon for an audio CD disc, the tracks contained
on the CD are displayed. See "Playing an audio CD" ( page 20).
• If you select the icon for a DVD disc, playback of the DVD will
begin.
Note
Using the System Configuration
menu
From the System Configuration menu, you can change settings for
numerous options including language or time display, and audio or video
output method.
1
Display the main menu (
2
Using the directional buttons, select "System Configuration"
and then press the
button.
The message "There is no data" is displayed on the Browser screen when no Memory
Card or disc is inserted in the console.
page 35).
The System Configuration menu is displayed.
3
Select an item, and then press the
button.
The menu option becomes active and can be selected.
4
36
Using the System Configuration menu
Select the desired setting, and then press the
button.
For details, see the instructions for each menu item (
38).
pages 37 to
Notes
• The default setting for each menu item is underlined in the explanations below.
• Changes to each setting are saved and remain in effect even after you turn off or
reset the console.
Clock Adjustment
You can set the display mode for the TV.
4:3
Select this option when using a standard TV with the
console.
Full*
Select this option when using a standard TV with the
console. The black margins on the upper and lower
portions of the screen are cut off.
16:9
Select this option when using a wide-screen TV or a
standard TV with special 16:9/wide-screen
functionality.
Optional settings
If you press the
button at the "Clock Adjustment" screen, you can set
options such as "Date Format" or "Time Format". Use the directional
buttons and the
button to make each setting.
Time Format
Sets the system clock to either 12-hour or 24-hour
clock display
Date Format
Sets the display order of year, month and day
Time Zone
Sets the time zone
Daylight Savings Time
Sets Standard or Daylight Savings (Summer Time).
Normally select "Standard".
Main menu
You can set the date and time. Use the directional buttons to set "Year",
"Month", "Day", "Hour", "Minute" and "Second". The setting goes into
effect when you press the
button.
Screen Size
* "Full" display mode is compatible with the System Configuration menu, Browser
screen and audio CD screen.
Digital Out (Optical)
You can set whether to output the signal through the DIGITAL OUT
(OPTICAL) connector.
On
Select this option when you want to output signal
through the DIGITAL OUT (OPTICAL) connector.
Off
Select this option when you do not want to output
signal through the DIGITAL OUT (OPTICAL)
connector.
Using the System Configuration menu
37
Component Video Out
When using the Component AV Cable (for PlayStation®2) (sold
separately), you must set the mode to match the input jacks on your TV.
Y Cb/Pb Cr/Pr
Select this option when connecting the console to
component video input connectors (default setting for
SCPH-70002).
RGB
Select this option when connecting the console to
RGB input connectors (default setting for
SCPH-70003).
Note
The "RGB" setting is only for PlayStation®2 and PlayStation® format software.
When you watch a DVD, the mode automatically switches to "Y Cb/Pb Cr/Pr".
Remote Control
You can set this option when using the DVD Remote Control (for
PlayStation®2) (sold separately).
Gameplay Function On
Gameplay Function Off
38
Select this option when operating PlayStation®2 or
PlayStation® format software with the DVD Remote
Control.
Select this option when not operating PlayStation®2
or PlayStation® format software with the DVD
Remote Control.
Using the System Configuration menu
Note
The following limitations apply when the DVD Remote Control is set to "Gameplay
Function On":
– Depending on the software, some remote control buttons may not work properly.
– The buttons of the DVD Remote Control will not work when two or more
buttons are pressed at the same time.
– Some software titles may stop operating properly when a controller is removed
from controller port 1. If this happens, set to "Gameplay Function Off".
Language
You can use this option to select the language displayed on the main menu,
Browser screen, System Configuration menu, and Version Information
screen.
English
Displays messages in English
French
Displays messages in French
Spanish
Displays messages in Spanish
German
Displays messages in German
Italian
Displays messages in Italian
Dutch
Displays messages in Dutch
Portuguese
Displays messages in Portuguese
Using the Version Information
screen
3
Select the desired setting, and then press the
For details, see the instructions for each item (
button.
pages 39 to 41).
Note
The default setting for each menu item is underlined in the explanations below.
You can check version information for various console components by
selecting this option. You can also change optional settings for some items.
At the main menu (
page 35), press the
button.
The Version Information screen is displayed.
Console
The PlayStation®2 console automatically adjusts its internal settings for
optimal playback. When "Diagnosis" is set to "On", the console makes
additional adjustments.
Main menu
1
Diagnosis
Off
Diagnosis is turned off.
On
Diagnosis is turned on.
Note
Optional settings
Optional settings are available for "Console", "PlayStation® Driver" and
"DVD Player". "DVD Player" can be set only if the DVD player's
"Progressive" option is set to "On".
1
The "Diagnosis" setting will automatically return to the default setting in the
following cases:
– When playback of PlayStation®2 or PlayStation® format software or a DVD
begins
– When the console is reset
– When the console is turned off
Using the directional buttons, select an item and then press
the
button.
The current setting for the item is displayed.
2
Select an item, and then press the
button.
The available options are displayed.
Using the Version Information screen
39
PlayStation® Driver
You can set the PlayStation® Driver programme to optimise performance
of PlayStation® format software.
Note
The settings will automatically return to the default settings in the following case:
– When the console is turned off
DVD Player
If you set "Progressive" to "On" when the console is connected to a TV
without the necessary equipment, the picture quality may be reduced or the
picture may not be displayed. You can clear the "Progressive" setting by
following the procedure below.
Remove the DVD before clearing the setting.
Clear Progressive Setting
Disc Speed
Standard
Loads discs at normal speed
Fast
Loads discs at high speed
Note
Set to "Standard" in the following cases:
– When fast loading does not produce improved results
– When using a software that is not compatible with fast loading
Texture Mapping
Standard
Displays as normal
Smooth
Displays with reduced roughness in on-screen images
Note
Set to "Standard" in the following cases:
– When smooth texture mapping does not produce improved results
– If the picture does not display properly when set to "Smooth"
40
Using the Version Information screen
No
Leaves the "Progressive" setting on
Yes
Clears the "Progressive" setting
1
Display the Version Information screen.
2
Using the directional buttons, select "DVD Player" and then
press the
button.
The "Clear Progressive Setting" option is displayed.
3
Press the
4
Select "Yes", and then press the
5
Press the
button.
button.
button twice.
The display returns to the main menu.
6
Press the A (open) button on the console front, and place a
DVD in the console.
7
Close the disc cover.
Playback begins.
Note
The setting will not be cleared if 1) you do not start a DVD after step 4 or 2) you reset
or turn off the console before step 6.
Main menu
Using the Version Information screen
41
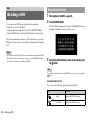
Networking
Connecting to a network
You can enjoy online games by connecting the PlayStation®2 console to a
broadband network. To play all online games, you will need the following:
• A Network Access Disc (supplied separately)
• A Memory Card (8MB) (for PlayStation®2) (sold separately)
• A service contract with a Broadband Internet Service Provider (sold
separately)
• An Ethernet Cable (sold separately)
• An External Network Device such as a Broadband enabled digital set-top
box, a cable modem, an ADSL modem or a router (sold separately)
Connecting with a network cable
You can connect the console to a network using an Ethernet network cable
connected to the NETWORK connector on the console rear. You can
connect to a 100 Base-TX or 10 Base-T network. Refer to the instructions
supplied with the network device for details.
Basic network setup
Network line
This will vary depending on the
type of broadband service in your
home.
Network equipment
The type of equipment used will also
vary depending on the type of
service.
Broadband modem, router etc.
Notes
• You cannot play online games with this console using a dial-up or ISDN
connection.
• USB connectivity from the External Network Device to the USB connector is not
supported.
• There are two types of network cables: straight-through cable and crossover cable.
Ensure that you use the correct type of cable when connecting your PlayStation®2
console to your Broadband Internet connection. Refer to the Instruction Manual
supplied with the network device, or your Broadband Internet Service Provider for
details.
Commercially
available network cable
PC
Note
When connecting the console and a PC to the network, a network device such as a
router or a hub may be required. Refer to the instructions supplied with the network
device for details.
For more information on network setup, visit www.playstation.com
42
Connecting to a network
Connecting the console
Warning
Warning
Do not plug the AC power cord for the console into the electrical outlet until you
have made all other connections.
1
Connect the Ethernet network cable to the NETWORK
connector on the console rear.
Do not connect network cables or telephone cords of the following types to the
network connector; too much electrical current may pass through the connector,
causing a malfunction, excessive heat or fire in the connector:
- Standard residential telephone lines
- Network cables not appropriate for use with a 10Base-T/100Base-TX network
- Any ISDN (digital) compatible phone or data line
- PBX phone lines
- Other "unknown" types of telephone lines
Console rear
Networking
Commercially available network cable
2
Insert the connector on the network cable to the network
device.
The connection method will vary depending on the network device.
Refer to the instructions supplied with the network device for details.
Connecting to a network
43
Creating network settings
After you have connected a network cable to the console, you will need to
create and save network settings. To do this you need a Network Access
Disc supplied by registering your PlayStation®2 console. You can register
your PlayStation®2 console by completing the Registration Card enclosed
or by visiting www.ps2registration.com
Items you will need
To create a network setting, you will need the following items:
• A Memory Card (8MB) (for PlayStation®2) (sold separately)
• Login and network setup information provided by your Broadband
Internet Service Provider
Note
Depending on the type of Internet service used, you may need to provide your
Broadband Internet Service Provider with your MAC Address. You can find the
MAC Address for your console listed in the Version Information screen
(
page 39).
44
Creating network settings
About DVD-Videos
Additional information
Compatible software
You can play discs of the following types on the PlayStation®2 console:
Disc logo
PlayStation®2 format DVD-ROM
[12 cm, Silver]
"
PlayStation®2 format CD-ROM
[12 cm, Blue]
"
PlayStation® format CD-ROM
[12 cm, Black]
PlayStation® logo and
designation
", PlayStation®2 logo and
designation
", PlayStation®2 logo and
designation
ALL
(SCPH-70002 only)
2
ALL
(SCPH-70003 only)
About DVD-R, DVD-RW, DVD+R and DVD+RW discs
Audio CD
[12 cm, 8 cm]
DVD-Video*
[12 cm, 8 cm]
The "DVD VIDEO" logo is a
trademark.
DVD-RW (VR mode)
[12 cm, 8 cm]
The "DVD-RW" logo is a
trademark.
* Throughout this manual, the term "DVD-Video" is used to refer to DVD-R,
DVD-RW (Video mode), DVD+R and DVD+RW discs.
About PlayStation®2 format CD-ROM and DVD-ROM, and
PlayStation® format CD-ROM discs
The console can only play discs with the
Discs marked with
,
cannot be played.
4
• Some discs may not be playable due to scratches, dust or problems
encountered during recording.
• Only discs that have been "finalised" can be played.
• Sections of video recorded on CPRM (Content Protection for Recordable
Media)-compatible DVD-RW discs or on CPRM-compatible DVD-R
discs using the "copy-once" capability cannot be played on this console.
Additional information
Disc type
• The console can only play discs recorded for the PAL broadcast standard.
You cannot play discs recorded for other broadcast standards (such as
NTSC) on this console (unless the NTSC disc displays the "ALL" label
and an NTSC compatible TV is used).
• DVD-Videos are assigned a number (region code) for the geographic
region in which the disc can be played. This console can only play discs
marked with region code "4" (SCPH-70002 only), "2" (SCPH-70003
only) or "ALL".
Music discs encoded with copyright protection
technologies
The audio CD playback feature of this product is designed to conform
to the Compact Disc (CD) standard. Recently, some record companies
have started marketing music discs encoded with copyright protection
technologies. Some of these music discs do not conform to the CD
standard and may not be playable on this product.
designation.
or
Compatible software
45
About DualDiscs
A DualDisc is a two sided disc product which contains DVD recorded
material on one side and digital audio material on the other side. However,
since the audio material side does not conform to the Compact Disc (CD)
standard, playback on this product is not guaranteed.
Accessories
Optional accessories are available for this model of PlayStation®2 console.
When using optional accessories, be sure to purchase those that are
compatible with this model of PlayStation®2 console. Contact the
appropriate PlayStation® customer service helpline which can be found
within every PlayStation® and PlayStation®2 format software manual or
visit www.playstation.com for details on the accessories that can be used
with this model.
Accessories not compatible with this model of
PlayStation®2 console
The following accessories are not compatible with this model of
PlayStation®2 console:
Model number
Product name
SCPH-10350 E
Network Adaptor (Ethernet) (for PlayStation®2)
SCPH-1070 E
Multitap
SCPH-10090 E
Multitap (for PlayStation®2)
SCPH-10040 E
Vertical Stand (for PlayStation®2)
SCPH-10110 E
Horizontal Stand (for PlayStation®2)
-
Product that use the
i.LINK and i.LINK logo " " are trademarks.
46
Accessories
S400 i.LINK connector
About the DVD Remote Control (for
PlayStation®2)
• This model of the PlayStation®2 console features a built-in IR receiver.
When operating with a DVD Remote Control (for PlayStation®2) (sold
separately), do not insert an IR receiver (for PlayStation®2) into a
controller port of the console.
• When purchasing a DVD Remote Control for use with this console,
choose one that does not include a separate IR receiver Unit.
• You cannot open or close the disc cover using the DVD Remote Control.
Only the Multitap (for PlayStation®2) (SCPH-70120 E)* (sold separately)
can be used with this console. Do not connect Multitap products with other
model numbers to the console as this may result in damage to the console.
* You can use this product with both PlayStation®2 and PlayStation® format
software titles.
GUARANTEE
Thank you for buying this Product. The term "Product" means the
PlayStation®2 computer entertainment system together with the
accessories and/or peripherals with which it is packaged. This Guarantee
does not cover any software whether or not packaged with the Product.
Sony Computer Entertainment Europe Ltd ("SCEE") guarantees that this
Product is free from defects in material and workmanship that result in
Product failure during normal usage in accordance with the terms set out
in below and will, for a period of 1 (one) year from the date of original
purchase, repair or (at SCEE's option) replace any component part of this
Product, free of charge, where it is faulty due to defective materials or
workmanship. Replacement will be with a new or refurbished component
or unit, at SCEE's option, which is guaranteed for the remainder of the
original Guarantee Period.
The benefits conferred by this Guarantee are in addition to the statutory
rights and remedies the consumer has in the UK and Eire in respect of this
Product and this Guarantee does not affect such rights and remedies in any
way. The benefits conferred by this Guarantee are also in addition to other
rights and remedies which the consumer has in law in Australia and New
Zealand in respect of this Product, including rights and remedies available
under the Trade Practices Act 1974 and State and Territory legislation in
Australia and the Fair Trading Act 1986 in New Zealand and this
Guarantee does not affect such rights and remedies in any way.
Additional information
About Multitaps
GUARANTEE
This Guarantee is given to you by Sony Computer Entertainment Europe
Ltd of 30 Golden Square, London, W1F 9LD, United Kingdom.
GUARANTEE
47
IMPORTANT
1. If you need to claim under this Guarantee, please call your local Customer Service
helpline (listed on the Customer Registration Card and PlayStation® and
PlayStation®2 format software manuals) for return instructions and other
guidance.
4. To the extent permitted by applicable law, this Guarantee will be your sole and
exclusive remedy in relation to defects in this Product and all other guarantees,
warranties, terms and conditions, express or implied by statute or otherwise, in
respect of this Product are excluded and neither SCEE nor any other Sony entity,
or their suppliers or authorised service facilities, will be liable for any special,
incidental, indirect or consequential loss or damage.
2. This Guarantee is only valid:
i.
in the United Kingdom, Eire, Australia and New Zealand; and
ii. when the original sales receipt or invoice or other proof of purchase
(indicating the date of purchase and retailer's name) is presented together with
the faulty Product (and has not been altered or defaced since the date of
original purchase); and
iii. when the Guarantee seal and the serial number on the Product have not been
damaged, altered or removed.
3. You may not claim under this Guarantee when the Product is damaged as a result
of:
i.
commercial use, accident, fair wear and tear, negligence, abuse, or misuse
(including, without limitation, failure to use this Product for its normal
purpose and/or in accordance with instructions on proper use and
maintenance, or installation or use in a manner inconsistent with applicable
local technical or safety standards);
ii. use in conjunction with any unauthorised peripheral (including, without
limitation, game enhancement devices, adaptors and power supply devices);
iii. any adaptation or adjustment to, or alteration of, the Product carried out for
any reason, and whether properly carried out or not;
iv. maintenance or repairs carried out other than by a SCEE authorised service
facility; or
v. use in conjunction with unauthorised software, virus infection, or fire, flood
or other natural calamity.
48
GUARANTEE
If this Product needs any repair which is not covered by this Guarantee,
please call your local Customer Service helpline for advice. If your home
country is not one of those listed, please contact your retailer.
Please complete and return the enclosed (Freepost) Customer Registration
Card.
AC adaptor
Specifications
General
Power requirements
100-240 V AC, 50/60 Hz
Voltage/electrical current
output (approx.)
8.5 V, 5.65 A
Power requirements
! DC IN 8.5V
Adaptor dimensions (approx.)
60 × 28 × 124 mm (w/h/d)
Electrical current consumption
(approx.)
5.3 A
Adaptor mass (approx.)
350 g
Console dimensions (approx.)
230 × 28 × 152 mm (w/h/d)
Console mass (approx.)
900 g
Signal format
PAL
Operating temperature
5 °C to 35° C
Inputs/outputs on the console
front
Controller port (2)
MEMORY CARD slot (2)
USB connector (2)
Supplied accessories
page 7
NETWORK connector
! DC IN 8.5V connector
AV MULTI OUT connector
DIGITAL OUT (OPTICAL) connector
Copyrights
This product incorporates copyright protection technology that is protected
by method claims of certain U.S. patents and other intellectual property
rights owned by Macrovision Corporation and other rights owners. Use of
this copyright protection technology must be authorized by Macrovision
Corporation, and is intended for home and other limited viewing uses only
unless otherwise authorized by Macrovision Corporation. Reverse
engineering or disassembly is prohibited.
Additional information
Inputs/outputs on the console
rear
Design and specifications are subject to change without notice.
This product is manufactured under license from Dolby Laboratories.
"Dolby" and the double-D symbol are trademarks of Dolby Laboratories.
Confidential unpublished works. ©1992-1997 Dolby Laboratories. All
rights reserved.
"DTS" and "DTS Digital Out" are trademarks of Digital Theater Systems,
Inc.
Specifications
49
About national export control
This product may fall within the scope of national export control
legislation. You must comply fully with the requirements of such
legislation and of all other applicable laws of any jurisdiction in relation to
this product.
About copy protection
Attempted copying of DVD's played on this device, may be prevented or
restricted by copy protection technology contained on the DVD.
Attempted recording or copying of DVD's for private use by the removal
or circumvention of copy protection technology may be prohibited under
applicable law.
About access control
This product incorporates access control technology. Use of software not
specifically designed for this product (excluding DVD-Videos and audio
CDs) and copies of software designed for this product are prevented by
access control. Unauthorised transfer, delivery, display, export, import, or
transmission of programs, devices, or the product modified with programs
or devices, to defeat the purpose of this access control feature is or may be
prohibited by law.
50
Troubleshooting
Troubleshooting
Go through this section if you experience difficulty in operating the
PlayStation®2 console. Should any problem persist, call the PlayStation®
service line at the number listed on your guarantee card for assistance.
Check the following items first:
• The console is turned on.
• The AC power cord is connected properly to the electrical outlet.
• The cables are correctly and securely connected.
Check also for the TV or monitor and other connected devices.
Picture
There is no picture on the TV screen.
, Check whether the =/1 (on/standby) indicator on the console front is lit up in red.
If it is red, press the =/1 (on/standby)/RESET button to turn on the console (the
=/1 indicator will turn green).
, Switch the input mode of the TV (or VCR) as appropriate for the connector in
use on the console.
, Try using another compatible AV Cable. There may be a problem with the AV
Cable in use.
, Set "Component Video Out" to "Y Cb/Pb Cr/Pr" in the System Configuration
menu (
page 38) when connecting the console to the component AV inputs on
a TV. Use the supplied AV Cable (integrated audio/video) to make the setting,
and then connect to the TV using the Component AV Cable (for PlayStation®2)
(sold separately).
, Check that the inserted disc can be played with the PlayStation®2 console
(
page 45).
"The disc could not be read" is displayed on the screen.
, Check that the disc is placed in the console with the label side facing up
(
page 15).
, Check that the disc is clean and does not have any scratches. If the disc is dirty,
clean it (
page 6).
There is no picture or picture noise appears when playing a DVD.
, When playing a DVD, connect the console to the TV directly (
page 10). If
the video signal from the console is coming through a VCR to the TV, copy
protection on some DVDs may affect picture quality.
, If the console is connected to a TV or cable* that does not support progressive
scan (480p), no image will be displayed when you set "Progressive" to "On" in
the Control Panel. Clear the "Progressive" setting (
pages 30, 40). If picture
noise appears when using a TV that supports progressive scan (480p), also clear
the "Progressive" setting.
* The Component AV Cable (for PlayStation®2) (sold separately) is compatible
with progressive scan.
, A DVD-R or DVD-RW disc that is not finalised cannot be played on the
PlayStation®2 console.
, Content of a video recorded on CPRM-compatible DVD-R or CPRM-compatible
DVD-RW discs cannot be played on the PlayStation®2 console.
, See also "There is no picture on the TV screen" and "Picture noise
appears on the TV screen".
The aspect ratio does not change even when playing the DVD with the
aspect ratio setting adjusted and/or playing 16:9 pictures of a DVD.
, Depending on the DVD, the aspect ratio cannot be changed.
, Check that the console is connected to the TV directly. If there is a selector or
receiver (AV amplifier) connected between the console and TV, depending on
the type of device connected, the aspect ratio cannot be changed.
, Depending on the TV, the aspect ratio cannot be changed.
The size of the video image and the TV screen do not match.
, Set the aspect ratio to match your TV screen (
page 37). If changing the
setting does not work, try adjusting the aspect ratio of your TV. Refer to the
instructions supplied with your TV for details.
Sound
There is no sound.
, Switch the input mode of the TV (or VCR) as appropriate for the connector in
use on the console.
, Check that the TV volume is not set to "mute". Also check that the TV volume
level is set properly.
, If the console is connected to an audio device, check the settings on the
connected device. Refer to the instructions supplied with the device for details.
, Try using another compatible AV Cable (
page 9). There may be a problem
with the AV Cable in use.
, Some PlayStation®2 format software titles do not support audio output from the
DIGITAL OUT (OPTICAL) connector. Connect the console to the audio device
using an analog AV Cable, such as the supplied AV Cable (integrated audio/
video) (
page 9).
Troubleshooting
Additional information
Picture noise appears on the TV screen.
, Check that the disc is clean and does not have any scratches. If the disc is dirty,
clean it (
page 6).
, If you move the console from a cold to a warm location, allow the console to
adjust to room temperature before use.
, If moisture condensation occurs, remove the disc and do not use the console for
several hours until the condensation evaporates (
page 6).
, For some output connectors on a TV, the component video out setting needs to
be set. Check that the correct settings have been made (
page 38).
, Some PlayStation® format software titles may not perform properly on the
PlayStation®2 console. For more information, call the PlayStation® service line
at the number listed on your guarantee card for assistance.
, Some TVs may experience a bouncing effect in their pictures when using the
PlayStation®2 console. If this happens, connect the console to another TV.
51
Sound quality is poor.
, Check that the disc is clean and does not have any scratches. If the disc is dirty,
clean it (
page 6).
, If you move the console from a cold to a warm location, allow the console to
adjust to room temperature before use.
, If moisture condensation occurs, remove the disc and do not use the console for
several hours until the condensation evaporates (
page 6).
, Some PlayStation® format software titles may not perform properly on the
PlayStation®2 console. For more information, contact the appropriate
PlayStation® customer service helpline which can be found within every
PlayStation® and PlayStation®2 format software manual.
There is no sound or the sound quality from the digital audio equipment
is poor.
, Check that the disc is clean and does not have any scratches. If the disc is dirty,
clean it (
page 6).
, Set "Digital Out (Optical)" to "On" in the System Configuration menu
(
page 37).
, If playing a DTS audio track using an audio device with a built-in DTS decoder,
check that the settings are correct (
pages 33, 37). If the console is connected
to an audio device without a built-in DTS decoder, select tracks other than DTS
audio tracks to play.
, Some PlayStation®2 format software titles do not support audio output from the
DIGITAL OUT (OPTICAL) connector. Connect the console to the audio device
using an analog AV Cable, such as the supplied AV Cable (integrated audio/
video) (
page 9).
, See also "There is no sound" and "Sound quality is poor".
Surround effect is not present when playing a DVD with a Dolby Digital
audio track.
, Check that the console is connected to an audio device with a built-in Dolby
Digital decoder using an optical digital cable.
, Check that the settings of the audio device are correct. Refer to the instructions
supplied with the device for details.
, Set "Dolby Digital" to "On" in "Audio Digital Out" (
page 33).
52
Troubleshooting
, For some DVDs with a Dolby Digital audio track, the output signal may not
comprise the entire 5.1 channel range.
Operation
The controller does not function.
, If the software title is compatible only with the Analog Controller
(DUALSHOCK®2), it will not work properly with the Analog Controller
(DUALSHOCK®). Use a controller that is appropriate for the software title.
Refer to the instructions supplied with the software for details.
, Check that the controller is set to the appropriate mode for the software. Refer to
the instructions supplied with the software for details.
, Try using another controller that is compatible with the PlayStation®2 console.
There may be a problem with the controller in use.
The console does not recognise the Memory Card. Data cannot be
saved or copied to the Memory Card.
, Check that the Memory Card is compatible with the software in use
(
page 18).
, Check that the Memory Card is inserted securely (
page 19).
, Check that you are saving the data correctly. Refer to the instructions supplied
with the software for details.
, Data cannot be saved if there is not enough free space on the Memory Card.
, Try using another Memory Card. There may be a problem with the Memory Card
in use.
Data saved on a Memory Card is corrupted.
, While saving, loading, copying or deleting data, do not attempt any of the
following. Doing so may damage the data.
• Do not remove the Memory Card or the controller.
• Do not open the disc cover.
• Do not reset the console.
• Do not turn off the console.
, Corrupted data can be deleted in the Browser menu (
page 19).
The console does not function properly.
, Static electricity and other similar occurrences may affect the console's
operation. Turn off the console and unplug it from the electrical outlet. Then,
replug and turn on the console by pressing the @/1/RESET button.
The @/1 indicator flashes in red and the console does not work.
, Do not use the console until the flashing stops. Placing the console in an
extremely hot location or blocking the console's vents raises the internal
temperature of the console, thereby preventing proper operation.
The console makes noise or shakes.
, Because PlayStation®2 format software titles load at a higher speed than
PlayStation® format software titles, the noise or vibration may be greater.
You forget your password.
, You can clear the password using the following procedure:
The registered password is cleared, and the screen for registering a password
is displayed. Enter a new password (
page 31).
Some functions are not available.
, Depending on the DVD, some functions may not be available:
• Stop, Search, Slow, Program Play, Shuffle Play or Repeat Play may be
prohibited.
• The audio language cannot be changed on discs that do not have multiple audio
tracks. Also, some DVDs do not allow the audio language to be changed.
• If multilingual subtitles are not recorded on the DVD, you cannot change the
language for the subtitles. It may not be possible to change the subtitle
language or turn the subtitles off.
• If multiple angles are not recorded on the DVD, you cannot change the viewing
angles. Changing the viewing angles may be prohibited.
• You can only select
when playing a DVD-RW disc (VR mode).
Check whether a DVD-RW disc (VR mode) is inserted in the console.
Some DVD settings cannot be changed.
, Some settings cannot be changed during playback or Resume Play (
page 28).
Stop playback completely or clear Resume Play (
page 24) before attempting
to adjust the settings.
1 Start a DVD, and then stop playback.
Clear Resume Play (
feature.
page 24). Use a DVD without the Parental Control
2 At the Control Panel, select
(
Additional information
The DVD does not play.
, Check that the DVD has the correct region code. Also check that the broadcast
signal of the disc is compatible with the console (
page 45).
, The Parental Control feature may be set on the disc. Follow the on-screen
instructions and temporarily raise the level of Parental Control (
page 32).
5 Enter the number "7444".
and then press the
button
page 22).
3 Select "Parental Control", and then press the
button.
The screen to enter a password is displayed. If the screen to register a
password is displayed, no password had been registered before. In this case,
register a new password.
4 Press the SELECT button.
The screen to clear the password is displayed.
Troubleshooting
53
Network
Connection to the network cannot be established.
, Check that the network settings are correct. Refer to the instructions supplied
with the software or the information from your Internet service provider and
adjust the settings accordingly.
, The network is busy. Wait a few minutes, and then try to access the network
again.
, Check that the network cable is properly connected (
page 43).
, Check that you are using the correct type of network cable.
, Check that the network settings or connections of the network device are correct.
Refer to the instructions supplied with the network device for details.
54
Troubleshooting
www.playstation.com
"
", "PlayStation", "
", "DUALSHOCK" and "
"SONY" and " " are registered trademarks and
© 2005 Sony Computer Entertainment Inc. All rights reserved.
" are registered trademarks of Sony Computer Entertainment Inc.
is a trademark of Sony Corporation.
Printed in China