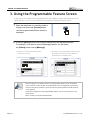
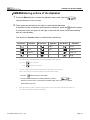
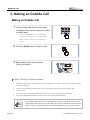
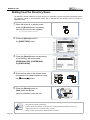
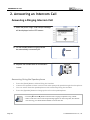
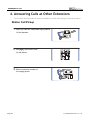
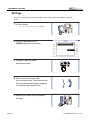
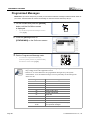
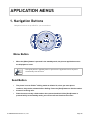
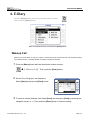
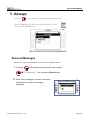
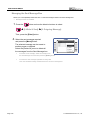
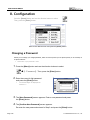
1
User Guide
ITP-5012L
This manual contains information that is proprietary to SAMSUNG Electronics Co. Ltd. and is protected by copyright.
No information contained herein may be copied, translated, transcribed or duplicated for any commercial purposes or disclosed to third
parties in any form without the prior written consent of SAMSUNG Electronics Co. Ltd.
CLASS B Digital device or Peripheral
This equipment has been tested and found to comply with the limits for a Class B digital device, pursuant to International Standaards
EN55022, and EN61000, Part 15 of the FCC Rules and Australian Standard AS/NZS3548.
These limits are designed to provide reasonable protection against harmful interference in a residential installation. This equipment
generates, uses and can radiate radio frequency energy and, if not installed and used in accordance with the instructions, may cause harmful
interference to radio communications. However, there is no guarantee that interference will not occur in a particular installation.
If this equipment does cause harmful interference to radio or television reception, which can be determined by turning the equipment off and on,
the user is encouraged to try to correct the interference by one or more of the following measures:
- Reorient or relocate the receiving antenna.
- Increase the separation between the equipment and receiver.
- Connect the equipment into an outlet on a circuit different from that to which the receiver is connected.
- Consult the dealer or experienced radio TV technician for help.
COPYRIGHT
This manual is proprietary to SAMSUNG Electronics Co., Ltd. and is protected by copyright.
No information contained herein may be copied, translated, transcribed or duplicated for any
commercial purposes or disclosed to third parties in any form without the prior written consent
of SAMSUNG Electronics Co., Ltd.
TRADEMARKS
OfficeServ ITP-5012L is the trademark of SAMSUNG Electronics Co., Ltd.
Product names mentioned in this document may be trademarks and/or registered trademarks
of their respective companies.
Please read this guide before using the ITP-5012L IP phone, and follow the instructions to use the ITP-5012L
IP phone safely and correctly.
This manual may be changed for the product improvement, standardization and other technical reasons without
prior notice.
For further information on the updated manual or the content contained in the manual, contact your Authorised
Samsung Reseller.HYPERLINK
©2003 SAMSUNG Electronics Co., Ltd. All rights reserved.
ABOUT THIS GUIDE
This User guide provides instructions for the use of Samsung’s latest ITP-5012L large LCD
IP Phone that can be used in connection with the Samsung’s Enterprise IP Solutions
OfficeServ System.
Please take the time to study this guide to become familiar with the operation of your ITP5012L phone and the benefits this new IP technology can provide. Keep this guide handy.
You may need to look up instructions for infrequently used features.
Learning to use the power of the ITP-5012L phone will simplify your communication needs.
Conventions
WARNING
Provides information or instructions that you should follow in order to avoid
personal injury or fatality.
CAUTION
Provides information or instructions that you should follow in order to avoid
a service failure or damage to your ITP-5012L phone.
NOTE
NOTE
Indicates additional information for reference.
© SAMSUNG Electronics Co., Ltd.
Page I
ABOUT THIS GUIDE
This page is intentionally left blank.
Page II
© SAMSUNG Electronics Co., Ltd.
SAFETY CONCERNS
For product safety and correct operation, the following information must be read before
the installation and operation of your ITP-5012L IP phone.
Symbols
Caution
Indication of a general caution
Restriction
Indication of a prohibited action when using the product
Instruction
Indication of a required action
© SAMSUNG Electronics Co., Ltd.
Page III
SAFETY CONCERNS
WARNING
The ITP-5012L IP phone shall be connected to the
local AC power using the power adaptor provided
with the IP phone.
Use of an alternative adaptor may result in serious
damage and voids the product warranty.
The handset receiver on the IP Phone may
retain metallic objects. Care should be taken
when using the handset in the vicinity of
small metal objects.
Avoid placing objects containing water such as
vases, cups, cosmetics, and medicines near the
phone.
Moisture in the IP phone may cause a fire and
electric shocks.
Do not install the phone on an unstable surface
or in direct sunlight.
It may cause severe damage to the plastic case of the phone,
and reduced the performance of your IP phone.
Do not place the phone in a dusty area or areas of
extreme or volatile changes in temperature.
It may cause a fire or electric shocks.
Page IV
© SAMSUNG Electronics Co., Ltd.
SAFETY CONCERNS
Do not install the phone near a heater or naked flames
(cigarette lighter, heating apparatus, etc.).
It may cause a fire or electric shocks.
Do not use flammable solvent or materials
near the phone. Do not store them near the phone.
It may cause a fire or electric shocks.
If the phone makes excessive noise,
emits an odour, or smoke, immediately unplug the
phone and call your Authorised Samsung
Reseller.
© SAMSUNG Electronics Co., Ltd.
Page V
SAFETY CONCERNS
CAUTION
Be careful not to connect the network LAN cable
to the PC connection port.
If the LAN cable connected to network is connected to
the PC connection port, both telephone and PC
communications will be disabled.
Use a soft dry cloth to clean the phone.
Do not use any chemical solvents like wax,
benzene, alcohol, thinner,
aerosols, lubricant, or detergent.
The use of chemicals on the phone may cause
fading/discoloring or damage to the parts.
Do not place heavy things on the phone.
It may cause damage to some parts.
Do not separate, repair or remodel
the phone arbitrarily.
If a repair is needed, please contact your
Authorised Samsung Reseller.
Page VI
© SAMSUNG Electronics Co., Ltd.
TABLE OF CONTENTS
ABOUT THIS GUIDE
Conventions.......................................................................................................................... I
SAFETY CONCERNS
Symbols .............................................................................................................................. III
Warning...............................................................................................................................IV
Caution ...............................................................................................................................VI
PREPARATION
1.
Main Features................................................................................................................................. 1
2.
Checking the Parts in the Package ............................................................................................ 4
3.
Name and Features of the ITP-5012L IP phone........................................................................ 5
Front Panel .......................................................................................................................... 5
Name and Features of Each Part ........................................................................................ 6
Bottom Panel of the ITP-5012L ........................................................................................... 8
4.
Assembling the ITP-5012L IP phone.......................................................................................... 9
Connecting lines to the phone ............................................................................................. 9
Using the Desktop Stand................................................................................................... 10
THINGS YOU SHOULD KNOW
1.
About Stations and Trunk Lines............................................................................................... 11
2.
Introduction of Main Screens.................................................................................................... 12
Programmable Feature Screen ......................................................................................... 12
Soft Menu Screen .............................................................................................................. 12
© SAMSUNG Electronics Co., Ltd.
Page VII
TABLE OF CONTENTS
Background Screen ........................................................................................................... 13
Executive Status Display ................................................................................................... 13
Application Menu Screen................................................................................................... 13
3.
Using the Programmable Feature Screen............................................................................... 14
4.
Using the Soft Menu Screen...................................................................................................... 15
5.
Choosing a Function .................................................................................................................. 16
6.
Using a Function Code............................................................................................................... 17
7.
Entering Characters.................................................................................................................... 18
Selecting an Input Mode.................................................................................................... 18
Entering Letters of the Alphabet ........................................................................................ 19
Entering Special Characters.............................................................................................. 20
Entering Numbers.............................................................................................................. 20
8.
Volume Adjustment .................................................................................................................... 21
Adjusting Handset Volume ................................................................................................ 21
Adjusting Speaker Volume ................................................................................................ 21
Adjusting Ring Volume ...................................................................................................... 22
9.
Types of Signal Tone.................................................................................................................. 23
10. Changing the Dial Mode............................................................................................................. 23
11. Telephone Status Indicator ....................................................................................................... 24
12. Button LED ................................................................................................................................... 24
GETTING STARTED
1.
Entering the Environment Setup Mode................................................................................... 25
2.
Editing ........................................................................................................................................... 26
3.
Network Settings ......................................................................................................................... 27
4.
Load & Upgrade Settings........................................................................................................... 29
5.
Setting System Authentication Information ........................................................................... 31
6.
Verifying Settings........................................................................................................................ 32
7.
Exiting Setup ................................................................................................................................ 32
Page VIII
© SAMSUNG Electronics Co., Ltd.
TABLE OF CONTENTS
MAKING A CALL
1.
Before Making a Call................................................................................................................... 33
Dialling Modes ................................................................................................................... 33
Calling Methods ................................................................................................................. 34
2.
Making an lntercom Call............................................................................................................. 35
Calling Other Stations........................................................................................................ 35
Busy Station Callback........................................................................................................ 36
Busy Station Camp-On...................................................................................................... 37
Calling your system operator............................................................................................. 37
3.
Making an Outside Call .............................................................................................................. 38
Making an Outside Call ..................................................................................................... 38
Redial................................................................................................................................. 39
Automatic Redial................................................................................................................ 40
Busy Line Queuing With Callback ..................................................................................... 41
Making a New Call............................................................................................................. 42
Call Park ............................................................................................................................ 42
Using Authorization or Account Codes.............................................................................. 43
Saving the Telephone Number .......................................................................................... 45
Redialling the Saved Number............................................................................................ 45
4.
Dialling Features.......................................................................................................................... 45
Calling From the Lists of the Latest Called Numbers/Incoming Calls ............................... 45
Dialling from Recent Call Log ............................................................................................ 46
Speed Dialling.................................................................................................................... 47
Dialling from the Directory Name....................................................................................... 48
Conference Call .......................................................................................................................49
© SAMSUNG Electronics Co., Ltd.
Page IX
TABLE OF CONTENTS
ANSWERING A CALL
1.
Before Answering a Call............................................................................................................. 53
Call Answering Methods .................................................................................................... 53
2.
Answering an Intercom Call ...................................................................................................... 54
Answering a Ringing Intercom Call ................................................................................... 54
Automatic Answering Mode............................................................................................... 55
Voice Announce Mode....................................................................................................... 55
3.
Answering an Outside Call ........................................................................................................ 56
Answering an outside call.................................................................................................. 56
Universal Answer for Outside Calls ................................................................................... 57
4.
Answering Calls at other Extensions ...................................................................................... 58
Station Call Pickup............................................................................................................. 58
Group Call Pickup.............................................................................................................. 59
Answering a Waiting Call................................................................................................... 60
FEATURES USED DURING A CALL
1.
During an Intercom Call ............................................................................................................. 61
Hold an Intercom Call ........................................................................................................ 61
2.
During a Outside Call.................................................................................................................. 62
Hold an Outside Call.......................................................................................................... 62
Call Transfer ...................................................................................................................... 64
3.
During Intercom/Trunk Line Calls ............................................................................................ 66
Conference ........................................................................................................................ 66
Mute .......................................................................................................................................
Page X
© SAMSUNG Electronics Co., Ltd.
67
TABLE OF CONTENTS
CONVENIENT FEATURES
1.
Call Forwarding............................................................................................................................ 69
Forward All Calls................................................................................................................ 69
Forward Busy..................................................................................................................... 70
Forward No Answer ........................................................................................................... 70
Forward Busy/No Answer .................................................................................................. 71
Cancel Call Forwarding ..................................................................................................... 71
Forward Follow Me ............................................................................................................ 72
2.
Do Not Disturb (DND).................................................................................................................. 73
Setting/Cancelling DND ..................................................................................................... 73
3.
Paging............................................................................................................................................ 74
Internal Page ..................................................................................................................... 74
External Page .................................................................................................................... 75
All Page ............................................................................................................................. 76
Meet Me Page ................................................................................................................... 77
Call Park and Page............................................................................................................ 78
Page Pickup....................................................................................................................... 79
Off-Hook Voice Announce (OHVA) .................................................................................... 80
OHVA Reject...................................................................................................................... 81
OHVA Cancel..................................................................................................................... 81
OHVA Block ....................................................................................................................... 82
4.
Messaging..................................................................................................................................... 83
Leaving a Station Message ............................................................................................... 83
Cancelling Station Messages ............................................................................................ 84
Verify/Return/Delete Station Message............................................................................... 85
Programmed Messages .................................................................................................... 86
© SAMSUNG Electronics Co., Ltd.
Page XI
TABLE OF CONTENTS
5.
Executive/Secretary Hot Line.................................................................................................... 87
Executive Status Display ................................................................................................... 87
Call Transfer from Secretary to Executive......................................................................... 88
Executive/Secretary Message ........................................................................................... 89
6.
In/Out of Group ............................................................................................................................ 91
7.
Group Listening........................................................................................................................... 92
8.
Caller ID (CID) Presentation....................................................................................................... 93
Saving Caller Number ....................................................................................................... 93
Dialling a Saved Caller Number ........................................................................................ 93
Storing the Caller Number to a Speed Dial Number ......................................................... 94
Viewing the Caller ID of Calls Parked/on Hold .................................................................. 95
9.
Call Duration Display .................................................................................................................. 95
10. Door Phone Related Features................................................................................................... 96
Answering the Door Phone................................................................................................ 96
Calling the Door Phone ..................................................................................................... 96
11. Background Music ...................................................................................................................... 97
APPLICATION MENUS
1.
Navigation Buttons ..................................................................................................................... 99
Menu Button ...................................................................................................................... 99
Send Button ....................................................................................................................... 99
Enter Button..................................................................................................................... 100
Direction button................................................................................................................ 100
Cancel Button .................................................................................................................. 100
End Button ....................................................................................................................... 100
2.
Entering Application Menus ................................................................................................... 101
Selecting Application Menus .......................................................................................... 101
Page XII
© SAMSUNG Electronics Co., Ltd.
TABLE OF CONTENTS
3.
Phone Book................................................................................................................................ 102
Search By Speed Dial Number Location ......................................................................... 102
Search a Telephone Number By Name........................................................................... 103
Search By Telephone Number......................................................................................... 104
Search a Telephone Number By Group........................................................................... 105
Search a Telephone Number By Time............................................................................. 106
Recent Caller Numbers ................................................................................................... 106
Recent Called Numbers .................................................................................................. 107
Telephone Number Registration ...................................................................................... 108
Editing Groups ................................................................................................................. 109
Deleting All Telephone Numbers ..................................................................................... 110
4.
E-Diary......................................................................................................................................... 111
HYPERLINKWakeup Call....................................................................................................... 111
Alarm Clock ..................................................................................................................... 112
Daily Planner ................................................................................................................... 112
Memo Pad ....................................................................................................................... 114
Calculator......................................................................................................................... 115
World Time....................................................................................................................... 116
D-DAY Plus ...................................................................................................................... 117
Unit Conversion ............................................................................................................... 118
5.
Message ...................................................................................................................................... 119
Received Messages ........................................................................................................ 119
Sent Messages ................................................................................................................ 122
Draft ................................................................................................................................. 125
6.
Volume Adjustment .................................................................................................................. 127
Selecting a Ring Type...................................................................................................... 127
Ringer Volume ................................................................................................................. 128
Off-hook Volume .............................................................................................................. 128
© SAMSUNG Electronics Co., Ltd.
Page XIII
TABLE OF CONTENTS
Handset Volume .............................................................................................................. 129
Speaker Volume .............................................................................................................. 129
BGM Volume.................................................................................................................... 130
Page Volume .................................................................................................................. 130
7.
Call Forwarding.......................................................................................................................... 131
8.
Configuration ............................................................................................................................. 132
Changing a Password...................................................................................................... 132
Locking a IP phone .......................................................................................................... 133
Setting the Answering Mode............................................................................................ 133
Setting the Boss Answering Mode................................................................................... 134
Language......................................................................................................................... 134
Setting the Method of CID Display .................................................................................. 135
Setting Absent Messages ................................................................................................ 136
Displaying Internal Calls .................................................................................................. 136
Dial Mode......................................................................................................................... 137
Station ON/OFF ............................................................................................................... 137
9.
My Phone .................................................................................................................................... 139
Select BG......................................................................................................................... 139
Entering the Name........................................................................................................... 140
Network Information......................................................................................................... 140
Viewing Status information .............................................................................................. 141
Enbloc Timeout................................................................................................................ 141
News Color ...................................................................................................................... 142
Privacy Option ................................................................................................................. 143
Config. Reset ................................................................................................................... 143
Version Information.......................................................................................................... 144
ANNEX
1.
Troubleshooting ........................................................................................................................ 145
2.
Product Specifications ............................................................................................................. 148
Page XIV
© SAMSUNG Electronics Co., Ltd.
PREPARATION
1. Main Features
IP Network
The ITP-5012L IP phone provides voice communication
through the previously installed data network line, making
installation of additional telephone lines unnecessary.
Network
Large LCD Screen
Displays various kinds of information, and you can simply
press the related [Select] button next to the feature/menu.
This feature provides easy search and selection
of menus and features.
Application menu
Allows you to easily check the phone features(Phonebook,
E-Diary, Message, Volume, Forward, Config., and My
Phone) with an icon or menu on the LCD screen just like a
mobile cellular phone. You can use the Application menu to
search any long text displayed on the LCD panel.
Speed Dial
For further convenient use of your phone, you can program
your frequently used phone numbers into the IP phone’s
Phone Book. For important numbers, you can press one
dial button to make a call to the speed dial number.
© SAMSUNG Electronics Co., Ltd.
Page 1
PREPARATION
Pickup
You can answer a call at another extension.
Automatic Redial/Retry
When your call is important but your party is busy on
another call you can use automatic redial/retry function.
The IP phone redials the called number automatically until
your party is free to take your call.
Hold
Hold
You can use the Hold function when you need something
or another call is arrives. Use this button to temporally hold
the current call until you are ready to resume the call. You
can even pickup the held call at another station.
Conference Calls
This button is used when multiple parties need to be
connected simultaneously during a phone conversation.
Up to five parties including you can be connected in
a conference call.
Call Forwarding
If you cannot answer an incoming call, the call can be
forwarded to another extension(unconditionally, while you
are busy on a call, or when you are away from your
phone).
Page 2
© SAMSUNG Electronics Co., Ltd.
PREPARATION
Do Not Disturb
When you do not want to be disturbed, the DND feature
can be set to block incoming calls and the phone will not
ring. Your calls can be forwarded to another station when
you cannot be disturbed.
Page
If you have an urgent announcement to make, or you wish
to locate a colleague, you can page through the speaker of
other stations, or through optional external speakers.
Executive/Secretary
When the Executive/Secretary button is pressed once,
the executive and his/her secretary can be connected.
The secretary can use this Executive/Secretary feature to
receive an incoming call and then simply forward it to the
executive.
Caller ID
When there is an incoming call, the caller ID or name
xxx-xxx-xxxx
will be displayed on the LCD screen. You can see who is
calling before answering the call and respond accordingly.
© SAMSUNG Electronics Co., Ltd.
Page 3
PREPARATION
2. Checking the Parts in the Package
Handset
LAN Cable
(for PC connection)
ITP-5012L
Phone Stand
User Guide
Power Adaptor
(The view of power adaptor
and power input specification
may vary for each country.)
- Please contact your Authorised Samsung Reseller if any item above is missing
or damaged.
NOTE
Page 4
© SAMSUNG Electronics Co., Ltd.
PREPARATION
3. Name and Features of the ITP-5012L IP phone
Front Panel
Select Buttons
LCD Panel
Status Indicator
Speaker
Select Buttons
Screen Button
Volume Button
Scroll Key
Conference Button
Transfer Button
Dial Buttons
Speaker Button
Hold Button
Microphone
© SAMSUNG Electronics Co., Ltd.
Navigation Buttons
Page 5
PREPARATION
Name and Features of Each PartEMBED
[Select] buttons
You can simply press the [Select] button next to the preferred item on the LCD panel.
LCD Screen
The LCD screen consists of the Status screen and the Main screen.
!
The Status screen on the top of the LCD screen indicates using icons the status of your phone
features.
!
: Executive/Secretary
: Headset Mode
: Call Forward
: Group Listening
: Phone Lock
: Mute
: Answer Mode
: Alarm
: DND
: Message
: Key telephone Message
: Network Connection Status
The main screen shows selectable menus, call details, and other
important messages.
Status Indicator
The three colors(red, blue, pink) indicate the phone status.
Screen Button
This button is used to move between the idle screen, the Programmable Feature screen,
Soft menu screen or Executive Status screen available on the phone.
Volume Button
The Volume Up/Down buttons are used for adjusting the handset, paging or speaker
volume.
Scroll Key
Scrolling up and down, this key allows you to move between options displayed on the LCD
screen or expose other available options not currently displayed.
Page 6
© SAMSUNG Electronics Co., Ltd.
PREPARATION
Conference Button
This button is used to connect multiple callers in a conference call.
Transfer Button
This button is used to transfer a call to another station or to access your station’s
programming options.
Navigation Buttons
You can easily check the phone Application menus(Phonebook, E-Diary, Message, Volume,
Forward, Config, and My Phone) with an icon or menu on the LCD screen.
Microphone
The microphone when in speakerphone mode and is located under the Navigation buttons.
Hold Button
This button is used for briefly holding a call without hanging up.
Speaker Button
This button is used for making a call through the speaker, without using the handset.
Dial Buttons
The dial buttons are used for entering numbers and characters.
Speaker
Used for providing ring tones, paging announcements and in speakerphone mode.
© SAMSUNG Electronics Co., Ltd.
Page 7
PREPARATION
Bottom Panel of the ITP-5012L
Grooves for mounting the desktop stand
LAN connection port
PC connection port
Power adaptor
connection port
Handset connection port
Recording device
Connection port
LAN connection port
Connect the LAN cable connected to the network to this port.
PC connection port
Connect the LAN cable connected to your PC’s network card to this port.
Power adaptor connection port
Connect the power adaptor plug to this port.
Handset connection port
Plug the handset cord into this port marked with the
symbol.
Recording device connection port
Connect your optional recording device to this port.
Grooves for mounting the desktop stand
When used as the desk phone, assemble the phone stand into these grooves.
Page 8
© SAMSUNG Electronics Co., Ltd.
PREPARATION
4. Assembling the ITP-5012L IP phone
Connecting lines to the phone
1. Connect the handset to the handset connection port.
2. Connect the LAN cable connected to the network to the LAN connection port
at the bottom panel of the IP phone.
3. Connect the LAN cable connected to the PC’s network card to the PC connection port
at the rear of the IP phone.
4. Connect the power adaptor. There is a power connection port for the power adaptor
at the rear of the IP phone. Connect the power adaptor cable to this port. Plug the
power adaptor into the AC power outlet and the IP phone is automatically booted.
5. To connect an optional recording device to the phone(REC.) to your recorder.
!
This allows you to record your telephone conversations.
!
Prior to recording conversations you must be aware of local privacy laws.
© SAMSUNG Electronics Co., Ltd.
Page 9
PREPARATION
Using the Desktop Stand
If the phone needs to be used in a desktop environment, insert the desktop stand into the
two side holes, which are located at the rear of the phone, and push it in the upward
direction, as shown in Figure below.
Page 10
© SAMSUNG Electronics Co., Ltd.
THINGS YOU SHOULD KNOW
1. About Stations and Trunk Lines
A station is a digital or IP phone or standard telephone connected to the OfficeServ
system.
A Trunk line is directly connected to your phone company’s telephone network. It allows
you to make telephone calls to parties outside your office(for example, your home) or to
received incoming calls from external parties.
© SAMSUNG Electronics Co., Ltd.
Page 11
THINGS YOU SHOULD KNOW
2. Introduction of Main Screens
The main screens displayed on LCD of this IP phone are as follows.
Programmable Feature Screen
The programmable feature screen appears when the [Screen] button is pressed in
standby mode or during a call. In this screen, the various features programmed in the
telephone system are displayed such as speed dial keys or station keys.
You can use these features by pressing the [Select] button for each feature.
! Example of the Programmable Feature
screen during a call
! Example of the Programmable Feature screen
that appears when the [Screen] button is
pressed twice in standby mode
Soft Menu Screen
There are two types of Soft menu screens: a screen that appears during the setup of a call
and the other screen that appears when the [Screen] button is pressed twice in standby
mode. You can use those features by pressing the associated [Select] button of each
! Example of the Soft menu screen during
a call
! Example of the Soft menu screen that appears
when the [Screen] button is pressed twice in
standby mode
menu.
Page 12
© SAMSUNG Electronics Co., Ltd.
THINGS YOU SHOULD KNOW
Background Screen
This is the default screen that appears in
standby mode.
!
You can use the ‘My Phone’ menu in the
application menus to change this background
screen. Refer to the Application Menus section.
Executive Status Display
This screen appears when the [Screen] button
is pressed three(3) times during standby mode.
The telephone shows this screen only when
the Executive/Secretary function is set, and
the secretary can conveniently set the executive
status appropriate to each situation.
Application Menu Screen
This screen appears when the [Menu] button
is pressed during standby mode.
The Phonebook, E-diary, Message, Volume,
Forward, Config, and My Phone menus are
displayed with icons.
© SAMSUNG Electronics Co., Ltd.
Page 13
THINGS YOU SHOULD KNOW
3. Using the Programmable Feature Screen
In this screen, the various features programmed in the telephone system are displayed such as
speed dial keys. You can use the features by pressing the associated [Select] button.
1. When the telephone is in standby mode or
Screen
during a call, press the [Screen] button
until the programmable feature screen is
displayed.
2. Press the [Select] button of the required feature from the displayed features.
For example, if you want to use the [Message] feature, you can press
the [Select] button next to [Message].
! Example of the Programmable Feature
screen during a call
NOTE
Page 14
! Example of the Programmable Feature screen
that appears when the [Screen] button is
pressed twice in standby mode
- When the phone is in standby mode, the programmable feature screen, Soft Menu
screen, Executive status display and background screen are displayed consecutively
whenever the [Screen] button is pressed. Press the [Screen] button until the desired
screen appears.
- The features displayed on the programmable feature screen can be tailored to your
requirements.
Please consult your System Administrator.
© SAMSUNG Electronics Co., Ltd.
THINGS YOU SHOULD KNOW
4. Using the Soft Menu Screen
In the Soft Menu screen, the various features that can be used during the setup of a call or during
standby mode are displayed. You can use those features by pressing the associated [Select] button.
1. When the telephone is in standby mode or
Screen
during a call, press the [Screen] button until
the Soft menu screen is displayed.
!
Even if you do not press the
[Screen] button during a call, the features that
can be used during a call will be displayed.
2. Press the [Select] button of the desired function from the displayed menus.
For example, if you want to use the [Last Redial] feature, you can press the [Select]
button next to [Redial].
NOTE
- Moving the Scroll key up and down, allows you to search over multiple menu pages
on the soft menu screen.
- You can move to the preferred feature using either the Scroll key or navigation
direction buttons.
- The features displayed on the Soft menu screen vary with OfficeServ system versions.
© SAMSUNG Electronics Co., Ltd.
Page 15
THINGS YOU SHOULD KNOW
5. Choosing a Function
Because various features of this IP phone are displayed on the LCD screen, you can press the
[Select] button corresponding to the desired feature or dial the desired function code. Refer below.
The features available during a call are
displayed on the LCD screen.
Press the [Select] button of the
desired function.
To use the phone during standby mode, you can press the [Screen] button and
bring up the Programmable Feature screen or Soft menu screen or Executive Status
Display, and then press the [Select] button corresponding to the desired function.
!
The Executive Status Display screen will show up only on the phone where the
Executive/Secretary feature is set up.
- Programmable Feature Screen
NOTE
Page 16
- Soft menu screen
- For the main screen, refer to the ‘Introduction of Main Screens’ section.
- If you want to use the function code to activate a function, refer to the next page.
- If you want to see additional menu pages or text on the LCD screen, scroll up and
down using the [Scroll] key, direction buttons or next page [Select] button.
© SAMSUNG Electronics Co., Ltd.
THINGS YOU SHOULD KNOW
6. Using a Function Code
Many of the OfficeServ system functions can be invoked by dialling function codes. Please refer to
the table below for the default function codes(these maybe changed in your system, refer to your
System Administrator.).
Dial Button
Functions
Dial Button
Functions
2XX(Note)
Station number
49
Flash
3XX(Note)
Station number
53+grp+0
Delete from the group
7XX(Note)
Trunk line
54+zone
Page forward
8X
Trunk group number
55+0/1/2/3/4
Page 0/1/2/3/4 internal zone
0
Trunk group number
55+5/6/7/8
Page 1/2/3/4 external zone
10+XXX
Answer a call in standby mode
55+9
Page all the external zones
11
Set/Clear a call on hold
55+*
Page all the zones
12+ XXX
Pick up a call on hold from
another station
56
Meet Me Page pickup
13
Door open
59
Change to self station level
16+XXX
Set speed dials
65
Direct call pickup
17
Dial the saved numbers
66
Group call pickup
19
Redial
67
Universal Answer
41
Leave a message
400
Cancel DND
42+XXX
Cancel a message
401
Set DND
43
Set/Return a message
500-5XX
Station Group
(Note)
44
Reserve access to station/
Trunk line during a call
600
Clear all forwarding calls
45
Wait for a busy extension
601+XXX
Forward all calls
46
Conference
602+XXX
Call forward on busy
47
Enter a billing code
603+XXX
Call forward on no answer
48
Assign a station message
604+XXX
Call forward on busy/no answer
NOTE
- Extension, trunk and station group numbers can be 3 or 4 digits.
- If the table above does not have the desired function code or the function code
does not match with the desired function, the system’s numbering plan may have
been changed, please consult with your System Administrator.
© SAMSUNG Electronics Co., Ltd.
Page 17
THINGS YOU SHOULD KNOW
7. Entering Characters
Using the dial buttons and the navigation buttons of this phone, you can easily enter/edit, letters,
numbers and special characters.
Selecting an Input Mode
When the input screen appears, press the [Menu] button until the required input mode is selected.
! Example of Character Input Screen
A
: Alphabet Capital Letters Input Mode
: Alphabet Lowercase Input Mode
: Numeric Input Mode
S
: Special Characters Input Mode
- The default input mode is set to English.
NOTE
Page 18
© SAMSUNG Electronics Co., Ltd.
THINGS YOU SHOULD KNOW
EMBEDEntering Letters of the Alphabet
1. Press the [Menu] button to select the alphabet input mode. Use the
direction button to move a cursor.
2. Then, press the dial buttons to modify or insert the desired letters.
If the letter to enter is the same as the previous character, press the
direction button
to move the cursor one space to the right or wait until the cursor moves automatically
after a 3 second delay.
The location of alphabet letters on dial buttons is as follows.
Dial Button
Alphabet
Dial Button
Alphabet
Dial Button
ABC
DEF
GHI
JKL
MNO
PQRS
TUV
WXYZ
*/.
!
#@-
Press the button repetitively until the desired alphabet letter appears.
e.g.) Dial
Dial
!
Alphabet
twice to enter K.
three times to enter L.
To enter another letter from the same button sequentially, enter the first
letter, wait for about 3 seconds, and then press the button again.
- Press the
direction button to insert blank.
- To insert a blank between the entered characters, press the
direction
buttons to move a cursor to a character that will be right next to the blank, and press
the dial button [0] once.
!
Press the [Cancel] button to delete any characters one by one. Press the [Cancel] button for
more than 2 seconds to delete all characters.
© SAMSUNG Electronics Co., Ltd.
Page 19
THINGS YOU SHOULD KNOW
Entering Special Characters
1. Press the [Menu] button to select the special character input mode.
2. Then, the special characters that can be selected will be displayed on the lower part
of the character input screen.
Press
direction button, to select the special characters and press
the [Enter] button. or
Press
NOTE
direction button to select another type of special characters.
- Press the dial button [0] to insert a blank.
- Press the [Cancel] button to delete special characters one by one.
Press the [Cancel] button for more than 2 seconds to delete all characters.
Entering Numbers
Press the [Menu] button to select the numeric input mode and then press the dial button
associated with the desired number.
Page 20
© SAMSUNG Electronics Co., Ltd.
THINGS YOU SHOULD KNOW
8. Volume Adjustment
[!Volume"] button is used for adjusting the volume of the handset, speaker, and ringer.
Adjusting Handset Volume
1. During a call using the handset,
press the [Volume"
"] button to increase
the handset volume.
2. Press the [!
!Volume] button to decrease
the handset volume.
Adjusting Speaker Volume
1. During a call using the [Speaker] button,
press the [Volume"
"] button to increase
the speaker volume.
2. Press the [!
!Volume] button to decrease
the speaker volume.
© SAMSUNG Electronics Co., Ltd.
Page 21
THINGS YOU SHOULD KNOW
Adjusting Ring Volume
1. To increase the ring volume, press the
[Volume"
"] button while the phone
is ringing.
2. To decrease the speaker volume, press the
[!
!Volume] button while the phone
is ringing.
- In order to set the required volume of the various options for this IP phone, refer to
the ‘Volume Menu’ of ‘Application Menus’ described in this guide.
NOTE
Page 22
© SAMSUNG Electronics Co., Ltd.
THINGS YOU SHOULD KNOW
9. Types of Signal Tone
The types of signal tone used in this telephone system are described in the following table.
Signal
Usages
Signal Interval
Tone Name
Dial tone
Ring back
tone
A steady tone that indicates
you can begin dialling.
Indicates the station you dialled
is ringing.
Busy tone
Indicates the station you dialled
is busy.
Transfer tone
Indicates your call is being held
and you can dial another
station.
Confirmation
tone
Very short beeps that indicate
you have correctly set or
cancelled a system feature.
* The Signal Interval may vary for each country.
10. Changing the Dial Mode
The OfficeServ system allows you to dial to the
local telephone network using either pulse
(mechanical) or tone dialling modes.
To change from pulse(mechanical) dial mode to
tone dial mode, press the [#] button while dialling
an external number. Then, every number pressed
after the [#] button will be transmitted in tone
mode(electronic mode).
© SAMSUNG Electronics Co., Ltd.
Page 23
THINGS YOU SHOULD KNOW
11. Telephone Status Indicator
The status indicator turns on or off according to the telephone status.
Situation
Status Indicator
Busy
Steady red.
Station Ring
Flashing red.
Trunk Ring
Flashing blue.
Recall Ring
Flashing purple.
Message Camp On
Flashing red.
DND
Fast flashing red within 1-second interval.
12. Button LED
The [Transfer] button, [Hold] button, and [Speaker] button have a LED that turns on or off
according to the phone status.
" [Transfer] button LED " " " "
Transfer
LED Status
Steady red
Function
When ‘Forward All Calls’ is set or a Follow-me has been set.
Hold
" [Hold] button LED " " " "
LED Status
Function
Flashing red
When the phone is locked for any outgoing Trunk call.
Steady red
When the entire phone is locked.
Speaker
" [Speaker] button LED " " " "
LED Status
Steady red
Page 24
Function
When the phone is used as a speakerphone.
© SAMSUNG Electronics Co., Ltd.
GETTING STARTED
This chapter describes the procedure for setting the user environment after installing and
booting the ITP-5012L IP phone.
1. Entering the Environment Setup Mode
When the IP phone is first installed or the system settings have changed, you must set the data
network environment settings through the environment setup menu. This menu also allows you to
designate the TFTP server for upgrading the IP phones programs.
1. Connect the power adaptor while pressing
the [Menu] button.
2. The environment setup menu appears
on the LCD screen.
Press the [ ]/[ ] direction button
to move to between the menus, and press
the [Enter] button to select.
Setup Menu Structure
Setting items are built in the below structure.
1. Information
1. Version
2. Network
3. Load Option
4. MAC address
Manual IP
2. Network
1. Mode
2. IP
3. Netmask
4. Gateway
3. Load & Upgrade
1. Load Option
2. Upgrade Program
3. Upgrade Bootrom
4. Format
4. System
1. Password(* Not Used)
5. Server
1. Server IP
2. ID
3. Password
DHCP
1. Mode
PPPoE
1. Mode
2. ID
3. Password
6. Exit
© SAMSUNG Electronics Co., Ltd.
Page 25
GETTING STARTED
2. Editing
The buttons and functions below are used for selecting a menu from the LCD screen and
entering/cancelling/saving a value.
Moving between Menus
!
Press the [
]/[
] direction button to move to a menu and press the [Enter] button, or
press the number of the menu using the dial buttons from [0] to [9].
!
Press the [Menu] button to move to the environment setup main menu.
!
Press the [End] button to move to the previous menu without saving the entry.
!
Use the [
]/[
] direction button to move to other menus.
Entering Numbers, Characters, and Period(.)
!
Enter a number or character using the dial buttons [0]~[9].
!
Press the [
] button to enter a period.
(Refer to the ‘Entering Characters’ section of ‘Things You Should Know’ for procedures on
entering characters.)
Deleting Entries
!
Press the [
] button or [Cancel] button to erase entries by moving the cursor to the left.
Saving Entries
!
Press the [Enter] button to save the entries.
Cancelling Settings
!
Page 26
Press the [End] button to move to the previous menu without saving the entry.
© SAMSUNG Electronics Co., Ltd.
GETTING STARTED
3. Network Settings
You can verify or change the network environment.
1. Use the [
]/[
] button to move to
the [2. Network] menu and press
the [Enter] button.
2. Move to the [1. Mode] submenu and
press the [Enter] button.
3. Select [1. Manual IP] menu to
directly enter the phone’s IP address.
"
"
Select [2. DHCP] to let your data network
automatically allocate the IP address.
The IP Address, Subnet Mask,
and Gateway values are automatically
set and are not displayed on the LCD screen.
Select [3. PPPoE] to use a broadband network such
as ADSL. In this case, you should enter the
ID and password which was given from
broadband network supplier.
4. After selecting the required mode a message
confirming the mode is displayed for 2
seconds.
© SAMSUNG Electronics Co., Ltd.
Page 27
GETTING STARTED
5. The upper menu is displayed again.
6. Select [2. IP] to display the current
IP address of the IP phone.
No address is displayed if an IP address
is not set.
Use the dial buttons [0]~[9] and [
] to
enter a new IP address, and press the [Enter] button.
"
Be careful not to enter a duplicate
IP address since the data network will not
support duplicated IP addresses.
7. Select [3. Netmask] to display the current
Netmask address of the IP phone.
To change the Netmask address,
enter a new address and press
the [Enter] button.
8. Select [4. Gateway] to display the current
Gateway address of the IP phone.
To change the Gateway address,
enter a new address and press
the [Enter] button.
Page 28
© SAMSUNG Electronics Co., Ltd.
GETTING STARTED
4. Load & Upgrade Settings
You can verify or change the upgrade environment of the IP phone.
1. Use the [
]/[ ] button to move to
the [3. Load & Upgrade] menu
and press [Enter] button.
2. The submenus are displayed.
3. Select [1. Load Option] and designate
the source of program for the IP phone.
"
"
Select [1. File System] to operate programs
saved in the IP phone flash memory.
Select [2. TFTP down run] to download
programs saved in the TFTP server to
the RAM memory of the IP phone.
- When you select [2.TFTP down run], you must consult System Administrator to know
the location of the server.
NOTE
© SAMSUNG Electronics Co., Ltd.
Page 29
GETTING STARTED
4. The [2. Upgrade Program] menu is
used for upgrading the phone’s program.
Enter the IP address of the TFTP
server from which the program should
be downloaded.
Press the [Enter] button to start the program download process.
If the correct TFTP server IP address is programmed
press [Enter] to start the download process.
5. The [3. Upgrade Bootrom] menu is
used for upgrading the phone’s Bootrom.
Enter the IP address of the TFTP server
from which the Bootrom program should
be downloaded, and press the [Enter] button.
"
The IP phone is rebooted after downloading
the Bootrom program and the Environment
Setup Main Menu appears. At this time, you
don’t need press the [Menu] button.
6. The [4. Format] menu is used to delete previously saved programs.
Check with your System administrator before using this option.
- After formatting the IP phone, download a new program through the [2. Upgrade
Program] menu.
NOTE
Page 30
© SAMSUNG Electronics Co., Ltd.
GETTING STARTED
5. Setting System Authentication Information
This function is used to set the IP address of the OfficeServ system connected to the IP phone and
the authentication ID and password of the IP phone. The ID and password of this menu are used
when initially setting the IP phone and are not required while using the functions of the IP phone.
If a function of the IP phone(such as Lock) requests a password, enter the system password set the
Config/Password menu.
1. Use the [
]/[ ] button to move to
the [5. Server] menu and press
the [Enter] button.
2. The submenus are displayed.
"
If the OfficeServ system is set to request
the ID and password of the IP phone,
[2. ID] and [3. Password] shall be entered.
3. The [1. Server IP] menu is used for
verifying or changing the IP address
of the OfficeServ system. Verify the current
IP address of the OfficeServ system before
making any changes. To change the
IP address, enter a new address and
press the [Enter] button.
4. [2. ID] and [3. Password] are user
information required for connecting to
the OfficeServ system.
Contact your System Administrator for the
correct ID and password.
NOTE
- The ID is composed of maximum 16 letters and numbers(Capital and lower case
letters are not distinguished). The password is composed of a maximum 8 numbers.
The password is displayed as * when entered.
© SAMSUNG Electronics Co., Ltd.
Page 31
GETTING STARTED
6. Verifying Settings
You can verify the IP phone settings after setup.
Incorrect settings can be adjusted after verification.
1. Use the [
]/[ ] button to move to
the [1. Information] menu and press
the [Enter] button.
2. The submenus are displayed.
Select each menu and verify the settings.
Check, the [2. Network] menu
settings are correct before
using the IP phone.
7. Exiting Setup
This option will exit the environment setup menu and reboot the IP phone.
1. Return to the main menu of environment
setup and select the [6. Exit] menu and
press the [Enter] button.
2. The settings are saved and the IP phone is rebooted.
- You should consult your System Administrator prior to changing any environment
settings of the IP phone.
NOTE
Page 32
© SAMSUNG Electronics Co., Ltd.
MAKING A CALL
1. Before Making a Call
The calling methods and features are summarized in the following table.
The detailed description corresponding to each feature then follows.
Call Type
Intercom Calls
Calling method
Handset, speakerphone
Feature
- Making an intercom call
- Intercom callback
- Call waiting
- Calling the system operator
Outside Calls
- Making an outside call
- Redial
- Automatic redial
- Trunk line callback
- Trunk line recall
- Call waiting in a parking orbit
- Changing Trunk line
level/Using a billing code
- Save/Repeat
- Calling the saved number
- Calling from the lists of the latest called numbers/incoming calls
- Dialling from recent call log
- Speed dialling
- Searching/Dialling from the System directories by name
- Conference Call
Dialling Modes
The ITP-5012L IP phone allows you to choose between 2 dialling modes, Overlap and
Enbloc. Refer to the Application Menus/Configuration section later in the manual for more
information.
!
Overlap dialling allows you to commence the calling process immediately you dial the first digit.
!
Enbloc dialling allows you to enter the number first, thus giving you time to review and change
If you dial without lifting the handset first, the IP phone will automatically turn on speakerphone.
the number. You then press the [Send] button to make the call using the handset or
speakerphone.
The following features descriptions for making calls is based on the Enbloc dialling mode.
© SAMSUNG Electronics Co., Ltd.
Page 33
MAKING A CALL
Calling Methods
"
Using a handset
This function allows you to lift the handset
and make a call.
"
Using a speakerphone
This function allows you to make a call
through the speakerphone without lifting
the handset.
Page 34
© SAMSUNG Electronics Co., Ltd.
MAKING A CALL
2. Making an Intercom Call
This function is used when you want to make a call to other stations.
Calling Other Stations
1. Lift the handset.
2. Dial the extension number of the other party.
!
Or, press the [Select] button corresponding
to the extension number in the programmable
feature screen.
3. Press the [Send] button and ring tone
will be heard.
!
If beep tones are heard,
without ring tone, the station you called is
set for a voice announcement or an automatic
answer function. After the beep tones
end, you can speak to the called party through
their station speaker.
4. Begin speaking after the other party answers.
Calling Through a Speakerphone
"
Dial the extension number without lifting the handset and press [Send].
"
Listen to the speaker to hear a voice of the other party and speak through the microphone.
"
You can switch from the speakerphone to the handset by lifting the handset.
"
Press the [Speaker] or [End] button to hang up the call on the speakerphone.
© SAMSUNG Electronics Co., Ltd.
Page 35
MAKING A CALL
Busy Station Callback
When you call another station and receive a busy signal, this function allows you to set a callback reservation
for when the other station becomes free.
1. When another station is called and a busy
tone is heard, press the [Select] button
corresponding to [CALLBACK]
displayed on the LCD screen.
2. Replace the handset after confirmation
tone is heard.
3. When the busy station becomes free,
your phone will ring. At this time,
the LCD screen will display a callback
message.
the reserved extension number
4. Lift the handset to call the now idle station.
5. Begin speaking after the other party picks
up the phone.
NOTE
Page 36
- A callback will be cancelled if not answered within 30 seconds.
- After the call is finished, the callback reservation will be automatically cleared.
- Callback can also be set for a station user that does not answer your call. The callback
will occur after the called station user next uses their phone.
© SAMSUNG Electronics Co., Ltd.
MAKING A CALL
Busy Station Camp-On
When you call another station and receive a busy signal but you do not want to wait for a callback, this
function allows you to camp on to the busy extension.
1. After calling a busy station, press the
[Select] button corresponding to the
[CAMP ON] displayed on the LCD screen.
2. The called station will receive off-hook ring
tone repeated every few seconds to
indicate that your call is waiting.
3. Wait for the called party to answer.
- The called station must release its first call or place it on hold before answering
the camp-on.
NOTE
Calling your system operator
Dial [9] to call the system operator or a group
of operators. If a specific operator needs to
be called, dial that person’s extension number.
© SAMSUNG Electronics Co., Ltd.
Page 37
MAKING A CALL
3. Making an Outside Call
Making an Outside Call
1. Lift the handset and dial the trunk access
code [0] and then dial the telephone number
of outside party.
!
Or, press the [Select] button corresponding
to the trunk line required in the programmable
feature screen and dial the outside telephone
number.
2. Press the [Send] button to make the call.
3. Begin speaking after the other party
picks up the phone.
Calling Through a Speakerphone
"
Dial the trunk access code followed by the telephone number without lifting the handset
and press [Send].
"
Listen to the speaker to hear the voice of the other party and speak through the
microphone.
"
You can switch from the speakerphone to the handset by lifting the handset.
"
Press the [Speaker] button to hang up the call on the speakerphone.
NOTE
Page 38
- In overlap dialling mode, if the Hot Keypad feature has been turned off, you must press
the [Speaker] button first then dial the trunk access code and telephone number required.
- Refer to Section ‘8. Application Menu/Configuration/Station On/Off’ for more details.
© SAMSUNG Electronics Co., Ltd.
MAKING A CALL
Redial
This function allows you to redial the last external number dialled.
1. When the phone is in standby mode,
press the [Screen] button repeatedly
until the Soft menu screen appears.
!
Or, dial [1][9], the function code for
redial, and then press the [Send] button.
2. Press the [Select] button corresponding
to [LAST REDIAL] displayed
on the Soft menu screen.
3. Begin speaking after the other party picks
up the phone.
© SAMSUNG Electronics Co., Ltd.
Page 39
MAKING A CALL
Automatic Redial
After making an outside call and receiving busy tone, your IP phone can redial the called number
automatically. It can redial up to 99 times at a the preprogrammed interval.
1. Upon hearing a busy tone, press the
[Select] button corresponding to the
[Retry].
2. The system reserves the line and redials
the same number automatically.
You can hear the call setup tones through
the speaker. At this time, the microphone
is automatically disabled.
3. When the other party answers, you
should lift the handset or press the
[Speaker] button or the [Send] button.
!
You must respond within 10 seconds.
(An automatic redial will be cancelled if not
answered within 10 seconds.)
- When you dial to another number, the automatic redial is cancelled.
- To cancel automatic redial, lift and replace the handset.
NOTE
Page 40
© SAMSUNG Electronics Co., Ltd.
MAKING A CALL
Busy Line Queuing With Callback
If you receive a busy signal when selecting an outside line, this means that the line or
group of lines is busy. This callback function allows a call to be placed in queue waiting for a free
outside line.
1.
If busy tone is heard when selecting a trunk
line, press the [Select] button corresponding to
[CALL BACK] displayed on the LCD screen.
2. Replace the handset after the confirmation
tone is heard.
!
If the [Hold] button is pressed when the
confirmation tone is heard, the first
callback that has been set will be cancelled.
3. When the busy line becomes available,
your phone will ring.
4. Lift the handset or press [Speaker] and a dial
tone will be heard.
Dial an outside telephone number and press
the [Send] button.
5. Begin speaking after the other party picks
up the phone.
- A callback will be cancelled if not answered within 30 seconds.
NOTE
© SAMSUNG Electronics Co., Ltd.
Page 41
MAKING A CALL
Making a New Call
This function allows you to disconnect the existing call and make a new call on the same line.
1. While on a call, press the [Select] button
corresponding to [NEW] menu displayed on
the LCD screen. This will disconnect the
current call and provide dial tone.
2. Dial an outside telephone number and
press the [Send] button.
Call Park
This function allows you to place a call in a ‘parking orbit’ and announce the call over a paging system for
someone to pick up. There are a total of 10 parking orbits and a call can be parked in one of these orbits.
1. During a call
press the [Screen] button until the
Programmable feature screen is displayed.
2. Press the [Select] button corresponding
to [PARK] on the Programmable feature
screen.
Page 42
© SAMSUNG Electronics Co., Ltd.
MAKING A CALL
3. Dial the orbit number(0~9) to park
the call and announce the orbit number
for the required party to answer the call.
4. To retrieve a parked call press the [Select]
button corresponding to [PARK]
on the Programmable feature screen and
dial the orbit number.
NOTE
About the Call Park and Orbit
‘Call Park’ means that you can park a call to allow someone to pick it up at another
location. The storage places are called ‘orbits’ and there are a total of 10 orbits.
The current call can be parked in one of those orbits and the relevant orbit number
(storage place) can be announced. Then, someone can take the call out of the
parking orbit.
A Park key can be programmed with a dedicated park orbit number(0-9). Calls can
be parked and retrieved by pressing the Park Orbit button. When a call is parked in
the orbit associated with the Park Orbit button it will flash to indicate a parked call
on all stations with that Park Orbit key programmed.
Using Authorization or Account Codes
These functions restrict access to outside lines without inputting a valid code. The system then prints these
codes out with the call details on a call details report.
Using Authorization Codes
If the telephone system asks for an authorization
code before you make an outside call, press
the [Select] button corresponding to
[AUTHORIZE] on the screen and dial a
valid authorization code.
© SAMSUNG Electronics Co., Ltd.
Page 43
MAKING A CALL
Using an Account Code
The OfficeServ system can be programmed to force an account code entry prior to making outside calls or at
anytime during the call if it is not forced. This allows the system to report calls against specific account codes
in the call details report.
1. For forced entry of account codes, lift the
handset and press [Send] in Enbloc dialling
mode or lift the handset in Overlap dialling mode.
2. Press the [Select] button corresponding to
[ACCT] on the screen.
!
Or, dial [4][7], the function code for using
an account code.
3. Enter the account code.
4. Press again the [Select] button
corresponding to the [ACCT] menu
on the screen.
!
This will not affect your telephone call.
!
To enter an Account code during a call follow
steps 2 to 4.
NOTE
Page 44
- If a wrong account code was entered, press the [Select] button for [ACCT]
twice and enter the correct account code.
Then, only the last account code that you entered will be printed out.
- Please consult your System Administrator for more details.
© SAMSUNG Electronics Co., Ltd.
MAKING A CALL
Saving the Telephone Number
You can save the current dialled outside number for later use and redial the number.
Press the [Select] button for
[SAVE/REPEAT] before hanging up
the call, to save the phone number that has
just been called.
Redialling the Saved Number
You can redial the saved number anytime.
Press the [Select] button for
[SAVE/REPEAT] in the Soft Menu
screen or dial [1][7].
!
[1][7] is the function code for redialling
the saved number.
- The saved number is stored in the memory until you save another outside number.
NOTE
4. Dialling Features
Calling From the Lists of the Latest Called Numbers/
Incoming Calls
The Application Menu is used for this function.
Please refer to the ‘Recent Caller IDs’ section in the ‘Phone Book’ part of ‘Application Menus’ in this guide.
© SAMSUNG Electronics Co., Ltd.
Page 45
MAKING A CALL
Dialling from your Recent Call Log
1. Press the [Send] button briefly while in
standby mode.
!
If the [Send] button is pressed and held about
2 seconds, you can redial the last number
dialled.
2. Up to 60 numbers of recently made
or received calls will be listed in the order
they were dialled/received. An icon
to the left of each number will indicate whether
it was an outgoing or an incoming answered
or missed call.
3. Use the direction button or [Scroll] button to
move the cursor to the desired telephone
number or name.
4. Press the [Send] button or the [Enter] button.
!
If the [Send] button is pressed, the call
is connected to the number or name selected.
If the [Enter] button is pressed, you can
view information about the call including the
caller’s name, time and date of connection,
and call duration.
After viewing the information, you can
press the [Send] button to dial the number.
5. The call will be made using
the speakerphone.
You can switch from the speakerphone to
the handset by lifting the handset.
Page 46
© SAMSUNG Electronics Co., Ltd.
MAKING A CALL
Speed Dialling
The OfficeServ system can store up to 500 frequently dialled telephone numbers in the system speed dial list.
In addition you can have up to 50 personal speed dial numbers stored in the system.
!
You can dial a preprogrammed telephone number stored in the system-wide speed
dial list of numbers 500-999 or from your personal list of numbers 00-49.
1. When the phone is in standby mode
press the [Screen] button repeatedly until
the Soft menu screen appears.
!
Or, press the [Speaker] button or dial [1][6],
the function code for speed dialling.
2. Press the [Select] button corresponding
to the [SPEED DIAL] button displayed
on the Soft menu screen.
3. Dial the speed dial number required and,
the associated telephone number
will be dialled automatically.
4. The phone of the other party will ring.
Begin speaking after the other party
picks up the phone.
NOTE
- The ITP-5012L also has an internal Phone Book for storing frequently called numbers.
Refer to the ‘Phone Book’ section of ‘Application Menus’ for the use of the internal
Phone Book function.
- The system speed dial numbers from 500 to 999 are registered by the System
Administrator, so any telephone user can use these system-wide speed dial numbers.
- The personal list of numbers from 00~49 are personally registered numbers that can
be only used on your station. The station may be assigned up to 50 in multiples
of 10. The System Administrator determines the maximum number of personal speed
dial numbers available to you.
© SAMSUNG Electronics Co., Ltd.
Page 47
MAKING A CALL
Dialling from the Directory Name
The OfficeServ system maintains an online directory for extensions, system and personal speed dial names.
The extension number or the speed dial number can be selected from the directory name list, which is in
alphabetical order.
1. When the phone is in standby mode,
press the [Screen] button repeatedly
until the Soft menu screen appears.
!
Or, press the [Speaker] button.
2. Press the [Select] button for
the [DIRECTORY] menu.
3. Press the [Select] button corresponding
to the directory that will be used :
[PERSONAL DIR], [SYSTEM DIR]
or [STATION DIR].
4. Enter the first letter of the desired name
and search for the desired name by using
the [!
!Volume"
"] button.
5. Press the [Select] button for
[DIAL] after the desired
name is selected to make the call.
NOTE
Page 48
- Please refer to the ‘Entering Characters’ section of ‘Things You Should Know’ part in
this guide for entering characters.
- Specific Directory buttons can be placed in the Programmable features screen for
single button access to each directory required.
- Please consult your System Administrator for details.
© SAMSUNG Electronics Co., Ltd.
MAKING A CALL
Conference Call
Up to 5 members, including you, can participate in a conference simultaneously.
1. Press [Conference] button in the standby
mode.
2. Press the [Select] button for
[Group] in the conference screen to display
the group list.
3. Press the left [Select] button of the entry
box and enter the phone numbers
of the participants.
And press the [Enter] button.
!
To save the entered phone numbers in the group,
press the [Menu] button.
!
You can set or cancel the participant by pressing
the right [Select] button.
4. Press the [Select] button of
the [Send All] menu.
The conference connection status
of all the numbers is displayed.
!
To disconnect a number from the
conference, press the [Select] button
of the [Delete] menu on the right side
of the number.
NOTE
- If you press the [Transfer] button and dial the conference function code [4][6], you can
use the conference function to add additional parties. Please follow the displayed
instructions.
© SAMSUNG Electronics Co., Ltd.
Page 49
MAKING A CALL
Conference Groups
You can establish a conference simply by selecting one of 5 possible groups and the conference will be setup
automatically. You can also review and edit the members of each group.
1. Press the [Conference] button in the
standby mode.
2. Press the [Select] button for
[Group] in the conference screen to display
the group list.
!
You can load or delete a number in the
group by moving to the group and pressing
the [Menu] button.
Select [Save] to save the entered
number to the group.
3. Press the [Select] button for the required group
to display the members of the group.
Press the [Select] button for [Send All]
to establish the conference.
Page 50
© SAMSUNG Electronics Co., Ltd.
MAKING A CALL
To establish a new Conference Group
1. Press the [Conference] button in the
standby mode.
2. Press the [Select] button for
[Group] in the conference screen to display
the group list.
3. Press the left [Select] button of the entry
boxes and enter the phone numbers
of the participants. Press the [Enter] button
after each participant to activate each member.
!
Each activated member is indicated by a black
Square in the entry box on the right hand side of
the conference screen.
4. Press the [Menu] button.
In the pop menu select the [Save] option.
5. Enter the name of the group and press the
[Enter] button to save.
!
You can verify that the group has been saved
by pressing the [Enter] button when the new
group is highlighted.
© SAMSUNG Electronics Co., Ltd.
Page 51
MAKING A CALL
This page is intentionally left blank.
Page 52
© SAMSUNG Electronics Co., Ltd.
ANSWERING A CALL
1. Before Answering a Call
The call answering methods and features are summarized in the following table.
If you want to learn how to use each feature, please refer to the detailed description corresponding
to each feature.
Call Type
Intercom Calls
Call Answering methods
Handset, speakerphone
Feature
- Answering an intercom call
- Automatic answering mode
- Broadcast answering mode
Outside Calls
- Answering an outside call
- Universal Answer
- Station Call Pickup
- Group Call Pickup
- Answering a waiting call
Call Answering Methods
!
Using a handset
This function allows you to lift the handset
and answer a call.
!
Using a speakerphone
This function allows you to answer
a call through the speakerphone without
lifting the handset.
© SAMSUNG Electronics Co., Ltd.
Page 53
ANSWERING A CALL
2. Answering an Intercom Call
Answering a Ringing Intercom Call
1. When the phone rings, a call receipt message
will be displayed on the LCD screen.
2. Lift the handset and the ringing call will
be automatically connected you.
3. Replace the handset after a conversation
is over.
Answering Using the Speakerphone
!
Press the [Send] button, without lifting the handset.
!
Listen to the speaker to hear a voice of the other party and speak through the microphone.
!
You can switch from the speakerphone to the handset by lifting the handset.
!
Press the [Speaker] button to hang up the call on the speakerphone.
NOTE
Page 54
- Press the [!Volume"] button while the bell is ringing to adjust the ring volume.
- When a call arrives and a call receipt message appears on the LCD panel, but the bell
does not ring, you should lift the handset to answer the call.
© SAMSUNG Electronics Co., Ltd.
ANSWERING A CALL
Automatic Answering Mode
This function allows you to answer a station call on your phone where the intercom answering mode
has been programmed for automatic answer.
"
Please refer to the ‘Setting the Answering Mode’ section in the ‘Configuration’ part of
‘Application Menus’ described in this guide.
1. When an incoming call arrives, beep
tones will be heard and
then the station automatically answers
the call.
2. The speakerphone is turned on and you
can speak hands-free.
After the conversation is over, press
the [Speaker] button or [End] button.
"
If a personal conversation is needed,
you should pick up the handset.
Voice Announce Mode
This function allows you to answer a station call on your phone where the Voice Announce answering mode
has been set up.
1. When an incoming call arrives, beep
tones will be heard and the caller’s voice
can be heard through the speaker.
2. To answer the call, you can lift the
handset or press the [Send] button to
use the speakerphone.
© SAMSUNG Electronics Co., Ltd.
Page 55
ANSWERING A CALL
3. Answering an Outside Call
Answering an outside call
1. When the phone rings, a call receipt message
will be displayed on the LCD screen.
2. Lift the handset and the ringing call will
be automatically connected.
3. Replace the handset after a conversation
is over.
To Answer using the Speakerphone
!
Press the [Send] button, without lifting the handset.
!
Listen to the speaker to hear a voice of the other party and speak through the microphone.
!
You can switch from the speakerphone to the handset by lifting the handset.
!
Press the [Speaker] button to hang up the call on the speakerphone.
- Press the [!Volume"] button while the phone is ringing to adjust the ringer volume.
NOTE
Page 56
© SAMSUNG Electronics Co., Ltd.
ANSWERING A CALL
Universal Answer for Outside Calls
The Universal answer feature allows you to answer outside calls programmed to ring a general alerting device
such as a night bell.
The Universal Answer feature does not apply to intercom calls.
1. If an outside call rings the alerting device.
2. Press the [Screen] button repeatedly
until the Soft menu screen appears.
"
Or, dial [6][7], the function code for
universal answer.
3. Press the [Select] button for [UNIV. ANSWER]
displayed on the Soft menu screen.
4. Lift the handset or press [Send] to speak
through the speakerphone.
© SAMSUNG Electronics Co., Ltd.
Page 57
ANSWERING A CALL
4. Answering Calls at Other Extensions
The functions below describe the methods available to answer calls ringing at unattended stations.
Station Call Pickup
1. When you hear an unattended ringing station
Lift the handset.
2. Dial [6][5], the function code
for call pickup.
3. Dial the extension number of
the ringing phone.
Page 58
© SAMSUNG Electronics Co., Ltd.
ANSWERING A CALL
Group Call Pickup
Allows you to pick up a call ringing in any pickup group. Use group pickup when you and the ringing extension
are part of a pickup group.
1. When a telephone assigned in the same
pickup group is ringing, you can lift
the handset.
2. Dial [6][6], the function code for group
call pickup.
3. Dial the group number(01~20).
NOTE
- Station and group call pickup features may not be able to answer calls recalling to a
station. Consult your System Administrator as this is a programmable option in the
OfficeServ system.
- Group call pickup will pickup ringing calls to stations in the group based on the
station’s priority in the group. This may result in you answering a call for a different
station to the one you expect. Use the station pickup to be sure you pick up the station
call you require.
© SAMSUNG Electronics Co., Ltd.
Page 59
ANSWERING A CALL
Answering a Waiting Call
When currently on a call and a second call arrives from another station/outside caller this feature allows you
to answer the waiting call.
1. Press the [Screen] button until the
Programmable Feature screen appears.
2. Press the [Select] button for the
Trunk flashing button in the Programmable
Feature screen.
"
If an automatic hold feature is set up on
your phone, the current call will be placed
on hold automatically, otherwise it will be
disconnected.
3. Alternatively when a new incoming call
arrives press the [Hold] button to place
your existing call in Hold and
then press the [Select] button
of the flashing button in the
Programmable Feature screen.
Page 60
© SAMSUNG Electronics Co., Ltd.
FEATURES USED DURING A CALL
1. During an Intercom Call
Features that can be used conveniently during an intercom call are described below.
Hold an Intercom Call
You can put the other party on hold if another call arrives or you wish to use both hands for another task and
resume the call later.
1. Press [Hold] button and replace
the handset to put the current call on hold.
!
The intercom call is placed into exclusive hold
and cannot be retrieved at another station.
2. To call again, press the blinking [CALL] button
in the programmable feature screen.
© SAMSUNG Electronics Co., Ltd.
Page 61
FEATURES USED DURING A CALL
2. During a Outside Call
Features that can be used conveniently during an outside calls are described below.
Hold an Outside Call
You can put the other party on hold if another call arrives or you wish to use both hands for another task and
resume the call later.
1. Press [Hold] button and put the call on hold.
2. Press the [Screen] button until
the Programmable Feature screen is
displayed.
3. The number of the Trunk line call,
which is on hold, blinks on the Programmable
Feature screen.
Press the [Select] button of the blinking
Trunk line number to resume the call.
4. Resume conversation.
NOTE
Page 62
- If the [Hold] button is pressed once, you can reconnect to the party on hold from
another phone.
- If the [Hold] button is pressed twice, you can reconnect to the party on hold only
from the original phone.
© SAMSUNG Electronics Co., Ltd.
FEATURES USED DURING A CALL
Hold a Outside Call and Make an Intercom Call
You can put the outside caller on hold and call another station to consult with another staff member.
1. Press [Transfer] button.
The caller will be placed on-hold.
2. Dial the station number.
3. Commence conversation with the recipient of
the station call.
4. Press [Transfer] button to reconnect
to the outside call on hold.
- You can switch between the outside caller and the internal party by pressing the
[Transfer] button.
NOTE
© SAMSUNG Electronics Co., Ltd.
Page 63
FEATURES USED DURING A CALL
Call Transfer
While on an outside call you can transfer the call to another internal or outside party.
1. Press [Transfer] button during the call.
2. Dial the station/outside number
to which the call should be transferred.
3. Press the [End] button or replace the handset
to immediately transfer the call or wait for the
called party to answer and announce the
transfer before disconnecting the call.
NOTE
Page 64
- If the recipient of the transferred call does not answer or rejects the transfer, the call
will recall to you.
- You can also press the [Transfer] button to reconnect to the outside caller.
- If the station you wish to transfer the call to is busy, you can camp-on the caller to the
busy station by pressing the [End] button.
The busy station will receive off hook ring to indicate a camp-on call.
© SAMSUNG Electronics Co., Ltd.
FEATURES USED DURING A CALL
Transfer to the Voice Mailbox
You can automatically transfer the incoming call to the voice mailbox.
The OfficeServ system should have the Samsung Voice Mail Service(SVMi) card installed.
1. When a call arrives, press the [Screen] button
and then press the [Select] button for
[VT] from the Programmable
Features screen.
2. Dial the voice mailbox number.
3. The caller will be answered by the Voice mail
card. Replace the handset or press [Speaker].
© SAMSUNG Electronics Co., Ltd.
Page 65
FEATURES USED DURING A CALL
3. During Intercom/Trunk Line Calls
Features that can be used conveniently during intercom/Trunk line calls are described below.
Conference
Up to 5 members, including you, can participate in a conference simultaneously.
1. Press [Conference] button while on a call.
You will hear conference tone
2. Dial the number of the internal or external
party you wish to add to the conference,
wait for them to answer and press
[Conference] again.
3. Dial the number of another internal or
external party to be added to the conference
or press the [Conference] button to begin
the conference.
The conference connection status
of all the numbers is displayed.
!
If the required party is busy or not reached
press the [End] button. Press the [Conference] button
again to return to the previous conversation.
!
When you have added the last party press the [Conference] button twice.
!
To disconnect a party from the conference, press the [Conference] button
and dial the station number or Trunk number of the party to be excluded.
Press [Conference] again to resume the conference with the remaining parties.
- If you press [Transfer] and dial the conference function code [4][6], you can use the
conference function to add additional parties. Please follow the displayed instructions.
NOTE
Page 66
© SAMSUNG Electronics Co., Ltd.
FEATURES USED DURING A CALL
Mute
During a call you can mute the handset transmitter or microphone while still listening to the other party.
1. Press the [Select] button for [MUTE]
displayed on the screen.
2. Press the [Select] button for [MUTE(OFF)] to
clear the Mute function.
© SAMSUNG Electronics Co., Ltd.
Page 67
FEATURES USED DURING A CALL
This page is intentionally left blank.
Page 68
© SAMSUNG Electronics Co., Ltd.
CONVENIENT FEATURES
1. Call Forwarding
When unable to take incoming calls you can forward your calls to another station, group of stations
or an outside telephone number. You may also program a dedicated feature key for Forward All,
Forward Busy, Forward No Answer or Forward Busy and No Answer in the Programmable Features
screen.
Call Forwarding can be set using the Application menu. Refer to the ‘Call Forwarding’ section of the
‘Application Menus’ in this guide.
Forward All Calls
You can forward all incoming calls to another number.
1. Dial [6][0][1] in the standby mode and
dial the number to which all calls should
be forwarded.
!
[6][0][1] is the function code for Forwarding
All Calls.
2. Wait for the confirmation tone and
hang up.
!
The [Transfer] button LED will turn on to
!
The forwarding icon will be displayed on the
Indicate Forward All has been set.
top of the phone’s LCD panel to indicate
Forward has been set.
© SAMSUNG Electronics Co., Ltd.
Page 69
CONVENIENT FEATURES
Forward Busy
You can forward incoming calls to another number when you are using the phone.
1. Dial [6][0][2] in the standby mode and
dial the number to which all calls should
be forwarded.
!
[6][0][2] is the function code for Forward Busy.
2. Wait for the confirmation tone and
hang up.
!
The forwarding icon will be displayed on the
top of the phone’s LCD panel to
indicate Forward has been set.
Forward No Answer
Your incoming calls can be forwarded to another number if you cannot answer the call within the specified
time.
1. Press [6][0][3] in the standby mode and
press the number to which all calls should
be forwarded.
!
[6][0][3] is the function code for Forward No
Answer.
2. Wait for the confirmation tone and
disconnect the call.
!
The forwarding icon will be displayed on the
top of the phone’s LCD panel to indicate
Forward has been set.
Page 70
© SAMSUNG Electronics Co., Ltd.
CONVENIENT FEATURES
Forward Busy/No Answer
When the Forward Busy and Forward No Answer destinations are both set, you may enable both these options
simultaneously. When you are busy, calls will be transferred to the number specified in Forward Busy
destination. If you do not answer, the calls will be forwarded to the Forward No Answer destination.
1. Dial [6][0][4] in the standby mode.
!
[6][0][4] is the function code for Forward
Busy/No Answer.
2. Wait for the confirmation tone and
hang up.
!
The forwarding icon will be displayed on the
top of the phone’s LCD panel to
indicate Forward has been set.
Cancel Call Forwarding
1. Lift the handset and dial [6][0][0] to
cancel all call forwarding settings.
!
[6][0][0] is the function code for Cancel Call
!
The forwarding icon will not be displayed on
Forwarding.
the top of the phones LCD panel.
© SAMSUNG Electronics Co., Ltd.
Page 71
CONVENIENT FEATURES
Forward Follow Me
When you will be away from your phone for a while, e.g. in a conference room or another office, you can
forward your incoming calls to a station where you are currently located. Alternatively you can redirect calls to
another station to your own phone. This is called follow-me or remote call forwarding.
1. At the phone you are currently located
near dial [6][0][6].
!
[6][0][6] is the function code for
Follow Me.
2. Enter the number of your phone,
or the station you want to redirect calls from.
3. Wait for the confirmation tone and
hang up. All your calls will
be forwarded to the new location.
!
The [Transfer] button LED at your phone
will turn on to Indicate Forward follow me
has been set.
!
The forwarding icon will be displayed on the
top of the phones LCD panel to indicate
Forward has been set.
Page 72
© SAMSUNG Electronics Co., Ltd.
CONVENIENT FEATURES
2. Do Not Disturb (DND)
This feature is used to block incoming calls.
Setting/Cancelling DND
1. Press the [Screen] button until the
Soft menu screen is displayed.
!
Or, dial the DND setup code, [4][0][1].
2. Press the [Select] button for [DND].
3. Press the [Select] button for
[SAVE] to set DND.
!
Press the [Select] button for [CLEAR]
to clear the DND setting.
4. The status indicator blinks to indicate that
the DND mode is set.
© SAMSUNG Electronics Co., Ltd.
Page 73
CONVENIENT FEATURES
3. Paging
This feature is used to broadcast announcements through the phone’s internal speaker and/or
optional external speakers.
Internal Page
To broadcast through the station speakers.
1. Lift the handset.
!
Or, press the Page function code [5][5].
2. Press the [Select] button for
[PAGE] displayed on the screen.
3. Dial the required external zone [1], [2], [3],
[4] or [0] to page all internal zones.
4. Deliver the announcement after the
confirmation tone. The announcement will be
broadcasted to stations in the selected zone.
5. Replace the handset after completing
the page announcement.
Page 74
© SAMSUNG Electronics Co., Ltd.
CONVENIENT FEATURES
External Page
You can broadcast announcements through optional speakers in external areas(such as large offices, work
areas and factories). Four(4) External zones are available plus all external zones.
1. Lift the handset.
!
Or, dial the Page function code [5][5].
2. Press the [Select] button of the
[PAGE] menu displayed on the screen.
3. Dial the required external zone [5], [6], [7],
[8] or [9] to page all external zones.
4. Deliver the announcement after
the confirmation tone. The announcement
will be broadcasted through the speakers
in the external zone.
5. Replace the handset upon completing
the page.
© SAMSUNG Electronics Co., Ltd.
Page 75
CONVENIENT FEATURES
All Page
Allows you to page through all station speakers in the internal zones and speakers in external
areas.
1. Lift the handset.
!
Or, press the Page function code [5][5].
2. Press the [Select] button for
[PAGE] displayed on the screen.
3. Dial [!] to page all internal
and external zones.
4. Deliver the announcement after
the confirmation tone. The announcement
will be broadcasted through the speakers
in all external and internal zones.
5. Replace the handset upon completing
the page.
Page 76
© SAMSUNG Electronics Co., Ltd.
CONVENIENT FEATURES
Meet Me Page
You can use page to find the recipient of a call.
1. Lift the handset.
!
Or, dial the Meet Me Page function code
[5][4].
2. Press the [Select] button for
[MEET ME PAGE] displayed on
the screen.
3. Dial the page zone number(0~9).
4. After the confirmation tone advise the
the person you require to dial [5][6].
5. The ‘Please press ANSWER WAIT’
message is displayed on the screen. Press
the [Select] button for [ANSWER WAIT].
!
or Press [Transfer] followed by [5][4].
© SAMSUNG Electronics Co., Ltd.
Page 77
CONVENIENT FEATURES
6. The ‘Wait until the recipient responds’
message is displayed. You should hold
on to the handset until the recipient dials
the page answer code([5][6]).
7. Once the recipient enters the page answer
code([5][6]), the recipient will be
automatically connected to you.
Call Park and Page
When you answer an outside call for another user not currently at their desk, you can park the call
and page the required party.
1. Press the [Select] button for
[PAGE] while the call is on line.
The call is automatically parked.
2. Dial the number of the page zone where
the recipient is located.
!
When the location of the recipient is not
known, press the [
] button and page all
internal and external zones.
3. After the confirmation tone, announce
the call has been parked. You should
inform the required user of the station
Mr.XXX!
number or the Trunk number where
Your Call is on Trunk line xxx.
the call is parked.
Page 78
© SAMSUNG Electronics Co., Ltd.
CONVENIENT FEATURES
4. Hang up by replacing the handset.
!
If the parked call is not answered within a
specified time, the outside call will recall
your phone. Intercom calls cannot be
parked or paged.
Page Pickup
To answer the parked call notified in the page.
1. Lift the handset and press the
[Screen] button until the Soft menu screen is
displayed.
!
Or, dial the Connect Call function code
[1][0]
2. Press the [Select] button for
[PAGE PICKUP].
3. Dial the phone or trunk number notified
through the page.
4. You will be automatically connected
to the parked caller.
- Call Park and Page is only applicable to outside calls.
NOTE
© SAMSUNG Electronics Co., Ltd.
Page 79
CONVENIENT FEATURES
Off-Hook Voice Announce (OHVA)
Allows you to make an announcement to another station currently on a call.
This feature is useful when you have an urgent message to deliver to a station user.
1. Dial the busy station.
2. After hearing the busy tone, press the
[Select] button for [OHVA].
3. After the warning tone,
deliver the announcement which will be heard
through the handset or the speaker on
the busy station.
!
Only the internal station will hear
the announcement, it will not be heard by
an external caller.
4. Disconnect the call by replacing the handset
or by pressing the [Speaker] button or
[End] button.
Page 80
© SAMSUNG Electronics Co., Ltd.
CONVENIENT FEATURES
OHVA Reject
1. While listening to OHVA, you can press
the [Select] button for [REJECT]
to disconnect the OHVA call and resume
the original call.
- OHVA is not applicable to phones that have the DND option enabled.
- OHVA is applicable to intercom calls and transferred calls.
NOTE
OHVA Cancel
After finishing the OHVA call, you can resume the original call that was on hold.
1. When an OHVA call is received, the Select
box of the station number blinks on
the Programmable Feature screen. Press the
[Select] button of the station number to
put the current call on hold and connect
to the OHVA call.
2. After the OHVA call is finished, press
the [Send] button to resume the call with
the original caller who was on hold.
© SAMSUNG Electronics Co., Ltd.
Page 81
CONVENIENT FEATURES
OHVA Block
You can use the OHVA Block feature to reject all OHVA calls.
1. Press the [Screen] button until the Soft Menu
screen is displayed.
2. Press the [Select] button for
[OHVA BLOCK] and then select [ON].
!
Press the [Select] button for [OFF] in
the [OHVA Block] menu to cancel OHVA Block.
Page 82
© SAMSUNG Electronics Co., Ltd.
CONVENIENT FEATURES
4. Messaging
Leaving a Station Message
You can leave your phone number as a message on stations that do not answer your call or are busy.
1. Press the [Screen] button until the
Programmable Feature screen is displayed.
!
Or, dial the message function number, [4][3].
2. Press the [Select] button of the
[MESSAGE] menu on the Programmable
Feature screen.
3. Wait for the confirmation tone and hang up.
- Leaving a message is only applicable to intercom calls.
NOTE
© SAMSUNG Electronics Co., Ltd.
Page 83
CONVENIENT FEATURES
Cancelling Station Messages
You can erase station messages left on other stations or delete the messages left on the
your station.
1. To erase station messages you left on other
stations, dial [4][2] and dial the station
number of the other station.
!
[4][2] is the function code for Cancelling
Messages.
2. Dial [4][2] and enter the your station number
to delete all station messages left on
your station.
!
Refer to the ‘Verify/Return/Delete Message’
in the next page to selectively erase numbers
left on your station.
Page 84
© SAMSUNG Electronics Co., Ltd.
CONVENIENT FEATURES
Verify/Return/Delete Station Messages
You can verify, return, or delete the station messages left on your phone.
The status indicator will flash red when a message is left on your phone and the
screen.
icon is displayed on the
1. Press the [Screen] button until
the Programmable Feature screen
is displayed.
2. Press the [Select] button of the
[MESSAGE] menu on the Programmable
Feature screen.
3. The number of the first station that has left
a message is displayed along with
the options [REPLY], [NEXT], and [CLEAR].
!
Press the [Select] button for [REPLY]
to reply to the message. The number of
the station that left the message is automatically
dialled. If the station does not answer, the red
light continues to flash on the status indicator.
!
When multiple messages are left on the phone, press the [Select] button for
[NEXT] to move to the next message, and return or delete the message.
!
Press the [Select] button for [CLEAR] to delete the message.
© SAMSUNG Electronics Co., Ltd.
Page 85
CONVENIENT FEATURES
Programmed Messages
EMBEDWhen you will be away from you desk you can leave an absence message to advise internal callers of
your status. Internal callers will receive the message on their LCD screen when they call you.
1. Lift the handset and press the [Screen]
button until the Soft Menu screen
is displayed.
!
Or, dial the Programmed Messages function
code [4][8].
2. Press the [Select] button for
[STATUS MSG] on the Soft menu screen.
3. Dial the Programmed Message code.
!
To cancel the Programmed Message,
press the [Select] button for [STATUS MSG]
and dial the Cancel code [0][0].
NOTE
- Programmed Messages can also be set by selecting the [7. Absent Msg] menu from
the [Config] menu of the Application menus.
- Items 01 to 15 in the table below are programmed messages set by the System
Administrator. 01-10 are default messages. You can personally set the messages for
items 16 to 20.
Message Number
Page 86
Messages
01
GIVE ME THE CALL
02
TAKE A MESSAGE
03
ASK THEM TO HOLD
04
SEND TO MY VM
05
TRSE TO MY SECY
06
LEAVE A MESSAGE
07
PAGE ME
08
OUT OF TOWN
09
IN A MESSAGE
10
I WILL CALL BACK
11~15
(Defined by the System Administrator)
16~20
Your personal messages
© SAMSUNG Electronics Co., Ltd.
CONVENIENT FEATURES
5. Executive/Secretary Hot Line
Executive Status Display
Available only on phones with the Executive/Secretary Hot Line feature programmed, this feature is used to
display the in/out status of the executive or to conveniently set messages between the executive and
secretary.
!
An icon, indicating an executive or secretary, is displayed on the upper section of the LCD screen.
1. In the standby mode of the phone where the
Executive/Secretary Hot Line is enabled,
press the [Screen] button until the Executive
Status screen is displayed.
2. Press the [Select] button corresponding to
the status of the executive. The current status
will be indicated by a grey filled status box.
© SAMSUNG Electronics Co., Ltd.
Page 87
CONVENIENT FEATURES
Call Transfer from Secretary to Executive
The programmed secretary station will receive calls for the executive first and transfer the calls to the
executive.
1. After the secretary answers the call
and verifies the nature of the caller’s business,
the secretary presses the [Select] button
for [BOSS] in the programmable
features screen to notify the executive
of the call.
2. The secretary replaces the handset to
complete the transfer of the call to
the executive.
!
If the executive does not answer, the secretary
should reconnect with the caller by pressing
the [Hold] button.
Page 88
© SAMSUNG Electronics Co., Ltd.
CONVENIENT FEATURES
Executive/Secretary Message
Messages that are frequently exchanged between the executive and the secretary can be preset
for convenient use.
The [EXE/SECR MSG] menu is displayed in the Soft menu screen of the phone where the Executive/Secretary
Hot Line is enabled.
1. In the standby mode, press the [Screen]
button until the Soft menu screen is
displayed.
2. Press the [Select] button for
[EXE/SECR MSG] on the Soft menu screen.
3. Press the [Select] button of the recipient of
the message.
!
This screen is not displayed if there are only
one executive or secretary.
!
Up to four executives for each secretary may
be selected.
4. Press the [Select] button of the message.
© SAMSUNG Electronics Co., Ltd.
Page 89
CONVENIENT FEATURES
Entering the Executive/Secretary Message
There are no preset messages when first using the Executive/Secretary Hot Line.
Press the [Menu] button and enter the message.
1. On the [Select EXE/SECR MSG] screen,
move to the item where the message
should be entered and press the
[Menu] button.
2. Move to the [Edit] menu and press [Enter] button.
3. Enter the message in the message entry screen.
The message should be composed of 16
characters or less.
4. Press the [Enter] button to save.
NOTE
Page 90
- Please refer to the ‘Entering Characters’ section of ‘Things You Should Know’ part in
this guide for entering characters.
- To delete a message, select the message and press the [Menu] button, and select [Delete]
from the pop-up menu.
© SAMSUNG Electronics Co., Ltd.
CONVENIENT FEATURES
6. In/Out of Group
If your phone is assigned to a station group, you can remove the phone from the group
or reassign the phone into the group. If the phone is removed from the group, you will receive
station calls but no new calls to the group number.
1. In the standby mode,
press the [Screen] button until
the Soft menu screen is displayed.
2. Press the [Select] button of the
[IN/OUT GROUP] menu on the Soft
menu screen.
3. Press the [Select] button of the
[IN GROUP] menu to receive calls to
the station group.
!
Press the [Select] button for [OUT OF GROUP] to
stop receiving calls to the station group.
© SAMSUNG Electronics Co., Ltd.
Page 91
CONVENIENT FEATURES
7. Group Listening
You can allow others to listen to your current conversation through the speaker while you are talking
on the handset.
Others can only hear the conversation since the microphone is disabled.
1. Press the [Select] button for
[GROUP LISTEN] during the call.
2. The conversation is audible to others through
the speaker.
3. To disable the speaker and resume a personal
conversation, press the [Select] button
for [LISTEN(OFF)].
NOTE
Page 92
- To prevent feedback when disconnecting the call with Group Listening ON, select
[LISTEN(OFF)] before disconnecting the call.
© SAMSUNG Electronics Co., Ltd.
CONVENIENT FEATURES
8. Caller ID (CID) Presentation
The OfficeServ system can be set to display not only the number but also the name of the caller
prior to answering a call. The presentation of the Caller Id is an optional service provided by your
telephone company. CID Presentation is applicable to both ISDN and analogue PSTN lines. To
activate the CID features you must have the feature keys programmed in you Programmable
Feature key screen. Refer to your System Administrator to ensure the service is available on your
phone lines and the features specified below are available on your ITP-5012L phone. However, the
CID may not be provided in cases listed below.
- When the caller requested non disclosure of his or her phone number.
- When the caller call from regions where the CID Presentation service is not provided(Example : International calls).
- When the caller calls from a public phone.
- When the information received is damaged or not complete.
- When the telephone company fails to transmit the CID.
To set the display type of the CID Presentation, refer to the description in ‘Setting the Method of CID Display’
of the ‘Configuration’ section of the ‘Application Menus’ part in this guide.
Saving Caller Number
After answering the call press the [Select] button for
[SAVE] displayed in the programmable features
screen.
Dialling a Saved Caller Number
Dial [1][7] to dial the saved number.
!
[1][7] is the function code for dialling a Saved
Caller Number.
© SAMSUNG Electronics Co., Ltd.
Page 93
CONVENIENT FEATURES
Storing the Caller Number to a Speed Dial Number
The caller number can be stored in your personal speed dial number list.
1.
Press the [Select] button for [STORE] menu
displayed on the programmable features
screen during the call.
2. The personal speed dial number where
the caller number is saved is displayed
on the screen.
NOTE
Page 94
- Least Cost Routing(LCR) should be set accordingly to dial the saved caller number.
The CID cannot be saved without the LCR programmed on the OfficeServ system.
© SAMSUNG Electronics Co., Ltd.
CONVENIENT FEATURES
Viewing the Caller ID of Calls Parked/on Hold
You can verify the CID before answering a call that is parked or on hold.
1. When the phone is in the standby mode or in
the middle of a call, press the [Select] button
of the [INQUIRE] menu displayed on
the screen.
2. Dial the Trunk line number displayed on the
screen to verify the CID.
The CID of the Trunk line number is
displayed on the screen.
3. After the inquiry is finished, press
the [Send] button to answer the call,
or press the [Select] button for
[NND] to view further detailed information
on the call, or press the [Select] button for
[IGNORE] to return to the standby mode.
NOTE
- If you are on a station call, the call should be disconnected or put on hold before
verifying the CID of a Trunk line call.
9. Call Duration Display
If the Call Duration Display function is enabled, the duration time of outside calls is displayed on the
LCD screen.
▪ Incoming TRUNK calls : The duration time is displayed the moment you answer the call.
▪ Outgoing TRUNK calls : The duration time is displayed when the called party answers on ISDN trunks or
after a preset time on analogue trunks.
© SAMSUNG Electronics Co., Ltd.
Page 95
CONVENIENT FEATURES
10. Door Phone Related Features
When you phone is programmed to receive calls from the door phone you can answer a call without
leaving your desk. If the optional electric door release is fitted you can also unlock the door from
your phone.
Answering the Door Phone
1. When a call is received from the door phone,
your IP phone will receive three
short bursts of ring consecutively.
2. Lift the handset or press the
[Send] button to connect to the door phone.
3. If an electric door lock is installed,
dial [1][3] to open the door.
Calling the Door Phone
You can call the door phone to listen to what is happening outside or in other rooms.
Dial the station number of the door phone.
You can listen or speak through
Hello~
the door phone.
Page 96
© SAMSUNG Electronics Co., Ltd.
CONVENIENT FEATURES
11. Background Music
If background music is available on your OfficeServ system, you can listen to the background music
through your ITP-5012L phone’s speaker in standby mode.
1. Press the [Hold] button to listen to
the background music.
2. Press the [Hold] button again to turn off
the music.
3. You can adjust the volume using the
[▼Volume▲] button. This does not affect
the speaker volume.
- Only the System Administrator can set and change the background music source.
NOTE
© SAMSUNG Electronics Co., Ltd.
Page 97
CONVENIENT FEATURES
This page is intentionally left blank.
Page 98
© SAMSUNG Electronics Co., Ltd.
APPLICATION MENUS
1. Navigation Buttons
Navigation buttons are provided for your convenience.
Menu Button
!
When the [Menu] button is pressed in the standby mode, the phones application menus
are displayed as icons.
- If the [End] button or [Speaker] button is pressed in the application menus, the phone
automatically exits the menus.
NOTE
Send Button
!
The phone is set to ‘Enbloc’ dialling mode as default. So, when you enter phone
numbers, they can be reviewed before dialling. Press the [Send] button to dial the number.
!
!
Answers incoming calls.
Dials the most recently called number when pressed and held. If the [Send] button is
pressed briefly in the standby mode, your recent calls are listed on the screen.
© SAMSUNG Electronics Co., Ltd.
Page 99
APPLICATION MENUS
Enter Button
The Enter button is used in the menu mode to select or save the corresponding item.
!
Direction button
The Direction button is used to move between items or to edit the content.
1[
¨ç
] button is used
- To move the cursor upward.
- To select the main menu.
2[
¨è
¨ê
] button is used
- To select the Phonebook menu.
- To move the cursor to the right.
3[
¨é
] button is used
- To select the Ring Type/Volume menu.
- To move the cursor downward.
- When moving to the lower menu item of the current menu.
4[
] button is used
- To select the Text Message menu.
- To move the cursor to the left.
Cancel Button
!
Moves to the previous page of a menu.
!
Deletes the entered letter or number.
End Button
!
Disconnects the current call.
!
Exits from the current mode to the idle screen.
Page 100
© SAMSUNG Electronics Co., Ltd.
APPLICATION MENUS
2. Entering Application Menus
When the IP phone is in the standby mode, press the [Menu] button. The main application menu
will appear on the LCD screen.
Selecting Application Menus
!
Use the direction button to move to the desired application. Then, press the [Enter] button.
!
Dial the corresponding to the number of the required menu item.
(P-Book[1], E-Diary[2], Message[3], Volume[4], Forward[5], Config[6], My-Phone[7])
!
Press the [End] button to exit the application menus.
- If there is a black mark at the bottom right of the LCD panel, you can press the [Menu]
button for other functions.
NOTE
[Menu] button
© SAMSUNG Electronics Co., Ltd.
Page 101
APPLICATION MENUS
3. Phone Book
Press the Right direction button
to enter the Phone Book menu OR
Press the [Menu] button and use the direction button to select
press the [Enter] button.
Then,
Search By Speed Dial Number Location
This function allows you to search any telephone number based on the speed
dial number locations registered in the IP phone.
1. Press the
button and use the direction buttons to select
" [1. Search] " [1. By Speed Dial No].
Then, press the [Enter] button.
2. When the speed dial number entry screen appears,
enter the speed dial number location and press
the [Enter] button.
#
#
Page 102
Phone Book is not related with the OfficeServ system
personal speed dial numbers.
A speed dial number location is allocated
automatically you enter and save a new
speed dial number. The location number is shown
in the small box next to the telephone number entered
and can be edited as required.
© SAMSUNG Electronics Co., Ltd.
APPLICATION MENUS
3. The telephone number corresponding to the entered speed dial location is displayed.
#
If you press the [Enter] button without entering the speed dial number location, a list of all
speed dial names programmed will be displayed.
4. Press the [Send] button to dial the selected telephone number.
#
Press the [Menu] button to change or disable the speed dial number. When the popup menu
appears, select the desired menu to Edit/Delete/New Entry the number.
Search a Telephone Number By Name
This function allows you to search any telephone number based on the name registered to the
telephone number in the IP phone.
1. Press the
button and use the direction button to select
" [1. Search] " [2. By name].
Then, press the [Enter] button.
2. A screen that prompts you to enter a name
appears. Enter the name or part of a name
to search and press the [Enter] button.
#
Please refer to the ‘Entering Characters’ section
of ‘Things You Should Know’ in this guide
for entering characters.
3. The speed dial name(s) matching the entry will be displayed from the [Phone Book].
If the [Enter] button is pressed without entering any name, all speed dial names will be
displayed.
4. Press the [Enter] button on the selected name to see the saved details(telephone
numbers, email address or notes) of the selected name.
#
Press the [Menu] button to change or the details registered for the speed dial name. When the popup
menu appears, select the desired menu to Edit/Delete the details registered or to make a New Entry.
5. Move to the desired telephone number and press the [Send] button to dial the number.
© SAMSUNG Electronics Co., Ltd.
Page 103
APPLICATION MENUS
Search By Telephone Number
You can search based on the telephone number or part of a telephone number registered in the
IP phone.
1. Press the
button and use the direction button to select
" [1. Search] " [3. By phone number].
Then, press the [Enter] button.
2. The screen that prompts you to enter
a telephone number appears,
enter the telephone number to search
and press the [Enter] button.
3. The speed dial name(s) related to entered telephone number is displayed.
#
If you press the [Enter] button without entering the phone number, a list of all the
telephone numbers will be displayed. Even if the part of the telephone number is entered,
a list of any telephone number that includes the entered part will be displayed.
- Entering *123* : Searches all numbers including 123.
- Entering 123* : Searches all numbers that start with 123.
- Entering *123 : Searches all numbers that end with 123.
4. Move to the telephone number to call and press the [Send] button.
#
Page 104
Press the [Menu] button to change or the details registered for the speed dial name.
When the popup menu appears, select the desired menu to Edit/Delete/ the details
registered or to make a New Entry.
© SAMSUNG Electronics Co., Ltd.
APPLICATION MENUS
Search a Telephone Number By Group
You can search for telephone numbers by groups registered in the IP phone. This will only work if
you have allocated speed dial names and numbers to specific groups.
Refer to Registering New Numbers and Editing Groups later in this section.
1. Press the
button and use the direction button to select
" [1. Search] " [4. By group].
Then, press the [Enter] button.
2. Move to the desired group from the list of
registered groups and press the [Enter] button.
3. Select the required speed dial name and press [Enter] button.
#
Press the [Menu] button to change or the details registered for the speed dial name. When the
popup menu appears, select the desired menu to Edit/Delete the details registered or to
make a New Entry.
4. Select one of the phone numbers(mobile phone, home, work, or other) programmed
and press the [Send] button.
© SAMSUNG Electronics Co., Ltd.
Page 105
APPLICATION MENUS
Search a Telephone Number By Time
You can search for any telephone number based on the time the telephone number was registered in
the phone. Speed dial names will be displayed commencing with the latest entry.
1. Press the
button and use the direction button to select
" [1. Search] " [5. By time].
Then, press the [Enter] button.
2. The list of all the registered names is
displayed, move to required name and press
the [Enter] button.
#
Press the [Menu] button to change or delete
the selected number. When the popup menu
appears, select the desired menu to
Edit/Delete the detail registered or make
a New Entry.
3. Move to the required telephone number to call and press the [Send] button.
Recent Caller Numbers
The last 30 called numbers will be saved. You can review to details and redial any one of these
called numbers.
1. Press the
button and use the direction button to select
" [2. Dialed Nos]. Then, press the [Enter] button.
2. Move to the desired telephone number
and press the [Enter] button to review details
of the previous call.
3. Press the [Send] button to dial the selected telephone number.
#
Page 106
Press the [Menu] button to save or delete the selected number. When the popup menu appears,
select the desired menu to save/delete the number or delete all outgoing calls.
© SAMSUNG Electronics Co., Ltd.
APPLICATION MENUS
Recent Called Numbers
The call details and Calling line ID, if available, of up to the last 30 incoming calls will be saved in
the incoming call log. You can review the details and dial the Caller ID.
1. Press the
button and use the direction button to select
" [3. Received Nos].
Then, press the [Enter] button.
2. Move to the desired telephone number
and press the [Enter] button to review details
about the call.
3. Press the [Send] button to dial the selected telephone number.
#
Press the [Menu] button to save or delete the selected number. When the popup menu appears,
select the desired menu to save/delete the number or delete all incoming calls.
© SAMSUNG Electronics Co., Ltd.
Page 107
APPLICATION MENUS
Telephone Number Registration
You can save 1000 speed dial names and 2,400 telephone numbers. Each Speed dial name can
have the following information registered : 5 telephone numbers(home, mobile phone,
work/school, Etc, and facsimile), e-mail, group, and memo. Each speed dial number can also be
allocated a speed dial number location.
1. Press the
button and use the direction button to select
" [4. New number]. Then, press the [Enter] button.
2. Use the direction button to move to each item.
Then, enter user information.
#
Please refer to the ‘Entering Characters’ section
of ‘Things You Should Know’ part in this guide
for entering characters.
3. Press the [Enter] button, the ‘Saved.’ message will appear and the
information is saved.
Page 108
© SAMSUNG Electronics Co., Ltd.
APPLICATION MENUS
Editing Groups
This function allows you to establish groups to which speed dial names can be included. This
allows you to search for speed dial numbers by personalized groupings.
1. Press the
button and use the direction button to select
" [5. Edit Group]. Then, press the [Enter] button.
2. The list of registered groups appears.
3. Press the [Menu] button to Add/Edit/Delete the group.
(Group 1(Null) provides the option to ‘Add’ only.)
#
To add a group:
Press the [Menu] button and select the [Add] menu. Enter the group name to register
and press the [Enter] button.
#
To Edit a group name:
Select the group to Edit and press the [Menu] button. Then, select the [Edit] menu.
Enter the group name and press the [Enter] button.
#
To delete a group:
Select the group to delete from the list and press the [Menu] button.
Then, select the [delete] menu. If the ‘Do you want to delete?’ message appears,
select [Yes] and press the [Enter] button.
© SAMSUNG Electronics Co., Ltd.
Page 109
APPLICATION MENUS
Deleting All Telephone Numbers
This function allows you to delete all saved telephone numbers and associated names.
1. Press the
button and use the direction button to select
" [6. Delete All]. Then, press the [Enter] button.
2. If the password entry screen appears,
enter the password set in the IP phone.
#
If the password is not changed, the initial value
of password is 1234. If you do not remember
your password, please contact your System
Administrator.
3. If the ‘Are you sure you want to permanently delete your data?’ message appears,
select [Yes] and press the [Enter] button.
Then, all the telephone numbers saved in the phone book will be deleted.
#
Page 110
The recent caller/called numbers are not deleted.
© SAMSUNG Electronics Co., Ltd.
APPLICATION MENUS
4. E-Diary
Press the [Menu] button and use the direction buttons to select
Then, press the [Enter] button.
Move to the desired menu and press the [Enter] button.
Wakeup Call
Allows you to set an alarm to ring for 1 minute or until answered, at the required time. The frequency options
for a wakeup call are ; everyday, Monday to Friday or Monday to Saturday.
1. Press the [Menu] button and use the direction button to select
! [1. Wakeup Call]. Then, press the [Enter] button.
2. Set the Time, Ring type, and frequency.
Select [Save] and press the [Enter] button.
3. To clear an existing Wakeup Call. Select [Save] and change to [Clear] by pressing the
navigation keys(< or >). Then press the [Enter] button to clear the setting.
© SAMSUNG Electronics Co., Ltd.
Page 111
APPLICATION MENUS
Alarm Clock
This function is similar to the wakeup call function except that the frequency of the alarm is limited to once
only or everyday. Two separate alarm times are available.
1. Press the [Menu] button and use the direction button to select
! [2. Alarm]. Then, press the [Enter] button.
2. Select [Alarm clock 1] or [Alarm clock 2].
3. Set the Time, Ring, and Frequency of
the selected alarm clock.
You should change the last parameter from
[Clear] to [Save] by pressing navigation
key(< or >). Then press the [Enter] button
to save the setting.
"
If you select the [Clear] menu and press
the [Enter] button, then the set alarm will be cleared.
Daily Planner
The Daily Planner allows you to schedule events and have the system notify you when an event is due to
commence. Up to 30 event schedules can be registered.
#
A note of up to 32 characters can be associated with each scheduled event. If the note is more
than 8 characters long, it can be viewed by selecting it, pressing the [Menu] button and then OK.
An available ring tone can be selected.
#
An alarm can be set to ring an hour before, 30 minutes before or on the specified time for the
scheduled event.
Schedule Registration
1. Press the [Menu] button and use the direction button to select
! [3. Daily Planner]. Then, press the [Enter] button.
2. Use the direction button and select the date to be registered. Press the [Menu] button
to ‘Add’ a new schedule.
Page 112
© SAMSUNG Electronics Co., Ltd.
APPLICATION MENUS
3. Use the direction button to program the schedule
items. Set the Date, Time, Message Contents,
Alarm Timer(an hour before the set time,
30 minutes before the set time, or on time)
and Ring type and press the [Enter] button.
Adding/Modifying/Deleting the Schedule
1. Press the [Menu] button and use the direction button to select
! [3. Daily Planner]. Then, press the [Enter] button.
2. Use the direction buttons and select the date you require.
Press the [Enter] button.
3. Press the [Menu] button to
add/edit/delete/delete all a schedule.
"
"
"
"
Press [Add] to add a new schedule.
Press [Edit] to modify a schedule.
Press [Delete] to delete the selected schedule.
Then, the ‘Do you want to delete?’ message will
appear.
Select [Yes], and press the [Enter] button.
Press [Delete All] to delete all the schedules.
Then, the ‘Do you want to delete all?’ message will appear. Select [Yes], and press
the [Enter] button.
© SAMSUNG Electronics Co., Ltd.
Page 113
APPLICATION MENUS
Memo Pad
Allows you to save a simple memo to the IP phone.
Entering a Memo
1. Press the [Menu] button and use the direction button to select
! [4. Memo Pad] ! [1.Add New Memo].
Then, press the [Enter] button.
2. Enter the memo in the Memo screen
and press the [Enter] button to save.
"
Please refer to the ‘Entering Characters’ section
of ‘Things You Should Know’ in this guide
for entering characters.
Checking/Modifying/Deleting/Registering Memo
1. Press the [Menu] button and use the direction buttons to select
! [4. Memo Pad] ! [2.Search].
Then, press the [Enter] button.
2. Select the desired memo and press
the [Menu] button to add a new memo
or edit/delete existing memos.
"
"
"
"
Press [Add] to add a new memo.
Press [Edit] to modify a selected memo.
Press [Delete] to delete the selected memo.
Press [Delete All] to delete all registered memos.
3. Press the [Enter] button to review details of the selected memo.
Page 114
© SAMSUNG Electronics Co., Ltd.
APPLICATION MENUS
Calculator
A simple calculator is available to add, subtract, multiply, and divide numbers.
1. Press the [Menu] button and use the direction button to select
! [5. Calculator]. Then, press the [Enter] button.
2. Enter the numbers to calculate. Then,
press the direction button to select the required
operation. Enter the next number and press
the [Enter] button to check the calculation
results.
"
Press the [#] button to enter negative numbers,
the [*] button to enter decimal points,
and the [Cancel] button to delete incorrectly
entered numbers.
3. To continue the calculation, select another required operation instead of pressing
the [Enter] button at step 2. And enter the number to calculate.
"
Press the [Enter] button to complete the calculation.
4. Press the [End] button to finish calculation.
© SAMSUNG Electronics Co., Ltd.
Page 115
APPLICATION MENUS
World Time
Allows you to search local time in 39 cities around the world(Guam, New York, Dallas, Tokyo, Denver, Lapas,
London, Rome, Miami, Moscow, Midway, Bangkok, Berlin, Buenos Aires, Beijing, Samoa, San Francisco, Seoul,
Sydney, Chicago, Abu Dhabi, Athens, Alaska, Alma Tai, Oakland, Okhotsk, Wellington, LA, Jakarta, Middle
Atlantic, Tashkent, Phoenix, Karakas, Cape Verde, Paris, Hawaii, Honolulu, Helsinki, and Hong Kong).
1. Press the [Menu] button and use the direction button to select
! [6. World Time]. Then, press the [Enter] button.
2. Use the direction button to select the city where
you want to check local time.
The local time of the time zone and major cities
will be displayed.
Changing the Time Zone
"
"
"
"
"
Page 116
You can change the time zone by the following procedure.
Press the [Menu] button in the world time.
Then pop-up menu will be displayed ‘Do you want to change time zone?’
Select [Yes] and press the [Enter] button.
Select the time zone(e.g. : Guam, Sydney) and press the [Enter] button.
© SAMSUNG Electronics Co., Ltd.
APPLICATION MENUS
D-DAY Plus
D-DAY Plus allows you to enter an important schedule so that you can check the time left until or the time
passed from, the entered date (D-Day). The D-DAY can be entered directly, or can also be entered
automatically by calculating the number of days before/after the entered base date.
Entering a New D-DAY
1. Press the [Menu] button and use the direction button to select
! [7. D-Day Plus] ! [1. D-Day Add].
Then, press the [Enter] button.
2. Select [1. D-Day Exact Date] and set each
option to enter a D-Day directly. Then,
press the [Enter] button.
"
Select [2. D-Day Base/Off] and set
the base date, number of days,
and before/after D-Day menus to calculate
and enter a D-Day.
Searching a List of D-Days
1. Press the [Menu] button and use the direction button to select
! [7. D-Day Plus] ! [2. D-Day Search].
Then, press the [Enter] button.
2. When the list of the registered D-Day’s appears,
press the direction button to select
the desired D-Day to review.
"
Press the [Enter] button to
check the details of a D-Day.
3. Press the [Menu] button to edit or delete the selected D-Day or
delete all the D-Day settings.
© SAMSUNG Electronics Co., Ltd.
Page 117
APPLICATION MENUS
Unit Conversion
This feature provides a simply conversion program for commonly used units of measurement for temperature,
length, weight, volume, and area.
1. Press the [Menu] button and use the direction button to select
! [8. Units Convert]. Then, press the [Enter] button.
2. Use the direction button to select the desired unit. Then, press the [Enter] button.
3. Specify the value of each item(base unit,
number to convert, and conversion unit)
and press the [Enter] button.
4. The converted value will be displayed.
Page 118
© SAMSUNG Electronics Co., Ltd.
APPLICATION MENUS
5. Message
Press the
direction button to enter the Text Message menu OR
Press the [Menu] button and use the direction button to select
Then, press the [Enter] button.
Move to the desired menu and press the [Enter] button.
Received Messages
Allows you to check text messages or set the status of message reception.
1. Press the
button and use the direction button to select
! [1. Received]. Then, press the [Enter] button.
2. When a new message is received, the screen
that shows the number of messages
will appear.
© SAMSUNG Electronics Co., Ltd.
Page 119
APPLICATION MENUS
Message Charge
Allows you to review received text messages and to setup how you wish to be notified on the arrival of a new
text message.
1. Press the
button and use the direction button to select
! [1. Received] ! [1. Msg. Charge].
Then, press the [Enter] button.
2. Select a message from a list of messages
and press the [Enter] button to see
the message content.
"
If the message is long, press
the direction button and display
the rest of the message.
Unchecked Message
Checked Message
3. Press the [Menu] button at the Text Message box screen to reply/resending/delete the
selected message or delete all messages.
"
Page 120
When free space of the draft memory is 20%
of the total space, the screen on the right appears.
Delete the unused messages from the draft
to increase the space.
© SAMSUNG Electronics Co., Ltd.
APPLICATION MENUS
Setting Message Arrival Notice Interval
You can set how your phone will notify you of a new text message.
1. Press the
button and use the direction button to select
! [1. Received] ! [2. TextMsg.Setup] ! [1. Indi. Interval].
Then, press the [Enter] button.
2. Select the interval for notifying you of
a new message arrival and press
the [Enter] button.
"
"
"
Once : Alarm rings once when a message arrives.
Every 2 Minutes : Alarm rings every 2 minutes
until the message is checked.
No Tone : Alarm does not ring when
a message arrives.
Setting a Message Arrival Alarm
Allows you to set an alarm tone for notifying you of a message arrival.
1. Press the
button and use the direction buttons to select
! [1. Received] ! [2. TextMsg.Setup] ! [2. Indi. Tone].
Then, press the [Enter] button.
2. Select an alarm tone and press
the [Enter] button.
"
Alarm tones 1/2/3/4/5 : The specified alarm
rings according to the interval setting.
© SAMSUNG Electronics Co., Ltd.
Page 121
APPLICATION MENUS
Setting/Clearing Message Display
Allows you to select whether to display the contents of the message when the message arrives.
1. Press the
button and use the direction buttons to select
! [1. Received] ! [2. TextMsg.Setup] ! [3. Show Contents].
Then, press the [Enter] button.
2. Select whether to display the contents of
the message when the message arrives
and press the [Enter] button.
"
"
Select [Save] to display the popup screen with
the contents of the new message.
Select [Clear] to display the popup screen
without displaying the contents of
the new message.
Sent Messages
Allows you to write a new message to be sent. In addition, messages saved in the Sent message box can be
resent through the Sent message function.
1. Press the
button and use the direction buttons to select
! [2. Write & Sent]. Then, press the [Enter] button.
2. Move from the Sent Message box to
the desired menu and press the [Enter] button.
Page 122
© SAMSUNG Electronics Co., Ltd.
APPLICATION MENUS
Writing a Message
You can write and send a text message.
1. Press the
button and use the direction buttons to select
! [2. Write & Sent] ! [1. Write Message] ! [1. Write New Message].
Then, press the [Enter] button.
2. Enter the phone number to receive
the message as well as the message.
Press the [Enter] button, to send the message.
"
"
"
Please refer to the ‘Entering Characters’ section
of ‘Things You Should Know’ in this guide
for entering characters.
If the sending succeeds, the screen prompting you
to save the message in the sent message box will
be displayed. Select [Yes] and press the [Enter] button to save the message.
If the sending fails, the screen prompting you to save the message in the reserved
message box will be displayed. Select [Yes] and press the [Enter] button to save the message.
Retrieving and Sending a Message
Allows you to retrieve the messages saved in the Text message box and send
them as they are or after modification.
1. Press the
button and use the direction buttons to select
! [2. Write & Sent] ! [1. Write Message] ! [2. Invoke Message].
Then, press the [Enter] button.
2. Use the direction button to move to the message
to be retrieved and press the [Menu] button.
You can add a new sentence
or Edit/Send/Delete the selected message or
Delete All existing messages.
© SAMSUNG Electronics Co., Ltd.
Page 123
APPLICATION MENUS
Managing the Sent Message Box
Allows you to check/delete/resend the sent or reserved messages saved in the Sent Message box.
"
Messages cannot be modified.
1. Press the
button and use the direction buttons to select
! [2. Write & Sent] ! [2. Outgoing Message].
Then, press the [Enter] button.
2. Select the sent message required
and press the [Menu] button.
The selected message can be resent to
another person or deleted.
Select the [Delete All] menu to delete all
the messages from the Sent Message box.
"
"
Page 124
To review a sent message, select the message from
the Sent Message List screen and press the [Enter] button.
To cancel the sent message regardless of being read.
Then the cancelled message is deleted from the receiver’s message box.
© SAMSUNG Electronics Co., Ltd.
APPLICATION MENUS
Draft
Allows you to retrieve and conveniently use messages saved as a Draft.
1. Press the
button and use the direction buttons to select
! [3. Draft]. Then, press the [Enter] button.
2. Move from the Draft screen to the desired menu.
Then, press the [Enter] button.
New Draft Message Registration
Allows you to write and register a new draft message for later use.
1. Press the
button and use the direction buttons to select
! [3. Draft] ! [1. New Message].
Then, press the [Enter] button.
2. Enter a new message and press
the [Enter] button.
"
Please refer to the ‘Entering Characters’ section
of ‘Things You Should Know’ in this guide
for entering characters.
© SAMSUNG Electronics Co., Ltd.
Page 125
APPLICATION MENUS
Searching Messages
Allows you to search your saved draft messages.
1. Press the
button and use the direction buttons to select
! [3. Draft] ! [2. Search Message].
Then, press the [Enter] button.
2. Use the direction button to move to the message
to be retrieved and press the [Menu] button.
Then, you can send/modify/delete/delete
all the draft messages or add a new message.
"
Page 126
To check a message, select the message from
the Message Catalog List screen and press
the [Enter] button.
© SAMSUNG Electronics Co., Ltd.
APPLICATION MENUS
6. Volume Adjustment
Press the down direction
button to enter the Ring type/Volume menu OR
Press the [Menu] button and use the direction buttons to select
Then, press the [Enter] button.
Move to the desired menu and press the [Enter] button.
Selecting a Ring Type
Allows you to select a ring type for incoming calls.
1. Press the
button and use the direction button to select
! [1. Ring type]. Then, press the [Enter] button.
2. There are 8 ring types.
Use the
direction button to select
the desired ring type.
Then, press the [Enter] button.
© SAMSUNG Electronics Co., Ltd.
Page 127
APPLICATION MENUS
Ringer Volume
Allows you to set the volume of the ringer.
1. Press the
button and use the direction button to select
! [2. Ringer]. Then, press the [Enter] button.
2. There are 8 volume levels.
Press the [▼Volume▲] button to set
the volume.
Off-hook Volume
Allows you to set the volume of the Off-hook ring that that indicates a waiting call.
1. Press the
button and use the direction buttons to select
! [3. OffHook Ring]. Then, press the [Enter] button.
2. There are 8 volume levels.
Press the [▼Volume▲] button to set
the volume.
Page 128
© SAMSUNG Electronics Co., Ltd.
APPLICATION MENUS
Handset Volume
Allows you to set the volume when speaking through the handset.
1. Press the
button and use the direction buttons to select
! [4. Handset]. Then, press the [Enter] button.
2. There are 8 volume levels.
Press the [▼Volume▲] button to set
the volume.
Speaker Volume
Allows you to set the volume of the speaker when using the phone in speakerphone mode.
1. Press the
button and use the direction buttons to select
! [5. Speaker]. Then, press the [Enter] button.
2. There are 16 volume levels.
Press the [▼Volume▲] button to set
the volume.
© SAMSUNG Electronics Co., Ltd.
Page 129
APPLICATION MENUS
BGM Volume
Allows you to set the Back Ground Music(BGM) volume when the BGM is set on the IP phone.
"
If BGM is not available on your phone refer to your System Administrator.
1. Press the
button and use the direction buttons to select
! [6. BGM]. Then, press the [Enter] button.
2 There are 16 volume levels.
Press the [▼Volume▲] button to set
the volume.
Page Volume
Allows you to set the volume for received Page announcements.
1. Press the
button and use the direction buttons to select
! [7. Page]. Then, press the [Enter] button.
2. There are 16 volume levels.
Press the [▼Volume▲] button to set
the volume.
Page 130
© SAMSUNG Electronics Co., Ltd.
APPLICATION MENUS
7. Call Forwarding
Allows you to forward your incoming calls to a specific extension, group of extensions or an external
number when you are unable to receive an incoming call.
#
The call forwarding option may not be available to all stations, please consult with your
System Administrator.
1. Press the [Menu] button and use the direction buttons to select
Then, press the [Enter] button.
2. Use the direction button to move to
the desired option, and press the
[Menu] button to set [Save] or [Edit] to insert
a new destination.
3. To set the forward option to an existing phone number, select it and, press the [Enter]
button.
4. To enter a new destination or to modify the existing phone number, select [Edit] and
press the [Enter] button. Enter the new destination number and press
the [Enter] button. Press the [Enter] button again to set forwarding to the new
destination.
© SAMSUNG Electronics Co., Ltd.
Page 131
APPLICATION MENUS
8. Configuration
Press the [Menu] button and use the direction buttons to select
Then, press the [Enter] button.
Move to the desired menu and press the [Enter] button.
Changing a Password
Allows you to change your 4-digit password, which is used to protect your IP phone privacy or set a variety of
IP phone features.
Initial value of your password is 1234.
"
1. Press the [Menu] button and use the direction buttons to select
! [1. Password]. Then, press the [Enter] button.
2. Enter the current 4 digit password
and press the [Enter] button.
"
The entered digits are displayed as
asterisks ‘*’.
3. The [New Password] screen appears. Enter a new password and press
the [Enter] button.
4. The [Confirm New Password] screen appears.
Re-enter the new password entered in Step 3 and press the [Enter] button.
Page 132
© SAMSUNG Electronics Co., Ltd.
APPLICATION MENUS
Locking a IP phone
Allows you to lock any outgoing trunk calls or incoming/outgoing calls to prevent others from using your IP
phone without permission.
1. Press the [Menu] button and use the direction buttons to select
! [2. Locked]. Then, press the [Enter] button.
2. Enter the password of the IP phone.
"
"
Initial value of password is 1234.
If you do not remember your password,
contact your System Administrator
3. Use the direction buttons to select the lock type required. Then,
press the [Enter] button.
"
"
"
Unlocked : Unlocked.
Locked All : Locked from all incoming/outgoing call.
Locked Out : Locked from making outgoing calls only.
Setting the Answering Mode
Allows you to set the intercom answering mode of your IP phone.
1. Press the [Menu] button and use the direction buttons to select
! [3. Answering Mode]. Then, press the [Enter] button.
2. Use the direction buttons to select
the answering mode. Then, press
the [Enter] button.
"
"
"
Ring : The IP phone rings when a intercom
call arrives.
Auto Answer Mode : The IP phone
automatically answers an incoming intercom call.
Voice Announce : You can hear only
the caller’s voice through a speaker.
The caller cannot hear you voice. To answer the call lift the handset or
press the [Send] button and you will be connected to the caller.
© SAMSUNG Electronics Co., Ltd.
Page 133
APPLICATION MENUS
Setting the Boss Answering Mode
Allows you to set the answering mode when you are called by a designated Secretary. Only applies if the IP
phone is assigned with a boss function. If the Automatic mode or the Voice Announce mode is set, the call will
be answered even if you are not present.
1. Press the [Menu] button and use the direction buttons to select
! [4. Boss Answering]. Then, press the [Enter] button.
2. Use the direction button to select the Boss
answering mode.
Then, press the [Enter] button.
"
"
"
Ring : The IP phone rings when a call arrives.
Auto Answer Mode : The IP phone
automatically answers an incoming call.
Voice Announce : You can hear only
the caller’s voice through the IP phone speaker.
The caller cannot hear you. To answer the
call lift the handset or press the [Send] button and
you will be connected to the caller.
Language
Allows you to set the language displayed on the LCD screen of the IP phone.
1. Press the [Menu] button and use the direction buttons to select
! [5. LANGUAGE]. Then, press the [Enter] button.
2. Press the direction button to select
the language. Then, press the [Enter] button.
"
Page 134
ENGLISH : The default language of the IP phone is
set to English.
© SAMSUNG Electronics Co., Ltd.
APPLICATION MENUS
Setting the Method of CID Display
Allows you to set the type of Caller ID(CID) display on the LCD screen of the IP phone.
1. Press the [Menu] button and use the direction buttons to select.
! [6. CID Display]. Then, press the [Enter] button.
2. Use the direction button to select the type of
caller ID display.
Then, press the [Enter] button.
"
"
"
None : Caller IDs are not displayed.
Name : If the name of a caller is registered
in the [Phone Book], the name will be
displayed. If not, the caller’s
telephone number will be displayed.
Number : The telephone number of a caller is displayed.
© SAMSUNG Electronics Co., Ltd.
Page 135
APPLICATION MENUS
Setting Absent Messages
Allows you to set a message to be displayed to internal callers on their LCD screen if you are absent for a
while.
1. Press the [Menu] button and use the direction buttons to select
! [7. Absent Msg.]. Then, press the [Enter] button.
2. Use the direction buttons to select
the desired absent message and then,
press the [Enter] button.
The absent message will be set.
3. When an internal caller rings you, the
absent message set will be displayed on the LCD panel of the caller’s station.
"
To disable the set absent message, move to the message, press the [Menu] button, and
"
Messages 1 to 15 are registered within the OfficeServ system. Messages of 16 to 20 can
select the [Clear] menu.
be entered by you. Move to messages 16 to 20(the Page 4 screen ), press the [Menu]
button, and select [Edit] to see the message input screen. Enter a message of up to 16
characters. For information about how to enter characters, refer to ‘Entering Characters’
section of ‘Things You Should Know’ in this guide.
Displaying Internal Calls
Allows you to determine whether internal numbers or internal names will be displayed in the Programmable
features screen.
1. Press the [Menu] button and use the direction buttons to select
! [8. Internal call]. Then, press the [Enter] button.
2. Use the Left/Right direction buttons to select
a number or name.
Then, press the [Enter] button.
Page 136
© SAMSUNG Electronics Co., Ltd.
APPLICATION MENUS
Dial Mode
Allows you to set the dial mode when making a call.
In Enbloc mode which is set by default, you enter the phone number first and press the [Send] button to
connect to the other party. In the Overlap mode, as you enter the phone number, the call connection will be
made immediately.
1. Press the [Menu] button and use the direction buttons to select
! [9. Dial Mode]. Then, press the [Enter] button.
2. Use the Left/Right direction buttons to select
the Dial Mode.
Then, press the [Enter] button.
"
"
Enbloc : This mode is set to the IP phone
by default. Enter the phone number and
press the [Send] button to make a call.
In the Enbloc mode, you can just
delete a wrong phone number and
re-enter the phone number without hanging up
the IP phone and re-pressing the phone number.
Overlap : Press the phone number to connect to another party immediately.
If you press a wrong number, hang up the IP phone and re-enter the phone number.
Station ON/OFF
Allows you to set or disable functions of your phone.
1. Press the [Menu] button and use the direction buttons to select
! [0. Station ON/OFF]. Then, press the [Enter] button.
2. Move to the desired menu and
press the [Enter] button to toggle the
feature [On] and [Off].
© SAMSUNG Electronics Co., Ltd.
Page 137
APPLICATION MENUS
The functions which can be tailored to your individual requirements in Station ON/Off are:
"
"
"
"
"
"
"
"
"
"
"
"
"
"
"
"
Page 138
AUTO HOLD : if ON an existing external call is automatically placed on hold if a CALL button, trunk
button or trunk group button is pressed during call. For example to answer a second incoming call.
AUTO TIMER : if ON, the stopwatch timer automatically starts during an external call.
HEADSET USE : if ON, this feature disables the hook switch allowing you to answer all calls when using
a headset by pressing the [Speaker] or [Send] button, as applicable.
HOT KEYPAD : if ON, this feature allows the you to dial numbers, in Overlap dialling mode, without
having to first lift the handset or press the [Speaker] button.
KEY TOUCH TONE : if ON, allows the you to hear a tone when pressing buttons on your station.
PAGE REJOIN : if ON, allows you to hear the latter part of page announcements when you become
free during a page.
RINGING PREFERENCE : if ON, you can answer a ringing call by pressing the [Send] button, or by
lifting the handset.
CALL COST DISPLAY : if ON, the cost of the call in progress will show in the upper right corner of the
station display instead of duration of the call. May not be available on all systems
AUTO CAMPON : if ON, allows you to automatically camp on to busy stations by remaining off hook
without having to press a [CAMP-ON] button.
AME BGM : if ON, allows you to hear background music (BGM) instead of your personal mailbox
greeting your caller’s hear when Answer Machine Emulation is activated. Requires the Samsung
Voicemail card and a BGM source programmed for your station.
AME PASSWORD : if ON, you must enter your station password to set Answering Machine Emulation
on your station . This feature requires the Samsung Voicemail card to be installed in your OfficeServ
system.
DISPLAY SPEED NAME : if ON, the speed dial name associated with a speed dial number is displayed
on your station’s LCD display when using speed dial. Not available on all systems.
CID REVIEW ALL : if ON, saves information on all calls that ring your station. When OFF, saves
information only on calls that were not answered at the extension or by voice mail. Not available on all
systems.
SECURE OHVA : if ON, an OHVA announcement from another station will only be heard when you are
using the handset. When OFF, OHVA announcements will be heard through the phone speaker. Not
available on all systems.
STOP CID DISPLAY : if ON, the Caller ID will not be displayed after you answer an external call.
AUTO ANSWER TRUNK : if ON, your station will automatically answer an incoming external call. Not
available on all systems.
© SAMSUNG Electronics Co., Ltd.
APPLICATION MENUS
9. My Phone
Press the [Menu] button and use the direction buttons to select
Then, press the [Enter] button.
Move to the desired menu and press the [Enter] button.
Select BG
Allows you to set the initial background screen on the LCD of your IP phone.
1. Press the [Menu] button and use the direction buttons to select
! [1. Select BG]. Then, press the [Enter] button.
2. Use the direction buttons
to select the desired screen, and
then press the [Enter] button.
© SAMSUNG Electronics Co., Ltd.
Page 139
APPLICATION MENUS
Entering the Name
Allows you to enter your name to identify your IP phone.
The entered name is displayed on the LCD screen of the caller’s phone during an internal phone call.
1. Press the [Menu] button and use the direction buttons to select
! [2. My Name]. Then, press the [Enter] button.
2. When the name input screen appears,
enter a name of up to 11 characters and press
the [Enter] button.
"
Please refer to the ‘Entering Characters’
section of ‘Things You Should Know’ in
this guide for entering characters.
Network Information
Allows you to view the network information registered in your phone.
1. Press the [Menu] button and use the direction button to select
! [3. Network Info]. Then, press the [Enter] button.
2. The network information(IP Address, Sub Net
mask, Gateway, Server IP and MAC Address) is
displayed.
Page 140
© SAMSUNG Electronics Co., Ltd.
APPLICATION MENUS
Viewing Status Information
Allows you to check the feature status registered on your phone.
1. Press the [Menu] and use the direction buttons to select
! [4. Status Info]. Then, press the [Enter] button.
2. Displays
the Call Forwarding, Absent Message,
DND, and Lock status of your IP phone.
Enbloc Timeout
Allows you to set a valid time from entering a phone number to pressing the [Send] button when
the dial mode of the IP phone is set to Enbloc.
1. Press the [Menu] button and use the direction buttons to select
! [5. Enbloc Timeout]. Then, press the [Enter] button.
2. Use the direction button to select an Enbloc
Timeout time(options are : 30 seconds/a minute/
three minutes).
Then, press the [Enter] button.
"
"
If you do not press the [Send] button before,
the Enbloc timeout the entered phone number
will be cancelled and the number must
be re-entered. This function is applied to the
application menu screen.
Enbloc
This is a dial mode set in the IP phone by default. Enter the phone number and press the
[Send] button to make a call. In the Enbloc mode, you can just delete an incorrect number
using the [Cancel] button and re-enter the phone number without hanging up the IP phone and
starting again.
© SAMSUNG Electronics Co., Ltd.
Page 141
APPLICATION MENUS
News Color
Allows you to set the color of characters of OfficeServ News in the calendar screen.
1. Press the [Menu] button and use the direction buttons to select
! [6. News Color]. Then, press the [Enter] button.
2. Select ‘Light’ or ‘Dark’.
"
"
Page 142
Light
The black news characters are displayed
on the white background screen.
Dark
The white news characters are displayed
on the black background screen.
© SAMSUNG Electronics Co., Ltd.
APPLICATION MENUS
Privacy Option
Allows you to restrict unauthorised access to the Application Menus on your phone. To access the Application
Menus you must enter your phone is the privacy option is set.
1. Press the [Menu] button and use the direction buttons to select
! [7. Privacy Option]. Then, press the [Enter] button.
2. Enter your password, and select [Save]
or [Clear].
Then press the [Enter] button to enable.
Config. Reset
Allows you to delete all saved data(Phone Book, Messages etc).
1. Press the [Menu] button and use the direction buttons to select
! [8. Config. Reset]. Then, press the [Enter] button.
2. Enter your password, and select [Yes] or [No].
3. Press the [Enter] button to save.
© SAMSUNG Electronics Co., Ltd.
Page 143
APPLICATION MENUS
Version Information
Allows you to view the version of your phone.
1. Press the [Menu] button and use the direction buttons to select
! [9. Version Info]. Then, press the [Enter] button.
2. The version of your phone is displayed
on the screen.
Page 144
© SAMSUNG Electronics Co., Ltd.
ANNEX
1. Troubleshooting
Possible problems and troubleshooting steps for your IP phone are described below:
Check the troubleshooting steps before contacting your Authorised Samsung Reseller.
?
The phone does not boot when the power is connected.
! Check to confirm the data network cable is connected to the LAN socket on the phone
properly.
! Check to confirm the connected power adaptor was the one supplied with the
ITP-5012L phone.
! Disconnect the power adaptor from the phone, and connect it again after about 10
seconds.
(Refer to ‘Assembling the ITP-5012L IP phone’ section of ‘Preparation’ in this guide.)
?
The phone does function after booting.
! If the screen of the phone displays ‘IP conflict’, you should consult your IT Manager.
Indicates another network device(e.g. PC) is using the same IP address as your phone.
! If the screen of the phone displays ‘ID conflict’, you should consult your IT Manager.
Indicates the user ID for your phone is already in use by another IP phone user.
?
Dial tone is not heard even if you lift the handset or press the
[Speaker] button.
! Check the data network cable and the data cable to your PC are connected correctly to
the LAN and PC sockets respectively.
! If the phone’s dial mode is set to ‘Enbloc’, you will hear dial tone only after pressing
the [Send] button.
(Refer to ‘Dial Mode’ of ‘Config.’ in the ‘Application Menus’ section of this guide.)
! Check the network environment is setup correctly in the phone.
(Refer to the ‘Getting Started’ section of this guide.)
© SAMSUNG Electronics Co., Ltd.
Page 145
ANNEX
?
Nothing appears on the LCD screen while the ITP-5012L phone is being
used.
! Check the data network cable is correctly connected to the LAN socket on the
ITP-5012L phone.
(Refer to ‘Assembling the ITP-5012L IP phone’ section of ‘Preparation’ in this guide.)
?
The ITP-5012L phone does not ring and volume is too low.
! Press the [▼Volume▲] button to adjust the volume.
(Refer to ‘Volume Adjustment’ section of the ‘Things You Should Know’ section in
this guide.)
?
Conversation quality is reduced due to noise and echo.
! If you are using the speakerphone, lift the handset and try speaking.
?
Excessive echo is heard during a page announcement or with Auto Answer
set.
! If IP phones are too close to each other, sound from one speaker might echo
during a page or on auto answer call.
Keep a reasonable distance between IP phones.
?
Caller IDs are not displayed on the LCD screen.
! Confirm with your System Administrator that the caller ID service is available from your
Telephone Company.
! If the caller blocks the sending of their caller ID, the caller ID will not be displayed.
! If the caller makes a call from an area where the caller ID cannot be provided
(e.g. international calls), the caller ID will not be displayed.
! If the caller makes a call from a public phone, the caller ID will not be displayed.
! If the caller ID received from the Telephone Company is corrupt, the caller ID will not be
displayed.
! If the Telephone Company does not send a caller ID, the caller ID will not be displayed.
* Refer to ‘the Caller ID(CID) Presentation’ from the ‘Convenient Features’ section of this guide.
Page 146
© SAMSUNG Electronics Co., Ltd.
ANNEX
?
An alarm does not ring at the programmed time.
! Check the current time is set on the ITP-5012L phone correctly. If the current time
setting needs to be changed, contact your System Administrator.
! Check if an alarm is set.
(Refer to ‘Alarm Clock’ in the ‘Application Menus/E-Diary’ section of this guide.)
© SAMSUNG Electronics Co., Ltd.
Page 147
ANNEX
2. Product Specifications
The specifications and features of the ITP-5012L IP phone are as follows.
Item
Specification
Model
ITP-5012L
Weight(kg)
1.1
Size(mm)
266(width) X 206(length) X 122(height)
Operating Temperature(°C)
Operating Humidity(%)
10 to 90 non condensing
Ethernet 10/100BASE-T
2 Ports(LAN & PC)
Dynamic Compression Modes
G.711 and G.729A
Protocol
Proprietary and SIP
Number of the [Select] buttons
12
Navigation Button
Yes
Speakerphone
LCD
Page 148
0 to 45
Full Duplex
Graphic LCD(320 x 240 pixel)
© SAMSUNG Electronics Co., Ltd.