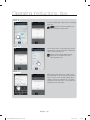
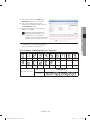
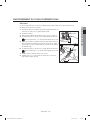
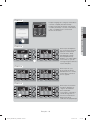
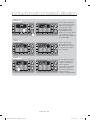
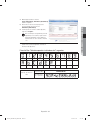
1
DV455* Gas and Electric Dryer user manual This manual is made with 100% recycled paper. imagine the possibilities Thank you for purchasing this Samsung product. To receive more complete service or accessory parts, please register your product at or contact www.samsung.com/register 1-800-SAMSUNG (726-7864) DV455_02836F-08_EN.indd 1 2013-12-12 5:11:49 contents SAFETY INSTRUCTIONS 4 4 4 INSTALLING YOUR DRYER 10 10 10 11 11 12 13 13 15 16 16 17 17 18 19 21 21 24 24 25 OPERATING INSTRUCTIONS, TIPS 27 27 32 33 33 33 34 35 38 50 60 What you need to know about safety instructions Important safety symbols and precautions Unpacking your dryer See exhaust requirements Basic requirements Ducting requirements Important to installer Location considerations Alcove or closet installations Exhausting Gas requirements Commonwealth of massachusetts installation instructions Electrical requirements Grounding Electrical connections Connecting the inlet hose Replacement parts and accessories Installation Final installation checklist Dryer exhaust tips Door Reversal Overview of the control panel Rack Dry Clean the lint filter Load the dryer properly Getting started Vent Sensor Setting up Smart control and Smart monitoring Using the mobile app (Android) Using the mobile app (iOS) Registering your dryer English - 2 DV455_02836F-08_EN.indd Sec9:2 2013-12-12 5:11:53 CARE AND CLEANING 62 62 62 62 62 62 Control Panel Tumbler Stainless Steel Tumbler Dryer Exterior Dryer Exhaust System SPECIAL LAUNDRY TIPS 63 Special laundry tips 64 66 67 Check these points if your dryer… Information codes Network Setup Q&A 69 70 70 70 71 72 Fabric care chart Protecting the environment Declaration of conformity Specifications Cycle chart Open Source Announcement 63 TROUBLESHOOTING 64 APPENDIX 69 English - 3 DV455_02836F-08_EN.indd Sec9:3 2013-12-12 5:11:53 Safety instructions Congratulations on your new Samsung Dryer. This manual contains important information on the installation, use, and care of your appliance. Please take the time to read this manual to take full advantage of your dryer’s many benefits and features. WHAT YOU NEED TO KNOW ABOUT SAFETY INSTRUCTIONS Please read this manual thoroughly to ensure that you know how to operate the extensive features and functions of your new appliance safely and efficiently. Retain the manual in a safe place near the appliance for future reference. Use this appliance only for its intended purpose as described in this instruction manual. The Warnings and Important Safety Instructions in this manual do not cover all possible conditions and situations that may occur. It is your responsibility to use common sense, caution, and care when installing, maintaining, or operating your dryer. Always contact your manufacturer about problems or conditions you do not understand. IMPORTANT SAFETY SYMBOLS AND PRECAUTIONS What the icons and signs in this user manual mean: WARNING CAUTION Hazards or unsafe practices that may result in severe personal injury, death and/or property damage. Follow the information in this manual to minimize the risk of fire or explosion or to prevent property damage, personal injury, or death. Do not store or use gasoline or other flammable vapors and liquids near this or any other appliance. Hazards or unsafe practices that may result in personal injury and/or property damage. Do NOT attempt. Do NOT disassemble. Do NOT touch. Follow directions explicitly. Unplug the power plug from the wall socket. Make sure the machine is grounded to prevent electric shock. Call the service center for help. Note These warning signs are here to prevent injury to you and others. Please follow them explicitly. After reading this section, keep it in a safe place for future reference. SAVE THESE INSTRUCTIONS English - 4 DV455_02836F-08_EN.indd Sec11:4 2013-12-12 5:11:53 WARNING - Risk of Fire • WARNING Clothes dryer installation must be performed by a qualified installer. Install the clothes dryer according to the manufacturer’s instructions and local codes. Do not install a clothes dryer with flexible plastic venting materials. If flexible metal (foil type) duct is installed, it must be of a specific type identified by the appliance manufacturer as suitable for use with clothes dryers. Flexible venting materials are known to collapse, be easily crushed, and trap lint. These conditions will obstruct clothes dryer airflow and increase the risk of fire. To reduce the risk of severe injury or death, follow all installation instructions. TO REDUCE THE RISK OF FIRE OR EXPLOSION: • • WARNING Do not dry items that have been previously cleaned, washed, soaked, or spotted with gasoline, dry cleaning solvents, or other flammable or explosive substances. They emit vapors that could ignite or explode. Any material that has been in contact with a cleaning solvent or flammable liquids or solids should not be placed in the dryer until all traces of these flammable liquids or solids and their fumes have been removed. There are many highly flammable items used in homes, such as acetone, denatured alcohol, gasoline, kerosene, some liquid household cleaners, some spot removers, turpentine, waxes, and wax removers Do not dry items containing foam rubber (may be labeled latex foam) or similarly textured rubber-like materials on a heat setting. Heated foam rubber materials can, under certain circumstances, produce fire by spontaneous combustion. 01 SAFETY INSTRUCTIONS • • • WHAT TO DO IF YOU SMELL GAS: • • • • • • • • Do not try to light any appliance. Do not turn on the appliance. Do not touch any electrical switch. Do not use any phone in your building. Clear the room, building or area of all occupants. Immediately call your gas supplier from a neighbor’s phone. Follow the gas supplier’s instructions. If you cannot reach your gas supplier, call the fire department. Installation and service must be performed by a qualified installer, service agency, or the gas supplier. SAVE THESE INSTRUCTIONS English - 5 DV455_02836F-08_EN.indd Sec11:5 2013-12-12 5:11:53 Safety instructions IMPORTANT SAFTY INSTRUCTION WARNING WARNING To reduce the risk of fire, electric shock, or injury to persons when using your appliance, follow basic precautions, including the following: 1. Read all instructions before using this appliance. 2. Do not dry articles that have been previously cleaned in, washed in, soaked in, or spotted with gasoline, dry-cleaning solvents, or other flammable or explosive substances, because they give off vapors that could ignite or explode. 3. Do not use the dryer to dry clothes which have traces of any flammable substance, such as vegetable oil, cooking oil, machine oil, flammable chemicals, thinner, etc., or anything containing wax or chemicals, such as mops and cleaning cloths. Flammable substances may cause the fabric to catch fire by itself. 4. Do not store or use gasoline or other flammable vapors and liquids near this or any other appliance. 5. Do not allow children or pets to play on, in, or in front of the appliance. Close supervision is necessary when the appliance is used near children and pets. 6. Before the appliance is removed from service or discarded, remove the door to the drying compartment to prevent children or animals from becoming trapped inside. 7. Do not reach into the appliance when the drum is moving. 8. Do not install or store this appliance where it will be exposed to the weather. 9. Do not tamper with the controls. 10. Do not repair or replace any part of the appliance or attempt any servicing unless specifically recommended in the user-maintenance instructions or published in the user-repair instructions that you understand and have the skills to carry out. 11. Do not use fabric softeners or products to eliminate static unless recommended by the manufacturer of the fabric softener or product. 12. Clean the lint screen before or after each load. 13. Do not use heat to dry articles containing foam rubber or similarly textured rubber-like materials. 14. Keep the area around the exhaust opening and surrounding areas free from lint, dust, and dirt. 15. The interior of the dryer and exhaust duct should be cleaned periodically by qualified service personnel. 16. Do not place items exposed to cooking oils in your dryer. Items contaminated with cooking oils may contribute to a chemical reaction that could cause a load to catch fire. 17. This appliance must be grounded. See “Electrical requirements” and ”Grounding” in the “Installing your dryer” section. 18. This appliance must be properly grounded. Never plug the power cord into a receptacle that is not grounded adequately and in accordance with local and national codes. Refer to installation instructions for grounding this appliance. SAVE THESE INSTRUCTIONS English - 6 DV455_02836F-08_EN.indd Sec11:6 2013-12-12 5:11:53 19. Ensure pockets are free from small irregularly shaped hard objects and foreign material, i.e. coins, knives, pins, etc. These objects could damage your dryer. 20. Gas leaks may occur in your system, resulting in a dangerous situation. 21. Gas leaks may not be detected by smell alone. WARNING GAS APPLIANCES : This product contains chemicals known to the State of California to cause cancer and reproductive toxicity. Gas appliances can cause low-level exposure to Proposition 65 listed substances, including but not limited to, benzene, carbon monoxide, formaldehyde and soot, substances resulting from the incomplete combustion of natural gas or LP fuels. CAUTION 01 SAFETY INSTRUCTIONS 22. Gas suppliers recommend you purchase and install a UL-approved gas detector. CAUTION 1. Do not sit on top of the dryer. 2. Because of continuing product improvements, Samsung reserves the right to change specifications without notice. For complete details, see the Installation Instructions packed with your product before selecting cabinetry, making cutouts, or beginning installation. 3. Do not wash clothing with large buckles, buttons, or other heavy metal or solid things. 4. Install and use in accordance with the manufacturer’s instructions. 5. Do not place items in your dryer that have been spotted or soaked with vegetable oil or cooking oil. Even after being washed, these items may contain significant amounts of these oils. 6. Residual oil on clothing can ignite spontaneously. The potential for spontaneous combustion increases when items containing vegetable oil or cooking oil are exposed to heat. Heat sources such as your dryer can warm these items, allowing an oxidation reaction in the oil to occur. Oxidation creates heat. If this heat cannot escape, the items can become hot enough to catch fire. Piling, stacking, or storing these kinds of items may prevent heat from escaping and can create a fire hazard. 7. All washed and unwashed fabrics that contain vegetable oil or cooking oil can be dangerous. Washing these items in hot water with extra detergent will reduce, but not eliminate, the hazard. Always use the Cool Down cycle for these items to reduce their temperature. Never remove these items from the dryer hot or interrupt the drying cycle until the items have run through the Cool Down cycle. Never pile or stack these items when they are hot. 8. Take care that children’s fingers are not caught in the door when closing it. This may result in injury. SAVE THESE INSTRUCTIONS English - 7 DV455_02836F-08_EN.indd Sec11:7 2013-12-12 5:11:53 Safety instructions REGULATORY NOTICE 1. FCC Notice FCC CAUTION: CAUTION Any changes or modifications not expressly approved by the party responsible for compliance could void the user’s authority to operate the equipment. This device complies with Part 15 of FCC Rules. Operation is subject to the following two conditions: 1. This device may not cause harmful interference, and 2. This device must accept any interference received including interference that causes undesired operation. For product available in the USA/Canada market, only channel 1~11 can be operated. Selection of other channels is not possible. FCC STATEMENT: This equipment has been tested and found to comply within the limits for a Class B digital device, pursuant to part 15 of the FCC Rules. These limits are designed to provide reasonable protection against harmful interference in a residential installation. This equipment generates, uses, and can radiate radio frequency energy and, if not installed and used in accordance with the instructions, may cause harmful interference to radio communications. However, there is no guarantee that interference will not occur in a particular installation. If this equipment does cause harmful interference to radio or television reception, which can be determined by turning the equipment off and on, the user is encouraged to try to correct the interference by one or more of the following measures: • Reorient or relocate the receiving antenna • Increase the separation between the equipment and receiver • Connect the equipment to an outlet on a different circuit from that of the receiver. • Consult the dealer or an experienced radio/TV technician for help. FCC RADIATION EXPOSURE STATEMENT: This equipment complies with FCC radiation exposure limits set forth for an uncontrolled environment. This equipment should be installed and operated with a minimum distance of 20cm between the radiator and your body. This device and its antenna(s) must not be co-located or operated in conjunction with any other antenna or transmitter. SAVE THESE INSTRUCTIONS English - 8 DV455_02836F-08_EN.indd Sec11:8 2013-12-12 5:11:53 2. IC Notice This Class B digital apparatus complies with Canadian ICES-003. Cet appareil numérique de la classe B est conforme á la norme NMB-003 du Canada. For product available in the USA/Canada market, only channels 1~11 can be operated. Selection of other channels is not possible. IC RADIATION EXPOSURE STATEMENT: This equipment complies with IC RSS-102 radiation exposure limits set forth for an uncontrolled environment. This equipment should be installed and operated with minimum distance of 20 cm between the radiator & your body. This device and its antenna(s) must not be co-located or operated in conjunction with any other antenna or transmitter. 01 SAFETY INSTRUCTIONS The term “IC” before the radio certification number only signifies that Industry Canada technical specifications were met. Operation is subject to the following two conditions: (1) this device may not cause interference, and (2) this device must accept any interference, including interference that may cause undesired operation of the device. SAVE THESE INSTRUCTIONS English - 9 DV455_02836F-08_EN.indd Sec11:9 2013-12-12 5:11:53 Installing your dryer UNPACKING YOUR DRYER Unpack your Dryer and inspect it for shipping damage. Make sure you have received all the items shown below. If your Dryer was damaged during shipping, or you do not have all the items, contact 1-800-SAMSUNG (726-7864). To prevent personal injury or strain, wear protective gloves whenever lifting or carrying the unit. WARNING The packing materials can be dangerous children. Keep all packaging material (plastic bags, polystyrene, etc.) well out of the reach of children. SEE EXHAUST REQUIREMENTS Top Cover [ BACK ] Control panel Door Filter Water Inlet Frame Front Duct Exhaust Parts supplied “Y”-connector Short inlet hose Rubber Washer Long inlet hose English - 10 DV455_02836F-08_EN.indd 10 2013-12-12 5:11:53 Tools needed Cutting knife Pipe wrench (gas only) Nut drivers Level Phillips Screwdriver Duct tape Wrench 02 INSTALLING YOUR DRYER Pliers BASIC REQUIREMENTS Make sure you have everything necessary for the proper installation • A GROUNDED ELECTRICAL OUTLET is required. Refer to the “Electrical requirements” section on page 17. • A POWER CORD electric dryer (except for Canada). • GAS LINES (if a gas dryer) must meet national and local codes. • The EXHAUST SYSTEM must be made of rigid metal or flexible stiff-walled metal exhaust ducting. DUCTING REQUIREMENTS • • • • • • • • • • • • • • • Use a 4-inch (10.2 cm) diameter rigid aluminum or rigid galvanized steel duct. Do not use a smaller duct. Ducts larger than 4 inches (10.2 cm) in diameter can result in increased accumulation of lint. Lint should be removed regularly. If a flexible metal duct must be used, use the type with a stiff sheet metal wall. Do not use a flexible duct with a thin foil wall. A serious blockage can result if the flexible metal duct is bent too sharply. Never install any type of flexible duct in walls, ceilings, or other concealed spaces. Keep the exhaust duct as straight and short as possible. Secure joints with duct tape. Do not use screws. Plastic flexible ducts can kink, sag, be punctured, reduce airflow, extend drying times, and affect the dryer operation. Exhaust systems longer than recommended can extend drying times, affect machine operations, and collect lint. The exhaust duct should end with an exhaust hood with a swing-out damper to prevent back drafts and entry of wildlife. Never use an exhaust hood with a magnetic damper. The hood should have at least 12 inches (30.5 cm) of clearance between the bottom of the hood and the ground or other obstruction. The hood opening should point down. Never install a screen over the exhaust outlet. To avoid lint buildup, do not exhaust the dryer directly into a window well. Do not exhaust under a house or porch. If the exhaust duct must run through an unheated area, the duct should be insulated and slope slightly down towards the exhaust hood to reduce condensation and lint buildup. English - 11 DV455_02836F-08_EN.indd 11 2013-12-12 5:11:53 Installing your dryer • • • • Inspect and clean the interior of the exhaust system at least once a year. Unplug the power cord before cleaning. Check frequently to make sure the exhaust hood damper opens and closes freely. Check once per month, and clean at least once per year. Note: If your clothes are not getting dry, then check the ducting for obstructions. Do not exhaust the dryer into a wall, ceiling, crawl space, or concealed space of a building, gas vent, or any other common duct or chimney. This could create a fire hazard from the lint expelled by the dryer. ELECTRIC AND GAS DRYER Weather Hood Type Recommended Use only for short-run installation 4” (10 .16 cm) No. of 90° elbows Rigid 0 1 2.5” (6.35 cm) Metallic Flexible* Rigid Metallic Flexible* 24.4 m (80 ft.) 12.4 m (41 ft.) 22.6 m (74 ft.) 10.1 m (33 ft.) 20.7 m (68 ft.) 11.2 m (37 ft.) 18.9 m (62 ft.) 8.8 m (29 ft.) 2 17.4 m (57 ft.) 10.1 m (33 ft.) 15.5 m (51 ft.) 7.6 m (25 ft.) 3 14.3 m (47 ft.) 9.0 m (29 ft.) 12.5 m (41 ft.) 6.5 m (21 ft.) * Do not use non-metallic flexible ducts. If the new dryer is installed into an existing exhaust system you must make sure: • The exhaust system meets all local, state, and national codes. • That a flexible plastic duct is not used. • To inspect and clean all lint buildup from inside the existing duct. • The duct is not dented or crushed. • The exhaust hood damper opens and closes freely. The static pressure in any exhaust system must not exceed 0.83 inches of water column, or be less than 0. This can be measured with the dryer running with a manometer at the point where the exhaust duct connects to the dryer. A no-heat setting should be used. The dryer tumbler should be empty and the lint filter clean. IMPORTANT TO INSTALLER Please read the following instructions carefully before installing the dryer. These instructions should be kept for future reference. WARNING Remove the door from all discarded appliances to avoid the danger of a child being trapped and suffocating. English - 12 DV455_02836F-08_EN.indd 12 2013-12-12 5:11:54 LOCATION CONSIDERATIONS ALCOVE OR CLOSET INSTALLATIONS WARNING • • The dryer must be exhausted to the outside to reduce the risk of fire when installed in an alcove or closet. 02 INSTALLING YOUR DRYER The dryer should be located where there is enough space at the front for loading the dryer, and enough space behind for the exhaust system. This dryer is factory-ready for the rear exhaust option. To exhaust out the bottom, right or the left, use the accessory exhaust kit. Instructions are included with the kit. Make sure the room in which the dryer is located has enough fresh air. The dryer must be located where there are no air-flow obstructions. For gas dryers, adequate clearance must be maintained as noted on the data plate to ensure adequate air for combustion and the proper dryer operation. The dryer must not be installed or stored in an area where it will be exposed to water and/or weather. The dryer area must be kept clear of combustible materials, gasoline, and other flammable vapors and liquids. A dryer produces combustible lint. The area around the dryer should be kept lint-free. No other fuel-burning appliance should be installed in the same closet as the dryer. WARNING: To reduce the risk of fire, this dryer must be exhausted to the outside. Refer to the “Exhausting” section on page 15. Minimum clearances between the dryer and adjacent walls or other surfaces Sides 1 in / 25 mm Rear 5 in / 127 mm Top 17 in / 432 mm Front 2 in / 51 mm • The front of the closet must have two unobstructed air openings for a combined minimum total area of 72 in² (465 cm²) with a minimum clearance of 3” (7.6 cm) at the top and bottom. A slatted door with equivalent space clearances is acceptable. Recessed area Side view - closet or confined area 1 in. (2.5 cm) 1 in. (2.5 cm) 27 in. (68.6 cm) 17 in. (43.2 cm) 27 in. (68.6 cm) 1 in. (2.5 cm) 2 in. (5 cm) 34.1 in. (86.5 cm) 5 in. (12.7 cm) English - 13 DV455_02836F-08_EN.indd 13 2013-12-12 5:11:54 Installing your dryer With optional pedestal base or stacking kit Required Dimensions for Installation With Pedestal Required Dimensions for Installation With Stacking Kit 51.2 in. (130 cm) to clear open door 39 in. (99 cm) 53.6 in. (136.2 cm) 34.1 in. (86.5 cm) 5 in. (12.7 cm) 3 in. (7.6 cm) 6 in. * (15.2 cm) 27 in. (68.6 cm) 5 in. (12.7 cm) 77.2 in. (196.2 cm) 48 in.² * (310 cm²) Closet or Door 1 in. (2.5 cm) 27 in. (68.6 cm) 24 in.² * (155 cm²) 3 in. (7.6 cm) 1 in. 34.1 in. 8 in.** (2.5 cm) (86.5 cm) (20.3 cm) * Required spacing ** An external exhaust elbow requires additional space. It is not recommended to stack DV457* on your washer. (it might be hard to control dryer LCD because of the viewing angle.) English - 14 DV455_02836F-08_EN.indd 14 2013-12-12 5:11:54 EXHAUSTING Refer to the “Ducting requirements” section on page 11 for the maximum duct length and number of bends. • All dryers must be exhausted to the outside. • Do not assemble the duct with screws or other fastening means that extend into the duct and catch lint. • The exhaust duct should be 4 inches (102 mm) in diameter. • The total length of flexible metal duct shall not exceed 2.4 m (7.8 ft.). In the United States: • Use only those foil-type flexible ducts, if any, specifically identified for use with the appliance by the manufacturer and that comply with the Outline for Clothes Dryer Transition Ducts, Subject 2158A, shall be used. 02 INSTALLING YOUR DRYER The dryer shall not be exhausted into a chimney, a wall, a ceiling, an attic, a crawl space, or a concealed space of a building. Exhausting the dryer to the outside will prevent large amounts of lint and moisture from being blown into the room. In Canada: • Use only those foil-type flexible ducts, if any, specifically identified for use with the appliance by the manufacturer. Outside the U.S. and Canada: • Refer to the local codes. WARNING WARNING The dryer must be exhausted to the outside to reduce the risk of fire when installed in an alcove or closet. NEVER USE A PLASTIC OR NON-METAL FLEXIBLE DUCT. If your existing ductwork is plastic, non-metal, or combustible, replace it with metal. Use only a metal exhaust duct that is non-flammable to ensure containment of the exhaust air, heat, and lint. English - 15 DV455_02836F-08_EN.indd 15 2013-12-12 5:11:55 Installing your dryer GAS REQUIREMENTS Use only natural or LP (liquid propane) gases. THE INSTALLATION MUST CONFORM WITH LOCAL CODES, OR IN THE ABSENCE OF LOCAL CODES, WITH THE NATIONAL FUEL GAS CODE ANSI/Z223.1, LATEST REVISION (FOR THE UNITED STATES), OR WITH THE CAN/CGA-B149 INSTALLATION CODES (FOR CANADA). Gas dryers are equipped with a burner vent for use with natural gas. If you plan to use your dryer with LP (liquid propane) gas, it must be converted for safe and proper performance by a qualified service technician. A 1/2” (1.27 cm) gas supply line is recommended and must be reduced to connect to the 3/8” (1 cm) gas line on your dryer. The National Fuel Gas Code requires that an accessible, approved manual gas shut-off valve be installed within 6” of your dryer. Gas dryers installed in residential garages must be raised 18 inches (46 cm) above the floor. Additionally, a 1/8” (0.3 cm) N.P.T. (National Pipe Thread) plugged tapping, accessible for test gauge connection, must be installed immediately upstream of your dryer’s gas supply connection. Your dryer must be disconnected from the gas supply pipe system during any pressure testing of the system. DO NOT reuse old flexible metal gas lines. Flexible gas lines must be design certified by the American Gas Association (CGA in Canada). • Any pipe joint compound used must be resistant to the action of any liquefied petroleum gas. • As a courtesy, most local gas utilities will inspect a gas appliance installation. GAS IGNITION - Your dryer uses an automatic ignition system to ignite the burner. There is no constant burning pilot. COMMONWEALTH OF MASSACHUSETTS INSTALLATION INSTRUCTIONS Your dryer must be installed by a licensed plumber or gas fitter. A “T” handle manual gas valve must be installed in the gas supply line to your dryer. If a flexible gas connector is used to install your dryer, the connector may not be longer than 3’ (36”). • Gas leaks may occur in your system, creating a dangerous situation. Gas leaks may not be detected by smell alone. WARNING • • Gas suppliers recommend that you purchase and install a UL-approved gas detector. • Install and use it in accordance with the manufacturer’s instructions. English - 16 DV455_02836F-08_EN.indd 16 2013-12-12 5:11:55 ELECTRICAL REQUIREMENTS The wiring diagram is located on the plate below the control panel. • • • The improper connection of the equipment grounding conductor can result in a risk of electric shock. Check with a qualified electrician or serviceman if you are in doubt as to whether your dryer is properly grounded. Do not modify the plug provided with your dryer - if it doesn’t fit the outlet, have a proper outlet installed by a qualified electrician. To prevent unnecessary risk of fire, electrical shock, or personal injury, all wiring and grounding must be done in accordance with local codes, or in the absence of local codes, with the National Electrical Code, ANSI/NFPA No. 70-Latest Revision (for the U.S.) or the Canadian Electrical Code CSA C22.1 - Latest Revisions and local codes and ordinances. It is your responsibility to provide adequate electrical services for your dryer. All gas installations must be done in accordance with the national Fuel Code ANSI/Z2231 - Latest Revision (for the U.S.) or CAN/CGA - B149 Installation Codes - Latest Revision (for Canada) and local codes and ordinances. 02 INSTALLING YOUR DRYER WARNING GROUNDING This dryer must be grounded. In the event of a malfunction or breakdown, the grounding the product will reduce the risk of electrical shock by providing a path of least resistance for the electrical current. WARNING Gas models Your dryer has a cord with an equipment-grounding conductor and a grounding plug. The plug must be plugged into an appropriate outlet that is properly installed and grounded in accordance with all local codes and ordinances. Do not modify the plug provided with your dryer – if it doesn’t fit the outlet, have a proper outlet installed by a qualified electrician. Never connect the ground wire to the plastic plumbing lines, gas lines, or hot water pipes. WARNING Electric models Your dryer has an optional cord with an equipment-grounding conductor and a grounding plug, which is sold separately. The plug must be plugged into an appropriate outlet that is properly installed and grounded in accordance with all local codes and ordinances. Do not modify the plug provided with your dryer – if it doesn’t fit the outlet, have a proper outlet installed by a qualified electrician. If a power cord is not used and the electric dryer is to be permanently wired, the dryer must be connected to a permanently grounded metal wiring system, or an equipment grounding conductor must be run with the circuit conductors and connected to the equipment grounding terminal or lead on the dryer. English - 17 DV455_02836F-08_EN.indd 17 2013-12-12 5:11:55 Installing your dryer ELECTRICAL CONNECTIONS Before operating or testing, follow all grounding instructions in the “Grounding” section on page 17. An individual branch (or separate) circuit serving only your dryer is recommended. DO NOT USE AN EXTENSION CORD. Gas models – U.S. and Canada A 120 volt, 60 Hz AC approved electrical service, with a 15-ampere fuse or circuit breaker is required. Electric models – U.S. only Most U.S. dryers require a 120/240 volt, 60 Hz AC approved electrical service. Some require 120/208 volt, 60 Hz approved electrical service. The electric service requirements can be found on the data label located behind the door. A 30-ampere fuse or circuit breaker on both sides of the line is required. • If a power cord is used, the cord should be plugged into a 30-ampere receptacle. • The power cord is NOT provided with U.S. electric model dryers. WARNING RISK OF ELECTRIC SHOCK: When local codes allow, the electrical supply of the dryer may be connected by means of a new power supply cord kit, marked for use with a dryer, that is U.L. listed and rated at a minimum of120/240 volts, 30-ampere with three No. 10 copper wire conductors terminated with closed loop terminals, open-end spade lugs with turned up ends, or with tinned leads. • Do not reuse a power supply cord from an old dryer. The power cord electric supply wiring must be retained at the dryer cabinet with a suitable UL-listed strain relief. • Grounding through the neutral conductor is prohibited for (1) new branch-circuit installations, (2) mobile homes, (3) recreational vehicles, and (4) areas where local codes prohibit grounding through the neutral conductor. (Use a 4-prong plug for 4 wire receptacles, NEMA type 14-30R.) Electric models – Canada Only • • A 120/240 volt, 60 Hz AC approved electrical service fused through a 30-ampere fuse or circuit breaker on both sides of the line is required. All Canadian models are shipped with the power cord attached. The power cord should be plugged into a 30-ampere receptacle. In Canada, you may not convert a dryer to 208 volts. English - 18 DV455_02836F-08_EN.indd 18 2013-12-12 5:11:55 CONNECTING THE INLET HOSE Method 1 1. If space permits, attach the brass female end of the “Y” connector to the cold water faucet. 2. Turn the cold water faucet off. 3. Attach the straight end of long hose to the “Y’ connector. 4. Using pliers, tighten the coupling with an additional twothirds turn. Do not overtighten, as this may damage the coupling. 5. Attach the angled end of long hoses to fill the valve at the bottom of the dryer’s rear frame. Screw on the coupling by hand until it is seated on the fill valve connector. 6. Using the pliers, tighten the coupling with an additional twothirds turn. Y-Connector Water Hose Duct Exhaust 02 INSTALLING YOUR DRYER The dryer must be connected to the cold water faucet using the new inlet hoses. Do not use old hoses. Frame (back) Do not overtighten, as this may damage the coupling. 7. Check that the water faucets are on. 8. Check for leaks around the “Y” connector, faucets and hoses. Water Hose English - 19 DV455_02836F-08_EN.indd 19 2013-12-12 5:11:55 Installing your dryer Method 2 The dryer must be connected to the cold water faucet using the new inlet hoses. Do not use old hoses. 1. If the “Y” connector cannot be attached directly to the cold water faucet, the short hose must be used. 2. Turn the cold water faucet off. 3. Attach the short inlet hose to the cold water faucet. Screw on the coupling by hand until it is seated on the faucet. 4. Using the pliers, tighten the coupling with an additional twothirds turn. Short hose (Inlet to cold water) “Y” connector Long hose Do not overtighten, as this may damage the coupling. 5. Attach the ‘Y” connector to the brass male end of the small hose. Screw on the coupling by hand until it is seated on the connector. 6. Using the pliers, tighten the coupling with an additional twothirds turn. Duct Exhaust Frame (back) Do not overtighten, as this may damage the coupling. 7. Attach the angled end of long hoses to the fill valve at the bottom of the dryer rear frame. Screw on the coupling by hand until it is seated on the fill valve connector. 8. Using pliers, tighten the coupling with an additional twothirds turn. Water Hose Do not overtighten, as this may damage the coupling. 9. Attach the washer hose to the other side of the “Y” connector. Screw on the hose coupling until it is tight. Using pliers, tighten the coupling with an additional two thirds turn. Do not overtighten. You can damage the coupling. 10. Check that the water faucets are on. 11. Check for leaks around the “Y” connector, faucets and hoses. English - 20 DV455_02836F-08_EN.indd 20 2013-12-12 5:11:55 REPLACEMENT PARTS AND ACCESSORIES If your dryer requires replacement parts or accessories, contact the dealer where you purchased your dryer or the SAMSUNG customer care center at 1-800-SAMSUNG (726-7864). For the proper installation, we recommend that you hire a qualified installer. To install 1. Move your dryer to an appropriate location for the installation. Consider installing the dryer and washer sideby-side, to allow access to the gas, electrical, and exhaust connections. Place two of the carton cushion-tops on the floor. Tip your dryer on its side so it lies across both cushiontops. 2. Set your dryer back in an upright position. 3. To ensure that the dryer provides the optimal drying performance, it must be level. To minimize vibrations, noise, and unwanted movement, the floor must be a perfectly level, solid surface. Level 02 INSTALLING YOUR DRYER INSTALLATION To set the dryer to the same height as the washer, fully retract the leveling feet by turning them counterclockwise, then loosen the legs by turning them clockwise. Leveling feet Retract fully Then loosen Adjust the leveling feet only as much as necessary to level the dryer. Extending the leveling feet more than necessary can cause the dryer to vibrate. 4. Review the “Exhausting” section on page 15 before installing the exhaust system. Install the ductwork from your dryer to the exhaust hood. The crimped end of the duct sections must point away from your dryer. DO NOT use sheet metal screws when assembling the ducting. These joints should be taped. Never use plastic flexible exhaust material. Tip for tight installations: install a section of the exhaust system onto your dryer before putting it in place. Use duct tape to secure this section to your dryer, but do not cover the ventilation slots at the back of the unit in dryer cabinet. English - 21 DV455_02836F-08_EN.indd 21 2013-12-12 5:11:55 Installing your dryer 5. Review the “Electrical requirements” section on page 17. BEFORE OPERATING OR TESTING, follow the grounding instructions in the “Grounding” section on page 17. WARNING U.S. MODELS: RISK OF ELECTRIC SHOCK - All U.S. models are produced for a 3-WIRE SYSTEM CONNECTION. The dryer frame is grounded to the neutral conductor at the terminal block. A 4-WIRE SYSTEM CONNECTION is required for new or remodeled construction, mobile homes, or if local codes do not permit grounding through neutral. If the 4-wire system is used, the dryer frame cannot be grounded to the neutral conductor at the terminal block. Refer to the following instructions for 3 and 4-WIRE SYSTEM CONNECTIONS. Remove the terminal block cover plate. Insert the power cord with a UL-listed strain relief through the hole provided in the cabinet near the terminal block. A strain relief must be used. Do not loosen the nuts already installed on the terminal block. Be sure they are tight. Use a 3/8” (1 cm) deep well socket. 6. Review the “Gas requirements” section on page 16. Remove the pipe thread protective cap. Apply a pipe joint compound or about 1 1/2 wraps of Teflon tape over all threaded connections. The pipe joint compound must be resistant to the actions of any liquefied petroleum gas. Connect the gas supply to your dryer. An additional fitting is required to connect the 3/4” (1.9 cm) female thread end of a flexible connector to the 3/8” (1 cm) male threaded end on the dryer. Securely tighten the gas line fitting over the threads. Turn on the gas supply. Check all gas connections for leaks using a soap solution. If bubbles appear, tighten the connections and recheck. DO NOT use an open flame to check for gas leaks. English - 22 DV455_02836F-08_EN.indd 22 2013-12-12 5:11:55 3-WIRE system connections WARNING 1 External ground connector 2 Neutral grounding wire (green/yellow) 3 Center silver-colored terminal block screw 4 Neutral wire (white or center wire) 5 3/4” (1.9 cm) UL-listed strain relief 02 INSTALLING YOUR DRYER 1. Loosen or remove the center terminal block screw. 2. Connect the neutral wire (white or center wire) of the power cord to the center, silver-colored terminal screw of the terminal block. Tighten the screw. 3. Connect the other wires to the outer terminal block screws. Tighten the screws. 4. Tighten the strain relief screws. 5. Insert the tab of the terminal block cover into your dryer’s rear panel slot. 6. Secure the cover with a hold-down screw. If converting from a 4-wire electrical system to a 3-wire, the ground strap must be reconnected to the terminal block support to ground the dryer frame to the neutral conductor. 4-WIRE system connections 1. Remove the center terminal block screw. 2. Connect the ground wire (green or unwrapped) of the power cord to the external ground conductor screw. 3. Connect the neutral wire (white or center wire) of the power cord and the appliance ground wire (green with yellow stripes) under the central screw of the terminal block. 4. Connect the other wires to the outer terminal block screws. Tighten the screws. 5. Tighten the strain relief screws. 6. Insert the tab of the terminal block cover into your dryer’s rear panel slot. 7. Secure the cover with a hold-down screw. 1 External ground connector 2 Green or bare copper wire of the power cord 3 3/4 in. (1.9 cm) UL-listed strain relief 4 Center silver-colored terminal block screw 5 Grounding wire (green/yellow) 6 Neutral wire (white or center wire) 8. With a level, check your dryer and make the necessary adjustments to the leveling legs. 9. At this time, make sure all gas connections (on gas models), exhaust and electrical connections are complete. Plug in your dryer, and check its operation by using the checklist below. 10. (GAS MODELS ONLY) The burner may not ignite initially due to air in the gas line. Allowing your dryer to operate on a heat setting will purge the line. If the gas does not ignite within 5 minutes, turn your dryer off and wait 5 minutes. Be sure the gas supply to your dryer has been turned on. In order to confirm the gas ignition, check the exhaust for heat. English - 23 DV455_02836F-08_EN.indd 23 2013-12-12 5:11:55 Installing your dryer FINAL INSTALLATION CHECKLIST • • • • • • • the dryer is plugged into an electrical outlet and is properly grounded. The exhaust ductwork is hooked up and the joints are taped. A plastic flexible duct is NOT used. Use rigid or stiff-walled flexible metal vent material. The dryer is level and is sitting firmly on the floor. Gas models – the gas is turned on with no gas leaks. Start your dryer to confirm that it runs, heats, and shuts off. DRYER EXHAUST TIPS A plastic or non-metal flexible duct presents a potential fire hazard. WARNING 1. Make sure your dryer is installed properly so it exhausts air easily. Wall Dryer Duct Exhaust 2. Use a 4” diameter rigid metal duct. Tape all joints, including at the dryer. Never use lint-trapping screws. 4” Tape Duct 3. Keep ducts as straight as possible. 4. Clean all old ducts before installing your new dryer. Be sure the vent flap opens and closes freely. Inspect and clean the exhaust system annually. Don’t let a poor exhaust system slow the drying process by: • Restricting your dryer with a poor exhaust system. • Using a plastic, thin foil, or non-metal flexible duct. • Unnecessarily using long ducts that have many elbows. • Allowing dented or clogged ducts and vent. English - 24 DV455_02836F-08_EN.indd 24 2013-12-12 5:11:56 DOOR REVERSAL 02 INSTALLING YOUR DRYER 1. Unplug the power cord. 2. Remove two door hinge screws. 3. Lift the door and remove it. 4. Remove two screws from the frame front. 5. Remove the two screws from the opposite side of the door hinge. 6. Remove the two screws from the holder lever. 7. Reassemble the two screws on the inside holes. 8. Remove a screw from the door hinge. The screw is for pre-fixing the door to the frame front. English - 25 DV455_02836F-08_EN.indd 25 2013-12-12 5:11:56 Installing your dryer 9. Reassemble the screw in the other hole. 10. Place the door on the other side and reattach it to the dryer. 11. Reattach the holder lever. 12. Reattach the screws in the remaining holes. English - 26 DV455_02836F-08_EN.indd 26 2013-12-12 5:11:56 Operating instructions, tips WARNING To reduce the risk of fi re, electric shock, or injury to persons,read the IMPORTANT SAFETY INSTRUCTIONS before operating this appliance. OVERVIEW OF THE CONTROL PANEL 1 Cycle Selector 8 6 2 3 4 5 7 8 9 10 To select a cycle, rotate the Cycle Selector dial to the desired cycle. The indicator light by the cycle name will illuminate. The Wool, Delicates, Sanitize, Bedding PLUS, Heavy Duty, Normal, Eco Normal and Perm Press cycles are Sensor Dry cycles. Sensor Dry automatically senses the moisture in the load and shuts the dryer off when the selected dryness level (very dry to damp dry) is reached. Eco Normal - This cycle reduces energy usage by up to 15% compared to the Normal Dry cycle. It adjusts the cycle time and temperature for increased efficiency. Normal - Use this cycle to dry loads such as cotton, underwear, and linen. Heavy Duty - Use this cycle to get high heat for heavy fabrics such as jeans, corduroys, or work clothes. Perm Press - Dry wrinkle-free cottons, synthetic fabrics, knits, and permanent press fabrics automatically. Bedding PLUS - For bulky items such as blankets, sheets, and comforters. Delicates - The Delicates cycle is designed to dry heat-sensitive items at a low drying temperature. Wool - For machine washable and tumble dryable wool only. 03 OPERATING INSTRUCTIONS, TIPS 1 Load should be under 3 pounds. The Wool cycle of this machine has been approved by Woolmark company for Total-Easy-Care Wool products, M0913(DV455E*) and M1007(DV455G*). Sanitize - Sanitize garments by infusing high temperature heat deep into the fabric during the drying cycle. Use this course to keep your bedding and curtains clean through sanitization. Time Dry - Time Dry allows you to select the desired cycle time in minutes. Turn the Cycle Selector dial to Time Dry, then press the Adjust Time up arrow to set the drying time. Press the arrow repeatedly to scroll through the time settings. English - 27 DV455_02836F-08_EN.indd Sec3:27 2013-12-12 5:11:56 Operating instructions, tips Quick Dry - Provides a 30 minutes drying cycle. Air Fluff - The Air Fluff cycle tumbles the load in room temperature air. Refresh - This cycle is best for smoothing out wrinkles and reducing odors from loads consisting of one to four dry items. In this cycle a small amount of water is sprayed into the dryer drum after several minutes of tumbling with heat. Wrinkle Away - The Wrinkle Away cycle removes wrinkles from clothes stored in closets, etc. It provides wrinkle release via optimized steam care. You can change the drying time.(Minimum time : 20 minutes) *For best results, load no more than 3 items. Overloading the dryer may not yield the same results. LED Display The display window shows the estimated time remaining in the cycle after the Start/Pause button is pressed. The estimated time remaining may fluctuate as the cycle progresses. The Drying light will illuminate and remain lit until the cycle is complete. When your dryer is in the cool-down phase, the Cooling light will illuminate. When your dryer is in the wrinkle prevent phase, the Wrinkle Prevent light will illuminate. When the cycle is complete, “End” will appear in the display panel until the dryer door is opened or the Power button is pushed. If your dryer is paused during a cycle, the indicator lights will blink until the Start/ Pause button is pressed. Dry Level Selection Button To select the dry level in the Normal, Heavy Duty, or other Sensor Dry cycles, press the Dry Level button. An indicator light will illuminate next to the desired dryness level. Press the button repeatedly to scroll through the settings. Larger or bulkier loads may require the Very Dry or More Dry setting for complete dryness. The Less Dry setting is best suited for lightweight fabrics or for leaving some moisture in the clothing at the end of the cycle. Damp Dry is designed to partially dry items. Use for items that lay flat or hang to dry. 4 Temp Selection Button To select the correct temperature for the load, press the Temp button. An indicator light will illuminate next to the desired temperature. Press the button repeatedly to scroll through the settings. High – For sturdy cottons or those labeled Tumble Dry. Medium – For permanent press, synthetics, lightweight cottons, or items labeled Tumble Dry Medium. Med Low – For lower heat than Medium to dry synthetic or washable knit fabrics. Low – For heat sensitive items labeled Tumble Dry Low or Tumble Dry Warm. Extra Low – Provides the lowest heated dry temperature possible. 5 Time Selection Button When using Manual Dry cycles, you can adjust the drying time by pressing the Time selection button. During the Sensor Dry cycle, the time light indicator is off because exact drying times are determined by fluctuating humidity levels. 2 3 English - 28 DV455_02836F-08_EN.indd Sec3:28 2013-12-12 5:11:57 When the cycle is complete, a chime will sound. If you selected the Wrinkle Prevent option, the chime will sound intermittently. Adjust the volume of the chime or turn it off by pressing the Signal button. Press the button repeatedly to scroll through the choices. 7 Delay Start Button Any cycle can be delayed for up to 24 hours in one-hour increments. Displayed hour indicates the time at which the cycle will be started. (Refer to the “Delay Start” section on page 30.) 8 Select Cycle Option Adjust Time – Time can be added or subtracted from the automatically set times in the Manual Dry cycles (Time Dry, Quick Dry, or Air Fluff cycles) and Wrinkle Away cycle. To add or subtract time from the cycle, press the Adjust Time arrow pad up or down until the desired time is displayed. Wrinkle Prevent -Wrinkle Prevent provides approximately 180 minutes of intermittent tumbling in unheated air at the end of the cycle to reduce wrinkling. Press the Wrinkle Prevent button to activate this feature. The indicator light above the pad will illuminate when Wrinkle Prevent is selected. The load is dry, and can be removed at any time during the Wrinkle Prevent cycle. My Cycle – Choose your favorite cycle including cycle, temp, dry level option, etc. (Refer to the “My cycle” section on page 31.) Rack Dry – Rack Dry is available in the Time Dry cycle. Temperature will be set to Extra Low only. (Refer to the “Rack Dry” section on page 32.) Mixed Load Bell - Mixed load bell - The mixed load bell that notifies you when the average dry level in a load is damp dry (80 % dried). This lets you take garments that you don’t want fully dried or that dry quickly out of the dryer early while letting others continue to dry. You can select this function in all Sensor Dry cycles except Wool, Sanitize. The dry level selections are limited to Normal Dry, More Dry, and Very Dry. 9 Start/Pause selection button Press to pause and restart programs. 10 Power button Press once to turn your dryer on. Press again to turn it off. If your dryer is left on for more than 10 minutes without any buttons being touched, the power automatically turns off. 03 OPERATING INSTRUCTIONS, TIPS 6 Signal Selection Button English - 29 DV455_02836F-08_EN.indd Sec3:29 2013-12-12 5:11:57 Operating instructions, tips Child lock Prevents children from playing with your dryer. Setting/Releasing To turn Child Lock on or off, press both the Temp. and Time buttons simultaneously for 3 seconds. Child Lock Details 1. You can turn Child Lock on while your dryer is running. 2. Once you set the Child Lock function, no button, except for the Power button, will respond until you turn off the Child Lock function. 3. The “Child Lock ” indicator will be lit. • If the dryer is powered on again, the Child Lock function stays on. • To turn off Child Lock, follow the instructions above. When other buttons, except for the Power button, do not respond, check the Child Lock indicator. If Child Lock is on, follow the instructions above to turn Child Lock off. Delay Start You can set the dryer to start your course automatically at a later time by choosing a delay time. The hour displayed indicates the time at which the course will be started. 1. Set your drying course. 2. Press the Delay Start button repeatedly until the delay time is set. 3. Press the Start/Pause button. The “Delay Start ” indicator will be lit, and the clock will begin counting down until it reaches the set time. 4. To cancel a Delay Start function, press the Power button and then turn the dryer on again. Drum Light Lights the dryer drum while the dryer is running. Turning On and Off To turn on or turn off the Drum Light, press both the Dry Level and Temp. buttons simultaneously. You can turn the Drum Light on and off while your dryer is running and when it is stopped. If you do not turn the Drum Light off 5 minutes after turning it on, the Drum Light is automatically turned off. English - 30 DV455_02836F-08_EN.indd Sec3:30 2013-12-12 5:11:57 My cycle Each cycle has certain default options that are automatically set. To see these default options, go to page 37. 4. Push the Start/Pause button. The cycle starts. 5. As the dryer moves through the cycle, it memorizes the cycle and the options. 6. To run this cycle again at a later time, press the My Cycle button. The dryer automatically selects the saved cycle and options. You can change the My Cycle settings by repeating the process above. The dryer will use these settings the next time you choose My Cycle. Smart Care 03 OPERATING INSTRUCTIONS, TIPS Lets you select, save, and then activate a customized cycle that includes Dry Level, Temp option, etc. at a later time. To use My Cycle, follow these steps: 1. Push the My Cycle button. The My Cycle indicator lights. 2. Select the cycle you want to include using the Cycle Selector Dial. 3. Select and set the options (Dry Level, Temp, etc.) This function enables you to check the status of the dryer using a smartphone. 1. Press and hold the Time and Delay Start buttons for 3 seconds when an error occurs or if you haven’t pressed any buttons on the dryer after you turned the power on. 2. When the Smart Care function is activated, the LED on the window display rotates for 2 or 3 seconds and then the error code will appear in the display panel. 3. Run the Smart Care app on your smart phone. The Smart Care function has been optimized for: Galaxy & iPhone series (cannot be supported for some models). 4. If the smart phone’s camera is focused on the display panel of the dryer, the panel and error message is automatically recognized and the error type and countermeasures are displayed on the smart phone. 5. If the smartphone fails to recognize the error code more than twice, please enter the error code displayed on the display panel of the dryer manually into the Smart Care app. Downloading the Smart Care app Download the Samsung Laundry App into your mobile phone from the Android market or Apple App store. (Search word :Samsung Smart Washer/Dryer) Precautions when using Smart Care • If light from a light bulb, fluorescent bulb, or lamp is reflected on the display panel of the washing machine, the smartphone may not be able to recognize the panel or error message easily. • If you hold the smartphone at too large an angle relative to the front of the display panel, it may not be able to recognize the error code. For best results, hold the smartphone so that the front of the panel and the smartphone are parallel or nearly parallel. English - 31 DV455_02836F-08_EN.indd Sec3:31 2013-12-12 5:11:57 Operating instructions, tips RACK DRY Installing the drying rack 1. Open the dryer door. 2. Position the drying rack in the tumbler,, placing the front lip of the drying rack on the top of the lint filter. 3. Place the rear legs in the two recessed areas of the dryer’s back wall, and then push down the middle of the drying rack to fix in place. 4. Place the items to be dried on the rack, leaving space between them so air can circulate. 5. Close the dryer door. 6. Press the Rack Dry button in the Time Dry cycle and then select the time according to the amount of moisture and the weight of the items. The drying rack can be also used at Air Fluff cycle. Drying Rack Door SUGGESTED ITEMS SUGGESTED TEMP. SETTINGS Washable sweaters (block to shape and lay flat on rack) Extra Low (Time Dry cycle) Stuffed toys (cotton or polyester fiberfilled) Extra Low (Time Dry cycle) Stuffed toys (foam or rubber-filled) Air Fluff Foam rubber pillows Air Fluff Sneakers Air Fluff Drying foam rubber, plastic, or rubber on a heat setting may cause damage to the items and lead to a fire hazard. English - 32 DV455_02836F-08_EN.indd Sec3:32 2013-12-12 5:11:58 CLEAN THE LINT FILTER After each load. To shorten drying time. To operate more energy efficiently. Door Do not operate your dryer without the lint filter in place. Frame Front Filter LOAD THE DRYER PROPERLY • • • • Place only one washload in your dryer at a time. Mixed loads of heavy and lightweight fabrics will dry differently, which may result in lightweight fabrics being dry while heavy fabrics remain damp at the end of a drying cycle. Add one or more similar items to your dryer when only one or two articles of clothing need drying. This improves the tumbling action and drying efficiency. Overloading restricts tumbling action, resulting in uneven drying as well as excessive wrinkling of some fabrics. 03 OPERATING INSTRUCTIONS, TIPS • • • GETTING STARTED 1. 2. 3. 4. 5. 6. Load your dryer loosely – DO NOT overload. Close the door. Select the appropriate cycle and options for the load. Press the Start/Pause button. The dryer indicator light will illuminate. The estimated cycle time will appear in the display. The time may fluctuate as humidity levels fluctuate in the dryer. • When the cycle is complete, “End” will appear in the display. • Pressing Power cancels the cycle and stops your dryer. • The Drying, Cooling, and Wrinkle Prevent indicator lights will illuminate during those portions of the cycle. Do not place anything on top of your dryer while it is running. WARNING English - 33 DV455_02836F-08_EN.indd Sec3:33 2013-12-12 5:11:58 Operating instructions, tips VENT SENSOR Your Samsung dryer is equipped with a Vent Sensor, which detects and notifies you when it is time to clean the ductwork. Keep your dryer safe and efficient by cleaning the ducts when prompted. The Vent Sensor detects any duct blockages You can figure out whether there is a duct blockage from the “Vent Sensor digital display. Level Message Status ” lamp of the Solution 0 The “Vent Sensor lamp is turned off. ” The ductwork is free from blockages. - 1 The “Vent Sensor lamp illuminates. ” When a part of the duct or the lint filter is blocked by lint or a foreign object. When the resistance is high because the duct is too long or bent. Check the duct connection and shorten the duct and straighten it if necessary. Check the lint filter or the duct and clean it if necessary. 2 The “Vent Sensor lamp blinks. ” When the duct is blocked by lint or a foreign object. When the resistance is very high because the duct is too long or bent excessively. Check the duct connection and shorten the duct and straighten it if necessary. Check the lint filter or the duct and clean it as soon as possible. In the LEVEL 2 state, this lamp blinks for 3 hours after the completion of the cycle. (If the wrinkle prevention function is activated, this message is displayed for up to 3 hours.) If the power button is pressed or the door is opened, the power is immediately turned off. For more information about the duct installation, please refer to the “Ducting requirements” section on page 11. • Although the dryer is available even if the blockage message is displayed, the drying time may be extended. • If the LEVEL 1 message is displayed the first time the dryer is run after the installation, check the connection and clean the duct. If the LEVEL 1 message appears even after you have checked and cleaned the ducts, this may indicate that there are some restrictions of the duct due to the length, condition, etc. If this occurs, you can use the dryer normally and no countermeasures need to be taken. However, the drying time may be extended or the drying performance may be degraded. English - 34 DV455_02836F-08_EN.indd Sec3:34 2013-12-12 5:11:58 SETTING UP SMART CONTROL AND SMART MONITORING Connect a wired/wireless router or modem and the dryer through a wireless connection, connect to www. samsungsmartappliance.com and then register the dryer with the Smart Control, the Smart Monitoring service. Any actions on your dryer will turn off the Smart Control Function.(Opening Door, Tapping the LCD panel, Pushing Buttons, Etc...) This product does not contain a wireless router. Configuring wireless router/modem • • • • • This product supports DHCP (Dynamic Host Configuration Protocol). If you wants to use an existing wireless router/modem, you must turn on the router/modem’s DHCP server or function. Set the channel for the connection with the wireless router/modem to a channel that is not being used. The dryer supports the WEP, TKIP or TKIP AES encryption types only. Other Wi-Fi encryption types are not supported. The quality of the wireless network may be affected by the surrounding environment. If your Internet service provider has registered and fixed the MAC address (the unique identification number of a device) of your PC or modem, you may not be able to connect the dryer to the Internet. Please ask your Internet service provider about the procedures to connect a device (e.g. dryer) other than a computer to the Internet. If your Internet service provider requires an ID and password to connect to the Internet, you may not be able to connect the dryer to the Internet. In this case, you have to enter the ID and password to connect to the Internet. You may not be able to connect to the Internet due to a firewall. In this case, ask your Internet service provider for assistance.If you cannot connect the dryer to the Internet even after contacting your Internet service provider, please contact a Samsung Electronics dealer or service center. 03 OPERATING INSTRUCTIONS, TIPS The Smart Control function of the electronic model contains the Smart Monitoring function of gas model, Check before installation • • • • For the procedures to install a normal wired/wireless sharer, refer to the user manual of the corresponding wireless router/modem. Samsung dryers only support Wi-Fi 2.4Ghz. Samsung dryers support IEEE 802.11 b/g/n and Wi-Fi Direct (IEEE802.11n is recommended). If the wireless router/modem is not Wi-Fi certified, it cannot be connected to the dryer. English - 35 DV455_02836F-08_EN.indd Sec3:35 2013-12-12 5:11:59 Operating instructions, tips Connecting to the network using the WPS setting Your Samsung dryer uses Wi-Fi Protected Setup/Push Button Configuration WPS(PBC) as the primary method of connecting to a wireless router or modem. If your router or modem is WPS compliant and has a WPS button, you can easily connect your dryer to your router/ modem. 1. Press and hold both the Temp. and Start/Pause buttons for 3 seconds. 2. Turn the Cycle Selector until “UP” is displayed on the display panel, and then press the Start/Pause button. If the connection is not established within 5 minutes, “FUP” is displayed on the display panel. 3. Press and hold the WPS button on the wireless router/ modem within 120 seconds to run the WPS function. If the WPS function runs, the wireless router/modem automatically fetches the necessary information from the dryer and the dryer is automatically connected to the Internet through the wired/wireless router/modem. • • • CAUTION • The way the WPS function runs on your wireless router/modem may differ depending on the manufacturer. Refer to the user manual of your router/modem for details. Even after the WPS setup is complete, it may take some time until the actual connection is established and an IP address is allocated through through DHCP (up to 5 minutes). Note that if you use a wireless router/modem that is not WPS-certified, the dryer may not be connected through Wi-Fi or another device that was connected to the wireless router/modem may be disconnected. Please note that for some wireless router/modem, if you press and hold the WPS button for some time, the settings of the router/modem may be reset. 4. If the dryer and the wireless router/modem are properly connected, the indicator blinks on the display panel for 30 seconds. 5. Press and hold the Signal On/Off button for 3 seconds to finish the Smart Control connection setup. When the setup is completed normally, the indicator blinks on the display panel accompanied by a beeping sound. If you press and hold the Signal On/Off button for 3 seconds when the dryer and the wired/wireless sharer are not properly connected, the invalid button sound is heard and the Smart Control connection setup is not completed. English - 36 DV455_02836F-08_EN.indd Sec3:36 2013-12-12 5:11:59 Connecting to the network using the Samsung Laundry App 03 OPERATING INSTRUCTIONS, TIPS 1. Press and hold both the Temp. and Start/Pause buttons for 3 seconds. 2. If “AP” is displayed on the display panel, press the Start/Pause button. If the connection is not established within 5 minutes, “FAP” is displayed on the display panel. English - 37 DV455_02836F-08_EN.indd Sec3:37 2013-12-12 5:12:00 Operating instructions, tips USING THE MOBILE APP (ANDROID) Downloading the phone application 1. Touch and bring up the applications menu on your phone. Then find and open the “Play Store” icon. 2. Once the “Play Store” has been open, do a search. 3. Once the search box appears type in “Samsung Smart Washer/Dryer”. English - 38 DV455_02836F-08_EN.indd Sec3:38 2013-12-12 5:12:01 4. Once the search is complete the App “SAMSUNG Smart Washer/Dryer” will be displayed. You need to download this App to your phone. 03 OPERATING INSTRUCTIONS, TIPS Make sure the app changes from “Free” to “Installed” 5. Once the phone app has been downloaded to your phone, you are now ready to set up the dryer Wi-Fi control. STEP 1 Figure 1 Figure 2 You need to first press the power button to activate the your machine. You can activate the machine to any dry cycle. (See figures 1~2) Figure 4 After you activate the machine, press the Temp & Start/Pause buttons simultaneously for 3 seconds. After 3 seconds the “AP” menu appears on the LED screen. (See figures 3~4) STEP 2 Figure 3 English - 39 DV455_02836F-08_EN.indd Sec3:39 2013-12-12 5:12:02 Operating instructions, tips STEP 3 After the AP menu appears on the LED screen, wait approximately 1 minute and press the Start/Pause button. Once the Start/Pause button is pressed the “AP” displayed on the LED screen should start to blink. It will take a minute or so for the Wi-Fi module to get ready. So if the you press the Start/Pause and the “AP” doesn’t blink try again after a moment. (See figure 5) Figure 5 STEP 4 Figure 6 Figure 7 Once the “AP” is blinking go to your mobile phone and press the “Settings” icon. Once the settings menu appears press the wireless and network section. (See figures 5~7) STEP 5 Figure 8 Figure 9 After selecting the wireless and network select Wi-Fi setting. Then turn on the Wi-Fi. (See figures 8~9) English - 40 DV455_02836F-08_EN.indd Sec3:40 2013-12-12 5:12:02 STEP 6 Once the list of available networks appears, select the network to be used and enter the password if necessary. Once you are connected to the selected network go back to the applications screen on your mobile phone. Once you are in the phones application screen touch the Samsung icon “SAMSUNG Smart Washer/Dryer” that was downloaded at the beginning of this process. 03 OPERATING INSTRUCTIONS, TIPS STEP 7 STEP 8 After opening the Samsung app, select the “Connection Setup”. English - 41 DV455_02836F-08_EN.indd Sec3:41 2013-12-12 5:12:02 Operating instructions, tips STEP 9 Once the mobile app is open select the “Setting Start” key. The Wi-Fi indicator will blink on & off on the phone several times. STEP 10 Once the unit starts connecting the phone will load the AP list. When the AP list is loaded you need to select the network. Please make sure the app and smart phone are connected to the same network/wireless AP. STEP 11 After selecting the network you need to enter your password. Once you enter your password select “Connect”. The unit start setting up the network. This process delivers the connection information of the “AP” that is connected to the mobile phone to the product. English - 42 DV455_02836F-08_EN.indd Sec3:42 2013-12-12 5:12:03 STEP 12 STEP 13 After the phone is connected to the machine, press the Temp & Start/Pause buttons simultaneously for 3 seconds. After 3 seconds the original dry cycle will be displayed on the LED screen. 03 OPERATING INSTRUCTIONS, TIPS When the network is setup the unit will display “Transfer complete”. After the transfer is completed select “Confirm”. The unit will then display “oAP”. The phone is now connected to the machine through the network. STEP 14 After the dry cycle has been displayed wait approximately 1 minute. You will then see the Wi-Fi icon start to blink. STEP 15 Once the Wi-Fi icon is displayed press and hold the “Signal” for 3 seconds. The Wi-Fi icon will stop blinking. The machine is now ready to run the device certification. English - 43 DV455_02836F-08_EN.indd Sec3:43 2013-12-12 5:12:03 Operating instructions, tips Device certification 1. The “Device Certification” only needs to be run with the initial setup. Touch the “Indoor Control” tab to search for the dryer’s name. Once the dryer’s name is displayed touch tab. Figure 1 Figure 2 2. Verify the that the Wi-Fi icon is not blinking. Press the Temp & Start/ Pause buttons simultaneously for 3 seconds. “AP” will now be displayed. Figure 3 3. After you touch the dryer name tab you need to touch the confirm tab to proceed with the certification. Figure 4 English - 44 DV455_02836F-08_EN.indd Sec3:44 2013-12-12 5:12:04 Figure 5 5. Follow the instructions displayed on the phone to start the dryer setup. Figure 6 6. Once the “AP” is displayed you need to turn the knob counter clockwise until “PS” is displayed. After the “PS” is displayed press the Start/Pause button. Figure 7 03 OPERATING INSTRUCTIONS, TIPS 4. After you touch the confirm tab you will now start preparing the certification. English - 45 DV455_02836F-08_EN.indd Sec3:45 2013-12-12 5:12:05 Operating instructions, tips 7. Once the Start/Pause button is pressed the “PS” will start to blink. Once it starts blinking the phone will automatically start to connect. Figure 8 8. After the “PS” is displayed, press the Temp & Start/Pause buttons simultaneously for 3 seconds. Please wait until the Smart Control Enabled icon [ ] starts blinking. If the Smart Control enabled icon starts blinking, press and hold the Signal on/off button for 3 seconds to activate the Smart Control. If the Smart Control is enabled, the Smart Control enabled icon [ ] is turned on. Figure 9 9. Press the dryer name tab to connect to the dryer. Figure 10 English - 46 DV455_02836F-08_EN.indd Sec3:46 2013-12-12 5:12:05 Figure 11 11. The Device Certification is now completed and the dryer is connected to your Smartphone. Figure 12 03 OPERATING INSTRUCTIONS, TIPS 10. The dryer is now connected. Touch the “Course button” and you can now control the dryer from your phone. English - 47 DV455_02836F-08_EN.indd Sec3:47 2013-12-12 5:12:05 Operating instructions, tips Using the mobile app STEP 1 Check to make sure the Wi-Fi icon is not blinking. If the icon is blinking press and hold the Signal button until the icon stops blinking. Once the door lock icon is activated the unit is ready. Now press the “SAMSUNG Smart Washer/Dryer” icon. STEP 2 After you touch the “SAMSUNG Smart Washer/Dryer” icon the will search for the dryer. Once the phone connects the dryer, the dryer’s name, or “MAC” will appear. Now touch the dryer name. STEP 3 Once the connection is established , touch the “Course button”. The unit should display the “Choose Cycle” screen. Once Choose Cycle screen is displayed touch the “Start” tab at the bottom left. English - 48 DV455_02836F-08_EN.indd Sec3:48 2013-12-12 5:12:06 STEP 4 03 OPERATING INSTRUCTIONS, TIPS Now touch the “Start” button and activate the dry cycle. You can monitor the dry cycle to check the status of the cycle. Once the cycle is finished the phone will display “Cycle completes”. English - 49 DV455_02836F-08_EN.indd Sec3:49 2013-12-12 5:12:06 Operating instructions, tips USING THE MOBILE APP (IOS) Downloading the phone application 1. Find and open the “App Store” icon. 2. Once the “App Store” has been open, do a search. 3. Once the search box appears type in “SAMSUNG Smart Washer/Dryer”. English - 50 DV455_02836F-08_EN.indd Sec3:50 2013-12-12 5:12:07 4. Once the search is complete the App “SAMSUNG Smart Washer/Dryer” will be displayed. You need to download this App to your phone. 03 OPERATING INSTRUCTIONS, TIPS Make sure the app changes from “Free” to “Installed” 5. Once the phone app has been downloaded to your phone, you are now ready to set up the dryer Wi-Fi control. STEP 1 Figure 1 Figure 2 You need to first press the power button to activate the your machine. You can activate the machine to any dry cycle. (See figures 1~2) Figure 4 After you activate the machine, press the Temp & Start/Pause buttons simultaneously for 3 seconds. After 3 seconds the “AP” menu appears on the LED screen. (See figures 3~4) STEP 2 Figure 3 English - 51 DV455_02836F-08_EN.indd Sec3:51 2013-12-12 5:12:07 Operating instructions, tips STEP 3 After the AP menu appears on the LED screen, wait approximately 1 minute and press the Start/Pause button. Once the Start/Pause button is pressed the “AP” displayed on the LED screen should start to blink. It will take a minute or so for the Wi-Fi module to get ready. So if the you press the Start/Pause and the “AP” doesn’t blink try again after a moment. (See figure 5) Figure 5 STEP 4 Figure 6 Figure 7 Once the “AP” is blinking go to your mobile phone and press the “Settings” icon. Once the settings menu appears press the Wi-Fi icon. (See figures 5~7) Figure 9 You can see “SMARTWASHER” in the Wi-Fi list. Select the SMARTWASHER and input the password (WASHER2012). You have to input as Capital. After typing the password, select the join button. (See figures 8~9) STEP 5 Figure 8 STEP 6 Once you are connected to the selected network go back to the applications screen on your mobile phone. Once you are in the phones application screen touch the Samsung icon “SAMSUNG Smart Washer/Dryer” that was downloaded at the beginning of this process. English - 52 DV455_02836F-08_EN.indd Sec3:52 2013-12-12 5:12:07 STEP 7 After opening the Samsung app, select the “Connection Setup”. Tap the “Setting Start” and input your SSID, Authentication Type, Encryption Type, password of AP. This process delivers the connection information of the “AP” that is connected to the mobile phone to the product. 03 OPERATING INSTRUCTIONS, TIPS STEP 8 Check the security option of the router and then set the wireless network configuration again as below. - - select the Security mode : WPA and Encryption:TKIP select the Security mode : WPA2 and Encryption:AES refer to wireless router manual for the security option of the wireless router. STEP 9 When the network is setup the unit will display “Transfer complete”. After the transfer is completed select “Confirm”. The unit will then display “oAP”. The phone is now connected to the machine through the network. English - 53 DV455_02836F-08_EN.indd Sec3:53 2013-12-12 5:12:08 Operating instructions, tips STEP 10 After the phone is connected to the machine, press the Temp & Start/Pause buttons simultaneously for 3 seconds. After 3 seconds the original dry cycle will be displayed on the LED screen. STEP 11 After the dry cycle has been displayed wait approximately 1 minute. You will then see the Wi-Fi icon start to blink. STEP 12 Once the Wi-Fi icon is displayed press and hold the “Signal” for 3 seconds. The Wi-Fi icon will stop blinking. The machine is now ready to run the device certification. English - 54 DV455_02836F-08_EN.indd Sec3:54 2013-12-12 5:12:09 Device certification Figure 1 Figure 2 2. Verify the that the Wi-Fi icon is not blinking. Press the Temp & Start/ Pause buttons simultaneously for 3 seconds. “AP” will now be displayed. Figure 3 3. After you touch the dryer name tab you need to touch the confirm tab to proceed with the certification. Figure 4 4. After you touch the confirm tab you will now start preparing the certification. Figure 5 03 OPERATING INSTRUCTIONS, TIPS 1. The “Device Certification” only needs to be run with the initial setup. Touch the “Indoor Control” tab to search for the dryer’s name. Once the dryer’s name is displayed touch tab. English - 55 DV455_02836F-08_EN.indd Sec3:55 2013-12-12 5:12:09 Operating instructions, tips 5. Follow the instructions displayed on the phone to start the dryer setup. Figure 6 6. Once the “AP” is displayed you need to turn the knob counter clockwise until “PS” is displayed. After the “PS” is displayed press the Start/Pause button. Figure 7 7. Once the Start/Pause button is pressed the “PS” will start to blink. Once it starts blinking the phone will automatically start to connect. Figure 8 8. After the “PS” is displayed, press the Temp & Start/Pause buttons simultaneously for 3 seconds. Please wait until the Smart Control Enabled icon [ ] starts blinking. If the Smart Control enabled icon starts blinking, press and hold the Signal on/off button for 3 seconds to activate the Smart Control. If the Smart Control is enabled, the Smart Control enabled icon [ ] is turned on. Figure 9 English - 56 DV455_02836F-08_EN.indd Sec3:56 2013-12-12 5:12:10 Figure 10 10. The dryer is now connected. Touch the “Course button” and you can now control the dryer from your phone. Figure 11 11. The Device Certification is now completed and the dryer is connected to your Smartphone. Figure 12 03 OPERATING INSTRUCTIONS, TIPS 9. Press the dryer name tab to connect to the dryer. English - 57 DV455_02836F-08_EN.indd Sec3:57 2013-12-12 5:12:10 Operating instructions, tips Using the mobile app STEP 1 Check to make sure the Wi-Fi icon is not blinking. If the icon is blinking press and hold the Signal button until the icon stops blinking. Once the door lock icon is activated the unit is ready. Now press the “SAMSUNG Smart Washer/Dryer” icon. STEP 2 After you touch the “SAMSUNG Smart Washer/Dryer” icon the will search for the dryer. Once the phone connects the dryer, the dryer’s name, or “MAC” will appear. Now touch the dryer name. STEP 3 Once the connection is established , touch the “Course button”. The unit should display the “Choose Cycle” screen. Once Choose Cycle screen is displayed touch the “Start” tab. English - 58 DV455_02836F-08_EN.indd Sec3:58 2013-12-12 5:12:11 STEP 4 03 OPERATING INSTRUCTIONS, TIPS Now touch the “Start” button and activate the wash cycle. You can monitor the wash cycle to check the status of the cycle. Once the cycle is finished the phone will display “Cycle Completes”. English - 59 DV455_02836F-08_EN.indd Sec3:59 2013-12-12 5:12:11 Operating instructions, tips REGISTERING YOUR DRYER 1. Access Samsung Smart appliance website. (http://www.samsungsmartappliance.com) 2. Enter your User ID and Password to log in. If you don’t have an account, press “Create a Samsung account” and fill in the form to become a member. 3. Select “My page” “My page”. 4. Select “Add device”. 5. Find the MAC number on your dryer and enter it into the device page. On your dryer: 1) Press and hold both the Temp., and Start/Pause buttons for 3 seconds. 2) Turn the Cycle Selector until “Ad” is displayed on the display panel and press the Start/Pause button. The MAC address appears. 3) Find out 12 Hexadecimal Address, pressing Start/Pause buttons for 2 digit & text. 6. Click “Certify device”. English - 60 DV455_02836F-08_EN.indd Sec3:60 2013-12-12 5:12:11 03 OPERATING INSTRUCTIONS, TIPS 7. Press and hold both the Temp., and Start/Pause buttons for 3 seconds. 8. Turn the Cycle Selector until PS is displayed on the display panel, and then the Start/Pause button. 9. When certify device checking window appears, click “Ok”. If the dryer you are registering is already registered by other users, a window will come on asking whether you want to delete the usage authority of the existing users or not. 10. After the registration of the dryer is completed, you can view the registered dryer on the device information list. Mac Address : Mapping Table of 7-Segment 0 1 2 3 4 5 A B C D E F Mac Label 6 7 8 9 90A4DE89B2D3 Mac Address Example 7-Segment English - 61 DV455_02836F-08_EN.indd Sec3:61 2013-12-12 5:12:12 Care and Cleaning CONTROL PANEL Clean with a soft, damp cloth. Do not use abrasive substances. Do not spray cleaners directly on the panel. The control panel finish may be damaged by some laundry pre-treatment soil and stain remover products. Apply such products away from your dryer and wipe up any spills or overspray immediately. TUMBLER Remove any stains caused by crayon, ink, or fabric dye (from new items such as towels or jeans) with an all-purpose cleaner. Tumble old towels or rags to remove any remaining stain or cleaning substance. Once these steps are followed, stains may still be visible, but should not transfer to subsequent loads. STAINLESS STEEL TUMBLER To clean the stainless steel tumbler, use a damp cloth with a mild, non-abrasive cleaner suitable for stainless steel surfaces. Remove the cleaner residue and dry with a clean cloth. DRYER EXTERIOR Clean with a soft, damp cloth. Do not use abrasive substances. Protect the surface from sharp objects. Do not place any heavy or sharp objects or a detergent box on the dryer. Keep them on the purchased pedestal or in a separate storage box. This may scratch or damage the top cover of the dryer. Since the entire dryer has a high-gloss finish, the surface can be scratched or damaged. Avoid scratching or damaging the surface when using the dryer. DRYER EXHAUST SYSTEM Should be inspected and cleaned yearly to maintain optimum performance. The outside exhaust hood should be cleaned more frequently to ensure proper operation. English - 62 DV455_02836F-08_EN.indd Sec5:62 2013-12-12 5:12:12 Special laundry tips SPECIAL LAUNDRY TIPS Please follow the care label or manufacturer’s instructions for drying special items. If care label instructions are not available, use the following information as a guide. • • • Follow the care label instructions or dry on the Bedding Plus. Make sure the item is thoroughly dry before using or storing. May require repositioning to ensure even drying. Blankets • Use Normal cycle and dry only one blanket at a time for best tumbling action. Make sure the item is thoroughly dry before using or storing. • Curtains & Draperies • • Use the Perm Press cycle and Low or Extra Low temperature to help minimize wrinkling. Dry these in small loads for best results and remove as soon as possible. Cloth Diapers • Use the Normal cycle and the High temperature settings for soft,fluffy diapers. Down–filled Items (jackets, sleeping bags, comforters, etc.) • • Use the Normal cycle and the Low or Extra Low temperature setting. Adding a couple of dry towels shortens drying time and absorbs moisture. Foam Rubber (rug backs, stuffed toys, shoulder pads, etc.) • • DO NOT dry on a heat setting. Use the Air Fluff cycle (no heat). WARNING – Drying a rubber item with heat may damage it or be a fire hazard. Pillows • • Use the Normal cycle. Add a couple of dry towels and a pair of clean sneakers to help the tumbling action and to fluff the item. DO NOT dry kapok or foam pillows in dryer. Use the Air Fluff cycle. Plastics (shower curtains, outdoor furniture covers, etc.) • • 05 SPECIAL LAUNDRY TIPS Bedspreads & Comforters Use the Air Fluff cycle or the Time Dry cycle and the Low or Extra Low temperature settings depending on the care label instructions. THINGS TO AVOID PUTTING IN THE DRYER: • Fiberglass items (curtains, draperies, etc.). • Woolens, unless recommended on the label. • Vegetable or cooking oil-soaked items. English - 63 DV455_02836F-08_EN.indd Sec4:63 2013-12-12 5:12:12 Troubleshooting CHECK THESE POINTS IF YOUR DRYER… PROBLEM SOLUTION Doesn’t run. • • • • Make sure the door is latched shut. Be sure the power cord is plugged into a live electrical outlet. Check the home’s circuit breaker and fuses. Press the Start/Pause button again if the door is opened during the cycle. Doesn’t heat. • • • • • Check the home’s circuit breaker and fuses. Select a heat setting other than Air Fluff. On a gas dryer, check that the gas supply is on. Clean the lint filter and exhaust duct. Dryer may have moved into the cool-down phase of the cycle. Doesn’t dry. • • Check all of the above, plus... Be sure the exhaust hood outside the home can open and close freely. Check exhaust system for lint buildup. Ducting should be inspected and cleaned annually. Use a 4” rigid metal exhaust duct. Do not overload. 1 wash load = 1 dryer load. Sort heavy items from lightweight items. Large, bulky items like blankets or comforters may require repositioning to ensure even drying. Check that the dryer is draining properly to extract adequate water from the load. Load may be too small to tumble properly. Add a few towels. • • • • • • • Is noisy. • • • • Dries unevenly. • • Has an odor. • • Check the load for objects such as coins, loose buttons, nails, etc. Remove promptly. It is normal to hear the dryer gas valve or heating element cycle on and off during the drying cycle. Be sure the dryer is leveled properly as outlined in the installation instruction. It is normal for the dryer to hum due to the high velocity of air moving through the dryer drum and exhaust system. Seams, pockets, and other similarly heavy areas may not be completely dry when the rest of the load has reached the selected dryness level. This is normal. Select the Very Dry setting if desired. If one heavy item is dried with a lightweight load, such as one towel with sheets, it is possible that the heavy item will not be completely dry when the rest of the load has reached the selected dryness level. Sort heavy items from lightweight items for best drying results. Household odors from painting, varnishing, strong cleaners, etc. may enter the dryer with the surrounding room air. This is normal as the dryer draws the air from the room, heats it, pulls it through the tumbler, and exhausts it outside. When these odors linger in the air, ventilate the room completely before using the dryer. English - 64 DV455_02836F-08_EN.indd Sec6:64 2013-12-12 5:12:13 PROBLEM SOLUTION Shuts off before load is dry • • • • • • Make sure the lint filter is cleaned before every load. With some loads that produce high amounts of lint, it may be necessary to clean the filter during the cycle. Some fabrics are lint producers (for example, a fuzzy white cotton towel) and they should be dried separately from clothes that are lint trappers (for example, a pair of lack linen pants) Divide larger loads into smaller loads for drying Check pockets thoroughly before washing and drying clothes. Garments still wrinkled after • Wrinkle-Care • Small loads of 1 to 4 items work best. Load fewer garments.Load similar-type garments. Odors remain in clothing after Refresh. • Fabrics containing strong odors should be washed in a normal cycle. Water drips from nozzle when Steam-Care starts • This is steam condensation. The dripping water will stop after a short time. Sprayed water is not visible during Steam-Care • Sprayed water is difficult to see when the door is closed 06 TROUBLESHOOTING Lint on clothes Dryer load is too small. Add more items or a few towels and restart the cycle. Dryer load is too large. Remove some items and restart the dryer. English - 65 DV455_02836F-08_EN.indd Sec6:65 2013-12-12 5:12:13 Troubleshooting INFORMATION CODES Information codes may be displayed to help you better understand what is occurring with your Dryer. ERROR DISPLAY MEANING SOLUTION tE The thermistor resistance is very low or high. Clean the screen or vent. If the problem continues, call for service. tE3 The resistance of the thermistor for the vent blockage detection is very low or very high. Clean the screen or vent If the problem continues, call for service. HE Invalid heating Temp when the dryer is running. Call for service. dE Running the dryer with door open Clean the door and then restart. If the problem continues, call for service. bE2 Invalid state of key. Circuit short for 30 secs. Make sure a button is NOT being pressed continuously. Try restarting the cycle. If the problem continue, call for service. FE Invalid power source frequency Try restarting the cycle. If the problem continues, call for service. 2E Electronic Control Problem (Over Voltage Error) Call for service. AE Electronic Control Problem (Communication Error) Call for service. Et Invalid state of Eeprom communication Call for service. AE4 A communication error between the Wi-Fi PBA and the MAIN PBA Call customer service. AE3 A A communication error between the DR Modem and the MAIN PBA Call customer service. AE5 A A communication error between the LCD PBA and the MAIN PBA Call customer service. Invalid door state for more than 256 milliseconds. Call for service. dF For any codes not listed above, call 1-800-SAMSUNG (726-7864) English - 66 DV455_02836F-08_EN.indd Sec6:66 2013-12-12 5:12:13 NETWORK SETUP Q&A ANSWER The washer or dryer is not found in the smartphone app. • • • • • The washer or dryer can’t find • the AP (access point). • • • • There are more than one washer or dryer in the house. Do I have to install an AP for each of them? • • • Check the power status of the access point(AP). Check if the smartphone is connected with Wi-Fi. Check if the Wi-Fi function of the washer or dryer is turned on. To refresh the screen, press “Configure” again. If the AP is installed too far away from the washer or dryer, the strength of the Wi-Fi signal may be weak. In this case, move the AP closer to the washer or dryer. Check the power status of the AP. Check if the Wi-Fi function of the washer or dryer is turned on. To refresh the screen, press “Configure” again. If the AP is installed too far away from the washer or dryer, the strength of the Wi-Fi signal may be weak. In this case, move the AP closer to the washer or dryer. Ensure that the number of the displayed antenna bars is at least 3. If the strength of the AP is low, the washer or dryer may not find it. Use a high performance AP if available. You can install only one AP. I you want to one AP for each of the washer and dryer, select the corresponding AP for each of the products in the “Smart Washer” app. When both a washer and dryer are installed, they can be controlled through one AP. What kind of AP (access poin) • should I use? • • Since the washer or dryer is controlled through the AP from the inside or outside of the house, we recommend a high performance AP. Use an AP with Wi-Fi certification mark. Since an AP with 2 or more antennas provides better performance, we recommend purchasing a wireless AP with 2 or more antennas. How can I check if the AP is out of order? Connect to the AP on a smartphone and check if you can connect to the Internet. If you can connect to the Internet, the AP is normal. Check if the LEDs on the AP are blinking. If all the LEDs are turned off, it indicates that the power is turned off. If the AP doesn’t seem to be working properly, request after-sales service. • • • 06 TROUBLESHOOTING QUESTION I do not have a PC. Can I use the indoor and outdoor control features? • If the Internet can be accessed inside of the house, the feature is available. However, you have to sign up on the Samsung web site and resgister the product. How many users can control a washer or dryer? • Multiple users can control the washer or dryer only if the “Smart Washer” app is authenticated, English - 67 DV455_02836F-08_EN.indd Sec6:67 2013-12-12 5:12:13 Troubleshooting QUESTION ANSWER What should I do to get the strongest Wi-Fi signal? • • • • • Install the AP near the washer or dryer is recommended. You can check the signal strength through the setup screen of the washer or dryer or a smartphone. Since network performance is seriously affected by a door or steel wall, install the washer or dryer in an open place. If there is door in front of the installed product, open the door when using the product. Do not place an object made with steel or glass in front of the front LCD of the washer since it blocks the radio signal. Note that the radio signal may be weakened or interfered with and the communication with the smartphone may fail when a microwave oven is used in the house. Install the washer or dryer so that the front of the product faces the AP if available. How can I connect the washer or dryer with a smartphone stably? • When the signal strenth that is displayed on the LCD of the washer or dryer is weak, the control may fail. For stable operation, the measures of signal strength should be as follows: • At least 3 antenna bars should be displayed on the LCD of the washer or dryer. • At least 3 antenna bars for the Wi-Fi connection should be displayed on the smartphone. • When the signal strenth is measured with a smartphone app that shows the Wi-Fi signal strength, the signal strength should be stronger than -65 dBm. (E.g. -60 dBm and -50 dBm are stronger than -65 dBm.) What should I have to do when the number of the antenna bars that are displayed on the LCD of the washer or dryer is 1? • When the signal strenth that is displayed on the LCD of the washer or dryer is weak, the control may fail. In this case, take the following measures for normal operation. • Move the AP closer to the washer or dryer. (At least 3 antenna bars should be dislayed in the network setup of the washer for proper operation.) • Because an old AP may provide lower performance, use a new AP if available. • Position the antenna of the AP so that the radio signal is more easily propagated. English - 68 DV455_02836F-08_EN.indd Sec6:68 2013-12-12 5:12:13 Appendix FABRIC CARE CHART Wash Cycle Special Instructions Warning Symbols for Laundering Normal Line Dry/ Hang to Dry Do Not Wash Permanent Press / Wrinkle Resistant / Wrinkle Control Drip Dry Do Not Wring Gentle/Delicates Dry Flat Do Not Bleach Hand Wash Heat Setting Do Not Tumble Dry High No Steam (added to iron) Hot Medium Do Not Iron Warm Low Cold Any Heat Dry Clean No Heat/Air Do Not Dry Clean Water Temperature** Bleach Any Bleach (when needed) Iron-Dry or Steam Temperatures 07 APPENDIX The following symbols provide garment care direction. The Clothing care labels include symbols for washing, bleaching, drying, and ironing, or dry cleaning when necessary. The use of symbols ensures consistency among garment manufacturers of domestic and imported items. Follow care label directions to maximize garment life and reduce laundering problems. Dryclean Line Dry/ Hang to Dry Only Non-Chlorine (color-safe) Bleach (when needed) High Drip Dry Tumble Dry Cycle Medium Dry Flat Low Normal Permanent Press/ Wrinkle Resistant/ Wrinkle Control Gentle/Delicates ** The dot symbols represent appropriate wash water temperatures for various items. The temperature range for Hot is 105 – 125 °F (41 – 52 °C), for Warm 85 – 105 °F (29 – 41 °C) and for Cold 60 – 85 °F (16 – 29 °C). (Wash water temperature must be a minimum of 60 °F (16 °C) for detergent activation and effective cleaning.) English - 69 DV455_02836F-08_EN.indd Sec7:69 2013-12-12 5:12:13 Appendix PROTECTING THE ENVIRONMENT This appliance is manufactured from recyclable materials. If you decide to dispose of this appliance, please observe local waste disposal regulations. Cut off the power cord so that the appliance cannot be connected to a power source. Remove the door so that animals and small children cannot get trapped inside the appliance. DECLARATION OF CONFORMITY This appliance complies with UL2158. SPECIFICATIONS C D A B TYPE DIMENSIONS FRONT LOADING DRYER A. Height 39” (99.0 cm) B. Width 27” (68.6 cm) C. Depth with door open 90° 51.65” (131.2 cm) D. Depth 32.28” (82.0 cm) WEIGHT 127.8 lb (57 Kg) HEATER RATING 5300 W (Elec.) 22000 BTU/hr (Gas) English - 70 DV455_02836F-08_EN.indd Sec7:70 2013-12-12 5:12:13 CYCLE CHART (: factory setting, : selectable ) CYCLE Manual Dry Steam Cycles MAXIMUM AMOUNT Cottons, Work clothes, Linen, Mixed loads Heavy Duty Heavy fabrics such as jean, Corduroys, Heavy work clothes Perm Press Shirts, Synthetic fabrics, Knits, Wrinkle-free cottons, Permanent Bedding PLUS Bulky items such as blankets, Sheets, Comforters, Pillows Delicates Underwear, Blouses, Lingerie Sanitize Bedding, Curtains, Children` clothing Eco Normal Cottons, Work clothes, Linen Wool For machine washable and tumble dryable wool only (Maximum amount : 3lb) Air Fluff Form, Rubber, Plastic Quick Dry Small loads Time Dry Any load Wrinkle Away Shirts, Trouser, Blouses Refresh Shirts, Trouser, Comforter, Pillows 07 APPENDIX Sensor Dry RECOMMENDED ITEMS Normal FUNCTIONS CYCLE Steam Cycles OPTIONS Temp. Control High Medium Medium Low Low Extra Low Time Wrinkle Prevent Delay Start Normal Normal dry Heavy Duty Normal dry Perm Press Normal dry Bedding PLUS Normal dry Delicates Normal dry Sanitize Very dry (No change) Eco Normal Normal dry (No change)* (DV455G)* Sensor Dry Manual Dry Sensor Dry Level Wool Normal dry (No change) Air Fluff - Quick Dry - Time Dry - Wrinkle Away - Refresh - * is only Gas model Load Size Recommendations Large load Medium load Small load Fill the drum to about ¾ full. Do not add items over this level as they need to tumble freely. Fill the drum to about ½ full. Fill the drum with 3~5 items, not more than ¼ full. For best results, follow the load size recommendations for each drying cycle. English - 71 DV455_02836F-08_EN.indd Sec7:71 2013-12-12 5:12:13 Appendix OPEN SOURCE ANNOUNCEMENT The software included in this product contains copyrighted software that is licensed under the GPL/LGPL. You may obtain the complete Corresponding Source code from us for a period of three years after our last shipment of this product by sending email to: [email protected] If you want to obtain the complete Corresponding Source code in the physical medium such as CD-ROM, the cost of physically performing source distribution may be charged. This offer is valid to anyone in receipt of this information. GPL Software: Bridge-Utils, BusyBox, DNRD, dosfstools, iproute2, IPTables, Linux Kernel, ntpclient, Open1x, RSDK toolchain, rtl819x - Bootloader, samba, squashfs, udhcp Server-Client Package, USB-ModeSwitch, wireless-tools LGPL Software: libnl-Netlink Library, Mini-XML GNU GENERAL PUBLIC LICENSE Version 2, June 1991 Copyright (C) 1989, 1991 Free Software Foundation, Inc. 51 Franklin Street, Fifth Floor, Boston, MA 02110-1301, USA Everyone is permitted to copy and distribute verbatim copies of this license document, but changing it is not allowed. Preamble The licenses for most software are designed to take away your freedom to share and change it. By contrast, the GNU General Public License is intended to guarantee your freedom to share and change free software--to make sure the software is free for all its users. This General Public License applies to most of the Free Software Foundation’s software and to any other program whose authors commit to using it. (Some other Free Software Foundation software is covered by the GNU Lesser General Public License instead.) You can apply it to your programs, too. When we speak of free software, we are referring to freedom, not price. Our General Public Licenses are designed to make sure that you have the freedom to distribute copies of free software (and charge for this service if you wish), that you receive source code or can get it if you want it, that you can change the software or use pieces of it in new free programs; and that you know you can do these things. To protect your rights, we need to make restrictions that forbid anyone to deny you these rights or to ask you to surrender the rights. These restrictions translate to certain responsibilities for you if you distribute copies of the software, or if you modify it. For example, if you distribute copies of such a program, whether gratis or for a fee, you must give the recipients all the rights that you have. You must make sure that they, too, receive or can get the source code. And you must show them these terms so they know their rights. We protect your rights with two steps: (1) copyright the software, and (2) offer you this license which gives you legal permission to copy, distribute and/or modify the software. Also, for each author’s protection and ours, we want to make certain that everyone understands that there is no warranty for this free software. If the software is modified by someone else and passed on, we want its recipients to know that what they have is not the original, so that any English - 72 DV455_02836F-08_EN.indd Sec7:72 2013-12-12 5:12:13 TERMS AND CONDITIONS FOR COPYING, DISTRIBUTION AND MODIFICATION 1. This License applies to any program or other work which contains a notice placed by the copyright holder saying it may be distributed under the terms of this General Public License. The “Program”, below, refers to any such program or work, and a “work based on the Program” means either the Program or any derivative work under copyright law: that is to say, a work containing the Program or a portion of it, either verbatim or with modifications and/or translated into another language. (Hereinafter, translation is included without limitation in the term “modification”.) Each licensee is addressed as “you”. Activities other than copying, distribution and modification are not covered by this License; they are outside its scope. The act of running the Program is not restricted, and the output from the Program is covered only if its contents constitute a work based on the Program (independent of having been made by running the Program). Whether that is true depends on what the Program does. 2. You may copy and distribute verbatim copies of the Program’s source code as you receive it, in any medium, provided that you conspicuously and appropriately publish on each copy an appropriate copyright notice and disclaimer of warranty; keep intact all the notices that refer to this License and to the absence of any warranty; and give any other recipients of the Program a copy of this License along with the Program. You may charge a fee for the physical act of transferring a copy, and you may at your option offer warranty protection in exchange for a fee. 3. You may modify your copy or copies of the Program or any portion of it, thus forming a work based on the Program, and copy and distribute such modifications or work under the terms of Section 1 above, provided that you also meet all of these conditions: 1) You must cause the modified files to carry prominent notices stating that you changed the files and the date of any change. 2) You must cause any work that you distribute or publish, that in whole or in part contains or is derived from the Program or any part thereof, to be licensed as a whole at no charge to all third parties under the terms of this License. 3) If the modified program normally reads commands interactively when run, you must cause it, when started running for such interactive use in the most ordinary way, to print or display an announcement including an appropriate copyright notice and a notice that there is no warranty (or else, saying that you provide a warranty) and that users may redistribute the program under these conditions, and telling the user how to view a copy of this License. (Exception: if the Program itself is interactive but does not normally print such an announcement, your work based on the Program is not required to print an announcement.) These requirements apply to the modified work as a whole. If identifiable sections of that work are not derived from the Program, and can be reasonably considered independent and separate works in themselves, then this License, and its terms, do not apply to those sections when you distribute them as separate works. But when you distribute the same sections as part of a whole which is a work based on the Program, the distribution of the whole must be on the terms of this License, whose permissions for other licensees extend to the entire whole, and thus to each and every part regardless of who wrote it. Thus, it is not the intent of this section to claim rights or contest your rights to work written 07 APPENDIX problems introduced by others will not reflect on the original authors’ reputations. Finally, any free program is threatened constantly by software patents. We wish to avoid the danger that redistributors of a free program will individually obtain patent licenses, in effect making the program proprietary. To prevent this, we have made it clear that any patent must be licensed for everyone’s free use or not licensed at all. The precise terms and conditions for copying, distribution and modification follow. English - 73 DV455_02836F-08_EN.indd Sec7:73 2013-12-12 5:12:13 Appendix 4. 5. 6. 7. entirely by you; rather, the intent is to exercise the right to control the distribution of derivative or collective works based on the Program. In addition, mere aggregation of another work not based on the Program with the Program (or with a work based on the Program) on a volume of a storage or distribution medium does not bring the other work under the scope of this License. 3. You may copy and distribute the Program (or a work based on it, under Section 2) in object code or executable form under the terms of Sections 1 and 2 above provided that you also do one of the following: 1) Accompany it with the complete corresponding machinereadable source code, which must be distributed under the terms of Sections 1 and 2 above on a medium customarily used for software interchange; or, 2) Accompany it with a written offer, valid for at least three years, to give any third party, for a charge no more than your cost of physically performing source distribution, a complete machine-readable copy of the corresponding source code, to be distributed under the terms of Sections 1 and 2 above on a medium customarily used for software interchange; or, c) Accompany it with the information you received as to the offer to distribute corresponding source code. (This alternative is allowed only for noncommercial distribution and only if you received the program in object code or executable form with such an offer, in accord with Subsection b above.) The source code for a work means the preferred form of the work for making modifications to it. For an executable work, complete source code means all the source code for all modules it contains, plus any associated interface definition files, plus the scripts used to control compilation and installation of the executable. However, as a special exception, the source code distributed need not include anything that is normally distributed (in either source or binary form) with the major components (compiler, kernel, and so on) of the operating system on which the executable runs, unless that component itself accompanies the executable. If distribution of executable or object code is made by offering access to copy from a designated place, then offering equivalent access to copy the source code from the same place counts as distribution of the source code, even though third parties are not compelled to copy the source along with the object code. You may not copy, modify, sublicense, or distribute the Program except as expressly provided under this License. Any attempt otherwise to copy, modify, sublicense or distribute the Program is void, and will automatically terminate your rights under this License. However, parties who have received copies, or rights, from you under this License will not have their licenses terminated so long as such parties remain in full compliance. You are not required to accept this License, since you have not signed it. However, nothing else grants you permission to modify or distribute the Program or its derivative works. These actions are prohibited by law if you do not accept this License. Therefore, by modifying or distributing the Program (or any work based on the Program), you indicate your acceptance of this License to do so, and all its terms and conditions for copying, distributing or modifying the Program or works based on it. Each time you redistribute the Program (or any work based on the Program), the recipient automatically receives a license from the original licensor to copy, distribute or modify the Program subject to these terms and conditions. You may not impose any further restrictions on the recipients’ exercise of the rights granted herein. You are not responsible for enforcing compliance by third parties to this License. English - 74 DV455_02836F-08_EN.indd Sec7:74 2013-12-12 5:12:13 07 APPENDIX 8. If, as a consequence of a court judgment or allegation of patent infringement or for any other reason (not limited to patent issues), conditions are imposed on you (whether by court order, agreement or otherwise) that contradict the conditions of this License, they do not excuse you from the conditions of this License. If you cannot distribute so as to satisfy simultaneously your obligations under this License and any other pertinent obligations, then as a consequence you may not distribute the Program at all. For example, if a patent license would not permit royalty-free redistribution of the Program by all those who receive copies directly or indirectly through you, then the only way you could satisfy both it and this License would be to refrain entirely from distribution of the Program. If any portion of this section is held invalid or unenforceable under any particular circumstance, the balance of the section is intended to apply and the section as a whole is intended to apply in other circumstances. It is not the purpose of this section to induce you to infringe any patents or other property right claims or to contest validity of any such claims; this section has the sole purpose of protecting the integrity of the free software distribution system, which is implemented by public license practices. Many people have made generous contributions to the wide range of software distributed through that system in reliance on consistent application of that system; it is up to the author/donor to decide if he or she is willing to distribute software through any other system and a licensee cannot impose that choice. This section is intended to make thoroughly clear what is believed to be a consequence of the rest of this License. 9. If the distribution and/or use of the Program is restricted in certain countries either by patents or by copyrighted interfaces, the original copyright holder who places the Program under this License may add an explicit geographical distribution limitation excluding those countries, so that distribution is permitted only in or among countries not thus excluded. In such case, this License incorporates the limitation as if written in the body of this License. 10. The Free Software Foundation may publish revised and/or new versions of the General Public License from time to time. Such new versions will be similar in spirit to the present version, but may differ in detail to address new problems or concerns. Each version is given a distinguishing version number. If the Program specifies a version number of this License which applies to it and “any later version”, you have the option of following the terms and conditions either of that version or of any later version published by the Free Software Foundation. If the Program does not specify a version number of this License, you may choose any version ever published by the Free Software Foundation. 11. If you wish to incorporate parts of the Program into other free programs whose distribution conditions are different, write to the author to ask for permission. For software which is copyrighted by the Free Software Foundation, write to the Free Software Foundation; we sometimes make exceptions for this. Our decision will be guided by the two goals of preserving the free status of all derivatives of our free software and of promoting the sharing and reuse of software generally. NO WARRANTY 12. BECAUSE THE PROGRAM IS LICENSED FREE OF CHARGE, THERE IS NO WARRANTY FOR THE PROGRAM, TO THE EXTENT PERMITTED BY APPLICABLE LAW. EXCEPT WHEN OTHERWISE STATED IN WRITING THE COPYRIGHT HOLDERS AND/OR OTHER PARTIES PROVIDE THE PROGRAM “AS IS” WITHOUT WARRANTY OF ANY KIND, EITHER EXPRESSED OR IMPLIED, INCLUDING, BUT NOT LIMITED TO, THE IMPLIED WARRANTIES OF MERCHANTABILITY AND FITNESS FOR A PARTICULAR PURPOSE. THE ENTIRE RISK AS TO THE QUALITY AND PERFORMANCE OF THE PROGRAM IS WITH YOU. SHOULD THE PROGRAM PROVE DEFECTIVE, YOU ASSUME THE COST OF ALL NECESSARY SERVICING, REPAIR OR CORRECTION. English - 75 DV455_02836F-08_EN.indd Sec7:75 2013-12-12 5:12:14 Appendix 13. IN NO EVENT UNLESS REQUIRED BY APPLICABLE LAW OR AGREED TO IN WRITING WILL ANY COPYRIGHT HOLDER, OR ANY OTHER PARTY WHO MAY MODIFY AND/OR REDISTRIBUTE THE PROGRAM AS PERMITTED ABOV E , BE L I ABL E TO YOU FOR DAMAGES, INCLUDING ANY GENERAL, SPECIAL, INCIDENTAL OR CONSEQUENTIAL DAMAGES ARISING OUT OF THE USE OR INABILITY TO USE THE PROGRAM (INCLUDING BUT NOT LIMITED TO LOSS OF DATA OR DATA BEING RENDERED INACCURATE OR LOSSES SUSTAINED BY YOU OR THIRD PARTIES OR A FAILURE OF THE PROGRAM TO OPERATE WITH ANY OTHER PROGRAMS), EVEN IF SUCH HOLDER OR OTHER PARTY HAS BEEN ADVISED OF THE POSSIBILITY OF SUCH DAMAGES. END OF TERMS AND CONDITIONS How to Apply These Terms to Your New Programs If you develop a new program, and you want it to be of the greatest possible use to the public, the best way to achieve this is to make it free software which everyone can redistribute and change under these terms. To do so, attach the following notices to the program. It is safest to attach them to the start of each source file to most effectively convey the exclusion of warranty; and each file should have at least the “copyright” line and a pointer to where the full notice is found. one line to give the program’s name and an idea of what it does. Copyright (C) yyyy name of author This program is free software; you can redistribute it and/or modify it under the terms of the GNU General Public License as published by the Free Software Foundation; either version 2 of the License, or (at your option) any later version. This program is distributed in the hope that it will be useful, but WITHOUT ANY WARRANTY; without even the implied warranty of MERCHANTABILITY or FITNESS FOR A PARTICULAR PURPOSE. See the GNU General Public License for more details. You should have received a copy of the GNU General Public License along with this program; if not, write to the Free Software Foundation, Inc., 51 Franklin Street, Fifth Floor, Boston, MA 02110-1301, USA. Also add information on how to contact you by electronic and paper mail. If the program is interactive, make it output a short notice like this when it starts in an interactive mode: Gnomovision version 69, Copyright (C) year name of author Gnomovision comes with ABSOLUTELY NO WARRANTY; for details type `show w’. This is free software, and you are welcome to redistribute it under certain conditions; type `show c’ for details. The hypothetical commands `show w’ and `show c’ should show the appropriate parts of the General Public License. Of course, the commands you use may be called something other than `show w’ and `show c’; they could even be mouse-clicks or menu items--whatever suits your program. You should also get your employer (if you work as a programmer) or your school, if any, to sign a “copyright disclaimer” for the program, if necessary. Here is a sample; alter the names: Yoyodyne, Inc., hereby disclaims all copyright interest in the program `Gnomovision’ (which makes passes at compilers) written by James Hacker. signature of Ty Coon, 1 April 1989 Ty Coon, President of Vice This General Public License does not permit incorporating your program into proprietary programs. If your program is a subroutine library, you may consider it more useful to permit linking proprietary applications with the library. If this is what you want to do, use the GNU Lesser General Public License instead of this License. English - 76 DV455_02836F-08_EN.indd Sec7:76 2013-12-12 5:12:14 GNU LESSER GENERAL PUBLIC LICENSE [This is the first released version of the Lesser GPL. It also counts as the successor of the GNU Library Public License, version 2, hence the version number 2.1.] 07 APPENDIX Version 2.1, February 1999 Copyright (C) 1991, 1999 Free Software Foundation, Inc. 51 Franklin Street, Fifth Floor, Boston, MA 02110-1301 USA Everyone is permitted to copy and distribute verbatim copies of this license document, but changing it is not allowed. Preamble The licenses for most software are designed to take away your freedom to share and change it. By contrast, the GNU General Public Licenses are intended to guarantee your freedom to share and change free software--to make sure the software is free for all its users. This license, the Lesser General Public License, applies to some specially designated software packages--typically libraries--of the Free Software Foundation and other authors who decide to use it. You can use it too, but we suggest you first think carefully about whether this license or the ordinary General Public License is the better strategy to use in any particular case, based on the explanations below. When we speak of free software, we are referring to freedom of use, not price. Our General Public Licenses are designed to make sure that you have the freedom to distribute copies of free software (and charge for this service if you wish); that you receive source code or can get it if you want it; that you can change the software and use pieces of it in new free programs; and that you are informed that you can do these things. To protect your rights, we need to make restrictions that forbid distributors to deny you these rights or to ask you to surrender these rights. These restrictions translate to certain responsibilities for you if you distribute copies of the library or if you modify it. For example, if you distribute copies of the library, whether gratis or for a fee, you must give the recipients all the rights that we gave you. You must make sure that they, too, receive or can get the source code. If you link other code with the library, you must provide complete object files to the recipients, so that they can relink them with the library after making changes to the library and recompiling it. And you must show them these terms so they know their rights. We protect your rights with a two-step method: (1) we copyright the library, and (2) we offer you this license, which gives you legal permission to copy, distribute and/or modify the library. To protect each distributor, we want to make it very clear that there is no warranty for the free library. Also, if the library is modified by someone else and passed on, the recipients should know that what they have is not the original version, so that the original author’s reputation will not be affected by problems that might be introduced by others. Finally, software patents pose a constant threat to the existence of any free program. We wish to make sure that a company cannot effectively restrict the users of a free program by obtaining a restrictive license from a patent holder. Therefore, we insist that any patent license obtained for a version of the library must be consistent with the full freedom of use specified in this license. Most GNU software, including some libraries, is covered by the ordinary GNU General Public License. This license, the GNU Lesser General Public License, applies to certain designated libraries, and is quite different from the ordinary General Public License. We use this license for certain libraries in order to permit linking those libraries into nonfree programs. When a program is linked with a library, whether statically or using a shared library, the combination of the two is legally speaking a combined work, a derivative of the original library. The ordinary General Public License therefore permits such linking only if the entire combination fits its criteria of freedom. The Lesser General Public License permits more lax criteria for linking other code with the library. We call this license the “Lesser” General Public License because it does Less to protect the English - 77 DV455_02836F-08_EN.indd Sec7:77 2013-12-12 5:12:14 Appendix user’s freedom than the ordinary General Public License. It also provides other free software developers Less of an advantage over competing non-free programs. These disadvantages are the reason we use the ordinary General Public License for many libraries. However, the Lesser license provides advantages in certain special circumstances. For example, on rare occasions, there may be a special need to encourage the widest possible use of a certain library, so that it becomes a de-facto standard. To achieve this, non-free programs must be allowed to use the library. A more frequent case is that a free library does the same job as widely used non-free libraries. In this case, there is little to gain by limiting the free library to free software only, so we use the Lesser General Public License. In other cases, permission to use a particular library in nonfree programs enables a greater number of people to use a large body of free software. For example, permission to use the GNU C Library in non-free programs enables many more people to use the whole GNU operating system, as well as its variant, the GNU/Linux operating system. Although the Lesser General Public License is Less protective of the users’ freedom, it does ensure that the user of a program that is linked with the Library has the freedom and the wherewithal to run that program using a modified version of the Library. The precise terms and conditions for copying, distribution and modification follow. Pay close attention to the difference between a “work based on the library” and a “work that uses the library”. The former contains code derived from the library, whereas the latter must be combined with the library in order to run. TERMS AND CONDITIONS FOR COPYING, DISTRIBUTION AND MODIFICATION 1. This License Agreement applies to any software library or other program which contains a notice placed by the copyright holder or other authorized party saying it may be distributed under the terms of this Lesser General Public License (also called “this License”). Each licensee is addressed as “you”. A “library” means a collection of software functions and/or data prepared so as to be conveniently linked with application programs (which use some of those functions and data) to form executables. The “Library”, below, refers to any such software library or work which has been distributed under these terms. A “work based on the Library” means either the Library or any derivative work under copyright law: that is to say, a work containing the Library or a portion of it, either verbatim or with modifications and/or translated straightforwardly into another language. (Hereinafter, translation is included without limitation in the term “modification”.) “Source code” for a work means the preferred form of the work for making modifications to it. For a library, complete source code means all the source code for all modules it contains, plus any associated interface definition files, plus the scripts used to control compilation and installation of the library. Activities other than copying, distribution and modification are not covered by this License; they are outside its scope. The act of running a program using the Library is not restricted, and output from such a program is covered only if its contents constitute a work based on the Library (independent of the use of the Library in a tool for writing it). Whether that is true depends on what the Library does and what the program that uses the Library does. 2. You may copy and distribute verbatim copies of the Library’s complete source code as you receive it, in any medium, provided that you conspicuously and appropriately publish on each copy an appropriate copyright notice and disclaimer of warranty; keep intact all the notices that refer to this License and to the absence of any warranty; and distribute a copy of this License along with the Library. You may charge a fee for the physical act of transferring a copy, and you may at your option English - 78 DV455_02836F-08_EN.indd Sec7:78 2013-12-12 5:12:14 07 APPENDIX offer warranty protection in exchange for a fee. 3. You may modify your copy or copies of the Library or any portion of it, thus forming a work based on the Library, and copy and distribute such modifications or work under the terms of Section 1 above, provided that you also meet all of these conditions: 1) The modified work must itself be a software library. 2) You must cause the files modified to carry prominent notices stating that you changed the files and the date of any change. 3) You must cause the whole of the work to be licensed at no charge to all third parties under the terms of this License. 4) If a facility in the modified Library refers to a function or a table of data to be supplied by an application program that uses the facility, other than as an argument passed when the facility is invoked, then you must make a good faith effort to ensure that, in the event an application does not supply such function or table, the facility still operates, and performs whatever part of its purpose remains meaningful. (For example, a function in a library to compute square roots has a purpose that is entirely well-defined independent of the application. Therefore, Subsection 2d requires that any application-supplied function or table used by this function must be optional: if the application does not supply it, the square root function must still compute square roots.) These requirements apply to the modified work as a whole. If identifiable sections of that work are not derived from the Library, and can be reasonably considered independent and separate works in themselves, then this License, and its terms, do not apply to those sections when you distribute them as separate works. But when you distribute the same sections as part of a whole which is a work based on the Library, the distribution of the whole must be on the terms of this License, whose permissions for other licensees extend to the entire whole, and thus to each and every part regardless of who wrote it. Thus, it is not the intent of this section to claim rights or contest your rights to work written entirely by you; rather, the intent is to exercise the right to control the distribution of derivative or collective works based on the Library. In addition, mere aggregation of another work not based on the Library with the Library (or with a work based on the Library) on a volume of a storage or distribution medium does not bring the other work under the scope of this License. 4. You may opt to apply the terms of the ordinary GNU General Public License instead of this License to a given copy of the Library. To do this, you must alter all the notices that refer to this License, so that they refer to the ordinary GNU General Public License, version 2, instead of to this License. (If a newer version than version 2 of the ordinary GNU General Public License has appeared, then you can specify that version instead if you wish.) Do not make any other change in these notices. Once this change is made in a given copy, it is irreversible for that copy, so the ordinary GNU General Public License applies to all subsequent copies and derivative works made from that copy. This option is useful when you wish to copy part of the code of the Library into a program that is not a library. 5. You may copy and distribute the Library (or a portion or derivative of it, under Section 2) in object code or executable form under the terms of Sections 1 and 2 above provided that you accompany it with the complete corresponding machine-readable source code, which must be distributed under the terms of Sections 1 and 2 above on a medium customarily used for software interchange. If distribution of object code is made by offering access to copy from a designated place, then offering equivalent access to copy the source code from the same place satisfies the requirement to distribute the source code, even though third parties are not compelled to copy the source along with the object code. English - 79 DV455_02836F-08_EN.indd Sec7:79 2013-12-12 5:12:14 Appendix 6. A program that contains no derivative of any portion of the Library, but is designed to work with the Library by being compiled or linked with it, is called a “work that uses the Library”. Such a work, in isolation, is not a derivative work of the Library, and therefore falls outside the scope of this License. However, linking a “work that uses the Library” with the Library creates an executable that is a derivative of the Library (because it contains portions of the Library), rather than a “work that uses the library”. The executable is therefore covered by this License. Section 6 states terms for distribution of such executables. When a “work that uses the Library” uses material from a header file that is part of the Library, the object code for the work may be a derivative work of the Library even though the source code is not. Whether this is true is especially significant if the work can be linked without the Library, or if the work is itself a library. The threshold for this to be true is not precisely defined by law. If such an object file uses only numerical parameters, data structure layouts and accessors, and small macros and small inline functions (ten lines or less in length), then the use of the object file is unrestricted, regardless of whether it is legally a derivative work. (Executables containing this object code plus portions of the Library will still fall under Section 6.) Otherwise, if the work is a derivative of the Library, you may distribute the object code for the work under the terms of Section 6. Any executables containing that work also fall under Section 6, whether or not they are linked directly with the Library itself. 7. As an exception to the Sections above, you may also combine or link a “work that uses the Library” with the Library to produce a work containing portions of the Library, and distribute that work under terms of your choice, provided that the terms permit modification of the work for the customer’s own use and reverse engineering for debugging such modifications. You must give prominent notice with each copy of the work that the Library is used in it and that the Library and its use are covered by this License. You must supply a copy of this License. If the work during execution displays copyright notices, you must include the copyright notice for the Library among them, as well as a reference directing the user to the copy of this License. Also, you must do one of these things: 1) Accompany the work wi th the complet e corresponding machine-readable source code for the Library including whatever changes were used in the work (which must be distributed under Sections 1 and 2 above); and, if the work is an executable linked with the Library, with the complete machine-readable “work that uses the Library”, as object code and/or source code, so that the user can modify the Library and then relink to produce a modified executable containing the modified Library. (It is understood that the user who changes the contents of definitions files in the Library will not necessarily be able to recompile the application to use the modified definitions.) 2) Use a suitable shared library mechanism for linking with the Library. A suitable mechanism is one that (1) uses at run time a copy of the library already present on the user’s computer system, rather than copying library functions into the executable, and (2) will operate properly with a modified version of the library, if the user installs one, as long as the modified version is interfacecompatible with the version that the work was made with. 3) Accompany the work with a written offer, valid for at least three years, to give the same user the materials specified in Subsection 6a, above, for a charge no more than the cost of performing this distribution. 4) If distribution of the work is made by offering access to copy from a designated place, offer equivalent access to copy the above specified materials from the same place. 5) Verify that the user has already received a copy of these materials or that you have already sent this user a copy. For an executable, the required form of the “work that uses the Library” must include any data and utility programs needed for reproducing the executable from it. However, as a special exception, the materials to be distributed need not include anything that is normally English - 80 DV455_02836F-08_EN.indd Sec7:80 2013-12-12 5:12:14 07 APPENDIX distributed (in either source or binary form) with the major components (compiler, kernel, and so on) of the operating system on which the executable runs, unless that component itself accompanies the executable. It may happen that this requirement contradicts the license restrictions of other proprietary libraries that do not normally accompany the operating system. Such a contradiction means you cannot use both them and the Library together in an executable that you distribute. 8. You may place library facilities that are a work based on the Library side-by-side in a single library together with other library facilities not covered by this License, and distribute such a combined library, provided that the separate distribution of the work based on the Library and of the other library facilities is otherwise permitted, and provided that you do these two things: 1) Accompany the combined library with a copy of the same work based on the Library, uncombined with any other library facilities. This must be distributed under the terms of the Sections above. 2) Give prominent notice with the combined library of the fact that part of it is a work based on the Library, and explaining where to find the accompanying uncombined form of the same work. 9. You may not copy, modify, sublicense, link with, or distribute the Library except as expressly provided under this License. Any attempt otherwise to copy, modify, sublicense, link with, or distribute the Library is void, and will automatically terminate your rights under this License. However, parties who have received copies, or rights, from you under this License will not have their licenses terminated so long as such parties remain in full compliance. 10. You are not required to accept this License, since you have not signed it. However, nothing else grants you permission to modify or distribute the Library or its derivative works. These actions are prohibited by law if you do not accept this License. Therefore, by modifying or distributing the Library (or any work based on the Library), you indicate your acceptance of this License to do so, and all its terms and conditions for copying, distributing or modifying the Library or works based on it. 11. Each time you redistribute the Library (or any work based on the Library), the recipient automatically receives a license from the original licensor to copy, distribute, link with or modify the Library subject to these terms and conditions. You may not impose any further restrictions on the recipients’ exercise of the rights granted herein. You are not responsible for enforcing compliance by third parties with this License. 12. If, as a consequence of a court judgment or allegation of patent infringement or for any other reason (not limited to patent issues), conditions are imposed on you (whether by court order, agreement or otherwise) that contradict the conditions of this License, they do not excuse you from the conditions of this License. If you cannot distribute so as to satisfy simultaneously your obligations under this License and any other pertinent obligations, then as a consequence you may not distribute the Library at all. For example, if a patent license would not permit royalty-free redistribution of the Library by all those who receive copies directly or indirectly through you, then the only way you could satisfy both it and this License would be to refrain entirely from distribution of the Library. If any portion of this section is held invalid or unenforceable under any particular circumstance, the balance of the section is intended to apply, and the section as a whole is intended to apply in other circumstances. It is not the purpose of this section to induce you to infringe any patents or other property right claims or to contest validity of any such claims; this section has the sole purpose of protecting the integrity of the free software distribution system which is implemented by public license practices. Many people have made generous contributions to the wide range of software distributed through that system in reliance on consistent application of that system; it is up to the author/ donor to decide if he or she is willing to distribute software through any other system and a licensee cannot impose that choice. English - 81 DV455_02836F-08_EN.indd Sec7:81 2013-12-12 5:12:14 Appendix This section is intended to make thoroughly clear what is believed to be a consequence of the rest of this License. 13. If the distribution and/or use of the Library is restricted in certain countries either by patents or by copyrighted interfaces, the original copyright holder who places the Library under this License may add an explicit geographical distribution limitation excluding those countries, so that distribution is permitted only in or among countries not thus excluded. In such case, this License incorporates the limitation as if written in the body of this License. 14. The Free Software Foundation may publish revised and/or new versions of the Lesser General Public License from time to time. Such new versions will be similar in spirit to the present version, but may differ in detail to address new problems or concerns. Each version is given a distinguishing version number. If the Library specifies a version number of this License which applies to it and “any later version”, you have the option of following the terms and conditions either of that version or of any later version published by the Free Software Foundation. If the Library does not specify a license version number, you may choose any version ever published by the Free Software Foundation. 15. If you wish to incorporate parts of the Library into other free programs whose distribution conditions are incompatible with these, write to the author to ask for permission. For software which is copyrighted by the Free Software Foundation, write to the Free Software Foundation; we sometimes make exceptions for this. Our decision will be guided by the two goals of preserving the free status of all derivatives of our free software and of promoting the sharing and reuse of software generally. NO WARRANTY 16. BECAUSE THE LIBRARY IS LICENSED FREE OF CHARGE, THERE IS NO WARRANTY FOR THE LIBRARY, TO THE EXTENT PERMITTED BY APPLICABLE LAW. EXCEPT WHEN OTHERWISE STATED IN WRITING THE COPYRIGHT HOLDERS AND/OR OTHER PARTIES PROVIDE THE LIBRARY “AS IS” WITHOUT WARRANTY OF ANY KIND, EITHER EXPRESSED OR IMPLIED, INCLUDING, BUT NOT LIMITED TO, THE IMPLIED WARRANTIES OF MERCHANTABILITY AND FITNESS FOR A PARTICULAR PURPOSE. THE ENTIRE RISK AS TO THE QUALITY AND PERFORMANCE OF THE LIBRARY IS WITH YOU. SHOULD THE LIBRARY PROVE DEFECTIVE, YOU ASSUME THE COST OF ALL NECESSARY SERVICING, REPAIR OR CORRECTION. 17. IN NO EVENT UNLESS REQUIRED BY APPLICABLE LAW OR AGREED TO IN WRI T ING WI L L ANY COPYRIGHT HOLDER, OR ANY OTHER PARTY WHO MAY MODIFY AND/ OR REDISTRIBUTE THE LIBRARY AS PERMITTED ABOVE, BE LIABLE TO YOU FOR DAMAGES, INCLUDING ANY GENERAL, SPECIAL, INCIDENTAL OR CONSEQUENTIAL DAMAGES ARISING OUT OF THE USE OR INABILITY TO USE THE LIBRARY (INCLUDING BUT NOT LIMITED TO LOSS OF DATA OR DATA BEING RENDERED INACCURATE OR LOSSES SUSTAINED BY YOU OR THIRD PARTIES OR A FAILURE OF THE LIBRARY TO OPERATE WITH ANY OTHER SOFTWARE), EVEN IF SUCH HOLDER OR OTHER PARTY HAS BEEN ADVISED OF THE POSSIBILITY OF SUCH DAMAGES. END OF TERMS AND CONDITIONS How to Apply These Terms to Your New Libraries If you develop a new library, and you want it to be of the greatest possible use to the public, we recommend making it free software that everyone can redistribute and change. You can do so by permitting redistribution under these terms (or, alternatively, under the terms of the ordinary General Public License). To apply these terms, attach the following notices to the library. It is safest to attach them to the start of each source file to most effectively convey the exclusion of warranty; and each file should have at least the “copyright” line and a pointer to where the full notice is found. one line to give the library’s name and an idea of what it does. English - 82 DV455_02836F-08_EN.indd Sec7:82 2013-12-12 5:12:14 Copyright (C) year name of author You should have received a copy of the GNU Lesser General Public License along with this library; if not, write to the Free Software Foundation, Inc., 51 Franklin Street, Fifth Floor, Boston, MA 02110-1301 USA Also add information on how to contact you by electronic and paper mail. You should also get your employer (if you work as a programmer) or your school, if any, to sign a “copyright disclaimer” for the library, if necessary. Here is a sample; alter the names: Yoyodyne, Inc., hereby disclaims all copyright interest in the library `Frob’ (a library for tweaking knobs) written by James Random Hacker. 07 APPENDIX This library is free software; you can redistribute it and/or modify it under the terms of the GNU Lesser General Public License as published by the Free Software Foundation; either version 2.1 of the License, or (at your option) any later version. This library is distributed in the hope that it will be useful, but WITHOUT ANY WARRANTY; without even the implied warranty of MERCHANTABILITY or FITNESS FOR A PARTICULAR PURPOSE. See the GNU Lesser General Public License for more details. signature of Ty Coon, 1 April 1990 Ty Coon, President of Vice That’s all there is to it! BSD LICENSE flex: the fast lexical analyser Copyright (c) 2001, 2002, 2003, 2004, 2005, 2006, 2007 The Flex Project. Copyright (c) 1990, 1997 The Regents of the University of California. All rights reserved. LibNet License Copyright (c) 1998 - 2001 Mike D. Schiffman <[email protected]> PPP/ Debian Copyright (c) 1989 Regents of the University of California. All rights reserved. Redistribution and use in source and binary forms, with or without modification, are permitted provided that the following conditions are met: 1. Redistributions of source code must retain the above copyright notice, this list of conditions and the following disclaimer. 2. Redistributions in binary form must reproduce the above copyright notice, this list of conditions and the following disclaimer in the documentation and/or other materials provided with the distribution. 3. Neither the name of the <organization> nor the names of its contributors may be used to endorse or promote products derived from this software without specific prior written permission. THIS SOFTWARE IS PROVIDED BY THE COPYRIGHT HOLDERS AND CONTRIBUTORS “AS IS” AND ANY EXPRESS OR IMPLIED WARRANTIES, INCLUDING, BUT NOT LIMITED TO, THE IMPLIED WARRANTIES OF MERCHANTABILITY AND FITNESS FOR A PARTICULAR PURPOSE ARE DISCLAIMED. IN NO EVENT SHALL <COPYRIGHT HOLDER> BE LIABLE FOR ANY DIRECT, INDIRECT, INCIDENTAL, SPECIAL, EXEMPLARY, OR CONSEQUENTIAL DAMAGES ( INCLUDING, BUT NOT LIMITED TO, PROCUREMENT OF SUBSTITUTE GOODS OR SERVICES; LOSS OF USE, DATA, OR PROFITS; OR BUSINESS INTERRUPTION) HOWEVER CAUSED AND ON ANY THEORY OF LIABILITY, WHETHER IN CONTRACT, STRICT LIABILITY, OR TORT (INCLUDING NEGLIGENCE OR OTHERWISE) ARISING IN ANY WAY OUT OF THE USE OF THIS SOFTWARE, EVEN IF ADVISED OF THE POSSIBILITY OF SUCH DAMAGE. English - 83 DV455_02836F-08_EN.indd Sec7:83 2013-12-12 5:12:14 Appendix OPENSSL This product includes software developed by the OpenSSL Project for use in the OpenSSL Toolkit. (http:// www.openssl.org/) This product includes cryptographic software written by Eric Young ([email protected]) LICENSE ISSUES ===================================================================== The OpenSSL toolkit stays under a dual license, i.e. both the conditions of the OpenSSL License and the original SSLeay license apply to the toolkit. See below for the actual license texts. Actually both licenses are BSD-style Open Source licenses. In case of any license issues related to OpenSSL please contact [email protected]. OpenSSL License ===================================================================== Copyright (c) 1998-2008 The OpenSSL Project. All rights reserved. Redistribution and use in source and binary forms, with or without modification, are permitted provided that the following conditions are met: 1. Redistributions of source code must retain the above copyright notice, this list of conditions and the following disclaimer. 2. Redistributions in binary form must reproduce the above copyright notice, this list of conditions and the following disclaimer in the documentation and/or other materials provided with the distribution. 3. All advertising materials mentioning features or use of this software must display the following acknowledgment: “This product includes software developed by the OpenSSL Project for use in the OpenSSL Toolkit. (http://www.openssl.org/)” 4. The names “OpenSSL Toolkit” and “OpenSSL Project” must not be used to endorse or promote products derived from this software without prior written permission. For written permission, please contact [email protected]. 5. Products derived from this software may not be called “OpenSSL” nor may “OpenSSL” appear in their names without prior written permission of the OpenSSL Project. 6. Redistributions of any form whatsoever must retain the following acknowledgment: “This product includes software developed by the OpenSSL Project for use in the OpenSSL Toolkit (http://www.openssl.org/)” THIS SOFTWARE IS PROVIDED BY THE OpenSSL PROJECT “AS IS” AND ANY EXPRESSED OR IMPLIED WARRANTIES, INCLUDING, BUT NOT LIMITED TO, THE IMPLIED WARRANTIES OF MERCHANTABILITY AND FITNESS FOR A PARTICULAR PURPOSE ARE DISCLAIMED. IN NO EVENT SHALL THE OpenSSL PROJECT OR ITS CONTRIBUTORS BE LIABLE FOR ANY DIRECT, INDIRECT, INCIDENTAL, SPECIAL, EXEMPLARY, OR CONSEQUENTIAL DAMAGES (INCLUDING, BUT NOT LIMITED TO, PROCUREMENT OF SUBSTITUTE GOODS OR SERVICES; LOSS OF USE, DATA, OR PROFITS; OR BUSINESS INTERRUPTION) HOWEVER CAUSED AND ON ANY THEORY OF LIABILITY, WHETHER IN CONTRACT, STRICT LIABILITY, OR TORT (INCLUDING NEGLIGENCE OR OTHERWISE) ARISING IN ANY WAY OUT OF THE USE OF THIS SOFTWARE, EVEN IF ADVISED OF THE POSSIBILITY OF SUCH DAMAGE. ===================================================================== This product includes cryptographic software written by Eric Young ([email protected]). This product includes software written by Tim Hudson ([email protected]). English - 84 DV455_02836F-08_EN.indd Sec7:84 2013-12-12 5:12:14 Warranty (U.S.A) SAMSUNG DRYER One (1) Year All Parts and Labor Two (2) Years Control Board Parts This limited warranty begins on the original date of purchase, and is valid only on products purchased and used in the United States. To receive warranty service, the purchaser must contact SAMSUNG for problem determination and service procedures. Warranty service can only be performed by a SAMSUNG authorized service center. The original dated bill of sale must be presented upon request as proof of purchase to SAMSUNG or SAMSUNG’s authorized service center. SAMSUNG will provide in-home service during the warranty period at no charge, subject to availability within the contiguous United States. In-home service is not available in all areas. To receive in-home service, product must be unobstructed and accessible to the service agent. If service is not available, SAMSUNG may elect to provide transportation of the product to and from an authorized service center. SAMSUNG will repair, replace, or refund this product at our option and at no charge as stipulated herein, with new or reconditioned parts or products if found to be defective during the limited warranty period specified above. All replaced parts and products become the property of SAMSUNG and must be returned to SAMSUNG. Replacement parts and products assume the remaining original warranty, or ninety (90) days, whichever is longer. 08 WARRANTY LIMITED WARRANTY TO ORIGINAL PURCHASER This SAMSUNG brand product, as supplied and distributed by SAMSUNG ELECTRONICS AMERICA, INC. (SAMSUNG) and delivered new, in the original carton to the original consumer purchaser, is warranted by SAMSUNG against manufacturing defects in materials and workmanship for a limited warranty period of: This limited warranty covers manufacturing defects in materials and workmanship encountered in normal, noncommercial use of this product and shall not apply to the following: damage that occurs in shipment; delivery and installation; applications and uses for which this product was not intended; altered product or serial numbers; cosmetic damage or exterior finish; accidents, abuse, neglect, fire, water, lightning, or other acts of nature or God; use of products, equipment, systems, utilities, services, parts, supplies, accessories, applications, installations, repairs, external wiring or connectors not supplied or authorized by SAMSUNG that damage this product or result in service problems; incorrect electrical line voltage, fluctuations and surges; customer adjustments and failure to follow operating instructions, maintenance and environmental instructions that are covered and prescribed in the instruction book; product removal and reinstallation; problems caused by pest infestations. This limited warranty does not cover problems resulting from incorrect electric current, voltage or supply, light bulbs, house fuses, house wiring, cost of a service call for instructions, or fixing installation errors. SAMSUNG does not warrant uninterrupted or error-free operation of the product. English - 85 DV455_02836F-08_EN.indd Sec8:85 2013-12-12 5:12:14 Warranty Except as set forth herein, there are no warranties on this product either express or implied, and samsung disclaims all warranties including, but not limited to, any implied warranties of merchantability, infringement or fitness for a particular purpose. No warranty or guarantee given by any person, firm, or corporation with respect to this product shall be binding on samsung. Samsung shall not be liable for loss of revenue or profits, failure to realize savings or thter benefits, or any other special, incidental or consequential damages caused by the use, misuse, or inability to use this product, regardless of the legal theory on which the claim is based, and even if samsung has been advised of the possibility of such damages. Nor shall recovery of any kind against samsung be greater in amount than the purchase price of the product sold by samsung and causing the alleged damage. Without limiting the foregoing, purchaser assumes all risk and liability for loss, damage, or injury to purchaser and purchaser’s property and to others and their property arising out of the use, misuse, or inability to use this product. This limited warranty shall not extend to anyone other than the original purchaser of this product, is nontransferable and states your exclusive remedy. Some states do not allow limitations on how long an implied warranty lasts, or the exclusion or limitation of incidental or consequential damages, so the above limitations or exclusions may not apply to you. This warranty gives you specific rights, and you may also have other rights, which vary from state to state. To obtain warranty service, please contact SAMSUNG at: Samsung Electronics America, Inc. 85 Challenger Road Ridgefield Park, NJ 07660 1-800-SAMSUNG (726-7864) www.samsung.com Visits by a Service Engineer to explain functions, maintenance or installation is not covered by warranty. Please contact your Samsung call agent for help with any of these issues. English - 86 DV455_02836F-08_EN.indd Sec8:86 2013-12-12 5:12:14 Warranty (CANADA) SAMSUNG DRYER One (1) year part and labor This limited warranty begins on the original date of purchase, and is valid only on products purchased and used in the Canada. To receive warranty service, the purchaser must contact SAMSUNG for problem determination and service procedures. Warranty service can only be performed by a SAMSUNG authorized service center. The original dated bill of sale must be presented upon request as proof of purchase to SAMSUNG or SAMSUNG’s authorized service center. SAMSUNG will provide in-home service during the warranty period at no charge, subject to availability within the Canada. In-home service is not available in all areas. 08 WARRANTY LIMITED WARRANTY TO ORIGINAL PURCHASER This SAMSUNG brand product, as supplied and distributed by SAMSUNG ELECTRONICS CANADA, INC. (SAMSUNG) and delivered new, in the original carton to the original consumer purchaser, is warranted by SAMSUNG against manufacturing defects in materials and workmanship for a limited warranty period of: To receive in-home service, product must be unobstructed and accessible to the service agent. If service is not available, SAMSUNG may elect to provide transportation of the product to and from an authorized service center. SAMSUNG will repair, replace, or refund this product at our option and at no charge as stipulated herein, with new or reconditioned parts or products if found to be defective during the limited warranty period specified above. All replaced parts and products become the property of SAMSUNG and must be returned to SAMSUNG. Replacement parts and products assume the remaining original warranty, or ninety (90) days, whichever is longer. This limited warranty covers manufacturing defects in materials and workmanship encountered in normal, noncommercial use of this product and shall not apply to the following: damage that occurs in shipment; delivery and installation; applications and uses for which this product was not intended; altered product or serial numbers; cosmetic damage or exterior finish; accidents, abuse, neglect, fire, water, lightning, or other acts of nature or God; use of products, equipment, systems, utilities, services, parts, supplies, accessories, applications, installations, repairs, external wiring or connectors not supplied or authorized by SAMSUNG that damage this product or result in service problems; incorrect electrical line voltage, fluctuations and surges; customer adjustments and failure to follow operating instructions, maintenance and environmental instructions that are covered and prescribed in the instruction book; product removal and reinstallation; problems caused by pest infestations. This limited warranty does not cover problems resulting from incorrect electric current, voltage or supply, light bulbs, house fuses, house wiring, cost of a service call for instructions, or fixing installation errors. SAMSUNG does not warrant uninterrupted or error-free operation of the product. English - 87 DV455_02836F-08_EN.indd Sec8:87 2013-12-12 5:12:14 Warranty EXCEPT AS SET FORTH HEREIN, THERE ARE NO WARRANTIES ON THIS PRODUCT EITHER EXPRESS OR IMPLIED, AND SAMSUNG DISCLAIMS ALL WARRANTIES INCLUDING, BUT NOT LIMITED TO, ANY IMPLIED WARRANTIES OF MERCHANTABILITY, INFRINGEMENT OR FITNESS FOR A PARTICULAR PURPOSE. NO WARRANTY OR GUARANTEE GIVEN BY ANY PERSON, FIRM, OR CORPORATION WITH RESPECT TO THIS PRODUCT SHALL BE BINDING ON SAMSUNG. SAMSUNG SHALL NOT BE LIABLE FOR LOSS OF REVENUE OR PROFITS, FAILURE TO REALIZE SAVINGS OR OTHER BENEFITS, OR ANY OTHER SPECIAL, INCIDENTAL OR CONSEQUENTIAL DAMAGES CAUSED BY THE USE, MISUSE, OR INABILITY TO USE THIS PRODUCT, REGARDLESS OF THE LEGAL THEORY ON WHICH THE CLAIM IS BASED, AND EVEN IF SAMSUNG HAS BEEN ADVISED OF THE POSSIBILITY OF SUCH DAMAGES. NOR SHALL RECOVERY OF ANY KIND AGAINST SAMSUNG BE GREATER IN AMOUNT THAN THE PURCHASE PRICE OF THE PRODUCT SOLD BY SAMSUNG AND CAUSING THE ALLEGED DAMAGE. WITHOUT LIMITING THE FOREGOING, PURCHASER ASSUMES ALL RISK AND LIABILITY FOR LOSS, DAMAGE, OR INJURY TO PURCHASER AND PURCHASER’S PROPERTY AND TO OTHERS AND THEIR PROPERTY ARISING OUT OF THE USE, MISUSE, OR INABILITY TO USE THIS PRODUCT. THIS LIMITED WARRANTY SHALL NOT EXTEND TO ANYONE OTHER THAN THE ORIGINAL PURCHASER OF THIS PRODUCT, IS NONTRANSFERABLE AND STATES YOUR EXCLUSIVE REMEDY. Some provinces do not allow limitations on how long an implied warranty lasts, or the exclusion or limitation of incidental or consequential damages, so the above limitations or exclusions may not apply to you. This warranty gives you specific rights, and you may also have other rights, which vary from province to province. To obtain warranty service, please contact SAMSUNG at: Samsung Electronics Canada Inc., Customer Service 55 Standish Court Mississauga, Ontario L5R 4B2 Canada 1-800-SAMSUNG (726-7864) www.samsung.com/ca (English) www.samsung.com/ca_fr (French) Visits by a Service Engineer to explain functions, maintenance or installation is not covered by warranty. Please contact your Samsung call agent for help with any of these issues. English - 88 DV455_02836F-08_EN.indd Sec8:88 2013-12-12 5:12:14 Memo DV455_02836F-08_EN.indd Sec8:89 2013-12-12 5:12:14 Memo DV455_02836F-08_EN.indd Sec8:90 2013-12-12 5:12:14 Memo DV455_02836F-08_EN.indd Sec8:91 2013-12-12 5:12:15 bit.ly/samsungwashers QUESTIONS OR COMMENTS? COUNTRY CALL OR VISIT US ONLINE AT U.S.A 1-800-SAMSUNG (726-7864) www.samsung.com MEXICO 01-800-SAMSUNG (726-7864) www.samsung.com CANADA 1-800-SAMSUNG (726-7864) www.samsung.com/ca (English) www.samsung.com/ca_fr (French) Visits by a Service Engineer to explain functions, maintenance or installation is not covered by warranty. Please contact your Samsung call agent for help with any of these issues. DC68-02836F-08 DV455_02836F-08_EN.indd Sec8:92 2013-12-12 5:12:15 DV455* Sèche-linge à gaz et électrique manuel d'utilisation Ce manuel a été imprimé sur du papier 100% recyclé. Un monde de possibilités Nous vous remercions d'avoir choisi ce produit Samsung. Si vous souhaitez recevoir un service plus complet ou des accessoires, enregistrez votre produit à l'adresse cidessous ou contactez www.samsung.com/register 1-800-SAMSUNG (726-7864) DV455_02836F-08_CFR.indd 1 2013-12-12 5:12:59 Table des matières MESURES DE SÉCURITÉ 4 4 4 INSTALLATION DU SÈCHE-LINGE 10 10 10 11 11 12 13 13 15 16 16 17 17 18 19 21 21 24 24 25 INSTRUCTIONS ET CONSEILS D’UTILISATION 27 27 32 33 33 33 34 35 38 50 60 Ce que vous devez connaître concernant les instructions de sécurité Symboles et mesures de sécurité importants Déballer le sèche-linge Voir les conditions requises en matière d'évacuation. Conditions d'installation de base Conditions requises en matière de conduits Remarque importante pour l’installateur Choix de l'emplacement d'installation Encastrement dans une niche ou installation dans un placard Évacuation Systèmes fonctionnant au gaz Instructions d’installation - Commonwealth du Massachusetts Normes électriques Mise à la terre Raccordement électrique Raccordement du tuyau d’arrivée d'eau Pièces de rechange et accessoires Installation Liste de contrôle final pour l’installation Conseils pour l’évacuation du sèche-linge Inversion du hublot Présentation du panneau de commandes Grille de séchage Nettoyage du filtre à peluches Chargement du sèche-linge Mise en marche Capteur de ventilation Configuration des fonctions Smart Control et Smart Monitoring Utilisation de l’application mobile (Android) Utilisation de l’application mobile (iOS) Enregistrement de votre sèche-linge Français - 2 DV455_02836F-08_CFR.indd Sec9:2 2013-12-12 5:13:03 ENTRETIEN ET NETTOYAGE 62 62 62 62 62 62 Panneau de commandes Tambour Tambour en acier inoxydable Extérieur du sèche-linge Système d’évacuation du sèche-linge CONSEILS D'ENTRETIEN DU LINGE 63 Conseils d'entretien du linge DÉPANNAGE 64 64 66 67 Vérifiez les points suivants si votre sèchelinge... Codes d'erreur Questions et Réponses sur la configuration du réseau 63 ANNEXE 69 69 70 70 70 71 72 Tableau des symboles textiles Protection de l’environnement Déclaration de conformité Caractéristiques techniques Tableau des programmes Open Source Announcement Français - 3 DV455_02836F-08_CFR.indd Sec9:3 2013-12-12 5:13:03 Mesures de sécurité Félicitations pour l’achat de votre nouveau sèche-linge Samsung. Ce manuel contient de précieuses informations concernant l'installation, l'utilisation et l'entretien de votre appareil. Prenez le temps de le lire pour tirer pleinement profit de tous les avantages et de toutes les fonctionnalités de votre sèche-linge. CE QUE VOUS DEVEZ CONNAÎTRE CONCERNANT LES INSTRUCTIONS DE SÉCURITÉ Veuillez lire attentivement ce manuel afin d’utiliser cet appareil en toute sécurité et de profiter pleinement de toutes ses fonctionnalités. Conservez ce manuel dans un endroit sûr situé à proximité du sèche-linge afin de pouvoir facilement vous y reporter en cas de besoin. N’utilisez pas cet appareil autrement que pour l’usage auquel il est destiné, conformément aux consignes du manuel. Les consignes de sécurité et les avertissements décrits dans ce manuel ne sont pas exhaustifs. Il est de votre responsabilité de faire preuve de bon sens, de prudence et de discernement lors de l’installation, de l’entretien et de l’utilisation de votre sèche-linge. Contactez toujours le fabricant en cas de problème ou de situation que vous ne comprenez pas. SYMBOLES ET MESURES DE SÉCURITÉ IMPORTANTS Signification des icônes et signes repris dans ce manuel d'utilisation : AVERTISSEMENT ATTENTION Risques ou pratiques inadaptées susceptibles de causer de graves blessures ou des dommages matériels. Observez les informations fournies dans ce manuel pour réduire les risques d’incendie ou d’explosion et prévenir les dommages matériels, les blessures corporelles et mortelles. N'entreposez ni n'utilisez jamais d'essence ou d'autres produits inflammables à proximité de cet appareil ou de tout autre appareil. Risques ou pratiques inadaptées susceptibles de causer des blessures ou des dommages matériels. NE PAS faire. NE PAS démonter. NE PAS toucher. Suivre attentivement les instructions. Débrancher la prise murale. S'assurer que l'appareil est relié à la terre afin d'éviter tout choc électrique. Contacter le service d'assistance technique pour obtenir de l'aide. Remarque Ces symboles d'avertissement ont pour but d'éviter tout risque de blessure corporelle. Respectez-les en toutes circonstances. Lisez attentivement la section Consignes de sécurité de ce manuel et conservez ce dernier en lieu sûr afin de pouvoir le consulter ultérieurement. CONSERVEZ SOIGNEUSEMENT CES CONSIGNES Français - 4 DV455_02836F-08_CFR.indd Sec11:4 2013-12-12 5:13:03 AVERTISSEMENT - Risque d'incendie • • AVERTISSEMENT L'installation du sèche-linge doit être effectuée par un technicien qualifié. L’installation du sèche-linge doit se faire conformément aux instructions du fabricant et aux réglementations locales. N’équipez jamais un sèche-linge de conduits de ventilation en plastique flexible. Si vous utilisez un conduit en métal flexible (de type aluminium), celui-ci doit être conforme aux spécifications du fabricant et adapté à une utilisation sur sèche-linge. Les matériaux flexibles utilisés dans les systèmes d'évacuation de l'air ont tendance à se plier, à s'écraser et à retenir les peluches de tissu. Ces conditions empêchent une évacuation adéquate de l'air et augmentent les risques d'incendie. Pour réduire les risques de blessure grave ou de décès, observez attentivement les consignes d'installation. POUR RÉDUIRE LE RISQUE D'INCENDIE OU D'EXPLOSION : • • AVERTISSEMENT 01 MESURES DE SÉCURITÉ • • Ne faites sécher aucun article ayant été précédemment en contact par nettoyage, lavage ou trempage avec de l’essence, des solvants de nettoyage à sec ou toute autre substance inflammable ou explosive. En effet, ceux-ci diffusent des vapeurs pouvant s’enflammer ou exploser. Ne placez aucun article ayant été en contact avec un solvant ou des matières solides ou liquides inflammables dans le sèche-linge tant que toutes les traces de ces produits n'ont pas été éliminées. De nombreux produits inflammables sont utilisés dans l'environnement domestique comme l'acétone, l'alcool dénaturé, l'essence, le kérosène, certains nettoyants ménagers sous forme liquide, certains détachants, la térébenthine, les cires et les produits décapants. Ne faites jamais sécher à chaud les articles à base de caoutchouc mousse (également appelé mousse de latex) ou de matériaux dont la texture ressemble à celle du caoutchouc. En effet, les matières en caoutchouc mousse peuvent, dans certaines circonstances, provoquer un incendie par combustion spontanée. QUE FAIRE EN CAS D’ÉMANATION DE GAZ : • • • • • • • • Ne tentez pas d'allumer un appareil électrique. Ne mettez pas l’appareil sous tension. Ne touchez à aucun interrupteur électrique. N’utilisez aucun téléphone dans le bâtiment. Faites évacuer tous les occupants de la pièce, du bâtiment ou du secteur. Appelez immédiatement votre fournisseur de gaz depuis le téléphone d'un voisin. Suivez les consignes que vous recevrez. Si vous ne pouvez pas joindre votre fournisseur de gaz, appelez les pompiers. L’installation et l’entretien doivent être effectués par un installateur qualifié, un réparateur agréé ou votre fournisseur de gaz. CONSERVEZ SOIGNEUSEMENT CES CONSIGNES Français - 5 DV455_02836F-08_CFR.indd Sec11:5 2013-12-12 5:13:03 Mesures de sécurité CONSIGNES IMPORTANTES DE SÉCURITÉ AVERTISSEMENT AVERTISSEMENT Afin de réduire les risques d’incendie, d’électrocution ou de blessures physiques lors de l’utilisation de l’appareil, des précautions de base doivent être prises : 1. Lisez toutes les consignes de sécurité avant d’utiliser l’appareil. 2. Ne faites pas sécher de linge ayant été en contact par nettoyage, lavage ou trempage avec de l’essence, des solvants de nettoyage à sec ou tout autre substance inflammable ou explosive ; ces produits dégagent en effet des vapeurs qui risqueraient de s’enflammer ou d’exploser. 3. N’utilisez pas le sèche-linge pour faire sécher des vêtements comportant des traces de substances inflammables telles que de l’huile végétale, de l’huile de cuisson, de l’huile de machine, des produits chimiques inflammables, des solvants, etc. ou des objets comportant des traces de cire ou de produits chimiques Ils risqueraient de prendre feu. 4. N’entreposez ni n’utilisez jamais d’essence ou d’autres produits inflammables à proximité de cet appareil ou de tout autre appareil. 5. Ne laissez ni les enfants ni les animaux domestiques jouer sur, dans ou devant l’appareil. Une surveillance attentive s’impose lorsque l’appareil est utilisé à proximité d’enfants ou d’animaux domestiques. 6. Avant de mettre l’appareil au rebut ou hors service, retirez le hublot du compartiment de séchage pour éviter que des enfants ou des animaux ne se trouvent piégés à l’intérieur. 7. N’ouvrez pas le sèche-linge lorsque le tambour est en mouvement. 8. N’installez et n’entreposez jamais cet appareil dans un endroit exposé aux intempéries. 9. N’utilisez pas les commandes du sèche-linge inutilement. 10. Ne procédez pas à la réparation ou au remplacement des pièces de l’appareil et ne tentez pas non plus de le réparer vous-même, sauf si le manuel d’entretien ou de réparation contient des recommandations spécifiques en la matière que vous comprenez et êtes en mesure d’exécuter. 11. N’utilisez aucun adoucissant ou produit antistatique autre que ceux recommandés par le fabricant du produit ou de l’appareil. 12. Nettoyez le filtre avant ou après chaque utilisation. 13. Ne sélectionnez pas une température élevée pour faire sécher des articles contenant du caoutchouc mousse ou des matériaux dont la texture est similaire à celle du caoutchouc. 14. Évitez toute accumulation de peluches, poussières et saletés à proximité de l’orifice d’évacuation. 15. L’intérieur du sèche-linge et du conduit d’évacuation doit être nettoyé régulièrement, par un technicien de maintenance qualifié. 16. Ne faites pas sécher du linge ayant été en contact avec de l’huile de cuisson. Il risquerait de s’enflammer. 17. Cet appareil doit être mis à la terre. Reportez-vous à «Normes électriques» et «Mise à la terre» dans la section «Installation du sèche-linge». 18. Cet appareil doit être correctement mis à la terre. Ne branchez jamais le cordon d’alimentation sur une prise qui n’est pas correctement reliée à la terre et qui n’est pas conforme aux réglementations locales et nationales en vigueur. Consultez les consignes d’installation pour relier cet appareil à la terre. 19. Vérifiez que les poches sont vides. Les petits objets aux bords irréguliers (pièces de monnaie, canifs, épingles, etc.) risquent en effet d’endommager votre sèche-linge. CONSERVEZ SOIGNEUSEMENT CES CONSIGNES Français - 6 DV455_02836F-08_CFR.indd Sec11:6 2013-12-12 5:13:03 20. Des fuites de gaz dangereuses pourraient survenir dans votre système. 21. Une fuite de gaz n’est pas toujours détectable à l’odeur. 22. C’est pourquoi les fournisseurs de gaz vous recommandent d’acheter et d’installer un détecteur de gaz conforme à la réglementation UL. APPAREILS À GAZ : Ce produit contient des substances chimiques considérées par l’État de Californie comme étant cancérigène ou à l’origine de troubles de la reproduction. Les appareils au gaz peuvent entraîner de faibles expositions aux substances listées dans la Proposition 65 parmi lesquelles le benzène, le monoxyde de carbone, le formaldéhyde et la suie, des substances engendrées par la combustion incomplète du gaz naturel ou du propane liquide. ATTENTION 01 MESURES DE SÉCURITÉ AVERTISSEMENT ATTENTION 1. Ne vous asseyez pas sur le sèche-linge. 2. Dans le cadre de l’amélioration constante de ses produits, Samsung se réserve le droit de modifier les spécifications sans préavis. Pour plus de détails, consultez les consignes d’installation accompagnant votre produit avant de sélectionner du mobilier, d’effectuer des découpes ou de commencer l’installation. 3. Évitez de laver des vêtements ayant de grandes boucles, des boutons ou d’autres accessoires en métal lourd ou massif. 4. Installez-le et utilisez-le conformément aux consignes du fabricant. 5. N’introduisez aucun article imprégné ou tâché d’huile végétale ou alimentaire dans votre sèche-linge. Même une fois lavés, ces articles peuvent encore contenir une quantité non négligeable d’huile. 6. Toute huile résiduelle risque de s’enflammer spontanément. Le potentiel de combustion spontanée augmente lorsque les articles imbibés d’huile végétale ou alimentaire sont exposés à la chaleur. Les sources de chaleur comme votre sèche-linge peuvent chauffer ces articles, engendrant une oxydation de l’huile Cette oxydation crée elle-même de la chaleur. Si cette chaleur ne se dissipe pas, les articles deviennent suffisamment brûlants pour s’enflammer. Entasser, empiler ou stocker ce type d’articles peut empêcher la dissipation de la chaleur et être à l’origine d’un risque d’incendie. 7. Tout le linge imbibé d’huile végétale ou alimentaire, qu’il soit lavé ou non, peut s’avérer dangereux. Le fait de laver ces articles à l’eau chaude avec une dose supplémentaire de lessive réduit ce risque, sans pour autant le supprimer. Utilisez toujours le programme de refroidissement Cool Down, afin de réduire leur température. Ne retirez jamais ces articles du sèche-linge lorsqu’ils sont chauds ; de même, n’interrompez pas le programme de séchage tant que le cycle Cool Down n’est pas terminé. N’entassez et n’empilez pas ces articles lorsqu’ils sont chauds. 8. Veillez à ce que les doigts des enfants ne soient pas pris dans le hublot en le fermant. Cela pourrait entraîner des blessures. CONSERVEZ SOIGNEUSEMENT CES CONSIGNES Français - 7 DV455_02836F-08_CFR.indd Sec11:7 2013-12-12 5:13:03 Mesures de sécurité AVIS D'APPLICATION DE LA RÉGLEMENTATION 1. Avis concernant la FCC PRÉCAUTION CONCERNANT LA FCC : ATTENTION Tous les changements ou modifications non expressément approuvé(e)s par l'autorité responsable de la conformité à la réglementation peut annuler le droit de l'utilisateur à utiliser cet appareil. Cet appareil est conforme aux dispositions de la section 15 du règlement de la FCC. Le fonctionnement est soumis aux deux conditions suivantes : 1. Cet appareil ne doit pas causer d'interférences nuisibles, et 2. Cet appareil doit accepter toute autre interférence reçue y compris les interférences pouvant entraîner un fonctionnement non désiré. Pour le produit disponible sur le marché des USA/du Canada, seuls les canaux 1 à 11 peuvent être utilisés. La sélection des autres canaux est impossible. DÉCLARATION DE LA FCC : Cet équipement a été testé et s'est avéré conforme aux limites d'un dispositif numérique de la classe B, conformément à la section 15 du réglement de la FCC. Ces limites sont conçues pour assurer la protection raisonnable contre des interférences nuisibles dans une installation résidentielle. Cet appareil génère, utilise, et peut émettre de l'énergie radio électrique et, s'il n'est pas installé et utilisé conformément aux présentes instructions, peut provoquer des interférences nuisibles. Cependant, il n'y a aucune garantie que des interférences ne se produiront pas dans une installation particulière. Si cet appareil cause des interférences nuisibles à la réception des signaux de radio ou de télévision, ce qui peut être déterminé en allumant et en éteignant l'appareil, l'utilisateur est encouragé à essayer de corriger l'interférence par une ou plusieurs des mesures suivantes : • Réorienter ou déplacer l’antenne de réception • Augmenter l’espace entre l’appareil et le récepteur • Connecter l’appareil sur un circuit électrique différent de celui auquel le récepteur est connecté. • Consultez le revendeur ou un technicien expérimenté en radio/télévision pour obtenir de l’aide. DÉCLARATION DE LA FCC SUR L'EXPOSITION AUX RADIATIONS : Cet appareil est conforme aux limitations prévues par la FCC pour l’exposition aux irradiations dans le cadre d’un environnement d’accès libre. Cet appareil doit être installé et utilisé avec une distance minimale de 20 cm entre le radiateur et votre corps. Ce dispositif et son(ses) antenne(s) ne doivent pas être coimplantés ni utilisés à proximité d’une autre antenne ou émetteur. CONSERVEZ SOIGNEUSEMENT CES CONSIGNES Français - 8 DV455_02836F-08_CFR.indd Sec11:8 2013-12-12 5:13:03 2. Notification IC Cet appareil numérique de la classe B est conforme à la norme ICES-003 canadienne. Pour le produit disponible sur le marché des USA/du Canada, seuls les canaux 1 à 11 peuvent être utilisés. La sélection des autres canaux est impossible. DÉCLARATION IC SUR L'EXPOSITION AUX RADIATIONS : Cet appareil est conforme aux limitations prévues par la norme IC RSS-102 pour l’exposition aux irradiations dans le cadre d’un environnement d’accès libre. Cet appareil doit être installé et utilisé avec une distance minimale de 20 cm entre le radiateur et votre corps. Ce dispositif et son(ses) antenne(s) ne doivent pas être coimplantés ni utilisés à proximité d’une autre antenne ou émetteur. 01 MESURES DE SÉCURITÉ Le terme « IC » précédant le numéro d'homologation radio signifie uniquement que les spécifications techniques d'Industry Canada ont été atteintes. Le fonctionnement est soumis aux deux conditions suivantes : (1) cet appareil ne doit pas causer d'interférences, et (2) cet appareil doit accepter toute autre interférence reçue y compris les interférences pouvant entraîner un fonctionnement non désiré. CONSERVEZ SOIGNEUSEMENT CES CONSIGNES Français - 9 DV455_02836F-08_CFR.indd Sec11:9 2013-12-12 5:13:03 Installation du sèche-linge DÉBALLER LE SÈCHE-LINGE Déballez votre sèche-linge et vérifiez qu'il n'a pas été endommagé pendant le transport. Vérifiez que vous disposez de tous les éléments illustrés ci-dessous. Si votre sèche-linge a été endommagé pendant le transport ou si vous ne disposez pas de tous les éléments, appelez immédiatement le 1-800-SAMSUNG (726-7864). Afin de prévenir tout risque de blessures, munissez-vous de gants de protection pour soulever ou porter le lave-linge. AVERTISSEMENT Les matériaux d’emballage peuvent être dangereux pour les enfants. Maintenez tous les emballages (sacs en plastique, polystyrène, etc.) hors de portée des enfants. Capot supérieur Panneau de commande [ ARRIÈRE ] Hublot Filtre Conduit d'évacuation Panneau avant Arrivée d'eau VOIR LES CONDITIONS REQUISES EN MATIÈRE D'ÉVACUATION. Pièces fournies Raccord en Y Tuyau d’arrivée d'eau court Rondelle de caoutchouc Tuyau d'arrivée d'eau long Français - 10 DV455_02836F-08_CFR.indd 10 2013-12-12 5:13:03 Outils requis Cutter Pince serre-tube (modèle au gaz uniquement) Tournevis à douille Niveau Tournevis cruciforme Ruban adhésif Clé anglaise 02 INSTALLATION DU SÈCHE-LINGE Pince CONDITIONS D'INSTALLATION DE BASE Vérifiez que vous disposez de tous les éléments requis pour installer correctement l’appareil. • Une PRISE ÉLECTRIQUE AVEC MISE A LA TERRE. Consultez la section « Normes électriques » à la page 17. • Un CORDON D’ALIMENTATION pour sèche-linge électrique (à l’exception du Canada). • Des CONDUITES DE GAZ (s’il s’agit d’un sèche-linge au gaz), conformes aux réglementations locales et nationales. • Un SYSTEME D’EVACUATION, réalisé en métal rigide ou en métal flexible avec parois rigides. CONDITIONS REQUISES EN MATIÈRE DE CONDUITS • • • • • • • • • • • • • Utilisez un conduit en aluminium ou en acier galvanisé rigide d’un diamètre de 4 pouces (10,2 cm). N’utilisez pas de conduit plus petit. Les conduits dont le diamètre est supérieur à 4 pouces (10,2 cm) peuvent provoquer une trop grande accumulation de peluches. Les peluches doivent être éliminées régulièrement. Si vous devez utiliser un conduit métallique flexible, optez pour un conduit aux parois rigides. N’utilisez pas de conduit flexible aux parois fines. En effet, un conduit métallique flexible se boucherait rapidement en cas de torsion trop forte. N’installez aucun conduit flexible à l’intérieur de murs, de plafonds ou d’autres espaces masqués. Faites en sorte que le conduit d’évacuation reste aussi droit et soit aussi court que possible. Fixez les joints à l’aide d’un ruban adhésif. N’utilisez pas de vis. Des conduits flexibles en plastique peuvent s’entortiller, se détendre, être transpercés, réduire le flux d’air, rallonger les temps de séchage et affecter le fonctionnement du sèche-linge. Des systèmes d’évacuation dépassant la longueur recommandée peuvent induire des temps de séchage plus longs, affecter le fonctionnement de l’appareil et accumuler les peluches. Le conduit d’évacuation doit se terminer par une hotte équipée d’un registre mobile, pour éviter les refoulements et bloquer l’accès aux petits animaux. N’utilisez jamais de hotte équipée d’un registre magnétique. Un espace de 12 pouces (30,5 cm) minimum doit séparer le bas de la hotte du sol ou de toute autre obstacle. L’ouverture de la hotte doit se faire vers le bas. N’installez jamais de filtre sur la sortie d’évacuation. Français - 11 DV455_02836F-08_CFR.indd 11 2013-12-12 5:13:04 Installation du sèche-linge • • • • • • Pour éviter les dépôts de peluches, n’installez pas directement l’évacuation du sèche-linge dans une fenêtre. L’évacuation ne doit pas se faire sous une maison ou un porche. Si le conduit d’évacuation doit traverser une zone non chauffée, le conduit doit être isolé et légèrement incliné vers le bas en direction de la hotte pour réduire la condensation et l’accumulation de peluches. Inspectez et nettoyez l’intérieur du système d’évacuation au moins une fois par an. Débranchez le cordon d’alimentation avant de procéder au nettoyage. Vérifiez fréquemment que le registre de la hotte s’ouvre et se ferme sans problème. Effectuez un contrôle une fois par mois et un nettoyage au moins une fois par an. Remarque : Si les vêtements ne sèchent pas, vérifiez que les conduits ne sont pas obstrués. L'évacuation du sèche-linge ne doit pas se faire dans un mur, le plafond, un vide sanitaire ou un espace caché d'un bâtiment, un conduit d'évacuation de gaz ou tout autre conduit ou cheminée standard, car les peluches expulsées par le sèche-linge peuvent présenter un risque d'incendie. SÈCHE-LINGE ÉLECTRIQUE ET À GAZ Type de bouche d’évacuation Recommandé À n’utiliser que pour les installations temporaires 4" (10,16 cm) 2,5” (6,35 cm) N° de coudes à 90° Rigide Métallique flexible* Rigide Métallique flexible* 0 24,4 m (80 pieds) 12,4 m (41 pieds) 22,6 m (74 pieds) 10,1 m (33 pieds) 8,8 m (29 pieds) 1 20,7 m (68 pieds) 11,2 m (37 pieds) 18,9 m (62 pieds) 2 17,4 m (57 pieds) 10,1 m (33 pieds) 15,5 m (51 pieds) 7,6 m (25 pieds) 3 14,3 m (47 pieds) 9,0 m (29 pieds) 12,5 m (41 pieds) 6,5 m (21 pieds) * N’utilisez pas de conduits flexibles non métalliques. Si un nouveau sèche-linge est relié à un système d’évacuation existant, vous devez veiller à ce que : • Le système d’évacuation soit conforme aux réglementations locales, régionales et nationales. • Aucun conduit flexible en plastique ne soit utilisé. • Le conduit existant doit être contrôlé et les peluches accumulées à l’intérieur retirées. • Le conduit ne doit être ni bosselé ni écrasé. • Le registre de la hotte s’ouvre et se ferme sans problème. La pression statique dans un système d’évacuation doit être inférieure à 0 ou ne doit pas dépasser 0,83 pouce de colonne d'eau (0,0021 bar). Vous pouvez la mesurer lorsque le sèche-linge est en marche à l’aide d’un manomètre, au point de connexion entre le conduit d’évacuation et le sèche-linge. Vous devez utiliser un réglage à froid. Le tambour du sèche-linge doit être vide et le filtre à peluches propre. REMARQUE IMPORTANTE POUR L’INSTALLATEUR Lisez attentivement les instructions suivantes avant d’installer le sèche-linge. Conservez soigneusement ces consignes afin de pouvoir vous y reporter ultérieurement. AVERTISSEMENT Retirez le hublot des appareils mis au rebut pour éviter qu'un enfant ne soit enfermé et ne s'étouffe à l'intérieur. Français - 12 DV455_02836F-08_CFR.indd 12 2013-12-12 5:13:04 CHOIX DE L'EMPLACEMENT D'INSTALLATION ENCASTREMENT DANS UNE NICHE OU INSTALLATION DANS UN PLACARD AVERTISSEMENT • • 02 INSTALLATION DU SÈCHE-LINGE Le sèche-linge doit être installé dans un endroit suffisamment spacieux, tant à l’avant pour permettre de charger l’appareil, qu’à l’arrière pour le système d’évacuation. Ce sèche-linge est équipé en usine pour une évacuation arrière en option. Si vous préférez l’évacuation par le bas, la droite ou la gauche, utilisez le kit d’évacuation auxiliaire. Les instructions sont fournies avec le kit. Veillez à ce que la pièce dans laquelle se trouve le sèche-linge soit suffisamment aérée. Vous devez donc installer le sèche-linge dans une pièce correctement ventilée. Pour les sèche-linge à gaz, respectez un dégagement adéquat - comme indiqué sur la plaque signalétique afin de garantir une aération appropriée pour la combustion et le bon fonctionnement du sèche-linge. Vous ne devez ni installer ni stocker le sèche-linge dans un endroit ou il pourrait être en contact avec de l’eau et/ou exposé aux intempéries. Vous devez maintenir le sèche-linge à l’écart de tous matériaux combustibles, essence et autres vapeurs et liquides inflammables. Un sèche-linge produit des peluches combustibles. Évitez donc que des peluches ne s’accumulent autour. L’évacuation du sèche-linge doit se faire vers l’extérieur afin de réduire les risques d’incendie si l'appareil est installé dans une niche ou un placard. Vous ne devez installer aucun autre appareil fonctionnant au fuel dans le même placard que le sèchelinge. AVERTISSEMENT : Afin de réduire le risque d'incendie, le sèche-linge doit disposer d'une évacuation vers l'extérieur. Consultez la section « Évacuation » à la page 15. Dégagements minimum entre le sèche-linge et les murs adjacents ou d'autres surfaces Côtés 1 pouce/25 mm Arrière 5 pouces/127 mm Haut 17 pouces/432 mm Avant 2 pouces/51 mm • Le panneau avant du placard doit être doté de deux ouvertures ; assurez-vous d'avoir une surface totale d'au moins 72 pouces carrés (465 cm²) et de laisser un espace minimum de 3 pouces (7,6 cm) en haut et en bas. Un hublot à lamelles et doté de dégagements équivalents est acceptable. Encastrement dans une niche Vue latérale du placard ou de l'espace réduit 1 po (2,5 cm) 1 po (2,5 cm) 27 po (68,6 cm) 17 po (43,2 cm) 27 po (68,6 cm) 1 po (2,5 cm) 2 po (5 cm) 34,1 po (86,5 cm) 5 po (12,7 cm) Français - 13 DV455_02836F-08_CFR.indd 13 2013-12-12 5:13:04 Installation du sèche-linge Avec un socle ou un kit de superposition facultatif Dimensions requises pour l'installation avec socle Dimensions requises pour l'installation avec kit de superposition 51,2 po (130 cm) pour permettre l’ouverture du hublot 39 po (99 cm) 53,6 po (136,2 cm) 34,1 po (86,5 cm) 5 po (12,7 cm) 3 po (7,6 cm) 6 po * (15,2 cm) 27 po (68,6 cm) 5 po (12,7 cm) 77,2 po (196,2 cm) 48 po² * (310 cm²) Placard ou hublot 1 po (2,5 cm) 27 po (68,6 cm) 24 po² * (155 cm²) 3 po (7,6 cm) 1 po 34,1 po 8 po** (2,5 cm) (86,5 cm) (20,3 cm) * Espace obligatoire ** Le coude d'évacuation externe nécessite un espace supplémentaire. Il n'est pas recommandé de superposer le modèle DV457* sur votre lave-linge. (Il pourrait s'avérer difficile de contrôler l'écran LCD du sèche-linge en raison de l'angle de vue.) Français - 14 DV455_02836F-08_CFR.indd 14 2013-12-12 5:13:05 ÉVACUATION L'évacuation du sèche-linge ne doit pas être reliée à un conduit de cheminée, un mur, un plafond, un grenier, un espace mansardé ou exigu d'un bâtiment. L’évacuation du sèche-linge vers l’extérieur évite le refoulement d’air humide et de peluches dans la pièce. • Tous les sèche-linge doivent être dotés d’une évacuation vers l’extérieur. • Le conduit ne doit pas être assemblé à l’aide de vis ou autres types d’attache pénétrant à l’intérieur du conduit et pouvant entraîner l’accumulation de peluches. • Le diamètre du conduit d’évacuation doit être de 4 po (102 mm). • La longueur totale du conduit en métal flexible ne doit pas dépasser 2,4 m (7,8 pieds). Aux États-Unis : • Utilisez uniquement des conduits flexibles de type aluminium, tels que spécifiés par le fabricant, le cas échéant, et conformes à la norme Outline for Clothes Dryer Transition Ducts, sujet 2158A (norme relative aux conduits d’évacuation des sèche-linge). 02 INSTALLATION DU SÈCHE-LINGE Consultez la section « Conditions requises en matière de conduits » à la page 11 pour la longueur maximale de conduit et le nombre de courbures. Au Canada : • Utilisez uniquement des conduits flexibles de type aluminium, tels que spécifiés par le fabricant, le cas échéant. Hors des États-Unis et du Canada : • Référez-vous aux réglementations locales. AVERTISSEMENT AVERTISSEMENT L’évacuation du sèche-linge doit se faire vers l’extérieur afin de réduire les risques d’incendie si l'appareil est installé dans une niche ou un placard. N'EMPLOYEZ JAMAIS UN CONDUIT FLEXIBLE EN PLASTIQUE OU NON-MÉTALLIQUE. Si votre canalisation existante est en plastique, non-métallique, ou combustible, la remplacer par une métallique. Employez uniquement un conduit d'évacuation métallique et non inflammable pour assurer le confinement de l’air d’évacuation, de la chaleur et des peluches. Français - 15 DV455_02836F-08_CFR.indd 15 2013-12-12 5:13:05 Installation du sèche-linge SYSTÈMES FONCTIONNANT AU GAZ Utilisez uniquement du gaz naturel ou du propane liquide (PL). L’INSTALLATION DOIT ÊTRE CONFORME AUX RÉGLEMENTATIONS LOCALES EN VIGUEUR OU, EN L’ABSENCE DE DISPOSITIONS SPÉCIFIQUES, À LA RÉGLEMENTATION NATIONALE SUR LE GAZ COMBUSTIBLE ANSI/Z223.1 (NATIONAL FUEL GAS CODE), DERNIÈRE RÉVISION (POUR LES ÉTATS-UNIS) OU AUX DISPOSITIONS D’INSTALLATION CAN/CGA-B149 (POUR LE CANADA). Les sèche-linge à gaz sont équipés d’un système de ventilation des brûleurs à utiliser avec le gaz naturel. Si vous envisagez d’utiliser votre sèche-linge avec du propane liquide, un technicien de maintenance qualifié doit le convertir pour garantir la fiabilité et la sécurité des performances. Une conduite d’alimentation en gaz de 1/2” (1,27 cm) est recommandée ; elle doit être réduite pour la connexion à la conduite de gaz de 3/8” (1 cm) de votre sèche-linge. La réglementation nationale sur le gaz combustible impose qu’un robinet de fermeture manuelle du gaz, accessible et agréé, soit installé à moins de 6” du sèche-linge. Les sèche-linge à gaz installés dans des garages résidentiels doivent être surélevés à 18 pouces (46 cm) au-dessus du sol. En outre, une prise enfichée N.P.T. (National Pipe Thread) de 1/8” (0,3 cm), permettant le branchement d’une jauge de test, doit être installée immédiatement en amont de la connexion d’alimentation en gaz du sèche-linge. Votre sèche-linge doit être déconnecté du circuit d’alimentation en gaz à chaque test de pression du système. NE réutilisez JAMAIS d’anciennes conduites de gaz métalliques flexibles. Toute conduite de gaz flexible doit être certifiée par l’American Gas Association - U.S.A. Gas (CGA au Canada). • Les raccords de conduite utilisés doivent être résistants à l’action de tout gaz de pétrole liquéfié. • La plupart des sociétés de gaz locales inspecteront gratuitement votre installation, sur demande. ALLUMAGE DU GAZ – Votre sèche-linge utilise un système d’allumage automatique pour le brûleur. Il n’existe pas de pilote de combustion constante. INSTRUCTIONS D’INSTALLATION - COMMONWEALTH DU MASSACHUSETTS Votre sèche-linge doit être installé par un plombier ou un installateur de gaz agréé. Un robinet de gaz manuel à poignée, dit en « T », doit être installé sur la conduite d’alimentation en gaz de votre sèche-linge. Si vous utilisez un connecteur gaz flexible pour installer votre sèche-linge, celui-ci doit mesurer au moins 3 cm (36”) de long. • Des fuites de gaz peuvent survenir dans votre système, créant une situation dangereuse. Une fuite de gaz n’est pas toujours détectable à l’odeur. AVERTISSEMENT • • C’est pourquoi les fournisseurs de gaz vous recommandent d’acheter et d’installer un détecteur de gaz conforme à la réglementation UL. • Installez-le et utilisez-le conformément aux consignes du fabricant. Français - 16 DV455_02836F-08_CFR.indd 16 2013-12-12 5:13:05 NORMES ÉLECTRIQUES Le schéma de câblage figure sur une plaque située sous le panneau de commande. • • • Un branchement incorrect du conducteur de mise à la terre peut créer un risque d'électrocution. Demandez conseil à un électricien ou un réparateur agréé si vous avez des doutes quant à la mise à la terre correcte de votre sèche-linge. Ne modifiez pas la prise fournie avec le sèche-linge ; si celle-ci ne correspond pas à la prise secteur, demandez à un électricien qualifié d'installer une prise adéquate. Pour prévenir tout risque d’incendie, d’électrocution ou de blessure, l’intégralité du câblage et des mises à la terre doit être réalisée conformément aux réglementations locales ou, en l’absence de ces dernières, au code électrique national (National Electrical Code) ANSI/NFPA dernière révision n°70 (pour les États-Unis) ou aux dispositions canadiennes sur l’électricité CSA C22.1 (dernières révisions) et aux réglementations locales. Il relève de votre responsabilité de fournir des services électriques adaptés à votre sèche-linge. Toutes les installations au gaz doivent être conformes aux dispositions nationales sur le gaz ANSI/ Z2231, dernière révision (pour les États-Unis), ou aux dispositions d'installation CAN/CGA (B149) dernière révision (pour le Canada), ainsi qu'aux réglementations et ordonnances locales en vigueur. 02 INSTALLATION DU SÈCHE-LINGE AVERTISSEMENT MISE À LA TERRE Ce sèche-linge doit être mis à la terre. En cas de panne ou de défaillance, la mise à la terre réduira le risque de surtension électrique en fournissant un circuit de fuite au courant électrique. AVERTISSEMENT Modèles au gaz Votre sèche-linge est doté d’un cordon équipé d’un conducteur de mise à la terre et d’une prise de terre. La prise doit être branchée sur une prise secteur appropriée, correctement installée et mise à la terre conformément aux dispositions et aux réglementations en vigueur. Ne modifiez pas la prise fournie avec le sèche-linge ; si celle-ci ne correspond pas à la prise secteur, demandez à un électricien qualifié d'installer une prise adéquate. Ne reliez jamais un conducteur de terre à une conduite de plomberie en plastique, une conduite de gaz ou une conduite d'eau chaude. AVERTISSEMENT Modèles électriques Votre sèche-linge nécessite un cordon (proposé en option) équipé d’un conducteur de mise à la terre de l’appareil et d’une prise de terre, vendu séparément. La prise doit être branchée sur une prise secteur appropriée, correctement installée et mise à la terre conformément aux dispositions et aux réglementations en vigueur. Ne modifiez pas la prise fournie avec le sèche-linge ; si celle-ci ne correspond pas à la prise secteur, demandez à un électricien qualifié d'installer une prise adéquate. Si vous n’utilisez pas de cordon d’alimentation et que le sèche-linge électrique doit être branché en permanence, reliez-le à une prise de terre métallique permanente ou connectez un conducteur de mise à la terre aux conducteurs du circuit et à la borne ou au fil de terre de l’appareil. Français - 17 DV455_02836F-08_CFR.indd 17 2013-12-12 5:13:05 Installation du sèche-linge RACCORDEMENT ÉLECTRIQUE Avant toute mise en marche ou test, observez les consignes de mise à la terre présentées dans la «Mise à la terre» section à la page 17. Nous vous recommandons de relier votre sèche-linge à une dérivation individuelle ou à un circuit distinct. N’UTILISEZ PAS DE RALLONGE AVEC CET APPAREIL. Modèles au gaz : États-Unis et Canada Vous devez utiliser une alimentation électrique de 120 V c.a., 60 Hz et un disjoncteur ou fusible de 15 A. Modèles électriques : États-Unis uniquement Aux États-Unis, la plupart des sèche-linge requièrent une alimentation en 120/240 V c.a., 60 Hz, tandis que d’autres requièrent une alimentation en 120/208 V c.a., 60 Hz. Vous trouverez les spécifications électriques sur l’étiquette située derrière le hublot. Un disjoncteur ou fusible de 30 A est requis de chaque côté de la ligne. • Si vous utilisez un cordon d’alimentation, branchez ce dernier sur une prise 30 A. • Le cordon d’alimentation n'est PAS fourni avec les sèche-linge version électrique aux ÉtatsUnis. AVERTISSEMENT RISQUE D'ELECTROCUTION : Lorsque les dispositions locales le permettent, vous pouvez brancher le sèche-linge électrique à l’aide d’un kit de cordon d’alimentation neuf, portant une mention de compatibilité avec les sèche-linge et homologué UL. Ce cordon doit supporter une alimentation nominale de 120/240 V, 30 A à partir d’un cordon doté de trois conducteurs en cuivre N° 10 et terminé par des bornes en boucle fermée, des cosses à fourches ouvertes aux extrémités relevées ou des conducteurs étamés. • Ne réutilisez pas le cordon d’alimentation d’un sèche-linge usagé. Le câblage électrique du cordon d’alimentation doit être branché sur le sèche-linge au moyen d’un réducteur de tension homologué UL. • La mise à la terre via le conducteur neutre est interdite pour (1) les nouvelles installations de circuit, (2) les mobil homes, (3) les véhicules de camping et (4) les zones où les réglementations locales interdisent ce type de mise à la terre. (Utilisez une fiche quadripolaire pour une prise 4 fils, de type NEMA 14-30R.) Modèles électriques : Canada uniquement • • Vous devez utiliser une alimentation électrique de 120/240 V c.a., 60 Hz, et un disjoncteur ou fusible de 30 A aux deux extrémités de la ligne. Tous les modèles canadiens sont livrés avec un cordon d’alimentation intégré. Vous devez brancher le cordon d’alimentation sur une prise 30 A. Au Canada, il est possible que vous ne puissiez pas convertir un sèche-linge en 208 V. Français - 18 DV455_02836F-08_CFR.indd 18 2013-12-12 5:13:05 RACCORDEMENT DU TUYAU D’ARRIVÉE D'EAU Méthode 1 1. Si l’espace libre est suffisant, branchez l’extrémité femelle en laiton du raccord en Y au robinet d’eau froide. 2. Fermez le robinet. 3. Branchez la partie droite du tuyau long sur le raccord en Y. 4. À l’aide d’une pince, serrez le raccord de deux tiers de tour. Raccord en Y Ne serrez pas plus, car cela endommagerait le raccord. 5. Branchez la partie coudée du tuyau long au robinet situé en bas du panneau arrière du sèche-linge. Vissez le raccord à la main jusqu’à ce qu’il soit bien fixé au connecteur du robinet de remplissage. 6. À l’aide d’une pince, serrez le raccord de deux tiers de tour. Ne serrez pas plus, car cela endommagerait le raccord. Tuyau d'eau Conduit d'évacuation 02 INSTALLATION DU SÈCHE-LINGE Le sèche-linge doit être connecté au robinet d’eau froide à l’aide d’un tuyau d’arrivée neuf. N’utilisez jamais de tuyaux usagés. Panneau (arrière) 7. Vérifiez que les robinets d’eau sont ouverts. 8. Vérifiez qu’il n’y a aucune fuite au niveau du raccord en Y, des robinets et des tuyaux. Tuyau d'eau Français - 19 DV455_02836F-08_CFR.indd 19 2013-12-12 5:13:05 Installation du sèche-linge Méthode 2 Le sèche-linge doit être connecté au robinet d’eau froide à l’aide d’un tuyau d’arrivée neuf. N’utilisez jamais de tuyaux usagés. 1. Si vous ne pouvez brancher directement le raccord en Y sur le robinet d’eau froide, vous devez utilisez le tuyau court fourni avec le sèche-linge. 2. Fermez le robinet. 3. Branchez le tuyau d’arrivée court sur le robinet d’eau froide. Vissez le raccord à la main jusqu’à ce qu’il soit correctement fixé au robinet. 4. À l’aide d’une pince, serrez le raccord de deux tiers de tour. Ne serrez pas plus, car cela endommagerait le raccord. 5. Branchez le raccord en Y à l’extrémité mâle en laiton du tuyau court. Vissez le raccord à la main jusqu’à ce qu’il soit bien fixé au connecteur. 6. À l’aide d’une pince, serrez le raccord de deux tiers de tour. Tuyau court (arrivée d'eau froide) Raccord en Y Tuyau long Conduit d'évacuation Panneau (arrière) Ne serrez pas plus, car cela endommagerait le raccord. 7. Branchez la partie coudée du tuyau long au robinet de remplissage situé en bas du panneau arrière du sèche-linge. Vissez le raccord à la main jusqu’à ce qu’il soit bien fixé au connecteur du robinet de remplissage. 8. À l’aide d’une pince, serrez le raccord de deux tiers de tour. Tuyau d'eau Ne serrez pas plus, car cela endommagerait le raccord. 9. Raccordez le tuyau du lave-linge à l’autre extrémité du raccord en Y. Serrez le raccord jusqu’à ce qu’il soit correctement fixé. À l’aide d’une pince, serrez le raccord de deux tiers de tour. Ne serrez pas à l’excès. vous risqueriez d’endommager le raccord. 10. Vérifiez que les robinets d’eau sont ouverts. 11. Vérifiez qu’il n’y a aucune fuite au niveau du raccord en Y, des robinets et des tuyaux. Français - 20 DV455_02836F-08_CFR.indd 20 2013-12-12 5:13:05 PIÈCES DE RECHANGE ET ACCESSOIRES Si vous avez besoin de pièces de rechange ou d’accessoires pour votre sèche-linge, contactez votre revendeur ou le centre d’assistance clientèle de SAMSUNG au 1-800-SAMSUNG (726-7864). Pour une installation optimale, nous vous recommandons de faire appel à un installateur qualifié. Installation : 1. Installez votre sèche-linge à l’emplacement approprié. Envisagez d’installer le sèche-linge et le lave-linge côte à côte pour faciliter l’accès aux raccords de gaz, électriques et d’évacuation. Posez deux des plateaux en carton sur le sol. Inclinez le sèche-linge sur le côté pour le poser sur les deux plateaux. 2. Remettez le sèche-linge à la verticale. 3. Pour pouvoir offrir des performances optimales, le sèchelinge doit être parfaitement de niveau. Pour minimiser les vibrations, le bruit et les mouvements indésirables, le sol sur lequel le lave-linge est installé doit être parfaitement de niveau et stable. Pour positionner le sèche-linge à la même hauteur que le lave-linge, rétractez entièrement les pieds réglables en les faisant tourner dans le sens anti-horaire, puis desserrez les pieds dans le sens horaire. Rétracter entièrement Niveau 02 INSTALLATION DU SÈCHE-LINGE INSTALLATION Pieds réglables Puis desserrer Ajustez les pieds uniquement pour atteindre le niveau requis. Si vous étendez les pieds plus que nécessaire, les vibrations seront plus importantes. 4. Consultez la «Évacuation» section à la page 15 avant d’installer le système d’évacuation. Reliez le sèche-linge et la hotte avec le système de conduites. L’extrémité sertie des sections du conduit doit être orientée vers l’extérieur. N’utilisez PAS de vis métallique pour assembler les conduits. Les joints doivent être maintenus par du ruban adhésif. N’utilisez jamais de conduit d’évacuation flexible en plastique. Conseil pour une installation étanche : installez une section du système d'évacuation sur votre sèche-linge, avant la mise en place définitive. Servez-vous de ruban adhésif pour maintenir cette section en place sur le sèche-linge, mais veillez à ne pas couvrir les évents de ventilation situés à l’arrière du sèche-linge. Français - 21 DV455_02836F-08_CFR.indd 21 2013-12-12 5:13:06 Installation du sèche-linge 5. Relisez la «Normes électriques» section à la page 17 AVANT TOUTE MISE EN MARCHE OU TEST, observez les consignes de mise à la terre présentées dans la «Mise à la terre» section à la page 17. AVERTISSEMENT MODELES POUR LES USA : RISQUE D'ELECTROCUTION - Tous les modèles pour les USA sont produits pour un SYSTÈME DE CONNEXION À 3 FILS. Le châssis du sèche-linge est mis à la terre par le conducteur neutre du bornier. Un SYSTÈME DE CONNEXION À 4 FILSest nécessaire pour les constructions nouvelles ou rénovées, les camping-cars ou si les règlements locaux n'autorisent pas la mise à la terre via le neutre. Si vous utilisez un système à 4 fils, vous ne pouvez pas mettre le châssis du sèche-linge à la terre via le conducteur neutre au niveau du bornier. Consultez les instructions suivantes pour plus d’informations sur les BRANCHEMENTS À 3 et 4 FILS. Retirez le cache du bornier. Introduisez le cordon d’alimentation équipé d’un réducteur de tension homologué UL par l’orifice découpé dans le panneau à proximité du bornier. Vous devez impérativement utiliser un réducteur de tension. Ne desserrez pas les écrous déjà fixés au bornier. Assurez-vous qu’ils sont bien serrés. Utilisez une douille longue de 3/8” (1 cm). 6. Reportez-vous à la «Systèmes fonctionnant au gaz» section à la page 16. Retirez le capuchon de protection du filet au pas du gaz. Appliquez sur tous les raccords filetés un matériau de joint d’étanchéité pour canalisation ou une bande de Teflon sur 1 tour 1/2. Le matériau de joint d’étanchéité utilisé doit être résistant à l’action des gaz de pétrole liquéfié. Branchez l’alimentation en gaz sur votre sèche-linge. Un raccord supplémentaire est requis pour relier l’extrémité filetée femelle 3/4” (1,9 cm) du raccord flexible à l’extrémité filetée mâle de 3/8” (1 cm) du sèche-linge. Serrez fermement les raccords de la conduite de gaz. Ouvrez l’arrivée du gaz. Confirmez l’absence de fuite de gaz au niveau des raccords, à l’aide d’une solution savonneuse. Si des bulles apparaissent, resserrez les raccords et recommencez le test. N’utilisez JAMAIS de flamme nue pour rechercher les fuites de gaz. Français - 22 DV455_02836F-08_CFR.indd 22 2013-12-12 5:13:06 Branchements à 3 FILS 1 Connecteur de terre externe 2 Fil de terre neutre (vert/jaune) 3 Vis centrale argentée du bornier 4 Fil neutre (blanc ou central) 5 Réducteur de tension 3/4” (1,9 cm) homologué UL 02 INSTALLATION DU SÈCHE-LINGE 1. Desserrez ou retirez la vis centrale du bornier. 2. Reliez le fil neutre (blanc ou central) du cordon d'alimentation à la borne à vis argentée centrale du bornier. Serrez la vis. 3. Reliez les autres fils aux bornes à vis extérieures. Serrez les vis. 4. Serrez les vis de décharge de tension. 5. Insérez la languette du cache du bornier dans la fente située sur le panneau arrière du sèchelinge. 6. Fixez le cache à l’aide d’une vis. Lors de la conversion d’un système électrique à 4 fils en système électrique à 3 fils, le conducteur de terre doit être rebranché sur le support du bornier, pour mettre le châssis du sèche-linge à la terre sur le conducteur neutre. AVERTISSEMENT Branchements à 4 FILS 1. Retirez la vis centrale du bornier. 2. Reliez le fil de terre (vert ou sans habillage) du cordon d’alimentation au conducteur à vis de terre externe. 3. Branchez le fil neutre (blanc ou central) du cordon d'alimentation et le fil de terre de l'appareil (vert à rayures jaunes) sous la vis centrale du bornier. 4. Reliez les autres fils aux bornes à vis extérieures. Serrez les vis. 5. Serrez les vis de décharge de tension. 6. Insérez la languette du cache du bornier dans la fente située sur le panneau arrière du sèchelinge. 7. Fixez le cache à l’aide d’une vis. 1 Connecteur de terre externe 2 Fil vert ou en cuivre nu du cordon d'alimentation 3 Réducteur de tension 3/4 po (1,9 cm) homologué UL 4 Vis centrale argentée du bornier 5 Fil de terre (vert/jaune) 6 Fil neutre (blanc ou central) 8. À l’aide d’un niveau, contrôlez la position du sèche-linge et réglez les pieds si nécessaire. 9. Profitez-en pour vérifier que tous les branchements gaz (sur les versions au gaz), évacuation et électricité ont été correctement effectués. Branchez le sèche-linge et vérifiez qu’il fonctionne correctement en vous servant de la liste de contrôle ci-dessous. 10. (MODELES AU GAZ UNIQUEMENT) Le brûleur peut ne pas s'allumer si de l'air est présent dans la conduite de gaz. Lancez un programme de séchage à chaud pour purger la conduite. Si le gaz ne s’allume pas dans un délai de 5 minutes, éteignez le sèche-linge et attendez pendant 5 minutes. Assurez-vous que le robinet d’alimentation en gaz du sèche-linge est ouvert. Pour vérifier l’allumage du gaz, contrôlez l’émission de chaleur au niveau de l’évacuation. Français - 23 DV455_02836F-08_CFR.indd 23 2013-12-12 5:13:06 Installation du sèche-linge LISTE DE CONTRÔLE FINAL POUR L’INSTALLATION • • • • • • • Le sèche-linge est branché sur une prise électrique et correctement relié à la terre. Les conduites d'évacuation sont installées et les joints maintenus par du ruban adhésif. AUCUN conduit flexible en plastique n'est utilisé. Le matériel d’évacuation est en métal rigide ou en métal flexible avec parois rigides. Le sèche-linge est de niveau et ses pieds sont posés au sol de manière stable. Modèles au gaz : l'arrivée de gaz est ouverte et aucune fuite de gaz n'est détectée. Allumez votre sèche-linge pour vérifier qu'il fonctionne correctement, puis éteignez-le. CONSEILS POUR L’ÉVACUATION DU SÈCHE-LINGE Les conduits en plastique ou non métalliques représentent un danger potentiel d’incendie. AVERTISSEMENT 1. Assurez-vous que le sèche-linge a été installé de manière à ce que l’évacuation de l’air se fasse sans problème. Mur Sèchelinge Conduit d'évacuation 2. Utilisez un conduit d’évacuation métallique rigide de 4”. Scellez tous les joints à l’aide d’un ruban adhésif, y compris au niveau du sèche-linge. N'utilisez jamais de vis qui piègent les peluches. 4” Ruban d'étanchéité Conduit 3. Faites en sorte que les conduits soient aussi droits que possible. 4. Nettoyez tous les anciens conduits avant d'installer votre nouveau sèche-linge. Vérifiez que le clapet d’air s’ouvre et se ferme sans problème. Inspectez et nettoyez le système d'évacuation une fois par an. Ne laissez pas un système d’évacuation de mauvaise qualité ralentir le séchage en : • Utilisation d’un système d’évacuation de mauvaise qualité. • • Utilisation de conduits inutilement longs, dotés de nombreux coudes. • Utilisation d’un conduit flexible en plastique, aux parois fines ou non métallique. Utilisation de conduits et d’évents bouchés ou bosselés. Français - 24 DV455_02836F-08_CFR.indd 24 2013-12-12 5:13:06 INVERSION DU HUBLOT 02 INSTALLATION DU SÈCHE-LINGE 1. Débranchez le cordon d'alimentation. 2. Retirez les deux vis de la charnière du hublot. 3. Soulevez le hublot et retirez-le du sèche-linge. 4. Retirez les deux vis du panneau avant. 5. Retirez les deux vis sur le côté opposé de la charnière du hublot. 6. Retirez les deux vis du dispositif de fermeture. 7. Remontez les deux vis dans les trous internes. 8. Retirez une vis de la charnière du hublot. La vis sert à préfixer le hublot au panneau avant. Français - 25 DV455_02836F-08_CFR.indd 25 2013-12-12 5:13:06 Installation du sèche-linge 9. Remontez les vis dans les autres trous. 10. Placez le hublot de l’autre côté et refixez-le sur le sèchelinge. 11. Remontez le dispositif de fermeture. 12. Ré-engagez les vis dans les trous restants. Français - 26 DV455_02836F-08_CFR.indd 26 2013-12-12 5:13:07 Instructions et conseils d’utilisation AVERTISSEMENT Afin de limiter les risques d'incendie, d'électrocution ou de blessures aux personnes, consultez la section CONSIGNES IMPORTANTES DE SÉCURITÉ avant d'utiliser cet appareil. PRÉSENTATION DU PANNEAU DE COMMANDES 1 Sélecteur de programme 8 6 2 3 4 5 7 8 9 10 Pour choisir un cycle, positionnez le sélecteur sur le programme de votre choix. Le témoin lumineux s’allume en regard du programme. Les programmes Laine, Délicat, Stérilisation, Literie PLUS, Grand rendement, Normal, éco-normal et Repassage facile sont des cycles fonctionnant avec capteur de séchage. La fonction Détecteur de séchage détecte automatiquement l’humidité du linge et éteint le sèche-linge une fois le niveau de sécheresse (très sec à légèrement humide) est atteint. Eco Normal (Éco-normal) - Ce programme permet de réduire la consommation d'énergie jusqu'à 15 % par rapport à un programme Normal Dry (Séchage normal). Il ajuste la durée de cycle et la température pour augmenter le rendement. Normal - Ce programme permet de sécher le linge en coton, les sous-vêtements et le linge de table. Heavy Duty (Grand rendement) - Ce programme permet de sécher à température élevée des tissus épais, tels que les jeans, le velours côtelé ou les vêtements de travail. Perm Press (Repassage facile) - Ce programme permet le séchage automatique des tissus infroissables en coton, synthétique et lainage. Bedding PLUS (Literie PLUS) - Ce programme permet de sécher des objets volumineux, comme les couvertures, les draps et les couettes. Delicates (Délicat) - Ce programme est conçu pour le séchage à basse température des articles fragiles. Wool (Laine) - Pour les lainages lavables en machine et séchables en sèche-linge uniquement. 03 INSTRUCTIONS ET CONSEILS D’UTILISATION 1 Charge inférieure à 3 livres. Le programme Laine de ce sèche-linge a été approuvé par Woolmark pour les lainages Total-Easy-Care, M0913 (DV455E*) et M1007 (DV455G*). Sanitize (Stérilisation) - Ce programme haute température permet de stériliser votre linge au cœur du tissu lors du cycle de séchage Ce programme est idéal pour nettoyer literie et rideaux. Time Dry (Temps de séchage) - Ce programme permet de sélectionner la durée souhaitée en minutes. Tournez la molette de sélection du programme sur Time Dry (Temps de séchage), puis appuyez sur la flèche vers le haut Adjust Time (Réglage du temps) pour définir la durée de séchage. Appuyez plusieurs fois sur la flèche pour faire défiler les temps. Français - 27 DV455_02836F-08_CFR.indd Sec3:27 2013-12-12 5:13:07 Instructions et conseils d’utilisation Quick Dry (Séchage rapide) - Ce programme permet d’effectuer un cycle de séchage de 30 minutes. Air Fluff (Air froid) - Ce programme refroidit le linge à la température de la pièce. Refresh (Rafraîch.) - Ce programme anti-froissage et désodorisant est conçu pour un à quatre articles secs. Il injecte une faible quantité de vapeur dans le tambour du sèchelinge, quelques minutes après le début du cycle de séchage à chaud. Wrinkle Away (Anti-froissement) - Le programme Anti-froissement permet de défroisser le linge resté dans une armoire, etc. Il offre un défroissage grâce à un traitement à la vapeur optimal. Vous pouvez changer la durée de séchage. (Temps minimum : 20 minutes) *Pour de meilleurs résultats, ne chargez pas plus de 3 articles. Une surcharge du sèche-linge peut entraîner une baisse des performances. 2 3 4 Affichage DEL La fenêtre d’affichage montre la durée estimée restante du programme une fois que vous avez appuyé sur le bouton Démarrer/Pause. La durée estimée restante peut varier au fur et à mesure de la progression du programme. Le voyant Drying (séchage) s’allume et reste allumé jusqu’à la fin du programme. Lorsque le sèche-linge entre en phase de refroidissement, le voyant de refroidissement s'allume. Lorsque le sèche-linge est en mode Wrinkle Prevent (Prévention des faux plis), le voyant correspondant s'allume. Lorsque le programme est terminé, la mention « End » (Fin) s'affiche à l'écran, jusqu'à ce que vous ouvriez le hublot du sèche-linge ou que vous appuyiez sur le bouton Marche/ Arrêt. Si votre sèche-linge est en pause pendant un programme, les voyants clignotent jusqu’à ce que vous appuyiez sur Start/Pause (Démarrer/Pause). Bouton Niveau de séchage Pour sélectionner le niveau de séchage en mode Normal (Normal), Heavy Duty (Grand rendement) ou d'autres programmes avec capteur de séchage, appuyez sur le bouton Dry Level (Niveau de séchage). Un voyant s’allume à côté du niveau de séchage souhaité. Appuyez plusieurs fois sur le bouton pour faire défiler les différents paramètres. Pour obtenir un séchage parfait sur des volumes de linge plus importants, vous pouvez utiliser les paramètres Very Dry (Séchage très fort) ou More Dry (Séchage fort). Le paramètre Less Dry (Séchage faible) convient mieux aux tissus légers ou si vous souhaitez que les vêtements ressortent légèrement humides en fin de programme. Le paramètre Damp Dry (Légèrement humide) a été conçu pour sécher partiellement le linge. Utilisez-le pour les articles qui doivent finir de sécher à plat ou en suspension. Bouton Température Appuyez sur le bouton Temp. (Température) pour sélectionner la température appropriée en fonction de la charge de linge. Un voyant s’allume à côté de la température souhaitée. Appuyez plusieurs fois sur le bouton pour faire défiler les différents paramètres. High (Élevée) : pour le linge en coton résistant ou portant l’étiquette Séchage en machine autorisé. Medium (Moyenne) : pour les tissus infroissables, le synthétique, les cotons légers et le linge portant l’étiquette Séchage en machine à température moyenne. Med Low (Moyenne-basse) : produit une chaleur moins élevée que l'option Medium (Moyenne), adaptée aux tissus synthétiques et lainages lavables. Low (Basse) : pour les articles sensibles à la chaleur, dont l’étiquette indique Séchage en machine à froid ou tiède. Extra Low (Très basse) : séchage à la plus basse température possible. Français - 28 DV455_02836F-08_CFR.indd Sec3:28 2013-12-12 5:13:07 Vous pouvez ajuster le temps de séchage en appuyant sur le bouton de sélection Time (Heure) lorsque vous utilisez les programmes de séchage manuel. Lors d’un programme Capteur de séchage, le voyant de durée est éteint car le temps de séchage est déterminé par le niveau d’humidité. 6 Bouton Signal Un signal sonore retentit à la fin du programme. Si l'option Wrinkle Prevent (Prévention des faux plis) est activée, le signal retentit par intermittence. Réglez le volume du signal sonore ou désactivez-le en appuyant sur le bouton Signal (Signal). Appuyez plusieurs fois sur le bouton pour faire défiler les différents paramètres. 7 Bouton Départ différé permet de différer le départ d'un programme de 24 heures maximum par tranches d'une heure. L'heure affichée est celle à laquelle le programme commencera. (Consultez la section « Départ différé » à la page 30.) 8 Options de programme Adjust Time (Réglage du temps) – Vous pouvez augmenter ou diminuer la durée de séchage automatiquement préconfigurée pour les programmes Séchage manuel (programmes Time Dry (Temps de séchage), Quick Dry (Séchage rapide) ou Air Fluff (Air froid)) et le programme Wrinkle Away (Anti-froissement). Pour allonger ou raccourcir la durée d’un programme, appuyez sur la flèche vers le haut ou vers le bas Ajust Time (Réglage du temps) jusqu’à ce que le temps souhaité s’affiche. Wrinkle Prevent (Anti-froissage) - La fonction Antifroissage assure 180 minutes de rotation à froid par intermittence à la fin du programme pour éviter de froisser le linge. Appuyez sur le bouton Wrinkle Prevent (Prévention des faux-plis) pour activer cette fonction. Le voyant situé au-dessus du bouton s’allume lorsque la fonction Wrinkle Prevent (Prévention des faux-plis) est sélectionnée. Une fois que le linge est sec, vous pouvez le retirer à tout moment du sèche-linge pendant le cycle Wrinkle Prevent (Prévention des faux-plis). My Cycle (Mon cycle) – Vous permet de choisir le programme, la température, le niveau de séchage, etc. que vous souhaitez. (Consultez la section « Mon cycle » à la page 31.) Rack Dry (Grille de séchage) – L’option Grille de séchage est disponible avec le programme Temps de séchage. La seule température disponible est Extra Low (Très basse) (Consultez la section « Grille de séchage » à la page 32.) Mixed Load Bell (Sonnerie charge mixte) - Sonnerie charge mixte - La sonnerie charge mixte qui vous avertit que le niveau de séchage moyen dans une charge est humide (séché à 80%). Cela vous permet de prendre les éléments que vous ne souhaitez pas entièrement secs ou qui sèchent rapidement hors du sèche-linge tout en permettant aux autres de continuer à sécher. Vous pouvez sélectionner cette fonction avec tous les programmes Sensor Dry (Séchage par capteur) à l’exception de Wool (Laine) et Sanitize (Stérilisation). Les sélections de niveau de séchage sont limitées à Normal Dry (Normal), More Dry (Séchage fort) et Very Dry (Séchage très fort). 9 Bouton Démarrer/ Pause Appuyez sur ce bouton pour interrompre et relancer les programmes. 10 Bouton Marche/ Arrêt Appuyez une fois pour allumer le sèche-linge. Appuyez une nouvelle fois pour l’éteindre. Si le sèche-linge reste allumé pendant plus de 10 minutes sans qu’aucun bouton ne soit actionné, il s’éteint automatiquement. 03 INSTRUCTIONS ET CONSEILS D’UTILISATION Bouton Temps 5 Français - 29 DV455_02836F-08_CFR.indd Sec3:29 2013-12-12 5:13:08 Instructions et conseils d’utilisation Sécurité enfant Cette fonction empêche les enfants de jouer avec le sèche-linge. Activation/Désactivation Si vous souhaitez activer ou désactiver la fonction Sécurité enfant, appuyez simultanément sur les boutons Temp. (Température) et Time (Heure) pendant 3 secondes. Informations sur la Sécurité enfant 1. Vous pouvez activer cette fonction alors que le sèche-linge fonctionne. 2. Lorsque la Sécurité enfant est activée, aucun bouton ne peut-être utilisé à l’exception du bouton Power (Marche/Arrêt); pour utiliser les autres boutons, vous devez désactiver la fonction Sécurité enfant. 3. Le voyant « Sécurité enfant » s'allume. • Si le sèche-linge est remis en marche, la Sécurité enfant reste activée. • Pour la désactiver, suivez les consignes ci-dessus. Si les boutons, à l’exception du bouton Power (Marche/Arrêt), ne répondent pas, vérifiez le voyant Sécurité enfant. Si la fonction Sécurité enfant est activée, suivez les consignes ci-dessus pour la désactiver. Départ différé Vous pouvez programmer votre sèche-linge pour qu’il démarre automatiquement plus tard, en choisissant un départ différé. L’heure affichée est celle à laquelle le programme commencera. 1. Programmez votre cycle de séchage. 2. Appuyez sur le bouton Delay Start (Départ différé) à plusieurs reprises jusqu'à obtenir le départ différé souhaité. 3. Appuyez sur le bouton Start/Pause (Démarrer/Pause). Le voyant « Départ différé » s'allume et l'horloge lance le compte à rebours. 4. Pour annuler la fonction Départ différé, appuyez sur le bouton Power (Marche/Arrêt) (Marche/Arrêt) puis remettez le sèche-linge en marche. Éclairage du tambour Cette fonction permet d'éclairer le tambour lorsque le sèche-linge est en marche. Activation/Désactivation Pour activer ou désactiver la fonction Éclairage du tambour, appuyez simutanément sur les boutons Dry Level (Niveau de séchage) et Temp. (Température). L’éclairage du tambour peut être activé ou désactivé lorsque le sèche-linge fonctionne ou non. Si vous ne désactivez pas la fonction Éclairage du tambour dans les 5 minutes suivant son activation, celle-ci s’éteindra automatiquement. Français - 30 DV455_02836F-08_CFR.indd Sec3:30 2013-12-12 5:13:08 Mon cycle Vous permet de sélectionner, enregistrer et activer plus tard un programme personnalisé comprenant les options Dry Level (Niveau de séchage), Temp. (Température), etc. Pour utiliser le programme My Cycle (Mon cycle), suivez les étapes ci-dessous : 1. Poussez le bouton My Cycle (Mon cycle). Le voyant My Cycle (Mon cycle) s’allume. 2. Sélectionnez le programme souhaité à l’aide de la molette du sélecteur de programme. 3. Sélectionnez et réglez les options (Dry Level (Niveau de séchage), Temp. (Température), etc.) 4. Poussez le bouton Start/Pause (Démarrer/Pause). Le programme démarre. 5. Alors que le sèche-linge avance dans le programme, il mémorise ce programme et les options. 6. Pour exécuter à nouveau ce programme ultérieurement, appuyez sur le bouton My Cycle (Mon cycle). Le sèche-linge sélectionne automatiquement le programme et les options enregistrés. Vous pouvez modifier la configuration du programme My Cycle (Mon cycle) en répétant la procédure indiquée ci-dessus. Le sèche-linge utilisera ces réglages la prochaine fois que vous utiliserez ce programme. Entretien intelligent Cette fonction vous permet de vérifier l'état du sèche-linge à l'aide d'un smartphone. 1. Appuyez et maintenez les boutons Time (Heure) et Delay Start (Départ différé) durant 3 secondes lorsqu’une erreur se produit ou si vous n’avez actionné aucun bouton du sèche-linge après sa mise sous tension. 2. Lorsque la fonction Smart Care (Entretien intelligent) est activée, le voyant situé sur la fenêtre d’affichage tourne pendant 2 ou 3 secondes puis le code d’erreur apparaît sur l’écran. 3. Lancez la fonction Application Smart Care sur votre smartphone. 03 INSTRUCTIONS ET CONSEILS D’UTILISATION Chaque cycle possède ses propres options par défaut, programmées automatiquement. Pour afficher la liste des options par défaut, consultez la page 37. La fonction Smart Care a été optimisée pour : les séries Galaxy et iPhone (elle ne peut pas être prise en charge pour certains modèles). 4. Si la caméra du smartphone est mise au point sur le panneau d'affichage du sèche-linge, l'affichage et le message d'erreur sont reconnus automatiquement et le type d'erreur et les mesures à prendre s'affichent sur le smartphone. 5. Si le smartphone ne reconnaît pas le code d'erreur plusieurs fois, veuillez saisir manuellement le code d'erreur affiché sur le panneau du sèche-linge dans l'application Smart Care. Téléchargement de l'application Smart Care Téléchargez l'application Samsung Laundry App sur votre smartphone via Android market ou Apple App store. (Recherchez les mots : Samsung Smart Washer/Dryer (lave-linge/ sèche-linge intelligent Samsung)) Consignes à suivre lors de l'utilisation de Smart Care • Si l'éclairage d'une ampoule, d'une lampe fluorescente ou d'un voyant se reflète sur le panneau d'affichage du lave-linge, le smartphone est susceptible de ne pas reconnaître le panneau ou le message d'erreur facilement. • Si vous maintenez le smartphone avec un angle relatif trop important par rapport à l'avant du panneau d'affichage, il peut ne pas être en mesure de reconnaître le code d'erreur. Pour de meilleurs résultats, maintenez le smartphone de sorte que l'avant du panneau et le smartphone soient parallèles ou quasiment. Français - 31 DV455_02836F-08_CFR.indd Sec3:31 2013-12-12 5:13:08 Instructions et conseils d’utilisation GRILLE DE SÉCHAGE Installation de la grille de séchage 1. Ouvrez le hublot du sèche-linge. 2. Placez le support de séchage dans le tambour en positionnant le bord avant du support sur le dessus du filtre à peluches. 3. Insérez les deux pieds arrière dans les orifices situés sur la paroi arrière du sèche-linge, puis appuyez sur le centre de la grille pour la fixer. 4. Posez les articles à sécher sur la grille en laissant suffisamment d’espace entre eux de manière à ce que l’air puisse circuler correctement. 5. Fermez le hublot du sèche-linge. 6. Appuyez sur le bouton Rack Dry (Grille de séchage) en mode Time Dry (Temps de séchage) puis sélectionnez la durée en fonction de l’humidité et du poids du linge. La grille de séchage peut également être utilisée en mode Air Fluff (Air froid). Support de séchage Hublot ARTICLES TEMPÉRATURES CONSEILLÉES Pulls lavables (mettre en forme et poser à plat sur le support) Extra Low (Très basse) (programme Time Dry (Temps de séchage)) Peluches (garnies de fibres coton ou polyester) Extra Low (Très basse) (programme Time Dry (Temps de séchage)) Peluches (garnies de mousse ou de caoutchouc) Air froid Oreillers à base de caoutchouc mousse Air froid Baskets Air froid Sécher à chaud des articles en plastique, en caoutchouc ou en caoutchouc mousse peut endommager l'article et engendrer un risque d'incendie. Français - 32 DV455_02836F-08_CFR.indd Sec3:32 2013-12-12 5:13:09 NETTOYAGE DU FILTRE À PELUCHES Après chaque séchage. Pour réduire la durée de séchage. Pour un meilleur rendement énergétique. Hublot Ne faites pas fonctionner le sèche-linge si le filtre à peluches n'est pas remis en place. Panneau avant Filtre CHARGEMENT DU SÈCHE-LINGE • • • • N’introduisez qu’une seule charge de linge lavé à la fois dans votre sèche-linge. Un mélange de textiles épais et légers séchera différemment ; ainsi, à la fin du programme de séchage, les textiles légers risquent d’être secs alors que les textiles épais seront encore humides. Ajoutez un ou plusieurs articles similaires dans votre sèche-linge lorsque seul un ou deux articles ont besoin d’être séchés. Ceci améliore l’action du tambour et l’efficacité du séchage. Une surcharge de linge réduit l’action du tambour et induit un séchage non uniforme, ainsi qu’un froissage excessif de certains tissus. 03 INSTRUCTIONS ET CONSEILS D’UTILISATION • • • MISE EN MARCHE 1. 2. 3. 4. 5. 6. Chargez votre sèche-linge sans tasser le linge. Surtout, NE LE SURCHARGEZ PAS. Fermez le hublot. Sélectionnez le programme et les options adaptés à la charge. Appuyez sur le bouton Start/Pause (Démarrer/Pause). Le voyant du sèche-linge s’allume. Une estimation de la durée du programme apparaît sur l’écran. La durée varie avec le taux d’humidité. • Lorsque le programme est terminé, la mention « End » (Fin) s’affiche sur l’écran. • Appuyer sur le bouton Power (Marche/Arrêt) annule le programme et arrête le sèche-linge. • Les voyants Drying (Séchage), Cooling (Refroidissement) et Wrinkle Prevent (Prévention des fauxplis) s’allument lorsque le programme entame ces cycles de séchage. Ne posez aucun objet sur le sèche-linge lorsque celui-ci est en cours de fonctionnement. AVERTISSEMENT Français - 33 DV455_02836F-08_CFR.indd Sec3:33 2013-12-12 5:13:09 Instructions et conseils d’utilisation CAPTEUR DE VENTILATION Votre sèche-linge Samsung est équipé d’un capteur de ventilation qui détecte et vous prévient lorsque les conduits doivent être nettoyés. Conservez votre sèche-linge propre et efficace en nettoyant les conduits lorsque vous y êtes invité. Le capteur de ventilation détecte tous les colmatages de conduit Vous pouvez voir s'il y a un colmatage de conduit à partir du voyant du capteur de ventilation « Vent Sensor » de l'affichage numérique. Niveau Message État Solution 0 Le voyant du capteur de ventilation « Vent » est éteint. Sensor Le conduit est exempt de colmatages. - 1 Le voyant du capteur de ventilation « Vent Sensor » s'allume. Lorsqu'une partie du conduit ou du filtre à peluches est bloquée par les peluches ou un corps étranger. Lorsque la résistance est élevée en raison d'un conduit trop long ou coudé. Vérifiez le raccordement de conduit et raccourcissez-le et redressez-le au besoin. Vérifiez le filtre à peluches ou le conduit et nettoyezle au besoin. 2 Le voyant du capteur de ventilation « Vent Sensor » clignote. Lorsque le conduit est bloqué par les peluches ou un corps étranger. Lorsque la résistance est très élevée en raison d’un conduit beaucoup trop long ou exagérément coudé. Vérifiez le raccordement de conduit et raccourcissez-le et redressez-le au besoin. Vérifiez le filtre à peluches ou le conduit et nettoyezle dès que possible. Dans l'état du NIVEAU 2, ce voyant clignote pendant 3 heures après la fin du cycle. (Si la fonction de prévention du froissage est activée, ce message s'affiche pendant 3 heures.) Si le bouton Marche/Arrêt est appuyé ou le hublot ouvert, l'alimentation est immédiatement coupée. Pour plus d'informations sur l'installation du conduit, reportez-vous à la consultez la section « Conditions requises en matière de conduits » à la page 11. • Bien que le sèche-linge soit disponible même si le message de colmatage s’affiche, le temps de séchage peut être prolongé. • Si le message du NIVEAU 1 s’affiche lors de la première mise en marche du sèche-linge après l’installation, vérifiez le raccordement et nettoyez le conduit. Si le messsage du NIVEAU 1 s’affiche même après avoir vérifié et nettoyé le conduit, ceci peut signifier la présence de restrictions dans le conduit dues à la longueur, à l’état, etc. Si cela se produit, vous pouvez utiliser le sèche-linge normalement et aucune contremesure ne doit être prise. Cependant, le temps de séchage peut être prolongé ou la performance du sèche-linge peut être dégradée. Français - 34 DV455_02836F-08_CFR.indd Sec3:34 2013-12-12 5:13:09 CONFIGURATION DES FONCTIONS SMART CONTROL ET SMART MONITORING La fonction Smart Control du modèle électronique possède la fonction Smart Monitoring du modèle à gaz. Toute action effectuée sur votre sèche-linge désactive la fonction Smart Control (ouvrir le hublot, appuyer sur l'écran LCD, pousser un bouton, etc.). Cet appareil ne contient pas de routeur sans fil. Configuration du routeur/modem sans fil • • • • • Cet appareil prend en charge le protocole DHCP (protocole de configuration de l’hôte dynamique). Si vous souhaitez utiliser un routeur/modem sans fil existant, activez le serveur DHCP ou la fonction du routeur/modem. Réglez le canal pour la connexion du routeur/modem sans fil à un canal qui n’est pas utilisé. Seuls les types de cryptage WEP, TKIP ou TKIP AES sont pris en charge par le sèche-linge. Les autres types de cryptage Wi-Fi ne sont pas pris en charge. La qualité du réseau sans fil peut être affectée par l’environnement ambiant. Si votre fournisseur de service Internet a enregistré et fixé l’adresse MAC (numéro d’identification unique d’un périphérique) de votre ordinateur ou de votre modem, vous pouvez ne pas être en mesure de connecter le sèche-linge à Internet. Veuillez demander à votre fournisseur de service Internet les procédures pour connecter à Internet un périphérique (sèche-linge par exemple) autre qu’un ordinateur. Si votre fournisseur de service Internet demande un identifiant et un mot de passe pour vous connecter à Internet, vous pouvez ne pas être en mesure de connecter le sèche-linge à Internet. Vous devez dans ce cas entrer l’identifiant et le mot de passe pour vous connecter à Internet. Vous pouvez ne pas être en mesure de vous connecter à Internet en raison d’un pare-feu. Dans ce cas, demandez assistance à votre fournisseur de service Internet. Si vous ne pouvez pas connecter le sèche-linge à Internet même après avoir contacté votre fournisseur de service, contactez le revendeur ou le centre de service Samsung Electronics. 03 INSTRUCTIONS ET CONSEILS D’UTILISATION Connectez un routeur ou un modem câblé/sans fil et le sèche-linge via une connexion sans fil, connectezvous à www.samsungsmartappliance.com et enregistrez le sèche-linge à Smart Control, le service de surveillance intelligente Smart Monitoring. Vérification avant installation • • • • Concernant les procédures d’installation d’un dispositif de partage câblé/sans fil, référez-vous au manuel d’utilisation du routeur/modem sans fil correspondant. Les sèche-linge Samsung prennent uniquement en charge les Wi-Fi 2,4 GHz. Les sèche-linge Samsung prennent en charge les normes IEEE 802.11 b/g/n et Wi-Fi Direct (IEEE802.11n est recommandé). Si le routeur/modem sans fil n’est pas certifié Wi-Fi, il ne peut pas être connecté au sèche-linge. Français - 35 DV455_02836F-08_CFR.indd Sec3:35 2013-12-12 5:13:09 Instructions et conseils d’utilisation Connexion au réseau en utilisant le réglage WPS Votre sèche-linge Samsung utilise le protocole Wi-Fi Protected Setup/Push Button Configuration WPS(PBC) comme méthode principale de connexion à un routeur ou un modem sans fil. Si votre routeur ou modem est conforme au WPS et dispose d’un bouton WPS, vous pouvez connecter facilement le sèche-linge au routeur/modem. 1. Appuyez et maintenez simultanément les boutons Temp. (Température) et Start/Pause (Démarrer/Pause) durant 3 secondes. 2. Tournez le Sélecteur de programme jusqu’à ce que « UP » s’affiche sur l’écran, puis appuyez sur le bouton Start/Pause (Démarrer/Pause). Si la connexion n'est pas établie dans les 5 minutes, « FUP » s'affiche sur l'écran. 3. Maintenez le bouton WPS enfoncé sur le routeur/modem sans fil pendant 120 secondes pour lancer la fonction WPS. Si la fonction WPS est activée, le routeur/modem sans fil rassemble les informations nécessaires du sèche-linge et celui-ci est automatiquement connecté à Internet via le routeur/modem sans fil. • • • ATTENTION • La manière dont la fonction WPS se lance sur votre routeur/modem sans fil peut varier en fonction du fabricant. Pour plus de détails, reportez-vous au manuel d’utilisation de votre routeur/modem. Même après avoir terminé la configuration WPS, un certain temps peut s’avérer nécessaire avant l’établissement réel de la connexion et l’attribution d’une adresse IP via le protocole DHCP (jusqu’à 5 minutes). Notez que si vous utilisez un routeur/modem sans fil qui n’est pas certifié WPS, le sèche-linge peut ne pas être connecté via le Wi-Fi ou un autre périphérique qui a été connecté au routeur/modem sans fil peut être déconnecté. Veuillez noter que pour certains routeurs/modems sans fil, si vous appuyez et maintenez le bouton WPS un certain temps, les réglages du routeur/modem peuvent être réinitialisés. 4. Si le sèche-linge et le routeur/modem sans fil sont correctement connectés, le voyant clignote sur l’écran durant 30 secondes. 5. Appuyez et maintenez le bouton Signal activé/désactivé durant 3 secondes pour terminer la configuration de la connexion Smart Control. Lorsque la configuration s’est terminée normalement, le voyant clignote sur l’écran accompagné d’un signal sonore. Si vous appuyez et maintenez le bouton Signal activé/désactivé durant 3 secondes alors que le sèche-linge et le dispositif de partage câblé/sans fil ne sont pas correctement connectés, le signal sonore du bouton non valide retentit et la configuration de connexion Smart Control n'est pas terminée. Français - 36 DV455_02836F-08_CFR.indd Sec3:36 2013-12-12 5:13:10 Connexion au réseau en utilisant l'application Samsung Laundry 03 INSTRUCTIONS ET CONSEILS D’UTILISATION 1. Appuyez et maintenez simultanément les boutons Temp. (Température) et Start/Pause (Démarrer/Pause) durant 3 secondes. 2. Si « AP » s'affiche sur l'écran, appuyez sur le bouton Start/Pause (Démarrer/Pause). Si la connexion n'est pas établie dans les 5 minutes, « FAP » s'affiche sur l'écran. Français - 37 DV455_02836F-08_CFR.indd Sec3:37 2013-12-12 5:13:11 Instructions et conseils d’utilisation UTILISATION DE L’APPLICATION MOBILE (ANDROID) Téléchargement de l’application téléphonique 1. Touchez votre téléphone et affichez le menu des applications. Puis recherchez et ouvrez l'icône « Play Store (Lancer le magasin) ». 2. Une fois que « Play Store (Lancer le magasin) » a été ouverte, faites une recherche. 3. Une fois que la boîte de recherche apparaît, saisissez « SAMSUNG Smart Washer/ Dryer (Lave-linge/Sèche-linge intelligent SAMSUNG) ». Français - 38 DV455_02836F-08_CFR.indd Sec3:38 2013-12-12 5:13:12 4. Une fois que la recherche est terminée, l’application « SAMSUNG Smart Washer/Dryer (Lave-linge/Sèche-linge intelligent SAMSUNG) » s’affiche. Téléchargez cette application sur votre téléphone. 03 INSTRUCTIONS ET CONSEILS D’UTILISATION Assurez-vous que l’application soit passée de « Free (Vide) » à « Installed (Installée) ». 5. Une fois que l’application a été téléchargée sur votre téléphone, vous pourrez configurer la commande Wi-Fi du sèche-linge. ÉTAPE 1 Figure 1 Figure 2 Tout d’abord, appuyez sur le bouton Power (Marche/Arrêt) pour activer votre machine. Vous pouvez activer la machine sur n’importe quel cycle de séchage. (Voir les figures 1~2) Figure 4 Après avoir activé la machine, appuyez simultanément sur les boutons Temp. (Température) et Start/ Pause (Départ/Pause) pendant 3 secondes. Après 3 secondes, le menu « AP » apparaît sur l’écran LED (DEL). (Voir les figures 3~4) ÉTAPE 2 Figure 3 Français - 39 DV455_02836F-08_CFR.indd Sec3:39 2013-12-12 5:13:12 Instructions et conseils d’utilisation ÉTAPE 3 Après avoir fait apparaître le menu AP à l'écran LED (DEL), attendez environ 1 minute puis appuyez sur le bouton Start/Pause (Démarrer/Pause). Une fois que le bouton Start/Pause (Démarrer/ Pause) a été actionné, le message « AP » affiché à l'écran commence à clignoter. Le module Wi-Fi mettra une minute environ à être prêt. Par conséquent, si vous appuyez sur le bouton Start/Pause (Démarrer/ Pause) et si « AP » ne clignote pas, réessayez après un moment. (Voir la figure 5). Figure 5 ÉTAPE 4 Figure 6 Figure 7 Une fois que « AP » clignote, prenez votre téléphone mobile et appuyez sur l'icône « Settings (Paramètres) ». Une fois que le menu des paramètres apparaît, appuyez sur la section sans fil et réseau. (Voir les figures 5~7) ÉTAPE 5 Figure 8 Figure 9 Après avoir sélectionné la section sans fil et réseau, sélectionnez le réglage Wi-Fi. Puis activez le Wi-Fi. (Voir les figures 8~9) Français - 40 DV455_02836F-08_CFR.indd Sec3:40 2013-12-12 5:13:13 ÉTAPE 6 Une fois que la liste des réseaux disponibles apparaît, sélectionnez le réseau à utiliser et entrez le mot de passe si nécessaire. Une fois que vous êtes connectés au réseau sélectionné, revenez sur l'écran des applications de votre téléphone mobile. Une fois que vous avez atteint l'application des téléphones, touchez l'icône Samsung « SAMSUNG Smart Washer/Dryer (Lave-linge/Sèche-linge intelligent SAMSUNG) » ayant été téléchargé au début du processus. 03 INSTRUCTIONS ET CONSEILS D’UTILISATION ÉTAPE 7 ÉTAPE 8 L’écran d’application affiché dans ce manuel peut être différent de l’écran de votre périphérique mobile. Français - 41 DV455_02836F-08_CFR.indd Sec3:41 2013-12-12 5:13:13 Instructions et conseils d’utilisation ÉTAPE 9 Une fois que l'application mobile est ouverte, sélectionnez la touche « Setting Start (Départ réglages) ». Le voyant Wi-Fi s'allume et s'éteint en clignotant sur le téléphone plusieurs fois. ÉTAPE 10 Une fois que l'unité démarre la connexion, le téléphone charge la liste des points d'accès. Lorsque la liste des points d'accès est chargée, sélectionnez le réseau. Assurez-vous que l'application et le smartphone sont connectés au même réseau/point d'accès sans fil. ÉTAPE 11 Après avoir sélectionné le réseau, entrez votre mot de passe. Une fois que vous avez entré votre mot de passe, sélectionnez « Connect (Connecter) ». L'unité démarre la configuration du réseau. Ce procédé délivre les informations relatives à la connexion de l'« AP » qui est connecté du téléphone mobile vers l'appareil. Français - 42 DV455_02836F-08_CFR.indd Sec3:42 2013-12-12 5:13:14 ÉTAPE 12 ÉTAPE 13 Une fois que le téléphone est connecté à la machine, appuyez simultanément sur les boutons Temp. (Température) et Start/ Pause (Départ/Pause) pendant 3 secondes. Après 3 secondes, le cycle de séchage d’origine s’affiche à l’écran LED (DEL). 03 INSTRUCTIONS ET CONSEILS D’UTILISATION Lorsque le réglage est configuré, l'unité affiche « Transfer complete (Transfert terminé) ». Lorsque le transfert est terminé, sélectionnez « Confirm (Confirmer) ». Ensuite, l'unité affiche « oAP ». Le téléphone est connecté à la machine via le réseau. ÉTAPE 14 Une fois que le cycle de séchage est affiché, attendez environ 1 minute. L’icône Wi-Fi commence ainsi à clignoter. ÉTAPE 15 Une fois que l'icône Wi-Fi est affiché, appuyez sur « Signal » et maintenez enfoncé pendant 3 secondes. L'icône Wi-Fi s'arrête de clignoter. La machine est maintenant prête à exécuter la certification du périphérique. Français - 43 DV455_02836F-08_CFR.indd Sec3:43 2013-12-12 5:13:14 Instructions et conseils d’utilisation Certification du périphérique 1. La « Device Certification (Certification du périphérique) » doit uniquement être exécutée avec la configuration initiale. Sélectionnez l’onglet « Indoor Control (Commande intérieure) » pour rechercher le nom du sèchelinge. Une fois que le nom du sèche-linge s’affiche, touchez l’onglet. Figure 1 Figure 2 2. Vérifiez que l’icône Wi-Fi ne clignote pas. Appuyez simultanément sur les boutons Temp. (Température) et Start/Pause (Démarrer/Pause) pendant 3 secondes. « AP » s’affiche. Figure 3 3. Après avoir touché l’onglet du nom du sèche-linge, vous devez toucher l’onglet Confirm (Confirmer) pour poursuivre la certification. Figure 4 Français - 44 DV455_02836F-08_CFR.indd Sec3:44 2013-12-12 5:13:15 Figure 5 5. Suivez les instructions affichées sur le téléphone pour démarrer la configuration du sèche-linge. Figure 6 6. Une fois que « AP » s'affiche, vous devez tourner le bouton en sens anti-horaire jusqu'à ce que « PS » s'affiche. Après que « PS » s'affiche, appuyez sur le bouton Start/Pause (Démarrer/Pause). Figure 7 03 INSTRUCTIONS ET CONSEILS D’UTILISATION 4. Après avoir touché l'onglet Confirm (Confirmer), vous pouvez alors commencer à préparer la certification. Français - 45 DV455_02836F-08_CFR.indd Sec3:45 2013-12-12 5:13:16 Instructions et conseils d’utilisation 7. Une fois que le bouton Start/Pause (Démarrer/Pause) a été actionné, « PS » commence à clignoter. Une fois qu'il commence à clignoter, le téléphone lance la connexion automatique. Figure 8 8. Une fois que « PS » est affiché, appuyez simultanément sur les boutons Temp. (Température) et Start/Pause (Démarrer/Pause) pendant 3 secondes. Veuillez patienter jusqu’à ce que l’icône Smart Control Enabled (Commande intelligente activée) [ ] commence à clignoter. Lorsque l’icône Smart Control enabled (Commande intelligente activée) commence à clignoter, appuyez sur la touche Signal on/off (Signal activé/désactivé) et maintenez-la pendant 3 secondes afin d’activer la commande intelligente. Lorsque la commande intelligente est activée, l’icône Smart Control enabled (Commande intelligente activée) [ ] est allumée. Figure 9 9. Appuyez sur l’onglet du nom du sèche-linge pour connecter au sèche-linge. Figure 10 Français - 46 DV455_02836F-08_CFR.indd Sec3:46 2013-12-12 5:13:16 Figure 11 11. La Certification du périphérique est terminée et le sèche-linge est connecté à votre smartphone. Figure 12 03 INSTRUCTIONS ET CONSEILS D’UTILISATION 10. Le sèche-linge est maintenant connecté. Appuyez sur le bouton « Course » (Programme) et vous pouvez dès lors contrôler le sèchelinge depuis votre téléphone. Français - 47 DV455_02836F-08_CFR.indd Sec3:47 2013-12-12 5:13:17 Instructions et conseils d’utilisation Utilisation de l’application mobile ÉTAPE 1 Assurez-vous que l'icône Wi-Fi ne clignote pas. Si l'icône ne clignote pas, appuyez sur le bouton Signal et maintenezle enfoncé jusqu'à ce que l'icône arrête de clignoter. Une fois que l'icône de verrouillage de la porte est activé, l'unité est prête. Appuyez alors sur l'icône « SAMSUNG Smart Washer/Dryer (Lave-linge/Sèche-linge intelligent SAMSUNG) ». ÉTAPE 2 Après avoir touché l’icône « SAMSUNG Smart Washer/Dryer (Lave-linge/Sèche-linge intelligent SAMSUNG) », la recherche du sèche-linge démarre. Une fois que le téléphone s’est connecté au sèchelinge, le nom du sèche-linge, ou « MAC » apparaît. Touchez alors le nom du sèche-linge. ÉTAPE 3 Une fois la connexion établie, appuyez sur le bouton « Course » (Programme). L’unité doit afficher l’écran « Choose Cycle » (Choisir le programme). Lorsque cet écran Choose Cycle (Choisir le programme) est affiché, touchez l’onglet « Start » (Départ) en bas à gauche. Français - 48 DV455_02836F-08_CFR.indd Sec3:48 2013-12-12 5:13:17 ÉTAPE 4 03 INSTRUCTIONS ET CONSEILS D’UTILISATION Appuyez alors sur le bouton « Start (Départ) » et activez le programme de séchage. Vous pouvez surveiller le programme de séchage pour contrôler l’état du programme. Une fois que le programme est terminé, le téléphone affiche « Cycle completes (Programme terminé) ». Français - 49 DV455_02836F-08_CFR.indd Sec3:49 2013-12-12 5:13:18 Instructions et conseils d’utilisation UTILISATION DE L’APPLICATION MOBILE (IOS) Téléchargement de l’application téléphonique 1. Recherchez et ouvrez l'icône « App Store (Magasin des applications) ». 2. Une fois que « App Store (Magasin des applications) » a été ouverte, faites une recherche. 3. Une fois que la boîte de recherche apparaît, saisissez « SAMSUNG Smart Washer/ Dryer (Lave-linge/Sèche-linge intelligent SAMSUNG) ». Français - 50 DV455_02836F-08_CFR.indd Sec3:50 2013-12-12 5:13:18 4. Une fois que la recherche est terminée, l'application « SAMSUNG Smart Washer/Dryer (Lave-linge/Sèche-linge intelligent SAMSUNG) » s'affiche. Téléchargez cette application sur votre téléphone. 03 INSTRUCTIONS ET CONSEILS D’UTILISATION Assurez-vous que l'application soit passée de « Free (Vide) » à « Installed (Installée) ». 5. Une fois que l’application a été téléchargée sur votre téléphone, vous pourrez configurer la commande Wi-Fi du sèche-linge. ÉTAPE 1 Figure 1 Figure 2 Tout d’abord, appuyez sur le bouton Power (Marche/Arrêt) pour activer votre machine. Vous pouvez activer la machine sur n’importe quel cycle de séchage. (Voir les figures 1~2) Figure 4 Après avoir activé la machine, appuyez simultanément sur les boutons Temp. (Température) et Start/ Pause (Départ/Pause) pendant 3 secondes. Après 3 secondes, le menu « AP » apparaît sur l’écran LED (DEL). (Voir les figures 3~4) ÉTAPE 2 Figure 3 Français - 51 DV455_02836F-08_CFR.indd Sec3:51 2013-12-12 5:13:19 Instructions et conseils d’utilisation ÉTAPE 3 Après avoir fait apparaître le menu AP à l'écran LED (DEL), attendez environ 1 minute puis appuyez sur le bouton Start/Pause (Démarrer/Pause). Une fois que le bouton Start/Pause (Démarrer/ Pause) a été actionné, le message « AP » affiché à l'écran commence à clignoter. Le module Wi-Fi mettra une minute environ à être prêt. Par conséquent, si vous appuyez sur le bouton Start/Pause (Démarrer/ Pause) et si « AP » ne clignote pas, réessayez après un moment. (Voir la figure 5). Figure 5 ÉTAPE 4 Figure 6 Figure 7 Une fois que « AP » clignote, prenez votre téléphone mobile et appuyez sur l'icône « Settings (Paramètres) ». Une fois que le menu des paramètres apparaît, appuyez sur l'icône Wi-Fi. (Voir les figures 5~7) Figure 9 « SMARTWASHER (LAVE-LINGE INTELLIGENT) » apparaît dans la liste Wi-Fi. Sélectionnez le SMARTWASHER (LAVE-LINGE INTELLIGENT) et entrez le mot de passe (WASHER2012 (LAVE-LINGE 2012)) La saisie doit être effectuée en majuscules. Après avoir tapé le mot de passe, sélectionnez le bouton Join (Rejoindre). (Voir les figures 8~9) ÉTAPE 5 Figure 8 ÉTAPE 6 Une fois que vous êtes connectés au réseau sélectionné, revenez sur l'écran des applications de votre téléphone mobile. Une fois que vous avez atteint l'application des téléphones, touchez l'icône Samsung « SAMSUNG Smart Washer/Dryer (Lave-linge/Sèchelinge intelligent SAMSUNG) » ayant été téléchargé au début du processus. Français - 52 DV455_02836F-08_CFR.indd Sec3:52 2013-12-12 5:13:19 ÉTAPE 7 L’écran d’application affiché dans ce manuel peut être différent de l’écran de votre périphérique mobile. Appuyez sur « Setting Start (Départ réglages) » et entrez votre SSID, Authentication Type (Type d'authentification), Encryption Type (Type de cryptage), mot de passe du point d'accès. Ce procédé délivre les informations relatives à la connexion de l'« AP » qui est connecté du téléphone mobile vers l'appareil. 03 INSTRUCTIONS ET CONSEILS D’UTILISATION ÉTAPE 8 Vérifiez l'option de sécurité du routeur puis réglez à nouveau la configuration du réseau sans fil comme indiqué ci-dessous. - - - sélectionnez le Mode de sécurité : WPA et Cryptage : TKIP sélectionnez le Mode de sécurité : WPA2 et Cryptage : AES reportez-vous manuel du routeur sans fil concernant l'option de sécurité du routeur sans fil. ÉTAPE 9 Lorsque le réglage est configuré, l'unité affiche « Transfer complete (Transfert terminé) ». Lorsque le transfert est terminé, sélectionnez « Confirm (Confirmer) ». Ensuite, l'unité affiche « oAP ». Le téléphone est connecté à la machine via le réseau. Français - 53 DV455_02836F-08_CFR.indd Sec3:53 2013-12-12 5:13:20 Instructions et conseils d’utilisation ÉTAPE 10 Une fois que le téléphone est connecté à la machine, appuyez simultanément sur les boutons Temp. (Température) et Start/ Pause (Départ/Pause) pendant 3 secondes. Après 3 secondes, le cycle de séchage d’origine s’affiche à l’écran LED (DEL). ÉTAPE 11 Une fois que le cycle de séchage est affiché, attendez environ 1 minute. L’icône Wi-Fi commence ainsi à clignoter. ÉTAPE 12 Une fois que l'icône Wi-Fi est affiché, appuyez sur « Signal » et maintenez enfoncé pendant 3 secondes. L'icône Wi-Fi s'arrête de clignoter. La machine est maintenant prête à exécuter la certification du périphérique. Français - 54 DV455_02836F-08_CFR.indd Sec3:54 2013-12-12 5:13:20 Certification du périphérique Figure 1 Figure 2 2. Vérifiez que l’icône Wi-Fi ne clignote pas. Appuyez simultanément sur les boutons Temp. (Température) et Start/Pause (Démarrer/Pause) pendant 3 secondes. « AP » s’affiche. Figure 3 3. Après avoir touché l'onglet du nom du lave-linge, vous devez touchez l'onglet Confirm (Confirmer) pour poursuivre la certification. Figure 4 4. Après avoir touché l'onglet Confirm (Confirmer), vous pouvez alors commencer à préparer la certification. Figure 5 03 INSTRUCTIONS ET CONSEILS D’UTILISATION 1. La « Device Certification (Certification du périphérique) » doit uniquement être exécutée avec la configuration initiale. Sélectionnez l’onglet « Indoor Control (Commande intérieure) » pour rechercher le nom du sèchelinge. Une fois que le nom du sèche-linge s’affiche, touchez l’onglet. Français - 55 DV455_02836F-08_CFR.indd Sec3:55 2013-12-12 5:13:21 Instructions et conseils d’utilisation 5. Suivez les instructions affichées sur le téléphone pour démarrer la configuration du sèche-linge. Figure 6 6. Une fois que « AP » s'affiche, vous devez tourner le bouton en sens anti-horaire jusqu'à ce que « PS » s'affiche. Après que « PS » s'affiche, appuyez sur le bouton Start/Pause (Démarrer/Pause). Figure 7 7. Une fois que le bouton Start/Pause (Démarrer/Pause) a été actionné, « PS » commence à clignoter. Une fois qu'il commence à clignoter, le téléphone lance la connexion automatique. Figure 8 8. Une fois que « PS » est affiché, appuyez simultanément sur les boutons Temp. (Température) et Start/Pause (Démarrer/Pause) pendant 3 secondes. Veuillez patienter jusqu’à ce que l’icône Smart Control Enabled (Commande intelligente activée) [ ] commence à clignoter. Lorsque l’icône Smart Control enabled (Commande intelligente activée) commence à clignoter, appuyez sur la touche Signal on/off (Signal activé/désactivé) et maintenez-la pendant 3 secondes afin d’activer la commande intelligente. Lorsque la commande intelligente est activée, l’icône Smart Control enabled (Commande intelligente activée) [ ] est allumée. Figure 9 Français - 56 DV455_02836F-08_CFR.indd Sec3:56 2013-12-12 5:13:22 Figure 12 10. Le sèche-linge est maintenant connecté. Appuyez sur le bouton « Course » (Programme) et vous pouvez dès lors contrôler le sèchelinge depuis votre téléphone. Figure 13 11. La Certification du périphérique est terminée et le sèche-linge est connecté à votre smartphone. Figure 14 03 INSTRUCTIONS ET CONSEILS D’UTILISATION 9. Appuyez sur l’onglet du nom du sèche-linge pour connecter au sèche-linge. Français - 57 DV455_02836F-08_CFR.indd Sec3:57 2013-12-12 5:13:22 Instructions et conseils d’utilisation Utilisation de l’application mobile ÉTAPE 1 Assurez-vous que l'icône Wi-Fi ne clignote pas. Si l'icône ne clignote pas, appuyez sur le bouton Signal et maintenezle enfoncé jusqu'à ce que l'icône arrête de clignoter. Une fois que l'icône de verrouillage de la porte est activé, l'unité est prête. Appuyez alors sur l'icône « SAMSUNG Smart Washer/Dryer (Lave-linge/Sèche-linge intelligent SAMSUNG) ». ÉTAPE 2 Après avoir touché l’icône « SAMSUNG Smart Washer/Dryer (Lave-linge/Sèche-linge intelligent SAMSUNG) », la recherche du sèche-linge démarre. Une fois que le téléphone s’est connecté au sèchelinge, le nom du sèche-linge, ou « MAC » apparaît. Touchez alors le nom du sèche-linge. ÉTAPE 3 Une fois la connexion établie, appuyez sur le bouton « Course » (Programme). L’unité doit afficher l’écran « Choose Cycle » (Choisir le programme). Lorsque cet écran Choose Cycle (Choisir le programme) est affiché, touchez l’onglet « Start » (Départ). Français - 58 DV455_02836F-08_CFR.indd Sec3:58 2013-12-12 5:13:22 ÉTAPE 4 03 INSTRUCTIONS ET CONSEILS D’UTILISATION Appuyez alors sur le bouton « Start (Démarrer) » et activez le programme de lavage. Vous pouvez surveiller le programme de lavage pour contrôler l'état du programme. Une fois que le programme est terminé, le téléphone affiche « Cycle Completes (Programme terminé) ». Français - 59 DV455_02836F-08_CFR.indd Sec3:59 2013-12-12 5:13:23 Instructions et conseils d’utilisation ENREGISTREMENT DE VOTRE SÈCHE-LINGE 1. Accédez au site Web Samsung Smart appliance. (http://www.samsungsmartappliance.com) 2. Saisissez votre ID utilisateur et le mot de passe pour vous connecter. Si vous ne possédez pas de compte, appuyez sur « Create a Samsung account (Créer un compte Samsung) » et remplissez le formulaire pour devenir membre. 3. Sélectionnez « My page (Ma page) » « My page (Ma page) ». 4. Sélectionnez « Add device (Ajouter un périphérique) ». 5. Recherchez le numéro MAC sur votre sèche-linge et saisissez-le dans la page des périphériques. Sur votre sèche-linge : 1) Appuyez et maintenez simultanément les boutons Temp. (Température) et Start/Pause (Démarrer/Pause) durant 3 secondes. 2) Tournez le Sélecteur de programme jusqu’à ce que « Ad » s’affiche sur l’écran et appuyez sur le bouton Start/Pause (Démarrer/Pause). L’adresse MAC apparaît. 3) Recherchez une adresse hexadécimale à 12 caractères, appuyez sur les boutons Start/Pause (Démarrer/Pause) pour les 2 chiffres et texte. 6. Cliquez sur « Certify device (Certifier le périphérique) ». Français - 60 DV455_02836F-08_CFR.indd Sec3:60 2013-12-12 5:13:23 03 INSTRUCTIONS ET CONSEILS D’UTILISATION 7. Appuyez et maintenez simultanément les boutons Temp. (Température) et Start/Pause (Démarrer/Pause) durant 3 secondes. 8. Tournez le Sélecteur de programme jusqu’à ce que « PS » s’affiche sur l’écran, puis appuyez sur le bouton Start/Pause (Démarrer/Pause). 9. Lorsque la fenêtre de vérification de certification du périphérique apparaît, cliquez sur « Ok ». Si le sèche-linge que vous allez enregistrer et déjà enregistré par d’autres utilisateurs, une fenêtre apparaîtra en vous demandant si vous souhaitez supprimer l’autorité d’utilisation des utilisateurs existants ou non. 10. Lorsque l’enregistrement du sèche-linge est terminé, vous pouvez vérifier le sèchelinge enregistré sur la liste des informations des périphériques. Adresse Mac : Tableau de correspondance de l’écran 0 1 2 3 4 5 A B C D E F Étiquette Mac Exemple d'adresse Mac 6 7 8 9 90A4DE89B2D3 Écran Français - 61 DV455_02836F-08_CFR.indd Sec3:61 2013-12-12 5:13:23 Entretien et nettoyage PANNEAU DE COMMANDES Nettoyez-le avec un chiffon doux et humide. N’utilisez pas de produits abrasifs. Ne vaporisez aucun produit d’entretien directement sur le panneau de commande. Certains détachants pour tissu peuvent endommager le revêtement du panneau de commandes. Appliquez donc ces produits à l’écart de votre sèche-linge et essuyez immédiatement toute projection ou tout excès. TAMBOUR Retirez les taches de crayon, d’encre ou de teinture (sur les articles neufs comme les serviettes ou les jeans), à l’aide d’un détachant universel. Frottez ensuite avec une vieille serviette ou un chiffon, pour retirer toute substance restante (tache ou détachant). Une fois ces étapes terminées, il est possible que les taches soient encore visibles mais elles ne devraient pas salir le reste du linge. TAMBOUR EN ACIER INOXYDABLE Pour nettoyer un tambour en acier inoxydable, utilisez un chiffon humide imprégné d’un nettoyant doux et non abrasif adapté aux surfaces en acier inoxydable. Retirez les résidus de détergent et essuyez avec un chiffon propre. EXTÉRIEUR DU SÈCHE-LINGE Nettoyez-le avec un chiffon doux et humide. N’utilisez pas de produits abrasifs. Protégez la surface des objets pointus. N’entreposez pas d’objets lourds (ex. : baril de lessive) ou à arêtes tranchantes sur le lave-linge. Utilisez le socle prévu à cet effet ou une boîte de rangement. Ceci risquerait de rayer ou d’endommager le capot supérieur du sèche-linge. Les faces du sèche-linge étant lisses et brillantes, elles sont sensibles aux rayures et aux coups. Évitez de les endommager lorsque vous utilisez le sèche-linge. SYSTÈME D’ÉVACUATION DU SÈCHE-LINGE Vous devez l’inspecter et le nettoyer une fois par an pour garantir des performances optimales. Nettoyez l’extérieur de la hotte plus fréquemment pour garantir son bon fonctionnement. Français - 62 DV455_02836F-08_CFR.indd Sec5:62 2013-12-12 5:13:24 Conseils d'entretien du linge CONSEILS D'ENTRETIEN DU LINGE Respectez les symboles textiles ou les consignes du fabricant concernant le séchage des articles spéciaux. Si aucun symbole textile n'est fourni, observez les consignes suivantes. • • • Couvertures • • Rideaux et tentures • • Reportez-vous aux symboles figurant sur les étiquettes des articles de literie plus. Assurez-vous que l'article est complètement sec avant de l'utiliser ou de le ranger. Il est parfois nécessaire de repositionner l'article dans le sèche-linge pour assurer un séchage homogène. Sélectionnez le programme Normal (Normal) et ne séchez qu'une couverture à la fois pour garantir un séchage optimal. Assurez-vous que l'article est complètement sec avant de l'utiliser ou de le ranger. Sélectionnez le programme Perm Press (Repassage facile) et la température Low (Basse) ou Extra Low (Très basse) pour réduire le froissage. Séchez ce type de linge par petits volumes pour obtenir de meilleurs résultats et sortez-le dès que possible. Couches en tissu • Sélectionnez le programme Normal (Normal) et la température High (Élevée) pour les couches en tissu ouaté et duveteux. Articles garnis de duvet (vestes, sacs de couchage, couettes, etc.) • Sélectionnez le programme Normal (Normal) et la température Low (Basse) ou Extra Low (Très basse). Ajouter une ou deux serviettes sèches pour accélérer le séchage et absorber l'humidité. Caoutchouc mousse (tapis, peluches, épaulettes, etc.) • • • Oreillers • • • Plastiques (rideaux de douche, bâches, etc.) • 05 CONSEILS D'ENTRETIEN DU LINGE Couvre-lits et couettes Ne séchez PAS ces articles à chaud. Servez-vous du programme Air Fluff (Air froid). AVERTISSEMENT : sécher un article à base de caoutchouc à chaud risque de l'endommager ou de provoquer un incendie. Sélectionnez le programme Normal (Normal). Ajoutez deux serviettes sèches et une paire de baskets propres pour favoriser l’action du tambour et dépelucher l’article. NE séchez PAS des oreillers à base de capoc ou de mousse dans le sèche-linge. Servez-vous du programme Air Fluff (Air froid). Sélectionnez le programme Air Fluff (Air froid) ou Time Dry (Temps de séchage) et la température Low (Basse) ou Extra Low (Très basse), en fonction des symboles figurant sur l'étiquette. CE QUE VOUS DEVEZ ÉVITER DE METTRE DANS LE SÈCHE-LINGE : • Articles en fibre de verre (rideaux, tentures, etc.). • Lainages, sauf indication contraire sur l'étiquette. • Articles imprégnés d'huile végétale ou alimentaire. Français - 63 DV455_02836F-08_CFR.indd Sec4:63 2013-12-12 5:13:24 Dépannage VÉRIFIEZ LES POINTS SUIVANTS SI VOTRE SÈCHE-LINGE... PROBLÈME SOLUTION Ne se met pas en route. • • • • Ne chauffe pas. • • • • • Ne sèche pas. • • • • • • • • • Fait du bruit. • • • • Assurez-vous que le hublot est bien fermé. Vérifiez que le cordon d'alimentation est branché sur une prise électrique opérationnelle. Vérifiez le disjoncteur et les fusibles de votre domicile. Appuyez de nouveau sur le bouton Start/Pause (Démarrer/Pause) en cas d'ouverture du hublot en cours de programme. Vérifiez le disjoncteur et les fusibles de votre domicile. Sélectionnez une autre température que Air Fluff (Air froid). Sur un sèche-linge à gaz, vérifiez que l'alimentation en gaz est ouverte. Nettoyez le filtre à peluches et le conduit d'évacuation. Le sèche-linge est peut-être en phase de refroidissement du programme. Vérifiez tous les points mentionnés ci-dessus, plus... Vérifiez que la hotte extérieure s'ouvre et se ferme sans problème. Vérifiez que des peluches ne se sont pas accumulées dans le système d'évacuation. Le conduit doit être inspecté et nettoyé une fois par an. Utilisez un conduit d’évacuation métallique rigide de 4 ”. Évitez de surcharger le tambour 1 charge de linge lavée = 1 charge de linge à sécher. Triez les articles : légers d’un côté, épais de l’autre. Il est parfois nécessaire de repositionner dans le sèche-linge les articles volumineux, comme les couvertures ou les couettes, pour assurer un séchage homogène. Vérifiez que le sèche-linge essore correctement le linge pour évacuer la quantité d'eau adéquate. La charge de linge est peut-être insuffisante pour que l'action du tambour soit efficace. Ajoutez quelques serviettes. Vérifiez le linge à la recherche de pièces de monnaie, de boutons décousus, de clous, etc. Retirez aussitôt ces objets. Il est normal d'entendre la mise en marche et l’arrêt du robinet de gaz du sèche-linge (le cas échéant) ou du système de chauffage, tout au long du programme de séchage. Vérifiez que le sèche-linge est correctement surélevé, comme indiqué dans les consignes d'installation. Il est normal que le sèche-linge émette un « bourdonnement », du fait de la grande vitesse de déplacement de l'air à travers le tambour du sèche-linge et le système d'évacuation. Français - 64 DV455_02836F-08_CFR.indd Sec6:64 2013-12-12 5:13:24 PROBLÈME SOLUTION Ne sèche pas le linge uniformément. • Dégage une odeur. • • S'arrête avant que le linge ne soit sec. • • Les vêtements sont pelucheux. • • • • Les odeurs ménagères (peinture, vernis, détachant, etc.) peuvent entrer dans le sèche-linge via l'air ambiant. Cette situation est normale puisque le sèche-linge aspire l'air de la pièce, le chauffe, l'introduit dans le tambour, puis l'éjecte à l’extérieur. Lorsque ces odeurs persistent dans l'air, aérez longuement la pièce avant d'utiliser le sèche-linge. Il n'y a pas assez de linge dans le sèche-linge. Ajoutez du linge ou quelques serviettes et relancez le programme. Il y a trop de linge dans le sèche-linge. Retirez du linge et relancez le sèche-linge. Assurez-vous que le filtre est propre avant chaque cycle. Sur les charges produisant beaucoup de peluches, il peut être nécessaire de nettoyer le filtre en cours de cycle. Certains tissus produisent une grande quantité de peluches (par exemple, les serviettes en coton). Ces articles doivent être séchés séparément des tissus qui attirent particulièrement les peluches (comme un pantalon en velours) Si la quantité de linge lavé est trop importante, séparez la charge en deux pour le séchage. Vérifiez soigneusement les poches des vêtements avant de les laver et de les sécher. Les vêtements sont encore froissés après le programme Wrinkle-Care ( Anti-froissement). • • Chargez entre 1 et 4 articles pour plus d’efficacité. Chargez moins de vêtements et de préférence des articles similaires. Les vêtements gardent une odeur après le programme Rafraîch. • Les tissus présentant une odeur forte doivent être lavés selon un cycle normal. De l'eau s'écoule par la • buse au démarrage du programme Steam (Vapeur). Il s'agit de la condensation de la vapeur. Ce phénomène s'arrête tout seul en peu de temps. L'eau vaporisée est invisible lors du programme Steam (Vapeur). Il est difficile de voir les minuscules gouttes d'eau vaporisées lorsque le hublot est fermé. • 06 DÉPANNAGE • Les coutures, les poches et les autres zones épaisses peuvent ne pas sécher complètement alors que le reste du linge a atteint le niveau de séchage sélectionné. Ceci est tout à fait normal. Sélectionnez le programme Very Dry (Très sec), au besoin. Si vous faites sécher un article épais avec une charge légère, par exemple une serviette de toilette avec des draps, il est possible que l'article le plus lourd ne soit pas complètement sec quand le reste du linge atteindra le niveau de séchage sélectionné. Triez les articles, légers d'un côté, épais de l'autre, pour obtenir des résultats de séchage homogènes. Français - 65 DV455_02836F-08_CFR.indd Sec6:65 2013-12-12 5:13:25 Dépannage CODES D'ERREUR Des codes système s'affichent parfois pour vous permettre de mieux comprendre le problème rencontré par le sèche-linge. AFFICHAGE DE L'ERREUR SIGNIFICATION SOLUTION tE La résistance de la thermistance est très faible ou très élevée. Nettoyez le filtre ou le système d'aération. Si le problème persiste, appelez le service de dépannage. tE3 La résistance de la thermistance pour la détection d'obstruction d'évents est très faible ou très élevée. Nettoyez le filtre ou le système d'aération. Si le problème persiste, appelez le service de dépannage. HE Température de chauffe non valide lors du fonctionnement du sèche- Appelez le service de dépannage. linge. dE Faire fonctionner le sèche-linge lorsque le hublot est ouvert Nettoyez le hublot, puis redémarrez. Si le problème persiste, appelez le service de dépannage. bE2 État non valide de court-circuit principal pendant 30 secondes. Vérifiez qu'AUCUN bouton NE reste enfoncé de façon continue. Essayez de relancer le cycle. Si le problème persiste, appelez le service de dépannage. FE Fréquence de source d'alimentation non valide Essayez de relancer le cycle. Si le problème persiste, appelez le service de dépannage. 2E Problème d'ordre électronique (Erreur de surtension) Appelez le service de dépannage. AE Problème d'ordre électronique (erreur de communication) Appelez le service de dépannage. Et Etat non valide de la communication Eeprom Appelez le service de dépannage. AE4 Une erreur de communication Appelez le service de dépannage. entre le Wi-Fi PBA et le MAIN PBA AE3 Une erreur de communication A entre le DR Modem et la MAIN PBA (Modem DR et Carte de circuit imprimé Principale) Appelez le service de dépannage. AE5 Une erreur de communication A entre la LCD PBA et la MAIN PBA (Cartes de circuit imprimé LCD et Principale) Appelez le service de dépannage. dF État de hublot non valide pendant plus de 256 millisecondes. Appelez le service de dépannage. Pour tout autre code non répertorié ici, appelez le 1-800-SAMSUNG (726-7864) Français - 66 DV455_02836F-08_CFR.indd Sec6:66 2013-12-12 5:13:25 QUESTIONS ET RÉPONSES SUR LA CONFIGURATION DU RÉSEAU RÉPONSE Le lave-linge ou le sèchelinge est introuvable dans l'application smartphone. • • • • • Impossible pour le lave-linge ou le sèche-linge de trouver l'AP (point d'accès). • • • • • Il y a plusieurs lave-linge ou sèche-linge dans l'habitation. Dois-je installer un AP pour chacun d'entre eux ? • • • Quel type d'AP (point d'accès) dois-je utiliser ? • • • Comment puis-je vérifier si l'AP est hors d'usage ? • • • Je n'ai pas de PC. Puisje utiliser les fonctions de commande intérieur et extérieur ? • Vérifiez l'état de l'alimentation du point d'accès (AP). Vérifiez si le smartphone est connecté avec le Wi-Fi. Vérifiez si la fonction Wi-Fi du lave-linge ou du sèche-linge est activée. Pour rafraîchir l'écran, appuyez sur « Configure (Configurer) » à nouveau. Si l'AP est installé trop loin du lave-linge ou du sèche-linge, la puissance des signaux Wi-Fi peut être affaiblie. Dans ce cas, rapprochez l'AP du lave-linge ou du sèche-linge. 06 DÉPANNAGE QUESTION Vérifiez l'état de l'alimentation de l'AP. Vérifiez si la fonction Wi-Fi du lave-linge ou du sèche-linge est activée. Pour rafraîchir l'écran, appuyez sur « Configure (Configurer) » à nouveau. Si l'AP est installé trop loin du lave-linge ou du sèche-linge, la puissance des signaux Wi-Fi peut être affaiblie. Dans ce cas, rapprochez l'AP du lave-linge ou du sèche-linge. Assurez-vous que le nombre de barres de l'antenne affiché est au moins de 3. Si la puissance de l'AP est faible, le lave-linge ou le sèche-linge peut ne pas le trouver. Utilisez un AP à haute performance s'il est disponible. Vous pouvez installer un seul AP. Si vous souhaitez un AP pour chaque lave-linge et sèche-linge, sélectionnez l'AP correspondant à chacun des appareils dans l'application « Smart Washer ». Lorsque lave-linge et sèche-linge sont installés, ils peuvent être commandés via un seul AP. Le lave-linge ou le sèche-linge étant commandé via l'AP de l'intérieur ou de l'extérieur de l'habitation, un AP de haute performance est recommandé. Utilisez un AP portant une marque de certification Wi-Fi. Un AP contenant au moins 2 antennes offrant de meilleures performances, nous vous recommandons d'acheter un AP sans fil avec au moins 2 antennes. Connectez l'AP à un smartphone et vérifiez si vous pouvez vous connecter à Internet. Si vous ne pouvez pas vous connecter, l'AP est normal. Vérifiez si les DEL de l'AP clignotent. Si toutes les DEL sont éteintes, cela signifie que l'alimentation est coupée. Si l'AP ne semble pas fonctionner correctement, consultez le service après-vente. S'il est possible d'accéder à Internet depuis l'intérieur de l'habitation, la fonction est disponible. Vous devez cependant vous inscrire sur le site Web Samsung et enregistrer l'appareil. Français - 67 DV455_02836F-08_CFR.indd Sec6:67 2013-12-12 5:13:25 Dépannage QUESTION RÉPONSE Combien d'utilisateurs peuvent commander un lavelinge ou un sèche-linge ? • Plusieurs utilisateurs peuvent commander le lave-linge ou le sèchelinge uniquement si l'application « Smart Washer » est authentifiée. Que dois-je faire pour obtenir le signal Wi-Fi le plus fort ? • Installer l'AP à proximité du lave-linge ou du sèche-linge est recommandé. Vous pouvez vérifier la puissance des signaux via l'écran de configuration du lave-linge ou du sèche-linge ou d'un smartphone. La performance du réseau étant sérieusement affectée par une porte ou une paroi métallique, installez le lave-linge ou le sèche-linge dans un lieu ouvert. Si une porte est présente en face de l'appareil installé, ouvrez-la lorsque vous utilisez l'appareil. Ne placez pas d'objet en acier ou en verre en face de l'écran LCD situé en façade du lave-linge car il bloquera le signal radio. Notez que le signal radio peut être affaibli ou interférer et la communication avec le smartphone peut échouer lorsqu'un four micro-ondes est utilisé dans l'habitation. Installez le lave-linge ou le sèche-linge de sorte que la façade de l'appareil soit orientée vers l'AP si possible. • • • • Comment puis-je connecter le lave-linge ou le sèche-linge à un smartphone de manière stable ? • Lorsque la puissance du signal qui est affichée sur l'écran LCD du lave-linge ou du sèche-linge est faible, la commande peut échouer. Pour un fonctionnement stable, la mesure de la puissance du signal doit être comme suit : • Au minimum trois barres d'antenne doivent être affichées sur l'écran LCD du lave-linge ou du sèche-linge. • Au minimum trois barres d'antenne doivent être affichées pour la connexion Wi-Fi sur le smartphone. • Lorsque la puissance des signaux est mesurée avec une application smartphone qui indique la puissance des signaux Wi-Fi, celle-ci doit être supérieure à 65 dBm. (Par ex. -60 dBm et -50 dBm sont supérieurs à -65 dBm.) Que dois-je faire lorsque le nombre de barres d'antenne affiché sur l'écran LCD du lave-linge ou du sèche-linge est de 1 ? • Lorsque la puissance du signal qui est affichée sur l'écran LCD du lave-linge ou du sèche-linge est faible, la commande peut échouer. Dans ce cas, prenez les mesures suivantes pour un fonctionnement normal. • Approchez l'AP plus près du lave-linge ou du sèche-linge. (Au minimum 3 barres d'antenne doivent être affichées dans la configuration réseau du lave-linge pour un fonctionnement correct.) • Un AP ancien pouvant délivrer des performances inférieures, utilisez un neuf si possible. • Positionnez l'antenne de l'AP de manière à ce que le signal radio se propage plus facilement. Français - 68 DV455_02836F-08_CFR.indd Sec6:68 2013-12-12 5:13:25 Annexe TABLEAU DES SYMBOLES TEXTILES Lavage Consignes spéciales Symboles de nettoyage Normal Séchage en suspension Ne pas laver Infroissable / Antifroissement Séchage sans essorage Ne pas tordre Délicat Séchage à plat Agent de blanchiment interdit Lavage main Séchage Pas de séchage machine Élevée Pas de vapeur (ajoutée au fer à repasser) Chaude Moyenne Pas de repassage Tiède Basse Froide Toutes températures Nettoyage à sec autorisé Pas de séchage Nettoyage à sec interdit Température de l'eau** Agent de blanchiment Tout type d'agent de blanchiment autorisé (si nécessaire) Température fer ou vapeur 07 ANNEXE Les symboles suivants fournissent des conseils d'entretien des vêtements. Les étiquettes d'entretien des vêtements incluent des symboles relatifs au lavage, au blanchiment, au séchage, au repassage et au nettoyage à sec, le cas échéant. L'utilisation de ces symboles garantit la cohérence des informations entre les fabricants de vêtements (articles domestiques ou importés). Respectez ces symboles d'entretien afin d'optimiser la durée de vie de votre linge et d'éviter les problèmes de lavage. Nettoyage à sec autorisé Séchage en suspension Non chloré (non décolorant) Agent de blanchiment (si nécessaire) Élevée Séchage sans essorage Programme de séchage machine Moyenne Séchage à plat Basse Normal Infroissable / Antifroissement Délicat ** Les points représentent la température appropriée de l'eau de lavage. Les niveaux de températures sont : Chaude 105 à 125 °F (41 à 52 °C), Tiède 85 à 105 °F (29 à 41 °C) et Froide 60 à 85 °F (16 à 29 °C). (La température de l'eau de lavage doit être d'au moins 16 °C pour activer les agents nettoyants et obtenir un lavage efficace.) Français - 69 DV455_02836F-08_CFR.indd Sec7:69 2013-12-12 5:13:25 Annexe PROTECTION DE L’ENVIRONNEMENT Cet appareil a été fabriqué à partir de matériaux recyclables. Si vous décidez de le jeter, veuillez respecter les normes locales en matière d’évacuation des déchets. Coupez le cordon d'alimentation de façon à ce que l'appareil ne puisse pas être raccordé à une source électrique. Enlevez le hublot pour que des animaux et des jeunes enfants ne se retrouvent pas piégés à l'intérieur de l'appareil. DÉCLARATION DE CONFORMITÉ Cet appareil est conforme à la norme UL2158. CARACTÉRISTIQUES TECHNIQUES C D A B TYPE DIMENSIONS SÈCHE-LINGE À CHARGEMENT FRONTAL A. Hauteur 99,0 cm (39”) B. Largeur 68,6 cm (27”) C. Profondeur, hublot ouvert à 90° 131,2 cm (51,65”) D. Profondeur 82,0 cm (32,28”) POIDS 57 Kg (127,8 lb) PUISSANCE DE CHAUFFE 5 300 W (élec.) 22 000 BTU/h (Gaz) Français - 70 DV455_02836F-08_CFR.indd Sec7:70 2013-12-12 5:13:25 TABLEAU DES PROGRAMMES ( : réglage usine, : sélectionnable) PROGRAMME Séchage manuel Cycles vapeur QUANTITÉ MAXIMALE Coton, vêtements de travail, lin, charges mixtes Heavy Duty (Grand rendement) Pièces au tissu épais, tels que les jeans, les velours côtelés ou les vêtements de travail Perm Press (Repassage facile) Chemises, tissus synthétiques, lainages, tissus infroissables en coton, tissus infroissables Bedding PLUS (Literie PLUS) Objets volumineux, tels que les couvertures, les draps, les couettes et les oreillers. Delicates (Délicat) Sous-vêtements, chemisiers, lingerie Sanitize (Stérilisation) Literie, rideaux, vêtements d'enfant Eco Normal (Éco-normal) Coton, vêtements de travail, lin Wool (Laine) Pour lainages lavables en machine et séchables en sèche-linge uniquement. (Charge maximale : 1,36 kg (3 lb)) Air Fluff (Air froid) Mousse, caoutchouc, matières plastiques Quick Dry (Séchage rapide) Petites charges Time Dry (Temps de séchage) Toute charge 07 ANNEXE Séchage par capteur ARTICLES RECOMMANDÉS Normal Wrinkle Away (Anti-froissement) Chemises, pantalons, chemisiers Refresh (Rafraîch.) Chemises, pantalons, couettes, oreillers FONCTIONS Capteur de séchage Élevée Moyenne Moyenne faible Faible Très faible Normal Séchage normal Heavy Duty (Grand rendement) Séchage normal Perm Press (Repassage facile) Séchage normal Bedding PLUS (Literie PLUS) Séchage normal Delicates (Délicat) Séchage normal Sanitize (Stérilisation) Séchage très fort (aucun changement) Eco Normal (Éco-normal) Séchage normal (aucun changement)* (DV455G)* Wool (Laine) Séchage normal (aucun changement) Air Fluff (Air froid) - Wrinkle Away (Anti-froissement) - Refresh (Rafraîch.) Time Dry (Temps de séchage) - Heure - Séchage manuel Quick Dry (Séchage rapide) Cycles vapeur OPTIONS Commande Temp. Niveau Séchage par capteur PROGRAMME AntiDépart froissage différé * pour modèle à gaz uniquement Recommandations à propos du volume des charges Charge importante Charge moyenne Petites charges Remplissez le tambour aux 3/4 environ. Au-delà de cette limite, n'ajoutez pas d'articles supplémentaires afin que le linge tourne librement. Remplissez le tambour à la moitié environ. Remplissez le tambour de 3 à 5 articles (pas plus du 1/4). Pour un résultat optimal, respectez ces recommandations de volume de charge pour chaque cycle de séchage. Français - 71 DV455_02836F-08_CFR.indd Sec7:71 2013-12-12 5:13:25 Annexe OPEN SOURCE ANNOUNCEMENT The software included in this product contains copyrighted software that is licensed under the GPL/LGPL. You may obtain the complete Corresponding Source code from us for a period of three years after our last shipment of this product by sending email to: [email protected] If you want to obtain the complete Corresponding Source code in the physical medium such as CD-ROM, the cost of physically performing source distribution may be charged. This offer is valid to anyone in receipt of this information. GPL Software: Bridge-Utils, BusyBox, DNRD, dosfstools, iproute2, IPTables, Linux Kernel, ntpclient, Open1x, RSDK toolchain, rtl819x - Bootloader, samba, squashfs, udhcp Server-Client Package, USB-ModeSwitch, wireless-tools LGPL Software: libnl-Netlink Library, Mini-XML GNU GENERAL PUBLIC LICENSE Version 2, June 1991 Copyright (C) 1989, 1991 Free Software Foundation, Inc. 51 Franklin Street, Fifth Floor, Boston, MA 02110-1301, USA Everyone is permitted to copy and distribute verbatim copies of this license document, but changing it is not allowed. Preamble The licenses for most software are designed to take away your freedom to share and change it. By contrast, the GNU General Public License is intended to guarantee your freedom to share and change free software--to make sure the software is free for all its users. This General Public License applies to most of the Free Software Foundation’s software and to any other program whose authors commit to using it. (Some other Free Software Foundation software is covered by the GNU Lesser General Public License instead.) You can apply it to your programs, too. When we speak of free software, we are referring to freedom, not price. Our General Public Licenses are designed to make sure that you have the freedom to distribute copies of free software (and charge for this service if you wish), that you receive source code or can get it if you want it, that you can change the software or use pieces of it in new free programs; and that you know you can do these things. To protect your rights, we need to make restrictions that forbid anyone to deny you these rights or to ask you to surrender the rights. These restrictions translate to certain responsibilities for you if you distribute copies of the software, or if you modify it. For example, if you distribute copies of such a program, whether gratis or for a fee, you must give the recipients all the rights that you have. You must make sure that they, too, receive or can get the source code. And you must show them these terms so they know their rights. We protect your rights with two steps: (1) copyright the software, and (2) offer you this license which gives you legal permission to copy, distribute and/or modify the software. Also, for each author’s protection and ours, we want to make certain that everyone understands that there is no warranty for this free software. If the software is modified by someone else and passed on, we want its recipients to know that what they have is not the original, so that any Français - 72 DV455_02836F-08_CFR.indd Sec7:72 2013-12-12 5:13:25 TERMS AND CONDITIONS FOR COPYING, DISTRIBUTION AND MODIFICATION 07 ANNEXE problems introduced by others will not reflect on the original authors’ reputations. Finally, any free program is threatened constantly by software patents. We wish to avoid the danger that redistributors of a free program will individually obtain patent licenses, in effect making the program proprietary. To prevent this, we have made it clear that any patent must be licensed for everyone’s free use or not licensed at all. The precise terms and conditions for copying, distribution and modification follow. 1. This License applies to any program or other work which contains a notice placed by the copyright holder saying it may be distributed under the terms of this General Public License. The “Program”, below, refers to any such program or work, and a “work based on the Program” means either the Program or any derivative work under copyright law: that is to say, a work containing the Program or a portion of it, either verbatim or with modifications and/or translated into another language. (Hereinafter, translation is included without limitation in the term “modification”.) Each licensee is addressed as “you”. Activities other than copying, distribution and modification are not covered by this License; they are outside its scope. The act of running the Program is not restricted, and the output from the Program is covered only if its contents constitute a work based on the Program (independent of having been made by running the Program). Whether that is true depends on what the Program does. 2. You may copy and distribute verbatim copies of the Program’s source code as you receive it, in any medium, provided that you conspicuously and appropriately publish on each copy an appropriate copyright notice and disclaimer of warranty; keep intact all the notices that refer to this License and to the absence of any warranty; and give any other recipients of the Program a copy of this License along with the Program. You may charge a fee for the physical act of transferring a copy, and you may at your option offer warranty protection in exchange for a fee. 3. You may modify your copy or copies of the Program or any portion of it, thus forming a work based on the Program, and copy and distribute such modifications or work under the terms of Section 1 above, provided that you also meet all of these conditions: 1) You must cause the modified files to carry prominent notices stating that you changed the files and the date of any change. 2) You must cause any work that you distribute or publish, that in whole or in part contains or is derived from the Program or any part thereof, to be licensed as a whole at no charge to all third parties under the terms of this License. 3) If the modified program normally reads commands interactively when run, you must cause it, when started running for such interactive use in the most ordinary way, to print or display an announcement including an appropriate copyright notice and a notice that there is no warranty (or else, saying that you provide a warranty) and that users may redistribute the program under these conditions, and telling the user how to view a copy of this License. (Exception: if the Program itself is interactive but does not normally print such an announcement, your work based on the Program is not required to print an announcement.) These requirements apply to the modified work as a whole. If identifiable sections of that work are not derived from the Program, and can be reasonably considered independent and separate works in themselves, then this License, and its terms, do not apply to those sections when you distribute them as separate works. But when you distribute the same sections as part of a whole which is a work based on the Program, the distribution of the whole must be on the terms of this License, whose permissions for other licensees extend to the entire whole, and thus to each and every part regardless of who wrote it. Thus, it is not the intent of this section to claim rights or contest your rights to work written Français - 73 DV455_02836F-08_CFR.indd Sec7:73 2013-12-12 5:13:25 Annexe 4. 5. 6. 7. entirely by you; rather, the intent is to exercise the right to control the distribution of derivative or collective works based on the Program. In addition, mere aggregation of another work not based on the Program with the Program (or with a work based on the Program) on a volume of a storage or distribution medium does not bring the other work under the scope of this License. 3. You may copy and distribute the Program (or a work based on it, under Section 2) in object code or executable form under the terms of Sections 1 and 2 above provided that you also do one of the following: 1) Accompany it with the complete corresponding machinereadable source code, which must be distributed under the terms of Sections 1 and 2 above on a medium customarily used for software interchange; or, 2) Accompany it with a written offer, valid for at least three years, to give any third party, for a charge no more than your cost of physically performing source distribution, a complete machine-readable copy of the corresponding source code, to be distributed under the terms of Sections 1 and 2 above on a medium customarily used for software interchange; or, c) Accompany it with the information you received as to the offer to distribute corresponding source code. (This alternative is allowed only for noncommercial distribution and only if you received the program in object code or executable form with such an offer, in accord with Subsection b above.) The source code for a work means the preferred form of the work for making modifications to it. For an executable work, complete source code means all the source code for all modules it contains, plus any associated interface definition files, plus the scripts used to control compilation and installation of the executable. However, as a special exception, the source code distributed need not include anything that is normally distributed (in either source or binary form) with the major components (compiler, kernel, and so on) of the operating system on which the executable runs, unless that component itself accompanies the executable. If distribution of executable or object code is made by offering access to copy from a designated place, then offering equivalent access to copy the source code from the same place counts as distribution of the source code, even though third parties are not compelled to copy the source along with the object code. You may not copy, modify, sublicense, or distribute the Program except as expressly provided under this License. Any attempt otherwise to copy, modify, sublicense or distribute the Program is void, and will automatically terminate your rights under this License. However, parties who have received copies, or rights, from you under this License will not have their licenses terminated so long as such parties remain in full compliance. You are not required to accept this License, since you have not signed it. However, nothing else grants you permission to modify or distribute the Program or its derivative works. These actions are prohibited by law if you do not accept this License. Therefore, by modifying or distributing the Program (or any work based on the Program), you indicate your acceptance of this License to do so, and all its terms and conditions for copying, distributing or modifying the Program or works based on it. Each time you redistribute the Program (or any work based on the Program), the recipient automatically receives a license from the original licensor to copy, distribute or modify the Program subject to these terms and conditions. You may not impose any further restrictions on the recipients’ exercise of the rights granted herein. You are not responsible for enforcing compliance by third parties to this License. Français - 74 DV455_02836F-08_CFR.indd Sec7:74 2013-12-12 5:13:25 07 ANNEXE 8. If, as a consequence of a court judgment or allegation of patent infringement or for any other reason (not limited to patent issues), conditions are imposed on you (whether by court order, agreement or otherwise) that contradict the conditions of this License, they do not excuse you from the conditions of this License. If you cannot distribute so as to satisfy simultaneously your obligations under this License and any other pertinent obligations, then as a consequence you may not distribute the Program at all. For example, if a patent license would not permit royalty-free redistribution of the Program by all those who receive copies directly or indirectly through you, then the only way you could satisfy both it and this License would be to refrain entirely from distribution of the Program. If any portion of this section is held invalid or unenforceable under any particular circumstance, the balance of the section is intended to apply and the section as a whole is intended to apply in other circumstances. It is not the purpose of this section to induce you to infringe any patents or other property right claims or to contest validity of any such claims; this section has the sole purpose of protecting the integrity of the free software distribution system, which is implemented by public license practices. Many people have made generous contributions to the wide range of software distributed through that system in reliance on consistent application of that system; it is up to the author/donor to decide if he or she is willing to distribute software through any other system and a licensee cannot impose that choice. This section is intended to make thoroughly clear what is believed to be a consequence of the rest of this License. 9. If the distribution and/or use of the Program is restricted in certain countries either by patents or by copyrighted interfaces, the original copyright holder who places the Program under this License may add an explicit geographical distribution limitation excluding those countries, so that distribution is permitted only in or among countries not thus excluded. In such case, this License incorporates the limitation as if written in the body of this License. 10. The Free Software Foundation may publish revised and/or new versions of the General Public License from time to time. Such new versions will be similar in spirit to the present version, but may differ in detail to address new problems or concerns. Each version is given a distinguishing version number. If the Program specifies a version number of this License which applies to it and “any later version”, you have the option of following the terms and conditions either of that version or of any later version published by the Free Software Foundation. If the Program does not specify a version number of this License, you may choose any version ever published by the Free Software Foundation. 11. If you wish to incorporate parts of the Program into other free programs whose distribution conditions are different, write to the author to ask for permission. For software which is copyrighted by the Free Software Foundation, write to the Free Software Foundation; we sometimes make exceptions for this. Our decision will be guided by the two goals of preserving the free status of all derivatives of our free software and of promoting the sharing and reuse of software generally. NO WARRANTY 12. BECAUSE THE PROGRAM IS LICENSED FREE OF CHARGE, THERE IS NO WARRANTY FOR THE PROGRAM, TO THE EXTENT PERMITTED BY APPLICABLE LAW. EXCEPT WHEN OTHERWISE STATED IN WRITING THE COPYRIGHT HOLDERS AND/OR OTHER PARTIES PROVIDE THE PROGRAM “AS IS” WITHOUT WARRANTY OF ANY KIND, EITHER EXPRESSED OR IMPLIED, INCLUDING, BUT NOT LIMITED TO, THE IMPLIED WARRANTIES OF MERCHANTABILITY AND FITNESS FOR A PARTICULAR PURPOSE. THE ENTIRE RISK AS TO THE QUALITY AND PERFORMANCE OF THE PROGRAM IS WITH YOU. SHOULD THE PROGRAM PROVE DEFECTIVE, YOU ASSUME THE COST OF ALL NECESSARY SERVICING, REPAIR OR CORRECTION. Français - 75 DV455_02836F-08_CFR.indd Sec7:75 2013-12-12 5:13:26 Annexe 13. IN NO EVENT UNLESS REQUIRED BY APPLICABLE LAW OR AGREED TO IN WRITING WILL ANY COPYRIGHT HOLDER, OR ANY OTHER PARTY WHO MAY MODIFY AND/OR REDISTRIBUTE THE PROGRAM AS PERMITTED ABOV E , BE L I ABL E TO YOU FOR DAMAGES, INCLUDING ANY GENERAL, SPECIAL, INCIDENTAL OR CONSEQUENTIAL DAMAGES ARISING OUT OF THE USE OR INABILITY TO USE THE PROGRAM (INCLUDING BUT NOT LIMITED TO LOSS OF DATA OR DATA BEING RENDERED INACCURATE OR LOSSES SUSTAINED BY YOU OR THIRD PARTIES OR A FAILURE OF THE PROGRAM TO OPERATE WITH ANY OTHER PROGRAMS), EVEN IF SUCH HOLDER OR OTHER PARTY HAS BEEN ADVISED OF THE POSSIBILITY OF SUCH DAMAGES. END OF TERMS AND CONDITIONS How to Apply These Terms to Your New Programs If you develop a new program, and you want it to be of the greatest possible use to the public, the best way to achieve this is to make it free software which everyone can redistribute and change under these terms. To do so, attach the following notices to the program. It is safest to attach them to the start of each source file to most effectively convey the exclusion of warranty; and each file should have at least the “copyright” line and a pointer to where the full notice is found. one line to give the program’s name and an idea of what it does. Copyright (C) yyyy name of author This program is free software; you can redistribute it and/or modify it under the terms of the GNU General Public License as published by the Free Software Foundation; either version 2 of the License, or (at your option) any later version. This program is distributed in the hope that it will be useful, but WITHOUT ANY WARRANTY; without even the implied warranty of MERCHANTABILITY or FITNESS FOR A PARTICULAR PURPOSE. See the GNU General Public License for more details. You should have received a copy of the GNU General Public License along with this program; if not, write to the Free Software Foundation, Inc., 51 Franklin Street, Fifth Floor, Boston, MA 02110-1301, USA. Also add information on how to contact you by electronic and paper mail. If the program is interactive, make it output a short notice like this when it starts in an interactive mode: Gnomovision version 69, Copyright (C) year name of author Gnomovision comes with ABSOLUTELY NO WARRANTY; for details type `show w’. This is free software, and you are welcome to redistribute it under certain conditions; type `show c’ for details. The hypothetical commands `show w’ and `show c’ should show the appropriate parts of the General Public License. Of course, the commands you use may be called something other than `show w’ and `show c’; they could even be mouse-clicks or menu items--whatever suits your program. You should also get your employer (if you work as a programmer) or your school, if any, to sign a “copyright disclaimer” for the program, if necessary. Here is a sample; alter the names: Yoyodyne, Inc., hereby disclaims all copyright interest in the program `Gnomovision’ (which makes passes at compilers) written by James Hacker. signature of Ty Coon, 1 April 1989 Ty Coon, President of Vice This General Public License does not permit incorporating your program into proprietary programs. If your program is a subroutine library, you may consider it more useful to permit linking proprietary applications with the library. If this is what you want to do, use the GNU Lesser General Public License instead of this License. Français - 76 DV455_02836F-08_CFR.indd Sec7:76 2013-12-12 5:13:26 GNU LESSER GENERAL PUBLIC LICENSE [This is the first released version of the Lesser GPL. It also counts as the successor of the GNU Library Public License, version 2, hence the version number 2.1.] 07 ANNEXE Version 2.1, February 1999 Copyright (C) 1991, 1999 Free Software Foundation, Inc. 51 Franklin Street, Fifth Floor, Boston, MA 02110-1301 USA Everyone is permitted to copy and distribute verbatim copies of this license document, but changing it is not allowed. Preamble The licenses for most software are designed to take away your freedom to share and change it. By contrast, the GNU General Public Licenses are intended to guarantee your freedom to share and change free software--to make sure the software is free for all its users. This license, the Lesser General Public License, applies to some specially designated software packages--typically libraries--of the Free Software Foundation and other authors who decide to use it. You can use it too, but we suggest you first think carefully about whether this license or the ordinary General Public License is the better strategy to use in any particular case, based on the explanations below. When we speak of free software, we are referring to freedom of use, not price. Our General Public Licenses are designed to make sure that you have the freedom to distribute copies of free software (and charge for this service if you wish); that you receive source code or can get it if you want it; that you can change the software and use pieces of it in new free programs; and that you are informed that you can do these things. To protect your rights, we need to make restrictions that forbid distributors to deny you these rights or to ask you to surrender these rights. These restrictions translate to certain responsibilities for you if you distribute copies of the library or if you modify it. For example, if you distribute copies of the library, whether gratis or for a fee, you must give the recipients all the rights that we gave you. You must make sure that they, too, receive or can get the source code. If you link other code with the library, you must provide complete object files to the recipients, so that they can relink them with the library after making changes to the library and recompiling it. And you must show them these terms so they know their rights. We protect your rights with a two-step method: (1) we copyright the library, and (2) we offer you this license, which gives you legal permission to copy, distribute and/or modify the library. To protect each distributor, we want to make it very clear that there is no warranty for the free library. Also, if the library is modified by someone else and passed on, the recipients should know that what they have is not the original version, so that the original author’s reputation will not be affected by problems that might be introduced by others. Finally, software patents pose a constant threat to the existence of any free program. We wish to make sure that a company cannot effectively restrict the users of a free program by obtaining a restrictive license from a patent holder. Therefore, we insist that any patent license obtained for a version of the library must be consistent with the full freedom of use specified in this license. Most GNU software, including some libraries, is covered by the ordinary GNU General Public License. This license, the GNU Lesser General Public License, applies to certain designated libraries, and is quite different from the ordinary General Public License. We use this license for certain libraries in order to permit linking those libraries into nonfree programs. When a program is linked with a library, whether statically or using a shared library, the combination of the two is legally speaking a combined work, a derivative of the original library. The ordinary General Public License therefore permits such linking only if the entire combination fits its criteria of freedom. The Lesser General Public License permits more lax criteria for linking other code with the library. We call this license the “Lesser” General Public License because it does Less to protect the Français - 77 DV455_02836F-08_CFR.indd Sec7:77 2013-12-12 5:13:26 Annexe user’s freedom than the ordinary General Public License. It also provides other free software developers Less of an advantage over competing non-free programs. These disadvantages are the reason we use the ordinary General Public License for many libraries. However, the Lesser license provides advantages in certain special circumstances. For example, on rare occasions, there may be a special need to encourage the widest possible use of a certain library, so that it becomes a de-facto standard. To achieve this, non-free programs must be allowed to use the library. A more frequent case is that a free library does the same job as widely used non-free libraries. In this case, there is little to gain by limiting the free library to free software only, so we use the Lesser General Public License. In other cases, permission to use a particular library in nonfree programs enables a greater number of people to use a large body of free software. For example, permission to use the GNU C Library in non-free programs enables many more people to use the whole GNU operating system, as well as its variant, the GNU/Linux operating system. Although the Lesser General Public License is Less protective of the users’ freedom, it does ensure that the user of a program that is linked with the Library has the freedom and the wherewithal to run that program using a modified version of the Library. The precise terms and conditions for copying, distribution and modification follow. Pay close attention to the difference between a “work based on the library” and a “work that uses the library”. The former contains code derived from the library, whereas the latter must be combined with the library in order to run. TERMS AND CONDITIONS FOR COPYING, DISTRIBUTION AND MODIFICATION 1. This License Agreement applies to any software library or other program which contains a notice placed by the copyright holder or other authorized party saying it may be distributed under the terms of this Lesser General Public License (also called “this License”). Each licensee is addressed as “you”. A “library” means a collection of software functions and/or data prepared so as to be conveniently linked with application programs (which use some of those functions and data) to form executables. The “Library”, below, refers to any such software library or work which has been distributed under these terms. A “work based on the Library” means either the Library or any derivative work under copyright law: that is to say, a work containing the Library or a portion of it, either verbatim or with modifications and/or translated straightforwardly into another language. (Hereinafter, translation is included without limitation in the term “modification”.) “Source code” for a work means the preferred form of the work for making modifications to it. For a library, complete source code means all the source code for all modules it contains, plus any associated interface definition files, plus the scripts used to control compilation and installation of the library. Activities other than copying, distribution and modification are not covered by this License; they are outside its scope. The act of running a program using the Library is not restricted, and output from such a program is covered only if its contents constitute a work based on the Library (independent of the use of the Library in a tool for writing it). Whether that is true depends on what the Library does and what the program that uses the Library does. 2. You may copy and distribute verbatim copies of the Library’s complete source code as you receive it, in any medium, provided that you conspicuously and appropriately publish on each copy an appropriate copyright notice and disclaimer of warranty; keep intact all the notices that refer to this License and to the absence of any warranty; and distribute a copy of this License along with the Library. You may charge a fee for the physical act of transferring a copy, and you may at your option Français - 78 DV455_02836F-08_CFR.indd Sec7:78 2013-12-12 5:13:26 07 ANNEXE offer warranty protection in exchange for a fee. 3. You may modify your copy or copies of the Library or any portion of it, thus forming a work based on the Library, and copy and distribute such modifications or work under the terms of Section 1 above, provided that you also meet all of these conditions: 1) The modified work must itself be a software library. 2) You must cause the files modified to carry prominent notices stating that you changed the files and the date of any change. 3) You must cause the whole of the work to be licensed at no charge to all third parties under the terms of this License. 4) If a facility in the modified Library refers to a function or a table of data to be supplied by an application program that uses the facility, other than as an argument passed when the facility is invoked, then you must make a good faith effort to ensure that, in the event an application does not supply such function or table, the facility still operates, and performs whatever part of its purpose remains meaningful. (For example, a function in a library to compute square roots has a purpose that is entirely well-defined independent of the application. Therefore, Subsection 2d requires that any application-supplied function or table used by this function must be optional: if the application does not supply it, the square root function must still compute square roots.) These requirements apply to the modified work as a whole. If identifiable sections of that work are not derived from the Library, and can be reasonably considered independent and separate works in themselves, then this License, and its terms, do not apply to those sections when you distribute them as separate works. But when you distribute the same sections as part of a whole which is a work based on the Library, the distribution of the whole must be on the terms of this License, whose permissions for other licensees extend to the entire whole, and thus to each and every part regardless of who wrote it. Thus, it is not the intent of this section to claim rights or contest your rights to work written entirely by you; rather, the intent is to exercise the right to control the distribution of derivative or collective works based on the Library. In addition, mere aggregation of another work not based on the Library with the Library (or with a work based on the Library) on a volume of a storage or distribution medium does not bring the other work under the scope of this License. 4. You may opt to apply the terms of the ordinary GNU General Public License instead of this License to a given copy of the Library. To do this, you must alter all the notices that refer to this License, so that they refer to the ordinary GNU General Public License, version 2, instead of to this License. (If a newer version than version 2 of the ordinary GNU General Public License has appeared, then you can specify that version instead if you wish.) Do not make any other change in these notices. Once this change is made in a given copy, it is irreversible for that copy, so the ordinary GNU General Public License applies to all subsequent copies and derivative works made from that copy. This option is useful when you wish to copy part of the code of the Library into a program that is not a library. 5. You may copy and distribute the Library (or a portion or derivative of it, under Section 2) in object code or executable form under the terms of Sections 1 and 2 above provided that you accompany it with the complete corresponding machine-readable source code, which must be distributed under the terms of Sections 1 and 2 above on a medium customarily used for software interchange. If distribution of object code is made by offering access to copy from a designated place, then offering equivalent access to copy the source code from the same place satisfies the requirement to distribute the source code, even though third parties are not compelled to copy the source along with the object code. Français - 79 DV455_02836F-08_CFR.indd Sec7:79 2013-12-12 5:13:26 Annexe 6. A program that contains no derivative of any portion of the Library, but is designed to work with the Library by being compiled or linked with it, is called a “work that uses the Library”. Such a work, in isolation, is not a derivative work of the Library, and therefore falls outside the scope of this License. However, linking a “work that uses the Library” with the Library creates an executable that is a derivative of the Library (because it contains portions of the Library), rather than a “work that uses the library”. The executable is therefore covered by this License. Section 6 states terms for distribution of such executables. When a “work that uses the Library” uses material from a header file that is part of the Library, the object code for the work may be a derivative work of the Library even though the source code is not. Whether this is true is especially significant if the work can be linked without the Library, or if the work is itself a library. The threshold for this to be true is not precisely defined by law. If such an object file uses only numerical parameters, data structure layouts and accessors, and small macros and small inline functions (ten lines or less in length), then the use of the object file is unrestricted, regardless of whether it is legally a derivative work. (Executables containing this object code plus portions of the Library will still fall under Section 6.) Otherwise, if the work is a derivative of the Library, you may distribute the object code for the work under the terms of Section 6. Any executables containing that work also fall under Section 6, whether or not they are linked directly with the Library itself. 7. As an exception to the Sections above, you may also combine or link a “work that uses the Library” with the Library to produce a work containing portions of the Library, and distribute that work under terms of your choice, provided that the terms permit modification of the work for the customer’s own use and reverse engineering for debugging such modifications. You must give prominent notice with each copy of the work that the Library is used in it and that the Library and its use are covered by this License. You must supply a copy of this License. If the work during execution displays copyright notices, you must include the copyright notice for the Library among them, as well as a reference directing the user to the copy of this License. Also, you must do one of these things: 1) Accompany the work wi th the complet e corresponding machine-readable source code for the Library including whatever changes were used in the work (which must be distributed under Sections 1 and 2 above); and, if the work is an executable linked with the Library, with the complete machine-readable “work that uses the Library”, as object code and/or source code, so that the user can modify the Library and then relink to produce a modified executable containing the modified Library. (It is understood that the user who changes the contents of definitions files in the Library will not necessarily be able to recompile the application to use the modified definitions.) 2) Use a suitable shared library mechanism for linking with the Library. A suitable mechanism is one that (1) uses at run time a copy of the library already present on the user’s computer system, rather than copying library functions into the executable, and (2) will operate properly with a modified version of the library, if the user installs one, as long as the modified version is interfacecompatible with the version that the work was made with. 3) Accompany the work with a written offer, valid for at least three years, to give the same user the materials specified in Subsection 6a, above, for a charge no more than the cost of performing this distribution. 4) If distribution of the work is made by offering access to copy from a designated place, offer equivalent access to copy the above specified materials from the same place. 5) Verify that the user has already received a copy of these materials or that you have already sent this user a copy. For an executable, the required form of the “work that uses the Library” must include any data and utility programs needed for reproducing the executable from it. However, as a special exception, the materials to be distributed need not include anything that is normally Français - 80 DV455_02836F-08_CFR.indd Sec7:80 2013-12-12 5:13:26 07 ANNEXE distributed (in either source or binary form) with the major components (compiler, kernel, and so on) of the operating system on which the executable runs, unless that component itself accompanies the executable. It may happen that this requirement contradicts the license restrictions of other proprietary libraries that do not normally accompany the operating system. Such a contradiction means you cannot use both them and the Library together in an executable that you distribute. 8. You may place library facilities that are a work based on the Library side-by-side in a single library together with other library facilities not covered by this License, and distribute such a combined library, provided that the separate distribution of the work based on the Library and of the other library facilities is otherwise permitted, and provided that you do these two things: 1) Accompany the combined library with a copy of the same work based on the Library, uncombined with any other library facilities. This must be distributed under the terms of the Sections above. 2) Give prominent notice with the combined library of the fact that part of it is a work based on the Library, and explaining where to find the accompanying uncombined form of the same work. 9. You may not copy, modify, sublicense, link with, or distribute the Library except as expressly provided under this License. Any attempt otherwise to copy, modify, sublicense, link with, or distribute the Library is void, and will automatically terminate your rights under this License. However, parties who have received copies, or rights, from you under this License will not have their licenses terminated so long as such parties remain in full compliance. 10. You are not required to accept this License, since you have not signed it. However, nothing else grants you permission to modify or distribute the Library or its derivative works. These actions are prohibited by law if you do not accept this License. Therefore, by modifying or distributing the Library (or any work based on the Library), you indicate your acceptance of this License to do so, and all its terms and conditions for copying, distributing or modifying the Library or works based on it. 11. Each time you redistribute the Library (or any work based on the Library), the recipient automatically receives a license from the original licensor to copy, distribute, link with or modify the Library subject to these terms and conditions. You may not impose any further restrictions on the recipients’ exercise of the rights granted herein. You are not responsible for enforcing compliance by third parties with this License. 12. If, as a consequence of a court judgment or allegation of patent infringement or for any other reason (not limited to patent issues), conditions are imposed on you (whether by court order, agreement or otherwise) that contradict the conditions of this License, they do not excuse you from the conditions of this License. If you cannot distribute so as to satisfy simultaneously your obligations under this License and any other pertinent obligations, then as a consequence you may not distribute the Library at all. For example, if a patent license would not permit royalty-free redistribution of the Library by all those who receive copies directly or indirectly through you, then the only way you could satisfy both it and this License would be to refrain entirely from distribution of the Library. If any portion of this section is held invalid or unenforceable under any particular circumstance, the balance of the section is intended to apply, and the section as a whole is intended to apply in other circumstances. It is not the purpose of this section to induce you to infringe any patents or other property right claims or to contest validity of any such claims; this section has the sole purpose of protecting the integrity of the free software distribution system which is implemented by public license practices. Many people have made generous contributions to the wide range of software distributed through that system in reliance on consistent application of that system; it is up to the author/ donor to decide if he or she is willing to distribute software through any other system and a licensee cannot impose that choice. Français - 81 DV455_02836F-08_CFR.indd Sec7:81 2013-12-12 5:13:26 Annexe This section is intended to make thoroughly clear what is believed to be a consequence of the rest of this License. 13. If the distribution and/or use of the Library is restricted in certain countries either by patents or by copyrighted interfaces, the original copyright holder who places the Library under this License may add an explicit geographical distribution limitation excluding those countries, so that distribution is permitted only in or among countries not thus excluded. In such case, this License incorporates the limitation as if written in the body of this License. 14. The Free Software Foundation may publish revised and/or new versions of the Lesser General Public License from time to time. Such new versions will be similar in spirit to the present version, but may differ in detail to address new problems or concerns. Each version is given a distinguishing version number. If the Library specifies a version number of this License which applies to it and “any later version”, you have the option of following the terms and conditions either of that version or of any later version published by the Free Software Foundation. If the Library does not specify a license version number, you may choose any version ever published by the Free Software Foundation. 15. If you wish to incorporate parts of the Library into other free programs whose distribution conditions are incompatible with these, write to the author to ask for permission. For software which is copyrighted by the Free Software Foundation, write to the Free Software Foundation; we sometimes make exceptions for this. Our decision will be guided by the two goals of preserving the free status of all derivatives of our free software and of promoting the sharing and reuse of software generally. NO WARRANTY 16. BECAUSE THE LIBRARY IS LICENSED FREE OF CHARGE, THERE IS NO WARRANTY FOR THE LIBRARY, TO THE EXTENT PERMITTED BY APPLICABLE LAW. EXCEPT WHEN OTHERWISE STATED IN WRITING THE COPYRIGHT HOLDERS AND/OR OTHER PARTIES PROVIDE THE LIBRARY “AS IS” WITHOUT WARRANTY OF ANY KIND, EITHER EXPRESSED OR IMPLIED, INCLUDING, BUT NOT LIMITED TO, THE IMPLIED WARRANTIES OF MERCHANTABILITY AND FITNESS FOR A PARTICULAR PURPOSE. THE ENTIRE RISK AS TO THE QUALITY AND PERFORMANCE OF THE LIBRARY IS WITH YOU. SHOULD THE LIBRARY PROVE DEFECTIVE, YOU ASSUME THE COST OF ALL NECESSARY SERVICING, REPAIR OR CORRECTION. 17. IN NO EVENT UNLESS REQUIRED BY APPLICABLE LAW OR AGREED TO IN WRI T ING WI L L ANY COPYRIGHT HOLDER, OR ANY OTHER PARTY WHO MAY MODIFY AND/ OR REDISTRIBUTE THE LIBRARY AS PERMITTED ABOVE, BE LIABLE TO YOU FOR DAMAGES, INCLUDING ANY GENERAL, SPECIAL, INCIDENTAL OR CONSEQUENTIAL DAMAGES ARISING OUT OF THE USE OR INABILITY TO USE THE LIBRARY (INCLUDING BUT NOT LIMITED TO LOSS OF DATA OR DATA BEING RENDERED INACCURATE OR LOSSES SUSTAINED BY YOU OR THIRD PARTIES OR A FAILURE OF THE LIBRARY TO OPERATE WITH ANY OTHER SOFTWARE), EVEN IF SUCH HOLDER OR OTHER PARTY HAS BEEN ADVISED OF THE POSSIBILITY OF SUCH DAMAGES. END OF TERMS AND CONDITIONS How to Apply These Terms to Your New Libraries If you develop a new library, and you want it to be of the greatest possible use to the public, we recommend making it free software that everyone can redistribute and change. You can do so by permitting redistribution under these terms (or, alternatively, under the terms of the ordinary General Public License). To apply these terms, attach the following notices to the library. It is safest to attach them to the start of each source file to most effectively convey the exclusion of warranty; and each file should have at least the “copyright” line and a pointer to where the full notice is found. one line to give the library’s name and an idea of what it does. Français - 82 DV455_02836F-08_CFR.indd Sec7:82 2013-12-12 5:13:26 Copyright (C) year name of author 07 ANNEXE This library is free software; you can redistribute it and/or modify it under the terms of the GNU Lesser General Public License as published by the Free Software Foundation; either version 2.1 of the License, or (at your option) any later version. This library is distributed in the hope that it will be useful, but WITHOUT ANY WARRANTY; without even the implied warranty of MERCHANTABILITY or FITNESS FOR A PARTICULAR PURPOSE. See the GNU Lesser General Public License for more details. You should have received a copy of the GNU Lesser General Public License along with this library; if not, write to the Free Software Foundation, Inc., 51 Franklin Street, Fifth Floor, Boston, MA 02110-1301 USA Also add information on how to contact you by electronic and paper mail. You should also get your employer (if you work as a programmer) or your school, if any, to sign a “copyright disclaimer” for the library, if necessary. Here is a sample; alter the names: Yoyodyne, Inc., hereby disclaims all copyright interest in the library `Frob’ (a library for tweaking knobs) written by James Random Hacker. signature of Ty Coon, 1 April 1990 Ty Coon, President of Vice That’s all there is to it! BSD LICENSE flex: the fast lexical analyser Copyright (c) 2001, 2002, 2003, 2004, 2005, 2006, 2007 The Flex Project. Copyright (c) 1990, 1997 The Regents of the University of California. All rights reserved. LibNet License Copyright (c) 1998 - 2001 Mike D. Schiffman <[email protected]> PPP/ Debian Copyright (c) 1989 Regents of the University of California. All rights reserved. Redistribution and use in source and binary forms, with or without modification, are permitted provided that the following conditions are met: 1. Redistributions of source code must retain the above copyright notice, this list of conditions and the following disclaimer. 2. Redistributions in binary form must reproduce the above copyright notice, this list of conditions and the following disclaimer in the documentation and/or other materials provided with the distribution. 3. Neither the name of the <organization> nor the names of its contributors may be used to endorse or promote products derived from this software without specific prior written permission. THIS SOFTWARE IS PROVIDED BY THE COPYRIGHT HOLDERS AND CONTRIBUTORS “AS IS” AND ANY EXPRESS OR IMPLIED WARRANTIES, INCLUDING, BUT NOT LIMITED TO, THE IMPLIED WARRANTIES OF MERCHANTABILITY AND FITNESS FOR A PARTICULAR PURPOSE ARE DISCLAIMED. IN NO EVENT SHALL <COPYRIGHT HOLDER> BE LIABLE FOR ANY DIRECT, INDIRECT, INCIDENTAL, SPECIAL, EXEMPLARY, OR CONSEQUENTIAL DAMAGES ( INCLUDING, BUT NOT LIMITED TO, PROCUREMENT OF SUBSTITUTE GOODS OR SERVICES; LOSS OF USE, DATA, OR PROFITS; OR BUSINESS INTERRUPTION) HOWEVER CAUSED AND ON ANY THEORY OF LIABILITY, WHETHER IN CONTRACT, STRICT LIABILITY, OR TORT (INCLUDING NEGLIGENCE OR OTHERWISE) ARISING IN ANY WAY OUT OF THE USE OF THIS SOFTWARE, EVEN IF ADVISED OF THE POSSIBILITY OF SUCH DAMAGE. Français - 83 DV455_02836F-08_CFR.indd Sec7:83 2013-12-12 5:13:26 Annexe OPENSSL This product includes software developed by the OpenSSL Project for use in the OpenSSL Toolkit. (http:// www.openssl.org/) This product includes cryptographic software written by Eric Young ([email protected]) LICENSE ISSUES ===================================================================== The OpenSSL toolkit stays under a dual license, i.e. both the conditions of the OpenSSL License and the original SSLeay license apply to the toolkit. See below for the actual license texts. Actually both licenses are BSD-style Open Source licenses. In case of any license issues related to OpenSSL please contact [email protected]. OpenSSL License ===================================================================== Copyright (c) 1998-2008 The OpenSSL Project. All rights reserved. Redistribution and use in source and binary forms, with or without modification, are permitted provided that the following conditions are met: 1. Redistributions of source code must retain the above copyright notice, this list of conditions and the following disclaimer. 2. Redistributions in binary form must reproduce the above copyright notice, this list of conditions and the following disclaimer in the documentation and/or other materials provided with the distribution. 3. All advertising materials mentioning features or use of this software must display the following acknowledgment: “This product includes software developed by the OpenSSL Project for use in the OpenSSL Toolkit. (http://www.openssl.org/)” 4. The names “OpenSSL Toolkit” and “OpenSSL Project” must not be used to endorse or promote products derived from this software without prior written permission. For written permission, please contact [email protected]. 5. Products derived from this software may not be called “OpenSSL” nor may “OpenSSL” appear in their names without prior written permission of the OpenSSL Project. 6. Redistributions of any form whatsoever must retain the following acknowledgment: “This product includes software developed by the OpenSSL Project for use in the OpenSSL Toolkit (http://www.openssl.org/)” THIS SOFTWARE IS PROVIDED BY THE OpenSSL PROJECT “AS IS” AND ANY EXPRESSED OR IMPLIED WARRANTIES, INCLUDING, BUT NOT LIMITED TO, THE IMPLIED WARRANTIES OF MERCHANTABILITY AND FITNESS FOR A PARTICULAR PURPOSE ARE DISCLAIMED. IN NO EVENT SHALL THE OpenSSL PROJECT OR ITS CONTRIBUTORS BE LIABLE FOR ANY DIRECT, INDIRECT, INCIDENTAL, SPECIAL, EXEMPLARY, OR CONSEQUENTIAL DAMAGES (INCLUDING, BUT NOT LIMITED TO, PROCUREMENT OF SUBSTITUTE GOODS OR SERVICES; LOSS OF USE, DATA, OR PROFITS; OR BUSINESS INTERRUPTION) HOWEVER CAUSED AND ON ANY THEORY OF LIABILITY, WHETHER IN CONTRACT, STRICT LIABILITY, OR TORT (INCLUDING NEGLIGENCE OR OTHERWISE) ARISING IN ANY WAY OUT OF THE USE OF THIS SOFTWARE, EVEN IF ADVISED OF THE POSSIBILITY OF SUCH DAMAGE. ===================================================================== This product includes cryptographic software written by Eric Young ([email protected]). This product includes software written by Tim Hudson ([email protected]). Français - 84 DV455_02836F-08_CFR.indd Sec7:84 2013-12-12 5:13:26 Garantie (U.S.A) SÈCHE-LINGE SAMSUNG Un (1) an (pièces et main d'œuvre) Deux (2) ans pour les pièces du panneau de commandes 08 GARANTIE GARANTIE LIMITÉE À L'ACHETEUR INITIAL Ce produit de la marque SAMSUNG, fourni, distribué par SAMSUNG ELECTRONICS AMERICA, INC. (SAMSUNG) et livré neuf, dans son emballage d'origine à l'acheteur initial, est garanti par SAMSUNG contre tout défaut de fabrication relatif aux matériaux et à la qualité d'exécution, pour une période de garantie limitée de : Cette garantie limitée prend effet à la date originale d'achat. Elle ne s'applique qu'aux produits achetés et utilisés aux États-Unis. Pour bénéficier de réparations dans le cadre de la présente garantie, l'acheteur doit contacter la société SAMSUNG afin qu'elle détermine l'origine du problème et une procédure de réparation. Les services de garantie peuvent être pris en charge uniquement par un centre de service agréé SAMSUNG. Lors de la remise d'un produit défectueux à SAMSUNG ou à un centre de service agréé SAMSUNG, l'acheteur est tenu de présenter le coupon d'achat d'origine à la demande des intéressés à titre de preuve d'achat. SAMSUNG s'engage à assurer un service de réparation gratuit à domicile pendant la période de garantie. Ce service est soumis à disponibilité sur le territoire des États-Unis. Le service à domicile n'est pas disponible pour toutes les zones. Pour bénéficier du service à domicile, l'appareil doit être situé dans un emplacement accessible à notre personnel. Si ce service n'est pas disponible, SAMSUNG peut choisir de prendre à sa charge le transport aller/retour du produit vers un centre de service agréé. La société SAMSUNG prendra en charge, à sa convenance, la réparation, le remplacement ou le remboursement du produit tel que stipulé dans les présentes conditions et procédera au remplacement ou au reconditionnement des pièces ou des produits si ces derniers s'avèrent défectueux dans la limite de la période de garantie mentionnée précédemment. Toutes les pièces et tous les produits remplacés deviennent la propriété de SAMSUNG et doivent être retournés à SAMSUNG. La période de garantie qui s'applique aux pièces et produits remplacés est la période restante de la garantie initiale ou une période de quatre-vingt-dix (90) jours ; dans tous les cas, la période la plus longue des deux périodes susmentionnées s'applique. Cette garantie limitée couvre les vices de fabrication au niveau des pièces et de la main-d'œuvre survenant à la suite d'une utilisation normale et non commerciale de ce produit et ne s'applique pas dans les cas suivants : tout dommage survenant au cours de l'expédition, de la livraison et de l'installation ; toute utilisation de l'appareil contraire au but auquel il était destiné ; tout numéro de produit ou de série effacé ; tout dommage du revêtement extérieur ou de l'aspect du produit ; tout dommage causé par un accident, une utilisation non conforme, une négligence, un incendie ou une inondation, la foudre ou une autre catastrophe naturelle ; toute utilisation de produits, d'équipements, de systèmes, d'appareils, de services, de pièces, de fournitures, d'accessoires, d'applications, d'installations, de réparations, de câblages externes ou de connecteurs non fournis ou autorisés par SAMSUNG et susceptibles d'endommager ledit appareil ou de nuire à son fonctionnement ; toute surtension, fluctuation ou tension de ligne électrique incorrecte ; tout réglage effectué par l'acheteur et tout non-respect des consignes d'utilisation, d'entretien et de respect de l'environnement couvertes ou prescrites dans le présent carnet d'entretien ; tout démontage ou toute réinstallation de l'appareil ; tout problème résultant d'une prolifération d'insectes nuisibles. Cette garantie limitée ne couvre pas les problèmes résultant d'un courant, d'une tension ou d'une alimentation électrique incorrects, ainsi que d'ampoules électriques, de fusibles ou de câblage inappropriés. Elle ne couvre pas non plus le coût des appels au service d'assistance pour obtenir des instructions ou la réparation des erreurs d'installation. SAMSUNG ne garantit pas que l'appareil sera exempt de tout problème ou qu'il fonctionnera sans interruption. Français - 85 DV455_02836F-08_CFR.indd Sec8:85 2013-12-12 5:13:26 Garantie Sauf exception mentionnée dans le présent document, Samsung ne fournit aucune garantie expresse ou implicite quant à cet appareil, y compris, mais sans s'y limiter, les garanties implicites de qualité marchande, de contrefaçon ou d'aptitude à un usage particulier. Aucune garantie, qu'elle soit donnée par un tiers, une entreprise ou une personne morale, ne pourra être considérée comme un engagement vis-à-vis de Samsung. Samsung ne sera aucunement responsable en cas de perte de bénéfices, de manque à gagner, d'incapacité à réaliser des économies ou tout autre avantage financier ou d'autres dommages spéciaux, accessoires ou indirects résultant de l'utilisation ou d'une mauvaise utilisation de cet appareil ou d'une incapacité à utiliser cet appareil, quelle que soit la base juridique invoquée pour justifier l’assertion et même si Samsung a été avisé de l'éventualité de tels dommages. Les indemnités financières exigées auprès de Samsung ne pourront en aucun cas excéder le prix d’achat du produit vendu par Samsung et à l’origine des dommages invoqués. Sans limitation aux dispositions susdites, l’acheteur assume tous les risques et toutes les responsabilités en cas de perte, de dommages ou de blessures éventuelles infligés à l’acheteur et aux biens de celui-ci et à toute autre personne et aux biens de celle-ci résultant de l'utilisation ou de la mauvaise utilisation de l'appareil ou de l'incapacité à l'utiliser. Cette garantie limitée n’est valable pour personne d’autre que l’acheteur initial du produit, n’est pas transférable et énonce votre recours exclusif. Certains états n'autorisent pas les limitations de durée de garantie implicite, ou l'exclusion ou la limitation des dommages accidentels ou indirects. Dans un tel cas, les limitations ou exclusions spécifiées ci-dessus ne s'appliquent pas. La présente garantie vous octroie des droits spécifiques, ainsi que d'autres variant d'un état à un autre. Pour bénéficier d'un service d'assistance couvert par votre garantie, contactez SAMSUNG à l'adresse suivante : Samsung Electronics America, Inc. 85 Challenger Road Ridgefield Park, NJ 07660 1-800-SAMSUNG (726-7864) www.samsung.com Les visites des techniciens de maintenance destinées à expliquer les fonctions, la maintenance ou l’installation n’est pas couverte par la garantie. Veuillez contacter votre agent d’appel Samsung pour obtenir de l’aide sur l’une de ces questions. Français - 86 DV455_02836F-08_CFR.indd Sec8:86 2013-12-12 5:13:26 Garantie (CANADA) SÈCHE-LINGE SAMSUNG Un (1) an (pièces et main d’œuvre) Cette limite de garantie s’applique à compter de la date d’acquisition et couvre uniquement les produits achetés et utilisés au Canada. Pour bénéficier de réparations dans le cadre de la présente garantie, l’acheteur doit contacter la société SAMSUNG afin qu’elle détermine l’origine du problème et une procédure de réparation. Les services de garantie peuvent être pris en charge uniquement par un centre de service agréé SAMSUNG. Lors de la remise d’un produit défectueux à SAMSUNG ou à un centre de service agréé SAMSUNG, l’acheteur est tenu de présenter le coupon d’achat d’origine à la demande des intéressés à titre de preuve d’achat. SAMSUNG assurera un service de réparation gratuit à domicile pendant la période de garantie sujet à la disponibilité au Canada. Le service à domicile n’est pas disponible pour toutes les zones. 08 GARANTIE GARANTIE LIMITÉE À L’ACHETEUR INITIAL Ce produit de la marque SAMSUNG, fourni, distribué par SAMSUNG ELECTRONICS CANADA, INC. (SAMSUNG) et livré neuf, dans son emballage d’origine à l’acheteur initial, est garanti par SAMSUNG contre les défauts de fabrication et de matériaux, pour une période limitée de : Pour bénéficier du service à domicile, l’appareil doit être situé dans un emplacement accessible à notre personnel. Si ce service n’est pas disponible, SAMSUNG peut choisir de prendre à sa charge le transport aller/retour du produit vers un centre de service agréé. La société SAMSUNG prendra en charge, à sa convenance, la réparation, le remplacement ou le remboursement du produit tel que stipulé dans les présentes conditions et procédera au remplacement ou au reconditionnement des pièces ou des produits si ces derniers s’avèrent défectueux dans la limite de la période de garantie mentionnée précédemment. Toutes les pièces et tous les produits remplacés deviennent la propriété de SAMSUNG et doivent être retournés à SAMSUNG. La période de garantie qui s’applique aux pièces et produits remplacés est la période restante de la garantie initiale ou une période de quatre-vingt-dix (90) jours ; dans tous les cas, la période la plus longue des deux périodes susmentionnées s’applique. Cette garantie limitée couvre les vices de fabrication au niveau des pièces et de la main-d’œuvre survenant à la suite d’une utilisation normale et non commerciale de ce produit et ne s’applique pas dans les cas suivants : tout dommage survenant au cours de l’expédition, de la livraison et de l’installation ; toute utilisation de l’appareil contraire au but auquel il était destiné ; tout numéro de produit ou de série effacé ; tout dommage du revêtement extérieur ou de l’aspect du produit ; tout dommage causé par un accident, une utilisation non conforme, une négligence, un incendie ou une inondation, la foudre ou une autre catastrophe naturelle ; toute utilisation de produits, d’équipements, de systèmes, d’appareils, de services, de pièces, de fournitures, d’accessoires, d’applications, d’installations, de réparations, de câblages externes ou de connecteurs non fournis ou autorisés par SAMSUNG et susceptibles d’endommager ledit appareil ou de nuire à son fonctionnement ; toute surtension, fluctuation ou tension de ligne électrique incorrecte ; tout réglage effectué par l’acheteur et tout non-respect des consignes d’utilisation, d’entretien et de respect de l’environnement couvertes ou prescrites dans le présent carnet d’entretien ; tout démontage ou toute réinstallation de l’appareil ; tout problème résultant d’une prolifération d’insectes nuisibles. Français - 87 DV455_02836F-08_CFR.indd Sec8:87 2013-12-12 5:13:26 Garantie Cette garantie limitée ne couvre pas les problèmes résultant d’un courant, d’une tension ou d’une alimentation électrique incorrects, ainsi que d’ampoules électriques, de fusibles ou de câblage inappropriés. Elle ne couvre pas non plus le coût des appels au service d’assistance pour obtenir des instructions ou la réparation des erreurs d’installation. SAMSUNG ne garantit pas que l’appareil sera exempt de tout problème ou qu’il fonctionnera sans interruption. SAUF EXCEPTION MENTIONNÉE DANS LE PRÉSENT DOCUMENT, SAMSUNG NE FOURNIT AUCUNE GARANTIE EXPRESSE OU IMPLICITE QUANT À CET APPAREIL, Y COMPRIS, MAIS SANS S’Y LIMITER, LES GARANTIES IMPLICITES DE QUALITÉ MARCHANDE, DE CONTREFAÇON OU D’APTITUDE À UN USAGE PARTICULIER. AUCUNE GARANTIE, QU’ELLE SOIT DONNÉE PAR UN TIERS, UNE ENTREPRISE OU UNE PERSONNE MORALE, NE POURRA ÊTRE CONSIDÉRÉE COMME UN ENGAGEMENT VIS-À-VIS DE SAMSUNG. SAMSUNG NE SERA AUCUNEMENT RESPONSABLE EN CAS DE PERTE DE BÉNÉFICES, DE MANQUE À GAGNER, D’INCAPACITÉ À RÉALISER DES ÉCONOMIES OU TOUT AUTRE AVANTAGE FINANCIER OU D’AUTRES DOMMAGES SPÉCIAUX, ACCESSOIRES OU INDIRECTS RÉSULTANT DE L’UTILISATION OU D’UNE MAUVAISE UTILISATION DE CET APPAREIL OU D’UNE INCAPACITÉ À UTILISER CET APPAREIL, QUELLE QUE SOIT LA BASE JURIDIQUE INVOQUÉE POUR JUSTIFIER L’ASSERTION ET MÊME SI SAMSUNG A ÉTÉ AVISÉ DE L’ÉVENTUALITÉ DE TELS DOMMAGES. LES INDEMNITÉS FINANCIÈRES EXIGÉES AUPRÈS DE SAMSUNG NE POURRONT EN AUCUN CAS EXCÉDER LE PRIX D’ACHAT DU PRODUIT VENDU PAR SAMSUNG ET À L’ORIGINE DES DOMMAGES INVOQUÉS. SANS LIMITATION AUX DISPOSITIONS SUSDITES, L’ACHETEUR ASSUME TOUS LES RISQUES ET TOUTES LES RESPONSABILITÉS EN CAS DE PERTE, DE DOMMAGES OU DE BLESSURES ÉVENTUELLES INFLIGÉS À L’ACHETEUR ET AUX BIENS DE CELUI-CI ET À TOUTE AUTRE PERSONNE ET AUX BIENS DE CELLE-CI RÉSULTANT DE L’UTILISATION OU DE LA MAUVAISE UTILISATION DE L’APPAREIL OU DE L’INCAPACITÉ À L’UTILISER. CETTE GARANTIE LIMITÉE N’EST VALABLE POUR PERSONNE D’AUTRE QUE L’ACHETEUR INITIAL DU PRODUIT, N’EST PAS TRANSFÉRABLE ET ÉNONCE VOTRE RECOURS EXCLUSIF. Certaines provinces n’autorisent pas de limitations quant à la durée des garanties implicites ni l’exclusion ou la limitation de dommages accessoires ou indirects ; il se peut par conséquent que les limitations et exclusions énoncées ci-dessus ne s’appliquent pas à votre cas. La présente garantie vous octroie des droits spécifiques, ainsi que d’autres variant d’une province à une autre. Pour bénéficier d’un service d’assistance couvert par votre garantie, contactez SAMSUNG à l’adresse suivante : Samsung Electronics Canada Inc., Customer Service 55 Standish Court Mississauga, Ontario L5R 4B2 Canada 1-800-SAMSUNG (726-7864) www.samsung.com/ca (English) www.samsung.com/ca_fr (French) Les visites des techniciens de maintenance destinées à expliquer les fonctions, la maintenance ou l’installation n’est pas couverte par la garantie. Veuillez contacter votre agent d’appel Samsung pour obtenir de l’aide sur l’une de ces questions. Français - 88 DV455_02836F-08_CFR.indd Sec8:88 2013-12-12 5:13:26 Mémo DV455_02836F-08_CFR.indd Sec8:89 2013-12-12 5:13:26 Mémo DV455_02836F-08_CFR.indd Sec8:90 2013-12-12 5:13:26 Mémo DV455_02836F-08_CFR.indd Sec8:91 2013-12-12 5:13:27 DES QUESTIONS OU DES COMMENTAIRES ? PAYS APPELEZ LE OU RENDEZ-VOUS SUR LE SITE U.S.A 1-800-SAMSUNG (726-7864) www.samsung.com MEXICO 01-800-SAMSUNG (726-7864) www.samsung.com CANADA 1-800-SAMSUNG (726-7864) www.samsung.com/ca (English) www.samsung.com/ca_fr (French) Les visites des techniciens de maintenance destinées à expliquer les fonctions, la maintenance ou l’installation n’est pas couverte par la garantie. Veuillez contacter votre agent d’appel Samsung pour obtenir de l’aide sur l’une de ces questions. DC68-02836F-08 DV455_02836F-08_CFR.indd Sec8:92 2013-12-12 5:13:27 DV455* Secadora a gas y eléctrica manual del usuario Este manual está impreso en papel 100% reciclado imagine las posibilidades Gracias por adquirir este producto Samsung. Para recibir un servicio más completo o los accesorios, registre su producto en o contacte con www.samsung.com/register 1-800-SAMSUNG (726-7864) DV455_02836F-08_MES.indd 1 2013-12-12 5:10:28 contenido INSTRUCCIONES DE SEGURIDAD 4 4 4 INSTALACIÓN DE LA SECADORA 10 10 10 11 11 12 13 13 15 16 16 17 17 18 19 21 21 24 24 25 MANUAL DE INSTRUCCIONES, SUGERENCIAS 27 27 32 33 33 33 34 35 38 50 60 Lo que necesita saber sobre las instrucciones de seguridad Símbolos y precauciones de seguridad importantes Desembalaje de la secadora Consulte los Requisitos para el drenaje. Requisitos básicos Requisitos para el tendido de conductos Importante para el instalador Consideraciones acerca de la ubicación Instalaciones del electrodoméstico en un gabinete o en un hueco Drenaje Requisitos en cuanto al gas Instrucciones de instalación de la comunidad de Massachusetts Requisitos eléctricos Conexión a tierra Conexiones eléctricas Conexión de la manguera de entrada Reemplazo de las piezas y los accesorios Instalación Lista de verificación final de la instalación Sugerencias acerca del drenaje de la secadora Inversión de la puerta Descripción general del panel de control Rack Dry (Secado en estante) Limpie el filtro para pelusas Cargue la secadora de manera adecuada Cómo comenzar Sensor de ventilación Configuración del Control Remoto y la Supervisión inteligente Uso de la aplicación móvil (Android) Uso de la aplicación móvil (iOS) Registrar su secadora Español - 2 DV455_02836F-08_MES.indd Sec9:2 2013-12-12 5:11:05 CUIDADO Y LIMPIEZA 62 62 62 62 62 62 Panel de control Tambor Tambor de acero inoxidable Exterior de la secadora Sistema de drenaje de la secadora SUGERENCIAS PARA PRENDAS ESPECIALES 63 Sugerencias para prendas especiales 64 66 67 Controle estos puntos si su secadora... Códigos de información Preguntas y respuestas sobre la configuración de red 69 70 70 70 71 72 Tabla de indicaciones sobre la tela Protección del medio ambiente Declaración de conformidad Especificaciones Tabla de ciclos Open Source Announcement 63 SOLUCIÓN DE PROBLEMAS 64 APÉNDICE 69 Español - 3 DV455_02836F-08_MES.indd Sec9:3 2013-12-12 5:11:05 Instrucciones de seguridad Felicitaciones por la compra de la nueva secadora Samsung. Este manual contiene información importante acerca de la instalación, el uso y el cuidado del electrodoméstico. Lea detenidamente estas instrucciones a fin de aprovechar al máximo los múltiples beneficios y funciones de la secadora. LO QUE NECESITA SABER SOBRE LAS INSTRUCCIONES DE SEGURIDAD Lea este manual detenidamente para aprender a utilizar con seguridad y eficacia todas las características y funciones de su nuevo electrodoméstico. Conserve el manual en lugar seguro cerca del aparato para consultas futuras. Utilice este electrodoméstico solo para el propósito para el que fue destinado como se describe en este manual. Las advertencias y las instrucciones de seguridad importantes de este manual no cubren todas las posibles condiciones y situaciones que pueden ocurrir. Es su responsabilidad actuar con sentido común, precaución y cuidado cuando instale, realice el mantenimiento o ponga en funcionamiento la secadora. Comuníquese siempre con el fabricante si surgen problemas o situaciones que usted no comprende. SÍMBOLOS Y PRECAUCIONES DE SEGURIDAD IMPORTANTES Los íconos y las señales incluidas en este manual del usuario significan lo siguiente: ADVERTENCIA Peligros o prácticas inseguras que podrían causar lesiones físicas graves o la muerte o daños materiales. Siga la información contenida en este manual para minimizar el riesgo de incendio o explosión o para evitar daños materiales, lesiones físicas o la muerte. No almacene ni utilice gasolina u otros vapores o líquidos inflamables cerca de este o cualquier otro aparato eléctrico. Peligros o prácticas inseguras que podrían causar lesiones físicas o daños materiales. PRECAUCIÓN NO intente hacer nada. NO desarme. NO toque. Siga las instrucciones completamente. Desenchufe el cable de alimentación eléctrica del tomacorriente de pared. Asegúrese de que la máquina tenga buena conexión a tierra para evitar descargas eléctricas. Llame al centro de servicio técnico para obtener asistencia. Nota Estas señales de advertencia están aquí para evitar que usted u otras personas sufran daños. Siga las instrucciones completamente. Después de leer esta sección, guárdela en un lugar seguro para consultas futuras. CONSERVE ESTAS INSTRUCCIONES Español - 4 DV455_02836F-08_MES.indd Sec11:4 2013-12-12 5:11:05 ADVERTENCIA - Riesgo de incendio • ADVERTENCIA La instalación de la secadora de ropa debe estar a cargo de un instalador calificado. Instale la secadora de ropa según las instrucciones del fabricante y los códigos locales. No instale una secadora de ropa con materiales para ventilación de plástico flexible. Si se instala un conducto de metal flexible (tipo lámina metálica), debe ser de un tipo específico identificado por el fabricante del electrodoméstico como adecuado para utilizar con secadoras de ropa. Los materiales para ventilación flexibles suelen hundirse, aplastarse fácilmente y atrapar pelusa. Estas condiciones obstruirán el flujo de aire de la secadora de ropa y aumentarán el riesgo de incendio. Para reducir el riesgo de lesiones graves o muerte, siga todas las instrucciones de instalación. PARA DISMINUIR EL RIESGO DE INCENDIO O EXPLOSIÓN: • • ADVERTENCIA No seque prendas que hayan sido previamente limpiadas, lavadas, remojadas o salpicadas con gasolina, solventes de limpieza en seco u otras sustancias inflamables o explosivas. Emiten vapores que se pueden prender fuego o explotar. No debe colocarse en la secadora ningún material que haya estado en contacto con un solvente de limpieza o líquidos o sólidos inflamables hasta que se haya eliminado todo vestigio de tales líquidos o sólidos inflamables y sus vapores. Existen muchos artículos altamente inflamables en los hogares, tales como acetona, alcohol desnaturalizado, gasolina, kerosene, algunos limpiadores líquidos de uso doméstico, algunos quitamanchas, aguarrás, ceras y removedores de cera. No seque artículos que contengan goma espuma (puede estar catalogada como espuma de látex) o materiales semejantes a la goma y con textura similar en la opción de secado con calor. Los materiales de goma espuma que reciben calor pueden, en ciertas circunstancias, provocar incendios por combustión espontánea. 01 INSTRUCCIONES DE SEGURIDAD • • • QUÉ HACER SI PERCIBE OLOR A GAS: • • • • • • • • No intente encender ningún electrodoméstico. No encienda este electrodoméstico. No toque ningún interruptor eléctrico. No utilice ningún teléfono de su edificio. Haga que todos los ocupantes se retiren de la habitación, edificio o área. Comuníquese inmediatamente con el proveedor de gas desde el teléfono de un vecino. Siga las instrucciones del proveedor de gas. Si no puede comunicarse con el proveedor de gas, llame al departamento de bomberos. La instalación y el servicio técnico deberán estar a cargo de un instalador calificado, una agencia de reparaciones o el proveedor de gas. CONSERVE ESTAS INSTRUCCIONES Español - 5 DV455_02836F-08_MES.indd Sec11:5 2013-12-12 5:11:05 Instrucciones de seguridad INSTRUCCIONES DE SEGURIDAD IMPORTANTES ADVERTENCIA ADVERTENCIA Para reducir el riesgo de incendio, descargas eléctricas o lesiones físicas cuando usa este electrodoméstico, siga las instrucciones de seguridad básicas que figuran a continuación: 1. Lea todas las instrucciones antes de usar este electrodoméstico. 2. No seque prendas que han sido previamente limpiadas, lavadas, remojadas o salpicadas con gasolina, solventes de limpieza en seco u otras sustancias inflamables o explosivas, ya que emiten vapores que pueden prenderse fuego o explotar. 3. No utilice la secadora para secar ropa que tenga restos de sustancias inflamables, como aceites vegetales, de cocción o de máquina, productos químicos inflamables, disolventes, etc., o que contengan cera o productos químicos, como trapeadores y paños de limpieza. Las sustancias inflamables pueden ocasionar que la tela se prenda fuego. 4. No almacene ni utilice gasolina u otros vapores o líquidos inflamables cerca de este o cualquier otro aparato eléctrico. 5. No permita que los niños o las mascotas jueguen sobre el electrodoméstico, dentro de él o frente a él. Se requiere de supervisión cuando el electrodoméstico es utilizado cerca de niños y mascotas. 6. Antes de retirar o descartar la secadora, retire la puerta del compartimiento de secado para evitar que los niños y las mascotas queden atrapados dentro de la secadora. 7. No introduzca la mano en el electrodoméstico cuando el tambor esté en movimiento. 8. No instale o guarde este electrodoméstico donde quede expuesto a factores climáticos. 9. No modifique los controles. 10. No repare, reemplace ni intente realizar el mantenimiento de cualquier pieza del electrodoméstico salvo que esté recomendado específicamente en las instrucciones de mantenimiento del usuario o en las instrucciones de reparación para el usuario publicadas y que, a su juicio, usted tenga la habilidad para llevarlas a cabo. 11. No use suavizante para ropa o productos para evitar la estática salvo que el fabricante del suavizante para ropa o del producto lo recomiende. 12. Limpie el filtro para pelusas antes o después de cada carga. 13. No aplique calor para secar prendas que contengan goma espuma o materiales semejantes a la goma con textura similar. 14. Mantenga el área alrededor de la salida del drenaje y las áreas circundantes libres de pelusa, polvo y suciedad. 15. El personal técnico calificado debe efectuar una limpieza periódica del interior de la secadora y del conducto de drenaje. 16. No coloque elementos expuestos a aceites de cocina en la secadora. Los elementos contaminados con aceites de cocina pueden contribuir a que se produzca una reacción química que ocasione que en la carga de ropa se prenda fuego. 17. Este electrodoméstico debe conectarse a tierra. Consulte “Requisitos eléctricos” y “Conexión a tierra” en la sección “Instalación de la secadora”. 18. Este electrodoméstico debe conectarse a tierra correctamente. Nunca enchufe el cable de alimentación a un receptáculo que no esté conectado a tierra correctamente ni guarde conformidad con los códigos locales y nacionales. Consulte las instrucciones de instalación para conectar este electrodoméstico a tierra. CONSERVE ESTAS INSTRUCCIONES Español - 6 DV455_02836F-08_MES.indd Sec11:6 2013-12-12 5:11:05 19. Asegúrese de que los bolsillos no contengan objetos pequeños, sólidos y de forma irregular, material extraño, etc., por ejemplo: monedas, cuchillos, alfileres, etc.. Tales objetos podrían dañar la secadora. 20. Se pueden producir pérdidas de gas en su sistema que generen una situación peligrosa. 21. Las pérdidas de gas pueden no ser detectadas únicamente por el olor. ADVERTENCIA APARATOS A GAS: Estos productos contienen sustancias químicas conocidas en el estado de California como causantes de cáncer y daños reproductivos. Los aparatos a gas pueden provocar una ligera exposición a alguna de las sustancias de la lista de la disposición 65, incluidos, entre otros, benceno, monóxido de carbono, formaldehído y hollín causada por la posible combustión incompleta de gas natural o combustibles PL. PRECAUCIÓN PRECAUCIÓN 01 INSTRUCCIONES DE SEGURIDAD 22. Los proveedores de gas recomiendan que compre e instale un detector de gas aprobado por UL. 1. No se siente encima de la secadora. 2. Debido a las constantes mejoras a los productos, Samsung se reserva el derecho de modificar las especificaciones sin previo aviso. Para conocer detalles completos, consulte las instrucciones de instalación incluidas con su producto antes de seleccionar los gabinetes, hacer aberturas o comenzar la instalación. 3. No lave ropa que contenga hebillas grandes, botones u otros objetos de metal pesado o sólido. 4. Instale y use de acuerdo con las instrucciones del fabricante. 5. No coloque prendas en la secadora que hayan sido salpicadas o remojadas con aceite vegetal o aceite de cocina. Incluso después del lavado, estas prendas pueden contener una cantidad importante de dichos aceites. 6. El aceite residual en las prendas puede prenderse fuego en forma espontánea. La posibilidad de combustión espontánea aumenta cuando las prendas que contienen aceite vegetal o aceite de cocina son expuestas al calor. Las fuentes de calor, tales como la secadora, pueden calentar estas prendas y permitir que se produzca la oxidación del aceite a modo de reacción. La oxidación genera calor. Si dicho calor no tiene forma salir, las prendas pueden calentarse lo suficiente como para prenderse fuego. Amontonar, apilar o guardar este tipo de prendas puede impedir que el calor salga y puede generar un peligro de incendio. 7. Todas las prendas limpias y sucias que contengan aceite vegetal o aceite de cocina pueden resultar peligrosas. Lavar dichas prendas en agua caliente con una dosis adicional de detergente reducirá el peligro, aunque no lo eliminará. Siempre use el ciclo Cool Down (Enfriamiento) para estas prendas con el fin de reducir la temperatura. Nunca retire estas prendas cuando la secadora se encuentre caliente ni interrumpa el ciclo de secado hasta que las prendas hayan pasado por el ciclo Cool Down (Enfriamiento). Nunca amontone o apile estas prendas cuando estén calientes. 8. Al cerrar la puerta tenga cuidado de no atrapar los dedos de los niños. Se puede causar lesiones personales. CONSERVE ESTAS INSTRUCCIONES Español - 7 DV455_02836F-08_MES.indd Sec11:7 2013-12-12 5:11:05 Instrucciones de seguridad AVISO REGULATORIO 1. Aviso para FCC PRECAUCIÓN FCC: PRECAUCIÓN Todos los cambios y modificaciones que no cuenten con la aprobación expresa de la parte responsable del cumplimiento invalidará la autoridad del usuario para operar el equipo. Este dispositivo cumple con la Parte 15 de las Normas de la FCC. El funcionamiento se encuentra sujeto a las siguientes dos condiciones: 1. Este aparato no puede causar interferencia dañina, y 2. Este aparato debe aceptar la recepción de cualquier interferencia, incluidas aquellas que puedan causar un funcionamiento indeseado. Producto disponible en el mercado de Estados Unidos/Canadá, sólo puede operarse el canal 1~11. No es posible seleccionar otros canales. DECLARACIÓN DE LA FCC: Este equipo ha sido sometido a pruebas y se ha determinado que se encuentra dentro de los límites para los dispositivos digitales clase B, de acuerdo con la parte 15 de las Normas de la FCC. Dichos límites han sido diseñados para proporcionar una protección razonables contra la interferencia dañina en una instalación residencial. Este equipo genera, utiliza y puede irradiar energía de frecuencias de radio y, si no se lo instala y utiliza de acuerdo con las instrucciones, puede provocar interferencia dañina a las comunicaciones de radio. Sin embargo, no existe garantía alguna de que no habrá interferencia en una instalación determinada. Si el equipo provoca interferencia dañina a la recepción de radio o televisión, que puede determinarse al encender y apagar el equipo, se sugiere que el usuario trate de corregir la interferencia mediante una o más de las siguientes medidas: • Reoriente o reubique la antena receptora • Aumente la distancia entre el equipo y el receptor • Conecte el equipo en una toma de un circuito diferente de aquel donde está conectado el receptor. • Consulte a su distribuidor o a un técnico experimentado en radio/TV para obtener ayuda. DECLARACIÓN DE LA FCC SOBRE LA EXPOSICIÓN A LA RADIACIÓN: Este equipo cumple con los límites de exposición a la radiación establecidos por la FCC para un entorno no controlado. Este equipo debe instalarse y utilizarse con una distancia mínima de 20cm entre el radiador y su cuerpo. Este aparato y su/s antena/s no deben ubicarse ni utilizarse junto con cualquier otra antena o transmisor. CONSERVE ESTAS INSTRUCCIONES Español - 8 DV455_02836F-08_MES.indd Sec11:8 2013-12-12 5:11:05 2. Aviso IC Este aparato digital Clase B cumple con la norma canadiense ICES-003. Cet appareil numérique de la classe B est conforme á la norme NMB-003 du Canada. Producto disponible en el mercado de Estados Unidos/Canadá, sólo pueden operarse los canales 1~11. No es posible seleccionar otros canales. DECLARACIÓN DE LA IC SOBRE LA EXPOSICIÓN A LA RADIACIÓN: Este equipo cumple con los límites de exposición a la radiación establecidos por la norma IC RSS-102 para un entorno no controlado. Este equipo debe instalarse y utilizarse con una distancia mínima de 20 cm entre el radiador y su cuerpo. Este aparato y su/s antena/s no deben ubicarse ni utilizarse junto con cualquier otra antena o transmisor. 01 INSTRUCCIONES DE SEGURIDAD El término “IC” antes del número de certificación de radio significa únicamente que se han cumplido las especificaciones técnicas de la Industria Canadiense. El funcionamiento se encuentra sujeto a las siguientes dos condiciones: (1) este aparato no puede causar interferencia y (2) este aparato debe aceptar cualquier interferencia, incluidas aquellas que puedan causar un funcionamiento indeseado. CONSERVE ESTAS INSTRUCCIONES Español - 9 DV455_02836F-08_MES.indd Sec11:9 2013-12-12 5:11:06 Instalación de la secadora DESEMBALAJE DE LA SECADORA Desembale la secadora e inspecciónela para controlar que no se hayan producido daños durante el transporte. Compruebe que haya recibido todos los elementos que se muestran a continuación. Si la secadora sufrió daños durante el transporte, o si falta algún elemento, comuníquese con el 1-800-SAMSUNG (726-7864). Para evitar lesiones físicas o tirones, use guantes protectores cada vez que levante o transporte la unidad. ADVERTENCIA Los materiales de embalaje pueden ser peligrosos para los niños. Mantenga todos los materiales de embalaje (bolsas de plástico, poliestireno, etc.) lejos del alcance de los niños. CONSULTE LOS REQUISITOS PARA EL DRENAJE. Cubierta superior [ PARTE POSTERIOR ] Panel de control Puerta Filtro Conducto de drenaje Marco delantero Entrada de agua Partes suministradas Conector en forma de “Y” Manguera de entrada corta Arandela de goma Manguera de entrada larga Español - 10 DV455_02836F-08_MES.indd 10 2013-12-12 5:11:06 Herramientas necesarias Cúter Llave inglesa para tuberías (sólo de gas) Llave de tuercas Nivel Destornillador Phillips Cinta para conductos Llave inglesa 02 INSTALACIÓN DE LA SECADORA Pinzas REQUISITOS BÁSICOS Asegúrese de tener todo lo necesario para realizar una instalación adecuada • Se requiere un TOMACORRIENTE CON CONEXIÓN A TIERRA. Consulte la sección “Requisitos eléctricos” en la página 17. • Un CABLE DE ALIMENTACIÓN para secadoras eléctricas (excepto Canadá). • Los CONDUCTOS DE GAS (si se trata de una secadora a gas) deben cumplir con los códigos locales y nacionales. • El SISTEMA DE DRENAJE debe ser un conducto de drenaje de metal rígido o flexible con un recubrimiento de metal resistente. REQUISITOS PARA EL TENDIDO DE CONDUCTOS • • • • • • • • • • • • • • • • Utilice un conducto de acero galvanizado rígido o de aluminio rígido, de 4 pulgadas (10,2 cm) de diámetro. No utilice un conducto de menor tamaño. Los conductos de más de 4 pulgadas (10,2 cm) de diámetro pueden ocasionar una mayor acumulación de pelusa. Debe extraer la pelusa regularmente. Si es preciso utilizar un conducto de metal flexible, utilice el tipo que viene con un recubrimiento de metal resistente. No utilice un conducto flexible con un recubrimiento delgado. Se puede producir una obstrucción importante si se dobla el conducto flexible en forma demasiado marcada. Nunca instale ningún tipo de conducto flexible en paredes, techos u otros espacios que queden ocultos. Haga que el conducto de drenaje se mantenga lo más recto y corto posible. Asegure las uniones con cinta para conductos. No utilice tornillos. Los conductos flexibles de plástico se pueden enroscar, combar, pinchar, pueden reducir el flujo de aire, prolongar el tiempo de secado y afectar el funcionamiento de la secadora. Los sistemas de drenaje de mayor longitud que la recomendada pueden prolongar el tiempo de secado, afectar el funcionamiento del equipo y acumular pelusa. El conducto de drenaje debe finalizar en una tapa de drenaje con un regulador de tiro que gire hacia afuera para evitar el reflujo de aire y el ingreso de insectos o plantas. Nunca utilice una tapa de drenaje con un regulador de tiro magnético. La tapa debe tener 12 pulgadas (30,5 cm) de espacio libre como mínimo entre la parte inferior de la tapa y el suelo u otra obstrucción. La abertura de la tapa debe apuntar hacia abajo. Nunca instale un filtro sobre la salida del drenaje. Para evitar la acumulación de pelusa, no permita que la secadora drene directamente en el hueco de una ventana. No permita que drene debajo de la casa o de una galería. Si la red de conductos del drenaje debe pasar por un área que no recibe calor, se debe aislar el conducto y se lo debe colocar levemente en declive hacia la tapa de drenaje para reducir la condensación y la acumulación de pelusa. Inspeccione y limpie el interior del sistema de drenaje por lo menos una vez por año. Desenchufe el cable de alimentación antes de limpiar. Español - 11 DV455_02836F-08_MES.indd 11 2013-12-12 5:11:06 Instalación de la secadora • • • Controle con frecuencia para asegurarse de que el regulador de tiro de la tapa del drenaje se abra y se cierre sin inconvenientes. Controle una vez por mes y limpie al menos una vez al año. Nota: Si las prendas no se secan, entonces verifique que los conductos no presenten obstrucciones. No haga que la secadora drene hacia ninguna pared, techo, sótano de pequeña altura o espacio oculto de un edificio, línea de descarga de gases o cualquier otro conducto común o chimenea. Esto podría generar un peligro de incendio como consecuencia de la pelusa expulsada por la secadora. SECADORA ELÉCTRICA Y A GAS Tipo de tapa impermeable Recomendado Utilice sólo para una instalación de corto alcance 4” (10,16 cm) 2,5” (6,35 cm) Nº codos de 90° Rígido Metálico flexible* Rígido Metálico flexible* 0 24,4 m (80 pies) 12,4 m (41 pies) 22,6 m (74 pies) 10,1 m (33 pies) 1 20,7 m (68 pies) 11,2 m (37 pies) 18,9 m (62 pies) 8,8 m (29 pies) 2 17,4 m (57 pies) 10,1 m (33 pies) 15,5 m (51 pies) 7,6 m (25 pies) 3 14,3 m (47 pies) 9,0 m (29 pies) 12,5 m (41 pies) 6,5 m (21 pies) * No utilice conductos flexibles de un material que no sea el metal. Si la nueva secadora se instala dentro de un sistema de drenaje existente, debe asegurarse de que: • el sistema de drenaje cumpla con todos los códigos locales, estaduales y nacionales; • no se utilice un conducto flexible de plástico; • Se controle y limpie toda la pelusa acumulada del interior del conducto existente. • Compruebe que el conducto no esté enroscado o aplastado. • el regulador de tiro de la tapa de drenaje se abra y se cierre sin inconvenientes. La presión estática de cualquier sistema de drenaje no debe superar las 0,83 pulgadas de la columna de agua ni ser inferior a 0. Esto se puede medir cuando la secadora está en funcionamiento con un manómetro en el punto donde el conducto de drenaje se conecta a la secadora. Se debe utilizar la opción sin calor. El tambor de la secadora debe estar vacío y el filtro para pelusas limpio. IMPORTANTE PARA EL INSTALADOR Lea las siguientes instrucciones con detenimiento antes de instalar la secadora. Estas instrucciones se deben conservar para consultas futuras. Retire la puerta de todos los electrodomésticos desechados para evitar el peligro de que un niño quede atrapado y se asfixie. ADVERTENCIA Español - 12 DV455_02836F-08_MES.indd 12 2013-12-12 5:11:06 CONSIDERACIONES ACERCA DE LA UBICACIÓN INSTALACIONES DEL ELECTRODOMÉSTICO EN UN GABINETE O EN UN HUECO ADVERTENCIA • • La secadora debe tener un drenaje con salida hacia el exterior para reducir el riesgo de incendio cuando se instala en un gabinete o en un hueco. 02 INSTALACIÓN DE LA SECADORA La secadora debe estar ubicada donde haya suficiente espacio adelante para cargarla y suficiente espacio atrás para el sistema de drenaje. Esta secadora viene preparada de fábrica con la opción de drenaje posterior. Para que drene por la parte inferior, hacia la derecha o izquierda, utilice el kit de drenaje accesorio. El kit viene acompañado de instrucciones. Asegúrese de que en la habitación circule suficiente aire fresco. La secadora debe estar ubicada donde el aire pueda fluir sin obstrucciones. Para las secadoras a gas, se debe mantener el espacio libre suficiente tal como figura en la placa de información para garantizar que haya aire suficiente para la combustión y el funcionamiento adecuado de la secadora. No se debe instalar o guardar la secadora en un área donde quede expuesta al agua y/o a los factores climáticos. El área de la secadora debe mantenerse libre de materiales combustibles, gasolina y otros vapores y líquidos inflamables. Una secadora produce pelusa combustible. No debe haber pelusas en el área circundante de la secadora. No se debe instalar ningún otro electrodoméstico que queme combustible en el mismo gabinete de la secadora. ADVERTENCIA: Para reducir el riesgo de incendio, esta secadora debe tener un drenaje con salida hacia el exterior. Consulte la sección “Drenaje” en la página 15. Espacios libres mínimos entre la secadora y las paredes adyacentes u otras superficies • Laterales 1 pulg. / 25 mm. Posterior 5 pulg. / 127 mm Arriba 17 pulg. / 432 mm Frente 2 pulg / 51 mm El frente del gabinete debe contar con dos aberturas sin obstrucciones para que ingrese el aire, para ocupar un área total combinada mínima de 72 pulg² (465 cm²), con 3” (7.6 cm) de abertura mínima en la parte superior y en la parte inferior. Se acepta una puerta tipo persiana con un espacio libre equivalente. Área empotrada Vista lateral - gabinete o área empotrada 1 pulg. (2,5 cm) 1 pulg. (2,5 cm) 27 pulg. (68,6 cm) 17 pulg. (43,2 cm) 27 pulg. (68,6 cm) 1 pulg. (2,5 cm) 2 pulg. (5 cm) 34,1 pulg. (86,5 cm) 5 pulg. (12,7 cm) Español - 13 DV455_02836F-08_MES.indd 13 2013-12-12 5:11:07 Instalación de la secadora Con pedestal opcional o kit de apilamiento Dimensiones requeridas de la instalación con kit de apilamiento Dimensiones requeridas de la instalación con pedestal 51,2 pulg. (130 cm) para poder abrir la puerta 39 pulg. (99 cm) 6 pulg. * (15,2 cm) 53,6 pulg. (136,2 cm) 34,1 pulg. (86,5 cm) 5 pulg. (12,7 cm) 27 pulg. (68,6 cm) 3 pulg. (7,6 cm) 5 pulg. (12,7 cm) 77,2 pulg. (196,2 cm) 48 pulg.² * (310 cm²) Gabinete o puerta 1 pulg. (2,5 cm) 27 pulg. (68,6 cm) 24 pulg.² * (155 cm²) 3 pulg. (7,6 cm) 1 pulg. (2,5 cm) 34,1 pulg. (86,5 cm) 8 pulg.** (20,3 cm) * Espacio necesario ** El codo del drenaje externo requiere espacio adicional. No se recomienda apilar el modelo DV457* sobre la lavadora. (puede resultar difícil controlar el panel LCD por el ángulo de visualización.) Español - 14 DV455_02836F-08_MES.indd 14 2013-12-12 5:11:07 DRENAJE La secadora no debe drenarse hacia una chimenea, pared, techo, altillo, sótano de pequeña altura o espacio oculto de un edificio. Si la secadora tiene un drenaje con salida hacia el exterior se evitará que ingrese una gran cantidad de pelusa y humedad a la habitación. • Todas las secadoras deben tener un drenaje con salida hacia el exterior. • No fije el conducto con tornillos u otros medios de sujeción que se extiendan dentro del conducto y atrapen pelusa. • El conducto de drenaje debe tener 4 pulgadas (10,2 cm) de diámetro. • La longitud total del conducto flexible metálico no debe superar los 2,4 m (7,8 pies). En los Estados Unidos: • Utilice sólo los conductos flexibles tipo lámina metálica, si los hubiera, identificados específicamente para su utilización con el electrodoméstico por el fabricante y que cumplan con el Esquema para conductos de transición de secadora de ropa, Tema 2158A. 02 INSTALACIÓN DE LA SECADORA Consulte la sección “Requisitos para el tendido de conductos” en la página 11 para conocer la longitud máxima del conducto y el número de codos. En Canadá: • Utilice sólo aquellos conductos flexibles tipo lámina metálica, si los hubiera, específicamente identificados por el fabricante para su uso con el electrodoméstico. Fuera de los EE.UU. y Canadá: • Remítase a los códigos locales. ADVERTENCIA ADVERTENCIA La secadora debe tener un drenaje con salida hacia el exterior para reducir el riesgo de incendio cuando se instala en un gabinete o en un hueco. NUNCA UTILICE UN CONDUCTO FLEXIBLE DE PLÁSTICO O DE UN MATERIAL QUE NO SEA EL METAL. Si su red de conductos existente es de plástico, de un material que no sea el metal o es inflamable, reemplácela por una que sea de metal. Utilice únicamente un conducto de drenaje de metal que no sea inflamable para asegurar la contención del aire expulsado, el calor y la pelusa. Español - 15 DV455_02836F-08_MES.indd 15 2013-12-12 5:11:08 Instalación de la secadora REQUISITOS EN CUANTO AL GAS Utilice únicamente gas natural o gas LP (gas licuado de propano). LA INSTALACIÓN DEBE REALIZARSE EN CONFORMIDAD CON LOS CÓDIGOS LOCALES, O EN AUSENCIA DE ELLOS, CON EL CÓDIGO NACIONAL PARA GAS Y COMBUSTIBLES ANSI/Z223.1, LA REVISIÓN MÁS RECIENTE (PARA LOS ESTADOS UNIDOS), O CON LOS CÓDIGOS DE INSTALACIÓN CAN/CGA-B149 (PARA CANADÁ). Las secadoras a gas están equipadas con un orificio para el quemador de modo que puedan ser utilizadas con gas natural. Si tiene pensado utilizar su secadora con gas LP (gas licuado de propano), deberá efectuarse la conversión para lograr un funcionamiento adecuado y seguro, tarea que deberá estar a cargo de un técnico calificado. Se recomienda usar un conducto de suministro de gas de ½” (1,27 cm) y debe reducirse para la conexión con el conducto de gas de 3/8” (1 cm) de su secadora. El Código Nacional para Gas y Combustibles exige que se instale una válvula manual de cierre del gas, aprobada y de fácil acceso, dentro de las 6” de distancia de la secadora. Las secadoras a gas instaladas en garajes residenciales deben estar elevadas a 18 pulgadas (46 cm) del piso. Además, inmediatamente contra la corriente de la conexión del suministro de gas de la secadora, se debe instalar una conexión roscada macho N.P.T. (Rosca nacional para tubos) de 1/8” (0,3 cm), accesible para la conexión del medidor de prueba. Su secadora debe estar desconectada del sistema de suministro de gas durante las pruebas de presión del sistema. NO vuelva a utilizar el viejo conducto de gas en metal flexible. El diseño del conducto de gas flexible debe estar certificado por la Asociación Americana del Gas (CGA en Canadá). • Todo compuesto de unión de tuberías utilizado debe ser resistente a la acción del gas licuado de petróleo. • A modo de cortesía, la mayoría de las empresas locales de gas inspeccionarán la instalación del artefacto a gas. ENCENDIDO DEL GAS: la secadora utiliza un sistema de encendido automático para encender el quemador. No existe un piloto que permanezca constantemente encendido. INSTRUCCIONES DE INSTALACIÓN DE LA COMUNIDAD DE MASSACHUSETTS La instalación de la secadora deberá estar a cargo de un plomero o un gasista matriculado. Se deberá instalar una válvula de gas manual con una manija en forma de “T” en el conducto de suministro de gas de la secadora. Si se utiliza un conector de gas flexible para instalar la secadora, el conector debe tener una longitud máxima de 3’ (36”). • Se pueden producir pérdidas de gas en su sistema que ocasionen una situación peligrosa. Las pérdidas de gas pueden no ser detectadas únicamente por el olor. ADVERTENCIA • • Los proveedores de gas recomiendan que compre e instale un detector de gas aprobado por UL. • Instálelo y utilícelo de acuerdo con las instrucciones del fabricante. Español - 16 DV455_02836F-08_MES.indd 16 2013-12-12 5:11:08 REQUISITOS ELÉCTRICOS El diagrama del cableado se encuentra en la placa debajo del panel de control. • • • La conexión inadecuada del conductor de conexión a tierra del equipo puede dar como resultado un riesgo de descarga eléctrica. Consulte a un electricista o técnico calificado si le surgen dudas acerca de si la conexión a tierra de su secadora es correcta. No modifique el enchufe provisto con la secadora; si no entra en el tomacorriente, solicite a un electricista calificado que instale el tomacorriente adecuado. Para evitar el riesgo innecesario de incendio, descarga eléctrica o lesiones físicas, todo el cableado y la conexión a tierra deben realizarse en conformidad con los códigos locales, o en ausencia de ellos, con el Código Eléctrico Nacional, ANSI/ NFPA Nro. 70, su última revisión (para los EE.UU.) o el Código Eléctrico Canadiense CSA C22.1, sus últimas revisiones y los códigos y ordenanzas locales. Es su responsabilidad proveer los servicios eléctricos adecuados para su secadora. Todas las instalaciones de gas deberán realizarse en conformidad con el Código Nacional para Combustibles ANSI/Z2231, su última revisión (para los EE.UU.) o con los Códigos de Instalación CAN/CGA - B149, su última revisión (para Canadá) y los códigos y ordenanzas locales. CONEXIÓN A TIERRA 02 INSTALACIÓN DE LA SECADORA ADVERTENCIA Esta secadora debe conectarse a tierra. En caso de que el electrodoméstico funcione mal o se descomponga, la conexión a tierra del producto reducirá el riesgo de descarga eléctrica al ofrecer una vía de menos resistencia a la corriente eléctrica. ADVERTENCIA Modelos a gas Su secadora tiene un cable con un conductor de conexión a tierra del equipo y un enchufe de conexión a tierra. El enchufe debe conectarse a un tomacorriente adecuado que esté correctamente instalado y conectado a tierra en conformidad con todos los códigos y ordenanzas locales. No modifique el enchufe provisto con la secadora; si no entra en el tomacorriente, solicite a un electricista calificado que instale el tomacorriente adecuado. Nunca conecte el cable a tierra a las tuberías de plástico, las tuberías de gas o a las cañerías de agua caliente. ADVERTENCIA Modelos eléctricos La secadora requiere un cable opcional con un conductor de conexión a tierra del equipo y un enchufe de conexión a tierra que se vende por separado. El enchufe debe conectarse a un tomacorriente adecuado que esté correctamente instalado y conectado a tierra en conformidad con todos los códigos y ordenanzas locales. No modifique el enchufe provisto con la secadora; si no entra en el tomacorriente, solicite a un electricista calificado que instale el tomacorriente adecuado. Si no se utiliza un cable de alimentación y la secadora eléctrica debe estar permanentemente conectada, se la debe conectar a un sistema de cableado de metal con conexión a tierra permanente, o se debe conectar un conductor con conexión a tierra del equipo a los conductores del circuito y a la terminal con conexión a tierra del equipo o al cable de la secadora. Español - 17 DV455_02836F-08_MES.indd 17 2013-12-12 5:11:08 Instalación de la secadora CONEXIONES ELÉCTRICAS Antes de poner al electrodoméstico en funcionamiento o realizar pruebas, siga las instrucciones de conexión a tierra de la “Conexión a tierra” sección en la página 17. Se recomienda que se destine un circuito derivado individual (o separado) sólo para la secadora. NO UTILICE UN CABLE PROLONGADOR. Modelos a gas – EE.UU. y Canadá Se requiere un servicio eléctrico aprobado de CA de 120 voltios, 60 Hz, con un fusible o disyuntor de 15 A. Modelos eléctricos – Sólo EE.UU. La mayor parte de las secadoras estadounidenses requieren un servicio eléctrico aprobado de CA de 120/240 voltios, 60 Hz. Algunas requieren un servicio eléctrico aprobado de 120/208 voltios, 60 Hz. Los requisitos del servicio eléctrico pueden encontrarse en la etiqueta con información ubicada detrás de la puerta. Se requiere un fusible o disyuntor de 30 A a ambos lados del conducto. • Si se utiliza un cable de alimentación, el cable debe enchufarse a un tomacorriente de 30 A. • NO se provee el cable de alimentación con los modelos eléctricos de secadoras estadounidenses. ADVERTENCIA RIESGO DE DESCARGA ELÉCTRICA: Si lo permiten los códigos locales, el suministro eléctrico de la secadora puede conectarse por medio de un nuevo kit de cables de alimentación eléctrica, rotulado para que se lo utilice con la secadora, es decir que cuente con certificación U.L. y categorizado en un mínimo de 120/240 voltios, 30 A con tres conductores de cobre N.° 10 que finalicen en terminales de bucle cerrado, pernos de pala de tipo abierto con extremos rebatidos o con conductores de estaño. • No vuelva a utilizar un cable de alimentación eléctrica de una secadora vieja. El cable de alimentación eléctrica debe conservarse en el gabinete de la secadora con un dispositivo de alivio de tensión con certificación UL adecuado. • La conexión a tierra a través del conductor neutro está prohibida para (1) instalaciones nuevas con circuito derivado, (2) casas rodantes, (3) vehículos de recreo y (4) áreas en las que los códigos locales prohíban la conexión a tierra a través de un conductor neutro. (Use un enchufe de 4 pines para el tomacorriente de 4 ranuras, tipo NEMA 14-30R.) Modelos eléctricos – Sólo Canadá • • Se requiere un servicio eléctrico aprobado de CA de 120/240 voltios, 60 Hz, equipado con un fusible o disyuntor de 30 A a ambos lados del conducto. Todos los modelos canadienses se envían con el cable de alimentación adjunto. El cable de alimentación debe conectarse a un tomacorriente de 30 A. En Canadá no está permitido convertir una secadora a 208 voltios. Español - 18 DV455_02836F-08_MES.indd 18 2013-12-12 5:11:08 CONEXIÓN DE LA MANGUERA DE ENTRADA Método 1 1. Si el espacio lo permite, conecte el extremo hembra de bronce del conector en forma de “Y” a la llave de agua fría. 2. Cierre la llave de agua fría. 3. Conecte el extremo recto de la manguera larga al conector en forma de “Y”. 4. Ajuste la unión con dos tercios de giro adicionales utilizando la pinza. Conector Y No ajuste demasiado ya que puede dañar la unión. 5. Conecte el extremo angular de las mangueras largas para llenar la válvula en la parte inferior del armazón trasero de la secadora. Enrosque la unión a mano hasta que se asiente en el conector de la válvula de carga. 6. Ajuste la unión con otros dos tercios de giro adicionales utilizando la pinza. No ajuste demasiado ya que puede dañar la unión. Manguera de agua Conducto de drenaje 02 INSTALACIÓN DE LA SECADORA La secadora debe conectarse a la llave de agua fría mediante las nuevas mangueras de entrada. No utilice mangueras viejas. Marco (posterior) 7. Compruebe que las llaves de agua estén abiertas. 8. Compruebe que no haya pérdidas alrededor del conector en forma de “Y”, las llaves de agua y las mangueras. Manguera de agua Español - 19 DV455_02836F-08_MES.indd 19 2013-12-12 5:11:08 Instalación de la secadora Método 2 La secadora debe conectarse a la llave de agua fría mediante las nuevas mangueras de entrada. No utilice mangueras viejas. 1. Si el conector en forma de “Y” no puede conectarse directamente a la llave de agua fría, se debe utilizar la manguera corta. 2. Cierre la llave de agua fría. 3. Una la manguera de entrada corta a la llave de agua fría. Enrosque la unión a mano hasta que se asiente en la llave de agua. 4. Ajuste la unión con otros dos tercios de giro adicionales utilizando la pinza. No ajuste demasiado ya que puede dañar la unión. 5. Una el conector en forma de “Y” al extremo macho de bronce de la manguera pequeña. Enrosque la unión a mano hasta que se asiente en el conecto. 6. Ajuste la unión con otros dos tercios de giro adicionales utilizando la pinza. No ajuste demasiado ya que puede dañar la unión. Manguera corta (Entrada de agua fría) Conector en forma de “Y” Manguera larga Conducto de drenaje Marco (posterior) 7. Una el extremo angular de las mangueras largas a la válvula de carga en la parte inferior del armazón trasero de la secadora. Enrosque la unión a mano hasta que se asiente en el conector de la válvula de carga. 8. Ajuste la unión con dos tercios de giro adicionales utilizando la pinza. No ajuste demasiado ya que puede dañar la unión. Manguera de agua 9. Conecte la manguera de la lavadora al otro extremo del conector con forma de “Y”. Atornille la unión de la manguera hasta que esté ajustada. Ajuste la unión con otros dos tercios de giro adicionales utilizando la pinza. No la ajuste en exceso. Puede dañar la unión. 10. Compruebe que las llaves de agua estén abiertas. 11. Compruebe que no haya pérdidas alrededor del conector en forma de “Y”, las llaves de agua y las mangueras. Español - 20 DV455_02836F-08_MES.indd 20 2013-12-12 5:11:08 REEMPLAZO DE LAS PIEZAS Y LOS ACCESORIOS Si es preciso reemplazar piezas o accesorios de la secadora, comuníquese con el distribuidor al que le compró la secadora o con el centro de atención al cliente de SAMSUNG al 1-800-SAMSUNG (726-7864). Para realizar una instalación adecuada, recomendamos contratar a un instalador calificado. Para instalar 1. Mueva la secadora al lugar adecuado para la instalación. Considere instalar la secadora y la lavadora una al lado de la otra, para permitir el acceso a las conexiones de gas, eléctricas y del drenaje. Coloque dos de las protecciones superiores de cartón en el piso. Incline la secadora hacia uno de los laterales, de modo tal que quede atravesando ambas protecciones. 2. Vuelva a colocar la secadora en posición vertical. 3. La secadora debe estar nivelada para garantizar un secado óptimo. Para minimizar las vibraciones, los ruidos y los movimientos indeseados, el piso debe ser una superficie sólida y perfectamente nivelada. Nivel 02 INSTALACIÓN DE LA SECADORA INSTALACIÓN Para colocar la secadora a la misma altura que la lavadora, retraiga completamente las patas niveladoras girándolas en sentido contrario a las agujas del reloj, luego afloje las patas girándolas en el sentido de las agujas del reloj. Patas niveladoras Retraer completamente Luego aflojar Ajuste las patas niveladoras sólo lo necesario para nivelar la secadora. Extender las patas niveladoras más de lo necesario puede hacer que la secadora vibre. 4. Consulte la sección “Drenaje” sección en la página 15 antes de instalar el sistema de drenaje. Instale la red de conductos desde la secadora hasta la tapa de drenaje. El extremo con reborde de las secciones del conducto deben apuntar hacia afuera de la secadora. NO utilice tornillos con recubrimiento de metal cuando realice el montaje de los conductos. Se les debe colocar cinta a las uniones. Nunca utilice material de plástico flexible para el drenaje. Sugerencia para que las instalaciones queden bien ajustadas: conecte una sección del sistema de drenaje a la secadora antes de colocarla en su lugar. Utilice cinta para conductos para asegurar esta sección a la secadora, pero no cubra las aberturas del gabinete de la secadora. Español - 21 DV455_02836F-08_MES.indd 21 2013-12-12 5:11:08 Instalación de la secadora 5. Revise la “Requisitos eléctricos” sección en la página 17.ANTES DE PONER EL ELECTRODOMÉSTICO EN FUNCIONAMIENTO O REALIZAR PRUEBAS, siga las instrucciones de conexión a tierra de la “Conexión a tierra” sección en la página 17. ADVERTENCIA MODELOS ESTADOUNIDENSES: RIESGO DE DESCARGA ELÉCTRICA - Todos los modelos estadounidenses se fabrican para una CONEXIÓN DE SISTEMAS DE 3 CABLES. El armazón de la secadora está conectado a tierra al conductor neutro del bloque de terminales. Se requiere una CONEXIÓN DE SISTEMAS DE 4 CABLES para las construcciones nuevas o remodeladas, las casas rodantes o si los códigos locales no permiten la conexión a tierra a través del neutro. Si se utiliza un sistema de 4 cables, el armazón de la secadora no puede conectarse a tierra al conductor neutro del bloque de terminales. Remítase a las siguientes instrucciones para las CONEXIONES DE SISTEMAS DE 3 Y 4 CABLES. Retire la tapa del bloque de terminales. Inserte el cable de alimentación con un dispositivo de alivio de tensión con certificación UL a través del orificio provisto en el gabinete cerca del bloque de terminales. Se debe utilizar un dispositivo de alivio de tensión. No afloje las tuercas ya instaladas en el bloque de terminales. Asegúrese de que estén ajustadas. Utilice un tomacorriente para huecos profundos de 3/8” (1 cm). 6. Revise la “Requisitos en cuanto al gas” sección en la página 16. Retire la cubierta protectora de la rosca para tubos. Aplique compuesto de unión de tuberías o 1 1/2 vueltas aproximadamente de cinta de Teflon en todas las conexiones roscadas. El compuesto de unión de tuberías utilizado debe ser resistente a la acción del gas licuado de petróleo. Conecte el suministro de gas a la secadora. Se requiere un accesorio adicional para conectar el extremo de la rosca hembra de 3/4” (1,9 cm) de un conector flexible al extremo de la rosca macho de 3/8” (1 cm) de la secadora. Ajuste firmemente el accesorio de la tubería de gas sobre las roscas. Abra el suministro de gas. Controle todas las conexiones de gas para detectar si presentan pérdidas usando una solución jabonosa. Si aparecen burbujas, ajuste las conexiones y vuelva a controlar. NO use la llama abierta para verificar si hay pérdidas de gas. Español - 22 DV455_02836F-08_MES.indd 22 2013-12-12 5:11:08 Conexiones de sistemas de 3 CABLES ADVERTENCIA 1 Conector a tierra externo 2 Cable a tierra neutro (verde/amarillo) 3 Tornillo central de color plateado del bloque de terminales 4 Cable neutro (cable blanco o central) 5 Protección contra los tirones con certificación UL de 3/4” (1,9 cm) Si realiza la conversión del sistema eléctrico de 4 cables a 3 cables, debe volver a conectar la cinta de conexión a tierra al soporte del bloque de terminales para conectar a tierra el armazón de la secadora al conductor neutro. 02 INSTALACIÓN DE LA SECADORA 1. Afloje o retire el tornillo central del bloque de terminales. 2. Conecte el cable neutro (cable blanco o central) del cable de alimentación a la terminal de tornillo central de color plateado del bloque de terminales. Ajuste el tornillo. 3. Conecte los demás cables a los tornillos externos del bloque de terminales. Ajuste los tornillos. 4. Ajuste los tornillos con dispositivo de alivio de tensión. 5. Inserte la lengüeta de la cubierta del bloque de terminales en la ranura del panel posterior de la secadora. 6. Asegure la cubierta con un tornillo de sujeción. Conexiones de sistemas de 4 CABLES 1. Retire el tornillo central del bloque de terminales. 2. Conecte el cable a tierra (verde o sin cubierta) del cable de alimentación al tornillo conductor a tierra externo. 3. Conecte el cable neutro (cable blanco o central) del cable de alimentación y el cable a tierra del electrodoméstico (verde con franjas amarillas) debajo del tornillo central del bloque de terminales. 4. Conecte los demás cables a los tornillos externos del bloque de terminales. Ajuste los tornillos. 5. Ajuste los tornillos con dispositivo de alivio de tensión. 6. Inserte la lengüeta de la cubierta del bloque de terminales en la ranura del panel posterior de la secadora. 7. Asegure la cubierta con un tornillo de sujeción. 1 Conector a tierra externo 2 Cable verde o de cobre desnudo del cable de alimentación 3 Dispositivo de alivio de tensión con certificación UL de 3/4 pulgadas (1.9 cm) 4 Tornillo central de color plateado del bloque de terminales 5 Cable a tierra (verde/amarillo) 6 Cable neutro (cable blanco o central) 8. Con un nivelador, controle la secadora y haga los ajustes necesarios a las patas niveladoras. 9. En ese momento, asegúrese de que todas las conexiones de gas (en los modelos a gas), y las conexiones eléctricas y del drenaje estén completas. Enchufe la secadora y controle el funcionamiento utilizando la lista de verificación que figura más abajo. 10. (SÓLO MODELOS A GAS) Es posible que al principio el quemador no se encienda debido a la presencia de aire en el conducto de gas. Permitir que la secadora funcione con la opción de calor purgará el conducto. Si en el lapso de 5 minutos el gas no se enciende, apague la secadora y espere 5 minutos. Asegúrese de que el suministro de gas hacia su secadora esté abierto. Para confirmar que el gas está encendido, controle que se sienta calor en el drenaje. Español - 23 DV455_02836F-08_MES.indd 23 2013-12-12 5:11:08 Instalación de la secadora LISTA DE VERIFICACIÓN FINAL DE LA INSTALACIÓN • • • • • • • La secadora está enchufada a un tomacorriente y está conectada a tierra correctamente. Los conductos de drenaje están conectados y se ha colocado cinta a las uniones. NO se usó un conducto flexible de plástico. Se usó material de metal rígido o flexible con un recubrimiento de metal resistente para la ventilación. La secadora está nivelada y apoyada firmemente sobre el piso. Modelos a gas: el gas está abierto y no hay pérdidas de gas. Encienda la secadora para confirmar que funciona, calienta y se apaga. SUGERENCIAS ACERCA DEL DRENAJE DE LA SECADORA Un conducto flexible de plástico o de un material que no sea el metal presenta un potencial riesgo de incendio. ADVERTENCIA 1. Asegúrese de que su secadora esté instalada correctamente para que extraiga el aire fácilmente. Pared Secadora Conducto de drenaje 2. Utilice un conducto de metal rígido, de 4” Coloque cinta en todas las uniones, incluso en la secadora. Nunca use tornillos que atrapen pelusa. 4” Cinta Conducto 3. Mantenga los conductos lo más recto posible. 4. Limpie todos los viejos conductos antes de instalar la nueva secadora. Asegúrese de que la ventilación se abra y se cierre sin inconvenientes. Inspeccione y limpie el sistema de drenaje todos los años. No permita que un sistema de drenaje defectuoso demore el secado: • restringiendo a la secadora con un sistema de drenaje defectuoso. • • utilizando conductos innecesariamente largos que tienen muchos codos. • al utilizar un conducto flexible de plástico, con un recubrimiento delgado o de un material que no es el metal. Permitiendo el uso de conductos y ventilaciones aplastados u obstruidos. Español - 24 DV455_02836F-08_MES.indd 24 2013-12-12 5:11:09 INVERSIÓN DE LA PUERTA 02 INSTALACIÓN DE LA SECADORA 1. Desconecte el cable de alimentación. 2. Retire los dos tornillos de la bisagra de la puerta. 3. Levante la puerta y retírela. 4. Retire los dos tornillos del marco frontal. 5. Retire los dos tornillos del lado opuesto de la bisagra de la puerta. 6. Retire los dos tornillos del cierre de la placa de apoyo. 7. Vuelva a poner los dos tornillos en los orificios internos. 8. Retire un tornillo de la bisagra de la puerta. El tornillo negro es para fijar previamente la puerta en el marco delantero. Español - 25 DV455_02836F-08_MES.indd 25 2013-12-12 5:11:09 Instalación de la secadora 9. Vuelva a colocar el tornillo en el otro orificio. 10. Coloque la puerta sobre el lado contrario y vuelva a fijar a la secadora. 11. Vuelva a conectar la placa de apoyo. 12. Vuelva a colocar los tornillos en los orificios restantes. Español - 26 DV455_02836F-08_MES.indd 26 2013-12-12 5:11:09 Manual de instrucciones, sugerencias ADVERTENCIA Para reducir el riesgo de incendio, descarga eléctrica o lesiones personales, lea las INSTRUCCIONES DE SEGURIDAD IMPORTANTES antes de poner en funcionamiento el aparato. DESCRIPCIÓN GENERAL DEL PANEL DE CONTROL 1 Selector de ciclos 8 6 2 3 4 5 7 8 9 10 Para seleccionar un ciclo, gire el disco Selector de ciclos hasta llegar al ciclo deseado. La luz del indicador junto al nombre del ciclo se iluminará. Los ciclos Lana, Delicado, Esterilizar, Ropa de cama, Carga pesada, Eco Normal y Sintética son ciclos de la opción Sensor Dry (Secado con sensor). La opción Sensor Dry (Secado con sensor) detecta automáticamente la humedad en la carga y apaga la secadora cuando alcanza el nivel de secado seleccionado (very dry (muy seco) a damp dry (centrifugado parcial). Eco Normal (Eco Normal) - Este ciclo reduce el uso de energía hasta un 15% en comparación con el ciclo Normal. Ajusta el tiempo y la temperatura del ciclo para mayor eficiencia. Normal - Utilice este ciclo para secar cargas tales como algodón, ropa interior y lino. Heavy Duty (Acción fuerte) - Utilice este ciclo para obtener más calor para las telas resistentes, tales como los jeans, el corderoy y la ropa de trabajo. Perm Press (Plancha permanente) - Seca automáticamente prendas de algodón sin arrugas, también telas sintéticas, tejidos y telas que requieren planchado permanente. Bedding PLUS (Más ropa cama) - para prendas voluminosas, como frazadas, sábanas y edredones. Delicates (Delicada) - Este ciclo fue diseñado para secar prendas sensibles al calor a baja temperatura de secado. Wool (Lana) - Sólo para lana que pueda lavarse en lavadora y secarse en secadora. 03 MANUAL DE INSTRUCCIONES, SUGERENCIAS 1 Las cargas deben tener un peso inferior a las 3 lb. El ciclo de Lana de esta máquina ha sido aprobado por Woolmark Company para productos de lana Total-Easy-Care M0913(DV455E*) y M1007(DV455G*). Sanitize (Desinfección) - Desinfecta las prendas impregnando la tela con calor a alta temperatura durante el ciclo de secado. Utilice este ciclo para mantener su ropa de cama y cortinas limpias por medio de la desinfección. Time Dry (Secado con temporizador) - El secado con temporizador le permite seleccionar el tiempo del ciclo deseado en minutos. Gire el disco Selector de ciclos a Time Dry (Secado con temporizador), a continuación, presione la flecha hacia arriba de Adjust Time (Ajustar tiempo) para determinar el tiempo de secado. Presione la flecha repetidamente para desplazarse por las opciones de tiempo. Español - 27 DV455_02836F-08_MES.indd Sec3:27 2013-12-12 5:11:09 Manual de instrucciones, sugerencias Quick Dry (Secado rápido) - Ofrece un ciclo de secado en 30 minutos. Air Fluff (Temperatura ambiente) - El ciclo Secado a temperatura ambiente seca la carga con aire a temperatura ambiente. Refresh (Refrescar) - Este ciclo es el más adecuado para alisar arrugas y reducir los olores de las cargas de una a cuatro prendas secas. En este ciclo se rocía una pequeña cantidad de agua en el tambor de la secadora después de varios minutos de secado con calor. Wrinkle Away (Antiarrugas)- El ciclo Antiarrugas elimina las arrugas de prendas guardadas en armarios, etc. Ofrece un tratamiento antiarrugas mediante un proceso con vapor optimizado. Puede cambiar el tiempo de secado. (Tiempo mínimo: 20 minutos) *Para obtener los mejores resultados, no cargue más de 3 prendas. Si sobrecarga la secadora puede no obtener los mismos resultados. 2 3 4 Pantalla LED La pantalla digital muestra el tiempo restante del ciclo calculado después de presionar el botón Start/Pause (Inicio/Pausa). El tiempo restante calculado puede fluctuar a medida que avance el ciclo. Se iluminará la luz de Drying (Secar) y se mantendrá iluminada hasta que se haya cumplido el ciclo. Cuando la secadora esté en la fase de enfriamiento, se iluminará la luz de Cooling (Refrescar). Cuando la secadora esté en la fase de prevención de arrugas, se iluminará la luz la Wrinkle Prevent (Prevención de arrugas). Cuando el ciclo haya finalizado, aparecerá la palabra “End” (Fin) en la pantalla hasta que se abra la puerta de la secadora o se presione el botón Power (Encendido). Si su secadora se detiene durante un ciclo, las luces del indicador parpadearán hasta que se presione el botón Start/Pause (Inicio/Pausa). Botón de selección Nivel de secado Para seleccionar el nivel de secado en los ciclos Normal (Normal), Heavy Duty (Servicio pesado), u otros ciclos Sensor Dry (Secado con sensor), presione el botón Dry Level (Nivel de secado). Se iluminará una luz en el indicador junto al nivel de secado deseado. Presione el botón repetidamente para desplazarse por las opciones. Las cargas más grandes o más voluminosas posiblemente requieran la opción Very Dry (Muy seco) o More Dry (Más seco) para que el secado sea completo. La opción Less Dry (Menos seco) es la más adecuada para telas livianas, o para que quede algo de humedad en las prendas al final del ciclo. La opción Damp Dry (Centrifugado parcial) fue concebida para secar las prendas parcialmente. Utilícela para las prendas que deban secarse en posición horizontal o colgarse. Botón de selección Temp Para seleccionar la temperatura correcta para la carga, presione el botón Temp. (Temperatura). Se iluminará una luz del indicador junto a la temperatura deseada. Presione el botón repetidamente para desplazarse por las opciones. High (Alta): para los algodones resistentes o aquellos con el rótulo Tumble Dry (Secar en secadora). Medium (Mediana): para telas que requieren planchado permanente, telas sintéticas, algodones livianos u otras prendas con el rótulo Tumble Dry Medium (Secar en secadora a temperatura media). Medium Low (Mediana baja): para secar telas sintéticas o de tejido lavable a una temperatura inferior a la mediana. Low (Baja): para prendas sensibles al calor con el rótulo Tumble Dry Low (Secar en secadora a temperatura baja) o Tumble Dry Warm (Secar en secadora a temperatura cálida). Extra Low (Extrabaja): ofrece la menor temperatura de secado con calor posible. Español - 28 DV455_02836F-08_MES.indd Sec3:28 2013-12-12 5:11:11 Cuando usa los ciclos Manual Dry (Secado manual), puede ajustar el tiempo de secado presionando el botón de Selección de tiempo. Durante el ciclo Sensor Dry (Secado con sensor), el indicador lumínico del tiempo se encuentra apagado porque el tiempo de secado exacto se determina según los niveles de humedad fluctuantes. 6 Botón de selección Señal Cuando el ciclo haya finalizado, se escuchará una señal sonora. Si seleccionó la opción Wrinkle Prevent (Prevención de arrugas), la señal sonora sonará en forma intermitente. Ajuste el volumen de la señal sonora o apáguela presionando el botón Signal (Señal). Presione el botón repetidamente para desplazarse por las opciones. 7 Botón Inicio retardado Cualquier ciclo puede retardarse hasta 24 horas en incrementos de una hora. La hora en pantalla indica el tiempo en el cual comenzará el ciclo. (Consulte la sección “Inicio retardado” en la página 30.) 8 Opción de selección de ciclo Adjust Time (Ajustar tiempo) – se puede agregar o restar tiempo a los tiempos configurados automáticamente en los ciclos de Secado Manual (ciclos Time Dry (Secado con temporizador), Quick Dry (Secado rápido) o Air Fluff (Temperatura ambiente)) y el ciclo Wrinkle Away (Antiarrugas) . Para agregar o restar tiempo al ciclo, presione la tecla Adjust Time (Ajustar tiempo) con la flecha hacia arriba o hacia abajo hasta que aparezca el tiempo deseado. Wrinkle Prevent (Prevención de arrugas)-Wrinkle Prevent (Prevención de arrugas) ofrece aproximadamente 180 minutos de secado intermitente con aire fresco al final de ciclo para reducir la formación de arrugas. Presione el botón Wrinkle Prevent (Prevención de arrugas) para activar dicha función. La luz del indicador arriba de la tecla se iluminará cuando se seleccione Wrinkle Prevent (Prevención de arrugas). La carga está seca y puede ser retirada en cualquier momento durante el ciclo Wrinkle Prevent (Prevención de arrugas). My Cycle (Mi ciclo) – Elija su ciclo favorito, incluidos el ciclo, la temperatura, la opción de nivel de secado, etc.Consulte la sección “Mi Ciclo” en la página 31.) Rack Dry (Secado en estante) - Rack Dry (Secado con Rack) está disponible en el ciclo Time Dry (Tiempo de Secado). La temperatura quedará establecida sólo en Extra Low (Extrabaja). (Consulte la sección “Rack Dry (Secado en estante)” en la página 32.) Mixed Load Bell (Timbre de carga mixta) - es una alarma que le notifica cuando el nivel de secado promedio de una carga ha alcanzado el centrifugado parcial (80% seco). Le permite retirar las prendas que no desea que se sequen completamente o que se secan rápidamente fuera de la secadora mientras deja que otras prendas sigan secándose. Puede seleccionar esta función en todos los ciclos de Sensor Dry (Secado con sensor), excepto Wool (Lana), Sanitize (Desinfección). Las selecciones del nivel de secado se limitan a Normal Dry (Secado normal), More Dry (Más seco) y Very Dry (Muy seco). 9 Botón de selección Inicio/Pausa Presiónelo para detener y reiniciar los programas. 10 Botón Encendido Presiónelo una vez para encender la secadora. Vuelva a presionarlo para apagarla. Si la secadora permanece encendida durante más de 10 minutos sin que se toque ninguno de los botones, se apagará automáticamente. 5 03 MANUAL DE INSTRUCCIONES, SUGERENCIAS Botón de selección Tiempo Español - 29 DV455_02836F-08_MES.indd Sec3:29 2013-12-12 5:11:11 Manual de instrucciones, sugerencias Seguro para niños Evita que los niños jueguen con la secadora. Configuración/Liberación Para activar o desactivar Seguro para niños presione simultáneamente los botones Temp. (Temperatura) y Time (Tiempo) durante 3 segundos. Detalles del Seguro para niños 1. Puede activar el Seguro para niños mientras su secadora está en funcionamiento. 2. Una vez que configure la función Seguro para niños, no responderá ningún botón, excepto el botón Power (Encender/Apagar), hasta que desactive dicha función. 3. Se iluminará el indicador de Seguro para Niños . • Si se vuelve a encender la secadora, la función Seguro para Niños continuará encendida. • Para desactivar el Seguro para niños, siga las instrucciones detalladas a continuación. Cuando otros botones, salvo el botón Power (Encender/Apagar), no respondan, verifique el indicador del Seguro para niños. Si el Seguro para niños está activado, siga las instrucciones precedentes para desactivarlo. Inicio retardado Puede hacer que la secadora inicie automáticamente el programa en otro momento, eligiendo un tiempo de retardo máximo. La hora en pantalla indica el tiempo en el cual comenzará el programa. 1. Establezca su programa de secado. 2. Presione el botón Delay Start (Inicio retardado) hasta establecer el tiempo de retardo. 3. Presione el botón Start/Pause (Inicio/Pausa). El indicador de “Inicio Retardado ” se encenderá y el reloj comenzará la cuenta regresiva hasta llegar al momento establecido. 4. Para cancelar la función de Inicio Retardado, presione el botón Power (Encender/Apagar) y luego encienda la secadora nuevamente. Luz del tambor Enciende el tambor de la secadora mientras se realiza el secado. Encendido y apagado Si desea activar o desactivar Drum Light (Luz del tambor), mantenga presionados los botones Dry Level (Nivel de secado) y Temp. (Temperatura) simultáneamente. Puede activar y desactivar Luz del tambor cuando la secadora está funcionando y cuando está detenida. Si no apaga la luz del tambor 5 minutos después de que se encienda, la luz del tambor se apaga automáticamente. Español - 30 DV455_02836F-08_MES.indd Sec3:30 2013-12-12 5:11:11 Mi Ciclo Cada ciclo cuenta con opciones predeterminadas que se configuran de forma automática. Para observar cuáles son estas opciones predeterminadas, diríjase a la página 37. 4. Presione el botón Start/Pause (Inicio/Pausa). Se inicia el ciclo. 5. Cuando la secadora ejecuta el ciclo, memoriza el ciclo y las opciones. 6. Para ejecutar nuevamente este ciclo en otro momento, presione el botón My Cycle (Mi ciclo). La secadora selecciona automáticamente el ciclo guardado y las opciones. Puede cambiar la configuración de Mi Ciclo repitiendo el proceso descrito más arriba. La secadora utilizará estos ajustes la próxima vez que usted seleccione My Cycle (Mi ciclo). Smart Care Esta función permite comprobar el estado de la secadora con un teléfono inteligente. 03 MANUAL DE INSTRUCCIONES, SUGERENCIAS Le permite seleccionar, guardar y activar un ciclo a medida que incluye las opciones Nivel de secado, Temperatura, etc. en otro momento. Para utilizar Mi ciclo siga estos pasos: 1. Presione el botón My Cycle (Mi ciclo). El indicador de Mi ciclo se ilumina. 2. Seleccione el ciclo que desea incluir utilizando el disco Selector de ciclos. 3. Seleccione y configure las opciones Nivel de secado, Temperatura, etc.) 1. Mantenga presionados los botones Time (Tiempo) y Delay Start (Inicio retardado) durante 3 segundos cuando se produce un error o si no ha presionado ningún botón de la secadora después de encender la alimentación. 2. Si activa la función Smart Care, la LED de la pantalla gira durante 2 o 3 segundos y el código de error aparecerá en la pantalla. 3. Ejecute la Aplicación Smart Care en su teléfono inteligente. La función Smart Care se ha optimizado para: Series Galaxy e iPhone (no es compatible con algunos modelos). 4. Si enfoca la cámara del teléfono inteligente al panel de la pantalla de la secadora, el panel y el mensaje de error se reconocen automáticamente y el tipo de error y la solución se muestran en el teléfono inteligente. 5. Si el teléfono inteligente no reconoce el código de error más de dos veces, ingrese en forma manual el código de error indicado en el panel de la pantalla de la secadora en la aplicación Smart Care. Descarga de la aplicación Smart Care Descargue la Samsung Laundry App en su teléfono celular desde Android Market o Apple App store. (Buscar palabra : Lavadora/secadora inteligente Samsung) Precauciones de uso de Smart Care • Si la luz de un fluorescente o una lámpara se refleja en el panel de la pantalla de la lavadora, es posible que el teléfono inteligente no reconozca fácilmente el panel o el mensaje de error. • Si sostiene el teléfono inteligente en un ángulo demasiado abierto respecto al frontal del panel de la pantalla, es posible que no se reconozca el código de error. Para obtener los mejores resultados, sostenga el teléfono inteligente en una posición paralela o casi paralela respecto al frontal del panel. Español - 31 DV455_02836F-08_MES.indd Sec3:31 2013-12-12 5:11:11 Manual de instrucciones, sugerencias RACK DRY (SECADO EN ESTANTE) Instalación del estante de secado 1. Abra la puerta de la secadora. 2. Coloque el estante de secado en el tambor, con el borde superior del estante de secado encima del filtro para pelusas. 3. Coloque las patas traseras en las dos áreas empotradas de la pared posterior de la secadora y luego empuje hacia abajo en el centro del estante de secado para ajustarlo en su lugar. 4. Coloque las prendas que se secarán sobre el estante, dejando espacio entre ellas para que el aire pueda circular. 5. Cierre la puerta de la secadora. 6. Presione el botón Rack Dry (Secado en estante) en el ciclo Secado con temporizador y luego seleccione el tiempo según la humedad y el peso de las prendas. El secado con rack también se puede utilizar en el ciclo Secado a temperatura ambiente. Estante de secado Puerta PRENDAS SUGERIDAS OPCIONES DE TEMP. SUGERIDAS Suéteres lavables (dóblelos y colóquelos en posición horizontal sobre el estante) Extra Low (Extrabaja) (ciclo Time Dry (Secado con temporizador)) Muñecos de peluche (rellenos con fibras de algodón o poliéster) Extra Low (Extrabaja) (ciclo Time Dry (Secado con temporizador)) Muñecos de peluche (rellenos con goma espuma o goma) Temperatura ambiente Almohadas de goma espuma Temperatura ambiente Zapatillas Temperatura ambiente Secar artículos de goma espuma, plástico o goma con la opción de calor puede ocasionar daños a los artículos y generar un peligro de incendio. Español - 32 DV455_02836F-08_MES.indd Sec3:32 2013-12-12 5:11:12 LIMPIE EL FILTRO PARA PELUSAS Después de cada carga. Para reducir el tiempo de secado. Para hacer uso de la energía con mayor eficacia. Puerta No haga funcionar la secadora sin el filtro para pelusas colocado. Marco delantero Filtro CARGUE LA SECADORA DE MANERA ADECUADA • • • • Coloque sólo una carga de ropa en la secadora por vez. Las cargas de telas pesadas y livianas mezcladas se secan en forma diferente, lo que puede ocasionar que las telas livianas estén secas mientras que las telas pesadas queden húmedas al final del ciclo de secado. Agregue una o más prendas similares a la secadora cuando necesite secar sólo una o dos prendas. Esto mejora el funcionamiento de la secadora y la eficacia del secado. Sobrecargar la secadora limita su funcionamiento y ocasiona un secado desparejo así como la formación excesiva de arrugas en algunas telas. 03 MANUAL DE INSTRUCCIONES, SUGERENCIAS • • • CÓMO COMENZAR 1. 2. 3. 4. 5. 6. Cargue la secadora dejando algo de espacio libre. NO la sobrecargue. Cierre la puerta. Seleccione el ciclo y las opciones apropiadas para el tipo de carga. Presione el botón Inicio/Pausa. Se iluminará la luz del indicador de la secadora. El tiempo del ciclo calculado aparecerá en la pantalla. El tiempo puede fluctuar debido a que los niveles de humedad fluctúan en la secadora. • Cuando haya finalizado el ciclo, la palabra “End” (Fin) aparecerá en la pantalla. • Si presiona Power (Encendido), se cancelará el ciclo y la secadora se detendrá. • Los indicadores de Drying (Secando), Cooling (Enfriando) y Wrinkle Prevent (Prevención de arrugas) se iluminarán durante tales fases del ciclo. No coloque ningún objeto en la parte superior de la secadora cuando está en funcionamiento. ADVERTENCIA Español - 33 DV455_02836F-08_MES.indd Sec3:33 2013-12-12 5:11:12 Manual de instrucciones, sugerencias SENSOR DE VENTILACIÓN Su secadora Samsung está equipada con un sensor de ventilación que detecta y le informa cuándo es momento de limpiar los conductos. Mantenga la seguridad y la eficacia de su secadora limpiando los conductos cuando se le avise. El Sensor de ventilación detecta las obstrucciones de los conductos Puede deducir si hay una obstrucción en los conductos en base a la luz del “Sensor de ventilación digital. Nivel Mensaje Estado ” de la pantalla Solución 0 La luz del “Sensor de ventilación ” se apaga. El conducto está libre de obstrucciones. - 1 La luz del “Sensor de ventilación ” se enciende. Cuando una parte del conducto o el filtro de pelusa está obstruido con pelusa o un objeto extraño. Cuando la resistencia es alta porque el conducto es demasiado largo o está doblado. Verifique la conexión del conducto y acórtelo y enderécelo su fuera necesario. Controle el filtro de pelusa o el conducto y límpielo si fuera necesario. 2 La luz del “Sensor de ventilación ” titila. Cuando el conducto está bloqueado con pelusa o un objeto extraño. Cuando la resistencia es muy alta porque el conducto es demasiado largo o está excesivamente doblado. Verifique la conexión del conducto y acórtelo y enderécelo su fuera necesario. Controle el filtro de pelusa o el conducto y límpielo lo antes posible. En el estado de NIVEL 2, la luz titila durante 3 horas una vez finalizado el ciclo. (Si la función de prevención de arrugas está activada, este mensaje aparece durante 3 horas.) Si se presiona el botón de encendido o se abre la puerta, la secadora se apaga automáticamente. Para obtener más información sobre la instalación de conductos, consulte la sección “Requisitos para el tendido de conductos” en la página 11. • Aunque la secadora está disponible incluso si aparece el mensaje de obstrucción, el tiempo de secado puede extenderse. • Si el mensaje de NIVEL 1 aparece la primera vez que se enciende la secadora después de la instalación, verifique la conexión y limpie el conducto. Si el mensaje de NIVEL 1 aparece a pesar de haber verificado y limpiado los conductos, puede indicar que hay algunas restricciones del conducto debido a la longitud, el estado, etc. Si esto ocurre, puede usar la secadora normalmente y no es necesario tomar otras medidas. Sin embargo, el tiempo de secado puede extenderse o el desempeño del secado puede degradarse. Español - 34 DV455_02836F-08_MES.indd Sec3:34 2013-12-12 5:11:12 CONFIGURACIÓN DEL CONTROL REMOTO Y LA SUPERVISIÓN INTELIGENTE Conecte un módem o un enrutador alámbrico/inalámbrico mediante una conexión inalámbrica, conéctese a www. samsungsmartappliance.com y registre la secadora con el Control Remoto, el servicio de Supervisión inteligente. Las acciones que realice en su secadora desactivarán la función de Control inteligente (Abrir la puerta, tocar el panel LCD, presionar botones, etc.). Este producto no contiene un enrutador inalámbrico. Configuración del módem/enrutador inalámbrico • • • • • Este producto es compatible con el DHCP (Protocolo de configuración de host dinámico). Si desea utilizar un módem/enrutador inalámbrico existente, debe activar la función o el servidor DHCP del módem/enrutador. Configure el canal para la conexión con el módem/enrutador inalámbrico en un canal que no esté en uso. La secadora sólo admite los tipos de encriptación WEP, TKIP o TKIP AES. Otros tipos de encriptación Wi-Fi no se admiten. La calidad de la red inalámbrica puede verse afectada por el entorno que las rodea. Si su proveedor de servicios de Internet ha registrado y fijado la dirección MAC (identificación única de un dispositivo) de su PC o módem, es posible que no pueda conectar la secadora a Internet. Consulte a su proveedor de servicios de Internet sobre los procedimientos para conectar un dispositivo (por Ej.: una secadora) que no sea una computadora a Internet. Si su proveedor de servicios de Internet requiere una identificación y contraseña para conectarse a Internet, es posible que no pueda conectar la secadora a Internet. En ese caso, debe ingresar la identificación y contraseña para conectarse a Internet. Es posible que no pueda conectarse a Internet por un cortafuegos. En este caso, solicite asistencia a su proveedor de servicios de Internet. Si no puede conectar la secadora a Internet incluso después de comunicarse con su proveedor de servicios de Internet, comuníquese con un distribuidor o centro de servicios de Samsung Electronics. 03 MANUAL DE INSTRUCCIONES, SUGERENCIAS La función Control Remoto del modelo electrónico tiene la función de Supervisión inteligente del modelo a gas. Verifique antes de las instalación • • • • Para conocer los procedimientos para instalar un enrutador alámbrico/ inalámbrico normal, consulte el manual del usuario del módem o del enrutador inalámbrico. Las secadoras Samsung son compatibles únicamente con Wi-Fi de 2.4Ghz. Las secadoras Samsung son compatibles con IEEE 802.11 b/g/n y Wi-Fi Directa (se recomienda IEEE802.11n). Si el módem/enrutador inalámbrico no cuenta con una certificación Wi-Fi, no puede conectarse a la secadora. Español - 35 DV455_02836F-08_MES.indd Sec3:35 2013-12-12 5:11:13 Manual de instrucciones, sugerencias Conectarse a la red utilizando el ajuste WPS Esta secadora Samsung usa la Configuración protegida Wi-Fi/Configuración del botón WPS(PBC) cómo método de conexión principal a un módem o enrutador inalámbrico. Si el enrutador o el módem son compatibles con WPS y tienen un botón WPS, es posible conectar fácilmente la secadora al enrutador/módem. 1. Mantenga presionados los botones Temp. (Temperatura) y Start/Pause (Inicio/Pausa) durante 3 segundos. 2. Gire el Selector de ciclos hasta que aparezca “UP” en la pantalla y presione el botón Start/Pause (Inicio/Pausa). Si la conexión no se establece en 5 minutos, aparece “FUP” en la pantalla. 3. Pulse y sostenga el botón WPS del módem/enrutador inalámbrico durante 120 segundos para ejecutar la función WPS. Si la función WPS se ejecuta, el módem/enrutador inalámbrico busca automáticamente la información necesaria para la secadora y la conecta automáticamente a Internet a través del módem/enrutador alámbrico/ inalámbrico. • • • PRECAUCIÓN • El modo como la función WPS ejecuta el módem/enrutador inalámbrico puede variar según el fabricante. Consulte el manual del usuario del enrutador/módem para conocer más detalles. Incluso una vez finalizada la configuración WPS, puede demorar un poco hasta que la conexión real se establezca y se asigne una dirección IP mediante DHCP (hasta 5 minutos). Tenga en cuenta que si utiliza un módem/enrutador inalámbrico que no cuenta con certificación WPS, es posible que la secadora no se conecte mediante el Wi-Fi o que un dispositivo conectado al módem/ enrutador inalámbrico se desconecte. Tenga en cuenta en ciertos módems/enrutadores inalámbricos, si mantiene presionado el botón WPS durante un momento, se puede restablece la configuración del enrutador/módem. 4. Si la secadora y el módem/enrutador inalámbrico están conectados correctamente, el indicador titila en la pantalla durante 30 segundos. 5. Mantenga presionado el botón Señal act./desact. durante 3 segundos para finalizar la configuración de la conexión del Control inteligente. Cuando la configuración finaliza normalmente, el indicador titila en la pantalla y emite un sonido. Si mantiene presionado el botón Señal act./desact. durante 3 segundos cuando el enrutador alámbrico/inalámbrico de la secadora no está conectado correctamente, se escucha el sonido de botón no válido y la configuración de la conexión del Control inteligente no finaliza. Español - 36 DV455_02836F-08_MES.indd Sec3:36 2013-12-12 5:11:13 Conectarse a la red mediante la aplicación Samsung Laundry 03 MANUAL DE INSTRUCCIONES, SUGERENCIAS 1. Mantenga presionados los botones Temp. (Temperatura) y Start/Pause (Inicio/Pausa) durante 3 segundos. 2. Si “AP” aparece en la pantalla, presione el botón Start/Pause (Inicio/Pausa). Si la conexión no se establece en 5 minutos, aparece “FAP” en la pantalla. Español - 37 DV455_02836F-08_MES.indd Sec3:37 2013-12-12 5:11:17 Manual de instrucciones, sugerencias USO DE LA APLICACIÓN MÓVIL (ANDROID) Descarga de la aplicación del teléfono 1. Toque el teléfono para que aparezca el menú de aplicaciones. Luego busque el ícono de “Play Store” y ábralo. 2. Una vez abierto “Play Store”, realice una búsqueda. 3. Cuando aparezca el cuadro de búsqueda, escriba “Samsung Smart Washer/Dryer (Lavadora/secadora inteligente SAMSUNG)”. Español - 38 DV455_02836F-08_MES.indd Sec3:38 2013-12-12 5:11:18 4. Una vez finalizada la búsqueda, aparecerá en pantalla la aplicación para “Samsung Smart Washer/Dryer (Lavadora/ secadora inteligente SAMSUNG)”. Debe descargar esta aplicación al teléfono. 03 MANUAL DE INSTRUCCIONES, SUGERENCIAS Asegúrese de que la aplicación cambie de “Free (Libre)” a “Installed (Instalada)” 5. Una vez que haya descargado la aplicación en el teléfono, podrá configurar el control Wi-Fi de la secadora. PASO 1 Figura 1 Figura 2 Primero debe presionar el botón de encendido para activar la máquina. Puede activarla para cualquier ciclo de secado. (Consulte las figuras 1~2) Figura 4 Después de activar la máquina, presione los botones Temp. (Temperatura) y Start/Pause (Inicio/ Pausa) simultáneamente durante 3 segundos. Después de 3 segundos, aparece el menú “AP” en la pantalla LED. (Consulte las figuras 3~4) PASO 2 Figura 3 Español - 39 DV455_02836F-08_MES.indd Sec3:39 2013-12-12 5:11:18 Manual de instrucciones, sugerencias PASO 3 Una vez que aparezca el menú AP en la pantalla LED, espere aproximadamente 1 minuto y presione el botón Start/Pause (Inicio/Pausa). Al presionar este botón, el menú “AP” que aparece en la pantalla LED debería comenzar a parpadear. El módulo Wi-Fi demorará aproximadamente un minuto para estar listo. Por lo tanto, si al presionar el botón Start/Pause (Inicio/Pausa) el menú “AP” no parpadea, inténtelo nuevamente. (Consulte la figura 5) Figura 5 PASO 4 Figura 6 Figura 7 Cuando el menú “AP” esté parpadeando, presione el ícono “Settings (Configuración)” del teléfono móvil. Cuando aparezca el menú de configuración, presione la sección Wireless and network (Inalámbrica y red). (Consulte las figuras 5~7) PASO 5 Figura 8 Figura 9 Una vez que haya seleccionado Wireless and network (Inalámbrica y red), seleccione Wi-Fi setting (Configuración Wi-Fi). Luego active el Wi-Fi. (Consulte las figuras 8~9) Español - 40 DV455_02836F-08_MES.indd Sec3:40 2013-12-12 5:11:19 PASO 6 Cuando aparezca la lista de redes disponibles, seleccione la red que desea utilizar e ingrese la contraseña de ser necesario. Una vez que se haya conectado a la red seleccionada, regrese a la pantalla de aplicaciones del teléfono móvil. Cuando esté en la pantalla de aplicaciones del teléfono, toque el ícono de la “Lavadora/secadora inteligente SAMSUNG” que descargó al comienzo del proceso. 03 MANUAL DE INSTRUCCIONES, SUGERENCIAS PASO 7 PASO 8 Después de abrir la aplicación Samsung, seleccione "Connection Setup" (Configuración de conexión). Español - 41 DV455_02836F-08_MES.indd Sec3:41 2013-12-12 5:11:19 Manual de instrucciones, sugerencias PASO 9 Una vez abierta la aplicación móvil, seleccione la tecla “Setting Start (Iniciar configuraciones)”. El indicador de Wi-Fi se encenderá y se apagará en el teléfono varias veces. PASO 10 Cuando la unidad empiece a conectarse, la lista de AP se cargará en el teléfono. Una vez cargada la lista de AP, debe seleccionar la red. Asegúrese de que la aplicación y el teléfono inteligente estén conectados a la misma red/AP inalámbrica. PASO 11 Después de seleccionar la red, debe ingresar la contraseña. Una vez ingresada la contraseña, seleccione “Connect (Conectar)”. La unidad comienza a configurar la red. Este proceso le suministra al producto la información de conexión de la “AP” que se conecta al teléfono móvil. Español - 42 DV455_02836F-08_MES.indd Sec3:42 2013-12-12 5:11:20 PASO 12 PASO 13 Una vez que el teléfono esté conectado a la máquina, presione los botones Temp. (Temperatura) y Start/Pause (Inicio/Pausa) simultáneamente durante 3 segundos. Después de 3 segundos, en la pantalla LED se visualizará el ciclo de secado original. 03 MANUAL DE INSTRUCCIONES, SUGERENCIAS Una vez que se haya configurado la red, en la unidad se visualizará “Transfer complete (Transferencia completada)”. Después de que finalice la transferencia, seleccione “Confirm (Confirmar)”. En la unidad se visualizará “oAP”. El teléfono ahora está conectado a la máquina a través de la red. PASO 14 Después de visualizar el ciclo de secado, espere aproximadamente 1 minuto. Observará que el ícono de Wi-Fi comienza a parpadear. PASO 15 Cuando el ícono de Wi-Fi aparezca en pantalla, presione el botón “Signal (Señal)” y manténgalo presionado durante 3 segundos. El ícono de Wi-Fi dejará de parpadear. La máquina ya está lista para que se le realice la certificación de dispositivos. Español - 43 DV455_02836F-08_MES.indd Sec3:43 2013-12-12 5:11:20 Manual de instrucciones, sugerencias Certificación de dispositivos 1. La “Certificación de dispositivos” sólo debe realizarse con la configuración inicial. Toque la pestaña “Indoor Control (Control del interior)” para buscar el nombre de la secadora. Cuando aparezca el nombre de la secadora, toque la pestaña. Figura 1 Figura 2 2. Verifique que el ícono de Wi-Fi no parpadee. Presione los botones Temp. (Temperatura) y Start/Pause (Inicio/Pausa) simultáneamente durante 3 segundos. En la pantalla se visualizará “AP”. Figura 3 3. Después de tocar la pestaña del nombre de la secadora, debe tocar la pestaña de confirmación para continuar con la certificación. Figura 4 Español - 44 DV455_02836F-08_MES.indd Sec3:44 2013-12-12 5:11:21 Figura 5 5. Siga las instrucciones que aparecen en la pantalla del teléfono para comenzar la configuración de la secadora. Figura 6 6. Una vez que aparezca “AP”, debe girar el dial en el sentido de las agujas del reloj hasta visualizar “PS” en la pantalla. Cuando visualice “PS”, presione el botón Start/Pause (Inicio/Pausa). Figura 7 03 MANUAL DE INSTRUCCIONES, SUGERENCIAS 4. Después de tocar la pestaña de confirmación, comenzará a preparar la certificación. Español - 45 DV455_02836F-08_MES.indd Sec3:45 2013-12-12 5:11:22 Manual de instrucciones, sugerencias 7. Al presionar el botón Start/Pause (Inicio/Pausa), “PS” comenzará a parpadear. Cuando comience a parpadear, el teléfono automáticamente empezará a conectarse. Figura 8 8. Después de visualizar “PS”, presione los botones Temp. (Temperatura) y Start/Pause (Inicio/Pausa) simultáneamente durante 3 segundos. Espere hasta que el ícono Smart Control Enabled (Control inteligente habilitado) [ ] comience a parpadear. Cuando el ícono Smart Control Enabled (Control inteligente habilitado) comience a parpadear, mantenga pulsado el botón Signal On/Off (Señal act./desact.) durante 3 segundos para activar el control inteligente. Cuando el control inteligente está habilitado, el ícono Smart Control Enabled (Control inteligente habilitado) [ ] se enciende. Figura 9 9. Presione la pestaña del nombre de la secadora para establecer conexión con la secadora. Figura 10 Español - 46 DV455_02836F-08_MES.indd Sec3:46 2013-12-12 5:11:22 Figura 11 11. Finalizó la Certificación de dispositivos y la secadora está conectada a su teléfono inteligente. Figura 12 03 MANUAL DE INSTRUCCIONES, SUGERENCIAS 10. Ahora la secadora está conectada. Toque el botón "Course" (Programa) y podrá controlar la secadora desde su teléfono. Español - 47 DV455_02836F-08_MES.indd Sec3:47 2013-12-12 5:11:23 Manual de instrucciones, sugerencias Uso de la aplicación móvil PASO 1 Asegúrese de que el ícono de Wi-Fi no parpadee. Si el ícono parpadea, presione el botón Signal (Señal) y manténgalo presionado hasta que el ícono deje de parpadear. Cuando se active el ícono de la traba de la puerta, la unidad estará lista. Ahora presione el ícono de la “Lavadora/ secadora inteligente SAMSUNG”. PASO 2 Cuando toque el ícono de la “Samsung Smart Washer/Dryer (Lavadora/secadora inteligente SAMSUNG)”, el teléfono buscará la secadora. Una vez que el teléfono se conecte con la secadora, aparecerá el nombre de la secadora o “MAC”. Ahora toque el nombre de la secadora. PASO 3 Una vez establecida la conexión, toque el botón "Course" (Programa). En la pantalla de la unidad debe visualizarse "Choose Cycle" (Seleccionar ciclo). Cuando visualice la pantalla Choose Cycle (Seleccionar ciclo), toque la pestaña "Start" (Inicio) en el ángulo inferior izquierdo. Español - 48 DV455_02836F-08_MES.indd Sec3:48 2013-12-12 5:11:23 PASO 4 03 MANUAL DE INSTRUCCIONES, SUGERENCIAS Ahora toque el botón “Start (Inicio)” y active el ciclo de secado. Puede controlar el ciclo de secado para verificar el estado del ciclo. Cuando el ciclo finalice, en el teléfono se visualizará “Cycle completes (Ciclo completo)”. Español - 49 DV455_02836F-08_MES.indd Sec3:49 2013-12-12 5:11:24 Manual de instrucciones, sugerencias USO DE LA APLICACIÓN MÓVIL (IOS) Descarga de la aplicación del teléfono 1. Busque el ícono de “App Store” y ábralo. 2. Una vez abierto “App Store”, realice una búsqueda. 3. Cuando aparezca el cuadro de búsqueda, escriba “SAMSUNG Smart Washer/Dryer (Lavadora/secadora inteligente SAMSUNG)”. Español - 50 DV455_02836F-08_MES.indd Sec3:50 2013-12-12 5:11:24 4. Una vez finalizada la búsqueda, aparecerá en pantalla la aplicación para “SAMSUNG Smart Washer/Dryer (Lavadora/secadora inteligente SAMSUNG)”. Debe descargar esta aplicación al teléfono. 03 MANUAL DE INSTRUCCIONES, SUGERENCIAS Asegúrese de que la aplicación cambie de “Free (Libre)” a “Installed (Instalada)” 5. Una vez que haya descargado la aplicación en el teléfono, podrá configurar el control Wi-Fi de la secadora. PASO 1 Figura 1 Figura 2 Primero debe presionar el botón de encendido para activar la máquina. Puede activarla para cualquier ciclo de secado. (Consulte las figuras 1~2) Figura 4 Después de activar la máquina, presione los botones Temp. (Temperatura) y Start/Pause (Inicio/ Pausa) simultáneamente durante 3 segundos. Después de 3 segundos, aparece el menú “AP” en la pantalla LED. (Consulte las figuras 3~4) PASO 2 Figura 3 Español - 51 DV455_02836F-08_MES.indd Sec3:51 2013-12-12 5:11:24 Manual de instrucciones, sugerencias PASO 3 Una vez que aparezca el menú AP en la pantalla LED, espere aproximadamente 1 minuto y presione el botón Start/Pause (Inicio/Pausa). Al presionar este botón, el menú “AP” que aparece en la pantalla LED debería comenzar a parpadear. El módulo Wi-Fi demorará aproximadamente un minuto para estar listo. Por lo tanto, si al presionar el botón Start/Pause (Inicio/Pausa) el menú “AP” no parpadea, inténtelo nuevamente. (Consulte la figura 5) Figura 5 PASO 4 Figura 6 Figura 7 Cuando el menú “AP” esté parpadeando, presione el ícono “Settings (Configuración)” del teléfono móvil. Cuando aparezca el menú de configuración, presione el ícono de Wi-Fi. (Consulte las figuras 5~7) Figura 9 Observará “SMARTWASHER (Lavadora inteligente)” en la lista de Wi-Fi. Seleccione SMARTWASHER e ingrese la contraseña (WASHER2012). Debe ingresarla en mayúsculas. Después de escribir la contraseña, seleccione el botón Join (Unir). (Consulte las figuras 8~9) PASO 5 Figura 8 PASO 6 Una vez que se haya conectado a la red seleccionada, regrese a la pantalla de aplicaciones del teléfono móvil. Cuando esté en la pantalla de aplicaciones del teléfono, toque el ícono de la “SAMSUNG Smart Washer/Dryer (Lavadora/secadora inteligente SAMSUNG)” que descargó al comienzo del proceso. Español - 52 DV455_02836F-08_MES.indd Sec3:52 2013-12-12 5:11:25 PASO 7 Después de abrir la aplicación Samsung, seleccione "Connection Setup" (Configuración de conexión). Toque el botón “Setting Start (Iniciar configuraciones)” e ingrese el SSID, el tipo de autenticación y de encriptación, y la contraseña de AP. Este proceso le suministra al producto la información de conexión de la “AP” que se conecta al teléfono móvil. 03 MANUAL DE INSTRUCCIONES, SUGERENCIAS PASO 8 Verifique la opción de seguridad del enrutador y luego vuelva a configurar la red inalámbrica como se indica a continuación. - seleccione el modo de Seguridad: WPA y encriptación: TKIP - seleccione el modo de Seguridad: WPA2 y encriptación: AES - consulte el manual del enrutador inalámbrico para conocer la opción de seguridad del enrutador inalámbrico. PASO 9 Una vez que se haya configurado la red, en la unidad se visualizará “Transfer complete (Transferencia completada)”. Después de que finalice la transferencia, seleccione “Confirm (Confirmar)”. En la unidad se visualizará “oAP”. El teléfono ahora está conectado a la máquina a través de la red. Español - 53 DV455_02836F-08_MES.indd Sec3:53 2013-12-12 5:11:25 Manual de instrucciones, sugerencias PASO 10 Una vez que el teléfono esté conectado a la máquina, presione los botones Temp. (Temperatura) y Start/Pause (Inicio/Pausa) simultáneamente durante 3 segundos. Después de 3 segundos, en la pantalla LED se visualizará el ciclo de secado original. PASO 11 Después de visualizar el ciclo de secado, espere aproximadamente 1 minuto. Observará que el ícono de Wi-Fi comienza a parpadear. PASO 12 Cuando el ícono de Wi-Fi aparezca en pantalla, presione el botón “Signal (Señal)” y manténgalo presionado durante 3 segundos. El ícono de Wi-Fi dejará de parpadear. La máquina ya está lista para que se le realice la certificación de dispositivos. Español - 54 DV455_02836F-08_MES.indd Sec3:54 2013-12-12 5:11:26 Certificación de dispositivos Figura 1 Figura 2 2. Verifique que el ícono de Wi-Fi no parpadee. Presione los botones Temp. (Temperatura) y Start/Pause (Inicio/Pausa) simultáneamente durante 3 segundos. En la pantalla se visualizará “AP”. Figura 3 3. Después de tocar la pestaña del nombre de la lavadora, debe tocar la pestaña de confirmación para continuar con la certificación. Figura 4 4. Después de tocar la pestaña de confirmación, comenzará a preparar la certificación. Figura 5 03 MANUAL DE INSTRUCCIONES, SUGERENCIAS 1. La “Certificación de dispositivos” sólo debe realizarse con la configuración inicial. Toque la pestaña “Indoor Control (Control del interior)” para buscar el nombre de la secadora. Cuando aparezca el nombre de la secadora, toque la pestaña. Español - 55 DV455_02836F-08_MES.indd Sec3:55 2013-12-12 5:11:27 Manual de instrucciones, sugerencias 5. Siga las instrucciones que aparecen en la pantalla del teléfono para comenzar la configuración de la secadora. Figura 6 6. Una vez que aparezca “AP”, debe girar el dial en el sentido de las agujas del reloj hasta visualizar “PS” en la pantalla. Cuando visualice “PS”, presione el botón Start/Pause (Inicio/Pausa). Figura 7 7. Al presionar el botón Start/Pause (Inicio/Pausa), “PS” comenzará a parpadear. Cuando comience a parpadear, el teléfono automáticamente empezará a conectarse. Figura 8 8. Después de visualizar “PS”, presione los botones Temp. (Temperatura) y Start/Pause (Inicio/Pausa) simultáneamente durante 3 segundos. Espere hasta que el ícono Smart Control Enabled (Control inteligente habilitado) [ ] comience a parpadear. Cuando el ícono Smart Control Enabled (Control inteligente habilitado) comience a parpadear, mantenga pulsado el botón Signal On/Off (Señal act./desact.) durante 3 segundos para activar el control inteligente. Cuando el control inteligente está habilitado, el ícono Smart Control Enabled (Control inteligente habilitado) [ ] se enciende. Figura 9 Español - 56 DV455_02836F-08_MES.indd Sec3:56 2013-12-12 5:11:27 Figura 10 10. Ahora la secadora está conectada. Toque el botón "Course" (Programa) y podrá controlar la secadora desde su teléfono. Figura 11 11. Finalizó la Certificación de dispositivos y la secadora está conectada a su teléfono inteligente. Figura 12 03 MANUAL DE INSTRUCCIONES, SUGERENCIAS 9. Presione la pestaña del nombre de la secadora para establecer conexión con la secadora. Español - 57 DV455_02836F-08_MES.indd Sec3:57 2013-12-12 5:11:28 Manual de instrucciones, sugerencias Uso de la aplicación móvil PASO 1 Asegúrese de que el ícono de Wi-Fi no parpadee. Si el ícono parpadea, presione el botón Signal (Señal) y manténgalo presionado hasta que el ícono deje de parpadear. Cuando se active el ícono de la traba de la puerta, la unidad estará lista. Ahora presione el ícono de la “SAMSUNG Smart Washer/Dryer (Lavadora/secadora inteligente SAMSUNG)”. PASO 2 Cuando toque el ícono de la “SAMSUNG Smart Washer/Dryer (Lavadora/secadora inteligente SAMSUNG)”, el teléfono buscará la secadora. Una vez que el teléfono se conecte con la secadora, aparecerá el nombre de la secadora o “MAC”. Ahora toque el nombre de la secadora. PASO 3 Una vez establecida la conexión, toque el botón "Course" (Programa). En la pantalla de la unidad debe visualizarse "Choose Cycle" (Seleccionar ciclo). Cuando visualice la pantalla Choose Cycle (Seleccionar ciclo), toque la pestaña “Start” (Inicio). Español - 58 DV455_02836F-08_MES.indd Sec3:58 2013-12-12 5:11:28 PASO 4 03 MANUAL DE INSTRUCCIONES, SUGERENCIAS Ahora toque el botón “Start (Inicio)” y active el ciclo de lavado. Puede controlar el ciclo de lavado para verificar el estado del ciclo. Cuando el ciclo finalice, en el teléfono se visualizará “Cycle Completes (Ciclo completo)”. Español - 59 DV455_02836F-08_MES.indd Sec3:59 2013-12-12 5:11:28 Manual de instrucciones, sugerencias Registrar su secadora 1. Acceda al sitio web Samsung Smart appliance (Dispositivo inteligente de Samsung). (http://www.samsungsmartappliance.com) 2. Ingrese la identificación de usuario y contraseña para iniciar la sesión. Si no tiene una cuenta, presione “Create a Samsung account (Crear una cuenta Samsung)” y complete el formulario para convertirse en miembro. 3. Seleccione “My page (Mi página)” “My page (Mi página)”. 4. Seleccione “Add device (Agregar dispositivo)”. 5. Buque el número MAC de su secadora e ingréselo en la página del dispositivo. En su secadora: 1) Mantenga presionados los botones Temp. (Temperatura) y Start/Pause (Inicio/Pausa) durante 3 segundos. 2) Gire el Selector de ciclos hasta que aparezca “AP” en la pantalla y presione el botón Start/Pause (Inicio/Pausa). Aparece la dirección MAC. 3) Averigüe la Dirección Hexadecimal 12, presionando los botones Start/Pause (Inicio/Pausa) de los 2 dígitos y texto. 6. Haga clic en “Certificar dispositivo”. Español - 60 DV455_02836F-08_MES.indd Sec3:60 2013-12-12 5:11:29 03 MANUAL DE INSTRUCCIONES, SUGERENCIAS 7. Mantenga presionados los botones Temp. (Temperatura) y Start/Pause (Inicio/Pausa) durante 3 segundos. 8. Gire el Selector de ciclos hasta que aparezca PS en la pantalla y presione el botón Start/Pause (Inicio/Pausa). 9. Cuando aparezca la ventana certificar dispositivo, haga clic en “Aceptar”. Si la secadora que está registrando ya ha sido registrada por otros usuarios, aparecerá una ventana preguntándole si desea eliminar la autorización de uso de los usuarios existentes o no. 10. Una vez finalizado el registro de la secadora, puede ver las secadoras registradas en la lista de información de dispositivos. Dirección Mac: Tabla de mapeo de visualizadores de 7 segmentos 0 1 2 3 4 5 A B C D E F Etiqueta de Mac Ejemplo de dirección Mac 6 7 8 9 90A4DE89B2D3 Visualizadores de 7 segmentos Español - 61 DV455_02836F-08_MES.indd Sec3:61 2013-12-12 5:11:29 Cuidado y limpieza PANEL DE CONTROL Limpie con un paño suave y húmedo. No utilice sustancias abrasivas. No rocíe el panel directamente con limpiadores en aerosol. El acabado del panel de control puede dañarse a causa de algunos productos removedores de suciedad y manchas de tratamiento previo al lavado. Aplique dichos productos lejos de la secadora y limpie el líquido derramado o el rocío inmediatamente. TAMBOR Elimine todas las manchas ocasionadas por crayón, tinta o tintura de la tela (proveniente de artículos nuevos, tales como toallas o jeans) con un limpiador común. Posteriormente, seque las toallas o prendas viejas para eliminar restos de manchas o solución de limpieza. Una vez que se hayan seguido estos pasos, es posible que las manchas aún sean visibles, pero no se transferirán a las cargas subsiguientes. TAMBOR DE ACERO INOXIDABLE Para limpiar el tambor de acero inoxidable, use un paño humedecido con un limpiador suave, no abrasivo, adecuado para superficies de acero inoxidable. Elimine los residuos del limpiador y seque con un paño limpio. EXTERIOR DE LA SECADORA Limpie con un paño suave y húmedo. No utilice sustancias abrasivas. Proteja la superficie de objetos afilados. No coloque objetos pesados ni afilados ni tampoco el paquete de detergente sobre la secadora. Manténgalos apartados sobre el pedestal o en una caja de almacenaje, que puede adquirir por separado. La cubierta superior de la secadora se podría rayar o dañar. Ya que toda la secadora tiene un acabado brillante, la superficie se puede rayar o dañar fácilmente. Evite rayar o dañar la superficie cuando use la secadora. SISTEMA DE DRENAJE DE LA SECADORA Para mantener un óptimo desempeño, se lo debe inspeccionar y limpiar todos los años. La tapa de drenaje exterior debe limpiarse con más frecuencia para garantizar un funcionamiento adecuado. Español - 62 DV455_02836F-08_MES.indd Sec5:62 2013-12-12 5:11:30 Sugerencias para prendas especiales SUGERENCIAS PARA PRENDAS ESPECIALES Siga las instrucciones del fabricante o de la etiqueta de indicaciones para secar prendas especiales. Si no se dispone de etiquetas con indicaciones, use la siguiente información como guía. • • • Ropa de cama • • Cortinas y paños de tela • • Siga las instrucciones de la etiqueta con indicaciones o seque en el ciclo Ropa de cama. Asegúrese de que la prenda esté completamente seca antes de usarla o guardarla. Tal vez deba volver a colocarla para garantizar un secado uniforme. Utilice el ciclo Normal (Normal) y seque de a una sola frazada por vez para lograr un mejor funcionamiento de la secadora. Asegúrese de que la prenda esté completamente seca antes de usarla o guardarla. Utilice el ciclo Perm Press (Plancha permanente) y la temperatura Low (Baja) o Extra Low (Extrabaja) para reducir la formación de arrugas. Seque estos artículos en tandas pequeñas para obtener mejores resultados y retírelos lo antes posible. Pañales de tela • Utilice el ciclo Normal (Normal) y la temperatura High (Alta) para pañales suaves y mullidos. Prendas con relleno de plumas (chaquetas, bolsas de dormir, edredones, etc.) • • Utilice el ciclo Normal y la opción de temperatura Baja o Extrabaja. Agregar toallas secas acorta el tiempo de secado y absorbe la humedad. Goma espuma (reverso de alfombras, muñecos de peluche, hombreras, etc.) • NO seque con el ciclo de secado con calor. Use el ciclo Secado a temperatura ambiente (sin calor). ADVERTENCIA – Secar un artículo de goma con calor puede dañarlo u ocasionar un riesgo de incendio. Almohadas • • • • Plásticos (cortinas de baño, cubiertas de muebles para exteriores, etc.) • 05 SUGERENCIAS PARA PRENDAS ESPECIALES Cubrecamas y edredones Utilice el ciclo Normal (Normal). Agregue un par de toallas secas y un par de zapatillas limpias para mejorar el funcionamiento de la secadora y secar el artículo. NO seque almohadas de capoc o de goma espuma en la secadora. Utilice el ciclo Air Fluff (Secado a temperatura ambiente). Utilice el ciclo Secado a temperatura ambiente o el ciclo Secado con temporizador y la opción de temperatura Baja o Extrabaja de acuerdo con las instrucciones de la etiqueta. ARTICULOS QUE SE DEBE EVITAR PONER EN LA SECADORA: • Artículos de fibra de vidrio (cortinas, paños de tela, etc.). • Lanas, salvo que se recomiende en la etiqueta. • Artículos embebidos en aceite vegetal o de cocina. Español - 63 DV455_02836F-08_MES.indd Sec4:63 2013-12-12 5:11:30 Solución de problemas CONTROLE ESTOS PUNTOS SI SU SECADORA... PROBLEMA SOLUCIÓN No funciona. • • • • No calienta. • • • • • No seca. • • • • • • • • • Hace ruido. • • • • No seca de manera uniforme. • • Asegúrese de que la puerta esté cerrada con traba. Asegúrese de que el cable de alimentación esté enchufado a un tomacorriente que funcione. Controle los disyuntores y fusibles de la casa. Presione el botón Start/Pause (Inicio/Pausa) nuevamente si la puerta se abre durante el ciclo. Controle los disyuntores y fusibles de la casa. Seleccione una opción de secado con calor distinta de Air Fluff (Secado a temperatura ambiente). En una secadora a gas, verifique que el suministro de gas esté abierto. Limpie el filtro atrapapelusas y el conducto de drenaje. La secadora puede haberse desplazado a la fase de enfriamiento del ciclo. Verifique todos los ítem anteriores y, además... Asegúrese de que la tapa de drenaje hacia el exterior de la casa se pueda abrir y cerrar sin inconvenientes. Verifique que el sistema de drenaje no presente obstrucciones. Los conductos deben inspeccionarse y limpiarse todos los años. Utilice un conducto de drenaje de metal rígido, de 4”. No la sobrecargue. 1 carga de lavado = 1 carga de secado. Separe los artículos pesados de los artículos livianos. Es posible que sea necesario volver a colocar los artículos grandes y voluminosos, como las frazadas o los edredones, para garantizar un secado uniforme. Verifique que la secadora esté drenando en forma correcta para extraer el agua de la carga adecuadamente. Es posible que la carga sea demasiado pequeña como para secarse correctamente. Agregue algunas toallas. Verifique si en la carga hay objetos tales como monedas, botones flojos, clavos, etc. Retírelos de inmediato. Es normal escuchar el ruido de la válvula de gas de la secadora o que el ciclo del dispositivo de calor se enciende o se apaga durante el ciclo de secado. Asegúrese de que la secadora esté correctamente nivelada tal como se describe en las instrucciones de instalación. Es normal que la secadora emita un zumbido debido a alta velocidad del aire que se mueve por el tambor de la secadora y el sistema de drenaje. Es posible que las costuras, los bolsillos y otras áreas resistentes similares no se sequen por completo cuando el resto de la carga ha llegado al nivel de secado seleccionado. Esto es normal. Seleccione la opción Very Dry (Super secado) si lo desea. Si se seca un artículo pesado con una carga liviana, por ejemplo una toalla con sábanas, es posible que el artículo pesado no se seque completamente cuando el resto de la carga ha alcanzado el nivel de secado seleccionado. Separe los artículos pesados de los artículos livianos para obtener mejores resultados. Español - 64 DV455_02836F-08_MES.indd Sec6:64 2013-12-12 5:11:30 PROBLEMA SOLUCIÓN Tiene olor. • Se apaga antes de que la carga esté seca • • Pelusa en las prendas • La carga de la secadora es demasiado pequeña. Agregue más prendas o algunas toallas y reinicie el ciclo. La carga de la secadora es demasiado grande. Retire algunas prendas y vuelva poner en funcionamiento la secadora. • • Limpie el filtro para pelusas antes de cada carga. Con algunas cargas que producen grandes cantidades de pelusa, quizá sea necesario limpiar el filtro durante el ciclo. Algunas telas producen pelusa (por ejemplo, una toalla de algodón blanco con mucho pelo) y deben secarse por separado de las prendas que atrapan pelusa (por ejemplo, un par de pantalones de lino negro) Divida las cargas grandes en cargas más pequeñas para el secado Revise bien los bolsillos antes de lavar y secar las prendas. Prendas arrugadas después del ciclo Antiarrugas • • Funciona mejor con cargas pequeñas de 1 a 4 prendas. Cargue menos prendas. Cargue prendas similares. Quedan olores en la ropa después de Refrescar. • Las telas que contienen olores fuertes deben lavarse en un ciclo normal. Gotea agua de la boquilla cuando comienza Proceso de vapor • Esto se debe a la condensación del vapor. El goteo de agua se detendrá en unos minutos. No se ve el agua rociada durante Proceso de vapor • El agua rociada es difícil de ver cuando la puerta está cerrada • 06 SOLUCIÓN DE PROBLEMAS • Los olores del hogar, ya sea que provengan de pintura, barniz, limpiadores potentes, etc., pueden ingresar en la secadora con el aire del ambiente. Esto es normal puesto que la secadora extrae el aire de la habitación, lo calienta y lo hace circular por el tambor y lo expulsa a través del drenaje hacia el exterior. Cuando estos olores permanecen en el aire, ventile bien la habitación antes de usar la secadora. Español - 65 DV455_02836F-08_MES.indd Sec6:65 2013-12-12 5:11:30 Solución de problemas CÓDIGOS DE INFORMACIÓN Pueden aparecer códigos de información para ayudarle a comprender mejor qué ocurre con la secadora. PANTALLA DE ERROR SIGNIFICADO SOLUCIÓN tE La resistencia del termistor es muy baja o muy alta. Limpie el filtro o el conducto de ventilación. Si el problema continúa, llame al servicio técnico. tE3 La resistencia del termistor para la detección del bloqueo de la ventilación es muy baja o muy alta. Limpie el filtro o el conducto de ventilación Si el problema continúa, llame al servicio técnico. HE Temperatura de calentamiento no válida cuando la secadora está en funcionamiento. Comuníquese con el servicio técnico. dE La secadora funciona con la puerta abierta Limpie la puerta y luego reinicie. Si el problema continúa, llame al servicio técnico. bE2 Estado no válido de un circuito corto clave durante 30 segundos Asegúrese de que NO haya botones presionados constantemente. Pruebe reiniciar el ciclo. Si el problema continúa, llame al servicio técnico. FE Frecuencia de fuente de alimentación no válida Pruebe reiniciar el ciclo. Si el problema continúa, llame al servicio técnico. 2E Problemas con el control electrónico (Falla de sobrevoltaje) Comuníquese con el servicio técnico. AE Problemas con el control electrónico (Erro de comunicación) Comuníquese con el servicio técnico. Et Estado no válido de la comunicación Eeprom Comuníquese con el servicio técnico. AE4 Un error de comunicación entre la PBA Wi-Fi y la PBA principal Comuníquese con el servicio al cliente. AE3 Un error de comunicación entre el módem DR y la PBA principal Comuníquese con el servicio al cliente. AE5 Un error de comunicación entre la PBA LCD y la PBA principal Comuníquese con el servicio al cliente. dF Estado de la puerta no válido durante más de 256 milisegundos. Comuníquese con el servicio técnico. Para los códigos que no figuran más arriba, llame al 1-800-SAMSUNG (726-7864) Español - 66 DV455_02836F-08_MES.indd Sec6:66 2013-12-12 5:11:30 PREGUNTAS Y RESPUESTAS SOBRE LA CONFIGURACIÓN DE RED RESPUESTA La lavadora o secadora no se encuentra en la aplicación del teléfono inteligente. • • • • • Controle el estado de alimentación del punto de acceso (AP). Verifique si el teléfono inteligente está conectado con Wi-Fi. Verifique si la función Wi-Fi de la lavadora o secadora está encendida. Para actualizar la pantalla, presione “Configurar” nuevamente. Si el AP está instalado demasiado lejos de la lavadora o secadora, la potencia de la señal Wi-Fi puede ser débil. En este caso, acerque el AP a la lavadora o secadora. La lavadora o la secadora no pueden encontrar el punto de acceso (AP). • • • • Controle el estado de alimentación del AP. Verifique si la función Wi-Fi de la lavadora o secadora está encendida. Para actualizar la pantalla, presione “Configurar” nuevamente. Si el AP está instalado demasiado lejos de la lavadora o secadora, la potencia de la señal Wi-Fi puede ser débil. En este caso, acerque el AP a la lavadora o secadora. Asegúrese de que el número de barras de antena que aparecen sea al menos 3. Si la potencia del AP es baja, es posible que la lavadora o secadora no puedan encontrarlo. Utilice un AP de alto desempeño si está disponible. • Hay más de una lavadora o secadora en la casa. ¿Debo instalar un AP para cada uno? • • • ¿Que clase de AP (punto de acceso) debo usar? • • • ¿Cómo puedo verificar si el AP no funciona? • • • 06 SOLUCIÓN DE PROBLEMAS PREGUNTA Puede instalar sólo un AP. Si desea instalar un AP para cada lavadora y secadora, seleccione el AP correspondiente para cada uno de los productos de la aplicación “Lavadora inteligente”. Cuando hay una lavadora y una secadora instaladas, pueden controlarse a través de un AP. Dado que la lavadora o secadora se controla a través del AP desde adentro o afuera de la casa, recomendamos un AP de alto desempeño. Utilice un AP con marca de certificación Wi-Fi. Dado que un AP con 2 o más antenas ofrece un mejor desempeño, le recomendamos que compre un AP inalámbrico con 2 o más antenas. Conecte el teléfono inteligente al AP y verifique si puede conectarse a Internet. Si puede conectarse a Internet, el AP es normal. Verifique si los LED del AP titilan. Si todos los LED están apagados, indica que la alimentación está apagada. Si el AP parece no funcionar adecuadamente, solicite servicio post venta. No tengo una PC. ¿Puedo usar las funciones de control interior y exterior? • Si puede accederse a Internet dentro de la casa, la función está disponible. Sin embargo, debe iniciar sesión en el sitio web de Samsung y registrar el producto. ¿Cuántos usuarios pueden controlar una lavadora o secadora? • Únicamente si la aplicación “Lavadora inteligente” está autenticada, múltiples usuarios pueden controlar la lavadora o secadora. Español - 67 DV455_02836F-08_MES.indd Sec6:67 2013-12-12 5:11:30 Solución de problemas PREGUNTA RESPUESTA ¿Qué debo hacer para conseguir una señal Wi-Fi más potente? • • • • • Instale el AP cerca de la lavadora o secadora. Puede verificar la potencia de la señal mediante la pantalla de la lavadora o secadora o el teléfono inteligente. Dado que el desempeño de la red se ve seriamente afectado por una puerta o pared de acero, instale la lavadora o la secadora en un lugar abierto. Di hay una puerta frente al producto instalado, abra la puerta al usar el producto. No coloque ningún objeto hecho de acero o vidrio frente al frente del LCD de la lavadora dado que bloquea la señal de radio. Tenga en cuenta que la señal de radio puede debilitarse o tener interferencia y la comunicación con el teléfono inteligente puede fallar cuando se usa un microondas en la casa. Instale la lavadora o secadora de manera tal que el frente del producto enfrente el AP si estuviera disponible. ¿Cómo puedo conectar la lavadora o secadora a un teléfono inteligente de manera estable? • Cuando la potencia de señal que aparece en el LCD de la lavadora o secadora es débil, puede fallar el control. Para conseguir un funcionamiento estable, deben verse las siguientes indicaciones de la potencia de la señal: • Deben aparecer al menos 3 barras de antena en el LCD de la lavadora o secadora. • Deben aparecer al menos 3 barras de antena para la conexión Wi-Fi en el teléfono inteligente. • Cuando la potencia de la señal se mide con una aplicación para teléfonos inteligentes que muestran la potencia de la señal Wi-Fi, la potencia de la señal debe ser superior a -65 dBm. (Por Ej.: -60 dBm y -50 dBm son más fuertes que -65 dBm.) ¿Qué debo hacer cuando la cantidad de barras de antena que aparecen en el LCD de la lavadora o secadora es 1? • Cuando la potencia de señal que aparece en el LCD de la lavadora o secadora es débil, puede fallar el control. Es este cado, tome las siguientes medidas para un funcionamiento normal. • Acerque el AP a la lavadora o secadora. (Deben aparecer al menos 3 barras de antena en la configuración de red de la lavadora para un funcionamiento adecuado.) • Dado que los AP viejos pueden tener un desempeño inferior, utilice un nuevo AP si estuviera disponible. • Coloque la antena del AP en posición vertical de manera que la señal de radio se propague más fácilmente. Español - 68 DV455_02836F-08_MES.indd Sec6:68 2013-12-12 5:11:30 Apéndice TABLA DE INDICACIONES SOBRE LA TELA Ciclo de lavado Instrucciones especiales Símbolos de advertencia para el lavado Normal Secar colgado/tender No lavar Planchado permanente / Antiarrugas / Control de arrugas Colgar para que escurra No retorcer Prendas suaves / delicadas Secar en posición horizontal No usar blanqueador Lavado a mano Secado con calor No secar en secadora Alta Sin vapor (agregado a la plancha) Caliente Media No planchar Tibia Baja Fría Cualquier calor Limpiar en seco Sin calor / aire No limpiar en seco Temperatura del agua** Blanqueador Cualquier blanqueador (cuando sea necesario) Temperaturas de secado con plancha o vapor 07 APÉNDICE Los siguientes símbolos ofrecen indicaciones acerca de las prendas. La etiqueta de indicaciones de la prenda incluye símbolos para lavado, blanqueado, secado y planchado, o limpieza a seco cuando sea necesaria. El uso de símbolos garantiza la consistencia entre los fabricantes textiles de artículos nacionales e importados. Siga las indicaciones de la etiqueta para prolongar la vida útil de la prenda y reducir los problemas del lavado. Limpiar en seco Secar colgado/tender Sólo blanqueador sin cloro (con protección para ropa de color) Blanqueador (cuando sea necesario) Alto Colgar para que escurra Ciclo de secado en secadora Media Secar en posición horizontal Baja Normal Planchado permanente / Antiarrugas / Control de arrugas Prendas suaves / delicadas ** Los símbolos con punto representan las temperaturas del agua del lavado apropiadas para diversas prendas. El rango de temperatura para Caliente es de 105 – 125 °F (41 – 52 °C), para Tibia es de 85 – 105 °F (29 – 41 °C) y para Fría es de 60 – 85 °F (16 – 29 °C). (La temperatura del agua del lavado debe alcanzar un mínimo de 60 °F (16 °C) para que se active el detergente y se logre un lavado eficaz.) Español - 69 DV455_02836F-08_MES.indd Sec7:69 2013-12-12 5:11:30 Apéndice PROTECCIÓN DEL MEDIO AMBIENTE Este electrodoméstico se fabrica con materiales reciclables. Si decide desechar este electrodoméstico, siga la normativa local relacionada con la eliminación de desechos. Corte el cable de alimentación para que el electrodoméstico no pueda conectarse a una fuente de alimentación. Quite la puerta para que los animales y los niños pequeños no puedan quedar atrapados dentro del electrodoméstico. DECLARACIÓN DE CONFORMIDAD Este electrodoméstico cumple con la norma UL2158. ESPECIFICACIONES C D A B TIPO DIMENSIONES LAVADORA DE CARGA FRONTAL A. Altura 39” (99,0 cm) B. Ancho 27” (68,6 cm) C. Profundidad con la puerta abierta 90° 51,65” (131,2 cm) D. Profundidad 32,28” (82,0 cm) PESO 127,8 lb (57 Kg) POTENCIA DEL CALENTADOR 5300 W (Elec.) 22000 BTU/h (Gas) Español - 70 DV455_02836F-08_MES.indd Sec7:70 2013-12-12 5:11:31 TABLA DE CICLOS (: configurado en fábrica, : seleccionable) CICLO Secado manual Ciclos de vapor CANTIDAD MÁXIMA Algodón, ropa de trabajo, ropa de cama, cargas mezcladas Heavy Duty (Acción fuerte) Telas resistentes, tales como jeans, corderoy y ropa de trabajo pesado Perm Press (Plancha permanente) Camisas, telas sintéticas, tejidos, prendas de algodón sin arrugas y telas que requieren planchado permanente Bedding PLUS (Más ropa cama) Prendas voluminosas, tales como frazadas, sábanas, edredones y almohadas Delicates (Delicada) Ropa interior, blusas, lencería Sanitize (Desinfección) Ropa de cama, cortinas, prendas para niños Eco Normal (Eco Normal) Algodón, ropa de trabajo, ropa de cama y de mesa Wool (Lana) Sólo para lana que pueda lavarse en lavadora y secarse en secadora. (Cantidad máxima: 3 lb) Air Fluff (Temperatura ambiente) Espuma, goma, plástico Quick Dry (Secado rápido) Carga pequeña Time Dry (Secado con temporizador) Cualquier carga Wrinkle Away (Antiarrugas) Camisas, pantalones, blusas Refresh (Refrescar) Camisas, pantalones, edredones, almohadas FUNCIONES CICLO Ciclos de vapor OPCIONES Temperatura temperatura Secado con sensor Nivel Alto Normal Secado normal Heavy Duty (Acción fuerte) Secado normal Perm Press (Plancha permanente) Secado normal Bedding PLUS (Más ropa cama) Secado normal Delicates (Delicada) Secado normal Sanitize (Desinfección) Muy seco (sin cambios) Eco Normal (Eco Normal) Secado normal (sin cambios)* Wool (Lana) Secado normal (sin cambios) Air Fluff (Temperatura ambiente) - Quick Dry (Secado rápido) Secado con sensor Secado manual 07 APÉNDICE Secado con sensor PRENDAS RECOMENDADAS Normal Prevención Inicio Tiempo Mediana de arrugas retardado Media Baja Extrabaja baja (DV455G)* - Time Dry (Secado con temporizador) - Wrinkle Away (Antiarrugas) - Refresh (Refrescar) - * es sólo el modelo a gas Recomendaciones sobre el tamaño de la carga Carga grande Carga media Carga pequeña Llene ¾ del tambor. No agregue prendas por encima de este nivel para que puedan dar vueltas con libertad. Llene ½ del tambor. Coloque 3 a 5 prendas y no llene más de ¼ del tambor. Para obtener los mejores resultados, siga las recomendaciones sobre el tamaño de la carga para cada ciclo de secado. Español - 71 DV455_02836F-08_MES.indd Sec7:71 2013-12-12 5:11:31 Apéndice OPEN SOURCE ANNOUNCEMENT The software included in this product contains copyrighted software that is licensed under the GPL/LGPL. You may obtain the complete Corresponding Source code from us for a period of three years after our last shipment of this product by sending email to: [email protected] If you want to obtain the complete Corresponding Source code in the physical medium such as CD-ROM, the cost of physically performing source distribution may be charged. This offer is valid to anyone in receipt of this information. GPL Software: Bridge-Utils, BusyBox, DNRD, dosfstools, iproute2, IPTables, Linux Kernel, ntpclient, Open1x, RSDK toolchain, rtl819x - Bootloader, samba, squashfs, udhcp Server-Client Package, USB-ModeSwitch, wireless-tools LGPL Software: libnl-Netlink Library, Mini-XML GNU GENERAL PUBLIC LICENSE Version 2, June 1991 Copyright (C) 1989, 1991 Free Software Foundation, Inc. 51 Franklin Street, Fifth Floor, Boston, MA 02110-1301, USA Everyone is permitted to copy and distribute verbatim copies of this license document, but changing it is not allowed. Preamble The licenses for most software are designed to take away your freedom to share and change it. By contrast, the GNU General Public License is intended to guarantee your freedom to share and change free software--to make sure the software is free for all its users. This General Public License applies to most of the Free Software Foundation’s software and to any other program whose authors commit to using it. (Some other Free Software Foundation software is covered by the GNU Lesser General Public License instead.) You can apply it to your programs, too. When we speak of free software, we are referring to freedom, not price. Our General Public Licenses are designed to make sure that you have the freedom to distribute copies of free software (and charge for this service if you wish), that you receive source code or can get it if you want it, that you can change the software or use pieces of it in new free programs; and that you know you can do these things. To protect your rights, we need to make restrictions that forbid anyone to deny you these rights or to ask you to surrender the rights. These restrictions translate to certain responsibilities for you if you distribute copies of the software, or if you modify it. For example, if you distribute copies of such a program, whether gratis or for a fee, you must give the recipients all the rights that you have. You must make sure that they, too, receive or can get the source code. And you must show them these terms so they know their rights. We protect your rights with two steps: (1) copyright the software, and (2) offer you this license which gives you legal permission to copy, distribute and/or modify the software. Also, for each author’s protection and ours, we want to make certain that everyone understands that there is no warranty for this free software. If the software is modified by someone else and passed on, we want its recipients to know that what they have is not the original, so that any Español - 72 DV455_02836F-08_MES.indd Sec7:72 2013-12-12 5:11:31 TERMS AND CONDITIONS FOR COPYING, DISTRIBUTION AND MODIFICATION 07 APÉNDICE problems introduced by others will not reflect on the original authors’ reputations. Finally, any free program is threatened constantly by software patents. We wish to avoid the danger that redistributors of a free program will individually obtain patent licenses, in effect making the program proprietary. To prevent this, we have made it clear that any patent must be licensed for everyone’s free use or not licensed at all. The precise terms and conditions for copying, distribution and modification follow. 1. This License applies to any program or other work which contains a notice placed by the copyright holder saying it may be distributed under the terms of this General Public License. The “Program”, below, refers to any such program or work, and a “work based on the Program” means either the Program or any derivative work under copyright law: that is to say, a work containing the Program or a portion of it, either verbatim or with modifications and/or translated into another language. (Hereinafter, translation is included without limitation in the term “modification”.) Each licensee is addressed as “you”. Activities other than copying, distribution and modification are not covered by this License; they are outside its scope. The act of running the Program is not restricted, and the output from the Program is covered only if its contents constitute a work based on the Program (independent of having been made by running the Program). Whether that is true depends on what the Program does. 2. You may copy and distribute verbatim copies of the Program’s source code as you receive it, in any medium, provided that you conspicuously and appropriately publish on each copy an appropriate copyright notice and disclaimer of warranty; keep intact all the notices that refer to this License and to the absence of any warranty; and give any other recipients of the Program a copy of this License along with the Program. You may charge a fee for the physical act of transferring a copy, and you may at your option offer warranty protection in exchange for a fee. 3. You may modify your copy or copies of the Program or any portion of it, thus forming a work based on the Program, and copy and distribute such modifications or work under the terms of Section 1 above, provided that you also meet all of these conditions: 1) You must cause the modified files to carry prominent notices stating that you changed the files and the date of any change. 2) You must cause any work that you distribute or publish, that in whole or in part contains or is derived from the Program or any part thereof, to be licensed as a whole at no charge to all third parties under the terms of this License. 3) If the modified program normally reads commands interactively when run, you must cause it, when started running for such interactive use in the most ordinary way, to print or display an announcement including an appropriate copyright notice and a notice that there is no warranty (or else, saying that you provide a warranty) and that users may redistribute the program under these conditions, and telling the user how to view a copy of this License. (Exception: if the Program itself is interactive but does not normally print such an announcement, your work based on the Program is not required to print an announcement.) These requirements apply to the modified work as a whole. If identifiable sections of that work are not derived from the Program, and can be reasonably considered independent and separate works in themselves, then this License, and its terms, do not apply to those sections when you distribute them as separate works. But when you distribute the same sections as part of a whole which is a work based on the Program, the distribution of the whole must be on the terms of this License, whose permissions for other licensees extend to the entire whole, and thus to each and every part regardless of who wrote it. Thus, it is not the intent of this section to claim rights or contest your rights to work written Español - 73 DV455_02836F-08_MES.indd Sec7:73 2013-12-12 5:11:31 Apéndice 4. 5. 6. 7. entirely by you; rather, the intent is to exercise the right to control the distribution of derivative or collective works based on the Program. In addition, mere aggregation of another work not based on the Program with the Program (or with a work based on the Program) on a volume of a storage or distribution medium does not bring the other work under the scope of this License. 3. You may copy and distribute the Program (or a work based on it, under Section 2) in object code or executable form under the terms of Sections 1 and 2 above provided that you also do one of the following: 1) Accompany it with the complete corresponding machinereadable source code, which must be distributed under the terms of Sections 1 and 2 above on a medium customarily used for software interchange; or, 2) Accompany it with a written offer, valid for at least three years, to give any third party, for a charge no more than your cost of physically performing source distribution, a complete machine-readable copy of the corresponding source code, to be distributed under the terms of Sections 1 and 2 above on a medium customarily used for software interchange; or, c) Accompany it with the information you received as to the offer to distribute corresponding source code. (This alternative is allowed only for noncommercial distribution and only if you received the program in object code or executable form with such an offer, in accord with Subsection b above.) The source code for a work means the preferred form of the work for making modifications to it. For an executable work, complete source code means all the source code for all modules it contains, plus any associated interface definition files, plus the scripts used to control compilation and installation of the executable. However, as a special exception, the source code distributed need not include anything that is normally distributed (in either source or binary form) with the major components (compiler, kernel, and so on) of the operating system on which the executable runs, unless that component itself accompanies the executable. If distribution of executable or object code is made by offering access to copy from a designated place, then offering equivalent access to copy the source code from the same place counts as distribution of the source code, even though third parties are not compelled to copy the source along with the object code. You may not copy, modify, sublicense, or distribute the Program except as expressly provided under this License. Any attempt otherwise to copy, modify, sublicense or distribute the Program is void, and will automatically terminate your rights under this License. However, parties who have received copies, or rights, from you under this License will not have their licenses terminated so long as such parties remain in full compliance. You are not required to accept this License, since you have not signed it. However, nothing else grants you permission to modify or distribute the Program or its derivative works. These actions are prohibited by law if you do not accept this License. Therefore, by modifying or distributing the Program (or any work based on the Program), you indicate your acceptance of this License to do so, and all its terms and conditions for copying, distributing or modifying the Program or works based on it. Each time you redistribute the Program (or any work based on the Program), the recipient automatically receives a license from the original licensor to copy, distribute or modify the Program subject to these terms and conditions. You may not impose any further restrictions on the recipients’ exercise of the rights granted herein. You are not responsible for enforcing compliance by third parties to this License. Español - 74 DV455_02836F-08_MES.indd Sec7:74 2013-12-12 5:11:31 07 APÉNDICE 8. If, as a consequence of a court judgment or allegation of patent infringement or for any other reason (not limited to patent issues), conditions are imposed on you (whether by court order, agreement or otherwise) that contradict the conditions of this License, they do not excuse you from the conditions of this License. If you cannot distribute so as to satisfy simultaneously your obligations under this License and any other pertinent obligations, then as a consequence you may not distribute the Program at all. For example, if a patent license would not permit royalty-free redistribution of the Program by all those who receive copies directly or indirectly through you, then the only way you could satisfy both it and this License would be to refrain entirely from distribution of the Program. If any portion of this section is held invalid or unenforceable under any particular circumstance, the balance of the section is intended to apply and the section as a whole is intended to apply in other circumstances. It is not the purpose of this section to induce you to infringe any patents or other property right claims or to contest validity of any such claims; this section has the sole purpose of protecting the integrity of the free software distribution system, which is implemented by public license practices. Many people have made generous contributions to the wide range of software distributed through that system in reliance on consistent application of that system; it is up to the author/donor to decide if he or she is willing to distribute software through any other system and a licensee cannot impose that choice. This section is intended to make thoroughly clear what is believed to be a consequence of the rest of this License. 9. If the distribution and/or use of the Program is restricted in certain countries either by patents or by copyrighted interfaces, the original copyright holder who places the Program under this License may add an explicit geographical distribution limitation excluding those countries, so that distribution is permitted only in or among countries not thus excluded. In such case, this License incorporates the limitation as if written in the body of this License. 10. The Free Software Foundation may publish revised and/or new versions of the General Public License from time to time. Such new versions will be similar in spirit to the present version, but may differ in detail to address new problems or concerns. Each version is given a distinguishing version number. If the Program specifies a version number of this License which applies to it and “any later version”, you have the option of following the terms and conditions either of that version or of any later version published by the Free Software Foundation. If the Program does not specify a version number of this License, you may choose any version ever published by the Free Software Foundation. 11. If you wish to incorporate parts of the Program into other free programs whose distribution conditions are different, write to the author to ask for permission. For software which is copyrighted by the Free Software Foundation, write to the Free Software Foundation; we sometimes make exceptions for this. Our decision will be guided by the two goals of preserving the free status of all derivatives of our free software and of promoting the sharing and reuse of software generally. NO WARRANTY 12. BECAUSE THE PROGRAM IS LICENSED FREE OF CHARGE, THERE IS NO WARRANTY FOR THE PROGRAM, TO THE EXTENT PERMITTED BY APPLICABLE LAW. EXCEPT WHEN OTHERWISE STATED IN WRITING THE COPYRIGHT HOLDERS AND/OR OTHER PARTIES PROVIDE THE PROGRAM “AS IS” WITHOUT WARRANTY OF ANY KIND, EITHER EXPRESSED OR IMPLIED, INCLUDING, BUT NOT LIMITED TO, THE IMPLIED WARRANTIES OF MERCHANTABILITY AND FITNESS FOR A PARTICULAR PURPOSE. THE ENTIRE RISK AS TO THE QUALITY AND PERFORMANCE OF THE PROGRAM IS WITH YOU. SHOULD THE PROGRAM PROVE DEFECTIVE, YOU ASSUME THE COST OF ALL NECESSARY SERVICING, REPAIR OR CORRECTION. Español - 75 DV455_02836F-08_MES.indd Sec7:75 2013-12-12 5:11:31 Apéndice 13. IN NO EVENT UNLESS REQUIRED BY APPLICABLE LAW OR AGREED TO IN WRITING WILL ANY COPYRIGHT HOLDER, OR ANY OTHER PARTY WHO MAY MODIFY AND/OR REDISTRIBUTE THE PROGRAM AS PERMITTED ABOV E , BE L I ABL E TO YOU FOR DAMAGES, INCLUDING ANY GENERAL, SPECIAL, INCIDENTAL OR CONSEQUENTIAL DAMAGES ARISING OUT OF THE USE OR INABILITY TO USE THE PROGRAM (INCLUDING BUT NOT LIMITED TO LOSS OF DATA OR DATA BEING RENDERED INACCURATE OR LOSSES SUSTAINED BY YOU OR THIRD PARTIES OR A FAILURE OF THE PROGRAM TO OPERATE WITH ANY OTHER PROGRAMS), EVEN IF SUCH HOLDER OR OTHER PARTY HAS BEEN ADVISED OF THE POSSIBILITY OF SUCH DAMAGES. END OF TERMS AND CONDITIONS How to Apply These Terms to Your New Programs If you develop a new program, and you want it to be of the greatest possible use to the public, the best way to achieve this is to make it free software which everyone can redistribute and change under these terms. To do so, attach the following notices to the program. It is safest to attach them to the start of each source file to most effectively convey the exclusion of warranty; and each file should have at least the “copyright” line and a pointer to where the full notice is found. one line to give the program’s name and an idea of what it does. Copyright (C) yyyy name of author This program is free software; you can redistribute it and/or modify it under the terms of the GNU General Public License as published by the Free Software Foundation; either version 2 of the License, or (at your option) any later version. This program is distributed in the hope that it will be useful, but WITHOUT ANY WARRANTY; without even the implied warranty of MERCHANTABILITY or FITNESS FOR A PARTICULAR PURPOSE. See the GNU General Public License for more details. You should have received a copy of the GNU General Public License along with this program; if not, write to the Free Software Foundation, Inc., 51 Franklin Street, Fifth Floor, Boston, MA 02110-1301, USA. Also add information on how to contact you by electronic and paper mail. If the program is interactive, make it output a short notice like this when it starts in an interactive mode: Gnomovision version 69, Copyright (C) year name of author Gnomovision comes with ABSOLUTELY NO WARRANTY; for details type `show w’. This is free software, and you are welcome to redistribute it under certain conditions; type `show c’ for details. The hypothetical commands `show w’ and `show c’ should show the appropriate parts of the General Public License. Of course, the commands you use may be called something other than `show w’ and `show c’; they could even be mouse-clicks or menu items--whatever suits your program. You should also get your employer (if you work as a programmer) or your school, if any, to sign a “copyright disclaimer” for the program, if necessary. Here is a sample; alter the names: Yoyodyne, Inc., hereby disclaims all copyright interest in the program `Gnomovision’ (which makes passes at compilers) written by James Hacker. signature of Ty Coon, 1 April 1989 Ty Coon, President of Vice This General Public License does not permit incorporating your program into proprietary programs. If your program is a subroutine library, you may consider it more useful to permit linking proprietary applications with the library. If this is what you want to do, use the GNU Lesser General Public License instead of this License. Español - 76 DV455_02836F-08_MES.indd Sec7:76 2013-12-12 5:11:31 GNU LESSER GENERAL PUBLIC LICENSE [This is the first released version of the Lesser GPL. It also counts as the successor of the GNU Library Public License, version 2, hence the version number 2.1.] 07 APÉNDICE Version 2.1, February 1999 Copyright (C) 1991, 1999 Free Software Foundation, Inc. 51 Franklin Street, Fifth Floor, Boston, MA 02110-1301 USA Everyone is permitted to copy and distribute verbatim copies of this license document, but changing it is not allowed. Preamble The licenses for most software are designed to take away your freedom to share and change it. By contrast, the GNU General Public Licenses are intended to guarantee your freedom to share and change free software--to make sure the software is free for all its users. This license, the Lesser General Public License, applies to some specially designated software packages--typically libraries--of the Free Software Foundation and other authors who decide to use it. You can use it too, but we suggest you first think carefully about whether this license or the ordinary General Public License is the better strategy to use in any particular case, based on the explanations below. When we speak of free software, we are referring to freedom of use, not price. Our General Public Licenses are designed to make sure that you have the freedom to distribute copies of free software (and charge for this service if you wish); that you receive source code or can get it if you want it; that you can change the software and use pieces of it in new free programs; and that you are informed that you can do these things. To protect your rights, we need to make restrictions that forbid distributors to deny you these rights or to ask you to surrender these rights. These restrictions translate to certain responsibilities for you if you distribute copies of the library or if you modify it. For example, if you distribute copies of the library, whether gratis or for a fee, you must give the recipients all the rights that we gave you. You must make sure that they, too, receive or can get the source code. If you link other code with the library, you must provide complete object files to the recipients, so that they can relink them with the library after making changes to the library and recompiling it. And you must show them these terms so they know their rights. We protect your rights with a two-step method: (1) we copyright the library, and (2) we offer you this license, which gives you legal permission to copy, distribute and/or modify the library. To protect each distributor, we want to make it very clear that there is no warranty for the free library. Also, if the library is modified by someone else and passed on, the recipients should know that what they have is not the original version, so that the original author’s reputation will not be affected by problems that might be introduced by others. Finally, software patents pose a constant threat to the existence of any free program. We wish to make sure that a company cannot effectively restrict the users of a free program by obtaining a restrictive license from a patent holder. Therefore, we insist that any patent license obtained for a version of the library must be consistent with the full freedom of use specified in this license. Most GNU software, including some libraries, is covered by the ordinary GNU General Public License. This license, the GNU Lesser General Public License, applies to certain designated libraries, and is quite different from the ordinary General Public License. We use this license for certain libraries in order to permit linking those libraries into nonfree programs. When a program is linked with a library, whether statically or using a shared library, the combination of the two is legally speaking a combined work, a derivative of the original library. The ordinary General Public License therefore permits such linking only if the entire combination fits its criteria of freedom. The Lesser General Public License permits more lax criteria for linking other code with the library. We call this license the “Lesser” General Public License because it does Less to protect the Español - 77 DV455_02836F-08_MES.indd Sec7:77 2013-12-12 5:11:31 Apéndice user’s freedom than the ordinary General Public License. It also provides other free software developers Less of an advantage over competing non-free programs. These disadvantages are the reason we use the ordinary General Public License for many libraries. However, the Lesser license provides advantages in certain special circumstances. For example, on rare occasions, there may be a special need to encourage the widest possible use of a certain library, so that it becomes a de-facto standard. To achieve this, non-free programs must be allowed to use the library. A more frequent case is that a free library does the same job as widely used non-free libraries. In this case, there is little to gain by limiting the free library to free software only, so we use the Lesser General Public License. In other cases, permission to use a particular library in nonfree programs enables a greater number of people to use a large body of free software. For example, permission to use the GNU C Library in non-free programs enables many more people to use the whole GNU operating system, as well as its variant, the GNU/Linux operating system. Although the Lesser General Public License is Less protective of the users’ freedom, it does ensure that the user of a program that is linked with the Library has the freedom and the wherewithal to run that program using a modified version of the Library. The precise terms and conditions for copying, distribution and modification follow. Pay close attention to the difference between a “work based on the library” and a “work that uses the library”. The former contains code derived from the library, whereas the latter must be combined with the library in order to run. TERMS AND CONDITIONS FOR COPYING, DISTRIBUTION AND MODIFICATION 1. This License Agreement applies to any software library or other program which contains a notice placed by the copyright holder or other authorized party saying it may be distributed under the terms of this Lesser General Public License (also called “this License”). Each licensee is addressed as “you”. A “library” means a collection of software functions and/or data prepared so as to be conveniently linked with application programs (which use some of those functions and data) to form executables. The “Library”, below, refers to any such software library or work which has been distributed under these terms. A “work based on the Library” means either the Library or any derivative work under copyright law: that is to say, a work containing the Library or a portion of it, either verbatim or with modifications and/or translated straightforwardly into another language. (Hereinafter, translation is included without limitation in the term “modification”.) “Source code” for a work means the preferred form of the work for making modifications to it. For a library, complete source code means all the source code for all modules it contains, plus any associated interface definition files, plus the scripts used to control compilation and installation of the library. Activities other than copying, distribution and modification are not covered by this License; they are outside its scope. The act of running a program using the Library is not restricted, and output from such a program is covered only if its contents constitute a work based on the Library (independent of the use of the Library in a tool for writing it). Whether that is true depends on what the Library does and what the program that uses the Library does. 2. You may copy and distribute verbatim copies of the Library’s complete source code as you receive it, in any medium, provided that you conspicuously and appropriately publish on each copy an appropriate copyright notice and disclaimer of warranty; keep intact all the notices that refer to this License and to the absence of any warranty; and distribute a copy of this License along with the Library. You may charge a fee for the physical act of transferring a copy, and you may at your option Español - 78 DV455_02836F-08_MES.indd Sec7:78 2013-12-12 5:11:31 07 APÉNDICE offer warranty protection in exchange for a fee. 3. You may modify your copy or copies of the Library or any portion of it, thus forming a work based on the Library, and copy and distribute such modifications or work under the terms of Section 1 above, provided that you also meet all of these conditions: 1) The modified work must itself be a software library. 2) You must cause the files modified to carry prominent notices stating that you changed the files and the date of any change. 3) You must cause the whole of the work to be licensed at no charge to all third parties under the terms of this License. 4) If a facility in the modified Library refers to a function or a table of data to be supplied by an application program that uses the facility, other than as an argument passed when the facility is invoked, then you must make a good faith effort to ensure that, in the event an application does not supply such function or table, the facility still operates, and performs whatever part of its purpose remains meaningful. (For example, a function in a library to compute square roots has a purpose that is entirely well-defined independent of the application. Therefore, Subsection 2d requires that any application-supplied function or table used by this function must be optional: if the application does not supply it, the square root function must still compute square roots.) These requirements apply to the modified work as a whole. If identifiable sections of that work are not derived from the Library, and can be reasonably considered independent and separate works in themselves, then this License, and its terms, do not apply to those sections when you distribute them as separate works. But when you distribute the same sections as part of a whole which is a work based on the Library, the distribution of the whole must be on the terms of this License, whose permissions for other licensees extend to the entire whole, and thus to each and every part regardless of who wrote it. Thus, it is not the intent of this section to claim rights or contest your rights to work written entirely by you; rather, the intent is to exercise the right to control the distribution of derivative or collective works based on the Library. In addition, mere aggregation of another work not based on the Library with the Library (or with a work based on the Library) on a volume of a storage or distribution medium does not bring the other work under the scope of this License. 4. You may opt to apply the terms of the ordinary GNU General Public License instead of this License to a given copy of the Library. To do this, you must alter all the notices that refer to this License, so that they refer to the ordinary GNU General Public License, version 2, instead of to this License. (If a newer version than version 2 of the ordinary GNU General Public License has appeared, then you can specify that version instead if you wish.) Do not make any other change in these notices. Once this change is made in a given copy, it is irreversible for that copy, so the ordinary GNU General Public License applies to all subsequent copies and derivative works made from that copy. This option is useful when you wish to copy part of the code of the Library into a program that is not a library. 5. You may copy and distribute the Library (or a portion or derivative of it, under Section 2) in object code or executable form under the terms of Sections 1 and 2 above provided that you accompany it with the complete corresponding machine-readable source code, which must be distributed under the terms of Sections 1 and 2 above on a medium customarily used for software interchange. If distribution of object code is made by offering access to copy from a designated place, then offering equivalent access to copy the source code from the same place satisfies the requirement to distribute the source code, even though third parties are not compelled to copy the source along with the object code. Español - 79 DV455_02836F-08_MES.indd Sec7:79 2013-12-12 5:11:31 Apéndice 6. A program that contains no derivative of any portion of the Library, but is designed to work with the Library by being compiled or linked with it, is called a “work that uses the Library”. Such a work, in isolation, is not a derivative work of the Library, and therefore falls outside the scope of this License. However, linking a “work that uses the Library” with the Library creates an executable that is a derivative of the Library (because it contains portions of the Library), rather than a “work that uses the library”. The executable is therefore covered by this License. Section 6 states terms for distribution of such executables. When a “work that uses the Library” uses material from a header file that is part of the Library, the object code for the work may be a derivative work of the Library even though the source code is not. Whether this is true is especially significant if the work can be linked without the Library, or if the work is itself a library. The threshold for this to be true is not precisely defined by law. If such an object file uses only numerical parameters, data structure layouts and accessors, and small macros and small inline functions (ten lines or less in length), then the use of the object file is unrestricted, regardless of whether it is legally a derivative work. (Executables containing this object code plus portions of the Library will still fall under Section 6.) Otherwise, if the work is a derivative of the Library, you may distribute the object code for the work under the terms of Section 6. Any executables containing that work also fall under Section 6, whether or not they are linked directly with the Library itself. 7. As an exception to the Sections above, you may also combine or link a “work that uses the Library” with the Library to produce a work containing portions of the Library, and distribute that work under terms of your choice, provided that the terms permit modification of the work for the customer’s own use and reverse engineering for debugging such modifications. You must give prominent notice with each copy of the work that the Library is used in it and that the Library and its use are covered by this License. You must supply a copy of this License. If the work during execution displays copyright notices, you must include the copyright notice for the Library among them, as well as a reference directing the user to the copy of this License. Also, you must do one of these things: 1) Accompany the work wi th the complet e corresponding machine-readable source code for the Library including whatever changes were used in the work (which must be distributed under Sections 1 and 2 above); and, if the work is an executable linked with the Library, with the complete machine-readable “work that uses the Library”, as object code and/or source code, so that the user can modify the Library and then relink to produce a modified executable containing the modified Library. (It is understood that the user who changes the contents of definitions files in the Library will not necessarily be able to recompile the application to use the modified definitions.) 2) Use a suitable shared library mechanism for linking with the Library. A suitable mechanism is one that (1) uses at run time a copy of the library already present on the user’s computer system, rather than copying library functions into the executable, and (2) will operate properly with a modified version of the library, if the user installs one, as long as the modified version is interfacecompatible with the version that the work was made with. 3) Accompany the work with a written offer, valid for at least three years, to give the same user the materials specified in Subsection 6a, above, for a charge no more than the cost of performing this distribution. 4) If distribution of the work is made by offering access to copy from a designated place, offer equivalent access to copy the above specified materials from the same place. 5) Verify that the user has already received a copy of these materials or that you have already sent this user a copy. For an executable, the required form of the “work that uses the Library” must include any data and utility programs needed for reproducing the executable from it. However, as a special exception, the materials to be distributed need not include anything that is normally Español - 80 DV455_02836F-08_MES.indd Sec7:80 2013-12-12 5:11:31 07 APÉNDICE distributed (in either source or binary form) with the major components (compiler, kernel, and so on) of the operating system on which the executable runs, unless that component itself accompanies the executable. It may happen that this requirement contradicts the license restrictions of other proprietary libraries that do not normally accompany the operating system. Such a contradiction means you cannot use both them and the Library together in an executable that you distribute. 8. You may place library facilities that are a work based on the Library side-by-side in a single library together with other library facilities not covered by this License, and distribute such a combined library, provided that the separate distribution of the work based on the Library and of the other library facilities is otherwise permitted, and provided that you do these two things: 1) Accompany the combined library with a copy of the same work based on the Library, uncombined with any other library facilities. This must be distributed under the terms of the Sections above. 2) Give prominent notice with the combined library of the fact that part of it is a work based on the Library, and explaining where to find the accompanying uncombined form of the same work. 9. You may not copy, modify, sublicense, link with, or distribute the Library except as expressly provided under this License. Any attempt otherwise to copy, modify, sublicense, link with, or distribute the Library is void, and will automatically terminate your rights under this License. However, parties who have received copies, or rights, from you under this License will not have their licenses terminated so long as such parties remain in full compliance. 10. You are not required to accept this License, since you have not signed it. However, nothing else grants you permission to modify or distribute the Library or its derivative works. These actions are prohibited by law if you do not accept this License. Therefore, by modifying or distributing the Library (or any work based on the Library), you indicate your acceptance of this License to do so, and all its terms and conditions for copying, distributing or modifying the Library or works based on it. 11. Each time you redistribute the Library (or any work based on the Library), the recipient automatically receives a license from the original licensor to copy, distribute, link with or modify the Library subject to these terms and conditions. You may not impose any further restrictions on the recipients’ exercise of the rights granted herein. You are not responsible for enforcing compliance by third parties with this License. 12. If, as a consequence of a court judgment or allegation of patent infringement or for any other reason (not limited to patent issues), conditions are imposed on you (whether by court order, agreement or otherwise) that contradict the conditions of this License, they do not excuse you from the conditions of this License. If you cannot distribute so as to satisfy simultaneously your obligations under this License and any other pertinent obligations, then as a consequence you may not distribute the Library at all. For example, if a patent license would not permit royalty-free redistribution of the Library by all those who receive copies directly or indirectly through you, then the only way you could satisfy both it and this License would be to refrain entirely from distribution of the Library. If any portion of this section is held invalid or unenforceable under any particular circumstance, the balance of the section is intended to apply, and the section as a whole is intended to apply in other circumstances. It is not the purpose of this section to induce you to infringe any patents or other property right claims or to contest validity of any such claims; this section has the sole purpose of protecting the integrity of the free software distribution system which is implemented by public license practices. Many people have made generous contributions to the wide range of software distributed through that system in reliance on consistent application of that system; it is up to the author/ donor to decide if he or she is willing to distribute software through any other system and a licensee cannot impose that choice. Español - 81 DV455_02836F-08_MES.indd Sec7:81 2013-12-12 5:11:32 Apéndice This section is intended to make thoroughly clear what is believed to be a consequence of the rest of this License. 13. If the distribution and/or use of the Library is restricted in certain countries either by patents or by copyrighted interfaces, the original copyright holder who places the Library under this License may add an explicit geographical distribution limitation excluding those countries, so that distribution is permitted only in or among countries not thus excluded. In such case, this License incorporates the limitation as if written in the body of this License. 14. The Free Software Foundation may publish revised and/or new versions of the Lesser General Public License from time to time. Such new versions will be similar in spirit to the present version, but may differ in detail to address new problems or concerns. Each version is given a distinguishing version number. If the Library specifies a version number of this License which applies to it and “any later version”, you have the option of following the terms and conditions either of that version or of any later version published by the Free Software Foundation. If the Library does not specify a license version number, you may choose any version ever published by the Free Software Foundation. 15. If you wish to incorporate parts of the Library into other free programs whose distribution conditions are incompatible with these, write to the author to ask for permission. For software which is copyrighted by the Free Software Foundation, write to the Free Software Foundation; we sometimes make exceptions for this. Our decision will be guided by the two goals of preserving the free status of all derivatives of our free software and of promoting the sharing and reuse of software generally. NO WARRANTY 16. BECAUSE THE LIBRARY IS LICENSED FREE OF CHARGE, THERE IS NO WARRANTY FOR THE LIBRARY, TO THE EXTENT PERMITTED BY APPLICABLE LAW. EXCEPT WHEN OTHERWISE STATED IN WRITING THE COPYRIGHT HOLDERS AND/OR OTHER PARTIES PROVIDE THE LIBRARY “AS IS” WITHOUT WARRANTY OF ANY KIND, EITHER EXPRESSED OR IMPLIED, INCLUDING, BUT NOT LIMITED TO, THE IMPLIED WARRANTIES OF MERCHANTABILITY AND FITNESS FOR A PARTICULAR PURPOSE. THE ENTIRE RISK AS TO THE QUALITY AND PERFORMANCE OF THE LIBRARY IS WITH YOU. SHOULD THE LIBRARY PROVE DEFECTIVE, YOU ASSUME THE COST OF ALL NECESSARY SERVICING, REPAIR OR CORRECTION. 17. IN NO EVENT UNLESS REQUIRED BY APPLICABLE LAW OR AGREED TO IN WRI T ING WI L L ANY COPYRIGHT HOLDER, OR ANY OTHER PARTY WHO MAY MODIFY AND/ OR REDISTRIBUTE THE LIBRARY AS PERMITTED ABOVE, BE LIABLE TO YOU FOR DAMAGES, INCLUDING ANY GENERAL, SPECIAL, INCIDENTAL OR CONSEQUENTIAL DAMAGES ARISING OUT OF THE USE OR INABILITY TO USE THE LIBRARY (INCLUDING BUT NOT LIMITED TO LOSS OF DATA OR DATA BEING RENDERED INACCURATE OR LOSSES SUSTAINED BY YOU OR THIRD PARTIES OR A FAILURE OF THE LIBRARY TO OPERATE WITH ANY OTHER SOFTWARE), EVEN IF SUCH HOLDER OR OTHER PARTY HAS BEEN ADVISED OF THE POSSIBILITY OF SUCH DAMAGES. END OF TERMS AND CONDITIONS How to Apply These Terms to Your New Libraries If you develop a new library, and you want it to be of the greatest possible use to the public, we recommend making it free software that everyone can redistribute and change. You can do so by permitting redistribution under these terms (or, alternatively, under the terms of the ordinary General Public License). To apply these terms, attach the following notices to the library. It is safest to attach them to the start of each source file to most effectively convey the exclusion of warranty; and each file should have at least the “copyright” line and a pointer to where the full notice is found. one line to give the library’s name and an idea of what it does. Español - 82 DV455_02836F-08_MES.indd Sec7:82 2013-12-12 5:11:32 Copyright (C) year name of author 07 APÉNDICE This library is free software; you can redistribute it and/or modify it under the terms of the GNU Lesser General Public License as published by the Free Software Foundation; either version 2.1 of the License, or (at your option) any later version. This library is distributed in the hope that it will be useful, but WITHOUT ANY WARRANTY; without even the implied warranty of MERCHANTABILITY or FITNESS FOR A PARTICULAR PURPOSE. See the GNU Lesser General Public License for more details. You should have received a copy of the GNU Lesser General Public License along with this library; if not, write to the Free Software Foundation, Inc., 51 Franklin Street, Fifth Floor, Boston, MA 02110-1301 USA Also add information on how to contact you by electronic and paper mail. You should also get your employer (if you work as a programmer) or your school, if any, to sign a “copyright disclaimer” for the library, if necessary. Here is a sample; alter the names: Yoyodyne, Inc., hereby disclaims all copyright interest in the library `Frob’ (a library for tweaking knobs) written by James Random Hacker. signature of Ty Coon, 1 April 1990 Ty Coon, President of Vice That’s all there is to it! BSD LICENSE flex: the fast lexical analyser Copyright (c) 2001, 2002, 2003, 2004, 2005, 2006, 2007 The Flex Project. Copyright (c) 1990, 1997 The Regents of the University of California. All rights reserved. LibNet License Copyright (c) 1998 - 2001 Mike D. Schiffman <[email protected]> PPP/ Debian Copyright (c) 1989 Regents of the University of California. All rights reserved. Redistribution and use in source and binary forms, with or without modification, are permitted provided that the following conditions are met: 1. Redistributions of source code must retain the above copyright notice, this list of conditions and the following disclaimer. 2. Redistributions in binary form must reproduce the above copyright notice, this list of conditions and the following disclaimer in the documentation and/or other materials provided with the distribution. 3. Neither the name of the <organization> nor the names of its contributors may be used to endorse or promote products derived from this software without specific prior written permission. THIS SOFTWARE IS PROVIDED BY THE COPYRIGHT HOLDERS AND CONTRIBUTORS “AS IS” AND ANY EXPRESS OR IMPLIED WARRANTIES, INCLUDING, BUT NOT LIMITED TO, THE IMPLIED WARRANTIES OF MERCHANTABILITY AND FITNESS FOR A PARTICULAR PURPOSE ARE DISCLAIMED. IN NO EVENT SHALL <COPYRIGHT HOLDER> BE LIABLE FOR ANY DIRECT, INDIRECT, INCIDENTAL, SPECIAL, EXEMPLARY, OR CONSEQUENTIAL DAMAGES ( INCLUDING, BUT NOT LIMITED TO, PROCUREMENT OF SUBSTITUTE GOODS OR SERVICES; LOSS OF USE, DATA, OR PROFITS; OR BUSINESS INTERRUPTION) HOWEVER CAUSED AND ON ANY THEORY OF LIABILITY, WHETHER IN CONTRACT, STRICT LIABILITY, OR TORT (INCLUDING NEGLIGENCE OR OTHERWISE) ARISING IN ANY WAY OUT OF THE USE OF THIS SOFTWARE, EVEN IF ADVISED OF THE POSSIBILITY OF SUCH DAMAGE. Español - 83 DV455_02836F-08_MES.indd Sec7:83 2013-12-12 5:11:32 Apéndice OPENSSL This product includes software developed by the OpenSSL Project for use in the OpenSSL Toolkit. (http:// www.openssl.org/) This product includes cryptographic software written by Eric Young ([email protected]) LICENSE ISSUES ===================================================================== The OpenSSL toolkit stays under a dual license, i.e. both the conditions of the OpenSSL License and the original SSLeay license apply to the toolkit. See below for the actual license texts. Actually both licenses are BSD-style Open Source licenses. In case of any license issues related to OpenSSL please contact [email protected]. OpenSSL License ===================================================================== Copyright (c) 1998-2008 The OpenSSL Project. All rights reserved. Redistribution and use in source and binary forms, with or without modification, are permitted provided that the following conditions are met: 1. Redistributions of source code must retain the above copyright notice, this list of conditions and the following disclaimer. 2. Redistributions in binary form must reproduce the above copyright notice, this list of conditions and the following disclaimer in the documentation and/or other materials provided with the distribution. 3. All advertising materials mentioning features or use of this software must display the following acknowledgment: “This product includes software developed by the OpenSSL Project for use in the OpenSSL Toolkit. (http://www.openssl.org/)” 4. The names “OpenSSL Toolkit” and “OpenSSL Project” must not be used to endorse or promote products derived from this software without prior written permission. For written permission, please contact [email protected]. 5. Products derived from this software may not be called “OpenSSL” nor may “OpenSSL” appear in their names without prior written permission of the OpenSSL Project. 6. Redistributions of any form whatsoever must retain the following acknowledgment: “This product includes software developed by the OpenSSL Project for use in the OpenSSL Toolkit (http://www.openssl.org/)” THIS SOFTWARE IS PROVIDED BY THE OpenSSL PROJECT “AS IS” AND ANY EXPRESSED OR IMPLIED WARRANTIES, INCLUDING, BUT NOT LIMITED TO, THE IMPLIED WARRANTIES OF MERCHANTABILITY AND FITNESS FOR A PARTICULAR PURPOSE ARE DISCLAIMED. IN NO EVENT SHALL THE OpenSSL PROJECT OR ITS CONTRIBUTORS BE LIABLE FOR ANY DIRECT, INDIRECT, INCIDENTAL, SPECIAL, EXEMPLARY, OR CONSEQUENTIAL DAMAGES (INCLUDING, BUT NOT LIMITED TO, PROCUREMENT OF SUBSTITUTE GOODS OR SERVICES; LOSS OF USE, DATA, OR PROFITS; OR BUSINESS INTERRUPTION) HOWEVER CAUSED AND ON ANY THEORY OF LIABILITY, WHETHER IN CONTRACT, STRICT LIABILITY, OR TORT (INCLUDING NEGLIGENCE OR OTHERWISE) ARISING IN ANY WAY OUT OF THE USE OF THIS SOFTWARE, EVEN IF ADVISED OF THE POSSIBILITY OF SUCH DAMAGE. ===================================================================== This product includes cryptographic software written by Eric Young ([email protected]). This product includes software written by Tim Hudson ([email protected]). Español - 84 DV455_02836F-08_MES.indd Sec7:84 2013-12-12 5:11:32 Garantía (U.S.A) SECADORA SAMSUNG un (1) año para todas las piezas y la mano de obra Dos (2) años para las piezas del panel de control 08 GARANTÍA GARANTÍA LIMITADA PARA EL COMPRADOR ORIGINAL El presente producto de la marca SAMSUNG, tal como lo provee y distribuye SAMSUNG ELECTRONICS AMERICA, INC. (SAMSUNG) y lo entrega nuevo, en su embalaje de cartón original al comprador o consumidor original, está garantizado por SAMSUNG contra defectos de fabricación de los materiales y la mano de obra durante el período limitado de la garantía de: La presente garantía limitada comienza en la fecha original de compra y es válida únicamente para productos comprados y usados en los Estados Unidos. Para recibir el servicio técnico de la garantía, el comprador debe comunicarse con SAMSUNG con el fin de que se determine el problema y los procedimientos del servicio. El servicio técnico de la garantía sólo puede ser prestado por un centro de servicio técnico autorizado de SAMSUNG. Se debe presentar la factura de compra original como prueba de compra a SAMSUNG o al servicio técnico autorizado de SAMSUNG. SAMSUNG prestará servicio técnico a domicilio durante el período de la garantía sin costo, sujeto a la disponibilidad dentro de los Estados Unidos contiguos. El servicio técnico a domicilio no está disponible en todas las áreas. Para recibir el servicio técnico a domicilio, el producto no debe presentar obstrucciones y debe ser accesible para el agente del servicio técnico. Si el servicio técnico no está disponible, SAMSUNG puede optar por transportar el producto hasta y desde el servicio técnico autorizado. SAMSUNG reparará, reemplazará el producto u ofrecerá un reembolso a su criterio y sin cargo adicional, tal como se establece en la presente garantía, con piezas o productos nuevos o reacondicionados si se comprueba que es defectuoso durante el período limitado de la garantía especificado anteriormente. Todas las piezas y los productos reemplazados pasan a ser propiedad de SAMSUNG y deben ser devueltos a SAMSUNG. Las piezas y los productos reemplazados asumen la garantía original que resta, o noventa (90) días, el período que sea el más prolongado. La presente garantía limitada cubre defectos de fabricación de los materiales y la mano de obra encontrados durante el uso normal y doméstico de este producto y no será válida para lo siguiente: daños que ocurran durante el envío; entrega e instalación; aplicaciones y usos para los cuales el presente producto no fue destinado; números de serie o producto alterados; daño cosmético o acabado exterior; accidentes, abuso, descuido, incendio, inundación, caída de rayos, u otros casos fortuitos o de fuerza mayor; uso de productos, equipo, sistemas, utilidades, servicios, piezas, suministros, accesorios, aplicaciones, instalaciones, reparaciones, cableado externo o conectores no provistos ni autorizados por SAMSUNG que dañen este producto o que acarreen problemas en el servicio; voltaje de la línea eléctrica incorrecto, fluctuaciones y sobretensión; ajustes del cliente e incumplimiento de lo establecido en el manual de instrucciones, instrucciones de mantenimiento y ambientales que están cubiertas y recomendadas en el manual de instrucciones; traslado y reinstalación del producto; problemas causados por plagas. La presente garantía limitada no cubre problemas derivados de la corriente, el voltaje o el suministro eléctrico incorrectos, las bombillas de luz, los fusibles de la casa, el cableado de la casa, el costo del servicio técnico para recibir instrucciones o corregir errores en la instalación. SAMSUNG no garantiza el funcionamiento ininterrumpido o sin errores del producto. Español - 85 DV455_02836F-08_MES.indd Sec8:85 2013-12-12 5:11:32 Garantía Excepto lo establecido en el presente, no existen garantías sobre este producto, ya sean expresas o tácitas, y samsung desconoce todas las garantías que incluyen, aunque no en carácter taxativo, cualquier garantía tácita de que el producto se encuentra en condiciones aptas para la venta, de defraudación de derechos o de que el producto se adecua a los fines específicos para los cuales se adquiere. Ningún aval o garantía otorgados por persona, compañía o corporación alguna con respecto al presente producto revestirá carácter vinculante para samsung. Samsung no será responsable por pérdida de ingresos o lucro cesante, imposibilidad de generar ahorros u obtener otros beneficios, o cualquier daño derivado de circunstancias especiales, daño imprevisto o derivado causado por el uso, uso incorrecto, o incapacidad para usar el presente producto, independientemente de la teoría legal en que se funde el reclamo y aun cuando se le haya notificado a samsung de la posibilidad de tales daños. Ningún resarcimiento de ninguna índole contra samsung superará el precio de compra del producto vendido por samsung y causante del presunto daño. Sin limitar lo precedente, el comprador asume todo el riesgo y la responsabilidad por pérdida, daño o lesión al comprador y a los bienes del comprador y a terceros y a sus bienes derivados del uso, uso incorrecto o incapacidad para usar el presente producto. La presente garantía limitada no se extenderá a ninguna persona distinta del comprador original del presente producto, es intransferible y establece su exclusiva reparación. Algunos Estados no permiten limitaciones en cuanto al plazo de una garantía implícita, o la exclusión o limitación de daños imprevistos o derivados, por lo tanto las limitaciones o exclusiones antedichas pueden no aplicarse en su caso. Esta garantía le otorga derechos específicos, y además puede tener otros derechos que varían según el Estado en el que se encuentre. Para recibir un servicio técnico de garantía, comuníquese con SAMSUNG a: Samsung Electronics America, Inc. 85 Challenger Road Ridgefield Park, NJ 07660 1-800-SAMSUNG (726-7864) www.samsung.com Las visitas del personal de servicio técnico para explicar funciones, mantenimiento o instalación no están cubiertas por la garantía. Póngase en contacto con su agente del centro de llamadas Samsung para que le asesore. Español - 86 DV455_02836F-08_MES.indd Sec8:86 2013-12-12 5:11:32 Garantía (CANADA) SECADORA SAMSUNG Un (1) año para las piezas y la mano de obra La presente garantía limitada comienza en la fecha original de compra y es válida únicamente para productos comprados y usados en Canadá. Para recibir el servicio técnico de la garantía, el comprador debe comunicarse con SAMSUNG con el fin de que se determine el problema y los procedimientos del servicio. El servicio técnico de la garantía sólo puede ser prestado por un centro de servicio técnico autorizado de SAMSUNG. Se debe presentar la factura de compra original como prueba de compra a SAMSUNG o al servicio técnico autorizado de SAMSUNG. SAMSUNG prestará servicio técnico a domicilio durante el período de la garantía sin costo, sujeto a la disponibilidad dentro de Canadá. El servicio técnico a domicilio no está disponible en todas las áreas. 08 GARANTÍA GARANTÍA LIMITADA PARA EL COMPRADOR ORIGINAL El presente producto de la marca SAMSUNG, tal como lo provee y distribuye SAMSUNG ELECTRONICS CANADA, INC. (SAMSUNG) y lo entrega nuevo, en su embalaje de cartón original al comprador o consumidor original, está garantizado por SAMSUNG contra defectos de fabricación de los materiales y la mano de obra durante el período limitado de la garantía de: Para recibir el servicio técnico a domicilio, el producto no debe presentar obstrucciones y debe ser accesible para el agente del servicio técnico. Si el servicio técnico no está disponible, SAMSUNG puede optar por transportar el producto hasta y desde el servicio técnico autorizado. SAMSUNG reparará, reemplazará el producto u ofrecerá un reembolso a su criterio y sin cargo adicional, tal como se establece en la presente garantía, con piezas o productos nuevos o reacondicionados si se comprueba que es defectuoso durante el período limitado de la garantía especificado anteriormente. Todas las piezas y los productos reemplazados pasan a ser propiedad de SAMSUNG y deben ser devueltos a SAMSUNG. Las piezas y los productos reemplazados asumen la garantía original que resta, o noventa (90) días, el período que sea el más prolongado. La presente garantía limitada cubre defectos de fabricación de los materiales y la mano de obra encontrados durante el uso normal y doméstico de este producto y no será válida para lo siguiente: daños que ocurran durante el envío; entrega e instalación; aplicaciones y usos para los cuales el presente producto no fue destinado; números de serie o producto alterados; daño cosmético o acabado exterior; accidentes, abuso, descuido, incendio, inundación, caída de rayos, u otros casos fortuitos o de fuerza mayor; uso de productos, equipo, sistemas, utilidades, servicios, piezas, suministros, accesorios, aplicaciones, instalaciones, reparaciones, cableado externo o conectores no provistos ni autorizados por SAMSUNG que dañen este producto o que acarreen problemas en el servicio; voltaje de la línea eléctrica incorrecto, fluctuaciones y sobretensión; ajustes del cliente e incumplimiento de lo establecido en el manual de instrucciones, instrucciones de mantenimiento y ambientales que están cubiertas y recomendadas en el manual de instrucciones; traslado y reinstalación del producto; problemas causados por plagas. La presente garantía limitada no cubre problemas derivados de la corriente, el voltaje o el suministro eléctrico incorrectos, las bombillas de luz, los fusibles de la casa, el cableado de la casa, el costo del servicio técnico para recibir instrucciones o corregir errores en la instalación. SAMSUNG no garantiza el funcionamiento ininterrumpido o sin errores del producto. Español - 87 DV455_02836F-08_MES.indd Sec8:87 2013-12-12 5:11:32 Garantía SALVO LO ESTABLECIDO EN LA PRESENTE GARANTÍA, NO EXISTEN GARANTÍAS SOBRE EL PRESENTE PRODUCTO, YA SEAN EXPRESAS O TÁCITAS, Y SAMSUNG DESCONOCE TODAS LAS GARANTÍAS QUE INCLUYEN, AUNQUE NO EN CARÁCTER TAXATIVO, CUALQUIER GARANTÍA TÁCITA DE QUE EL PRODUCTO SE ENCUENTRA EN CONDICIONES APTAS PARA LA VENTA, DE DEFRAUDACIÓN DE DERECHOS O DE QUE EL PRODUCTO SE ADECUA A LOS FINES ESPECÍFICOS PARA LOS CUALES SE ADQUIERE. NINGÚN AVAL O GARANTÍA OTORGADOS POR PERSONA, COMPAÑÍA O CORPORACIÓN ALGUNA CON RESPECTO AL PRESENTE PRODUCTO REVESTIRÁ CARÁCTER VINCULANTE PARA SAMSUNG. SAMSUNG NO SERÁ RESPONSABLE POR PÉRDIDA DE INGRESOS O LUCRO CESANTE, IMPOSIBILIDAD DE GENERAR AHORROS U OBTENER OTROS BENEFICIOS, O CUALQUIER DAÑO DERIVADO DE CIRCUNSTANCIAS ESPECIALES, DAÑO IMPREVISTO O DERIVADO CAUSADO POR EL USO, USO INCORRECTO, O INCAPACIDAD PARA USAR EL PRESENTE PRODUCTO, INDEPENDIENTEMENTE DE LA TEORÍA LEGAL EN QUE SE FUNDE EL RECLAMO Y AUN CUANDO SE LE HAYA NOTIFICADO A SAMSUNG DE LA POSIBILIDAD DE TALES DAÑOS. NINGÚN RESARCIMIENTO DE NINGUNA ÍNDOLE CONTRA SAMSUNG SUPERARÁ EL MONTO DE COMPRA DEL PRODUCTO VENDIDO POR SAMSUNG Y CAUSANTE DEL PRESUNTO DAÑO. SIN LIMITAR LO PRECEDENTE, EL COMPRADOR ASUME TODO EL RIESGO Y LA RESPONSABILIDAD POR PÉRDIDA, DAÑO O LESIÓN AL COMPRADOR Y A LOS BIENES DEL COMPRADOR Y A TERCEROS Y A SUS BIENES DERIVADOS DEL USO, USO INCORRECTO O INCAPACIDAD PARA USAR EL PRESENTE PRODUCTO. LA PRESENTE GARANTÍA LIMITADA NO SE EXTENDERÁ A NINGUNA PERSONA DISTINTA DEL COMPRADOR ORIGINAL DEL PRESENTE PRODUCTO, ES INTRANSFERIBLE Y ESTABLECE SU EXCLUSIVA REPARACIÓN. Algunas provincias no permiten limitaciones en cuanto al plazo de una garantía implícita, o la exclusión o limitación de daños imprevistos o derivados, por lo que las limitaciones o exclusiones antedichas pueden no aplicarse en su caso. Esta garantía le otorga derechos específicos, y además puede tener otros derechos que varían según la provincia en la que se encuentre. Para recibir un servicio técnico de garantía, comuníquese con SAMSUNG a: Samsung Electronics Canada Inc., Customer Service 55 Standish Court Mississauga, Ontario L5R 4B2 Canada 1-800-SAMSUNG (726-7864) www.samsung.com/ca (English) www.samsung.com/ca_fr (French) Las visitas del personal de servicio técnico para explicar funciones, mantenimiento o instalación no están cubiertas por la garantía. Póngase en contacto con su agente del centro de llamadas Samsung para que le asesore. Español - 88 DV455_02836F-08_MES.indd Sec8:88 2013-12-12 5:11:32 Memo DV455_02836F-08_MES.indd Sec8:89 2013-12-12 5:11:32 Memo DV455_02836F-08_MES.indd Sec8:90 2013-12-12 5:11:32 Memo DV455_02836F-08_MES.indd Sec8:91 2013-12-12 5:11:32 ¿TIENE PREGUNTAS O COMENTARIOS? PAÍS LLAME AL O VISÍTENOS EN LÍNEA EN U.S.A 1-800-SAMSUNG (726-7864) www.samsung.com MEXICO 01-800-SAMSUNG (726-7864) www.samsung.com CANADA 1-800-SAMSUNG (726-7864) www.samsung.com/ca (English) www.samsung.com/ca_fr (francés) Las visitas del personal de servicio técnico para explicar funciones, mantenimiento o instalación no están cubiertas por la garantía. Póngase en contacto con su agente del centro de llamadas Samsung para que le asesore. DC68-02836F-08 DV455_02836F-08_MES.indd Sec8:92 2013-12-12 5:11:32