1
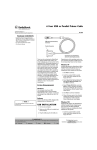
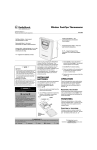
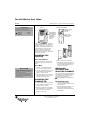
6YQ"$GNN"9KTGNGUU"&QQT"%JKOG
63-1124
OWNER’S MANUAL — Please read before using this equipment.
#"+/2146#06"#
Transmitter (two included)
Receiver
If an icon appears at the end of a paragraph,
go to the box on that page with the
corresponding icon for pertinent information.
Rý— Warning
. — Caution
# — Important
Indicator — Lights
when BELL is
pressed.
° — Hint
Slide ON/OFF to
ON so that when
BELL is pressed
on one of the
transmitters, a
door chime
sounds.
± — Note
BELL — Press
BELL to hear the
door chime.
Thank you for purchasing the RadioShack
Two Bell Wireless Door Chime. It works as a
doorbell, a remote pager, or an alert. You
can add an optional external sensor to have
a chime that alerts you when someone
walks into a room. The wireless door
chime’s three-position channel switch
prevents other transmitters or radio devices
from sounding the chime.
/1706+0)"6*'"
4'%'+8'4
10"#"(.#6"574(#%'
Pull out the wire stand on the back of the
receiver and set it on a table or other flat
surface.
10"#"9#..
."%#76+10".
1. Drill one 3/16-inch diameter hole and
insert one of the supplied anchors.
• Use only fresh batteries of the required size
and type. Always remove old or weak
batteries. They can leak chemicals that
destroy electronic circuits
2. Drive the supplied M3.5 screw into the
hole until the screw's head extends
about 1/8 inch from the wall.
• Do not mix old and new batteries, different
types of batteries (standard, alkaline, or
rechargeable), or rechargeable batteries of
different capacities.
3. Align the keyhole slot on the bottom of
the receiver with the screw in the wall,
then slide it down to secure it.
/1706+0)"6*'"
64#05/+66'4
1. Remove the transmitter from the holder.
2. Use the holder as a template to mark
two screw holes on the wall.
3. Remove the holder from the mounting
surface and drill two 3/16 inch diameter
holes. Insert one of the supplied
anchors into each hole.
4. Drive a screw through the holders.
5. The transmitter can be slid in and out of
the holder. To lock the transmitter in the
holder, fix it with a size M2.6 screw at
the bottom of the holder.
+056#..+0)"
$#66'4+'5"#0&"
5'.'%6+0)"%*#00'.5
The wireless door chime requires three AAA
size batteries in both transmitters and three
C size batteries in the receiver. For best
performance and longest life, we
recommend RadioShack alkaline batteries.
.
+0"6*'"64#05/+66'4
1. Slide the transmitter's battery
compartment door in the direction of the
arrow to remove it.
2. Use a small flat-blade screwdriver to
slide the switch inside the battery
compartment to the desired channel for
the transmitter.
© 2002 RadioShack Corporation.
All Rights Reserved.
RadioShack and RadioShack.com are trademarks
used by RadioShack Corporation.
3. Install three AAA batteries as indicated
by the polarity symbols (+ and –)
marked inside.
4. Replace the compartment door.
5. Repeat Steps 1-4 for the other
transmitter. If the transmitter's LED
indicator dims, replace its batteries.
+0"6*'"4'%'+8'4
±"016'"±"
The transmitter’s channel setting must be the
same as the receiver setting. If the door chime
occasionally sounds without anyone pressing
BELL, this indicates that the channel settings
are different. Change the channel settings so
both the transmitter and the receiver match.
1. Slide the receiver's battery
compartment door in the direction of the
arrow to remove it.
2. There are two channel switches inside
the battery compartment — BELL 1 and
BELL 2. Slide the channel switches so
that they are on the same channel as
the transmitter. ±
3. Install three C size batteries as
indicated by the polarity symbols (+ and
–) marked inside the compartment.
±"016'"±"
4. Replace the compartment door. If the
receiver's LED flashes with a short
beep tone, replace its batteries.
• Press BELL until the indicator lights.
Otherwise, the receiver may not work
properly.
• If you don't want to be bothered by the door
chime, slide ON/OFF on the receiver to OFF.
12'4#6+10
1. Slide ON/OFF on the receiver to ON.
Limited One-Year Warranty
This product is warranted by RadioShack against manufacturing defects in material and workmanship under normal use for
one (1) year from the date of purchase from RadioShack
company-owned stores and authorized RadioShack franchisees and dealers. EXCEPT AS PROVIDED HEREIN,
RadioShack MAKES NO EXPRESS WARRANTIES AND
ANY IMPLIED WARRANTIES, INCLUDING THOSE OF
MERCHANTABILITY AND FITNESS FOR A PARTICULAR
PURPOSE, ARE LIMITED IN DURATION TO THE DURATION OF THE WRITTEN LIMITED WARRANTIES CONTAINED HEREIN. EXCEPT AS PROVIDED HEREIN,
RadioShack SHALL HAVE NO LIABILITY OR RESPONSIBILITY TO CUSTOMER OR ANY OTHER PERSON OR ENTITY WITH RESPECT TO ANY LIABILITY, LOSS OR
DAMAGE CAUSED DIRECTLY OR INDIRECTLY BY USE
OR PERFORMANCE OF THE PRODUCT OR ARISING OUT
OF ANY BREACH OF THIS WARRANTY, INCLUDING, BUT
NOT LIMITED TO, ANY DAMAGES RESULTING FROM INCONVENIENCE, LOSS OF TIME, DATA, PROPERTY, REVENUE, OR PROFIT OR ANY INDIRECT, SPECIAL,
INCIDENTAL, OR CONSEQUENTIAL DAMAGES, EVEN IF
RadioShack HAS BEEN ADVISED OF THE POSSIBILITY OF
SUCH DAMAGES.
Some states do not allow limitations on how long an implied
warranty lasts or the exclusion or limitation of incidental or
consequential damages, so the above limitations or exclusions may not apply to you.
In the event of a product defect during the warranty period,
take the product and the RadioShack sales receipt as proof of
purchase date to any RadioShack store. RadioShack will, at
its option, unless otherwise provided by law: (a) correct the
defect by product repair without charge for parts and labor; (b)
replace the product with one of the same or similar design; or
(c) refund the purchase price. All replaced parts and products,
and products on which a refund is made, become the property
of RadioShack. New or reconditioned parts and products may
be used in the performance of warranty service. Repaired or
replaced parts and products are warranted for the remainder
of the original warranty period. You will be charged for repair
or replacement of the product made after the expiration of the
warranty period.
This warranty does not cover: (a) damage or failure caused
by or attributable to acts of God, abuse, accident, misuse, improper or abnormal usage, failure to follow instructions, improper installation or maintenance, alteration, lightning or
other incidence of excess voltage or current; (b) any repairs
other than those provided by a RadioShack Authorized Service Facility; (c) consumables such as fuses or batteries; (d)
cosmetic damage; (e) transportation, shipping or insurance
costs; or (f) costs of product removal, installation, set-up service adjustment or reinstallation.
This warranty gives you specific legal rights, and you may
also have other rights which vary from state to state.
RadioShack Customer Relations, 200 Taylor Street, 6th Floor,
Fort Worth, TX 76102
2. Press and hold down BELL on the BELL
1 transmitter. Transmit begins, the
indicator lights, and the receiver sounds
the door chime twice. ±
3. When BELL is pressed on the BELL 2
transmitter, it’s indicator lights and the
door chime sounds “Home sweet
home”.
75+0)"6*'"%*+/'"#5"#0"
'064;"%*+/'
1. Connect the transmitter to a normally
open alarm sensor. You need 2conductor wire (not supplied) to make
this connection.
2. Split the ends of the wire, then connect
the wire from the sensor's switch to the
screw holes on the back of the
transmitter, using the two supplied
machine screws. If the sensor you are
using has both normally open and
normally closed contacts, be sure to
connect to the sensor's normally open
contacts.
3. Slide ON/OFF on the receiver to ON.
6*'"(%%"9#065";17"
61"-019
This equipment has been tested and found
to comply with the limits for a Class B digital
device, pursuant to Part 15 of the FCC
Rules. These limits are designed to provide
reasonable protection against harmful
interference in a residential installation. This
equipment generates, uses and can radiate
radio frequency energy and, if not installed
and used in accordance with the
instructions, may cause harmful interference
to radio communications.
However, there is no guarantee that
interference will not occur in a particular
installation. If this equipment does cause
harmful interference to radio or television
reception, which can be determined by
turning the equipment off and on, the user is
encouraged to try to correct the interference
by one or more of the following measures:
• Reorient or relocate the receiving
antenna.
• Increase the separation between the
equipment and receiver.
• Consult your local RadioShack store or
an experienced radio/TV technician for
help.
• If you cannot eliminate the interference,
the FCC requires that you stop using
your door chime.
Changes or modifications not expressly
approved by RadioShack may cause
interference and void the user’s authority to
operate the equipment.
This device complies with Part 15 of the
FCC Rules. Operation is subject to the
following two conditions: (1) this device may
not cause harmful interference, and (2) this
device must accept any interference
received, including interference that may
cause undesired operation.
52'%+(+%#6+105
Frequency ........................433.92 MHz ± 600KHz
Transmitter current consumption............... <10mA
Receiver current consumption...<2mA @ standby
< 130mA @ sound playing
Receiver battery low.......................... 2.4V ± 0.1V
Receiver audio power............... > 80dBA @ 25cm
Transmitter operating
temperature .................................. –20°C to 60 °C
(–4°F to 140°F)
Specifications are typical; individual units might
vary. Specifications are subject to change without
notice.
12/99
RadioShack Corporation
Fort Worth, Texas 76102
63-1124
AO0114AAA1
07A02
Printed in China