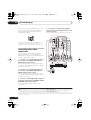
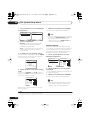
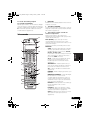
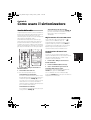
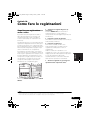
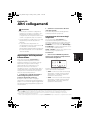
1
VSX_916.book.fm 1 ページ 2005年12月22日 木曜日 午後4時21分 VSX-916-S/-K AUDIO/VIDEO MULTI-CHANNEL RECEIVER SINTOAMPLIFICATORE AUDIO/VIDEO MULTICANALE Discover the benefits of registering your product online at www.pioneer.co.uk (www.pioneer-eur.com). Registra il tuo prodotto su www.pioneer.it (o www.pioneer-eur.com) e scopri subito quali vantaggi puoi ottenere! Operating Instructions Istruzioni per l’uso VSX_916.book.fm 2 ページ 2005年12月22日 木曜日 午後4時21分 IMPORTANT CAUTION RISK OF ELECTRIC SHOCK DO NOT OPEN The lightning flash with arrowhead symbol, within an equilateral triangle, is intended to alert the user to the presence of uninsulated "dangerous voltage" within the product's enclosure that may be of sufficient magnitude to constitute a risk of electric shock to persons. CAUTION: TO PREVENT THE RISK OF ELECTRIC SHOCK, DO NOT REMOVE COVER (OR BACK). NO USER-SERVICEABLE PARTS INSIDE. REFER SERVICING TO QUALIFIED SERVICE PERSONNEL. The exclamation point within an equilateral triangle is intended to alert the user to the presence of important operating and maintenance (servicing) instructions in the literature accompanying the appliance. D3-4-2-1-1_En-A Replacement and mounting of an AC plug on the power supply cord of this unit should be performed only by qualified service personnel. IMPORTANT: THE MOULDED PLUG This appliance is supplied with a moulded three pin mains plug for your safety and convenience. A 5 amp fuse is fitted in this plug. Should the fuse need to be replaced, please ensure that the replacement fuse has a rating of 5 amps and that it is approved by ASTA or BSI to BS1362. Check for the ASTA mark or the BSI mark on the body of the fuse. If the plug contains a removable fuse cover, you must ensure that it is refitted when the fuse is replaced. If you lose the fuse cover the plug must not be used until a replacement cover is obtained. A replacement fuse cover can be obtained from your local dealer. If the fitted moulded plug is unsuitable for your socket outlet, then the fuse shall be removed and the plug cut off and disposed of safely. There is a danger of severe electrical shock if the cut off plug is inserted into any 13 amp socket. If a new plug is to be fitted, please observe the wiring code as shown below. If in any doubt, please consult a qualified electrician. IMPORTANT: The wires in this mains lead are coloured in accordance with the following code: Blue : Neutral Brown : Live As the colours of the wires in the mains lead of this appliance may not correspond with the coloured markings identifying the terminals in your plug, proceed as follows ; The wire which is coloured BLUE must be connected to the terminal which is marked with the letter N or coloured BLACK. The wire which is coloured BROWN must be connected to the terminal which is marked with the letter L or coloured RED. How to replace the fuse: Open the fuse compartment with a screwdriver and replace the fuse. D3-4-2-1-2-2_B_En Thank you for buying this Pioneer product. Please read through these operating instructions so you will know how to operate your model properly. After you have finished reading the instructions, put them away in a safe place for future reference. WARNING This equipment is not waterproof. To prevent a fire or shock hazard, do not place any container filed with liquid near this equipment (such as a vase or flower pot) or expose it to dripping, splashing, rain D3-4-2-1-3_A_En or moisture. WARNING Before plugging in for the first time, read the following section carefully. The voltage of the available power supply differs according to country or region. Be sure that the power supply voltage of the area where this unit will be used meets the required voltage (e.g., 230V D3-4-2-1-4_A_En or 120V) written on the rear panel. WARNING To prevent a fire hazard, do not place any naked flame sources (such as a lighted candle) on the D3-4-2-1-7a_A_En equipment. Operating Environment Operating environment temperature and humidity: +5 ºC – +35 ºC (+41 ºF – +95 ºF); less than 85 %RH (cooling vents not blocked) Do not install this unit in a poorly ventilated area, or in locations exposed to high humidity or direct sunlight (or strong artificial light) D3-4-2-1-7c_A_En This product complies with the Low Voltage Directive (73/23/EEC, amended by 93/68/EEC), EMC Directives (89/336/EEC, amended by 92/31/EEC and 93/68/EEC). D3-4-2-1-9a_En VSX_916.book.fm 3 ページ 2005年12月22日 木曜日 午後4時21分 If you want to dispose this product, do not mix it with general household waste. There is a separate collection system for used electronic products in accordance with legislation that requires proper treatment, recovery and recycling. Private households in the 25 member states of the EU, in Switzerland and Norway may return their used electronic products free of charge to designated collection facilities or to a retailer (if you purchase a similar new one). For countries not mentioned above, please contact your local authorities for the correct method of disposal. By doing so you will ensure that your disposed product undergoes the necessary treatment, recovery and recycling and thus prevent potential negative effects on the environment and human health. K058_En VENTILATION CAUTION When installing this unit, make sure to leave space around the unit for ventilation to improve heat radiation (at least 60 cm at top, 10 cm at rear, and 30 cm at each side). WARNING Slots and openings in the cabinet are provided for ventilation to ensure reliable operation of the product, and to protect it from overheating. To prevent fire hazard, the openings should never be blocked or covered with items (such as newspapers, table-cloths, curtains) or by operating the D3-4-2-1-7b_A_En equipment on thick carpet or a bed. This product is for general household purposes. Any failure due to use for other than household purposes (such as long-term use for business purposes in a restaurant or use in a car or ship) and which requires repair will be charged for even during the K041_En warranty period. CAUTION The STANDBY/ON switch on this unit will not completely shut off all power from the AC outlet. Since the power cord serves as the main disconnect device for the unit, you will need to unplug it from the AC outlet to shut down all power. Therefore, make sure the unit has been installed so that the power cord can be easily unplugged from the AC outlet in case of an accident. To avoid fire hazard, the power cord should also be unplugged from the AC outlet when left unused for a long period of time D3-4-2-2-2a_A_En (for example, when on vacation). DOWN DOWN If the AC plug of this unit does not match the AC outlet you want to use, the plug must be removed and appropriate one fitted. Replacement and mounting of an AC plug on the power supply cord of this unit should be performed only by qualified service personnel. If connected to an AC outlet, the cut-off plug can cause severe electrical shock. Make sure it is properly disposed of after removal. The equipment should be disconnected by removing the mains plug from the wall socket when left unused for a long period of time (for example, when D3-4-2-2-1a_A_En on vacation). WARNING Do not use or store batteries in direct sunlight or other excessively hot place, such as inside a car or near a heater. This can cause batteries to leak, overheat, explode or catch fire. It can also reduce the life or performance of batteries. D3-4-2-3-3_En Manufactured under license from Dolby Laboratories. "Dolby", "Pro Logic", "Surround EX", and the double-D symbol are trademarks of Dolby Laboratories. "DTS" ,"DTS-ES" ,"DTS 96/24" and "Neo:6" are trademarks of Digital Theater Systems, Inc. VSX_916.book.fm 4 ページ 2005年12月22日 木曜日 午後4時21分 Contents 01 Before you start Checking what’s in the box . . . . . . . . . . . . . . . Loading the batteries . . . . . . . . . . . . . . . . . . . Installing the receiver . . . . . . . . . . . . . . . . . . . Ventilation . . . . . . . . . . . . . . . . . . . . . . . . . . . . 6 6 6 6 02 5 minute guide Introduction to home theater . . . . . . . . . . . . . 7 Listening to Surround Sound . . . . . . . . . . . . . 7 Using the Quick Setup . . . . . . . . . . . . . . . . . . 8 03 Quick surround sound setup Setting the effect options . . . . . . . . . . . . . . 29 Listening in stereo . . . . . . . . . . . . . . . . . . . . . 30 Listening with Acoustic Calibration EQ . . . . . 30 Using surround back channel processing . . . 31 Using Virtual Surround Back (VSB) . . . . . . . 31 Using Midnight and Loudness . . . . . . . . . . . . 32 Using the Sound Retriever . . . . . . . . . . . . . . . 32 Enhancing dialog . . . . . . . . . . . . . . . . . . . . . 32 Using the tone controls . . . . . . . . . . . . . . . . . 32 Playing other sources . . . . . . . . . . . . . . . . . . 33 Choosing the input signal . . . . . . . . . . . . . . . 33 Selecting the multichannel analog inputs . . . 33 07 USB playback Automatically setting up for surround sound (MCACC) . . . . . . . . . . . . . . . . . . . . . . . . . . . . . 9 Other problems when using the Auto MCACC Setup . . . . . . . . . . . . . . . . . . . . . . 11 Using the USB interface . . . . . . . . . . . . . . . . 34 Basic playback controls . . . . . . . . . . . . . . . . . 34 Compressed audio compatibility . . . . . . . . . 35 04 Connecting up 08 The System Setup menu Making cable connections . . . . . . . . . . . . . . Analog audio cables . . . . . . . . . . . . . . . . . . Digital audio cables . . . . . . . . . . . . . . . . . . Video cables . . . . . . . . . . . . . . . . . . . . . . . . Connecting a DVD player and TV . . . . . . . . . Connecting the multichannel analog outputs . . . . . . . . . . . . . . . . . . . . . . . . . . . . Connecting a satellite receiver or other digital set-top box . . . . . . . . . . . . . . . . . . . . . Connecting other audio components . . . . . . About the WMA9 Pro decoder . . . . . . . . . . Connecting other video components . . . . . . Using the component video jacks . . . . . . . . Connecting to the front panel video terminal . . . . . . . . . . . . . . . . . . . . . . . . . . . Connecting antennas . . . . . . . . . . . . . . . . . . Using external antennas . . . . . . . . . . . . . . . Connecting the speakers . . . . . . . . . . . . . . . Hints on speaker placement . . . . . . . . . . . . 12 12 12 12 13 14 14 15 15 16 17 17 18 18 19 20 05 Controls and displays Front panel . . . . . . . . . . . . . . . . . . . . . . . . . . Display . . . . . . . . . . . . . . . . . . . . . . . . . . . . . Remote control . . . . . . . . . . . . . . . . . . . . . . . Operating range of remote control . . . . . . . 22 23 25 27 06 Listening to your system Auto playback . . . . . . . . . . . . . . . . . . . . . . . . 28 Listening in surround sound . . . . . . . . . . . . . 28 Using the Advanced surround effects . . . . 29 Making receiver settings from the System Setup menu. . . . . . . . . . . . . . . . . . . . . . . . . . 36 Surround back speaker setting . . . . . . . . . . . 36 Manual MCACC speaker setup . . . . . . . . . . . 37 Fine Channel Level . . . . . . . . . . . . . . . . . . . 38 Fine Speaker Distance . . . . . . . . . . . . . . . . 38 Acoustic Calibration EQ . . . . . . . . . . . . . . . 39 Manual speaker setup . . . . . . . . . . . . . . . . . . 41 Speaker Setting . . . . . . . . . . . . . . . . . . . . . 42 Crossover Network . . . . . . . . . . . . . . . . . . . 43 Channel Level . . . . . . . . . . . . . . . . . . . . . . . 43 Speaker Distance . . . . . . . . . . . . . . . . . . . . 44 09 Using the tuner Listening to the radio. . . . . . . . . . . . . . . . . . . 45 Improving FM stereo sound . . . . . . . . . . . . 45 Tuning directly to a station . . . . . . . . . . . . . 45 Saving station presets . . . . . . . . . . . . . . . . . . 46 Naming station presets. . . . . . . . . . . . . . . . 46 Listening to station presets . . . . . . . . . . . . . 46 An introduction to RDS . . . . . . . . . . . . . . . . . 47 Displaying RDS information . . . . . . . . . . . . 47 Searching for RDS programs . . . . . . . . . . . 47 Using EON . . . . . . . . . . . . . . . . . . . . . . . . . . 48 10 Making recordings Making an audio or a video recording . . . . . . 49 VSX_916.book.fm 5 ページ 2005年12月22日 木曜日 午後4時21分 13 Other Settings 14 Additional information Español Troubleshooting . . . . . . . . . . . . . . . . . . . . . . 66 Resetting the main unit . . . . . . . . . . . . . . . . . 68 Switching the speaker impedance . . . . . . . . . 68 Changing the TV format setting . . . . . . . . . . . 68 Specifications . . . . . . . . . . . . . . . . . . . . . . . . 69 Power cord caution . . . . . . . . . . . . . . . . . . . . 70 Cleaning the unit . . . . . . . . . . . . . . . . . . . . . . 70 Nederlands The Input Assign menu . . . . . . . . . . . . . . . . . 63 The Other Setup menu . . . . . . . . . . . . . . . . . 64 Dynamic Range Control Setup . . . . . . . . . . 64 Dual Mono Setup . . . . . . . . . . . . . . . . . . . . 65 LFE Attenuator Setup . . . . . . . . . . . . . . . . . 65 SR+ Setup for Pioneer plasma displays . . . 65 Deutsch Second Zone speaker B setup . . . . . . . . . . . . 59 Switching the speaker system . . . . . . . . . . 59 Bi-amping your front speakers . . . . . . . . . . . 60 Bi-wiring your speakers . . . . . . . . . . . . . . . . . 60 Connecting additional amplifiers . . . . . . . . . . 61 Using this receiver with a Pioneer plasma display . . . . . . . . . . . . . . . . . . . . . . . . . . . . . . 61 Using the SR+ mode with a Pioneer plasma display . . . . . . . . . . . . . . . . . . . . . . 62 Français 12 Other connections Italiano Operating other Pioneer components . . . . . . 50 Setting the remote to control other components . . . . . . . . . . . . . . . . . . . . . . . . . 50 Selecting preset codes directly . . . . . . . . . . . 51 Programming signals from other remote controls . . . . . . . . . . . . . . . . . . . . . . . . . . . . . 51 Erasing one of the remote control button settings . . . . . . . . . . . . . . . . . . . . . . . . . . . . . 52 Erasing all of the remote control presets . . . . 53 Direct function . . . . . . . . . . . . . . . . . . . . . . . 53 Confirming preset codes . . . . . . . . . . . . . . . . 53 Multi Operation and System Off . . . . . . . . . . 53 Programming a multi-operation or a shutdown sequence . . . . . . . . . . . . . . . . . . 54 Using multi operations . . . . . . . . . . . . . . . . 55 Using System off . . . . . . . . . . . . . . . . . . . . . 55 Controls for TVs . . . . . . . . . . . . . . . . . . . . . . . 55 Controls for other components . . . . . . . . . . . 57 English 11 Controlling the rest of your system 01_before_you_start.fm 6 ページ 2005年12月26日 月曜日 午前11時8分 01 Before you start Chapter 1: Before you start Checking what’s in the box Please check that you've received the following supplied accessories: • Setup microphone • Remote control unit • Dry cell batteries (AA size IEC R6) x2 WARNING • Do not use or store batteries in direct sunlight or other excessively hot place, such as inside a car or near a heater. This can cause batteries to leak, overheat, explode or catch fire. It can also reduce the life or performance of batteries. • AM loop antenna • FM wire antenna Installing the receiver • Warranty card When installing this unit, make sure to put it on a level and stable surface. Don’t install it on the following places: – on a color TV (the screen may distort) – near a cassette deck (or close to a device that gives off a magnetic field). This may interfere with the sound. – in direct sunlight – in damp or wet areas – in extremely hot or cold areas – in places where there is vibration or other movement – in places that are very dusty – in places that have hot fumes or oils (such as a kitchen) • These operating instructions Loading the batteries Caution Incorrect use of batteries may result in such hazards as leakage and bursting. Observe the following precautions: • Never use new and old batteries together. • Insert the plus and minus sides of the batteries properly according to the marks in the battery case. • Batteries with the same shape may have different voltages. Do not use different batteries together. • When disposing of used batteries, please comply with governmental regulations or environmental public instruction’s rules that apply in your country/area. 6 En Ventilation When installing this unit, make sure to leave space around the unit for ventilation to improve heat dispersal (at least 20 cm at the top). If not enough space is provided between the unit and walls or other equipment, heat will build up inside, interfering with performance and/or causing malfunctions. Slot and openings in the cabinet are provided for ventilation and to protect the equipment from overheating. To prevent fire hazard, do not place anything directly on top of the unit, make sure the openings are never blocked or covered with items (such as newspapers, table-cloths and curtains), and do not operate the equipment on thick carpet or a bed. VSX_916.book.fm 7 ページ 2005年12月22日 木曜日 午後4時21分 5 minute guide 02 Chapter 2: • Be sure to complete all connections before connecting to an AC power source. 1 Connect your DVD player and TV. See Connecting a DVD player and TV on page 13 to do this. For surround sound, you’ll want to hook up using a digital connection from the DVD player to the receiver. 2 Connect your speakers and place them for optimal surround sound. See Connecting the speakers on page 19. Surround speaker (RS) Surround back speaker (SBR) Listening position Surround speaker (LS) Surround back speaker (SBL) 3 Plug in and switch on the receiver, followed by your DVD player, subwoofer and TV. Make sure you’ve set the video input on your TV to this receiver. Check the manual that came with the TV if you don’t know how to do this. 4 Press QUICK SETUP on the front panel to specify your speaker setup, room size and listening position. Use the MULTI JOG dial to select and ENTER to confirm your selection. See Using the Quick Setup below for more on this. Español With the following quick setup guide, you should have your system hooked up for surround sound in no time at all. In most cases, you can simply leave the receiver in the default settings. Subwoofer (SW) Nederlands Listening to Surround Sound Front speaker (L) Italiano This receiver will automatically decode multichannel Dolby Digital, DTS, or Dolby Surround sources according to your speaker setup. In most cases, you won’t have to make changes for realistic surround sound, but other possibilities (like listening to a CD with multichannel surround sound) are explained in Listening to your system on page 28. Front speaker (R) Center speaker (C) Français Home theater refers to the use of multiple audio tracks to create a surround sound effect, making you feel like you're in the middle of the action or concert. The surround sound you get from a home theater system depends not only on your speaker setup, but also on the source and the sound settings of the receiver. Where you place the speakers will have a big effect on the sound. Place your speakers as shown below for the best surround sound effect. Also see Hints on speaker placement on page 20 for more on this. Deutsch Introduction to home theater English 5 minute guide 5 Play a DVD, and adjust the volume. Make sure that DVD is showing in the receiver’s display. If it isn’t, press DVD on the remote to set the receiver to the DVD input.1 There are several other sound options you can select. See Listening to your system on page 28 for more on this.2 Note 1 You may need to set your DVD player to output Dolby Digital, DTS and 88.2/96 kHz PCM (2 channel) audio (see your DVD player’s manual for more on this). 2 Depending on your DVD player or source disc, you may only get 2 channel sound. In this case, the listening mode must be set to STANDARD (see Listening in surround sound on page 28 if you need to do this) if you want multichannel surround sound. 7 En VSX_916.book.fm 8 ページ 2005年12月22日 木曜日 午後4時21分 02 5 minute guide • Check the table below to find the speaker setup that corresponds with your system. Using the Quick Setup You can use the Quick Setup to get your system up and running with just a few button presses. The receiver automatically makes the necessary settings after you have selected your speaker setup, room size and listening position. Use the front panel controls for the steps below. • If you want a more complete setup option, refer to Automatically setting up for surround sound (MCACC) on page 9. If you choose to do so, you can skip the Quick Setup.1 AUDIO/VIDEO MULTI-CHANNEL RECEIVER VSX-916 MULTI JOG ENTER DIGITAL PRECISION PROCESSING STANDARD ADVANCED ST/DIRECT/ SURR AUTO SURR DIGITAL PRECISION PROCESSING DVD/LD TV/ SAT DVR/ VCR SIGNAL SELECT AUX SB ch ACOUSTIC PROCESSING EQ 4 LISTENING MODE EON MODE PTY SEARCH MCACC SETUP MIC PHONES TUNING / STATION TUNER EDIT TONE QUICK SETUP SETUP MULTI JOG DOWN UP 1 If the receiver is off, press STANDBY/ON to turn the power on. 2 Press ENTER. MASTER VOLUME MIDNIGHT/ LOUDNESS SPEAKERS STANDBY/ON Press QUICK SETUP. • SW DET flashes in the display while the receiver checks your setup for a subwoofer. SW YES or SW NO confirms the subwoofer check, then the display prompts you to select your speaker setup. 3 Use the MULTI JOG dial to choose your speaker setup. When a subwoofer was detected in step 2, the following choices are available: 2.1ch – 3.1ch – 4.1ch – 5.1ch – 6.1ch – 7.1ch If a subwoofer wasn’t detected in step 2, you can cycle between the following choices: 5 Use the MULTI JOG dial to choose your room size. Depending on the distance of your speakers from the listening position, choose between small, medium, or large (S, M or L), M being an average-sized room. 6 Press ENTER. 7 Use the MULTI JOG dial to choose your listening position. You can cycle between the following choices: • FWD – If you are nearer to the front speakers than the surround speakers • MID – If you are equal distance from the front and surround speakers • BACK – If you are nearer to the surround speakers than the front speakers 8 Press ENTER to confirm your setup. The display shows the speaker setup, room size and listening position that you have selected. 2.0ch – 3.0ch – 4.0ch – 5.0ch – 6.0ch – 7.0ch Note 1 See also Making receiver settings from the System Setup menu on page 36 for more setup options. 8 En VSX_916.book.fm 9 ページ 2005年12月22日 木曜日 午後4時21分 Quick surround sound setup 03 Chapter 3: Caution DIALOG E RECEIVER SYSTEM OFF INPUT SELECT SOURCE D.ACCESS CLASS +10 DISC If you have a tripod, use it to place the microphone so that it’s about ear level at your normal listening position. Otherwise, place the microphone at ear level using a table or a chair. • Make sure there are no obstacles between the speakers and the microphone. 3 Press RECEIVER on the remote control, then press the SETUP button. An on-screen display (OSD) appears on your TV. Use /// and ENTER on the remote control to navigate through the screens and select menu items. Press RETURN to exit the current menu. • Press SETUP at any time to exit the System Setup menu.1 Español • The test tones used in the Auto MCACC Setup are output at high volume. UP Nederlands • The Auto MCACC Setup will overwrite any existing speaker settings you’ve made. • Make sure the headphones are unplugged. DOWN Italiano Important MASTER VOLUME MCACC SETUP MIC Français The Auto Multi-Channel Acoustic Calibration (MCACC) setup measures the acoustic characteristics of your listening area, taking into account ambient noise, speaker size and distance, and tests for both channel delay and channel level. After you have set up the microphone provided with your system, the receiver uses the information from a series of test tones to optimize the speaker settings and equalization for your particular room. Push down on the PUSH OPEN tab to access the MCACC SETUP MIC jack. Deutsch Automatically setting up for surround sound (MCACC) English Quick surround sound setup 4 Select ‘Auto MCACC’ from the System Setup menu then press ENTER. ENTER AV PRE-PROGRAMMED AND LEARNING REMOTE CONTROL UNIT MENU TOP MENU System Setup TUNE ST ST ENTER SETUP GUIDE PTY SEARCH T.EDIT RETURN TUNE TV CONTROL DVD TV DVR CD-R/TAPE USB FM AM TV CTRL TV VOL CD INPUT SELECT TV CH 2. Auto MCACC 1.Surr Back System 2.Auto MCACC 3.Manual MCACC 4.Manual SP Setup 5.Input Assign 6.Other Setup Surr Back System Normal (SB) ] VOL RECEIVER : Exit ENTER: Start : Cancel REC 1 Switch on the receiver and your TV. 2 Connect the microphone to the MCACC SETUP MIC jack on the front panel. Note 1 The screensaver automatically starts after three minutes of inactivity. If you cancel the Auto MCACC Setup at any time, the receiver automatically exits and no settings will be made. 9 En VSX_916.book.fm 10 ページ 2005年12月22日 木曜日 午後4時21分 03 Quick surround sound setup 5 Make sure ‘Normal (SB)’ is selected then press ENTER. 1 Try to be as quiet as possible after pressing ENTER. The system outputs a series of test tones to establish the ambient noise level. 6 Follow the instructions on-screen. • Make sure the microphone is connected. • If you’re using a subwoofer, it is automatically detected every time you switch on the system. Make sure it is on and the volume is turned up. • See below for notes regarding background noise and other possible interference. 7 Wait for the test tones to finish. A progress report is displayed on-screen while the receiver outputs test tones to determine the speakers present in your setup. Try to be as quiet as possible while it’s doing this. If the speaker configuration displayed isn’t correct, use / to select the speaker and / to change the setting (and number for surround back). When you’re finished, go to the next step. If you see an error message (ERR) in the right side column, there may be a problem with the speaker connection. If selecting RETRY doesn’t fix the problem, turn off the power and check the speaker connections. 9 Make sure ‘OK’ is selected, then press ENTER. A progress report is displayed on-screen while the receiver outputs more test tones to determine the optimum receiver settings for speaker setting, channel level, speaker distance, and Acoustic Calibration EQ. 2.Auto MCACC Now Analyzing Surround Speaker Speaker Channel Acoustic 2.Auto MCACC Now Analyzing Environment Check Ambient Noise Microphone Speaker YES/NO [ OK ] [ OK ] [ OK ] :Cancel • For correct speaker settings, do not adjust the volume during the test tones. 8 Confirm the speaker configuration. The configuration shown on-screen should reflect the actual speakers you have. 2.Auto MCACC CHECK! Front Center Surround SB SUB W. [ [ [ [ [ YES YES YES Yx2 YES ] ] ] ] ] OK :Cancel Analyzing System Distance Level Cal EQ [ [ [ [ ] ] ] ] :Cancel Again, try to be as quiet as possible while this is happening. It may take 3 to 8 minutes. 10 The Auto MCACC Setup has finished! Select ‘SKIP’ to go back to the System Setup menu. The MCACC indicator on the front panel will light to show the setup is complete. The settings made in the Auto MCACC Setup should give you excellent surround sound from your system, but it is also possible to adjust these settings manually using the System Setup menu (starting on page 36).2 You can also choose to view the settings by selecting individual parameters from the Analyzed Data Check screen: Note 1 If you are planning on bi-amping your front speakers, or setting up a separate speaker system in another room, read through Surround back speaker setting on page 36 and make sure to connect your speakers as necessary before continuing. 2 • Depending on the characteristics of your room, sometimes identical speakers with cone sizes of around 12 cm will end up with different size settings. You can correct the setting manually using the Speaker Setting on page 42. • The subwoofer distance setting may be farther than the actual distance from the listening position. This setting should be accurate (taking delay and room characteristics into account) and generally does not need to be changed. 10 En VSX_916.book.fm 11 ページ 2005年12月22日 木曜日 午後4時21分 Quick surround sound setup 03 English • Speaker Setting – The size and number of speakers you’ve connected (see page 42 for more on this) • Speaker Distance – The distance of your speakers from the listening position (see page 44 for more on this) Deutsch • Channel Level – The overall balance of your speaker system (see page 43 for more on this) Français • Acoustic Cal EQ – Adjustments to the frequency balance of your speaker system based on the acoustic characteristics of your room (see page 39 for more on this) Press RETURN after you have finished checking each screen. When you’re finished, select SKIP to go back to the System Setup menu. Italiano Other problems when using the Auto MCACC Setup Nederlands If the room environment is not optimal for the Auto MCACC Setup (too much background noise, echo off the walls, obstacles blocking the speakers from the microphone) the final settings may be incorrect. Check for household appliances (air conditioner, fridge, fan, etc.), that may be affecting the environment and switch them off if necessary. If there are any instructions showing in the front panel display, please follow them. Español • Some older TVs may interfere with the operation of the microphone. If this seems to be happening, switch off the TV when doing the Auto MCACC Setup. 11 En VSX_916.book.fm 12 ページ 2005年12月22日 木曜日 午後4時21分 04 Connecting up Chapter 4: Connecting up Video cables Making cable connections Important • Before making or changing connections, switch off the power and disconnect the power cord from the AC outlet. • Make sure not to bend the cables over the top of this unit. If this happens, the magnetic field produced by the transformers in this unit may cause a humming noise from the speakers. • Before unplugging the power cord, switch the power into standby. Analog audio cables Use stereo RCA phono cables to connect analog audio components. These cables are typically red and white, and you should connect the red plugs to R (right) terminals and white plugs to L (left) terminals. Analog audio cables Right (red) Left (white) Digital audio cables Commercially available coaxial digital audio cables or optical cables should be used to connect digital components to this receiver.1 Standard RCA video cables These cables are the most common type of video connection and are used to connect to the composite video terminals. The yellow plugs distinguish them from cables for audio. Standard RCA video cable S-video cables S-video cables give you a clearer picture reproduction than standard RCA video cables by sending separate signals for the luminance and color. S Video Component video cables Use component video cables to get the best possible color reproduction of your video source. The color signal of the TV is divided into the luminance (Y) signal and the color (PB and PR) signals and then output. In this way, interference between the signals is avoided. Component video cables Green (Y) Blue (PB) Coaxial digital audio cable Red (PR) Optical cable Note 1 • When connecting optical cables, be careful when inserting the plug not to damage the shutter protecting the optical socket. • When storing optical cable, coil loosely. The cable may be damaged if bent around sharp corners. • You can also use a standard RCA video cable for coaxial digital connections. 12 En VSX_916.book.fm 13 ページ 2005年12月22日 木曜日 午後4時21分 Connecting up 04 English Connecting a DVD player and TV This page shows you how to connect your DVD player and TV to the receiver. 2 Connect the composite video output and the stereo analog audio outputs2 on your DVD player to the DVD/LD inputs on this receiver. Use a standard RCA video cable3 and a stereo RCA phono cable for the connection. TV 3 DIGITAL AUDIO OUT OPTICAL ANALOG AUDIO OUT R L AUX IN CD IN DVR / VCR OPT FM UNBAL 75 Ω AM LOOP ANTENNA MONITOR OUT OPT OUT 2 (TV/ SAT) OPT CONTROL IN 1 (CD) ASSIGNABLE DIGITAL IN OUT OUT VIDEO IN DVR / VCR OUT IN IN IN ASSIGNABLE DIGITAL IN DVD /LD FRONT IN COAX 2 (DVR/VCR) PLAY CD-R / TAPE / MD IN (DVD/LD) OUT TV / SAT MONITOR OUT DVD 5.1CH INPUT IN SUB WOOFER PREOUT Italiano TV / SAT 1 IN DVD /LD S-VIDEO IN REC R AUDIO L Nederlands This receiver 2 1 COAXIAL DIGITAL OUT R AUDIO L ANALOG OUT VIDEO OUT Español 4 Connect the MONITOR OUT video jack on this receiver to a video input on your TV. Use a standard RCA video cable to connect to the composite video jack.4 Français IN COAX • If your TV has a built-in digital decoder, you can also connect an optical digital audio output from your TV to the DIGITAL OPT 2 (TV/SAT) input on this receiver. Use an optical cable for the connection. VIDEO IN 4 DIGITAL OUT • If your DVD player has multichannel analog outputs, see Connecting the multichannel analog outputs below for how to connect it. 3 Connect the analog audio outputs from your TV to the TV/SAT inputs on this receiver. This will allow you to play the sound from the TV's built-in tuner. Use a stereo RCA phono cable to do this. Deutsch 1 Connect a coaxial digital audio output on your DVD player to the DIGITAL COAX 1 (DVD/LD) input on this receiver. Use a coaxial digital audio cable for the connection.1 DVD player Note 1 If your DVD player only has an optical digital output, you can connect it to the optical input on this receiver using an optical cable. When you set up the receiver you'll need to tell the receiver which input you connected the player to (see The Input Assign menu on page 63). 2 This connection will allow you to make analog recordings from your DVD player. 3 For better quality, you can also connect with S-video using the S-VIDEO DVD/LD jack. If your player also has a component video output, you can connect this too. See Using the component video jacks on page 17 for more on this. 4 For better quality, you can also connect with S-video using the S-VIDEO MONITOR OUT jack. See Using the component video jacks on page 17 if you want to use the component video outputs to connect this receiver to your TV. 13 En VSX_916.book.fm 14 ページ 2005年12月22日 木曜日 午後4時21分 04 Connecting up Connecting the multichannel analog outputs For DVD Audio and SACD playback, your DVD player may have 5.1 channel analog outputs.In this case, you can connect the multichannel analog outputs to the multichannel inputs of this receiver as shown below.1 This receiver CEN- SUB TER WOOFER DIGITAL OUT IN AUX IN CD OPT FM UNBAL 75 Ω AM LOOP ANTENNA OPT Y IN OUT This receiver OUT VIDEO TV / SAT IN OUT IN IN DVR / VCR IN DVD /LD FRONT IN COAX 2 (DVR/VCR) (DVR/VC PB SURROUND DVD 5.1CH INPUT CONTROL DVR / VCR IN 1 (CD) ASSIGNABLE DIGITAL IN ASSIGNABLE DIGITAL IN L OUT 2 OPT 2 Connect an optical digital audio output from your set-top box component to the DIGITAL OPT 2 (TV/SAT) input on this receiver. Use an optical cable for the connection.4 COMPONE MONITOR OUT R (TV/ SAT) 1 Connect a set of audio/video outputs on the set-top box component to the TV/SAT AUDIO and VIDEO inputs on this receiver.2 Use a stereo RCA phono cable for the audio connection and a standard RCA video cable for the video connection.3 PLAY CD-R / TAPE / MD IN COAX 1 (DVD/LD) OUT TV / SAT MONITOR OUT DVD 5.1CH INPUT SUB WOOFER PREOUT IN IN DVD /LD S-VIDEO REC R AUDIO L IN MONITO S P E A K E R S R FRONT LR DIGITAL OUT IN AUX IN CD OPT A FM UNBAL 75 Ω AM LOOP ANTENNA MONITOR OUT OPT OUT 2 (TV/ SAT) OPT CONTROL DVR / VCR IN IN 1 (CD) ASSIGNABLE DIGITAL IN OUT OUT VIDEO TV / SAT IN DVR / VCR OUT IN IN IN ASSIGNABLE DIGITAL IN DVD /LD FRONT IN COAX 2 (DVR/VCR) PLAY CD-R / TAPE / MD IN COAX R L FRONT OUTPUT CENTER OUTPUT R L SURROUND OUTPUT 1 SUB WOOFER OUTPUT (DVD/LD) OUT VIDEO OUTPUT DVD/multi-channel decoder with multi-channel analog output jacks DVD 5.1CH INPUT SUB WOOFER PREOUT IN IN DVD /LD S-VIDEO IN REC R AUDIO L 2 1 DIGITAL OUT OPTICAL COAXIAL R AUDIO L VIDEO AV OUT Connecting a satellite receiver or other digital set-top box Satellite and cable receivers, and terrestrial digital TV tuners are all examples of so-called 'set-top boxes'. TV / SAT MONITOR OUT STB Note 1 The multichannel input can only be used when DVD 5.1 ch is selected (see page 33). 2 If you've already connected your TV to the TV/SAT inputs, simply choose another input. However, to receive a signal, you'll need to press the input select button for the input you connected the set-top box to. 3 For better quality, you can also connect with S-video using the S-VIDEO TV/SAT jack. If your set-top box also has a component video output, you can connect this too. See Using the component video jacks on page 17 for more on this. 4 If your satellite/cable receiver doesn’t have a digital audio output, omit this step. If it only has a coaxial digital output, you can connect it to one of the coaxial inputs on this receiver using a coaxial digital audio cable. When you set up the receiver you'll need to tell the receiver which input you connected the set-top box to (see The Input Assign menu on page 63). 14 En VSX_916.book.fm 15 ページ 2005年12月22日 木曜日 午後4時21分 Connecting up This receiver DIGITAL OUT IN AUX IN CD OPT The number and kind of connections depends on the kind of component you’re connecting.1 Follow the steps below to connect a CD-R, MD, DAT, tape recorder or other audio component. FM UNBAL 75 Ω AM LOOP ANTENNA MONITOR OUT OPT OUT 2 (TV/ SAT) OPT CONTROL DVR / VCR IN IN 1 OUT OUT VIDEO IN TV / SAT DVR / VCR OUT IN IN 2 PLAY CD-R / TAPE / MD IN COAX 1 (DVD/LD) OUT SUB WOOFER PREOUT IN L AUDIO 3 OPTICAL 2 R IN REC L AUDIO IN 4 DVD /LD IN S-VIDEO REC R 1 DVD 5.1CH INPUT IN R OUT PLAY L AUDIO OUT Nederlands CD-R, MD, DAT, Tape recorder, etc. OPTICAL DIGITAL IN Español 4 If your recorder has a digital input, connect it to the digital output on the receiver as shown. Use an optical cable to make this connection. COAX (DVR/VCR) TV / SAT MONITOR OUT Italiano 3 If you're connecting a recorder, connect the analog audio outputs (REC) to the analog audio inputs on the recorder. The example shows an analog connection to the CD-R/TAPE/MD analog output jack using a stereo RCA phono cable. IN Français 2 If necessary, connect the analog audio outputs of the component to a set of spare audio inputs on this receiver. You’ll need to make this connection for components without a digital output, or if you want to record from a digital component. Use a stereo RCA phono cable as shown. ASSIGNABLE DIGITAL IN DVD /LD FRONT Deutsch (CD) ASSIGNABLE DIGITAL IN IN 1 If your component has a digital output, connect this to a digital input on the receiver as shown. The example shows a coaxial connection to the CD digital input jack using a coaxial digital audio cable. English Connecting other audio components 04 About the WMA9 Pro decoder This unit has an on-board Windows Media® Audio 9 Professional (WMA9 Pro) decoder, so it is possible to playback WMA9 Pro-encoded audio using a coaxial or optical digital connection when connected to a WMA9 Procompatible player. Note 1 Note that you must connect digital components to analog audio jacks if you want to record to/from digital components (like an MD) to/from analog components. 15 En VSX_916.book.fm 16 ページ 2005年12月22日 木曜日 午後4時21分 04 Connecting up However, the connected DVD player, set-top box, etc. must be able to output WMA9 Pro format audio signals through a coaxial or optical digital output. 4 If your video component has a digital input, connect it to the digital output on the receiver as shown. Use an optical cable to make this connection. This receiver DIGITAL OUT IN AUX IN CD OPT FM UNBAL 75 Ω AM LOOP ANTENNA MONITOR OUT OPT OUT 2 (TV/ SAT) Microsoft, Windows Media®, and the Windows logo are trademarks, or registered trademarks of Microsoft Corporation in the United States and/or other countries. OPT CONTROL DVR / VCR IN IN 1 (CD) ASSIGNABLE DIGITAL IN OUT OUT VIDEO TV / SAT IN DVR / VCR OUT IN IN IN ASSIGNABLE DIGITAL IN DVD /LD FRONT IN COAX 2 (DVR/VCR) Connecting other video components This receiver has audio/video inputs and outputs suitable for connecting analog or digital video recorders, including VCRs, DVDrecorders and HDD recorders. 1 Connect a set of audio/video outputs on the recorder to the DVR/VCR AUDIO and VIDEO inputs on this receiver. Use a stereo RCA phono cable for the audio connection and a standard RCA video cable for the video connection.1 2 Connect a set of audio/video inputs on the recorder to the DVR/VCR AUDIO and VIDEO outputs on this receiver. Use a stereo RCA phono cable for the audio connection and a standard RCA video cable for the video connection.2 PLAY CD-R / TAPE / MD IN COAX 1 (DVD/LD) OUT OPTICAL DVD 5.1CH INPUT IN AUDIO COAXIAL 4 DVD /LD S-VIDEO IN L 2 1 DIGITAL OUT SUB WOOFER PREOUT IN REC R 3 TV / SAT MONITOR OUT R IN REC R OUT L AUDIO IN PLAY VIDEO IN L AUDIO OUT VIDEO OUT VCR, DVR, LD player, etc. OPTICAL DIGITAL IN 3 Connect a coaxial digital audio output on your video component to the DIGITAL COAX 2 (DVR/VCR) input on this receiver. Use a coaxial digital audio cable for the connection.3 Note 1 For better quality, you can also connect with S-video using the S-VIDEO DVR/VCR IN jack. If your video component also has a component video output, you can connect this too. See Using the component video jacks on page 17 for more on this. 2 For better quality, you can also connect with S-video using the S-VIDEO DVR/VCR OUT jack. 3 If your video component only has an optical digital output, you can connect it to the optical input on this receiver using an optical cable. When you set up the receiver you'll need to tell the receiver which input you connected the player to (see The Input Assign menu on page 63). 16 En VSX_916.book.fm 17 ページ 2005年12月22日 木曜日 午後4時21分 Connecting up Using the component video jacks Connecting to the front panel video terminal • Push down on the PUSH OPEN tab to access the front video connections. VIDEO INPUT L AUDIO MCACC SETUP MIC USB R DIGITAL IN PUSH OPEN PROCESSING CD CD-R / TAPE / MD S -VIDEO VIDEO FM VIDEO INPUT L AUDIO AM USB AUX USB R DIGITAL IN MCACC SETUP MIC Video camera (etc.) V L VIDEO OUTPUT Nederlands • COMPONENT 1 – DVD VIDEO Italiano 2 If necessary, assign the component video inputs to the input source you've connected. This only needs to be done if you didn’t connect according to the following defaults: S-VIDEO Français 1 Connect the component video outputs of your source to a set of component video inputs on this receiver. Use a three-way component video cable for the connection. Deutsch Front video connections are accessed via the front panel using the VIDEO button. There are standard audio/video jacks as well as an Svideo jack and an optical input. Hook them up the same way you made the rear panel connections. Important • If you connect any source component to the receiver using a component video input, you must also have your TV connected to this receiver's COMPONENT VIDEO MONITOR OUT jacks. English Component video should deliver superior picture quality when compared to composite video. A further advantage (if your source and TV are both compatible) is progressive-scan video, which delivers a very stable, flicker-free picture. See the manuals that came with your TV and source component to check whether they are compatible with progressive-scan video. 04 R DIGITAL OUT This receiver Español • COMPONENT 2 – TV • COMPONENT 3 – DVR See Assigning the component video inputs on page 63 for more on this. 3 Connect the COMPONENT VIDEO MONITOR OUT jacks on this receiver to the component video inputs on your TV or monitor. Use a three-way component video cable. 17 En VSX_916.book.fm 18 ページ 2005年12月22日 木曜日 午後4時21分 04 Connecting up Using external antennas Connecting antennas Connect the AM loop antenna and the FM wire antenna as shown below. To improve reception and sound quality, connect external antennas (see Using external antennas below). fig. a fig. b To improve FM reception Use a PAL connector to connect an external FM antenna. fig. c One-touch PAL connector 3 75 Ω coaxial cable 5 FM UNBAL 75 Ω AM LOOP ANTENNA 1 4 2 FM UNBAL 75 Ω AM LOOP ANTENNA To improve AM reception Connect a 5 to 6 meter length of vinyl-coated wire to the AM antenna terminal without disconnecting the supplied AM loop antenna. For the best possible reception, suspend horizontally outdoors. 1 Pull off the protective shields of both AM antenna wires. Outdoor antenna 2 Push open the tabs, then insert one wire fully into each terminal, then release the tabs to secure the AM antenna wires. 3 Fix the AM loop antenna to the attached stand. To fix the stand to the antenna, bend in the direction indicated by the arrow (fig. a) then clip the loop onto the stand (fig. b). • If you plan to mount the AM antenna to a wall or other surface, secure the stand with screws (fig. c) before clipping the loop to the stand. Make sure the reception is clear. 4 Place the AM antenna on a flat surface and in a direction giving the best reception. 5 Connect the FM wire antenna in the same way as the AM loop antenna. For best results, extend the FM antenna fully and fix to a wall or door frame. Don’t drape loosely or leave coiled up. 18 En 5 to 6 meters Indoor antenna (vinyl-coated wire) FM UNBAL 75 Ω AM LOOP ANTENNA VSX_916.book.fm 19 ページ 2005年12月22日 木曜日 午後4時21分 Connecting up 04 English Connecting the speakers A complete setup of eight speakers (including the subwoofer) is shown here but everyone’s home setup will vary. Simply connect the speakers you have in the manner shown below. 1 The receiver will work with just two stereo speakers (the front speakers in the diagram) but using at least three speakers is recommended, and a complete setup is best. Deutsch Make sure you connect the speaker on the right to the right terminal and the speaker on the left to the left terminal. Also make sure the positive and negative ( +/–) terminals on the receiver match those on the speakers.2 You can use speakers with a nominal impedance between 6 Ω to 16 Ω (please see Switching the speaker impedance on page 68 if you plan to use speakers with an impedance of less than 8 Ω). L Surround speakers Surround back speakers Center speaker R Français Front speakers C LS RS SBL SBR Italiano DIGITAL OUT CEN- SUB TER WOOFER AUX IN CD IN DVR / VCR FM UNBAL 75 Ω AM LOOP ANTENNA Y IN OUT (DVD/LD) IN 1 PB PR FRONT SURROUND SURROUND BACK L L L R R PREOUT VIDEO TV / SAT IN DVR / VCR OUT IN IN DVD /LD FRONT IN COAX 2 (DVR/VCR) ASSIGNABLE PR Y OUT IN ASSIGNABLE DIGITAL IN (DVR/VCR) IN 3 PB SURROUND DVD 5.1CH INPUT CONTROL 1 (CD) ASSIGNABLE DIGITAL IN L R OUT 2 OPT COMPONENT VIDEO MONITOR OUT OPT (TV/ SAT) Nederlands IN OPT PLAY CD-R / TAPE / MD IN COAX 1 DVD 5.1CH INPUT IN SUB WOOFER PREOUT IN DVD /LD S-VIDEO REC R AUDIO L This receiver IN (TV/SAT) IN 2 MONITOR OUT S P E A K E R S R FRONT LR SURROUND A L CENTER R R SURROUND BACK CENTER L B Español (DVD/LD) OUT TV / SAT MONITOR OUT Powered subwoofer SW INPUT Caution • Make sure that all the bare speaker wire is twisted together and inserted fully into the speaker terminal. Use good quality speaker wire to connect the speakers to the receiver. Note 1 If you’re not using a subwoofer, change the front speaker setting (see Speaker Setting on page 42) to LARGE. 2 If you are using only one surround back speaker, connect it to the surround back left ( L) terminal. 19 En VSX_916.book.fm 20 ページ 2005年12月22日 木曜日 午後4時21分 04 Connecting up Make sure that the speaker cable you’re using is properly prepared with about 10 mm of insulator stripped from each wire, with the exposed wire strands twisted together (fig. A). the TV is switched on. If you do not have magnetically shielded speakers and notice discoloration of the TV picture, move the speakers farther away from the TV. Unscrew the terminal a few turns until there is enough space to insert the exposed wire (fig. B). Once the wire is in position, tighten the terminal until the wire is firmly clamped (fig. C). • If you're using a center speaker, place the front speakers at a wider angle. If not, place them at a narrower angle. fig. A fig. B fig. C 10 mm Caution • These speaker terminals carry HAZARDOUS LIVE voltage. To prevent the risk of electric shock when connecting or disconnecting the speaker cables, disconnect the power cord before touching any uninsulated parts. Hints on speaker placement Speakers are usually designed with a particular placement in mind. Some are designed to be floorstanding, while others should be placed on stands to sound their best. Some should be placed near a wall; others should be placed away from walls. We have provided a few tips on getting the best sound from your speakers (following), but you should also follow the guidelines on placement that the speaker manufacturer provided with your particular speakers to get the most out of them. • Place the front left and right speakers at equal distances from the TV. • When placing speakers near the TV, we recommend using magnetically shielded speakers to prevent possible interference, such as discoloration of the picture when 20 En • Place the center speaker above or below the TV so that the sound of the center channel is localized at the TV screen. Also, make sure the center speaker does not cross the line formed by the leading edge of the front left and right speakers. • It is best to angle the speakers towards the listening position. The angle depends on the size of the room. Use less of an angle for bigger rooms. • Surround and surround back speakers should be positioned 60 cm to 90 cm higher than your ears and titled slightly downward. Make sure the speakers don't face each other. • To achieve the best possible surround sound, install your speakers as shown below. Be sure all speakers are installed securely to prevent accidents and improve sound quality. Caution • If you choose to install the center speaker on top of the TV, be sure to secure it with putty, or by other suitable means, to reduce the risk of damage or injury resulting from the speaker falling from the TV in the event of external shocks such as earthquakes. • Make sure no exposed speaker wire is touching the rear panel, this may cause the receiver to turn off automatically. VSX_916.book.fm 21 ページ 2005年12月22日 木曜日 午後4時21分 Connecting up 04 Overhead view of speaker setup Front left English You can also refer to the 3-D speaker setup illustration on page 7. Front right Center Deutsch Subwoofer Surround left Surround right Français Listening position Surround back left Surround back right Single surround back speaker . Italiano Nederlands The diagrams below show suggested surround and surround back speaker orientation. The first diagram (fig. A) shows orientation with one surround back speaker (or none) connected. The second (fig. B) shows orientation with two surround back speakers connected. 90 to 120 RS LS RS LS 0 to 60 SB fig. A Español RS LS SBL SBL SBR SBR fig. B 3-D view of 7.1 channel speaker setup 21 En VSX_916.book.fm 22 ページ 2005年12月22日 木曜日 午後4時21分 05 Controls and displays Chapter 5: Controls and displays Front panel 2 1 3 4 5 6 AUDIO/VIDEO MULTI-CHANNEL RECEIVER VSX-916 MULTI JOG ENTER DIGITAL PRECISION PROCESSING STANDARD ADVANCED ST/DIRECT/ SURR AUTO SURR TV/ SAT DVD/LD DVR/ VCR VIDEO CD CD-R / TAPE / MD FM AM USB SIGNAL SELECT AUX SB ch ACOUSTIC PROCESSING EQ LISTENING MODE EON MODE PTY SEARCH MASTER VOLUME MIDNIGHT/ LOUDNESS SPEAKERS STANDBY/ON S- VIDEO VIDEO PHONES TUNING / STATION TUNER EDIT TONE QUICK SETUP SETUP VIDEO INPUT L AUDIO USB R DIGITAL IN MCACC SETUP MIC RETURN MULTI JOG DOWN 8 9 7 STANDARD ADVANCED ST/DIRECT/ SURR AUTO SURR 10 14 15 16 EON MODE PTY SEARCH 18 19 20 21 TUNING / STATION TUNER EDIT TONE QUICK SETUP UP 11 12 13 17 23 MIDNIGHT/ LOUDNESS SPEAKERS SIGNAL SELECT 24 25 SB ch ACOUSTIC PROCESSING EQ LISTENING MODE 22 SETUP RETURN MULTI JOG 1 Input select buttons Press to select an input source. 2 Digital Precision Processing indicator Lights to indicate digital processing. 3 Character display See Display on page 23. 4 MCACC indicator Lights when Acoustic Calibration EQ (page 30) is on (Acoustic Calibration EQ is automatically set to ALL CH ADJUST after the Auto MCACC Setup (page 9) or EQ Auto Setup (page 39)). 5 22 En ENTER 6 MULTI JOG dial Use the MULTI JOG dial to select various settings and menu options. 7 LISTENING MODE buttons STANDARD – Press for Standard decoding and to switch between the various Pro Logic IIx and Neo:6 options (page 28). ADVANCED SURR – Use to switch between the surround modes (page 29). ST/DIRECT/AUTO SURR Selects stereo/direct playback (page 30). Also selects Auto Surround (Auto playback on page 28). VSX_916.book.fm 23 ページ 2005年12月22日 木曜日 午後4時21分 Controls and displays 05 18 TUNING / STATION Selects the frequency (page 45) and station presets (page 46) when using the tuner. 9 STANDBY/ON Switches the receiver between on and standby. 19 TUNER EDIT Press to memorize and name a station for recall (page 46). 11 USB interface Connect a USB audio device for playback (see Using the USB interface on page 34). 21 QUICK SETUP See Using the Quick Setup on page 8. Français 12 MCACC SETUP MIC jack Use to connect the supplied microphone. 20 TONE Press this button to access the bass and treble controls, which you can then adjust with the MULTI JOG dial (page 32). Deutsch 10 VIDEO INPUT See Connecting to the front panel video terminal on page 17. English 8 PHONES jack Use to connect headphones (when connected, there is no sound output from the speakers). 22 System Setup menu controls SETUP – Use with the MULTI JOG dial to access the System Setup menu (page 9, page 36, page 63). 13 MASTER VOLUME dial 14 EON MODE Use to search for programs that are broadcasting traffic or news information (page 48). Italiano RETURN – Press to confirm and exit the current menu. 23 SIGNAL SELECT Use to select an input signal (page 33). 15 PTY SEARCH Use this button to search for RDS program types (page 47). 16 MIDNIGHT/LOUDNESS Switches between Midnight and Loudness listening (page 32). Nederlands 24 SBch PROCESSING Selects surround back channel processing or the virtual surround back mode (page 31). 25 ACOUSTIC EQ Press to select an Acoustic Calibration EQ setting (page 30). Español 17 SPEAKERS Use to change the speaker system (page 59) and the impedance setting (page 68). Display 1 2 3 4 5 6 7 8 9 10 11 12 [L] 6 EON [C] RDS SP AB [ R ] [Rs ] 0 [SBR] [SB L ] [Ls ] 6 40 125 250 4K13K 13 14 15 1 SIGNAL indicators Lights to indicate the type of input signal: 16 17 18 19 20 21 22 AUTO – Lights when AUTO signal select is on. 23 En VSX_916.book.fm 24 ページ 2005年12月22日 木曜日 午後4時21分 05 Controls and displays SB – Depending on the source, this lights when a signal with surround back channel encoding is detected. DIGITAL – Lights when a digital audio signal is detected. – Lights when a stereo FM broadcast is being received in auto stereo mode. 2 DIGITAL – Lights when a Dolby Digital encoded signal is detected. – Lights when a broadcast is being received. ANALOG – Lights when an analog signal is detected. 11 EON/RDS indicators EON – Lights when the EON mode is set, and flashes during an EON broadcast. The indicator lights when the current station carries the EON service (page 48). DTS – Lights when a source with DTS encoded audio signals is detected. 2 When the STANDARD mode is on, this lights to indicate decoding of a DTS multichannel signal. 3 2 DIGITAL When the STANDARD mode is on, this lights to indicate decoding of a Dolby Digital multichannel signal. 4 2 PRO LOGIC IIx When the (STANDARD) Pro Logic II mode is on, 2 PRO LOGIC II lights to indicate Pro Logic II decoding. 2 PRO LOGIC IIx lights to indicate Pro Logic IIx decoding (see Listening in surround sound on page 28). 5 VIR.SB Lights during Virtual surround back processing (page 31). 6 DIRECT Lights when source direct playback is in use. Direct playback bypasses the tone controls for the most accurate reproduction of a source. 7 AUTO SURR. Lights when Auto Surround (see Auto playback on page 28) is on. 8 ATT Lights when ANALOG ATT is used to attenuate (reduce) the level of the analog input signal. 9 SLEEP Lights when the sleep mode is active (see Remote control below). 24 En 10 Tuner indicators – Lights when the mono mode is set using the MPX button. RDS – Lights when an RDS broadcast is received (page 47). 12 Speaker indicators Lights to indicate the current speaker system, A and/or B (page 59). 13 Character display 14 Neo:6 When the (STANDARD) Neo:6 mode is on, this lights to indicate Neo:6 processing. 15 ADV.SURR. (Advanced Surround) Lights when one of the Advanced Surround modes has been selected. 16 WMA9 Pro Lights to indicate decoding of a WMA9 Pro signal. 17 MIDNIGHT Lights during Midnight listening (page 32). 18 D.E. Lights when Dialog Enhancement (DIALOG E) is switched on (page 32). 19 LOUDNESS Lights during Loudness listening (page 32). 20 EX Lights when a Dolby Digital Surround EX encoded signal is detected. VSX_916.book.fm 25 ページ 2005年12月22日 木曜日 午後4時21分 Controls and displays 05 21 Master volume level 11 INPUT SELECT 1 SOURCE 12 AV PRE-PROGRAMMED AND LEARNING REMOTE CONTROL UNIT 13 DVR USB 2 FM AM CD TV CTRL RECEIVER SB ch ANALOG ATT SR+ DIMMER MIDNIGHT/ LOUDNESS 14 D.ACCESS CLASS +10 SLEEP – Press to change the amount of time before the receiver switches into standby (30 min – 60 min – 90 min – Off). You can check the remaining sleep time at any time by pressing SLEEP once. SB ch – Selects the surround back channel mode (page 31) or virtual surround back mode (page 31). DIALOG E 3 The following are accessed by pressing the RECEIVER button first: Nederlands SLEEP DISC (ENTER) can be used to enter commands for TVs, and can also be used to select a disc in a multi-CD player. Italiano TV CD-R/TAPE DVD 3 Number buttons and other receiver/ component controls Use the number buttons to directly select a radio frequency (page 45) or the tracks on a CD, DVD, etc. Français RECEIVER SYSTEM OFF 2 MULTI CONTROL buttons Press to select control of other components (see Controlling the rest of your system on page 50). Deutsch Remote control 1 RECEIVER This switches between standby and on for this receiver. English 22 MCACC channel EQ indicators These indicators show the EQ balance for each channel in Checking your Acoustic Calibration EQ settings on page 41. Also, L and R light when the Sound Retriever is active (page 32). DISC ENTER ANALOG ATT – Attenuates (lowers) the level of an analog input signal to prevent distortion. MENU TOP MENU TUNE ST ST ENTER SETUP GUIDE PTY SEARCH T.EDIT RETURN SR + – Switches the SR+ mode on/off (page 62). TUNE TV CONTROL 6 INPUT SELECT TV VOL A TV CH VOL MPX B EON D DISP 10 DIMMER – Dims or brightens the display. 16 MIDNIGHT/LOUDNESS – Use Midnight when listening to movie soundtracks at low volume. Use Loudness to boost the bass and treble at low volume (page 32). REC STOP JUKEBOX C AUDIO SUBTITLE 8 9 15 REC MUTE 7 STANDARD ADV.SURR E HDD DVD CH CH DIALOG E – Use to make dialog stand out when watching TV or a movie (page 32). STEREO AUTO SURR MULTI OPE S.RETRIEVER ACOUSTIC EQ SIGNAL SEL SHIFT EFFECT/CH SEL RECEIVER Español 4 5 17 D.ACCESS – After pressing, you can access a radio station directly using the number buttons (page 45). CLASS – Switches between the three banks (classes) of radio station presets (page 46). 25 En VSX_916.book.fm 26 ページ 2005年12月22日 木曜日 午後4時21分 05 Controls and displays 4 Tuner/component control buttons/SETUP The following button controls (except SETUP) can be accessed after you have selected the corresponding MULTI CONTROL button (DVD, AM, FM, TV, etc.) TOP MENU – Displays the disc ‘top’ menu of a DVD. MENU – Displays the disc menu of DVDVideo discs. It also displays TV menus. 7 Component control buttons The main buttons (, , etc.) are used to control a component after you have selected it using the MULTI CONTROL buttons. The controls above these buttons can be accessed after you have selected the corresponding MULTI CONTROL button (for example DVD or DVR). MPX – Switches between stereo and mono reception of FM broadcasts. If the signal is weak then switching to mono will improve the sound quality (page 45). T.EDIT – Press to memorize and name a station for recall (page 46). SETUP (Press RECEIVER first to access) Use to access the System Setup menu (see page 36). EON – Use to search for programs that are broadcasting traffic or news information (page 48). GUIDE – Displays the guides on a digital TV. AUDIO – Changes the audio language or channel on DVD discs. PTY SEARCH – Use this button to search for RDS program types (page 47). DISP – Switches between named station presets and radio frequencies (page 46). It also displays RDS information (page 47). RETURN – Press to confirm and exit the current menu (also use to return to the previous menu with DVDs). 5 (TUNE/ST +/–) /ENTER Use the arrow buttons when setting up your surround sound system (see page 36). Also used to control DVD menus/options and for deck 1 of a double cassette deck player. Use the TUNE / buttons to find radio frequencies and use ST / to find preset stations (page 46). 6 TV CONTROL buttons These buttons are dedicated to control the TV assigned to the TV CTRL button. Thus if you only have one TV to hook up to this system assign it to the TV CTRL MULTI CONTROL button. If you have two TVs, assign the main TV to the TV CTRL button (see page 50 for more on this). TV – Use to turn on/off the TV power. TV VOL +/– – Use to adjust the TV volume. INPUT SELECT – Use to select the TV input signal. TV CH +/– – Use to select channels. 26 En SUBTITLE – Displays/changes the subtitles included in multilingual DVD-Video discs. CH +/– – Use to select channels when using a TV, VCR, DVR, etc. The following DVR controls can be accessed by pressing SHIFT: REC – Starts recording. REC STOP – Stops recording. JUKEBOX – Switches to the Jukebox feature. HDD/DVD – These buttons switch between the hard disk and DVD controls for DVD/ HDD recorders. 8 RECEIVER CONTROL buttons STANDARD – Press for Standard decoding and to switch between the various Pro Logic IIx and Neo:6 options (page 28). ADV.SURR – Use to switch between the various surround modes (page 29). STEREO – Selects stereo/direct playback (page 30). Also selects the Auto Surround mode (Auto playback on page 28). VSX_916.book.fm 27 ページ 2005年12月22日 木曜日 午後4時21分 Controls and displays 05 S. RETRIEVER – Press to restore CD quality sound to compressed audio sources (page 32). READ ID – See Confirming preset codes on page 53. ACOUSTIC EQ – Press to select an Acoustic Calibration EQ setting (page 30). 14 RECEIVER Switches the remote to control the receiver (used to select the green commands above the number buttons (DIMMER, etc). Also use this button to set up surround sound (page 9, page 36). SIGNAL SEL – Use to select an input signal (page 33). 9 MULTI OPE Press to perform multi operations (page 53). 13 Character display (LCD) This display shows information when transmitting control signals. SETUP – Indicates the setup mode, from which you choose the options below. PRESET – See Selecting preset codes directly on page 51. LEARNING – See Programming signals from other remote controls on page 51. Operating range of remote control The remote control may not work properly if: • There are obstacles between the remote control and the receiver's remote sensor. Español The following commands are shown when you’re setting the remote to control other components (see Controlling the rest of your system on page 50): 17 EFFECT/CH SEL Press repeatedly to select a channel, then use +/– to adjust the level (see Tip on page 44). Also adjusts the level of the Advanced Surround effects, Dolby Pro Logic IIx Music, and Neo:6 Music parameters (page 29). You can then use the +/– buttons to make these adjustments. Nederlands 12 SOURCE Press to turn on/off other components connected to the receiver (see page 50 for more on this). Press after MULTI OPE to trigger System Off (page 53). 16 MUTE Mutes the sound or restores the sound if it has been muted (adjusting the volume also restores the sound). Italiano 11 INPUT SELECT Use to select the input source (use SHIFT for INPUT SELECT ). 15 VOL +/– Use to set the listening volume. Français 10 SHIFT Press to access the DVR controls (above the component control buttons) as well as some receiver controls. Deutsch RESET – See Erasing all of the remote control presets on page 53. English AUTO SURR – Selects Auto Surround (Auto playback on page 28). • Direct sunlight or fluorescent light is shining onto the remote sensor. • The receiver is located near a device that is emitting infrared rays. • The receiver is operated simultaneously with another infrared remote control unit. MULTI OP – See Multi Operation and System Off on page 53. SYS OFF – See Multi Operation and System Off on page 53. DIRECT F – See Direct function on page 53. 30 30 DOWN DOWN 7m ERASE – See Programming signals from other remote controls on page 51. 27 En 05_playing_sources.fm 28 ページ 2006年1月6日 金曜日 午前9時33分 06 Listening to your system Chapter 6: Listening to your system The following modes provide basic surround sound for stereo and multichannel sources. Important • Certain features explained in this section will not be possible depending on the source (for example, PCM 88.2 kHz / 96 kHz, DTS 96 kHz (24 bit) or WMA 9 Pro sources). Auto playback The simplest, most direct listening option is the Auto Surround feature. With this, the receiver automatically detects what kind of source you’re playing and selects multichannel or stereo playback as necessary.1 STANDARD ADV.SURR STEREO AUTO SURR • While listening to a source, press AUTO SURR for auto playback of a source. AUTOSURR. shows briefly in the display (it will then show the decoding or playback format). Check the digital format indicators in the display to see how the source is being processed. Listening in surround sound Using this receiver, you can listen to any source in surround sound. However, the options available will depend on your speaker setup and the type of source you’re listening to. If you connected surround back speakers, see also Using surround back channel processing on page 31.2 STANDARD ADV.SURR STEREO AUTO SURR • While listening to a source, press STANDARD. If necessary, press repeatedly to select a listening mode. • If the source is Dolby Digital, DTS, or Dolby Surround encoded, the proper decoding format will automatically be selected and shows in the display. With two channel sources, you can select from: • 2 Pro Logic IIx MOVIE – Up to 7.1 channel sound, especially suited to movie sources • 2 Pro Logic IIx MUSIC – Up to 7.1 channel sound, especially suited to music sources • 2 Pro Logic IIx GAME – Up to 7.1 channel sound, especially suited for video games • 2 PRO LOGIC – 5.1 channel surround sound (sound from the surround speakers is mono) • Neo:6 CINEMA – 6.1 channel sound, especially suited to movie sources • Neo:6 MUSIC – 6.1 channel sound, especially suited to music sources With multichannel sources, if you have connected surround back speaker(s) and have selected SB ON, you can select (according to format): Note 1 • Stereo surround (matrix) formats are decoded accordingly using Neo:6 CINEMA or 2 Pro Logic IIx MOVIE (see Listening in surround sound above for more on these decoding formats). • The Auto Surround feature is canceled if you connect headphones or select the multichannel analog inputs. 2 If surround back processing (page 31) is switched to OFF, or the surround back speakers are set to NO (page 42) (this happens automatically if the Surround back speaker setting on page 36 is set to anything but Normal (SB)), 2 Pro Logic IIx becomes 2 Pro Logic II (5.1 channel sound). 28 En VSX_916.book.fm 29 ページ 2005年12月22日 木曜日 午後4時21分 Listening to your system 06 Setting the effect options • 2 Pro Logic IIx MUSIC – See above When using surround effects, there are a number of settings you can adjust. • Dolby Digital EX – Creates surround back channel sound for 5.1 channel sources and provides pure decoding for 6.1 channel sources (like Dolby Digital Surround EX) Using the Advanced surround effects CH STEREO AUTO SURR • ADV. MUSIC – Suitable for music sources. • TV SURR. – Provides surround sound for both mono and stereo TV sources. • SPORTS – Suitable for sports programs. • EXPANDED – Simulates multichannel surround sound for two-channel sources.2 • 7-STEREO – Gives multichannel sound to a stereo source, using all of your speakers. • VIR. SURR – A virtual surround effect using just the subwoofer and front speakers. What it does Center Widtha (Applicable only when using a center speaker) Spreads the center channel 0 to 7 between the front right and left Default: 3 speakers, making it sound wider (higher settings) or narrower (lower settings). –3 to +3 Dimensiona Adjusts the surround sound Default: 0 balance from front to back, making the sound more distant (minus settings), or more forward (positive settings). Panoramaa Extends the front stereo image to include surround speakers for a ‘wraparound’ effect. Center Imageb (Applicable only when using a center speaker) OFF Español • ADV. GAME – Suitable for video games. Options Setting Nederlands • Press ‘ADV.SURR’ repeatedly to select a listening mode. • ADV. MOVIE – Suitable for movie sources. 3 Press EFFECT/CH SEL again to adjust other settings. Italiano CH STANDARD ADV.SURR 2 Use the +/– buttons to set it as necessary. See the table below for the options available for each setting. The defaults, if not stated, are listed in bold. Français The Advanced surround effects can be used for a variety of additional surround sound effects. Most Advanced Surround modes are designed to be used with film soundtracks, but some modes are also suited for music sources. Try different settings with various soundtracks to see which you like.1 1 Press EFFECT/CH SEL repeatedly to select the setting you want to adjust. Depending on the current status / mode of the receiver, certain options may not appear. Check the table below for notes on this. Deutsch • DTS-ES – Allows you to hear 6.1 channel playback with DTS encoded sources English • 2 Pro Logic IIx MOVIE – See above ON Adjusts the center image to 0 to 10 create a wider stereo effect with Default: 3 vocals. Adjust the effect from 0 (all center channel sent to front right and left speakers) to 10 (center channel sent to the center speaker only). • PHONESUR. – Creates the effect of overall surround with headphones. Note 1 • If you press ADVANCED SURROUND when the headphones are connected, the PHONES SURROUND mode will automatically be selected. • Depending on the source and the sound mode you have selected, you may not get sound from the surround back speakers in your setup. For more on this, refer to Using surround back channel processing on page 31. • When an Advanced Surround listening mode is selected, the effect level can be adjusted using the EFFECT parameter in Setting the effect options above. 2 Use with Dolby Pro Logic for a stereo surround effect (stereo field is wider than Standard modes with Dolby Digital sources). 29 En VSX_916.book.fm 30 ページ 2005年12月22日 木曜日 午後4時21分 06 Listening to your system Setting What it does Options Effect Sets the effect level for the currently selected Advanced Surround mode (each mode can be set separately). 10 to 90 a Only available with 2ch sources in Dolby Pro Logic IIx Music mode. b Only available with 2ch sources in Neo:6 Music mode. You can listen to sources using the Acoustic Calibration Equalization set in Automatically setting up for surround sound (MCACC) on page 9 or Acoustic Calibration EQ on page 39. Refer to these pages for more on Acoustic Calibration Equalization. MULTI OPE S.RETRIEVER ACOUSTIC EQ SIGNAL SEL S Listening in stereo When you select STEREO or DIRECT, you will hear the source through just the front left and right speakers (and possibly your subwoofer depending on your speaker settings). Dolby Digital, DTS and WMA9 Pro multichannel sources are downmixed to stereo. EFFECT/CHSEL • While listening to a source, press ACOUSTIC EQ. Press repeatedly to select between: • ALL CH – No special weighting is given to any one channel. • F. ALIGN – All speakers are heard in accordance with the front speaker settings. • CUSTOM 1/2 – Custom settings STANDARD ADV.SURR STEREO AUTO SURR • While listening to a source, press STEREO for stereo playback. Press repeatedly to switch between: • EQ OFF – Switches Acoustic Calibration EQ off. The MCACC indicator on the front panel lights when Acoustic Calibration EQ is active.2 • STEREO – The audio is heard with your surround settings and you can still use the Midnight, Loudness, and Tone functions. • DIRECT – Bypass all effects and surround settings so that the audio remains as close to the source audio signal as possible.1 • AUTO SURR. – See Auto playback on page 28 for more on this. Listening with Acoustic Calibration EQ • Default setting: OFF / ALL CH (after the Auto MCACC Setup or EQ Auto Setting) Note 1 If you switch on Midnight listening, Loudness, Dialog Enhancement, the Sound Retriever, or the Tone controls when DIRECT is selected, the receiver automatically switches to STEREO. 2 • You can’t use Acoustic Calibration EQ with DVD 5.1ch or WMA9 Pro, and it has no effect with headphones. • If you switch on Acoustic Calibration EQ when DIRECT is selected, the receiver automatically switches to STEREO. 30 En VSX_916.book.fm 31 ページ 2005年12月22日 木曜日 午後4時21分 Listening to your system 06 Using Virtual Surround Back (VSB) When you’re not using surround back speakers, selecting this mode allows you to hear a virtual surround back channel through your surround speakers. You can choose to listen to sources with no surround back channel information, or if the material sounds better in the format (for example, 5.1) for which it was originally encoded, you can have the receiver only apply this effect to 6.1 encoded sources like Dolby Digital EX or DTS-ES.2 The table below indicates when you will hear the surround back channel (=Sound plays through surround back speaker(s)). • Press SB ch (SB ch PROCESSING) to select a virtual surround back channel option. Each press cycles through the following: • SB ON – 6.1 decoding is always used (for example, a surround back channel will be generated for 5.1 encoded material) • SB AUTO – Automatically switches to 6.1 decoding for 6.1 encoded sources (for example, Dolby Digital EX or DTS-ES) • SB OFF – Maximum 5.1 playback • VSB AUTO – Virtual Surround Back is automatically applied to 6.1 encoded sources (for example, Dolby Digital EX or DTS-ES) Dolby Digital EX/DTS-ES/ WMA9 Pro encoded multichannel sources with 6.1ch surround Dolby Digital/DTS/WMA9 Pro encoded multichannel sources Dolby Digital/DTS/WMA9 Pro encoded stereo source; other digital stereo source • VSB OFF – Virtual Surround Back mode is switched off Español Type of source Nederlands • VSB ON – Virtual Surround Back is always used (for example, on 5.1 encoded material) Italiano • Press SB ch (SB ch PROCESSING) to select a surround back channel option. Each press cycles through the following: Français The table indicates when you will hear the virtual surround back channel (=Sound plays through surround speakers). Deutsch • Default setting: SB ON You can have the receiver automatically use 6.1 decoding for 6.1 encoded sources (for example, Dolby Digital EX or DTS-ES), or you can choose to always use 6.1 decoding (for example, with 5.1 encoded material). With 5.1 encoded sources, a surround back channel will be generated, but the material may sound better in the 5.1 format for which it was originally encoded (in which case, you can simply switch surround back processing off).1 English Using surround back channel processing Standard SBch Processing / Virtual SB mode Multichannel sources ON a AUTO a ON a Advanced surround Stereo sources 2 Pro Logic IIx 2 Pro Logic Neo:6 AUTO a ON AUTO c a,b a a Note 1 You can’t use the surround back channel with headphones, the STEREO / DIRECT mode, or if the surround back speaker is set to NO in Speaker Setting on page 42. Also, the Surround back speaker setting on page 36 must be set to Normal (SB) to hear the surround back channel. 2 You can’t use virtual surround back with headphones, the STEREO / DIRECT mode, or if the surround speaker is set to NO in Speaker Setting on page 42 (however, the surround back speaker must be set to NO). 31 En VSX_916.book.fm 32 ページ 2005年12月22日 木曜日 午後4時21分 06 Listening to your system Type of source Analog 2-channel (stereo) sources SBch Processing / Virtual SB mode Standard Multichannel sources Advanced surround Stereo sources 2 Pro Logic IIx 2 Pro Logic Neo:6 ON b AUTO c a Excluding WMA9 Pro format b Only applicable when using the Virtual Surround Back mode. c Not applicable when using the Virtual Surround Back mode. Using Midnight and Loudness Enhancing dialog The Midnight listening feature allows you to hear effective surround sound of movies at low volume levels. The effect automatically adjusts according to the volume at which you’re listening. The Loudness listening feature can be used to get good bass and treble from music sources at low volume levels. The Dialog Enhancement feature localizes dialog in the center channel to make it stand out from other background sounds in a TV or movie soundtrack. • Press MIDNIGHT/LOUDNESS to switch between MIDNIGHT, LOUDNESS, and OFF. • Default setting: OFF • Press DIALOG E to switch dialog enhancement on or off. Using the tone controls Using the Sound Retriever When audio data is removed during the compression process, sound quality often suffers from an uneven sound image. The Sound Retriever feature employs new DSP technology that helps bring CD quality sound back to compressed 2-channel audio by restoring sound pressure and smoothing jagged artifacts left over after compression.1 • Press S. RETRIEVER to switch the sound retriever on or off. Note 1 The Sound Retriever is only applicable to 2-channel sources. 32 En Depending on what you are listening to, you may want to adjust the bass or treble using the front panel tone control. 1 Press TONE to select the frequency you want to adjust. Press to switch between BASS and TREBLE. 2 Use the MULTI JOG dial to change the amount of bass or treble as necessary. Wait about five seconds for your changes to be input automatically. VSX_916.book.fm 33 ページ 2005年12月22日 木曜日 午後4時21分 Listening to your system 1 Turn on the power of the playback component. 2 Turn on the power of the receiver. 4 Start playback of the component you selected in step 1. If you have connected a decoder or a DVD player with multichannel analog outputs to this receiver (page 14), you must select the analog multichannel inputs for surround sound. 3 1 Make sure you have set the playback source to the proper output setting. For example, you might need to set your DVD player to output multichannel analog audio. • Default setting: AUTO Press DVD. 3 Press SIGNAL SEL (SIGNAL SELECT) to select the multichannel analog inputs. DVD 5.1ch shows in the display and the ANALOG indicator lights. Italiano You need to hook up a component to both analog and digital inputs on the rear of the receiver to select between input signals.2 Français 2 Choosing the input signal Deutsch 3 Select the source you want to playback. Use the input select buttons.1 Selecting the multichannel analog inputs English Playing other sources 06 Nederlands • Press SIGNAL SEL (SIGNAL SELECT) to select the input signal corresponding to the source component. Each press cycles through the options as follows: Español • AUTO – This is the default setting. The receiver selects the first available signal in the following order: DIGITAL; ANALOG. • ANALOG – Selects an analog signal. • DIGITAL – Selects an optical or coaxial digital signal. When set to DIGITAL or AUTO, 2 DIGITAL lights when a Dolby Digital signal is input, and DTS lights when a DTS signal is input. Note 1 If your source is the TV’s built-in tuner, switch to the channel you want to watch, otherwise make sure that the TV’s video input is set to this receiver (For example, if you connected this receiver to the VIDEO jacks on your TV, make sure that the VIDEO input is selected). Turn down the volume of your TV so that all the sound is coming from the speakers connected to this receiver. 2 • This receiver can only play back Dolby Digital, PCM (32 kHz to 96 kHz), DTS and WMA9 Pro digital signal formats. With other digital signal formats, set to ANALOG. • You may get digital noise when a LD or CD player compatible with DTS is playing an analog signal. To prevent noise, make the proper digital connections (Connecting other audio components on page 15) and set the signal input to DIGITAL. • Some DVD players don’t output DTS signals. For more details, refer to the instruction manual supplied with your DVD player. 3 • During playback from the multichannel inputs, you can’t use any of the sound features/modes and only the volume and channel levels can be set. • You can’t listen to your speaker B (Second Zone) system during playback from the multichannel inputs. 33 En VSX_916.book.fm 34 ページ 2005年12月22日 木曜日 午後4時21分 07 USB playback Chapter 7: USB playback Basic playback controls Using the USB interface It is possible to listen to two-channel audio using the USB interface on the front of this receiver. Connect a USB mass storage device2 as shown below. The following table shows the basic controls on the remote for USB playback. Starts normal playback. 1 1 Press USB (SHIFT+AM). Button What it does Pauses/unpauses playback. 2 Connect your USB device. The USB terminal is located on the front panel. Press to start fast reverse scanning (press twice for high-speed scanning). 3 Press (play) to start playback. Files/folders play in sequential order based on the filename (according to the Unicode standard). Within a given directory, all files are played before continuing to folders/subfolders. Press to start fast forward scanning. Skips to the start of the current track, then previous tracks. In the diagram below, playback proceeds from folder 0 to folder 5, playing files 1 to 8 in order. Skips to the next track. (press twice for high-speed scanning). Important Folder 0 (Root) file 1 Folder 1 (Artisit) Folder 2 (Album) file 4 file 2 file 3 Folder 5 (Artisit) file 8 Folder 3 If a USB ERR message lights in the display, try following the points below: file 5 USB ERR What it means file 6 USB ERR1 Folder 4 (Album) file 7 • Make sure the receiver is in standby when disconnecting the USB device. The power requirements of the USB device are too high for this receiver. USB ERR2 The USB device is incompatible USB ERR3 See Troubleshooting on page 66 for more on this error message. • Switch the receiver off, then on again. • Reconnect the USB device with the receiver switched off. Note 1 This includes playback of WMA/MP3/MPEG-4 AAC files (except files with copy-protection or restricted playback). 2 • Compatible USB devices include external magnetic hard drives, portable flash memory (particularly keydrives) and digital audio players (MP3 players) of format FAT16/32. It is not possible to connect this unit to a personal computer for USB playback. • Pioneer cannot guarantee compatibility (operation and/or bus power) with all USB mass storage devices and assumes no responsibility for any loss of data that may occur when connected to this receiver. • With large amounts of data, it may take longer for the receiver to read the contents of a USB device. 34 En VSX_916.book.fm 35 ページ 2005年12月22日 木曜日 午後4時21分 USB playback • Use a dedicated AC adapter (supplied with the device) for USB power. If this doesn’t remedy the problem, it is likely your USB device is incompatible. Apple and iTunes are trademarks of Apple Computer, Inc., registered in the U.S. and other countries. Français Note that although most standard bit/ sampling rate combinations for compressed audio are compatible, some irregularly encoded files may not play back. The list below shows compatible formats for compressed audio files: Advanced Audio Coding (AAC) is at the core of the MPEG-4 AAC standard, which incorporates MPEG-2 AAC, forming the basis of the MPEG-4 audio compression technology. The file format and extension used depend on the application used to encode the AAC file. This unit plays back AAC files encoded by iTunes® bearing the extension '.m4a'. DRM-protected files will not play, and files encoded with some versions of iTunes® may not play. Deutsch Compressed audio compatibility About MPEG-4 AAC English • Select another input source (like DVD/CD), then switch back to USB. 07 About WMA • AAC (MPEG-4 Advanced Audio Coding) – Sampling rates: 11.025 kHz to 48 kHz; Bit rates: 16 kbps to 320 kbps (128 Kbps or higher recommended); File extension: .m4a; Apple lossless encoding: No • VBR (variable bit rate) MP3/WMA/MPEG-4 AAC playback: Yes1 • DRM (Digital Rights Management) protection compatible: Yes (DRMprotected audio files will not play in this receiver). WMA is an acronym for Windows Media Audio and refers to an audio compression technology developed by Microsoft Corporation. This unit plays back WMA files encoded using Windows Media® Player bearing the extension '.wma'. Note that DRM-protected files will not play, and files encoded with some versions of Windows Media® Player may not play. Español Other compatibility information The Windows Media® logo printed on the box indicates that this receiver can playback Windows Media Audio content. Nederlands • WMA (Windows Media Audio) – Sampling rates: 32 kHz / 44.1 kHz; Bit rates: 32 kbps to 192 kbps (128 Kbps or higher recommended); File extension: .wma; WM9 Pro and WMA lossless encoding: No Italiano • MP3 (MPEG-1/2/2.5 Audio Layer 3) – Sampling rates: 8 kHz to 48 kHz; Bit rates: 8 kbps to 320 kbps (128 Kbps or higher recommended); File extension: .mp3 Microsoft, Windows Media, and the Windows logo are trademarks, or registered trademarks of Microsoft Corporation in the United States and/or other countries. Note 1 Note that in some cases playback time will not be displayed correctly. 35 En VSX_916.book.fm 36 ページ 2005年12月22日 木曜日 午後4時21分 08 The System Setup menu Chapter 8: The System Setup menu Making receiver settings from the System Setup menu The following section shows you how to make detailed settings to specify how you’re using the receiver (for example, if you want to set up two speaker systems in separate rooms), and also explains how to fine-tune individual speaker system settings to your liking. DIALOG E RECEIVER SYSTEM OFF INPUT SELECT SOURCE D.ACCESS CLASS +10 DISC ENTER MENU TOP MENU AV PRE-PROGRAMMED AND LEARNING REMOTE CONTROL UNIT TUNE ST ST ENTER SETUP GUIDE PTY SEARCH T.EDIT RETURN TUNE TV CONTROL DVD TV DVR CD-R/TAPE USB FM AM TV CTRL TV VOL CD INPUT SELECT TV CH VOL RECEIVER 1 Switch on the receiver and your TV. Use the RECEIVER button to switch on. • If headphones are connected to the receiver, disconnect them. 2 Press RECEIVER on the remote control, then press the SETUP button. An on-screen display (OSD) appears on your TV. Use /// and ENTER on the remote control to navigate through the screens and select menu items. Press RETURN to confirm and exit the current menu. • Press SETUP at any time to exit the System Setup menu. 3 Select the setting you want to adjust. System Setup 1.Surr Back System 2.Auto MCACC 3.Manual MCACC 4.Manual SP Setup 5.Input Assign 6.Other Setup : Exit 36 En • Surr Back System – Specify how you are using your surround back speakers (see Surround back speaker setting below). • Auto MCACC – This is a quick and effective automatic surround setup (see Automatically setting up for surround sound (MCACC) on page 9). • Manual MCACC – Fine tune your speaker settings and customize the Acoustic Calibration EQ (see Manual MCACC speaker setup below). • Manual SP Setup – Specify the size, number, distance and overall balance of the speakers you’ve connected (see Manual speaker setup on page 41). • Input Assign – Specify what you’ve connected to the digital and component video inputs (see The Input Assign menu on page 63). • Other Setup – Make customized settings to reflect how you are using the receiver (see The Other Setup menu on page 64). Surround back speaker setting • Default setting: Normal (SB) There are several ways you can use the surround back speaker channels with this system. In addition to a normal home theater setup where they are used for the surround back speakers, they can be used for bi-amping the front speakers or as a separate speaker system in another room. 1 Select ‘Surr Back System’ from the System Setup menu. See Making receiver settings from the System Setup menu above if you’re not already at this screen. VSX_916.book.fm 37 ページ 2005年12月22日 木曜日 午後4時21分 The System Setup menu System Setup 08 1.Surround Back System : Exit Surr Back System Normal (SB) ] : Finish 3 When you’re finished, press RETURN. You return to the System Setup menu. You only need to make these settings once (unless you change the placement of your current speaker system or add new speakers). Important • For some of the settings below, you’ll have to connect the setup microphone to the front panel and place it about ear level at your normal listening position. See Automatically setting up for surround sound (MCACC) on page 9 if you’re unsure how to do this. Also see Other problems when using the Auto MCACC Setup on page 11 for notes regarding background noise and other possible interference. :Return 2 Select the setting you want to adjust. If you’re doing this for the first time, you might want to make these settings in order. • Fine Ch Level – Make fine adjustments to the overall balance of your speaker system (see Fine Channel Level below). • Fine SP Distance – Make precise delay settings for your speaker system (see Fine Speaker Distance on page 38). The last five settings are specifically for customizing the parameters explained in Acoustic Calibration EQ below: • EQ AUTO Setting – Measure the acoustic characteristics of your room and automatically adjust the frequency balance of your speaker system (see Setting the Acoustic Calibration EQ automatically below). • EQ Data Copy – Copy Acoustic Calibration EQ settings for manual adjustment (see Copying your Acoustic Calibration EQ settings below). • EQ CUSTOM1/2 Adjust – Make detailed manual adjustments to your custom Acoustic Calibration EQ settings (see Setting the Acoustic Calibration EQ manually on page 40). • EQ Data Check – Check the ALL CH ADJUST, FRONT ALIGN and custom settings using the on-screen display (see Checking your Acoustic Calibration EQ settings on page 41). Español You can use the settings in the Manual MCACC setup menu to make detailed adjustments when you’re more familiar with the system. Before making these settings, you should have already completed Automatically setting up for surround sound (MCACC) on page 9. : Exit a.Fine Ch Level b.Fine SP Distance c.EQ AUTO Setting d.EQ Data Copy e.EQ CUSTOM1 Adjust f .EQ CUSTOM2 Adjust g.EQ Data Check Nederlands Manual MCACC speaker setup 3.Manual MCACC 1.Surr Back System 2.Auto MCACC 3.Manual MCACC 4.Manual SP Setup 5.Input Assign 6.Other Setup Italiano • Front Bi-Amp – Select this setting if you’re bi-amping your front speakers (see Biamping your front speakers on page 60). System Setup Français • Second Zone – Select to use the (surround back) B speaker terminals to listen to stereo playback in another room (see Second Zone speaker B setup on page 59). 1 Select ‘Manual MCACC’ from the System Setup menu. See Making receiver settings from the System Setup menu above if you’re not already at this screen. Deutsch 2 Select the surround back speaker setting. • Normal (SB) – Select for normal home theater use with surround back speakers in your main (speaker system A) setup. • If you’re using a subwoofer, switch it on and turn up the volume as necessary. English 1.Surr Back System 2.Auto MCACC 3.Manual MCACC 4.Manual SP Setup 5.Input Assign 6.Other Setup 37 En VSX_916.book.fm 38 ページ 2005年12月22日 木曜日 午後4時21分 08 The System Setup menu Fine Channel Level • Default setting: 0dB (all channels) You can achieve better surround sound by properly adjusting the overall balance of your speaker system. The following setting can help you make detailed adjustments that you may not achieve using the Manual speaker setup on page 41. 1 Select ‘Fine Ch Level’ from the Manual MCACC setup menu. You’ll hear test tones from each speaker in turn. Since the left speaker is the main reference speaker, the level is fixed. 3a.Fine Channel Level 3.Manual MCACC a.Fine Ch Level b.Fine SP Distance c.EQ AUTO Setting d.EQ Data Copy e.EQ CUSTOM1 Adjust f .EQ CUSTOM2 Adjust g.EQ Data Check Please Wait... Fine Speaker Distance • Default setting: 3.0 m (all channels) For proper sound depth and separation with your system, it is necessary to add a slight bit of delay to some speakers so that all sounds will arrive at the listening position at the same time. The following setting can help you make detailed adjustments that you may not achieve using the Manual speaker setup below. 1 Select ‘Fine SP Distance’ from the Manual MCACC setup menu. The volume increases to the reference level. 20 Caution! Loud test tones will be output. :Cancel :Return 3 When you're finished, press RETURN. You return to the Manual MCACC setup menu. 3.Manual MCACC a.Fine Ch Level b.Fine SP Distance c.EQ AUTO Setting d.EQ Data Copy e.EQ CUSTOM1 Adjust f .EQ CUSTOM2 Adjust g.EQ Data Check :Return Caution • The test tones used in the System Setup are output at high volume (the volume increases to -18 dB automatically). 2 Adjust the distance of the left channel from the listening position. 3b.Fine SP Distance 2 Select each channel in turn and adjust the levels (+/– 10 dB) as necessary. Use / to adjust the volume of the speaker you selected to match the reference speaker. When it sounds like both tones are the same volume, press ENTER to confirm and continue to the next channel. 3a.Fine Channel Level L R C LS RS SBL SBR SW + 0.0dB [ 0.0dB + 1.0dB [ -3.0dB [+ 10.0dB [– 10.0dB [+ 9.5dB [– 1.5dB (Reference) ] ] ] ] ] ] :Finish • For comparison purposes, the reference speaker will change depending on which speaker you select. • If you want to go back and adjust a channel, simply use / to select it. 38 En L(Reference) 3.0 m ENTER:Next :Cancel After pressing ENTER, test tones will be output. 3 Select each channel in turn and adjust the distance as necessary. Use / to adjust the delay of the speaker you selected to match the reference speaker. The delay is measured in terms of speaker distance from 0.1 to 9.0 meters. 3b.Fine SP Distance L R C LS RS SBL SBR SW 3.0 m (Reference) [ 1.8 m ] 3.0 m 1.3 m ] 1.2 m ] 1.3 m ] 1.2 m ] 2.4 m ] [ [ [ [ [ :Finish VSX_916.book.fm 39 ページ 2005年12月22日 木曜日 午後4時21分 The System Setup menu Setting the Acoustic Calibration EQ automatically English Listen to the reference speaker and use it to measure the target channel. From the listening position, face the two speakers with your arms outstretched pointing at each speaker. Try to make the two tones sound as if they are arriving simultaneously at a position slightly in front of you and between your arm span. 08 Deutsch If you have already completed Automatically setting up for surround sound (MCACC) on page 9, ALL CH ADJUST and FRONT ALIGN (below) should already be set. Therefore, if you want to adjust your settings manually, you can skip to Setting the Acoustic Calibration EQ manually below. 1 Select ‘EQ AUTO Setting’ from the Manual MCACC setup menu. a.Fine Ch Level b.Fine SP Distance c.EQ AUTO Setting d.EQ Data Copy e.EQ CUSTOM1 Adjust f .EQ CUSTOM2 Adjust g.EQ Data Check When it sounds like the delay settings are matched up, press ENTER to confirm and continue to the next channel. :Cancel Italiano • Make sure the microphone is connected. 4 When you're finished, press RETURN. You return to the Manual MCACC setup menu. Nederlands • If you’re using a subwoofer, it is automatically detected every time you switch on the system. Make sure it is on and the volume is at the middle position. • If you want to go back and adjust a channel, simply use / to select it. • See Other problems when using the Auto MCACC Setup on page 11 for notes regarding high background noise levels and other possible interference. Acoustic Calibration EQ 2 Wait for the EQ AUTO Setting to finish. 3c.EQ AUTO Setting 3c.EQ AUTO Setting Now Analyzing Environment Check Ambient Noise Microphone Speaker YES/NO Español Acoustic Calibration Equalization is a kind of room equalizer for your speakers (excluding the subwoofer). It works by measuring the acoustic characteristics of your room and neutralizing the ambient characteristics that can color the original source material. This provides a ‘flat’ equalization setting. If you’re not satisfied with the automatic adjustment, you can also adjust these settings manually to get a frequency balance that suits your tastes. Set microphone. Turn on Subwoofar. :Return • For comparison purposes, the reference speaker will change depending on which speaker you select. Français 3c.EQ AUTO Setting 3.Manual MCACC Now Analyzing [ [ [ ] ] ] :Cancel Surround Analyzing Channel Level [ Acoustic Cal EQ [ ] ] :Cancel As the receiver outputs test tones, the frequency balance is adjusted automatically for the following settings: • ALL CH ADJUST – A ‘flat’ setting where all the speakers are set individually so no special weighting is given to any one channel. 39 En VSX_916.book.fm 40 ページ 2005年12月22日 木曜日 午後4時21分 08 The System Setup menu • FRONT ALIGN – All speakers are set in accordance with the front speaker settings (no equalization is applied to the front left and right channels). You return to the Acoustic Cal EQ setup menu after the Acoustic Calibration Equalization is set. Copying your Acoustic Calibration EQ settings If you want to manually adjust the Acoustic Calibration EQ (see Setting the Acoustic Calibration EQ manually below), we recommend copying the ALL CH ADJUST or the FRONT ALIGN settings from the EQ AUTO setup above (or from Automatically setting up for surround sound (MCACC) on page 9) to one of the custom settings. Instead of just a flat EQ curve, this will give you a reference point from which to start. 1 Select ‘EQ Data Copy’ from the Manual MCACC setup menu. 3 Select ‘OK’ to copy and confirm. Setting the Acoustic Calibration EQ manually Before manually adjusting the Acoustic Calibration EQ, we recommend copying the ALL CH ADJUST or the FRONT ALIGN settings from the auto setup above (or from Automatically setting up for surround sound (MCACC) on page 9) to one of the custom settings. Instead of just a flat EQ curve, this will give you a reference point from which to start (see Copying your Acoustic Calibration EQ settings above for how to do this). 1 Select ‘EQ CUSTOM1 Adjust or EQ CUSTOM2 Adjust’ from the Manual MCACC setup menu. 3e.EQ CUSTOM1 Adjust 3.Manual MCACC a.Fine Ch Level b.Fine SP Distance c.EQ AUTO Setting d.EQ Data Copy e.EQ CUSTOM1 Adjust f .EQ CUSTOM2 Adjust g.EQ Data Check :Return Test Tone Type ALL CH ADJUST ENTER:Next :Cancel 3.Manual MCACC a.Fine Ch Level b.Fine SP Distance c.EQ AUTO Setting d.EQ Data Copy e.EQ CUSTOM1 Adjust f .EQ CUSTOM2 Adjust g.EQ Data Check 2 Select which method you would like to use to adjust the overall frequency balance. It is best to choose whichever one you copied to the custom setting in Copying your Acoustic Calibration EQ settings above. :Return 2 Select CUSTOM1 or CUSTOM2 then use / to select the setting you want to copy. 3d.EQ Data Copy 3d.EQ Data Copy TO CUSTOM1 CUSTOM2 Start Copy TO FROM [ CUSTOM1 CUSTOM2 [ OK ] CUSTOM1 CUSTOM2 ] Start Copy :Cancel FROM [ ALL CH ADJ CUSTOM2 ] [ OK ] :Cancel • You can also copy from one custom setting to another. For more on the ALL CH ADJUST and FRONT ALIGN settings, see Setting the Acoustic Calibration EQ automatically above. 40 En • ALL CH ADJUST – All the speakers can be set independently so no special weighting is given to any one channel. When adjusting, test tones will sound for each individual channel. • FRONT ALIGN – Speakers are set in accordance with the front speaker settings. The sound of the test tone will alternate between the left front (reference) speaker and the target speaker. VSX_916.book.fm 41 ページ 2005年12月22日 木曜日 午後4時21分 The System Setup menu 3e.EQ CUSTOM1 Adjust 3.Manual MCACC 3e. EQ CUSTOM1 Adjust Use / to select the channel. • The front speakers can’t be adjusted if you selected FRONT ALIGN. 4 When you're finished, press RETURN. You return to the Manual MCACC setup menu. Checking your Acoustic Calibration EQ settings After you have completed an automatic or manual Acoustic Calibration EQ adjustment, you can check the ALL CH ADJUST, FRONT ALIGN and custom settings using the onscreen display. Select the setting you want to check. • It is useful to do this while a source is playing so you can compare the different settings. 3 Select the channels you want, pressing ENTER when you’re finished checking each one. 4 When you're finished, press RETURN. You return to the Manual MCACC setup menu. Manual speaker setup This receiver allows you to make detailed settings to optimize the surround sound performance. You only need to make these settings once (unless you change the placement of your current speaker system or add new speakers.). These settings are designed to fine-tune your system, but if you’re satisfied with the settings made in Automatically setting up for surround sound (MCACC) on page 9, it isn’t necessary to make all of these settings. Español • Changing the frequency curve of one channel too drastically will affect the overall balance. If the speaker balance seems uneven, you can raise or lower channel levels using test tones with the TRIM feature. Use / to select TRIM then use / to raise or lower the channel level for the current speaker. : + 1.0dB : 0.0dB : 0.0dB : 0.0dB : 0.0dB : 0.0dB :Return Nederlands Tip 2 40Hz 125Hz 250Hz 4kHz 13kHz TRIM Italiano • The OVER! indicator shows in the display if the frequency adjustment is too drastic and might distort. If this happens, bring the level down until OVER! disappears from the display. :Return ALL CH ADJUST [ Left EQ ] Français Use / to select the frequency and / to boost or cut the EQ. When you’re finished, go back to the top of the screen and use / to select the next channel. 3g.EQ Data Check a.Fine Ch Level b.Fine SP Distance c.EQ AUTO Setting d.EQ Data Copy e.EQ CUSTOM1 Adjust f .EQ CUSTOM2 Adjust g.EQ Data Check Test Tone Type: "ALL CH ADJUST" [ Left ] 40Hz : + 1.0dB 125Hz : [ 0.0dB ] 250Hz : [ 0.0dB ] 4kHz : [ 0.0dB ] 13kHz : [ 0.0dB ] TRIM : [ 0.0dB ] :Finish Deutsch Test Tone Type: "ALL CH ADJUST" Left 40Hz : [+ 1.0dB ] 125Hz : [ 0.0dB ] 250Hz : [ 0.0dB ] 4kHz : [ 0.0dB ] 13kHz : [ 0.0dB ] TRIM : [ 0.0dB ] :Finish 1 Select ‘EQ Data Check’ from the Manual MCACC setup menu. English 3 Select the channel(s) you want and adjust to your liking. 08 Caution • The test tones used in the System Setup are output at high volume (the volume increases to -18 dB automatically). 41 En VSX_916.book.fm 42 ページ 2005年12月22日 木曜日 午後4時21分 08 The System Setup menu 1 Select ‘Manual SP Setup’ then press ENTER. System Setup 4.Manual SP Setup 1.Surr Back System 2.Auto MCACC 3.Manual MCACC 4.Manual SP Setup 5.Input Assign 6.Other Setup : Exit 1 Select ‘Speaker Setting’ from the Manual SP Setup menu. 4a.Speaker Setting 4.Manual SP Setup a.Speaker Setting b.Crossover Network c.Channel Level d.Speaker Distance :Return 2 Select the setting you want to adjust. If you are doing this for the first time, you may want to adjust these settings in order: • Speaker Setting – Specify the size and number of speakers you’ve connected (page 42). • Crossover Network– Specify which frequencies will be sent to the subwoofer (page 43). • Channel Level – Adjust the overall balance of your speaker system (page 43). • Speaker Distance – Specify the distance of your speakers from the listening position (page 44). 3 Make the adjustments necessary for each setting, pressing RETURN to confirm after each screen. Speaker Setting Use this setting to specify your speaker configuration (size, number of speakers). It is a good idea to make sure that the settings made in Automatically setting up for surround sound (MCACC) on page 9 are correct. a.Speaker Setting b.Crossover Network c.Channel Level d.Speaker Distance :Return Front Center Surr SB [ SUB W. SMALL [ SMALL [ SMALL SMALL x2 : YES ] ] ] ] :Finish 2 Choose the set of speakers that you want to set then select a speaker size. Use / to select the size (and number) of each of the following speakers: • Front – Select LARGE if your front speakers reproduce bass frequencies effectively, or if you didn’t connect a subwoofer. Select SMALL to send the bass frequencies to the subwoofer.1 • Center – Select LARGE if your center speaker reproduces bass frequencies effectively, or select SMALL to send bass frequencies to the other speakers or subwoofer. If you didn’t connect a center speaker, choose NO (the center channel is sent to the front speakers). • Surr – Select LARGE if your surround speakers reproduce bass frequencies effectively. Select SMALL to send bass frequencies to the other speakers or subwoofer. If you didn’t connect surround speakers choose NO (the sound of the surround channels is sent to the front speakers or a subwoofer). Note 1 If you select SMALL for the front speakers the subwoofer will automatically be fixed to YES. Also, the center, surround, and surround back speakers can’t be set to LARGE if the front speakers are set to SMALL. In this case, all bass frequencies are sent to the subwoofer. 42 En VSX_916.book.fm 43 ページ 2005年12月22日 木曜日 午後4時21分 The System Setup menu 4b.Crossover Network 4.Manual SP Setup a.Speaker Setting b.Crossover Network c.Channel Level d.Speaker Distance :Return Frequency 80Hz :Finish Nederlands 2 Choose the frequency cutoff point. Frequencies below the cutoff point will be sent to the subwoofer (or LARGE speakers). 3 When you’re finished, press RETURN. You return to the Manual SP Setup menu. Español • If you have a subwoofer and like lots of bass, it may seem logical to select LARGE for your front speakers and PLUS for the subwoofer. This may not, however, yield the best bass results. Depending on the speaker placement of your room you may actually experience a decrease in the amount of bass due to low frequency cancellations. In this case, try changing the position or direction of speakers. If you can’t get good results, listen to the bass response with it set to PLUS and YES or the front speakers set to LARGE and SMALL alternatively and let your ears judge which 1 Select ‘Crossover Network’ from the Manual SP Setup menu. Italiano Tip • Default setting: 100Hz This setting decides the cutoff between bass sounds playing back from the speakers selected as LARGE, or the subwoofer, and bass sounds playing back from those selected as SMALL. It also decides where the cutoff will be for bass sounds in the LFE channel.2 Français 3 When you’re finished, press RETURN. You return to the Manual SP Setup menu. Crossover Network Deutsch • SUB W. – LFE signals and bass frequencies of channels set to SMALL are output from the subwoofer when YES is selected (see notes below). Choose the PLUS setting if you want the subwoofer to output bass sound continuously or you want deeper bass (the bass frequencies that would normally come out the front and center speakers are also routed to the subwoofer). If you did not connect a subwoofer choose NO (the bass frequencies are output from other speakers). sounds best. If you’re having problems, the easiest option is to route all the bass sounds to the subwoofer by selecting SMALL for the front speakers. English • SB – Select the number of surround back speakers you have (one, two or none). Select LARGE if your surround back speakers reproduce bass frequencies effectively. Select SMALL to send bass frequencies to the other speakers or subwoofer. If you didn’t connect surround back speakers choose NO.1 08 Channel Level Using the channel level settings, you can adjust the overall balance of your speaker system, an important factor when setting up a home theater system. Note 1 • If the surround speakers are set to NO, the surround back speakers will automatically be set to NO. • If you selected Second Zone or Front Bi-Amp (in Surround back speaker setting on page 36) you can’t adjust the surround back settings. • If you select one surround back speaker only, make sure that speaker is hooked up to the left surround back terminal. 2 For more on selecting the speaker sizes, see Speaker Setting above. 43 En VSX_916.book.fm 44 ページ 2005年12月22日 木曜日 午後4時21分 08 The System Setup menu 1 Select ‘Channel Level’ from the Manual SP Setup menu. 4.Manual SP Setup 4c.Channel Level a.Speaker Setting b.Crossover Network c.Channel Level d.Speaker Distance Test Tone :Return 2 5 When you’re finished, press RETURN. You return to the Manual SP Setup menu. ENTER:Next Manual :Cancel Select a setup option. • Manual – Move the test tone manually from speaker to speaker and adjust individual channel levels. • Auto – Adjust channel levels as the test tone moves from speaker to speaker automatically. 3 Confirm your selected setup option. The test tones will start after you press ENTER. After the volume increases to the reference level, test tones will be output. Tip • You can change the channel levels at any time by using EFFECT/CH SEL and +/– on the remote control. You can set two channel levels: one for DVD 5.1 CH and one for the listening modes. Speaker Distance For good sound depth and separation from your system, you need to specify the distance of your speakers from the listening position. The receiver can then add the proper delay needed for effective surround sound. 1 Select ‘Speaker Distance’ from the Manual SP Setup menu. 4d.Speaker Distance 4.Manual SP Setup 4c.Channel Level Test Tone [ Manual ] Please Wait . . . a.Speaker Setting b.Crossover Network c.Channel Level d.Speaker Distance 20 Caution! Loud test tones will be output. :Return L C R RS SBR SBL LS SW [ [ [ [ [ [ [ 3.0 3.0 3.0 3.0 3.0 3.0 3.0 3.0 m m m m m m m m ] ] ] ] ] ] ] :Finish :Cancel 4 Adjust the level of each channel using /. If you selected Manual, use / to switch speakers. The Auto setup will output test tones in the order shown on-screen: 2 Adjust the distance of each speaker using /. You can adjust the distance of each speaker in 0.1 meter increments. 3 When you’re finished, press RETURN. You return to the Manual SP Setup menu. 4c.Channel Level L C R RS SBR SBL LS SW [ [ [ [ [ [ [ 0.0dB 0.0dB 0.0dB 0.0dB 0.0dB 0.0dB 0.0dB 0.0dB Tip ] ] ] ] ] ] ] :Finish • For best surround sound, make sure the surround back speakers are the same distance from the listening position. Adjust the level of each speaker as the test tone is emitted.1 Note 1 • If you are using a Sound Pressure Level (SPL) meter, take the readings from your main listening position and adjust the level of each speaker to 75 dB SPL (C-weighting/slow reading). • The subwoofer test tone is output at low volumes. You may need to adjust the level after testing with an actual soundtrack. 44 En VSX_916.book.fm 45 ページ 2005年12月22日 木曜日 午後4時21分 Using the tuner 09 Chapter 9: English Using the tuner DVR USB FM AM CD SLEEP TV CTRL TV CH MUTE B EON REC STOP JUKEBOX C MIDNIGHT/ LOUDNESS DIMMER D AUDIO SUBTITLE DIALOG E DISP STANDARD ADV.SURR E HDD DVD CH CH STEREO AUTO SURR DISC ENTER MULTI OPE S.RETRIEVER ACOUSTIC EQ SIGNAL SEL MENU TOP MENU TUNE ST ENTER SETUP GUIDE PTY SEARCH T.EDIT RETURN 1 Press FM or AM to select the band. 2 Press D.ACCESS (Direct Access). TUNE TV CONTROL RECEIVER Press FM or AM to select the band. 2 Tune to a station. There are three ways to do this: Automatic tuning To search for stations in the currently selected band, press and hold TUNE/ for about a second. The receiver will start searching for the next station, stopping when it has found one. Repeat to search for other stations. 3 Use the number buttons to enter the frequency of the radio station. For example, to tune to 106.00 (FM), press 1, 0, 6, 0, 0. Español 1 SHIFT EFFECT/CH SEL ST Sometimes, you'll already know the frequency of the station you want to listen to. In this case, you can simply enter the frequency directly using the number buttons on the remote control. Nederlands CLASS +10 Tuning directly to a station REC A ANALOG ATT MPX D.ACCESS VOL RECEIVER SB ch SR+ INPUT SELECT TV VOL If the (tuned) or (stereo) indicators don't light when tuning to an FM station because the signal is weak, press the MPX button to switch the receiver into mono reception mode. This should improve the sound quality and allow you to enjoy the broadcast. Italiano TV CD-R/TAPE DVD Improving FM stereo sound Français The following steps show you how to tune in to FM and AM radio broadcasts using the automatic (search) and manual (step) tuning functions. If you already know the frequency of the station you want, see Tuning directly to a station below. Once you are tuned to a station you can memorize the frequency for recall later—see Saving station presets on the next page for more on how to do this. Deutsch High speed tuning Press and hold TUNE/ for high speed tuning. Release the button at the frequency you want. Listening to the radio If you make a mistake halfway through, press D.ACCESS twice to cancel the frequency and start over. Manual tuning To change the frequency one step at a time, press TUNE/. 45 En VSX_916.book.fm 46 ページ 2005年12月22日 木曜日 午後4時21分 09 Using the tuner Saving station presets If you often listen to a particular radio station, it's convenient to have the receiver store the frequency for easy recall whenever you want to listen to that station. This saves the effort of manually tuning in each time. This unit can memorize up to 30 stations, stored in three banks, or classes, (A, B and C) of 10 stations each. When saving an FM frequency, the MPX setting (see previous page) is also stored. 1 Tune to a station you want to memorize. See Listening to the radio on the previous page for more on this. 2 Press T.EDIT (TUNER EDIT). The display shows ST. MEMORY, then a blinking memory class. 3 Press CLASS to select one of the three classes then press ST/ to select the station preset you want. You can also use the number buttons or the MULTI JOG dial (front panel) to select a station preset. 4 Press ENTER. After pressing ENTER, the preset class and number stop blinking and the receiver stores the station. Naming station presets For easier identification, you can name your station presets. 1 Choose the station preset you want to name. See Listening to station presets below for how to do this. 2 Press T.EDIT (TUNER EDIT). The display shows ST. NAME, then a blinking cursor at the first character position. 3 Input the name you want. Choose a name up to four characters long. 46 En • Use the MULTI JOG dial (front panel) or the ST/ buttons (remote) to select characters. • Press ENTER to confirm a character. If no character is input, a space is input. • The name is stored when ENTER is pressed after choosing the fourth character. Tip • To erase a station name, simply repeat steps 1 to 3 and input four spaces instead of a name. Once you have named a station preset, you can press DISP when listening to a station to switch the display between name and frequency. It also displays RDS information (page 47). Listening to station presets You will need to have some presets stored to do this. See Saving station presets above if you haven’t done this already. 1 Press FM, then press CLASS to select the class in which the station is stored. Press repeatedly to cycle through classes A, B and C. 2 Press ST/ to select the station preset you want. • You can also use the number buttons on the remote control to recall the station preset. VSX_916.book.fm 47 ページ 2005年12月22日 木曜日 午後4時21分 Using the tuner 09 Displaying RDS information One feature of RDS is that you can search by type of program. For example, you can search for a station that’s broadcasting a show with the program type, Jazz. • Program Service Name (PS) – The name of the radio station. • Program Type (PTY) – This indicates the kind of program currently being broadcast. • Current tuner frequency (FREQ) Searching for RDS programs You can search for a program type listed above. 1 Press the FM button to select the FM band.3 2 Press the PTY SEARCH button. SEARCH shows in the display. Nederlands 3 Use the MULTI JOG dial to select the program type you want to hear. 4 Press ENTER to search for the program type. The system starts searching through the station presets for a match. When it finds one, the search stops and the station plays for five seconds. Español Finance – Stock market reports, commerce, trading, etc. Children – Programs for children Social – Social affairs Religion – Programs concerning religion Phone In – Public expressing their views by phone Travel – Holiday-type travel rather than traffic announcements Leisure – Leisure interests and hobbies Jazz – Jazz Country – Country music Nation M – Popular music in a language other than English Oldies – Popular music from the ’50s and ’60s Folk M – Folk music Document – Documentary • Radio Text (RT) – Messages sent by the radio station. For example, a talk radio station may provide a phone number as RT. Italiano News – News Affairs – Current Affairs Info – General Information Sport – Sport Educate – Educational Drama – Radio plays, etc. Culture – National or regional culture, theater, etc. Science – Science and technology Varied – Usually talkbased material, such as quiz shows or interviews. Pop M – Pop music Rock M – Rock music Easy M – Easy listening Light M – ‘Light’ classical music Classics – ‘Serious’ classical music Other M – Music not fitting above categories Weather – Weather reports • Press DISP for RDS information. Each press changes the display as follows: Français You can search the following program types:1 Use the DISP button to display the different types of RDS information available.2 Deutsch Radio Data System (RDS) is a system used by most FM radio stations to provide listeners with various kinds of information—the name of the station and the kind of show they’re broadcasting, for example. English An introduction to RDS 5 If you want to keep listening to the station, press ENTER within the 5 seconds. If you don’t press ENTER, searching resumes. Note 1 In addition, there are three other program types, TEST, Alarm!, and None. Alarm! and TEST are used for emergency announcements. You can’t search for these, but the tuner will switch automatically to this RDS broadcast signal. None appears when a program type cannot be found. 2 • If any noise is picked up while displaying the RT scroll, some characters may be displayed incorrectly. • If you see NO RADIO TEXT DATA in the RT display, it means no RT data is sent from the broadcast station. The display will automatically switch to the PS data display (if no PS data, the frequency is displayed). • In the PTY display, NO DATA may be shown. In this case, the PS display is shown after a few seconds. 3 RDS is only possible in the FM band. 47 En VSX_916.book.fm 48 ページ 2005年12月22日 木曜日 午後4時21分 09 Using the tuner If NO PTY is displayed it means the tuner couldn’t find that program type at the time of the search.1 Using EON When EON (Enhanced Other Network information) is turned on, the receiver jumps to an EON-linked broadcast when it begins, even if a receiver function other than the tuner is being used. It can’t be used in areas that EON information isn’t transmitted and when FM broadcast stations don’t transmit PTY data. When the broadcast ends, the tuner returns to the original frequency or function. 1 Press the FM button to select the FM band.2 2 Press EON (EON MODE) to select one of the possible modes. Press repeatedly to switch between: • EON TA (Traffic Announcement) – Sets the tuner to pick up traffic information when it is broadcast. • EON NEWS – Sets the tuner to pick up news when it is broadcast. • OFF – Switches off the EON feature. When set to TA or NEWS, the EON indicator in the display lights (it flashes when receiving an EON broadcast).3 The indicator in the display lights when the current station carries the EON service.4 Note 1 RDS searches station presets only. If no stations have been preset, or if the program type could not be found among the station presets NO PTY is displayed. FINISH means the search is complete. 2 EON is only possible in the FM band. 3 You can’t search for traffic announcements and news at the same time. 4 • You cannot operate the TUNER EDIT and PTY SEARCH buttons while the EON indicator in the display is lit. • If you want to change to a function other than the tuner when the EON indicator is flashing, press EON to turn EON off. 48 En VSX_916.book.fm 49 ページ 2005年12月22日 木曜日 午後4時21分 Making recordings 10 Chapter 10: You can make an audio or a video recording from the built-in tuner, or from an audio or video source connected to the receiver (such as a CD player or TV). 3 Prepare the source you want to record. Tune to the radio station, load the CD, video, DVD etc. INPUT SELECT TV VOL TV CH Refer to the instructions that came with the recorder if you are unsure how to do this. Most video recorders set the audio recording level automatically—check the component’s instruction manual if you’re unsure. 5 Start recording, then start playback of the source component.1 Nederlands If you want to record a video source, you also need to use the same type of connection for the source as for the recorder. For example, you can’t record a component hooked up to S-video jacks with a recorder hooked up to the composite video outputs (see page 16 for more on video connections). 4 Prepare the recorder. Insert a blank tape, MD, video etc. into the recording device and set the recording levels. Italiano Keep in mind you can’t make a digital recording from an analog source or vice-versa, so make sure the components you are recording to/from are hooked up in the same way (see Connecting up on page 12 for more on connections). Français 2 Select the input signal (if necessary). Press SIGNAL SEL to select the input signal corresponding to the source component (see page 33 for more on this). Deutsch Making an audio or a video recording English Making recordings VOL SYSTEM OFF INPUT RECEIVER SELECT SOURCE A REC MPX B EON Español MUTE AV PRE-PROGRAMMED AND LEARNING REMOTE CONTROL UNIT REC STOP JUKEBOX C D AUDIO SUBTITLE DISP STANDARD ADV.SURR E HDD DVD CH CH STEREO AUTO SURR MULTI OPE S.RETRIEVER ACOUSTIC EQ SIGNAL SEL DVD CD TV DVR CD-R/TAPE USB FM AM SLEEP SB h TV CTRL SHIFT EFFECT/CH SEL RECEIVER ANALOG 1 Select the source you want to record. Use the MULTI CONTROL buttons (or INPUT SELECT). Note 1 • The receiver's volume, balance, tone (bass, treble, loudness), and surround effects have no effect on the recorded signal. • Some digital sources are copy-protected, and can only be recorded in analog. • Some video sources are copy-protected. These cannot be recorded. 49 En VSX_916.book.fm 50 ページ 2005年12月22日 木曜日 午後4時21分 11 Controlling the rest of your system Chapter 11: Controlling the rest of your system Operating other Pioneer components Setting the remote to control other components Many Pioneer components have SR CONTROL jacks which can be used to link components together so that you can use just the remote sensor of one component. When you use a remote control, the control signal is passed along the chain to the appropriate component.1 Most components can be assigned to one of the MULTI CONTROL buttons using the component’s manufacturer preset code stored in the remote. Note that if you use this feature, make sure that you also have at least one set of analog audio or video jacks connected to another component for grounding purposes. However, please note that there are cases where only certain functions may be controllable after assigning the proper preset code, or the codes for the manufacturer in the remote control will not work for the model that you are using.2 Note CONTROL OUT IN CONTROL IN OUT • After one minute of inactivity, the remote automatically exits the operation. Receiver Remote control unit • You can cancel or exit any of the steps by press and hold RECEIVER for two seconds. To go back a step, press RETURN. Other Pioneer products with CONTROL terminals Connect to CONTROL terminal of other Pioneer products Note 1 • If you want to control all your components using this receiver’s remote control, refer to Controlling the rest of your system on page 50. • If you have connected a remote control to the CONTROL IN jack (using a mini-plug cable), you won't be able to control this unit using the remote sensor. 2 • TV codes (for example, codes for TV, CATV or Satellite TV) can only be assigned to the TV/SAT or TV CTRL button. • If you assign the AM or FM function to another component, you will have to reassign it to the Pioneer preset code to use this receiver’s built-in tuner. 50 En VSX_916.book.fm 51 ページ 2005年12月22日 木曜日 午後4時21分 Controlling the rest of your system RECEIVER To try out the remote control, switch the component on or off (into standby) by pressing SOURCE . If it doesn’t seem to work, select the next code from the list (if there is one). English Selecting preset codes directly 11 SYSTEM OFF INPUT SELECT SOURCE SR+ AV PRE-PROGRAMMED AND LEARNING REMOTE CONTROL UNIT MIDNIGHT/ LOUDNESS DIMMER DIALOG E CLASS +10 DISC Deutsch D.ACCESS 7 If your component is controlled successfully, press ENTER to confirm. The remote LCD display shows OK. ENTER MENU TOP MENU TUNE DVD TV DVR ST TV CTRL ST ENTER SETUP CD CD-R/TAPE USB FM AM RECEIVER GUIDE SLEEP SB ch PTY SEARCH T.EDIT RETURN TUNE TV CONTROL ANALOG ATT INPUT SELECT TV CH VOL 1 While pressing the RECEIVER button, press the SETUP button. The remote LCD display shows SETUP. 5 Use / to select the manufacturer’s name from the list then press ENTER. 6 Use / to select the proper code from the list, then try using this remote control with your component. The code should start with the component type (for example, DVD 009). If there is more than one, start with the first one. 2 Use / to select LEARNING then press ENTER. 3 Press the MULTI CONTROL button for the component you want to control then press ENTER. The LCD on the remote displays the component you want to control.2 Español 4 Use / to select the first letter of the brand name of your component then press ENTER. This should be the manufacturer’s name (for example, P for Pioneer). 1 While pressing the RECEIVER button, press the SETUP button. The remote LCD display shows SETUP. Nederlands 3 Press the MULTI CONTROL button for the component you want to control then press ENTER. The LCD on the remote displays the component you want to control.1 Italiano 2 Use / to select PRESET then press ENTER. If the preset code for your component is not available, or the available preset codes do not operate correctly, you can program signals from the remote control of another component. This can also be used to program additional operations (buttons not covered in the presets) after assigning a preset code. Français TV VOL Programming signals from other remote controls PRES KEY shows in the LCD display. 4 Point the two remote controls towards each other then press the button that will be doing the learning on this receiver’s remote control. PRES KEY starts flashing to indicate the remote is ready to accept a signal. Note 1 You can’t assign the RECEIVER button. 2 • You can’t assign the RECEIVER button. • TV CONTROL buttons (TV,TV VOL +/–, TV CH +/– and INPUT SELECT) can only be learned after selecting TV CONT. 51 En VSX_916.book.fm 52 ページ 2005年12月22日 木曜日 午後4時21分 11 Controlling the rest of your system RECEIVER SLEEP CH MUTE EFFECT DVD HDD CH LEVEL DTV INFO REC STOP STEREO TEST TONE CHSELECT REC ADV.SURR CH RETURN SUBTITLE RECEIVER CONTROL SHIFT MPX AUDIO TUNER DISPLAY MIDNIGHT/ LOUDNESS DTV ON/OFF STANDRAD DISC CLASS MENU RETURN VOL TV CH SETUP ENTER TUNE TUNE INPUT SELECT T.EDIT D.ACCESS TOP MENU GUIDE DTV MENU ST TVVOL TV CONTROL ST TV CONT RECEIVER ENTER SR TUNER FL DIMMER +10 CD-R/TAPE CD INPUT ATT SOURCE DVR/VCR DVD/LD TV/SAT INPUT RECEIVER SELECT MULTI CONTROL 2 cm to 5 cm MCACC SETUP BAND • The remote controls should be 2 cm to 5 cm apart. 5 Press the corresponding button on the other remote control that is sending (teaching) the signal to this receiver’s remote control. For example, if you want to learn the playback control signal, press and hold for a couple of seconds. The LCD display will show OK if the operation has been learned. If for some reasons the operation hasn’t been learned the LCD will display ERROR briefly and then display PRES KEY again. If this happens, keep pressing the (teaching) button as you vary the distance between the two remotes, until the LCD display shows OK.1 Certain buttons represent operations that cannot be learned from other remote controls. The buttons available are shown below: SYSTEM OFF INPUT RECEIVER SELECT SOURCE AV PRE-PROGRAMMED AND LEARNING REMOTE CONTROL UNIT TV CONTROL TV VOL TV DVR CD-R/TAPE USB FM AM DVD CD VOL TV CTRL A RECEIVER SLEEP SB ch ANALOG ATT SR+ DIMMER MIDNIGHT/ LOUDNESS B REC EON REC STOP JUKEBOX C CLASS +10 D AUDIO SUBTITLE DISP STANDARD ADV.SURR DIALOG E Erasing one of the remote control button settings This erases a control assigned to one of the buttons and restores it to the factory default. 1 While pressing the RECEIVER button, press the SETUP button. The remote LCD display shows SETUP. 2 Use / to select ERASE then press ENTER. The LCD on the remote displays the component. 3 Press the MULTI CONTROL button corresponding to the button setting to be erased then press ENTER. The remote LCD display flashes PRES KEY. MUTE MPX D.ACCESS TV CH 7 Press and hold the RECEIVER button for two seconds to exit and store the operation(s). 4 Press and hold the button to be erased for two seconds. The LCD display shows OK or NO CODE to confirm the button has been erased. GUIDE INPUT SELECT 6 To program additional signals for the current component repeat steps 4 and 5. To program signals for another component, exit and repeat steps 1 through 5. E HDD DVD CH CH STEREO AUTO SURR 5 Repeat step 4 to erase other buttons. 6 Press and hold the RECEIVER button for two seconds when you’re done. MULTI OPE S.RETRIEVER ACOUSTIC EQ SIGNAL SEL DISC ENTER SHIFT EFFECT/CH SEL MENU TOP MENU TUNE ST SETUP GUIDE PTY SEARCH ST ENTER TUNE T.EDIT RETURN RECEIVER Note 1 • Some commands from other remote controls cannot be learned, but in most cases the remotes just need to be moved closer together or farther apart. • If the remote LCD shows ERROR, it may also mean the memory is full. See Programming signals from other remote controls below to erase a programmed button you’re not using to free up more memory. 52 En 09_controlling_system.fm 53 ページ 2005年12月22日 木曜日 午後5時35分 Controlling the rest of your system This will erase all preset remote control preset codes. 2 Use / to select RESET then press ENTER. • Default setting: ON 1 While pressing the RECEIVER button, press the SETUP button. The remote LCD display shows SETUP. 1 While pressing the RECEIVER button, press the SETUP button. The remote LCD display shows SETUP. 2 Use / to select READ ID then press ENTER. 3 Press the MULTI CONTROL button of the component for which you want to check the preset code then press ENTER. The brand name and preset code appears in the display for three seconds. Español When direct function is on, any component you select (using the MULTI CONTROL buttons) will be selected by both the receiver and the remote control. When you turn direct function off, you can operate the remote control without affecting the receiver.1 Use this feature to check which preset code is assigned to a MULTI CONTROL button. Nederlands You can use the direct function feature to control one component using the remote control while at the same time, using your receiver to playback a different component. This could let you, for example, use the remote control to set up and listen to a CD on the receiver and then use the remote control to rewind a tape in your VCR while you continue to listen to your CD player. Confirming preset codes Italiano Direct function 4 Use / to switch direct function ON or OFF then press ENTER. The LCD shows OK to confirm the setting. Français 3 Press and hold ENTER for about two seconds. The LCD shows OK to confirm the remote presets have been erased. 3 Press the MULTI CONTROL button for the component you want to control then press ENTER. The LCD on the remote displays the component you want to control. Deutsch 1 While pressing the RECEIVER button, press the SETUP button. The remote LCD display shows SETUP. 2 Use / to select DIRECT F then press ENTER. English Erasing all of the remote control presets 11 Multi Operation and System Off The Multi Operation feature allows you to program a series of up to 5 commands for the components in your system. For example, you could turn on your TV, turn on your DVD player and start playing the loaded DVD using only two buttons on the remote control. Similar to multi operations, System Off allows you to use one button to stop and switch off a series of components in your system at the same time.2 Note 1 You can’t use direct function with the TV CTRL function. 2 • Before Multi Operation and System Off will work correctly, you must setup the remote to work with your TV and other components (see Setting the remote to control other components on page 50 for more on this). • Some units may take some time to power up, in which case multiple operations may not be possible. • Power on and off commands only work with components that have a standby mode. 53 En VSX_916.book.fm 54 ページ 2005年12月22日 木曜日 午後4時21分 11 Controlling the rest of your system Programming a multi-operation or a shutdown sequence DIALOG E 7 Select the button for the command you want to input. The following remote control commands can be selected: SYSTEM OFF INPUT RECEIVER SELECT SOURCE D.ACCESS CLASS +10 DISC ENTER AV PRE-PROGRAMMED AND LEARNING REMOTE CONTROL UNIT MENU TOP MENU TUNE ST ST ENTER SETUP GUIDE PTY SEARCH SYSTEM OFF INPUT RECEIVER SELECT SOURCE T.EDIT RETURN AV PRE-PROGRAMMED AND LEARNING REMOTE CONTROL UNIT TUNE GUIDE TV CONTROL DVD CD TV DVR CD-R/TAPE USB FM AM TV CONTROL TV CTRL TV VOL INPUT SELECT TV CH VOL 1 While pressing the RECEIVER button, press SETUP. The remote LCD display shows SETUP. TV DVR VOL CD-R/TAPE USB FM AM CD TV CTRL 2 Use / to select MULTI OP or SYS OFF from the menu and press ENTER. If you selected Multi Operation (MULTI OP), the LCD on the remote prompts you for an input source button. If you selected System Off (SYSOFF), go to step 4. 3 Press the input source button for the component that will start the multi-operation then press ENTER. For example, if you want to start the sequence by switching on your DVD player, press DVD. 4 Use / to select CODE EDT then press ENTER. To erase any previously stored multi-operations (or shutdown sequences) select CODE ERS above. 5 Use / to select a command in the sequence then press ENTER. If this is the first command in the sequence, select 1ST CODE. Otherwise, simply choose the next command in the sequence. PRES KEY flashes after you press ENTER. 6 If necessary, press the input source button for the component whose command you want to input. This is only necessary if the command is for a new component (input source). A RECEIVER SLEEP SB ch ANALOG ATT SR+ DIMMER MIDNIGHT/ LOUDNESS D.ACCESS REC MUTE MPX B EON REC STOP JUKEBOX C CLASS +10 D AUDIO SUBTITLE DISP STANDARD ADV.SURR DIALOG E En TV CH RECEIVER DVD 54 INPUT SELECT TV VOL E HDD DVD CH CH STEREO AUTO SURR MULTI OPE S.RETRIEVER ACOUSTIC EQ SIGNAL SEL DISC ENTER SHIFT EFFECT/CH SEL MENU TOP MENU TUNE ST SETUP GUIDE PTY SEARCH ST ENTER TUNE T.EDIT RETURN RECEIVER • You don't need to program the receiver to switch on or off. This is done automatically. With Pioneer components, you don’t need to: • program the power to switch off in a shutdown sequence (except DVD recorders); • program the power to switch on if it’s the source component selected in step 3; • program a Pioneer TV or monitor to switch on if the input function (selected in step 2) has video input terminals; These take priority in multi operations (not shutdown). 8 Repeat steps 5–7 to program a sequence of up to five commands. 9 When you’re finished, use / to select EDITEXIT from the menu and press ENTER. You will return to the remote control SETUP menu. Select * EXIT * again to exit. VSX_916.book.fm 55 ページ 2005年12月22日 木曜日 午後4時21分 Controlling the rest of your system Using multi operations STANDARD ADV.SURR Using System off English You can start multi operations with the receiver switched on, or in standby. 11 SYSTEM OFF INPUT RECEIVER SELECT SOURCE STEREO AUTO SURR STANDARD ADV.SURR STEREO AUTO SURR MULTI OPE S.RETRIEVER ACOUSTIC EQ SIGNAL SEL AV PRE-PROGRAMMED AND LEARNING REMOTE CONTROL UNIT MULTI OPE S.RETRIEVER ACOUSTIC EQ SIGNAL SEL SHIFT EFFECT/CH SEL SHIFT EFFECT/CH SEL Deutsch RECEIVER DVD TV DVR TV CTRL RECEIVER 1 Press MULTI OPE. MULTI OP flashes in the display. 2 Press SOURCE. The command sequence you programmed will run, then all Pioneer components will switch off1, followed by this receiver. Français 2 Press an input source button that has been set up with a multi operation. The receiver switches on (if it was in standby) and the programmed multi operation is performed automatically. 1 Press MULTI OPE. MULTI OP flashes in the display. Italiano Controls for TVs Nederlands This remote control can control components after entering the proper codes or teaching the receiver the commands (see Operating other Pioneer components on page 50 for more on this). Use the MULTI CONTROL buttons to select the component. • The TV CONTROL buttons on the remote control are dedicated to control the TV assigned to the TV CTRL button. If you have two TVs, assign the main TV to the TV CTRL button. Function Components TV Press to switch the component assigned to the TV CTRL button on or off. Cable TV/Satellite TV/TV INPUT SELECT Switches the TV input. (Not possible with all models.) TV TV CH +/– Selects channels. Cable TV/Satellite TV/TV TV VOL +/– Adjust the TV volume. Cable TV/Satellite TV/TV SOURCE Press to switch the component assigned to the TV CTRL button on or off. Cable TV/Satellite TV/TV Use to choose the ‘A’ commands on a Satellite TV menu. Satellite TV Use to choose the RED/B commands on a Satellite TV/TV menu. Satellite TV/TV Español Button(s) Note 1 In order to avoid accidently switching off a DVD recorder that is currently recording, no DVD recorder power off codes are sent. 55 En VSX_916.book.fm 56 ページ 2005年12月22日 木曜日 午後4時21分 11 56 En Controlling the rest of your system Button(s) Function Components Use to choose the CYAN/E commands on a Satellite TV/TV Satellite TV/TV menu. Use to choose the GREEN/C commands on a Satellite TV/ Satellite TV/TV TV menu. Use to choose the YELLOW/D commands on a Satellite TV/ Satellite TV/TV TV menu. AUDIO Use to switch audio tracks. Satellite TV/TV GUIDE Use as the GUIDE button for navigating. Cable TV/Satellite TV/TV Switches TEXT OFF for TVs. TV RETURN Use to select RETURN or EXIT. Satellite TV/TV Number buttons Use to select a specific TV channel. Cable TV/Satellite TV/TV +10 button Use to add a decimal point when selecting a specific TV channel. Cable TV/Satellite TV/TV ENTER/ DISC Use to enter a channel. Cable TV/Satellite TV/TV MENU Select the menu screen. Cable TV/Satellite TV/TV & Press to select or adjust and navigate items on the menu screen. ENTER Cable TV/Satellite TV/TV TOP MENU Switches TEXT ON for TVs. TV VSX_916.book.fm 57 ページ 2005年12月22日 木曜日 午後4時21分 Controlling the rest of your system 11 English Controls for other components This remote control can control these components after entering the proper codes or teaching the receiver the commands (see Operating other Pioneer components on page 50 for more on this). Use the MULTI CONTROL buttons to select the component. Function Components CD/MD/CD-R/DVD/LD player Go back channels (channel –). DVR/VCR Press to advance to the start of the next track. Repeated presses skips to the start of following tracks. CD/MD/CD-R/DVD/LD player Go forward channels (channel +). VCR Pause playback or recording. CD/MD/CD-R/VCR/DVD/LD/ DVR player/Cassette deck Start playback. CD/MD/CD-R/VCR/DVD/LD/ DVR player/Cassette deck Hold down for fast forward playback. CD/MD/CD-R/VCR/DVD/LD/ DVR player/Cassette deck Hold down for fast reverse playback. CD/MD/CD-R/VCR/DVD/LD/ DVR player/Cassette deck Stops playback (on some models, pressing this when the disc is already stopped will cause the disc tray to open). CD/MD/CD-R/VCR/DVD/LD/ DVR player/Cassette deck REC (SHIFT+) Starts recording. To prevent accidental recording, this button must be pressed twice to take effect. MD/CD-R/VCR/ DVR player/ Cassette deck REC STOP (SHIFT+) Stops recording. DVR player JUKEBOX Switches to the Jukebox feature. (SHIFT+) DVR player Number buttons CD/MD/CD-R/VCR/LD player Directly access tracks on a program source. Español Press to return to the start of the current track. Repeated presses skips to the start of previous tracks. Nederlands Italiano CD/MD/CD-R/VCR/DVD/LD/ DVR player/Cassette deck Français SOURCE Press to switch the component between standby and on. Deutsch Button (s) Use the number buttons to navigate the on-screen display. DVD/DVR player +10 button Selects tracks higher than 10. (For example, press +10 then 3 to select track 13.) CD/MD/CD-R/VCR/LD player 57 En VSX_916.book.fm 58 ページ 2005年12月22日 木曜日 午後4時21分 11 Controlling the rest of your system Button (s) Function Components ENTER/ Chooses the disc. Multiple CD player Ejects the disc. MD player Use as the ENTER button. VCR Use as the CLEAR button. DVD Displays the setup screen for DVR players. DVR player Changes sides of the LD. LD player DISC TOP MENU Displays the disc ‘top’ menu of a DVD player. DVD/DVR player MENU Displays menus for the current DVD or DVR you are using. DVD/DVR player Pauses the tape. Cassette deck Stops the tape. Cassette deck ENTER Starts playback. Cassette deck / Fast rewinds/fast forwards the tape. Cassette deck & Navigates DVD menu/options. DVD/DVR Player ENTER GUIDE Press to access the DVD player setup screen. DVD/DVR Player CH +/– Selects channels. VCR/DVD/DVR Player Selects tracks. CD/MD/CD-R/Cassette deck AUDIO Changes the audio language or channel. DVD/DVR Player SUBTITLE Displays/changes the subtitles on multilingual DVDs. DVD/DVR Player HDD (SHIFT Switches to the hard disk controls when using a DVD/ DVR Player + CH–) HDD recorder. DVD (SHIFT Switches to the DVD controls when using a DVD/HDD DVR Player + CH+) recorder. 58 En VSX_916.book.fm 59 ページ 2005年12月22日 木曜日 午後4時21分 Other connections 12 Chapter 12: Caution Second Zone speaker B setup EON MODE PTY SEARCH TUNING / STATION TUNER EDIT MIDNIGHT/ LOUDNESS SPEAKERS TONE QUICK SETUP SETUP RETURN MULTI JOG Press repeatedly to choose a speaker system option: Español 1 Connect a pair of speakers to the surround back speaker terminals on the rear panel. Connect them the same way you connected your speakers in Connecting the speakers on page 19. Make sure to review Hints on speaker placement on page 20 when placing the speakers in another room. • Use the SPEAKERS button on the front panel to select a speaker system setting. Nederlands After selecting Second Zone in Surround back speaker setting on page 36, you can use the speakers connected to the (surround back) B speaker terminals on the rear panel to listen to stereo playback in another room. See Switching the speaker system below for the listening options with this setup. If you selected Second Zone in Surround back speaker setting on page 36, three speaker system settings are possible using the SPEAKERS button. If you selected Normal (SB) or Front Bi-Amp, the speaker system is fixed as SPA or SPAB (respectively). The options below are for the Second Zone setting only.1 Italiano • You can use speakers with a nominal impedance between 6 Ω to 16 Ω (please see Switching the speaker impedance on page 68 if you plan to use speakers with an impedance of less than 8 Ω). Switching the speaker system Français • Do not allow any contact between speaker wires from different terminals. 2 Select ‘Second Zone’ from the ‘Surr Back System’ menu. See Surround back speaker setting on page 36 to do this. Deutsch • Before making or changing the connections, switch off the power and disconnect the power cord from the power outlet. Plugging in components should be the last connection you make with your system. English Other connections • SPA – Sound is output from the speakers connected to the A speaker terminals (multichannel playback is possible). • SPB – Sound is output from the two speakers connected to speaker system B (only stereo playback is possible). Note 1 • The subwoofer output depends on the settings you made in Speaker Setting on page 42. However, if SPB is selected above, no sound is heard from the subwoofer (the LFE channel is not downmixed). • Depending on the Surround back speaker setting on page 36 output from the surround back pre-out terminals may change. • All speaker systems (except Second Zone connections) are switched off when headphones are connected. 59 En VSX_916.book.fm 60 ページ 2005年12月22日 木曜日 午後4時21分 12 Other connections • SPAB – Sound is output from speaker system A (up to 5 channels, depending on the source), the two speakers in speaker system B, and the subwoofer. Multichannel sources (heard through speaker system A) are downmixed for stereo output from speaker system B. Bi-amping your front speakers Bi-amping is when you connect the high frequency driver and low frequency driver of your speakers to different amplifiers (in this case, to both front and surround back terminals) for better crossover performance. Your speakers must be bi-ampable to do this (having separate terminals for high and low) and the sound improvement will depend on the kind of speakers you’re using. 1 Connect your speakers as shown below. This illustration below shows the connections for bi-amping your front left speaker. Hook up your front right speaker in the same way. Front left speaker S P E A K E R S R A FRONT LR SURROUND L CENTER R SURROUND BACK L B Hi Lo Since both front and surround back speaker terminals output the same audio, it doesn’t matter which set (front or surround back) is powering which part (Hi or Low) of the speaker. • Make sure that the + / – connections are properly inserted. 60 En 2 Select the ’Front Bi-Amp’ setting from the ‘Surr Back System’ menu. See Surround back speaker setting on page 36 to specify how you’re using the surround back speaker terminals. Caution • Most speakers with both Hi and Low terminals have two metal plates that connect the Hi to the Low terminals. These must be removed when you are bi-amping the speakers or you could severely damage the amplifier. See your speaker manual for more information. • If your speakers have a removable crossover network, make sure you do not remove it for bi-amping. Doing so may damage your speakers. Bi-wiring your speakers The reasons for bi-wiring are basically the same as bi-amping, but additionally, interference effects within the wire could be reduced, producing better sound. Again, to do this your speakers must be bi-wireable (that is they must have separate terminals for the high and low frequencies). When bi-wiring, make sure you’ve selected Normal (SB) or Second Zone in Surround back speaker setting on page 36. • To bi-wire a speaker, connect two speaker cords to the speaker terminal on the receiver. VSX_916.book.fm 61 ページ 2005年12月22日 木曜日 午後4時21分 Other connections 12 • Make sure you use a parallel (not series, which are fairly uncommon) connection when bi-wiring your speakers. If you have a Pioneer plasma display2, you can use an SR+ cable to connect it to this unit and take advantage of various convenient features, such as automatic video input switching of the plasma display when the input is changed. Connecting additional amplifiers CONTROL OUT Pioneer plasma display DIGITAL OUT AUX IN CD IN DVR / VCR FM UNBAL 75 Ω (TV/ SAT) OPT IN 1 OUT L L L ASSIGNABLE DIGITAL IN DVD /LD FRONT IN COAX 2 (DVR/VCR) PLAY CD-R / TAPE / MD IN 1 INPUT L (DVD/LD) OUT R R R SURROUND BACK R R CENTER TV / SAT MONITOR OUT DVD 5.1CH INPUT IN SUB WOOFER PREOUT IN DVD /LD AUDIO S-VIDEO IN L This receiver Español (TV/SAT) IN 2 IN REC R Surround back channel amplifier CENTER DVR / VCR OUT Nederlands PR IN IN ANALOG PREOUT OUT VIDEO TV / SAT COAX SURROUND BACK CONTROL IN Center channel amplifier (mono) SURROUND MONITOR OUT OUT 2 INPUT FRONT AM LOOP ANTENNA OPT (CD) ASSIGNABLE DIGITAL IN ANALOG IN OPT Italiano • Before making or changing the connections, switch off the power and disconnect the power cord from the AC outlet. Français This receiver has more than enough power for any home use, but it’s possible to add additional amplifiers to every channel of your system using the pre-outs. Make the connections shown below to add amplifiers to power your speakers.1 (DVD/LD) IN 1 PB Deutsch • Don't connect different speakers from the same terminal in this way. Using this receiver with a Pioneer plasma display English Caution ANALOG INPUT L L R Surround channel amplifier B ANALOG INPUT L R Front channel amplifier ANALOG INPUT To SUB WOOFER PREOUT jack Powered subwoofer Note 1 • You can use the additional amplifier on the surround back channel pre-outs for a single speaker as well. In this case plug the amplifier into the left (L (Single)) terminal only. • The sound you hear from the surround back terminals depends on the Surround back speaker setting on page 36. • To hear sound only from the pre-outs, simply disconnect any speakers that are connected directly to the receiver. • If you’re not using a subwoofer, change the front speaker setting (see Speaker Setting on page 42) to large. 2 This receiver is compatible with all Pioneer plasma displays from 2003 onward. 61 En VSX_916.book.fm 62 ページ 2005年12月22日 木曜日 午後4時21分 12 Other connections • Use a 3-ringed miniplug SR+ cable1 to connect the CONTROL IN jack of this receiver with the CONTROL OUT of your plasma display. Before you can use the extra SR+ features, you need to make a few settings in the receiver. See SR+ Setup for Pioneer plasma displays on page 65 for detailed instructions. VIDEO INPUT 1 VIDEO INPUT 2 Pioneer plasma display Using the SR+ mode with a Pioneer plasma display When connected using an SR+ cable, a number of features become available to make using this receiver with your Pioneer plasma display even easier. These features include: • On-screen volume display. • On-screen display of listening mode. • Automatic video input switching on the plasma display. • Automatic volume muting on the plasma display.2 See also SR+ Setup for Pioneer plasma displays on page 65 for more on setting up the receiver. SYSTEM OFF INPUT RECEIVER SELECT SOURCE AV PRE-PROGRAMMED AND LEARNING REMOTE CONTROL UNIT DVD player D.ACCESS DVD TV/SAT AUDIO IN AUDIO/VIDEO MULTI-CHANNEL RECEIVER VSX-916 MULTI JOG ENTER DIGITAL PRECISION PROCESSING STANDARD ADVANCED ST/DIRECT/ SURR AUTO SURR DVD/LD TV/SAT DVR/VCR VIDEO CD CD-R / TAPE / MD AM FM USB SIGNAL SELECT AUX SB ch ACOUSTIC PROCESSING EQ LISTENING MODE EON MODE PTY SEARCH TUNING / STATION TUNER EDIT MASTER VOLUME MIDNIGHT/ LOUDNESS SPEAKERS STANDBY/ON S -VIDEO VIDEO PHONES TONE QUICK SETUP SETUP VIDEO INPUT L AUDIO USB R DIGITAL IN MCACC SETUP MIC RETURN MULTI JOG DOWN UP This receiver To make the most of the SR+ features, you should connect your source components (DVD player, etc.) in a slightly different way to that described in this chapter. For each component, connect the video output directly to the plasma display, and just connect the audio (analog and/or digital) to this receiver. SB ch ANALOG ATT SR+ DIMMER MIDNIGHT/ LOUDNESS DIALOG E Satellite receiver, etc DVD AUDIO IN SLEEP CD TV DVR CD-R/TAPE USB FM AM CLASS +10 MENU TOP MENU TUNE RECEIVER ST SLEEP SB h ANALOG DISC ENTER TV CTRL ST T.EDIT ENTER 1 Make sure that the plasma display and this receiver are switched on and that they are connected with the SR+ cable. See Using this receiver with a Pioneer plasma display above for more on this. 2 To switch SR+ mode on/off, press RECEIVER, then the SR+ button. The front panel display shows SR+ ON or OFF. Note 1 • The 3-ringed SR+ cable from Pioneer is commercially available under the part number ADE7095. Contact the Pioneer Customer Support division for more information on obtaining an SR+ cable (you can also use a commercially available 3-ringed mini phone plug for the connection). • If you connect to a Pioneer plasma display using an SR+ cable, you will need to point the remote control at the plasma display remote sensor to control the receiver. In this case, you won’t be able to control the receiver using the remote control if you switch the plasma display off. 2 The automatic volume muting feature is enabled separately; see SR+ Setup for Pioneer plasma displays on page 65. 62 En VSX_916.book.fm 63 ページ 2005年12月22日 木曜日 午後4時21分 Other Settings 13 Chapter 13: English Other Settings 5a.Digital Input Setup 5.Input Assign a.Digital Input b.Component Input 2 Select ‘Input Assign’ from the System Setup menu. 5.Input Assign 1.Surr Back System 2.Auto MCACC 3.Manual MCACC 4.Manual SP Setup 5.Input Assign 6.Other Setup a.Digital Input b.Component Input : Exit :Return • Default settings: Coaxial - 1 – DVD Coaxial - 2 – DVR Optical - 1 – CD Optical - 2 – TV You only need to do this if you didn’t hook up your digital equipment according to the default settings for the digital inputs (see above). This setting tells the receiver what digital equipment is hooked up to which terminal so the buttons on the remote correspond to what you have hooked up. 1 Select ‘Digital Input’ from the Input Assign menu. ] ] ] :Finish :Return 2 Select the number of the digital input to which you’ve connected the digital component. The numbers correspond with the numbers beside the inputs on the back of the receiver. 3 Select the component that corresponds with the one you connected to that input. Select between DVD, TV, CD, CD-R, DVR or OFF. • Use / and ENTER to do this. • If you assign a digital input to a certain function (for example, DVD/LD) then any digital inputs previously assigned to that function will automatically be switched off. 4 When you're finished, press RETURN. You return to the Input Assign menu. Assigning the component video inputs • Default settings: Component 1 – DVD Component 2 – TV Component 3 – DVR If you used component video cords to connect your video equipment you must tell the receiver which device it is, or else you may see the Svideo or composite video input instead of the component video signal. For more on this, see Using the component video jacks on page 17. 1 Select ‘Component Input’ from the Input Assign menu. 5. Input Assign Español Assigning the digital inputs DVD DVR CD TV [ [ [ Nederlands System Setup 1 2 1 2 Italiano 1 Press RECEIVER on the remote control, then press the SETUP button. An on-screen display (OSD) appears on your TV. Use /// and ENTER on the remote control to navigate through the screens and select menu items. Press RETURN to confirm and exit the current menu. - Français You only need to make settings in the Input Assign menu if you didn’t hook up your digital equipment according to the default settings for the digital inputs, or if you have connected equipment using component video cables. Coaxial Coaxial Optical Optical Deutsch The Input Assign menu 5b.Component Input a.Digital Input b.Component Input :Return Component - 1 Component - 2 Component - 3 [ [ DVD TV DVR ] ] :Finish 63 En VSX_916.book.fm 64 ページ 2005年12月22日 木曜日 午後4時21分 13 Other Settings 2 Select the number of the component video input to which you’ve connected your video component. The numbers correspond with the numbers beside the inputs on the back of the receiver. • DRC Setup – Specify the amount of dynamic range adjustment to Dolby Digital soundtracks (see Dynamic Range Control Setup below). • Dual Mono Setup – Isolate one channel when listening to discs with dual mono encoding (see Dual Mono Setup below). • LFE ATT Setup – Choose the attenuator level for the LFE channel (LFE Attenuator Setup on page 65). 3 Select the component that corresponds with the one you connected to that input. Select between DVD, TV, DVR or OFF. • Use / and ENTER to do this. • Make sure you have connected the audio from the component to the corresponding inputs on the rear of the receiver. • If you connect any source component to the receiver using a component video input, you should also have your TV connected to this receiver's component video MONITOR output. 4 When you're finished, press RETURN. You return to the Input Assign menu. The Other Setup menu The Other Setup menu is where you can make customized settings to reflect how you are using the receiver. 1 Press RECEIVER on the remote control, then press the SETUP button. An on-screen display (OSD) appears on your TV. Use /// and ENTER on the remote control to navigate through the screens and select menu items. Press RETURN to confirm and exit the current menu. 2 Dynamic Range Control Setup • Default setting: OFF This setting specifies the amount of dynamic range adjustment to Dolby Digital and DTS movie soundtracks. You may want to use this when listening to surround sound at low volumes. 1 Select ‘DRC Setup’ from the Other Setup menu. 6.Other Setup a.DRC b.Dual c.LFE d.SR + : Exit a.DRC b.Dual c.LFE d.SR + Setup Mono Setup ATT Setup Setup :Return 3 Select the setting you want to adjust. If you are doing this for the first time, you may want to adjust these settings in order: 6a.Dynamic Range Control Setup Mono Setup ATT Setup Setup :Return 2 6.Other Setup 1.Surr Back System 2.Auto MCACC 3.Manual MCACC 4.Manual SP Setup 5.Input Assign 6.Other Setup En 4 Make the adjustments necessary for each setting, pressing RETURN to confirm after each screen. Select ‘Other Setup’ then press ENTER. System Setup 64 • SR+ Setup – Specify how you want to control your Pioneer plasma display (SR+ Setup for Pioneer plasma displays on page 65). DRC OFF :Finish Choose the setting that you want. • MAX – Dynamic range is reduced (loud sounds are reduced in volume while quieter sounds are increased). • MID – Mid setting. • OFF – No dynamic range adjustment (use when listening at higher volume). 3 When you're finished, press RETURN. You return to the Other Setup menu. VSX_916.book.fm 65 ページ 2005年12月22日 木曜日 午後4時21分 Other Settings 13 Dual Mono Setup 3 When you're finished, press RETURN. You return to the Other Setup menu. Default setting: CH1 1 Select ‘Dual Mono Setup’ from the Other Setup menu. 1 Dual Mono :Finish • Default setting: ATT 0 dB 1 Select ‘LFE ATT Setup’ from the Other Setup menu. 6c. LFE ATT Setup Setup Mono Setup ATT Setup Setup LFE ATT ATT 0dB :Return 2 Select the ‘PDP Volume Control’ setting you want. • OFF – The receiver does not control the volume of the plasma display • ON – When the receiver is switched to one of the inputs that use the plasma display (DVD/LD, or another function below), the volume on the plasma display is muted so only sound from the receiver is heard. 3 Assign any input source connected to the plasma display to the corresponding input number. This matches the receiver’s input source with a numbered video input on the plasma display. For example, assign DVD/LD to input-2 if you have connected your DVD video output to video input 2 on the plasma display. • The Monitor Out Connect should be set to the input that you’ve used to connect this receiver to your plasma display. 6d.SR + Setup :Return 2 :Finish Choose the setting that you want. • ATT 0dB – No limiting (recommended) • ATT 10dB – 10 dB of limiting • LFE OFF – No sound from LFE channel PDP Volume Control OFF PDP Input Select DVD/LD [ input-1 ] TV/SAT [ input-2 ] DVR [ input-3 ] VIDEO [ TV ] Monitor Out Connect [ OFF ] :Finish PDP Volume Control [ ON ] PDP Input Select DVD/LD input-1 TV/SAT [ input-2 ] DVR [ input-3 ] VIDEO TV [ ] Monitor Out Connect [ OFF ] :Finish Español Some Dolby Digital and DTS audio sources include ultra-low bass tones. Set the LFE attenuator as necessary to prevent the ultra-low bass tones from distorting the sound from the speakers. Setup Mono Setup ATT Setup Setup Nederlands LFE Attenuator Setup a.DRC b.Dual c.LFE d.SR + Italiano 3 When you're finished, press RETURN. You return to the Other Setup menu. a.DRC b.Dual c.LFE d.SR + 6d.SR + Setup 6.Other Setup Choose the setting that you want. • CH2 – Only channel 2 is played • CH1 CH2 – Both channels are played through the front speakers • CH1 – Only channel 1 is played 6.Other Setup Select ‘SR+ Setup’ from the Other Setup menu. [ CH1 Français Setup Mono Setup ATT Setup Setup :Return 2 Make the following settings if you have connected a Pioneer plasma display to this receiver using an SR+ cable. Note that the number of settings available will depend on the plasma display you’ve connected. See also Using this receiver with a Pioneer plasma display on page 61. 6b.Dual Mono Setup 6.Other Setup a.DRC b.Dual c.LFE d.SR + SR+ Setup for Pioneer plasma displays Deutsch You can specify how dual mono encoded Dolby Digital and DTS soundtracks should be played. Dual mono is not widely used, but is sometimes necessary when two languages need to be sent to separate channels. English • 6d.SR + Setup PDP Volume Control [ ON ] PDP Input Select DVD/LD input-2 TV/SAT [ OFF ] DVR [ input-3 ] VIDEO TV [ ] Monitor Out Connect [ OFF ] :Finish 4 When you're finished, press RETURN. You return to the Other Setup menu. 65 En VSX_916.book.fm 66 ページ 2005年12月22日 木曜日 午後4時21分 14 Additional information Chapter 14: Additional information Troubleshooting Incorrect operations are often mistaken for trouble and malfunctions. If you think that there is something wrong with this component, check the points below. Take a look at the other components and electrical appliances being used, because sometimes the problem may lie there. If the trouble isn’t sorted out even after going through the checks below, ask your nearest Pioneer authorized independent service company to carry out repair work. • If the unit does not operate normally due to external effects such as static electricity disconnect the power plug from the outlet and insert again to return to normal operating conditions. Problem Remedy The power does not turn on. • Disconnect the power plug from the outlet, and insert again. • Make sure there are no loose strands of speaker wire touching the rear panel. This could cause the receiver to shut off automatically. The receiver suddenly switches • After about a minute (you won't be able to switch the unit on during this time), off and the power indicator switch the receiver back on. If the message persists, call a Pioneer authorized blinks. independent service company. 66 En No sound is output when a function is selected. • Make sure the component is connected correctly (refer to Connecting up on page 12). • Press MUTE on the remote control to turn muting off. • Press SPEAKERS to select the proper speaker set (see Switching the speaker system on page 59). • Press SIGNAL SELECT to select the proper input signal (see Choosing the input signal on page 33). No image is output when a function is selected. • Make sure the component is connected correctly (refer to Connecting up on page 12). • Select the correct component (use the input select buttons). • Check Assigning the component video inputs on page 63 to make sure you’re assigned the correct input. • The video input selected on the TV monitor is incorrect. Refer to the instruction manual supplied with the TV. No sound from subwoofer. • Make sure the subwoofer is switched on. • If the subwoofer has a volume knob, make sure it’s turned up. • The Dolby Digital or DTS source you are listening to may not have an LFE channel. • Switch the subwoofer setting in Speaker Setting on page 42 to YES or PLUS. • Switch the LFE Attenuator Setup on page 65 to LFEATT 0 or LFEATT 10. No sound from surround or center speakers. • Connect the speakers properly (refer to page 19). • Refer to Speaker Setting on page 42 to check the speaker settings. • Refer to Channel Level on page 43 to check the speaker levels. VSX_916.book.fm 67 ページ 2005年12月22日 木曜日 午後4時21分 Additional information Broadcast stations cannot be selected automatically. • Connect an outdoor antenna (refer to page 18). Noise during playback of a cassette deck. • Move the cassette deck away from your receiver, until the noise disappears. Sound is produced from other components, but not from LD or DVD player. • Set the SIGNAL SELECT to AUTO, DIGITAL or ANALOG according to the type of connections made. (refer to page 33). • Set the digital input settings correctly (refer to page 63). • Make digital connections (refer to page 13) and set the SIGNAL SELECT to DIGITAL (refer to page 33). • Refer to the instruction manual supplied with the DVD player. No sound is output or a noise is output when software with DTS is played back. • Set the digital volume level of the player to full, or to the neutral position. • Make sure the player's settings are correct and/or the DTS signal out is on. Refer to the instruction manual supplied with the DVD player. • Set the input signal type to DIGITAL (see Choosing the input signal on page 33) During a playback search, noise is output from a DTS compatible CD player. • This is not a malfunction, but be sure to turn the volume down to prevent the output of loud noise from your speakers. Everything seems to be set up correctly, but the playback sound is odd. • Check that the positive/negative speaker terminals on the receiver are matched with the corresponding terminals on the speakers (see Connecting the speakers on page 19). There seems to be a time lag between the speakers and the output of the subwoofer. • See Automatically setting up for surround sound (MCACC) on page 9 to set up your system again using MCACC (this will automatically compensate for a delay in the subwoofer output). Español • Connect the antenna (page 18) and adjust the position for best reception. • Route any loose cables away from the antenna terminals and wires. • Fully extend the FM wire antenna, position for best reception, and secure to a wall (or connect an outdoor FM antenna). • Connect an additional internal or external AM antenna (page 18). • Turn off equipment causing interference or move it away from the receiver (or move antennas farther away from equipment causing noise). Nederlands Considerable noise in radio broadcasts. Italiano • Refer to Speaker Setting on page 42 to check the surround back speaker settings. • Refer to Channel Level on page 43 to check the speaker levels. • Refer to Using surround back channel processing on page 31 to make sure surround back processing and the sound mode are set for surround back sound. Français No sound from surround back speakers. Deutsch Remedy English Problem 14 After using the Auto MCACC • Low-frequency noise could have been caused by an air conditioner or motor. Setup, the speaker size setting Switch off all appliances in the room and rerun the Auto MCACC Setup. (LARGE or SMALL) is incorrect. Can’t operate the remote control. • Replace the batteries (refer to page 6). • Operate within 7 m, 30° of the remote sensor (refer to page 27). • Remove the obstacle or operate from another position. • Avoid exposing the remote sensor on the front panel to direct light. • Unplug anything connected to the CONTROL IN jack and use remote normally (see Operating other Pioneer components on page 50). 67 En VSX_916.book.fm 68 ページ 2005年12月22日 木曜日 午後4時21分 14 Additional information Problem Remedy The SR cable is connected, but the connected components can’t be operated with the remote. • Reinsert the SR cable, making sure it’s connected to the right jack (see Using this receiver with a Pioneer plasma display on page 61). • Make sure an analog connection has been made between the units. • This feature only works with Pioneer products. The display is dark or off. • Press DIMMER on the control repeatedly to return to the default. The System Setup screen doesn't appear. • When the receiver is in standby, switch to BURST.OFF by holding down ACOUSTIC EQ (front panel) and pressing STANDBY/ON (the current setting is displayed). USB mass storage device is • Try switching the receiver off, then on again. not recognized by the receiver. • Make sure you have completely inserted the USB connector to this receiver. • Check that the memory format is FAT16 or FAT32 (FAT12, NTFS and HFS are not supported). • USB devices with an internal USB hub are not supported. USB ERR3 shows in the display • If this message continues to appear after going through all the checks in when connecting a USB Important on page 34 of USB playback, take the unit to your nearest Pioneer device. authorized service center or your dealer for servicing. Can’t play audio files. • The WMA or MPEG-4 AAC files were recorded using DRM (digital rights management), or the bit rate/sampling rate is not compatible (see Compressed audio compatibility on page 35). This is not a malfunction. Resetting the main unit Use this procedure to reset all the receiver’s settings to the factory default. Use the front panel controls to do this. 1 Switch the receiver into standby. 2 While holding down the TONE button, press and hold the STANDBY/ON button for about three seconds. 3 When you see RESET? appear in the display, press ENTER. OK? shows in the display. 4 Press SETUP to confirm. OK appears in the display to indicate that the receiver has been reset to the factory settings. Switching the speaker impedance We recommend using speakers of 8 Ω with this system, but it is possible to switch the impedance setting if you plan to use speakers with a 6 Ω impedance rating. 68 En • With the receiver in standby, press STANDBY/ON while holding down the SPEAKERS button. Each time you do this, you switch between the impedance settings: • SP 6 OHM – Use this setting if your speakers are rated at 6 Ω. • SP 8 OHM – Use this setting if your speakers are rated at 8 Ω or more. Changing the TV format setting If the System Setup menu is not displayed correctly, it may be that the TV system is set incorrectly for your country or region. • With the receiver in standby, press STANDBY/ON while holding down the SIGNAL SELECT button. The display shows the new setting (PAL or NTSC). 12_additional_info.fm 69 ページ 2006年1月6日 金曜日 午前9時34分 Additional information 14 • Continuous power output (stereo) Component video section • • Power output (surround) Audio section • dB Output (Level/Impedance) DVR/VCR REC, CD-R/TAPE/ MD REC . . . . . . . . . . . . . . . . . . . . . 200 mV/2.2 kΩ • • Frequency response DVD/LD, TV/SAT, DVR/VCR MONITOR . . . 5 Hz to 40 MHz dB Signal-to-Noise Ratio . . . . . . . . . . . . . . . . . . 60 dB Tone control AM Tuner Section CD, DVR/VCR, CD-R/TAPE/MD, DVD/LD, TV/SAT. . . . . . . . . . . . . . . . . 88 dB/64 dB Frequency Range . . . . . . . . .531 kHz to 1 602 kHz Sensitivity (IHF, Loop antenna) . . . . . . . 350 µV/m Signal-to-Noise Ratio . . . . . . . . . . . . . . . . . . 50 dB Antenna . . . . . . . . . . . . . . . . . . . . . . Loop antenna Video Section Miscellaneous • Signal-to-Noise Ratio DIN (Continuous rated power output / 50mW) • Input (Sensitivity/Impedance) DVR/VCR, DVD/LD, TV/SAT . . . . . . . .1 Vp-p/75 Ω • Output (Level/Impedance) DVR/VCR, MONITOR OUT . . . . . . . . .1 Vp-p/75 Ω Español Bass . . . . . . . . . . . . . . . . . . . . . . . ± 6 dB (100 Hz) Treble . . . . . . . . . . . . . . . . . . . . . . ± 6 dB (10 kHz) Loudness . . . . . . +10 dB/+5 dB (100 Hz/10 kHz) (at volume level –50 dB) Frequency Range . . . . . . . . 87.5 MHz to 108 MHz Usable Sensitivity . . . . . . . . . . Mono:13.2 dBf, IHF (1.3 µV/ 75 Ω) 50 dB Quieting Sensitivity . . . . . . . Mono: 20.2 dB Stereo: 38.6 dBf Signal-to-Noise Ratio . . . Mono: 73 dB (at 85 dBf) Stereo: 70 dB (at 85 dBf) Distortion. . . . . . . . . . . . . . . .Stereo: 0.5 % (1 kHz) Alternate Channel Selectivity . . . . . . . . . . . 60 dB (400 kHz) Stereo Separation. . . . . . . . . . . . . . . 40 dB (1 kHz) Frequency Response . . . . . . . . . . 30 Hz to 15 kHz (±1 dB) Antenna Input (DIN). . . . . . . . . .75 Ω unbalanced Nederlands • Output (Level/Impedance) MONITOR OUT . . . . . . . . . . . . . . . . . . 1 Vp-p/75 Ω Italiano Frequency response CD, DVR/VCR, CD-R/TAPE/MD, DVD/LD, TV/SAT . . . . . . . . . . . . . . 5 Hz to 100 000 Hz • FM Tuner Section Input (Sensitivity/Impedance) CD, DVR/VCR, CD-R/TAPE/MD, DVD/LD, TV/SAT. . . . . . . . . . . . . . . .200 mV/47 kΩ • Input (Sensitivity) DVD/LD, TV/SAT, DVR/VCR . . . . . . . . 1 Vp-p/75 Ω Français Front . . . . . 100 W per channel (1 kHz, THD 1.0 %, 8 Ω) Center . . . . . . . . . . 100 W (1 kHz, THD 1.0 %, 8 Ω) Surround . . . . . . . . . . . . . . . . .100 W per channel (1 kHz, THD 1.0 %, 8 Ω) Surround Back. . . . . . . . . . . . .100 W per channel (1 kHz, THD 1.0 %, 8 Ω) Deutsch Front . . . . . . . .100 W (DIN 1kHz, THD 1.0 %, 8 Ω) English Amplifier section • Frequency response DVR/VCR, DVD/LD, TV/SAT MONITOR . . . . . . 5 Hz to 7 MHz dB Signal-to-Noise Ratio . . . . . . . . . . . . . . . . . . 55 dB Crosstalk . . . . . . . . . . . . . . . . . . . . . . . . . . . . 50 dB Specifications Power requirements . . . . . . . . . . . . . . . AC 220 V to 230 V, 50 Hz/60 Hz Power consumption . . . . . . . . . . . . . . . . . . . 360 W In standby . . . . . . . . . . . . . . . . . . . . . . . . . 0.5 W Dimensions . . . . . 420 (W) mm x 158 (H) mm x 352.5 (D) mm Weight (without package) . . . . . . . . . . . . . . 9.0 kg 69 En VSX_916.book.fm 70 ページ 2005年12月22日 木曜日 午後4時21分 14 Additional information Furnished Parts Microphone (for Auto MCACC setup). . . . . . . . . 1 Dry cell batteries (AA size IEC R6) . . . . . . . . . . 2 Remote control . . . . . . . . . . . . . . . . . . . . . . . . . . 1 AM loop antenna . . . . . . . . . . . . . . . . . . . . . . . . . 1 FM wire antenna . . . . . . . . . . . . . . . . . . . . . . . . . . 1 Warranty card . . . . . . . . . . . . . . . . . . . . . . . . . . . . 1 These operating instructions Note • Specifications and the design are subject to possible modifications without notice, due to improvements. Power cord caution Handle the power cord by the plug. Do not pull out the plug by tugging the cord and never touch the power cord when your hands are wet as this could cause a short circuit or an electric shock. Do not place the unit, a piece of furniture, etc., on the power cord, or pinch the cord. Never make a knot in the cord or tie it with other cords. The power cords should be routed such that they are not likely to be stepped on. A damaged power cord can cause a fire or give you an electrical shock. Check the power cord once in a while. When you find it damaged, ask your nearest Pioneer authorized service center or your dealer for a replacement. Cleaning the unit • Use a polishing cloth or dry cloth to wipe off dust and dirt. • When the surface is dirty, wipe with a soft cloth dipped in some neutral cleanser diluted five or six times with water, and wrung out well, and then wipe again with a dry cloth. Do not use furniture wax or cleansers. • Never use thinners, benzine, insecticide sprays or other chemicals on or near this unit, since these will corrode the surface. 70 En VSX_916.book.fm 71 ページ 2005年12月22日 木曜日 午後4時21分 Additional information 14 . English Deutsch Français Italiano Nederlands Español 71 En VSX_916_Italian.fm Page 2 Friday, January 6, 2006 11:54 AM IMPORTANTE CAUTION RISK OF ELECTRIC SHOCK DO NOT OPEN Il simbolo del lampo con terminale a forma di freccia situato all’interno di un triangolo equilatero serve ad avvisare l’utilizzatore della presenza di una “tensione pericolosa” non isolata nella struttura del prodotto che potrebbe essere di un’intensità tale da provocare scosse elettriche all’utilizzatore. ATTENZIONE: PER EVITARE IL RISCHIO DI SCOSSE ELETTRICHE, NON RIMUOVERE IL COPERCHIO (O IL RETRO). NON CI SONO PARTI INTERNE LA CUI MANUTENZIONE POSSA ESSERE EFFETTUATA DALL’UTENTE. IN CASO DI NECESSITÀ, RIVOLGERSI ESCLUSIVAMENTE A PERSONALE DI SERVIZIO QUALIFICATO. Grazie per aver acquistato questo prodotto Pioneer. Leggere attentamente questo manuale di istruzioni per familiarizzarsi con l’uso dell’apparecchio. Conservare poi il manuale per ogni eventuale futuro riferimento. Il punto esclamativo in un triangolo equilatero serve ad avvisare l’utilizzatore della presenza di importanti istruzioni di funzionamento e manutenzione riportate nel libretto allegato al prodotto. D3-4-2-1-1_It Condizioni ambientali di funzionamento Gamma ideale della temperatura ed umidità dell’ambiente di funzionamento: da +5 a +35 °C, umidità relativa inferiore all‘85% (fessure di ventilazione non bloccate) Non installare l’apparecchio in luoghi poco ventilati, o in luoghi esposti ad alte umidità o alla diretta luce del sole (o a sorgenti di luce artificiale molto forti). D3-4-2-1-7c_A_It ATTENZIONE Questo apparecchio non è impermeabile. Per prevenire pericoli di incendi o folgorazioni, non posizionare nelle vicinanze di questo apparecchio contenitori pieni di liquidi (quali vasi da fiori, o simili), e non esporre l’apparecchio a sgocciolii, D3-4-2-1-3_A_It schizzi, pioggia o umidità. ATTENZIONE Prima di collegare per la prima volta l’apparecchio alla sorgente di alimentazione leggere attentamente la sezione che segue. La tensione della sorgente di elettricità differisce da Paese a Paese e da regione a regione. Verificare che la tensione di rete della zona in cui si intende utilizzare l’apparecchio sia quella corretta, come indicato sul pannello posteriore dell’apparecchio D3-4-2-1-4_A_It stesso (ad es.: 230 V o 120 V). AVVERTENZA PER LA VENTILAZIONE Installare l’apparecchio avendo cura di lasciare un certo spazio all’intorno dello stesso per consentire una adeguata circolazione dell’aria e migliorare la dispersione del calore (almeno 60 cm sulla parte superiore, 10 cm sul retro, e 30 cm su ciascuno dei lati). ATTENZIONE L’apparecchio è dotato di un certo numero di fessure e di aperture per la ventilazione, allo scopo di garantirne un funzionamento affidabile, e per proteggerlo dal surriscaldamento. Per prevenire possibili pericoli di incendi le aperture non devono mai venire bloccate o coperte con oggetti vari (quali giornali, tovaglie, tende o tendaggi, ecc.), e l’apparecchio non deve essere utilizzato appoggiandolo su tappeti spessi o sul letto. D3-4-2-1-7b_A_It ATTENZIONE Per evitare il pericolo di incendi, non posizionare sull’apparecchio dispositivi con fiamme vive (ad D3-4-2-1-7a_A_It esempio una candela accesa, o simili). DOWN DOWN VSX_916_Italian.fm Page 3 Friday, January 6, 2006 11:54 AM Se si vuole eliminare questo prodotto, non gettarlo insieme ai rifiuti domestici. Esiste un sistema di raccolta differenziata in conformità alle leggi che richiedono appositi trattamenti, recupero e riciclo. I privati cittadini dei venticinque paesi membri dell’UE, di Svizzera e Norvegia, possono restituire senza alcun costo i loro prodotti elettronici usati ad appositi servizi di raccolta o a un rivenditore (se si desidera acquistarne uno simile). Per i paesi non citati qui sopra, si prega di prendere contatto con le autorità locali per il corretto metodo di smaltimento. In questo modo, si è sicuri che il proprio prodotto eliminato subirà il trattamento, il recupero e il riciclo necessari per prevenire gli effetti potenzialmente negativi sull’ambiente e sulla vita dell’uomo. Se la spina del cavo di alimentazione di questo apparecchio non si adatta alla presa di corrente alternata di rete nella quale si intende inserire la spina stessa, questa deve essere sostituita con una adatta allo scopo. La sostituzione della spina del cavo di alimentazione deve essere effettuata solamente da personale di servizio qualificato. Dopo la sostituzione, la vecchia spina, tagliata dal cavo di alimentazione, deve essere adeguatamente eliminata per evitare possibili scosse o folgorazioni dovute all’accidentale inserimento della spina stessa in una presa di corrente sotto tensione. Se si pensa di non utilizzare l’apparecchio per un relativamente lungo periodo di tempo (ad esempio, durante una vacanza), staccare la spina del cavo di alimentazione dalla presa di corrente alternata di D3-4-2-2-1a_A_It rete. K058_It Questo prodotto è conforme alla direttiva sul basso voltaggio (73/23/CEE emendata 93/68/CEE), direttive EMC 89/338/CEE, emendata 92/31/CEE e 93/68/CEE. D3-4-2-1-9a_It Questo prodotto è destinato esclusivamente all'uso domestico. Eventuali disfunzioni dovute ad usi diversi (quali uso prolungato a scopi commerciali, in ristoranti, o uso in auto o su navi) e che richiedano particolari riparazioni, saranno a carico dell'utente, anche se nel corso del periodo di garanzia. K041_It Questo prodotto è conforme al DM 28/8/1995, Nº548, ottemperando alle prescrizioni di cui al DM 25/6/1985 (par.3, all. A) e DM 27/8/1987 (All. I). D44-8-4a_It AVVERTENZA L’interruttore principale (STANDBY/ON) dell’apparecchio non stacca completamente il flusso di corrente elettrica dalla presa di corrente alternata di rete. Dal momento che il cavo di alimentazione costituisce l’unico dispositivo di distacco dell’apparecchio dalla sorgente di alimentazione, il cavo stesso deve essere staccato dalla presa di corrente alternata di rete per sospendere completamente qualsiasi flusso di corrente. Verificare quindi che l’apparecchio sia stato installato in modo da poter procedere con facilità al distacco del cavo di alimentazione dalla presa di corrente, in caso di necessità. Per prevenire pericoli di incendi, inoltre, il cavo di alimentazione deve essere staccato dalla presa di corrente alternata di rete se si pensa di non utilizzare l’apparecchio per periodi di tempo relativamente lunghi (ad esempio, durante una D3-4-2-2-2a_A_It vacanza). Prodotto sotto licenza Dolby Laboratories. "Dolby", "Pro Logic", "Surround EX", ed il simbolo doppia D sono marchi registrati della Dolby Laboratories. "DTS" ,"DTS-ES" ,"DTS 96/24" e "Neo:6" sono marchi di fabrica Digital Theater Systems, Inc. VSX_916_Italian.fm Page 4 Friday, January 6, 2006 11:54 AM Indice 01 Prima di cominciare Controllo dei contenuti della scatola . . . . . . . . Installazione delle batterie . . . . . . . . . . . . . . . Installazione del ricevitore. . . . . . . . . . . . . . . . Ventilazione . . . . . . . . . . . . . . . . . . . . . . . . . . 6 6 6 6 02 Guida di 5 minuti Presentazione del sistema home theater . . . . 7 Ascolto del suono surround . . . . . . . . . . . . . . 7 Uso della Configurazione rapida . . . . . . . . . . . 8 03 Impostazione rapida suono surround Impostazione automatica del suono surround (MCACC). . . . . . . . . . . . . . . . . . . . . . . . . . . . . 9 Altri problemi che possono sorgere durante l’uso della funzione Auto MCACC Setup. . . 11 04 Collegamento Come collegare i cavi . . . . . . . . . . . . . . . . . . Cavi audio analogici . . . . . . . . . . . . . . . . . . Cavi audio digitali . . . . . . . . . . . . . . . . . . . . Cavi video . . . . . . . . . . . . . . . . . . . . . . . . . . Collegamento di un lettore DVD e di un televisore. . . . . . . . . . . . . . . . . . . . . . . . . . . . Collegamento delle uscite analogiche multicanale . . . . . . . . . . . . . . . . . . . . . . . . Collegamento di ricevitori satellitari o di altri set-top digitali . . . . . . . . . . . . . . . . . . . . Collegamento di altri componenti audio . . . . Informazioni sul decoder WMA9 Pro . . . . . Collegamento di altri componenti video . . . . Uso delle prese video componenti . . . . . . . Come collegare il terminale video del pannello anteriore . . . . . . . . . . . . . . . . . . . Collegamento delle antenne . . . . . . . . . . . . . Uso delle antenne esterne . . . . . . . . . . . . . Collegamento degli altoparlanti . . . . . . . . . . Suggerimenti per l’ubicazione degli altoparlanti . . . . . . . . . . . . . . . . . . . . . . . . . 12 12 12 12 13 14 14 15 15 16 17 17 18 18 19 20 05 Controlli e display Pannello anteriore. . . . . . . . . . . . . . . . . . . . . Display . . . . . . . . . . . . . . . . . . . . . . . . . . . . . Telecomando . . . . . . . . . . . . . . . . . . . . . . . . Intervallo operativo del telecomando . . . . . 22 23 25 27 06 Ascolto del sistema Riproduzione automatica . . . . . . . . . . . . . . . 28 Ascolto con il suono surround . . . . . . . . . . . 28 Uso degli effetti surround Advanced . . . . . . 29 Impostazione delle opzioni relative agli effetti . . . . . . . . . . . . . . . . . . . . . . . . . . . . . 29 Ascolto stereo . . . . . . . . . . . . . . . . . . . . . . . . 30 Ascolto con la funzione Acoustic Calibration EQ . . . . . . . . . . . . . . . . . . . . . . . . 30 Uso dell’elaborazione del canale posteriore surround . . . . . . . . . . . . . . . . . . . . . . . . . . . . 31 Uso della modalità Virtual Surround Back (VSB) . . . . . . . . . . . . . . . . . . . . . . . . . . . . . 31 Uso delle modalità Midnight e Loudness. . . . 32 Uso della funzione Sound Retriever. . . . . . . . 32 Enfatizzazione dei dialoghi . . . . . . . . . . . . . . 32 Uso dei controlli del tono. . . . . . . . . . . . . . . . 32 Riproduzione di altre fonti . . . . . . . . . . . . . . . 33 Come scegliere il segnale d’ingresso . . . . . . 33 Selezione degli ingressi analogici multicanale . . . 33 07 Riproduzione USB Uso dell’interfaccia USB . . . . . . . . . . . . . . . . 34 Controlli di base per la riproduzione . . . . . . . 34 Compatibilità dell’audio compresso . . . . . . 35 08 Menù System Setup Come eseguire le impostazioni del ricevitore sul menù System Setup. . . . . . . . . . . . . . . . . 36 Impostazione dell’altoparlante surround posteriore . . . . . . . . . . . . . . . . . . . . . . . . . . . 36 Configurazione manuale MCACC degli altoparlanti . . . . . . . . . . . . . . . . . . . . . . . . . . 37 Livello canale ottimo . . . . . . . . . . . . . . . . . . 38 Distanza ottimale degli altoparlanti. . . . . . . 38 Calibratura acustica EQ . . . . . . . . . . . . . . . 39 Configurazione manuale degli altoparlanti . . 41 Impostazione degli altoparlanti . . . . . . . . . . 42 Rete Crossover . . . . . . . . . . . . . . . . . . . . . . 43 Livello del canale . . . . . . . . . . . . . . . . . . . . 43 Distanza dell’ altoparlante . . . . . . . . . . . . . 44 09 Come usare il sintonizzatore Ascolto della radio. . . . . . . . . . . . . . . . . . . . . 45 Miglioramento del suono FM stereo . . . . . . 45 Sintonizzazione diretta di una stazione . . . . 45 Come salvare le stazioni di preselezione . . . . 46 Come denominare le stazioni preselezionate . . . 46 Ascolto delle stazioni preselezionate. . . . . . 46 Un’introduzione al sistema RDS . . . . . . . . . . 47 Visualizzazione delle informazioni RDS . . . . 47 Ricerca dei programmi RDS . . . . . . . . . . . . 47 Utilizzo della funzione EON . . . . . . . . . . . . . . 48 VSX_916_Italian.fm Page 5 Friday, January 6, 2006 11:54 AM 14 Informazioni addizionali Come fare una registrazione audio o video . . . . 49 Localizzazione dei guasti . . . . . . . . . . . . . . . . 66 Ripristino dell’unità principale . . . . . . . . . . . . 68 Commutazione dell’impedenza dell’altoparlante. . . . . . . . . . . . . . . . . . . . . . . 68 Modifica dell’impostazione del formato TV. . . 68 Specifiche . . . . . . . . . . . . . . . . . . . . . . . . . . . 69 Precauzione riguardante il cavo d’alimentazione . . . . . . . . . . . . . . . . . . . . . . . 70 Pulizia dell'unità. . . . . . . . . . . . . . . . . . . . . . . 70 11 Controllo del resto del sistema Español Menù Input Assign . . . . . . . . . . . . . . . . . . . . 63 Menù Other Setup. . . . . . . . . . . . . . . . . . . . . 64 Impostazione di controllo della gamma dinamica. . . . . . . . . . . . . . . . . . . . . . . . . . . 64 Impostazione Dual Mono . . . . . . . . . . . . . . 65 Impostazione LFE Attenuator . . . . . . . . . . . 65 SR+ Setup per i display plasma della Pioneer. . . . . . . . . . . . . . . . . . . . . . . . 65 Nederlands 13 Altre impostazioni Deutsch Impostazione dell’altoparlante B Second Zone . . . . . . . . . . . . . . . . . . . . . . . 59 Commutazione del sistema degli altoparlanti . . . . . . . . . . . . . . . . . . . . . . . . . 59 Bi-amping degli altoparlanti anteriori . . . . . . 60 Bi-wiring degli altoparlanti . . . . . . . . . . . . . . 60 Collegamento di altri amplificatori. . . . . . . . . 61 Utilizzo di questo ricevitore con un display plasma della Pioneer. . . . . . . . . . . . . . . . . . . 61 Uso della modalità SR+ con un display plasma della Pioneer . . . . . . . . . . . . . . . . . 62 Français 12 Altri collegamenti Italiano Come manovrare altri componenti Pioneer. . . . 50 Impostazione del telecomando per manovrare altri componenti . . . . . . . . . . . . . 50 Selezione diretta dei codici di preselezione. . . . 51 Programmazione dei segnali provenienti dagli altri telecomandi. . . . . . . . . . . . . . . . . . 51 Cancellazione di una delle impostazioni del tasto del telecomando . . . . . . . . . . . . . . . 52 Cancellazione di tutte le preselezioni del telecomando . . . . . . . . . . . . . . . . . . . . . . . . . 53 Funzione diretta. . . . . . . . . . . . . . . . . . . . . . . 53 Conferma dei codici di preselezione . . . . . . . 53 Funzioni Multi Operation e System Off . . . . . 53 Programmazione di un’operazione multipla o di una sequenza di spegnimento . . . . . . . 54 Uso delle operazioni multiple . . . . . . . . . . . 55 Uso della funzione System off . . . . . . . . . . . 55 Controlli per TV . . . . . . . . . . . . . . . . . . . . . . . 55 Come manovrare altri componenti . . . . . . . . 57 English 10 Come fare le registrazioni VSX_916_Italian.fm Page 6 Friday, January 6, 2006 11:54 AM Capitolo 1: Prima di cominciare Controllo dei contenuti della scatola Controllare che siano stati inclusi i seguenti accessori in dotazione: • Impostazione microfono • Non usare né conservare le batterie alla luce diretta del sole o in luoghi eccessivamente caldi, come all’interno di un’automobile o in prossimità di un calorifero. Le batterie potrebbero perdere liquido, surriscaldarsi, esplodere o prendere fuoco. In tali condizioni, anche la durata e le prestazioni delle batterie potrebbero risultare ridotte. • Telecomando • Pile a secco (IEC R6, dimensione AA) x2 • Antenna AM a telaio • Antenna FM a filo • Documento di garanzia • Queste istruzioni per l’uso Installazione delle batterie Installazione del ricevitore All’installazione di quest’unità, assicurarsi di posizionarla su una superficie piana e stabile. Evitare di installare l’apparecchio nei seguenti luoghi: – sopra un televisore (possibile distorsione dello schermo) – vicino ad una piastra a cassette (o vicino ad un dispositivo che genera campi magnetici). Questo può interferire con il suono. – nella luce diretta del sole – in luoghi umidi o bagnati – in luoghi estremamente caldi o freddi – in luoghi esposti a vibrazioni o altri movimenti – in luoghi molto polverosi – in luoghi esposti a fumi o oli (ad esempio la cucina) Attenzione L’utilizzo errato delle batterie può causare rischi quali perdite o scoppi. Osservare sempre le seguenti precauzioni: • Non usare mai batterie nuove e vecchie allo stesso tempo. • Inserire le polarità positiva e negativa delle batterie in conformità con le marcature nel vano batterie. • Batterie con la stessa forma possono avere un voltaggio diverso. Non usare diversi tipi di batterie contemporaneamente. • Assicurarsi di rispettare le norme nazionali o la legislazione per la tutela dell’ambiente in vigore nella nazione in cui verrà usato l’apparecchio. 6 It Ventilazione Installare l’apparecchio avendo cura di lasciare un certo spazio all’intorno dello stesso per consentire una adeguata circolazione dell’aria e migliorare la dispersione del calore (almeno 20 cm sulla parte superiore). La mancanza di spazio sufficiente verso i muri o altri apparecchi provoca un accumulo di calore all’interno dell’apparecchio impedendone il corretto funzionamento e la capacità di fornire prestazioni ottimali. L’apparecchio è dotato di un certo numero di fessure e di aperture per la ventilazione per proteggerlo dal surriscaldamento. Per prevenire possibili pericoli di incendi non collocare alcun oggetto direttamente sull’apparecchio, non bloccare le aperture né coprirle con oggetti vari (quali giornali, tovaglie, tendaggi ecc.) e non utilizzare l’apparecchio appoggiandolo su tappeti spessi o sul letto. VSX_916_Italian.fm Page 7 Friday, January 6, 2006 11:54 AM Capitolo 2: Guida di 5 minuti 4 Premere QUICK SETUP sul pannello anteriore per specificare la configurazione degli altoparlanti, la dimensione della stanza e la posizione di ascolto. Usare il controllo MULTI JOG per la selezione e ENTER per confermare la selezione. Vedi a Uso della Configurazione rapida sotto per ulteriori informazioni al riguardo. Español 2 Collegare gli altoparlanti e collocarli in una posizione che consenta di ottenere un suono surround ottimale. Vedi a Collegamento degli altoparlanti a pagina 19. Nederlands 1 Collegare il lettore DVD e il televisore. Consultare Collegamento di un lettore DVD e di un televisore a pagina 13. Per un suono surround, è utile effettuare l’installazione usando un collegamento digitale dal lettore DVD al ricevitore. 3 Collegare e accendere il ricevitore; accendere poi - nell’ordine - lettore DVD, subwoofer e televisore. Assicurarsi di aver impostato l’ingresso video su televisore in questo ricevitore. Controllare il manuale in dotazione con il televisore per ulteriori istruzioni su come procedere. Italiano Con la seguente guida rapida alla configurazione è possibile collegare in pochissimo tempo il sistema per il suono surround. In molti casi, si può semplicemente lasciare inalterate le impostazioni standard del ricevitore. • Accertarsi di aver effettuato tutte le connessioni prima di collegare l’unità alla sorgente di alimentazione CA. Français Ascolto del suono surround Deutsch Home theater riguarda l’uso di piste audio multiple per creare un effetto sonoro surround, per farvi sentire al centro dell’azione o di un concerto. Il suono surround che si ottiene da un sistema home theater non dipende solo dalla configurazione degli altoparlanti in uso, ma anche dalla sorgente utilizzata e dalle impostazioni del ricevitore. Questo ricevitore decodifica automaticamente sorgenti multicanale Dolby Digital, DTS o Dolby Surround a seconda dell’impostazione degli altoparlanti. Nella maggior parte dei casi, non sarà necessario fare modifiche per ottenere un suono surround realistico, ma altre possibilità (ad esempio l’ascolto di un CD con il suono surround multicanale) sono spiegati in Ascolto del sistema a pagina 28. English Presentazione del sistema home theater Il luogo d'installazione degli altoparlanti influisce molto sul suono. Per ottenere un effetto sonoro ottimale, posizionare gli altoparlanti come indicato di seguito. Per maggiori dettagli, consultare inoltre Suggerimenti per l’ubicazione degli altoparlanti a pagina 20. 5 Riprodurre un DVD e regolare il volume. Accertarsi che il display del ricevitore riporti l’indicazione DVD. Altrimenti, premere DVD sul telecomando per impostare l’ingresso DVD sul ricevitore.1 Vi sono diverse altre opzioni audio che si possono selezionare. Vedere Ascolto del sistema a pagina 28 per ulteriori informazioni.2 Nota 1 Potrebbe essere necessario impostare il lettore DVD per l'uscita audio Dolby Digital, DTS e 88.2/96 kHz PCM (2 canali) (per maggiori informazioni fare riferimento al manuale del lettore DVD). 2 A seconda del lettore DVD o disco sorgente in uso, si potrebbe ottenere solo un suono a 2 canali. In questo caso, il ricevitore deve essere impostato su una modalità di ascolto STANDARD (consultare Ascolto con il suono surround a pagina 28 se necessario) per ottdnere un suono surround multicanale. 7 It VSX_916_Italian.fm Page 8 Friday, January 6, 2006 11:54 AM • Controllare la tabella seguente per trovare la configurazione degli altoparlanti che corrisponde al sistema. Uso della Configurazione rapida È possibile usare la Configurazione rapida per fare funzionare rapidamente il sistema solo premendo qualche pulsante. Il ricevitore effettua le opportune impostazioni dopo aver selezionato la configurazione degli altoparlanti, la dimensione della stanza e la posizione di ascolto. Usare i comandi del pannello anteriore per le fasi successive. • Per un’opzione di configurazione più completa, fare riferimento a Impostazione automatica del suono surround (MCACC) a pagina 9. Se si sceglie di farlo, è possibile tralasciare la Configurazione rapida.1 4 1 Se il ricevitore è spento, premere STANDBY/ON per accenderlo. 2 Premere QUICK SETUP. • SW DET lampeggia sul display mentre il ricevitore controlla l’impostazione di un subwoofer. SW YES o SW NO conferma il controllo del subwoofer, quindi il display chiede di selezionare la configurazione degli altoparlanti. 3 Usare il comando MULTI JOG per scegliere la configurazione degli altoparlanti. Quando è stato rilevato un subwoofer nella fase 2, sono disponibili le seguenti scelte: 2.1ch – 3.1ch – 4.1ch – 5.1ch – 6.1ch – 7.1ch Se un subwoofer non è stato rilevato nella fase 2, si possono scorrere le seguenti scelte: 2.0ch – 3.0ch – 4.0ch – 5.0ch – 6.0ch – 7.0ch Premere ENTER. 5 Usare il controllo MULTI JOG per scegliere la dimensione della stanza. A seconda della distanza degli altoparlanti dalla posizione di ascolto, scegliere tra piccola (S), media (M) o grande (L), M è una stanza di dimensioni medie. 6 Premere ENTER. 7 Usare il comando MULTI JOG per scegliere la posizione di ascolto. È possibile scorrere le seguenti scelte: • FWD – Se si è più vicini agli altoparlanti centrali che non agli altoparlanti surround • MID – Se si è a distanza uguale dagli altoparlanti frontali e da quelli surround • BACK – Se si è più vicini agli altoparlanti surround rispetto agli altoparlanti frontali 8 Premere ENTER per confermare la configurazione. Il display mostra la configurazione degli altoparlanti, la dimensione della stanza e la posizione di ascolto scelte. Nota 1 Vedere Come eseguire le impostazioni del ricevitore sul menù System Setup a pagina 36 per altre opzioni di configurazione. 8 It VSX_916_Italian.fm Page 9 Friday, January 6, 2006 11:54 AM Capitolo 3: Impostazione rapida suono surround SOURCE D.ACCESS CLASS +10 DISC • Assicurarsi che non ci siano ostacoli tra gli altoparlanti ed il microfono. 3 Premere RECEIVER sul telecomando, poi premere il tasto SETUP. Sul televisore viene visualizzata una schermata. Usare i tasti /// ed ENTER sul telecomando per navigare attraverso le schermate e per selezionare le voci di menu. Premere RETURN per uscire dal menu corrente. • Premere SETUP in qualsiasi momento per uscire dal menu System Setup.1 Español DIALOG E SYSTEM OFF INPUT RECEIVER SELECT Se avete un treppiedi a disposizione, usatelo per posizionare il microfono in modo tale che sia all’altezza delle orecchio nella vostra normale posizione d’ascolto. Altrimenti, posizionare il microfono al livello dell’orecchio usando un tavolo o una sedia. Nederlands Attenzione • I toni di prova usati nell’impostazione automatica MCACC sono emessi ad un alto livello di volume. UP Italiano • La funzione Auto MCACC Setup sostituirà eventuali impostazioni degli altoparlanti esistenti già fatte. • Assicurarsi che siano scollegate le cuffie. DOWN Français Importante MASTER VOLUME MCACC SETUP MIC Deutsch L’impostazione del sistema automatico di calibratura acustica multicanale (MCACC) misura le caratteristiche acustiche dell’area di ascolto, prendendo in considerazione il rumore ambientale, la dimensione e la distanza degli altoparlanti e i test per il ritardo e il livello dei canali. Dopo aver impostato il microfono in dotazione con il sistema, il ricevitore utilizza le informazioni di una serie di toni di prova per ottimizzare le impostazioni degli altoparlanti e l’equalizzazione per la stanza in questione. English Impostazione automatica del suono surround (MCACC) Premere la linguetta PUSH OPEN per accedere alla presa MCACC SETUP MIC. 4 Selezionare ‘Auto MCACC’ dal menu System Setup e quindi premere ENTER. ENTER AV PRE-PROGRAMMED AND LEARNING REMOTE CONTROL UNIT MENU TOP MENU System Setup TUNE ST ST ENTER SETUP GUIDE PTY SEARCH T.EDIT RETURN TUNE TV CONTROL DVD TV DVR CD-R/TAPE USB FM AM TV CTRL TV VOL CD INPUT SELECT TV CH 2. Auto MCACC 1.Surr Back System 2.Auto MCACC 3.Manual MCACC 4.Manual SP Setup 5.Input Assign 6.Other Setup Surr Back System Normal (SB) ] VOL RECEIVER : Exit ENTER: Start : Cancel REC 1 Accendere il ricevitore e il televisore. 2 Collegare il microfono alla presa MCACC SETUP MIC sul pannello anteriore. Nota 1 Lo screen saver si avvia automaticamente dopo tre minuti di inattività. Se si cancella la funzione Auto MCACC Setup in qualsiasi momento, il ricevitore esce automaticamente e non sarà effettuata alcuna impostazione. 9 It VSX_916_Italian.fm Page 10 Friday, January 6, 2006 11:54 AM 5 Accertarsi di aver selezionato ‘Normal (SB)’ poi premere ENTER. 1 Cercare di stare il più possibile in silenzio dopo aver premuto ENTER. Il sistema emette una serie di test di prova per stabilire il livello di rumore ambientale. 6 Seguire le istruzioni visualizzate. • Assicurarsi che sia collegato il microfono. • Se state usando un subwoofer, questo viene rivelato automaticamente ogniqualvolta si accende il sistema. Accertarsi che sia acceso e che il volume sia sufficientemente alto. • Vedere di seguito le note relative al rumore di fondo e ad altre possibili interferenze. 7 Attendere il completamento dell’emissione dei toni di prova. Mentre il ricevitore emette i toni di prova per determinare gli altoparlanti presenti nella configurazione in uso, sullo schermo viene visualizzato un rapporto sull’avanzamento delle operazioni. Mentre il sistema esegue queste attività, cercare di rimanere il più possibile in silenzio. Se la configurazione visualizzata non è corretta, usare / per selezionare l’altoparlante e / per modificare l’impostazione (e il numero per il surround posteriore). Al termine, procedere al punto successivo. Se viene visualizzato un messaggio di errore (ERR) nella colonna di destra, potrebbe trattarsi di un problema di connessione dell’altoparlante. Se l’opzione RETRY non risolve il problema, spegnere l’alimentazione e verificare i collegamenti degli altoparlanti. 9 Accertarsi di aver selezionato ‘OK’ poi premere ENTER. Sullo schermo viene visualizzato un rapporto sull’avanzamento delle operazioni, mentre il ricevitore emette ulteriori toni di prova per determinare le impostazioni ottimali relative a livello dei canali, distanza degli altoparlanti e alla funzione Acoustic Calibration EQ. 2.Auto MCACC Now Analyzing Surround Speaker Speaker Channel Acoustic Analyzing System Distance Level Cal EQ [ [ [ [ ] ] ] ] :Cancel 2.Auto MCACC Now Analyzing Environment Check Ambient Noise Microphone Speaker YES/NO [ OK ] [ OK ] [ OK ] :Cancel • Per una corretta impostazione degli altoparlanti, non regolare il volume durante l’emissione dei toni di prova. 8 Confermare la configurazione degli altoparlanti. La configurazione visualizzata sullo schermo dovrebbe rispecchiare la configurazione effettiva degli speaker in uso. 2.Auto MCACC CHECK! Front Center Surround SB SUB W. [ [ [ [ [ YES YES YES Yx2 YES ] ] ] ] ] Cercare nuovamente di rimanere il più possibile in silenzio mentre vengono eseguite queste operazioni. Il tempo necessario è di circa 3 a 8 minuti. 10 E’ terminata la funzione Auto MCACC Setup! Selezionare ‘SKIP’ per tornare al menu System Setup. L’indicatore MCACC sul pannello frontale si illumina per segnalare il completamento delle impostazioni. Le impostazioni fatte nell’impostazione Auto MCACC Setup devono fornire un suono surround eccellente, ma è anche possibile regolare le impostazioni manualmente usando il menù System Setup (vedi a pagina 36).2 Le impostazioni possono essere visualizzate selezionando i singoli parametri dalla schermata Analyzed Data Check: OK :Cancel Nota 1 Se si intende effettuare il bi-amping degli altoparlanti anteriori o impostare un altro sistema di altoparlanti in un’altra stanza, leggere Impostazione dell’altoparlante surround posteriore a pagina 36 e assicurarsi di aver collegato gli altoparlanti nel modo corretto prima di proseguire. 2 • Secondo le caratteristiche della stanza, può capitare che altoparlanti identici con un formato cono intorno a 12 cm abbiano un’impostazione diversa del formato. Si può correggere manualmente l’impostazione usando Impostazione degli altoparlanti a pagina 42. • Il valore dell’impostazione della distanza del subwoofer può essere più distante rispetto alla distanza effettiva dalla posizione d’ascolto. Quest’impostazione deve essere esatta (prendendo in considerazione il ritardo e le caratteristiche della stanza) e generalmente non va cambiata. 10 It VSX_916_Italian.fm Page 11 Friday, January 6, 2006 11:54 AM • Speaker Setting – Dimensioni e numero degli altoparlanti collegati (vedere a pagina 42 per altri dettagli) • Speaker Distance – Distanza degli altoparlanti dalla posizione di ascolto (vedere a pagina 44 per altri dettagli) English • Channel Level – Bilanciamento complessivo del sistema di altoparlanti (vedere a pagina 43 per altri dettagli) Deutsch • Acoustic Cal EQ – Regolazione del bilanciamento della frequenza del sistema di altoparlanti in base alle caratteristiche acustiche della stanza (vedere a pagina 39 per altri dettagli) Français Selezionare i canali desiderati, premendo RETURN dopo aver terminato la verifica di ciascuno di essi. Alla fine, selezionare SKIP per tornare al menù System Setup. Altri problemi che possono sorgere durante l’uso della funzione Auto MCACC Setup Italiano Nederlands Se l’ambiente della stanza non è ottimale per la funzione Auto MCACC Setup (troppo rumore di fondo, eco contro le pareti, ostacoli che isolano gli altoparlanti dal microfono), le impostazioni finali possono risultare errate. Controllare gli elettrodomestici (condizionatori d’aria, frigorifero, ventilatore, ecc.) che possono influire nell’ambiente e spegnere gli stessi se necessario. Se ci fossero delle istruzioni sul pannello anteriore, seguire queste. Español • Alcuni televisori di vecchia data possono interferire con il funzionamento del microfono. Se questo sembra essere il caso, spegnere il televisore durante l’uso della funzione Auto MCACC Setup. 11 It VSX_916_Italian.fm Page 12 Friday, January 6, 2006 11:54 AM Capitolo 4: Collegamento Cavi video Come collegare i cavi Importante • Prima di effettuare o modificare i collegamenti, spegnere l’alimentazione e scollegare il cavo di alimentazione dalla presa CA. • Avere cura di non piegare i cavi sulla parte superiore di questa unità. Se ciò accade, il campo magnetico prodotto dai trasformatori in questa unità può provocare un ronzio dagli altoparlanti. • Prima di scollegare il cavo di alimentazione, porre l’apparecchio in modalità standby. Cavi video RCA standard Si tratta di cavi per la connessione video del tipo più comune, che si utilizzano per collegare i terminali video compositi. Gli spinotti gialli consentono di distinguerli dai cavi audio. Cavi S-video I cavi S-video forniscono una riproduzione più nitida delle immagini rispetto ai cavi video RCA standard, poiché trasmettono segnali separati per luminanza e colori. Cavi audio analogici Usare dei cavi fono RCA stereo per effettuare il collegamento dei componenti audio analogici. Questi cavi sono rossi e bianchi e bisogna collegare gli spinotti rossi ai terminali di destra (R) e gli spinotti bianchi ai terminali di sinistra (L). Cavi video componenti Usare dei cavi video per ottenere la migliore riproduzione possibile dei colori della fonte video. ll segnale dei colori del televisore è suddiviso in segnali di luminanza (Y) e colore (PB e PR) e poi emesso. In questo modo si evitano le interferenze tra i segnali. Cavi audio digitali Usare un cavo audio digitale coassiale venduto separatamente oppure cavi ottici per collegare i componenti digitali a questo ricevitore.1 Nota 1 • Quando si collegano i cavi ottici, è importante fare attenzione durante l’inserimento dello spinotto per non danneggiare l’otturatore che protegge la presa ottica. • Per mettere via il cavo ottico, avvolgere lo stesso senza stringere. Il cavo si può danneggiare se piegato con forza. • E’ anche possibile usare un cavo video RCA standard per effettuare i collegamenti digitali coassiali. 12 It VSX_916_Italian.fm Page 13 Friday, January 6, 2006 11:54 AM Collegamento di un lettore DVD e di un televisore Questa pagina mostra come collegare il lettore DVD e il televisore al ricevitore. English 1 Collegare un’uscita audio digitale coassiale sul lettore DVD all’ingresso DIGITAL COAX 1 (DVD/LD) sul ricevitore. Usare un cavo audio digitale coassiale per il collegamento.1 Deutsch Français 2 Collegare l’uscita video composita e le uscite audio analogiche stereo presenti2 sul lettore DVD agli ingressi DVD/LD su questo ricevitore. Usare un cavo video RCA3 standard e un cavo fono stereo RCA per il collegamento. • Se il lettore DVD ha uscite analogiche multicanale, consultare Collegamento delle uscite analogiche multicanale sotto sotto per informazioni su come collegarlo. Italiano Nederlands 3 Collegare le uscite audio analogiche dal televisore agli ingressi TV/SAT su questo ricevitore. Ciò permetterà di riprodurre il suono dal sintonizzatore incorporato nel televisore. Usare un cavo fono RCA a tale scopo. Español • Se il televisore ha un decoder digitale incorporato, è possibile anche collegare un’uscita audio digitale ottica dal televisore all’ingresso DIGITAL OPT 2 (TV/SAT) al ricevitore. Usare un cavo ottico per il collegamento. 4 Collegare il presa video MONITOR OUT sul ricevitore all’ingresso video del televisore. Usare un cavo video standard RCA per il collegamento alla presa video composita.4 Nota 1 Se il lettore DVD ha solo un’uscita digitale ottica, è possibile collegarlo all’ingresso ottico su questo ricevitore usando un cavo ottico. Quando si configura il ricevitore, è necessario specificare al ricevitore l’ingresso al quale si è collegato il lettore (consultare Menù Input Assign a pagina 63). 2 Questo collegamento permette di effettuare registrazioni analogiche dal lettore DVD. 3 Per ottenere una migliore qualità, è possibile effettuare il collegamento S-video usando la presa S-VIDEO DVD/LD. Se il lettore dispone di un’uscita per componente video, è possibile collegare anche tale componente. Vedi a Uso delle prese video componenti a pagina 17 per ulteriori informazioni al riguardo. 4 Per ottenere una migliore qualità, è possibile effettuare il collegamento S-video usando la presa S-VIDEO MONITOR OUT. Per usare le uscite video component per il collegamento del ricevitore alla TV, consultare Uso delle prese video componenti a pagina 17. 13 It VSX_916_Italian.fm Page 14 Friday, January 6, 2006 11:54 AM Collegamento delle uscite analogiche multicanale Per la riproduzione Audio DVD e SACD il lettore DVD può essere provvisto di uscite analogiche a 5.1 canali. In questo caso è possibile collegare le uscite analogiche multicanale agli ingressi analogici multicanale di questo ricevitore, come mostrato qui sotto.1 1 Collegare una serie di uscite audio/video sul componente set-top agli ingressi TV/SAT AUDIO e VIDEO sul ricevitore.2 Usare un cavo fono RCA stereo per il collegamento audio e un cavo video RCA standard per il collegamento video.3 2 Collegare un’uscita audio digitale ottica dal componente set-top box all’ingresso DIGITAL OPT 2 (TV/SAT) sul ricevitore. Usare un cavo ottico per il collegamento.4 Collegamento di ricevitori satellitari o di altri set-top digitali I ricevitori satellitari e via cavo e i decoder TV digitali terrestri sono tutti esempi di 'set-top box'. Nota 1 L’ingresso multicanale può essere usato solo quando è selezionato DVD 5.1 ch (vedere a pagina 33). 2 Se è già stato collegato il televisore agli ingressi TV/SAT, scegliere semplicemente un altro ingresso. Per ricevere il segnale occorre tuttavia premere il pulsante di selezione dell’ingresso relativo all’ingresso cui è stato collegato il set-top box. 3 Per ottenere una migliore qualità, è possibile effettuare il collegamento S-video usando la presa S-VIDEO TV/SAT. Se il set-top box dispone anche di un’uscita video component è possibile effettuare anche questo tipo di collegamento. Vedi a Uso delle prese video componenti a pagina 17 per ulteriori informazioni al riguardo. 4 Se il ricevitore satellitare/TV via cavo non dispone di un’uscita audio digitale, tralasciare questo passo. Se il ricevitore dispone soltanto di un’uscita digitale coassiale, è possibile effettuare il collegamento a uno degli ingressi coassiali di questo ricevitore mediante un cavo audio digitale coassiale. Quando si configura il ricevitore occorre specificare a quale ingresso è stato collegato il set-top box (vedere Menù Input Assign a pagina 63). 14 It VSX_916_Italian.fm Page 15 Friday, January 6, 2006 11:54 AM Collegamento di altri componenti audio English Il numero e il tipo di collegamenti dipende dal tipo di componente che si sta collegando.1 Seguire le fasi successive per collegare un CDR, un MD, un DAT, una piastra a cassette o altri componenti audio. Deutsch 1 Se il componente ha un’uscita digitale, collegarlo ad un ingresso digitale sul ricevitore, come mostrato. L’esempio mostra un collegamento coassiale alla presa di ingresso digitale CD con un cavo audio digitale coassiale. Français 2 Se necessario, collegare le uscite audio analogiche del componente ad una serie di ingressi audio liberi su questo ricevitore. Occorrerà effettuare questo collegamento per i componenti privi di uscita digitale o se si vuole registrare da un componente digitale. Usare un cavo fono RCA stereo, come da illustrazione. Italiano Informazioni sul decoder WMA9 Pro Quest’unità ha un decoder Windows Media® Audio 9 Professional (WMA9 Pro) incorporato. È quindi possibile riprodurre l’audio WMA9 Pro-encoded usando un collegamento digitale coassiale o ottico quando è collegata ad un lettore WMA9 Pro-compatibile. Español 4 Se il registratore dispone di un ingresso digitale, collegarlo all'uscita digitale del ricevitore, come indicato. Per effettuare il collegamento usare un cavo ottico. Nederlands 3 Se si collega un registratore, collegare le uscite audio analogiche (REC) agli ingressi audio analogici sul registratore. L’esempio mostra un collegamento analogico alla presa di uscita analogica CD-R/TAPE/MD usando un cavo fono RCA stereo. Nota 1 Notare che occorre collegare componenti digitali a prese audio analogiche se si vogliono registrare su/da componenti digitali (quale un MD) su/da componenti analogici. 15 It VSX_916_Italian.fm Page 16 Friday, January 6, 2006 11:54 AM Tuttavia, il lettore DVD, la set-top box, ecc. devono essere in grado di emettere segnali audio di formato WMA9 Pro attraverso un’uscita digitale coassiale o ottica. 4 Se il componente video dispone di un ingresso digitale, collegarlo all’uscita digitale del ricevitore, come indicato. Per effettuare il collegamento usare un cavo ottico. Microsoft, Windows Media® e il logo Windows sono marchi commerciali o marchi commerciali registrati di Microsoft Corporation negli Stati Uniti e/o altri Paesi. Collegamento di altri componenti video Questo ricevitore ha ingressi e uscite audio/ video adatti alla connessione di apparecchi di registrazione video analogici o digitali, inclusi videoregistratori, registratori DVD e registratori HDD. 1 Collegare un set di uscite audio/video sul registratore agli ingressi DVR/VCR AUDIO e VIDEO del ricevitore. Usare un cavo fono RCA stereo per il collegamento audio e un cavo video RCA standard per il collegamento video.1 2 Collegare una serie di ingressi audio/ video sul registratore alle uscite DVR/VCR AUDIO e VIDEO su questo ricevitore. Usare un cavo fono RCA stereo per il collegamento audio e un cavo video RCA standard per il collegamento video.2 3 Collegare un’uscita audio digitale coassiale sul lettore DVD all’ingresso DIGITAL COAX 2 (DVR/VCR) sul ricevitore. Usare un cavo audio digitale coassiale per il collegamento.3 Nota 1 Per ottenere una migliore qualità, è possibile effettuare il collegamento S-video usando la presa S-VIDEO DVR/VCR IN. Se il componente video dispone di un’uscita per componente video, è possibile collegare anche tale componente. Vedi a Uso delle prese video componenti a pagina 17 per ulteriori informazioni al riguardo. 2 Per ottenere una migliore qualità, è possibile effettuare il collegamento S-video usando la presa S-VIDEO DVR/VCR OUT. 3 Se il componente video dispone solo di un’uscita digitale ottica, è possibile collegarlo all’ingresso ottico del ricevitore mediante un cavo ottico. Quando si configura il ricevitore, è necessario specificare al ricevitore l’ingresso al quale si è collegato il lettore (vedere Menù Input Assign a pagina 63). 16 It VSX_916_Italian.fm Page 17 Friday, January 6, 2006 11:54 AM Uso delle prese video componenti Come collegare il terminale video del pannello anteriore L’accesso alle connessioni video frontali avviene mediante il pannello frontale usando il tasto VIDEO. Sono presenti delle prese audio/ video standard, nonché una presa S-video e un ingresso ottico. Collegare questi nello stesso modo dei collegamenti posti sul pannello posteriore. English La qualità d’immagine fornita dal collegamento video component è superiore rispetto al collegamento video composito. Un ulteriore vantaggio (se la sorgente e la TV sono entrambi compatibili) consiste nella scansione video progressiva, che consente di ottenere immagini molto stabili, prive di sfarfallio. Fare riferimento ai manuali forniti con l’apparecchio TV e il componente sorgente per verificare la compatibilità di tali apparecchi con la scansione video progressiva. Deutsch • Premere verso il basso la linguetta PUSH OPEN per accedere alle connessioni video frontali. Importante Français • Se si collega al ricevitore un qualsiasi componente sorgente mediante un ingresso Video Component, occorre collegare anche la TV alle prese COMPONENT VIDEO MONITOR OUT del ricevitore. Italiano 1 Collegare le uscite video component dell’apparecchio sorgente agli ingressi video component del ricevitore. Per effettuare il collegamento usare un cavo video component a tre vie. Nederlands 2 Se necessario assegnare gli ingressi video component alla sorgente di ingresso che è stata collegata. Questa operazione è necessaria solo nel caso in cui per il collegamento non sia stato seguito lo schema predefinito descritto di seguito: • COMPONENT 1 – DVD Español • COMPONENT 2 – TV • COMPONENT 3 – DVR Per maggiori informazioni consultare Assegnazione degli ingressi del componente video a pagina 63. 3 Collegare le prese COMPONENT VIDEO MONITOR OUT di questo ricevitore agli ingressi video component della TV o del monitor. Usare un cavo video component a tre vie. 17 It VSX_916_Italian.fm Page 18 Friday, January 6, 2006 11:54 AM Uso delle antenne esterne Collegamento delle antenne Collegare l’antenna AM a telaio e l’antenna FM a filo come segue. Per migliorare la ricezione e la qualità sonora, collegare le antenne esterne (vedi Uso delle antenne esterne qui sotto). Per migliorare la ricezione FM Usare un connettore PAL per collegare un’antenna esterna FM. Connettore PAL a un tocco Cavo coassiale 75 Ω FM UNBAL 75Ω Ω AM LOOP ANTENNA Per migliorare la ricezione AM Collegare un filo rivestito di vinile e con una lunghezza di 5 a 6 metri al terminale della presa dell’antenna AM senza scollegare l’antella AM a telaio. 1 Rimuovere gli schermi protettivi da entrambe le antenne AM a filo. Per ottenere la migliore ricezione possibile, sospendere l’antenna orizzontalmente all’aria aperta. 2 Premere le linguette dei connettori per aprirli, quindi inserire completamente un filo in ciascun terminale, quindi rilasciare le linguette per fissare i fili dell’antenna AM. a metri 3 Fissare l’antenna AM a telaio al supporto. Per fissare il supporto all’antenna, piegare nella direzione indicata dalla freccia (fig. a) quindi agganciare il telaio al supporto (fig. b). • Se si intende fissare l’antenna AM su una parete o altra superficie, fissare il supporto con delle viti (fig. c) prima di agganciare il telaio al supporto. Assicurarsi che la ricezione sia chiara. 4 Collocare l’antenna AM su una superficie piana e in una direzione che consenta di ottenere la ricezione migliore. 5 Collegare l’antenna FM a filo nello stesso modo dell’antenna AM a telaio. Per i migliori risultati, srotolare completamente il filo dell’antenna FM e fissarlo a una parete o al telaio di una porta. Non lasciare il filo allentato né arrotolato. 18 It Ω VSX_916_Italian.fm Page 19 Friday, January 6, 2006 11:54 AM Collegamento degli altoparlanti English Un’impostazione completa di otto altoparlanti (incluso il subwoofer) è visualizzata qui, ma l’impostazione privata di ogni cliente varia rispetto a questa. Collegare semplicemente gli altoparlanti nella maniera indicata.1 Il ricevitore funzionerà con solo due altoparlanti stereo (gli altoparlanti anteriori nel disegnno), ma raccomandiamo di usare almeno tre altoparlanti ed un’impostazione completa è l’ideale. Deutsch Assicurarsi di collegare gli altoparlanti di destra al terminale di destra e l’altoparlante di sinistra al terminale di sinistra. Inoltre, assicurarsi che i terminali positivo e negativo (+/–) del ricevitore corrispondano a quelli degli altoparlanti.2 E’ possibile usare altoparlanti con un’impedenza nominale compresa tra 6 Ω a 16 Ω (vedi a Commutazione dell’impedenza dell’altoparlante a pagina 68 per usare altoparlanti con un’impedenza inferiore ad 8 Ω). Français Italiano Nederlands Español Attenzione • Assicurarsi che il filo nudo dell’altoparlante sia attorcigliato ed inserito completamente nel terminale dell’altoparlante. Usare fili per altoparlanti di buona qualità per collegare gli altoparlanti al ricevitore. Nota 1 Se non si utilizza un subwoofer, impostare gli altoparlanti frontali su LARGE (consultare Impostazione degli altoparlanti a pagina 42). 2 Se si utilizza un unico altoparlante surround posteriore, collegarlo al terminale surround posteriore sinistro (L). 19 It VSX_916_Italian.fm Page 20 Friday, January 6, 2006 11:54 AM Assicurarsi che il cavo dell’altoparlante da usare sia stato preparato correttamente, togliendo circa 10 mm dell’isolamento su ciascun filo e attorcigliando i trefoli che sono rimasti esposti (fig. A). Svitare il terminale di alcuni giri finché non ci sarà spazio sufficiente per inserire il filo esposto (fig. B). Dopo aver installato il filo, serrate il terminale finché il filo sarà fermo (fig. C). • Quando posizionate gli altoparlanti vicini al televisore, vi raccomandiamo di usare altoparlanti con una schermatura magnetica per prevenire possibili interferenze, ad esempio immagini scolorite all’accensione del televisore. Se gli altoparlanti non sono dotati della schermatura magnetica e notate lo scolorimento dell’immagine televisiva, allontanare ulteriormente gli altoparlanti dal televisore. • Se usate un altoparlante centrale, posizionare gli altoparlanti anteriori ad un angolo più ampio. Altrimenti, posizionare gli stessi ad un angolo più stretto. Attenzione • I terminali degli altoparlanti sono sotto tensione, alla stessa PERICOLOSA tensione della corrente di rete. Per prevenire rischi di folgorazioni nel corso delle operazioni di collegamento o di distacco dei cavi degli altoparlanti, staccare il cavo di alimentazione principale prima di toccare qualsiasi parte non isolata. Suggerimenti per l’ubicazione degli altoparlanti Gli altoparlanti sono normalmente disegnati per una posizione particolare. Alcuni sono disegnati per essere appoggiati per terra, mentre altri devono essere installati su sostegni per rendere il suono massimo. Alcuni altoparlanti vanno posizionati vicino ad un muro; altri ancora vanno allontanati dal muro. Abbiamo fornito alcuni suggerimenti per ottenere il migliore suono surround dagli altoparlanti (qui sotto), ma dovete anche seguire le linee guida sull’ubicazione fornite dal fabbricante degli altoparlanti per ottenere il massimo dei vostri altoparlanti particolari. • Posizionare gli altoparlanti anteriori sinistro e destro alla stessa distanza dal televisore. 20 It • Posizionare l’altoparlante centrale sopra o sotto il televisore affinché il suono del canale centrale sia localizzato sullo schermo televisivo. Inoltre, assicurarsi che l’altoparlante centrale non attraversi la linea formata dal bordo superiore degli altoparlanti anteriori sinistro e destro. • E’ bene indirizzare gli altoparlanti verso la posizione d’ascolto. L’angolo dipende dal formato della stanza. Usare un angolo inferiore per le stanze più grandi. • Gli altoparlanti surround e surround posteriori vanno posizionati da 60 cm a 90 cm più in alto rispetto alle vostre orecchie ed essere inclinati leggermente verso il basso. Assicurarsi che gli altoparlanti non siano rivolti l’uno verso l’altro. • Per ottenere il miglior suono surround possibile, installare gli altoparlanti come segue. Assicurarsi che tutti gli altoparlanti siano installati in modo sicuro per prevenire incidenti e migliorare la qualità sonora. Attenzione • Se scegliete di installare l’altoparlante centrale sopra il televisore, assicurarsi di fissarlo con qualche mezzo, per ridurre il rischio di danni o lesioni dovuti alla caduta dell’altoparlante dal televisore in caso di scosse esterne, quali terremoti. • Assicurasi che nessun filo scoperto tocchi il pannello posteriore. In tal caso, il ricevitore potrebbe spegnersi automaticamente. VSX_916_Italian.fm Page 21 Friday, January 6, 2006 11:54 AM Vista generale dell’impostazione dell’altoparlante Vedi anche l’illustrazione dell’impostazione dell’altoparlante 3-D alla pagina 7. English Deutsch Français . Italiano Le illustrazioni qui sotto mostrano l’orientamento degli altoparlanti surround e posteriori surround. La prima illustrazione (fig. A) mostra l’orientamento con un altoparlante surround posteriore (o nessuno) collegato. La seconda illustrazione (fig. B) mostra l’orientamento con due altoparlanti surround collegati. Nederlands 90 a 120 RS LS RS LS 0 a 60 RS LS fig. A SBL SBL SBR SBR Español SB fig. B Vista 3-D dell’impostazione dell’altoparlante 7,1 canali 21 It VSX_916_Italian.fm Page 22 Friday, January 6, 2006 11:54 AM Capitolo 5: Controlli e display Pannello anteriore 1 Tasti di selezione dell’ingresso Premere questo per selezionare una fonte d’ingresso. 6 Controllo MULTI JOG Usare il controllo MULTI JOG per selezionare varie impostazioni ed opzioni del menù. 2 Indicatore Digital Precision Processing Si illumina per segnalare che l’elaborazione digitale è attiva. 7 3 Display dei caratteri Vedi a Display a pagina 23. 4 Indicatore MCACC Si illumina quando è attiva la funzione Acoustic Calibration EQ (pagina 30) (la funzione Acoustic Calibration EQ è impostata automaticamente su ALL CH ADJUST dopo aver eseguito la funzione Auto MCACC Setup (pagina 9) o EQ Auto Setup (pagina 39). 5 22 It ENTER Tasti LISTENING MODE STANDARD – Premere questo tasto per una decodificazione standard e per commutare tra le varie opzioni Pro Logic IIx e Neo:6 (pagina 28). ADVANCED SURR – Si utilizza per alternare le varie modalità surround (pagina 29). ST/DIRECT/AUTO SURR Consente di selezionare la riproduzione stereo/diretta (pagina 30). Consente inoltre di selezionare la modalità Auto Surround (Riproduzione automatica a pagina 28). VSX_916_Italian.fm Page 23 Friday, January 6, 2006 11:54 AM 18 TUNING/STATION Seleziona la frequenza (pagina 45) e le stazioni di preselezione (pagina 46) nell’utilizzo del sintonizzatore. 9 STANDBY/ON Commuta tra le modalità di accensione e attesa nel ricevitore. 19 TUNER EDIT Premere questo per memorizzare e denominare una stazione da richiamare (pagina 46). 10 VIDEO INPUT Vedi a Come collegare il terminale video del pannello anteriore a pagina 17 13 Controllo MASTER VOLUME 15 PTY SEARCH Usare questo tasto per localizzare tipi di programmi RDS (pagina 47). 22 Controlli del menù System Setup SETUP – Utilizzare il controllo MULTI JOG per accedere al menu System Setup (pagina 9, pagina 36, pagina 63). RETURN – Premere per accettare le impostazioni e uscire dal menu corrente. Italiano 14 EON MODE Usare questo per localizzare programmi che trasmettono informazioni sul traffico o notizie (pagina 48). 21 QUICK SETUP Vedi a Uso della Configurazione rapida a pagina 8. Français 12 Presa MCACC SETUP MIC Usare questa per collegare il microfono in dotazione. 20 TONE Premere questo tasto per accedere ai comandi degli alti e dei bassi, che è quindi possibile regolare con il controllo MULTI JOG (pagina 32). Deutsch 11 Interfaccia USB Consente di collegare un dispositivo audio USB per la riproduzione (consultare Uso dell’interfaccia USB a pagina 34). English 8 Presa PHONES Consente di collegare la cuffia (se questa è collegata, gli altoparlanti non emettono alcun suono). 23 SIGNAL SELECT Usato per selezionare un segnale d’ingresso (pagina 33). 24 SBch PROCESSING Consente di selezionare l’elaborazione del canale posteriore surround oppure la modalità posteriore surround virtuale (pagina 31). 17 SPEAKERS Si usa per cambiare il sistema di altoparlanti (pagina 59) e per cambiare le impostazioni di impedenza (pagina 68). 25 ACOUSTIC EQ Premere questo per selezionare un’impostazione EQ della calibratura acustica (pagina 30). Nederlands 16 MIDNIGHT/LOUDNESS Consente di alternare le modalità di ascolto Midnight e Loudness (pagina 32). Español Display 1 Spie SIGNAL S’illumina per indicare il tipo di segnale in ingresso: AUTO – S’illumina quando è attivata la selezione di segnale AUTO. 23 It VSX_916_Italian.fm Page 24 Friday, January 6, 2006 11:54 AM SB – A seconda della fonte, si illumina quando viene rilevato un segnale con una codifica di canale posteriore surround. DIGITAL – S’illumina quando viene rivelato un segnale audio digitale. 2 DIGITAL – S’illumina quando viene rivelato un segnale di codifica Dolby Digital. ANALOG – S’illumina quando viene rivelato un segnale analogico. DTS – S’illumina quando viene rilevata una fonte con segnali audio con codifica DTS. 2 Se la modalità STANDARD è attiva, si illumina per indicare la decodifica di un segnale DTS multicanale. 3 2 DIGITAL Quando è attiva la modalità STANDARD, si illumina per indicare la decodifica di un segnale multicanale Dolby Digital. 4 2 PRO LOGIC IIx Quando è attiva la modalità (STANDARD) Pro Logic II, 2 PRO LOGIC II si illumina per indicare la codifica Pro Logic II. 2 PRO LOGIC IIx si illumina per indicare la decodifica Pro Logic IIx (vedere Ascolto con il suono surround a pagina 28). 5 VIR.SB S’illumina durante l’elaborazione posteriore surround virtuale (pagina 31). 6 DIRECT S’illumina quando è in uso la riproduzione diretta da fonte. La riproduzione diretta ignora i controlli del tono per la riproduzione ottimale della sorgente. 7 AUTO SURR. Si illumina quando è attiva la funzione Auto Surround (vedere Riproduzione automatica a pagina 28). 8 ATT S’illuminaquando usate ANALOG ATT per attenuare (ridurre) il livello del segnale d’ingresso analogico. 9 SLEEP S’illumina quando è attiva la modalità di riposo (Telecomando sotto). 24 It 10 Spie del Sintonizzatore – S’illumina quando è impostata la modalità mono usando il tasto MPX. – S’illumina quando la trasmissione FM stereo è in fase di ricezione nella modalità stereo automatica. – S’illumina quando è in fase di ricezione una trasmissione. 11 Indicatori EON/RDS EON – Si illumina quando è impostata la modalità EON e lampeggia durante la ricezione di una trasmissione EON. L’indicatore s’illumina quando la stazione corrente esegue il servizio EON (pagina 48). RDS – S’illumina alla ricezione di una trasmissione RDS (pagina 47). 12 Indicatori dell’altoparlante S’illumina per indicare il sistema di altoparlanti in uso, A e/o B (pagina 59). 13 Display dei caratteri 14 Neo:6 Quando è attiva la modalità (STANDARD) Neo:6, si illumina per indicare l’elaborazione Neo:6. 15 ADV.SURR. (Surround avanzato) S’illumina quando è stata selezionata una delle modalità Advanced Surround. 16 WMA9 Pro S’illumina per indicare la decodifica di un segnale WMA9 Pro. 17 MIDNIGHT S’illumina durante la modalità di ascolto Midnight (pagina 32). 18 D.E. S’illkumina alla selezione di Dialog Enhancement (DIALOG E) (pagina 32). 19 LOUDNESS S’illumina durante la funzione di ascolto Loudness (pagina 32). 20 EX S’illumina quando viene rivelato un segnale codificato Dolby Digital Surround EX. VSX_916_Italian.fm Page 25 Friday, January 6, 2006 11:54 AM 21 Livello del volume principale Telecomando 1 INPUT RECEIVER SELECT SOURCE 12 AV PRE-PROGRAMMED AND LEARNING REMOTE CONTROL UNIT TV DVR CD-R/TAPE USB FM AM DVD 2 CD TV CTRL RECEIVER SB ch ANALOG ATT SR+ DIMMER MIDNIGHT/ LOUDNESS 14 DIALOG E 3 D.ACCESS CLASS +10 DISC ENTER MENU TOP MENU TUNE ST ST ENTER SETUP GUIDE PTY SEARCH T.EDIT RETURN TUNE TV CONTROL 6 INPUT SELECT TV VOL 15 VOL REC 16 MUTE 7 MPX B EON REC STOP JUKEBOX C D AUDIO SUBTITLE DISP 8 9 10 STANDARD ADV.SURR E HDD DVD CH CH STEREO AUTO SURR MULTI OPE S.RETRIEVER ACOUSTIC EQ SIGNAL SEL SHIFT EFFECT/CH SEL RECEIVER 17 Español A TV CH Nederlands 4 5 Italiano SLEEP 3 Tasti numerici ed altri controlli del ricevitore/componente Usare i tasti numerici per selezionare direttamente una frequenza radio (pagina 45) o i brani del CD, DVD, ecc. DISC (ENTER) si può usare per inserire i comandi destinati a un televisore; si può utilizzare inoltre per selezionare un disco in un lettore CD multiplo. Funzioni accessibili premendo prima il tasto RECEIVER: SLEEP – Consente di modificare l’intervallo di tempo precedente all’attivazione della modalità di riposo sul ricevitore (90 min – 60 min – 30 min – Off). E’ possibile controllare il tempo rimanente dello sleep timer in qualsiasi momento premendo SLEEP una volta. SB ch – Seleziona la modalità del canale posteriore surround (pagina 31) o la modalità posteriore surround virtuale (pagina 31). ANALOG ATT – Attenua (diminuisce) il livello di un segnale d’ingresso analogico per prevenire la distorsione del suono. SR + – Attiva o disattiva la modalità SR+ (pagina 62). DIMMER – Rende il display più tenue o più luminoso. MIDNIGHT/LOUDNESS – Usare Midnight per ascoltare le colonne sonore cinematografiche ad un basso livello di volume. Usare la funzione Loudness per enfatizzare i bassi e gli acuti ad un basso livello di volume (pagina 32). DIALOG E – Usato per dar rilievo al dialogo mentre guardate la TV o un film (pagina 32). D.ACCESS – Dopo aver premuto il tasto, accedere direttamente alla stazione radio usando i tasti numerici (pagina 45). CLASS – Cambia tra le tre memorie (classi) delle stazioni radio di preselezione (pagina 46). Français 13 2 Tasti MULTI CONTROL Premere questi tasti per selezionare il controllo degli altri componenti (vedi a Controllo del resto del sistema a pagina 50). Deutsch 11 SYSTEM OFF 1 RECEIVER Cambia tra le modalità d’attesa ed accensione di questo ricevitore. English 22 Spie EQ canale MCACC Queste spie indicano il bilanciamento EQ per ciascun canale in Controllo delle Impostazioni Acoustic Calibration EQ a pagina 41. Inoltre, L e R si illuminano quando è attiva la funzione Sound Retriever (pagina 32). 25 It VSX_916_Italian.fm Page 26 Friday, January 6, 2006 11:54 AM 4 Tasti di controllo del sintonizzatore/ componente/SETUP I seguenti tasti (tranne quello SETUP) sono disponibili dopo aver selezionato il tasto MULTI CONTROL corrispondente (DVD, AM, FM,TV ecc.) TOP MENU – Visualizza il menù ‘top’ di un DVD. MENU – Consente di visualizzare i menu presenti sui dischi DVD o videodischi. Visualizza anche i menù televisivi. T.EDIT – Premere questo per memorizzare e denominare una stazione da richiamare (pagina 46). 7 Tasti di controllo del componente I tasti principali (, , ecc.) sono stati usati per manovrare un componente dopo averlo selezionato usando i tasti MULTI CONTROL. Per accedere ai controlli al di sopra di questi tasti è necessario aver selezionato prima il tasto MULTI CONTROL corrispondente (ad esempio DVD oppure DVR). MPX – Cambia tra la ricezione stereo o mono delle trasmissioni FM. Se il segnale è debole, la commutazione a mono migliorerà la qualità sonora (pagina 45). EON – Usare questo per localizzare programmi che trasmettono informazioni sul traffico o notizie (pagina 48). SETUP (Premere RECEIVER prima per accedere alla funzione) Usato per accedere almenù System Setup (vedi a pagina 36). GUIDE – Visualizzazione delle guide sui televisori digitali. PTY SEARCH – Usare questo tasto per localizzare tipi di programmi RDS (pagina 47). RETURN – Premere questo per confermare ed uscire dallo schermo del menù corrente (serve anche per ritornare al menù precedente con i DVD). 5 (TUNE/ST +/–) /ENTER Usare i tasti delle frecce per impostare il sistema sonoro surround (vedi a pagina 36). Serve anche per controllare i menù e le opzioni DVD e per la piastra 1 di una doppia piastra a cassette. I tasti TUNE / consentono di localizzare le frequenze radio; i tasti ST / consentono di localizzare le stazioni di preselezione (pagina 46). 6 Tasti TV CONTROL Questi tasti sono riservati per il controllo del televisore assegnato al tasto TV CTRL. Quindi se avete solo un televisore da collegare a questo sistema, assegnare lo stesso al tasto TV CTRLMULTI CONTROL. Se avete due televisori, assegnare quello principale al tasto TV CTRL (vedi a pagina 50 per ulteriori informazioni). TV – Consente di accendere/spegnere l’alimentazione del televisore. TV VOL +/– – Consente di regolare il volume del televisore. INPUT SELECT – Usato per selezionare il segnale d’ingresso della TV. TV CH +/– – Usato per selezionare i canali. 26 It AUDIO – Cambia la lingua audio o il canale nei dischi DVD. DISP – Cambia tra le stazioni di preselezione denominate e le frequenze radio (pagina 46). Visualizza inoltre le informazioni RDS (pagina 47). SUBTITLE – Visualizza/cambia i sottotitoli inclusi nei DVD/videodischi multilingue. CH +/– – Usato per selezionare i canali durante l’uso di TV, VCR, DVR, ecc. Accedere ai seguenti controlli DVR premendo SHIFT: REC – Avvio della registrazione. REC STOP – Interruzione della registrazione. JUKEBOX – Consente di passare alla funzione Jukebox. HDD/DVD – Questi tasti possono commutare tra il disco fisso ed i controlli DVD per i registratori DVD/HDD. 8 Tasti RECEIVER CONTROL STANDARD – Premere questo tasto per una decodificazione standard e per commutare tra le varie opzioni Pro Logic IIx e Neo:6 (pagina 28). ADV.SURR. – Si utilizza per alternare le varie modalità surround (pagina 29). STEREO – Consente di selezionare la riproduzione stereo/diretta (pagina 30). Consente inoltre di selezionare la modalità Auto Surround (Riproduzione automatica a pagina 28). VSX_916_Italian.fm Page 27 Friday, January 6, 2006 11:54 AM RESET – Vedi a Cancellazione di tutte le preselezioni del telecomando a pagina 53. READ ID – Vedi a Conferma dei codici di preselezione a pagina 53. 14 RECEIVER Commuta il telecomando per il controllo del ricevitore (si usa per selezionare i comandi verdi posti sopra ai tasti numerici, ad esempio DIMMER, ecc). Usare anche questo tasto per impostare il suono surround (pagina 9, pagina 36). 16 MUTE Silenzia il suono o ripristina il suono se è stato silenziato (potete anche regolare il volume per ripristinare il suono). 11 INPUT SELECT Usato per selezionare la fonte d’ingresso ). (usare SHIFT per INPUT SELECT 17 EFFECT/CH SEL Premere il tasto ripetutamente per selezionare un canale, quindi usare +/– per regolare il livello (vedere Suggerimento a pagina 44). Consente inoltre di regolare il livello degli effetti Advanced Surround, i parametri Dolby Pro Logic IIx Music e Neo:6 Music (pagina 29). Si possono quindi utilizzare i tasti +/– per effettuare queste regolazioni. 12 SOURCE Premere questo tasto per accendere/spegnere altri component collegati al ricevitore (Vedi a pagina 50 per ulteriori informazioni). Premere dopo MULTI OPE per attivare la funzione System Off (pagina 53). Nederlands Intervallo operativo del telecomando Il telecomando può non funzionare correttamente se: • Ci sono degli ostacoli tra il telecomando e il sensore remoto del ricevitore. • La luce diretta del sole o una luce fluorescente arriva direttamente sul sensore remoto. • Il ricevitore si trova vicino ad un dispositivo che emette raggi infrarossi. • Il ricevitore è usato contemporaneamente con un altro telecomando a raggi infrarossi. Español 13 Display dei caratteri (LCD) Questo display visualizza delle informazioni durante la trasmissione dei segnali di controllo. I seguenti comandi appaiono sul display quando impostate il telecomando per manovrare altri componenti (vedi a Controllo del resto del sistema a pagina 50): SETUP – Indica la modalità d’impostazione da cui scegliere le opzioni sotto. PRESET – Vedi a Selezione diretta dei codici di preselezione a pagina 51. LEARNING – Vedi a Programmazione dei segnali provenienti dagli altri telecomandi a pagina 51. MULTI OP – Vedi a Funzioni Multi Operation e System Off a pagina 53. SYS OFF – Vedi a Funzioni Multi Operation e System Off a pagina 53. DIRECT F – Vedi a Funzione diretta a pagina 53. ERASE – Vedi a Programmazione dei segnali provenienti dagli altri telecomandi a pagina 51. Italiano 10 SHIFT Premere questo tasto per accedere ai controlli DVR (sopra ai tasti di controllo del componente) nonché ad alcuni controlli del ricevitore. Français 15 VOL +/– Usato per impostare il volume d’ascolto. Deutsch 9 MULTI OPE Premere questo tasto per eseguire operazioni multiple (pagina 53). English AUTO SURR – Consente di selezionare la modalità Auto Surround (Riproduzione automatica a pagina 28). S. RETRIEVER – Premere questo tasto per ripristinare un suono di qualità CD per le sorgenti audio compresse (pagina 32). ACOUSTIC EQ – Premere questo per selezionare un’impostazione EQ della calibratura acustica (pagina 30). SIGNAL SEL – Usato per selezionare un segnale d’ingresso (pagina 33). 27 It VSX_916_Italian.fm Page 28 Friday, January 6, 2006 11:54 AM Capitolo 6: Ascolto del sistema Le seguenti modalità offrono il suono surround base per le fonti stereo e multicanale. Importante • Alcune funzioni spiegate in questa sezione non saranno possibili a seconda della fonte (ad esempio, PCM 88,2 kHz / 96 kHz, DTS 96 kHz (24 bit) o fonti WMA 9 Pro). Riproduzione automatica L’opzione di ascolto più semplice e diretta consiste nell’uso della funzione Auto Surround. Con questa funzione, il ricevitore rivela automaticamente il tipo di fonte in fase di riproduzione e seleziona la riproduzione multicanale o stereo.1 STANDARD ADV.SURR STEREO AUTO SURR • Quando si ascolta una fonte, premere AUTO SURR per la riproduzione automatica di una fonte. AUTOSURR. appare brevemente sul display. (indicherà quindi il formato di decodifica o di riproduzione). Controllare le spie del formato digitale sul display per vedere l’elaborazione della fonte. Ascolto con il suono surround Usando questo ricevitore, è possibile ascoltare una qualsiasi fonte con il suono surround. Comunque, le opzioni disponibili dipendono dall’impostazione dell’altoparlante e dal tipo di fonte in fase di ascolto. Se sono stati collegati gli altoparlanti posteriori surround, vedere anche Uso dell’elaborazione del canale posteriore surround a pagina 31.2 STANDARD ADV.SURR STEREO AUTO SURR • Premere STANDARD durante l’ascolto della fonte. Se necessario, premerlo ripetutamente per selezionare la modalità d’ascolto. • Se la fonte è codificata Dolby Digital, DTS o Dolby Surround, il formato di decodificazione corretto verrà selezionato automaticamente e visualizzato sul display. Con fonti a due canali, selezionare tra: • 2 Pro Logic IIx MOVIE – Suono fino a 7.1 canali, particolarmente adatto per i film • 2 Pro Logic IIx MUSIC – Suono a 7.1 canali, particolarmente adatto per le fonti musicali • 2 Pro Logic IIx GAME – Suono a 7.1 canali, particolarmente adatto ai video giochi • 2 PRO LOGIC – Suono surround a 4.1 canali (il suono proveniente dagli altoparlanti surround è mono) • Neo:6 CINEMA – Suono a 6.1 canali, particolarmente adatto per i film • Neo:6 MUSIC – Suono a 6.1 canali, particolarmente adatto per le fonti musicali Nota 1 • I formati stereo surround (matrice) sono decodificati di conseguenza usando Neo:6 CINEMA o 2 Pro Logic IIx MOVIE (vedi a Ascolto con il suono surround sopra per ulteriori informazioni su questi formati di decodificazione). • La funzione Auto Surround viene cancellata se collegate le cuffie o selezionate gli ingressi analogici multicanale. 2 Se l’elaborazione posteriore surround (pagina 31) è impostata su OFF, o se gli altoparlanti surround posteriori sono impostati su NO (pagina 42) (queste impostazioni sono applicate automaticamente se Impostazione dell’altoparlante surround posteriore a pagina 36 è configurata su un qualsiasi valore diverso da Normal (SB)), 2 Pro Logic IIx diventa 2 Pro Logic II (suono a 5.1 canali). 28 It VSX_916_Italian.fm Page 29 Friday, January 6, 2006 11:54 AM STANDARD ADV.SURR CH STEREO AUTO SURR 2 Usare i tasti +/– per impostare il parametro secondo le proprie esigenze. Per conoscere le opzioni disponibili per ciascun parametro consultare la tabella che segue. I valori predefiniti, se non indicati come tali, sono elencati in grassetto. 3 Premere EFFECT/CH SEL nuovamente per regolare le altre impostazioni. ImpostaFunzione zione Center Widtha (Valido solo se si utilizza un altoparlante centrale) Opzioni Nederlands 0a7 Distribuisce il canale centrale tra gli altoparlanti frontali Impostasinistro e destro, ampliando zione pre(impostazioni più alte) o definita: 3 restringendo (impostazioni più basse) tale canale. Español • Premere ‘ADV.SURR’ ripetutamente per selezionare una modalità d’ascolto. • ADV. MOVIE – Adatta per la visione di film. • ADV. MUSIC – Adatta per le sorgenti musicali. • TV SURR. – Produce un suono surround per le sorgenti televisive sia mono sia stereo. • SPORTS – Adatta per i programmi sportivi. • ADV. GAME – Adatta per i videogiochi. • EXPANDED – Simula un suono multicanale per le sorgenti a due canali.2 • 7-STEREO – Simula un suono multicanale per una sorgente stereo, usando tutti gli altoparlanti. 1 Premere ripetutamente EFFECT/CH SEL per selezionare il parametro che si desidera regolare. A seconda dello stato o della modalità corrente del ricevitore, alcune opzioni potrebbero non essere disponibili. Per maggiori informazioni fare riferimento alla tabella che segue. Italiano CH Quando si usano gli effetti surround, è possibile regolare numerosi parametri. Français Gli effetti surround Advanced possono essere usati per un’ampia gamma di effetti surround addizionali. La maggior parte delle modalità surround Advanced sono state disegnate per l’uso con le colonne sonore del cinema, ma alcune modalità sono anche adatte per le fonti musicali. Provare varie impostazioni con varie colonne sonore per scoprire le proprie preferenze.1 Impostazione delle opzioni relative agli effetti Deutsch Uso degli effetti surround Advanced • VIR. SURR – Crea un effetto surround virtuale usando soltanto il subwoofer e gli altoparlanti frontali. • PHONESUR. – Crea un effetto surround generale attraverso la cuffia. English Con le fonti multicanale, se avete collegato degli altoparlanti posteriori surround e selezionato SB ON, potete selezionare (secondo il formato): • 2 Pro Logic IIx MOVIE – Vedi sopra (disponibile solo se usate due altoparlanti posteriori surround) • 2 Pro Logic IIx MUSIC – Vedi sopra • Dolby Digital EX – Crea un suono del canale surround posteriore per le fonti a 5.1 canali e fornisce una decodificazione pura per le fonti a 6.1 canali (come Dolby Digital Surround EX) • DTS-ES – Vi consente di riprodurre fonti a 6.1 canali con la codificazione DTS -3 a +3 Dimensiona Regola il bilanciamento del suono surround dalla parte Impostaanteriore a quella posteriore, zione prerendendo il suono più distante definita: 0 (impostazione negativa) o più vicino (impostazione positiva). Panoramaa Amplia l’immagine stereo frontale fino a comprendere gli altoparlanti surround per ottenere un effetto ‘avvolgente’. OFF ON Nota 1 • Se si preme ADVANCED SURROUND quando le cuffie sono collegate, la modalità PHONES SURROUND sarà selezionata automaticamente. • A seconda della fonte e della modalità sonora scelte, si potrebbe non avere suono dagli altoparlanti posteriori surround nella propria configurazione. Per ulteriori informazioni, vedi a Uso dell’elaborazione del canale posteriore surround a pagina 31. • Quando si seleziona una modalità di ascolto Advanced Surround, è possibile regolare il livello degli effetti usando il parametro EFFECT in Impostazione delle opzioni relative agli effetti sopra. 2 Usare con Dolby Pro Logic per un effetto surround stereo (il campo stereo è più ampio rispetto alle modalità Standard con sorgenti Dolby Digital). 29 It VSX_916_Italian.fm Page 30 Friday, January 6, 2006 11:54 AM ImpostaFunzione zione Opzioni Center Imageb (Valido solo se si utilizza un altoparlante centrale) Regola l’immagine centrale per 0 a 10 creare un effetto stereo più Impostaampio per le voci. Regolare zione prel’effetto da 0 (il canale centrale definita: 3 viene trasmesso agli altoparlanti anteriori destro e sinistro) a 10 (il canale centrale viene trasmesso solo all’altoparlante centrale). Effect Imposta il livello degli effetti per la modalità Advanced Surround selezionata (ciascuna modalità può essere impostata separatamente). 10 a 90 a Disponibile solo con sorgenti a 2 canali in modalità Dolby Pro Logic IIx Music. b Disponibile solo con sorgenti a 2 canali in modalità Neo:6 Music. Ascolto stereo Alla selezione STEREO o DIRECT, sentirete la fonte solo attraverso gli altoparlanti anteriori di sinistra e destra (e possibilmente anche attraverso il subwoofer, secondo le impostazioni dell’altoparlante). Le sorgenti multicanale Dolby Digital, DTS e WMA9 Pro vengono sottoposte a downmixing per l’uscita in stereo. STANDARD ADV.SURR STEREO AUTO SURR • Durante l’ascolto di una fonte, premere STEREO per la riproduzione stereo. Premere ripetutamente per commutare tra: Ascolto con la funzione Acoustic Calibration EQ • Impostazione standard: OFF / ALL CH (dopo Auto MCACC Setup o EQ Auto Setting) E’ possibile ascoltare le fonti usando la funzione Acoustic Calibration Equalization impostata in Impostazione automatica del suono surround (MCACC) a pagina 9 o Calibratura acustica EQ a pagina 39. Vedere a queste pagine per ulteriori informazioni sulla funzione Acoustic Calibration Equalization. MULTI OPE S.RETRIEVER ACOUSTIC EQ SIGNAL SEL S EFFECT/CHSEL • Durante l’ascolto di una fonte, premere ACOUSTIC EQ. Premere ripetutamente per selezionare tra: • ALL CH – Nessun peso speciale viene dato ad un canale particolare. • F. ALIGN – Tutti gli altoparlanti sono allineati in conformità con le impostazioni degli altoparlanti anteriori. • CUSTOM 1/2 – Impostazioni personalizzate • EQ OFF – Spegne la calibratura acustica EQ. L’indicatore MCACC s’illumina sul pannello anteriore quando è attivata la funzione Acoustic Calibration EQ.2 • STEREO – L’audio viene ascoltato con le impostazioni surround definite dall’utente; è comunque possibile usare le funzioni Midnight, Loudness e Tone. • DIRECT – Oltrepassa tutti gli effetti ed impostazioni surround in modo tale che l’audio rimanga il più vicino possibile al segnale audio della fonte.1 • AUTO SURR. – Vedere Riproduzione automatica a pagina 28 per ulteriori informazioni. Nota 1 Se si attiva l’ascolto in modalità Midnight, Loudness, Dialog Enhancement, la funzione Sound Retriever o i comandi tonalità quando è selezionata la modalità DIRECT, il ricevitore passa automaticamente alla modalità STEREO. 2 • Non è possibile usare la funzione Acoustic Calibration EQ se è attiva la funzione DVD 5.1ch o WMA9 Pro, e non ha effetto con le cuffie. • Se si attiva la funzione Acoustic Calibration EQ dopo aver selezionato DIRECT, il ricevitore cambia automaticamente a STEREO. 30 It VSX_916_Italian.fm Page 31 Friday, January 6, 2006 11:54 AM Uso dell’elaborazione del canale posteriore surround • VSB AUTO – La funzione Posteriore Surround Virtuale viene applicata automaticamente alle sorgenti con codifica 6.1 (ad esempio, Dolby Digital EX o DTS-ES) • VSB OFF – La modalità Posteriore Surround Virtuale è disattivata Standard SBch Processing / Modalità VSB Fonti multicanale ON a AUTO a ON a Surround Advanced Fonti stereo 2 Pro Logic IIx 2 Pro Logic Español Fonte stereo codificata Dolby Digital/DTS/WMA9 Pro; altra fonte stereo digitale • VSB ON – Posteriore Surround Virtuale è sempre usato (ad esempio per il materiale codificato 5.1) Nederlands Fonte Dolby Digital/DTS/ WMA9 Pro multicanale codificata • Premere SB ch (SB ch PROCESSING) per selezionare un’opzione per il canale posteriore surround virtuale. Ad ogni pressione, la selezione cambia come segue: Italiano Fonte Dolby Digital EX/DTS-ES/ WMA9 Pro multicanale codificata a 6.1 canali surround Questa tabella indica quando sentirete il canale surround posteriore virtuale.(=Il suono viene riprodotto attraverso il diffusore surround) Français Tipo di fonte Deutsch • SB ON – La decodifica 6.1 viene sempre usata (ad esempio, per il materiale a codifica 5.1, sarà generato un canale posteriore surround) • SB AUTO – Passa automaticamente alla decodifica 6.1 per fonti a codifica 6.1 (ad esempio, Dolby Digital EX o DTS-ES) • SB OFF – Riproduzione massima a 5.1 Se non si usano altoparlanti surround posteriori, selezionando questa modalità è possibile ascoltare un canale posteriore virtuale attraverso gli altoparlanti surround. È possibile ascoltare le sorgenti senza informazioni relative al canale posteriore surround oppure - nel caso in cui il suono risulti migliore nel formato di codifica originale del materiale (ad esempio 5.1) - è possibile specificare al ricevitore che questo effetto sia applicato solo alle sorgenti con codifica 6.1, quali Dolby Digital EX o DTS-ES.2 English • Impostazione standard: SB ON Il ricevitore può essere impostato per usare automaticamente solo la decodifica 6.1 per le fonti con codifica 6.1 (per esempio, Dolby Digital EX o DTS-ES), o si può scegliere di usare sempre la decodifica 6.1 (ad esempio, con il materiale con codifica 5.1). Con sorgenti codificate 5.1, viene generato un canale surround posteriore, ma il materiale potrebbe avere una qualità migliore nel formato 5.1 per il quale è stato originariamente codificato; in tal caso è sufficiente disattivare l’elaborazione del canale surround posteriore.1 La tabella che segue indica i casi in cui si sente il canale surround posteriore (=Il suono viene riprodotto attraverso gli altoparlanti surround posteriori). • Premere SB ch (SB ch PROCESSING) per selezionare un’opzione per il canale posteriore surround virtuale. Ad ogni pressione, la selezione cambia come segue: Uso della modalità Virtual Surround Back (VSB) Neo:6 AUTO a ON AUTO c a,b a a Nota 1 • Non è possibile usare il canale posteriore surround con le cuffie, con la modalità STEREO / DIRECT, né se il diffusore surround posteriore è impostato su NO in Impostazione degli altoparlanti a pagina 42. Inoltre, Impostazione dell’altoparlante surround posteriore a pagina 36 deve essere su Normal (SB) per poter ascoltare il canale surround posteriore. 2 La modalità Virtual Surround Back non può essere usata con le cuffie, in modalità STEREO / DIRECT, né se il diffusore surround è impostato su NO in Impostazione degli altoparlanti a pagina 42 (il diffusore posteriore surround deve essere comunque impostato su NO). 31 It VSX_916_Italian.fm Page 32 Friday, January 6, 2006 11:54 AM Tipo di fonte SBch Processing / Modalità VSB Fonte analogica a 2 canali (stereo) Standard Fonti multicanale Surround Advanced Fonti stereo 2 Pro Logic IIx 2 Pro Logic Neo:6 b ON AUTO c a Escluso il formato WMA9 Pro b Valido solo utilizzando la modalità Posteriore Surround Virtuale. c Non valido quando si utilizza la modalità Posteriore Surround Virtuale. Uso delle modalità Midnight e Loudness La funzione di ascolto Midnight vi consente di ascoltare il suono effettivo di film ad un basso livello di volume. L’effetto si regola automaticamente al volume d’ascolto. La funzione dell’ascolto Loudness può essere usata per ottenere degli ottimi bassi e acuti da fonti musicali ad un basso livello di volume. • Premere MIDNIGHT/LOUDNESS per cambiare tra MIDNIGHT, LOUDNESS e OFF. Uso della funzione Sound Retriever Quando si rimuovono dati audio durante il processo di compressione, la qualità del suono spesso si riduce a causa della mancanza di uniformità di immagine dei suoni. La funzione Sound Retriever impiega l’innovativa tecnologia DSP, che consente di ripristinare un suono di qualità CD per il suono a 2 canali compresso, ripristinando la pressione sonora e livellando i picchi causati dalla compressione.1 Enfatizzazione dei dialoghi • Impostazione standard: OFF La funzione Dialog Enhancement localizza il dialogo nel canale centrale per farlo uscire fuori dai suoni di fondo in una colonna sonora televisiva o cinematografica. • Premere DIALOG E per attivare/ disattivare dialog enhancement. Uso dei controlli del tono Secondo l’ascolto, può essere utile regolare i bassi o gli acuti usando il controllo del tono del pannello anteriore. 1 Premere TONE per selezionare la frequenza da regolare. Premere per commutare tra BASS e TREBLE. 2 Usare il controllo MULTI JOG per cambiare la quantità dei bassi o degli acuti se necessario. Attendere cinque secondi circa per l’inserimento automatico delle modifiche. • Premere S. RETRIEVER per attivare o disattivare la funzione Sound retriever. Nota 1 La funzione Sound Retriever è valida solo per le sorgenti a 2 canali. 32 It VSX_916_Italian.fm Page 33 Friday, January 6, 2006 11:54 AM Riproduzione di altre fonti 1 Accendere la corrente del componente di riproduzione. 2 Accendere la corrente del ricevitore. 4 Avviare la riproduzione del componente selezionato al punto 1. E’ necessario collegare il componente agli ingressi analogico e digitale sul retro del ricevitore per selezionare tra i segnali d’ingresso.2 Premere DVD. 3 Premere SIGNAL SEL (SIGNAL SELECT) per selezionare gli ingressi analogici multicanale. Sul display viene visualizzata la dicitura DVD 5.1ch e l’indicatore ANALOG si illumina. Italiano • Premere SIGNAL SEL (SIGNAL SELECT) per selezionare il segnale d’ingresso corrispondente al componente fonte. Ad ogni pressione, l’opzione cambia come segue: 2 Français • Impostazione standard: AUTO 1 Assicurarsi di aver impostato la fonte di riproduzione all’impostazione d’uscita corretta. Per esempio, può essere necessario impostare il lettore DVD per emettere l’audio analogico multicanale. Deutsch Come scegliere il segnale d’ingresso Se al ricevitore è collegato un decoder o un lettore DVD dotato di uscite analogiche multicanale (pagina 14), è necessario selezionare gli ingressi analogici multicanale per la riproduzione del suono surround. 3 English 3 Selezionare la fonte da riprodurre. Usare i tasti di selezione dell’ingresso.1 Selezione degli ingressi analogici multicanale Nederlands • AUTO – Questa è l’impostazione predefinita. Il ricevitore seleziona il primo segnale disponibile, nel seguente ordine: DIGITAL; ANALOG. • ANALOG – Seleziona un segnale analogico. • DIGITAL – Seleziona un segnale digitale ottico o coassiale. Quando è su DIGITAL o AUTO, 2 DIGITAL s’illumina quando è inviato un segnale Dolby Digital e DTS s’illumina quando è inviato un segnale DTS. Español Nota 1 Se la sorgente è il sintonizzatore incorporato dell’apparecchio TV, passare al canale che si desidera guardare; in caso contrario accertarsi che l’ingresso video della TV sia impostato su questo ricevitore (ad esempio se il ricevitore è collegato alle prese VIDEO della TV, accertarsi che sia selezionato l’ingresso VIDEO). Abbassare il volume del televisore in modo tale che il suono surround provenga solo dagli altoparlanti collegati a questo ricevitore. 2 • Questo ricevitore può riprodurre solo Dolby Digital, PCM (32 kHz a 96 kHz), DTS e i formati del segnale digitale WMA9 Pro. Con gli altri formati dei segnali digitali, impostare ANALOG. • Quando un lettore LD o CD compatibile con DTS riproduce un segnale analogico, è possibile che appaia del rumore digitale. Per prevenire la generazione del rumore, effettuare i collegamenti digitali corretti (Collegamento di altri componenti audio a pagina 15) ed impostare l’ingresso del segnale su DIGITAL. • Alcuni lettori DVD non emettono i segnali DTS. Per ulteriori informazioni, vedere nel manuale delle istruzioni in dotazione con il lettore DVD. 3 • Durante la riproduzione da ingressi multicanale, non è possibile usare alcuna funzione o modalità audio ed è possibile impostare solo i livelli relativi a volume e canali. • Non è possibile ascoltare il sistema di altoparlanti B (Second Zone) durante la riproduzione dagli ingressi multicanale. 33 It VSX_916_Italian.fm Page 34 Friday, January 6, 2006 11:54 AM Capitolo 7: Riproduzione USB Uso dell’interfaccia USB 1 È possibile ascoltare audio a due canali mediante l’interfaccia USB presente sul lato frontale del ricevitore. Collegare un dispositivo di archiviazione di massa USB2 come indicato di seguito. 1 Premere USB (SHIFT+AM). 2 Collegare il dispositivo USB. Il terminale USB si trova sul pannello frontale. 3 Premere (riproduzione) per avviare la riproduzione. I file e le cartelle vengono riprodotti in ordine sequenziale in base al nome dei file (secondo lo standard Unicode). All’interno di ogni directory, vengono prima riprodotti tutti i file, per poi passare al contenuto di cartelle e sottocartelle. Nello schema che segue, la riproduzione procede dalla cartella 0 alla cartella 5; vengono riprodotti, in sequenza, i file da 1 a 8. Cartella 0 (Directory principale) file 1 Cartella 1 (Artista) Cartella 2 (Album) file 4 file 5 file 2 file 3 Cartella 3 file 6 Cartella 5 (Artisit) file 8 Cartella 4 (Album) file 7 • Accertarsi che il ricevitore si trovi in modalità standby quando si scollega il dispositivo USB. Controlli di base per la riproduzione La tabella che segue mostra i controlli di base presenti sul telecomando per la riproduzione USB. Taste Funzione Avvia la normale riproduzione. Mette in pausa/riprende la riproduzione. Premere per avviare la scansione con riavvolgimento rapido (premere due volte per la scansione ad alta velocità). Premere per avviare la scansione con avanzamento rapido. (premere due volte per la scansione ad alta velocità). Salta all’inizio del brano corrente, quindi al brano precedente. Salta al brano successivo. Importante Se sul display viene visualizzato il messaggio USB ERR provare a eseguire le operazioni descritte di seguito: USB ERR Cosa significa USB ERR 1 I requisiti di alimentazione del dispositivo USB sono troppo elevati per questo ricevitore. USB ERR 2 Il dispositivo USB non è compatibile USB ERR 3 Per maggiori dettagli su questo messaggio di errore, consultare la sezione Localizzazione dei guasti a pagina 66. • Spegnere e riaccendere il ricevitore. • Ricollegare il dispositivo USB con il ricevitore spento. Nota 1 Tra i file riproducibili sono compresi i file WMA/MP3/MPEG-4 AAC (ad eccezione dei file con protezione dalla copia o a riproduzione limitata). 2 • I dispositivi USB compatibili comprendono unità disco magnetiche esterne, memorie flash portatili (in particolare le chiavette USB) e i lettori audio digitali (lettori MP3) in formato FAT16/32. Non è possibile collegare questa unità a un personal computer per la riproduzione USB. • Pioneer non è in grado di garantire la compatibilità (riguardo al funzionamento e/o all’alimentazione del bus) per tutti i dispositivi di archiviazione di massa USB e non si assume alcuna responsabilità per l’eventuale perdita di dati causata durante il collegamento al ricevitore. • Nel caso di grandi quantità di dati, il ricevitore potrebbe impiegare una maggiore quantità di tempo per leggere il contenuto di un dispositivo USB. 34 It VSX_916_Italian.fm Page 35 Friday, January 6, 2006 11:54 AM • Selezionare una sorgente di ingresso differente (ad esempio DVD/CD), quindi selezionare nuovamente USB. • Usare un alimentatore CA dedicato (in dotazione con il dispositivo) per l’alimentazione USB. Compatibilità dell’audio compresso • Riproduzione a velocità di bit variabile VBR (Variable Bit Rate) MP3/WMA/MPEG-4 AAC: Yes1 L’acronimo WMA sta per Windows Media Audio e si riferisce ad una tecnologia di compressione dati audio sviluppata da Microsoft Corporation. Questa unità riproduce i file WMA codificati usando Windows Media® Player, con estensione '.wma'. Si noti che i file protetti con tecnologia DRM non vengono riprodotti; inoltre, i file codificati con alcune versioni di Windows Media® Player potrebbero non essere riprodotti. Español Altre informazioni sulla compatibilità Il logo Windows Media® stampato sulla confezione indica che questo lettore è in grado di riprodurre file Windows Media Audio. Nederlands • AAC (MPEG-4 Advanced Audio Coding) – Frequenze di campionamento: 11,025 kHz a 48 kHz; velocità di bit: da 16 kbps a 320 kbps (velocità consigliata: 128 Kbps o superiore); estensione file: .m4a; Codifica Apple lossless: No Informazioni su WMA Italiano • WMA (Windows Media Audio) – Frequenze di campionamento: da 32 kHz / 44,1 kHz; velocità di bit: da 32 kbps a 192 kbps (velocità consigliata: 128 Kbps o superiore); estensione file: .wma; WM9 Pro e WMA con codifica lossless: No Apple e iTunes sono marchi registrati di Apple Computer, Inc. negli Stati Uniti e in altri Paesi. Français • MP3 (MPEG-1/2/2.5 Audio Layer 3) – Frequenze di campionamento: 8 kHz a 48 kHz; velocità di bit: da 8 kbps a 320 kbps (velocità consigliata: 128 Kbps o superiore); estensione file: .mp3 Deutsch Si noti che, nonostante la compatibilità con la maggior parte delle combinazioni di velocità di bit/frequenza di campionamento standard per l’audio compresso, alcuni file con codifica irregolare potrebbero non esssere riprodotti. L’elenco che segue indica i formati compatibili per i file audio compressi: La codifica audio avanzata AAC (Advanced Audio Coding) è il nucleo dello standard MPEG-4 AAC, che incorpora il formato MPEG2 AAC ed è alla base della tecnologia di compressione audio MPEG-4. Il formato e l’estensione dei file dipendono dall’applicazione usata per codificare i file AAC. Questa unità riproduce i file AAC codificati da iTunes®, con estensione '.m4a'. I file protetti con tecnologia DRM non vengono riprodotti; inoltre, i file codificati con alcune versioni di iTunes® potrebbero non essere riprodotti. English Se il problema persiste, è probabile che il dispositivo USB in uso non sia compatibile. Informazioni sul formato MPEG-4 AAC Microsoft, Windows Media e il logo di Windows sono marchi di fabbrica o marchi di fabbrica registrati di Microsoft Corporation negli Stati Uniti e/o in altri paesi. • Compatibile con la tecnologia di protezione DRM (Digital Rights Management): Sì (i file audio protetti con tecnologia DRM non vengono riprodotti con questo ricevitore). Nota 1 Si noti che in alcuni casi il tempo di riproduzione potrebbe non essere visualizzato correttamente. 35 It VSX_916_Italian.fm Page 36 Friday, January 6, 2006 11:54 AM Capitolo 8: Menù System Setup Come eseguire le impostazioni del ricevitore sul menù System Setup La seguente sezione vi mostra come fare impostazioni dettagliate per specificare come è usato il ricevitore (ad esempio, per impostare due sistemi di altoparlanti in due stanze separate) e spiega anche come sintonizzare con precisione le impostazioni desiderate. DIALOG E SYSTEM OFF INPUT RECEIVER SELECT SOURCE D.ACCESS CLASS +10 DISC ENTER MENU TOP MENU AV PRE-PROGRAMMED AND LEARNING REMOTE CONTROL UNIT TUNE ST ST ENTER SETUP GUIDE PTY SEARCH T.EDIT RETURN TUNE TV CONTROL DVD TV DVR TV CTRL TV VOL CD CD-R/TAPE USB FM AM INPUT SELECT TV CH VOL RECEIVER 1 Accendere il ricevitore e il televisore. Usare il tasto RECEIVER per l’accensione. • Se le cuffie sono collegate al ricevitore, scollegare le stesse. 2 Premere RECEIVER sul telecomando, poi premere il tasto SETUP. Sul televisore viene visualizzata una schermata. Usare i tasti /// ed ENTER sul telecomando per navigare attraverso le schermate e per selezionare le voci di menu. Premere RETURN per confermare ed uscire dal menù corrente. • Premere SETUP in qualsiasi momento per uscire dal menu System Setup. 3 Selezionare l’impostazione da regolare. System Setup 1.Surr Back System 2.Auto MCACC 3.Manual MCACC 4.Manual SP Setup 5.Input Assign 6.Other Setup : Exit 36 It • Surr Back System – Specificare la modalità di utilizzo degli altoparlanti surround posteriori (Vedi a Impostazione dell’altoparlante surround posteriore sotto). • Auto MCACC – Questa modalità costituisce un modo rapido, efficiente e automatico per impostare il suono surround (vedi a Impostazione automatica del suono surround (MCACC) a pagina 9). • Manual MCACC – Per sintonizzare con precisione le impostazioni degli altoparlanti e personalizzare l’effetto Acoustic Calibration EQ (vedi a Configurazione manuale MCACC degli altoparlanti sotto). • Manual SP Setup – Specificare dimensione, numero, distanza e bilanciamento complessivo degli altoparlanti collegati (vedere Configurazione manuale degli altoparlanti a pagina 41). • Input Assign – Specificare cosa si è collegato agli ingressi digitale e dei componenti video (vedere Menù Input Assign a pagina 63). • Other Setup – Effettuare impostazioni personalizzate a seconda di come si sta usando il ricevitore (vedere Menù Other Setup a pagina 64). Impostazione dell’altoparlante surround posteriore • Impostazione standard: Normal (SB) Ci sono vari modi per usare i canali dell’altoparlante surround posteriore con questo sistema. Oltre alla normale impostazione home theater in cui sono usati per gli altoparlanti surround posteriori, possono essere usati per bi-amping degli altoparlanti anteriori o come sistema di altoparlanti separati in un’altra stanza. 1 Selezionare ‘Surr Back System’ dal menù System Setup. Vedere Come eseguire le impostazioni del ricevitore sul menù System Setup qui sopra se non si è ancora raggiunta questa schermata. VSX_916_Italian.fm Page 37 Friday, January 6, 2006 11:54 AM System Setup 1.Surround Back System 1.Surr Back System 2.Auto MCACC 3.Manual MCACC 4.Manual SP Setup 5.Input Assign 6.Other Setup : Exit Surr Back System Normal (SB) ] : Finish 2 Selezionare l’impostazione da regolare. Se queste sono le prime impostazioni, bisogna eseguirle in ordine. • Fine Ch Level – Effettuare regolazioni fini al bilanciamento complessivo del sistema di diffusori (vedere Livello canale ottimo sotto). • Fine SP Distance – Effettuare impostazioni di ritardo precise per il sistema dei diffusori (vedere Distanza ottimale degli altoparlanti a pagina 38). Le ultime cinque impostazioni sono in modo specifico per personalizzare i parametri spiegati in Calibratura acustica EQ sotto: • EQ AUTO Setting – Misurare le caratteristiche acustiche dell’ambiente e regolare automaticamente il bilanciamento della frequenza del sistema di altoparlanti (vedere Impostazione automatica della funzione Acoustic Calibration EQ sotto). • EQ Data Copy – Copiare le impostazioni Acoustic Calibration EQ per le regolazioni manuali (vedere le Copiatura delle impostazioni Acoustic Calibration EQ sotto). • EQ CUSTOM1/2 Adjust – Effettuare regolazioni manuali alle impostazioni personalizzate Acoustic Calibration EQ (vedere Impostazione manuale della funzione Acoustic Calibration EQ a pagina 40). • EQ Data Check – Controllare le impostazioni ALL CH ADJUST, FRONT ALIGN e le impostazioni personalizzate usando i dati visualizzati sullo schermo (vedere Controllo delle Impostazioni Acoustic Calibration EQ a pagina 41). Español • Per alcune delle impostazioni qui sotto, bisogna collegare il microfono al pannello anteriore e posizionarlo al livello dell’orecchio nella normale posizione d’ascolto. Vedi a Impostazione automatica del suono surround (MCACC) a pagina 9 se non siete sicuri come procedere. Vedere inoltre Altri problemi che possono sorgere durante l’uso della funzione Auto MCACC Setup a pagina 11 per informazioni relative al rumore di fondo e ad altre possibili interferenze. :Return Nederlands Importante : Exit a.Fine Ch Level b.Fine SP Distance c.EQ AUTO Setting d.EQ Data Copy e.EQ CUSTOM1 Adjust f .EQ CUSTOM2 Adjust g.EQ Data Check Italiano E’ possibile usare le impostazioni nel menù d’impostazione manuale MCACC per fare delle regolazioni dettagliate quando avete familiarizzato con il sistema. Prima di fare queste impostazioni, bisogna aver completato la procedura Impostazione automatica del suono surround (MCACC) a pagina 9. Queste impostazioni vanno fatte solo una volta (se non cambiate l’ubicazione dell’attuale sistema di altoparlanti o aggiungete nuovi altoparlanti). 3.Manual MCACC 1.Surr Back System 2.Auto MCACC 3.Manual MCACC 4.Manual SP Setup 5.Input Assign 6.Other Setup Français Configurazione manuale MCACC degli altoparlanti System Setup Deutsch 3 Al termine, premere RETURN. La schermata ritorna al menù System Setup. 1 Selezionare ‘Manual MCACC’ dal menù System Setup. Vedere Come eseguire le impostazioni del ricevitore sul menù System Setup qui sopra se non si è ancora raggiunta questa schermata. English 2 Selezionare l’impostazione dell’altoparlante surround posteriore. • Normal (SB) – Selezionare nella configurazione principale (sistema di altoparlanti A) per l’uso normale come home theater con gli altoparlanti surround posteriori. • Second Zone – Selezionare se si desidera usare i terminali degli altoparlanti B (surround posteriori) per ascoltare una riproduzione stereo in un’altra stanza (vedi a Impostazione dell’altoparlante B Second Zone a pagina 59). • Front Bi-Amp – Selezionare questa impostazione se si intende effettuare il biamping degli altoparlanti anteriori (vedi a Bi-amping degli altoparlanti anteriori a pagina 60). • Se si utilizza un subwoofer, accenderlo e alzare il volume, se necessario. 37 It VSX_916_Italian.fm Page 38 Friday, January 6, 2006 11:54 AM Livello canale ottimo • Impostazione standard: 0dB (tutti i canali) Si può ottenere un migliore suono surround regolando correttamente il bilanciamento generale del sistema degli altoparlanti. Le impostazioni seguenti possono aiutare ad effettuare regolazioni dettagliate che è impossibile fare usando l’ Configurazione manuale degli altoparlanti a pagina 41. 1 Selezionare ‘Fine Ch Level’ dal menù d’impostazione Manuale MCACC. I toni di prova vengono emessi a rotazione da ciascun diffusore. Dal momento che l’altoparlante sinistro è l’altoparlante di riferimento principale, il suo livello è fisso. 3a.Fine Channel Level 3.Manual MCACC a.Fine Ch Level b.Fine SP Distance c.EQ AUTO Setting d.EQ Data Copy e.EQ CUSTOM1 Adjust f .EQ CUSTOM2 Adjust g.EQ Data Check :Return Please Wait... 3 Al termine, premere RETURN. L’ unità ritornerà al menù d’ impostazione manuale MCACC. Distanza ottimale degli altoparlanti • Impostazione standard: 3,0 m (tutti i canali) Per una profondità e separazione corretta del sistema, è necessario aggiungere un certo ritardo ad alcuni degli altoparlanti in modo tale che tutti i suoni arrivino alla posizione d’ascolto allo stesso tempo. Le impostazioni seguenti possono aiutare ad effettuare regolazioni dettagliate che è impossibile fare usando l’ Configurazione manuale degli altoparlanti sotto. 1 Selezionare ‘Fine SP Distance’ dal menù d’impostazione Manuale MCACC. Il volume aumenta fino al livello di riferimento. 20 Caution! Loud test tones will be output. :Cancel 3.Manual MCACC a.Fine Ch Level b.Fine SP Distance c.EQ AUTO Setting d.EQ Data Copy e.EQ CUSTOM1 Adjust f .EQ CUSTOM2 Adjust g.EQ Data Check :Return Attenzione • I toni di prova usati nel menu System Setup sono emessi ad alto volume (il volume aumenta automaticamente fino a -18 dB). 2 Regolare la distanza del canale sinistro dalla posizione di ascolto. 3b.Fine SP Distance 2 Selezionare un canale per volta e, se necessario, regolare i livelli (+/– 10 dB). Usare / per regolare il volume dell’altoparlante selezionato in modo che corrisponda all’altoparlante di riferimento. Quando si ritiene che entrambi i toni abbiano lo stesso volume, premere ENTER per confermare e passare al canale successivo. L(Reference) 3.0 m ENTER:Next :Cancel Dopo aver premuto ENTER, vengono emessi dei toni di prova. 3 Selezionare un canale per volta e, se necessario, regolare la distanza. Usare / per regolare il ritardo dell’altoparlante selezionato in modo che corrisponda all’altoparlante di riferimento. Il ritardo è misurato in termini della distanza dell’altoparlanti da 0.1 a 9.0 metri. • Per consentire un confronto, l’altoparlante di riferimento cambia secondo l’altoparlante selezionato. • Se si vuole tornare indietro e regolare un canale, usare semplicemente / per selezionarlo. 38 It VSX_916_Italian.fm Page 39 Friday, January 6, 2006 11:54 AM Impostazione automatica della funzione Acoustic Calibration EQ Se si sono già eseguite le operazioni descritte in Impostazione automatica del suono surround (MCACC) a pagina 9, ALL CH ADJUST e FRONT ALIGN (sotto) dovrebbero risultare già impostati. Perciò, se si desidera regolare le impostazioni manualmente, saltare a Impostazione manuale della funzione Acoustic Calibration EQ sotto. English Ascoltare l’altoparlante di riferimento ed usare lo stesso per misurare il canale bersaglio. Dalla posizione d’ascolto, rivolgersi verso i due altoparlanti con le braccia aperte indicando ciascun altoparlante. Cercare di far suonare i due toni come se arrivassero contemporaneamente ad una posizione leggermente davanti a voi tra le braccia. 1 Selezionare EQ AUTO Setting dal menù d’impostazione manuale MCACC. • Per consentire un confronto, l’altoparlante di riferimento cambia secondo l’altoparlante selezionato. Calibratura acustica EQ :Cancel • Assicurarsi che sia collegato il microfono. • Se state usando un subwoofer, questo viene rivelato automaticamente ogniqualvolta si accende il sistema. Assicurarsi che sia acceso e che il volume sia nella posizione centrale. • Vedere anche Altri problemi che possono sorgere durante l’uso della funzione Auto MCACC Setup a pagina 11 per le note sugli alti livelli di rumore di fondo e altre possibili interferenze. 2 Attendere il termine della funzione EQ AUTO Setting. 3c.EQ AUTO Setting 3c.EQ AUTO Setting Now Analyzing Environment Check Ambient Noise Microphone Speaker YES/NO Español La funzione Acoustic Calibration Equalization è un tipo d’equalizzatore per gli altoparlanti (escluso il subwoofer). Funziona misurando le caratteristiche acustiche della stanza e neutralizzando le caratteristiche ambientali che possono colorare il materiale della fonte originale. Questo fornisce un’impostazione d’equalizzazione piatta. Se non siete soddisfatti della regolazione automatica, è possibile regolare queste impostazioni manualmente per ottenere un bilanciamento della frequenza adatto al vostro gusto personale. :Return Nederlands 4 Al termine, premere RETURN. L’unità ritornerà al menù d’ impostazione manuale MCACC. Set microphone. Turn on Subwoofar. Italiano • Se si vuole tornare indietro e regolare un canale, usare semplicemente / per selezionarlo. a.Fine Ch Level b.Fine SP Distance c.EQ AUTO Setting d.EQ Data Copy e.EQ CUSTOM1 Adjust f .EQ CUSTOM2 Adjust g.EQ Data Check Français Quando sembra che le impostazioni di ritardo siano corrispondenti, premere l ENTER per confermare e continuare sul canale successivo. Deutsch 3c.EQ AUTO Setting 3.Manual MCACC Now Analyzing [ [ [ ] ] ] :Cancel Surround Analyzing Channel Level [ Acoustic Cal EQ [ ] ] :Cancel Mentre il ricevitore emette i toni di prova, il bilanciamento della frequenza viene regolato automaticamente per le seguenti impostazioni: • ALL CH ADJUST – Si tratta di un’impostazione ‘uniforme’ in cui tutti gli altoparlanti sono impostati individualmente, per cui a nessun canale viene dato un peso particolare. 39 It VSX_916_Italian.fm Page 40 Friday, January 6, 2006 11:54 AM • FRONT ALIGN – Tutti gli altoparlanti sono impostati secondo le impostazioni degli altoparlanti frontali (ai canali frontali sinistro e destro non viene applicata alcuna equalizzazione). L’unità ritornerà al menù d’ impostazione Acoustic Cal EQ dopo aver impostato Acoustic Callbration Equalization. Copiatura delle impostazioni Acoustic Calibration EQ Se si desidera regolare manualmente la funzione Acoustic Calibration EQ (vedere Impostazione manuale della funzione Acoustic Calibration EQ sotto), si consiglia di copiare le impostazioni ALL CH ADJUST o FRONT ALIGN dall’impostazione EQ AUTO descritta sopra (o da Impostazione automatica del suono surround (MCACC) a pagina 9) su una delle impostazioni personalizzate. Invece di fornire una curva EQ piatta, fornisce un punto di riferimento da cui iniziare. 1 Selezionare ‘EQ Data Copy’ dal menù d’impostazione manuale MCACC. 3 Selezionare ‘OK’ per copiare e confermare. Impostazione manuale della funzione Acoustic Calibration EQ Prima di regolare manualmente l’Acoustic Calibration EQ, consigliamo di copiare le impostazioni ALL CH ADJUST o FRONT ALIGN dall’impostazione automatica precedente (o da Impostazione automatica del suono surround (MCACC) a pagina 9) su una delle impostazioni personalizzate. Invece della curva EQ piatta, questo fornisce un punto di riferimento da cui iniziare (vedi a Copiatura delle impostazioni Acoustic Calibration EQ qui sopra sopra per procedere). 1 Selezionare ‘EQ CUSTOM1 Adjust o EQ CUSTOM2 Adjust’ dal menu di impostazione Manual MCACC. 3e.EQ CUSTOM1 Adjust 3.Manual MCACC a.Fine Ch Level b.Fine SP Distance c.EQ AUTO Setting d.EQ Data Copy e.EQ CUSTOM1 Adjust f .EQ CUSTOM2 Adjust g.EQ Data Check :Return Test Tone Type ALL CH ADJUST ENTER:Next :Cancel 3.Manual MCACC a.Fine Ch Level b.Fine SP Distance c.EQ AUTO Setting d.EQ Data Copy e.EQ CUSTOM1 Adjust f .EQ CUSTOM2 Adjust g.EQ Data Check :Return 2 Selezionare CUSTOM1 o CUSTOM2, quindi usare / per selezionare l’impostazione che si desidera copiare. • Si può anche copiare da un’impostazione personalizzata ad un’altra. Per altri dettagli sull’impostazione di ALL CH ADJUST e FRONT ALIGN, vedere Impostazione automatica della funzione Acoustic Calibration EQ qui sopra. 40 It 2 Selezionare il metodo che si desidera utilizzare per regolare il bilanciamento complessivo della frequenza. E’ bene scegliere quale è stato copiato nelle impostazioni personalizzate in Copiatura delle impostazioni Acoustic Calibration EQ qui sopra. • ALL CH ADJUST – Tutti gli altoparlanti possono essere impostati in modo autonomo. Quindi, nessun peso speciale viene dato ad un canale particolare. • FRONT ALIGN – Gli altoparlanti vengono impostati in linea con le impostazioni degli altoparlanti frontali. Il suono del tono di prova alternerà tra l’altoparlante anteriore sinistro (riferimento) e l’altoparlante bersaglio. VSX_916_Italian.fm Page 41 Friday, January 6, 2006 11:54 AM 3 Selezionare i canali desiderati e regolarli secondo le proprie preferenze. 3e.EQ CUSTOM1 Adjust 3e. EQ CUSTOM1 Adjust Test Tone Type: "ALL CH ADJUST" [ Left ] 40Hz : + 1.0dB 125Hz : [ 0.0dB ] 250Hz : [ 0.0dB ] 4kHz : [ 0.0dB ] 13kHz : [ 0.0dB ] TRIM : [ 0.0dB ] :Finish Usare / per selezionare il canale. Suggerimento Controllo delle Impostazioni Acoustic Calibration EQ 2 Selezionare l’impostazione che si desidera verificare. • E’ utile fare questo durante la riproduzione della fonte, affinché si possano confrontare le varie impostazioni. 3 Selezionare i canali desiderati, premendo ENTER dopo aver terminato la verifica di ciascuno di essi. 4 Al termine, premere RETURN. L’unità ritornerà al menù d’ impostazione manuale MCACC. Configurazione manuale degli altoparlanti Questo ricevitore consente all’utente di fare impostazioni dettagliate per ottimizzare le prestazioni del suono surround. Queste impostazioni vanno fatte solo una volta (se non cambiate l’ubicazione dell’attuale sistema di altoparlanti o aggiungete nuovi altoparlanti). Queste impostazioni sono state disegnate per sintonizzare il sistema con precisione, ma se sono sufficienti le impostazioni effettuate nella sezione Impostazione automatica del suono surround (MCACC) a pagina 9, non è necessario effettuare ulteriori impostazioni. Español 4 Al termine, premere RETURN. L’unità ritornerà al menù d’ impostazione manuale MCACC. : + 1.0dB : 0.0dB : 0.0dB : 0.0dB : 0.0dB : 0.0dB :Return Nederlands • Il cambio della curva di frequenza di un canale in modo troppo repentino influisce sul bilanciamento generale. Se il bilanciamento degli altoparlanti sembra irregolare, è possibile alzare o abbassare i livelli del canale usando i toni di prova con la funzione TRIM. Usare / per selezionare TRIM e quindi usare / per aumentare o diminuire il livello del canale dell’altoparlante corrente. 40Hz 125Hz 250Hz 4kHz 13kHz TRIM Italiano • L’indicatore OVER! appare sul display se la regolazione della frequenza è troppo improvvisa e si possono verificare distorsioni. In tal caso, abbassare il livello finché l’indicazione OVER! non scomparirà dal display. :Return ALL CH ADJUST [ Left EQ ] Français • Non è possibile regolare gli altoparlanti frontali se si è selezionata la funzione FRONT ALIGN. 3g.EQ Data Check a.Fine Ch Level b.Fine SP Distance c.EQ AUTO Setting d.EQ Data Copy e.EQ CUSTOM1 Adjust f .EQ CUSTOM2 Adjust g.EQ Data Check Deutsch Usare / per selezionare la frequenza e / per potenziare o ridurre il livello EQ. Una volta terminata l’impostazione, tornare nella parte superiore della schermata e usare / per selezionare il canale successivo. 3.Manual MCACC English Test Tone Type: "ALL CH ADJUST" Left 40Hz : [+ 1.0dB ] 125Hz : [ 0.0dB ] 250Hz : [ 0.0dB ] 4kHz : [ 0.0dB ] 13kHz : [ 0.0dB ] TRIM : [ 0.0dB ] :Finish 1 Selezionare ‘EQ Data Check’ dal menù d’impostazione manuale MCACC. Attenzione • I toni di prova usati nel menu vengono emessi ad alto volume (il volume aumenta automaticamente fino a -18 dB). Dopo aver completato la regolazione automatica o manuale della funzione Acoustic Calibration EQ, è possibile verificare i parametri ALL CH ADJUST, FRONT ALIGN e le impostazioni personalizzate usando i dati visualizzati sullo schermo. 41 It VSX_916_Italian.fm Page 42 Friday, January 6, 2006 11:54 AM 1 Selezionare ‘Manual SP Setup’ e premere ENTER. System Setup 4.Manual SP Setup 1.Surr Back System 2.Auto MCACC 3.Manual MCACC 4.Manual SP Setup 5.Input Assign 6.Other Setup : Exit 1 Selezionare ‘Speaker Setting’ dal menù Manual SP Setup. 4a.Speaker Setting 4.Manual SP Setup a.Speaker Setting b.Crossover Network c.Channel Level d.Speaker Distance :Return 2 Selezionare l’impostazione da regolare. Se l’impostazione avviene per la prima volta, può essere utile effettuare le seguenti impostazioni in ordine: • Speaker Setting – Specificare le dimensioni e il numero di altoparlanti che si sono collegati (Vedi pagina 42). • Crossover Network – Specificare quali frequenze saranno inviate al subwoofer (Vedi pagina 43). • Channel Level – Regolare il bilanciamento complessivo del sistema di altoparlanti (Vedi a pagina 43). • Speaker Distance – Specificare la distanza degli altoparlanti dalla posizione d’ascolto (vedere pagina 44). 3 Effettuare le regolazioni necessarie per ciascun’impostazione, premendo RETURN come conferma dopo ogni schermata. Impostazione degli altoparlanti Usare quest’impostazione per specificare la configurazione degli altoparlanti (formato, numero di altoparlanti). E’ bene assicurarsi che le impostazioni fatte in Impostazione automatica del suono surround (MCACC) a pagina 9 siano corrette. a.Speaker Setting b.Crossover Network c.Channel Level d.Speaker Distance :Return Front Center Surr SB [ SUB W. SMALL [ SMALL [ SMALL SMALL x2 : YES ] ] ] ] :Finish 2 Selezionare il set di altoparlanti che si desidera impostare, quindi selezionare la dimensione degli altoparlanti. Usare / per selezionare le dimensioni (e il numero) di ognuno dei seguenti altoparlanti: • Front – Selezionare LARGE se gli altoparlanti anteriori riproducono le frequenze dei bassi efficientemente oppure se non è stato collegato un subwoofer. Selezionare SMALL per inviare le basse frequenze al subwoofer.1 • Center – Selezionare LARGE se l’altoparlante centrale riproduce le basse frequenze efficientemente oppure selezionare SMALL per inviare le basse frequenze all’altro altoparlante o subwoofer. Se non è stato collegato un altoparlante centrale, scegliere NO (il canale centrale viene inviato agli altoparlanti anteriori). • Surr – Selezionare LARGE se gli altoparlanti surround riproducono in modo efficace le frequenze basse. Selezionare SMALL per inviare le basse frequenze all’altro altoparlante o subwoofer. Se non sono stati collegati gli altoparlanti surround, scegliere NO (il suono dei canali surround viene inviato agli altoparlanti anteriori o al subwoofer). Nota 1 Se si seleziona SMALL per gli altoparlanti anteriori, il subwoofer è fisso su YES. Inoltre, gli altoparlanti centrale, surround e posteriore surround non possono essere impostati su LARGE se gli altoparlanti frontali sono impostati su SMALL. In tal caso, tutte le frequenze basse sono inviate al subwoofer. 42 It VSX_916_Italian.fm Page 43 Friday, January 6, 2006 11:54 AM 1 Selezionare ‘Crossover Network’ dal menù Manual SP Setup. 4b.Crossover Network 4.Manual SP Setup a.Speaker Setting b.Crossover Network c.Channel Level d.Speaker Distance :Return Frequency 80Hz :Finish 2 Selezionare il punto di taglio della frequenza. Le frequenze sotto il punto di taglio saranno trasmesse al subwoofer (o altoparlanti LARGE). Nederlands 3 Al termine, premere RETURN. La schermata ritorna al menù Manual SP Setup. Livello del canale Español • Se avete un subwoofer e preferite dei bassi potenti, può sembrare logico selezionare LARGE per gli altoparlanti anteriori e PLUS per il subwoofer. Ma il risultato non sarà il migliore. Secondo l’ubicazione degli altoparlanti nella stanza, potete notare una diminuzione della quantità dei bassi per via della cancellazione delle basse frequenze. In tal caso, provare a cambiare la posizione o la direzione degli altoparlanti. Se non riuscite ad ottenere un buon risultato, ascoltare la risposta dei bassi con l’impostazione PLUS e YES o con gli altoparlanti anteriori su LARGE e SMALL alternativamente e lasciare scegliere le Quest’impostazione decide il taglio tra i suoni dei bassi riproducendo i toni da tutti gli altoparlanti selezionati come LARGE, o il subwoofer e riproduce i suoni bassi da quelli selezionati come SMALL. Inoltre decide dove tagliare i bassi nel canale LFE.2 Italiano Suggerimento • Impostazione standard: 100Hz Français 3 Al termine, premere RETURN. La schermata ritorna al menù Manual SP Setup. Rete Crossover Deutsch • SUB W. – segnali LFE e le basse frequenze dei canali impostati su SMALL sono emessi dal subwoofer dopo aver selezionato YES (vedi le note qui sotto). Scegliere l’impostazione PLUS per far emettere il suono dei bassi dal subwoofer continuamente o per dei bassi più profondi (le frequenze basse normalmente riprodotte dagli altoparlanti anteriori e centrale sono inviate al subwoofer). Se non è stato collegato un subwoofer, scegliere NO (le basse frequenze sono emesse dagli altri altoparlanti). vostre orecchie. Se avete problemi, l’opzione più facile è far passare tutti i suoni dei bassi al subwoofer selezionando SMALL per gli altoparlanti anteriori. English • SB – Selezionare il numero degli altoparlanti posteriori surround in uso (uno, due o nessuno). Selezionare LARGE se gli altoparlanti posteriori surround riproducono in modo efficace le frequenze basse. Selezionare SMALL per inviare le basse frequenze all’altro altoparlante o subwoofer. Se non sono stati collegati gli altoparlanti surround posteriori, selezionare NO.1 Usando le impostazioni del livello del canale, potete regolare il bilanciamento generale del sistema di altoparlanti e questo è molto importante nell’impostazione di un sistema home theater. Nota 1 • Se gli altoparlanti surround sono su NO, gli altoparlanti surround posteriori saranno automaticamente su NO. • Se si è selezionata l’opzione Second Zone o Front Bi-Amp (in Impostazione dell’altoparlante surround posteriore a pagina 36) non è possibile regolare le impostazioni surround posteriori. • Se si seleziona un solo altoparlante posteriore surround, accertarsi che tale altoparlante sia collegato al terminale surround posteriore sinistro. 2 Per ulteriori informazioni sulla selezione dei formati degli altoparlanti, vedi a Impostazione degli altoparlanti qui sopra. 43 It VSX_916_Italian.fm Page 44 Friday, January 6, 2006 11:54 AM 1 Selezionare ‘Channel Level’ dal menù Manual SP Setup. 4.Manual SP Setup 5 Al termine, premere RETURN. La schermata ritorna al menù Manual SP Setup. 4c.Channel Level a.Speaker Setting b.Crossover Network c.Channel Level d.Speaker Distance Test Tone Manual Suggerimento :Return ENTER:Next :Cancel 2 Selezionare un’opzione di impostazione. • Manual – Spostare manualmente il test di prova da altoparlante ad altoparlante e regolare individualmente i livelli dei canali. • Auto – Regolare i livelli dei canali quando il test di prova si sposta automaticamente da un altoparlante all’altro. 3 Conffermare la selezione dell’opzione d’impostazione. I toni di prova inizieranno a suonare appena premete ENTER. Quando il volume raggiunge il livello di riferimento, vengono emessi dei toni di prova. 4c.Channel Level Test Tone • E’ possibile cambiare i livelli del canale in qualunque momento usando EFFECT/CH SEL e +/– sul telecomando. È possibile impostare due livelli di canale: uno per DVD 5.1 CH e uno per le modalità di ascolto. Distanza dell’ altoparlante Per una buona profondità sonora ed un’ottima separazione dal sistema, bisogna specificare la distanza degli altoparlanti dalla posizione d’ascolto. Il ricevitore sarà poi in grado di aggiungere il ritardo necessario per un suono surround efficiente. 1 Selezionare ‘Speaker Distance’ dal menù Manual SP Setup. 4d.Speaker Distance 4.Manual SP Setup [ Manual ] Setting Start Please Wait . . . 20 a.Speaker Setting b.Crossover Network c.Channel Level d.Speaker Distance Caution! Loud test tones will be output. :Cancel 4 Regolare il livello di ciascun canale mediante i tasti /. Se è stato selezionato Manual, usare /) per passare da un altoparlante all’altro. L’impostazione Auto emette i toni di prova nell’ordine indicato sullo schermo: 4c.Channel Level L C R RS SBR SBL LS SW [ [ [ [ [ [ [ 0.0dB 0.0dB 0.0dB 0.0dB 0.0dB 0.0dB 0.0dB 0.0dB ] ] ] ] ] ] ] :Return L C R RS SBR SBL LS SW [ [ [ [ [ [ [ 3.0 3.0 3.0 3.0 3.0 3.0 3.0 3.0 m m m m m m m m ] ] ] ] ] ] ] :Finish 2 Regolare la distanza di ciascun altoparlante mediante i tasti /. La distanza dei singoli altoparlanti può essere regolata con incrementi di 0,1 metri. 3 Al termine, premere RETURN. La schermata ritorna al menù Manual SP Setup. Suggerimento :Finish Regola il livello di ogni altoparlante durante l’emissione del tono di prova.1 • Per ottenere il miglior suono surround possibile, assicurarsi che gli altoparlanti surround posteriori siano alla stessa distanza dalla posizione d’ascolto. Nota 1 • Se si usa un misuratore del livello della pressione sonora (SPL), leggere la posizione d’ascolto principale e regolare il livello di ogni altoparlante a 75 dB SPL (pesato C/lettura lenta). • Il tono di prova del subwoofer è emesso ad un basso livello di volume. Può essere necessario regolare il livello dopo il test con una colonna sonora vera. 44 It VSX_916_Italian.fm Page 45 Friday, January 6, 2006 11:54 AM Capitolo 9: Come usare il sintonizzatore Ascolto della radio DVR USB FM AM CD TV CTRL INPUT SELECT TV VOL TV CH ANALOG ATT SR+ DIMMER MIDNIGHT/ LOUDNESS A Sintonizzazione diretta di una stazione REC MUTE MPX B EON REC STOP JUKEBOX C DIALOG E D DISP CLASS +10 STANDARD ADV.SURR E HDD DVD CH CH STEREO AUTO SURR DISC ENTER MULTI OPE S.RETRIEVER ACOUSTIC EQ SIGNAL SEL MENU TOP MENU TUNE ST SHIFT EFFECT/CH SEL ST PTY SEARCH T.EDIT RETURN 1 Premere FM o AM per selezionare la banda desiderata. Nederlands ENTER SETUP GUIDE A volte, si conosce già la frequenza della stazione desiderata. In tal caso, basta inserire la frequenza direttamente, usando i tasti numerici sul telecomando. Italiano SB ch AUDIO SUBTITLE D.ACCESS VOL RECEIVER SLEEP Se gli indicatori / (sintonizzato) o / (stereo) non s’illuminano dopo la sintonizzazione di una stazione FM poiché il segnale è debole, premere il tasto MPX per commutare alla modalità di ricezione mono. Questo migliorerà la qualità sonora e vi consentirà di ascoltare la trasmissione. Français TV CD-R/TAPE DVD Miglioramento del suono FM stereo Deutsch I seguenti punti mostrano come sintonizzare le trasmissioni radio FM e AM usando le funzioni di sintonizzazione automatica (ricerca) e manuale (punti). Se già conoscete la frequenza della stazione desiderata, vedi a Sintonizzazione diretta di una stazione qui sotto. Dopo aver sintonizzato una stazione, è possibile memorizzare la frequenza per un richiamo successivo—vedere Come salvare le stazioni di preselezione alla pagina successiva per ulteriori informazioni su come procedere. English Sintonizzazione ad alta velocità Premere e mantenere premuto TUNE/ per una sintonizzazione ad alta velocità. Rilasciare il tasto alla frequenza desiderata. TUNE TV CONTROL RECEIVER 1 Premere FM o AM per selezionare la banda desiderata. Sintonizzazione automatica Per una localizzazione delle stazioni nella banda attualmente selezionata, premere e mantenere premuto TUNE/ per un secondo circa. Il ricevitore inizia la ricerca della stazione successiva, fermandosi quando è stata localizzata. Ripetere questo per localizzare altre stazioni. Premere D.ACCESS (Direct Access). 3 Usare i tasti numerici per inserire la frequenza della stazione radio. Per esempio, per sintonizzare la frequenza 106.00 (FM), premere 1, 0, 6, 0, 0. Español 2 Sintonizzare una stazione. Ci sono tre modi per fare questo: 2 Se si commette un errore a metà strada, premere D.ACCESS due volte per cancellare la frequenza e ricominciare. Sintonizzazione manuale Per cambiare la frequenza di un passo per volta, premere TUNE/. 45 It VSX_916_Italian.fm Page 46 Friday, January 6, 2006 11:54 AM Come salvare le stazioni di preselezione Se si ascolta spesso una particolare stazione radio, è comodo memorizzare la frequenza della stessa per un facile richiamo ogni qualvolta si desidera ascoltare la stazione in questione. Questo serve per evitare ogni volta la sintonizzazione manuale. Quest’unità è in grado di memorizzare massimo 30 stazioni in tre memorie o classi (A, B e C) di 10 stazioni ciascuna. Quando si salva una frequenza FM, viene memorizzata anche l’impostazione MPX (vedi pagina precedente). 1 Sintonizzare la stazione da memorizzare. Per maggiorl informazioni, consultare Ascolto della radio alla pagina precedente. 2 Premere T.EDIT (TUNER EDIT). L’indicazione ST. MEMORY appare sul display, seguita dalla classe che lampeggia. 3 Premere CLASS per selezionare una delle tre classi e quindi premere ST/ per selezionare la stazione di preselezione desiderata. E’ anche possibile usare i tasti numerici o il controllo MULTI JOG (sul pannello anteriore) per selezionare la stazione come preselezione. 4 Premere ENTER. Dopo aver premuto ENTER, la classe di preselezione ed il numero smettono di lampeggiare ed il ricevitore memorizza la stazione. Come denominare le stazioni preselezionate Per un’identificazione più facile, si può dare un nome alla stazione di preselezione. 1 Scegliere la stazione da denominare. Vedi a Ascolto delle stazioni preselezionate qui sotto per ulteriori informazioni. 2 Premere T.EDIT (TUNER EDIT). L’indicazione ST. NAME appare sul display, seguita da un cursore lampeggiante nella posizione del primo carattere. 3 Inserire il nome desiderato. Selezionare un nome della lunghezza massima di quattro caratteri. 46 It • Usare il controllo MULTI JOG (sul pannello anteriore) o i tasti ST/ (sul telecomando) per selezionare i caratteri. • Premere ENTER per confermare un carattere. Se non è inserito nessun carattere, viene inserito uno spazio. • Il nome viene memorizzato alla pressione di ENTER dopo aver scelto il quarto carattere. Suggerimento • Per cancellare il nome di una stazione, ripetere semplicemente i passi 1 a 3 ed inserire quattro spazi anziché un nome. • Dopo aver denominato una stazione preselezionata, premere DISP per ascoltare una stazione e cambiare la visualizzazione tra il nome e la frequenza. Visualizza inoltre le informazioni RDS (pagina 47). Ascolto delle stazioni preselezionate E’ necessario aver memorizzato delle stazioni per poter ascoltarle. Vedere Come salvare le stazioni di preselezione sopra se non lo si è già fatto. 1 Premere FM, quindi premere CLASS per selezionare la classe di memorizzazione della stazione. Premere questo ripetutamente per cambiare tra le classi A, B e C. 2 Premere ST/ per selezionare la stazione di preselezione desiderata. • E’ anche possibile usare i tasti numerici sul telecomando per richiamare una stazione preselezionata. VSX_916_Italian.fm Page 47 Friday, January 6, 2006 11:54 AM Un’introduzione al sistema RDS Una funzione del RDS è la possibilità di ricerca per tipo di programma. Ad esempio, è possibile cercare una stazione che sta trasmettendo uno spettacolo con il tipo di programma, Jazz. • Program Service Name (PS): il nome della stazione radio. • Program Type (PTY): indica il tipo di programma in fase di trasmissione. • Frequenza corrente del sintonizzatore. (FREQ) Ricerca dei programmi RDS È possibile cercare un tipo di programma nell’elenco precedente. Italiano 1 Premere il tasto FM per selezionare la banda FM.3 2 Premere il tasto PTY SEARCH. SEARCH appare sul display. Nederlands 3 Usare il controllo MULTI JOG per selezionare il tipo del programma da ascoltare. 4 Premere ENTER per localizzare il tipo di programma. Il sistema inizia la ricerca attraverso le stazioni preselezionate per trovare una corrispondenza. Dopo la localizzazione della stazione, la ricerca si ferma e la stazione viene riprodotta per cinque secondi. Español Finance – Notizie di borsa, economia, commercio, ecc. Children – Programmi per bambini Social – Affari sociali Religion – Programmi sulla religione Phone In – Il pubblico esprime la propria opinione per telefono Travel – Viaggi di tipo vacanziero invece di notizie sul traffico Leisure – Tempo libero e hobby Jazz – Jazz Country – Musica country Nation M – Musica popolare in lingua diversa dall’inglese Oldies – Musica popolare degli anni 50 e 60 Folk M – Musica folk Document – Documentari • Radio Text (RT): messaggi inviati da una stazione radio. Ad esempio, un stazione radio di programmi parlati può fornire un numero di telefono come RT. Français News – Notizie Affairs – Attualità Info – Informazioni generali Sport – Sport Educate – Programmi educativi Drama – Drammi radiofonici, ecc. Culture – Cultura nazionale o regionale, teatro, ecc. Science – Scienze e tecnologia Varied – Talk show, quali quiz o interviste. Pop M – Musica pop Rock M – Musica rock Easy M – Musica leggera Light M – Musica classica leggera Classics – Musica classica seria Other M – Altri tipi di musica che non rientrano nelle categorie di cui sopra Weather – Previsioni del tempo • Premere DISP per informazioni RDS. Il display cambia come segue ad ogni pressione del tasto: Deutsch È possibile cercare i seguenti tipi di programma:1 Usare il tasto DISP per visualizzare i diversi tipi di informazioni RDS disponibili.2 English Radio Data System (RDS) è un sistema usato da gran parte delle stazioni radio FM per fornire agli ascoltatori vari tipi di informazioni: ad esempio il nome della stazione e il tipo di spettacolo che stanno trasmettendo. Visualizzazione delle informazioni RDS 5 Se desiderate continuare ad ascoltare la stazione, premere ENTER entro 5 secondi. Se non premete ENTER, la ricerca continua. Nota 1 Inoltre, vi sono altri tre tipi di programmi: TEST, Alarm! e None. Alarm! e TEST sono usati per avvisi di emergenza. Non è possibile localizzare questo programma, ma il sintonizzatore cambia automaticamente a questo segnale di trasmissione RDS. None appare nulla quando non si trova un tipo di programma. 2 • Se viene assorbito del rumore durante la visualizzazione dello scorrimento RT, alcuni caratteri possono non essere visualizzati correttamente. • Se si vede NO RADIO TEXT DATA sul display RT, significa che nessun dato RT è inviato dalla stazione di trasmissione. Il display passerà automaticamente sul display di dati PS (in assenza di dati PS, viene visualizzata la frequenza). • Sul display PTY, potrebbe apparire NO DATA. In questo caso, il display PS viene mostrato dopo qualche secondo. 3 RDS è possibile solo per la banda FM. 47 It VSX_916_Italian.fm Page 48 Friday, January 6, 2006 11:54 AM Se l’indicazione NO PTY appare sul display, ciò significa che il sintonizzatore non è stato in grado di trovare il tipo del programma nel momento della ricerca.1 Utilizzo della funzione EON Quando è attivata la funzione EON (Enhanced Other Network information), il ricevitore salta ad una trasmissione collegata ad EON appena inizia, anche se usate una funzione diversa da quella del sintonizzatore. Non lo si può usare in aree dove non sono trasmesse le informazioni EON e quando le stazioni FM non trasmettono i dati PTY. Quando termina la trasmissione, il sintonizzatore ritorna alla frequenza o funzione originale. 1 Premere il tasto FM per selezionare la banda FM.2 2 Premere EON (EON MODE) per selezionare una delle modalità possibili. Premere ripetutamente per commutare tra: • EON TA (Traffic Announcement) – Imposta il sintonizzatore per ricevere le trasmissioni sul traffico quando queste sono trasmesse. • EON NEWS – Imposta il sintonizzatore per ricevere le notizie quando queste sono trasmesse. • OFF – Cambia alla funzione EON. Quando è impostata la funzione TA o NEWS, l’indicatore EON s’illumina sul display (lampeggia alla ricezione di una trasmissione EON).3 L’indicatore s’illumina sul display quando la stazione corrente esegue il servizio EON.4 Nota 1 Il sistema RDS effettua la ricerca solo delle stazioni di preselezione. Se nessuna stazione è stata preselezionata o se il tipo del programma non è stato trovato tra le stazioni di preselezione, l’indicazione NO PTY appare sul display. FINISH significa che è stata completata la ricerca. 2 EON è possibile solo nella banda FM. 3 Non è possibile localizzare annunci sul traffico e notizie allo stesso tempo. 4 • Non è possibile usare i tasti TUNER EDIT e PTY SEARCH mentre è illuminato l’indicatore EON sul display. • Se desiderate cambiare ad una funzione che non sia quella del sintonizzatore quando l’indicatore EON sta lampeggiando, premere su EON per disattivare EON. 48 It VSX_916_Italian.fm Page 49 Friday, January 6, 2006 11:54 AM Capitolo 10: Come fare le registrazioni TV CH VOL 5 Avviare la registrazione, poi avviare la riproduzione del componente fonte.1 Nederlands INPUT SELECT TV VOL Vedere le istruzioni in dotazione con il registratore se non si sa come procedere. La maggior parte dei videoregistratori impostano il livello di registrazione dell’audio automaticamente—controllare il manuale delle istruzioni per ulteriori chiarimenti. Italiano Per registrare una fonte video, è necessario usare lo stesso tipo di collegamento sia per la fonte sia per il registratore. Per esempio, non è possibile effettuare una registrazione su un componente collegato alle prese S-video con un registratore collegato alle uscite video composte (vedi a pagina 16 per ulteriori informazioni sui collegamenti video). 4 Preparare il registratore. Inserire una cassetta, un MD o una videocassetta vergine nel dispositivo di registrazione ed impostare i livelli di registrazione. Français Non dimenticare che non è possibile fare una registrazione digitale da una fonte analogica o viceversa, assicurarsi che i componenti usati per la registrazione siano collegati nella stessa maniera (vedi Collegamento a pagina 12 per ulteriori informazioni sui collegamenti). 3 Preparare la fonte da registrare. Sintonizzare la stazione radio, inserire il CD, la videocassetta, il DVD ecc. Deutsch E’ possibile fare una registrazione audio o video dal sintonizzatore incorporato o da un’altra fonte audio o video collegata al ricevitore (ad esempio un lettore CD o un televisore). English Come fare una registrazione audio o video 2 Selezionare il segnale d’ingresso (se necessario). Premere SIGNAL SEL per selezionare il segnale d’ingresso corrispondente al componente fonte (vedi pagina 33 per ulteriori informazioni). SYSTEM OFF INPUT RECEIVER SELECT SOURCE A REC MUTE AV PRE-PROGRAMMED AND LEARNING REMOTE CONTROL UNIT MPX B EON REC STOP JUKEBOX C D AUDIO SUBTITLE DISP DVD CH CH STEREO AUTO SURR Español STANDARD ADV.SURR E HDD MULTI OPE S.RETRIEVER ACOUSTIC EQ SIGNAL SEL DVD CD TV DVR CD-R/TAPE USB FM AM SLEEP SB h TV CTRL SHIFT EFFECT/CH SEL RECEIVER ANALOG 1 Selezionare la fonte da registrare. Usare i tasti MULTI CONTROL (o quelli INPUT SELECT). Nota 1 • Il volume, il bilanciamento, il tono (bassi, acuti, loudness) e gli effetti surround non influiscono sul segnale registrato. • Alcune fonti digitali sono protette contro la copiatura e possono essere registrate solo in modo analogico. • Alcune fonti video sono protette contro la copiatura. Non possono essere registrate. 49 It VSX_916_Italian.fm Page 50 Friday, January 6, 2006 11:54 AM Capitolo 11: Controllo del resto del sistema Come manovrare altri componenti Pioneer Impostazione del telecomando per manovrare altri componenti Molti componenti Pioneer sono dotati di prese SR CONTROL da usare per collegare i componenti in modo tale che si possa usare il sensore a distanza di un unico componente. Quando si usa un telecomando, il segnale di controllo passa lungo la catena al componente appropriato.1 Alla maggior parte dei componenti è possibile assegnare uno dei tasti MULTI CONTROL usando il codice di preselezione che il fabbricante del componente ha memorizzato nel telecomando. Osservare che se si usa questa funzione, assicurarsi di avere almeno una coppia di prese audio o video analogiche collegate ad un altro componente per motivi di messa a terra. Tuttavia, osservare che ci sono casi in cui solo certe funzioni sono manovrabili dopo aver assegnato il codice di preselezione appropriato, altrimenti i codici del fabbricante nel telecomando non funzioneranno per il modello usato.2 Nota CONTROL OUT IN CONTROL IN OUT Ricevitore Altri prodotti Pioneer Telecomando con terminali CONTROL • È possibile annullare o uscire dalle varie operazioni premendo e tenendo premuto RECEIVER per due secondi. Per ritornare indietro di un passo, premere RETURN. • Dopo un minuto d’inattività, il telecomando esce automaticamente dalla funzione. Collegare al terminale CONTROL degli altri prodotti Pioneer Nota 1 • Se desiderate controllare tutti i componenti usando il telecomando di questo ricevitore, vedi a Controllo del resto del sistema a pagina 50. • Se è stato collegato un telecomando alla presa CONTROL IN (usando un cavo con lo spinotto mini), non sarà possibile manovrare quest’unità usando il sensore a distanza. 2 • I codici TV (ad esempio i codici TV, CATV o TV via satellite) possono essere assegnati solo al tasto TV/SAT o TV CTRL. • Se assegnate la funzione AM o FM ad un altro componente, bisogna riassegnarlo al codice di preselezione Pioneer per poter usare il sintonizzatore incorporato di questo ricevitore. 50 It VSX_916_Italian.fm Page 51 Friday, January 6, 2006 11:54 AM Selezione diretta dei codici di preselezione RECEIVER SYSTEM OFF INPUT SELECT SOURCE SR+ DIALOG E D.ACCESS CLASS +10 DISC 7 Se il componente è manovrato in modo giusto, premere ENTER per conferma. L’indicazione OK appare sul display LCD del telecomando. English AV PRE-PROGRAMMED AND LEARNING REMOTE CONTROL UNIT MIDNIGHT/ LOUDNESS DIMMER Per provare il telecomando, accendere o spegnere il componente (nella modalità d’attesa) premendo SOURCE . Se sembra non funzionare, selezionare il codice successivo dalla lista (se disponibile). ENTER MENU TOP MENU TUNE DVD DVR CD-R/TAPE USB FM AM ST TV CTRL ST ENTER SETUP CD RECEIVER GUIDE SLEEP SB ch PTY SEARCH T.EDIT RETURN TUNE TV CONTROL ANALOG ATT TV VOL INPUT SELECT TV CH VOL 2 Usare / per selezionare PRESET, poi premere ENTER. 5 Usare / per selezionare il nome del fabbricante dalla lista, poi premere ENTER. 2 Usare / per selezionare LEARNING, poi premere ENTER. 3 Premere il tasto MULTI CONTROL relativo al componente che si desidera manovrare, quindi premere ENTER. Il LCD visualizza il componente da manovrare.2 PRES KEY appare sul display LCD. Español 6 Usare / per selezionare il codice giusto dalla lista, poi cercare di usare questo telecomando con il componente. Il codice deve cominciare con il tipo del componente (ad esempio, DVD 009). Se c’è più di un nome, iniziare con il primo nome. 1 Mentre si preme il tasto RECEIVER, premere il tasto SETUP. L’indicazione SETUP appare sul display LCD del telecomando. Nederlands 4 Usare / per selezionare la prima lettera della marca del componente, poi premere ENTER. Questo deve essere il nome del fabbricante (ad esempio, P per Pioneer). Italiano 3 Premere il tasto MULTI CONTROL relativo al componente che si desidera manovrare, quindi premere ENTER. Il LCD visualizza il componente da manovrare.1 Se il codice di preselezione del componente non è disponibile o i codici di preselezione disponibili non funzionano correttamente, si possono programmare i segnali da un telecomando di un altro componente. Questa procedura può essere usata anche per programmare altre funzioni (tasti non inclusi nelle preselezioni) dopo aver assegnato un codice di preselezione. Français 1 Mentre si preme il tasto RECEIVER, premere il tasto SETUP. L’indicazione SETUP appare sul display LCD del telecomando. Programmazione dei segnali provenienti dagli altri telecomandi Deutsch TV 4 Puntare i due telecomandi l’uno verso l’altro, poi premere il tasto che invierà il segnale al telecomando di questo ricevitore. PRES KEY inizia a lampeggiare per indicare che il telecomando è pronto per accettare il segnale. Nota 1 Non è possibile assegnare il tasto RECEIVER. 2 • Non è possibile assegnare il tasto RECEIVER. • I tasti TV CONTROL (TV, TV VOL +/–, TV CH +/– e INPUT SELECT) possono essere selezionati solo dopo aver selezionato TV CONT. 51 It VSX_916_Italian.fm Page 52 Friday, January 6, 2006 11:54 AM 6 Per programmare altri segnali per il componente corrente, ripetere i passi 4 e 5. Per programmare i segnali per altri componenti, uscire e ripetere i passi da 1 a 5. RECEIVER SLEEP CH MUTE EFFECT DVD HDD CH LEVEL STEREO DTV INFO REC STOP REC TEST TONE CHSELECT CH RETURN SUBTITLE RECEIVER CONTROL ADV.SURR SHIFT MPX AUDIO MIDNIGHT/ LOUDNESS TUNER DISPLAY STANDRAD DTV ON/OFF DISC RETURN VOL CLASS MENU SETUP ENTER TUNE TUNE TV CH TVVOL T.EDIT D.ACCESS TOP MENU GUIDE DTV MENU ST INPUT SELECT TV CONTROL ST TV CONT RECEIVER ENTER SR TUNER FL DIMMER CD-R/TAPE +10 CD INPUT ATT SOURCE DVR/VCR DVD/LD TV/SAT INPUT RECEIVER SELECT MULTI CONTROL 2 cm a 5 cm MCACC SETUP BAND • I telecomandi devono rimanere ad una distanza di 2 cm a 5 cm l’uno dall’altro. 5 Premere il tasto corrispondente sull’altro telecomando che trasmette il segnale al telecomando di questo ricevitore. Per esempio, per memorizzare il segnale di controllo della riproduzione, premere e mantenere premuto per alcuni secondi. L’indicazione OK apparirà sul display LCD se l’operazione è riuscita. Se l’operazione non riesce per qualche motivo, l’indicazione ERROR apparirà brevemente sul display LCD e poi riapparirà PRES KEY. In tal caso, continuare a premere il tasto (memorizzazione) per variare la distanza tra i due telecomandi finché l’indicazione OK non apparirà sul display LCD.1 Certi tasti rappresentano operazioni che non si possono memorizzare da altri telecomandi. I tasti disponibili sono visualizzati qui sotto: Cancellazione di una delle impostazioni del tasto del telecomando Questa procedura cancella un controllo assegnato a uno dei tasti e ripristina per il tasto le impostazioni predefinite. 1 Mentre si preme il tasto RECEIVER, premere il tasto SETUP. L’indicazione SETUP appare sul display LCD del telecomando. 2 Usare / per selezionare ERASE, poi premere ENTER. Il LCD del telecomando visualizza il componente. 3 Premere il tasto MULTI CONTROL corrispondente all’impostazione del tasto che si desidera cancellare, quindi premere ENTER. Sul display LCD del telecomando viene visualizzata l’indicazione PRES KEY. SYSTEM OFF INPUT RECEIVER SELECT 7 Premere e tenere premuto il tasto RECEIVER per due secondi per uscire e memorizzare l’operazione o le operazioni. SOURCE AV PRE-PROGRAMMED AND LEARNING REMOTE CONTROL UNIT GUIDE TV CONTROL INPUT SELECT TV VOL TV DVR CD-R/TAPE USB FM AM DVD CD A RECEIVER SLEEP SB ch ANALOG ATT SR+ DIMMER MIDNIGHT/ LOUDNESS B REC EON REC STOP JUKEBOX C CLASS +10 D AUDIO SUBTITLE DISP STANDARD ADV.SURR DIALOG E DVD CH CH STEREO AUTO SURR MULTI OPE S.RETRIEVER ACOUSTIC EQ SIGNAL SEL SHIFT EFFECT/CH SEL TUNE SETUP GUIDE PTY SEARCH ENTER TUNE 4 Premere il tasto e mantenerlo premuto per due secondi per cancellare il contenuto. L’indicazione OK o NO CODE appare sul display per confermare l’avvenuta cancellazione del tasto. 5 Ripetere il passo 4 per cancellare altri tasti. DISC MENU ST E HDD ENTER TOP MENU ST VOL MUTE MPX D.ACCESS TV CH TV CTRL T.EDIT 6 Una volta terminato, premere e tenere premuto il tasto RECEIVER per due secondi. RETURN RECEIVER Nota 1 • Alcuni comandi provenienti da altri telecomandi non possono essere memorizzati, ma nella maggior parte dei casi, basta avvicinare o allontanare i telecomandi. • Se il LCD del telecomando visualizza ERROR, questo significa che la memoria è piena. Vedi a Programmazione dei segnali provenienti dagli altri telecomandi qui sotto per cancellare il tasto programmato non usato per liberare la memoria. 52 It VSX_916_Italian.fm Page 53 Friday, January 6, 2006 11:54 AM Cancellazione di tutte le preselezioni del telecomando 2 Usare / per selezionare DIRECT F , poi premere ENTER. 1 Mentre si preme il tasto RECEIVER, premere il tasto SETUP. L’indicazione SETUP appare sul display LCD del telecomando. 4 Usare / per ON o OFF l’interruttore direttamente poi premere ENTER. Il LCD mostra OK per confermare l’impostazione. 3 Tenere premuto il tasto ENTER per due secondi circa. Il LCD mostra OK per confermare l’avvenuta cancellazione delle preselezioni. 2 Usare / per selezionare READ ID, poi premere ENTER. 3 Premere il tasto MULTI CONTROL del componente per il quale desiderate controllare il codice di preselezione. Il nome della marca ed il codice di preselezione appaiono sul display per tre secondi. Nederlands Funzioni Multi Operation e System Off La funzione Multi Operation consente di programmare una serie di comandi (fino a 5) per i componenti del sistema. Ad esempio, è possibile accendere il televisore, accendere il lettore DVD e avviare la riproduzione del DVD caricato usando solo due tasti del telecomando. Analogamente a quanto avviene con la funzione operazioni multiple, System Off consente di usare un solo pulsante per interrompere e spegnere contemporaneamente una serie di componenti del sistema.2 Español 1 Mentre si preme il tasto RECEIVER, premere il tasto SETUP. L’indicazione SETUP appare sul display LCD del telecomando. 1 Mentre si preme il tasto RECEIVER, premere il tasto SETUP. L’indicazione SETUP appare sul display LCD del telecomando. Italiano • Impostazione standard: ON E’ possibile usare la funzione diretta per controllare un componente usando il telecomando, mentre si può usare allo stesso tempo il ricevitore per riprodurre un altro componente. “Questo vi dà la possibilità, per esempio, di usare il telecomando per impostare ed ascoltare un CD nel ricevitore e poi usare il telecomando per riavvolgere un nastro nel VCR mentre si continua ad ascoltare il suono del lettore CD. Quando la funzione diretta è attivata, un qualsiasi componente selezionato (usando i tasti MULTI CONTROL) verrà selezionato sia dal ricevitore e dal telecomando. Quando si spegne la funzione diretta, è possibile manovrare il telecomando senza influire sul ricevitore.1 Usare questa funzione per controllare quale codice di preselezione è stato assegnato ad un tasto MULTI CONTROL. Français Funzione diretta Conferma dei codici di preselezione Deutsch 2 Usare / per selezionare RESET, poi premere ENTER. English Questa procedura cancella tutti i codici di preselezione impostati sul telecomando. 3 Premere il tasto MULTI CONTROL relativo al componente che si desidera manovrare, quindi premere ENTER. Il LCD visualizza il componente da manovrare. Nota 1 Non è possibile usare la funzione diretta con la funzione TV CTRL. 2 • Per il corretto funzionamento delle opzioni Multi Operation e System Off, è necessario impostare il telecomando in modo che possa funzionare con il televisore e altri componenti (vedere Impostazione del telecomando per manovrare altri componenti a pagina 50 per altri dettagli). • Alcune unità possono richiedere una certa quantità di tempo per accendersi; in tal caso non è possibile eseguire operazioni multiple. • I comandi di accensione e spegnimento funzionano solo con i componenti che dispongono della modalità di riposo. 53 It VSX_916_Italian.fm Page 54 Friday, January 6, 2006 11:54 AM Programmazione di un’operazione multipla o di una sequenza di spegnimento 7 Selezionare il tasto relativo al comando che si desidera inserire. È possibile selezionare i seguenti comandi del telecomando: DIALOG E SYSTEM OFF INPUT RECEIVER SELECT SOURCE D.ACCESS CLASS +10 DISC ENTER AV PRE-PROGRAMMED AND LEARNING REMOTE CONTROL UNIT SYSTEM OFF INPUT RECEIVER SELECT SOURCE MENU TOP MENU AV PRE-PROGRAMMED AND LEARNING REMOTE CONTROL UNIT TUNE ST ST ENTER SETUP T.EDIT RETURN GUIDE TV CONTROL GUIDE PTY SEARCH TUNE TV CONTROL DVD CD TV DVR CD-R/TAPE USB FM AM TV VOL INPUT SELECT TV CH VOL TV DVR CD-R/TAPE USB FM AM DVD VOL RECEIVER TV CTRL A RECEIVER 1 Mentre si preme il tasto RECEIVER, premere SETUP. L’indicazione SETUP appare sul display LCD del telecomando. 2 Usare i tasti / per selezionare MULTI OP o SYS OFF dal menu principale, quindi premere ENTER. Se si è selezionata la funzione Multi Operation (MULTI OP), il display LCD del telecomando richiede di premere un tasto relativo alla sorgente di ingresso. Se si è selezionata la funzione System Off (SYSOFF), passare al punto 4. 3 Premere il tasto relativo alla sorgente di ingresso per il componente che dovrà avviare l’operazione multipla, quindi premere ENTER. Ad esempio, se si desidera avviare la sequenza accendendo il lettore DVD, premere DVD. 4 Usare i tasti / per selezionare CODE EDT, quindi premere ENTER. Per cancellare le operazioni multiple (o le sequenze di spegnimento) memorizzate in precedenza, selezionare CODE ERS in alto. 5 Usare i tasti / per selezionare un comando della sequenza, quindi premere ENTER. Se si tratta del primo comando della sequenza, selezionare 1ST CODE. Altrimenti è sufficiente selezionare il comando successivo della sequenza. L’indicazione PRES KEY lampeggia dopo aver premuto ENTER. 6 Se necessario, premere il tasto relativo alla sorgente di ingresso per il componente per il quale si desidera inserire il comando. Questa operazione è necessaria solo se il comando si riferisce a un nuovo componente (sorgente di ingresso). SLEEP SB ch ANALOG ATT SR+ DIMMER MIDNIGHT/ LOUDNESS B EON REC STOP JUKEBOX C CLASS +10 D AUDIO SUBTITLE DISP STANDARD ADV.SURR DIALOG E D.ACCESS REC MUTE MPX It TV CH TV CTRL CD 54 INPUT SELECT TV VOL E HDD DVD CH CH STEREO AUTO SURR MULTI OPE S.RETRIEVER ACOUSTIC EQ SIGNAL SEL DISC ENTER SHIFT EFFECT/CH SEL MENU TOP MENU TUNE ST SETUP GUIDE PTY SEARCH ST ENTER TUNE T.EDIT RETURN RECEIVER • Non è necessario programmare il ricevitore per l’accensione o lo spegnimento. Questa operazione viene eseguita automaticamente. Con i componenti Pioneer, non è necessario: • programmarne lo spegnimento in una sequenza di spegnimento (ad eccezione dei DVD recorder); • programmarne l’accensione qualora si tratti del componente sorgente selezionato al punto 3; • programmare l’accensione di un televisore o di un monitor Pioneer se la sorgente di ingresso (selezionata al punto 2) dispone di terminali di ingresso video; Queste operazioni hanno la priorità in caso di operazioni multiple (non nello spegnimento programmato). 8 Ripetere le istruzioni dei punti 5–7 per programmare una sequenza composta da un massimo di cinque comandi. 9 Una volta terminato, usare i tasti / per selezionare EDITEXIT dal menu, quindi premere ENTER. La schermata ritorna al menù SETUP del telecomando. Selezionare nuovamente * EXIT * per uscire. VSX_916_Italian.fm Page 55 Friday, January 6, 2006 11:54 AM Uso delle operazioni multiple È possibile avviare le operazioni multiple con il ricevitore acceso o in modalità di riposo. STANDARD ADV.SURR STEREO AUTO SURR Uso della funzione System off SYSTEM OFF INPUT RECEIVER SELECT SOURCE STANDARD ADV.SURR STEREO AUTO SURR MULTI OPE S.RETRIEVER ACOUSTIC EQ SIGNAL SEL AV PRE-PROGRAMMED AND LEARNING REMOTE CONTROL UNIT SHIFT EFFECT/CH SEL MULTI OPE S.RETRIEVER ACOUSTIC EQ SIGNAL SEL English SHIFT EFFECT/CH SEL RECEIVER DVD TV DVR TV CTRL RECEIVER 2 Premere SOURCE. La sequenza di comandi programmata viene eseguita, quindi tutti i componenti Pioneer si spengono1, seguiti dal ricevitore. Français 2 Premere un pulsante relativo a una sorgente di ingresso impostata per un’operazione multipla. Il ricevitore si accende (se era in modalità di riposo) e l’operazione multipla programmata viene eseguita automaticamente. 1 Premere MULTI OPE. Sul display lampeggia l’indicazione MULTI OP . Deutsch 1 Premere MULTI OPE. Sul display lampeggia l’indicazione MULTI OP . Controlli per TV Italiano Questo telecomando è in grado di manovrare i componenti dopo aver inserito i codici giusti o memorizzato i comandi nel ricevitore (vedi a Come manovrare altri componenti Pioneer a pagina 50 per ulteriori istruzioni su come procedere). Usare i tasti MULTI CONTROL per selezionare il componente. Funzione Componenti TV Premere questo per accendere o spegnere il componente TV via cavo/TV satellitare/TV assegnato al tasto TV CONT. INPUT SELECT Commuta l’ingresso TV. (Non possibile con tutti i modelli.) TV TV CH +/– Seleziona i canali. TV via cavo/TV satellitare/TV TV VOL +/– Regola il volume del televisore. TV via cavo/TV satellitare/TV Español Tasto Nederlands • I tasti TV CONTROL sul telecomando sono riservati per manovrare il televisore assegnato al tasto TV CTRL. Se possedete due televisori, assegnare il televisore principale al tasto TV CTRL. SOURCE Premere questo per accendere o spegnere il componente TV via cavo/TV satellitare/TV assegnato al tasto TV CTRL. Usato per scegliere i comandi ‘A’ del menù di un televisore TV via satellite via satellite. Usato per scegliere i comandi RED/B del menù di un televisore via satellite o un televisore normale. TV via satellite/TV Nota 1 Per evitare lo spegnimento accidentale di un DVD recorder che sta eseguendo una registrazione, non viene inviato alcun codice di spegnimento per il DVD recorder. 55 It VSX_916_Italian.fm Page 56 Friday, January 6, 2006 11:54 AM Tasto Funzione Componenti Usato per scegliere i comandi CYAN/E del menù di un televisore via satellite o un televisore normale. TV via satellite/TV Usato per scegliere i comandi GREEN/C del menù di un televisore via satellite o un televisore normale. TV via satellite/TV Usato per scegliere i comandi YELLOW/D del menù di un televisore via satellite o un televisore normale. TV via satellite/TV AUDIO Usato per commutare i brani audio. TV via satellite/TV GUIDE Usare come tasto GUIDE per la navigazione. TV via cavo/TV satellitare/TV Attiva TEXT OFF per i televisori. TV RETURN Usato per selezionare RETURN o EXIT. TV via satellite/TV Tasti numerici Usati per selezionare un canale televisivo specifico. TV via cavo/TV satellitare/TV Tasto +10 Usato per aggiungere un punto decimale alla selezione di TV via cavo/TV satellitare/TV un canale televisivo specifico. ENTER/ DISC Usato per inserire un canale. TV via cavo/TV satellitare/TV MENU Seleziona lo schermo del menù. TV via cavo/TV satellitare/TV & Premere questo tasto per selezionare o regolare e navigare TV via cavo/TV satellitare/TV ENTER tra le voci sullo schermo del menù. TOP MENU Attiva TEXT ON per i televisori. 56 It TV VSX_916_Italian.fm Page 57 Friday, January 6, 2006 11:54 AM Come manovrare altri componenti Questo telecomando è in grado di manovrare i componenti dopo aver inserito i codici giusti o memorizzato i comandi nel ricevitore (vedi a Come manovrare altri componenti Pioneer a pagina 50 per ulteriori istruzioni su come procedere). Usare i tasti MULTI CONTROL per selezionare il componente. Funzione SOURCE Premere questo per commutare il componente tra la modalità d’attesa e accensione. Lettore CD/MD/CD-R/VCR/ DVD/LD/ DVR/Piastra a cassette Premere per tornare all’inizio del brano corrente. Lettore CD/MD/CD-R/DVD/ Premendo ripetutamente si salta all’inizio dei brani precedenti. LD Ritornare ai canali (canale –). Componenti DVR/VCR Lettore CD/MD/CD-R/VCR/ DVD/LD/ DVR/Piastra a cassette Avviare la riproduzione. Lettore CD/MD/CD-R/VCR/ DVD/LD/ DVR/Piastra a cassette Mantenerlo premuto per una riproduzione ad avanzamento rapido. Lettore CD/MD/CD-R/VCR/ DVD/LD/ DVR/Piastra a cassette Mantenerlo premuto per una riproduzione rapida all’indietro. Lettore CD/MD/CD-R/VCR/ DVD/LD/ DVR/Piastra a cassette Ferma la riproduzione (in alcuni modelli, la pressione di questo mentre il disco è fermo, causa l’apertura del piatto portadischi). Lettore CD/MD/CD-R/VCR/ DVD/LD/ DVR/Piastra a cassette REC (SHIFT+) Avvio della registrazione. Per prevenire eventuali Lettore MD/CD-R/VCR/ DVR registrazioni accidentali, occorre premere il tasto due volte player/Piastra a cassette per attivarne gli effetti. REC STOP (SHIFT+) Interruzione della registrazione. JUKEBOX Passaggio alla funzione Jukebox. (SHIFT+) Tasto +10 Español Mette in pausa la riproduzione o la registrazione. Nederlands Italiano VCR Français Premere per avanzare fino all’inizio del brano successivo. Lettore CD/MD/CD-R/DVD/ Premendo ripetutamente si salta all’inizio dei brani successivi. LD Procedere tra i canali (canale +). Tasti numerici Deutsch English Tasto Lettore DVR Lettore DVR Per accedere direttamente ai brani della fonte del programma. Lettore CD/MD/CD-R/VCR/ LD Usare i tasti numerici per navigare sul display dello schermo. Lettore DVD/DVR Seleziona i brani superiori a 10. (Per esempio, premere +10 poi 3 per selezionare il brano 13). Lettore CD/MD/CD-R/VCR/ LD 57 It VSX_916_Italian.fm Page 58 Friday, January 6, 2006 11:54 AM Tasto Funzione Componenti ENTER/ Sceglie il disco. Multilettore CD Espelle il disco. Lettore MD Usato come tasto ENTER. VCR Usato come tasto CLEAR. DVD Visualizza lo schermo d’impostazione dei lettori DVR. Lettore DVR Cambia il lato del LD. Lettore LD DISC TOP MENU Visualizza il menù ‘top’ di un DVD. Lettore DVD/DVR MENU Visualizza i menu relativi al DVD o DVR in uso. Lettore DVD/DVR Mette in pausa il nastro. Piastra a cassette Ferma il nastro. Piastra a cassette ENTER Avvia la riproduzione. Piastra a cassette / Riavvolge/avanza il nastro rapidamente. Piastra a cassette & Naviga tra il menù e le opzioni del DVD. Lettore DVD/DVR ENTER GUIDE Premere questo per accedere allo schermo d’impostazione del lettore DVD. Lettore DVD/DVR CH +/– Seleziona i canali. Lettore VCR/DVD/DVR Seleziona i brani. CD/MD/CD-R/Piastra a cassette AUDIO Cambia la lingua audio o il canale. Lettore DVD/DVR SUBTITLE Visualizza/cambia i sottotitoli dei DVD multilingue. Lettore DVD/DVR HDD (SHIFT Cambia ai controlli del disco fisso quando usate un + CH–) registratore DVD/HDD. Lettore DVR DVD (SHIFT Cambia ai controlli DVD quando usate un registratore Lettore DVR + CH+) DVD/HDD. 58 It VSX_916_Italian.fm Page 59 Friday, January 6, 2006 11:54 AM Capitolo 12: Altri collegamenti • Prima di fare o cambiare i collegamenti, spegnere la corrente e scollegare il cavo d’alimentazione dalla presa murale. Il collegamento dei componenti deve essere l’ultimo collegamento fatto nel sistema. PTY SEARCH TUNING / STATION TUNER EDIT MIDNIGHT/ LOUDNESS SPEAKERS TONE QUICK SETUP SETUP RETURN MULTI JOG Premerlo ripetutamente per scegliere tra le opzioni del sistema di altoparlanti: Español 1 Collegare una coppia di altoparlanti ai terminali degli altoparlanti surround posteriori sul pannello posteriore. Collegarli come sono stati collegati gli altoparlanti in Collegamento degli altoparlanti a pagina 19. Assicurarsi di leggere Suggerimenti per l’ubicazione degli altoparlanti a pagina 20 in un’altra stanza. EON MODE Nederlands Dopo aver selezionato Second Zone in Impostazione dell’altoparlante surround posteriore a pagina 36, è possibile usare gli altoparlanti collegati ai terminali degli altoparlanti B (surround posteriori) sul pannello posteriore per ascoltare la riproduzione stereo in un’altra stanza. Vedi a Commutazione del sistema degli altoparlanti sottoper ulteriori informazioni sulle opzioni d’ascolto di quest’impostazione. • Usare il tasto SPEAKERS sul pannello anteriore per selezionare un’impostazione del sistema di altoparlanti. Italiano Impostazione dell’altoparlante B Second Zone Se si è selezionato Second Zone in Impostazione dell’altoparlante surround posteriore a pagina 36, è possibile impostare tre sistemi di altoparlanti mediante il tasto SPEAKERS. Se si è selezionato Normal (SB) o Front Bi-Amp, il sistema di altoparlanti è fisso e corrisponde rispettivamente a SPA o SPAB. Le opzioni che seguono sono valide solo per l’impostazione di Second Zone.1 Français • E’ possibile usare altoparlanti con un’impedenza nominale compresa tra 6 Ω a 16 Ω (vedi a Commutazione dell’impedenza dell’altoparlante a pagina 68 per usare altoparlanti con un’impedenza inferiore ad 8 Ω). Commutazione del sistema degli altoparlanti Deutsch • Non far entrare a contatto tra loro i fili degli altoparlanti provenienti da terminali differenti. 2 Selezionare ‘Second Zone’ dal menu ‘Surr Back System’. Consultare Impostazione dell’altoparlante surround posteriore a pagina 36. English Attenzione • SPA – L’emissione audio avviene dagli altoparlanti collegati ai terminali degli altoparlanti A (è possibile ottenere la riproduzione multicanale). • SPB – L’emissione audio avviene dagli altoparlanti collegati ai terminali degli altoparlanti B (è possibile ottenere la riproduzione multicanale). Nota 1 • L’uscita subwoofer dipende dalle impostazioni effettuate in Impostazione degli altoparlanti a pagina 42. Tuttavia, se si è selezionato SPB qui sopra, il subwoofer non riproduce l’audio (il canale LFE non viene sottoposto a downmixing). • L’uscita dai terminali di preuscita surround può variare a seconda delle configurazioni effettuate in Impostazione dell’altoparlante surround posteriore a pagina 36. • Tutti i sistemi di altoparlanti (ad eccezione dei collegamenti Second Zone) vengono disattivati al collegamento delle cuffie. 59 It VSX_916_Italian.fm Page 60 Friday, January 6, 2006 11:54 AM • SPAB – Il suono viene emesso dal sistema di altoparlanti A (fino a 5 canali, secondo la fonte), dai due altoparlanti nel sistema di altoparlanti B e dal subwoofer. Le sorgenti multicanale (che si ascoltano attraverso il sistema di altoparlanti A) vengono sottoposte a downmixing per l’uscita stereo dal sistema di altoparlanti B. Bi-amping degli altoparlanti anteriori Il bi-amping ha luogo quando si collegano il driver ad alta frequenza e il driver a bassa frequenza degli altoparlanti a più amplificatori (in questo caso, ai terminali anteriore e surround posteriore) per ottenere migliori prestazioni di crossover. Gli altoparlanti devono essere predisposti per questa modifica (dotati di terminali separati per i livelli alti e bassi) e il miglioramento sonoro dipende dal tipo di altoparlanti usati. 1 Collegare gli altoparlanti come segue. Quest’illustrazione mostra i collegamenti biamping dell’altoparlante anteriore sinistro. Collegare gli altoparlanti anteriori di destra nello stesso modo. Altoparlante sinistro anteriore S P E A K E R S R A FRONT LR SURROUND L CENTER R SURROUND BACK L B Hi Lo Poiché i terminali degli altoparlanti anteriori e surround posteriori emettono lo stesso audio, non importa quale terminale (anteriore o surround posteriore) alimenti quale parte (Hi o Low) dell’altoparlante. • Assicurarsi che i collegamenti + / – siano corretti. 60 It 2 Selezionare l’impostazione ’Front BiAmp’ dal menu ‘Surr Back System’. Vedi a Impostazione dell’altoparlante surround posteriore a pagina 36 per specificare come sono usati i terminali surround posteriori degli altoparlanti. Attenzione • La maggior parte degli altoparlanti dotati di terminali Hi e Low hanno due piastre di metallo che collegano i terminali Hi ai terminali Low. Questi vanno rimossi per il bi-amping degli altoparlanti, altrimenti si possono verificare gravi danni all’amplificatore. Vedere nel manuale dell’altoparlante per ulteriori informazioni. • Se gli altoparlanti sono dotati di una rete crossover removibile, assicurarsi di non rimuoverla per il bi-amping. Altrimenti si possono danneggiare gli altoparlanti. Bi-wiring degli altoparlanti I motivi del bi-wiring sono uguali a quelli del biamping, ma in più, gli effetti dell’interferenza all’interno del filo possono essere ridotti per generare un suono migliore. Per rendere possibile questo, gli altoparlanti devono essere predisposti (devono avere canali separati per le alte e le basse frequenze). Quando si esegue il bi-wiring, accertarsi di aver selezionato Normal (SB) o Second Zone in Impostazione dell’altoparlante surround posteriore a pagina 36. • Per collegare un altoparlante con biwiring, collegare due fili degli altoparlante al terminale dell’altoparlante posto sul ricevitore. VSX_916_Italian.fm Page 61 Friday, January 6, 2006 11:54 AM Attenzione • Assicurarsi di usare un collegamento parallelo (non di serie, che è comune) per il collegamento bi-wiring degli altoparlanti. Collegamento di altri amplificatori Se si dispone di un display al plasma Pioneer2, è possibile usare un cavo SR+ per collegarlo a questa unità e sfruttare varie comode funzioni, come ad esempio la commutazione automatica dell’ingresso video del display al plasma quando si cambia il dispositivo di ingresso. English • Non collegare altoparlanti diversi dallo stesso terminale in questo modo. Utilizzo di questo ricevitore con un display plasma della Pioneer Deutsch Français Questo ricevitore ha una potenza che è più che sufficiente per qualsiasi uso domestico, ma è possibile aggiungere amplificatori addizionali ad ogni canale del sistema usando delle uscite preliminari. Effettuare i collegamenti sotto per aggiungere altri amplificatori ed ottimizzare l’effetto degli altoparlanti.1 Display al plasma Pioneer Italiano • Prima di effettuare o modificare i collegamenti, spegnere la corrente e scollegare il cavo d’alimentazione dalla presa murale CA. Nederlands Questo ricevitore Español Nota 1 • È possibile usare un amplificatore addizionale nel canale surround posteriore anche per un unico altoparlante. In questo caso, bisogna collegare l’amplificatore solo al terminale sinistro (L (Single)). • Il suono che proviene dai terminali surround posteriori dipende da Impostazione dell’altoparlante surround posteriore a pagina 36. • Per ascoltare solo l’audio proveniente dalle uscite di preamplificazione, è sufficiente scollegare gli altoparlanti collegati direttamente al ricevitore. • Se non avete installato un subwoofer, cambiare l'impostazione degli altoparlanti anteriori (vedi Impostazione degli altoparlanti a pagina 42) a large. 2 Questo ricevitore è compatibile con tutti i display plasma Pioneer dal 2003 in poi. 61 It VSX_916_Italian.fm Page 62 Friday, January 6, 2006 11:54 AM • Usare un cavo SR+ dotato1 di spina mini a 3 anelli per collegare la presa CONTROL IN di questo ricevitore alla Presa CONTROL OUT del display plasma. Prima di poter usare le funzioni SR+ addizionali, bisogna fare alcune impostazioni nel ricevitore. Per istruzioni dettagliate consultare SR+ Setup per i display plasma della Pioneer a pagina 65. Uso della modalità SR+ con un display plasma della Pioneer Quando avete effettuato il collegamento usando un cavo SR+, una serie di funzioni diventano disponibili per poter usare questo ricevitore insieme al display plasma della Pioneer in maniera ancora più facile. Queste funzioni includono: • Display del volume sullo schermo. • Display del volume nella modalità d’ascolto. • Commutazione automatica dell’ingresso video sul display plasma. • Silenziamento automatico del volume sul display plasma.2 Consultare anche SR+ Setup per i display plasma della Pioneer a pagina 65 per ulteriori informazioni sulle impostazioni del ricevitore. SYSTEM OFF INPUT RECEIVER SELECT SOURCE AV PRE-PROGRAMMED AND LEARNING REMOTE CONTROL UNIT SLEEP SB ch ANALOG ATT SR+ DIMMER MIDNIGHT/ LOUDNESS DIALOG E D.ACCESS DVD CD TV DVR CD-R/TAPE USB FM AM CLASS +10 MENU TOP MENU TUNE RECEIVER ST SLEEP Per ottenere il massimo delle caratteristiche SR+, collegare i componenti fonte (lettore DVD; ecc.) in una maniera leggermente diversa rispetto alla descrizione in questo capitolo. Per ogni componente, bisogna collegare l’uscita video direttamente al display plasma e non solo collegare l’audio (analogico e/o digitale) a questo ricevitore. SB h ANALOG DISC ENTER TV CTRL ST T.EDIT ENTER 1 Assicurarsi che il display plasma e questo ricevitore siano accesi e collegati tramite il cavo SR+. Vedi a Utilizzo di questo ricevitore con un display plasma della Pioneer sopra per ulteriori informazioni al riguardo. 2 Per attivare/disattivare la modalità SR+, premere RECEIVER, poi premere il tasto SR+. L’indicazione SR+ ON o OFF appare sul display anteriore. Nota 1 • Il cavo SR+ a 3 anelli della Pioneer è venduto con il codice componente ADE7095. Rivolgersi al reparto Assistenza clienti della Pioneer per ulteriori informazioni su come ottenere un cavo SR+ (è possibile usare la spina del telefono mini a 3 anelli, venduta separatamente, per il collegamento). • Se collegate un display plasma della Pioneer usando un cavo SR+, dovete puntare il telecomando verso il sensore remoto del display plasma per manovrare il ricevitore. In questo caso, non sarà possibile manovrare il rievitore usando il telecomando se spegnete il display plasma. 2 La funzione di silenziamento automatico del volume è attivata separatamente; vedi a SR+ Setup per i display plasma della Pioneer a pagina 65. 62 It VSX_916_Italian.fm Page 63 Friday, January 6, 2006 11:54 AM Capitolo 13: Altre impostazioni 5a.Digital Input Setup 5.Input Assign a.Digital Input b.Component Input System Setup 5.Input Assign a.Digital Input b.Component Input : Exit :Return Assegnazione degli ingressi digitali • Impostazioni predefinite: ] ] ] :Finish :Return 2 Selezionare il numero dell’ingresso digitale al quale si è collegato il componente digitale. I numeri corrispondono ai numeri all’interno degli ingressi sul retro del ricevitore. 3 Selezionare il componente che corrisponde a quello collegato a quell’ingresso. Selezionare DVD, TV, CD, CD-R, DVR o OFF. • Usare i tasti / e ENTER per effettuare la selezione. • Se si assegna un ingresso digitale ad una certa funzione (ad esempio DVD/LD) gli ingressi digitali precedentemente assegnati a quella funzione si spegneranno automaticamente. 4 Al termine, premere RETURN. La schermata ritorna al menù Input Assign. Assegnazione degli ingressi del componente video • Impostazioni predefinite: Component 1 – DVD Component 2 – TV Component 3 – DVR Se per collegare l’ apparato video si sono utilizzati cavi video component, è necessario specificare al ricevitore di quale dispositivo si tratta; in caso contrario si potrebbe visualizzare un segnale S-video o video composito anziché il corretto segnale video component. Per ulteriori informazioni, vedi a Uso delle prese video componenti a pagina 17. 1 Selezionare ‘Component Input’ dal menù Input Assign. 5. Input Assign Español Coaxial - 1 (coassiale) – DVD Coaxial - 2 (coassiale) – DVR Optical - 1 (ottico) – CD Optical - 2 (ottico) – TV Questo è necessario solo se il componente digitale non è stato collegato secondo le impostazioni standard per gli ingressi digitali (vedi sopra). Quest’impostazione informa il ricevitore del componente digitale collegato al terminale affinché i tasti del telecomando corrispondano al collegamento. 1 Selezionare ‘Digital Input’ dal menu Input Assign. DVD DVR CD TV [ [ [ Nederlands 1.Surr Back System 2.Auto MCACC 3.Manual MCACC 4.Manual SP Setup 5.Input Assign 6.Other Setup 1 2 1 2 Italiano 2 Selezionare ‘Input Assign’ dal menù System Setup. - Français 1 Premere RECEIVER sul telecomando, poi premere il tasto SETUP. Sul televisore viene visualizzata una schermata. Usare i tasti /// ed ENTER sul telecomando per navigare attraverso le schermate e per selezionare le voci di menu. Premere RETURN per confermare ed uscire dal menù corrente. Coaxial Coaxial Optical Optical Deutsch Dovete solo fare le impostazioni nel menù Input Assign se non avete collegato il componente digitale in conformità con le impostazioni predefinite per gli ingressi digitali o se il componente è stato collegato usando i cavi video. English Menù Input Assign 5b.Component Input a.Digital Input b.Component Input :Return Component - 1 Component - 2 Component - 3 [ [ DVD TV DVR ] ] :Finish 63 It VSX_916_Italian.fm Page 64 Friday, January 6, 2006 11:54 AM • DRC Setup– Specificare la quantità della regolazione del campo dinamico da fare alle colonne sonore Dolby Digital (vedi a Impostazione di controllo della gamma dinamica sotto). • Dual Mono Setup – Isolare un canale quando si ascoltano i dischi con codifica dual mono (vedere Impostazione Dual Mono sotto). • LFE ATT Setup – Selezionare il livello dell’ attenuatore per il canale LFE (Impostazione LFE Attenuator a pagina 65). • SR+ Setup – Specificare la modalità di controllo desiderata per il display al plasma Pioneer (consultare di seguito SR+ Setup per i display plasma della Pioneer a pagina 65) 2 Selezionare il numero dell’ingresso video a cui è stato collegato il componente video. I numeri corrispondono ai numeri all’interno degli ingressi sul retro del ricevitore. 3 Selezionare il componente che corrisponde a quello collegato a quell’ingresso. Selezionare DVD, TV, DVR o OFF. • Usare i tasti / e ENTER per effettuare la selezione. • Assicurarsi di aver collegato l’audio dal componente agli ingressi posti sul retro del ricevitore. • Se si collega un componente sorgente al ricevitore attraverso un ingresso video component, anche il televisore deve essere collegato all’uscita video component MONITOR del ricevitore. 4 Al termine, premere RETURN. La schermata ritorna al menù Input Assign. 4 Effettuare le regolazioni necessarie per ciascun’impostazione, premendo RETURN come conferma dopo ogni schermata. Impostazione di controllo della gamma dinamica Menù Other Setup • Impostazione standard: OFF Il menu Other Setup consente di personalizzare le impostazioni secondo le proprie modalità di utilizzo del ricevitore. 1 Premere RECEIVER sul telecomando, poi premere il tasto SETUP. Sul televisore viene visualizzata una schermata. Usare i tasti /// ed ENTER sul telecomando per navigare attraverso le schermate e per selezionare le voci di menu. Premere RETURN per confermare ed uscire dal menù corrente. Quest’impostazione specifica la quantità delle regolazioni della quantità della gamma dinamica alle colonne sonore dei film Dolby Digital e DTS. Si può voler usare questa per ascoltare il suono surround ai bassi livelli di volume. 1 Selezionare ‘DRC Setup’ dal menu Other Setup. 6.Other Setup a.DRC b.Dual c.LFE d.SR + 2 Selezionare ‘Other Setup’ e premere ENTER. 6a.Dynamic Range Control Setup Mono Setup ATT Setup Setup DRC :Return OFF :Finish 6.Other Setup System Setup 1.Surr Back System 2.Auto MCACC 3.Manual MCACC 4.Manual SP Setup 5.Input Assign 6.Other Setup : Exit a.DRC b.Dual c.LFE d.SR + Setup Mono Setup ATT Setup Setup :Return 3 Selezionare l’impostazione da regolare. Se l’impostazione avviene per la prima volta, può essere utile effettuare le seguenti impostazioni in ordine: 2 Selezionare l’impostazione desiderata. • MAX – La gamma dinamica è ridotta (i suoni forti hanno un volume ridotto, mentre i suoni silenziosi sono aumentati). • MID – Impostazione media. • OFF – Nessuna regolazione della gamma dinamica (per ascoltare ad un alto livello del volume). 3 Al termine, premere RETURN. La schermata ritorna al menù Other Setup. 64 It VSX_916_Italian.fm Page 65 Friday, January 6, 2006 11:54 AM Impostazione Dual Mono • 3 Al termine, premere RETURN. La schermata ritorna al menù Other Setup. Impostazione standard: CH1 1 Selezionare ‘Dual Mono Setup’ dal menu Other Setup. 6b.Dual Mono Setup 6.Other Setup Setup Mono Setup ATT Setup Setup Dual Mono [ CH1 Assicurarsi di fare le seguenti impostazioni se è stato collegato un display plasma della Pioneer a questo ricevitore usando un cavo SR+. Si noti che la quantità di impostazioni disponibili dipende dal display al plasma in uso. Vedere anche Utilizzo di questo ricevitore con un display plasma della Pioneer a pagina 61. 1 Selezionare ‘SR+ Setup’ dal menù Other Setup. 6d.SR + Setup 6.Other Setup :Finish :Return 3 Al termine, premere RETURN. La schermata ritorna al menù Other Setup. Impostazione LFE Attenuator Alcune fonti audio Dolby Digital e DTS includono toni ultrabassi. Impostare l’attenuatore LFE nel modo necessario per prevenire l’eventuale distorsione dei toni ultrabassi provenienti dagli altoparlanti. 6c. LFE ATT Setup 6.Other Setup a.DRC b.Dual c.LFE d.SR + Setup Mono Setup ATT Setup Setup :Return 2 LFE ATT ATT 0dB :Finish Selezionare l’impostazione desiderata. • ATT 0dB – Nessuna limitazione (impostazione consigliata) • ATT 10dB – 10 dB di limitazione • LFE OFF – Nessun suono dal canale LFE 2 Selezionare l’impostazione desiderata per l’opzione ‘PDP Volume Control’. • OFF – Il ricevitore non controlla il volume del display plasma • ON – Quando il ricevitore viene commutato su uno degli ingressi che usano il display al plasma (DVD/LD, o un’altra delle funzioni che seguono), il volume del display al plasma viene silenziato in modo che si senta solo il suono emesso dal ricevitore. 3 Assegnare una fonte d’ingresso collegata al display plasma al numero dell’ingresso corrispondente. Questo fa corrispondere la fonte d’ingresso del ricevitore con un ingresso video numerato del display plasma. Ad esempio, assegnare DVD/LD a input-2 se si è collegata l’uscita video DVD all’ingresso 2 del display al plasma. • L’opzione Monitor Out Connect deve essere impostata sull’ingresso usato per collegare il ricevitore al display al plasma. 6d.SR + Setup PDP Volume Control [ ON ] PDP Input Select DVD/LD input-1 TV/SAT [ input-2 ] DVR [ input-3 ] VIDEO TV [ ] Monitor Out Connect [ OFF ] :Finish Español 1 Selezionare ‘LFE ATT Setup’ dal menù Other Setup. :Return PDP Volume Control OFF PDP Input Select DVD/LD [ input-1 ] TV/SAT [ input-2 ] DVR [ input-3 ] VIDEO [ TV ] Monitor Out Connect [ OFF ] :Finish Nederlands • Impostazione standard: ATT 0 dB Setup Mono Setup ATT Setup Setup Italiano Selezionare l’impostazione desiderata. • CH2 – Solo il canale 2 viene riprodotto • CH1 CH2 – Ambedue i canali sono riprodotti attraverso gli altoparlanti anteriori • CH1 – Solo il canale 1 viene riprodotto a.DRC b.Dual c.LFE d.SR + Français 2 Deutsch a.DRC b.Dual c.LFE d.SR + SR+ Setup per i display plasma della Pioneer English È possibile specificare la modalità di riproduzione delle colonne sonore con codifica dual mono Dolby Digital e DTS. Dual mono non è una funzione molto usata, ma a volte può essere utile quando due lingue vanno mandate a canali separati. 6d.SR + Setup PDP Volume Control [ ON ] PDP Input Select DVD/LD input-2 TV/SAT [ OFF ] DVR [ input-3 ] VIDEO TV [ ] Monitor Out Connect [ OFF ] :Finish 4 Al termine, premere RETURN. La schermata ritorna al menù Other Setup. 65 It VSX_916_Italian.fm Page 66 Friday, January 6, 2006 11:54 AM Capitolo 14: Informazioni addizionali Localizzazione dei guasti Le operazioni errate sono spesso interpretate come problemi o malfunzionamenti. Se si sospetta qualche problema nel componente, si prega di controllare i punti qui sotto. Esaminare gli altri componenti e apparati elettrici usati, poiché talvolta il problema può dipendere da essi. Se non è possibile risolvere il problema dopo aver effettuato i controlli elencati di seguito, rivolgersi al più vicino centro di assistenza autorizzato Pioneer per richiedere la riparazione. • Se l’unità non funziona in modo normale per via degli effetti esterni, quali l’elettricità statica, scollegare la spina d’alimentazione dalla presa murale e ricollegarla per ritornare alle normali condizioni d’uso. Problema Rimedio La corrente non si accende. • Scollegare la spina del cavo d’alimentazione dalla presa ed inseritela nuovamente. • Assicurarsi che non vi siano cavi scollegati di altoparlanti che toccano il pannello posteriore. Ciò potrebbe fare spegnere automaticamente il ricevitore. I ricevitore si spegne improvvisamente e la spia di accensione lampeggia. • Attendere circa un minuto (non è possibile accendere l’unità prima che sia trascorso un minuto), quindi accendere nuovamente il ricevitore. Se il messaggio persiste, rivolgersi a un centro di assistenza autorizzato Pioneer. Non viene emesso suono quando è selezionata una funzione. • Assicurarsi che il componente sia collegato correttamente (fare riferimento a Collegamento a pagina 12). • Premere MUTE sul telecomando per disattivare la funzione corrispondente. • Premere SPEAKERS per selezionare la coppia di altoparlanti giusta (vedi a Commutazione del sistema degli altoparlanti a pagina 59). • Premere SIGNAL SELECT per selezionare il segnale d’ingresso appropriato (vedi a Come scegliere il segnale d’ingresso a pagina 33). Non viene emessa alcuna • Assicurarsi che il componente sia collegato correttamente (fare riferimento a immagine quando si seleziona Collegamento a pagina 12). • Selezionare il componente corretto (usare i tasti di selezione di ingresso). una funzione. • Controllare Assegnazione degli ingressi del componente video a pagina 63 per assicurarsi di aver assegnato l’ingresso corretto. • L’ingresso video selezionato sul monitor TV è errato. Vedere nel manuale delle istruzioni in dotazione con il televisore. 66 It Nessun suono dal subwoofer. • Assicurarsi che il subwoofer sia acceso. • Se il subwoofer ha una manopola del volume, assicurarsi che il volume sia sufficientemente alto. • La fonte Dolby Digital o DTS che si sta ascoltando potrebbe non avere un canale LFE. • Commutare l’impostazione del subwoofer in Impostazione degli altoparlanti a pagina 42 su YES o PLUS. • Commutare Impostazione LFE Attenuator a pagina 65 su LFEATT 0 o LFEATT 10. Assenza di suono dagli altoparlanti surround o centrali. • Collegare correttamente gli altoparlanti (vedere pagina 19). • Consultare Impostazione degli altoparlanti a pagina 42 per controllare le impostazioni degli altoparlanti. • Fare riferimento Livello del canale a pagina 43 per controllare i livelli dell’altoparlante. VSX_916_Italian.fm Page 67 Friday, January 6, 2006 11:54 AM • Fare riferimento a Impostazione degli altoparlanti a pagina 42 per controllare le impostazioni dell’altoparlante posteriore surround. • Fare riferimento Livello del canale a pagina 43 per controllare i livelli dell’altoparlante. • Consultare Uso dell’elaborazione del canale posteriore surround a pagina 31 per accertarsi che l’elaborazione posteriore surround e la modalità del suono siano impostate nel modo corretto per il suono surround posteriore. Notevole rumore nelle trasmissioni radio. • Collegare l’antenna (pagina 18) e regolarne la posizione in modo da ottenere una ricezione ottimale. • Spostare i cavi scollegati dai terminali e dai fili dell’antenna. • Allungare completamente l’antenna FM a filo, posizionarla in modo da ottenere una ricezione ottimale e fissarla a una parete (oppure collegare un’antenna FM esterna). • Collegare un’antenna AM interna o esterna (fare riferimento a pagina 18). • Spegnere le apparecchiature che causano interferenze o posizionarli lontano dal ricevitore (oppure allontanare le antenne dalle apparecchiature che causano interferenze). Deutsch Rimedio Assenza di audio dagli altoparlanti surround posteriori. English Problema • Collegare un’antenna esterna (fare riferimento a pagina 18). Non è possibile selezionare automaticamente le stazioni di trasmissione. Français Rumore durante la riproduzione • Allontanare la piastra dal ricevitore finché non scompare il rumore. da una piastra a cassette. Italiano Viene emesso un suono da altri • Impostare SIGNAL SELECT su AUTO, DIGITAL o ANALOG a seconda del tipo di componenti, ma non dal lettore collegamenti fatti. (fare riferimento a pagina 33). • Impostare correttamente l’ingresso digitale (fare riferimento a pagina 63). LD o DVD. • Effettuare collegamenti digitali (fare riferimento a pagina 13) e impostare SIGNAL SELECT su DIGITAL (fare riferimento a pagina 33). • Vedere nel manuale delle istruzioni in dotazione con il lettore DVD. • Questo non è segno di malfunzionamento, ma assicurarsi di abbassare il volume per prevenire la riproduzione di un rumore forte dagli altoparlanti. Tutto sembra impostato correttamente, ma il suono di riproduzione è strano. • Verificare che i terminali positivo/negativo degli altoparlanti sul ricevitore corrispondano ai rispettivi terminali sugli altoparlanti (vedere Collegamento degli altoparlanti a pagina 19). Sembra che ci sia una differenza di tempo tra gli altoparlanti e l’uscita del subwoofer. • Vedere Impostazione automatica del suono surround (MCACC) a pagina 9 per impostare nuovamente il sistema usando MCACC (ciò compenserà automaticamente un ritardo nell’emissione del subwoofer). Español Quando viene effettuata la ricerca in riproduzione, il lettore CD DTS compatibile emette rumore. Nederlands Non viene emesso alcun suono • Impostare il livello del volume digitale del lettore al massimo o nella posizione neutra. o rumore alla riproduzione di • Assicurarsi che le impostazioni del lettore siano corrette e/o che l’uscita del software con DTS. segnale DTS sia accesa. Vedere nel manuale delle istruzioni in dotazione con il lettore DVD. • Impostare il tipo del segnale d’ingresso su DIGITAL (vedi a Come scegliere il segnale d’ingresso a pagina 33). Dopo aver usato la funzione Auto • Il rumore a bassa frequenza potrebbe essere stato causato da un condizionatore d’aria o da un motore. Spegnere tutti gli apparecchi nella stanza e riavviare la MCACC Setup, l’impostazione funzione Auto MCACC Setup. del formato dell’altoparlante (LARGE o SMALL) è errata. Il telecomando non funziona. • Sostituire le pile (fare riferimento a pagina 6). • Utilizzarlo entro 7 m e a un’angolazione di 30° rispetto al sensore (fare riferimento a pagina 27). • Spostare gli ostacoli o utilizzarlo da un’altra posizione. • Evitare l’esposizione alla luce diretta del sensore a distanza sul pannello anteriore. • Scollegare tutti i dispositivi collegati alla presa CONTROL IN usare normalmente il telecomando (consultare Come manovrare altri componenti Pioneer a pagina 50). 67 It VSX_916_Italian.fm Page 68 Friday, January 6, 2006 11:54 AM Problema Rimedio • Reinserire il cavo SR, assicurandosi di collegarlo alla presa destra (vedi a Utilizzo Il cavo SR è collegato, ma i componenti collegati non sono di questo ricevitore con un display plasma della Pioneer a pagina 61). manovrati con il telecomando. • Assicurarsi che ci sia un collegamento analogico tra le unità. • Questa funzione è disponibile solo con i prodotti Pioneer. Il display è scuro o spento. • Premere ripetutamente DIMMER sul telecomando per tornare all’impostazione predefinita. La schermata System Setup non viene visualizzata. • Mentre il ricevitore è in standby, passare a BURST.OFF tenendo premuto contemporaneamente ACOUSTIC EQ sul pannello frontale e STANDBY/ON (viene visualizzata l’impostazione corrente). Il dispositivo di archiviazione di • Provare a spegnere e riaccendere il ricevitore. • Accertarsi di aver inserito completamente il connettore USB nel ricevitore. massa USB non viene • Verificare che il formato della memoria sia FAT16 o FAT32 (i formati FAT12, NTFS e riconosciuto dal ricevitore. HFS non sono supportati). • I dispositivi USB dotati di hub USB interno non sono supportati. Quando si collega un dispositivo USB, sul display viene visualizzata l’indicazione USB ERR3 . • Se il messaggio continua ad apparire dopo aver eseguito tutti i controlli riportati in Importante a pagina 34 of Riproduzione USB, richiedere la riparazione dell’unità presso il centro di assistenza autorizzato Pioneer più vicino o rivolgersi al proprio rivenditore. I file audio non vengono riprodotti. • I file WMA o MPEG-4 AAC sono stati registrati usando la tecnologia DRM (digital rights management) oppure la velocità di bit/frequenza di campionamento non è compatibile (si veda Compatibilità dell’audio compresso a pagina 35). Ciò non è dovuto ad un guasto. Ripristino dell’unità principale Usare questa procedura per azzerare tutte le impostazioni del ricevitore ai valori di fabbrica. Usare i controlli sul pannello anteriore per effettuare questo. 1 Commutare il ricevitore nella modalità d’attesa. • SP 6 OHM – Usare quest’impostazione se gli altoparlanti hanno un valore nominale di 6 Ω. 2 Mantenendo premuto il tasto TONE, premere e mantenere premuto il tasto STANDBY/ON per tre secondi circa. • SP 8 OHM – Usare quest’impostazione se gli altoparlanti hanno un valore nominale di almeno 8 Ω. 3 Quando appare RESET? sul display, premere ENTER. OK? appare sul display. 4 Premere SETUP per conferma. Sul display viene visualizzata la dicitura OK, per indicare che sul ricevitore sono state ripristinate le impostazioni di fabbrica. Commutazione dell’impedenza dell’altoparlante Si raccomanda l’uso di altoparlanti 8 Ω con questo sistema, ma è possibile commutare l’impostazione dell’impedenza se intendete usare altoparlanti con un’impedenza nominale di 6 Ω. 68 It • Con il ricevitore nella modalità d’attesa, premere STANDBY/ON mantenendo premuto il tasto SPEAKERS. Ogni volta, si cambiano tra le impostazioni dell’impedenza: Modifica dell’impostazione del formato TV Se il menu System Setup non viene visualizzato correttamente, il sistema TV potrebbe non essere impostato correttamente per il paese o l’area geografica di utilizzo. • Con il ricevitore in modalità standby, premere STANDBY/ON tenendo premuto il tasto SIGNAL SELECT. Sul display viene visualizzata la nuova impostazione (PAL o NTSC). VSX_916_Italian.fm Page 69 Friday, January 6, 2006 11:54 AM • Sezione dell’amplificatore • Risposta di frequenza DVR/VCR, DVD/LD, TV/SAT MONITOR . . . . . . 5 Hz a 7 MHz dB Rapporto segnale/rumore . . . . . . . . . . . . . .55 dB Diafonia (crosstalk) . . . . . . . . . . . . . . . . . . .50 dB Specifiche Uscita di corrente continua (Stereo) Sezione Video Component • • Potenza in uscita (surround) Ingresso (Sensibilità) DVD/LD, TV/SAT, DVR/VCR . . . . . . . 1 Vp-p/75 Ω • Uscita (Livello/Impedenza) MONITOR OUT . . . . . . . . . . . . . . . . . 1 Vp-p/75 Ω • Deutsch Anteriore . . . . . . 100 W per canale (1 kHz, THD 1,0 %, 8 Ω) Centrale . . . . . . . 100 W (1 kHz, THD 1,0 %, 8 Ω) Surround . . . . . . . . . . . . . . . . . 100 W per canale (1 kHz, THD 1,0 %, 8 Ω) Posteriore surround . . . . . . . . 100 W per canale (1 kHz, THD 1,0 %, 8 Ω) English Anteriore. . . . 100 W (DIN 1kHz, THD 1,0 %, 8 Ω) Risposta di frequenza DVD/LD, TV/SAT, DVR/VCR MONITOR . . . 5 Hz a 40 MHz dB Rapporto segnale/rumore . . . . . . . . . . . . . .60 dB • Sezione del sintonizzatore FM Ingresso (Sensibilità/Impedenza) CD, DVR/VCR, CD-R/TAPE/MD, DVD/LD, TV/SAT. . . . . . . . . . . . . . . 200 mV/47 kΩ • Risposta di frequenza • dB Uscita (Livello/Impedenza) DVR/VCR REC, CD-R/TAPE/ MD REC . . . . . . . . . . . . . . . . . . . . .200 mV/2,2 kΩ Controllo del tono Bassi . . . . . . . . . . . . . . . . . . . . . . ± 6 dB (100 Hz) Alti. . . . . . . . . . . . . . . . . . . . . . . . .± 6 dB (10 kHz) Loudness . . . . . +10 dB/+5 dB (100 Hz/10 kHz) (a livello di volume –50 dB) CD, DVR/VCR, CD-R/TAPE/MD, DVD/LD, TV/SAT. . . . . . . . . . . . . . . . .88 dB/64 dB Sezione video • Ingresso (Sensibilità/Impedenza) DVR/VCR, DVD/LD, TV/SAT. . . . . . . . 1 Vp-p/75 Ω • Uscita (Livello/Impedenza) DVR/VCR, MONITOR OUT. . . . . . . . . 1 Vp-p/75 Ω Español • DIN rapporto segnale/rumore DIN (uscita di corrente continua nominale/50 mW) Nederlands • Gamma di frequenza . . . . . 87,5 MHz a 108 MHz Sensibilità utile . . . . . . . . . . . Mono:13,2 dBf, IHF (1,3 µV/ 75 Ω) 50 dB Sensibilità di silenziamento . . . . . . . . . . . . . . . . Mono: 20,2 dB Stereo: 38,6 dBf Rapporto segnale/rumore . . . . . . .Mono: 73 dB (a 85 dBf) Stereo: 70 dB (a 85 dBf) Distorsione . . . . . . . . . . . . . Stereo: 0,5 % (1 kHz) Selettività del canale alternativo . . . . . . . . .60 dB (400 kHz) Separazione stereo . . . . . . . . . . . . . 40 dB (1 kHz) Risposta di frequenza. . . . . . . . . . 30 Hz a 15 kHz (±1 dB) Ingresso dell’antenna (DIN). . . 75 Ω asimmetrico Italiano CD, DVR/VCR, CD-R/TAPE/MD, DVD/LD, TV/SAT . . . . . . . . . . . . . . 5 Hz a 100 000 Hz Français Sezione audio Sezione del sintonizzatore AM Risposta di frequenza. . . . . . .531 Hz a 1 602 kHz Sensibilità (IHF, antenna a telaio). . . . .350 µV/m Rapporto segnale/rumore . . . . . . . . . . . . . .50 dB Antenna . . . . . . . . . . . . . . . . . . . .Antenna a telaio Generalità Alimentazione . . . . AC 220 V a 230 V, 50 Hz/60 Hz Consumo corrente . . . . . . . . . . . . . . . . . . . 360 W Nella modalità d’attesa . . . . . . . . . . . . . .0,5 W Dimensioni . . . . . 420 (W) mm x 158 (H) mm x 352,5 (P) mm Peso (senza imballaggio). . . . . . . . . . . . . . 9,0 kg 69 It VSX_916_Italian.fm Page 70 Friday, January 6, 2006 11:54 AM Componenti in dotazione Microfoni (per l’impostazione Auto MCACC setup) . . . . . . . . . . . . . . . . . . . . . . . . . . . . . . . . . . Pile a secco (IEC R6, dimensione AA) . . . . . Telecomando . . . . . . . . . . . . . . . . . . . . . . . . . . . Antenna AM a telaio. . . . . . . . . . . . . . . . . . . . . . Antenna FM a filo . . . . . . . . . . . . . . . . . . . . . . . . Documento di garanzia . . . . . . . . . . . . . . . . . . . Queste istruzioni per l’uso 1 2 1 1 1 1 Nota • Le specifiche ed il design sono soggetti a possibili modifiche senza preavviso, per motivi di miglioramenti del prodotto. Precauzione riguardante il cavo d’alimentazione Maneggiare sempre il cavo d’alimentazione agendo per la spina. Non estrarre la spina tirando il cavo e non toccare mai il cavo d’alimentazione con le mani bagnate, altrimenti si può verificare un corto circuito o scosse elettriche. Non posizionare l’unità, un mobile, ecc., sul cavo d’alimentazione o premere il cavo stesso. Non annodare mai il cavo e non bisogna mai legare il cavo d’alimentazione insieme ad altri cavi. Far passare i cavi d’alimentazione in modo tale che non sia possibile calpestare gli stessi. Un cavo d’alimentazione danneggiato può causare un incendio o dare scosse elettriche. Controllare il cavo d’alimentazione ogni tanto. Se è danneggiato, chiedere di sostituirlo al più vicino centro di servizio o concessionario autorizzato Pioneer. Pulizia dell'unità • Usare un panno di pulizia o un panno asciutto per rimuovere le tracce di polvere e sporcizia. • Quando la superficie è sporca, strofinarla con un panno soffice inumidito con un detergente neutro diluito cinque o sei volte con acqua e ben strizzato, poi passare un panno asciutto sulla superficie. Non usare mai cera per mobili o prodotti di pulizia. • Non usare mai acquaragia, benzina, spray insetticida o altri prodotti chimici sopra o nelle vicinanze di quest'unità, poiché possono corrodere la superficie della stessa. 70 It VSX_916_Italian.fm Page 71 Friday, January 6, 2006 11:54 AM English Deutsch Français Italiano Nederlands Español 71 It VSX_916_Italian.fm Page 72 Friday, January 6, 2006 11:54 AM 72 It VSX_916_Italian.fm Page 73 Friday, January 6, 2006 11:54 AM English Deutsch Français Italiano Nederlands Español 73 It VSX_916_Italian.fm Page 74 Friday, January 6, 2006 11:54 AM Published by Pioneer Corporation. Copyright © 2005 Pioneer Corporation. All rights reserved. PIONEER CORPORATION 4-1, Meguro 1-Chome, Meguro-ku, Tokyo 153-8654, Japan PIONEER ELECTRONICS (USA) INC. P.O. BOX 1540, Long Beach, California 90810-1540, U.S.A. TEL: (800) 421-1404 PIONEER ELECTRONICS OF CANADA, INC. 300 Allstate Parkway, Markham, Ontario L3R OP2, Canada TEL: 1-877-283-5901 PIONEER EUROPE NV Haven 1087, Keetberglaan 1, B-9120 Melsele, Belgium TEL: 03/570.05.11 PIONEER ELECTRONICS ASIACENTRE PTE. LTD. 253 Alexandra Road, #04-01, Singapore 159936 TEL: 65-6472-7555 PIONEER ELECTRONICS AUSTRALIA PTY. LTD. 178-184 Boundary Road, Braeside, Victoria 3195, Australia, TEL: (03) 9586-6300 PIONEER ELECTRONICS DE MEXICO S.A. DE C.V. Blvd.Manuel Avila Camacho 138 10 piso Col.Lomas de Chapultepec, Mexico,D.F. 11000 TEL: 55-9178-4270 K002_A_En <05L00001> Printed in <XRE3117-A>