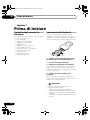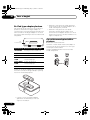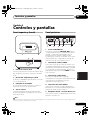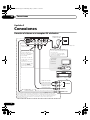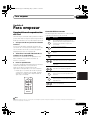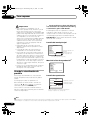
1
IDK-01.book 1 ページ 2006年5月17日 IDK-01 水曜日 午後1時55分 IDK-01.book 2 ページ 2006年5月17日 水曜日 午後1時55分 IMPORTANT CAUTION RISK OF ELECTRIC SHOCK DO NOT OPEN The lightning flash with arrowhead symbol, within an equilateral triangle, is intended to alert the user to the presence of uninsulated "dangerous voltage" within the product's enclosure that may be of sufficient magnitude to constitute a risk of electric shock to persons. CAUTION: TO PREVENT THE RISK OF ELECTRIC SHOCK, DO NOT REMOVE COVER (OR BACK). NO USER-SERVICEABLE PARTS INSIDE. REFER SERVICING TO QUALIFIED SERVICE PERSONNEL. The exclamation point within an equilateral triangle is intended to alert the user to the presence of important operating and maintenance (servicing) instructions in the literature accompanying the appliance. D3-4-2-1-1_En-A WARNING WARNING This equipment is not waterproof. To prevent a fire or shock hazard, do not place any container filed with liquid near this equipment (such as a vase or flower pot) or expose it to dripping, splashing, rain D3-4-2-1-3_A_En or moisture. To prevent a fire hazard, do not place any naked flame sources (such as a lighted candle) on the D3-4-2-1-7a_A_En equipment. This product complies with the EMC Directives (89/336/EEC, amended by 92/31/EEC and D3-4-2-1-9b_En 93/68/EEC). If you want to dispose this product, do not mix it with general household waste. There is a separate collection system for used electronic products in accordance with legislation that requires proper treatment, recovery and recycling. Private households in the 25 member states of the EU, in Switzerland and Norway may return their used electronic products free of charge to designated collection facilities or to a retailer (if you purchase a similar new one). For countries not mentioned above, please contact your local authorities for the correct method of disposal. By doing so you will ensure that your disposed product undergoes the necessary treatment, recovery and recycling and thus prevent potential negative effects on the environment and human health. K058_En AC adapter caution • Make sure to grasp the body of the AC adapter when removing it from the power outlet. If you pull the power cord, it may become damaged which could lead to fire and/or electrocution. • Do not attempt to plug in or remove the AC adapter with wet hands. This may result in electrocution. • Insert the prongs of the AC adapter all the way into the power outlet. If the connection is incomplete, heat may be generated which could lead to fire. Furthermore, contact with the connected prongs of the adapter may result in electrocution. • Do not insert the AC adapter into a power outlet where the connection remains loose despite inserting the prongs all the way into the outlet. Heat may be generated which could lead to fire. Consult with the retailer or an electrician regarding replacement of the power outlet. IDK-01.book 3 ページ 2006年5月17日 水曜日 午後1時55分 Thank you for buying this Pioneer product. Please read through these operating instructions so that you will know how to operate your model properly. After you have finished reading the instructions, put them in a safe place for future reference. English Contents Connecting the system to your AV receiver or TV . . . . . . . . . . . . . . . . . . . . . . . . . . 8 02 Controls and displays 05 Additional information Top and front panel . . . . . . . . . . . . . . . . . . . . . 7 Rear panel . . . . . . . . . . . . . . . . . . . . . . . . . . . . 7 Troubleshooting . . . . . . . . . . . . . . . . . . . . . . . 11 Specifications . . . . . . . . . . . . . . . . . . . . . . . . 11 Cleaning the unit . . . . . . . . . . . . . . . . . . . . . . 11 04 Getting started iPod playback features . . . . . . . . . . . . . . . . . . . 9 Using the on-screen display . . . . . . . . . . . . . . 10 Italiano Discover the benefits of registering your product online at www.pioneer.co.uk (www.pioneer-eur.com) Français 03 Connecting up Checking what’s in the box . . . . . . . . . . . . . . . 4 Inserting the battery . . . . . . . . . . . . . . . . . . . . 4 Range of the remote control unit . . . . . . . . . . . 5 Regarding interference with this unit . . . . . . . 5 Attaching the iPod type adapter . . . . . . . . . . . 6 Fitting the AC adapter plug . . . . . . . . . . . . . . . 6 Deutsch 01 Before you start Nederlands Español 3 En IDK-01.book 4 ページ 2006年5月17日 01 水曜日 午後1時55分 Before you start Chapter 1 Before you start Checking what’s in the box Inserting the battery Please check that you've received the following supplied accessories: Reseat the lithium battery (CR2025) in the remote control as shown right. When you notice a decrease in the operating range, replace the battery in the same manner. • • • • • • • • • • Remote control Lithium battery (CR2025) iPod type adapter x6 AC adapter Plug adapters (for AC adapter) x2 Audio cable (2 m) red/white Video cable (2 m) yellow SR cable (2 m) These operating instructions Warranty card 2 4 1 3 1 Push the release tab to the right to open the battery casing. 2 Pull out the battery casing. 3 Remove the battery from the casing. If you're doing this for the first time, remove the protective seal from the battery supplied with the system before re-inserting it. 4 Place a new battery in the casing. Make sure the side of the battery is facing up when you place it in the space provided. Caution When using lithium batteries, please observe the following: • Dispose of used battery cells immediately after replacement. Keep away from children. • If swallowed, please contact a doctor immediately. 4 En IDK-01.book 5 ページ 2006年5月17日 水曜日 午後1時55分 Before you start Range of the remote control unit The remote control has a range of about 7 meters. It may not work properly if: • There are obstacles between the remote control and this unit’s remote sensor. • When disposing of used batteries, please comply with governmental regulations or environmental public instruction’s rules that apply in your country/area. • Direct sunlight or fluorescent light is shining onto the remote sensor. 30 t Sh lis SD ff O O n/ O y a t Pl lis r te En y u a en Pl uf R fle p e ea t 7m There may be cases where using a cellular phone near this unit will result in noise or interference. If you experience this problem, distance your cellular phone and this unit. Nederlands Regarding interference with this unit Italiano 30 M • Do not use or store batteries in direct sunlight or other excessively hot place, such as inside a car or near a heater. This can cause batteries to leak, overheat, explode or catch fire. It can also reduce the life or performance of batteries. • This unit is operated simultaneously with another infrared remote control unit. Français • There is danger of explosion if the battery is incorrectly replaced. Make sure to replace only with the same type recommended by the manufacturer. • This system is located near a device that is emitting infrared rays. Deutsch • Remove the battery if the unit isn’t going to be used for a month or more. English • Lithium batteries may present a fire or chemical burn hazard if misused. Do not disassemble, heat above 100˚C or incinerate. 01 Español 5 En IDK-01.book 6 ページ 2006年5月17日 01 水曜日 Before you start Attaching the iPod type adapter For your iPod to sit properly in the dock connector port, you will have to match the iPod type adapter with your model of iPod. Each iPod type adapter has a model marking as shown below. Model mark Corresponding iPod type Fourth generation 20 GB iPod iPod 40GB Fourth generation 40 GB iPod mini iPod mini Color 20GB 20 GB / 30 GB iPod <color display> 30GB Color 40GB 40 GB / 60 GB iPod <color display> 60GB iPod nano After selecting the iPod type adapter that corresponds with your iPod unit, insert it into the iPod type adapter pocket as shown. • It is also possible to connect an iPod type adapter from an original iPod dock. 6 • When using a third generation iPod model with this system, please use an ‘Apple iPod Universal Dock adapter 3-pack for iPod with Dock Connector’ available for purchase from Apple Computer Inc. U.K. model only iPod 20GB nano • When using fifth generation iPod models with this system, please use the iPod type adapter supplied with your iPod unit. Fitting the AC adapter plug iPod model marking En 午後1時55分 Make sure the AC adapter is fitted with the appropriate plug for your region. Switch the removable AC adapter plug as shown below. CAUTION SHOCK RISK OF ELECTRIC USE ONLY DRY LOCATION CAUTION SHOCK RISK OF ELECTRIC USE ONLY DRY LOCATION CAUTION SHOCK RISK OF ELECTRIC USE ONLY DRY LOCATION PUSH PUSH PUSH IDK-01.book 7 ページ 2006年5月17日 水曜日 午後1時55分 Controls and displays 02 English Chapter 2 Controls and displays Rear panel OUTPUT IN 1 2 3 4 4 AUDIO L 5 1 CONTROL IN terminal Connect this to a Pioneer AV receiver (or similar component) CONTROL OUT terminal using the supplied SR cable. This allows you to use the receiver's remote to control this unit. Check your Pioneer receiver's operating instructions for more on this.1 2 S-VIDEO output terminal Use to connect an S-video cable to your TV/AV receiver to view the on-screen display or for higher quality iPod video playback (no video is output to the VIDEO terminal if you make this connection). 3 VIDEO output terminal Connect a standard (composite) video cable to your TV/AV receiver to view the on-screen display or for iPod video playback. 3 Power indicator Lights when your iPod is connected to the dock connector port. 4 AUDIO output terminal Use to connect a stereo RCA/phono terminal cable to your AV receiver /power amplifier for two-channel audio. 4 Remote sensor See Range of the remote control unit on page 5 for more on this. 5 AC adapter DC IN 12 V terminal Use to connect the AC adapter to an AC power outlet. Español 2 iPod type adapter pocket Holds the iPod type adapter that matches your iPod unit. 3 R Nederlands 1 iPod connector port Insert your iPod dock connector port to connect and recharge your iPod unit. 2 VIDEO Italiano 1 S - VIDEO Français CONTROL DC IN 12 V Deutsch Top and front panel Note 1 If you have connected an SR cable to this terminal, you must point the remote control supplied with this unit at the remote sensor of the connected receiver or amplifier. 7 En IDK-01_02_connect_up.fm 8 ページ 2006年5月19日 03 金曜日 午後6時42分 Connecting up Chapter 3 Connecting up Connecting the system to your AV receiver or TV OUTPUT IN CONTROL S - VIDEO VIDEO DC IN 12 V R AUDIO AC adapter (supplied) L AC power outlet Control Dock for iPod • Plug in the AC adapter only after completing all connections. • Do not use any adapter with this unit other than the one supplied. • A video connection is necessary if you want to see iPod video playback or the OSD of this unit. • Connect an S-video cable for higher quality video playback (no video is output to the VIDEO terminal if you make this connection). Optional connection to your TV TV VIDEO IN Receiver or amplifier Audio cable (supplied) R AUDIO IN Video cable (supplied) L VIDEO IN SR cable (supplied) CONTROL OUT Most Pioneer receivers have a CONTROL OUT terminal which can be used to link this component, allowing you to use the receiver's remote to control this unit. Check your Pioneer receiver's operating instructions for more on this. (If you have connected an SR cable to this terminal, you must point the remote control supplied with this unit at the remote sensor of the connected receiver or amplifier.) 8 En IDK-01.book 9 ページ 2006年5月17日 水曜日 午後1時55分 Getting started 04 English Chapter 4 Getting started Once you have connected everything, you’re ready to starting watching videos and listening to music. Follow the steps below for an introduction to your iPod dock. The following table shows the basic playback controls for your iPod: Button OSD On/Off Returns to the previous menu. Selects menu items/levels. Enter Starts/pauses playback. Press to skip to the previous/next song. Playlist Playlist Shuffle Press repeatedly to switch between shuffle play options. Press repeatedly to switch between repeat play options. Español Repeat OSD On/Off Starts playback of the previous/next playlist. Nederlands Press and hold during playback to start scanning. Italiano • Since the volume of the iPod cannot be controlled using this unit, please adjust the volume using the AV receiver or power amplifier to which you have connected. Switches on/off this unit’s on-screen display (this appears on the video component to which you’re connected). Menu 2 Select the proper input on your AV receiver (or power amplifier). To use the on-screen display or to watch video, you must also switch on your TV or monitor. 3 Start playback. Check the table in Basic remote controls below for an explanation of the playback features available with this system.1 What it does Français 1 Place your iPod into the dock connector port. Make sure you have fitted the connector port with the iPod type connector that matches your iPod model (see Attaching the iPod type adapter on page 6 to do this). Basic remote controls Deutsch iPod playback features Menu Enter Playlist Shuffle Playlist Repeat Use these buttons to move the cursor (on-screen). Note 1 You can also use your iPod main unit controls for playback. Please refer to the manual supplied with the iPod for more on this. 9 En IDK-01.book 10 ページ 2006年5月17日 04 水曜日 午後1時55分 Getting started Important • This system is compatible with an iPod mini, iPod Photo, iPod nano and iPod Video portable device (third generation and above), however, compatibility may vary depending on the software version of your iPod. The following software versions have been tested: Model Software version iPod Video 1.0 or higher iPod nano 1.0 or higher • Make sure the iPod dock is connected to a video component, then press ‘OSD On/Off’. The OSD will appear on screen.1 If you want to play video content from your iPod, or use any of the iPod main unit playback controls, you must press OSD On/Off again to switch the OSD off before using your iPod. Main menu screen MAIN MENU iPod Photo 1.2 or higher iPod mini 1.4 or higher 3.02 or higher Fourth Generation iPod Third 2.3 or higher Generation iPod • Depending on your model of iPod, some features may not be available. • Video output with this system is compatible with the PAL TV format. • Pioneer is not responsible for any data loss occuring when using your iPod together with this unit. >Playlists Artists Albums Songs Podcasts Genres Composers Audiobooks SHUFFLE:ALBUMS (1/8) Shuffle play setting Repeat play setting RPT:ALL Proceed to next screen Playlist menu2 Playlists >The Planets Mars Venus Mercury Jupiter Saturn Uranus Neptune SHUFFLE:ALBUMS (1/8) RPT:ALL Playback screen Using the on-screen display For ease of use, this system makes use of a graphical on-screen display (OSD). All the screens are navigated in basically the same way, using the cursor buttons (, ) to change the highlighted item and pressing ENTER to select it. See Basic remote controls above for the other controls available. Now Playing (1/12) Song name Artist name Album name Tic Tac Toe Nth Degree Best Hits Vol. 2 00:28 -03:48 SHUFFLE:ALBUMS 04:16 RPT:ALL Elapsed playback time / remaining playback time / total time Note 1 • A screen saver appears after 3 minutes of inactivity. Press any button to return to the OSD menu. • Playback stops when OSD On/Off is pressed. 2 Note that non-roman characters in playlists will be displayed as . 10 En IDK-01_05_add_info.fm 11 ページ 2006年5月18日 木曜日 午後12時25分 Additional information 05 Additional information Remedy • Make sure your iPod is working properly. • Make sure the iPod is seated correctly in the iPod connector dock. • Make sure you have properly connected the AV outputs from the dock to your external components. Also check that the correct input is selected on your receiver and/or monitor. • If you have connected the S-video output, nothing is output from the standard (composite) video output. Specifications • Power section and miscellaneous • Accessories Remote control . . . . . . . . . . . . . . . . . . . . . . . . . 1 Lithium battery (CR2025) . . . . . . . . . . . . . . . . . . 1 iPod type adapter . . . . . . . . . . . . . . . . . . . . . . . . 6 AC adapter . . . . . . . . . . . . . . . . . . . . . . . . . . . . . 1 Plug adapters (for AC adapter) . . . . . . . . . . . . . 2 Audio cable (2 m) red/white . . . . . . . . . . . . . . . . 1 Video cable (2 m) yellow . . . . . . . . . . . . . . . . . . . 1 SR cable (2 m). . . . . . . . . . . . . . . . . . . . . . . . . . 1 These operating instructions . . . . . . . . . . . . . . 1 Warranty card . . . . . . . . . . . . . . . . . . . . . . . . . . . 1 Cleaning the unit Español Power requirements (using the supplied adapter) . . . . . . . . . . . . . . . . . . . . . . . . . . . . . . . . . . DC 12 V Dimensions . . . 99 mm (W) x 33 mm (H) x 74 mm (D) Weight . . . . . . . . . . . . . . . . . . . . . . . . . . . . . 200 g Note • Specifications and design subject to possible modification without notice, due to improvements. Nederlands Operation doesn’t seem possible • For operation, you must point the remote control supplied with this after connecting the SR cable from unit at the remote sensor of the connected receiver or amplifier. this unit to an external component. • Make sure you are using the SR cable supplied with this system. Italiano Problem No sound/no picture. Français Incorrect operations are often mistaken for trouble and malfunctions. If you think that there is something wrong with this component, check the points below. Sometimes the trouble may lie in another component. Investigate the other components and electrical appliances being used. If the trouble cannot be rectified even after exercising the checks listed below, ask your nearest Pioneer authorized service center or your dealer to carry out repair work. Deutsch Troubleshooting English Chapter 5 • Use a polishing cloth or dry cloth to wipe off dust and dirt. • When the surface is dirty, wipe with a soft cloth dipped in some neutral cleanser diluted five or six times with water, and wrung out well, and then wipe again with a dry cloth. Do not use furniture wax or cleansers. • Never use thinners, benzine, insecticide sprays or other chemicals on or near this unit, since these will corrode the surface. Published by Pioneer Corporation Copyright ©2006 Pioneer Corporation All rights reserved 11 En IDK-01.book Page 2 Wednesday, May 17, 2006 11:10 AM IMPORTANT ATTENTION DANGER D´ELECTROCUTION NE PAS OUVRIR Ce symbole de l’éclair, placé dans un triangle équilatéral, a pour but d’attirer l’attention de l’utilisateur sur la présence, à l’intérieur du coffret de l’appareil, de “tensions dangereuses” non isolées d’une grandeur suffisante pour représenter un risque d’électrocution pour les êtres humains. ATTENTION: POUR ÉVITER TOUT RISQUE D’ÉLECTROCUTION, NE PAS ENLEVER LE COUVERCLE (NI LE PANNEAU ARRIÈRE). AUCUNE PIÈCE RÉPARABLE PAR L’UTILISATEUR NE SE TROUVE À L’INTÉRIEUR. CONFIER TOUT ENTRETIEN À UN PERSONNEL QUALIFIÉ UNIQUEMENT. Ce point d’exclamation, placé dans un triangle équilatéral, a pour but d’attirer l’attention de l’utilisateur sur la présence, dans les documents qui accompagnent l’appareil, d’explications importantes du point de vue de l’exploitation ou de l’entretien. D3-4-2-1-1_Fr AVERTISSEMENT AVERTISSEMENT Cet appareil n’est pas étanche. Pour éviter les risques d’incendie et de décharge électrique, ne placez près de lui un récipient rempli d’eau, tel qu’un vase ou un pot de fleurs, et ne l’exposez pas à des gouttes d’eau, des éclaboussures, de la pluie ou de l’humidité. D3-4-2-1-3_A_Fr Pour éviter les risques d’incendie, ne placez aucune flamme nue (telle qu’une bougie allumée) sur D3-4-2-1-7a_A_Fr l’appareil. Ce produit est conforme aux directives relatives à la compatibilité électromagnétique (89/336/CEE, amendements 92/31/CEE et 93/68/CEE). D3-4-2-1-9b_Fr Si vous souhaitez vous débarrasser de cet appareil, ne le mettez pas à la poubelle avec vos ordures ménagères. Il existe un système de collecte séparé pour les appareils électroniques usagés, qui doivent être récupérés, traités et recyclés conformément à la législation. Les habitants des 25 états membres de l’UE, de Suisse et de Norvège peuvent retourner gratuitement leurs appareils électroniques usagés aux centres de collecte agréés ou à un détaillant (si vous rachetez un appareil similaire neuf). Dans les pays qui ne sont pas mentionnés ci-dessus, veuillez contacter les autorités locales pour savoir comment vous pouvez vous débarrasser de vos appareils. Vous garantirez ainsi que les appareils dont vous vous débarrassez sont correctement récupérés, traités et recyclés et préviendrez de cette façon les impacts néfastes possibles sur l’environnement et la santé humaine. K058_Fr IDK-01.book Page 3 Wednesday, May 17, 2006 11:10 AM Nous vous remercions de votre achat d'un produit Pioneer. Veuillez lire ce mode d'emploi pour savoir comment utiliser correctement votre modèle. Après sa lecture, placez ce mode d'emploi dans un endroit accessible pour pouvoir le consulter. 01 Avant de commencer Vue supérieure et avant. . . . . . . . . . . . . . . . . . 7 Vue arrière. . . . . . . . . . . . . . . . . . . . . . . . . . . . 7 04 Pour commencer Fonctions de lecture iPod . . . . . . . . . . . . . . . . 9 Utilisation de l'affichage sur écran. . . . . . . . . 10 05 Informations supplémentaires Dépannage . . . . . . . . . . . . . . . . . . . . . . . . . . 11 Caractéristiques techniques . . . . . . . . . . . . . 11 Nettoyage de l'appareil. . . . . . . . . . . . . . . . . . 11 Deutsch 02 Contrôles et affichages Connexion du système avec votre récepteur AV ou téléviseur . . . . . . . . . . . . . . . . 8 Français Vérifier le contenu de la boîte . . . . . . . . . . . . . 4 Introduction de la pile . . . . . . . . . . . . . . . . . . . 4 Portée de la télécommande. . . . . . . . . . . . . . . 5 Au sujet des interférences possibles avec cet appareil . . . . . . . . . . . . . . . . . . . . . . . . . . . . . . 5 Fixation de l'adaptateur de type d'iPod. . . . . . . 6 Installation de la prise d'adaptateur secteur . . 6 03 Connexion English Table des matières Italiano Nederlands Español 3 Fr IDK-01.book Page 4 Wednesday, May 17, 2006 11:10 AM 01 Avant de commencer Chapitre 1 Avant de commencer Vérifier le contenu de la boîte Introduction de la pile Veuillez vérifier que vous avez reçu les accessoires suivants : • Télécommande • Pile au lithium (CR2025) • Adaptateur de type d'iPod x6 • Adaptateur secteur • Adaptateurs de prise (pour adaptateur secteur) x2 • Câble audio (2 m) rouge/blanc • Câble vidéo (2 m) jaune • Câble SR (2 m) • Ce mode d'emploi • Carte de garantie Placez la pile au lithium (CR2025) dans la télécommande comme illustré à droite. Si vous remarquez une réduction de la distance de fonctionnement de la télécommande, remplacez la pile de la même façon. 2 4 1 3 1 Appuyez sur la languette vers la droite pour ouvrir le compartiment à pile. 2 Retirez le compartiment à pile. 3 Otez la pile du compartiment. Si vous effectuez cette action pour la première fois, retirez l'étiquette protectrice de la pile fournie avec le système avant son introduction. 4 Placez une nouvelle pile dans le compartiment. Vérifiez que le côté de la pile est dirigé vers le haut lors de son introduction. Attention Lors de l'utilisation de piles au lithium, suivez les consignes suivantes : • Il faut mettre les piles usagées au rebut dès leur remplacement. Il faut les tenir hors de portée des enfants. • Si elles sont avalées, il faut immédiatement consulter un médecin. 4 Fr IDK-01.book Page 5 Wednesday, May 17, 2006 11:10 AM Avant de commencer Deutsch 30 Français La portée de la télécommande est d'environ 7 mètres. Elle peut ne pas fonctionner correctement si : • Il y a des obstacles entre la télécommande et le capteur de cet appareil. • La lumière du soleil ou une lumière fluorescente rayonne sur le capteur. • Ce système est placé près d'un dispositif émettant des rayons infrarouges. • Cette unité est utilisée en même temps qu'une autre télécommande à infrarouge. English Portée de la télécommande 30 u t Sh lis SD ff O O n/ O y r a t Pl lis te En y a en Pl M uf p e ea t 7m Au sujet des interférences possibles avec cet appareil Nederlands Il peut arriver que l'utilisation d'un téléphone portable près de cet appareil provoque des bruits ou interférences. Si c'est le cas, mettez de la distance entre votre téléphone portable et cet appareil. Italiano R fle • Les piles au lithium peuvent présenter un risque d'incendie ou de brûlure chimique en cas d'utilisation incorrecte. Evitez de les démonter, de les chauffer au-dessus de 100 °C ou de les brûler. • Retirez la pile si vous n'allez pas utiliser l'appareil pendant au moins un mois. • Lors de la mise au rebut de piles usées, veuillez vous conformer aux normes gouvernementales ou environnementales en vigueur dans votre pays ou région. • Il y a danger d'explosion si la pile n'est pas replacée correctement. Remplacez la pile par une pile de type identique recommandée par le fabricant. • Ni utilisez ni conservez les piles sous la lumière directe du soleil ou dans un endroit excessivement chaud, comme l'intérieur d'une voiture ou à proximité d'un appareil de chauffage. Les piles risqueraient de fuir, de surchauffer, d'exploser ou de s'enflammer. Leur durée de vie ou leur performance pourrait également être réduite. 01 Español 5 Fr IDK-01.book Page 6 Wednesday, May 17, 2006 11:10 AM 01 Avant de commencer Fixation de l'adaptateur de type d'iPod Pour que votre iPod soit placé correctement dans le port connecteur du dock, vous devez sélectionner l'adaptateur correspondant à votre iPod. Chaque adaptateur de type d'iPod a une indication de modèle comme ci-dessous. Indication de modèle d'iPod Indication de modèle Type d'iPod correspondant iPod 20 Go iPod 20 Go quatrième génération iPod 40 Go iPod 40 Go quatrième génération mini iPod mini Couleur 20 iPod 20 Go / 30 Go <affichage couleur> Go 30 Go Couleur 40 iPod 40 Go / 60 Go <affichage couleur> Go 60 Go nano • Il est aussi possible de connecter un adaptateur de type d'iPod d'un dock pour iPod original. • Lors de l'utilisation de modèles d'iPod de la cinquième génération avec ce système, veuillez utiliser l'adaptateur fourni avec votre iPod. • Lors de l'utilisation d'un iPod de la troisième génération avec ce système, veuillez utiliser un ‘Apple iPod Universal Dock Adapter - Jeu de 3 adaptateurs pour iPod avec Dock connector’, disponible chez Apple Computer Inc. Installation de la prise d'adaptateur secteur Uniquement pour le modèle britannique Assurez-vous que l'adaptateur secteur est installé dans la prise appropriée à votre région. Permutez la prise d'adaptateur secteur amovible comme indiqué ci-dessous. CAUTION SHOCK RISK OF ELECTRIC USE ONLY DRY LOCATION CAUTION SHOCK RISK OF ELECTRIC USE ONLY DRY LOCATION CAUTION SHOCK RISK OF ELECTRIC USE ONLY DRY LOCATION PUSH iPod nano PUSH Poussez Après la sélection de l'adaptateur de type d'iPod correspondant à votre iPod, introduisezle dans l'emplacement prévu à cet effet comme illustré. 6 Fr IDK-01.book Page 7 Wednesday, May 17, 2006 11:10 AM Contrôles et affichages 02 English Chapitre 2 Contrôles et affichages Vue supérieure et avant Vue arrière CONTROL 2 3 4 3 Témoin d'alimentation S'allume quand votre iPod est branché sur le port connecteur du dock. 4 Capteur de télécommande Voir Portée de la télécommande sur la page 5 pour plus d'information à ce sujet. L 5 1 Borne CONTROL IN Connectez cette borne à la borne CONTROL OUT d'un récepteur AV Pioneer (ou d'un composant équivalent), à l'aide du câble SR fourni. Ceci vous permet d'utiliser la télécommande du récepteur pour contrôler cet appareil. Consultez le mode d'emploi de votre récepteur Pioneer pour plus de détails.1 2 Borne de sortie S-VIDEO Utilisez cette borne pour connecter un câble SVidéo à votre récepteur TV/AV pour visualiser l'affichage sur écran ou pour une meilleure qualité de lecture vidéo iPod (avec cette connexion, aucun signal vidéo n'est émis à la borne VIDEO). 3 Borne de sortie VIDEO Connectez un câble vidéo (composite) standard à votre récepteur TV/AV pour visualiser l'affichage sur écran ou pour la lecture vidéo iPod. Español 2 Emplacement pour adaptateur de type d'iPod Pour placer l'adaptateur de type d'iPod correspondant à votre iPod. 4 AUDIO Nederlands 1 Port connecteur d'iPod Introduisez le port connecteur de votre iPod pour brancher et recharger votre iPod. 3 R Italiano 1 2 VIDEO Deutsch 1 S - VIDEO DC IN 12 V Français OUTPUT IN 4 Borne de sortie AUDIO Pour la connexion d'un câble pour borne stéréo RCA/phono à votre récepteur AV/amplificateur afin d'obtenir un son à deux canaux. 5 Borne DC IN 12 V pour adaptateur secteur Utilisez cette borne pour raccorder l'adaptateur secteur à une prise d'alimentation secteur. Remarque 1 Si vous avez connecté un câble SR à cette borne, vous devez diriger la télécommande fournie avec cet appareil vers le capteur de télécommande du récepteur ou de l'amplificateur connecté. 7 Fr IDK-01.book Page 8 Wednesday, May 17, 2006 11:10 AM 03 Connexion Chapitre 3 Connexion Connexion du système avec votre récepteur AV ou téléviseur OUTPUT IN CONTROL S - VIDEO VIDEO DC IN 12 V R AUDIO Adaptateur secteur (fourni) L Prise d'alimentation secteur Dock de contrôle pour iPod • Ne branchez l'adaptateur secteur qu'après avoir effectué toutes les connexions. • N'utilisez pas d'autre adaptateur que celui fourni avec cet appareil. • La lecture de vidéo iPod ou des messages sur écran de cet appareil nécessite une connexion vidéo. • Connectez un câble Svidéo pour une meilleure Connexion optionnelle à votre téléviseur qualité de lecture vidéo (avec cette connexion, aucun signal vidéo n'est émis vers la borne VIDEO). Téléviseur VIDEO IN Récepteur ou amplificateur Câble audio (fourni) R AUDIO IN Câble vidéo (fourni) L VIDEO IN Câble SR (fourni) CONTROL OUT La plupart des récepteurs Pioneer sont munis d'une borne CONTROL OUT qui peut servir à relier ce composant, ce qui permet d'utiliser la télécommande du récepteur pour contrôler cet appareil. Consultez le mode d'emploi de votre récepteur Pioneer pour plus de détails. (Si vous avez connecté un câble SR à cette borne, vous devez diriger la télécommande fournie avec cet appareil vers le capteur de télécommande du récepteur ou de l'amplificateur connecté.) 8 Fr IDK-01.book Page 9 Wednesday, May 17, 2006 11:10 AM Pour commencer 04 Pour commencer Fonctions de lecture iPod Bouton OSD On/Off Pour activer et désactiver l'affichage sur écran de cette unité (ceci apparaît sur le composant vidéo connecté). Pour revenir au menu précédent. Menu Enter Pour sélectionner les élément/niveaux de menu. Appuyez et maintenez pendant la lecture pour lancer le balayage. Playlist Playlist Shuffle Appuyez plusieurs fois pour commuter entre les options de lecture aléatoire. Appuyez plusieurs fois pour commuter entre les options de lecture répétée. Español Repeat Lance la lecture de la liste de lecture précédente/suivante. Nederlands Appuyez pour passer à la chanson précédente/suivante. Italiano Pour lancer/arrêter momentanément la lecture. 2 Sélectionnez l'entrée qui convient sur votre récepteur AV (ou amplificateur). Pour utiliser l'affichage sur écran ou pour regarder des vidéos, vous devez aussi mettre votre téléviseur ou moniteur sous tension. 3 Lancez la lecture. Consultez le tableau dans Contrôles de base de la télécommande ci-dessous pour une explication des fonctions de lecture disponibles avec ce système.1 • Comme il n'est pas possible de contrôler le volume à l'aide de cet appareil, veuillez le régler à l'aide du récepteur AV ou de l'amplificateur auquel vous l'avez connecté. Ce qu'il fait Deutsch 1 Placez votre iPod dans le port connecteur du dock. Vérifiez que vous utilisez le port connecteur avec le connecteur de type d'iPod correspondant à votre iPod (pour ceci, voir Fixation de l'adaptateur de type d'iPod sur la page 6). Le tableau suivant montre les contrôles de lecture de base pour votre iPod : Français Une fois que toutes les connexions sont effectuées, vous pouvez regarder des vidéos et écouter de la musique. Suivez les étapes suivantes pour une introduction à votre dock pour iPod. Contrôles de base de la télécommande English Chapitre 4 OSD On/Off Menu Enter Playlist Shuffle Playlist Repeat Utilisez ces boutons pour déplacer le curseur (sur l'écran). Remarque 1 Pour la lecture, vous pouvez aussi utiliser les contrôles principaux de votre iPod. Pour ces fonctions, veuillez consulter le mode d'emploi fourni avec votre iPod. 9 Fr IDK-01.book Page 10 Wednesday, May 17, 2006 11:10 AM 04 Pour commencer Important • Ce système est compatible avec les lecteurs iPod, iPod mini et iPod photo (troisième génération et plus), mais la compatibilité peut varier selon la version de logiciel de votre iPod. Ce récepteur ne prend pas en charge les versions de logiciel antérieures à la mise à jour iPod 2004-10-20. Veuillez vérifier que vous utilisez le logiciel le plus récent. Pour de plus amples informations à ce sujet, veuillez consulter la page d'accueil Apple Computer Inc. • Suivant votre modèle d'iPod, certaines fonctions peuvent ne pas être disponibles. • La sortie vidéo avec ce système est compatible avec le format PAL TV. • L'accord d'utilisateur iPod permet la reproduction de matériel sans droit d'auteur, de matériel dont vous avez les droits d'auteurs, ou de matériel dont vous avez la permission de reproduction à des fins personnelles. Si vous n'êtes pas sûrs de vos droits de reproduction de matériel, consultez votre conseiller juridique. • Pioneer décline toute responsabilité en cas de perte de données lors de l'utilisation de votre iPod avec cet appareil. Utilisation de l'affichage sur écran Pour faciliter son utilisation, ce système utilise un affichage graphique sur écran (OSD). Tous les écrans sont utilisés d'une manière similaire, en appuyant sur les boutons (, ) pour choisir l'élément à sélectionner et en appuyant sur ENTER pour le sélectionner. Voir Contrôles de base de la télécommande cidessus pour les autres contrôles disponibles. • Vérifiez que le dock pour iPod est connecté à un composant vidéo, puis appuyez sur ‘OSD On/Off’ (OSD activé/ désactivé). L'affichage OSD apparaît à l'écran.1 Si vous souhaitez lire une vidéo de votre iPod, ou utiliser n'importe quel contrôle de lecture de votre iPod, vous devez appuyer à nouveau sur OSD On/Off pour désactiver l'affichage OSD avant d'utiliser votre iPod. Ecran de menu principal MAIN MENU >Playlists Artists Albums Songs Podcasts Genres Composers Audiobooks SHUFFLE:ALBUMS (1/8) Réglage de lecture aléatoire Réglage de lecture répétée RPT:ALL Passer à l'écran suivant Menu des listes de lecture2 Playlists >The Planets Mars Venus Mercury Jupiter Saturn Uranus Neptune SHUFFLE:ALBUMS (1/8) RPT:ALL Ecran de lecture Now Playing (1/12) Titre de chanson Nom de l'artiste Titre de l'album Tic Tac Toe Nth Degree Best Hits Vol. 2 00:28 -03:48 SHUFFLE:ALBUMS 04:16 RPT:ALL Durée de lecture écoulée / durée de lecture restante / durée totale Remarque 1 Un économiseur d'écran apparaît après 3 minutes d'inactivité. Appuyez sur n'importe quel bouton pour revenir au menu OSD. 2 Remarquez que les caractères non romains des listes de lecture apparaissent comme . 10 Fr IDK-01.book Page 11 Wednesday, May 17, 2006 11:10 AM Informations supplémentaires 05 Informations supplémentaires English Chapitre 5 Dépannage L'utilisation semble impossible après la connexion du câble SR de cet appareil à un composant externe. • Pour l'utilisation, vous devez diriger la télécommande fournie avec cet appareil vers le capteur du récepteur ou de l'amplificateur connecté. • Veillez à bien utiliser le câble SR fourni avec ce système. • Section alimentation et divers • Accessoires Télécommande . . . . . . . . . . . . . . . . . . . . . . . . . 1 Pile au lithium (CR2025) . . . . . . . . . . . . . . . . . . 1 Adaptateur de type d'iPod . . . . . . . . . . . . . . . . 6 Adaptateur secteur . . . . . . . . . . . . . . . . . . . . . . 1 Adaptateurs de prise (pour adaptateur secteur) . . . . . . . . . . . . . . . . . 2 Câble audio (2 m) rouge/blanc. . . . . . . . . . . . . . 1 Câble vidéo (2 m) jaune. . . . . . . . . . . . . . . . . . . . 1 Câble SR (2 m) . . . . . . . . . . . . . . . . . . . . . . . . . 1 Ce mode d'emploi . . . . . . . . . . . . . . . . . . . . . . . 1 Carte de garantie . . . . . . . . . . . . . . . . . . . . . . . . 1 Nettoyage de l'appareil • Utilisez un chiffon de nettoyage ou un chiffon sec pour enlever la poussière et la saleté. • Si la surface est sale, essuyez-la avec un chiffon doux imbibé d'une solution d'eau et de produit de nettoyage neutre (cinq à six parts d'eau pour une de produit) et bien essoré, puis essuyez-la à nouveau avec un chiffon sec. Evitez d'utiliser des cires ou produits de nettoyage pour mobilier. • N'utilisez jamais de dissolvants, de benzine, d'insecticides ou autres produits chimiques près de ou sur cet appareil, car ces produits pourraient en corroder la surface. Español Alimentation nécessaire (avec l'adaptateur fourni) . . . . . . . . . . . . . . . . . . . . . . . . . . . . . . . . . . DC 12 V Dimensions . . . . . . . 99 mm (L) x 33 mm (H) x 74 mm (P) Poids . . . . . . . . . . . . . . . . . . . . . . . . . . . . . . . . xxx g Remarque • Les caractéristiques techniques sont sujettes à modification sans préavis, à des fins d'amélioration. Nederlands Caractéristiques techniques Italiano Solution • Vérifiez le bon fonctionnement de votre iPod. • Vérifiez le bon emplacement de l'iPod dans le dock connecteur pour iPod. • Vérifiez la bonne connexion des sorties AV du dock à vos composants externes. Vérifiez aussi que l'entrée correcte est sélectionnée sur votre récepteur et/ou moniteur. • Si vous avez connecté la sortie S-vidéo, aucun signal n'est émis depuis la sortie vidéo (composite) standard. Deutsch Problème Absence de son/d'image. Français On prend souvent des utilisations incorrectes pour des problèmes et des défauts. Si vous croyez que ce composant a un problème, vérifiez les points ci-dessous. Le problème réside parfois dans un autre composant. Examinez les autres composants et appareils électriques utilisés. Si vous ne pouvez remédier au problème après les points de vérifications suivants, consultez votre centre de service autorisé Pioneer ou votre revendeur pour une réparation. Publication de Pioneer Corporation. © 2006 Pioneer Corporation. Tous droits de reproduction et de traduction réservés. 11 Fr IDK-01.book Page 2 Wednesday, May 17, 2006 11:11 AM WICHTIG CAUTION RISK OF ELECTRIC SHOCK DO NOT OPEN Das Blitzsymbol in einem Dreieck weist den Benutzer darauf hin, dass eine Berührungsgefahr mit nicht isolierten Teilen im Geräteinneren, die eine gefährliche Spannung führen, besteht. Die Spannung kann so hoch sein, dass sie die Gefahr eines elektrischen Schlages birgt. ACHTUNG: UM SICH NICHT DER GEFAHR EINES ELEKTRISCHEN SCHLAGES AUSZUSETZEN, DÜRFEN SIE NICHT DEN DECKEL (ODER DIE RÜCKSEITE) ENTFERNEN. IM GERÄTEINNEREN BEFINDEN SICH KEINE VOM BENUTZER REPARIERBAREN TEILE. ÜBERLASSEN SIE REPARATUREN DEM QUALIFIZIERTEN KUNDENDIENST. Ein Ausrufezeichen in einem Dreieck weist den Benutzer auf wichtige Bedienungs- und Wartungsanweisungen in den Dokumenten hin, die dem Gerät beiliegen. D3-4-2-1-1_Ge WARNUNG WARNUNG Dieses Gerät ist nicht wasserdicht. Zur Vermeidung der Gefahr von Brand und Stromschlag keine Behälter mit Flüssigkeiten (z.B. Blumenvasen und -töpfe) in die Nähe des Gerätes bringen und dieses vor Tropfwasser, Spritzwasser, Regen und Nässe D3-4-2-1-3_A_Ge schützen. Keine Quellen offener Flammen (z.B. eine brennende Kerze) auf dieses Gerät stellen. D3-4-2-1-7a_A_Ge Dieses Produkt entspricht den EMV-Richtlinien (89/336/EEC, geändert durch 92/31/EEC und D3-4-2-1-9b_Ge 93/68/EEC). Mischen Sie dieses Produkt, wenn Sie es entsorgen wollen, nicht mit gewöhnlichen Haushaltsabfällen. Es gibt ein getrenntes Sammelsystem für gebrauchte elektronische Produkte, über das die richtige Behandlung, Rückgewinnung und Wiederverwertung gemäß der bestehenden Gesetzgebung gewährleistet wird. Privathaushalte in den 25 Mitgliedsstaaten der EU, in der Schweiz und in Norwegen können ihre gebrauchten elektronischen Produkte an vorgesehenen Sammeleinrichtungen kostenfrei zurückgeben oder aber an einen Händler zurückgeben (wenn sie ein ähnliches neues Produkt kaufen). Bitte wenden Sie sich in den Ländern, die oben nicht aufgeführt sind, hinsichtlich der korrekten Verfahrensweise der Entsorgung an die örtliche Kommunalverwaltung. Auf diese Weise stellen Sie sicher, dass das zu entsorgende Produkt der notwendigen Behandlung, Rückgewinnung und Wiederverwertung unterzogen wird, und so mögliche negative Einflüsse auf die Umwelt und die menschliche Gesundheit vermieden werden. K058_Ge IDK-01.book Page 3 Wednesday, May 17, 2006 11:11 AM Lesen Sie bitte diese Bedienungsanleitung sorgfältig durch, damit Sie in der Lage sind, dieses Modell ordnungsgemäß zu bedienen. Bewahren Sie diese Bedienungsanleitung zur künftigen Einsichtnahme an einem sicheren Ort auf, nachdem Sie sie gelesen haben. 01 Vor dem Start Ober- und Vorderseite . . . . . . . . . . . . . . . . . . . 7 Rückseite . . . . . . . . . . . . . . . . . . . . . . . . . . . . 7 04 Start Wiedergabefunktionen des iPod . . . . . . . . . . . 9 OnScreenDisplay . . . . . . . . . . . . . . . . . . . . . . 10 05 Ergänzende Informationen Fehlerbehebung. . . . . . . . . . . . . . . . . . . . . . . 11 Technische Daten . . . . . . . . . . . . . . . . . . . . . 11 Reinigung des Geräts . . . . . . . . . . . . . . . . . . 11 Italiano 02 Bedienelemente und Anzeigen Anschluss des Systems an Ihren Audio-/ Video-Receiver oder Fernseher. . . . . . . . . . . . . 8 Deutsch Prüfung des Packungsinhalts . . . . . . . . . . . . . 4 Einlegen der Batterie. . . . . . . . . . . . . . . . . . . . 4 Reichweite der Fernbedienung . . . . . . . . . . . . 5 Interferenzen mit diesem Gerät . . . . . . . . . . . . 5 Montage des iPod-Adapters . . . . . . . . . . . . . . 6 Montage des Netzadaptersteckers . . . . . . . . . 6 03 Vornahme der Anschlüsse Français Inhalt English Vielen Dank für den Kauf dieses Pioneer-Produkts. Nederlands Español 3 Ge IDK-01.book Page 4 Wednesday, May 17, 2006 11:11 AM 01 Vor dem Start Kapitel 1 Vor dem Start Prüfung des Packungsinhalts Einlegen der Batterie Überprüfen Sie, ob sich folgendes mitgeliefertes Zubehör in der Packung befindet: • Fernbedienung • Lithiumbatterie (CR2025) • iPod-Adapter x6 • Netzteil • Adapterstecker (für Netzteil) x2 • Audiokabel (2 m) rot/weiß • Videokabel (2 m) gelb • SR Kabel (2 m) • Diese Bedienungsanleitung • Garantiekarte Legen Sie die Lithiumbatterie (CR2025) wie im Folgenden dargestellt in die Fernbedienung ein. Wechseln Sie die Batterie bei Abnahme ihrer Reichweite auf die selbe Weise aus. 2 4 1 3 1 Schieben Sie die Entriegelung nach rechts, um das Batteriefach zu öffnen. 2 Ziehen Sie das Batteriefach heraus. 3 Nehmen Sie die Batterie aus dem Batteriefach. Sollten Sie dies zum ersten Mal tun, entfernen Sie die Schutzhülle der beiliegenden Batterie, bevor Sie sie wieder einlegen. 4 Legen Sie eine neue Batterie ins Batteriefach ein. Achten Sie beim Einlegen der Batterie darauf, dass die Seite der Batterie nach oben weist. Achtung Beachten Sie beim Umgang mit Lithiumbatterien Folgendes: • Entsorgen Sie verbrauchte Batterien direkt nach dem Auswechseln. Halten Sie sie von Kindern fern. • Sollte sie verschluckt werden, ziehen Sie unverzüglich einen Arzt zu Rat. 4 Ge IDK-01.book Page 5 Wednesday, May 17, 2006 11:11 AM Vor dem Start Français Deutsch Die Fernbedienung weist eine Reichweite von ca. 7 Metern auf. Unter folgenden Umständen könnte sie nicht ordnungsgemäß funktionieren: • Es befinden sich Hindernisse zwischen der Fernbedienung und dem Fernbedienungssensor. • Es fällt direktes Sonnenlicht oder fluoreszierendes Licht auf den Fernbedienungssensor. • Dieses System befindet sich in der Nähe eines Geräts, das Infrarotstrahlen aussendet. • Dieses Gerät wird gleichzeitig mit einer anderen Infrarot-Fernbedienung betrieben. English Reichweite der Fernbedienung Italiano 30 30 t Sh lis SD ff O O n/ O y r a t Pl lis te En y u a en Pl M uf p Re fle ea t 7m Interferenzen mit diesem Gerät Español Es könnten Interferenzen oder Störgeräusche auftreten, wenn ein Mobiltelefon in der Nähe dieses Geräts verwendet wird. Sollte dieses Problem auftreten, verwenden Sie Ihr Mobiltelefon mit größerem Abstand von diesem Gerät. Nederlands • Lithiumbatterien können bei unsachgemäßem Umgang Brandwunden oder Verätzungen verursachen. Zerlegen, verbrennen oder erhitzen Sie die Batterien nicht über 100 °C. • Nehmen Sie die Batterie heraus, wenn Sie das Gerät länger als einen Monat nicht verwenden werden. • Bei der Entsorgung von verbrauchten Batterien sind die einschlägigen gesetzlichen Vorschriften und Umweltschutzbestimmungen strikt einzuhalten. • Bei unsachgemäßem Auswechseln der Batterie besteht Explosionsgefahr. Diese Batterie ausschließlich gegen eine Batterie des gleichen Typs bzw. eine vom Hersteller empfohlene gleichwertige Batterie auswechseln. • Bewahren Sie Batterien nicht in direktem Sonnenlicht oder an anderen, extrem heißen Orten auf wie z. B. im Innenraum eines Fahrzeugs oder in der Nähe einer Heizung. Dadurch können die Batterien auslaufen, sich überhitzen, explodieren oder in Brand geraten. Auch kann dies die Lebensdauer der Batterien verringern. 01 5 Ge IDK-01.book Page 6 Wednesday, May 17, 2006 11:11 AM 01 Vor dem Start Montage des iPod-Adapters Damit Ihr iPod genau in den Dock-Anschluss passt, muss der zu Ihrem iPod-Modell passende iPod-Adapter gewählt werden. Jeder iPod-Adapter weist eine im Folgenden dargestellte Modellbezeichnung auf. iPodModellbezeichnung Modellbezeichnung Zugehöriger iPod iPod 20GB 20 GB iPod der vierten Generation iPod 40GB 40 GB iPod der vierten Generation mini iPod Mini Color 20GB 30GB 20 GB / 30 GB iPod <Farbdisplay> Color 40GB 60GB 40 GB / 60 GB iPod <Farbdisplay> nano iPod Nano Nachdem Sie den zu Ihrem iPod-Gerät passenden iPod-Adapter ausgewählt haben, stecken Sie ihn wie dargestellt in den iPodAdapter-Halter. 6 Ge • Ebenso ist der Anschluss eines iPodAdapters von einem Original-iPod-Dock möglich. • Benutzen Sie bei Verwendung von iPodModellen der fünften Generation mit diesem System bitte den Ihrem iPod-Gerät beiliegenden iPod-Adapter. • Benutzen Sie bei Verwendung von iPodModellen der dritten Generation bitte einen bei Apple Computer Inc. erhältlichen ‘Apple iPod Universal Dock Adapter 3erPackung für iPod mit Dock Connector’. Montage des Netzadaptersteckers Nur britisches Modell Achten Sie darauf, dass das Netzteil mit dem für Ihre Region geeigneten Stecker versehen ist. Stecken Sie den abnehmbaren Netzadapterstecker wie unten dargestellt ein. CAUTION SHOCK RISK OF ELECTRIC USE ONLY DRY LOCATION CAUTION SHOCK RISK OF ELECTRIC USE ONLY DRY LOCATION CAUTION SHOCK RISK OF ELECTRIC USE ONLY DRY LOCATION PUSH PUSH Drücken IDK-01.book Page 7 Wednesday, May 17, 2006 11:11 AM Bedienelemente und Anzeigen 02 Bedienelemente und Anzeigen Ober- und Vorderseite Rückseite CONTROL 3 4 3 Stromanzeige Leuchtet, wenn Ihr iPod mit dem DockAnschluss verbunden ist. 4 Fernbedienungssensor Weitere Einzelheiten siehe Reichweite der Fernbedienung auf Seite 5. L 5 1 CONTROL IN-Ausgang Schließen Sie diesen mit dem beiliegenden SR Kabel an die CONTROL OUT-Buchse Ihres Audio-/Video-Receivers von Pioneer (oder eines ähnlichen Geräts) an. Dies ermöglicht die Verwendung der Fernbedienung des Receivers zur Steuerung dieses Geräts. Weitere Einzelheiten siehe die Bedienungsanleitung des Receivers von Pioneer.1 2 S-VIDEO-Ausgang Zum Anschluss eines S-Videokabels an Ihren Fernseher/Audio-/Video-Receiver (bei Vornahme dieses Anschlusses wird vom VIDEO-Anschluss kein Bild ausgegeben) für eine hochwertigere Videowiedergabe oder zur Anzeige des OnScreenDisplays. 3 VIDEO-Ausgang Schließen Sie zum Abspielen von Videos über den iPod oder zur Anzeige des OnScreenDisplays ein Standard-(Composite-)Kabel an Ihren Fernseher/Audio-/Video-Receiver an. Español 2 iPod-Adapter-Halter Zum Einsetzen des zu Ihrem iPod passenden iPod-Adapters. 4 AUDIO Nederlands 1 iPod-Anschluss Verbinden Sie Ihren iPod Dock-Anschluss, um Ihren iPod anzuschließen und aufzuladen. 3 R Italiano 2 2 VIDEO Deutsch 1 S - VIDEO DC IN 12 V Français OUTPUT IN 1 English Kapitel 2 4 AUDIO-Ausgang Zum Anschluss eines Stereo-Cinch/ Phonobuchsenkabel an Ihren Audio-/VideoReceiver/Verstärker für Zweikanalton. 5 Netzadapterausgang DC IN 12 V Zum Anschluss des Netzadapters an eine Netzsteckdose. Hinweis 1 Wenn Sie ein SR Kabel an diesen Ausgang anschließen, müssen Sie die diesem Gerät beiliegende Fernbedienung auf den Fernbedienungssensor des angeschlossenen Receivers oder Verstärkers halten. 7 Ge IDK-01.book Page 8 Wednesday, May 17, 2006 11:11 AM 03 Vornahme der Anschlüsse Kapitel 3 Vornahme der Anschlüsse Anschluss des Systems an Ihren Audio-/Video-Receiver oder Fernseher OUTPUT IN CONTROL S - VIDEO VIDEO DC IN 12 V R AUDIO Netzteil (mitgeliefert) L Netzsteckdose iPod Control Dock • Stecken Sie das Netzteil erst nach Vornahme aller Anschlüsse in die Netzsteckdose. • Zum Abspielen von Videos über den iPod oder zur Anzeige des OSD dieses Geräts muss ein Videoanschluss vorgenommen werden. • Verwenden Sie für dieses Gerät nur den beiliegenden Adapter. Optionaler Anschluss an Ihren Fernseher • Schließen Sie für eine hochwertigere Videowiedergabe ein SVideokabel an (bei Vornahme dieses Anschlusses wird vom Fernseher VIDEO IN VIDEO-Anschluss kein Bild ausgegeben). Receiver oder Verstärker Audiokabel (mitgeliefert) R AUDIO IN Videokabel (mitgeliefert) L VIDEO IN SR Kabel (mitgeliefert) CONTROL OUT Die meisten Receiver von Pioneer verfügen über einen CONTROL OUT-Ausgang, der zum Anschluss dieser Komponente dient, so dass dieses Gerät mit der Fernbedienung des Receivers gesteuert werden kann. Weitere Einzelheiten siehe die Bedienungsanleitung des Receivers von Pioneer. (Wenn Sie ein SR Kabel an diesen Ausgang anschließen, müssen Sie die diesem Gerät beiliegende Fernbedienung auf den Fernbedienungssensor des angeschlossenen Receivers oder Verstärkers halten.) 8 Ge IDK-01.book Page 9 Wednesday, May 17, 2006 11:11 AM Start 04 Start Wiedergabefunktionen des iPod Playlist Shuffle Playlist Repeat Ein-/Ausschalten des OnScreenDisplays dieses Geräts (dieses erscheint auf dem angeschlossenen Videogerät). Rückkehr zum vorherigen Menü. Menu Wahl der Menüpunkte/-ebenen. Enter Start/Pausierung der Wiedergabe. Zum Durchlauf während der Wiedergabe gedrückt halten. Zum vorherigen/nächsten Titel gehen. Playlist Playlist Shuffle Repeat Start der Wiedergabe der vorherigen/ nächsten Play List. Zum Umschalten zwischen ShuffleWiedergabefunktionen wiederholt drücken. Zum Umschalten zwischen Wiederholungsfunktionen wiederholt drücken. Español Enter Funktion Nederlands OSD On/Off Menu OSD On/Off Italiano 3 Starten Sie die Wiedergabe. Sehen Sie die Tabelle in Grundlegende Fernbedienungstasten unten mit der Erläuterung der für dieses System zur Verfügung stehenden Wiedergabefunktionen ein.1 • Da die Lautstärke des iPod nicht mit diesem Gerät geregelt werden kann, stellen Sie die Laufstärke bitte mit dem jeweils angeschlossenen Audio-/VideoReceiver oder Verstärker ein. Taste Deutsch 2 Wählen Sie den entsprechenden Eingang auf Ihrem Audio-/Video-Receiver (oder Verstärker). Zum Abspielen von Videos oder zur Anzeige des OnScreenDisplays muss auch Ihr Fernseher oder Monitor eingeschaltet werden. In folgender Tabelle werden die grundlegenden Wiedergabetasten für Ihren iPod dargestellt: Français Nach der Vornahme aller Anschlüsse können Sie Filme abspielen und Musik hören. Führen Sie folgende Schritte aus, um alles für den iPod-Anschluss vorzubereiten. 1 Stecken Sie Ihren iPod in den DockAnschluss. Achten Sie darauf, dass der Anschluss mit dem zu Ihrem iPod-Modell passenden iPodAdapter vorgenommen wurde (siehe hierzu Montage des iPod-Adapters auf Seite 6). Grundlegende Fernbedienungstasten English Kapitel 4 Diese Tasten zum Verschieben des Cursors (auf dem Bildschirm) verwenden. Hinweis 1 Sie können zur Wiedergabe auch die Gerätesteuertasten des iPod verwenden. Weitere Einzelheiten siehe bitte die dem iPod beiliegende Bedienungsanleitung. 9 Ge IDK-01.book Page 10 Wednesday, May 17, 2006 11:11 AM 04 Start Zur Beachtung • Dieses System ist kompatibel zu einem tragbaren iPod, iPod Mini und iPod Photo (der dritten Generation und höher). Der Grad der Kompatibilität hängt jedoch von der Version der Software Ihres iPod ab. Dieser Receiver unterstützt keine der iPodAktualisierung vom 20.10.2004 vorhergehenden Softwareversionen. Achten Sie bitte darauf, die neueste Software zu verwenden. Weitere Einzelheiten siehe die Homepage der Apple Computer Inc. • Manche Funktionen könnten je nach Modell Ihres iPod nicht zur Verfügung stehen. • Die Videoausgabe dieses Systems ist mit dem Format PAL TV kompatibel. • Die Nutzungsvereinbarung von iPod gestattet die Reproduktion nicht urheberrechtlich geschützten Materials, sowie von Material, deren Urheberrechtsschutz Sie inne haben, oder von Material, zu dessen Reproduktion Sie zum persönlichen Gebrauch berechtigt sind. Wenn Sie Zweifel bezüglich des Rechts zur Kopie von Material haben, wenden Sie sich an Ihren Rechtsberater. • Pioneer übernimmt keinerlei Haftung für den Verlust von Daten während der Verwendung eines iPod für dieses Gerät. OnScreenDisplay Zur bequemen Verwendung ist dieses System mit einem grafischen OnScreenDisplay (OSD) ausgestattet. Sämtliche Anzeigen werden grundsätzlich auf die selbe Weise gesteuert, d.h. der markierte Punkt wird mit den Pfeiltasten (, ) gewechselt und mit ENTER angewählt. Siehe Grundlegende Fernbedienungstasten oben bezüglich anderer verfügbarer Bedienelemente. • Stellen Sie sicher, dass das iPod-Dock an ein Videogerät angeschlossen ist und drücken Sie dann ‘OSD On/Off’. Das OSD erscheint auf der Anzeige.1 Zum Abspielen von Videos von Ihrem iPod oder zur Verwendung der Wiedergabetasten des iPodGeräts muss vor der Verwendung Ihres iPod erneut OSD On/Off gedrückt werden, um das OSD auszuschalten. Hauptmenüanzeige MAIN MENU >Playlists Artists Albums Songs Podcasts Genres Composers Audiobooks SHUFFLE:ALBUMS (1/8) RPT:ALL Eingestellte Shuffle-Wiedergabe Eingestellte Wiederholungs-Wiedergabe Zur nächsten Anzeigeseite Play List-Menü2 Playlists >The Planets Mars Venus Mercury Jupiter Saturn Uranus Neptune SHUFFLE:ALBUMS (1/8) RPT:ALL Wiedergabe-Anzeige Now Playing (1/12) Titel des Lieds Name des Interpreten Name des Albums Tic Tac Toe Nth Degree Best Hits Vol. 2 00:28 -03:48 SHUFFLE:ALBUMS 04:16 RPT:ALL Verstrichene Spielzeit / Restspielzeit / Gesamtspielzeit Hinweis 1 Nach 3 Minuten ohne Bedienung des Geräts schaltet sich ein Bildschirmschoner ein. Drücken Sie eine beliebige Taste, um zum OSD-Menü zurückzukehren. 2 Beachten Sie, dass nicht-römische Zeichen in Play Listen als erscheinen. 10 Ge IDK-01.book Page 11 Wednesday, May 17, 2006 11:11 AM Ergänzende Informationen 05 Ergänzende Informationen English Kapitel 5 Fehlerbehebung • Sie müssen zum Betrieb die diesem Gerät beiliegende Fernbedienung auf den Fernbedienungssensor des angeschlossenen Receivers oder Verstärkers halten. • Verwenden Sie unbedingt das diesem System beiliegende SR Kabel. Technische Daten • Stromversorgung und Sonstiges • Zubehör Fernbedienung. . . . . . . . . . . . . . . . . . . . . . . . . . 1 Lithiumbatterie (CR2025) . . . . . . . . . . . . . . . . . . 1 iPod-Adapter . . . . . . . . . . . . . . . . . . . . . . . . . . . . 6 Netzteil . . . . . . . . . . . . . . . . . . . . . . . . . . . . . . . . . 1 Adapterstecker (für Netzteil). . . . . . . . . . . . . . . . 2 Audiokabel (2 m) rot/weiß. . . . . . . . . . . . . . . . . . 1 Videokabel (2 m) gelb . . . . . . . . . . . . . . . . . . . . . 1 SR Kabel (2 m) . . . . . . . . . . . . . . . . . . . . . . . . . 1 Diese Bedienungsanleitung . . . . . . . . . . . . . . 1 Garantiekarte . . . . . . . . . . . . . . . . . . . . . . . . . . . 1 Reinigung des Geräts • Verwenden Sie ein Staubtuch oder sonstiges trockenes Tuch, um Staub und Schmutz abzuwischen. • Sollte die Oberfläche verschmutzt sein, wischen Sie sie mit einem in Wasser (ca. 80 %) aufgelösten neutralen Reinigungsmittel (ca. 20 %) angefeuchteten und gut ausgewrungenen weichen Tuch und danach mit einem trockenen Tuch ab. Verwenden Sie kein Möbelwachs oder Möbelreinigungsmittel. • Verwenden Sie keine Lösungsmittel, Benzin, Insektenspray oder anderen chemischen Substanzen auf oder in der Nähe dieses Geräts, da sie die Oberfläche angreifen. Español Stromversorgung (mit dem mitgelieferten Netzteil) . . . . . . . . . . . . . . . . . . . . . . . . . . . . . . . . . . DC 12 V Abmessungen. . . . . 99 mm (B) x 33 mm (H) x 74 mm (T) Gewicht. . . . . . . . . . . . . . . . . . . . . . . . . . . . . . xxx g Hinweis • Konstruktive Änderungen, die dem technischen Fortschritt dienen, bleiben vorbehalten. Nederlands Der Betrieb scheint nach Verbindung dieses Geräts mit einem externen Gerät über ein SR Kabel unmöglich zu sein. Italiano Maßnahme • Stellen Sie sicher, dass Ihr iPod korrekt funktioniert. • Stellen Sie sicher, dass der iPod ordnungsgemäß im DockAnschluss des iPod sitzt. • Stellen Sie sicher, dass die AV-Ausgänge des Docks ordnungsgemäß an Ihre externen Geräte angeschlossen sind. Vergewissern Sie sich auch, dass an Ihrem Receiver bzw. Monitor der richtige Eingang eingestellt ist. • Sollte der S-Video-Ausgang angeschlossen sein, so wird am Standard-(Composite-)Videoausgang nichts ausgegeben. Deutsch Problem Kein Ton/ kein Bild. Français Oft wird eine unsachgemäße Bedienung fälschlicherweise als Störung oder Fehlfunktion angesehen. Sollten Sie glauben, dass etwas mit dem Gerät nicht stimmt, überprüfen Sie zunächst die untenstehenden Punkte. Manchmal könnte der Fehler von einer anderen Komponente ausgehen. Kontrollieren Sie auch die anderen verwendeten Komponenten und Elektrogeräte. Sollte die Störung auch nach Prüfung der untenstehenden Punkte fortbestehen, wenden Sie sich bezüglich der Reparatur an Ihren nächsten Pioneer-Fachkundendienst oder Händler. Veröffentlicht von Pioneer Corporation. Urheberrechtlich geschützt © 2006 Pioneer Corporation. Alle Rechte vorbehalten. 11 Ge IDK-01.book Page 2 Wednesday, May 17, 2006 11:12 AM IMPORTANTE CAUTION RISK OF ELECTRIC SHOCK DO NOT OPEN Il simbolo del lampo con terminale a forma di freccia situato all’interno di un triangolo equilatero serve ad avvisare l’utilizzatore della presenza di una “tensione pericolosa” non isolata nella struttura del prodotto che potrebbe essere di un’intensità tale da provocare scosse elettriche all’utilizzatore. ATTENZIONE: PER EVITARE IL RISCHIO DI SCOSSE ELETTRICHE, NON RIMUOVERE IL COPERCHIO (O IL RETRO). NON CI SONO PARTI INTERNE LA CUI MANUTENZIONE POSSA ESSERE EFFETTUATA DALL’UTENTE. IN CASO DI NECESSITÀ, RIVOLGERSI ESCLUSIVAMENTE A PERSONALE DI SERVIZIO QUALIFICATO. Il punto esclamativo in un triangolo equilatero serve ad avvisare l’utilizzatore della presenza di importanti istruzioni di funzionamento e manutenzione riportate nel libretto allegato al prodotto. D3-4-2-1-1_It ATTENZIONE ATTENZIONE Questo apparecchio non è impermeabile. Per prevenire pericoli di incendi o folgorazioni, non posizionare nelle vicinanze di questo apparecchio contenitori pieni di liquidi (quali vasi da fiori, o simili), e non esporre l’apparecchio a sgocciolii, schizzi, pioggia o umidità. D3-4-2-1-3_A_It Per evitare il pericolo di incendi, non posizionare sull’apparecchio dispositivi con fiamme vive (ad D3-4-2-1-7a_A_It esempio una candela accesa, o simili). Se si vuole eliminare questo prodotto, non gettarlo insieme ai rifiuti domestici. Esiste un sistema di raccolta differenziata in conformità alle leggi che richiedono appositi trattamenti, recupero e riciclo. I privati cittadini dei venticinque paesi membri dell’UE, di Svizzera e Norvegia, possono restituire senza alcun costo i loro prodotti elettronici usati ad appositi servizi di raccolta o a un rivenditore (se si desidera acquistarne uno simile). Per i paesi non citati qui sopra, si prega di prendere contatto con le autorità locali per il corretto metodo di smaltimento. In questo modo, si è sicuri che il proprio prodotto eliminato subirà il trattamento, il recupero e il riciclo necessari per prevenire gli effetti potenzialmente negativi sull’ambiente e sulla vita dell’uomo. K058_It IDK-01.book Page 3 Wednesday, May 17, 2006 11:12 AM La ringraziamo per aver acquistato questo prodotto Pioneer. Si prega di leggere tutte le istruzioni per l’uso al fine di apprendere come utilizzare correttamente questo modello. Una volta lette le istruzioni, conservare il manuale in un luogo sicuro per l’eventuale consultazione in futuro. 02 Comandi e display Pannello superiore ed anteriore . . . . . . . . . . . 7 Pannello posteriore . . . . . . . . . . . . . . . . . . . . . 7 04 Predisposizione all’avvio Funzioni di riproduzione dell’iPod . . . . . . . . . . 9 Utilizzo dei display su schermo . . . . . . . . . . . 10 05 Ulteriori informazioni Risoluzione dei problemi . . . . . . . . . . . . . . . . 11 Specifiche tecniche . . . . . . . . . . . . . . . . . . . . 11 Pulizia dell’apparecchio . . . . . . . . . . . . . . . . . 11 Deutsch Controllo degli accessori in dotazione . . . . . . . 4 Inserimento della batteria . . . . . . . . . . . . . . . . 4 Raggio di azione del telecomando. . . . . . . . . . 5 Interferenze con questo apparecchio . . . . . . . 5 Collegamento dell’adattatore per iPod . . . . . . 6 Utilizzo dell'adattatore di connessione. . . . . . . 6 Collegamento dell’apparecchio al ricevitore AV o al televisore . . . . . . . . . . . . . . . 8 Français 01 Prima di iniziare 03 Collegamenti English Indice Italiano Nederlands Español 3 It IDK-01.book Page 4 Wednesday, May 17, 2006 11:12 AM 01 Prima di iniziare Capitolo 1 Prima di iniziare Controllo degli accessori in dotazione Si prega di verificare di aver ricevuto i seguenti accessori in dotazione: • Telecomando • Batteria al litio (CR2025) • Adattatore per iPod x6 • Adattatore CA • Adattatori di connessione (per adattatore CA) x2 • Cavo audio (2 m) rosso/bianco • Cavo video (2 m) giallo • Cavo SR (2 m) • Istruzioni per l’uso • Scheda di garanzia Inserimento della batteria Inserire correttamente la batteria al litio (CR2025) nel telecomando come indicato. Sostituire, parimenti, la batteria non appena si nota una diminuzione della portata operativa. 2 4 1 3 1 Spingere la linguetta di rilascio verso destra per aprire il comparto batteria. 2 Estrarre il comparto batteria. 3 Rimuovere la batteria dal comparto. Se si esegue questa operazione per la prima volta, rimuovere la pellicola protettiva della batteria in dotazione con l’apparecchio, prima di inserirla di nuovo. 4 Inserire una nuova batteria nel comparto. Assicurarsi che il lato della batteria sia rivolto verso l’alto durante l’inserimento della batteria nello spazio previsto. Attenzione Quando si utilizzano batterie al litio, osservare quanto segue: • Smaltire gli elementi della batteria adoperata immediatamente dopo averla sostituita. Tenere lontano dalla portata dei bambini. • Se ingerita, contattare immediatamente un dottore. 4 It IDK-01.book Page 5 Wednesday, May 17, 2006 11:12 AM Prima di iniziare Français Deutsch Il telecomando dispone di un raggio di azione di circa 7 metri. Potrebbe non funzionare correttamente se: • Vi sono ostacoli tra il telecomando e il sensore remoto di questo apparecchio. • La luce diretta del sole o una luce fluorescente si riflette sul sensore remoto. • L’apparecchio è collocato in prossimità di un dispositivo che emette raggi infrarossi. • L’apparecchio viene azionato simultaneamente ad un altro telecomando ad infrarossi. English Raggio di azione del telecomando 30 t Sh lis SD ff O O n/ O y a t Pl lis r te En y u a en Pl uf R fle p e ea t 7m A volte, l’utilizzo di telefoni cellulari in prossimità del presente apparecchio potrebbe causare disturbi ed interferenze. In caso di inconvenienti, allontanare il telefono cellulare dall’apparecchio. Nederlands Interferenze con questo apparecchio Italiano 30 M • Le batterie al litio potrebbero provocare un rischio di incendio o bruciature chimiche, se utilizzate in maniera errata. Non smontarle, non surriscaldarle oltre i 100 °C o non bruciarle. • Rimuovere le batterie se l’apparecchio non viene utilizzato per un mese o oltre. • Per lo smaltimento delle batterie usate, osservare i decreti governativi o le norme ambientali in vigore nel proprio paese/ regione. • Pericolo di esplosione se la batteria viene sostituita in maniera errata. Sostituire la batteria esclusivamente con una dello stesso tipo consigliata dal fabbricante. • Non usare né conservare le batterie alla luce diretta del sole o in luoghi eccessivamente caldi, ad esempio all'interno di un'automobile o in prossimità di un calorifero. Le batterie potrebbero perdere liquido, surriscaldarsi, esplodere o prendere fuoco. Anche la durata e le prestazioni delle batterie potrebbero risultare ridotte. 01 Español 5 It IDK-01.book Page 6 Wednesday, May 17, 2006 11:12 AM 01 Prima di iniziare Collegamento dell’adattatore per iPod Per sistemare correttamente l’iPod nella porta del connettore, è necessario far corrispondere l’adattatore per iPod al proprio modello di iPod. Ciascun adattatore per iPod dispone di una etichetta relativa al modello, come indicato di seguito. • È inoltre possibile collegare un adattatore per iPod da una base dock originale iPod. • Se con questo apparecchio si usano i modelli iPod di quinta generazione, adoperare l’adattatore per iPod in dotazione con l’apparecchio. • Se con questo apparecchio si usa un modello iPod di quinta generazione, acquistare un ‘Apple iPod Universal Dock Adapter, confezione da 3 per iPod con connettore Dock’ della Apple Computer Inc. Utilizzo dell'adattatore di connessione Etichetta modello iPod Etichetta modello Modello iPod corrispondente iPod 20GB iPod 20 GB di quarta generazione iPod 40GB iPod 40 GB di quarta generazione mini iPod mini 20GB/30GB iPod 20 GB/30 GB <display a colori> a colori Solo per il modello britannico Assicurarsi che l'adattatore CA sia dotato della presa adeguata per la propria regione. Inserire la presa estraibile dell'adattatore CA come indicato di seguito. CAUTION SHOCK RISK OF ELECTRIC USE ONLY DRY LOCATION CAUTION SHOCK RISK OF ELECTRIC USE ONLY DRY LOCATION CAUTION SHOCK RISK OF ELECTRIC USE ONLY DRY LOCATION PUSH PUSH 40GB/60GB iPod 40 GB/60 GB <display a colori> a colori nano iPod nano Dopo aver selezionato l’adattatore corrispondente al proprio modello iPod, inserirlo nella base dell’adattatore per iPod, come indicato. 6 It Premi IDK-01.book Page 7 Wednesday, May 17, 2006 11:12 AM Comandi e display 02 English Capitolo 2 Comandi e display Pannello superiore ed anteriore Pannello posteriore CONTROL 2 3 4 3 Spia di alimentazione Si accende quando si collega l’iPod alla porta del connettore dock. 4 Sensore remoto Per ulteriori informazioni, consultare Raggio di azione del telecomando a pagina 5. L 5 1 Terminale CONTROL IN Collegarlo al terminale CONTROL OUT di un ricevitore AV Pioneer (o componente simile) con il cavo SR in dotazione. Ciò consente di utilizzare il telecomando per il controllo di questo apparecchio. Per ulteriori informazioni, controllare le istruzioni per l’uso del ricevitore Pioneer.1 2 Terminale uscita S-VIDEO Usarlo per collegare un cavo S-video al ricevitore TV/AV per visualizzare il display su schermo o per una riproduzione video iPod di qualità superiore (effettuando questo collegamento, non viene trasmesso alcun video al terminale VIDEO). 3 Terminale uscita VIDEO Collegare un cavo video standard (composito) al ricevitore TV/AV per visualizzare il display su schermo o per la riproduzione video iPod. Español 2 Base adattatore iPod Supporta l’adattatore che meglio si adatta al modello di iPod. 4 AUDIO Nederlands 1 Porta connettore iPod Inserire la porta del connettore dock dell’iPod per collegare e ricaricare l’iPod. 3 R Italiano 1 2 VIDEO Deutsch 1 S - VIDEO DC IN 12 V Français OUTPUT IN 4 Terminale uscita AUDIO Usarlo per collegare un cavo per terminale stereo RCA/fono al ricevitore AV/amplificatore di potenza per audio a due canali. 5 Terminale DC IN 12 V per adattatore CA Usarlo per collegare l’adattatore CA ad una presa CA. Nota 1 Se si è collegato un cavo SR a questo terminale, puntare il telecomando in dotazione all’apparecchio verso il sensore remoto del ricevitore o amplificatore collegato. 7 It IDK-01.book Page 8 Wednesday, May 17, 2006 11:12 AM 03 Collegamenti Capitolo 3 Collegamenti Collegamento dell’apparecchio al ricevitore AV o al televisore OUTPUT IN CONTROL S - VIDEO VIDEO Adattatore CA (in dotazione) DC IN 12 V R AUDIO L Presa alimentazione CA Dock di controllo per iPod • Inserire l’adattatore CA solo dopo aver eseguito tutti i collegamenti. • Con questo apparecchio non usare nessun adattatore che non sia quello in dotazione. • È necessario effettuare un collegamento video, se si desidera riprodurre un video sull'iPod o l'OSD di questo apparecchio. • Collegare un cavo Svideo per una riproduzione video di qualità superiore (effettuando questo collegamento, non viene trasmesso alcun video al terminale VIDEO). Collegamento opzionale al televisore Televisore VIDEO IN Ricevitore o amplificatore Cavo audio (in dotazione) R AUDIO IN Cavo video (in dotazione) L VIDEO IN Cavo SR (in dotazione) CONTROL OUT La maggior parte dei ricevitori Pioneer dispongono di terminale CONTROL OUT per il collegamento di questo componente, consentendo l’utilizzo del telecomando del ricevitore per il controllo del presente apparecchio. Per ulteriori informazioni, controllare le istruzioni per l’uso del ricevitore Pioneer (se si è collegato un cavo SR a questo terminale, puntare il telecomando in dotazione all’apparecchio verso il sensore del ricevitore o amplificatore collegato). 8 It IDK-01.book Page 9 Wednesday, May 17, 2006 11:12 AM Predisposizione all’avvio 04 Predisposizione all’avvio Dopo aver effettuato i collegamenti, è possibile iniziare a guardare video ed ascoltare musica. Osservare le operazioni di seguito per un’introduzione alla base dock dell’iPod. La seguente tabella mostra i comandi basici di riproduzione dell’iPod: Tasto OSD On/Off Consente di tornare al menu precedente. Enter Consente di selezionare le voci/i livelli del menu. Consente di avviare/interrompere la riproduzione. Tenerlo premuto durante la riproduzione per avviare la scansione. Playlist Playlist Shuffle Premerlo più volte per passare tra le opzioni di riproduzione shuffle. Premerlo più volte per passare tra le opzioni di riproduzione ripetuta. Español Repeat Inizia la riproduzione della playlist precedente/successiva. Nederlands Premere per saltare alla precedente/ successiva canzone. Italiano OSD On/Off Menu Consente di spegnere/accendere il display su schermo dell’apparecchio (ciò appare sul componente video cui si è collegati). Menu 2 Selezionare l’ingresso adeguato del ricevitore del ricevitore AV (o amplificatore di potenza). Per utilizzare il display su schermo o per guardare un video, è inoltre necessario accendere il televisore o lo schermo. 3 Iniziare la riproduzione. Controllare la tabella su Comandi basici del telecomando di seguito per informazioni sulle funzioni di riproduzione disponibili su questo apparecchio.1 • Poiché non è possibile controllare il volume dell’iPod con questo apparecchio, regolarlo dal ricevitore AV o dall’amplificatore di potenza a cui è collegato. Funzione Deutsch 1 Collocare l’iPod nella porta del connettore dock. Assicurarsi che la porta del connettore sia inserita nel connettore iPod corrispondente al proprio modello iPod (a tal fine, vedere Collegamento dell’adattatore per iPod a pagina 6). Comandi basici del telecomando Français Funzioni di riproduzione dell’iPod English Capitolo 4 Utilizzare questi tasti per spostare il cursore (su schermo). Enter Playlist Shuffle Playlist Repeat Nota 1 Per la riproduzione, si possono utilizzare anche i comandi dell’iPod. Per ulteriori informazioni, consultare il manuale in dotazione con l’iPod. 9 It IDK-01.book Page 10 Wednesday, May 17, 2006 11:12 AM 04 Predisposizione all’avvio Importante • Il presente apparecchio è compatibile con dispositivi portatiti iPod, iPod mini ed iPod Photo (terza generazione e superiore). Tuttavia, tale compatibilità potrebbe variare in base alla versione software dell’iPod. Il presente ricevitore non supporta versioni software precedenti a iPod Updater 2004-10-20. Assicurarsi di utilizzare il software più aggiornato. Per ulteriori informazioni, si prega di visitare la pagina principale di Apple Computer Inc. • A seconda del modello iPod, potrebbero non essere disponibili alcune funzioni. • L'uscita video con questo sistema è compatibile con il formato PAL TV. • L’accordo stipulato con gli utenti iPod garantisce la riproduzione di materiali non protetti da copyright, materiali di cui si possiede il copyright o materiali per i quali si è autorizzati o di cui si dispone il permesso legale alla riproduzione per uso personale. Se non si è sicuri di detenere i diritti di copia sul materiale, contattare un consulente legale. • Pioneer non si ritiene responsabile dell’eventuale perdita di dati, durante l’utilizzo dell’iPod con questo apparecchio. Schermata menu principale MAIN MENU >Playlists Artists Albums Songs Podcasts Genres Composers Audiobooks SHUFFLE:ALBUMS (1/8) RPT:ALL Passare alla schermata successiva Menu playlist2 Playlists >The Planets Mars Venus Mercury Jupiter Saturn Uranus Neptune SHUFFLE:ALBUMS (1/8) RPT:ALL Schermata riproduzione Now Playing (1/12) Canzone Artista Album Tic Tac Toe Nth Degree Utilizzo dei display su schermo Per un utilizzo più semplice, il presente apparecchio utilizza un display grafico su schermo (OSD). Si naviga su tutte le schermate praticamente alla stessa maniera, utilizzando i tasti del cursore (, ) per modificare la voci evidenziata e premendo ENTER per selezionarla. Vedere Comandi basici del telecomando in precedenza per altri comandi disponibili. Impostazione riproduzione shuffle Impostazione riproduzione ripetuta Best Hits Vol. 2 00:28 -03:48 SHUFFLE:ALBUMS 04:16 RPT:ALL Tempo di riproduzione trascorso/tempo di riproduzione restante/tempo totale • Assicurarsi che il dock iPod sia collegato ad un componente video, quindi premere ‘OSD On/Off’. Sullo schermo viene visualizzato l’OSD.1 Se si desidera riprodurre i contenuti video dall’iPod o utilizzare uno dei comandi di riproduzione dell’iPod, premere di nuovo OSD On/Off per disattivare l’OSD prima di utilizzare l’iPod. Nota 1 Dopo 3 minuti di inattività appare uno screensaver. Premere un tasto per tornare al menu dell’OSD. 2 Si noti che i caratteri non romani verranno visualizzati come . 10 It IDK-01.book Page 11 Wednesday, May 17, 2006 11:12 AM Ulteriori informazioni 05 Ulteriori informazioni English Capitolo 5 Risoluzione dei problemi • Per effettuare l’operazione, è necessario puntare il telecomando in dotazione all’apparecchio verso il sensore remoto del ricevitore o amplificatore collegato. • Assicurarsi di utilizzare il cavo SR in dotazione all’apparecchio. Specifiche tecniche • Alimentazione e varie • Accessori Telecomando . . . . . . . . . . . . . . . . . . . . . . . . . . . 1 Batteria al litio (CR2025) . . . . . . . . . . . . . . . . . . 1 Adattatore per iPod . . . . . . . . . . . . . . . . . . . . . . 6 Adattatore CA . . . . . . . . . . . . . . . . . . . . . . . . . . . 1 Adattatori di connessione (per adattatore CA) . . . . . . . . . . . . . . . . . . . . . . . 2 Cavo audio (2 m) rosso/bianco. . . . . . . . . . . . . . 1 Cavo video (2 m) giallo . . . . . . . . . . . . . . . . . . . . 1 Cavo SR (2 m) . . . . . . . . . . . . . . . . . . . . . . . . . . 1 Istruzioni per l’uso . . . . . . . . . . . . . . . . . . . . . . . 1 Scheda di garanzia . . . . . . . . . . . . . . . . . . . . . . 1 Pulizia dell’apparecchio • Utilizzare un panno per lucidare o un panno asciutto per rimuovere polvere e sporcizia. • Se la superficie è sporca, pulirla con un panno morbido impregnato con un detergente neutro diluito in cinque o sei parti di acqua e ben strizzato, quindi pulire di nuovo con un panno asciutto. Non utilizzare cera o prodotti per mobili. • Non utilizzare diluenti, benzina, spray insetticidi o altre sostanze chimiche su questo apparecchio o nei pressi di esso, in quanto potrebbero corroderne la superficie. Español Alimentazione (con l’adattatore in dotazione) . . . . . . . . . . . . . . . . . . . . . . . . . . . . . . . . . . CC 12 V Dimensioni . . . . . . . . 99 mm (L) x 33 mm (A) x 74 mm (P) Peso . . . . . . . . . . . . . . . . . . . . . . . . . . . . . . . . xxx g Nota • Le specifiche tecniche ed il design sono soggetti a possibili modifiche dovute al miglioramento del prodotto senza previo avviso. Nederlands Non è possibile effettuare l’operazione dopo aver collegato il cavo SR da questo apparecchio ad un componente esterno. Italiano Rimedio • Assicurarsi che l’iPod funzioni correttamente. • Assicurarsi che l’iPod sia collocato correttamente nella base dock del connettore iPod. • Assicurarsi di aver collegato correttamente le uscite AV dalla base dock ai componenti esterni. Verificare inoltre di aver selezionato l’ingresso corretto sul ricevitore e/o sullo schermo. • Se si è collegata l’uscita S-video, non si avverte alcuna emissione dall’uscita video standard (composita). Deutsch Problema Nessun audio/nessuna immagine. Français Un funzionamento anomalo può essere spesso interpretato come un guasto o un problema di funzionamento. Se si ritiene che questo componente non funzioni correttamente, effettuare i controlli secondo la lista di seguito. Talvolta il problema può riguardare un altro componente. Controllare gli altri componenti e gli apparecchi elettrici utilizzati. Se non si riesce a risolvere il problema neppure dopo aver eseguito i controlli elencati di seguito, rivolgersi al più vicino centro di assistenza Pioneer autorizzato o al proprio rivenditore per la riparazione. Pubblicato da Pioneer Corporation. Copyright © 2006 Pioneer Corporation. Tutti i diritti riservati. 11 It IDK-01.book Page 2 Wednesday, May 17, 2006 11:10 AM BELANGRIJK CAUTION RISK OF ELECTRIC SHOCK DO NOT OPEN De lichtflash met pijlpuntsymbool in een gelijkzijdige driehoek is bedoeld om de aandacht van de gebruikers te trekken op een niet geïsoleerde “gevaarlijke spanning” in het toestel, welke voldoende kan zijn om bij aanraking een elektrische shock te veroorzaken. WAARSCHUWING: OM HET GEVAAR VOOR EEN ELEKTRISCHE SHOCK TE VOORKOMEN, DEKSEL (OF RUG) NIET VERWIJDEREN. AAN DE BINNENZIJDE BEVINDEN ZICH GEEN ELEMENTEN DIE DOOR DE GEBRUIKER KUNNEN BEDIEND WORDEN. ENKEL DOOR GEKWALIFICEERD PERSONEEL TE BEDIENEN. WAARSCHUWING Dit apparaat is niet waterdicht. Om brand of een elektrische schok te voorkomen, mag u geen voorwerp dat vloeistof bevat in de buurt van het apparaat zetten (bijvoorbeeld een bloemenvaas) of het apparaat op andere wijze blootstellen aan waterdruppels, opspattend water, regen of vocht. Het uitroepteken in een gelijkzijdige driehoek is bedoeld om de aandacht van de gebruiker te trekken op de aanwezigheid van belangrijke bedienings- en onderhoudsinstructies in de handleiding bij dit toestel. D3-4-2-1-1_Du Bij dit product zijn batterijen geleverd. Wanneer deze leeg zijn, moet u ze niet weggooien maar inleveren als KCA. D3-4-2-1-3_A_Du WAARSCHUWING Om brand te voorkomen, mag u geen open vuur (zoals een brandende kaars) op de apparatuur D3-4-2-1-7a_A_Du zetten. D3-4-2-4-2_Du Dit product voldoet aan de EMC-richtlijnen (89/336/EEG, gewijzigd bij 92/31/EEG en 93/68/EEG). D3-4-2-1-9b_Du Deponeer dit product niet bij het gewone huishoudelijk afval wanneer u het wilt verwijderen. Er bestaat een speciaal wettelijk voorgeschreven verzamelsysteem voor de juiste behandeling, het opnieuw bruikbaar maken en de recycling van gebruikte elektronische producten. In de 25 lidstaten van de EU, Zwitserland en Noorwegen kunnen particulieren hun gebruikte elektronische producten gratis bij de daarvoor bestemde verzamelplaatsen of een verkooppunt (indien u aldaar een gelijkwaardig nieuw product koopt) inleveren. Indien u zich in een ander dan bovengenoemd land bevindt kunt u contact opnemen met de plaatselijke overheid voor informatie over de juiste verwijdering van het product. Zodoende zorgt u ervoor dat het verwijderde product op de juiste wijze wordt behandeld, opnieuw bruikbaar wordt gemaakt, t gerecycleerd en het niet schadelijk is voor de gezondheid en het milieu. K058_Du IDK-01.book Page 3 Wednesday, May 17, 2006 11:10 AM Bedankt voor het aanschaffen van dit Pioneer-product. Lees deze gebruiksinstructies door om u ervan te verzekeren dat u in staat bent om uw model op de juiste wijze te bedienen. Bewaar de gebruiksaanwijzing goed als referentiemateriaal na deze te hebben doorgelezen. 01 Voor u begint Boven- en voorpaneel . . . . . . . . . . . . . . . . . . . 7 Achterpaneel. . . . . . . . . . . . . . . . . . . . . . . . . . 7 04 Beginnen iPod-weergavefuncties. . . . . . . . . . . . . . . . . . . 9 Het schermdisplay gebruiken . . . . . . . . . . . . 10 05 Aanvullende informatie Problemen verhelpen. . . . . . . . . . . . . . . . . . . 11 Specificaties . . . . . . . . . . . . . . . . . . . . . . . . . 11 Het apparaat reinigen . . . . . . . . . . . . . . . . . . 11 Deutsch 02 Bedieningselementen en displays Het apparaat op uw AV-receiver of TV aansluiten . . . . . . . . . . . . . . . . . . . . . . . . . . 8 Français De inhoud van de doos controleren. . . . . . . . . 4 De batterij plaatsen . . . . . . . . . . . . . . . . . . . . . 4 Bereik van de afstandsbediening. . . . . . . . . . . 5 Over interferentie en het gebruik van dit apparaat . . . . . . . . . . . . . . . . . . . . . . . . . . . 5 De iPod type-adapter plaatsen. . . . . . . . . . . . . 6 De netstroomadapterstekker plaatsen. . . . . . . 6 03 Aansluiten English Inhoud Italiano Nederlands Español 3 Du IDK-01.book Page 4 Wednesday, May 17, 2006 11:10 AM 01 Voor u begint Hoofdstuk 1 Voor u begint De inhoud van de doos controleren Verzeker u ervan dat de volgende accessoires zijn meegeleverd: • Afstandsbediening • Lithiumbatterij (CR2025) • iPod type-adapter x6 • Netstroomadapter • Stekkeradapters (voor netstroomadapter) x2 • Audiokabel (2 m) rood/wit • Videokabel (2 m) geel • SR-kabel (2 m) • Deze gebruiksaanwijzing • Garantiekaart De batterij plaatsen Plaats de lithiumbatterij (CR2025) in de afstandsbediening zoals hieronder wordt aangegeven. Vervang de batterij op dezelfde wijze in het geval dat u een afname van het bereik opmerkt. 2 4 1 3 1 Druk het ontgrendelingslipje naar rechts om de batterijbehuizing te openen. 2 Trek de batterijbehuizing naar buiten. 3 Verwijder de batterij uit de behuizing. Verwijder indien u dit voor het eerst doet het beschermende plastic van de batterij die bij het systeem is geleverd, alvorens het opnieuw te plaatsen. 4 Plaats een nieuwe batterij in de behuizing. Let erop dat u de zijde van de batterij naar boven richt als u hem plaatst. Let op Houd het volgende in acht bij gebruik van lithiumbatterijen: • Werp de gebruikte batterijen direct weg na vervanging. Houd ze uit de buurt van kinderen. • Neem direct contact op met een arts indien de batterij wordt ingeslikt. 4 Du IDK-01.book Page 5 Wednesday, May 17, 2006 11:10 AM Voor u begint Bereik van de afstandsbediening Français Deutsch De afstandsbediening heeft een bereik van ongeveer 7 meter. Het functioneert mogelijk niet goed indien: • Er obstakels zijn geplaatst tussen de afstandsbediening en de afstandsbedieningssensor van het apparaat. • Direct zonlicht of TL-licht op de afstandsbedieningssensor schijnt. • Het systeem zich bevindt in de buurt van een apparaat dat infraroodstraling aan het genereren is. • De eenheid tegelijkertijd wordt gebruikt met een andere infraroodafstandsbediening. English Italiano • Lithiumbatterijen kunnen tot vuur of chemicaliën gerelateerd brandgevaar leiden indien ze onjuist worden gebruikt. Haal ze niet uit elkaar, verwarm ze niet boven de 100 °C en verbrandt ze ook niet. • Verwijder de batterij indien het apparaat gedurende een maand of langer niet zal worden gebruikt. • Werp de batterijen weg volgens de overheidsvoorschriften en milieuwetgeving die van toepassing zijn op uw land/gebied. • Er bestaat explosiegevaar indien de batterij onjuist wordt geplaatst. Vervang hem enkel door hetzelfde type dat door de fabrikant wordt aangeraden. • Bewaar of gebruik batterijen niet in de zon of op extreem warme plaatsen, zoals in een auto of in de buurt van een verwarming. Dit kan leiden tot batterijen die lekken, oververhit raken, exploderen of vuur vatten. Het vermindert ook de levensduur en performance van de batterijen. 01 30 30 t Sh lis SD ff O O n/ O y r a t Pl lis te En y a u en Pl M uf R fle p e ea t 7m Español In sommige gevallen resulteert het gebruik van een mobiele telefoon in de buurt van dit apparaat in ruis of interferentie. Plaats indien u dit probleem ondervindt de mobiele telefoon en het apparaat verder uit elkaar. Nederlands Over interferentie en het gebruik van dit apparaat 5 Du IDK-01.book Page 6 Wednesday, May 17, 2006 11:10 AM 01 Voor u begint De iPod type-adapter plaatsen Om uw iPod op de juiste wijze in het dock te plaatsen, dient u de iPod type-adapter te selecteren die overeenkomt met het model van uw iPod. Iedere iPod type-adapter is voorzien van een modelmarkering zoals hieronder wordt aangeduid. • Gebruik in het geval van vijfde generatie iPod-modellen de iPod type-adapter die u heeft ontvangen bij uw iPod. • Gebruik in het geval van een derde generatie iPod-model de ‘Apple iPod Universal Dock Adapter 3-Pack voor iPod met Dock Connector’ die beschikbaar is via Apple Computer Inc. De netstroomadapterstekker plaatsen iPod modelmarking Modelmarkering Overeenkomstig iPod-type iPod 20GB Vierde generatie 20 GB iPod iPod 40GB Vierde generatie 40 GB iPod mini iPod mini Color 20GB 30GB 20 GB / 30 GB iPod <kleurendisplay> Color 40GB 60GB 40 GB / 60 GB iPod <kleurendisplay> nano iPod nano Enkel voor model uit het V.K. Verzeker u ervan dat de netstroomadapter is voorzien van de juiste stekker voor uw regio. Vervang de verwisselbare netstroomadapterstekker zoals hieronder wordt aangeduid. CAUTION Plaats de iPod type-adapter die overeenkomt met uw iPod in de iPod type-adapter opening zoals hier wordt aangegeven. • U kunt ook een iPod type-adapter gebruiken die afkomstig is van een origineel iPod-dock. 6 Du SHOCK RISK OF ELECTRIC USE ONLY DRY LOCATION CAUTION SHOCK RISK OF ELECTRIC USE ONLY DRY LOCATION CAUTION SHOCK RISK OF ELECTRIC USE ONLY DRY LOCATION PUSH PUSH Druk In IDK-01.book Page 7 Wednesday, May 17, 2006 11:10 AM Bedieningselementen en displays 02 English Hoofdstuk 2 Bedieningselementen en displays Achterpaneel OUTPUT IN 1 2 4 4 AUDIO L 5 1 CONTROL IN-aansluiting Sluit dit aan op de CONTROL OUT-aansluiting van een Pioneer AV-receiver (of vergelijkbaar component) met behulp van de meegeleverde SR-kabel. Dit stelt u in staat om het apparaat te bedienen met de afstandsbediening van de receiver. Raadpleeg de gebruiksaanwijzing van uw Pioneer-receiver voor informatie hierover.1 2 S-VIDEO-uitgang Sluit hier een S-VIDEO-kabel op aan voor aansluiting met uw TV/AV-receiver om de schermdisplays weer te geven of een iPodvideoweergave van hogere kwaliteit te verkrijgen (er wordt geen video uitgevoerd via de VIDEO-uitgang indien deze verbinding tot stand wordt gebracht). 3 VIDEO-uitgang Sluit een standaard (composiet) videokabel aan op uw TV/AV-receiver om de schermdisplays weer te geven of voor iPodvideoweergave. 4 AUDIO-uitgangen Voor het aansluiten van een stereo RCA/phono aansluitkabel op uw AV-receiver/versterker voor twee-kanaals geluid. 5 Netstroomadapter DC IN 12 V aansluiting Voor het aansluiten van de netstroomadapter op een stopcontact. Español 1 iPod-aansluitpoort Plaats uw iPod-dockaansluitpoort om uw iPod aan te sluiten en tegelijkertijd op te laden. 2 iPod type-adapter opening Plaats hier de iPod type-adapter die overeenkomt met uw iPod. 3 Stroomindicatielampje Licht op als uw iPod is aangesloten op de dockaansluitpoort. 4 Afstandsbedieningssensor Zie Bereik van de afstandsbediening op pagina 5 voor meer informatie hierover. 3 R Nederlands 3 2 VIDEO Italiano 1 S - VIDEO Deutsch CONTROL DC IN 12 V Français Boven- en voorpaneel Opmerking 1 Richt de afstandsbediening die wordt meegeleverd bij deze eenheid op de afstandsbedieningssensor van de aangesloten receiver of versterker indien u een SR-kabel heeft aangesloten op deze aansluiting. 7 Du IDK-01.book Page 8 Wednesday, May 17, 2006 11:10 AM 03 Aansluiten Hoofdstuk 3 Aansluiten Het apparaat op uw AV-receiver of TV aansluiten OUTPUT IN CONTROL S - VIDEO VIDEO DC IN 12 V R AUDIO Netstroomadapter (meegeleverd) L Stopcontact Control Dock voor iPod • Verbind de netstroomadapter pas na alle aansluitingen tot stand te hebben gebracht. • Gebruik enkel de meegeleverde adapter met dit apparaat. • Een videoverbinding is vereist indien u videouitvoer van uw iPod of de OSD van dit apparaat wenst te bekijken. • Gebruik een S-VIDEOkabel voor een videoweergave van hogere kwaliteit (er wordt geen video uitgevoerd via de VIDEO -uitgang indien deze verbinding tot stand wordt gebracht). Optionele verbinding met uw TV TV VIDEO IN Receiver of versterker Audiokabel (meegeleverd) R AUDIO IN Videokabel (meegeleverd) SR-kabel (meegeleverd) De meeste Pioneer-receivers zijn voorzien van een CONTROL OUT -aansluiting die kan worden gebruikt om de apparatuur te verbinden met dit component, wat u in staat stelt om deze eenheid te bedienen met de afstandsbediening van de receiver.Raadpleeg de gebruiksaanwijzing van uw Pioneer-receiver voor informatie hierover. (Richt, indien u een SRkabel heeft aangesloten op deze aansluiting, de afstandsbediening die wordt meegeleverd bij deze eenheid op de afstandsbedieningsensor van de aangesloten receiver of versterker.) 8 Du L VIDEO IN CONTROL OUT IDK-01.book Page 9 Wednesday, May 17, 2006 11:10 AM Beginnen 04 Beginnen Basishandelingen met de afstandsbediening Zodra u alles heeft aangesloten, bent u klaar om video’s te bekijken en naar muziek luisteren. Volg de onderstaande stappen voor een introductie van uw iPod-dock. De volgende tabel bevat informatie over de basishandelingen die via de afstandsbediening van uw iPod kunnen worden uitgevoerd: Keert terug naar het vorige menu. Menu Selecteert menuitems/-niveaus. Enter Start/pauzeert de weergave. Houd deze ingedrukt tijdens de weergave om het spoelen te starten. Druk hierop om naar de vorige/ volgende track te gaan. Playlist Playlist Shuffle Menu Enter Repeat Playlist Shuffle Playlist Repeat Schakelt de schermdisplay (die verschijnt op aangesloten videocomponent) van dit apparaat aan/ uit. Start de weergave van de vorige/ volgende playlist. Druk hier een aantal maal op om te schakelen tussen de beschikbare shuffle weergaveopties. Español OSD On/Off Functie Nederlands 3 Start de weergave. Raadpleeg de tabel in Basishandelingen met de afstandsbediening onder voor uitleg over de weergavefuncties die in combinatie met dit systeem beschikbaar zijn.1 • Aangezien het volume van de iPod niet kan worden bediend vanaf het apparaat zelf, dient u het volume aan te passen via de AVreceiver of versterker waarop het is aangesloten. OSD On/Off Italiano 2 Selecteer de juiste invoer op uw AVreceiver (of versterker). Voor het weergeven van de schermdisplays of video dient u ook uw TV of monitor in te schakelen. Toets Deutsch 1 Plaats uw iPod in de dockaansluitpoort. Verzeker u ervan dat u de juiste iPod typeadapter voor uw iPod heeft geplaatst in de aansluitpoort (zie De iPod type-adapter plaatsen op pagina 6 voor instructies). Français iPod-weergavefuncties English Hoofdstuk 4 Druk hier een aantal maal op om te schakelen tussen de beschikbare repeat weergaveopties. Gebruik deze toets om de cursor te verplaatsen (op het scherm). Opmerking 1 U kunt ook de bedieningstoetsen van uw iPod zelf gebruiken om hem te bedienen. Raadpleeg de handleiding die u heeft ontvangen bij uw iPod voor meer informatie hierover. 9 Du IDK-01.book Page 10 Wednesday, May 17, 2006 11:10 AM 04 Beginnen Belangrijk • Dit systeem is compatibel met de draagbare iPod, iPod mini en iPod Photo apparatuur (derde generatie en daarboven), maar de compatibiliteit kan desondanks variëren, afhankelijk van de softwareversie van uw iPod. Deze receiver ondersteunt geen softwareversies voor iPod-update 2004-10-20. Verzeker u ervan dat u de meest actuele software gebruikt. Raadpleeg voor meer informatie de Apple Computer Inc. homepage. • Afhankelijk van het iPod-model zijn sommige functies mogelijk niet beschikbaar. • De videouitvoer via dit systeem is compatibel met het PAL TV-systeem. • De iPod-gebruikersovereenkomst geeft toestemming voor de weergave van materiaal zonder copyright, material waarvan u de copyright bezitter bent en materiaal waarvoor u autorisatie heeft ontvangen of dat is goedgekeurd voor persoonlijk gebruik. Neem contact op met uw juridisch adviseur indien u niet zeker weet of u het recht heeft om bepaald materiaal te kopiëren. • Pioneer is niet verantwoordelijk voor het verlies van data dat voortkomt uit het gebruik van uw iPod in combinatie met dit apparaat. Het schermdisplay gebruiken Dit systeem maakt voor extra gemak gebruik van een grafisch schermdisplay (OSD). Alle schermen worden op vrijwel dezelfde wijze bediend, waarbij de cursortoetsen (, ) dienen voor het aanpassen van het gehighlighte item en ENTER het item selecteert. Zie Basishandelingen met de afstandsbediening boven voor de andere beschikbare bedieningselementen. • Controleer eerst of de iPod-dock is aangesloten op videoapparatuur en druk vervolgens op ‘OSD On/Off’. De OSD verschijnt vervolgens op het scherm.1 Druk, indien u video wenst weer te geven via u iPod of zijn bedieningselementen wenst te gebruiken, voor u uw iPod gebruikt, nogmaals op OSD On/Off om de OSD uit te schakelen. Hoofdmenuscherm MAIN MENU >Playlists Artists Albums Songs Podcasts Genres Composers Audiobooks SHUFFLE:ALBUMS (1/8) Shuffle play configuratie Repeat play configuratie RPT:ALL Ga naar het volgende scherm Playlistmenu2 Playlists >The Planets Mars Venus Mercury Jupiter Saturn Uranus Neptune SHUFFLE:ALBUMS (1/8) RPT:ALL Weergavescherm Now Playing (1/12) Track-naam Artiestnaam Albumnaam Tic Tac Toe Nth Degree Best Hits Vol. 2 00:28 -03:48 SHUFFLE:ALBUMS 04:16 RPT:ALL Verstreken / resterende speelduur speelduur / totale speelduur Opmerking 1 Er verschijnt een screensaver nadat het apparaat gedurende 3 minuten niet is gebruikt. Druk op een willekeurige toets om terug te keren naar het OSD-menu. 2 Merk op dat niet-romeinse tekens binnen de playlist worden weergegeven als . 10 Du IDK-01.book Page 11 Wednesday, May 17, 2006 11:10 AM Aanvullende informatie 05 Aanvullende informatie English Hoofdstuk 5 Problemen verhelpen • Voor de bediening ervan dient u de afstandsbediening die u bij uw apparaat heeft ontvangen te richten op de afstandsbedieningssensor van de aangesloten receiver of versterker. • Verzeker u ervan dat u de SR-kabel gebruikt die u heeft ontvangen bij dit systeem. Specificaties • Stroomvoorziening en overige • Accessoires Afstandsbediening . . . . . . . . . . . . . . . . . . . . . . 1 Lithiumbatterij (CR2025) . . . . . . . . . . . . . . . . . . 1 iPod type-adapter . . . . . . . . . . . . . . . . . . . . . . . . 6 Netstroomadapter . . . . . . . . . . . . . . . . . . . . . . . 1 Stekkeradapters (voor netstroomadapter) . . . . . . . . . . . . . . . . . . . 2 Audiokabel (2 m) rood/wit. . . . . . . . . . . . . . . . . . 1 Videokabel (2 m) geel . . . . . . . . . . . . . . . . . . . . . 1 SR-kabel (2 m). . . . . . . . . . . . . . . . . . . . . . . . . . 1 Deze gebruiksaanwijzing . . . . . . . . . . . . . . . . . 1 Garantiekaart . . . . . . . . . . . . . . . . . . . . . . . . . . . 1 Het apparaat reinigen • Gebruik een poetsdoek of droge doek om de stof en ander vuil weg te vegen. • Gebruik in het geval dat het oppervlak vies is een zachte doek met een beetje neutraal reinigingsmiddel dat u eerst vijf tot zes maal heeft verdunt in water, en vervolgens goed heeft uitgewrongen, om het schoon te maken en droog het vervolgens met een droge doek. Gebruik geen meubelwas of schoonmaakmiddel. • Gebruik nooit verdunner, benzine, insecticidespray of overige chemicaliën op, of in de buurt van dit apparaat, aangezien dit het oppervlak aantast. Español Stroomverbruik (in combinatie met de meegeleverde adapter) . . . . . . . . . . . . . . . . . . . . . . . . . . . . . . . . . . DC 12 V Afmetingen. . . . . . . .99 mm (B) x 33 mm (H) x 74 mm (D) Gewicht. . . . . . . . . . . . . . . . . . . . . . . . . . . . . . xxx g Opmerking • De specificaties en het ontwerp zijn onderhevig aan mogelijke aanpassingen in verband met verbeteringen, zonder voorgande kennisgeving. Nederlands De bediening van het apparaat lijkt niet meer mogelijk na de SRkabel te hebben aangesloten vanaf dit apparaat naar een extern component. Italiano Oplossing • Controleer of uw iPod goed werkt. • Verzeker u ervan dat de iPod juist is geplaatst in het iPodaansluitdock. • Verzeker u ervan dat de AV-uitgangen juist zijn aangesloten vanaf het dock naar uw externe apparatuur. Controleer ook of de juiste invoer is geselecteerd op uw receiver en/of monitor. • Als de S-VIDEO-uitgang wordt gebruikt, wordt er geen beeld uitgevoerd naar de standaard (composiet) videouitgang. Deutsch Probleem Geen geluid/geen beeld. Français Een verkeerd gebruik wordt vaak onterecht gezien als een probleem of storing. Controleer de volgende punten indien u vermoedt dat er iets mis is met dit apparaat. Soms wordt het probleem veroorzaakt door een ander apparaat. Onderzoek de overige componenten en elektrische apparaten die u gebruikt. Als de problemen zich blijven voordoen, na de lijst te hebben doorgenomen, kunt u contact opnemen met het dichtstbijzijnde, geautoriseerde Pioneer service center of direct met uw leverancier om de reparatie te laten uitvoeren. Uitgegeven door Pioneer Corporation. Copyright © 2006 Pioneer Corporation. Alle rechten voorbehouden. 11 Du IDK-01.book Page 2 Wednesday, May 17, 2006 11:13 AM IMPORTANTE CAUTION RISK OF ELECTRIC SHOCK DO NOT OPEN La luz intermitente con el símbolo de punta de flecha dentro un triángulo equilátero. Está convenido para avisar el usuario de la presencia de “voltaje peligrosa” no aislada dentro el producto que podría constituir un peligro de choque eléctrico para las personas. ATENCIÓN: PARA PREVENIR EL PELIGRO DE CHOQUE ELÉCTRICO NO REMOVER LA TAPA NI LAS PARTES DENTRO NO UTILIZADAS, LLAMAR UNA PERSONA CUALIFICADA El punto exclamativo dentro un triángulo equilátero convenido para avisar el usuário de la presencia de importantes instrucciones sobre el funcionamiento y la manutención en la libreta que acompaña el aparato. D3-4-2-1-1_Sp ADVERTENCIA ADVERTENCIA Este aparato no es impermeable. Para evitar el riesgo de incendio y de descargas eléctricas, no ponga ningún recipiente lleno de líquido (como pueda ser un vaso o un florero) cerca del aparato ni lo exponga a goteo, salpicaduras, lluvia o D3-4-2-1-3_A_Sp humedad. Para evitar el peligro de incendio, no ponga nada con fuego encendido (como pueda ser una vela) D3-4-2-1-7a_A_Sp encima del aparato. Si desea deshacerse de este producto, no lo mezcle con los residuos generales de su hogar. De conformidad con la legislación vigente, existe un sistema de recogida distinto para los productos electrónicos que requieren un procedimiento adecuado de tratamiento, recuperación y reciclado. Las viviendas privadas en los 25 estados miembros de la UE, en Suiza y Noruega pueden devolver gratuitamente sus productos electrónicos usados en las instalaciones de recolección previstas o bien en las instalaciones de minoristas (si adquieren un producto similar nuevo). En el caso de los países que no se han mencionado en el párrafo anterior, póngase en contacto con sus autoridades locales a fin de conocer el método de eliminación correcto. Al actuar siguiendo estas instrucciones, se asegurará de que el producto de desecho se somete a los procesos de tratamiento, recuperación y reciclaje necesarios, con lo que se previenen los efectos negativos potenciales para el entorno y la salud humana. K058_Sp IDK-01.book Page 3 Wednesday, May 17, 2006 11:13 AM Gracias por la adquisición de este producto Pioneer. Lea completamente este manual de instrucciones para aprender a operar correctamente el aparato. Después de haber terminado la lectura de las instrucciones, guarde el manual en un lugar seguro para poderlo consultar en el futuro. 01 Antes de comenzar Panel superior y frontal . . . . . . . . . . . . . . . . . . 7 Panel posterior . . . . . . . . . . . . . . . . . . . . . . . . 7 04 Para empezar Características de reproducción del iPod . . . . 9 Usando la visualización de pantalla . . . . . . . . 10 05 Información adicional Resolución de problemas . . . . . . . . . . . . . . . 11 Especificaciones . . . . . . . . . . . . . . . . . . . . . . 11 Limpieza de la unidad . . . . . . . . . . . . . . . . . . 11 Deutsch 02 Controles y pantallas Conectar el sistema a su receptor AV o televisor . . . . . . . . . . . . . . . . . . . . . . . . . . . . 8 Français Comprobar los contenidos de la caja . . . . . . . 4 Instalación de las pilas . . . . . . . . . . . . . . . . . . 4 Distancia de funcionamiento del mando a distancia . . . . . . . . . . . . . . . . . . . . . . . . . . . . . 5 Interferencias con esta unidad . . . . . . . . . . . . 5 Acoplar el adaptador tipo iPod . . . . . . . . . . . . 6 Acoplamiento del enchufe adaptador de CA . . . . . . . . . . . . . . . . . . . . . . . . . . . . . . . 6 03 Conexiones English Contenidos Italiano Nederlands Español 3 Sp IDK-01.book Page 4 Wednesday, May 17, 2006 11:13 AM 01 Antes de comenzar Capítulo 1 Antes de comenzar Comprobar los contenidos de la caja Le rogamos que compruebe que ha recibido los siguientes accesorios: • • • • • • • • • • Mando a distancia Batería de litio (CR2025) Instalación de las pilas Reinstale la pila de litio (CR2025) en el mando a distancia como se indica a la derecha. Cuando observe una disminución de la distancia de funcionamiento, recambie la pila del mismo modo. Adaptador para iPod x6 Adaptador tipo CA Adaptadores del enchufe (para el adaptador de CA) x2 Cable de audio (2 m) rojo/blanco Cable de vídeo (2 m) amarillo Cable SR (2 m) Este manual de instrucciones Tarjeta de garantía 2 4 1 3 1 Presione la pestaña de liberación a la derecha para abrir la carcasa del portapilas. 2 Saque el portapilas. 3 Extraiga la pila del portapilas. Si ésta la primera vez que realiza esta operación, quite también el sello de protección de la pila que se suministra con el sistema antes de volverla a insertar. 4 Coloque una nueva pila en el portapilas. Cerciórese de que la cara de la pila mira hacia arriba al colocarla en el espacio provisto. Precaución Cuando use pilas de litio, recuerde estos consejos: • Tire las pilas usadas inmediatamente después de cambiarlas. Manténgalas alejadas de los niños. • En caso de ingerirla accidentalmente, póngase en contacto con su médico de inmediato. 4 Sp IDK-01.book Page 5 Wednesday, May 17, 2006 11:13 AM Antes de comenzar El mando a distancia tiene una distancia de funcionamiento de unos 7 metros. Tal vez no funcione si: Français Deutsch • Hay obstáculos entre él y el sensor remoto de esta unidad. • Brilla directamente luz solar o fluorescente sobre el sensor remoto. • Este sistema se coloca cerca de un dispositivo que emite rayos infrarrojos. • Este mando funciona simultáneamente junto con otro que también use rayos infrarrojos. English Distancia de funcionamiento del mando a distancia 30 t Sh lis SD ff O O n/ O y a t Pl lis r te En y u a en Pl uf R fle p e ea t 7m En ocasiones, usar un teléfono móvil cerca de esta unidad puede provocar ruidos o interferencias. Si experimenta este tipo de problemas, aleje su teléfono móvil de esta unidad. Nederlands Interferencias con esta unidad Italiano 30 M • Las pilas de litio pueden representar un peligro de incendio o de quemadura química si se usan mal. No desmonte, caliente más allá de los 100 °C ni incinere. • Quite la batería si la unidad no va a ser utilizada durante un mes o más tiempo. • Cumpla con las normativas gubernamentales o regulaciones de las instituciones públicas sobre el medio ambiente vigentes en su país/región cuando vaya a deshacerse de las pilas usadas. • Hay peligro de explosión si la pila se recambia incorrectamente. Al recambiar, cerciórese de usar únicamente pilas del mismo tipo como recomienda el fabricante. • No utilice ni guarde las pilas bajo luz solar directa o en lugares con excesivo calor, como dentro de un coche o cerca de una estufa. Si lo hace, las pilas podrían tener fugas, sobrecalentarse, explotar o prenderse fuego. También se puede acortar la duración de la pila o su rendimiento. 01 Español 5 Sp IDK-01.book Page 6 Wednesday, May 17, 2006 11:13 AM 01 Antes de comenzar Acoplar el adaptador tipo iPod Para que su iPod pueda acoplarse adecuadamente en el puerto conector de la base dock, deberá hacer coincidir el adaptador para iPod con su modelo iPod. Cada adaptador para iPod tiene una marca de modelo como puede apreciar a continuación. Marca de modelo iPod • También puede conectar un adaptador para iPod desde un dock base para iPod original. • Cuando use modelos iPod de quinta generación con este sistema, use el adaptador para iPod que se suministra con su unidad iPod. • Cuando use un modelo iPod de tercera generación con este sistema, use un ‘Apple iPod Universal Dock Adapter Juego de 3 adaptadores para el iPod con conector para la base Dock’ disponible de Apple Computer Inc. Acoplamiento del enchufe adaptador de CA Modelo Tipo de iPod iPod 20GB iPod 20 GB de cuarta generación iPod 40GB iPod 40 GB de cuarta generación mini iPod mini Color 20GB 20 GB / 30 GB iPod <pantalla a color> 30GB Color 40GB 40 GB / 60 GB iPod <pantalla a color> 60GB Sólo modelo británico Asegúrese de que el adaptador de CA lleva acoplado el enchufe apropiado para su región. Cambie el adaptador del enchufe de CA como se muestra en la ilustración. CAUTION SHOCK RISK OF ELECTRIC USE ONLY DRY LOCATION CAUTION SHOCK RISK OF ELECTRIC USE ONLY DRY LOCATION CAUTION SHOCK RISK OF ELECTRIC USE ONLY DRY LOCATION PUSH nano Después de seleccionar el adaptador para iPod que corresponda a su unidad iPod, insértelo en el bolsillo adaptador para iPod como puede apreciar en la ilustración. 6 Sp PUSH iPod nano Empuje IDK-01.book Page 7 Wednesday, May 17, 2006 11:13 AM Controles y pantallas 02 English Capítulo 2 Controles y pantallas Panel superior y frontal Panel posterior CONTROL 2 3 4 3 Indicador de encendido Se enciende cuando su iPod se conecta al puerto de conexión de la base dock. 4 Sensor remoto Consulte Distancia de funcionamiento del mando a distancia en la página 5 si necesita más información. L 5 1 Terminal CONTROL IN Conéctelo al terminal CONTROL OUT de un receptor AV de Pioneer (o componente similar) usando el cable SR suministrado. Esto le permitirá usar el mando a distancia del receptor para controlar la unidad. Si necesita más información, compruebe el manual de instrucciones de su receptor Pioneer.1 2 Terminal de salida S-VIDEO Úselo para conectar un cable de S-vídeo a su receptor de TV/AV para visionar la visualización en pantalla o para obtener una mayor calidad en la reproducción del vídeo del iPod (no se reproducirá vídeo al terminal VIDEO si realiza esta conexión). 3 Terminal de salida VIDEO Conecte un cable de vídeo estándar (compuesto) a su receptor TV/AV para visionar la visualización en pantalla o para la reproducción de vídeo iPod. Español 2 Bolsillo del adaptador para iPod Sostiene el adaptador para iPod que coincide con su unidad iPod. 4 AUDIO Nederlands 1 Puerto de conexión iPod Inserte su puerto de conexión de la base dock del iPod para conectar y recargar su unidad iPod. 3 R Italiano 1 2 VIDEO Deutsch 1 S - VIDEO DC IN 12 V Français OUTPUT IN 4 Terminales de salida AUDIO Úselos para conectar un cable de terminal RCA/fono a su receptor AV/amplificador para obtener un audio en dos canales. 5 Adaptador de CA - Terminal DC IN 12 V Úselo para conectar el adaptador de CA a una toma de corriente CA. Nota 1 Si ha conectado un cable SR a este terminal, deberá apuntar con el mando a distancia suministrado con esta unidad al sensor remoto del receptor o amplificador conectado. 7 Sp IDK-01.book Page 8 Wednesday, May 17, 2006 11:13 AM 03 Conexiones Capítulo 3 Conexiones Conectar el sistema a su receptor AV o televisor OUTPUT IN CONTROL S - VIDEO VIDEO Adaptador CA (suministrado) DC IN 12 V R AUDIO L Base dock de control para iPod • Es necesaria una conexión de vídeo si desea ver vídeo usando el iPod o los OSD de esta unidad. • Conecte un cable de S-vídeo para una mayor calidad en la reproducción de vídeo (no se reproducirá vídeo al terminal VIDEO si realiza esta conexión). Toma de corriente CA • Enchufe el adaptador de CA sólo tras haber completado todas las conexiones. • No utilice con esta unidad ningún otro adaptador que no sea el suministrado. Conexión opcional para su televisor televisor VIDEO IN Receptor o amplificador Cable de audio (suministrado) Cable de vídeo (suministrado) Cable SR (suministrado) La mayoría de los receptores Pioneer disponen de un terminal CONTROL OUT que puede usarse para unir este componente, permitiéndole el mando a distancia del receptor para controlar esta unidad. Si necesita más información, compruebe el manual de instrucciones de su receptor Pioneer. (Si ha conectado un cable SR a este terminal, deberá apuntar con el mando a distancia suministrado con esta unidad al sensor remoto del receptor o amplificador conectado). 8 Sp R AUDIO IN L VIDEO IN CONTROL OUT IDK-01.book Page 9 Wednesday, May 17, 2006 11:13 AM Para empezar 04 Para empezar Una vez haya conectado todo, podrá ver vídeos y escuchar música. Siga los pasos siguientes a modo de introducción a su dock base del iPod. La tabla siguiente muestra los controles de reproducción básicos de su iPod: Botón OSD On/Off Vuelve al menú anterior. Enter Selecciona elementos/niveles del menú. Inicia/pausa la reproducción. Mantenga presionado durante la reproducción para iniciar la búsqueda. Playlist Playlist Repeat Pulse repetidamente para cambiar entre las opciones de reproducción aleatoria. Pulse repetidamente para cambiar entre las opciones de repetición de la reproducción. Español Shuffle Inicia la reproducción de la lista de reproducción anterior/siguiente. Nederlands Pulse para saltar a la canción anterior/ siguiente. Italiano OSD On/Off Menu Enciende/apaga la visualización en pantalla de esta unidad (aparece en el componente de vídeo al que esté conectado). Menu 2 Seleccione la entrada adecuada de su receptor AV (o amplificador). Para usar la visualización en pantalla o ver vídeo, también necesitará encender su televisor o monitor. 3 Inicie la reproducción. Consulte la tabla de Controles básicos remotos citado más adelante si necesita una explicación de las características de reproducción disponibles con este sistema.1 • Dado que el volumen del iPod no puede controlarse usando esta unidad, ajústelo usando el receptor AV o amplificador al que esté conectado. Función Deutsch 1 Coloque su iPod en el puerto base dock de conexión. Cerciórese de haber instalado al puerto de conexión un conector para iPod que coincida con su modelo de iPod (consulte Acoplar el adaptador tipo iPod en la página 6). Controles básicos remotos Français Características de reproducción del iPod English Capítulo 4 Enter Use estos botones para mover el cursor (en pantalla). Playlist Shuffle Playlist Repeat Nota 1 También puede utilizar los controles de la unidad principal del iPod para reproducir. Consulte el manual suministrado con el iPod si necesita más información. 9 Sp IDK-01.book Page 10 Wednesday, May 17, 2006 11:13 AM 04 Para empezar Importante • Este sistema es compatible con un dispositivo portátil iPod, iPod mini y iPod Photo (tercera generación y versiones superiores). No obstante, la compatibilidad puede variar dependiendo de la versión de software que use su iPod. Este receptor no es compatible con las versiones de anteriores a la actualización 2004-10-20 del iPod. Cerciórese de que está usando el software más reciente. Si necesita más información, visite las páginas web de Apple Computer Inc. • Dependiendo de su modelo de iPod, algunas características pueden no estar disponibles. • La salida de vídeo de este sistema es compatible con el formato de TV PAL. • El acuerdo de licencia de iPod permite la reproducción de materiales sin derechos de autor, materiales para los cuales usted posea los derechos de autor o materiales para los que esté autorizado o para los que tenga permiso legal de reproducción para uso personal. Si no está seguro sobre su derecho a copiar algún material, diríjase a su asesor legal. • Pioneer no se responsabiliza de cualquier pérdida de datos que ocurra al usar su iPod junto con esta unidad. Usando la visualización de pantalla Para mayor facilidad de uso, este sistema utiliza una pantalla de visualización gráfica (OSD). Se navega por todas las pantallas en básicamente el mismo modo, usando los cursores (, ) para cambiar el elemento iluminado y pulsando ENTER para seleccionarlo. Consulte Controles básicos remotos citado anteriormente para los demás controles disponibles. • Cerciórese de que su base dock del iPod está conectada a un componente de vídeo y, a continuación, pulse ‘OSD On/Off’. El OSD aparecerá en la pantalla.1 Si desea reproducir vídeo desde su iPod o si usa cualquiera de los controles de reproducción de la unidad principal del iPod, deberá pulsar OSD On/Off de nuevo para desactivar el OSD antes de usar su iPod. Pantalla del menú principal MAIN MENU >Playlists Artists Albums Songs Podcasts Genres Composers Audiobooks SHUFFLE:ALBUMS (1/8) RPT:ALL Ajuste de reproducción aleatoria Ajuste de repetición de la reproducción Proceda a la pantalla siguiente Menú de la lista de reproducción2 Playlists >The Planets Mars Venus Mercury Jupiter Saturn Uranus Neptune SHUFFLE:ALBUMS (1/8) RPT:ALL Pantalla de reproducción Now Playing (1/12) Nombre de la canción Nombre del artista Nombre del álbum Tic Tac Toe Nth Degree Best Hits Vol. 2 00:28 -03:48 SHUFFLE:ALBUMS 04:16 RPT:ALL Tiempo de reproducción transcurrido/restante tiempo de reproducción / tiempo total Nota 1 Verá aparecer un salvapantallas transcurridos 3 minutos de inactividad. Pulse cualquier botón para regresar al menú OSD. 2 Recuerde que los caracteres no latinos de las listas de reproducción aparecerán como . 10 Sp IDK-01.book Page 11 Wednesday, May 17, 2006 11:13 AM Información adicional 05 Información adicional English Capítulo 5 Resolución de problemas • Para hacer funcionar el aparato, debe apuntar con el mando a distancia suministrado con esta unidad al sensor remoto del receptor o amplificador conectado. • Cerciórese de usar el cable SR suministrado con este sistema. Especificaciones • Alimentación y miscelánea • Accesorios Mando a distancia . . . . . . . . . . . . . . . . . . . . . . . 1 Batería de litio (CR2025) . . . . . . . . . . . . . . . . . . 1 Adaptador para iPod . . . . . . . . . . . . . . . . . . . . . 6 Adaptador tipo CA . . . . . . . . . . . . . . . . . . . . . . . 1 Adaptadores del enchufe (para el adaptador de CA) . . . . . . . . . . . . . . . . . 2 Cable de audio (2 m) rojo/blanco . . . . . . . . . . . . 1 Cable de vídeo (2 m) amarillo . . . . . . . . . . . . . . . 1 Cable SR (2 m) . . . . . . . . . . . . . . . . . . . . . . . . . 1 Este manual de instrucciones . . . . . . . . . . . . . 1 Tarjeta de garantía . . . . . . . . . . . . . . . . . . . . . . . 1 Limpieza de la unidad Español Alimentación (usando el adaptador suministrado) . . . . . . . . . . . . . . . . . . . . . . . . . . . . . . . . . . . CC 12V Dimensiones . . . 99 mm (An) x 33 mm (Al) x 74 mm (Lg) Peso . . . . . . . . . . . . . . . . . . . . . . . . . . . . . . . . xxx g Nota • Las especificaciones y el diseño están sujetos a posibles modificaciones sin previo aviso debido a mejoras que se introducirán. Nederlands No parece ser posible el funcionamiento después de conectar el cable SR desde esta unidad a un componente externo. Italiano Solución • Cerciórese de que su iPod funciona correctamente. • Cerciórese de que el iPod está correctamente acoplado a la base dock de conexión del iPod. • Cerciórese de que ha conectado las salidas AV debidamente desde la base dock a sus componentes externos. Compruebe también haber seleccionado la entrada correcta en su receptor y/o monitor. • Si ha conectado la salida S-vídeo, no saldrá nada de la salida vídeo estándar (compuesto). Deutsch Problema No hay sonido/no hay imagen. Français A menudo se confunde una operación incorrecta con un mal funcionamiento o problema. Si piensa que hay algo que no va bien con este componente, compruebe los puntos siguientes. En ocasiones, los problemas pueden ser debidos a otro componente. Investigue los demás componentes y electrodomésticos que se están utilizando en este momento. Si no puede solucionarse el problema incluso después de haber comprobado los puntos anteriores, pregunte a su centro de servicio autorizado Pioneer más cercano o a su comercio que lleve a cabo las tareas de reparación. • Use un paño de pulido o paño seco para limpiar el polvo y suciedad. • Cuando la superficie esté sucia, límpiela con un paño suave humedecido en algún producto de limpieza neutro diluido cinco o seis veces en agua y bien escurrido. Cuando acabe, frote de nuevo con un paño seco. No utilice ceras o productos de limpieza para muebles. • Nunca utilice disolventes, benzina, insecticidas u otros productos químicos en o cerca de esta unidad dado que pueden corroer la superficie. Publicado por Pioneer Corporation. Copyright © 2006 Pioneer Corporation. Todos los derechos reservados. 11 Sp IDK-01_05_add_info.fm 12 ページ 2006年5月17日 水曜日 午後2時9分 PIONEER CORPORATION 4-1, Meguro 1-Chome, Meguro-ku, Tokyo 153-8654, Japan PIONEER ELECTRONICS (USA) INC. P.O. BOX 1540, Long Beach, California 90810-1540, U.S.A. TEL: (800) 421-1404 PIONEER ELECTRONICS OF CANADA, INC. 300 Allstate Parkway, Markham, Ontario L3R OP2, Canada TEL: 1-877-283-5901 PIONEER EUROPE NV Haven 1087, Keetberglaan 1, B-9120 Melsele, Belgium TEL: 03/570.05.11 PIONEER ELECTRONICS ASIACENTRE PTE. LTD. 253 Alexandra Road, #04-01, Singapore 159936 TEL: 65-6472-7555 PIONEER ELECTRONICS AUSTRALIA PTY. LTD. 178-184 Boundary Road, Braeside, Victoria 3195, Australia, TEL: (03) 9586-6300 PIONEER ELECTRONICS DE MEXICO S.A. DE C.V. Blvd.Manuel Avila Camacho 138 10 piso Col.Lomas de Chapultepec, Mexico,D.F. 11000 TEL: 55-9178-4270 <06E00001> Printed in China K002_A_En <5707-00000-005-0>