1
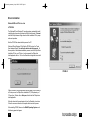
602_harmonic_usermanual_v14.qxd 10/9/01 5:45 PM Page 1
Philips Harmonic Edge™
2-Channel PCI Sound Card
PSC602
____________________________
Philips Consumer Electronics Company
602_harmonic_usermanual_v14.qxd 10/9/01 5:45 PM Page 2
SOFTWARE END USER LICENSE AGREEMENT
Philips Harmonic Edge™
2-Channel PCI Sound Card
PLEASE READ THE FOLLOWING TERMS AND CONDITIONS CAREFULLY. If you (end user, either an entity or an
individual) do not agree with these terms and conditions do not install the software. This End User License
Agreement is a contract between you and Philips Consumer Electronics B.V, including its suppliers and licensors
(“Philips”) for this software program (“Licensed Software”). By installing the Licensed Software or using the Licensed
Software you agree to and accept the terms and conditions of this End User License Agreement. YOU AGREE
THAT YOUR USE OF THE LICENSED SOFTWARE ACKNOWLEDGES THAT YOU HAVE READ THIS END USER
LICENSE AGREEMENT, UNDERSTAND IT, AND AGREE TO BE BOUND BY ITS TERMS AND CONDITIONS:
1.
Copyright
The Licensed Software is a proprietary product of Philips, and is protected by copyright laws. Title, ownership
rights and intellectual property rights in and to the Licensed Software shall remain with Philips.
2.
Right to use
Philips hereby grants you the personal, non-exclusive license to use the Licensed Software only on and in conjunction with one (1) computer at one time. You may not sell, rent, redistribute, sublicense or lease the Licensed
Software, or otherwise transfer or assign the right to use it. You may not decompile, disassemble, reverse engineer, or in any way modify program code, except where this restriction is expressly prohibited by applicable law.
Except for one (1) copy which may be made for backup purposes only, you may not copy the Licensed
Software. You are not allowed to alter or remove any proprietary notices, including copyright notices, in the
Licensed Software.
3.
Disclaimer of Warranty
THE LICENSED SOFTWARE IS PROVIDED AS IS WITHOUT WARRANTY OF ANY KIND. THE ENTIRE RISK
OF USE OF THE LICENSED SOFTWARE REMAINS WITH YOU. TO THE MAXIMUM EXTENT PERMITTED
BY LAW, PHILIPS MAKES NO FURTHER REPRESENTATIONS OR WARRANTIES EXPRESSLY OR IMPLIED
SUCH AS BY WAY OF EXAMPLE BUT NOT OF LIMITATION REGARDING MERCHANTABILITY OR FITNESS
FOR ANY PARTICULAR PURPOSE, OR THAT LICENSED SOFTWARE IS ERROR FREE, OR THAT THE
USE OF THE LICENSED SOFTWARE OR ANY COPIES THEREOF WILL NOT INFRINGE ANY PATENT,
COPYRIGHT, TRADEMARK OR OTHER RIGHT OF THIRD PARTIES.
4.
Updated
This license does not grant you the right to any upgrades or updates of the Licensed Software. However,
Philips will be entitled to offer updates and/or modifications to the Licensed Software at its discretion.
5.
Changes of the agreement
No changes of this Agreement are valid unless with Philips’ and your written approval. Any terms and conditions provided by you are inapplicable, whether or not contained in order forms or otherwise, unless specifically
accepted by Philips in writing by means of a duly signed addition to this Agreement.
6.
Limitations of liability
PHILIPS ACCEPTS NO LIABILITY FOR ANY DAMAGES, INCLUDING ANY LOSS OF PROFIT, LOSS SAVINGS, LOSS OF DATA, BUSINESS INTERRUPTIONS, OR ANY DIRECT, INDIRECT, INCIDENTAL, CONSEQUENTIAL, SPECIAL OR PUNITIVE DAMAGES ARISING OUT OF YOUR USE OR INABILITY TO USE THE
LICENSED SOFTWARE, EVEN IF PHILIPS OR ITS REPRESENTATIVES HAVE BEEN ADVISED OF THE
POSSIBILITY OF SUCH DAMAGES, OR FOR ANY CLAIM BY ANY OTHER PARTY. SINCE SOME JURISDICTIONS DO NOT ALLOW THIS LIMITATION OF LIABILITY, THIS LIMITATION OF LIABILITY MAY NOT APPLY
TO YOU.
7.
Validity and Termination
The license granted hereunder shall terminate automatically and without notice if you do not comply with all the
terms and conditions of this End User License Agreement. In the event of termination, you shall immediately
stop any use of the Licensed Software and destroy all copies thereof. In addition, in the event of termination
because of your failure to comply with your obligations, Philips reserves the right to invoke any and all other
remedies available to it in law or contract including the right to claim damages.
8.
Applicable Law
This contract shall exclusively be governed by the laws of the Kingdom of The Netherlands without regard to its
conflict of law provisions.
9.
Competent Court
The competent court for any dispute between you and Philips pursuant to this End User License Agreement is
the court of ‘s-Hertogenbosch, the Netherlands.
© Copyright 2001
Harmonic Edge™ is a trademark of Philips Consumer Electronics
Sensaura™ , EnvironmentFX™, MacroFX™, and ZoomFX™ are trademarks of Sensaura Technology
EAX and Environmental Audio Extensions are trademarks of Creative
Technology Ltd. in the United States and other countries.
Microsoft and Windows are registered trademarks of Microsoft Corporation.
DirectX and DirectSound are trademarks of Microsoft Corporation.
All other trademarks are the property of their respective owners.
© Philips Consumer Electronics B.V., 1999, Eindhoven, The Netherlands
V-1 991214
2
3
602_harmonic_usermanual_v14.qxd 10/9/01 5:45 PM Page 4
Table of Contents
Introduction
Introduction
Key Features ..................................................................................5
Minimum System Requirements ....................................................5
What’s Included ..............................................................................6
What you need for Installation.........................................................6
Hardware Installation
Before Installing Soundcard ...........................................................7
Soundcard Installation .....................................................................8
Soundcard Cable Connections .....................................................10
Driver Installation
Windows® 95/98/2000 Installation . . . . . . . . . . . . . . . . . . . . . . .11
Windows® ME/XP Installation . . . . . . . . . . . . . . . . . . . . . . . . . .14
Yamaha SoftSynthesizer Installation . . . . . . . . . . . . . . . . . . . . .17
About Sensaura Technology ...........................................................18
About Siren XPress..........................................................................19
About Acid XPress ...........................................................................19
About AudioPix.................................................................................20
Microsoft DirectX Installation..........................................................20
Recording Source Configuration....................................................21
Uninstalling Software Drivers .........................................................21
Windows® 95/98 Uninstall .............................................................21
Windows® 98SE/ME/2000/XP Uninstall ........................................21
Technical Support . . . . . . . . . . . . . . . . . . . . . . . . . . . . . . . . . . . .22
CONGRATULATIONS ON YOUR PURCHASE OF THE
PHILIPS HARMONIC EDGE™ SOUND CARD!
Thank you for enhancing your computer with the Philips Harmonic Edge™.
PSC 602 is the stereo card for you! You have never heard your computer
sound this good! You’ll hear full, rich bass, and clear, crisp trebles from all
your favorite games, music or websites. Experience your computer like
never before!
The heart of your sound card is the powerful Allegro™ audio accelerator
which combines advanced audio and Codec functionality in a highly integrated PCI solution for the multimedia PC. Plus!! PSC602 is compatible
with all current Windows operating systems and supports the latest gaming
standards, including EAX™ 1.0 & 2.0. Endulge yourself in full rich 16 bit
CD quality sound with up to 512 voices.
KEY FEATURES
•
•
•
•
•
•
•
•
•
•
•
Full-duplex, 48khz digital recording and playback
Hardware DSP accelerated algorithms
512 Voice professional quality soft-synth with XG and GM compatibility
DirectSound™, DirectSound3D™
Stereo, 2 channel speaker or headphone output
Multi-stream DirectSound and DirectSound 3D Acceleration
Sensaura CRL Positional 3D
High-quality sample rate conversion and digital mixing
Direct Music support
Realtime effects processing
Full legacy DOS game support using PC/PCI, DDMA or TDMA hardware
implementation methods
MINIMUM SYSTEM REQUIREMENTS
Installation of your Philips Harmonic Edge™ requires the following minimum hardware and operating system:
• One available PCI 2.1 compliant slot
• Intel Pentium® class or 100% compatible 133MHz or faster processor
4
5
602_harmonic_usermanual_v14.qxd 10/9/01 5:45 PM Page 6
Introduction
•
•
•
•
•
Intel® or 100% compatible motherboard chip set
16MB system RAM
CD ROM for driver installation
Stereo, 2 channel powered speakers or headphones
MS-DOS, Windows® 95, Windows® 98, Windows NT® 4.0 (SP3)*,
Windows® 2000, Windows® Me, Windows® XP
WHAT’S INCLUDED
You will find the following items in your Harmonic Edge™ package:
1 – Harmonic Edge™ sound card in a anti-static pouch
1 – Harmonic Edge™ installation CD
1 – Harmonic Edge™ user’s manual
1 – Yamaha XG Certificate
1 – Warranty Card
* Bundled applications are included in the installation CD driver
* Please retain the Yamaha Certificate of Authenticity. The included serial
number will be needed during software installation.
WHAT
YOU NEED FOR INSTALLATION
Computers come in different shapes and sizes. The installation procedures
in this manual apply generally and you should compare the illustrations
here with your computer before you start your sound card installation.
• Sound card
• Installation CD
• A Phillips screwdriver
Have your Windows® installation CD available as it may be needed to complete installation of common software components.
6
Before Installing Soundcard
Its essential to wipe out every trace of any existing soundcard softR ware
prior to installing the Harmonic Edge. Go to
Start/Settings/Control Panel and choose Add/Remove Programs.
Highlight the entry for the existing sound card software (if any) and
click Add/Remove. Most sound card software will uninstall all files,
drivers, and applications that relate to the sound card, but you might
need to uninstall several different software components from the
Add/Remove list. If you can't find anything that relates to the sound
card in the Add/Remove Program list, check for un-install options in
the sound card software. An alternate method is to go to the Device
Manager and remove sound card entries under the Sound, video
and game controllers tab.
If the PC has sound support built into the motherboard, you'll need to
disable that sound support before the PSC can be installed. This is
usually done through the PC's setup program (BIOS) and/or by setting a jumper on the motherboard. There might be as many as 3 setting in BIOS that may need to be disabled, check the motherboard
user's guide for these settings.
RS
TATIC ELECTRICITY CAN CAUSE PERMANENT DAMAGE
TO YOUR SOUND CARD
To prevent damage please:
1. Always hold your sound card by its edges. Avoid touching any
electronic components on your sound card.
2. Use a grounding strap or touch any non -painted surface of your
computer chassis before you begin installation to discharge
static electricity.
7
602_harmonic_usermanual_v14.qxd 10/9/01 5:45 PM Page 8
Soundcard Installation
TO INSTALL
THE SOUND CARD:
Turn off your computer, and disconnect the power cable. Disconnect all
devices that are connected to the computer.
Remove the Harmonic Edge™ Sound Card from the anti-static bag. Align
your sound card with the selected PCI Bus-Slot and firmly push it into the
slot. Be sure the sound card is aligned properly and fits snugly into the
slot.
Remove the computer cover.
Sound Card
Top & Bottom View
PCI Bus Slot
Mounting Screw
Select an available PCI slot and, if necessary, remove its cover plate.
Keep the mounting screw to secure your sound card later. Save the
mounting plate for possible use later.
Cover Plate
PCI Bus Slot
Align sound card and fit firmly in place
Use the screw from the slot cover to secure the sound card to the frame
of the computer chassis, but do not over-tighten. Securing the card
assures proper grounding.
PCI Bus Slot
Mounting Screw
PCI Bus Slot
Cover Plate
Mounting Screw
8
9
602_harmonic_usermanual_v14.qxd 10/9/01 5:45 PM Page 10
Soundcard Cable Connections
SOUND CARD CONFIGURATION (ACTUAL
Analog CD IN
CARD LAYOUT MAY VARY)
AUX In
Speakers
Connect your stereo speakers or headphones to the SPEAKER OUT stereo
jack on the end bracket.
Line In, Mic In and MIDI/Joystick
External analog stereo sources with line level output can be connected to
light blue 3.5mm Line In jack at the top of the sound card bracket. A microphone can be connected to the pink 3.5mm Mic In jack. An analog or digital joystick and/or MIDI devices can be connected to the Midi/Joystick connector at the bottom of the bracket.
Internal Connections
Connectors for two line level analog inputs (Aux In, CD In) are
provided along the top of the sound card as indicated in the picture on page
10. Use the 4 pin CD audio cable to connect the analog audio output of
your internal CD or DVD drive to the sound cards "Analog CD In" connector.
END BRACKET CONFIGURATION
Line In
Mic In
Speaker Out
Replace computer cover and reconnect the power cable, monitor and other
devices.
Driver Installation
WINDOWS® 95/98/98SE/2000 INSTALLATION
See below for WINDOWS® ME AND XP installation instructions.
After the PSC602 has been installed power on the PC.
Game / MIDI Port
10
Windows will find the PSC602 and run the “New Hardware Wizard”, select
cancel to abort the OS hardware installation.
11
602_harmonic_usermanual_v14.qxd 10/9/01 5:45 PM Page 12
Driver Installation
Insert the Philips Driver Installation CD into your CD drive. In a few
moments the Philips Auto Install application will run. Click on the Yes button to begin the driver install process.
NOTE: During the Windows 2000 install process the following Panel will be
displayed:
On Windows 95 systems you will see the following Install message.
PANEL 1
If after a minute or two, one of the panels above do not appear on your
screen go to D:\setup.exe on the Philips Driver Installation CD (D:
Represents your CD rom drive). Double click on Setup.exe, this will start
the Philips driver Install application.
You must click on the Yes button to properly complete the driver install
process. NOTE: PSC602 drivers are not Microsoft certified but have been
thoroughly tested and qualified by Philips to work reliably with all Microsoft
operating systems.
When the driver install process begins click on the Yes button to continue.
Follow the on-screen instructions to complete the driver install process.
12
13
602_harmonic_usermanual_v14.qxd 10/9/01 5:45 PM Page 14
Driver Installation
WINDOWS® ME
AND
XP INSTALLATION
ATTENTION
The Windows ME and Windows XP operating systems automatically install
a default audio driver when the Harmonic Edge is first detected. You must
install the Philips Harmonic Edge drivers from the installation CD for proper
audio card operation.
After the PSC602 has been installed power on the PC.
Windows ME and Windows XP will find the PSC602 and run the “Found
New Hardware Wizard” (You will not be able to abort this process). At
the completion of the hardware installation process, insert the Philips Driver
Installation CD into your CD drive. In a few moments the Philips Auto
Install application will run. Click on the Yes button to begin the driver install
process.
PANEL 2
If after a minute or two the panel above does not appear on your screen go
to D:\setup.exe on the Philips Driver Installation CD (D: Represents your
CD rom drive). Double click on Setup.exe, this will start the Philips driver
Install application.
When the driver install process begins click on the Yes button to continue.
Follow the on-screen instructions to complete the driver install process.
When installing PSC602 drivers on the WinME Operating System one of
the following panels will appear:
14
15
602_harmonic_usermanual_v14.qxd 10/9/01 5:45 PM Page 16
Driver Installation
PANEL 4
Click Continue Anyway to continue driver installation. NOTE: PSC602 drivers are not Microsoft certified but have been thoroughly tested and qualified by Philips to work reliably with all Microsoft operating systems.
PANEL 3
If PANEL 2 appears you must click on the Yes button to properly complete
the driver install process. NOTE: PSC602 drivers are not Microsoft certified but have been thoroughly tested and qualified by Philips to work reliably with all Microsoft operating systems
If PANEL 3 appears (Panel 3 does not have Yes No buttons) you must click
on the Advanced Button and select:
ž Warn when installing unsigned devices.
Click OK to return to PANEL 2.
Click Yes to continue driver installation.
When installing PSC602 drivers on the WinXP Operating System the following panel will appear:
16
Follow the on screen instructions to complete the install process.
Congratulations!
You have successfully installed your Philips Harmonic Edge™.
YAMAHA SOFTSYNTHESIZER INSTALLATION
Insert your install CD into your CD drive.
For Win 95, 98, and 98 SE,
Go to D:\S-yxg50\Win9x\S-YXG50 V3.13.56\setup.exe, where D: represents your CD-ROM drive
For Win NT, ME, XP
Go to D:\S-yxg50\WIN2000-NT\S-YXG50 V3.13.15\setup.exe, where
D: represents your CD-ROM drive
17
602_harmonic_usermanual_v14.qxd 10/9/01 5:45 PM Page 18
Driver Installation
Double click the setup.exe and follow the on-screen instructions (Note:
Your Yamaha Certificate of Authenticity is included with your product
documentation).
To use the Yamaha Application as the MIDI playback set YAMAHA
SXG Driver as the MIDI playback device.
For Win95, Win98, & Win98SE go to Windows control panel,
Multimedia, Midi Tab to set the Midi Playback device.
For WinME, & Win2000 go to Windows control panel, Sounds and
Multimedia, Audio Tab to set the Midi Playback device.
For WinXP, go to Windows control panel, Sounds and Audio Devices,
Audio Tab to set the Midi Playback device.
About Sensaura Technology
• The Philips Harmonic Edge takes PC audio to the next level of realism
with Sensaura’s groundbreaking ZoomFX™, MacroFX™ and
EnvironmentFX™ technologies.
• Sensaura ZoomFX simulates the acoustic energy that sound emitting
objects radiate from large scale areas, strips and volumes. This provides
‘big sound realism’, and is useful for example, for an extended railway
train passing a stationary individual.
• Sensaura MacroFX creates ‘near-field proximity effects’ as experienced in
real-life when objects move very close to the listener, such as bees
buzzing around your head or bullets flying past your ear.
• Sensaura Environment FX acoustically renders 3D audio environments.
Up to 26 different pre-set environments are provided such as underwater
effects, sewer-pipe and so on. This technology is compatible with
Creative Labs EAX 1.0, EAX 2.0 and also I3DL2 as prescribed by IA-SIG.
• Sensaura technology is specifically engineered to enhance the industry
standard Microsoft’s DirectSound3D™ API (DS3D). Interactive games
will now come alive as the acoustic environment engulfs you. The technology is also compatible with all A3D 1.0.
• Complete 360o horizontal and vertical positional audio above and below
you, to your left and right, in front and behind you, so now you can hear
your enemies coming at you from any direction long before you see them.
18
About SIREN XPress
Transform your PC into the ultimate music entertainment center with SIREN
XPress music jukebox. SIREN XPress lets you “rip” your CD collection
onto one convenient location - your hard drive. Let SIREN XPress help you
surf the net and find more great music to add to your collection - MP3, WAV
and WMA files are all supported. Use SIREN XPress’ advanced organizational features to create custom playlists of the songs you want to hear.
SIREN XPress maximizes your audio experience with dazzling, colorful eye
candy - real-time computer animation that pulses and interacts with your
songs. And when you’re ready to hit the road with your portable MP3 player, * SIREN XPress is the fun, easy way to upload your custom playlists.
To install Siren XPress, follow these simple instructions:
1.
Insert your install CD into your CD drive
2.
Go to D:\Applications\Sonic Foundry\Siren where D: represents your
CD-ROM drive.
3.
Double click on SirenSetup.exe and follow the on-screen instructions.
About ACID XPress
ACID™ XPress is a tool for producing, arranging, and editing loop-based
music. ACID XPress allows you to take the tedious hours of loop and sample matching out of the music-making equation and opens the doors wide
for creativity. ACID’s power stems from its ability to take any audio loop
and make it fit into the tempo of a project. You no longer need to lock yourself into a tempo and go through great pains to make your loops and samples fit that tempo. ACID will take all of your audio and make it match any
tempo you choose in real time!
To install Acid XPress, follow these simple instructions:
1.
Insert your install CD into your CD-ROM drive
2.
Go to D:\Applications\Sonic Foundry\Acid where D: represents your
CD-ROM drive
3.
Double click on AcidXpress.exe and follow the on-screen instructions.
19
602_harmonic_usermanual_v14.qxd 10/9/01 5:45 PM Page 20
About AudioPix
Recording Source Configuration
AudioPix™ makes it easy to combine digital images with MP3 sound to get
the ultimate multimedia presentation. In just three simple steps you will
have an exciting new MPEG format that can be played back in either of the
popular players, RealPlayer® or Windows Media™ Player. Now for the first
time, you don’t have to be a Web Master to create your own unique presentations – just grab an MP3 file, some of your most treasured images and let
your imagination go.
Philips Harmonic Edge™ allows you to record sounds and music from
various input sources (i.e. microphone, audio CD, line in, etc). Before you
start recording, you need to configure the recording source as follow:
To install AudioPix, follow these simple instructions:
1. Insert your install CD into your CD drive
2.
Go to D:\Applications\QSound Labs\AudioPix\ (D represents your
CD-ROM drive)
3.
Double click on apixinst.exe
4.
Follow the on-screen instructions for installation.
Microsoft DirectX Installation
1.
Insert your install CD into your CD drive
2.
For Win95, 98 and 98 SE,
• Open the Volume Mixer, go to Options, and select Properties.
• Choose "Recording" under “Adjust Volume for”, and check the recording
source that you want to display in the Recording Mixer.
• Click OK, and the Recording Mixer window will open. Now you can select
the recording source you intend to use and adjust the recording volume
level.
• Open your favorite recording application and start recording.
Uninstalling Software Drivers
Windows® 95/98 Uninstall
To un-install the PSC602 drivers when using the Windows 95 or 98
Operating System go to the Drivers\Win95\Uninstall or
Drivers\Win98\Uninstall folder on the Philips Installation CD. Double click
on uninstal.exe to start the uninstall program.
Follow the on-screen instructions to complete the driver un-install process.
Go to D:\DirectX_8\Win9X where D: represents your CD-ROM drive
Windows® 98SE,ME,2000,XP Uninstall
3.
Double click on the appropriate language icon and follow the instructions
4.
For Win2k, ME, and XP,
To un-install the PSC602 drivers when using the Windows 98SE,ME,2000,
or XP Operating System remove the Philips PSC602 Audio Driver entry
from the Add/Remove Programs utility located in the Windows control
panel.
Go to D:\DirectX_8\WinNT\ where D: represents your CD-ROM drive
5.
20
Follow the on-screen instructions to complete the driver un-install process.
Double click on the appropriate language icon and follow the instructions
21
602_harmonic_usermanual_v14.qxd 10/9/01 5:45 PM Page 22
Technical Support
Before calling the technical support number please make sure you have the
following information available:
•
•
•
•
•
Model number and date of purchase.
Computer type, processor speed, and memory available.
Computer Operating System (IE: Windows® 95, Windows® 98, etc.)
On-screen error information.
Other hardware connected to your sound card.
Technical Support Information:
• Before calling for technical support make sure the PSC602
Harmonic Edge drivers have been loaded. Refer to pages 11-17 for
installation instructions.
• Toll-Free Telephone Number: 1-800-835-3506
Operating Hours (US Central Time):
• Monday through Friday
7:00am – 11:00pm
• Saturday & Sunday
8:00am – 10:00pm
Internet Address: www.pcsound.philips.com
Product Return
Before returning the Philips sound card, you must first contact the Philips
Technical Support group to determine the nature of product defect. Once
the nature of the problem has been determined, a Return Authorization
number and address will be supplied. A RETURN AUTHORIZATION
NUMBER MUST ACCOMPANY THE RETURN OF THIS PRODUCT.
When returning the product for service:
• The cost of shipment is at your expense and you assume all the risk. It is
recommended to ship the product through a carrier that provides proof of
delivery and product should be insured.
• Return Authorization number must be clearly marked on the outside of
the package.
• Use proper packing materials for shipment
• A dated proof of purchase proving the product is still under Warranty
Warranty: 3-year limited warranty
22
23