1
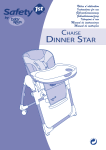
ENInstructions for use
ES Instrucciones de uso
FR Notice d’emploi
prima pappa zero-3
U.S.A./CANADA
1
2
3
4
5
6
7
8
9
10
11
12
SERIAL NUMBER
prima pappa zero-3
9
1
3
4
2
5
6
7
8
1
2
3
4
BMPA03NA*
MUCI5P25GR
SPST7338*
SAPU7342*NA
5
6
7
ITPP03NAL65BMGV
SPST7335NP
SPST7343DGV
SPST7343SGV
8
9
SPST7344DGV
SPST7344SGV
ASPI0153N
SPST7331BM
EN Spare parts available in different colours to be specified when ordering.
E S Repuestos disponibles en otros colores que se especificarán en el pedido.
FR Pièces de rechange disponibles en plusieurs couleurs à spécifier dans la demande.
-6-
EN_English
HEAT, OR FLAMES.
_DO NOT PUT FINGERS IN THE
MECHANISM. MAKE SURE YOUR
CHILD’S ARMS AND LEGS ARE CLEAR
OF THE MOVING PARTS DURING
ADJUSTMENT.
_USING ACCESSORIES THAT
HAVE NOT BEEN APPROVED BY
THE MANUFACTURER MAY BE
HAZARDOUS.
_DO NOT USE THE PRODUCT NEAR
STAIRS OR STEPS.
_BE CAREFUL NOT TO PLACE THE
PRODUCT NEAR SOURCES OF HEAT
OR FLAMES, SUCH AS GAS STOVES,
ELECTRIC HEATERS, ETC.
_MAKE SURE THE BELT IS ATTACHED
PROPERLY.
_DO NOT USE THE HIGH CHAIR
UNLESS ALL OF THE PARTS ARE
PROPERLY FITTED AND ADJUSTED.
_TO MAKE SURE THAT ANY HARNESS
IS CORRECTLY FITTED
Thank you for choosing a Peg-Pérego
product.
WARNING
_ IMPORTANT: KEEP
FOR FUTURE USE
_IMPORTANT: READ THESE
INSTRUCTIONS CAREFULLY AND
KEEP THEM FOR FUTURE REFERENCE.
FAILURE TO FOLLOW THESE
INSTRUCTIONS COULD PUT THE
CHILD’S SAFETY AT RISK.
_ALL ASSEMBLY AND OPERATING
PROCEDURES SHOULD BE
PERFORMED BY AN ADULT; DO NOT
USE THE PRODUCT IF IT HAS BROKEN
OR MISSING PARTS.
WARNING: PREVENT SERIOUS
_
INJURY OR DEATH FROM FALLS
OR SLIDING OUT; ALWAYS USE
COMPLETE 5 POINT SEATBELT;
WARNING:THE CHILD SHOULD
BE SECURED IN THE HIGH CHAIR
AT ALL TIMES BY THE RESTRAINING
SYSTEM, EITHER IN THE RECLINED OR
UPRIGHT POSITION.
_ALWAYS USE THE CROTCH STRAP.
_NEVER LEAVE THE CHILD
UNATTENDED; ALWAYS KEEP CHILD
IN VIEW WHILE IN THE HIGHCHAIR.
_TRAY AND ACCESSORY TRAYS ARE
NOT DESIGNED TO SUPPORT THE
CHILD’S WEIGHT; TRAY IS NOT
DESIGNED TO HOLD THE CHILD IN
THE CHAIR.
_ALWAYS USE THE HIGHCHAIR ON A
FLAT, HORIZONTAL SURFACE.
_IT IS RECOMMENDED THAT THE HIGH
CHAIR BE USED IN THE UPRIGHT
POSITION ONLY BY CHILDREN
CAPABLE OF SITTING UPRIGHT
UNASSISTED.
_BE CAREFUL OF WHERE YOU PLACE
THE PRODUCT. AVOID PLACING THE
CHILD NEAR SAFETY HAZARDS SUCH
AS ELECTRICAL CORDS, SOURCES OF
NOTICE:
_THIS ARTICLE MEETS OR EXCEEDS
ALL REQUIREMENTS COVERED IN
ASTM F404 STANDARD AND LATEST
REVISIONS.
RECLINER
_WHEN USED AS A RECLINER,
THIS PRODUCT IS DESIGNED FOR
CHILDREN FROM BIRTH UP TO 6
MONTHS OR 20 lbs (9 Kg).
_DO NOT USE THE PRODUCT AS A
RECLINER WHEN THE CHILD IS ABLE
TO SIT UP ALONE.
_THE RECLINER IS NOT DESIGNED FOR
LONG PERIODS OF SLEEP. IT SHOULD
NOT BE USED AS A SUBSTITUTE FOR
A COT. IF THE CHILD NEEDS TO SLEEP,
HE/SHE SHOULD BE PLACED IN A
SUITABLE COT.
_DANGER OF STRANGULATION: NEVER
LEAVE THE CHILD IN THE RECLINER IF
THE SAFETY HARNESS IS LOOSE OR
UNDONE.
_RISK OF FALLING: IT IS DANGEROUS
TO USE THE RECLINED CRADLE ON A
-7-
RAISED SURFACE.
A single product which follows the growth
of your child.
_ From 0 to 6 months, a comfortable bouncer.
_ From the age of 6 months, a high chair for
eating, playing and relaxing.
_ From the age of 12 months, a high chair
without a tray, for sitting at the table with the
adults.
COMPONENTS OF THE ITEM
Check the contents of the packaging and if
you have any complaints please contact the
Assistance Service.
_ High chair with washable, removable padding
and double tray.
INSTRUCTIONS FOR USE
1 OPENING: Lift the seat (fig_a), press the side
buttons (fig_b) and open the high chair
(fig_c).
2 TRAY: To fit the tray, pull the central lever
underneath it towards you while at the same
time pushing it all the way into the armrests
(fig_a). To extend or remove the tray, pull
the central lever underneath it towards you
(fig_b) and move it outwards (fig_c). To
remove the tray, pull the side levers outwards
and pull the tray towards you. The high chair
has a double tray. The top tray can be easily
washed in a dishwasher. To remove it, detach
it from the lower tray and lift it up (fig. d).
3 ADJUSTING THE HEIGHT: The chair can be set
at 7 different heights. To raise or lower the
chair, press the two side levers (fig_a) and
stop in the required position. The handle
under the netting can also be used to raise
the seat (fig_b). The height can be adjusted
in these ways with the child in the high chair.
RECLINING BACKREST: The seat can be
reclined in 5 positions. To adjust it, raise the
handle behind the backrest (fig. c) and lock
it in the required position. This can also be
done with the child in the high chair.
4 ADJUSTABLE FOOTREST: The footrest can be
set in 3 positions. To raise it, push it upwards.
To lower it, push in the two levers and move
the footrest down (fig_b).
5 FIVE POINT SAFETY HARNESS: to close it, insert
the two waist strap buckles (with attached
shoulder straps) into the crotch strap until they
click into position (fig_a). To release it, press the
two sides of the buckles and at the same time
pull the waist strap outwards (fig_b). To tighten
the waist strap pull from both sides in the
direction of the arrow (fig_c), to loosen do the
opposite.
6 The shoulder straps of the harness can be set
at two different heights. Partially remove the
-8-
fabric covering (fig_a), release the shoulder
straps from the backrest (fig_b) and pull
them out from the fabric covering. Insert
the ends of the shoulder straps in the other
slots in the fabric covering and the backrest
(fig_c), then put the fabric covering back into
the right position on the backrest.
7 USE WITHOUT THE TRAY: to use the seat at
the table, remove the tray. To clip the tray on
the rear supports of the high chair, align and
engage it with the attachments (fig_b).
8 CLOSING AND REOPENING THE TRAY: Pull the
central lever underneath the tray towards
you (fig_a) and extend it as far as the red
markers (fig_b), then swing it upwards to lock
it in place (fig_c). To reopen the tray, press
the lever under the armrest (fig_d), swing
it downwards, then pull the central lever
towards you and put the tray in one of the
positions for use.
9 FOLDING UP: Press the side buttons (fig_a)
and fold up the high chair (fig_b). Fig_c
shows a folded-up high chair.
10REMOVABLE COVERS: To remove the covers of
the seat, pull off the upper part of the fabric
covering and pull the harness straps through
the backrest (fig_a) and the fabric covering
(fig_b). Lower the backrest and pull out the
leg divider strap from under the seat (fig_c).
11 Unbutton the sack at the sides (fig. a) and
pull up to remove it (fig. b).
SERIAL NUMBERS
12Information about the production date of the
Prima Pappa Zero-3 can be found on the seat.
_ Product name, date of manufacture and serial
number.
This information is required for any
complaints.
CLEANING AND
MAINTENANCE
PRODUCT MAINTENANCE: protect from the
weather: water, rain, or snow; prolonged
and continuous exposure to bright sunlight
may give rise to colour changes of various
different materials; store this product in a dry
place. The maintenance have to be regularly.
CLEANING THE CHASSIS: periodically clean
all plastic parts with a damp cloth. Do not
use solvent or similar cleaning products;
keep all metal parts dry to prevent rusting;
keep moving parts clean (adjustment
mechanisms, locking mechanisms, wheels, ...)
and free of dust and sand and, if necessary,
lubricate with light machine oil all metallic
moving parts. Check all nuts and bolts for
tightness and tighten when required. check
all coverings for bolts and sharp edges and
replace when required. check swing seat and
attachments for evidence of deterioration.
Replace when required in accordance with
the manufacturer's instructions.
CLEANING THE SACK: Wash with a damp cloth
and neutral detergent. Do not wring. Do not
use chlorine bleach. Do not iron. Do not dry
clean. Do not use solvents for stain removal.
Do not spin dry.
PEG-PÉREGO S.p.A.
Peg Pérego can make changes at any time to
the models described in this publication for
technical or commercial reasons.
PEG-PÉREGO AFTER-SALES
SERVICE
ES_Español
Le agradecemos haber elegido un producto
Peg-Pérego.
ADVERTENCIA
_ IMPORTANTE:
CONSERVAR LAS
INSTRUCCIONES
PARA FUTURAS
CONSULTAS.
_IMPORTANTE: LEER ATENTAMENTE
ESTAS INSTRUCCIONES Y
CONSERVARLAS PARA UNA FUTURA
UTILIZACIÓN. SI NO SE SIGUEN
ESTAS INSTRUCCIONES, SE PODRÍA
ARRIESGAR LA SEGURIDAD DEL NIÑO.
_LAS OPERACIONES DE MONTAJE Y
DE REGULACIÓN DEL PRODUCTO
TIENEN QUE SER REALIZADAS
POR UN ADULTO; NO UTILIZAR EL
PRODUCTO SI EL MONTAJE NO HA
SIDO COMPLETADO Y SI EL PRODUCTO
PRESENTA ROTURAS O FALTAN PIEZAS.
_LAS OPERACIONES DE LIMPIEZA Y
MANTENIMIENTO SÓLO PUEDEN SER
REALIZADAS POR ADULTOS.
ADVERTENCIA: PREVENIR
_
HERIDAS SERIAS O LA MUERTE DEL
NIÑO CAUSADAS POR LA CAÍDA O
EL RESBALAMIENTO DEL MISMO;
UTILIZAR SIEMPRE LOS CINTURONES
DE SEGURIDAD DE CINCO PUNTOS;
UTILIZAR LOS CINTURONES TANTO
EN POSICIÓN RECLINADA COMO EN
POSICIÓN ERECTA.
_
ADVERTENCIA: CUANDO SE
ENCUENTRA EN LA SILLA ALTA, EL NIÑO
DEBE ESTAR SIEMPRE SUJETADO CON
EL SISTEMA DE SEGURIDAD, TANTO
EN POSICIÓN RECLINADA COMO EN
POSICIÓN ERECTA.
_UTILIZAR SIEMPRE LA TIRA ENTREPIERNAS.
_NO DEJAR NUNCA AL NIÑO SIN
VIGILANCIA; NO PERDER NUNCA DE
VISTA AL NIÑO.
If any parts of your Peg Pérego product
should be accidentally mislaid or damaged,
use exclusively genuine original Peg Pérego
replacements. For any repairs, replacements,
product information, and orders for genuine
original replacement parts and accessories,
contact Peg Pérego After-Sales Service:
CANADA
tel. 905.839.3371 fax 905.839.9542
call us toll free 1.800.661.5050 website
www.pegperego.com
USA
tel. 800.671.1701 fax 260.471.6332
call us toll free 1.800.671.1701 website
www.pegperego.com
-9-
_LA BANDEJA Y SUS ACCESORIOS
NO HAN SIDO CONCEBIDOS
PARA SOPORTAR EL PESO DEL
NIÑO; LA BANDEJA NO HA SIDO
DISEÑADA PARA SUJETAR AL NIÑO
EN EL ASIENTO Y NO SIRVE COMO
CINTURÓN DE SEGURIDAD.
_ASEGURARSE DE QUE EL PRODUCTO
ESTÉ SOBRE UNA SUPERFICIE
HORIZONTAL.
_UTILIZAR EL PRODUCTO EN POSICIÓN
ERECTA SOLO CUANDO EL NIÑO SEA
CAPAZ DE ESTAR SENTADO SOLO.
_PONER EL PRODUCTO DE MANERA
QUE EL NIÑO ESTÉ LEJOS DE POSIBLES
PELIGROS COMO CABLES ELÉCTRICOS,
FUENTES DE CALOR O LLAMAS.
_NO INTRODUCIR LOS DEDOS EN
LOS MECANISMOS Y PRESTAR
ATENCIÓN A LA POSICIÓN DE LAS
EXTREMIDADES DEL NIÑO DURANTE
LAS OPERACIONES DE REGULACIÓN.
_PUEDE SER PELIGROSO UTILIZAR
ACCESORIOS NO HOMOLOGADOS
POR EL FABRICANTE.
_NO UTILIZAR EL PRODUCTO CERCA
DE ESCALERAS O ESCALONES.
_PRESTAR ATENCIÓN A NO PONER EL
PRODUCTO CERCA DE FUENTES DE
CALOR O FUEGO COMO HORNILLOS
DE GAS, ESTUFAS ELÉCTRICAS, ETC.
_ASEGURARSE DE QUE SE FIJE
CORRECTAMENTE EL CHASIS.
_USAR LA SILLA ALTA ÚNICAMENTE
SI TODOS LOS ELEMENTOS SE HAN
FIJADO Y AJUSTADO DE MODO
ADECUADO.
_ASEGURARSE DE QUE CADA CINTURÓN
ESTÉ ADECUADAMENTE REGULADO.
AVISO:
_ESTE PRODUCTO CUMPLE
SUFICIENTEMENTE CON TODOS LOS
REQUISITOS ESTABLECIDOS POR LA
NORMA ASTM F404 Y ULTERIORES
REVISIONES.
HAMACA
_CUANDO SE UTILIZA COMO MECEDOR,
ESTE PRODUCTO ESTÁ DISEÑADO
PARA NIÑOS DE 0 A 6 MESES DE EDAD
O DE HASTA 20 LBS (9 KG) DE PESO.
- 10 -
_NO UTILIZAR EL PRODUCTO COMO
HAMACA SI EL BEBÉ ES CAPAZ DE
SENTARSE SOLO.
_ESTA HAMACA NO SE HA DISEÑADO
PARA UN PERIODO PROLONGADO DE
SUEÑO. LA HAMACA NO REEMPLAZA
LA CUNA, POR LO QUE SI EL BEBÉ
NECESITA DORMIR ES IMPORTANTE
METERLO EN UNA CUNA APTA.
_RIESGO DE ESTRANGULAMIENTO: NO
DEJAR EL BEBÉ EN LA HAMACA SI LOS
CINTURONES ESTÁN DESAPRETADOS
O DESENGANCHADOS.
_PELIGRO DE CAÍDA: ES PELIGROSO
UTILIZAR LA HAMACA SOBRE UNA
SUPERFICIE ELEVADA.
Un único producto que acompaña al
crecimiento de su bebé.
_ De 0 a 6 meses una cómoda hamaca ;
_ A partir de los 6 meses, trona para la comida,
el juego y el descanso;
_ De 12 meses en adelante, trona sin bandeja
para quedarse en la mesa con los grandes.
COMPONENTES DEL ARTÍCULO
Comprobar el contenido presente en el
embalaje y en caso de reclamación le
rogamos contacte el Servicio de Asistencia.
_ Trona con acolchado lavable y desmontable,
doble bandeja.
INSTRUCCIONES DE USO
1 APERTURA: Levantar el asiento (fig_a),
apretar los botones laterales (fig_b) y abrir la
trona (fig_c).
2 BANDEJA: Para montar la bandeja, tirar hacia
sí de la palanca central colocada bajo la
misma y, simultáneamente, encajarla en los
brazos presionando completamente (fig_a).
Para alargar o extraer la bandeja, tirar hacia sí
de la palanca central colocada bajo la misma
(fig_b) y alargarla (fig_c).
Para extraer la bandeja, tirar hacia fuera de
las palancas laterales y extraer la bandeja.
La trona cuenta con una bandeja doble, siendo
la superior fácil de lavar en el lavavajillas. Para
quitarla, hay que desengancharla de la bandeja
inferior levantándola (fig_d).
3 REGULACIÓN DE LA ALTURA: La altura del
asiento puede regularse en 7 posiciones. Para
subir o bajar el asiento, pulsar las dos palancas
laterales (fig_a), deteniéndose en la posición
deseada. El asiento puede elevarse también
utilizando el asa que hay debajo de la red
(fig_b). Estas operaciones pueden realizarse
también con el bebé sentado en la trona.
RESPALDO RECLINABLE: La silla puede
reclinarse en 5 posiciones. Para regularlo,
levantar el asa que está detrás del respaldo
(fig_c) y bloquearlo en la posición deseada.
Esta operación también puede realizarse con
el bebé en la trona.
4 REPOSAPIÉS REGULABLE: el reposapiés puede
regularse en 3 posiciones. Para levantarlo,
empujar hacia arriba; para bajarlo, empujar
hacia abajo las dos palancas y bajar (fig_b).
5 ARNÉS DE SEGURIDAD DE 5 PUNTOS: para
engancharlo, introducir las dos hebillas
de la correa de la cintura (con los tirantes
enganchados) a la tira entrepiernas hasta oír
un clic (fig_a). Para desengancharlo, presionar
a los lados de la hebilla y al mismo tiempo
tirar hacia fuera la correa de la cintura (fig_b).
Para apretar la correa de la cintura, tirar de
ambos lados en el sentido que indica la flecha
(fig_c). Y para aflojarla, hacer lo mismo pero
en sentido contrario.
6 Es posible regular la altura de los tirantes del
arnés en dos posiciones; sacar parcialmente
el forro (fig_a), desenganchar los tirantes del
respaldo (fig_b) y quitar el forro. Introducir
los extremos de los tirantes en las ranuras del
forro y del respaldo (fig_c). Por último, volver
a colocar el forro sobre el respaldo.
7 USO SIN BANDEJA: Para utilizar la trona en la
mesa, hay que quitar la bandeja. Para volver
a colocar la bandeja sobre los bastidores
traseros de la trona, alinearla con respecto a
los enganches y engancharla (fig_b).
8 CERRAR Y VOLVER A ABRIR LA BANDEJA:
tirar hacia sí de la palanca central colocada
bajo la bandeja (fig_a), alargarla hasta los
indicadores de color rojos (fig_b) y, por
último, girar la bandeja hacia arriba (fig_c)
hasta bloquearla. Para volver a abrir la
bandeja, pulsar la palanca colocada bajo el
reposabrazos (fig_d), girar la bandeja hacia
abajo y, tirando hacia sí de la palanca central,
colocarla en una de las posiciones de uso.
9 CIERRE: Pulsar los botones laterales (fig_a) y
cerrar la trona (fig_b). Trona cerrada (fig_c).
10DESENFUNDABLE: para desenfundar la silla,
sacar la parte superior del forro; y quitar los
cinturones del respaldo (fig_a) y del forro
(fig_b). Bajar el respaldo y quitar por debajo
del asiento la tira entrepierna (fig_c).
11 Desabrochar los botones laterales del forro
(fig_a) y quitarla desde arriba (fig_b).
LIMPIEZA Y MANTENIMIENTO
MANTENIMIENTO DEL PRODUCTO: proteger
contra agentes atmosféricos (agua, lluvia o
nieve). Una exposición contínua y prolongada
al sol podría causar cambios de color de
muchos materiales. Conservar este producto
en un lugar seco. Realizar controles e
intervenciones de mantenimiento habituales
en las partes principales.
LIMPIEZA DEL CHASIS: Limpiar con frecuencia
las partes de plástico con un paño húmedo sin
usar solventes u otros productos parecidos;
mantener secas todas las partes de metal a fin
de evitar la corrosión; mantener limpias de polvo
o arena todas las partes móviles (mecanismos
de regulación, mecanismos de enganche,
ruedas, etc.) y lubricar con aceite ligero todas las
partes móviles de metal. Controlar el ajuste de
las tuercas y de los pernos y apretarlos cuando
proceda. Controlar todas las coberturas de pernos
y bordes cortantes y sustituirlas cuando proceda.
Comprobar la existencia de signos de deterioro
del asiento y de los medios de suspensión.
Realizar las sustituciones que sean necesarias de
conformidad con las instrucciones del fabricante.
LIMPIEZA DEL FORRO: lavar con un paño
húmedo y detergente neutro. No torcer, no
utilizar lejía, no planchar, no lavar en seco, no
eliminar las manchas con disolventes y no secar
en secadora con tambor rotativo.
PEG-PÉREGO S.p.A
Peg-Pérego podrá aportar en cualquier
momento modificaciones a los modelos
que se describen en el presente manual por
razones técnicas o comerciales.
SERVICIO DE ASISTENCIA
PEG-PÉREGO
En caso de que se pierdan o se dañen
partes del producto, utilizar sólo repuestos
originales Peg-Pérego. Para eventuales
reparaciones, cambios e informaciones sobre
los productos, así como la venta de recambios
originales y accesorios, contactar el Servicio
de Asistencia Peg-Pérego:
CANADA
tel. 905.839.3371 fax 905.839.9542
call us toll free 1.800.661.5050
website www.pegperego.com
NÚMEROS DE SERIE
12Prima Pappa Zero-3 incluye en el asiento
información relativa a la fecha de producción
de la misma.
_ Nombre del producto, fecha de producción y
número de serie.
Estas informaciones son indispensables en
caso de reclamación.
- 11 -
FR_Français
Merci d’avoir choisi un produit Peg-Pérego.
AVERTISSEMENT
_ IMPORTANT: À
CONSERVER POUR
TOUTE UTILISATION
ULTÉRIEURE.
_IMPORTANT: LIRE CES
INSTRUCTIONS AVEC ATTENTION
ET LES CONSERVER POUR TOUTE
RÉFÉRENCE FUTURE. LA SÉCURITÉ
DE VOTRE ENFANT POURRAIT ÊTRE
MENACÉE SI CES INSTRUCTIONS NE
SONT PAS RESPECTÉES.
_LES OPÉRATIONS DE MONTAGE
ET DE RÉGLAGE DU PRODUIT
DOIVENT ÊTRE EFFECTUÉES PAR
UN ADULTE; NE PAS UTILISER LE
PRODUIT SI LE MONTAGE N’EST PAS
CONVENABLEMENT TERMINÉ ET SI
LE PRODUIT PRÉSENTE DES PIÈCES
CASSÉES OU MANQUANTES.
_LES OPÉRATIONS DE NETTOYAGE
ET D’ENTRETIEN DOIVENT ÊTRE
EFFECTUÉES UNIQUEMENT PAR DES
ADULTES.
_ AVERTISSEMENT: EMPÊCHER
DE GRAVES BLESSURES OU LA MORT
DE L’ENFANT DUES À SA CHUTE OU
À SON GLISSEMENT: TOUJOURS
UTILISER LES CEINTURES DE
SÉCURITÉ À CINQ POINTS; UTILISER
LES CEINTURES EN POSITION
INCLINÉE ET À LA VERTICALE.
_ AVERTISSEMENT: IL FAUT
TOUJOURS ATTACHER L’ENFANT
DANS LA CHAISE HAUTE AU MOYEN
DU SYSTÈME DE RETENUE, QUE CE
SOIT DANS LA POSITION INCLINÉE
OU VERTICALE.
_UTILISER SYSTEMATIQUEMENT
L'ENTREJAMBE
_NE JAMAIS LAISSER L’ENFANT SANS
SURVEILLANCE; TOUJOURS GARDER
L’ENFANT EN VUE.
_LE PLATEAU ET SES ACCESSOIRES
N’ONT PAS ÉTÉ CONÇUS POUR
SUPPORTER LE POIDS DE L’ENFANT;
LE PLATEAU N’A PAS ÉTÉ CONÇU
POUR MAINTENIR L’ENFANT EN
POSITION ASSISE ET NE REMPLACE
PAS LA SANGLE DE SÉCURITÉ.
_S’ASSURER QUE LE PRODUIT EST
INSTALLÉ SUR UNE SURFACE
HORIZONTALE.
_N’UTILISER LE PRODUIT EN POSITION
VERTICALE QUE SI L’ENFANT EST
CAPABLE DE RESTER ASSIS TOUT
SEUL.
_INSTALLER LE PRODUIT DE MANIÈRE
À CE QUE L’ENFANT NE PUISSE ÊTRE
MIS EN DANGER PAR DES CÂBLES
ÉLECTRIQUES, DES SOURCES DE
CHALEUR OU DES FLAMMES.
_NE PAS METTRE LES DOIGTS
DANS LES MÉCANISMES ET FAIRE
ATTENTION À LA POSITION DES
MEMBRES DE L’ENFANT AU COURS
DES OPÉRATIONS DE RÉGLAGE.
_L’UTILISATION D’ACCESSOIRES
N’AYANT PAS ÉTÉ APPROUVÉS PAR LE
FABRICANT PEUT ÊTRE DANGEREUSE.
_NE PAS UTILISER LE PRODUIT
À PROXIMITÉ DE MARCHES OU
D’ESCALIERS.
_FAIRE ATTENTION À NE PAS
POSITIONNER LE PRODUIT À
PROXIMITÉ DE SOURCES DE CHALEUR
OU DE FEUX COMME LES POÊLES À
GAZ, LES RADIATEURS ÉLECTRIQUES,
ETC.
_NE PAS UTILISER LA CHAISE HAUTE
SI TOUS LES ÉLÉMENTS NE SONT
PAS FIXÉS ET RÉGLÉS DE MANIÊRE
APPROPRIÉE.
_S’ASSURER QUE CHAQUE CEINTURE
EST CORRECTEMENT RÉGLÉE.
_CONFORME AUX EXIGENCES DE
SECURITE.
REMARQUE:
_CET ARTICLE REMPLIT LES
CONDITIONS REQUISES PAR LA
NORME ASTM F404 ET RÉVISIONS
RÉCENTES OU SATISFAIT À DES
CONDITIONS PLUS SÉVÈRES.
- 12 -
TRANSAT
_LORSQU’IL EST UTILISÉ COMME
TRANSAT, CE PRODUIT EST
CONÇU POUR DES ENFANTS DE LA
NAISSANCE À SIX MOIS OU 20 lbs (9
Kg).
_NE PAS UTILISER LE PRODUIT COMME
TRANSAT LORSQUE L’ENFANT SAIT SE
TENIR ASSIS TOUT SEUL.
_CE TRANSAT N’EST PAS CONÇU POUR
DE LONGS SOMMEILS. LE TRANSAT
NE REMPLACE PAS LE LIT D’ENFANT.
SI L’ENFANT A ENVIE DE DORMIR, IL
EST IMPORTANT DE LE COUCHER
DANS UN LIT APPROPRIÉ.
_DANGER D’ÉTRANGLEMENT : NE
JAMAIS LAISSER L’ENFANT DANS LE
TRANSAT LORSQUE LES CEINTURES
SONT DÉTENDUES OU DÉTACHÉES.
_DANGER DE CHUTE : IL EST
DANGEREUX D’UTILISER LE TRANSAT
SUR UNE SURFACE SITUÉE EN
HAUTEUR.
Un seul produit qui accompagne la
croissance de votre enfant :
_ De 0 à 6 mois, un transat confortable ;
_ À partir de 6 mois, une chaise haute multi-
usages : pour les repas, le jeu et la détente ;
_ À partir de 12 mois et après, une chaise sans
tablette pour être à table avec les grands.
COMPOSANTS DE L’ARTICLE
Vérifier le contenu de l’emballage. Pour toute
réclamation, veuillez contacter le Service
d’assistance.
_ Chaise haute avec housse amovible et
lavable, double plateau.
MODE D’EMPLOI
1 OUVERTURE : Lever le siège (fig_a), les
presser les boutons latéraux (fig_b) et ouvrir
la chaise haute (fig_c).
2 PLATEAU : pour monter le plateau, tirer vers
soi la poignée centrale située sous le plateau
tout en insérant complètement ce dernier
dans les accoudoirs (fig_a). Pour allonger ou
enlever le plateau, tirer vers soi la poignée
centrale située sous le plateau (fig_b) et
l’allonger (fig_c).
Pour extraire la tablette, tirer vers soi les
leviers latéraux et tirer la tablette vers soi.
La chaise haute est équipée d’un double
plateau ; celui du haut est lavable en lavevaisselle. Pour le démonter, le déboiter du
plateau inférieur en le soulevant (fig_d).
3 RÉGLAGE EN HAUTEUR : La chaise haute
- 13 -
offre 7 positions de réglage en hauteur. Pour
lever ou abaisser le siège, appuyer sur les
deux petits leviers latéraux (fig_a) jusqu’à
la position voulue. La chaise haute peut
également être réglée en hauteur au moyen
de la poignée située sous le filet (fig_b).
Ces opérations peuvent également être
effectuées lorsque l’enfant est assis sur la
chaise haute.
DOSSIER INCLINABLE : le siège a 5 positions
d’inclinaison. Pour régler l’inclinaison du
siège, lever la poignée qui se trouve derrière
le dossier (fig_c) et bloquer le siège dans
la position souhaitée. Cette opération peut
également être effectuée lorsque l’enfant est
assis sur la chaise.
4 REPOSE-PIEDS RÉGLABLE : le repose-pieds est
réglable en 3 positions ; pousser le reposepieds vers le haut pour le relever, pousser les
deux languettes vers le bas pour l’abaisser
(fig_b).
5 CEINTURE DE SÉCURITÉ À CINQ POINTS :
pour accrocher la ceinture, insérer jusqu’au
déclic les deux boucles de la ceinture ventrale
(avec les bretelles attachées) dans la sangle
d’entrejambes (fig_a). Pour décrocher la
ceinture, enfoncer les côtés de la boucle tout
en tirant la ceinture ventrale vers l’extérieur
(fig_b). Pour serrer la ceinture ventrale, tirer
des deux côtés dans le sens indiqué par la
flèche (fig_c). Pour la desserrer, procéder à
l’opération contraire.
6 La hauteur des bretelles est réglable en deux
positions ; défaire une partie de la housse
(fig_a), décrocher les bretelles du dossier
(fig_b) et les faire ressortir de la housse.
Insérer les extrémités des bretelles dans les
autres passants de la housse et du dossier
(fig_c) puis repositionner correctement la
housse sur le dossier.
7 UTILISATION SANS PLATEAU : pour utiliser
la chaise haute à table, enlever le plateau.
Pour replacer le plateau sur les montants à
l’arrière de la chaise haute, le positionner en
correspondance des fixations et l’accrocher
(fig_b).
8 FERMETURE ET RÉOUVERTURE DU PLATEAU
: tirer vers soi la poignée centrale située
sous le plateau (fig_a) et l’allonger jusqu’aux
repères rouges (fig_b), puis faire pivoter le
plateau vers le haut (fig_c) jusqu’à ce qu’il se
bloque. Pour rouvrir le plateau, appuyer sur
le petit levier situé sous l’accoudoir (fig_d), le
faire pivoter vers le bas et, tout en tirant vers
soi la poignée centrale, le placer dans l’une
des positions d’utilisation.
9 FERMETURE : Presser les boutons latéraux
(fig_a) et replier la chaise haute (fig_b).
Chaise haute repliée (fig_c).
10ENLEVER LA HOUSSE : pour enlever la housse,
défaire la partie supérieure de la housse et
faire ressortir les sangles du dossier (fig_a)
et de la housse (fig_b). Abaisser le dossier et
faire ressortir la sangle d’entrejambes par le
dessous de l’assise (fig_c).
11 Déboutonner la housse sur les côtés (fig_a) et
la retirer par le haut (fig_b).
modèles décrits dans cet ouvrage, pour des
raisons de nature technique ou commerciale.
SERVICE D’ASSISTANCE
PEG-PÉREGO
En cas de perte de pièces ou de rupture de
l'une d'elles, utiliser exclusivement des pièces
de rechange originales Peg-Pérego. Pour les
réparations, les remplacements, les demandes
d'informations relatives aux produits et
l’achat de pièces de rechange originales et
d’accessoires, contacter le service d'assistance
Peg-Pérego:
NUMÉROS DE SÉRIE
12Les informations comme la date de
production du produit sont inscrites sous
l’assise de Prima Pappa Zero-3.
_ Nom du produit, date de production et numéro
de série.
Ces informations sont indispensables en cas
de réclamation.
CANADA
tél. 905.839.3371 fax 905.839.9542
call us toll free 1.800.661.5050 site Internet
www.pegperego.com
NETTOYAGE ET ENTRETIEN
ENTRETIEN DE L’ARTICLE: protéger l’article
des agents atmosphériques (eau, pluie ou
neige); une exposition continue et prolongée
au soleil pourrait entraîner un changement
de couleur de nombreux matériaux; ranger
cet article dans un lieu sec. Effectuer des
contrôles et des interventions d’entretien
sur les pièces principales à des intervalles
réguliers.
NETTOYAGE DU CHÂSSIS : nettoyer
régulièrement les pièces en plastique à l’aide
d’un linge humide sans utiliser de solvants ou
d’autres produits similaires ; toutes les pièces
métalliques doivent rester sèches de manière
à prévenir la formation de rouille ; toutes
les pièces mobiles (dispositifs de réglage,
dispositifs de fixation, roues, etc.) doivent
être exemptes de poussières ou de sable et
les pièces métalliques mobiles doivent être
lubrifiées avec de l’huile légère. Contrôler
le serrage de tous les écrous et boulons et
les serrer le cas échéant. Contrôler tous les
caches de boulons et bords tranchants et les
remplacer le cas échéant. Vérifier que le siège
et les dispositifs de suspension ne présentent
pas de signes de détérioration. Procéder
aux remplacements de pièces nécessaires
conformément aux instructions du fabricant
le cas échéant.
NETTOYAGE DES ÉLÉMENTS EN TISSU :
nettoyer à l’aide d’un linge humide et d’un
détergent neutre ; ne pas tordre ; ne pas
utiliser de javel ; ne pas repasser ; ne pas laver
à sec ; ne pas détacher à l’aide de solvants ;
ne pas sécher dans un sèche-linge à tambour
rotatif.
PEG-PÉREGO S.p.A.
Peg-Pérego se réserve le droit de procéder
à tout moment à des modifications sur les
- 14 -
Identification du produit
IMPP03
Standard du referiment (origin)
ASTM F 404-10
16 CFR 1501
16 CFR 1303
CPSIA 2008
EN 12790 :2009
EN 14988 :2006
EN71-3
European Directive 2005/84/CE
( Phtalates Directive)
European Directive 2002/61/CE
( Azocolourants)
Product name
PRIMA PAPPA ZERO-3
Product reference number
IMPP03
Reference Standards (origin)
ASTM F 404-10
16 CFR 1501
16 CFR 1303
CPSIA 2008
EN 12790 :2009
EN 14988 :2006
EN71-3
European Directive 2005/84/CE
( Phtalates Directive)
European Directive 2002/61/CE
( Azocolourants)
Denominazione del prodotto
PRIMA PAPPA ZERO-3
Codice identificativo del
prodotto
IMPP03
Normative di riferimento (origine)
ASTM F 404-10
16 CFR 1501
16 CFR 1303
CPSIA 2008
EN 12790 :2009
EN 14988 :2006
EN71-3
European Directive 2005/84/CE
( Phtalates Directive)
European Directive 2002/61/CE
( Azocolourants)
Declaration du
conformitè
Declaration of
conformity
Dichiarazione di
conformità
Declaration of conformity
PegPerego S.p.A. declares under
its sole responsibility that the
article to which this declaration
relates has undergone internal
testing and has been approved,
in accordance with regulations
in force, by external, independent testing laboratories.
Date and place of issue
Arcore, March 2012
PegPerego S.p.A.
via De Gasperi, 50
20862 Arcore (MB), ITALY
Dichiarazione di conformità
La PegPerego S.p.A. dichiara sotto
la propria responsabilità che
l’ articolo in oggetto è stato
sottoposto a test di collaudo
interni e omologato secondo le
normative vigenti presso laboratori
esterni ed indipendenti.
Data e luogo di rilascio
Arcore, Marzo 2012
PegPerego S.p.A.
via De Gasperi, 50
20862 Arcore (MB), ITALY
PegPerego S.p.A.
Via De Gasperi, 50
20862 Arcore (MB), ITALY
Date et lieu du publication
Arcore, Mars 2012
Declaration du conformitè
PegPerego S.p.A. déclare, sous
sa propre responsabilité, que
l’article en question a été
soumis à des tests d’essais
internes et homologué selon
les normes en vigueur par des
laboratoires extérieurs et
indépendants.
Denomination du produit
PRIMA PAPPA ZERO-3
FR_Français
EN_English
IT_Italiano
Declaración de conformidad
PegPerego S.p.A. declara bajo
su responsabilidad que el
artículo en objeto ha sido
sometido a pruebas de ensayo
internas y ha sido homologado
según las normativas vigentes
en laboratorios exteriores e
independientes.
Konformitätserklärung
Die Firma PegPerego S.p.A.
erklärt auf ihre Verantwortung,
dass der betreffende Artikel
internen Abnahmetests
unterzogen sowie gemäß den
gültigen Bestimmungen von
externen und unabhängigen
Labors zugelassen wurde.
PegPerego S.p.A.
Via De Gasperi, 50
20862 Arcore (MB), ITALY
PegPerego S.p.A.
Via De Gasperi, 50
20862 Arcore (MB), ITALY
Fecha y lugar de expedición
Arcore, Marzo 2012
Normativas de referencia
(origen)
ASTM F 404-10
16 CFR 1501
16 CFR 1303
CPSIA 2008
EN 12790 :2009
EN 14988 :2006
EN71-3
European Directive 2005/84/CE
( Phtalates Directive)
European Directive 2002/61/CE
( Azocolourants)
Bezugsbestimmungen
(Ursprung)
ASTM F 404-10
16 CFR 1501
16 CFR 1303
CPSIA 2008
EN 12790 :2009
EN 14988 :2006
EN71-3
European Directive 2005/84/CE
( Phtalates Directive)
European Directive 2002/61/CE
( Azocolourants)
Datum und Ort der Ausstellung
Arcore, März 2012
Código de identificación del
producto
IMPP03
Denominación del producto
PRIMA PAPPA ZERO-3
declaración de
conformidad
ES_Español
Kennzeichnungscode des
Produktes
IMPP03
Bezeichnung des Produktes
PRIMA PAPPA ZERO-3
Konformitätserklärung
DE_Deutsch
MMFI0596
- 15 -
PEG PEREGO U.S.A. Inc.
3625 INDEPENDENCE DRIVE FORT WAYNE INDIANA 46808
phone 260 482 8191 fax 260 484 2940
Call us toll free: 1 800 671 1701
PEG PEREGO CANADA Inc.
585 GRANITE COURT PICKERING ONTARIO CANADA L1W3K1
phone 905 839 3371 fax 905 839 9542
Call us toll free: 1 800 661 5050
www.pegperego.com
Tutti i diritti di proprietà intellettuale relativi ai contenuti di questo manuale d’istruzione appartengono
a PEG PEREGO S.p.A. e sono tutelati dalle leggi vigenti.
All of the intellectual property rights for the contents of this instruction manual belong
to PEG PEREGO S.p.A. and are protected by the laws in force.
WARNING
AVOID SERIOUS INJURY FROM FALLING OR SLIDING OUT.
ALWAYS USE COMPLETE 5 POINT SEAT BELT.
ADVERTENCIA
EVITE LESIÓNES DE CAIDAS O DESLIZAMIENTOS HACIA FUERA.
SIEMPRE UTILIZE EL CINTURON COMPLETO DE 5 PUNTOS.
AVERTISSEMENT
EVITER UNE BLESSURE SÉRIEUSE DUE À UNE CHUTE OU À UN GLISSEMENT.
TOUJOURS UTILISER LA CEINTURE DE SÉCURITÉ À 5 POINTS COMPLÈTE.
prima pappa zero-3
PEG PEREGO S.p.A.
VIA DE GASPERI 50 20862 ARCORE MB ITALIA
tel. 0039 039 60881 fax 0039 039 615869/616454
Servizio Post Vendita - After Sale:
tel. 0039 039 6088213 fax: 0039 039 3309992
PRIMA PAPPA ZERO-3
FINA1202I157
30/08/2012