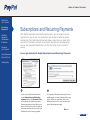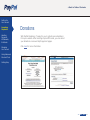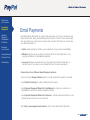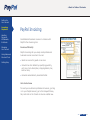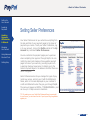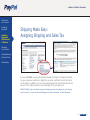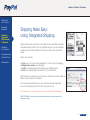
1
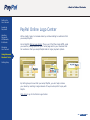
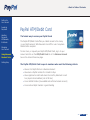
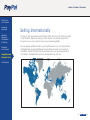
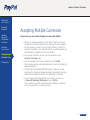
Merchant Overview
for Website Payments Standard
and Email Payments
Using PayPal in Your Online Business
Welcome to PayPal. This guide will give you an overview
of Website Payments Standard and Email Payments-solutions that you can use to begin accepting payments online.
For Professional Use Only.
PayPal Merchant Overview
Copyright ©2006 PayPal. All Rights Reserved
Last revision: 06.03.05
Notice of Liability:
The information in this manual is distributed in an “as is” basis. All information provided in this document is provided with good will.
The authors and publishers of this manual are not responsible for loss, or purported loss due to any contents of this publication.
NEXT >>
Setting Up
Your Account
Accepting
Payments
Handling
Payments,
Withdrawals,
& Refunds
Table of Contents
The PayPal Merchant Overview is divided into sections. To read a section, click on the link below.
1 Setting Up Your Account
1
2
2 Accepting Payments
Payments Overview
Website Payments Standard
Managing
Your Account
PayPal Shopping Cart
Compatible Shopping Carts
4
4
Managing Your Account
Selling Safely with PayPal Seller Protection
Accessing Your Profile
Reviewing Your Account History
Viewing Your PayPal Reputation and Verification
Status
Using Advanced
Merchant Tools
Buy Now Buttons
Getting Help
Donations
Custom Payment Pages
Email Payments
Multi-User Access
PayPal Invoicing
Online Logo Center
Payment Request Wizard for QuickBooks
PayPal ATM/Debit Card
Payment Request Wizard for Outlook
Selling Internationally
Subscriptions and Recurring Payments
5 5 Using Advanced Merchant Tools
Accepting Multiple Currencies
Features Available for Both Solutions
Selling on an Auction
PayPal Account Optional
Instant Payment Notification (IPN)
Virtual Terminal
Mass Pay
PayPal Shops
3
Handling Payments, Withdrawals,
& Refunds
Setting Seller Preferences
Shipping Made Easy
Withdrawing Funds from Your PayPal Account
Refunding Payments
Web Services and Developers Central
For additional information, visit the PayPal Website at
https://www.paypal.com/. Click on the Merchant Tools tab for
detailed information on the features covered in this manual, or click
on the Help Center link in the upper right-hand corner of the page
to search for frequently asked questions.
<< BACK
NEXT >>
< Back to Table of Contents
Setting Up
Your Account
Accepting
Payments
Handling
Payments,
Withdrawals,
& Refunds
Managing
Your Account
4 Add Bank Account
Using Advanced
Merchant Tools
Getting Help
3 Add a Credit Card or Debit Card
Log in to your PayPal account and click on
the Profile sub-tab of the My Account
tab. Click on the Credit Cards link in the
Financial Information column.
On the Credit Cards page, fill in the
requested information and click the
Add Card button. The credit or debit card
you add will become your primary card,
meaning it is the default card used on
your PayPal account.
GOOD TO KNOW: The credit or debit card billing address you entered when you added your
card is now a confirmed address.* Many sellers
require that buyers use their confirmed address
as their shipping address when they pay with
PayPal, a best practice your business may want
to consider.
To quickly withdraw payments you receive
to your bank account, take a moment now
to add your bank account to your PayPal
account. To do this you will first need a
check or deposit slip for that bank account.
Log in to your PayPal account and click on
the Profile sub-tab of the My Account
tab. Click on the Bank Accounts link in
the Financial Information column.
On the Bank Accounts page, click the
Add button.
GOOD TO KNOW: While you can use your
PayPal account to accept payments after adding
a credit card, your only method of withdrawing
funds is by check, which can take 1-2 weeks
and costs $1.50 USD per withdrawal. By adding
a bank account, you will be able to withdraw
funds to your bank account in 3-4 business days
via a free electronic funds transfer.
* At this time, Confirmed Addresses are only available to Canadian, U.S., and U.K. users.
PayPal hopes to offer buyers in other countries the ability to add Confirmed Addresses soon.
5 Confirm Bank Account
When you add your bank account, PayPal
will send two small deposits, each of less
than $1.00 USD, to your bank account.
Check your bank statement in 3-4 business
days for the amounts of the two deposits.
After getting the deposit amounts, log
in to your PayPal account and click on
the Confirm Bank Account link in the
Activate Account box on your Account
Overview. Enter the amounts of each of
the deposits on the page and your bank
account will be confirmed and you will
become a Verified Member.
GOOD TO KNOW: PayPal buyers are clear:
they prefer doing business with Verified sellers (i.e. sellers who have a confirmed bank
account). Verification simply lets your buyer
know that there’s a legitimate seller on the
other side of the computer screen…and that
builds trust and sales.
<< BACK
NEXT >>
< Back to Table of Contents
Setting Up
Your Account
Accepting
Payments
Handling
Payments,
Withdrawals,
& Refunds
Managing
Your Account
Using Advanced
Merchant Tools
Getting Help
Accepting Payments
• Payments Overview
Website Payments Standard
• PayPal Shopping Cart
• Compatible Shopping Carts
• Buy Now Buttons
• Subscriptions and
Recurring Payments
Email Payments
• Donations
Features for both payment solutions
• PayPal Account Optional
• PayPal Invoicing
• Payment Request Wizard for
QuickBooks
• Payment Request Wizard for Outlook
• Virtual Terminal
Now that you’ve set up your basic account with PayPal, you’re ready to start
receiving payments. Just add Website Payments Standard to your website, or
use our Email Payments solution to send your customers emails with clickable
payment buttons.
TIP: Even if you don’t yet have a business website, you can still use PayPal to accept credit
card payments. PayPal’s Request Money and Invoicing features let you receive customer payments directly into your account. All you will need is the customer’s email address to create
and send an invoice. Go to the Request Money tab after logging in to learn more.
<< BACK
NEXT >>
< Back to Table of Contents
Setting Up
Your Account
Accepting
Payments
Handling
Payments,
Withdrawals,
& Refunds
Managing
Your Account
Using Advanced
Merchant Tools
Getting Help
Payments Overview
PayPal makes it easy to add e-commerce functionality to your website and emails.
Set up Email Payments or Website Payments Standard to accept secure online
payments. Accept all major credit cards, debit cards, bank transfers and PayPal
balance affordably. You don’t need a separate merchant account and gateway.
Website Payments Standard
Email Payments
• PayPal Shopping Cart
Let shoppers browse your site and
track their purchases
Learn More
• PayPal Invoicing
Send professsional invoices to your customers
easily and get paid fast.
Learn More
• Other Shopping Carts
Use PayPal with many online shopping
carts, or with a custom cart
Learn More
• Payment Request Wizard for QuickBooks
Turn your QuickBooks data into email invoices
payable via PayPal
Learn More
• PayPal Buy Now Buttons
Create payment buttons easily
for your website
Learn More
• Payment Request Wizard for Outlook
Let customers pay via PayPal from any Outlook
email
Learn More
• Donations
Raise funds online easily for your nonprofit organization
Learn More
• Subscriptions and Recurring Payments
Let your customers make recurrent payments
Learn More
<< BACK
NEXT >>
< Back to Table of Contents
Setting Up
Your Account
Accepting
Payments
Handling
Payments,
Withdrawals,
& Refunds
Managing
Your Account
Using Advanced
Merchant Tools
Getting Help
Website Payments Standard
PayPal Website Payments Standard lets you instantly start accepting all major credit and
debit cards, bank transfers, and PayPal payments on your website. Website Payments
Standard is:
• Easy. Website Payments Standard is simple to set up on your website.
• Secure. Our industry-leading fraud-prevention systems and chargeback protection
programs help you do business safely.
• Affordable. No setup fees, monthly fees or cancellation fees.
You pay just one low fee per transaction—as low as 1.9% + $0.30.
You can easily sell multiple items at once with one of these options:
• If you already have a shopping cart, PayPal seamlessly integrates with
hundreds of compatible carts or custom-built storefronts.
• If you don’t have a shopping cart, set up the free PayPal Shopping Cart
quickly and easily—or choose from many other popular, compatible carts.
You can also sell one item at a time, or collect recurring payments:
• Easily start receiving payments on your website. You don’t need a shopping cart.
• Automatically accept subscriptions.
• Take donations simply.
Visit http://www.paypal.com/standard to learn more about Website Payments
Standard.
<<
<< BACK
BACK NEXT >>
< Back to Table of Contents
Setting Up
Your Account
Accepting
Payments
Handling
Payments,
Withdrawals,
& Refunds
PayPal Shopping Cart
The PayPal Shopping Cart provides an easy way for you to create an online store.
Customers are able to add multiple items to the PayPal Shopping Cart, continue
shopping, and check out through PayPal.
Managing
Your Account
PayPal also supports more than 100 third-party Shopping Carts and Storefront Solutions.
Click here to learn more.
Using Advanced
Merchant Tools
How to get started with a PayPal Shopping Cart
Getting Help
1
Log in to your PayPal account and click on
the PayPal Shopping Cart link on the
Merchant Tools tab to create
buttons for your website.
2
For each item you are selling, enter the
item’s details and choose which button
your customers will click to add the item
to their shopping carts. You can even use
your own button.
More >
<< BACK
NEXT >>
< Back to Table of Contents
Setting Up
Your Account
Accepting
Payments
PayPal Shopping Cart
Handling
Payments,
Withdrawals,
& Refunds
Managing
Your Account
Using Advanced
Merchant Tools
Getting Help
3
Click Add More Options to customize
your pages. You can maintain the look of
your store on PayPal’s payment pages by
changing the background color, including
your logo, or specifying the URL that
customers will return to after completing
their payments. For detailed information
about customizing your payment pages, go
to Custom Payment Pages in the Advanced
Tools section of this guide.
4
PayPal creates customized HTML code for
your Add to Cart and View Cart buttons.
Follow the on-screen instructions to past
this code where you want the buttons to
appear on your website.
Your customers add items to the shopping
cart by clicking on the Add to Cart button
on your website. When they check our and
pay with PayPal, the payment will be sent
directly to your PayPal account. You will
receive an email confirming the payment,
and the transaction will appear in your
Account History. Just ship the items, and
you’re done!
<< BACK
NEXT >>
< Back to Table of Contents
Setting Up
Your Account
Accepting
Payments
Handling
Payments,
Withdrawals,
& Refunds
Managing
Your Account
Using Advanced
Merchant Tools
Getting Help
Compatible Shopping Carts
You can use PayPal with many currently available shopping carts, or with a custom
cart or storefront that you’ve built.
PayPal-compatible shopping carts
If you need a shopping cart, PayPal offers hundreds of full-featured carts that
are already seamlessly integrated with PayPal’s functionality.
• Check our list of featured shopping carts.
• Sign up for the shopping cart that best fits your business needs.
• Select PayPal as your payment processor by following the instructions on your
shopping cart provider’s website.
If you currently use a third-party shopping cart or storefront, you can add
PayPal to accept payments easily.
• Sign up for a business account with PayPal.
• Find your third-party provider in the If you can’t
find your provider, consider switching to one of the listed options.
• Log in with your provider and add PayPal as a payment option.
Custom shopping carts
If you’ve built your own shopping cart or storefront, you can easily integrate
PayPal in just minutes. It works seamlessly with your shopping cart and business
operations, so you can process payments efficiently.
Click here to learn more about how to integrate PayPal into your shopping cart or
storefront.
<< BACK
NEXT >>
< Back to Table of Contents
Setting Up
Your Account
Accepting
Payments
Handling
Payments,
Withdrawals,
& Refunds
Managing
Your Account
Using Advanced
Merchant Tools
Getting Help
Buy Now Buttons
Make it even easier for your customers to pay: add a PayPal Payment Button anywhere
you use HTML. With Buy Now Buttons, you can create customized payment buttons to sell
individual items on your website. Your buyers will be able to make their purchases quickly
and securely on PayPal-hosted payment pages.
TIP: If you’re already using a Web publishing tool such as FrontPage or Dreamweaver, PayPal makes it even
easier to set up your payment buttons with special add-ins. See the PayPal Developer Network for more information
GOOD TO KNOW: PayPal offers encrypted versions of its Buy Now buttons, or you can download PayPal’s public certificate.
Find out more in the Encrypted Website Payment Hub.
How to get started with Buy Now buttons
1
Log in to your PayPal account and click on
the Buy Now Buttons link on
the Merchant Tools tab to create a
payment button for your website.
2
Enter the item details, then
select a button or use your own image
to customize the look of your button.
More >
<< BACK
NEXT >>
< Back to Table of Contents
Setting Up
Your Account
Accepting
Payments
Buy Now Buttons
Handling
Payments,
Withdrawals,
& Refunds
Managing
Your Account
Using Advanced
Merchant Tools
Getting Help
3
Click Add More Options if you wish to
enter information about shipping, sales
tax, your logo, and the page users are
sent to after payment. PayPal then generates the HTML code, which includes all the
details of your payment.
NEXT
4
Follow the on-screen instructions to
paste this HTML code onto your website
or into your email. You can insert payment
buttons right on your product pages.
Customers clicking on your Buy Now
button will be taken to a secure PayPal
page to complete the payment.
GOOD TO KNOW: For detailed instructions on how to use Buy Now Buttons, refer
to the Buy Now Button Manual (PDF 568k).
<< BACK
NEXT
< Back to Table of Contents
Setting Up
Your Account
Accepting
Payments
Handling
Payments,
Withdrawals,
& Refunds
Managing
Your Account
Using Advanced
Merchant Tools
Subscriptions and Recurring Payments
With PayPal Subscriptions and Recurring Payments, you can accept recurring
payments for your service. Your subscribers will be able to subscribe quickly
and securely from PayPal-hosted payment pages, where they can make initial
payments (if necessary) and set up any future payments for the subscription.
You can also use PayPal Subscriptions to offer free trials of your product or
service.
How to get started with PayPal Subscriptions and Recurring Payments
Getting Help
1
Log in to your PayPal Account and click
on the Subscriptions and Recurring
Payments link on the Merchant Tools
tab to specify your subscription terms.
Recurring periods can be as little as one
day or as long as five years. An optional
initial trial period can also be set up that
is different from the recurring period.
2
You can place Subscribe buttons right on your
website pages, or place Subscribe links in your
emails. When your customers click on the
Subscribe button or link, they are taken to a
secure PayPal payment page.
More >
<< BACK
NEXT >>
< Back to Table of Contents
Setting Up
Your Account
Accepting
Payments
Subscriptions and Recurring Payments
Handling
Payments,
Withdrawals,
& Refunds
Missing,
Need
Screenshot
Managing
Your Account
Using Advanced
Merchant Tools
Getting Help
3
After the payment is sent, your customers will see a confirmation page with an
Access Subscription link that returns
them to your website.
4
When your subscribers return to your
website, you can tell them how to access
their new subscription.
<< BACK
NEXT >>
< Back to Table of Contents
Setting Up
Your Account
Accepting
Payments
Donations
Handling
Payments,
Withdrawals,
& Refunds
With PayPal Donations, it’s easy for you to collect secure donations
from your website. After inserting simple HTML code, you can collect
your donations via secure PayPal payment pages.
Managing
Your Account
Click here for more information.
Using Advanced
Merchant Tools
Getting Help
<< BACK
NEXT >>
< Back to Table of Contents
Setting Up
Your Account
Accepting
Payments
Handling
Payments,
Withdrawals,
& Refunds
Email Payments
Use PayPal Email Payments for a quick and secure way to bill your customers and
accept credit card, bank, and PayPal payments online. You don’t even need a website—just email your customers an invoice with a button that they can click to pay
you. Email Payments is:
Managing
Your Account
• Faster. Stop waiting for checks—your customers can pay online immediately.
Using Advanced
Merchant Tools
• Efficient. Email invoices by filling out simple forms on the PayPal site, or by
using your Outlook or QuickBooks programs.
Getting Help
• Low-cost. Receive payments with no merchant account fees, setup fees, or
monthly fees. All you pay are low transaction fees to receive payments.
Choose from four different Email Payment options
• Use our simple Request Money option to email a payment request in seconds.
• Use PayPal Invoicing to email a detailed invoice easily.
• Use Payment Request Wizard for QuickBooks to email your customers a
QuickBooks invoice that includes a payment button.
• Use Payment Request Wizard for Outlook to include a payment button in any
Outlook email you send to your customer.
Visit http://www.paypal.com/email to learn more about Email Payments.
<< BACK
NEXT >>
< Back to Table of Contents
Setting Up
Your Account
Accepting
Payments
Handling
Payments,
Withdrawals,
& Refunds
Managing
Your Account
Using Advanced
Merchant Tools
Getting Help
PayPal Invoicing
Send detailed business invoices in minutes with
PayPal’s free Invoicing tool.
Invoice efficiently
PayPal Invoicing lets you easily send professional
business invoices via email. You can:
• Send an invoice for goods or services
• Include line-item details by specifying quantity,
unit price, item description, shipping details, tax,
and currency
• Generate automatically calculated totals
Get started now
To send your customers professional invoices, just log
in to your PayPal account, go to the Request Money
tab, and click on the Create an Invoice subtab now.
<< BACK
NEXT >>
< Back to Table of Contents
Setting Up
Your Account
Accepting
Payments
Handling
Payments,
Withdrawals,
& Refunds
Managing
Your Account
Using Advanced
Merchant Tools
Getting Help
Payment Request Wizard
for QuickBooks
Turn your QuickBooks invoices, statements or estimates into emails that you send to your customers.
Your buyers click the included payment button, and
pay you instantly via PayPal.
Using data stored in QuickBooks, you can easily create email invoices and estimates that customers can
pay online through Paypal. The Wizard creates a
professional, formatted email invoice that includes a
PayPal payment button. The customer clicks the button, and you get paid for the items on the invoice.
• Integrate your QuickBooks invoice data into your
emails
• Avoid extra invoicing paperwork
• Make it easy for buyers to pay you
Best of all, installing and using the Payment Request
Wizard for QuickBooks is free.
Click here to learn more about Payment Request
Wizard for QuickBooks.
<< BACK
NEXT >>
< Back to Table of Contents
Setting Up
Your Account
Accepting
Payments
Handling
Payments,
Withdrawals,
& Refunds
Managing
Your Account
Using Advanced
Merchant Tools
Getting Help
Payment Request Wizard
for Outlook
You can also use PayPal Buy Now Buttons in
your emails.
Using the Payment Request Wizard for Outlook,
you can quickly add PayPal payment buttons to your
email messages. When your customers click the button, it takes them to the PayPal website to complete
the transaction. Collect money quickly and easily. You
don’t even need a website!
The Payment Request Wizard lets you:
• Request credit card payments via email
• Track your payments on PayPal’s secure website
• Enjoy a fast and free installation
Select from 5 types of payment buttons:
•
•
•
•
•
Basic Payment
Product Invoice
Service Invoice
Auction Payment
Donations
<< BACK
NEXT >>
< Back to Table of Contents
Setting Up
Your Account
Accepting
Payments
Handling
Payments,
Withdrawals,
& Refunds
Managing
Your Account
Using Advanced
Merchant Tools
Getting Help
Improved Checkout:
PayPal Account Optional
PayPal’s payment flow makes it optional for new buyers to sign up for a
PayPal account. That choice makes the purchase process more convenient,
resulting in an increase in completed sales and higher customer satisfaction.
The streamlined new payment process applies to both Website Payments
Standard and Email Payments. It’s included with these features: Buy
Now Buttons, Donations, PayPal Shopping Cart, Request Money, PayPal
Invoicing, and Payment Request Wizards for both Outlook and QuickBooks.
(It does not apply to Subscriptions.)
This checkout takes your customers through four easy steps:
• Shipping — Customers enter their name and shipping address.
• Billing — Customers enter credit card information, email address,
phone number, and an optional message to you.
• Review — Customers make sure their payment information is correct. They can either edit the information or complete the checkout
process.
• Save Information (optional) — Customers can save the information that they’ve entered into a PayPal account for future purchases.
To create an account, all they need to do is choose a password and
answer a few security questions.
To turn off this new feature, simply go to the Profile subtab, click on
Website Payment Preferences under the Selling Preferences column, and
check the yes/no box under PayPal Account Optional.
<< BACK
NEXT >>
< Back to Table of Contents
Setting Up
Your Account
Accepting
Payments
Handling
Payments,
Withdrawals,
& Refunds
Managing
Your Account
Using Advanced
Merchant Tools
Getting Help
Virtual Terminal
PayPal’s Virtual Terminal feature lets you accept credit card
payments for phone, fax, mail, and in-person orders.
With Virtual Terminal, you can accept payments in your offline
store, at trade shows, or anywhere else you deal with customers. Just enter some simple information about the transaction
into a PayPal-hosted online payment form, and PayPal will process the payments.
Virtual Terminal lets you:
• Accept payments from customers who either prefer to pay
offline, or who don’t have PayPal accounts.
• Use PayPal as a one-stop payment solution—you don’t need a separate
merchant account.
• Keep costs low. Virtual Terminal is affordable—just $20 per month.
Apply for Virtual Terminal now
To apply for Virtual Terminal, you need to first sign up for a Business Account.
Then, submit an application for Virtual Terminal, get approved, and complete the
billing agreement that you will receive.
<< BACK
NEXT >>
< Back to Table of Contents
Setting Up
Your Account
Accepting
Payments
Handling
Payments,
Withdrawals,
& Refunds
Managing
Your Account
Handling Payments, Withdrawals,
& Refunds
Using Advanced
Merchant Tools
• Setting Seller Preferences
Getting Help
• Shipping Made Easy
• Withdrawing Funds from Your PayPal Account
• Refunding Payments
In this section, you will learn how to administer the payment functions in PayPal
and access your funds.
<< BACK
NEXT >>
< Back to Table of Contents
Setting Up
Your Account
Accepting
Payments
Handling
Payments,
Withdrawals,
& Refunds
Managing
Your Account
Using Advanced
Merchant Tools
Getting Help
Setting Seller Preferences
Your Seller Preferences let you customize everything from
the look and feel of your payment pages to the types of
payments you receive. To set your Seller Preferences, log
in to your account, click on the Profile sub-tab of the My
Account tab, and select Seller Preferences.
You can customize the payment pages your buyers see
when completing their payment through PayPal. You can
match the colors and images on these website payment
pages to those of your own site, providing buyers with
a seamless checkout experience. For details, go to the
Custom Payment Pages in the Advance Merchant Tools section of this guide.
Seller Preferences also lets you manage the types of payments you receive, and set your Credit Card Statement
Name, which is the name displayed on your customer’s
credit card statements when they pay you through PayPal.
The name will appear as PAYPAL <*YOURNAMEHERE>, and
can be up to 11 alpha-numeric characters.
T I P : By making sure your Credit Card Statement Name is meaningful
to your buyers, you can lower the risk of your buyers filing chargebacks
against you.
<< BACK
NEXT >>
< Back to Table of Contents
Setting Up
Your Account
Accepting
Payments
Handling
Payments,
Withdrawals,
& Refunds
Shipping Made Easy:
Assigning Shipping and Sales Tax
Managing
Your Account
Using Advanced
Merchant Tools
Getting Help
From your Profile, you can automatically manage the amount of shipping and sales
tax you charge your customers. PayPal lets you enter a different tax rate for each of
the 50 states. In addition, you can charge shipping costs at a fixed rate based on the
amount of the total purchase or as a percentage of the purchase price.
GOOD TO KNOW: Keep in mind that currently the shipping and tax rate settings only work with payments sent by U.S. buyers via the PayPal Shopping Cart, Buy Now Buttons, or PayPal Donations.
<< BACK
NEXT >>
< Back to Table of Contents
Setting Up
Your Account
Accepting
Payments
Handling
Payments,
Withdrawals,
& Refunds
Managing
Your Account
Using Advanced
Merchant Tools
Getting Help
Shipping Made Easy:
Using Integrated Shipping
PayPal has teamed up with the U.S. Postal Service and UPS to provide
integrated shipping tools. From your PayPal account, you can calculate
shipping costs, purchase and print labels, and track your shipments
online.
Here’s how it works:
•
•
•
•
Pack your item in your own packaging or in the carrier’s packaging
Weigh and measure your package
Create a shipping label online through your PayPal account
Print your shipping label and attach it to your shipment
Your shipment is ready to go! You and your customer can easily track the
status of your shipment via PayPal.
You can access shipping tools on your account overview page after
you’ve received payment for the item you want to ship.
TIP: eBay Sellers: To ship an item sold on eBay, use PayPal’s Post Sale Manager.
GOOD TO KNOW: Your printer must produce labels that are clear enough to be
scanned correctly.
<< BACK
NEXT >>
< Back to Table of Contents
Setting Up
Your Account
Accepting
Payments
Handling
Payments,
Withdrawals,
& Refunds
Managing
Your Account
Using Advanced
Merchant Tools
Getting Help
Withdrawing Funds from Your PayPal Account
You can withdraw funds from your PayPal account by requesting an electronic funds
transfer to your bank account, or by requesting that a check be sent to you by mail.
Funds transferred to your bank account should become available within 3-4 business
days, but may take more time depending on your bank’s policies. For PayPal to send you
a check, please allow 1-2 weeks for delivery. While fund transfers are free of charge,
each check withdrawal carries a $1.50 USD fee.
GOOD TO KNOW: Each new PayPal account is limited to withdrawing $500.00 USD per month until they complete two of our three authentication steps (confirm bank account, enter Expanded Use Number, and confirm
Social Security Number). To view or remove your own PayPal Limits, log in to your PayPal account and click
on the View Limits link next to the Balance Box on your Account Overview.
Here’s how you withdraw funds from your PayPal account:
1
Log in to your PayPal account and click on
the Withdraw sub-tab.
2
Click the Transfer funds to your bank
account link.
More >
<< BACK
NEXT >>
< Back to Table of Contents
Setting Up
Your Account
Accepting
Payments
Withdrawing Funds from Your PayPal Account
Handling
Payments,
Withdrawals,
& Refunds
Managing
Your Account
Using Advanced
Merchant Tools
Getting Help
3
Choose the bank account to which you
would like to withdraw the funds and
enter the amount. Click Continue.
4
Review the details of your transaction.
Click Submit. Your funds should appear
in your bank account balance in 3-4
business days.
T I P : You can also access your funds immediately with the PayPal ATM/Debit Card.
<< BACK
NEXT >>
< Back to Table of Contents
Setting Up
Your Account
Accepting
Payments
Refunding Payments
Handling
Payments,
Withdrawals,
& Refunds
You can easily refund payments you receive, including all transaction fees,
within 60 days of the payment.
Managing
Your Account
Using Advanced
Merchant Tools
Getting Help
To refund all or just part of a payment, log in to your account and click on the
History sub-tab of the My Account tab. Find the payment in your transaction
history and click on the Details link to go to the Transaction Details page. To
fully or partially refund the payment, go to the bottom of the page and click on
the Refund Payment link.
GOOD TO KNOW: If you decide to refund a payment more than 60 days after it was sent,
you will need to use the Send Money tab to send the refund. In this case, your transaction fees
will not be refunded.
<< BACK
NEXT >>
< Back to Table of Contents
Setting Up
Your Account
Accepting
Payments
Handling
Payments,
Withdrawals,
& Refunds
Managing
Your Account
Using Advanced
Merchant Tools
Getting Help
Managing Your Account
• Selling Safely with PayPal Seller Protection
• Accessing Your Profile
• Reviewing Your Account History
• Viewing Your PayPal Reputation and Verification Status
On our secure website, you’ll find everything you need to manage your PayPal account
through the Profile. To go to your Profile, log in to your PayPal account and click on the
Profile sub-tab of the My Account tab.
<< BACK
NEXT >>
< Back to Table of Contents
Setting Up
Your Account
Accepting
Payments
Selling Safely with PayPal Seller Protection
Handling
Payments,
Withdrawals,
& Refunds
Protect Yourself from Chargebacks with PayPal’s Seller Protection
Managing
Your Account
Using Advanced
Merchant Tools
Getting Help
When you use PayPal to receive payments, you can protect yourself against
certain chargebacks by meeting all the requirements of the Seller Protection Policy.
A chargeback occurs when your buyer contests a charge through his credit card
company and the credit card company reverses the charge. Unfortunately, as with
a traditional merchant account, this often leaves the seller responsible for 100%
of the transaction liability.
However, when a transaction qualifies for PayPal Seller Protection and you follow the
guidelines below, PayPal will protect you from chargebacks.
Seller Protection Policy requirements (all of these must be met)
• Have a Verified Premier or Business PayPal account
• Ship to the buyer’s address displayed on the Transaction Details page
• Ship within 7 days of the payment
• Retain reasonable proof-of-shipment that can be tracked online
• Ship tangible goods
• Only accept a single payment from a single PayPal account
• Respond to PayPal’s investigation of the transaction in a timely manner
• Do not surcharge the buyer
Note: At this time, the Seller Protection Policy is only available for U.S. or Canadian sellers transacting with U.S.
buyers, and for U.K. sellers transacting with U.K. or U.S. buyers. Eligible transactions will be displayed as Seller
Protection Policy Eligible on the Transaction Details page of a payment.
More >
<< BACK
NEXT >>
< Back to Table of Contents
Setting Up
Your Account
Accepting
Payments
Selling Safely with PayPal Seller Protection
Handling
Payments,
Withdrawals,
& Refunds
Non-qualifying Transactions
Managing
Your Account
Using Advanced
Merchant Tools
Getting Help
If a transaction does not fully qualify for PayPal Seller Protection coverage, and you
have relevant evidence to support your case, PayPal may still help you dispute the
chargeback with the buyer’s credit card company.
You can provide your documentation through the Resolution Center, which you can
access near the top of the page when you login to your account (you can also send
it via email to [email protected] or fax it to 402-537-5755; please
include your PayPal Case ID in the subject of their email or on a Fax Cover Sheet).
PayPal uses your evidence plus any evidence PayPal may already have to dispute the
chargeback with the buyer’s credit card company. Because credit card companies
impose short deadlines on responding to chargebacks, you should respond within 3
days after you’re notified of a chargeback (you’ll find response deadlines in the notification email sent to you by PayPal).
PLEASE NOTE: PayPal reserves the right not to dispute a chargeback even if the seller
has provided some evidence, particularly if PayPal believes the dispute is not likely to
be successful.
GOOD TO KNOW: If you decide to ship internationally outside the Seller Protection Policy, you should still
retain proof-of-shipment, ship promptly, and only accept a single payment from a single PayPal account.
TIP: For additional information on the Seller Protection Policy and mitigating your risk, visit PayPal’s Security
Center by going to the Security Center link in the footer of any PayPal page.
<< BACK
NEXT >>
< Back to Table of Contents
Setting Up
Your Account
Accepting
Payments
Accessing Your Profile
Handling
Payments,
Withdrawals,
& Refunds
Your Profile is organized in three columns:
Managing
Your Account
Using Advanced
Merchant Tools
Getting Help
Account Information
Use the Account Information column
to perform basic account maintenance,
including updating your password,
adding and confirming one or multiple
email addresses, and managing your
Business Information.
Financial Information
Use the Financial Information column
to keep track of all the financial tools
associated with your PayPal account,
including adding credit cards and bank
accounts, activating and managing your
PayPal ATM/Debit Card, maintaining your
Multiple Currency Balances, and viewing
your Monthly Account Statements.
Selling Preferences
Use the Selling Preferences column to
organize the way you sell with your PayPal
account, including editing your Payment
Receiving and Shipping Preferences,
maintaining your Reputation, and listing
your store with PayPal shops.
<< BACK
NEXT >>
< Back to Table of Contents
Setting Up
Your Account
Accepting
Payments
Handling
Payments,
Withdrawals,
& Refunds
Reviewing Your Account History
To view and download your transaction history and generate valuable reports, log in to
your PayPal account and click on the History sub-tab of the My Account tab.
Managing
Your Account
Using Advanced
Merchant Tools
Getting Help
Basic Search
Advanced Search
You can use the Basic Search to view
sub-sections of your transaction history
—such as Payments Received or Money
Requests sent —using the Show dropdown menu and the Within and From
radio buttons.
You can use the Advanced Search to view
your transaction history by Transaction
ID, auction number, or your buyer’s email
address or last name. To use Advanced
Search, click the Advanced Search link
from the History sub-tab.
More >
<< BACK
NEXT >>
< Back to Table of Contents
Setting Up
Your Account
Accepting
Payments
Reviewing Your Account History
Handling
Payments,
Withdrawals,
& Refunds
Managing
Your Account
Using Advanced
Merchant Tools
Getting Help
Transaction Details
Monthly Account Statements
You can view the Transaction Details,
which include in-depth information
such as shipping address and related
transactions, for any entry in your
Transaction History by clicking on the
Details link for that entry.
You can view and print summaries of the
latest three months of your transaction
history by choosing a month from the
drop-down menu on the History page.
The Monthly Account Statement gives
you a daily summary of transaction
activities, such as Payments Received
and Fees Charged, for each currency
your account holds.
TIP: When you go to the Transaction Details
page, you can also complete actions related to
that transaction, including providing a refund,
accepting or denying the payment, and
creating a packing slip for the item purchased.
TIP: Your Monthly Account Statement can also
be accessed by clicking the Monthly Statement
link in the Financial Information
column on the Profile page.
More >
<< BACK
NEXT >>
< Back to Table of Contents
Setting Up
Your Account
Accepting
Payments
Handling
Payments,
Withdrawals,
& Refunds
Reviewing Your Account History
Managing
Your Account
Using Advanced
Merchant Tools
Getting Help
Downloadable History Log
Merchant Sales Reports
To download your transaction history log,
go to the History sub-tab and click the
Download My History link to go to the
Download History page. In addition to
choosing which transactions to include in
your download, you can also choose the
file format (comma-delimited, Quicken,
or QuickBooks) and customize your
download. For detailed instructions, see
the PayPal Downloadable History Log
Manual.
With PayPal’s Merchant Sales Reports,
you can analyze your revenue sources
to better understand your customers’
buying behavior. Every week, you’ll
receive a valuable analysis of your sales
by channel and currency. Merchant Sales
Reports cover the most recent week,
from Saturday through Friday.
TIP: Once you’ve downloaded your history,
you can use the information to gather
customer email addresses (for a targeted
mailing list), track seasonal business trends,
or just reconcile your business accounts.
Only one week’s information is available
at a time, but you can download your
Merchant Sales Reports to view them
later. To start using PayPal’s Merchant
Sales Reports, log in to your PayPal
account and click on the Merchant
Sales Report link under the
Merchant Tools tab.
<< BACK
NEXT >>
< Back to Table of Contents
Setting Up
Your Account
Accepting
Payments
Handling
Payments,
Withdrawals,
& Refunds
Viewing Your PayPal Reputation
and Verification Status
Managing
Your Account
Using Advanced
Merchant Tools
Getting Help
Your Member Information Box gives prospective buyers the opportunity to
learn a little more about you before they make payment. Buyers will see a
link to your Member Information Box on the Send Money Confirmation page,
and, if you sell in PayPal Shops, it will appear as a numeric link next to your
name [e.g. PayPal Shop (20)].
The number in parentheses next to your Verification Status is your Seller
Reputation Number. This shows the number of unique Verified buyers
who have paid you. New transactions are added after 30 days, and only
transactions of more than $5.00 USD will count towards your Seller
Reputation Number.
<< BACK
NEXT >>
< Back to Table of Contents
Setting Up
Your Account
Accepting
Payments
Handling
Payments,
Withdrawals,
& Refunds
Managing
Your Account
Using Advanced
Merchant Tools
Getting Help
Using Advanced Merchant Tools
• Custom Payment Pages
• Multi-User Access
• Online Logo Center
• PayPal ATM/Debit Card
• Selling Internationally
• Accepting Multiple Currencies
• Selling on an Auction
• Instant Payment Notification (IPN)
• Mass Pay
• PayPal Shops
• Web Services & Developer Central
<< BACK
NEXT >>
< Back to Table of Contents
Setting Up
Your Account
Accepting
Payments
Handling
Payments,
Withdrawals,
& Refunds
Managing
Your Account
Custom Payment Pages
With our Custom Payment Pages feature, you can tailor PayPal’s payment pages to the
style of your website and give customers a seamless payment experience. Choose custom page colors and add images to make PayPal’s payment flow yours! This feature is
available exclusively to Premier and Business Account holders. You’ll see the difference
these customizations can make in the examples below.
Using Advanced
Merchant Tools
Getting Help
A payment page in the regular, PayPal
page style.
The same payment page with a Custom
Payment Page Style applied. This page
style includes a custom header image
and header border color.
<< BACK NEXT >>
< Back to Table of Contents
Setting Up
Your Account
Accepting
Payments
Handling
Payments,
Withdrawals,
& Refunds
Custom Payment Pages
Getting Started
To start using Custom Payment Pages, go to the Custom Payment Page Styles page:
Managing
Your Account
Using Advanced
Merchant Tools
Getting Help
1
From the Account Overview page, click on
the Profile sub-tab. Click on the Custom
Payment Pages link under the Selling
Preferences heading. This will take you to
the Custom Payment Page Styles page.
2
From this page, you can Add, Edit,
Preview, and Remove page styles, as well
as make any page style your Primary
style.
TIP: Set the Auto Return feature for Website
Payments to bring your buyers back to your
website immediately after payment completion.
And, set up Payment Data Transfer to display transaction details to buyers when they are
redirected back to your website.
<< BACK
NEXT >>
< Back to Table of Contents
Setting Up
Your Account
Accepting
Payments
Multi-User Access
Handling
Payments,
Withdrawals,
& Refunds
PayPal’s Multi-User Access feature allows you to set up multiple logins and access levels,
so your employees only have access to the parts of your PayPal account that they need
to complete their jobs, letting you run your business smoothly and securely.
Managing
Your Account
Here’s how to get started with Multi-User Access
Using Advanced
Merchant Tools
Getting Help
1
Log in to your PayPal Business Account.
2
Go to your Profile and click the
Multi-User Access link.
More >
<< BACK
NEXT >>
< Back to Table of Contents
Setting Up
Your Account
Accepting
Payments
Multi-User Access
Handling
Payments,
Withdrawals,
& Refunds
Managing
Your Account
Using Advanced
Merchant Tools
Getting Help
3
Specify your Administrative Contact email
address, which is the email address
that will receive notifications about your
account activity.
4
Add up to 200 separate logins to your
account. For every login, select a User ID
and password, and specify what account
privileges the user has permission to
access (e.g. Refunds, Send and Request
Money).
TIP: You may want to establish a separate login
for each employee who accesses your PayPal
account, and grant each user the minimum
access necessary. If an employee forgets or
loses a password, you can always log in and
reset it.
GOOD TO KNOW: You can create additional
logins, edit an existing user’s privileges, or
delete a login at any time from your Profile.
<< BACK
NEXT >>
< Back to Table of Contents
Setting Up
Your Account
Accepting
Payments
Handling
Payments,
Withdrawals,
& Refunds
Managing
Your Account
PayPal Online Logo Center
We’ve made it easy to increase sales by communicating to customers that
you accept PayPal.
Go to PayPal’s Online Logo Center. There, you’ll find the simple HTML code
you need to place graphics on your home page and in your checkout that
tell customers that you accept PayPal and all major payment options.
Using Advanced
Merchant Tools
Getting Help
By letting buyers know that you accept PayPal, you can help increase
your sales by reaching a large network of buyers who prefer to pay with
PayPal.
Click here to go to the Online Logo Center.
<< BACK
NEXT >>
< Back to Table of Contents
Setting Up
Your Account
Accepting
Payments
Handling
Payments,
Withdrawals,
& Refunds
Managing
Your Account
Using Advanced
Merchant Tools
Getting Help
PayPal ATM/Debit Card
The fastest way to access your PayPal funds
The PayPal ATM/Debit Card offers you instant access to the money
in your PayPal account. Withdraw cash at an ATM or use it anywhere
MasterCard is accepted.
To learn more, or request your PayPal ATM/Debit Card, log in to your
account and click on the ATM/Debit Card link in the Enhance Account
box on the Account Overview page.
The PayPal ATM/Debit Card is open to members who meet the following criteria:
• Have a U.S. PayPal Premier or Business Account
• Have been a PayPal member for at least 60 days
• Have registered a credit card where the monthly statement is sent
to a physical street address (not a P.O. Box)
• Are a Verified Member (have added and confirmed a bank account)
• Are an active PayPal member in good standing
<< BACK
NEXT >>
< Back to Table of Contents
Setting Up
Your Account
Accepting
Payments
Selling Internationally
Handling
Payments,
Withdrawals,
& Refunds
It’s easy to sell internationally with PayPal. With more than 45 million accounts
in 38 countries, PayPal can help you reach buyers from almost anywhere in
the world, so you can continue to grow your business globally.
Managing
Your Account
You can always withdraw funds in your PayPal account to a U.S. bank account,
and PayPal also accepts withdrawals to local bank accounts in 24 countries.
In addition, PayPal’s Multiple Currencies feature lets you accept payments in
U.S. Dollars, Canadian Dollars, Euros, Pounds Sterling, and Yen.
Using Advanced
Merchant Tools
Getting Help
<< BACK
NEXT >>
< Back to Table of Contents
Setting Up
Your Account
Accepting
Payments
Handling
Payments,
Withdrawals,
& Refunds
Managing
Your Account
Using Advanced
Merchant Tools
Getting Help
Accepting Multiple Currencies
Here’s how you can handle foreign currency with PayPal
• When you receive a payment in a currency in which you do not
already hold a balance, PayPal will prompt you to open a balance
for that currency, convert to your primary balance, or deny the
payment. Payments in currencies for which you hold a balance will
automatically be applied to the correct balance.
• You will see a summary of each currency balance on your
Account Overview page.
• You can manage your currency balances in your Profile.
This includes opening and closing balances, as well as transferring
between balances.
• Transferring funds between different currency balances is easy
and instant. A foreign exchange calculator is provided to help you
determine the exact amount prior to completing the transfer.
• You can auto-convert payments to your primary currency via
a Payment Receiving Preference in your Profile.
This is useful if you wish to display prices in different currencies,
but only do business in a single currency.
<< BACK
NEXT >>
< Back to Table of Contents
Setting Up
Your Account
Accepting
Payments
Selling on an Auction
Handling
Payments,
Withdrawals,
& Refunds
PayPal offers a full suite of auction tools to assist you in managing your auctions
and eBay listings. You’ll be able to stay on top of your items, from sales to
invoicing to payment collection. You can view all of PayPal’s auction products
from the Auction Tools tab, located at the top of every PayPal page.
Managing
Your Account
Using Advanced
Merchant Tools
Getting Help
LOGO INSERTION Make payments even easier for your buyers: add a PayPal
payment logo to your listings.
Here’s how you add a PayPal logo to all your new listings:
1. Log in to your PayPal account.
2. Click on the Automatic Logos link on the Auction Tools tab.
3. Enter your eBay User ID and password, and click the Off button for Automatic
Logo Insertion. Select On and click Update. PayPal will be added as an
accepted payment method for all your U.S. listings. A smart logo will be
added to any non-U.S. listings. You can also add a PayPal logo to your listings
manually. Simply log in to your PayPal account and click the Manual Logos
link on the Auction Tools tab.
TIP: When you use a Smart Logo on your eBay listings, the logo changes depending on the state of
your listing. It begins as a standard logo, and then becomes a Pay Now button as soon as your listing
has ended, so your buyer can pay you instantly.
More >
<< BACK
NEXT >>
< Back to Table of Contents
Setting Up
Your Account
Accepting
Payments
Selling on an Auction
Handling
Payments,
Withdrawals,
& Refunds
WINNING BUYER NOTIFICATION (WBN)
Managing
Your Account
Using Advanced
Merchant Tools
Getting Help
Sign up for PayPal’s free Winning Buyer Notification (WBN) service, and we will
automatically notify your winning buyer of your eBay items closing. You’ll get your
money faster when you invoice your buyers instantly.
WBN emails include all of the information your winning buyer will need, including
a link back to the item listing and a PayPal Payment Button. Each email includes:
• A link to a secure PayPal payment page with the item
details already filled in
• Your instructions on shipping, handling, and payment
• A customized message from you
• Your logo and email address
Here’s how you get started with WBN:
1. Log in to your PayPal account.
2. Click the Winning Buyer Notification link on the Auction Tools tab.
3. Enter your eBay User ID and password. You can also customize
the email notification each buyer will receive.
More >
<< BACK
NEXT >>
< Back to Table of Contents
Setting Up
Your Account
Accepting
Payments
Selling on an Auction
Handling
Payments,
Withdrawals,
& Refunds
POST-SALE MANAGER
Managing
Your Account
PayPal’s Post-Sale Manager is your one-stop resource for managing all of your
end-of-sale activities for items sold on eBay. With Post-Sale Manager, you can manage
payments, invoices, shipments, and feedback from one location, so it’s easy to keep
track of your eBay listings.
Using Advanced
Merchant Tools
Here’s how you get started using Post-Sale Manager:
Getting Help
1. Log in to your PayPal account.
2. Click the Post-Sale Manager link on the Auction Tools tab.
3. Enter your eBay User ID and password. The next time you log in, click the
Post-Sale Manager link on the Auction Tools tab to view and manage your
eBay items sold in the past 30 days.
TIP: You can explore all of PayPal’s Auction Tools by logging in to your PayPal account
and clicking on the Auction Tools tab.
<< BACK
NEXT >>
< Back to Table of Contents
Setting Up
Your Account
Accepting
Payments
Instant Payment Notification (IPN)
Handling
Payments,
Withdrawals,
& Refunds
PayPal’s Instant Payment Notification (IPN) service immediately notifies your
backend server with an HTTPS post whenever you receive a payment. You can
use IPN to integrate PayPal payments with your website’s back-end operations,
helping you save time, keep your inventory updated, and automate fulfillment.
With IPN, you can:
Managing
Your Account
• Customize your website’s response to customer purchases in real time
Using Advanced
Merchant Tools
• Track customers through the notification’s pass-through variables
Getting Help
• Store transaction information in your own database
• Automate your fulfillment operations
GOOD TO KNOW: Using IPN requires custom programming by your web development team to
interface with a back-end database. Alternately, some third-party vendors offer products to help
you manage your PayPal payments. To learn more about IPN and the many other developer tools
offered by PayPal, go to the PayPal Developer Network (PDN) by clicking on the “Developers” link in
the footer of any PayPal page.
Here’s how you get started with IPN:
1. Log in to your PayPal account.
2. Click on the Instant Payment Notification link on the Merchant Tools tab.
3. You’ll be taken to the IPN Center where you can view a demo,
read the manual, and sign up for IPN.
<< BACK
NEXT >>
< Back to Table of Contents
Setting Up
Your Account
Accepting
Payments
Mass Pay
Handling
Payments,
Withdrawals,
& Refunds
Replace checks with instant email payments. PayPal lets you avoid the slow, tedious
process of writing and disbursing checks to large numbers of people. And Mass Pay is
inexpensive: a fee of just 2% of the payment amount, up to a $1.00 USD cap, will be
added to each payment.
Managing
Your Account
Using Advanced
Merchant Tools
Getting Help
Use PayPal Mass Pay for:
• Affiliate commissions
• Customer rebates
• Employee benefits
• Lottery prizes
• Survey incentives
GOOD TO KNOW: There must be sufficient funds in your account to cover the Mass Payments and
applicable fees. You cannot use a credit card or bank account for this service.
More >
<< BACK
NEXT >>
< Back to Table of Contents
Setting Up
Your Account
Accepting
Payments
Mass Pay
Handling
Payments,
Withdrawals,
& Refunds
Here’s how you get started with Mass Pay
Managing
Your Account
Using Advanced
Merchant Tools
Getting Help
1
Create a simple tab-delimited text file
that lists the email address in the first
column and the payment amount in the
second column. An optional third column
lets you list a unique identifier for each
recipient, for tracking and reconciliation
purposes. And, an optional fourth column lets you add custom notes for each
recipient.
2
Click on the Mass Pay link in the
footer and then click on Make a Mass
Payment on the Overview page. You
will be prompted to upload your Mass
Payment file and customize the email
notification that is sent to your recipients.
Click Continue to confirm your payment,
and then click Send Money to complete
your transaction. Your recipients can
claim their money by clicking on a link
within their payment email notification.
<< BACK
NEXT >>
< Back to Table of Contents
Setting Up
Your Account
Accepting
Payments
Handling
Payments,
Withdrawals,
& Refunds
Managing
Your Account
Using Advanced
Merchant Tools
PayPal Shops
PayPal Shops is a directory of over 42,000 online businesses and
organizations that accept PayPal payments. Enrolling in PayPal
Shops puts your online store into the directory for free, and allows
millions of PayPal members instant access to your website.
PayPal members can easily search for your product or service
through our PayPal Shops directory and can be confident that they
are purchasing from a reputable seller. PayPal Shops provides customers with a direct link to your online store, encouraging them to
view additional products and services.
Getting Help
GOOD TO KNOW: To create the most secure marketplace possible, we require all
PayPal Shops sellers to have a Premier or Business account, a confirmed bank
account, and a registered credit card.
PayPal Shops sellers must also have a PayPal Money Market Fund account, which
requires either a Social Security Number or an Employer Identification Number.
Having this information helps PayPal prevent fraud and ensure a safe shopping
environment for our members.
To enroll your online store in the PayPal Shops directory, login to
your account, then visit https://www.paypal.com/APPLYSHOPS.
<< BACK
NEXT >>
< Back to Table of Contents
Setting Up
Your Account
Accepting
Payments
Web Services & Developer Central
Handling
Payments,
Withdrawals,
& Refunds
In PayPal Developer Central, a gateway to the PayPal Web Services
platform, you’ll find the latest technical information about developing
e-commerce websites and applications with PayPal.
Managing
Your Account
Log in to Developer Central.
Using Advanced
Merchant Tools
Getting Help
Sign up for a free Developer Central account.
Services available:
Developer Help Center & Forums
Access helpful manuals, code samples and developer forums. Enable
interaction with the PayPal developer community. Share best practices,
get feedback on your ideas, ask questions, and discuss solutions with
other developers and merchants.
PayPal Web Services Beta
Register for a developer certificate, automate your payment processing,
and build new e-commerce applications with the PayPal APIs.
PayPal Sandbox
Test PayPal application components in a self-contained environment
before integrating them into an application. Test Website Payments,
Instant Payment Notification (IPN), and APIs.
<< BACK
NEXT >>
< Back to Table of Contents
Setting Up
Your Account
Accepting
Payments
Handling
Payments,
Withdrawals,
& Refunds
Managing
Your Account
Getting Help
Instant Help
Most questions can be answered immediately in the online Help Center.
Try entering a topic in the search box.
Getting Help
Help by Email
The PayPal Customer Service team is trained to address all account inquiries.
Send an email for a prompt reply.
Help by Phone
If you have an issue of immediate concern and cannot find your answer
in the Help Center, call the Service Center.
<< BACK