1
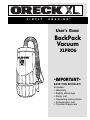
S I M P L Y
A M A Z I N G
®
USER’S GUIDE
BackPack
Vacuum
XLPRO6
•IMPORTANT•
SAVE THIS BOOKLET!
Includes:
• Warranty
• Safety Warnings
• Parts List
• Operating Instructions
• Accessories List
• Trouble Diagnosis
BEFORE OPERATING, READ ALL
INSTRUCTIONS IN THIS MANUAL
CAREFULLY.
IMPORTANT SAFETY
INSTRUCTIONS
When using an electrical appliance, basic
precautions should always be followed,
including the following:
Table of Contents
READ ALL INSTRUCTIONS BEFORE
USING THIS VACUUM
Warranty, Important Safety Instructions . . . . . . . . . . . . . . . . . . page
2
Maintenance & Customer Service, Vacuum Cleaner Care,
Operation & Assembly, Grounding Instructions,
Adjustment Instructions . . . . . . . . . . . . . . . . . . . . . . . . . . . . . . page
3
WARNING
Troubleshooting Guide, Parts Listing, Parts Diagram,
Accessories . . . . . . . . . . . . . . . . . . . . . . . . . . . . . . . . . . . . . . . page
4
To reduce the risk of fire,
electric shock, or injury:
•
DO NOT leave the vacuum when plugged in. Unplug from the
outlet when not in use and before servicing.
•
To avoid electric shock, DO NOT expose to rain. Store
indoors. DO NOT use on wet surfaces.
•
This is NOT a toy. Close attention is necessary when used
around or near children.
•
Use only as described in this safety manual. Use only
manufacturer's recommended attachments and accessories.
•
DO NOT use this vacuum with damaged cord or plug. If the
vacuum is not working as it should, because it has been
dropped, damaged, left outdoors or dropped into water, return
to a service center or call customer service at:
1-800-989-3535
•
DO NOT pull or carry by the cord, use cord as a handle, close
a door on cord or pull cord around sharp edges and corners.
Keep cord away from heated surfaces.
Oreck’s limited warranty is valid only if you retain proof of purchase from
Oreck or an Oreck Authorized Retail Dealer for this product. If you
purchase this product from any other source, your purchase is "AS IS,"
which means Oreck grants you no warranty, and that you, not Oreck,
assume the entire risk of the quality and performance of this product,
including the entire cost of any necessary servicing or repairs of any
defects.
•
DO NOT unplug the vacuum by pulling on the cord. To unplug,
grasp the plug, not the cord.
•
DO NOT handle the plug of the vacuum with wet hands.
•
DO NOT put any objects into openings. DO NOT use with any
opening blocked; keep free of dust, lint, hair and anything that
may reduce air flow.
Oreck’s liability for damages to you for any costs whatsoever arising out
of this statement of limited warranty shall be limited to the amount paid for
this product at the time of original purchase, and Oreck shall not be liable
for any direct, indirect, consequential or incidental damages arising out of
the use or inability to use this product.
•
Keep hair, loose clothing, fingers, and all parts of body away
from openings and moving parts.
•
DO NOT pick up anything that is burning or smoking, such as
cigarettes, matches, or hot ashes.
•
DO NOT use without dust bag and/or filters in place.
Some states do not allow the exclusion or limitation of incidental or
consequential damages, so the above limitation or exclusion may not
apply to you.
•
DO NOT use the vacuum to pick up flammable or combustible
liquids such as gasoline or use in areas where they may be
present.
ALL EXPRESS AND IMPLIED WARRANTIES FOR THIS PRODUCT,
INCLUDING IMPLIED WARRANTIES OF MERCHANTABILITY AND
FITNESS FOR A PARTICULAR PURPOSE, ARE LIMITED IN DURATION
TO THE WARRANTY PERIOD, AND NO WARRANTIES, WHETHER
EXPRESS OR IMPLIED, WILL APPLY AFTER THIS PERIOD.
•
Use extra care when cleaning stairs.
•
DO NOT use where oxygen or anesthetics are used.
•
Turn off all controls before unplugging
•
The extension cord provided with this unit is 50 feet, #16, 3
wire and MUST be used with this unit to insure grounding
protection.
•
Replace damaged or worn parts immediately with genuine
original equipment parts to maintain safety and to protect your
limited warranty.
•
BackPack Vacuum can become heavy during use. To avoid
injury, DO NOT bend over while the BackPack Vaccum is on
your back.
Warranty
ORECK MANUFACTURING COMPANY: (Oreck gives you the following
limited warranty for this product only if it was originally purchased for use,
not resale, from Oreck or an Oreck Authorized Retail Dealer.)
Oreck will repair or replace, free of charge, to the original purchaser, any
part which is found to be defective in material or workmanship within one
(1) year of the date of purchase.
This limited warranty does not apply to any part subjected to accident,
abuse, or alteration, misuse, damage caused by fire or act of God, the use
of voltages other than indicated on the serial number plate of this product
or service of this product by other than Oreck or an Oreck Factory
Authorized Service Center.
Oreck does not authorize any person or representative to assume or grant
any other warranty obligation with the sale of this product.
Some states do not allow limitations on the duration of implied warranties,
so the above limitation may not apply to you.
This warranty gives you specific legal rights, and you may also have other
rights which vary from state to state.
SAVE THESE INSTRUCTIONS
2
To Assemble Tools
Maintenance and Customer Service
1. Turn wand nut counterclockwise approximately four
complete turns.
Your XLPro is a product of precise engineering. If you require additional
information or have problems with your Oreck appliance, you may call
ORECK customer service at: 1-800-989-3535
2. Insert the tool into wand and coupling.
3. While holding tool in place, turn nut clockwise until
wand nut is fully locked.
TO O
PEN
TO LO
Please specify the model number and serial/code number which can be
found on the data plate on the back of the vacuum.
Grounding Instructions
Save your sales or purchase slip. Should your Oreck appliance require
warranty service in the U.S.A., present this slip to the Authorized Service
Center as your proof of purchase date or, in Canada, call customer service.
DANGER: Improper use of the grounding plug can result in a risk of
electric shock.
CK
Electrical equipment must be grounded. If it should malfunction or break,
grounding provides a path of least resistance for electrical current to
reduce the risk of electric shock. The vacuum is equipped with a cord
having an equipment-grounding conductor and grounding plug. The
plug must be inserted into an appropriate outlet that is properly installed
and grounded in accordance with all local codes and ordinances.
Vacuum Cleaner Care
Treat your vacuum cleaner as you would any other high grade precision
made product. Dropping and other misuses may result in a damaged
unit which will not be covered by warranty.
If repair or replacement of the cord or plug is necessary, bring unit to an
authorized service center. This electric equipment is for use on a
nominal 120 volt circuit, and has a grounded plug that looks like the plug
illustrated in (Fig A).
When not in use, the power cord should be wrapped around the molded-in
cord wrap for storage. After each use, wipe the vacuum body,
accessories and power cord with a damp cloth.
Read this manual completely before operating this vacuum. It is
important to follow the instructions in the manual to prevent the
possibility of injury or damage to the user and/or machine.
Operation & Assembly
This vacuum is equipped with an air-thru motor and is designed for dry
pickup only. Unpack the carton and remove the vacuum and
attachments. The backpack comes assembled; you will need to install
the hose and attachments.
WARNING: Improper connection of the equipmentgrounding conductor can result in a risk of electric shock.
Check with a qualified electrician or service person if you
are in doubt as to whether the outlet is properly grounded.
NOTE: Some accessories are packed inside the units.
To Change Paper Filter Bag
DO NOT modify the plug provided with the equipment. If it will not fit the
outlet, have a proper outlet installed by a qualified electrician.
1. Turn top lid of vacuum a half turn counterclockwise
and remove from the body.
2. Remove full paper bag from the tank and dispose
of properly.
3. Expand paper filter bag and set inside the cloth
filter.
4. Reinstall top lid and turn a half turn clockwise to
tighten.
CAUTION: Always exercise caution when handling the vacuum.
Dropping the vacuum could cause permanent damage to the internal
components.
NOTE: In Canada, the use of a temporary adaptor is not permitted by
the Canadian Electrical Code.
Adjustment Instructions
Proper fitting and adjustment of the straps is necessary to ensure fatigue
free use. The most important item to remember when adjusting the
shoulder straps and the hip belt is that it is the hip belt that supports
the BackPack, not the shoulder straps. The shoulder straps are there
to provide stability to balance the load, NOT to bear the weight.
Cloth Filter Maintenance
Hip Belt
The cloth filter should be cleaned each time you empty the tank. DO
NOT WASH the cloth filter because shrinkage of the cloth and damage
to the gasket can occur. To clean the cloth filter, shake off loose particles
and brush exposed surface with a soft bristle brush.
Loosen the shoulder straps and the hip belt and place
the BackPack on your back with your arms through the
shoulder straps. Position the belt on your hips. This
should be about 2” below where you would wear a
normal belt. Connect the male and female connectors
together. Grasp the adjustment strap on each side of
the hip belt connector and pull out, parallel to the
ground, until the hip belt is firmly cinched to your hips.
To Connect Hose
1. Connect the non-swivel end of the hose into the inlet on top of
vacuum.
Shoulder Straps
2. Connect the swivel end of hose to the wand or tool you are
planning to use.
Now that you have the hip belt in place and tightened
you may adjust the shoulder straps. Grasp the
adjustment strap at the bottom of each shoulder pad and
pull the straps downward until the straps are fitted to
your body. When properly adjusted you should be able
to slide two fingers under the strap on top of your
shoulder. Any irritation around the shoulder area
indicates your shoulder straps are too tight.
Wand Assembly
The two piece wand requires some assembly.
1.
Align the button lock of the upper wand section
with the opening for button lock in the lower
wand section.
TO O
PEN
TO LO
CK
2. Push sections together; unit lock is
accomplished.
3
Troubleshooting Guide
CAUTION: Always disconnect power cord before servicing
vacuum.
Parts Diagram
WARNING: Repairs should only be performed by an
authorized service center.
Problem: Loss of Vacuum
Cause:
1. Damaged lid.
2. Full paper filter bag.
3. Clogged hose or wand.
Solution:
1. Inspect and replace if needed.
2. Replace paper filter bag.
3. Remove obstruction.
Problem: Dust blowing from
vacuum when running.
Cause:
1. Full paper filter bag.
2. Improperly installed paper
filter bag.
3. Cloth filter bag dirty.
Solution:
1. Replace filter bag.
2. Reinstall or replace paper filter
bag.
3. Clean cloth filter bag.
ALL OTHER SERVICING SHOULD BE DONE BY AN
ORECK AUTHORIZED SERVICE CENTER.
CALL CUSTOMER SERVICE HOT LINE
1-800-989-3535
Whenever calling, please be sure to have your model and serial
number from data plate.
XLPRO6 Parts Listing
Item #
1
2
6
7
8
12
14
15
16
17
18
19
20
21
22
23
25
26
28
38
39
40
Part #
Description
10-0001-B
10-0002-6-B
PK25PRO6DW
10-0496
10-0008-A
10-0012
10-0014
10-0015
10-0016
10-0017
10-0018
10-0019
10-0020
10-0021
10-0022
10-0023
10-0025
10-0026-A
COMMCORD
10-0069
10-0070
10-1333
6 Qt Body
6 Qt Lid
6 Qt Paper Bag, 25 Pk
6 Qt Cloth Bag
Complete Dome Filter
Motor
Screws, Motor
Washers, Motor
Motor Deflector Plate
Screw, Motor Deflector
Sound Filter Band
Dual Cell Noise Filter
Cushioned Back Pad
Waist Belt (Not Shown)
Screw, Waist Belt
Washer, Waist Belt
On/Off Switch
Power Cord, 17”
50’ Electrical Cord
Cushion Support Clamp
Screw (Cord Lock)
Set, Motor Brushes
Part #
(36)
(37)
Accessories
Item #
(29)
(33)
(32)
Description
(41)
(31)
29
31
32
33
36
37
41
42
10-0030-A
10-0031
10-0032
10-0033
10-0036
10-0037
10-0183-A
10-0183
2 Pc Aluminum Wand
5” Upholstery Tool
14” Scalloped Floor Tool
17” Crevice Tool
Stretch Hose w/Cuffs
3” Dust Brush
Floor Replace Brush
Bristle, Floor Tool (Sold
(42)
Separately)
©2005 Oreck Holdings, LLC. All Rights Reserved. All word mark, logos, product configurations, and registered trademarks are
owned and used under the authority of Oreck Holdings, LLC.
424692 REV E 12/05
ECN R-8214