1
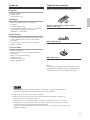
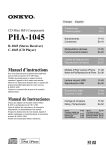
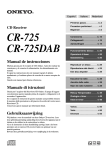
Contents CD Receiver CR-445 Getting Started ................................... 2 Connections ..................................... 13 Basic Operations ............................ 18 Instruction Manual Disc Playback ................................. 20 iPod / iPhone Playback .................... 27 Listening to the Radio .................... 30 Thank you for purchasing an Onkyo CD receiver. Please read this manual thoroughly before making any connections and plugging it in. Following the instructions in this manual will enable you to obtain optimum performance and listening enjoyment from your new CD receiver. Please retain this manual for future reference. Clock and Timer .............................. 36 Miscellaneous ................................. 40 Troubleshooting .............................. 40 WARNING: TO REDUCE THE RISK OF FIRE OR ELECTRIC SHOCK, DO NOT EXPOSE THIS APPARATUS TO RAIN OR MOISTURE. CAUTION: TO REDUCE THE RISK OF ELECTRIC SHOCK, DO NOT REMOVE COVER (OR BACK). NO USER-SERVICEABLE PARTS INSIDE. REFER SERVICING TO QUALIFIED SERVICE PERSONNEL. The lightning flash with arrowhead symbol, within an equilateral triangle, is intended to alert the user to the presence of uninsulated “dangerous voltage” within the product’s enclosure that may be of sufficient magnitude to constitute a risk of electric shock to persons. The exclamation point within an equilateral triangle is intended to alert the user to the presence of important operating and maintenance (servicing) instructions in the literature accompanying the appliance. Important Safety Instructions 1. 2. 3. 4. 5. 6. 7. 8. 9. 10. 11. 12. 13. 14. 2 Read these instructions. Keep these instructions. Heed all warnings. Follow all instructions. Do not use this apparatus near water. Clean only with dry cloth. Do not block any ventilation openings. Install in accordance with the manufacturer’s instructions. Do not install near any heat sources such as radiators, heat registers, stoves, or other apparatus (including amplifiers) that produce heat. Do not defeat the safety purpose of the polarized or grounding-type plug. A polarized plug has two blades with one wider than the other. A grounding type plug has two blades and a third grounding prong. The wide blade or the third prong are provided for your safety. If the provided plug does not fit into your outlet, consult an electrician for replacement of the obsolete outlet. Protect the power cord from being walked on or pinched particularly at plugs, convenience receptacles, and the point where they exit from the apparatus. Only use attachments / accessories specified by the manufacturer. Use only with the cart, stand, tripod, bracket, or table specified by the PORTABLE CART WARNING manufacturer, or sold with the apparatus. When a cart is used, use caution when moving the cart / apparatus combination to avoid injury from tip-over. Unplug this apparatus during lightning storms or when unused for long periods of time. Refer all servicing to qualified service personnel. Servicing is required when the apparatus has been damaged in any way, such as power-supply cord or plug is damaged, liquid has been spilled or objects have fallen into the apparatus, the apparatus has been exposed to rain or moisture, does not operate normally, or has been dropped. 15. Damage Requiring Service Unplug the apparatus from the wall outlet and refer servicing to qualified service personnel under the following conditions: A. When the power-supply cord or plug is damaged, B. If liquid has been spilled, or objects have fallen into the apparatus, C. If the apparatus has been exposed to rain or water, D. If the apparatus does not operate normally by following the operating instructions. Adjust only those controls that are covered by the operating instructions as an improper adjustment of other controls may result in damage and will often require extensive work by a qualified technician to restore the apparatus to its normal operation, E. If the apparatus has been dropped or damaged in any way, and F. When the apparatus exhibits a distinct change in performance this indicates a need for service. 16. Object and Liquid Entry Never push objects of any kind into the apparatus through openings as they may touch dangerous voltage points or short-out parts that could result in a fire or electric shock. The apparatus shall not be exposed to dripping or splashing and no objects filled with liquids, such as vases shall be placed on the apparatus. Don’t put candles or other burning objects on top of this unit. 17. Batteries Always consider the environmental issues and follow local regulations when disposing of batteries. 18. If you install the apparatus in a built-in installation, such as a bookcase or rack, ensure that there is adequate ventilation. Leave 20 cm (8") of free space at the top and sides and 10 cm (4") at the rear. The rear edge of the shelf or board above the apparatus shall be set 10 cm (4") away from the rear panel or wall, creating a flue-like gap for warm air to escape. Precautions 1. Recording Copyright—Unless it’s for personal use only, recording copyrighted material is illegal without the permission of the copyright holder. 2. AC Fuse—The AC fuse inside the unit is not userserviceable. If you cannot turn on the unit, contact your Onkyo dealer. 3. Care—Occasionally you should dust the unit all over with a soft cloth. For stubborn stains, use a soft cloth dampened with a weak solution of mild detergent and water. Dry the unit immediately afterwards with a clean cloth. Don’t use abrasive cloths, thinners, alcohol, or other chemical solvents, because they may damage the finish or remove the panel lettering. 4. Power WARNING BEFORE PLUGGING IN THE UNIT FOR THE FIRST TIME, READ THE FOLLOWING SECTION CAREFULLY. AC outlet voltages vary from country to country. Make sure that the voltage in your area meets the voltage requirements printed on the unit’s rear panel (e.g., AC 230 V, 50 Hz or AC 120 V, 60 Hz). The power cord plug is used to disconnect this unit from the AC power source. Make sure that the plug is readily operable (easily accessible) at all times. Pressing the [ON/STANDBY] button to select Standby mode does not fully shutdown the unit. If you do not intend to use the unit for an extended period, remove the power cord from the AC outlet. 5. Never Touch this Unit with Wet Hands—Never handle this unit or its power cord while your hands are wet or damp. If water or any other liquid gets inside this unit, have it checked by your Onkyo dealer. 6. Preventing Hearing Loss Caution Excessive sound pressure from earphones and headphones can cause hearing loss. 7. Batteries and Heat Exposure Warning Batteries (battery pack or batteries installed) shall not be exposed to excessive heat as sunshine, fire or the like. 8. Handling Notes • If you need to transport this unit, use the original packaging to pack it how it was when you originally bought it. • Do not leave rubber or plastic items on this unit for a long time, because they may leave marks on the case. • This unit’s top and rear panels may get warm after prolonged use. This is normal. • If you do not use this unit for a long time, it may not work properly the next time you turn it on, so be sure to use it occasionally. • When you’ve finished using this unit, remove all discs and turn off the power. 9. Installing this Unit • Install this unit in a well-ventilated location. • Ensure that there’s adequate ventilation all around this unit, especially if it’s installed in an audio rack. If the ventilation is inadequate, the unit may overheat, leading to malfunction. • Do not expose this unit to direct sunlight or heat sources, because its internal temperature may rise, shortening the life of the optical pickup. • Avoid damp and dusty places. • Install this unit horizontally. Never use it on its side or on a sloping surface, because it may cause a malfunction. • If you install this unit near a TV, radio, or VCR, the sound quality may be affected. If this occurs, move this unit away from the TV, radio, or VCR. 10. Moisture Condensation Moisture condensation may damage this unit. Read the following carefully: Moisture may condense on the lens of the optical pickup, one of the most important parts inside this unit. • Moisture condensation can occur in the following situations: – The unit is moved from a cold place to a warm place. – A heater is turned on, or cold air from an air conditioner is hitting the unit. – In the summer, when this unit is moved from an air conditioned room to a hot and humid place. – The unit is used in a humid place. • Do not use this unit when there’s the possibility of moisture condensation occurring. Doing so may damage your discs and certain parts inside this unit. If condensation does occur, unplug the power cord and leave the unit for two to three hours in the room temperature. 3 Precautions—Continued This unit contains a semiconductor laser system and is classified as a “CLASS 1 LASER PRODUCT”. So, to use this model properly, read this Instruction Manual carefully. In case of any trouble, please contact the store where you purchased the unit. To prevent being exposed to the laser beam, do not try to open the enclosure. • Consult the dealer or an experienced radio/TV technician for help. CAUTION: USE OF ANY CONTROLS, ADJUSTMENTS, OR PROCEDURES OTHER THAN THOSE SPECIFIED HEREIN MAY RESULT IN HAZARDOUS RADIATION EXPOSURE. CAUTION: CLASS 1M VISIBLE AND INVISIBLE LASER RADIATION WHEN OPEN. DO NOT VIEW DIRECTLY WITH OPTICAL INSTRUMENTS. THIS PRODUCT UTILIZES A LASER. USE OF CONTROLS OR ADJUSTMENTS OR PERFORMANCE OF PROCEDURES OTHER THAN THOSE SPECIFIED HEREIN MAY RESULT IN HAZARDOUS RADIATION EXPOSURE. The label on the right is applied on the rear panel. 1. This unit is a CLASS 1 LASER PRODUCT and employs a laser inside the cabinet. 2. To prevent the laser from being exposed, do not remove the cover. Refer servicing to qualified personnel. For North American Models FCC Information for User CAUTION: The user changes or modifications not expressly approved by the party responsible for compliance could avoid the user’s authority to operate the equipment. NOTE: This equipment has been tested and found to comply with the limits for a Class B digital device, pursuant to Part 15 of the FCC Rules. These limits are designed to provide reasonable protection against harmful interference in a residential installation. This equipment generates, uses, and can radiate radio frequency energy and, if not installed and used in accordance with the instructions, may cause harmful interference to radio communications. However, there is no guarantee that interference will not occur in a particular installation. If this equipment does cause harmful interference to radio or television reception, which can be determined by turning the equipment off and on, the user is encouraged to try to correct the interference by one or more of the following measures: • Reorient or relocate the receiving antenna. • Increase the separation between the equipment and receiver. • Connect the equipment into an outlet on a circuit different from that to which the receiver is connected. 4 For Canadian Models NOTE: THIS CLASS B DIGITAL APPARATUS COMPLIES WITH CANADIAN ICES-003. For models having a power cord with a polarized plug: CAUTION: TO PREVENT ELECTRIC SHOCK, MATCH WIDE BLADE OF PLUG TO WIDE SLOT, FULLY INSERT. Features Amplifier Supplied Accessories Make sure you have the following accessories: • Digital Amplifier • 1 Audio Input • Subwoofer Pre Out CD Player • Plays CDs, MP3 / WMA *1, CD-Rs and CD-RWs *2 • 25 Track Programming • 3 Repeat Modes (TRACK / FULL / 1 FOLDER) • 4 Play Modes (NORMAL / RANDOM / MEMORY / 1 FOLDER) Remote controller (RC-791S) and two batteries (R6 / AA) iPod / iPhone *3 • Made for iPod touch (1st and 2nd generation), iPod classic, and iPod nano (2nd, 3rd, 4th, and 5th generation). • Made for iPhone 3GS, iPhone 3G, and iPhone. • Digital Connection Indoor FM antenna Tuner & Other • • • • • • • 40 FM / AM presets 4-Program Timer (PLAY / ONCE or EVERY) Sleep Timer Battery-Free Memory Backup Headphone Jack Aluminum Front Panel Speaker Binding Posts AM loop antenna Note: In catalogs and on packaging, the letter at the end of the product name indicates the color. Specifications and operations are the same regardless of color. *1. Windows Media, and the Windows logo are trademarks, or registered trademarks of Microsoft Corporation in the United States and/or other countries. *2. Make sure to use discs that have been finalized. *3. iPhone, iPod, iPod classic, iPod nano, and iPod touch are trademarks of Apple Inc., registered in the U.S. and other countries. “Made for iPod” and “Made for iPhone” mean that an electronic accessory has been designed to connect specifically to iPod or iPhone, respectively, and has been certified by the developer to meet Apple performance standards. Apple is not responsible for the operation of this device or its compliance with safety and regulatory standards. 5 Before Using the CD Receiver Installing the Batteries 1 Open the battery compartment, as shown. Using the Remote Controller When you operate the remote controller, point it at the CD receiver’s remote control sensor. Remote control sensor 5 x. p ro Ap ft.) 6 (1 2 3 Insert two batteries (R6 / AA) into the battery compartment. Carefully follow the polarity diagram (positive (+) and negative (–) symbols) inside the battery compartment. After the batteries are installed and seated correctly, attach the compartment cover. Notes: • If the remote controller doesn’t work reliably, try replacing the batteries. • Don’t mix new and old batteries or different types of batteries. • If you intend not to use the remote controller for a long time, remove the batteries to prevent damage from leakage or corrosion. • Expired batteries should be removed as soon as possible to prevent damage from leakage or corrosion. 6 m Notes: • The remote controller may not work reliably if the CD receiver is subjected to bright light, such as direct sunlight or inverter-type fluorescent lights. Keep this in mind when installing. • If another remote controller of the same type is used in the same room, or the CD receiver is installed close to equipment that uses infrared rays, the remote controller may not work reliably. • Don’t put anything, such as a book, on the remote controller because the buttons may be pressed inadvertently, thereby draining the batteries. • The remote controller may not work reliably if the CD receiver is installed in a rack behind colored glass doors. Keep this in mind when installing. • The remote controller will not work if there’s an obstacle between it and the CD receiver’s remote control sensor. 7 Getting to Know the CD Receiver Front Panel 1 INPUT button 9 2 ON/STANDBY button Disc tray 3 STANDBY indicator 10 Previous / Next [ or PRESET [ ] / [ 4 Remote control sensor 11 Stop [ ] button 5 Display 12 Play/Pause [ 6 VOLUME control knob 13 Open/Close [ 7 TONE/BALANCE button / knob 8 PHONES jack ]/[ ] buttons ] buttons ] button ] button Rear Panel LINE IN 5 SUBWOOFER PRE OUT 2 VIDEO OUT 6 Power cord 3 AM ANTENNA 7 FM ANTENNA 4 SPEAKERS 1 8 Getting to Know the CD Receiver—Continued Display 7 iPod menu mode indicator MP3 8 MUTING indicator WMA 9 TITLE, ARTIST, and ALBUM indicators 1 Input source indicator 2 File format indicators 3 S.BASS indicator 10 Message area 4 FOLD indicator 11 FILE indicator 5 Playback mode indicators 12 TRACK indicator 1FOLD 13 Play [ ] and pause [ ] indicators MEM 14 TIMER indicators RDM 6 (REPEAT) 15 DISC, TOTAL indicators (REPEAT 1) 16 SLEEP indicator Tuning indicators AUTO FM ST 9 Getting to Know the CD Receiver—Continued Remote Controller 1 SLEEP button 2 ON/STANDBY button 3 Number buttons 4 Previous / Next [ 5 INPUT [ 6 STOP button 7 CD Play/Pause [ 8 Fast Reverse / Fast Forward [ buttons 9 iPod Play/Pause [ ]/[ ]/[ ] buttons ] buttons ] button ]/[ ] button 10 PLAYLIST / FOLDER [] / [] buttons 11 ALBUM [] / [] buttons 12 TIMER button 13 CLOCK CALL button 14 DISPLAY button 15 MODE button 16 MENU / CLEAR button 17 ENTER button 18 FOLDER button 19 VOLUME [ ] / [ ] buttons 20 TUNER button 21 MUTING button 22 REPEAT button 23 SHUFFLE / RANDOM button 24 TONE button 25 S.BASS button 10 ] Disc Notes Precautions for Playback Compact discs (CDs) with the following logo on the label surface can be used. Do not use discs designed for purposes other than audio, such as CD-ROMs for PC use. Abnormal noise could damage the speakers or amplifier. * * * This CD receiver supports CD-R and CD-RW discs. Note that some discs may not playback because of the disc characteristics, scratches, contamination or the recording state. A disc recorded with an audio CD record will not playback unless it is finalized. Never use discs which have a special shape (such as hearts or octagons). These types of discs could jam and damage the CD receiver. CD Playback with Copy-control Function Some audio CDs with copy-control function do not comply with official CD standards. These are special discs and cannot be played with this CD receiver. Playback of MP3 and WMA Discs MP3 and WMA files recorded on a CD-R/CD-RW can be played with this CD receiver. • Use discs which have been recorded following the ISO 9660 Level 2 file system. (The supported directory depth is eight levels, the same as ISO 9660 Level 1) Discs recorded with the hierarchical file system (HFS) cannot be played. • Up to 99 folders (including the root folder), and up to 499 folders (including root) and files can be recognized and played. • Always close the disc tray. Notes: • A disc recorded with a recorder or personal computer may not play in some cases. (Cause: Disc’s characteristics, damaged or dirty disc, dirt on player’s lens, dew condensation, etc.) • A disc recorded on a personal computer may not play because of the application settings or environment. Record the disc with the proper format. (Contact the application maker for details.) • A disc with insufficient storage capacity may not playback properly. Playback of MP3 Discs • Only MP3 files with the extension “.MP3” or “. mp3” are supported. • This CD receiver supports files recorded in MPEG 1 Audio Layer 3 (32-320kbps), with the sampling rate of 32/44.1/48kHz. • Variable bitrates (VBR) between 32kbps and 320kbps are supported. The time information during VBR playback may not display correctly. Playback of WMA Discs • WMA stands for “Windows Media® Audio”, an audio compression technology developed by Microsoft Corporation USA. • Only WMA files with the extension “.WMA” or “.wma” are supported. • Encode the WMA file with an application approved by Microsoft Corporation USA. The file may not playback correct if encoded with an unapproved application. • Variable bitrates (VBR) between 64kbps and 160kbps (32/44.1/48kHz) are supported. The time information during VBR playback may not display correctly. • Copyright-protected WMA files cannot be played back. • WMA Pro, Lossless and Voice are not supported. * Windows Media is a registered trademark or trademark of Microsoft Corporation in the United States and/or in other countries. Handling Discs Hold discs by the edge, or by the center hold and edge. Avoid touching the playback surface (surface with nothing printed on it). Label surface (printed surface) Playback surface Do not attach paper or stickers, or write on the playback or label surface of the disc. Take care not to scratch or damage the disc. 11 Disc Notes—Continued Precautions for Rental Discs Do not use discs with residue from cellophane tape, rental discs with labels which are peeling off, or discs with decorative labels. This type of disc could get stuck in the CD receiver, or could damage the CD receiver. Precautions for Inkjet Printable Discs Do not leave a CD-R/CR-RW having a label printed with an inkjet printer in the CD receiver for a long time. The disc could get stuck in the CD receiver, or could damage the CD receiver. Remove the disc from the CD receiver when not being played, and store it in a case. A freshly printed disc will stick easily, and should not be played immediately. Caring for Discs If the disc is dirty, the CD receiver will have a hard time reading signals, and the audio quality may drop. If the disc is dirty, gently wipe off fingerprints and dust with a soft cloth. Lightly wipe from the center outwards. To remove stubborn dust or dirt, wipe the disc with a soft cloth dampened with water, and then dry it with a dry cloth. Do not use cleaning spray for analog records or antistatic agents, etc. Never use volatile chemicals such as benzine or paint thinner as they can impregnate the disc surface. 12 Connecting Antennas This section explains how to connect the supplied indoor FM antenna and AM loop antenna, and how to connect commercially available outdoor FM antenna. The CD receiver won’t pick up any radio signals without an antenna connected, so you must connect the antenna to use the tuner. Connecting the AM Loop Antenna The supplied indoor AM loop antenna is for indoor use only. 1 Assemble the AM loop antenna, inserting the tabs into the base, as shown. 2 Connect the terminal of the AM loop antenna to the AM antenna jack, as shown. AM antenna jack FM antenna jack Connecting the Indoor FM Antenna The supplied indoor FM antenna is for indoor use only. 1 Attach the FM antenna, as shown. Insert the plug fully into the jack. 2 Use thumbtacks or something similar to fix the FM antenna into position. Thumbtacks, etc. Caution: Be careful that you don’t injure yourself when using thumbtacks. If you cannot achieve good reception with the supplied indoor FM antenna, try a commercially available outdoor FM antenna instead (see page 14). 13 Connecting Antennas—Continued Connecting an Outdoor FM Antenna If you cannot achieve good reception with the supplied indoor FM antenna, try a commercially available outdoor FM antenna instead. Notes: • Outdoor FM antennas work best outside, but usable results can sometimes be obtained when installed in an attic or loft. • For best results, install the outdoor FM antenna well away from tall buildings, preferably with a clear line of sight to your local FM transmitter. • Outdoor antenna should be located away from possible noise sources, such as neon signs, busy roads, etc. • For safety reasons, outdoor antenna should be situated well away from power lines and other high-voltage equipment. • Outdoor antenna must be grounded in accordance with local regulations to prevent electrical shock hazards. Using a TV / FM Antenna Splitter It’s best not to use the same antenna for both FM and TV reception, as this can cause interference problems. If circumstances demand it, use a TV / FM antenna splitter, as shown. TV / FM antenna splitter To CD receiver To TV (or VCR) 14 Connecting Speakers Terminal posts Strip about 15 mm (5/8") of insulation from the ends of the speaker cables, and twist the bare wires tightly. Unscrew the terminal. Fully insert the bare wire, making sure that it’s touching the threaded shaft in the center. Screw the terminal tight. • Connect the right speaker to the CD receiver’s right (R) SPEAKERS terminals. Connect the left speaker to the left (L) SPEAKERS terminals. • Connect the positive (+) terminal on each speaker to the corresponding positive (+) terminal on the CD receiver. Connect the negative (–) terminal on each speaker to the corresponding negative (–) terminal on the CD receiver. Use the red wires to connect the positive (+) terminals. • Connect only speakers with an impedance of between 4 and 16 ohms. Connecting a speaker with a lower impedance may damage the CD receiver. • Be careful not to short the positive and negative wires. Doing so may damage the CD receiver. • Do not connect both speaker cables to the same L or R terminals (Fig. 1). Do not connect more than two speaker terminals to each speaker (Fig. 2). Fig. 1 Fig. 2 15 Connecting Other Components About Connections • Before making any connections, read the manuals supplied with your other components. • Don’t connect the power cord until you’ve completed and double-checked all connections. Connection Color Coding RCA-type audio connections are usually color-coded: red and white. Use red plugs to connect right-channel audio inputs and outputs (typically labeled “R”). Use white plugs to connect left-channel audio inputs and outputs (typically labeled “L”). Note: Do not put anything on top of the CD receiver, as it may interfere with proper ventilation. Connecting a Subwoofer The CD receiver has a SUBWOOFER PRE OUT jack for connecting a powered subwoofer (i.e., a subwoofer with a built-in amplifier). Connecting Sound Reproduction Equipments The following diagram shows how to connect sound reproduction equipments. Connect the CD receiver’s LINE IN jacks to the cassette deck’s or MD recorder's, etc. OUTPUT (PLAY) jacks. 16 Connecting Other Components —Continued Connecting a TV The CD receiver has a VIDEO OUT jack, which outputs video signal. When you see the contents of “videos” and “photos” in your iPod on TV, connect the cable as follows. Notes: • Before connecting the power cord, connect all of your speakers and AV components. • Turning on the CD receiver may cause a momentary power surge that might interfere with other electrical equipment on the same circuit. If this is a problem, plug the CD receiver into a different branch circuit. Plug the power cord into a suitable wall outlet. The STANDBY indicator lights up. To wall outlet Power cord (The figure varies from country to country.) 17 Basic Operations Turning On the CD Receiver Using Headphones To turn on the CD receiver, press the [ON/STANDBY] button on the CD receiver or remote controller. The STANDBY indicator goes off. Press the [ON/STANDBY] button again to set the CD receiver to Standby. The STANDBY indicator lights up. Turn down the volume, then connect your stereo headphones to the PHONES minijack. The speakers output no sound while the headphones are connected. Adjusting the Volume Turn the [VOLUME] control clockwise to increase the volume or counterclockwise to decrease it. You can also use remote controller’s VOLUME [ ] / [ ] buttons. Selecting the Input Source Press the remote controller’s INPUT [ ] / [ ] buttons repeatedly in order to select the input source. On the CD receiver, press the [INPUT] button repeatedly. The input sources are selected in the following order. Note: When you select iPod as the input source, the headphones output no sound. If use headphones, connect it directly to iPod. Muting the Sound To mute the output of the CD receiver, press the remote controller’s [MUTING] button. The MUTING indicator flashes on the display. To unmute the CD receiver, press the [MUTING] button again. Tips: While the CD receiver is muted: • Turning the [VOLUME] control on the CD receiver or use the VOLUME [ ] / [ ] buttons on the remote controller will unmute the CD receiver. • If you turn the CD receiver off and on, the CD receiver will be unmuted. 18 Basic Operations —Continued Adjusting the Bass, Treble and Balance 1 Press the [TONE] button to select “Bass”. 2 Use the [ ]/[ ] buttons to adjust the bass. Press [ENTER], and then use the [ ]/[ ] buttons to adjust the treble. The default setting is “0”. You can adjust the bass and treble from – 4 to + 4. Press [ENTER], and then use the [ ]/[ ] buttons to adjust the balance. The default setting is “0”. You can adjust the balance from L + 5 to 0, then 0 to R + 5. Tip: To adjust the bass, treble and balance, you can also use TONE / BALANCE button and knob. Note: If you press no buttons for 8 seconds, the previous display will appear automatically. Using the Super Bass Function To turn off the Super Bass function, press the [S.BASS] button. The S.BASS indicator disappears. To turn on the Super Bass function, press the [S.BASS] button again. Note: The default setting of Super Bass function is on. 19 Disc Playback Using the CD Receiver 1 • MP3 / WMA Disc Display Press the [ ] button to open the disc tray. Tip: Pressing the [ ] button while the CD receiver is on Standby will turn on the CD receiver and open the disc tray. 2 Place the CD on the tray with the label-side facing up. Place 8 cm CDs in the center of the tray. 3 To start playback, press the [ ] button. The disc tray closes and playback starts. Then the “” indicator appears. To stop playback: Press the [ ] button. Playback stops automatically when the last track has been played. To pause playback: Press the [ ] button. The Pause indicator appears. To resume playback, press the [ ] button again. To remove the CD: Press the [ ] button to open the disc tray. Display during Stop • Audio CD Display “DISC TOTAL” lights up while the disc information is being displayed. Total number of tracks 20 Total playing time Disc name or file format Total number of folders Total number of files Selecting Tracks To return to the beginning of the track currently playing, press the [ ] button. Press the [ ] button repeatedly to select earlier tracks. • While playback is stopped, pressing the [ ] button will select the previous track. Press the [ ] button repeatedly to select subsequent tracks. • On MP3 / WMA Disc, you can select MP3 / WMA files in other folder (see page 22). Disc Playback—Continued Using the Remote Controller Press to select tracks • Press the Previous [ ] button to locate the beginning of the currently playing or paused track. Press it repeatedly to select earlier tracks. • Press the Next [ ] button repeatedly to select subsequent tracks. On MP3 / WMA Disc, you can select files in other folders (see page 22). Press to stop playback Press to fast reverse or fast forward During playback or while playback is paused, press and hold the fast forward [ ] button to fast forward, or the fast reverse [ ] button to fast back. Press to select folders Use the number buttons as shown in the examples below to select tracks To select: Track # 8 Press: Track # 10 Track # 34 used to enter numbers over 10. With MP3 / WMA Disc, you can select files in the current folder with these buttons. Press to display more CD information Press to adjust the volume Press the VOLUME Up [ ] button to increase volume. Press the VOLUME Down [ ] button to decrease volume. Press to Play / Pause playback Pressing this button while the CD receiver is on Standby will turn on the CD receiver and start playback. To resume playback, press this button. On MP3 / WMA Disc, press the [] button to select the next folder, and press the [] button to select the previous folder. Displaying CD Information During playback or while playback is paused, press the remote controller’s [DISPLAY] button repeatedly to display the following CD information. The elapsed track time is displayed. The remaining track time is being displayed with “–”. The remaining disc time is being displayed with “–” and TOTAL indicator. Note: See page 23 for details on displaying MP3 / WMA information. 21 Disc Playback—Continued Selecting / Playing MP3 / WMA Files 2 On an MP3 / WMA Disc, MP3 / WMA files may be organized hierarchically, with folders containing files and subfolders, as shown below. On the CD receiver, all folders appear at the same level, making it easy to select folders regardless of the hierarchy. Use the [ ]/[ ] buttons to select the other folders. You can select any folder that contains MP3 / WMA files. To play the first file in the selected folder, go to Step 4. 3 To access the files inside the folder, press the [FOLDER] button. The name of the first MP3 / WMA file inside the folder is displayed. Use the [ ]/[ ] buttons to select the MP3 / WMA files within the folder. To select another folder, press the [FOLDER] button again, and then use the [ ]/[ ] buttons to select it. 4 If you don’t select a specific MP3 / WMA file or folder for playback, all of the MP3 / WMA files on the CD will be played in numerical order starting with file #1. Selecting MP3 / WMA Files To start playback, press the [ENTER] or [ ] button. Playback will start with the specified file or folder and continue until all of the MP3 / WMA files on the disc have been played. To select an MP3 / WMA file in another folder during playback, press the [FOLDER] button, select the folder by using the [ ]/[ ] buttons, and then press [ENTER]. Now use the [ ]/[ ] buttons to select the MP3 / WMA files within that folder. • Pausing Playback To pause playback, press the [ resume playback, press it again. ] button. To • Selecting MP3 / WMA Folders and Files by Number The all folders in MP3 / WMA files appear at the same revel. If random playback is currently selected, press the [SHUFFLE / RANDOM] button to cancel it before proceeding. 1 22 While playback is stopped, press the [FOLDER] button. The CD receiver enters All Folder mode and the name of the first folder appears on the display. 1 Press the [FOLDER] button. The current folder name is displayed. 2 Use the number buttons to enter folder numbers. If playback is stopped, playback starts with the first MP3 / WMA file in the specified folder. If playback is already in progress, press [ENTER] to play the first MP3 / WMA file in the specified folder. To Select: Folder # 8 Folder # 10 Folder # 34 Press: used to enter numbers over 10. Disc Playback—Continued 3 Use the number buttons to enter the file number. Playback starts. If a folder contains more than 99 MP3 / WMA files, double-digit file numbers must be preceded by zeros. To specify file #5, press [>10], [0], [0], and [5]. - Artist name Name of the album (if tag present). - Album name Name of the album (if tag present). Displaying MP3 / WMA Information You can display various information about the MP3 / WMA file currently playing, including tags such as title, artist name, and album name. During playback, press the [DISPLAY] button repeatedly to display the following MP3 / WMA information. File name: - Elapsed time The length of time that the current file has been playing (default display). Notes: • If there is no data, [Unknown Title], [Unknown Artist], or [Unknown Album] will be displayed. • To display the disc name, press the [DISPLAY] button while playback is stopped. • If a file or folder name contains any characters that cannot be displayed, “File_n” or “Folder_n” will be displayed (“n” is a file or folder number). • If a title, artist, or album name contains any characters that cannot be displayed, a “y (centered dot)” will be displayed in place of those characters. Various Playbacks - File name Name of the current MP3 / WMA file. You can combine “Random”, “Repeat”, and “Memory” playback. One Folder Playback - Folder name Name of the current folder. Normally, all of the MP3 / WMA files in all of the folders on the disc are played. With 1-folder playback, only the MP3 / WMA files in the specified folder are played. - Sampling rate and bitrate Sampling rate and bitrate of the current file. Title: - Elapsed time The length of time that the current file has been playing (default display). - Title name Title of the current file (if tag present). 1 Press the [MODE] button repeatedly until the 1FOLDER ( ) indicator appears. 2 Use the [ ]/[ ] buttons to select the folder. You can select any folder that contains MP3 / WMA files. 23 Disc Playback—Continued 3 To start playback, press the [ENTER] or [ ] button. Playback will start with the first MP3 / WMA file in the specified folder and continue until all of the MP3 / WMA files in that folder have been played. Repeat Playback With repeat playback, you can play an entire CD repeatedly or play one track repeatedly. Random Playback With random playback, all of the tracks on the disc are played in random order. Random playback can be set only when playback is stopped. Press the [REPEAT] button repeatedly until the REPEAT ( ) or REPEAT 1 ( ) indicator appears. Cancelling Repeat Playback • To cancel repeat playback, press the [REPEAT] button repeatedly until both the REPEAT and REPEAT 1 indicators disappear. • Repeat playback is cancelled when you press the [ ] button to open the disc tray. Memory Playback 1 Press the [SHUFFLE / RANDOM] button repeatedly until the RANDOM ( ) indicator appears. 2 To start random playback, press the [ ] button. With memory playback, you can create a playlist of up to 25 tracks. Cancelling Random Playback • To cancel random playback, press the [SHUFFLE / RANDOM] button repeatedly until the RANDOM indicator disappears. • Random playback is cancelled when you press the [ ] button to open the disc tray. Memory playback can be set only when the input source is set to CD and playback is stopped. 1 Press the [MODE] button repeatedly until the MEMORY Indicator appears. MEMORY indicator Playlist number 24 Disc Playback—Continued 2 Removing Tracks from the Playlist • While memory playback is stopped, press the [MENU / CLEAR] button. Each press removes the last track from the playlist. Use the [ ]/[ ] buttons to select the first track you want to add to the playlist, then press [ENTER]. Cancelling Memory Playback • To cancel Memory playback, press the [MODE] button repeatedly until the MEMORY indicator disappears. • Memory playback is cancelled when you press the [ ] button to open the disc tray. Track to be added to Total time of the playlist playlist Setting Disc Preferences Repeat this step to add additional tracks to the playlist. You can also use the number buttons on the remote controller to select tracks. To select MP3 / WMA files for memory playback: See page 22 for details on selecting MP3 / WMA files. With the Disc preferences, you can change the way MP3 / WMA file information is displayed and the way MP3 / WMA Disc is played. To remove tracks from the playlist: Press the [MENU / CLEAR] button. Each press removes the last track from the playlist. Notes: • If the total playing time is more than 99 minutes and 59 seconds, “– –:– –” is displayed. • You can add up to 25 tracks to the playlist. If you try to add more, the message “Memory Full” appears. 3 The preferences can be set only when the input source is set to CD and playback is stopped. To start memory playback, press the [ ] button. 1 Press the [MENU / CLEAR] button repeatedly until “MP3 / WMA Info?” appears. 2 Use the [ ]/[ ] buttons to select the preference you want to change. The preferences are explained in the next column. 3 Press [ENTER]. 4 Use the [ ]/[ ] buttons to select the preference’s options. 5 Press [ENTER]. When the preference has been set, “Complete” appears on the display. Track currently playing On the CD receiver, press the Play / Pause [ ] button to start memory playback. Selecting Other Tracks During Memory Playback To select other playlist tracks during memory playback, use the remote controller’s [ ]/[ buttons. ] Checking What’s on the Playlist To check what tracks are on the playlist, with playback stopped, use the [ ]/[ ] buttons to scroll through the playlist. To cancel the procedure at any point, press the [MENU / CLEAR] button. 25 Disc Playback—Continued Preferences (*: default) MP3 / WMA Info? Select the MP3 / WMA file information to be displayed at the start of playback. The related information can be also switched with the [DISPLAY] button. File Name *: File name, Folder name, Sampling rate, and Bitrate Title: Title of the current file, Artist name, Album title Info Scroll? Select the method of scrolling the titles displayed at the start of playback. Not Display: The title is not displayed. Once *: The title is displayed once, and then the playback time is displayed. Repeat: The title is repeatedly displayed. CD Extra? This preference applies to CD Extra discs and determines whether music in the audio session or MP3 / WMA files in the data session are played. Audio *: Music in the audio session will be played. MP3 / WMA: MP3 / WMA files will be played. Prefix Num? This preference determines whether or not the numbers at the beginning of file and folder names are displayed. When you create an MP3 / WMA Disc on a personal computer, each file name may be assigned a number. If you don’t want these numbers to appear on the display, choose “Not Display”. Display *: The file and folder name, including numbers, will be displayed as it is. Not Display: The file and folder name will be displayed but numbers will be hidden. 26 The following table shows a few examples of numbered file and folder names and how they will appear with the “Display” and “Not Display” options. File / folder name “Prefix Num?” Option Display Not Display 01 Pops 01 Pops Pops 10-Rock 10-Rock Rock 16_Jazz 16_Jazz Jazz 21th Century 21th Century 21th Century 05-07-20 Album 05-07-20 Album Album Dimmer? Select the CD receiver’s display brightness. Off *: 1: 2: Normal Dim Dimmer iPod / iPhone Playback When you select iPod as the input source, the headphones output no sound. If use headphones, connect it directly to iPod. Before using your iPod with the CD receiver, be sure to update your iPod with the latest software, available from the Apple Web site. If you leave your iPod paused when using it on its own, eventually it will go into hibernation. If you insert it into the CD receiver dock in this state, you’ll need to wait a few moments before your iPod is ready for use. Always remove your iPod before moving CD receiver. Depending on your iPod, or the type of content being played, some functions may not work as expected. Installing the iPod / iPhone Universal Dock Adapter First, with the adapter slot facing the back, fit in the front of the adapter and then press in the back until a click is heard. To remove the adapter, lift the back side up. If the adapter is difficult to remove, insert a thin object into the slot and lift the adapter up. Always use the Universal Dock Adapter enclosed with the iPod model to correctly set the iPod in the CD receiver. Note: The slot’s connection terminal could be damaged if the iPod is set in the CD receiver dock without using the Universal Dock Adapter. Please purchase a commercially available dock adapter when using an iPhone or when the Universal Dock Adapter has been lost or damaged. Make sure the slot is at the rear. Playing iPod / iPhone 1 Inserting your iPod into the CD receiver’s dock for iPod. Raise the dock cover, insert your iPod ensuring that it is seated correctly. Notes: • The appropriate iPod universal dock adapter must be installed prior to inserting an iPod. • To prevent damage to the dock connector, do not twist or force your iPod into the dock, and be careful not to wiggle your iPod while inserting it. • Do not use with any iPod accessories, such as FM transmitters and microphones, as they may cause a malfunction. • If you use your iPod with its case, always remove the case before you insert iPod. Otherwise, it will not connect properly and a malfunction may occur. • Depending on the iPod / iPhone model or software version, it may take 30 seconds for the "Reading" process required for the connection to finish. If the connection is not established even after a minute, remove the iPod / iPhone from the unit once, and try setting it again. 2 Use the INPUT [ ] / [ ] buttons to select “iPod”. When no iPod is connected, “iPod No Device” will be displayed. 3 To start playback, press the [ ] button. Playback will begin. To pause playback: Press the [ ] button. The Pause indicator appears. To resume playback, press the [ ] button again. Notes: • You can see the contents of “videos” and “photos” in your iPod on TV (see page 17). Confirm your iPod, if video output is available. • The volume level is adjusted by using the VOLUME [ ] / [ ] knob or the buttons on the remote controller. Adjusting the volume on your iPod has no effect. In case you inadvertently move your iPod volume control, make sure the volume level is not set too high before you reconnect your headphones. 27 iPod / iPhone Playback—Continued Using the iPod / iPhone menu (only remote control) 1 Press the [MENU / CLEAR] button to display iPod menu on iPod. A dot indicator (iPod menu mode indicator) appears on the CD receiver’s display. To go to the upper iPod menu, press the [MENU / CLEAR] button. iPod menu mode indicator 2 Press the [ ]/[ ] button, and move the iPod menu item (highlight). 3 Press the [ENTER] button to select the item. Notes: • iPod menu items can be moved only when the indicator is lit. In this state, [ ]/[ ] buttons can not be used for skipping tracks. This state can be canceled forcibly by the [ ] button. • When operating iPod menu via the CD receiver, do not operate iPod directly. This may be the cause of the trouble of CD receiver’s operation. • The volume level is adjusted by using the VOLUME [ ] / [ ] knob or the buttons on the remote controller. Adjusting the volume on your iPod has no effect. Displaying Music File Information You can display various information about the music files currently playing. 28 During playback, press the [DISPLAY] button repeatedly to display the following music file information. Title name: Title of the current file Artist name: Name of the artist. Album name: Name of the album. Elapsed time: The length of time that the current music file has been playing. While a music file is in pause state, “iPod” will appear. iPod / iPhone Playback—Continued Setting for iPod / iPhone 1 Remove the iPod. 2 Press [MENU]. 3 Select the desired setting item with the [ ]/[ ] buttons. 4 Press [ENTER]. 5 Select the desired selection with the [ ]/[ ] buttons. 6 Press [ENTER]. Dimmer? Select the CD receiver’s display brightness. Off *: 1: 2: Normal Dim Dimmer Preferences (*: default) Charging? Select the method for charging iPod, which inserted to the CD receiver’s dock, during the standby state. To Full *: Fully charge the iPod and then shift to the complete standby state. Ever: Always feed the power to iPod. Notes: • If “To Full” is set, the charging stops automatically, when iPod is fully charged. To start the charging again, remove and set iPod or restart the CD receiver. • Select “Ever”, if keep standby state for a long time with inserting iPhone in the CD receiver’s dock. • The maximum power consumption during iPod charging may be 25 W. Info Scroll? Select the method of scrolling the titles displayed at the start of playback. Not Display: The title is not displayed. Once: The title is displayed once, and then the playback time is displayed. Repeat *: The title is repeatedly displayed. TV Out? On *: Select to turn the iPod TV Out setting on. No Change: Does not change the iPod TV Out setting. 29 Listening to the Radio Tuning into FM /AM Radio Stations Adjusting the Antennas Adjusting and installing the FM antenna Choose a location for the FM antenna while listening to an FM station. 1 When tuned into a station, the Tuned indicator appears. When tuned into a stereo FM station, the FM Stereo indicator appears as well. Change the direction of the antenna to achieve the best reception. 2 AUTO Band FM Stereo Frequency Tuning into Weak Stereo FM Stations If the signal from a stereo FM station is weak, it may be impossible to get good reception. In this case, switch to mono mode with [MODE] button and listen to the station in mono. 1 Press the [TUNER] button repeatedly to select “FM” or “AM”. 2 Press and hold down the [ ]/ [ ] buttons until frequency runs and then release. Once a station is found, tuning stops automatically. Radio frequency can be changed in 0.2 MHz steps for FM and 10 kHz steps for AM. 30 Affix the antenna with a thumbtack. (Do not push the thumbtack through the antenna.) Caution: Be careful not to prick your finger! Adjusting the AM antenna Adjust the location and position of the AM antenna while listening to an AM station to achieve the best reception. Listening to the Radio—Continued Displaying FM/ AM Radio Information Press the remote controller’s [DISPLAY] button repeatedly to display more radio information. FM / AM 1 Press the [TUNER] or INPUT [ ] / [ ] buttons repeatedly until “FM” appears. Make sure the FM antenna is positioned to achieve the best possible reception. 2 Press the [MENU / CLEAR] button, and then use the [ ]/[ ] buttons to select “Auto Preset?”. 3 Press [ENTER]. The confirmation message “Auto Preset??” appears. To cancel the Auto Preset function at this point, press the [MENU / CLEAR] button. 4 To start the Auto Preset function, press [ENTER]. Frequency Preset name * * If the selected preset has no name, “No Name” appears briefly and then the frequency is displayed. See “Naming Presets” on page 33. Presetting FM Stations Automatically (Auto Preset) With the Auto Preset function, you can automatically preset the FM radio stations available in your area in one go. Presets make it easy to select your favorite stations and eliminate the need to tune the radio manually each time you want to change stations. The Auto Preset function does not preset AM radio stations. Auto Preset Caution! Any existing presets will be deleted when the Auto Preset function is run. Note: Depending on your location, a preset may be stored with no station and you will hear only noise when you select it. In this case, delete the preset (see page 34). Presetting FM / AM Stations Manually With the Preset Write function, you can manually preset individual FM and AM radio stations. Presets make it easy to select your favorite stations and eliminate the need to tune the radio manually each time you want to change stations. FM stations can also be preset automatically (see page 31). About Presets • You can store up to 40 stations as presets and this can be any combination of FM and AM stations. For example, 27 FM and 13 AM or 32 FM and 8 AM. • Although FM and AM presets share the same numbers, they’re selected independently. For example, preset #1 will store an FM station when the FM band is selected, and an AM station when the AM band is selected. • Stations can be stored to presets in any order. For example, you could store preset #5 first, #1 second, and so on. 31 Listening to the Radio—Continued Selecting Preset Stations You must store some presets before you can select them (see page 31). 1 Tune into the station that you want to store as a preset. 2 Press the [MENU / CLEAR] button, and then use the [ ]/[ ] buttons to select “Preset Write?”. 3 Press [ENTER]. The preset number flashes. To cancel the Preset write function at this point, press the [MENU / CLEAR] button. 4 5 6 32 Use the [ ]/[ select a preset. ] buttons to To store the station, press [ENTER]. If no station has yet been stored to the selected preset, “Complete” appears and the station is stored. If a station has already been stored in the selected preset, the message “Overwrite?” appears. To overwrite the previously stored station, press the [ENTER] button. To not overwrite the previously stored station, press the [MENU / CLEAR] button. If the message “Memory Full” appears, all the presets have been stored and you’ll need to erase some presets before you can store any more stations (see page 34). Repeat steps 1 to 5 to preset more radio stations. 1 Use the [TUNER] or INPUT [ ] / [ ] buttons to select “FM” or “AM”. The preset you selected the last time will still be selected. 2 Use the [ ]/[ ] buttons to select a preset. Press the [ ] button to select the previous preset. Press the [ ] button to select the next preset. You can also use the number buttons to select presets. To select: Press: Folder # 8 Folder # 10 Folder # 34 used to enter numbers over 10. You can also use the front panel controls. 1. Use the INPUT button to select “FM” or “AM”. 2. Use the PRESET [ ] / [ ] buttons to select a preset. Listening to the Radio—Continued Naming Presets • Deleting characters: To delete characters, press the [MENU / CLEAR] button. The character at the cursor position will be deleted. If there is no character at the cursor position or to the right of it, the character to the left of the cursor will be deleted. • To continue inputting characters assigned to same button: Use the INPUT [ ] button, move the cursor and input the next character. • Inserting a new character: Move the cursor with the INPUT [ ] / [ ] buttons, and flicker the character to the right of the insertion position. To cancel the Name In function, press and hold the [MENU / CLEAR] button for 2 seconds. You can name presets for easy identification. The preset name may contain of up to twelve characters. 6 1 Select the preset you want to name (see page 32). 2 Press the [MENU / CLEAR] button, and then use the [ ]/[ ] buttons to select “Name In?” 3 Press [ENTER]. 4 Press the [DISPLAY] button repeatedly to select one of the following character groups: • “A” for uppercase letters. • “a” for lowercase letters. • “1” for numbers. 5 • Selecting letters: Press the number buttons repeatedly to select the available letters. For example, press the [2] button repeatedly to select: A, B, C or 2. • Selecting numbers and symbols: Use the number buttons to select numbers. Press the [>10] button repeatedly to select: , . ’: - & ( ) [ ] Note: Not all of the symbols can be entered by using the number buttons. Use the [ ]/ [ ] buttons to select from the full range of symbols. When you’ve finished entering the name, press the [ENTER] button. The preset is named and “Complete” appears on the display. Available Characters Button 1 2 3 4 5 6 7 8 9 >10 10 / 0 FOLDER A ./-1 ABC2 DEF3 GHI4 JKL5 MNO6 PQRS7 TUV8 WXYZ9 , . ’: - & ( ) [ ] 0 (space) a ./-1 abc2 def3 ghi4 jkl5 mno6 pqrs7 tuv8 wxyz9 , . ’: - & ( ) [ ] 0 (space) 1 1 2 3 4 5 6 7 8 9 , . ’: - & ( ) [ ] 0 (space) See below See below See below The next symbol can be selected with the buttons. , . ’ : - & ( ) [ ] < > _; @ # ¥ $ %!? + * / = a D P 23 ” (space) 33 Listening to the Radio—Continued Copying Presets Erasing a Preset’s Name With the Preset Copy function, you can organize your presets in the order you want. When you copy a preset, its name is also copied. With the following operation, all the preset’s names are erased. 1 Select the preset you want to copy (see page 32). 2 Press the [MENU / CLEAR] button, and then use the [ ]/[ ] buttons to select “Preset Copy?”. 3 Press [ENTER]. The number of the preset to be copied flashes. 1 Select the preset name you want to erase (see page 32). 2 Press the [MENU / CLEAR] button, and then use the [ ]/[ ] buttons to select “Name Erase?”. 3 To erase the preset’s name, press the [ENTER] button. The preset’s name is erased and “Complete” appears on the display. Erasing Presets 4 Use the [ ]/[ ] buttons to select the destination preset. The number of the destination preset flashes. 5 To copy the preset, press [ENTER]. If no station has yet been stored in the destination preset, the station is copied and “Complete” appears. If a station has already been stored in the destination preset, the message “Overwrite?” appears. To overwrite the previously stored station, press [ENTER]. To not overwrite the previously stored station, press the [MENU / CLEAR] button. Tip: If you favorite station is stored in preset #5 and you want to make it preset #1, copy preset #5 to preset #1. To keep the station that’s already stored in preset #1, you may want to copy it to an unused preset first. 34 1 Select the preset you want to erase (see page 32). 2 Press the [MENU / CLEAR] button, and then use the [ ]/[ ] buttons to select “Preset Erase?”. 3 Press [ENTER]. A message requesting confirmation appears. To cancel the Preset Erase function at this point, press the [MENU / CLEAR] button. 4 To erase the preset, press [ENTER]. The preset is erased and “Complete” appears on the display. Listening to the Radio—Continued Adjusting the Display's Brightness 1 Press the [MENU / CLEAR] button, and then use the [ ]/[ ] buttons to select “Dimmer?”. 2 Press [ENTER]. 3 Set the brightness with [ buttons. Off: Normal Dim 1: Dimmer 2: 4 Press [ENTER]. ]/[ ] 35 Setting the Clock Use the following procedure to set the clock. 1 Press the [TIMER] button repeatedly until “Clock” appears. 2 Press [ENTER]. 3 ]/[ ] buttons to Use the [ select the day of the week. You can select: SUN, MON, TUE, WED THU, FRI, or SAT. 4 Press [ENTER]. Tip: To change the time format between 12-hour and 24-hour, press the [DISPLAY] button. 5 Use the remote controller’s number buttons to enter the current time. You can also use the [ ]/[ ] buttons. Use the remote controller’s [ > 10] button to select A.M. or P.M. 6 Press [ENTER]. The clock is set and the second dot starts flashing. Displaying the Day and Time To display the day and time, press the remote controller’s [CLOCK CALL] button. Press the button again or perform another operation to cancel the time display. If the CD receiver is on Standby, the day and time will be displayed for 8 seconds. While the CD receiver is on, the day and time are displayed continuously. 36 Using the Timers The CD receiver has four programmable timers for automated playback, and a sleep timer for turning the CD receiver off after a specified period. The timers can be used to start all the playback at a specified time. You could, for example, use a timer to turn on the CD receiver every morning, just like a radio alarm clock. About the Timers The various settings for the four programmable timers are explained here. For details on the sleep timer, see page 39. Repeat Timers Each timer can be programmed to work just once (Once), every week (Every), every day (Everyday), or on a range of days (Days Set). Once The timer will work just once. Every The timer will work every week on the specified day and time. • Everyday The timer will work every day. • Days Set The timer will work on the specified range of days. With this setting, you could set up a morning alarm from Monday to Friday. Timer Example To wake up to your favorite radio station (preset #1) every morning, you could program a timer as follows: FMݬ#1ݬEveryݬEverydayݬOn 7:00 amݬOff 7:30 amݬTimer Vol. 15 If you want a radio alarm only on week days, select “Days Set” instead of “Everyday” and specify “MON–FRI”. Timer Priority If two or more timers are set to the same On time, the lowest numbered timer has priority. For example: Timer 1: 7:00 A.M. – 1:00 P.M. (This timer has priority.) Timer 2: 7:00 A.M. – 11:00 A.M. If two or more timers overlap, the timer with the earliest start time has priority. For example: Timer 1: 9:00 A.M. – 10:00 A.M. Timer 2: 8:00 A.M. – 10:00 A.M. (This timer has priority.) If the On and Off times of two timers are the same, the timer with the earliest start time has priority and the other timer will fail. For example: Timer 1: 1:00 P.M. – 2:00 P.M. (This timer has priority.) Timer 2: 2:00 P.M. – 3:00 P.M. Time Indicators When a timer has been set, the TIMER ( ) indicator and the number of the timer appear on the display. Notes: • The timers work only if the CD receiver is on Standby. If it’s on when a timer is supposed to start playback, nothing will happen. • While timed playback is in progress, the timer’s Off time cannot be changed. Programming the Timers Notes: • You must set the clock before you can program the timers. • Before programming a timer to turn on the radio, you must preset the station you want to use. (See page 31.) • If you don’t operate any buttons for 60 seconds while programming a timer, the procedure will be cancelled and the previous display will reappear. 1 Press the [TIMER] button repeatedly to select timer 1, 2, 3, or 4, and then press [ENTER]. If “Clock” appears, you need to set the clock (see page 36). 2 Use the [ ]/[ ] buttons to select the source, and then press [ENTER]. You can select the following sources: CD, iPod, FM, AM, or LINE 37 Using the Timers—Continued 3 If you selected FM or AM, use the [ ]/[ ] buttons to select the radio preset, and then press [ENTER]. 4 Use the [ ]/[ ] buttons to select Once or Every, and then press [ENTER]. Select “Once” for one-off operation. Select “Every” to perform the same operation every week. 8 You can also use the remote controller’s number buttons to enter the time. For example, to enter 7:29, press [7], [2], and [9]. Notes: • Once the On time is set, the Off time is automatically set to one hour later. • Use the remote controller’s [ > 10] button to select A.M. or P.M. 9 5 6 If you selected “Once”, use the [ ]/[ ] buttons to select the day, and then press [ENTER]. You can select: SUN, MON, TUE, WED, THU, FRI, or SAT. Skip to step 8. TUE SUN Days Set WED THU Everyday ]/[ ] buttons to specify the CD receiver’s volume level, for the timer setting, and then press [ENTER]. To keep the latest volume level for the timer setting, press [ ] button repeatedly until “TimerVol.Lst” appears on the display and set. FRI SAT 11 7 Use the [ ]/[ ] buttons to specify the Off time, and then press [ENTER]. 10 Use the [ If you selected “Every”, use the [ ]/[ ] buttons to select the day, “Everyday”, or “Days Set”, and then press [ENTER]. If you selected other than “Days Set”, skip to step 8. You can select the followings: MON Use the [ ]/[ ] buttons to specify the On time, and then press [ENTER]. If you selected “Days Set”, use the [ ]/[ ] buttons to select the first day, and then press [ENTER]. Timer indicator 1, 2, 3, or 4 will light up. Timer Number of programmed timer Use the [ ]/[ ] buttons again to select the last day, and then press [ENTER]. You can select only consecutive days. Press the [ON/STANDBY] button to set the CD receiver to Standby. Notes: • Be sure to set the CD receiver to Standby, otherwise the timed operation will not work. • While a timed operation is in progress, you can cancel it by pressing the [TIMER] or [SLEEP] button. To return to step 1 and start timer programming all over again, press the [MENU / CLEAR] button at any point in this procedure. 38 Using the Timers—Continued Turning Timers On and Off Using the Sleep Timer Once a timer has been programmed, you can turn it on or off as necessary. For example, while you’re on holiday, you may want to turn off the timer you use as an early-morning alarm. With the sleep timer, you can set the CD receiver so that it automatically turns off after a specified period. 1 Press the [TIMER] button repeatedly to select timer 1, 2, 3, or 4. 2 Use the [ ]/[ ] buttons to select “Timer On” or “Timer Off”. The timer numbers, which set “Timer On” light up. After a few moments, the previous display reappears. Checking Timer Settings 1 Press the [TIMER] button repeatedly to select timer 1, 2, 3, or 4, and then press [ENTER]. 2 Press [ENTER] repeatedly to see all of the timer’s settings. Notes: • You can change the settings by using the [ ]/[ ] buttons. • If you change the settings of a timer that is off, that timer will be turned on. After confirming all the settings, the previous display reappears. To return to the previous display at any point in this procedure, press the [MENU / CLEAR] button. Press the [SLEEP] button repeatedly to select the required sleep time. With the [SLEEP] button, you can set the sleep time from 90 to 10 minutes in 10 minute decrements. Use the [ ]/[ ] buttons to set the sleep time in 1 minute increments from 99 to 1. SLEEP indicator When the sleep timer has been set, the SLEEP indicator appears on the display, as shown. The sleep time appears on the display for about 8 seconds, then the previous display reappears. Checking the Remaining Sleep Time To check the remaining sleep time, press the [SLEEP] button. Note that if you press the [SLEEP] button while the sleep time is being displayed, you’ll shorten the sleep time by 10 minutes. Cancelling the Sleep Timer To cancel the sleep timer, press the [SLEEP] button repeatedly until “Sleep Off” appears, then the SLEEP indicator disappears. 39 Troubleshooting If you have any trouble using the CD receiver, look for a solution in this section. How to reset to factory default? 1. Before unplug the power-supply cord, set the CD receiver in the STANDBY state. 2. While holding down the [ON/STANDBY] button on the main unit, plug the power-supply cord. "RESET" appears on the display, then the CD receiver is in the STANDBY state. Power Can’t turn on the CD receiver. • Make sure that the power cord is properly plugged into the wall outlet (see page 17). • Unplug the power cord from the wall outlet, wait 5 seconds or more, then plug it in again. The CD receiver turns off unexpectedly. • If the sleep timer has been set and the TIMER indicator is shown on the display, the CD receiver will turn off automatically after a specified period. • When timed playback finishes, the CD receiver automatically switches to Standby mode. • If the STANDBY indicator is flashing, the built-in amplifier protection circuit has been activated. This can happen if there’s a short between the positive and negative wires of a speaker cable. Audio There’s no sound. • Make sure the CD receiver’s volume control is not set to minimum (see page 18). • Make sure the correct input source is selected (see page 18). • Make sure the CD receiver is not muted (see page 18). • Make sure the speakers are connected correctly (see page 15). • Check all connections and correct as necessary (see pages 13 to 17). • While headphones are connected, the speakers output no sound (see page 18). The sound quality is not good. • Make sure the speaker cables are connected with the correct polarity (see page 15). • Make sure all audio connecting plugs are pushed in all the way (see pages 16 to 17). • The sound quality can be affected by strong magnetic fields, such as that from a TV. Try moving any such devices away from the CD receiver. • If you have any devices that emit high-intensity radio waves near the CD receiver, such as a cellular phone that’s being used to make a call, the CD receiver may output noise. • The CD receiver’s precision drive mechanism may emit a faint hissing sound while reading discs during playback or when searching for tracks. You may be able to hear this noise in extremely quiet environments. Audio output is intermittent when the CD receiver is subjected to vibration. • The CD receiver is not a portable device. Use it in a location that’s not subject to shock or vibration. Headphone output is intermittent or there’s no sound. • This may be due to dirty contacts. Clean the headphones plug. See your headphones’ instruction manual for cleaning information. Also, make sure that the headphones cable is not broken or damaged. • When you select iPod as the input source, the headphones output no sound. Audio performance • Audio performance will be at its best about 10 to 30 minutes after the CD receiver has been turned on and had time to warm up. • Using cable ties to bundle audio cables with speaker or power cables may degrade the sound quality, so don’t do it. 40 Troubleshooting—Continued CD Playback Playback jumps. • The CD receiver is being subjected to vibration or the disc is scratched or dirty (see pages 11 to 12). Can’t add tracks to the playlist for memory playback. • Make sure there’s a disc in the CD receiver. Also, you can only add valid track numbers. For example, if the CD contains 11 tracks, you cannot add track #12. The disc will not play. • Make sure the disc has been loaded correctly, with the label-side facing up. • Check to see if the surface of the disc is dirty (see pages 11 to 12). • If condensation is suspected, unplug the power cord and leave CD receiver for two to three hours in the room temperature before playing any discs. • Some CD-R / RW discs may not be playable (see page 11). It takes a long time for playback to start. • It may take the CD receiver a while to read CDs that contain many tracks or files. Can’t play MP3 / WMA DISCs. • Use only ISO 9660 Level 1 or Level 2 format discs (see page 11). • The disc has not been finalized. Finalize the disc. • Check whether the file format is supported (see page 11). • MP3 / WMA files without a “.MP3 / .WMA” or “.mp3 / .wma” filename extension are not recognized. Tuner Reception is noisy, stereo FM reception suffers from hiss, the Auto Preset function doesn’t preset all stations, or the ST indicator doesn’t light up when tuned to a stereo FM station. • Check the antenna connections (see pages 13 to 14). • Change the position of the antenna (see page 30). • Move the CD receiver away from a nearby TV or computer. • Cars or airplanes can cause noisy interference. • The radio signal will be weakened if it has to pass through a concrete wall before reaching the antenna. • Try setting FM mode to mono (see page 30). • Move power cords and speaker cables as far away as possible from the tuner’s antenna. • When listening to an AM station, noise may be heard when you operate the remote controller. • If none of the above improves the reception, install an outdoor antenna (see page 14). If a power outage occurs or the power cable is disconnected. • If the preset stations are lost, preset them again (see page 31). • The clock and timer settings will be lost. Set the clock and timers again (see pages 36 to 39). Can’t adjust the frequency of the radio. • Use the remote controller’s [ ]/[ ] buttons to change the frequency of the radio. iPod / iPhone “Cannot Use HP” appears on the display. • When you select iPod as the input source, the headphones output no sound. Remove the headphones and use the speaker. If use headphones, connect it directly to iPod. No sound • Make sure that your iPod is compatible with the system (see page 5). • Make sure that the iPod is securely inserted in the dock. Remove your iPod from its case before inserting it. • Confirm that the CD receiver’s INPUT is set to iPod, and that the iPod is set to PLAY. iPod does not respond to the CD receiver buttons or enclosed remote control. • Confirm that the CD receiver’s INPUT is set to iPod. • Make sure that the iPod is securely inserted in the dock. Remove your iPod from its case before inserting it. • If the iPod is sleeping, wait for the iPod to wake up and start. • If “iPod No Device” is displayed, or “Reading” is displayed for a minute or more, remove your iPod once, wait a few moments and then connect it again. 41 Troubleshooting—Continued • Some functions may not be available depending on the iPod model, software version or contents being played. Update the iPod software to the latest version. • The iPod item (highlighted) can be moved by [ ]/[ ] buttons during the (iPod menu mode indicator) is lit. If the tracks are skipped by pressing [ ]/[ ] buttons, press the remote controller’s [MENU / CLEAR] button and confirm the indicator on the display. Then press [ ]/[ ] buttons. External Components No sound is heard from a connected component. • Make sure the correct input source is selected (see page 18). • Make sure the analog audio cable is connected correctly (see page 16). • Make sure that all audio connecting plugs are pushed in all the way (see page 16). No sound is heard from your turntable. • Make sure the turntable has a built-in phono equalizer. • If the turntable doesn’t have a phono equalizer built-in, you must provide one. Remote Controller The remote controller doesn’t work properly. • Make sure the batteries have been installed with the correct polarity (+ / –) (see page 6). • Replace both batteries with new ones. (Do not mix different types of batteries or new and old batteries.) • The remote controller is too far away from the CD receiver, or there’s an obstacle between them. • The CD receiver’s remote control sensor is being subjected to bright light (inverter-type fluorescent light or sunlight). • The CD receiver is located behind the colored glass doors of an audio rack or cabinet. Timers Timer playback doesn’t work. • Make sure the clock has been set correctly (see page 36). • Timed operation will fail if the CD receiver is on at the specified On time, so make sure it’s set to Standby. • The timer may overlap with another timer. If you program several timers, make sure they don’t overlap. • If you press the [SLEEP] or [TIMER] button while a timed operation is in progress, the timer will be cancelled. Clock The time is not displayed in Standby mode. • The clock is not displayed in Standby mode. Press CLOCK CALL, the clock display appears for eight seconds. • If there is a power failure, the clock will stop and “Adjust” will appear when the clock is displayed with the CLOCK CALL button. Set the clock in this case. Others “RESET” appears after the power cord is connected. • Because the power cord was disconnected for a long time, the memory contents have been reset and all settings returned to the factory default settings. Perform the required settings again. The power turns on when the power cord is connected to a power outlet. • If the power cord is disconnected while the power is ON, the power will turn ON the next time the power cord is connected. If there is a power failure while the power is ON, disconnect the power cord. Onkyo is not responsible for damages (such as CD rental fees) due to unsuccessful recordings caused by the unit’s malfunction. Before you record important data, make sure that the material will be recorded correctly. The CD receiver contains a microcomputer for control functions. In very rare situations, severe interference, noise from an external source, or static electricity may cause it to lockup. In the unlikely event that this should happen, unplug the power cord, wait at least 5 seconds, and then plug it again. If it’s not cleared, please refer to “How to reset to factory default?” on page 40. 42 Specifications General Power Supply: Power Consumption: Stand-by Power Consumption: Dimensions (W × H × D): Weight: Audio Inputs Analog Inputs: Audio Outputs Subwoofer Pre Output: Speaker Outputs: Phones: Video Output: AC 120 V, 60 Hz 38 W 0.5 W (iPod not charging) 215 × 98 × 334 mm (8-7/16" × 3-7/8" × 13-1/8") 4.1 kg (9.0 lbs.) 1 (LINE IN) 1 2 1 1 (Composite) Amplifier Section Power Output: THD (Total Harmonic Distortion): Damping Factor: Frequency Response: Tone Control: Signal to Noise Ratio: Speaker Impedance: 2ch u 40 W (4 :, 1 kHz, 10 %, 2ch driven, FTC) 2ch u 20 W (8 :, 20 Hz–20 kHz, 10 %, 2ch driven, FTC) 10 % (Power Rated) / 0.05 % (1 kHz, 1 W) 40 (Front, 1 kHz, 4 :) 20 Hz–20 kHz / +0 to –3 dB (LINE IN) ±10 dB, 80 Hz (BASS) ±10 dB, 10 kHz (TREBLE) +7.5 dB, 80 Hz (S.BASS) 70 dB (LINE, IHF-A) 4 :–16 : Tuner Section FM Tuning Frequency Range: AM Tuning Frequency Range: 87.5 MHz–107.9 MHz 530 kHz–1710 kHz CD Frequency Response: Audio Dynamic Range: THD (Total Harmonic Distortion): Wow and Flutter: 20 Hz–20 kHz 80 dB 0.05 % Below threshold of measurability Specifications and features are subject to change without notice. 43 Sales & Product Planning Div. : 2-1, Nisshin-cho, Neyagawa-shi, OSAKA 572-8540, JAPAN Tel: 072-831-8023 Fax: 072-831-8163 ONKYO U.S.A. CORPORATION 18 Park Way, Upper Saddle River, N.J. 07458, U.S.A. Tel: 800-229-1687, 201-785-2600 Fax: 201-785-2650 http://www.us.onkyo.com/ ONKYO EUROPE ELECTRONICS GmbH Liegnitzerstrasse 6, 82194 Groebenzell, GERMANY Tel: +49-8142-4401-0 Fax: +49-8142-4401-555 http://www.eu.onkyo.com/ ONKYO EUROPE ELECTRONICS GmbH (UK BRANCH) The Coach House 81A High Street, Marlow, Buckinghamshire, SL7 1AB, UK Tel: +44-(0)1628-473-350 Fax: +44-(0)1628-401-700 ONKYO CHINA LIMITED Unit 1 & 12, 9/F, Ever Gain Plaza Tower 1, 88, Container Port Road, Kwai Chung, N.T., Hong Kong. Tel: 852-2429-3118 Fax: 852-2428-9039 http://www.ch.onkyo.com/ W1004-1 SN 29400459 (C) Copyright 2010 ONKYO CORPORATION Japan. All rights reserved.