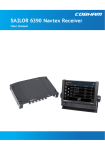
1
Northstar NS100
Quickstart Guide
and
Reference Manual
FCC Statement
This equipment has been tested and found to comply with the limits for a Class B digital device, pursuant to Part
15 of FCC Rules. These limits are designed to provide a reasonable protection against harmful interference in a
residential installation. This equipment generates, uses and can radiate radio frequency energy and, if not installed and used in
accordance with the instructions, may cause harmful interference to radio communications. However, there is no guarantee that
interference will not occur in a particular installation. If this equipment does cause
harmful interference to radio or television reception, which can be determined by turning the equipment off and
on, the user is encouraged to try and correct the interference by one or more of the following measures:
• reorient or relocate the receiving antenna.
• increase the separation between the equipment and receiver.
• connect the equipment into an outlet on a circuit different from that to which the receiver is connected.
• consult the dealer or an experienced radio/TV technician for help.
IMPORTANT
1. DSC functions will not operate until your MMSID has been entered. Refer to page 32 for details.
2. The radio channels installed into the NS100 radio may vary from country to country, depending upon the
model, and government or national communications authority regulations.
3. Northstar recommends that you check the radio operating licensing requirements of your country before using
the NS100 radio. The operator is solely responsible for observing proper radio installation and usage practices.
4. A DSC warning label is supplied with the NS100 radio. To comply with FCC regulations, this warning label must
be affixed in a location that is clearly visible from the operating controls of this radio. Make sure that the
chosen location is clean and dry before applying this warning label.
RF Emissions Notice:
This equipment complies with FCC radiation exposure limits set forth for an uncontrolled environment. This device’s antenna
must be installed in accordance with provided instructions; and it must be operated with minimum 96 cm spacing between the
antennas and all person’s body (excluding extremities of hands, wrist and feet) during operation. Further, this transmitter must
not be co-located or operated in conjunction with any other antenna or transmitter.
Contents
Getting Started.............................................................................4
Using this manual ...................................................................... 5
Conventions ................................................................................. 6
Maintaining the radio ............................................................... 6
Technical support ....................................................................... 6
Quickstart Guide .........................................................................7
LCD screen symbols .................................................................. 8
Enter alphanumeric data ......................................................... 9
Handset button functions .....................................................10
Display and navigate a menu .............................................11
Customise your radio ............................................................. 12
Adjust the volume.................................................................... 12
Select the TX power ................................................................ 12
Adjust the backlighting .......................................................... 12
Adjust the squelch ................................................................... 13
Select the channel bank ........................................................ 13
Select a channel ....................................................................... 13
Select a favorite channel ....................................................... 14
Store 3 favorite channels ...................................................... 14
Make a call ................................................................................. 14
Delete a favorite channel ...................................................... 15
Select a weather channel ...................................................... 15
Dual/Tri watch scan ................................................................ 15
All scan and channel lock out ............................................. 16
Shadow watch scan ................................................................ 16
Use the foghorn........................................................................ 16
Use the intercom on the NS100 DS ................................. 17
Use the hailer on the NS100 DS ........................................ 17
Handset alarm for the NS100 DS .......................................18
Use the dual handsets on the NS100 DS.........................18
Reference Section 1
Radio Menu Options ............................................................................19
Add a new buddy ...................................................................21
Edit a buddy’s details .............................................................21
Delete a buddy’s details ...................................................... 22
Set the radio sensitivity ........................................................ 22
Select the channel bank ...................................................... 23
Set your position and time manually............................... 23
Set the time offset ................................................................... 24
Select the time format ........................................................... 25
Show or hide the time ........................................................... 25
Show or hide the boat’s position ...................................... 26
GPS alert setting ...................................................................... 26
Edit or delete a channel name ............................................27
Select dual or triple watch mode ........................................27
Weather alert setting ............................................................ 28
Set the contrast ....................................................................... 29
Reset to factory defaults ...................................................... 29
Reference Section 2
Setup the DSC functions .................................................................... 30
The DSC setup menu ..............................................................31
Enter your MMSID .................................................................. 32
Enter a new group MMSID .................................................. 32
Edit a group MMSID .............................................................. 33
Delete a group MMSID ......................................................... 34
Select your response to individual calls .......................... 34
Select your response to LL polling calls .......................... 35
Turn the DSC functions on/off ........................................... 35
Enter your ATIS ID .................................................................. 36
Turn the ATIS functions on/off ........................................... 36
Reference Section 3
Making DSC calls ................................................................................... 37
Reply to the last incoming call ............................................39
Make a routine call to an individual .................................39
Make a routine call to a group ...........................................40
Retry a routine call .................................................................. 41
Call all ships ............................................................................... 41
Call back using the call log data......................................... 42
Request the LL position of a buddy ................................... 42
Reference Section 4
Receiving DSC calls .............................................................................. 44
Automatically acknowledge an individual call..............46
Reply to a group call ...............................................................46
Reply to an all ships call ........................................................ 47
Automatically reply to an LL position request ...............48
Manually reply to an LL position request ........................48
Do not reply to an LL position request ............................49
Reply to a geographic call ....................................................49
Reference Section 5
Distress calls ............................................................................................50
Receive and reply to a distress call.................................... 52
Call back using the distress logs ......................................... 52
Receive a distress relay .......................................................... 53
Receive a distress acknowledgement ............................... 54
Appendix A Technical Specifications ...............................55
NS100 SS .....................................................................................56
NS100 DS .................................................................................... 57
Appendix B Troubleshooting ............................................. 59
Appendix C VHF Marine Channel Banks ........................ 61
International channel banks ................................................ 62
USA channel banks ................................................................. 65
Canadian channel banks ......................................................68
Country-specific inland waterways (Europe)................... 71
Special Channels ...................................................................... 73
Getting Started
Welcome to the NS100 radio ..................................................... 5
Using this manual .......................................................................... 5
Conventions ..................................................................................... 6
Maintaining the radio ................................................................... 6
Technical support .......................................................................... 6
This chapter introduces this manual and the NS100 radio, and explains a few things
you should know to keep your radio in top condition.
4
Northstar NS100
Welcome to the NS100 radio
Congratulations on your purchase of a
Northstar NS100 radio! There are two models
available; the NS100 SS (Single System) and
the NS100 DS (Dual System). Both provide the
following useful features:
• an alphanumeric handset with built-in LCD
screen for easy operation and information
display.
• local/distance mode to eliminate noise in
high traffic urban areas
• adjustable contrast settings for the handset
screen
• adjustable keypad backlighting for easy
night-time use
• waterproof and submersible handset to
comply with JIS-7
• powerful 4W external speaker audio output
• access to all currently-available marine VHF
channel banks (USA, Canada, International)
including weather channels where
available
• special 3CH button to select your three
favourite channels
• MMSID storage for your three favourite
groups
• DSC (Digital Selective Calling) capability that
meets USCG SC101 Standards. USA only.
• DSC (Digital Selective Calling) capability that
meets EC Class D Standards. Europe only.
• PSCAN (similar to dual watch) facility
• DISTRESS call button to automatically
transmit your MMSID and position until an
acknowledgement is received
• easy access to a buddy list (maximum of 20
favourite people)
• group calling and all ships calling facility
• LL position polling information
• weather alert facility. US only.
• ATIS facility for inland waterways. Europe
only.
The NS100 DS provides the following
additional features:
• a second alphanumeric handset
• a second 4W external speaker
• intercom facility between the two handsets
• foghorn mode for use in reduced visibility
• hailer function with powerful 20W output
through a Hailer Horn (optional).
Using this manual
This manual is divided into two main sections:
• The QuickStart Guide has all the basic
information you need to operate your
radio. Be sure to read this section as you
start to use the radio.
• The Reference Sections provide more
detailed information about each function.
Reference Manual
Use these sections to learn more about the
radio and get the most out of it.
Check the mini table of contents at the start
of each section, or the index at the end of
the manual, to quickly find information on a
particular topic.
5
Conventions
This manual uses certain conventions to
provide a consistent means of recognizing
specific information, as follows:
•
is used for warning information related
to your personal safety or possible damage
to the radio. These warning notes contain
critical information - please read them!
• "Press" means push and immediately
release the button.
• "Hold down" means keep the button
depressed for the specified time.
• LOCAL. Words looking like this indicate
a menu option on the LCD screen of the
handset, OR a button name.
Maintaining the radio
To help maintain your radio at peak operating
performance, we recommend that you:
• hang the handset on the customized
bracket when you're not using it.
• use a soft cloth dampened in water to wipe
any dirt or salt from the handset, cable, or
speaker.
• use a small amount of window cleaner on
a soft cloth to remove any grease, oil, or
fingerprints from the LCD screen.
Technical support
If you need technical support, or have any
other questions that this manual or your dealer
cannot answer, you can contact the factory as
follows:
by telephone (USA only):
1-800-628-4487
1-978-897-6600
by email:
Service: [email protected]
Sales: [email protected]
6
by mail:
BNT Marine Electronics
30 Sudbury Road
Acton, MA 01720
USA
Additional information is available at
Northstar's website:
www.NorthstarNav.com
Getting Started
Northstar NS100
Quickstart Guide
Turn the radio on and off ............................................................8
LCD screen symbols ......................................................................8
Enter alphanumeric data ............................................................9
Handset button functions .........................................................10
Display and navigate a menu................................................. 11
Customise your radio ................................................................ 12
Adjust the volume ....................................................................... 12
Select the TX power ................................................................... 12
Adjust the backlighting ............................................................. 12
Adjust the squelch....................................................................... 13
Select the channel bank ........................................................... 13
Select a channel ........................................................................... 13
Make a call ......................................................................................14
Store three favorite channels ..................................................14
Select a favorite channel ...........................................................14
Delete a favorite channel ........................................................ 15
Select a weather channel ........................................................ 15
Dual/Tri watch scan ................................................................... 15
All scan and channel lock out ..................................................16
Shadow watch mode ..................................................................16
Use the foghorn ............................................................................16
Use the intercom on the NS100 DS .......................................17
Use the hailer on the NS100 DS ..............................................17
Handset alarm for the NS100 DS ...........................................18
Use the dual handsets on the NS100 DS .............................18
This section explains the basic operation of the NS100 radio.
We suggest that you
read this section carefully when you first start using your radio, and then refer to the
Reference Sections for more information if necessary.
Quickstart Guide
Quickstart Guide
7
Turn the radio on and off
Use the rotary knob on the speaker to turn the
radio on and off, and to adjust the volume.
it remembers the last working channel and
displays this when you turn the radio on again.
Turn clockwise (right) to turn on. A white
indicator light appears. Turn counter-clockwise
(left) to turn off. When you turn off the radio,
The radio has a variety of beep tones to
indicate different operations, but the beeps will
not sound if you set the volume level to zero.
LCD screen symbols
8
Symbol
Meaning
Symbol
Meaning
TX
transmitting.
LO
transmission power is LO (low)
1W. If blank, the transmission
power is HI (high) 25W.
USA INT
CAN
channel bank selected for VHF
radio operations and regulations
(USA/Canada only).
WX
DSC
DSC functions are available.
weather channel (USA/Canada
only).
BUSY
receiver is busy with an incoming
signal.
LOC
receiver sensitivity for local calling
is selected. If blank, distance
calling is selected.
Quickstart Guide
Northstar NS100
Symbol
Meaning
ATIS
ATIS is enabled. (Europe only).
Otherwise blank.
88
channel selected. V indicates an
EU special channel, e.g. M1.
indicates an incoming DSC call, or
blinks to notify you of any unread
call log messages.
X
channel is temporarily deleted
from the ALL SCAN operation.
8
channel suffix, if applicable to the
selected channel. Usually A or B.
low battery warning (activates at
10.8V DC).
GPS
Blinking indicates that the NMEA
GPS input is missing or invalid.
Enter alphanumeric data
Quickstart Guide
Use the handset buttons to enter channel
numbers or names, for radio functions, and for
menu editing. Each button has the functionality
shown in the table.
Press:
x1
button 1
1
-
.
‘
/
button 2
2
A
B
C
?
Press >ENT to move the cursor to the next
position when you enter a Buddy Name or a
Channel Name. Otherwise, the cursor moves
automatically to the next position when
entering data (similar to a cell phone). Also
press >ENT to confirm any input or changes.
button 3
3
D
E
F
!
button 4
4
G
H
I
:
button 5
5
J
K
L
#
button 6
6
M
N
O
+
button 7
7
P
Q
R
S
Press AESC to backup if you make a mistake,
or to cancel any changes and return to the
previous mode.
button 8
8
T
U
V
;
button 9
9
W
X
Y
Z
button 0
0
Space
(
)
%
x2
x3
x4
Quickstart Guide
x5
9
Handset button functions
All possible buttons and their functions are
described. Some of the buttons may not work
or may not be available, depending on your
location and your NS100 radio model.
3CH
16/9
CALL
SCAN
WX
FUNC
A single beep sounds whenever you press a
button. A double beep sounds to indicate an
invalid key or an error. (The beeps won't sound
if the volume is set to zero.)
Button
Function
Channel selection. In normal
mode, press to step through the
channels one at a time or hold
down for rapid selection.
In menu mode, press to step
through the menu options.
Three favorite channels. Press
repeatedly to cycle through your
three favorite channels.
Priority channel. USA/Canada
only. Press to cancel the current
mode and tune into the priority
channel. Press again to return to
your original mode.
CH16 is the default. To make CH9
the default instead, hold down
16/9 until 09 is displayed on the
LCD screen.
Priority channel. Europe only.
Press to cancel the current mode
and tune into CH16. Press again
to return to your original mode.
10
Quickstart Guide
Button
Function
DSC call menu. Press to display
the DSC call menu and to make
different types of DSC calls.
Scan. Press to start a dual (DW)
or triple (TW) watch scan. Hold
down to start an all scan. Press
again to stop scanning.
Weather channel. USA/Canada
only. Press to hear the most
recently used weather channel.
Press again to return to your
previous mode.
Squelch adjustment. Press ^SQ to
increase or SQv to decrease the
squelch (threshold level). (Also see
Adjust the squelch.)
Volume. (Buttons located on
the right hand side of handset).
Press ^VOL to increase or VOLv
to decrease the speaker volume.
(Also see Adjust the volume.)
Press To Talk. (Button located on
left hand side of handset). Press
at any time to transmit on an
allowed channel. (Some channels
are restricted and do not allow
transmissions. Appendix C has
detailed information on channels.)
Northstar NS100
Button
Function
Button
Function
Escape. Press to cancel any
changes, return to the previous
mode, or backup.
FUNC 6
Intercom. NS100 DS only. Pick up
your handset, then press FUNC
then 6 to activate the intercom.
(Also see Use the intercom on the
NS100 DS.)
FUNC 7
Transmission power. Press FUNC
then 7 to change the transmission
power setting. Press FUNC then
7 again to return to the previous
setting.
FUNC 9
Fog mode. NS100 DS only. Press
FUNC then 9 to enter the fog
mode. (Also see Use the foghorn.)
Enter. Press to confirm and accept
any input or changes.
Function. Provides access to the
following useful radio functions
when combined with the button
number indicated:
FUNC 1
Radio Menu mode. Press FUNC
then 1 to display the radio
menu and DSC setup options
and to enter menu mode. (Also
see Reference Section 1 and
Reference Section 2.)
FUNC 3
Backlighting. Press FUNC then 3
to set the backlight level for the
LCD screen and handset buttons.
(Also see Adjust the backlighting.)
FUNC 4
Hailer. NS100 DS only. Press FUNC
then 4 to enter hailer mode. (Also
see Use the hailer on the NS100
DS.)
Distress. (Red button located
on right hand side of handset).
To make a distress call, lift the
hinged protective cover from
the button. Then either press
DISTRESS to show the Nature of
Distress categories OR hold down
DISTRESS to send an undefined
distress call. (Also see Reference
Section 5 - Send a Distress call.)
Display and navigate a menu
Only a few menu options can be displayed at
any one time on the LCD screen. To show the
menu options:
1. Press FUNC then press 1 to display the first
four radio menu options OR press CALL to
display the DSC call menu.
2. Press ^CH/SEL or CH/SELv to scroll up and
down the menu until the cursor is postioned
at the desired option.
Quickstart Guide
3. Press >ENT to display that option. Make any
entries or changes, if required.
4. Press >ENT to confirm changes OR press
<ESC to keep the original entry. Any changes
are active as soon as you exit the menu.
5. Press <ESC to backup to the previous screen
or to exit the menu completely.
Quickstart Guide
11
Customise your radio
You can customize the radio to suit your
individual preferences. You can set some
preferences directly, using the handset buttons
as explained in this section.
Other preferences can be set up only through
the menus and these are explained in the
Reference Sections.
Use the VOL buttons on the right hand side of
the handset to adjust the volume. There are
ten volume levels available.
volume by one level. The current level is
shown as a percentage on the LCD screen, e.g.
VOLUME 30%.
Press ^VOL once to increase the volume by
one level. Press VOLv once to decrease the
Hold down either of the buttons to change the
volume levels automatically until the limit is
reached.
Adjust the volume
Select the TX power
Some channels allow
only low power
transmissions. Error
beeps will sound if
the power setting is
incorrect.
You can set the transmission power to either
high (25W output) or low (1W output).
If LO is shown in the LCD screen, low
transmission power is selected; if the LCD
screen does not show LO, high transmission
power is selected.
To change from one selection to the other,
press FUNC then press 7. Press FUNC then 7
again to change back.
A special antenna RF reverse current
monitoring circuit will automatically reduce the
transmission power to 1W if a failed or open
antenna is detected.
Adjust the backlighting
You can adjust the backlighting of the LCD
screen and keypad simultaneously. (To adjust
the contrast, see Reference Section 1 - Set the
contrast.)
There are four backlight settings;
• OFF (no backlighting)
• LO (low)
• MID (medium)
• HI (maximum)
12
Quickstart Guide
To adjust the backlighting, press FUNC then 3
to enter the backlight mode. The current setting
is shown on the LCD screen, e.g DIMMER LO.
Use ^CH/SEL and CH/SELv to select your
desired setting. If you select OFF, the LO setting
will operate for 5 seconds whenever you make
a keypad entry so you can check your entry is
correct.
If you have the NS100 DS radio, you can adjust the
backlighting for each handset independently.
Northstar NS100
Adjust the squelch
You can adjust the squelch (the threshold level)
for the minimum receiver signal. There are ten
settings available.
Press ^SQ once to increase the squelch by one
step. Press vSQ once to decrease the squelch
by one step. The current setting is shown as a
percentage on the LCD screen, e.g. SQUELCH
30%.
Hold down either button to change the squelch
automatically until the threshold limit is
reached.
The optimum squelch setting will improve
reception. Decrease the squelch until random
noise is heard, then increase it one step at a
time until the random noise disappears. For
best reception in open sea conditions, increase
the squelch one more step.
In areas of high noise (e.g. close to large
cities or pager broadcast sites) reception may
improve if the squelch is increased or the
LOCAL setting is used. (See Reference Section 1
- Set the radio sensitivity.)
If you have the NS100 DS radio and change
the squelch on one handset, the new level is
automatically applied to the other handset too.
Select the channel bank
In Europe, only the
INT (International)
channel bank is
available and it
cannot be changed.
If you are based in the USA or Canada, there
is a choice of 3 channel banks; USA, INT
(International), and CAN (Canadian). The
channel bank that is currently selected is
shown on the LCD screen.
Use the radio menu if you want to change the
channel bank. See Reference Section 1 - Select
the channel bank.
When you turn the radio on, it automatically
tunes to the last working channel OR to the
suffix channel if the normal channel is not
available in the channel charts.
To change the channel, you can EITHER enter
the channel number directly using the keypad
Select a channel
The channel number is shown in very big
digits on the LCD screen. The channel suffix (if
applicable) is shown at a smaller size.
Quickstart Guide
OR
press ^CH/SEL to step up or CH/SELv to
step down to the next channel. To rapidly
scroll through the channels, just hold down
^CH/SEL or CH/SELv until the desired channel
is reached.
Quickstart Guide
13
Error beeps will sound if you try to select a
channel that is not allowed.
Some examples on selecting a channel (USA
channel bank) are given:
• Press 1 then 8 to select CH18A.
• Press 2 then 0 to select CH20, then press
^CH/SEL to select CH20A (suffix A channel).
OR
• Press 2 then 0 then ^CH/SEL to select
CH20A (suffix A channel).
Make a call
Hold down the PTT (Press To Talk) button on
the left hand side of the handset to transmit on
an allowable channel. The channel number
and TX are shown on the LCD screen.
A built-in timer will automatically shut down
a transmission after five minutes and sound
a warning beep. A warning message is also
shown on the LCD screen.
When you press PTT the NS100 radio
automatically exits from any menu and stops
scanning. You must release PTT to receive a
call.
Some channels are restricted and do not allow
transmissions. Check out Appendix C for a
complete listing of channels.
Store 3 favorite channels
You can store one, two or three channels as
favorites.
If you try to store another favorite channel, the
radio asks: OVERWRITE CH3?
Select the first channel that you want to store,
then hold down 3CH for about two seconds to
store it as CH1. Repeat the procedure to store
two more favorite channels as CH2 and CH3
respectively.
If you press >ENT to confirm, CH3 is
overwritten with the new channel.
Select a favorite channel
Press 3CH to display the first favorite channel.
Repeat the procedure, if necessary, to cycle
through the three favorite channels.
When you are finished using a favorite channel,
press <ESC to return to previous working
channel.
The LCD screen displays CH1, CH2, or CH3 as
appropriate, to show which favorite channel is
operational.
14
Quickstart Guide
Northstar NS100
Delete a favorite channel
Press 3CH to display the first favorite channel.
Repeat the procedure, if necessary, until the
favorite channel that you want to delete is
displayed.
If you press >ENT to confirm, the channel is
deleted from your favorite channel selection.
With the favorite channel displayed, hold down
3CH for about two seconds until the radio asks:
DELETE CHxx?
Select a weather channel
This option is only
available with the
USA or Canadian
channel banks.
Press WX to tune to the most recently used
weather channel. WX is displayed on the LCD
screen.
Press ^CH/SELv to tune to a different weather
channel, if desired.
While scanning in the Wx Alert ON mode,
if a weather alert is transmitted on 1050Hz
by a weather station, the radio picks it up
automatically and sounds the loud weather
alert warning tone.
Press any key while the loud alarm is sounding
to cancel the warning tone and listen to the
weather alert voice message.
When you are finished using the weather
channel, press WX again to return to previous
working channel.
Dual/Tri watch scan
The SCAN function is
not available in some
European countries.
You can use the radio setup menu to select a
dual watch mode (all radio models) or a triple
watch mode (USA/Canada only). (See Reference
Section 1 - Select dual or triple watch mode.)
Dual watch mode will automatically scan
between the working channel and CH16 (the
priority channel).
Triple watch mode, with the USA or CAN
channel banks selected and the weather alert
ON, automatically scans the working channel,
both the priority channels (CH09 and CH16)
and the weather channel.
Quickstart Guide
When you are on a working channel, just press
SCAN to start scanning. DW (dual watch) or TW
(triple watch) is shown on the LCD screen.
If a signal is received, scanning stops at that
channel and BUSY appears on the LCD screen.
Scanning starts again four seconds after the
BUSY annunciator disappears.
To stop at the current channel and cancel the
SCAN mode, press SCAN again or <ESC.
To scan all 3 favorite channels, press 3CH then
immediately press and hold SCAN.
Quickstart Guide
15
All scan and channel lock out
While scanning, USA
radio models will
shadow watch on
CH70 for incoming
DSC calls.
When you are on a working channel, hold
down SCAN for at least two seconds to start
scanning all working channels. CH16 (the
priority channel) is scanned at least once every
two seconds. ALL SCAN is shown on the LCD
screen.
Press <ENT to lock out (skip over) an 'always
busy" channel when in ALL SCAN mode. An X
is shown on the LCD screen to indicate a locked
out channel. You cannot lock out CH16 or
CH70.
To unlock a locked out channel, press <ESC
2 seconds when the channel is displayed.
The X disappears to show it is now unlocked.
If a signal is received, scanning stops at that
channel and BUSY appears on the LCD screen.
Scanning starts again four seconds after the
BUSY annunciator disappears.
To stop at the current channel and cancel the
SCAN mode, press SCAN again or <ESC.
Shadow watch scan
The USA radio models use shadow watch mode
to scan for incoming DSC signals on CH70 in
any channel bank (USA, CAN, INT).
The European radio models have a dedicated
DSC CH70 receiver and don't use shadow
watch mode.
Shadow watch mode means that the scanning
operation is not shown on the LCD screen
unless a DSC signal on CH70 is detected.
Use the foghorn on the NS100DS
When visibility is reduced by fog, you can
operate a manual or automatic foghorn
through the external speaker. The manual
foghorn will sound whenever you press or hold
down PTT. The automatic foghorn will sound
for five seconds once every minute.
You can also adjust the foghorn volume or
leave it at the default level.
1. Press FUNC then 9 to enter fog mode. FO is
shown on the LCD screen.
2. Press >ENT to select the automatic foghorn
OR
16
Quickstart Guide
move the cursor to MANUAL and then press
>ENT to select the manual foghorn.
3. When the foghorn is blowing you can press
^VOL to increase or VOLv to decrease the
foghorn volume. The LCD screen will show
the current foghorn volume as a percentage
e.g. 50% VOLUME.
4. The foghorn’s listening function allows
sounds picked up by the hailer horn to be
heard over the radio. When the LCD screen
shows LISTENING, you can press ^VOL to
increase or VOLv to decrease the volume.
Press <ESC when you want to exit from the
foghorn mode.
Northstar NS100
Use the intercom on the NS100 DS
PORT OPS
N 38 27.021’
E137 12.011’
T 12:27 UTC
FUNC>WAITING
N 38 27.021’
E137 12.011’
T 12:27 UTC
IMPORTANT!
Normal radio operation
is suspended when
you are using the
foghorn or intercom,
but an incoming DSC
signal will interrupt the
intercom facility and
you must attend to
the DSC signal before
using the foghorn or
intercom again.
INTERCOM
CALLING
STATION-2
INTERCOM
TALKING
The dual handsets on the NS100 DS radio
provide a useful intercom facility.
When you lift a handset out from its
customised bracket, an inbuilt sensor
automatically makes the handset operational.
1. Press FUNC then 6 on your handset (handset1) to enter the intercom mode. The radio calls
handset-2 for one minute.
2. Handset-2 beeps and the LCD screen shows a
message to indicate that you (handset-1) are
calling.
3. If the person at handset-2 wants to enter
intercom mode and reply, they need to pick
up handset-2, then press PTT to talk.
You can use the intercom for a maximum of
five minutes, and you can adjust the intercom
volume during the listening mode with ^VOL
and VOLv.
4. When you are finished with the intercom
mode, just press <ESC to return to normal
radio operation. Always be sure to replace
your handset back in its customised bracket.
Use the hailer on the NS100 DS
PORT OPS
N 38 27.021’
E137 12.011’
T 12:27 UTC
FUNC>WAITING
N 38 27.021’
E137 12.011’
T 12:27 UTC
HAILER MODE
LISTENING
VOLUME 30%
HAILER MODE
HAILING
VOLUME 30%
The NS100 DS radio has a useful hailing facility
with ten volume settings. To use the hailer:
1. Press FUNC then 4 to activate the hailer.
The LCD screen shows HL to confirm that
hailer mode is operating and also shows the
hailer volume as a percentage.
2. Press PTT to send a hail. Speak at a normal
volume into the handset microphone, and
use the ^VOLv buttons if you need to
increase or decrease the volume.
Quickstart Guide
The hailer horn has a listening function
which allows sounds picked up by the hailer
horn to be heard over the radio. To change
the volume, use the ^VOLv buttons when
LISTENING is shown on the LCD screen.
You can use the hailer for a maximum of 30
minutes.
3. When you are finished using the hailer,
just press <ESC to return to normal radio
operation.
Quickstart Guide
17
Handset alarm for the NS100 DS
If you forget to put one of the handsets back
into its customised bracket (ON HOOK mode)
when you are finished using it, the handset
sounds an alarm after one hour and a
message on the LCD screen warns you to put
the handset into its customised bracket.
Press FUNC, then >ENT to regain operational
control of the handset.
Use the dual handsets on the NS100 DS
The internal handset
speaker is disabled
when the handset
is in its customised
bracket.
When handset-2 is in its customized bracket
(in ON HOOK mode), you can use handset-1
for any radio operation.
Handset-2 can be used only for distress calls
and the intercom function when it is in ON
HOOK mode.
Handset-1 has priority over handset-2.
18
Quickstart Guide
Northstar NS100
Reference Section 1
Radio Menu Options
NS100 radio menu .......................................................................20
Add a new buddy .........................................................................21
Edit a buddy’s details ..................................................................21
Delete a buddy’s details .............................................................22
Set the radio sensitivity .............................................................22
Select the channel bank ............................................................23
Set your position and time manually ...................................23
Set the time offset ........................................................................24
Select the time format................................................................25
Show or hide the time ................................................................25
Show or hide the boat’s position............................................26
GPS alert setting ...........................................................................26
Edit or delete a channel name ................................................27
Select dual or triple watch mode ...........................................27
Weather alert setting ..................................................................28
Set the contrast .............................................................................29
Reset to factory defaults ...........................................................29
This reference section explains how to display and use the radio menu options
to customise your NS100 radio. Note that some options may not be available,
depending on your radio model and location.
Reference Manual
19
NS100 radio menu
Press FUNC then 1 to display the radio menu. Note that only four menu items can be shown on
the LCD screen at any one time so use ^CH/SEL to scroll up and CH/SELv to scroll down the radio
menu. Press >ENT to select an option.
BUDDY LIST
Set up and manage your buddy list.
LOCAL/DIST
Set the radio sensitivity to suit local or
distance conditions.
USA/INT/CAN
Select the channel bank (USA and
Canada).
GPS/DATA
DSC SETUP
RADIO SETUP
20
MANUAL NEW
EDIT/DELETE
MANUAL
SETTING
USER MMSID
GROUP SETUP
INDIV REPLY
LL REPLY
DSC FUNC
ATIS ID
ATIS FUNC
CH NAME
WATCH MODE
WX ALERT
CONTRAST
RESET
Set your position & UTC (time)
manually. Set the local time and
your preferred time formats, display
options, and GPS alert ON/OFF.
DSC SETUP menu. See Reference
Section 2.
Change a channel's name.
Select the watch mode.
Turn the weather alert on or off (USA
and Canada only).
Change the contrast level.
Reset to factory defaults.
Northstar NS100
Add a new buddy
>BUDDY LIST
LOCAL/DIST
USA/INT/CAN
GPS/DATA
BUDDY LIST
>MANUAL NEW
EDIT/DELETE
ENTER NAME
––––––––––––
ENTER MMSID
–––––––––
ENTER NAME
JON
ENTER MMSID
123456789
You can use the Buddy List option to store, edit,
or delete the names and associated MMSIDs
of your 20 favorite buddies. Their details are
stored in the order of entry, with the most
recent entry shown first.
1. Select BUDDY LIST and press >ENT. The
cursor is at MANUAL NEW. Press >ENT.
2. Enter your buddy's name, one character at a
time (this may be alphanumeric) then press
>ENT repeatedly until the cursor moves to
the MMSID entry line.
JON
123456789
ENT>STORE
ESC>CANCEL
3. Enter the MMSID associated with that
buddy's name (this must be numeric) then
press >ENT to confirm a correct entry.
4. The new name and MMSID are displayed.
Press >ENT to store the new entry which is
displayed at the top of your buddy list.
When your BUDDY LIST is full up with 20
entries, you cannot make another new entry
until you have deleted an existing entry.
Edit a buddy’s details
>BUDDY LIST
LOCAL/DIST
USA/INT/CAN
GPS/DATA
BUDDY LIST
MANUAL NEW
>EDIT/DELETE
JON
>EDIT
DELETE
ENTER NAME
JON
ENTER MMSID
112233445
1. Select BUDDY LIST and press >ENT. Move
the cursor to the buddy name you want to
EDIT/DELETE. Press >ENT to display the list
of entries.
2. Press >ENT to select EDIT. The cursor moves
to the first character of the name.
3. Edit the buddy name, OR, to edit only the
MMSID, press >ENT repeatedly to move the
cursor to the MMSID line.
Reference Manual
JON
111223344
ENT>STORE
ESC>CANCEL
4. When you are finished, press >ENT
(repeatedly if necessary) to display the next
screen.
5. Press >ENT to store the changes. The buddy
list is displayed again. If more changes are
required, repeat Steps 2 thru 6. Otherwise,
press <ESC to exit.
21
Delete a buddy’s details
>BUDDY LIST
LOCAL/DIST
USA/INT/CAN
GPS/DATA
BUDDY LIST
MANUAL NEW
>EDIT/DELETE
MANUAL NEW
ALEX
>TOM
JEAN
TOM
EDIT
>DELETE
DELETE BUDDY
TOM
ENT>YES
ESC>NO
1. Select BUDDY LIST and press >ENT.
3. Move the cursor to DELETE and press >ENT.
2. Move the cursor to the buddy name you
want to EDIT/DELETE. Press >ENT to display
the list of entries.
4. The radio asks for confirmation. Press >ENT.
The entry is deleted immediately and the
buddy list is displayed again.
Set the radio sensitivity
BUDDY LIST
>LOCAL/DIST
USA/INT/CAN
GPS/DATA
SENSITIVITY
>DISTANT
LOCAL
You can improve the sensitivity of the receiver
depending whether you are operating the radio
locally (LOCAL) or over distances (DISTANT).
LOCAL is not recommended for use in open
sea conditions. It is designed for use in areas of
high radio noise; for example, close to cities or
pager broadcast sites.
Also see the Quickstart Guide - Adjust the
squelch as the squelch setting can alter the
radio sensitivity.
2. To activate the DISTANT setting, press >ENT
again. LOC disappears from the LCD screen
to show that reduced receiver sensitivity is
not operational
OR
to activate the LOCAL setting, move the
cursor to LOCAL and press >ENT. LOC
appears on the LCD screen to show that
reduced receiver sensitivity is operational.
1. Move the cursor to LOCAL/DIST and press
>ENT.
22
Northstar NS100
Select the channel bank
BUDDY LIST
LOCAL/DIST
>USA/INT/CAN
GPS/DATA
CH SELECT
>USA
INT
CAN
This option is not
available in Europe
because the channel
bank is preset to INT
(international).
In the USA and Canada, a choice of 3 channel
banks is available;
• USA
• INT (International)
• CAN (Canadian).
Appendix C shows the channel bank details.
1. Move the cursor to USA/INT/CAN and press
>ENT.
2. Press >ENT again to select the USA channel
bank
OR
move the cursor to INT or CAN and then
press >ENT.
Depending on your selection, USA, INT or CAN
will be shown on the LCD screen.
Set your position and time manually
BUDDY LIST
LOCAL/DIST
USA/INT/CAN
>GPS/DATA
GPS/DATA
>MANUAL
SETTING
MANUAL LL
N __`__.__`
E___`__.__`
MAN --:--UTC
If your boat has an operational GPS navigation
receiver, the radio automatically detects and
updates the vessel position and the local time.
However, if the GPS navigation receiver is
disconnected or absent, you can specify your
boat's position and the local time manually,
using the GPS/DATA menu option. This
information is important because it will be used
if you transmit a DSC DISTRESS call.
1. Move the cursor to GPS/DATA and press
>ENT.
2. Move the cursor to MANUAL and press
>ENT.
Reference Manual
3. Enter your latitude and press >ENT. Enter
your longitude and press >ENT.
4. Enter your local time in UTC format only; e.g.
if the local time is 1715 and you are 3.5 hours
behind UTC, enter the time as 2045. A world
time chart is shown for your information.
5. Press >ENT when all the information is
correct.
The vessel’s latitude and longitude are shown
on the LCD screen, with the UTC time. The
prefix MAN indicates a manual entry.
If a real GPS position is received, your manual
entries are cancelled and MAN disappears off
the LCD screen.
23
Set the time offset
BUDDY LIST
LOCAL/DIST
USA/INT/CAN
>GPS/DATA
GPS/DATA
MANUAL
>SETTING
SETTING
>TIME OFFSET
TIME FORMAT
TIME DISPLY
TIME OFFSET
>+00:00
TIME OFFSET
>+1.30
TIME OFFSET
>+1.30
00:00 UTC
01:30 UTC
01:30 LOC
1. Move the cursor to GPS/DATA and press
>ENT.
4. Work out the offset between your local
time and UTC using the world time chart if
necessary; e.g. if you are 1.5 hours ahead of
UTC, enter an offset of +01:30 hours.
2. Move the cursor to SETTING and press
>ENT.
5. Enter your local offset from UTC and press
>ENT to confirm. The offset is shown with a
suffix LOC to indicate your local offset.
3. Press >ENT again. The time offset is shown
as +00:00.
LM Y X
W
V
S
T
U
Q
R
O
P
Z
‡
T
M
S
T
H
U
Z
C
G
E*
F
K
H
F
C
Corrected to January 2005
Zone boundaries are approximate
Daylight Saving Time (Summer Time),
usually one hour in advance of Standard
Time, is kept in some places
Map outline © Mountain High Maps
Compiled by HM Nautical Almanac Office
120°W
90°W
P
60°W
I*
H
h m
Z
A
B
C
C*
D
D*
E
30°W
K
h m
h m
0
+1
+2
+3
+ 3 30
+4
+ 4 30
+5
E*
F
F*
G
H
I
I*
+ 5 30
+6
+ 6 30
+7
+8
+9
+ 9 30
‡
0°
K
K*
L
L*
M
M*
M†
+10
+10 30
+11
+11 30
+12
+13
+14
M*
L
-1
-2
-3
- 3 30
-4
-5
-6
No Standard Time legally adopted
30°E
60°E
90°E
M
K
h m
N
O
P
P*
Q
R
S
M
*
*
Standard Time = Universal Time + value from table
O
L
K
Q
STANDARD TIME ZONES
L
L
B
Z
P
IK
D
S
M
I
K
H
F*
O
M
I
G
M
H
G
C
A
X
H
F*
F
D
B
Z
Q
150°W
E*
E
A
O
L
I
E*
C
M
I
I
H
D
A
Z
W
W
L MY
K
H
D*
E
C*
P
P
L
D
C
Q
F
C
P
S
V*
K
H
F
D
B
Z
N
R
K
International Date Line
M†
I
I
E
R
Q
E
D
B
B
W
24
C
A
N
S
180°
G
M
h m
T
U
U*
V
V*
W
X
Y
-7
-8
- 8 30
-9
- 9 30
-10
-11
-12
120°E
WORLD MAP OF TIME ZONES
International Date Line
P*
R
W
M*
F
E
G
D
Z
Q
X
X
D
A B
S
M
C
B
N
P
R
M*
L
R
A
A
Z
V
U
M
S
Z
N
Z
‡
150°E
180°
Northstar NS100
Select the time format
BUDDY LIST
LOCAL/DIST
USA/INT/CAN
>GPS/DATA
GPS/DATA
MANUAL
>SETTING
SETTING
TIME OFFSET
>TIME FORMAT
TIME DISPLY
TIME FORMAT
>12
24
23:30 LOC
PORT OPS
N 35’.43.211’
E123’45.113’
11.30PM LOC
1. Move the cursor to GPS/DATA and press
>ENT.
2. Move the cursor to SETTING and press
>ENT.
3. Move the cursor to TIME FORMAT and press
>ENT. There is a choice of a 12 hour time
format that uses AM and PM suffixes, or a 24
hour time format.
4. Press >ENT again to select the 12 hour time
format
OR
move the cursor to 24 and then press >ENT
to select the 24 hour time format.
The new time format is displayed immediately.
Show or hide the time
BUDDY LIST
LOCAL/DIST
USA/INT/CAN
>GPS/DATA
GPS/DATA
MANUAL
>SETTING
SETTING
TIME OFFSET
TIME FORMAT
>TIME DISPLY
TIME DISPLAY
>ON
OFF
If you have entered the time manually (see
Reference Section 1 - Set your position and
time manually), the time is always shown on
the screen with the prefix MAN.
However, if the time is being updated through
a GPS navigation receiver, you can show or
hide the time on the LCD screen.
1. Move the cursor to GPS/DATA and press
>ENT.
Reference Manual
2. Move the cursor to SETTING and press >ENT.
3. Move the cursor to TIME DISPLY and press
>ENT again.
4. Press >ENT again to have the LCD screen
show the time
OR
move the cursor to OFF and then press <ENT
to hide the time.
25
Show or hide the boat’s position
BUDDY LIST
LOCAL/DIST
USA/INT/CAN
>GPS/DATA
GPS/DATA
MANUAL
>SETTING
SETTING
TIME FORMAT
TIME DISPLY
>LL DISPLAY
LL DISPLAY
>ON
OFF
If you have entered the boat's position
manually (see Reference Section 1 - Set your
position and time manually), the position is
always shown on the screen with the prefix
MAN.
However, if the boat's position is being updated
through a GPS navigation receiver, you can
show or hide the boat's position on the LCD
screen.
1. Move the cursor to GPS/DATA and press
>ENT.
2. Move the cursor to SETTING and press
>ENT.
3. Scroll through the GPS/DATA menu to LL
DISPLAY and press >ENT again.
4. Press >ENT again to have the LCD screen
show the boat's position
OR
move the cursor to OFF and then press <ENT
if you want to hide the boat's position.
GPS alert setting
BUDDY LIST
LOCAL/DIST
USA/INT/CAN
>GPS/DATA
GPS/DATA
MANUAL
>SETTING
SETTING
TIME DISPLY
LL DISPLAY
>GPS ALERT
GPS ALERT
>ON
OFF
The GPS alert is usually set to ON so that if
the GPS navigation receiver is disconnected,
warning alarm beeps sound.
1. Move the cursor to GPS/DATA and press
>ENT.
2. Move the cursor to SETTING and press
>ENT.
26
3. Scroll through the GPS/DATA menu to GPS
ALERT and press >ENT again.
4. Press >ENT again to have the GPS alert ON
OR
move the cursor to OFF and then press <ENT
to turn it off.
Northstar NS100
Edit or delete a channel name
USA/INT/CAN
GPS/DATA
DSC SETUP
>RADIO SETUP
RADIO SETUP
>CH NAME
WATCH MODE
WX ALERT
CH NAME
TELEPHONE
TELEPHONE
>EDIT
DELETE
EDIT CH NAME
TELEPHONE
The channel banks are listed in Appendix C
with their default names. You can edit the
individual channel names or delete them.
1. Scroll through the radio menu until RADIO
SETUP is displayed.
2. Move the cursor to RADIO SETUP and press
>ENT.
3. Press >ENT again to select CH NAME.
4. Use ^CH/SELv to select the channel and
display the associated name tag, then press
>ENT.
The LCD screen shows the existing channel
name and invites you to edit or delete it.
EDIT CH NAME
PHONE AAAA
ENT>STORE
ESC>CANCEL
5. Press >ENT to edit the channel name and
then enter the new name over the existing
name. It can be a maximum of 12 characters.
(In this example, TELEPHONE is changed to
PHONE AAAA.)
OR
move the cursor to DELETE and then press
>ENT to delete the existing name. In this
case, no name will be displayed on the LCD
screen when the channel is operational.
6. Press >ENT again to confirm the new
channel name or deletion.
Select dual or triple watch mode
USA/INT/CAN
GPS/DATA
DSC SETUP
>RADIO SETUP
RADIO SETUP
CH NAME
>WATCH MODE
WX ALERT
WATCH MODE
>ONLY 16CH
16CH + 9CH
Dual watch mode automatically scans between
the priority channel and the working channel.
CH16 is the default priority channel.
If the USA or CAN channel banks are selected
on the USA radio model, and the weather alert
is ON, the weather channel is also scanned in
dual watch mode.
Reference Manual
Triple watch mode is available only with the
USA radio model. Triple watch mode, with
the USA or CAN channel banks selected and
the weather alert ON, automatically scans the
working channel, both of the priority channels
(CH09 and CH16), and the weather channel.
1. Scroll through the radio menu until RADIO
SETUP is displayed.
27
2. Move the cursor to RADIO SETUP and press
>ENT.
3. Move the cursor to WATCH MODE and press
>ENT.
4. To set a dual watch mode that scans CH16 as
the priority channel, press >ENT again
OR
to set a triple watch mode that scans both
the priority channels, move the cursor to
16CH + 9CH and then press >ENT.
Weather alert setting
USA/INT/CAN
GPS/DATA
DSC SETUP
>RADIO SETUP
RADIO SETUP
CH NAME
WATCH MODE
>WX ALERT
WX ALERT
>ON
OFF
The NOAA provides several weather forecast
channels on the USA and Canadian channel
banks. If severe weather (such as storms or
hurricanes) is forecast, the NOAA broadcasts a
weather alert on 1050Hz.
If you are operating on the USA or Canadian
channel banks, you can set the radio to pick up
any weather alerts as follows:
1. Scroll through the radio menu until RADIO
SETUP is displayed.
2. Move the cursor to RADIO SETUP and press
>ENT.
28
3. Move the cursor to WX ALERT and press
>ENT.
4. If you want to select the weather alert facility,
press >ENT again so that when a weather
alert is broadcast, the alert will sound. (Press
any button to hear the weather alert voice
message).
Move the cursor to OFF and then press <ENT
to cancel the weather alert facility. Use
the radio’s SCAN operation to monitor for
Weather Alerts.
Northstar NS100
Set the contrast
USA/INT/CAN
GPS/DATA
DSC SETUP
>RADIO SETUP
RADIO SETUP
WATCH MODE
WX ALERT
>CONTRAST
CONTRAST
LO
HI
You can adjust the contrast on the LCD screen
to suit your own preference. There is a choice
of 16 contrast levels.
The lowest contrast levels 1 thru 3 are all
shown by one bar only on the LCD screen. The
highest contrast levels 14 thru 16 are all shown
by 12 bars on the LCD screen. The example
here indicates contrast level 6.
1. Scroll through the radio menu until RADIO
SETUP is displayed.
2. Move the cursor to RADIO SETUP and press
>ENT.
3. Move the cursor to CONTRAST and press
>ENT.
4. Use ^CH/SEL or CH/SELv to increase or
decrease the contrast to the desired level.
.
Reset to factory defaults
USA/INT/CAN
GPS/DATA
DSC SETUP
>RADIO SETUP
RADIO SETUP
WX ALERT
CONTRAST
>RESET
RESET RADIO
ARE YOU SURE
ENT>YES
ESC>NO
You can reset the radio back to the following
factory defaults:
Time offset:
Time format:
Time display:
LL display:
GPS alert:
Individual reply:
LL reply:
WX alert:
Contrast:
Priority channel:
Watch mode:
DSC FUNC:
Reference Manual
00.00
24 hour clock
On
On
Off (USA), On (Europe)
Manual
Manual
On
8
CH16
CH16
On
Your buddy list and group list are not deleted
when you reset the radio. All data in the call
logs is deleted.
1. Scroll through the radio menu until RADIO
SETUP is displayed.
2. Move the cursor to RADIO SETUP and press
>ENT.
3. Scroll through the radio menu until the cursor
is next to RESET then press >ENT.
4. The radio asks you to reconfirm that you
really want to reset to the factory defaults.
Press >ENT to reset the radio
OR
press <ESC to keep all your preferences.
29
Reference Section 2
Setup the DSC functions
What is DSC? .................................................................................31
The DSC setup menu .................................................................31
Enter your MMSID ..................................................................... 32
Enter a new group MMSID ..................................................... 32
Edit a group MMSID .................................................................. 33
Delete a group MMSID............................................................. 34
Select your response to individual calls............................. 34
Select your response to LL polling calls ............................. 35
Turn the DSC functions on/off .............................................. 35
Enter your ATIS ID ..................................................................... 36
Turn the ATIS functions on/off ............................................. 36
This reference section explains how to set up the DSC (Digital Selective Calling)
functions on your radio. Some options may not be available, depending on your
radio model and location.
30
Northstar NS100
What is DSC?
IMPORTANT!
You must enter your
MMSID to access the
DSC functions.
DSC (Digital Selective Calling) is a VHF radio
transmission system that can transmit digital
signals. DSC capability enables you to use the
Global Maritime Distress Signalling System
(GMDSS) to transmit a coded distress signal
using the DISTRESS button.
Any DSC radio within range of the distress
signal will automatically register the distress
signal and display the details on the LCD
screen.
Every DSC user has a unique identifier called
an MMSID. You must enter your MMSID into
the radio so that you can access the DSC
functionality.
If you don't have an MMSID, contact the
appropriate authorities in your country. If you
don't know who to contact, ask your dealer.
The DSC setup menu
1. Press FUNC then 1 to enter the radio menu. Note that only four menu items can be shown on the
LCD screen at any one time so use ^CH/SEL to scroll up and CH/SELv to scroll down the menu.
2. Scroll through the main menu until the cursor is next to the DSC SETUP option, then press >ENT.
The DSC setup menu is displayed.
USER MMSID
Reference Manual
Enter your user MMSID.
GROUP SETUP
Enter or change the name and/or details of a group MMSID.
INDV REPLY
Choose an automatic or manual response to calls (USA and Canada only).
LL REPLY
Select your response to an LL polling request.
DSC FUNC
Turn the DSC functionality ON/OFF (USA). In Europe, if DSC functionality is
OFF, ATIS functionality is ON.
ATIS ID
Enter your ATIS MMSID (Europe only).
ATIS FUNC
Enable/disable the ATIS function (Europe only).
31
Enter your MMSID
LOCAL/DIST
USA/INT/CAN
GPS/DATA
>DSC SETUP
DSC SETUP
>USER MMSID
GROUP SETUP
INDV REPLY
INPUT MMSID
_________
187654321
MMSID
ENT>STORE
ESC>CANCEL
1. Select DSC SETUP and press >ENT.
WARNING!
This is once-only
operation. You can
display and read your
MMSID at any time,
but you get only one
opportunity to store
your MMSID in the
radio. You cannot
change it after you
have stored it.
2. Press >ENT again to select the USER MMSID
option.
3. If this is the first time that you are entering
your MMSID, a dashed line appears.
Enter your nine-digit MMSID along the
dashed line. The cursor automatically moves
to the next space after you enter each digit.
If you make an error, press <ESC to clear
all the numbers you've entered so far, and
return to the DSC SETUP menu so that you
can start again.
USER MMSID
INPUT AGAIN
_________
187654321
MMSID
ENT>STORE
ESC>CANCEL
4. When you have entered your MMSID
correctly, press >ENT.
5. You must reenter your MMSID again as a
check, then press >ENT again to permanently
store your MMSID and return to the menu.
You can view your stored MMSID at anytime
by selecting USER MMSID in the main menu.
SPECIAL NOTE:
After storing your MMSID, check if the DSC
FUNC is selected ON. If it is OFF, you must
set it to ON. See Page #35 for details.
Enter a new group MMSID
LOCAL/DIST
USA/INT/CAN
GPS/DATA
>DSC SETUP
DSC SETUP
USER MMSID
>GROUP SETUP
INDV REPLY
GROUP SETUP
>MANUAL NEW
GROUP 1
GROUP 2
GROUP NAME
_________
GROUP MMSID
0________
If you call the same group of people frequently,
you can store their details in a group MMSID.
Then, when you call that group MMSID,
every person in the group receives your call
automatically.
You can store a maxmimum of five group
MMSIDs.
A group MMSID always starts with 0.
ENTER NAME
FISHING
ENTER MMSID
0_________
ENTER NAME
FISHING
ENTER MMSID
023456789
FISHING
023456789
ENT>STORE
ESC>CANCEL
2. Move the cursor to GROUP SETUP then
press >ENT.
3. Press >ENT again to select MANUAL NEW. If
this is the first time that you are entering a
group name OR if an unused group MMSID is
available, a dashed line appears. (Otherwise,
the existing group names are displayed for
you to edit or delete.)
1. Select DSC SETUP and press >ENT.
32
Northstar NS100
4. Enter the group name along the dashed line.
In this example the group name is FISHING.
The group name can contain a maximum of
11 alphanumeric characters.
The cursor automatically moves to the next
space after you enter each digit. If you make
an error, press <ESC to backup and correct
the entry.
When you have finished, press >ENT
(repeatedly if necessary) until the cursor
moves to the MMSID line.
5. Enter the group MMSID. Remember that
the first number is always 0. The cursor
automatically moves to the next space after
you enter each digit. If you make an error,
press <ESC to backup and correct the entry.
When you are finished, press >ENT.
6. The group name and group MMSID are
shown in a confirmation screen. Press >ENT
to store the details and return to the GROUP
SETUP option.
Edit a group MMSID
LOCAL/DIST
USA/INT/CAN
GPS/DATA
>DSC SETUP
DSC SETUP
USER MMSID
>GROUP SETUP
INDV REPLY
GROUP SETUP
FISHING
>WTERSKIERS
RACERS
WTERSKIERS
067890123
>EDIT
DELETE
1. Select DSC SETUP and press >ENT.
2. Move the cursor to GROUP SETUP then
press >ENT. The existing group MMSID
names are listed.
3. Move the cursor to the group MMSID name
that you want to edit, then press >ENT.
EDIT NAME
WTERSKIERS
EDIT MMSID
067890123
WATERSKIERS
067890123
ENT>STORE
ESC>CANCEL
required, or press >ENT repeatedly to move
the cursor to the group MMSID. Make any
changes to the group MMSID number, if
required.
5. When you are finished, press >ENT to
confirm the changes and return to the
GROUP SETUP option.
4. The group name and group MMSID are
listed, with the cursor at the first character
of the group name. Edit the group name, if
Reference Manual
33
Delete a group MMSID
LOCAL/DIST
USA/INT/CAN
GPS/DATA
>DSC SETUP
DSC SETUP
USER MMSID
>GROUP SETUP
INDV REPLY
GROUP SETUP
MANUAL NEW
FISHING
>WATERSKIERS
WATERSKIERS
EDIT
>DELETE
1. Select DSC SETUP and press >ENT.
2. Move the cursor to GROUP SETUP then
press >ENT. The existing group MMSID
names are listed.
3. Move the cursor to the group MMSID name
that you want to delete, then press >ENT.
DELETE GROUP
WATERSKIERS
ENT>YES
ESC>NO
4. The group name is shown. Move the cursor
to DELETE and press >ENT.
5. Press >ENT again to confirm the deletion or
<ESC to cancel the deletion and return to the
GROUP SETUP option, .
Select your response to individual calls
LOCAL/DIST
USA/INT/CAN
GPS/DATA
>DSC SETUP
DSC SETUP
USER MMSID
GROUP SETUP
>INDV REPLY
European radio models
require a manual
acknowledgement.
INDV REPLY
>AUTO
MANUAL
If you are operating on the USA or Canadian
channel banks, you can choose to respond to
incoming individual calls with an automatic or
manual response.
An automatic response sends an
acknowledgement and then sets the request
link channel, ready for a conversation.
A manual response asks if you want to
acknowledge the call, and then asks if you
want to converse with the caller.
34
1. Select DSC SETUP and press >ENT.
2. Move the cursor to INDV REPLY and press
>ENT.
3. Press >ENT again if you want to select AUTO
for an automatic response,
OR
move the cursor to MANUAL and then press
<ENT for a manual response.
Northstar NS100
Select your response to LL polling calls
LOCAL/DIST
USA/INT/CAN
GPS/DATA
>DSC SETUP
DSC SETUP
GROUP SETUP
INDV REPLY
>LL REPLY
LL REPLY
>AUTO
MANUAL
OFF
Another boat may send an LL polling request
to ask for your boat's position. You can choose
to respond to an LL polling request in one of
three ways:
• AUTO will automatically send your boat's
position in response to any incoming LL
polling requests from your buddies.
• MANUAL means that you choose whether
or not to reply to any incoming LL polling
requests.
• OFF ignores all LL polling requests.
1. Select DSC SETUP and press >ENT.
2. Move the cursor to LL REPLY and press
>ENT.
3. Select your response, then press >ENT again
to return to the DSC SETUP option.
Turn the DSC functions on/off
LOCAL/DIST
USA/INT/CAN
GPS/DATA
>DSC SETUP
DSC SETUP
INDV REPLY
LL REPLY
>DSC FUNC
WARNING!
You can turn OFF the
DSC functions, but this
is not recommended
because you won’t be
able to automatically
transmit coded
information about
your boat to the
GMDSS in a distress
situation.
Reference Manual
DSC FUNC
>ON
OFF
1. Select DSC SETUP and press >ENT.
2. Move the cursor to DSC FUNC and press
>ENT.
3. Press >ENT again if you want to turn the
DSC functions ON,
OR
move the cursor to OFF and then press <ENT
to turn the DSC functions OFF.
It is not possible to have both of DSC and ATIS
operating simultaneously. When you turn one
ON, the other will turn OFF. If they are both
OFF, you must set DSC FUNC to ON to get DSC
functionality.
SPECIAL NOTE:
The DSC or ATIS annunciator in the LCD will
illuminate if DSC or ATIS is fully operational.
35
Enter your ATIS ID
LOCAL/DIST
USA/INT/CAN
GPS/DATA
>DSC SETUP
DSC SETUP
LL REPLY
DSC FUNC
>ATIS ID
WARNING!
This is a once-only
operation. You can
display and read your
ATIS ID at any time,
but you only get one
opportunity to store it
in the radio. You cannot
change it after you
have stored it.
INPUT USER
ATIS ID
9________
987654321
ATIS ID
ENT>STORE
ESC>CANCEL
USERATISID
INPUT AGAIN
_________
If you are navigating inland waterways within
Europe, you must enter your ATIS ID to access
ATIS functionality. ATIS will send a digital signal
anytime you release the PTT key.
1. Select DSC SETUP and press >ENT.
2. Move the cursor to ATIS ID and press >ENT.
If this is the first time that you are entering
your ATIS ID, a dashed line appears with 9
shown as the first number. Note that an ATIS
ID always starts with 9.
3. Enter the rest of your ATIS ID numbers along
the dashed line. The cursor automatically
moves to the next space after you enter each
number.
987654321
ATIS ID
ENT>STORE
ESC>CANCEL
If you make an error, press <ESC to clear all
the numbers you have entered so far and
return to the DSC SETUP menu, so that you
can start again.
4. When you have entered your ATIS ID
correctly, press >ENT.
5. You must reenter your ATIS ID again as a
check, then press >ENT again to permanently
store your ATIS ID in the radio.
You can view your ATIS ID any time by
selecting ATIS ID in the DSC SETUP menu.
Turn the ATIS functions on/off
LOCAL/DIST
USA/INT/CAN
GPS/DATA
>DSC SETUP
DSC SETUP
DSC FUNC
ATIS ID
>ATIS FUNC
Inland waterways rules
require 1W Tx power
on channels 06, 08, 10,
11, 12, 13, 14, 15, 17,
71, 72, 74, and 77.
36
ATIS FUNC
>ON
OFF
1. Select DSC SETUP and press >ENT.
OR
2. Move the cursor to ATIS FUNC and press
>ENT.
move the cursor to OFF and then press <ENT
to turn ATIS functionality OFF.
3. Press >ENT again if you want to turn the
ATIS functions ON and the ATIS symbol will
appear on the LCD screen to confirm that
your vessel has ATIS functionality,
NOTE: It is not possible to have ATIS and DSC
operating simultaneously. When you turn one
ON, the other will turn OFF. If they are both off,
you must turn on DSC to get DSC functionality.
Northstar NS100
Reference Section 3
Making DSC calls
The DSC call menu ..................................................................... 38
Reply to the last incoming call ............................................... 39
Make a routine call to an individual.................................... 39
Make a routine call to a group ............................................. 40
Retry a routine call .................................................................... 41
Call all ships .................................................................................... 41
Call back using the call log data..............................................42
Request the LL position of a buddy .......................................42
IMPORTANT!
You must have stored a valid user
MMSID into your NS100 radio in order to
access these DSC functions.
This reference section explains how to access the DSC call menu options and
how to make different types of DSC calls.
Reference Manual
37
The DSC call menu
Press CALL to display the first three options of the DSC call menu. Note that only three options
can be shown on the LCD screen at any one time, so use ^CH/SEL to scroll up and CH/SELv and
down the DSC call menu. Press >ENT to select an option.
38
INDIVIDUAL
Make a routine call to another individual or to a buddy.
LAST CALL
Display details of the most recent incoming call and reply.
GROUP
Make a routine call to any one of the five groups that you have (optionally)
set up.
ALL SHIPS
Make a call to all ships.
CALL LOG
Show details of the most recent 20 incoming calls.
DISTRES LOG
Two DISTRESS logs show the details of the ten most recent distress calls and
the ten most recent distress relays.
LL REQUEST
Request the LL position of a buddy.
Northstar NS100
Reply to the last incoming call
DSC CALL
INDIVIDUAL
>LAST CALL
GROUP
787878787
INDIVIDUAL
ROUTINE
>SET CHANNEL
The person you are
calling must also
have a radio with
DSC functionality.
787878787
INDIVIDUAL
ROUTINE
>SEND?
PORT OPS/VTS
787878787
INDIVIDUAL
WAITING ACK
787878787
INDIVIDUAL
ROUTINE
CALLING...
INDV ACK
787878787
PRESS PTT
ESC->EXIT
4. The call details are summarized on the LCD
screen. Press >ENT to send the call. The
radio checks the status of CH70 and if it is
busy, waits for 2 seconds before rechecking.
1. Press CALL to display the first three options
of the DSC CALL menu.
2. Press >ENT to have the radio display the
MMSID and other details about the most
recent incoming call.
3. If you want to reply, press >ENT to select
the working channel. Otherwise, press
<ESC. (Note: you cannot usually call a
duplex channel so these are automatically
eliminated. If the call is to a Coast Station the
radio will recognize this and select the correct
frequency.)
When CH70 is free, the call is sent and the
TX symbol appears on the LCD screen.
5. If the call is acknowledged, press PTT to talk
on the working channel.
If there is no reply, try making the call again.
(See Reference Section 3 - Retry a routine
call.)
Make a routine call to an individual
DSC CALL
>INDIVIDUAL
LAST CALL
GROUP
INDIVIDUAL
>MANUAL NEW
JON
BILL
The person you are
calling must also
have a radio with
DSC functionality.
MANUAL MMSID
_________
345634563
INDIVIDUAL
ROUTINE
>SET CHANNEL
345634563
INDIVIDUAL
ROUTINE
ENT>SEND?
1. Press CALL to display the first three options
of the DSC CALL menu.
2. Move the cursor up to INDIVIDUAL then
press >ENT. You can send a call to one of
your buddies or to another individual.
3. To call a buddy, scroll through your buddy
list, select the name and then press >ENT.
345634563
INDIVIDUAL
ROUTINE
CALLING...
345634563
INDIVIDUAL
ROUTINE
WAITING ACK
must enter the individual's MMSID and then
press >ENT. (If you enter a wrong digit, press
<ESC to erase it.)
4. Select the working channel and press >ENT.
(You cannot usually call a duplex channel so
these are automatically eliminated. If the call
is to a Coast Station the radio will recognize
this and select the correct frequency.)
To call an individual that is not in your buddy
list, press >ENT to select MANUAL NEW. You
Reference Manual
39
5. The call details are summarized on the
LCD screen. Press >ENT to send the call.
The radio checks the status of CH70 and
if it is busy, waits for two seconds before
rechecking.
6. If the call is acknowledged, press PTT to talk
on the working channel.
If there is no reply, try making the call again.
(See Reference Section 3 - Retry a routine
call.)
When CH70 is free, the call is sent and the
TX symbol appears on the LCD screen.
Make a routine call to a group
DSC CALL
INDIVIDUAL
LAST CALL
>GROUP
SELECT GROUP
>FISHING
WATERSKIERS
RACING
FISHING
055555555
ROUTINE
>SET CHANNEL
FISHING
055555555
ROUTINE
ENT>SEND?
FISHING
055555555
ROUTINE
CALLING...
1. Press CALL to display the first three options
of the DSC CALL menu.
2. Move the cursor to GROUP then press >ENT.
You can send a call to any one of the groups
that you have set up (see Reference Section 2
- Enter a new group MMSID.)
3. Select the group that you want to call and
then press >ENT.
4. The group name and MMSID are displayed.
Select the working channel and press >ENT.
(You cannot usually call a duplex channel so
these are automatically eliminated. If the call
is to a Coast Station the radio will recognize
this and select the correct frequency.)
40
5. The call details are summarized on the
LCD screen. Press >ENT to send the call.
The radio checks the status of CH70 and
if it is busy, waits for two seconds before
rechecking. When CH70 is free, the call is
sent and the TX symbol appears on the LCD
screen.
6. If the call is acknowledged, press PTT to talk
on your selected working channel. If there
is no reply, try making the call again. (See
Reference Section 3 - Retry a routine call.)
Northstar NS100
Retry a routine call
PORT OPS/VTS
787878787
INDIVIDUAL
WAITING ACK
787878787
SEND AGAIN?
ENT>YES
ESC>NO
787878787
INDIVIDUAL
ROUTINE
CALLING...
PORT OPS/VTS
787878787
INDIVIDUAL
WAITING ACK
1. If there is no acknowledgement to your call
after waiting for 8 seconds, the radio asks
if you want to retry sending the call. Press
>ENT to retry.
2. The radio checks the status of CH70 and
if it is busy, waits for two seconds before
rechecking.
INDV ACK
787878787
PRESS PTT
ESC->EXIT
When CH70 is free, the call is sent again and
the TX symbol appears on the LCD screen.
3. The radio will repeat this cycle twice. If the
call remains unacknowledged after one
minute at the last attempt, the radio returns
to normal working channel mode.
4. If the call is acknowledged, press PTT to talk
on the working channel.
Call all ships
DSC CALL
LAST CALL
GROUP
>ALL SHIPS
ALL SHIPS
>URGENCY
SAFETY
ROUTINE
ALL SHIPS
URGENCY
ENT>SEND
ESC>CANCEL
ALL SHIPS
URGENCY
CALLING...
1. Press CALL to display the first three options
of the DSC CALL menu.
2. Scroll through the options and move the
cursor to ALL SHIPS. Press >ENT. You have a
choice of different priority levels:
• URGENCY for use in a serious situation
or problem that could lead to a distress
situation.
• SAFETY to send safety information to all
other vessels in range.
• ROUTINE for a routine call at 1W
transmission power (USA/Canada only).
DISTRESS
N 38 27.021’
E137 12.011’
T 12:27 UTC
4. The radio displays a summary and asks for
confirmation. Press >ENT to make the call or
<ESC to cancel.
5. The radio checks the status of CH70 and
if it is busy, waits for two seconds before
rechecking. The radio will repeat this cycle
twice and then return to normal working
channel mode.
When CH70 is free, the call is sent and the
TX symbol appears on the LCD screen. The
working channel moves to CH16 to wait for a
voice contact.
3. Press >ENT to select URGENCY, or scroll to a
different priority level and then press >ENT.
Reference Manual
41
Call back using the call log data
DSC CALL
GROUP
ALL SHIPS
>CALL LOG
01 NS100
INDIVIDUAL
ROUTINE
10:45PM LOC
NS100
>CALL BACK
DELETE
SAVE
3. Use ^CH/SELv to scroll through the log
and locate a particular entry. Press >ENT to
continue.
You can use the call log to quickly display
details about the 20 most recent incoming
calls, so that you can call any of them back.
You can also save an entry in your buddy list,
or delete an entry.
4. Press >ENT again to confirm the call back
OR
1. Press CALL to display the first three options
of the DSC CALL menu.
2. Scroll through the options and move the
cursor to CALL LOG. Press >ENT. The details
of most recent incoming call is shown as the
first entry (01) in the call log.
to delete or save the entry in your call log,
scroll to the desired option and then press
>ENT.
Request the LL position of a buddy
DSC CALL
CALL LOG
DISTRES LOG
>LL REQUEST
LL REQUEST
>ALEX
JEAN
BILL
ALEX
LL REQUEST
ALEX
LL REQUEST
ENT>SEND?
CALLING..
PORT OPS/VTS
ALEX
LL REQUEST
WAITING ACK
You can use this option to contact a buddy
and ask for their position. For example, if your
buddy is in a good fishing spot, your buddy
can send you the position in confidence, rather
than revealing it over an voice channel.
1. Press CALL to display the first three options
of the DSC CALL menu.
42
POSITION ACK
ALEX
ESC->EXIT
PORT OPS/VTS
N 39 27.021’
E135 12.011’
T 09:34 UTC
2. Scroll through the options and move the
cursor to LL REQUEST. Press >ENT.
3. Press >ENT to select the first buddy in your
buddy list, or scroll through the other entries
until the cursor is next to the buddy whose
position you want to check and then press
>ENT.
Northstar NS100
4. The NS100 radio asks for confirmation. Press
>ENT to send the LL position request to your
buddy.
5. The radio checks the status of CH70 and
if it is busy, waits for two seconds before
rechecking. (The radio will repeat this cycle
twice before returning to the normal working
channel mode.)
When CH70 is free, the LL position request is
sent and the TX symbol appears on the LCD
screen.
Reference Manual
6. The working channel is displayed while
the radio waits for an acknowledgement
from your buddy. If no acknowledgement is
received within 8 seconds, the radio asks if
you want to retry. Press >ENT to retry.
If your buddy hasn't acknowledged the LL
position request after one minute at your last
attempt, the radio returns to normal working
channel mode.
7. If the LL position request is acknowledged,
your buddy's position data and the time are
both displayed on the LCD screen.
43
Reference Section 4
Receiving DSC calls
Manually acknowledge an individual call. ........................ 45
Automatically acknowledge an individual call .......................46
Reply to a group call...................................................................46
Reply to an all ships call ............................................................ 47
Manually reply to an LL position request ..........................48
Automatically reply to an LL position request .................48
Do not reply to an LL position request ................................49
Reply to a geographical call ....................................................49
IMPORTANT!
You must have stored a valid user
MMSID into your NS100 radio in order to
receive these DSC functions.
This reference section explains how to respond to the different types of
incoming DSC calls.
44
Northstar NS100
Manually acknowledge an individual call
PORT OPS/VTS
N 39 27.021’
E135 12.011’
T 09:34 UTC
RCV:INDIV
ROUTINE
567856789
European radio
models require
a manual
acknowledgement.
ENT->ACK
ESC->EXIT
RCV:INDIV
567856789
ENT->ACK
ESC->EXIT
COMMERCIAL
N 39 27.021’
E135 12.011’
T 09:39 UTC
If you have set up your radio to respond to
incoming DSC calls manually (see Reference
Section 2 - Select your response to individual
calls) the following happens when the radio
picks up an incoming individual call:
1. The radio beeps to alert you to the incoming
call. Press any key except >ENT or <ESC to
stop the beeps.
At the same time, the LCD screen displays the
TELEPHONE symbol, the type of incoming
call and the MMSID of the caller. After one
second this LCD screen changes and invites
you to press >ENT to acknowledge the
call OR press <ESC to ignore it. These two
screens alternate once every second for a
maximum of three minutes.
If you press <ESC to ignore the call or do
not respond within three minutes, the radio
returns to its previous status.
2. Press >ENT if you want to acknowledge the
call. The LCD screen displays the TX symbol
and changes to CH70.
3. Press >ENT again to send an
acknowledgement and automatically move
to a working channel.
The caller should now respond to your
acknowledgement by making voice contact
on the designated working channel. If not,
you can use PTT to make voice contact
yourself.
The details of the incoming call are stored
in the call log. If the call log is full, the oldest
entry is automatically deleted.
You can also store the MMSID of any call log
entry in your buddy list, if you want. The radio
will automatically copy the MMSID but you
must enter the buddy name manually.
If the radio recognises the MMSID as one of
your buddies, it displays the buddy name in
place of the MMSID.
Reference Manual
45
Automatically acknowledge an individual call
PORT OPS/VTS
N 39 27.021’
E135 12.011’
T 09:34 UTC
COMMERCIAL
N 39 27.021’
E135 12.011’
T 09:39 UTC
RCV:INDIV
ROUTINE
567856789
ESC->EXIT
If you have set up your radio to respond
to incoming DSC calls automatically (see
Reference Section 2 - Select your response to
individual calls) the following happens when
the radio picks up an incoming call:
1. The radio beeps to alert you to the incoming
call. Press any key except >ENT or <ESC to
stop the beeps now.
At the same time, the LCD screen displays the
TELEPHONE symbol, the type of incoming
call, and the MMSID of the caller.
If the radio recognises the MMSID as one of
your buddies, it displays the buddy name in
place of the MMSID.
The radio also changes to CH70
automatically and displays the TX symbol.
If you press <ESC to ignore the call, or do
not respond within three minutes, the radio
returns to its previous status.
The details of the incoming call are stored
in the call log. If the call log is full, the oldest
entry is automatically deleted.
You can also store the MMSID of any entry
into your buddy list, if you want. The radio
will automatically copy the MMSID but you
must enter a name manually.
Reply to a group call
PORT OPS/VTS
N 39 27.021’
E135 12.011’
T 09:34 UTC
RCV:GROUP
URGENCY
RACING
FROM
034567891
ESC->EXIT
PORT OPS/VTS
N 39 27.021’
E135 12.011’
T 09:39 UTC
When the radio picks up an incoming call from
any one of the groups that you have set up
earlier:
46
1. The radio beeps to alert you to the incoming
call. The type of beep depends upon the type
of call. Press any key except >ENT or <ESC
to stop the beeps.
Northstar NS100
IMPORTANT!
You must have stored
at least one group
MMSID into your
radio in order to
access this function.
(See Reference Section
2 - Enter a new group
MMSID.)
The radio automatically selects the working
channel designated in the incoming call.
At the same time, the LCD screen displays
the BUSY TELEPHONE symbol, the type
of incoming call, the group name and the
designated channel. After one second this
LCD screen changes and displays the group
MMSID and invites you to press <ESC to
exit. These two screens alternate once every
second, for a maximum of three minutes.
If you press <ESC or do not respond within
three minutes, the radio returns to its
previous status.
2. No acknowledgement is required. Just press
PTT to communicate on the designated
working channel.
The details of the incoming call are stored
in the call log. If the call log is full, the oldest
entry is automatically deleted.
Reply to an all ships call
PORT OPS/VTS
N 39 27.021’
E135 12.011’
T 09:34 UTC
RCV:ALL SHIPS
URGENCY
123456789
ESC->EXIT
The all ships ROUTINE
category at 1W
transmission power
is available only in
USA/Canada.
PORT OPS/VTS
N 39 27.021’
E135 12.011’
T 09:39 UTC
When the radio picks up an incoming all ships
call:
1. The radio beeps to alert you to the incoming
call. The type of beep depends upon the type
of call. Press any key except PTT or <ESC to
stop the beeps now. The radio automatically
selects CH16.
At the same time, the LCD screen displays the
TELEPHONE symbol, the type and priority of
the incoming call, the MMSID of the caller,
and invites you to press <ESC to exit.
If the radio recognises the MMSID as one of
your buddies, it displays the buddy name in
place of the MMSID.
2. No acknowledgement is required. Just press
PTT to communicate on the designated
working channel.
The details of the incoming call are stored
in the call log. If the call log is full, the oldest
entry is automatically deleted.
If you press <ESC or do not respond within
three minutes, the radio returns to CH16 to
receive voice communication.
Reference Manual
47
Manually reply to an LL position request
PORT OPS/VTS
N 39 27.021’
E135 12.011’
T 09:34 UTC
POSITION REQ
123451234
ENT->ACK
ESC->EXIT
You can reply to this
request manually
only if you have set
the LL REPLY option
to MANUAL. (See
Reference Section 2
- Select your response
to LL polling calls.)
RCV:POSITION
123451234
ENT->ACK
ESC->EXIT
PORT OPS/VTS
N 39 27.021’
E135 12.011’
T 09:39 UTC
When the radio receives an LL position request
it sounds a beep to alert you to the request.
At the same time, the LCD screen displays the
TELEPHONE symbol, the position request and
the MMSID of the caller.
2. Press >ENT to acknowledge the call
and transmit your position on CH70
automatically.
The LL position request is not stored in the
call log.
1. If you press <ESC, or do not respond to
the request within three minutes, the radio
returns to its previous state.
Automatically reply to an LL position request
PORT OPS/VTS
N 39 27.021’
E135 12.011’
T 09:34 UTC
RCV:POSITION
123451234
REPLY AUTO
ESC->EXIT
You can reply to this
request automatically
only if you have
set the LL REPLY
option to AUTO. (See
Reference Section 2
- Select your response
to LL polling calls.)
48
123451234
N 39 27.021’
E135 12.011’
T 09:39 UTC
PORT OPS/VTS
N 39 27.021’
E135 12.011’
T 09:39 UTC
When the radio receives an LL position request
it sounds a beep to alert you to the request.
At the same time, the LCD screen displays the
TELEPHONE symbol, the position request and
the MMSID of the caller.
The radio acknowledges the request
automatically, and immediately sends your
boat's position to the caller.
The radio then returns automatically to its
previous state.
Northstar NS100
Do not reply to an LL position request
PORT OPS/VTS
N 39 27.021’
E135 12.011’
T 09:34 UTC
RCV:POSITION
123451234
REPLY OFF
ESC->EXIT
PORT OPS/VTS
N 39 27.021’
E135 12.011’
T 09:39 UTC
When the radio receives an LL position request
it beeps to alert you to the request.
At the same time, the LCD screen displays the
BUSY symbol, the position request and the
MMSID of the caller.
The radio shows that the reply facility is
OFF. Just press <ESC or PTT to return to the
previous state.
The LL position request is not stored in the call
log.
Reply to a geographic call
PORT OPS/VTS
N 39 27.021’
E135 12.011’
T 09:34 UTC
RCV:POSITION
123451234
REPLY OFF
PORT OPS/VTS
N 39 27.021’
E135 12.011’
T 09:39 UTC
A geographical call can be received only
by vessels within a certain radius of the
transmission, typically 20-30 miles (32-48 kms).
When the radio picks up an incoming
geographic call:
1. The radio beeps to alert you to the incoming
call. Press any key except PTT or <ESC to
stop the beeps now.
At the same time, the LCD screen displays
the BUSY symbol, the type and priority of the
incoming call, and the MMSID of the caller.
If you press <ESC to ignore the call, or do
not respond within three minutes, the radio
returns to its previous status.
Reference Manual
If the radio recognises the MMSID as one of
your buddies, it displays the buddy name in
place of the MMSID.
2. You can reply to the incoming call with an
INDIVIDUAL call back. The incoming call is
stored in the call log.
Press >ENT to move to the designated
working channel. If no channel is designated,
CH 16 is automatically selected.
Press PTT to communicate on the designated
working channel.
The details of the incoming call are stored
in the call log. If the call log is full, the oldest
entry is automatically deleted.
49
Reference Section 5
Distress calls
Send a distress call. ..................................................................... 51
Receive and reply to a distress call ....................................... 52
Call back using the distress logs............................................. 52
Receive a distress relay ............................................................. 53
Receive a distress acknowledgment....................................54
IMPORTANT!
You must have stored a valid user
MMSID into your NS100 radio in order to
access these DSC functions.
This reference section explains how to send, and respond to, different types
of DSC distress calls. For distress calls, the radio is capable of automatically
sending and receiving enhanced position information that specifies the
position of the distressed vessel to within about 60ft (18m).
50
Northstar NS100
Send a distress call
DISTRES CALL
>UNDEFINED
FIRE
FLOODING
DISTRES CALL
>FIRE
HOLD DISTRES
3 SECONDS
If you hold down
DISTRESS, an
UNDEFINED distress
call is transmitted
automatically after
a three second
countdown.
DISTRES CALL
SENT! WAIT
PRESS ESC
TO CANCEL
1. Lift up the protective hinged cover from the
red DISTRESS button, located on the right
hand side of the handset.
2. Press DISTRESS to show the following
distress categories on the LCD screen. Note
that only four categories can be shown at
any one time so use ^CH/SEL to scroll up
and CH/SELv to scroll down.
UNDEFINED
FIRE
FLOODING
COLLISON
GROUNDING
LISTING
SINKING
ADRIFT
ABANDONING
PIRACY
OVERBOARD
3. Scroll to the category that best describes
your situation, then hold down >ENT
or DISTRESS until the distress signal is
transmitted at high power on CH70 at the
end of a three second countdown.
Reference Manual
If CH70 is already busy, the distress signal
will override the existing transmission.
The distress call repeats randomly
every 3.5 to 4.5 minutes until a distress
acknowledgement is received from a Search
and Rescue authority or until you cancel the
distress call manually by pressing <ESC or
16/9.
After transmitting the distress call, the radio
beeps loudly for 2 minutes and waits for a
distress acknowledgement.
4. Press any key except <ESC or 16/9 if you
want to stop the beeps while waiting for the
distress acknowledgement. (Press <ESC or
16/9 only if you want to cancel the waiting
phase and move to CH16.)
5. The radio selects CH16 automatically so that
you can hear any incoming voice contacts
from the Search and Rescue authorities and/
or other vessels in your area.
51
Receive and reply to a distress call
PORT OPS/VTS
N 39 27.021’
E135 12.011’
T 09:34 UTC
RCV:DISTRESS
123451234
FIRE
ESC->EXIT
IMPORTANT!
You can establish
voice contact with the
distressed vessel, as
described here, but
the Coast Guard is the
only agency allowed
to send a distress
acknowledgement.
RCV:DISTRESS
N 12.12.121’
E121.12.121’
T 09:36 UTC
When the radio picks up an incoming distress
call:
These two screens alternate once every
second.
1. The radio beeps loudly to alert you to the
incoming distress call and the working
channel changes automatically to CH16.
Press any key except PTT or <ESC if you
want to stop the beeps.
If the vessel's position isn't specified, a series
of dashed lines are shown instead.
2. Press PTT to establish voice contact with the
distressed vessel or press <ESC to maintain a
listening watch on CH16.
At the same time, the LCD screen displays the
BUSY symbol, the category of the distress,
and the MMSID (or buddy name) of the
distressed vessel. After one second, the LCD
display changes to show the position of the
distressed vessel and the time of the distress
transmission.
The details of the incoming call are stored in
the distress log. If the distress log is full, the
oldest entry is automatically deleted.
Call back using the distress logs
DSC CALL
ALL SHIPS
CALL LOG
>DISTRES LOG
DISTRES LOG
>DISTRESS
RELAY
IMPORTANT!
You can establish
voice contact with
the distressed vessel,
but ONLY the Coast
Guard is allowed
to send a distress
acknowledgement.
52
RELAY LOG 01
DIST RELAY
678678678
FLOODING
N 38 27.021’
E137 12.011’
T 12:27 UTC
The radio has two distress logs that each hold
the details of ten distress calls. The DISTRESS
log stores received distress calls, and the RELAY
log stores relayed distress calls.
You can reply to any of them with an
INDIVIDUAL call back, as follows:
SENT FROM
987654321
ENT> OPERATE
987654321
>CALL BACK
DELETE
SAVE MMSID
1. Press CALL to display the first three options
of the DSC CALL menu.
2. Scroll through the options and move the
cursor to DISTRES LOG. Press >ENT.
3. Press >ENT again to select the received
distress call log
Northstar NS100
OR
move the cursor to RELAY and then press
>ENT to select the relayed distress call log.
The most recent incoming distress call is
shown as the first entry in the log.
3. Press >ENT to select the first entry in the log,
or scroll through the other entries until the
cursor is next to the entry you want to call
and then press >ENT.
4. The radio displays the details of the distress
call over three screens that alternate every
one second; the first screen shows the
MMSID (or buddy name) of the distressed
vessel and the type of distress, the second
screen shows the position of the distressed
vessel, the time of the distress call and the
MMSID (or buddy name) of the vessel that
relayed the Distress Call.
If the vessel's position isn't specified, a series
of dashed lines are shown instead.
5. Press >ENT to display another screen with a
list of options. Press >ENT again if you want
to call back.
Receive a distress relay
PORT OPS/VTS
N 39 27.021’
E135 12.011’
T 09:34 UTC
RCV:RELAY
123451234
FIRE
ESC->EXIT
RCV:RELAY
N 12.12.121’
E121.12.121’
T 09:36 UTC
RCV:RELAY
SENT FROM
876587658
ESC->EXIT
When the radio picks up an incoming distress
relay:
1. The radio beeps loudly to alert you to the
incoming distress relay and the working
channel changes automatically to CH16.
Press any key except PTT or <ESC if you
want to stop the beeps.
At the same time, the LCD screen displays
the BUSY symbol, the MMSID (or buddy
name) of the distressed vessel and the
type of distress. After one second, the LCD
screen changes to show the position of the
distressed vessel and the time of the distress
transmission. After another second, the LCD
screen changes again to show the MMSID
(or buddy name) of the vessel relaying the
distress call.
Reference Manual
These three screens cycle once every second.
If the position of the distressed vessel's isn't
specified, a series of dashed lines are shown
instead.
2. Press PTT to try and establish voice contact
with the distressed vessel or press <ESC to
maintain a listening watch on CH16.
The details of the incoming distress relay are
stored in the distress log. If the distress log is
full, the oldest entry is automatically deleted.
53
Receive a distress acknowledgement
PORT OPS/VTS
N 39 27.021’
E135 12.011’
T 09:34 UTC
RCV:DISTRESS
ACKNOWLEDGE
FROM
123451234
654365436
SINKING
N 39 27.021’
E135 12.011’
T 09:37 UTC
654365436
ESC->EXIT
When the radio picks up an incoming distress
acknowledgement:
1. The radio beeps loudly for two minutes,
to alert you to the incoming distress
acknowledgement and the working channel
changes automatically to CH16. Press any
<ESC or 16/9 to stop the beeps.
At the same time, the LCD screen displays the
distress acknowledgement and the MMSID
(or buddy name) of the vessel sending the
acknowledgement. After one second, the
LCD screen changes to show the MMSID
and position of the distressed vessel and
the type of distress. After another second,
the LCD screen changes again to show
MMSID again and the time of the distress
acknowledgement.
54
These three screens cycle once every second.
If the distressed vessel's position isn't
specified, a series of dashed lines are shown
instead.
2. Press <ESC or 16/9 to cancel the LCD screen
cycle, then press PTT to try and establish
voice contact with the coast guard or press
<ESC again to maintain a listening watch on
CH16.
Northstar NS100
Appendix A - Technical Specifications
The following pages show the technical specifications for the NS100 SS and the
NS100 DS radios. These technical specifications are subject to change without
notice.
Reference Manual
55
NS100 SS
GENERAL
Power Supply:
Current drain:
• Transmit
• Receive
Useable channels
(country-specific):
Modulation mode:
Compass safe distance:
PHYSICAL
LCD display (viewing):
Contrast and
backlight control:
Antenna connector:
Temperature Range:
Waterproofing:
• Handset
• Speaker/Box
Dimensions:
• Handset
• Speaker
• Box
Weight:
• Handset
• Speaker
• Box
Frequency stability:
Frequency control:
GPS/NMEA input:
Comm. port:
FEATURES
13.6V DC.
6A at 25W Tx / 1.5A at 1W Tx
<350mA in standby
International
USA
Canada
Weather
16K0G3E (FM)/16K0G2B (DSC)
speaker - 2.1’ (700mm)
48 (W) x 24 (H) mm
FSTN 4 x 12 character
Yes
SO-239 (50 ohm)
-15ºC to +50ºC
JIS-7
IPX6
68(W) x 140(H) x 30(T) mm
140(W) x 148(H) x 49(T) mm
220(W) x 173(H) x 50(T) mm
10oz (0.28kg)
11oz (0.31kg)
3.0lbs (1.36kg)
+/- 10ppm
PLL
Yes
4800 baud NMEA output
Local/Distant control:
Position polling:
Group Call:
Call logs:
DSC (USCG SC101)
DSC (Class D):
Channel Naming:
Tri watch, Favorite
channel scan, All scan:
Yes
Hailer function
with 20W output:
No
Intercom function:
No
Second handset:
No
Second 4W external speaker: No
Separate CH70 DSC receiver. Yes (Europe only)
TRANSMITTER
Frequency:
Output power:
Transmitter protection:
Max Freq deviation:
Spurious & harmonics:
Modulation distortion:
RECEIVER
Frequency:
12dB SINAD sensitivity:
20db SINAD sensitivity:
Adjacent CH selectivity:
56
Yes
Yes
Yes
Yes (20 individual, 10 distress,
10 distress relay)
Yes (USA/Canada)
Yes (Europe)
Yes
156.025 - 157.425MHz
25W / 1W selectable
Open / short circuit of
antenna with VSWR
shutdown
+/- 5kHz
Attenuated at least
43+10logPo (USA)
80db@25W, 60db@1W (EU)
Less than 10%@ 1kHz for a
+/- 3kHz deviation
156.025 - 163.275MHz
0.25uV (distant) / 2.5uV
(local) (USA models)
0.35uV
more than 80db
Northstar NS100
Spurious response rejection ratio: more than 80db
Intermodulation rejection ratio: more than 80db
Residual Noise level:
more than -40db unsquelched
Audio output power:
• handset
1W
• external large speaker
2W
Specifications are subject to change without notice.
NS100 DS
GENERAL
Power Supply:
Current drain:
• Transmit
• Receive
Useable channels
(country-specific):
Modulation mode:
Compass safe distance:
13.6V DC.
6A at 25W Tx / 1.5A at 1W Tx
Less than 400mA in standby
International
USA
Canada
Weather
16K0G3E(FM)/16K0G2B (DSC)
speaker - 2.1’ (700mm)
Contrast and
backlight control:
Antenna connector:
Temperature Range:
Waterproofing:
• Handset
• Speaker/Box
Dimensions:
Reference Manual
68(W) x 140(H) x 30(T) mm
140(W) x 148(H) x 49(T) mm
220(W) x 173(H) x 50(T) mm
10oz (0.28kg)
11oz (0.31kg)
3.0lbs (1.36kg)
+/- 10ppm
PLL
Yes
4800 baud NMEA output
FEATURES
PHYSICAL
LCD display (viewing):
• Handset
• Speaker
• Box
Weight:
• Handset
• Speaker
• Box
Frequency stability:
Frequency control:
GPS/NMEA input:
Comm. port:
48 (W) x 24 (H) mm
FSTN 4 x 12 character
Yes
SO-239 (50 ohm)
-15ºC to +50ºC
JIS-7
IPX6
Local/Distant control:
Position polling:
Group Call:
Call logs:
DSC (USCG SC101)
DSC (Class D):
Channel Naming:
Tri watch, Favorite
channel scan, All scan:
Hailer function
with 20W output:
Yes
Yes
Yes
Yes (20 individual, 10 distress,
10 distress relay)
Yes (USA/Canada)
Yes (Europe)
Yes
Yes
Yes
57
Intercom function:
Yes
Second handset:
Yes
Second 4W external speaker: Yes
Separate CH70 DSC receiver. Yes (Europe only)
TRANSMITTER
Frequency:
156.025 - 157.425MHz
Output power:
25W / 1W selectable
Transmitter protection:
Open / short circuit of antenna
with VSWR shutdown
Max Freq deviation:
+/- 5kHz
Spurious & harmonics:
Attenuated at least 43+10logPo (USA)
80dB@25W, 60dB@1W (EU)
Modulation distortion:
Less than 10%@ 1kHz for a +/3kHz deviation
RECEIVER
Frequency:
12dB SINAD sensitivity:
(USA models)
20db SINAD sensitivity:
Adjacent CH selectivity:
Spurious response rejection ratio:
Intermodulation rejection ratio:
Residual Noise level:
Audio output power:
• handset
• external large speaker
• hailer:
156.025 - 163.275MHz
0.25uV (distant) / 2.5uV (local)
0.35uV
more than 80db
more than 80db
more than 80db
more than -40db unsquelched
1W
2W
20W into 4 Ohms
Specifications are subject to change without notice.
58
Northstar NS100
Appendix B - Troubleshooting
The following pages provide some tips on solving the more common problems
that may occur from time to time. If you’re not able to solve a problem, contact
your Northstar dealer for advice.
Reference Manual
59
PROBLEM: The transceiver will not power up.
A fuse may have blown OR there is no
voltage getting to the transceiver.
a) Check the power cable for cuts, breaks, or
squashed sections.
b) After checking the wiring, replace the 10A
fuse (one spare fuse is supplied).
c) Check the battery voltage. This must be at
least 10.8V ± 0.5V DC.
PROBLEM: No sound from the external
speaker.
a) Check that the external speaker cable is
physically connected.
b) Check the soldering of the external
speaker cable.
PROBLEM: Transmissions are always on low
power, even when high (HI) power is selected.
The antenna may be faulty.
PROBLEM: The transceiver blows the fuse
when the power is switched on.
The power wires may have been reversed.
a) Check that the red wire is connected to
the positive battery terminal, and the
black wire is connected to the negative
battery terminal.
PROBLEM: The speaker makes popping or
whining noises when the engine is running.
Electrical noise may be interfering with the
transceiver.
60
a) Test the transceiver with a different
antenna.
b) Have the antenna checked out.
PROBLEM: Battery symbol is displayed.
The power supply is too low or too high.
a) Check the battery voltage. This should be
at least 10.8V ± 0.5V DC.
b) Check the alternator on the vessel.
PROBLEM: No position information is
displayed.
a) Re-route the power cables away from the
engine.
The GPS cable may faulty or the GPS setting
may be incorrect.
b) Add a noise suppressor to the power
cable.
a) Check that the GPS cable is physically
connected.
c) Use resistive spark plug wires and/or use
an alternator whine filter.
b) Check the polarity of the GPS cable.
c) Check the baud rate setting of the GPS if
applicable. The baud rate setting should
be 4800 for NMEA. Parity should be set to
NONE.
Northstar NS100
Appendix C - VHF Marine Channel Banks
International channel banks ................................................... 62
USA channel banks ..................................................................... 65
Canadian channel banks ........................................................... 68
Country-specific inland waterways (Europe) .....................71
Special Channels ......................................................................... 73
The following pages show details of the VHF marine channel banks being used
in different parts of the world.
Reference Manual
61
International channel banks
CHANNEL
01
02
03
04
05
06
07
08
09
10
11
12
62
TRANSMIT
(MHz)
156.050
156.100
156.150
156.200
156.250
156.300
156.350
156.400
156.450
156.500
156.550
156.600
RECEIVE
(MHz)
160.650
160.700
160.750
160.800
160.850
156.300
160.950
156.400
156.450
156.500
156.550
156.600
13
156.650
156.650
14
15 1
16
17 1
18
19
20
21
22
23
24
25
26
27
28
156.700
156.750
156.800
156.850
156.900
156.950
157.000
157.050
157.100
157.150
157.200
157.250
157.300
157.350
157.400
156.700
156.750
156.800
156.850
161.500
161.550
161.600
161.650
161.700
161.750
161.800
161.850
161.900
161.950
162.000
TRAFFIC TYPE
Public Correspondence, Duplex
Public Correspondence, Duplex
Public Correspondence, Duplex
Port Operations, Duplex
Port Operations, VTS in Selected Areas
Inter-ship Safety
Port Operations, Duplex
Commercial (inter-ship only)
Recreational Calling Channel
Commercial
Commercial, VTS in Selected Areas
Port Operations, VTS in Selected Areas
Intership Navigation Safety (bridge-tobridge)
Port Operations, VTS in Selected Areas
Port Operations – 1W Only
International Distress, Safety, and Calling
State Controlled – 1W Only
Port Operations, Duplex
Commercial, Duplex
Port Operations, Duplex
Port Operations, Duplex
Port Operations, Duplex
Public Correspondence, Duplex
Public Correspondence, Duplex
Public Correspondence, Duplex
Public Correspondence, Duplex
Public Correspondence, Duplex
Public Correspondence, Duplex
SHIP
TO
SHIP
No
No
No
No
No
Yes
No
Yes
Yes
Yes
Yes
Yes
SHIP
TO
SHORE
Yes
Yes
Yes
Yes
Yes
No
Yes
No
Yes
Yes
Yes
Yes
TELEPHONE
TELEPHONE
TELEPHONE
PORT OPS
PORT OPS/VTS
SAFETY
PORT OPS
COMMERCIAL
CALLING
COMMERCIAL
VTS
PORT OPS/VTS
Yes
No
BRIDGE COM
Yes
Yes
Yes
Yes
No
No
No
No
No
No
No
No
No
No
No
Yes
Yes
Yes
Yes
Yes
Yes
Yes
Yes
Yes
Yes
Yes
Yes
Yes
Yes
Yes
PORT OPS/VTS
PORT OPS
DISTRESS
SAR
PORT OPS
SHIP - SHORE
PORT OPS
PORT OPS
PORT OPS
TELEPHONE
TELEPHONE
TELEPHONE
TELEPHONE
TELEPHONE
TELEPHONE
NAME TAG
Northstar NS100
CHANNEL
60
61
62
63
64
65
66
67
68
69
70 3
71
72
73
74
77
78
79
80
81
82
83
84
85
86
87
88
Reference Manual
TRANSMIT
(MHz)
156.025
156.075
156.125
156.175
156.225
156.275
156.325
156.375
156.425
156.475
156.525
156.575
156.625
156.675
156.725
156.875
156.925
156.975
157.025
157.075
157.125
157.175
157.225
157.275
157.325
157.375
157.425
RECEIVE
(MHz)
160.625
160.675
160.725
160.775
160.825
160.875
160.925
156.375
156.425
156.475
156.525
156.575
156.625
156.675
156.725
156.875
161.525
161.575
161.625
161.675
161.725
161.775
161.825
161.875
161.925
161.975
162.025
TRAFFIC TYPE
Public Correspondence, Duplex
Port Operations, Duplex
Port Operations, Duplex
Port Operations, Duplex
Public Correspondence, Duplex
Port Operations, Duplex
Port Operations, Duplex
Commercial, bridge-to-bridge
Boat Operations, Recreational
Port Operations
Digital Selective Calling - DSC
Port Operations
Intership
Port Operations
Port Operations
Intership
Non-Commercial, Duplex
Commercial, Duplex
Commercial, Duplex
Port Operations, Duplex
Port Operations, Duplex
Public Correspondence, Duplex
Public Correspondence, Duplex
Public Correspondence, Duplex
Public Correspondence, Duplex
Public Correspondence, Duplex
Public Correspondence, Duplex
SHIP
TO
SHIP
No
No
No
No
No
No
No
Yes
Yes
Yes
-----Yes
Yes
Yes
Yes
Yes
No
No
No
No
No
No
No
No
No
No
No
SHIP
TO
SHORE
Yes
Yes
Yes
Yes
Yes
Yes
Yes
No
No
Yes
-----Yes
No
Yes
Yes
No
Yes
Yes
Yes
Yes
Yes
Yes
Yes
Yes
Yes
Yes
Yes
NAME TAG
TELEPHONE
PORT OPS
PORT OPS
PORT OPS
TELEPHONE
PORT OPS
PORT OPS
BRIDGE COM
SHIP - SHIP
PORT OPS
DSC
PORT OPS
SHIP - SHIP
PORT OPS
PORT OPS
SHIP - SHIP
SHIP - SHORE
SHIP - SHORE
SHIP - SHORE
PORT OPS
PORT OPS
TELEPHONE
TELEPHONE
TELEPHONE
TELEPHONE
TELEPHONE
TELEPHONE
63
WEATHER
Wx01
Wx02
Wx03
Wx04
Wx05
Wx06
Wx07
Wx08
Wx09
Wx10
RX Only
RX Only
RX Only
RX Only
RX Only
RX Only
RX Only
RX Only
RX Only
RX Only
162.550
162.400
162.475
162.425
162.450
162.500
162.525
161.650
161.775
163.275
NOAA WEATHER CHANNEL
NOAA WEATHER CHANNEL
NOAA WEATHER CHANNEL
NOAA WEATHER CHANNEL
NOAA WEATHER CHANNEL
NOAA WEATHER CHANNEL
NOAA WEATHER CHANNEL
CANADIAN WEATHER CHANNEL
CANADIAN WEATHER CHANNEL
NOAA WEATHER CHANNEL
---------------------------------------------------
---------------------------------------------------
NAME TAG
NOAA WX
NOAA WX
NOAA WX
NOAA WX
NOAA WX
NOAA WX
NOAA WX
CANADA WX
CANADA WX
NOAA WX
SPECIAL NOTES ON INTERNATIONAL CHANNEL USAGE
1. LOW POWER (1W) only.
2. LOW POWER (1W) initially. Override to HIGH POWER by holding down H/L key before transmitting. Used normally in
bridge-to-bridge communications.
3. Channel 70 is designated for use exclusively for Digital Selective Calling (DSC), such as Distress, Safety, and Ship Calls.
No voice communication is allowed on CH70.
4. The INTERNATIONAL mode is not legal for use in U.S. or Canada waters.
64
Northstar NS100
USA channel banks
CHANNEL
TRANSMIT
(MHz)
RECEIVE
(MHz)
01A
03A 4
05A
06
07A
08
09
10
11
12
156.050
156.150
156.250
156.300
156.350
156.400
156.450
156.500
156.550
156.600
156.050
156.150
156.250
156.300
156.350
156.400
156.450
156.500
156.550
156.600
13 3
156.650
156.650
14
15 2
16
17 1
18A
19A
20
20A
21A 4
22A
23A 4
24
25
26
27
28
156.700
RX Only
156.800
156.850
156.900
156.950
157.000
157.000
157.050
157.100
157.150
157.200
157.250
157.300
157.350
157.400
156.700
156.750
156.800
156.850
156.900
156.950
161.600
157.000
157.050
157.100
157.150
161.800
161.850
161.900
161.950
162.000
Reference Manual
TRAFFIC TYPE
Port Operation, VTS in Selected Areas
US Government, Coast Guard
Port Operations, VTS in Selected Areas
Inter-ship Safety
Commercial
Commercial (inter-ship only)
Recreational Calling Channel
Commercial
Commercial, VTS in Selected Areas
Port Operations, VTS in Selected Areas
Intership Navigation Safety (bridge-to-bridge),
1W with Power-up
Port Operations, VTS in Selected Areas
Environmental, RX Only
International Distress, Safety, and Calling
State Controlled – 1W Only
Commercial
Commercial
Port Operations, Canadian Coast Guard, Duplex
Port Operations
U.S. Government, Canadian Coast Guard
Coast Guard Liaison
U.S. Government, Coast Guard
Public Correspondence, Marine Operator
Public Correspondence, Marine Operator
Public Correspondence, Marine Operator
Public Correspondence, Marine Operator
Public Correspondence, Marine Operator
SHIP
TO
SHIP
Yes
Yes
Yes
Yes
Yes
Yes
Yes
Yes
Yes
Yes
SHIP
TO
SHORE
Yes
Yes
Yes
No
Yes
No
Yes
Yes
Yes
Yes
PORT OPS/VTS
UNAUTHORIZED
PORT OPS/VTS
SAFETY
COMMERCIAL
COMMERCIAL
CALLING
COMMERCIAL
VTS
PORT OPS/VTS
Yes
No
BRIDGE COM
Yes
-----Yes
Yes
Yes
Yes
No
Yes
Yes
Yes
Yes
No
No
No
No
No
Yes
-----Yes
Yes
Yes
Yes
Yes
Yes
Yes
Yes
Yes
Yes
Yes
Yes
Yes
Yes
PORT OPS/VTS
ENVIROMENTAL
DISTRESS
SAR
COMMERCIAL
COMMERCIAL
PORT OPS
PORT OPS
UNAUTHORIZED
COAST GUARD
UNAUTHORIZED
TELEPHONE
TELEPHONE
TELEPHONE
TELEPHONE
TELEPHONE
NAME TAG
65
CHANNEL
RECEIVE
(MHz)
61A 4
63A
64A 4
65A
66A
156.075
156.175
156.225
156.275
156.325
156.075
156.175
156.225
156.275
156.325
67 3
156.375
156.375
68
69
70 6
71
72
73
74
77 1
78A
79A
80A
156.425
156.475
156.525
156.575
156.625
156.675
156.725
156.875
156.925
156.975
157.025
156.425
156.475
156.525
156.575
156.625
156.675
156.725
156.875
156.925
156.975
157.025
81A 4
157.075
157.075
4
157.125
157.175
157.225
157.275
157.325
157.375
157.425
157.425
157.125
157.175
161.825
161.875
161.925
161.975
162.025
157.425
82A
83A 4
84
85
86
87
88
88A
66
TRANSMIT
(MHz)
TRAFFIC TYPE
U.S. Government, Canadian Coast Guard
Port Operations, VTS in Selected Areas
U.S. Government, Canadian Commercial Fishing
Port Operations
Port Operations
Commercial, bridge-to-bridge, 1W with Powerup
Boat Operations, Recreational
Boat Operations, Recreational
Digital Selective Calling - DSC
Boat Operations, Recreational
Boat Operations, Recreational
Port Operations
Port Operations
Port Operations –1W Only
Boat Operations, Recreational
Commercial
Commercial
U.S. Government, Environmental Protection
Agency Operations
U.S. Government, Canadian Coast Guard
U.S. Government, Canadian Coast Guard
Public Correspondence, Marine Operator
Public Correspondence, Marine Operator
Public Correspondence, Marine Operator
Public Correspondence, Marine Operator
Public Correspondence, Marine Operator
Commercial, Intership Only
SHIP
TO
SHIP
Yes
Yes
Yes
Yes
Yes
SHIP
TO
SHORE
Yes
Yes
Yes
Yes
Yes
UNAUTHORIZED
PORT OPS/VTS
UNAUTHORIZED
PORT OPS
PORT OPS
Yes
No
BRIDGE COM
Yes
Yes
-----Yes
Yes
Yes
Yes
Yes
Yes
Yes
Yes
No
Yes
-----Yes
No
Yes
Yes
Yes
No
Yes
Yes
SHIP - SHIP
PLEASURE
DSC
PLEASURE
SHIP - SHIP
PORT OPS
PORT OPS
PORT OPS
SHIP - SHIP
COMMERCIAL
COMMERCIAL
Yes
Yes
UNAUTHORIZED
Yes
Yes
No
No
No
No
No
Yes
Yes
Yes
Yes
Yes
Yes
Yes
Yes
No
UNAUTHORIZED
UNAUTHORIZED
TELEPHONE
TELEPHONE
TELEPHONE
TELEPHONE
TELEPHONE
COMMERCIAL
NAME TAG
Northstar NS100
WEATHER
Wx01
Wx02
Wx03
Wx04
Wx05
Wx06
Wx07
Wx08
Wx09
Wx10
RX Only
RX Only
RX Only
RX Only
RX Only
RX Only
RX Only
RX Only
RX Only
RX Only
162.550
162.400
162.475
162.425
162.450
162.500
162.525
161.650
161.775
163.275
NOAA WEATHER CHANNEL
NOAA WEATHER CHANNEL
NOAA WEATHER CHANNEL
NOAA WEATHER CHANNEL
NOAA WEATHER CHANNEL
NOAA WEATHER CHANNEL
NOAA WEATHER CHANNEL
CANADIAN WEATHER CHANNEL
CANADIAN WEATHER CHANNEL
NOAA WEATHER CHANNEL
---------------------------------------------------
---------------------------------------------------
NAME TAG
NOAA WX
NOAA WX
NOAA WX
NOAA WX
NOAA WX
NOAA WX
NOAA WX
CANADA WX
CANADA WX
NOAA WX
SPECIAL NOTES ON USA CHANNEL USAGE
1. LOW POWER (1W) only.
2. Receive Only.
3. LOW POWER (1W) initially. Override to HIGH POWER by holding down H/L key before transmitting. Used normally in
bridge-to-bridge communications.
4. Lightly Shaded Simplex channels 03A, 21A, 23A, 61A, 64A, 81A, 82A, and 83A cannot be lawfully used in U.S.
waters unless special authorization is obtained from the U.S. Coast Guard. Not for use by the general public.
5. The letter “A” illuminated by the channel number indicates the USA channel is simplex. This same channel is always
duplex when selecting International. There is no “A” reference for International channels. The letter “B” is only used
for some Canadian “Receive Only” channels.
6. Channel 70 is designated for use exclusively for Digital Selective Calling (DSC), such as Distress, Safety, and Ship Calls.
No voice communication is allowed on CH70.
Reference Manual
67
Canadian channel banks
CHANNEL
01
02
03
04A
05A
06
07A
08
09
10
11
12
13 3
14
15 1
16
17 1
18A
19A
20 1
21
21A
21B
22A
23
24
25
25B
26
27
28
68
TRANSMIT
(MHz)
156.050
156.100
156.150
156.200
156.250
156.300
156.350
156.400
156.450
156.500
156.550
156.600
156.650
156.700
156.750
156.800
156.850
156.900
156.950
157.000
157.050
157.050
RX Only
157.100
157.150
157.200
157.250
RX Only
157.300
157.350
157.400
RECEIVE
(MHz)
160.650
160.700
160.750
156.200
156.250
156.300
156.350
156.400
156.450
156.500
156.550
156.600
156.650
156.700
156.750
156.800
156.850
156.900
156.950
161.600
161.650
157.050
161.650
157.100
161.750
161.800
161.850
161.850
161.900
161.950
162.000
TRAFFIC TYPE
Public Correspondence, Duplex
Public Correspondence, Duplex
Public Correspondence, Duplex
Canadian Coast Guard, SAR
Port Operations, VTS in Selected Areas
Inter-ship Safety
Commercial
Commercial (inter-ship only)
Recreational Calling Channel
Commercial
Commercial, VTS in Selected Areas
Port Operations, VTS in Selected Areas
Intership Navigation Safety (bridge-to-bridge)
Port Operations, VTS in Selected Areas
Commercial – 1W Only
International Distress, Safety, and Calling
State Controlled – 1W Only
Commercial
Canadian Coast Guard
Canadian Coast Guard, Duplex– 1W Only
Port Operations, Duplex
U.S. Government, Canadian Coast Guard
Port Operations, RX Only
Canadian Coast Guard Liaison
Public Correspondence, Duplex
Public Correspondence, Duplex
Public Correspondence, Duplex
Public Correspondence, RX Only
Public Correspondence, Duplex
Public Correspondence, Duplex
Public Correspondence, Duplex
SHIP
TO
SHIP
No
No
No
Yes
Yes
Yes
Yes
Yes
Yes
Yes
Yes
Yes
Yes
Yes
Yes
Yes
Yes
Yes
Yes
No
No
Yes
-----Yes
No
No
No
-----No
No
No
SHIP
TO
SHORE
Yes
Yes
Yes
Yes
Yes
No
Yes
No
Yes
Yes
Yes
Yes
No
Yes
Yes
Yes
Yes
Yes
Yes
Yes
Yes
Yes
-----Yes
Yes
Yes
Yes
-----Yes
Yes
Yes
NAME TAG
TELEPHONE
TELEPHONE
TELEPHONE
CANADIAN CG
PORT OPS/VTS
SAFETY
COMMERCIAL
COMMERCIAL
CALLING
COMMERCIAL
VTS
PORT OPS/VTS
BRIDGE COM
PORT OPS/VTS
COMMERCIAL
DISTRESS
SAR
COMMERCIAL
CANADIAN CG
CANADIAN CG
PORT OPS
UNAUTHORIZED
PORT OPS
CANADIAN CG
TELEPHONE
TELEPHONE
TELEPHONE
TELEPHONE
TELEPHONE
TELEPHONE
TELEPHONE
Northstar NS100
CHANNEL
28B
60
61A 4
62A
64
64A 4
65A
66A 1
67
68
69
70 6
71
72
73
74
77 1
78A
79A
80A
81A 4
82A 4
83
83A 4
83B
84
85
86
87
88
Reference Manual
TRANSMIT
(MHz)
RX Only
156.025
156.075
156.125
156.225
156.225
156.275
156.325
156.375
156.425
156.475
156.525
156.575
156.625
156.675
156.725
156.875
156.925
156.975
157.025
157.075
157.125
157.175
157.175
RX Only
157.225
157.275
157.325
157.375
157.425
RECEIVE
(MHz)
162.000
160.625
156.075
156.125
160.825
156.225
156.275
156.325
156.375
156.425
156.475
156.525
156.575
156.625
156.675
156.725
156.875
156.925
156.975
157.025
157.075
157.125
161.775
157.175
161.775
161.825
161.875
161.925
161.975
162.025
TRAFFIC TYPE
Public Correspondence, RX Only
Public Correspondence, Duplex
U.S. Government, Canadian Coast Guard
Canadian Coast Guard
Public Correspondence, Duplex
U.S. Government, Canadian Commercial Fishing
Port Operations
Port Operations – 1W Only
Commercial, SAR
Boat Operations, Recreational
Commercial Fishing Only
Digital Selective Calling - DSC
Boat Operations, Recreational
Intership
Commercial Fishing Only
Commercial Fishing Only
Port Operations –1W Only
Boat Operations, Recreational
Commercial
Commercial
U.S. Government Operations
U.S. Government, Canadian Coast Guard
Canadian Coast Guard
U.S. Government, Canadian Coast Guard
Canadian Coast Guard, RX Only
Public Correspondence, Marine Operator
Public Correspondence, Marine Operator
Public Correspondence, Marine Operator
Public Correspondence, Marine Operator
Public Correspondence, Marine Operator
SHIP
TO
SHIP
-----No
Yes
Yes
No
Yes
Yes
Yes
Yes
Yes
Yes
-----Yes
Yes
Yes
Yes
Yes
Yes
Yes
Yes
Yes
Yes
Yes
Yes
-----No
No
No
No
No
SHIP
TO
SHORE
-----Yes
Yes
Yes
Yes
Yes
Yes
Yes
No
No
Yes
-----Yes
No
Yes
Yes
Yes
No
Yes
Yes
Yes
Yes
Yes
Yes
-----Yes
Yes
Yes
Yes
Yes
NAME TAG
TELEPHONE
TELEPHONE
UNAUTHORIZED
CANADIAN CG
TELEPHONE
UNAUTHORIZED
PORT OPS
PORT OPS
COMMERCIAL
SHIP - SHIP
COMMERCIAL
DSC
PLEASURE
SHIP - SHIP
COMMERCIAL
COMMERCIAL
PORT OPS
SHIP - SHIP
COMMERCIAL
COMMERCIAL
UNAUTHORIZED
UNAUTHORIZED
CANADIAN CG
UNAUTHORIZED
CANADIAN CG
TELEPHONE
TELEPHONE
TELEPHONE
TELEPHONE
TELEPHONE
69
WEATHER
Wx01
Wx02
Wx03
Wx04
Wx05
Wx06
Wx07
Wx08
Wx09
Wx10
RX Only
RX Only
RX Only
RX Only
RX Only
RX Only
RX Only
RX Only
RX Only
RX Only
162.550
162.400
162.475
162.425
162.450
162.500
162.525
161.650
161.775
163.275
NOAA WEATHER CHANNEL
NOAA WEATHER CHANNEL
NOAA WEATHER CHANNEL
NOAA WEATHER CHANNEL
NOAA WEATHER CHANNEL
NOAA WEATHER CHANNEL
NOAA WEATHER CHANNEL
CANADIAN WEATHER CHANNEL
CANADIAN WEATHER CHANNEL
NOAA WEATHER CHANNEL
---------------------------------------------------
---------------------------------------------------
NAME TAG
NOAA WX
NOAA WX
NOAA WX
NOAA WX
NOAA WX
NOAA WX
NOAA WX
CANADA WX
CANADA WX
NOAA WX
SPECIAL NOTES ON CANADA CHANNEL USAGE
1. LOW POWER (1W) only.
2. Receive Only.
3. LOW POWER (1W) initially. Override to HIGH POWER by holding down H/L key before transmitting. Used normally in
bridge-to-bridge communications.
4. Lightly Shaded Simplex channels 21A, 23A, 61A, 64A, 81A, 82A, and 83A cannot be lawfully used in Canada waters
unless special authorization is obtained from the Canadian Coast Guard. Not for use by the general public.
5. The letter “A” illuminated by the channel number indicates the Canada channel is simplex. This same channel is
always duplex when selecting International. There is no “A” reference for International channels. The letter “B” is only
used for some Canadian “Receive Only” channels.
6. Channel 70 is designated for use exclusively for Digital Selective Calling (DSC), such as Distress, Safety, and Ship Calls.
No voice communication is allowed on CH70.
7. The CANADA mode is not legal to use in U.S. waters.
70
Northstar NS100
Country-specific inland waterways (Europe)
CHANNEL
01
02
03
04
05
06
07
08
09
10
11
12
13
14
15 1
16
17 1
18
19
20
21
22
23
24
25
26
27
28
Reference Manual
TRANSMIT
(MHz)
156.050
156.100
156.150
156.200
156.250
156.300
156.350
156.400
156.450
156.500
156.550
156.600
156.650
156.700
156.750
156.800
156.850
156.900
156.950
157.000
157.050
157.100
157.150
157.200
157.250
157.300
157.350
157.400
RECEIVE
(MHz)
160.650
160.700
160.750
160.800
160.850
156.300
160.950
156.400
156.450
156.500
156.550
156.600
156.650
156.700
156.750
156.800
156.850
161.500
161.550
161.600
161.650
161.700
161.750
161.800
161.850
161.900
161.950
162.000
TRAFFIC TYPE
Public Correspondence, Duplex
Public Correspondence, Duplex
Public Correspondence, Duplex
Port Operations, Duplex
Port Operations, VTS in Selected Areas
Inter-ship Safety
Port Operations, Duplex
Commercial (inter-ship only)
Recreational Calling Channel
Commercial
Commercial, VTS in Selected Areas
Port Operations, Selected VTS Areas
Intership Navigation Safety (bridge-to-bridge)
Port Operations, VTS in Selected Areas
Port Operations – 1W Only
International Distress, Safety, and Calling
State Controlled – 1W Only
Port Operations, Duplex
Commercial, Duplex
Port Operations, Duplex
Port Operations, Duplex
Port Operations, Duplex
Public Correspondence, Duplex
Public Correspondence, Duplex
Public Correspondence, Duplex
Public Correspondence, Duplex
Public Correspondence, Duplex
Public Correspondence, Duplex
SHIP
TO
SHIP
No
No
No
No
No
Yes
No
Yes
Yes
Yes
Yes
Yes
Yes
Yes
Yes
Yes
Yes
No
No
No
No
No
No
No
No
No
No
No
SHIP
TO
SHORE
Yes
Yes
Yes
Yes
Yes
No
Yes
No
Yes
Yes
Yes
Yes
No
Yes
Yes
Yes
Yes
Yes
Yes
Yes
Yes
Yes
Yes
Yes
Yes
Yes
Yes
Yes
NAME TAG
TELEPHONE
TELEPHONE
TELEPHONE
PORT OPS
PORT OPS/VTS
SAFETY
PORT OPS
COMMERCIAL
CALLING
COMMERCIAL
VTS
PORT OPS/VTS
BRIDGE COM
PORT OPS/VTS
PORT OPS
DISTRESS
SAR
PORT OPS
SHIP - SHORE
PORT OPS
PORT OPS
PORT OPS
TELEPHONE
TELEPHONE
TELEPHONE
TELEPHONE
TELEPHONE
TELEPHONE
71
CHANNEL
72
TRANSMIT
(MHz)
RECEIVE
(MHz)
60
61
62
63
64
65
66
67
68
69
70 3
71
72
73
74
77
78
79
80
81
82
83
84
85
86
156.025
156.075
156.125
156.175
156.225
156.275
156.325
156.375
156.425
156.475
156.525
156.575
156.625
156.675
156.725
156.875
156.925
156.975
157.025
157.075
157.125
157.175
157.225
157.275
157.325
160.625
160.675
160.725
160.775
160.825
160.875
160.925
156.375
156.425
156.475
156.525
156.575
156.625
156.675
156.725
156.875
161.525
161.575
161.625
161.675
161.725
161.775
161.825
161.875
161.925
87
161.975
161.975
88
162.025
162.025
TRAFFIC TYPE
Public Correspondence, Duplex
Port Operations, Duplex
Port Operations, Duplex
Port Operations, Duplex
Public Correspondence, Duplex
Port Operations, Duplex
Port Operations, Duplex
Commercial, bridge-to-bridge
Boat Operations, Recreational
Port Operations
Digital Selective Calling - DSC
Port Operations
Intership
Port Operations
Port Operations
Intership
Non-Commercial, Duplex
Commercial, Duplex
Commercial, Duplex
Port Operations, Duplex
Port Operations, Duplex
Public Correspondence, Duplex
Public Correspondence, Duplex
Public Correspondence, Duplex
Public Correspondence, Duplex
AIS - do not use for public correspondence
reallocated
AIS - do not use for public correspondence
reallocated
SHIP
TO
SHIP
No
No
No
No
No
No
No
Yes
Yes
Yes
-----Yes
Yes
Yes
Yes
Yes
No
No
No
No
No
No
No
No
No
SHIP
TO
SHORE
Yes
Yes
Yes
Yes
Yes
Yes
Yes
No
No
Yes
-----Yes
No
Yes
Yes
No
Yes
Yes
Yes
Yes
Yes
Yes
Yes
Yes
Yes
TELEPHONE
PORT OPS
PORT OPS
PORT OPS
TELEPHONE
PORT OPS
PORT OPS
BRIDGE COM
SHIP - SHIP
PORT OPS
DSC
PORT OPS
SHIP - SHIP
PORT OPS
PORT OPS
SHIP - SHIP
SHIP - SHORE
SHIP - SHORE
SHIP - SHORE
PORT OPS
PORT OPS
TELEPHONE
TELEPHONE
TELEPHONE
TELEPHONE
------
------
AIS1
------
------
AIS2
NAME TAG
Northstar NS100
SPECIAL CHANNELS 7
CHANNEL
00 6
M1
M2
31
96H
L1
L2
L3
F1
F2
F3
AIS1
AIS2
TRANSMIT
(MHz)
156.000
157.425
161.425
157.550
162.425
155.500
155.525
155.650
155.625
155.775
155.825
161.975
162.025
RECEIVE
(MHz)
156.000
157.850
161.425
162.150
162.425
155.500
155.525
155.650
155.625
155.775
155.825
161.975
162.025
TRAFFIC TYPE
UK Coast Guard Users
UK Marina Channel M1
UK Marina Channel M2
INT’L, Duplex (Holland)
INT’L (Belgium)
INT’L (Scandinavia)
INT’L (Scandinavia)
INT’L (Scandinavia – not in Denmark)
INT’L (Scandinavia)
INT’L (Scandinavia)
INT’L (Scandinavia) call back
AIS1
AIS2
SHIP
TO
SHIP
Yes
Yes
Yes
No
No
Yes
Yes
Yes
Yes
Yes
Yes
---------
SHIP
TO
SHORE
Yes
Yes
Yes
Yes
Yes
no
no
no
no
no
no
---------
NAME TAG
UK COAST GUARD
UK MARINA
UK MARINA
NL MARINA
BEL G MARINA
LEISURE 1
LEISURE 2
LE ISURE3
FISHING 1
FISHING 2
FISHING 3
---------
SPECIAL NOTES ON EUROPEAN INTERNATIONAL CHANNEL USAGE
1. LOW POWER (1W) only.
2. LOW POWER (1W) initially. Override to HIGH POWER by holding down H/L key before transmitting. Used normally in
bridge-to-bridge communications.
3. Channel 70 is designated for use exclusively for Digital Selective Calling (DSC), such as Distress, Safety, and Ship Calls.
No voice communication is allowed on CH70.
4. The INTERNATIONAL mode is not legal for use in U.S.A. or Canada waters.
5. No WX channels are available.
6. Lightly Shaded Simplex channel CH00 is only available in the UK to Coast Guard users with written authorization.
7. The special channels above (and others) may be fitted to your radio. These are only licensed for use in the country
indicated. No attempt should be made to use them in any other country.
Reference Manual
73