1
TalkTime Max™ 920
Owner’s Manual
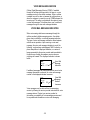
ATTENTION
Before Using the Phone:
It is necessary that you CHARGE your phone
battery fully before attempting to make or receive a call.
Battery Disposal:
DO NOT PLACE USED BATTERIES IN YOUR REGULAR
TRASH. THIS NICKEL-CADMIUM (Ni-Cd) BATTERY MUST
BE COLLECTED, RECYCLED OR DISPOSED OF IN AN
ENVIRONMENTALLY SOUND MANNER.
Battery Recommendations:
The NEC TalkTime MAX™ 920 cellular phone you have
purchased was designed to deliver quality performance and
provide you with years of use. In order to maintain optimum
performance, NEC recommends that only NEC Authentic
Accessories™ be used with the TalkTime phones.
Specifically, NEC recommends only the use of Nickel
Cadmium (NiCd) batteries with the TalkTime MAX™ 920
phone. Use of other batteries, such as Nickel Metal Hydride
(NiMH) may result in poor battery performance, and in some
cases, create a potential safety risk due to overheating of the
battery.
The incineration, landfilling or mixing of nickel-cadmium
(Ni-Cd) batteries with municipal solid waste stream is
PROHIBITED BY LAW in most areas.
Return this battery to a federal or state approved nickelcadmium (or “sealed lead”) battery recycler. This may be
where you purchased the battery or a local seller of
automotive batteries. In all states, call 1-800-822-8837,
except Minnesota if further disposal information is required.
In Minnesota, call 1-800-225-PRBA.
Contact local waste management officials for other
information regarding the environmentally sound collection,
recycling and disposal of this battery.
In-Vehicle Operation:
For In-Vehicle Operations, the phone battery must be
charged, since In-Vehicle Adapter Kits serve only as a trickle
battery charger.
i
IMPORTANT
READ THIS INFORMATION BEFORE USING
YOUR HAND-HELD PORTABLE CELLULAR
TELEPHONE
First introduced in 1984, the hand-held portable cellular
telephone is one of the most exciting and innovative
electronic products ever developed. With it you can stay in
contact with your office, your home, emergency services, and
others.
For the safe and efficient operation of your phone, observe
these guidelines.
Your cellular telephone is a radio transmitter and receiver.
When it is ON, it receives and also sends out radio frequency
(RF) energy. The phone operates in the frequency range of
824 MHz to 894 MHz and employs commonly used
frequency modulation (FM) techniques. When you use your
phone, the cellular system handling your call controls the
power level at which your phone transmits. The power level
can range from 0.006 of a watt to 0.6 of a watt.
Exposure to Radio Frequency Energy
In 1991 the Institute of Electrical and Electronics Engineers
(IEEE), and in 1992 the American National Standards
Institute (ANSI) updated the 1982 ANSI Standard for safety
levels with respect to human exposure to RF energy. Over
120 scientists, engineers, and physicians from universities,
government health agencies, and industry, after reviewing the
available body of research, developed this updated Standard.
In March, 1993, the Federal Communications Commission
(FCC) proposed the adoption of this updated Standard.
The design of your phone complies with this updated
Standard. Of course, if you want to limit RF exposure even
further than the updated ANSI Standard, you may choose to
control the duration of your calls and operate your phone in
the most power efficient manner.
Efficient Phone Operation
For your phone to operate at the lowest power level,
consistent with satisfactory call quality, please observe the
following guidelines:
ii
If your phone has an extendable antenna, extend it
fully. Some models allow you to place a call with the
antenna retracted. However, your phone operates more
efficiently with the antenna fully extended.
Hold the phone as you would any other telephone. While
speaking directly into the mouthpiece, position the antenna
up and over your shoulder. Do not hold the antenna when
the phone is “IN USE.” Holding the antenna affects call
quality and may cause the phone to operate at a higher
power level than needed.
Antenna Care and Replacement
Do not use the phone with a damaged antenna. If a
damaged antenna comes into contact with the skin, a minor
burn may result. Replace a damaged antenna immediately.
Consult your manual to see if you can change the antenna
yourself. If so, use only a manufacturer approved antenna.
Otherwise, take your phone to a qualified service center for
repair.
Use only the supplied or approved antenna. Non-approved
antennas, modifications, or attachments could impair call
quality, damage the phone, and violate FCC regulations.
Driving
Check the laws and regulations on the use of cellular
telephones in the areas where you drive. Always obey them.
Also, when using your phone while driving, please:
* give full attention to driving,
* use hands-free operation, if available, and
* pull off the road and park before making or answering
a call if driving conditions so require.
Electronic Devices
Most modern electronic equipment is shielded from RF
energy. However, RF energy from cellular telephones may
affect inadequately shielded electronic equipment.
iii
RF energy may affect improperly installed or inadequately
shielded electronic operating and entertainment systems in
motor vehicles. Check with the manufacturer or its
representative to determine if these systems are adequately
shielded from external RF energy. You should also check
with the manufacturer of any equipment that has been added
to your vehicle.
Consult the manufacturer of any personal medical devices
(such as pacemakers, hearing aids, etc.) to determine if they
are adequately shielded from external RF energy.
Turn your phone OFF in health care facilities when
any regulations posted in the areas instruct you to do so.
Hospitals or health care facilities may be using equipment
that could be sensitive to external RF energy.
Aircraft
Turn your phone OFF before boarding any aircraft.
* Use it on the ground only with crew permission.
* Do not use it in the air.
To prevent possible interference with aircraft systems,
Federal Aviation Administration (FAA) regulations require you
to have permission from a crew member to use your phone
while the plane is on the ground. To prevent interference
with cellular systems, FCC regulations prohibit using your
phone while the plane is in the air.
Children
Do not allow children to play with your phone. It is not a toy.
Children could hurt themselves or others (by poking
themselves or others in the eye with the antenna for
example). Children also could damage the phone, or make
calls that increase your telephone bills.
Blasting Areas
To avoid interfering with blasting operations, turn your unit
OFF when in a “blasting area” or in areas posted:
“Turn off two-way radio.”
Construction crews often use remote control RF devices to
set off explosives.
Air Bags
An air bag inflates with great force. DO NOT place objects,
including both installed or portable wireless equipment, in the
area over the air bag or in the bag deployment area. If invehicle wireless equipment is improperly installed and the air
bag inflates, serious injury could result.
iv
Potentially Explosive Atmospheres
Turn your phone OFF when in any area with a potentially
explosive atmosphere. It is rare, but your phone or its
accessories could generate sparks. Sparks in such areas
could cause an explosion or fire resulting in bodily injury or
even death.
Areas with a potentially explosive atmosphere are often, but
not always, clearly marked. They include fueling areas such
as gas stations; below deck on boats; fuel or chemical
transfer or storage facilities; areas where the air contains
chemicals or particles, such as grain, dust, or metal powders;
and any other area where you would normally be advised to
turn off your vehicle engine.
Do not transport or store flammable gas, liquid, or explosives
in the compartment of your vehicle that contains your phone
or accessories.
Vehicles using liquefied petroleum gas (such as propane or
butane) must comply with the National Fire Protection
Standard (NFPA-58). For a copy of this standard, contact
the National Fire Protection Association, One Batterymarch
Park, Quincy, MA 02269, Attn: Publication Sales Division.
Pacemaker/ICDs
Research sponsored by the Wireless Technology Research,
LLC (“WTR”), indicates that some wireless telephones cause
interference with pacemakers. Accordingly, NEC America
endorses the following recommendations issued by the WTR:
Wireless phones should be kept at a safe distance from a
pacemaker. Existing data indicate that the greater the
distance between a pacemaker and a wireless phone, the
less risk of interference. These data further indicate that six
inches is the proper separation distance for minimal risk.
Practical steps to achieve this separation distance include:
o The wireless telephone should not be placed over the
pacemaker, such as in a breast pocket, when it is in the
“ON” position. (A phone is “ON” when power is being
supplied to the telephone by the battery.)
o The phone should be used at the ear opposite the
pacemaker.
Note: There is nothing in the comprehensive data to
suggest that bystanders with pacemakers would be at risk of
interference from others who are using wireless phones.
v
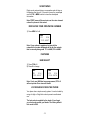
CONTROLS AND FEATURES
Antenna
Earpiece Receiver
Liquid Crystal
Display
Call Control Keys
Volume Key
Function Keys
Dialing
Indicators
Microphone
Symbol Keys/
Scroll Keys
Battery Locking Catch
Sounder/Speaker
Battery
Charging
Contacts
Rechargeable
Battery Pack
Battery Charging
Jack
External Connector
vi
CONTENTS
Getting Started
Installing and Removing the Battery
The Battery Charge Indicator
Charging and Recharging the Battery
Display Indicators
Quick Reference Guide
Operation of the Phone
Turning On or Off
Placing a Call
Receiving a Call
Signal Strength
Volume Key
Last Number Redial
Speed Dialing
The Memory
Storing Information
Recalling A Number From Memory
Editing Numbers
Displaying “Hidden” Numbers
Deleting Information from Memory
Scanning for a Number
Scratchpad
Displaying Your Own Phone Number
Features
NAM Select
Locking/Unlocking the Phone
Length of Your Calls
Resetting the Call Timers
Backlighting
Setting the Ringing Volume
Using the Phone on Two Networks
Pause Dialing
Roaming(System Select)
SID Management
DTMF Tone
Mute
Low Battery Alarm
Error Tone
Self Diagnostic Check
NAM Programming
Temporary Lock Code Set
One-Touch Dialing
Hands-Free
Caller Line Identification
Voice Messaging Service
Voice Mail Message Indication
Limited Warranty
Troubleshooting
Technical Information
Care and Maintenance
NEC Service Support
-1-
2
2
3
3
4
4,5
6
6
6
7
7
7
8
8
8
9
9
9
10
10
10
11
11
11
11
11
13
14
15
15
15
16
16
18
18
19
20
20
20
20
21
21
22
22
23
23
24
26
27
27
28
GETTING STARTED
Your phone is powered by a rechargeable battery.
A new battery must be fully charged
before being used for the first time.
If left unused, a fully charged battery will discharge itself in
about a month. Store batteries uncharged in a cool, dark,
and dry place.
The battery pack is a sealed unit with no serviceable parts
inside. Do not attempt to open the case.
WARNING: Use only NEC approved batteries, antennas,
and chargers. The use of any other types will invalidate
any approval or warranty applying to the telephone.
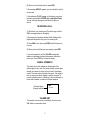
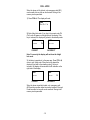
INSTALLING AND REMOVING THE BATTERY
To Install the Battery:
1. Insert the bottom of the battery into
the base of the phone.
➁
2. Fasten it to the phone by
pressing slightly downward on
the battery until the locking
catch snaps into place.
3. Make sure the battery is properly
installed.
To Remove the Battery:
Remember to switch the power off before removing
the battery.
1. Slide the locking latch located at the top of the battery
upward and gently pull the battery away from the phone.
①
-2-
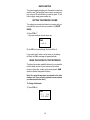
THE BATTERY CHARGE INDICATOR
The Battery Charge Indicator can be
accessed by pressing [FCN] [8] keys
after power has been applied to the
phone. The display screen indicates the
battery charge level ranging from [o] to
[oooo]. [o] representing low battery and
[oooo] representing full battery.
PWR
batt
oooo
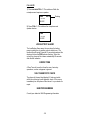
CHARGING AND RECHARGING THE BATTERY
Charging the battery can be accomplished two ways.
(A) By direct connect of the AC Adapter to the charging jack
of the phone.
(B) By placing the phone into the charging stand.
(A)
1. Plug the AC Adapter into a standard
PWR
110V AC outlet.
2. Insert the DC plug into the phones
oooo
battery jack.
CHArging
3. With PWR on display will show:
(B)
1. Plug the AC Adapter into a standard 110V AC outlet.
2. Plug the Charging Stand into the Adapter.
(A)
(B)
Note: Initial charging and recharging of the battery
usually takes approximately 10 hours.
A new battery must be fully charged
before being used for the first time.
Batteries last longer and perform better if allowed to
discharge fully at least once a week. You can do this by
leaving the phone switched on overnight, or until the
message RECHARGE BATTERY is displayed and the phone
shuts itself off.
NOTE: If the battery is too hot or cold, charging will be
interrupted until the battery reaches a normal temperature.
-3-
DISPLAY INDICATORS
PWR
FCN
HF
MUTE
8 8 8 8 8 8 8 8
8 8 8 8 8 8 8 8
IN USE
NOSVC
ROAM-B
(Power-Up Display)
PWR
oooo
IN USE
Received Signal Strength
Indicator
NOSVC
“NO SVC” shows until automatic
lock-in with Carrier Service. Stays
on for no signal or no connection
with Carrier Service.
PWR
oooo
IN USE
(Normal Operating Display)
QUICK REFERENCE GUIDE
Turn On/Off
Press and hold PWR.
Make Call
Key in number, press SND.
End call
Press END.
Answer call
Press any key except PWR.
Clear digit
Press CLR.
Clear display
Press and hold CLR.
Last number redial
Press SND.
Adjust volume
(4-levels off-max)
Press VOL for each level.
-4-
QUICK REFERENCE GUIDE
___________________The Memory___________________
Store a phone
number
Press [FCN][MEM].
Desired memory location
by number.(01,02,14 etc.)
Press [MEM] to store if occupied.
Speed Dialing
Press [MEM] and memory
location number.
Press SND.
Scan through
memory
Press [MEM] + 0 + 1, # or
✶
_______________List of Menu Functions______________
TOTAL TIME
Home & Roam
FCN + 1
CALL TIME
FCN + 2
MUTE
TX MUTE
FULL MUTE
FCN + 3
FCN + 3
FCN + 3(HOLD 3)
DTMF TONE
(Long/Standard)
FCN + 4
Press 4 to change.
SYSTEM SELECT
(Home,Standard,
A-Only,B-Only)
FCN + 5
Press 5 to change.
NAM SELECT
(NAM1,NAM2)
FCN + 6
Press 6 to change.
RING TONE VOLUME
(4 LEVELS 1,2,3,4)
FCN + 7
Press VOL to change.
BATTERY LEVEL
FCN + 8
PAUSE DIAL
FCN + 9
FULL LOCK
FCN + #
PARTIAL LOCK
FCN +
HIDDEN DIGITS
FCN(Hold)
-5-
✶
OPERATION OF THE PHONE
1) Press the PWR key and hold it for at least 2 seconds.
The phone will carry out a short self-test sequence, then
briefly display an all “8” pattern.
2) When the RSSI Indicator appears on the display, the
phone is ready for use.
If NO SVC appears it means that you are outside the cellular
service area and the network cannot serve you.
A cellular phone can only send and receive calls when it
is switched on.
3) Press the PWR key and hold it for at least 2 seconds to
switch the phone off.
PLACING A CALL
For optimum performance, fully extend the antenna before
sending or receiving a call.
Note: Push in the antenna when you are not using the
phone.
You can use the phone without extending the antenna in a
good coverage area.
1) Key in the number (include the area code if you're
making a long distance call).
If you make a mistake, press the CLR key to delete the last
keystroke; or to clear the whole display, press and hold the
CLR key.
2) The number will appear on the display.
3) Press SND.
4) The IN USE indicator will appear, and the number will
disappear from the display.
5) Lift the phone to your ear, and wait until your call is
answered.
-6-
6) When you have finished the call, press END.
If the message NO SVC appears, you are outside the cellular
service area.
If lock indicators (FL)(PL) appear on the display, your phone
has been electronically LOCKED (see Locking the Phone).
You can still make emergency calls when the phone is
locked.
RECEIVING A CALL
1) When there is an incoming call, the phone rings, and the
CALL message flashes on the display.
If the ringing tone has been switched off-the flashing of the
display and keypad will alert you of an incoming call.
2) Press SND (or any key except PWR) and lift the phone to
your ear.
3) When you have finished your conversation, press END.
If you don’t answer the call, the CALLED message will
remain on the display (showing that someone has tried to
phone you). Press CLR key to clear the display.
SIGNAL STRENGTH
The quality of your call depends on the strength of the
cellular signal in your area. The phone displays current signal
strength as a series of circles on the left side of the display
screen. The more circles, the better the signal. If the signal is
poor, try moving the phone slightly to improve reception. If
you are using the phone in a building, it may be necessary to
move near a window, or outdoors for better reception.
PWR
oooo
Received Signal
Strength Indicator
VOLUME KEY
The earpiece volume can be controlled by the volume key
VOL while in conversation mode.
-7-
LAST NUMBER REDIAL
The last number dialed can be redialed automatically
without re-entering it. (The number can still be retrieved
even if the phone has been switched off and back on.)
1) With the display clear, press SND.
2) The number you last called will momentarily appear on the
display and is automatically redialed.
PWR
2141234567
IN USE
PWR
oooo
IN USE
SPEED DIALING
The phone dials quickly by recalling phone numbers from
memory using the memory location number and the SND
key.
1) Press MEM and the Memory Location Number (i.e.12)
PWR
12
2141234567
2) Press SND. The phone number will disappear and
the signal strength indicator will appear.
PWR
2141234567
IN USE
PWR
oooo
IN USE
THE MEMORY
Your phone has 24 memory locations which allow you to
store numbers of up to 32 digits.
o Memory Address MEM #: Displayed as “OC” 32 digits.
Auto-Stored when Last Number Dialed is sent. Erased by
next number sent.
o Memory Address MEM 00: Your own phone number and
NAM used.
o Memory Address 1 to 24: 32 digits. Keypad Entry.
-8-
STORING INFORMATION
1) Key in the phone number.
2) Press FCN + MEM.
PWR
StorE
3) Press in Memory Location number (01,02,12, etc.).
4) The number will automatically be stored in the memory
location selected.
Note: If the memory location you have selected is
already occupied, an alarm tone will sound, the display
will flash and the contents of the memory location will be
displayed.
5) If you wish to overwrite the contents in this memory
location, simply press MEM.
6) If you do not want to overwrite the contents of the
memory location, simply press and hold the CLR key.
RECALLING A NUMBER FROM MEMORY
Numbers stored in any of the 24 memory locations can be
recalled for viewing and or changing as the user prefers.
1) Press MEM + Memory Location Number(i.e. 12)(if
known). If not known use # or ✶ to find the desired number.
PWR
PWR
12
2141234567
rECALL
2) Press SND to proceed with the call.
EDITING NUMBERS
If you make a mistake while keying in a number, you can
correct it as follows:
1) Press CLR to delete the last digit.
2) Press and hold CLR to clear the whole display.
-9-
DISPLAYING “HIDDEN” NUMBERS
The phone can display up to 16 digits (dashes count as
digits). If you key in more than 16, the first digits will
disappear off the side of the display.
If you want to check these hidden digits, press and hold FCN
and they will appear on the display. When you release the
FCN key, the original 16 digit display will reappear.
Remember to clear the whole display (press CLR and hold)
after having displayed a long number.
DELETING INFORMATION FROM MEMORY
1) Press and hold CLR to clear display.
2) Press FCN + MEM.
3) The display will read.
PWR
StorE
4) Key in the number of the memory location you want to
delete.
5) An alarm tone will sound, and the contents of the memory
location will be displayed and flashing.
Flashing
PWR
01
2141234567
6) Press MEM. The contents of the memory location will be
deleted.
SCANNING FOR A NUMBER
1) To scan the entire memory, press MEM and # or ✶ to
display each occupied memory location.
PWR
12
2141234567
2) When you find the name you want, make the call by
pressing SND.
-10-
SCRATCHPAD
Digits can be entered during a conversation and will stay on
the display after the call. If you wish to keep the scratchpad
use the FCN + MEM function to store the scratchpad
information.
Note: DTMF tones will be sent out over the voice channel
unless the phone is first muted.
DISPLAYING YOUR OWN PHONE NUMBER
1) Press MEM + 0 + 0.
PWR
P-1
214
123-4567
Note: If your phone is registered on two cellular
networks, the number displayed will be for the network
that is currently being used. P1 is NAM1, P2 is NAM2.
FEATURES
NAM SELECT
1) Press FCN + 6.
2) Press 6 to change.
PWR
P-1
214
123-4567
PWR
P-2
214
234-5678
Note: If only one NAM has been programmed, FCN + 6
will not operate. Error tone will sound.
LOCKING/UNLOCKING THE PHONE
Your phone has a simple security system. It can be locked by
using a 4-digit or 3-digit lock code to prevent unauthorized
use.
The lock code is supplied by the dealer. If you forget
your lock code contact your dealer. The factory default
lock code is 0000.
-11-
FULL LOCK
When the phone is fully locked, only emergency calls (911)
can be made, but any call can be received. Storing to the
memory is also prevented.
1) Press FCN + #. The display will read:
PWR
EntEr Cd
2) Enter 4-digit lock code. If you key in the correct code, FL
(Full Lock) will appear on the right side of the display. If the
key is incorrect, the display will go back to the standby mode.
PWR
oooo
PWR
oooo
FL
CORRECT
INCORRECT
Note: For security the display will not show the 4-digit
lock code.
3) Unlocking is carried out in the same way. Press FCN + #,
enter in your 4-digit code. When the lock is cleared the
display will go back to the standby mode. If the key is
incorrect, the display will remain with the FL indicator on the
right side of the display.
PWR
oooo
PWR
oooo
CORRECT
FL
INCORRECT
When the phone is partially locked, only emergency calls
(911) and any numbers stored in memory locations 1 through
9 can be made, but any call can be received. Storing to the
memory is also prevented.
-12-
PARTIAL LOCK
1) Press FCN + ✶. The display will read:
PWR
EntEr Cd
2) Enter 4-digit lock code. If you key in the correct code, PL
(Partial Lock) will appear on the right side of the display. If
the key is incorrect, the display will go back to the standby
mode.
PWR
oooo
PWR
oooo
PL
CORRECT
INCORRECT
Note: For security the display will not show the 4-digit
lock code.
3) Unlocking is carried out in the same way. Press FCN + ✶.
When the lock is cleared the display will go back to the
standby mode. If the key is incorrect, the display will remain
with the PL indicator on the right side of the display.
PWR
oooo
PWR
oooo
CORRECT
PL
INCORRECT
LENGTH OF YOUR CALLS
The phone allows you to check the duration of your calls.
Upon sending or receiving a call, the current call timer begins
counting. This can be viewed at anytime on the display
by pressing FCN + 2.
Minutes
PWR
CALL-t
01-16
Seconds
Note: The current call timer will be reset upon receipt or
sending of another call.
-13-
RESETTING THE CALL TIMERS
Each NAM has a Total Time Counter. The Total Time of all
incoming and outgoing calls are registered by these
counters.
SINGLE - NAM
o To View Total Time: Press FCN + 1.
Hours
PWR
totAl-t
003-29
Minutes
DUAL - NAM
o To Change NAMs: Press FCN + 6. Press 6 to change.
PWR
P-1
214
123-4567
PWR
P-2
214
234-5678
o To View Total Time: Press FCN + 1.
Hours
PWR
totAl-t
004-15
Minutes
RESETTING TOTAL TIME COUNTER
To reset the Total Time Counters:
o Press FCN + 1+ #.
o Enter 0000.
PWR
totAL-t
CLEArEd
PWR
EntEr Cd
o Press CLR to exit.
-14-
BACKLIGHTING
The phone keypad and display are illuminated to make them
easier to read. The backlights come on when you press any
key, and go off 10 seconds after your last key press. To turn
them on again, simply press another key.
SETTING THE RINGING VOLUME
The ringing tone sounds when there’s an incoming call. you
can select the volume of the tone or switch it off (SILENT
MODE).
1) Press FCN + 7.
Ring tone sounds at the last volume set.
PWR
rin9-4
2) Use VOL key to step through the levels 0 thru 4.
If you select level 0, when a call is coming in, the display
will flash, the CALL message will appear and flash.
USING THE PHONE ON TWO NETWORKS
The phone two number capability feature lets you subscribe
to both cellular services in your area as well as cellular
service in other cities, usually one for each network. (NAM
stands for Number Assignment Module).
Note: You cannot change from one network to the other
during a call. (If you are only registered on one network,
you cannot access the other.)
To Change the Network:
1) Press FCN + 6.
PWR
P-1
214
123-4567
-15-
2) Press 6.
PWR
P-2
214
234-4567
3) Press CLR. Phone will re-initialize on the NAM selected.
PAUSE DIALING
PAUSES - FCN + 9 . This function creates pauses while
sending out DTMF signaling tones during conversation
mode. When a manual pause is encountered in the DTMF
string, the phone will pause indefinitely, until the user presses
the SND key.
More than one pause may be placed in a sequence,
separating several groups of DTMF digits.
For example, this function may be used for calling a paging
system and sending commands, ID numbers (PIN), and/or
numeric messages:
(1)
(2)
(3)
(4)
(5)
“123456789” + “P” + “123456789#” + SND + SND
(1) This is the phone number to be called via the cellular
system.
(2) This character indicates a Manual Pause. The user will
wait for the initial prompt from the paging system before
pressing the SND key.
(3) This is a DTMF digit sequence which may represent the
PIN of the called pager.
(4) This is the initial send keypress which causes the phone
to initiate a call using the number up to the first pause mark.
(5) This is the second send keypress, while in conversation
mode, which will end the manual pause and start the sending
of DTMF digits.
ROAMING (SYSTEM SELECT)
Each cellular service area can have two cellular service
suppliers called carriers. One carrier is called the ‘nonwireline’ or ‘A’ system and the other carrier is called the
‘wireline’ or ‘B’ system. Your phone is designed to work with
either or both carriers.The system priority feature allows you
to program your phone for optimum operation when in your
home serving area or when away from your home area. This
is called roaming. When you buy your phone, you may
register (receive a phone number) with either or both of your
-16-
local carriers. Contact the office of your home cellular phone
company for information about the roaming agreements they
have with other cellular phone companies. In some areas,
roaming telephones are automatically recognized by the
cellular system’s computer. In other areas, you must contact
the cellular phone operator before it can recognize your
phone. The company needs to know your telephone number,
your phone ESN (electronic serial number), and how you
plan to pay for your calls. There is usually an additional
charge for roaming calls.
Note: The ESN for your phone is located in the battery
compartment of the phone, and is comprised of the first
8 digits preceded by NEC’s company code of 189.
To Select the Roaming Mode:
1) Press FCN + 5.
PWR
SyS-SEL
H-OnLy
Home Only
This service is limited to your home area.
2) Press 5 to advance through the system selections.
Sys A only
This service is limited to the ‘A’ (non-wireline) carrier
only.
PWR
SyS-SEL
A-OnLy
Sys B only
This service is limited to the ‘B’ (wireline) carrier only.
PWR
SyS-SEL
b-OnLy
-17-
Standard
This allows the phone to first search for a free channel
in the Home system. If the phone cannot find a free
channel, it searches the other system.
PWR
SyS-SEL
StAndArd
The ROAM indicator is displayed when the phone is using a
system other than your home system. The roam systems
your phone accesses can be specified through the use of
system identification management, referred to as SID
management. SID Management is described below.
PWR
oooo
ROAM-A
SID MANAGEMENT
The SID Management feature lets the phone operate only
within specifically identified (Preferred) systems. The service
provider can enter up to thirty (30) preferred System ID
numbers that identify the systems that you want your phone
to access.
Programming of your System ID numbers is accomplished
by your service provider and is only associated with NAM1.
DTMF TONE
The DTMF Tone generator has two settings, Standard and
Long. If the DTMF Tone generator is set to Standard, the
phone sends each DTMF signaling tone for 100 milliseconds. With the DTMF Tone generator set to Long, the
phone sends each DTMF signaling tone for as long as the
key is pressed, up to 3 seconds maximum.
-18-
1) Press FCN + 4.
PWR
tonE
StAndArD
2) Press 4 to change.
PWR
tonE
Lon9
MUTE
The Mute function operates only when the phone is in the
conversation mode. There are two (2) Mute positions, MUTE
or FULL MUTE.
MUTE - This function switches off the microphone while in
the conversation mode.
FULL MUTE - In the portable configuration, this function
switches off both the microphone and the earpiece while in
the conversation mode. While mounted in a vehicle (HF
Adapter), this function turns off the phones external
microphone and speaker.
MUTE:
1) Press FCN + 3. This switches off the microphone.
PWR
oooo
IN USE
MUTE
2) Press FCN + 3. This switches the microphone back on.
PWR
oooo
IN USE
-19-
FULL MUTE:
1) Press and hold FCN + 3. This switches off both the
microphone and earpiece or speaker.
PWR
oooo
IN USE
MUTE
Flashing
2) Press FCN + 3. This switches the microphone and
speaker back on.
PWR
oooo
IN USE
LOW BATTERY ALARM
The Low Battery Alarm warns the user when the battery
power is getting low, by emitting a short double tone. The
double tone will sound 6 times at 10 second intervals and the
display will show the PWR indicator flashing. When this
occurs, the phone will shut down automatically 60 seconds
after the first indication.
ERROR TONE
A Error Tone will sound to inform the user of miss key
operations, or when a keypress is ignored.
SELF DIAGNOSTIC CHECK
The phone will show a blank display if it finds any trouble
within the unit during its self diagnostic check. If this occurs,
immediately turn the phone off and return it to your dealer for
repair.
NAM PROGRAMMING
Consult your dealer for NAM Programming information.
-20-
TEMPORARY LOCK CODE SET
This function allows the user to program any 3-digit
temporary lock code to lock or unlock the phone without
revealing the personal 4-digit lock code.
Note: The 3-digit temporary code cannot be the same as
the first three digits of your personal lock code.
1) Press FCN + 0.
PWR
EntEr 3d
2) Enter any three digits. Press the ★ key.
PWR
EntEr Cd
3) Enter your 4-digit lock code.
PWR
t-Cd SEt
Note: Your 3-digit Temporary Lock Code is now set.
4) Press CLR. Phone returns to stand-by.
ONE-TOUCH DIALING
When One-Touch dialing is enabled, the user will have up to
three (3) one-touch keys available. Each one-touch key
corresponds to one of the first three (3) memory locations
(i.e. one-touch 1 = RCL 01). When turned on this function
will allow the user to press a single digit (1 thru 3)(Hold) and
have the phone automatically display and dial (SND) the
number residing in that memory location.
1) Press FCN + 3.(Stand-by Mode Only)
PWR
1-touch
On
-21-
2) Press 3 to switch On or Off.
3) Press CLR to return to standby.
HANDS-FREE
This function operates only when phone is installed in the
Simple Hands-Free Adapter and you are in conversation
mode. FCN + VOL turns the Hands-Free function On or Off.
With Hands-Free mode On and the phone in the
conversation mode, the display shows:
PWR
oooo
IN USE
HF
To go out of the Hands-Free mode, press FCN + VOL.
PWR
oooo
IN USE
PWR
oooo
IN USE
Hands-Free OFF
HF
Hands-Free ON
CALLER LINE IDENTIFICATION
The caller line identification feature (where available) allows
the phone number of the incoming call to appear on the
phone display. Contact your cellular service provider for
information on caller line identification.
With the phone in standby, an incoming call appears on the
display as shown below.
PWR
CALL
214
555-1212
Incoming Call
Phone
Number
Once the incoming call is answered, the caller line identification information is removed from the display.
-22-
VOICE MESSAGING SERVICE
Cellular Digital Messaging Service (CDMS), if available
through the cellular service provider in the area, is a voice
message service for the cellular customer. When a cellular
customer turns off or does not answer the cellular phone, or
when the customer is currently on a call, CDMS answers the
incoming call. The caller is provided with the option to leave
a voice mail message. The cellular phone user is notified of
messages through a voice mail message indication.
VOICE MAIL MESSAGE INDICATION
When an incoming caller leaves a message through the
cellular provider's digital messaging service, the cellular
phone user is notified by a voice mail message indication.
The type of voice mail message notification varies between
cellular service providers. Upon receiving a voice mail
message, the voice mail message indication is one of the
following: a phone beep and displayed “MAIL” indication, a
phone beep without a displayed indication, or a series of
beeps generated by the service provider and transmitted to
the phone user through the earpiece receiver when an
outgoing call is made. The displayed indication is shown
below.
Voice Mail
PWR
Message
oooo
Indication
AIL 01
If additional messages are received before the current voice
message information is retrieved, the voice mail message
number in the displayed indicator increases.
Voice Mail
PWR
Message
oooo
Number
AIL 02
Increases
Voice messages can be retrieved from the messaging
service by following the service provider instructions for voice
message retrieval. Contact your service provider for
information on availability of voice messaging services and
for any additional information on voice mail messaging.
-23-
LIMITED WARRANTY
1. What Products May Be Covered By This Limited
Warranty?
The following products (the "Products" or the "Product")
purchased through an NEC America, Inc. (NECAM), Wireless
Communications Division Authorized Dealer (the "Dealer") in
the United States on or after January 1, 1997, may be
covered by this warranty:
[TALKTIME MAX™ 920 ANALOG CELLULAR TELEPHONE]
2. What Does This Warranty Cover?
NECAM warrants to the original end-user Product purchaser
("You") that the Products will conform to the applicable
published specifications in effect at the time of shipment from
NECAM to the Dealer, and that the Products will be free from
defects in materials or workmanship under normal use and
service during the warranty period described in Paragraph 4.
3. When Does Your Warranty Begin?
The warranty period will begin on the date You purchase the
Product. Dated proof of purchase is necessary to
accompany any Product returned for warranty service
consideration. Valid proof of purchase must identify the point
of purchase, date of purchase, Product model or trade name,
and Electronic Serial Number or Mechanical Serial Number
for transceivers and boosters.
4. How Long Does The Coverage Last?
The warranty period for the Product is:
[ONE (1) YEAR]
Any Products repaired or replaced under the terms of this
warranty are covered under the warranty for the remainder of
the original warranty period or ninety (90) days from the date
of service return shipping, whichever is longer.
5. What Will The Manufacturer Do If The Product
Becomes Defective In Materials Or Workmanship During
The Warranty Period?
If any Product covered under this warranty becomes defective in materials or workmanship during the applicable warranty period, NECAM will, at its option, either repair the
defective Product without charge for parts and labor, or provide a replacement in exchange for the defective Product.
-24-
6. What Is Not Covered By This Warranty?
(a) This warranty does not extend to:
(i) Products which have been subjected to misuse, accident, physical damage, improper installation, abnormal
operation or handling, neglect, inundation, fire, water, or
other liquid intrusion, or;
(ii) Products which have been damaged due to repair,
altered, or modified by anyone other than an authorized
service warranty component-level representative of
NECAM, or;
(iii) Defects caused by components, parts, or accessories not compatible with the warranted Product, or;
(iv) Products whose warranty/quality labels, product
serial number plates or electronic serial numbers have
been removed, altered, or rendered illegible, or;
(v) Accessory items such as antenna, cables, curl
cords, cases, etc., or;
(vi) Products shipped to NECAM for repair from outside
the United States.
(b)
Any other warranties, including but not limited to the
implied warranties of merchantibility and fitness for a
particular purpose, shall be limited to the duration of
this warranty. Some states do not allow limitations on
how long an implied warranty lasts, so the above limitation may not apply to you.
(c)
NECAM's total liability for damages for any cause related to or arising out of the use or inability to use the
product, whether in contract, negligence, strict tort, or
based on any other legal theory, shall not exceed the
original price paid for the product.
(d)
In no case shall NECAM be liable for any indirect, special, incidental, or consequential damages based upon
breach of warranty, breach of contract, negligence,
strict tort, or any other legal theory. Such damages
include, but are not limited to, loss of profits, loss of
savings or revenues, inability to use the products or any
associated equipment, cost of capital, cost of any substitute equipment, facilities or services, claims by third
parties other than you, and injury to property. These
limitations do not apply to claims for personal injury.
Some states do not allow the exclusion or limitation of
incidental or consequential damages, so the above limitation or exclusion may not apply to you.
-25-
7. How Do You Get Warranty Service?
If Your Product requires warranty service, it must be returned
to an NEC Authorized Service Center along with a description of the Product malfunction or difficulty. You are required
to substantiate warranty status with a dated proof of purchase (as explained in item #3), inclusive of Product's serial
number (if applicable). The address of the nearest NECAM
Authorized Service Center may be obtained by calling (800)
637-5917 or (972) 751-7500, or by writing to: NEC America,
Inc., Attention: Service Support & Administration, 1621
Walnut Hill Lane, Irving, Texas, 75038. NECAM assumes no
risk for damage or loss in transit.
If, in NECAM's sole opinion, the Product failure is not covered under this warranty, or proof of purchase does not meet
the terms of this warranty, You will be notified and Your
authorization will be requested for any further repair activity.
Products repaired under warranty will be returned to You,
transportation prepaid.
8. How Does State Law Apply To This Warranty?
This warranty gives You specific legal rights, and You may
also have other rights which vary from state to state.
9. This Warranty Is The Entire Agreement.
Unless modified in writing, signed by both You and NECAM,
this warranty is understood to be the complete and exclusive
agreement.
REV: LW012097
TROUBLESHOOTING
If the power does not come on or stay on:
Make sure the battery is installed in the phone properly.
Be sure the contacts are clean on the battery and the
charger.
Battery charge may be too low for operation. Listen for
the low battery alarm or check battery level by pressing
FCN + 8.
If the power comes on, but the phone does not work:
Check the NO Service (NO SVC) message, you might
be out of the cellular service area.
Make sure that the antenna is extended to its full
length.
-26-
TECHNICAL INFORMATION
Dimensions
147.32x50.8x27.94mm
(5.8"x2.0"x1.1")
Weight
7.8 ounces
Transmitting Power
0.6 W max. ERP
Operating Voltage
4.8V(int. battery)
Frequency Band
824.040 - 848.970 MHz (TX)
869.040 - 893.970 MHz (RX)
Standard Battery
Capacity
1000 mAh
Number of Channels
832
Memory Locations
24
Memory Capacity
32 digits memory locations 1-24
CARE AND MAINTENANCE
Your phone is a product of superior design and
craftsmanship and should be treated with care. The
suggestions below will help you enjoy this product for many
years.
Keep it dry. (Water contains minerals that will corrode
electronic circuits.) Avoid all liquid spills. Any form of liquid
will cause permanent damage to your phone.
Do not store in hot area. High temperatures can shorten the
life of electronic devices, damage batteries, and warp or melt
certain plastics.
Do not drop it. This might cause permanent damage. The
internal circuit boards can be broken.
Do not use or store in dusty, dirty areas. This will cause
permanent damage to moving parts.
Do not use harsh chemicals, cleaning solvents, or strong
detergents to clean it. Wipe it with a soft cloth slightly
dampened in a mild soap-and-water solution. If the unit is
not working properly, take it to your nearest authorized
dealer. The personnel there will assist you, and, if necessary,
arrange for service.
-27-
NEC SERVICE SUPPORT
NEC's Service Support group is ready to assist you with any
additional information that you may need in the operation and
integration of your NEC Cellular Telephone and NEC
Authentic Accessories. Service Support can be obtained by
contacting NEC at:
Telephone:
1-800-637-5917 *
1-972-751-7500
Writing:
NEC America, Inc.
Service Support
1621 Walnut Hill Lane
Irving, Texas 75038
* The 800 number listed above also provides access to the
NEC Repair Service and Parts Sales groups.
NEC Marketing & Sales
Marketing:
NEC America Inc.
Wireless Marketing Div.
1621 Walnut Hill Lane
Irving, Texas 75038
1-800-421-2141
Sales Agency:
NMI Corporation
14110 N. Dallas Parkway
Suite 300
Dallas, Texas 75240
1-800-CALL-NMI (225-5664)
Copyright A1998 by NEC Corporation
Manual Part Number: 621-0301
2nd Edition February 1999
All Rights Reserved. Printed in U.S.A.
All Specifications and conditions are subject to change without notice.
LICENSED UNDER ONE OR MORE OF THE FOLLOWING U.S. PATENTS
4,954,951
4,396,976
4,739,396
4,942,516 4,896,260
4,371,923 4,121,284
4,675,863 4,817,089
4,829,419
4,120,583
4,912,705
-28-
4,825,364
4,435,732
5,022,024
4,686,622 4,531,182
4,471,385 4,672,457
5,121,391
Alphabetical Index
Topic
Page
-AAircraft
Use on
Alarm
Battery
Alert
Call
Antenna
Care
Replacement
-Liv
20
15
iii
iii
-BBattery
Alarm
Charging
Indicator
Installing
Recharging
Removing
Backlighting
20
3
3
2
3
2
15
-CCall
Placing
Receiving
Length of
Timers
Caller Line ID
Care
6
7
13
14
22
27
-DDeleting
Information
Dialing
One Touch
Pause
Speed
Display
Hidden Numbers
Indicators
Own Number
Locking
Full
Partial
Temporary
-MMemory
Deleting
Editing
Hidden Digits
Locking
Recalling
Scanning
Scratchpad
Speed Dial
Storing
Menu
Functions
Mute
Mute
Full Mute
10
21
16
8
10
4
11
4,5
-H22
-IInformation
Deleting
Editing
Recalling
Storing
10
9
9
9
-LLast # Redial
Lights
5
19
20
21
6
11
-PPause Dialing
Recall
Receiving
Redial (Last #)
Resetting
Call Timers
Ring
“Volume
Roam/Sys Select
16
8
15
9
7
8
14
15
16-18
-SSID Management
-G-
Handsfree
8
10
9
10
11-13,21
9
10
11
8
9
-OOne Touch
Operating
Own Phone #
20
Guide
Quick Reference
12
13
21
-R-
-EError Tone
Page
Topic
18
-TTechnical Info
Tones
Low Battery
Troubleshoot
27
20
26
-UUnlock
Unmute
11-13
19
-VVoice Messaging
23
Voice Mail Indication 23
Volume
Ring
15
Voice
7
-WWarranty Info
24-26
NEC TalkTime MAX™ 920 Manual
OPERATION SUMMARY
Page
_________________________________________
NOTES:
o [X][X] = Memory Address 01 to 24.
[X] = Memory Address 1 to 9.
KEY OPERATION TERMS:
o
o
o
o
Press = Press Key firmly.
Press(Hold) = Press and hold down key.
Turn = Change Mode
Key-In = Enter a series of digits
_________________________________________
BASIC OPERATION:
Power On/Off:
o Press(Hold): [PWR]. For On or Off.
Place A Call:
o Key-in [Number]. Dial Number
Send A Number:
o Press [SND]
Receive A Call:
o Press Any Key Except [PWR]
End A Call:
o Press [END]
6
6
6
7
7
_________________________________________
CONVENIENCE FUNCTIONS:
Edit Display:
o Press [CLR]. Erase Digit.
Press [CLR Hold].Erase display
Backlight:
o Press [Any Key] Except [PWR]
For 10-second backlight.
View Hidden Digits:
o Press [FCN Hold].
With Number Displayed.
Earpiece Volume Control:
o Press [VOL] during standby.
View Own Number:
o Press [MEM]+ 0 + 0
9
9
15
10
7
11
_________________________________________
MEMORY STORING AND RECALL:
Store Number to Memory Address:
o Key-in Number. Press [FCN]+[MEM]+
[Memory Location].
Store Number to Occupied Address:
o Key-in Number. Press [FCN]+[MEM]+
[Memory Location]. Press [MEM]
again to overwrite.
9
9
NEC TalkTime MAX™ 920 Manual
OPERATION SUMMARY
Page
_________________________________________
Store Number From Scratchpad:
o Key-in Number During Conversation.
Press [FCN+MEM]+[Memory Location].
Recalling Stored Numbers:
For Direct Recall
o Press [MEM] + [Memory Location].
For Scanning All Locations.
Press [MEM] # or ✶.
11
9
10
_________________________________________
FCN KEY OPERATIONS:
FCN
FCN
FCN
FCN
FCN
FCN
FCN
FCN
FCN
FCN
FCN
FCN
FCN
FCN
FCN
FCN
1: Total Time(View/Reset)
2: Call Time (View)
3: Mute (Conversation Mode Only)
3: One Touch Dial(Standby Only)
4: DTMF Tone (Long/Standard)
5; System Select
6: NAM Select
7: Ring Tone Volume
8: Battery Level
9: Pause Dial
0: Temporary Lock Code Set
#: Phone Full Lock/Unlock
✶: Partial Lock/Unlock
(Hold): View Hidden Digits
VOL: Handsfree Mode On/Off
MEM: Storing Information
14
13
19
21
18
16
11
15
3
16
21
12
13
10
22
9