1
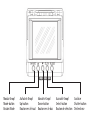
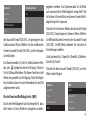
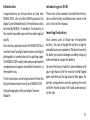
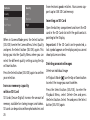
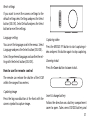
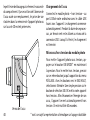
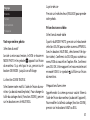
DCM 5.0
DIGITAL CAMERA MODULE
Bedienungsanleitung
Instruction manual
Notice d’utilisation
Modus-Knopf
Mode-button
Bouton Mode
Aufwärts-Knopf
Up-button
Bouton vers le haut
Abwärts-Knopf
Down-button
Bouton vers le bas
Auswahl-Knopf
Select-button
Bouton de sélection
Auslöser
Shutter-button
Déclencheur
Vergrößerungen mit dem DCM
Magnifications with the DCM
Grossissements avec le DCM
Spektiv
Spotting Scope
Lunette terrestre
Vergrößerung
Magnification
Grossissement
Minox MD 62 Serie / Series / Série
40 x
Leica Televid 62
32 x
Leica Televid 77
40 x
Swarovski AT / ST 80
42 x
Swarovski ATS / STS 65
42 x
Swarovski ATS / STS 80
42 x
Kowa TSN 1-4
38 x
Kowa TSN 600 Serie / Series / Série
38 x
Kowa TSN 660 Serie / Series / Série
38 x
Kowa TSN 820 Serie / Series / Série*
38 x
Kowa TSN 770 Serie / Series / Série*
45 x
Kowa TSN 880 Serie / Series / Série*
45 x
Zeiss Diascope 65
35 x
Andere Spektive sind mit dem MINOX DCM nicht kombinierbar.
Other spotting scopes can not be adapted with the MINOX DCM.
On ne peut pas combiner le MINOX DCM et d’autres lunettes terrestres.
*benötigt den Kowa Okular-Adapter
*requires Kowa eyepiece adapter
*nécessite un adapteur de Kowa
Bedienungsanleitung MINOX DCM
Deutsch . . . . . . . . . . . . . . . . . . . . . . . . . . . . . . . . . . . . . . . . . . . . . ab Seite 2
Instruction manual MINOX DCM
English . . . . . . . . . . . . . . . . . . . . . . . . . . . . . . . . . . . . . . . . . . . . from page 20
Notice d’utilisation MINOX DCM
Français . . . . . . . . . . . . . . . . . . . . . . . . . . . . . . . . . . . . . . . . . . . . de page 36
Inhaltsverzeichnis
Einleitung . . . . . . . . . . . . . . . . . . . . 3
Benutzen des Selbstauslösers . . . . . . . . . 10
Einsetzen der Batterie . . . . . . . . . . . . . . 3
Einstellen des Weißabgleichs (WB) . . . . . . 11
Aufladen der Batterie . . . . . . . . . . . . . . 4
Einstellen des Belichtungswertes (EV) . . . . 12
Einschalten der Kamera . . . . . . . . . . . . . 4
Anpassen Ihrer Kamera-Einstellungen . . . . 12
Ihr erstes Bild . . . . . . . . . . . . . . . . . . 5
Benutzen der Fernbedeinung . . . . . . . . . 14
Video-Aufnahme . . . . . . . . . . . . . . . . 5
Wartung des Kameramoduls . . . . . . . . . 15
Wiedergabe-Modus . . . . . . . . . . . . . . . 6
Technische Daten . . . . . . . . . . . . . . . 17
Bildqualität . . . . . . . . . . . . . . . . . . . 7
Gewährleistungsbestimmungen . . . . . . . 18
Erweiterung des Speicherplatzes
durch eine SD-Karte . . . . . . . . . . . . . . . 8
Einsetzen einer SD-Karte . . . . . . . . . . . . 8
Löschen von Bildern . . . . . . . . . . . . . . . 9
Übertragen Ihrer Bilder
auf Ihren Computer . . . . . . . . . . . . . . . 9
2
Einleitung
Lernen Sie das DCM kennen
Wir beglückwünschen Sie zum Kauf Ihres MINOX
DCM. Wie alle anderen MINOX Produkte steht auch
dieses digitale Kameramodul in der großen Tradition
unseres Hauses. Es verbindet Funktionalität auf
kleinstmöglichem Raum mit sehr guter optischer
Qualität.
Nehmen Sie sich bitte einige Momente Zeit, um
diese Anweisungen und die Sicherheits- und Wartungshinweise im letzten Abschnitt dieser Bedienungsanleitung zu lesen.
Einfach und schnell zu bedienen, ist das MINOX
DCM für die digitale Beobachtung bzw. digitale
Fotografie in Kombination mit einem Spektiv hervorragend geeignet. Das MINOX DCM kann zu Ihrem ständigen Begleiter werden, um Ihre schönsten
Erinnerungen auf moderne Weise festzuhalten.
Ihr Kameramodul verwendet eine wiederaufladbare
Lithium-Ionen-Batterie. Die Batterie kann mithilfe
des im Lieferumfang enthaltenen Zubehörs aufgeladen werden. Wir gewähren weder für die Batterie
noch für das Kameramodul Garantie, falls die Batterie auf andere Art aufgeladen wird.
Diese Anleitung soll Ihnen helfen, das Leistungsspektrum des MINOX DCM kennen zu lernen und
optimal zu nutzen.
Um die Batterie einzusetzen, halten Sie mit der
rechten Hand das Kameramodul bei geöffneter
Monitorabdeckung so, dass die Rückseite nach
oben zeigt. Öffnen Sie jetzt die Batterieabdeckung,
indem Sie mit dem Daumen der linken Hand den
Verschluss öffnen und zur Seite ziehen.
Wir wünschen Ihnen viel Freude
beim Fotografieren!
Einsetzen der Batterie
3
Schieben Sie die Batterie mit den Metall-Kontakten voran in das Batteriefach und schließen
Sie die Batterie-Verriegelung. Schließen Sie das
Batteriefach.
Auch wenn die Batterie entfernt oder ersetzt wird,
bleiben Ihre Bilder im Speicher der Kamera oder der
SD-Karte gesichert.
Aufladen der Batterie
Schließen Sie das ausgeschaltete Kameramodul
unter Verwendung des mitgelieferten USB-Kabels
an den USB-Anschluss Ihres Computers an. Der
Ladevorgang startet automatisch.
Solange die Batterie geladen wird, leuchtet ein
grünes Licht im Bereich des USB-Anschlusses.
Wenn das Licht erlischt, ist der Ladevorgang abgeschlossen.
Ein- / Ausschalten des Kameramoduls
Um die Kamera einzuschalten, drücken und halten
Sie die Modus-Knopf ON/MODE*.
Um die Kamera auszuschalten, drücken Sie den
Modus-Knopf so oft, bis das Einstellungs-Menü
erscheint. Drücken Sie den Abwärts-Knopf, bis Ausschalten ausgewählt ist, und betätigen Sie dann den
Auswahl-Knopf, um die Kamera auszuschalten.
Batteriefach-Verriegelung
4
* siehe schematische Darstellung auf der Aufklappseite
Einstellungen
Ausschalten
Formatieren
Auto aus
Frequenz
In der Grundeinstellung
schaltet sich Ihre Kamera
automatisch aus, wenn
sie 60 Sekunden nicht
benutzt wird. Dies spart
Batterie-Energie.
Ihr erstes Bild
Erfassen des Motivs
Wird das DCM eingeschaltet, befindet es sich im
Kamera-Modus; das
-Symbol erscheint auf dem
Display. Ist dieses Symbol nicht sichtbar, drücken
Sie so oft auf den Modus-Knopf, bis es erscheint.
Digitale Zoomfunktion
Erfassen Sie das Motiv, das Sie aufnehmen wollen,
im Display auf der Rückseite des Kameramoduls.
Um den gewünschten Bildausschnitt in der Größe
zu verändern (Zoom-Funktion), drücken Sie den
Aufwärts- bzw. den Abwärtsknopf.
Aufnahme des Bildes
Drücken Sie den Auslöser (RELEASE), um das Bild
aufzunehmen.
Video-Aufnahme
Auswählen des Video-Modus
Drücken Sie im Foto-Modus den Auswahl-Knopf
(SEL/OK); das Kamera-Menü erscheint. Wählen Sie
mit Hilfe des Abwärtsknopfes die Option Video aus
und drücken Sie dann erneut den Auswahl Knopf
(SEL/OK), um in das Video-Einstellungen-Menü
zu gelangen.
Die Option Kamera ist ausgewählt. Wählen Sie mit
Hilfe des Aufwärtssknopfes die Option Video aus
und drücken Sie dann den Auswahl Knopf (SEL/OK),
um die Einstellung zu bestätigen. Die Kamera befindet sich jetzt im Video-Modus, das -Symbol
erscheint auf dem Display.
5
Erfassen der Szene
Wiedergabe-Modus
Erfassen Sie die Szene, die Sie aufnehmen möchten,
mit dem Display auf der Rückseite der Kamera.
Um den gewünschten Bildausschnitt in der Größe
zu verändern (Zoom-Funktion), drücken Sie den
Aufwärts- bzw. den Abwärtsknopf.
Betrachten Sie Ihre Bilder und Videos
auf dem Display
Drücken Sie den Modus-Knopf (ON/MODE) so oft,
bis Sie in den Wiedergabe-Modus ( ) gelangen.
Aufnahme des Videos
Drücken Sie den Aufwärts- bzw. Abwärts-Knopf, um
durch die gespeicherten Bilder zu blättern.
Drücken Sie den Auslöser, um die Aufnahme zu
starten. Durch erneuten Druck auf den Auslöser
beenden Sie die Aufnahme. Während der Aufnahme erscheint ein roter Punkt auf dem Display.
Um die Wiedergabe eines Video-Clips zu starten
drücken Sie den Auslöser. Drücken Sie erneut den
Auslöser, um die Wiedergabe vor dem Ende des
Clips anzuhalten.
Kamera
Video
Qualität
Video
Video
Kamera
Selbstauslöser
WB
6
Detail-Ansicht
Sie können Detailausschnitte Ihrer Bilder mithilfe
der Zoomfunktion genauer betrachten.
Drücken Sie, während Sie ein Bild betrachten, den
Auswahl-Knopf (SEL/OK), um in das WiedergabeMenü zu gelangen. Wählen Sie Zoom und drücken
Sie erneut den Auswahl-Knopf (SEL/OK).
Wiedergabe
Wiedergabe
Zoom
Zoom
4 Miniaturbilder
4 Miniaturbilder
9 Miniaturbilder
9 Miniaturbilder
Dia Show
Dia Show
Drücken Sie den Aufwärts- bzw. Abwärts-Knopf,
um das Bild zu vergrößern bzw. zu verkleinern.
Drücken Sie den Auswahl-Knopf zweimal, um den
Zoom-Modus zu verlassen.
Gleichzeitiges Betrachten mehrerer Bilder
Drücken Sie im Wiedergabe-Modus ( ) den Auswahl-Knopf, um ins Wiedergabe-Menü zu gelangen,
wählen Sie 4 Bilder oder 9 Bilder und drücken Sie
den Auswahl-Knopf. Das Display zeigt nun 4 oder
9 Miniaturen Ihrer Bilder.
Betrachten Ihrer Bilder in einer Dia-Show
Ihr Kameramodul kann Ihre Bilder automatisch als
Dia-Show nacheinander abspielen.
Drücken Sie im Wiedergabe-Modus ( ) den Auswahl-Knopf, um ins Wiedergabe-Menü zu gelangen,
wählen Sie Dia-Show und drücken Sie den AuswahlKnopf. Die Dia-Show wird gestartet.
Um die Dia-Show anzuhalten, drücken Sie erneut
den Auswahl-Knopf.
Bildqualität
Mit steigender Qualität wächst die Größe der
einzelnen Bilddatei. Sie können zwischen drei verschiedenen Qualitätsstufen für Ihre Bilder wählen.
Dadurch beeinflussen Sie, wieviele Bilder auf den
internen Speicher des DCM passen:
Wählen Sie ein bestimmtes Bild mithilfe des Aufwärts- bzw. des Abwärts-Knopfes und drücken Sie
den Auswahl-Knopf, um es zu vergrößern.
7
Kamera
Qualität
Qualität
Niedrig
Video
Normal
Selbstauslöser
Hoch
WB
Niedrig (*) - 2048 x 1536 Pixel – bis zu 117 Bilder
Normal (**) - 2048 x 1536 Pixel – bis zu 60 Bilder
Hoch (***) - 2560 x 1920 Pixel (durch Interpolation)
– bis zu 37 Bilder
Drücken Sie im Kamera-Modus den AuswahlKnopf (SEL/OK); Sie gelangen ins Kamera-Menü.
Wählen Sie Qualität und drücken Sie erneut den
Auswahl-Knopf (SEL/OK). Sie gelangen ins Qualitäts-Menü, wo Sie mithilfe des Aufwärts- bzw.
Abwärts-Knopfes zwischen den verschiedenen
Qualitätsstufen wählen können.
8
Drücken Sie erneut den Auswahl-Knopf (SEL/OK),
um Ihre Wahl zu bestätigen.
Erweiterung des Speicherplatzes
durch eine SD-Karte
SD-Karten (Secure Digital) erweitern den Speicherplatz, der Ihrem Kameramodul für die Speicherung
von Bildern und Videos zur Verfügung steht. SDKarten erhalten Sie in Fotofachgeschäften und im
Elektronikhandel. Ihre Kamera unterstützt bis zu 4
GB SD-Karten-Speicher.
Einsetzen einer SD-Karte
Öffnen Sie das Batteriefach und setzen Sie die SDKarte mit zum Display zeigenden Gold-kontakten
in den SD-Karten-Steckplatz ein.
Wichtig: Wenn die SD-Karte schreibgeschützt ist,
erscheint ein Schloss-Symbol auf dem Display und
es können keine Fotos oder Videos aufgenommen
werden.
Löschen von Bildern
Löschen eines einzelnen Bildes
Wählen Sie im Wiedergabe-Modus ( ) mithilfe
des Aufwärts- bzw. des Abwärtknopfes das Bild,
das Sie löschen möchten.
Drücken Sie den Auswahl-Knopf (SEL/OK), um
ins Wiedergabe-Menü zu gelangen, wählen Sie
Bild löschen und drücken Sie den Auswahl-Knopf.
Wählen Sie Ja und drücken Sie erneut den Auswahl-Knopf (SEL/OK). Das ausgewählte Bild wird
aus dem Speicher der Kamera gelöscht.
Löschen aller Bilder
Drücken Sie im Wiedergabe-Modus ( ) den Auswahl-Knopf, um ins Wiedergabe-Menü zu gelangen,
wählen Sie Alle löschen und drücken Sie den Auswahl-Knopf (SEL/OK). Wählen Sie Ja und drücken
Sie erneut den Auswahl-Knopf. Alle Bilder werden
aus dem Speicher der Kamera gelöscht.
Übertragen Ihrer Bilder auf Ihren
Computer
Hinweis: Sie müssen keine Kamera-Treiber installieren für die Windows-Versionen Vista/2000/ME/
XP oder Mac OS 9+ oder OS X. Ihre MINOX DCM
unterstützt keine älteren Versionen der oben genannten Betriebssysteme.
Hinweis: Wenn Ihr DCM angeschlossen ist, wird
es über das USB-Kabel vom Computer mit Strom
versorgt, wodurch die Energiereserven der Batterie
geschont werden.
Anschließen Ihrer Kameramoduls
an den Computer
Bevor Sie Ihr Kameramodul an den Computer anschließen, schalten Sie es immer zuvor ein. Schließen Sie dann Ihr DCM mithilfe des mitgelieferten
USB-Kabels an den Computer an. (Der kleinere
Stecker wird am Kameramodul und der größere
an den Computer angeschlossen.)
9
Wenn Sie Ihr Kameramodul zum ersten Mal an Ihren
Computer anschließen, erkennt Ihr Computer es als
eine neue Hardware. Ihr Computer installiert die
Treiber automatisch. Warten Sie, bis Ihr Computer
Sie über den Abschluss der Installation informiert,
bevor Sie versuchen, Zugang zu den auf dem Kameramodul oder der SD-Karte gespeicherten Bildern
oder Filmen zu erhalten.
Übertragen der Bilder auf einen Windows PC
Öffnen Sie das Mein Computer-Symbol auf Ihrem
Computer. Sie sehen ein Symbol mit der Bezeichnung Wechseldatenträger.
tensymbol mit der Bezeichnung Unbenannt auf
Ihrem Desktop.
Innerhalb dieser Festplatte finden Sie einen Ordner
DCIM und darin wiederum einen Ordner 100_CAM,
in dem sich alle Ihre Bilder befinden.
Sie können die Festplatte Unbenannt in jeden gewünschten Namen umbenennen.
Hinweis: Sie können Ihre Kamera auch für das Speichern oder Übertragen von anderen Dateien nutzen.
Öffnen Sie hierzu den oben genannten Ordner und
kopieren Sie die entsprechende Datei in diesen Ordner, um sie auf dem Kamera-Speicher zu sichern.
Doppelklicken Sie auf das Symbol und öffnen Sie
den Ordner DCIM und dann den Ordner 100_CAM,
in dem sich alle Ihre Bilder befinden.
Benutzen des Selbstauslösers
Übertragen der Bilder auf einen Apple Mac
Drücken Sie im Kamera-Modus den AuswahlKnopf (SEL/OK); Sie gelangen ins Kamera-Menü.
Wählen Sie Selbstauslöser und drücken Sie erneut
Nachdem Sie die Kamera angeschlossen und eingeschaltet haben, erscheint ein neues Festplat10
Fotografieren oder filmen Sie sich selbst, indem Sie
die Selbstauslöser-Funktion nutzen.
Kamera
Selbstauslöser
Qualität
An
Video
Aus
Selbstauslöser
WB
den Auswahl-Knopf (SEL/OK). Sie gelangen in das
Selbstauslöser-Menü. Wählen Sie An und drücken
Sie den Auswahl-Knopf (SEL/OK), um Ihre Eingabe
zu bestätigen.
Das Kameramodul ist jetzt im Selbstauslöser-Modus, das
-Symbol erscheint im Display. Erfassen
Sie Ihr Bild nach Belieben. Die Zoom-Funktion steht
Ihnen wie gewohnt zur Verfügung. Nach Betätigen
des Auslösers dauert es zwei Sekunden, bis das Bild
aufgenommen wird.
gegeben werden. Das Kameramodul ist ab Werk
auf automatischen Weißabgleich eingestellt. Bei
kritischen Lichtverhältnissen können Sie den Weißabgleich gezielt anpassen.
Drücken Sie im Kamera-Modus den Auswahl-Knopf
(SEL/OK); Sie gelangen ins Kamera-Menü. Wählen
Sie WB und drücken Sie erneut den Auswahl-Knopf
(SEL/OK). Im WB-Menü können Sie zwischen 6
Einstellungen wählen:
Auto (automatisch), Tageslicht, Bewölkt, Glühbirne,
Kunstlicht, Nacht
Drücken Sie den Auswahl-Knopf (SEL/OK), um Ihre
Wahl zu bestätigen.
Kamera
WB
Qualität
Auto
Einstellen des Weißabgleichs (WB)
Video
Tageslicht
Durch den Weißabgleich wird sichergestellt, dass
die Farben in Ihren Bildern naturgetreu wieder-
Selbstauslöser
Bewölkt
WB
Glühbirne
11
Einstellen des Belichtungswertes (EV)
Anpassen Ihrer Kamera-Einstellungen
In kritischen Lichtverhältnissen können Sie die Helligkeit Ihrer Aufnahmen manuell regulieren.
Öffnen des Einstellungen-Menüs
Drücken Sie im Kamera-Modus den Auswahl-Knopf
(SEL/OK); Sie gelangen ins Kamera-Menü. Wählen
Sie EV und drücken Sie erneut den Auswahl-Knopf
(SEL/OK). Reduzieren oder erhöhen Sie jetzt die
Belichtungszeit mithilfe des Aufwärts- bzw. des
Abwärts-Knopfes.
Drücken Sie den Auswahl-Knopf (SEL/OK), um Ihre
Eingabe zu bestätigen.
EV
12
Wählen Sie mithilfe des Aufwärts- bzw. des Abwärts-Knopfes eine der folgenden Optionen:
Einstellungen
Ausschalten
Formatieren
Auto aus
Frequenz
Kamera
Verlassen
Drücken Sie den ON/MODE Knopf, bis das Einstellungen-Menü auf dem Display erscheint.
Ausschalten
EV
+0.3
Wählen Sie Ausschalten und drücken Sie den
Auswahl-Knopf (SEL/OK), um das Kameramodul
auszuschalten.
Formatieren
Zurücksetzen der Einstellungen
Es ist möglich, den Speicher der Kamera zu formatieren. Wählen Sie im Einstellungen-Menü Formatieren
und drücken Sie den Auswahl-Knopf. Wählen Sie
im Formatieren-Menü Ja und drücken Sie erneut
den Auswahl-Knopf (SEL/OK). Sämtliche Bilder
und Einstellungen werden gelöscht.
Wenn Sie die Einstellungen Ihrer Kamera auf die Einstellungen ab Werk zurücksetzen möchten, wählen
Sie Einstellung und drücken Sie den Auswahl-Knopf
(SEL/OK). Wählen Sie Voreinstellung und drücken
Sie den Auswahl-Knopf, um die Einstellungen zurückzusetzen.
Einstellen der AutoAus-Zeit
Wahl der Sprache
Wählen Sie AutoAus und drücken Sie den AuswahlKnopf (SEL/OK). Wählen Sie, nach welchem Zeitraum sich die Kamera automatisch abschaltet.
Sie können die Sprache für die Menüs einstellen.
Wählen Sie Sprache und drücken Sie den AuswahlKnopf (SEL/OK).
Anpassen der Frequenz
Wählen Sie Ihre bevorzugte Sprache und bestätigen Sie Ihre Eingabe mit dem Auswahl-Knopf
(SEL/OK).
Um bei Kunstlichtaufnahmen im Video-Modus Bildflackern zu reduzieren, können Sie die Frequenz
manuell anpassen. Wählen Sie Frequenz und drücken Sie den Auswahl-Knopf (SEL/OK).
Wählen Sie zwischen 50 Hz und 60 Hz und bestätigen Sie Ihre Eingabe mit dem Auswahl-Knopf.
13
Benutzen der Fernbedienung
Zoomfunktion
Die Ferdnbedinung des DCM hat eine Reichweite
von ca. zwei Metern.
Drücken Sie an der flachen Seite der DCM Fernbedienung den Zoom Knopf.
Auslösen eines Bildes
Drücken Sie den großen Knopf mit dem KameraSymbol um ein Bild zu machen.
Batteriewechsel
Öffnen Sie die Batterieklappe – folgen Sie hierbei
den Richtungspfeilen. Fügen Sie eine neue CR2032
Batterie in den dafür vorgesehen Platzhalter ein.
Achten Sie hierbei auf die Polarität. Schließen Sie
nun wieder das Batteriefach.
Videofunktion
Drücken Sie an der flachen Seite der DCM Fernbedienung den MODUS P/V. Nun startet das Video.
Ein erneuter Druck auf diesen Knopf stoppt das
Video.
14
Wartung des MINOX DCM
Bitte lesen Sie die folgenden Informationen, um sicherzustellen, dass Sie Ihr DCM korrekt benutzen.
Orte, die Sie meiden sollten
Lagern oder benutzen Sie die Kamera nicht in folgender Umgebung:
• An sehr feuchten, schmutzigen oder staubigen
Orten.
• An Orten mit direkter Sonneneinstrahlung oder
extremen Temperaturen, wie zum Beispiel in
einem geschlossenen Auto im Sommer.
• An extrem kalten Orten.
• An Orten, die starken Vibrationen ausgesetzt sind.
• An Orten, die Rauch oder Dampf ausgesetzt sind.
• An Orten, die starken Magnetfeldern ausgesetzt
sind (zum Beispiel nahe Elektromotoren, Transformern oder Magneten).
• An Orten, an denen über längere Zeiträume aggressive Chemikalien wie Pestizide, Gummi- oder
Vinylprodukte gelagert werden.
Hinweis: Halten Sie das DCM von Sand und Staub
fern. Wie jede elektronische Kamera ist auch das
DCM besonders empfindlich gegen Sand und Staub.
Stellen Sie bitte in sandigen Gegenden, besonders an
Stränden oder Wüsten, wo feiner Sand durch Wind
aufgewirbelt wird, sicher, dass das Kameramodul dem
Sand nicht ausgesetzt ist.
Aufbewahrung des Kameramoduls
Wenn Ihr DCM für einen längeren Zeitraum nicht
benutzt wird, entfernen Sie bitte die Batterie und
lagern Sie das Kameramodul am besten an einem
trockenen Ort.
Reinigung Ihres DCM
Benutzen Sie einen kleinen Pinsel, um vorsichtig den
Staub von Linse und der LCD-Oberfläche zu entfernen.
15
Wischen Sie die Oberfläche leicht mit einem trockenen, weichen und fusselfreien Tuch ab. Sollten auf
dem Objektiv irgendwelche Flecken entstanden sein,
geben Sie einen Tropfen flüssigen Linsenreiniger auf
ein Optiktuch und wischen Sie die Linsenoberfläche
sachte ab.
Kratzen Sie über keinen Teil des Kameramoduls mit
harten Gegenständen. Benutzen Sie keine flüchtigen
Substanzen wie Verdünner, Benzol oder Insektizide,
denn sie könnten mit dem Kameragehäuse reagieren und eine Verformung zur Folge haben oder die
Beschichtung zerstören.
Bei Flugreisen
Verstauen Sie Ihr Kameramodul nicht im normalen
Reisegepäck. Der Umgang mit dem Gepäck an Flughäfen könnte sie im Inneren beschädigen, selbst
wenn von außen keine Einflüsse sichtbar sind.
16
Technische Daten
Bildsensor
5,0 MP, CMOS Sensor (3,2 MP Hardware-Auflösung)
Bildauflösung
Standbild: 2.560 x 1.920 Pixel (Interpoliert),
2.048 x 1.536 Pixel (3,2 MP); Videoclip: 320 x 240 Pixel
Speichermedien
Intern: 128 MB Flash Memory /
Extern: optionale SD Karte bis 16 GB (unterstützt SDHC)
Display
2,0’’ TFT-LCD Monitor
Weißabgleich
Automatisch, Tageslicht, Bewölkt, Glühbirne, Kunstlicht, Nacht
Auslöser
Direkt / Fernbedienung / Selbstauslöser: 2 Sekunden
Zoom
4-fach Digitalzoom
Aufzeichnung
Standbild: JPEG / Videoclips: AVI
Energieversorgung
Aufladbarer Li-Ionen Akku / USB-Kabel
Systemvorraussetzungen
Windows Vista / ME / 2000 / XP; Mac OS X kompatibel
Abmessungen
74 mm x 47 mm x 44 mm (B x H x T)
Gewicht
ca. 220 g
17
Gewährleistungsbestimmungen
Mit dem Kauf des MINOX DCM haben Sie ein Produkt erworben, das nach besonders strengen Qualitätsrichtlinien hergestellt und geprüft wurde.
Die für dieses Produkt geltende gesetzliche Gewährleistung von 2 Jahren wird von uns ab dem Tag des
Verkaufs durch einen autorisierten Händler unter
folgenden Bedingungen übernommen:
1) In der Gewährleistungszeit werden Beanstandungen, die auf Fabrikationsfehlern beruhen,
kostenlos und nach eigenem Ermessen durch
Instandsetzung, Austausch defekter Teile oder
Umtausch in ein gleichartiges einwandfreies
Erzeugnis behoben. Weitergehende Ansprüche,
gleich welcher Art und gleich aus welchem
Rechtsgrund im Zusammenhang mit dieser Gewährleistung, sind ausgeschlossen.
18
2) Gewährleistungsansprüche entfallen, wenn
der betreffende Mangel auf unsachgemäße
Behandlung – wozu auch die Verwendung von
Fremdzubehör zählen kann – zurückzuführen ist,
ein Eingriff von nicht autorisierten Personen und
Werkstätten durchgeführt oder die Fabrikationsnummer unkenntlich gemacht wurde.
3) Gewährleistungsansprüche können nur bei Vorlage eines maschinengeschriebenen Kaufbelegs
eines autorisierten Händlers geltend gemacht
werden.
4) Bei Inanspruchnahme der Gewährleistung leiten
Sie bitte die MINOX Kamera zusammen mit dem
Original des maschinengeschriebenen Kaufbelegs und einer Schilderung der Beanstandung
dem Kundendienst der MINOX GmbH oder einer
Landesvertretung zu.
5) Touristen steht im Bedarfsfalle unter Vorlage des
maschinengeschriebenen Kaufbelegs die Vertretung des jeweiligen Reiselandes gemäß den Regelungen zur Gewährleistung der MINOX GmbH
zur Verfügung.
MINOX GmbH
Walter-Zapp-Str. 4
D-35578 Wetzlar
Tel.: +49 (0) 6441 / 917-0
Fax: +49 (0) 6441 / 917-612
eMail: [email protected]
Internet: www.minox.com
19
Content
Introduction . . . . . . . . . . . . . . . . . . 21
Using the Self Timer . . . . . . . . . . . . . . 28
Inserting the battery . . . . . . . . . . . . . 21
Adjusting the white balance (WB) . . . . . . 29
Charging the battery . . . . . . . . . . . . . 22
Adjusting the Exposure Values (EV) . . . . . 29
Switching the camera on . . . . . . . . . . . 22
Adjusting your camera settings . . . . . . . . 30
Taking your first picture . . . . . . . . . . . . 23
How to use the remote control . . . . . . . . 31
Taking videos . . . . . . . . . . . . . . . . . 23
Camera maintenance . . . . . . . . . . . . . 32
Playback mode . . . . . . . . . . . . . . . . 24
Technical Data . . . . . . . . . . . . . . . . . 34
Image quality . . . . . . . . . . . . . . . . . 25
Conditions of warranty . . . . . . . . . . . . 35
Increase the camera memory
with an SD card . . . . . . . . . . . . . . . . 26
Inserting an SD card . . . . . . . . . . . . . . 26
Deleting unwanted images . . . . . . . . . . 26
Downloading your images
to your computer . . . . . . . . . . . . . . . 27
20
Introduction
Introducing your DCM
Congratulations on the purchase of your new
MINOX DCM. Like all other MINOX products this
digital Camera Module boasts the traditional values
fostered by MINOX. It combines functionality in
the smallest possible space with excellent optical
quality.
Please take a few moments to read these Instructions and the Safety and Maintenance notes in the
last section of this manual.
Fast and easy operation make the MINOX DCM an
excellent tool for digital observation and digital
photography in combination with a spotting scope.
The MINOX DCM is ready to become your permanent
companion and capture wonderful memories in
the modern way.
These instructions are to help you benefit from the
full performance spectrum of your MINOX DCM.
Enjoy photography with your digital Camera
Module!
Inserting the battery
Your camera uses a lithium-ion rechargeable
battery. You can recharge the battery using the
provided accessory equipment. We do not warranty
for battery or camera damage caused by using any
other method to charge the battery.
To insert the battery hold the Camera Module with
your right hand, with the monitor shield flipped
open and the back facing upward. Now open the
battery compartment cover by opening the latch
with the thumb of your left hand and moving it
to the side.
21
Slide the battery into the battery compartment with
the metal contacts head first and close the battery
latch. Close the battery compartment.
Your photos will remain safely stored in the camera
memory or on the SD card even if the batteries are
removed or replaced.
Charging the battery
Connect the switched off Camera Module using
the provided USB cable to the USB connection of
your computer. This starts the charging process
automatically. While the battery is being charged
a green lamp lights up in the proximity of the USB
connection.
Charging is completed when the lamp
extinguishes.
Switching your Camera Module On / Off
To switch the camera on press and hold the Mode
button ON/MODE.
To switch your camera off, press the Mode button
until the Setup menu appears. Press the Down button until Power Off is selected and then press the
Select button to switch the camera off. By default
the DCM will automatically switch itself off if it is not
used within 60 seconds, thus saving battery power.
Battery lock
22
* see schematic diagram on the flipped-open side.
Setup
Power Off
Format
Auto Off
Frequency
Shoot the picture
Press the shutter button (RELEASE) to shoot the
picture.
Taking videos
Select Video Mode
Taking your fi rst picture
Frame your subject
When the DCM is switched on it is in Camera Mode
and the
symbol appears on the display. If this
symbol does not show, press the Mode button until
it appears.
Digital zoom function
Frame your subject in the display on the back of
the Camera Module.
In the Photo mode, press the Select button (SEL/
OK); the Camera Menu appears. Use the Down
button to select the option Movie and then press
the Select button (SEL/OK) again to get into the
Video Setup Menu.
The Camera option is selected. Use the Up button
to select the option Movie and then press the Select
button (SEL/OK) to confirm the setting. The camera
is now in Video Mode, the symbol will show on
the display.
To change the size of the desired image detail (zoom
function) press the Up button (to zoom in) or Down
button (to zoom out).
23
Frame the scene
Playback mode
Frame the scene you want to take using the display
on the back of the camera. To change the size of
the desired image detail (zoom function) press
the Up button (to zoom in) or the Down button
(to zoom out).
Review your pictures and videos on the display
Shoot the video
Press the shutter button to start the replay of a
video clip. Press the shutter button again to stop
the replay before the end of the clip.
Press the shutter button (RELEASE) to start the
recording. Press it again to stop the video. During
the shooting you will see a red dot in the display.
Camera
Movie
Quality
Movie
Movie
Camera
Self Timer
WB
Press the Mode button (ON/MODE) as many times
as needed to get into the Playback mode ( ).
Use the Up or Down button to scroll through the
stored images.
Look at details
You can take a closer look at details of your images
using the zoom function.
Press the Select button (SEL/OK) while viewing an
image. Select Zoom and press the Select button
(SEL/OK) again.
Press the Up or Down button to zoom in or zoom out.
Press the Select button twice to leave Zoom Mode.
24
Playback
Playback
Zoom
Zoom
4 Thumbnail
4 Thumbnail
9 Thumbnail
9 Thumbnail
Slide Show
Slide Show
Review several images at once
Press the Select button when in Playback Mode
( ) to reach the Playback Menu, select either
4 or 9 images, and press the Select button. The
display will now show 4 or 9 miniature images of
your pictures.
Select one of the images using the Up or Down button
and press the Select button to enlarge this image.
View your pictures in a slide show
Your Camera Module can automatically display your
images one after the other in a slide show.
Press the Select button when in Playback Mode
( ) to reach the Playback Menu, select Slide
Show and press the Select button. The slide show
then starts.
Press the select button again to stop the slide
show.
Image quality
The higher the selected quality, the larger the size of
the individual image file. You can choose between
three different quality settings for your images. This
has an impact on the number of images that will fit
on the internal memory of the DCM:
Low (*) - 2048 x 1536 pixels
– up to 117 images
Normal (**) - 2048 x 1536 pixels
– up to 60 images
High (***) - 2560 x 1920 pixels (by interpolation)
– up to 37 images
25
Camera
Quality
Quality
Low
Movie
Normal
Self Timer
High
WB
When in Camera Mode press the Select button
(SEL/OK) to enter the Camera Menu. Select Quality
and press the Select button (SEL/OK) again. This
brings you into the Quality Menu where you can
select the different quality settings using the Up
or Down button.
Press the Select button (SEL/OK) again to confirm
your selection.
Increase memory capacity
with an SD Card
SD Cards (Secure Digital) increase the amount of
memory available for storing images and videos.
SD cards can be purchased from photo dealers and
26
from electronic goods retailers. Your camera supports up to 4 GB SD Card memory.
Inserting an SD Card
Open the battery compartment and insert the SD
card in the SD Card slot with the gold contacts
pointing to the Display.
Important: If the SD Card is write-protected, a
lock symbol appears on the display and you cannot
shoot pictures or videos.
Deleting unwanted images
Delete an individual image
In Playback Mode ( ) use the Up or Down button
to select the image you want to delete.
Press the Select button (SEL/OK), to enter the
Playback Menu, select Delete One and press
the Select button. Select Yes and press the Select
button (SEL/OK) again.
The selected image is then deleted from the
camera memory.
Delete all images
In Playback mode ( ) press the Select button to
enter the Playback Menu, select Delete All and press
the Select button (SEL/OK). Select Yes and press
the Select button (SEL/OK) again. All images are
then deleted from the camera memory.
Downloading pictures onto
your computer
Note: You do not need to install camera drivers for
Windows versions Vista/2000/ME/XP or Mac OS 9+
or OS X. Your MINOX DCM does not support older
versions of the named operating systems.
Note: When your DCM is connected your computer
supplies the power via the USB cable to save the
batteries.
Connect your Camera Module to the computer
Always turn your Camera Module on before
connecting it to the computer. Then connect the
DCM to the computer using the provided USB cable
(the smaller sized head connects to the Camera
Module and the larger one to the computer).
When you connect your Camera Module to your
computer for the first time, your computer will recognize it as new hardware. Your computer then
installs the drivers automatically. Wait until your
computer informs you that the installation is complete before trying to access the pictures or movies
stored in the camera or on the SD card.
Download images to a Windows PC
Open the My Computer icon on your computer. You
will see a new icon named Removable Disk.
Double click on the icon and open the folder DCIM
and then the folder 100_CAM in which all of your
images are stored.
27
Download images to an Apple Mac
After connecting the Camera Module and switching
it on, a new hard disk icon appears on your Desktop
called Untitled.
In this hard disk you will find a folder named DCIM
and this contains a folder named 100_CAM in which
all of your images are stored.
You can rename Untitled to any name you prefer.
Note: You can also use your Camera Module for
saving or transferring other files. Simply open the
above named folder and copy in the file you want
to save in the camera memory.
Using the Self Timer
Put yourself in the picture using the Self Timer function. The timer has a two seconds delay.
In Camera Mode press the Select button (SEL/OK);
This provides access to the Camera Menu. Select
Self Timer and press the Select button (SEL/OK)
28
again. This provides access to the Self Timer Menu.
Select On and press the Select button (SEL/OK) to
confirm your selection.
The Camera Module is now in Self Timer Mode, the
symbol appears on the display.
Frame your picture as required. To do this, you can
still use the zoom function as normal.
After pressing the shutter button you have two
seconds to put yourself in the picture before the
shutter is released.
Camera
Self Timer
Quality
On
Movie
Off
Self Timer
WB
Adjusting the White Balance (WB)
Adjusting the Exposure Values (EV)
The white balance ensures natural color rendition of
your pictures. The Camera Module is set to automatic
white balance in the factory. In critical light conditions you can selectively adjust the white balance.
In critical light conditions you can manually adjust
the brightness of your images.
In Camera Mode press the Select button (SEL/OK);
this provides access to the Camera Menu. Select WB
and press the Select button (SEL/OK) again. In the
WB Menu you can choose between 6 settings:
Auto (automatic), Daylight, Cloudy, Lamp, Tungsten, Night
Press the Select button (SEL/OK) to confirm your
selection.
In Camera Mode press the Select button (SEL/OK);
this provides access to the Camera Menu. Select EV
and press the Select button (SEL/OK) again. Now
reduce or increase the exposure time using the Up
or Down button.
Press the Select button (SEL/OK) to confirm your
adjustment.
Camera
EV
Exit
Camera
WB
Quality
Auto
Movie
Daylight
Self Timer
Cloudy
WB
Lamp
EV
+ 0.3
29
Adjusting your camera settings
Formatting
Open the Setup Menu
It is possible to format your camera memory. In
the Setup Menu select Format and press the Select
button. Select Yes in the Formatting Menu and press
the Select button (SEL/OK) again. This deletes all
images and settings.
Press the ON/MODE button until the Setup Menu
appears on the display.
Setup
Power Off
Set AutoOff time
Format
Select AutoOff and press the Select button (SEL/
OK). Select the time after which you would like
the camera to switch off automatically if left unattended.
Auto Off
Frequency
Use the Up or Down button to select one of the
following options:
Switch off
Select the option Power Off and press the Select
button (SEL/OK) to switch off the Camera Module.
Adjust frequency
You can manually adjust the frequency to reduce
image flicker under tungsten light when in the
Video Mode. Select Frequency and press the Select
button (SEL/OK).
Select between 50 Hz and 60 Hz and confirm your
setting with the Select button.
30
Reset settings
If you want to reset the camera settings to the
default settings select Settings and press the Select
button (SEL/OK). Select Default and press the Select
button to reset the settings.
Language setting
You can set the language used in the menus. Select
Language and press the Select button (SEL/OK).
Select the preferred language and confirm the setting with the Select button (SEL/OK).
How to use the remote control
Capturing video
Press the MODUS P/V button to start capturing video and press this button again to stop capturing.
Zooming in/out
Press the Zoom button to zoom in/out.
The remote can release the shutter of the DCM
within the range of two meters.
Capturing image
Press the big round button at the front with the
camera symbol to capture image.
Insert & change battery
Follow the direction on a battery compartment
cover to open. Take a new CR2032 battery and
31
temperatures, such as the inside of a closed car
in the summer,
• extremely cold places,
• places exposed to severe vibrations,
• places exposed to smoke or steam,
place it in the battery compartment. Pay attention
to the correct pole alignment +/-. Close and lock
the battery compartment cover.
• places exposed to strong magnetic fields (e.g. in
close proximity of electric motors, transformers
or magnets,
Maintenance of the Camera Module
• places where aggressive chemicals are stored on
a long-term basis, such as pesticides, rubber or
vinyl products.
Please read the following information to make sure
you are using your DCM correctly.
Places to avoid
Do not store or use your camera in any of the following environments:
• very damp, dirty or dusty places,
• places exposed to direct sunlight or extreme
32
Note: Always keep the DCM away from sand and
dust. Like any other electronic/digital camera, the
DCM is particularly sensitive to sand and dust. Always
make sure that the camera is not exposed to sand in
sandy places, especially on the beach or in the desert
where fine sand is blown about.
Storing the Camera Module
Traveling by air
If your DCM is not being used for a longer period, it
is best to remove the battery and store the Camera
Module in a dry place.
Do not pack the Camera Module in baggage to be
handed in at the airport. The baggage handling
could cause damage on the inside of the Camera
Module, even if there are no signs of this showing
on the outside.
Cleaning your DCM
Use a small brush to carefully remove the dust from
the lens and the LCD surface. Gently wipe the surface
with a dry, soft, fluff-free cloth. If there are any spots
on the lens, apply a few drops of liquid lens cleaner to
an optical cloth and carefully wipe the lens surface.
Never scratch any part of the Camera Module using
a hard object. Do not use volatile substances like
solvents, benzole or insecticide as these could react
with the camera body and lead to deformation or
destroy the coating.
33
Technical Data
Image sensor
5.0 MP, CMOS Sensor (3.2 MP Hardware-resolution)
Image resolution
Still: 2,560 x 1,920 pixels (interpolated),
2,048 x 1,536 Pixel (3.2 MP); Videoclip: 320 x 240 pixels
Memory
Internal: 128 MB Flash memory
External: optional SD card up to 16 GB (supports SDHC)
Display
2.0’’ TFT LCD display
White balance
Automatic, Daylight, Cloudy, Lamp, Tungsten, Night
Shutter
Direct / Remote Control / Selftimer: 2 sec
Zoom
4x digital zoom
File-format
Picture: JPEG / Video: AVI
Power supply
Rechargeable Lithium-Ion-Battery/USB-cable
Support
Windows Vista / ME / 2000 / XP; Mac OS X compatible
Dimensions
74 mm (L) x 47 mm (W) x 44 mm (H)
Weight
approx. 220 g / 7.76 oz
34
Conditions of warranty
With the purchase of this MINOX product you have
acquired a product which has been manufactured
and checked to special quality standards.
For this product the MINOX GmbH provides
warranty of 2 years. The period commences on the
date of purchase from an authorized dealer and the
warranty is subject to the following conditions:
1) During the warranty period we shall deal with
complaints based on faulty manufacture (free of charge) by repair, replacement
of defective parts or replacement by an identical
flawless product at our own discretion. Consequential claims, no matter what kind of what
legal argument in connection with this warranty,
cannot be accepted.
accessories – if the MINOX product is serviced
by unauthorized persons or workshops, or if the
serial number has been obliterated.
3) Warranty claims can only be made by submission
of the typewritten sales slip of an authorized
dealer.
4) When submitting claims under warranty please
return the MINOX product together with the
typewritten sales slip and a description of the
claim to the MINOX GmbH or MINOX agency.
5) Tourists may, if required, make use of the Agency
of the country in which they are travelling (within
the terms of the Warranty of the MINOX GmbH)
by presenting the typewritten sales slip.
2) Claims under warranty are null and void, if the
defect has been caused by improper handling
– which also can include the use of non-MINOX
35
MINOX GmbH
Walter-Zapp-Str. 4
D-35578 Wetzlar
Tel.: +49 (0) 6441 / 917-0
Fax: +49 (0) 6441 / 917-612
eMail: [email protected]
Internet: www.minox.com
36
Notes
37
Sommaire
Présentation . . . . . . . . . . . . . . .
Installation de l’accu . . . . . . . . . .
Chargement de l’accu . . . . . . . . . .
Mise en marche de l’appareil . . . . . .
Votre première photo . . . . . . . . . .
Prise de vue en vidéo . . . . . . . . . .
Mode Playback . . . . . . . . . . . . .
La qualité des images . . . . . . . . . .
Augmentez la mémoire de votre
appareil avec une carte SD . . . . . . .
Installation d’une carte SD . . . . . . .
Effacement d’images . . . . . . . . . .
Télécharger vos images
sur votre ordinateur . . . . . . . . . . .
Utilisation du retardateur . . . . . . . .
Réglage de la balance des blancs (WB) .
38
.
.
.
.
.
.
.
.
.
.
.
.
.
.
.
.
.
.
.
.
.
.
.
.
39
39
40
40
41
41
42
43
. . . 44
. . . 44
. . . 44
. . . 45
. . . 46
. . . 46
Compensation des valeurs
d’exposition (EV) . . . . . . . . .
Ajustement des réglages de votre
appareil photo . . . . . . . . . . .
Utilisation de la télécommande . .
Maintenance de l'appareil . . . .
Informations techniques . . . . .
Clauses de la garantie . . . . . . .
. . . . . . 47
.
.
.
.
.
.
.
.
.
.
.
.
.
.
.
.
.
.
.
.
.
.
.
.
.
.
.
.
.
.
48
49
50
52
53
Présentation
Nous vous félicitons pour l’acquisition de votre
MINOX DCM. Comme tous les autres produits
MINOX, ce module photo digital s’inscrit dans
la longue tradition de notre maison: combiner
fonctionnalité et qualité optique hors pair dans
un espace aussi réduit que possible.
Facile à commander, rapide à réagir, le MINOX DCM
est idéal pour l’observation et la photographie digitales en combinaison avec une lunette terrestre. Le
MINOX DCM deviendra vite indispensable lorsqu’il
s’agira d’immortaliser vos plus beaux souvenirs,
sous l’égide d’une technique moderne.
Ce mode d’emploi vous aidera à connaître l’éventail
des possibilités offertes par le MINOX DCM, en vue
de leur exploitation optimale. Nous vous souhaitons
de bonnes prises de vues !
Faites connaissance avec
votre DCM
Avant d’utiliser votre appareil, veuillez prendre le
temps de lire les informations qui suivent, ainsi que
les conseils d’utilisation et d’entretien présentés à
la fin de ce mode d’emploi.
Installation de l’accu
Votre appareil photo est alimenté par un accu
lithium-ion rechargeable à l’aide de l’accessoire
fourni avec l’appareil. La recharge de cet accu par
un autre moyen conduirait à l’annulation de la
garantie, à la fois pour l’appareil et l’accu. Pour
installer ce dernier, tenez le module photo dans la
main droite avec le couvercle du moniteur ouvert,
le dos dirigé vers le haut. Avec le pouce de la main
gauche, déverrouillez le couvercle du logement de
l’accu et ouvrez-le complètement. Poussez l’accu
dans son logement avec les contacts métalliques
dirigés vers l’avant. Bloquez-y l’accu en tournant
39
le petit levier de blocage puis refermez le couvercle
du compartiment. Que ce soit lors de l’absence de
l’accu ou de son remplacement, les prises de vue
stockées dans la mémoire de l’appareil photo ou
sur la carte SD restent préservées.
Chargement de l’accu
Connectez le module photo – hors tension – au
port USB de votre ordinateur avec le câble USB
fourni avec l’appareil. Le chargement commence
automatiquement. Pendant la durée de ce processus, un témoin vert reste allumé au niveau de la
connexion USB. Lorsqu’il s’éteint, le chargement
est terminé.
Mise sous/hors tension du module photo
Verrou de l’accu
40
Pour mettre l’appareil photo sous tension, appuyer sur le bouton ON/MODE* en maintenant
la pression. Pour le mettre hors tension, pressez
sur ce même bouton jusqu’à apparition du menu
RÉGLAGE. Avec les boutons vers le BAS/HAUT,
sélectionnez Eteindre. Une simple pression sur le
bouton de sélection SEL/OK mettra votre appareil
hors tension. Afin d’économiser l’énergie de son
accu, l’appareil se met automatiquement hors
tension s’il reste inutilisé 60 secondes.
* voir à ce sujet la représentation schématique sur la page rabattable
Réglage
Eteindre
Format
Arrêt automat.
Fréquence
La prise de vue
Pressez sur le déclencheur (RELEASE) pour prendre
votre photo.
Prise de vue en vidéo
Sélection du mode vidéo
Votre première photo
Sélection du motif
Lors de sa mise sous tension, le DCM se trouve en
MODE PHOTO et le symbole
apparaît sur l’écran
du moniteur. Si ça n’est pas le cas, pressez sur le
bouton ON/MODE jusqu’à son affichage.
La fonction ZOOM DIGITAL
Sélectionner votre motif à l’aide de l’écran du moniteur (au dos du module photo). Pour changer la
taille du cadrage choisi (Fonction ZOOM), presser
sur les boutons vers le HAUT/BAS.
À partir du MODE PHOTO, pressez sur le bouton de
sélection SEL/OK pour accéder au menu APPAREIL.
Avec les boutons HAUT/BAS, sélectionnez Film (option video). Confirmez via SEL/OK pour accéder au
menu FILM où vous élisez l’option Film. Confirmez
avec SEL/OK. Votre appareil se trouve maintenant
en mode VIDEO: Le symbole s’affiche sur l’écran
du moniteur.
Préparation d’une scène
Appréhendez la scène que vous voulez filmer à
l’aide de l’écran du moniteur (au dos de l’appareil).
Pour modifier la taille du cadrage (fonction ZOOM),
pressez sur les boutons HAUT ou BAS.
41
Appareil
Film
Qualité
Film
Film
Appareil
Retardateur
WB
La prise de vue en vidéo
Pour filmer, pressez sur le déclencheur RELEASE.
Pour s’arrêter, répétez cette pression. Pendant
la prise de vue, un témoin rouge apparaît sur
l’écran.
Mode Playback
Pour regardez vos photos et vos vidéos clips sur
l’écran du moniteur
Pressez sur ON/MODE jusqu’à apparition du mode
Playback ( ). En pressant sur HAUT/BAS, vous
pourrez passer en revue les images mémorisées.
Pour visionner un vidéo clip, pressez sur RELEASE
42
(déclencheur). Pour interrompre cette vision, appuyer à nouveau sur le déclencheur.
Visualisation détaillée
Avec la fonction ZOOM vous pouvez observer vos
photos en détail. Pendant l’observation d’une image,
appuyez SEL/OK pour entrer dans le menu PLAYBACK
où vous sélectionnez la fonction Zoom. Ce que vous
confirmez via SEL/OK. En pressant sur HAUT/BAS vous
pourrez zoomer sur une image. Pour quitter le mode
ZOOM, appuyez deux fois sur SEL/OK.
Visualisation de plusieurs images en même temps
En mode Playback ( ), pressez sur SEL/OK pour
accéder au menu PLAYBACK et y choisir entre la
vision de 4 ou 9 vignettes. Confirmez votre sélection
avec SEL/OK. Suivant votre sélection, 4 ou 9 images
miniatures s’afficheront sur l’écran du moniteur.
Avec HAUT/BAS, vous pourrez élire une image et
l’agrandir en pressant sur SEL/OK.
Playback
Playback
Appareil
Qualité
Zoom
Zoom
Qualité
Bas
4 Vignette
4 Vignette
Film
Normal
9 Vignette
9 Vignette
Retardateur
Haut
Diaporama
Diaporama
WB
Pour visionner vos photos en diaporama
Avec votre module photo vous pouvez aussi visionner automatiquement vos images en diaporama. Pour ce faire, en mode PLAYBACK, vous
sélectionnez Diaporama. Confirmez avec SEL/OK
puis pressez sur le déclencheur pour commencer
le diaporama. Pour en interrompre le déroulement,
pressez sur SEL/OK.
La qualité des images
L’occupation de la mémoire par vos images croît
en fonction de leur résolution. Vous pouvez choisir
entre trois niveaux de qualité pour vos images. De
ce choix dépendra le nombre d’images pouvant être
stockées dans la mémoire interne de votre DCM:
Basse (*) 2048 x 1536 Pixel
Jusqu’à 117 images
Normale (**) 2048 x 1536 Pixel
Jusqu’à 60 images
Fine (***) 2560 x 1920 Pixel (par interpolation)
Jusqu’à 37 images
En mode PHOTO, pressez sur SEL/OK pour accéder
au menu APPAREIL où vous sélectionnez Qualité.
Confirmez avec SEL/OK. Dans le menu QUALITÉ,
choisissez celle qui vous convient en actionnant
43
HAUT/BAS. Confirmez ce choix en pressant sur
SEL/O.
il ne sera pas possible d’y mémoriser des photos
ou des vidéos.
Augmentez la mémoire de votre appareil
avec une carte SD
Effacement d’images
Les cartes SD (Secure Digital) permettent d’augmenter la mémoire dont dispose normalement votre
appareil pour le stockage d’images et de vidéos.
Elles sont vendues dans les magasins spécialisés
en photographie et électronique. Votre appareil est
compatible pour l’installation de cartes SD allant
jusqu’à une capacité de stockage de 4 GB.
En mode PLAYBACK ( ), sélectionnez l’image
à effacer à l’aide de HAUT/BAS puis pressez sur
SEL/OK pour accéder au menu PLAYBACK où vous
sélectionnerez Supprimer une. Confirmez ce choix
avec SEL/OK, puis avec Oui suivi de SEL/OK: cette
image sera éliminée de la mémoire de l’appareil.
Installation d’une carte SD
Ouvrir le compartiment de l’accu. Introduire la carte
SD dans le logement prévu à cet effet, avec les
contacts dorés dirigés vers le moniteur de votre
appareil.
Important: Si cette carte SD est protégée, le
symbole d’un cadenas s’affichera. Dans ce cas,
44
Effacement d’une seule image
Effacement de toutes les images
En mode PLAYBACK ( ), pressez sur SEL/OK pour
accéder au menu PLAYBACK où vous sélectionnerez Suppr. toutes. Pressez à nouveau sur SEL/OK.
Confirmer votre choix avec Oui suivi de SEL/OK.
Toutes les images se trouvant dans la mémoire de
l’appareil seront éliminées.
Télécharger vos images sur votre
ordinateur
Remarque: Avec cet appareil, il n’est pas nécessaire d’installer de pilote pour Windows Vista/2000/
ME/XP ou Mac OS 9 ou OS X. Votre MINOX DCM ne
reconnaîtra cependant aucune version ultérieure
aux systèmes d’exploitation mentionés ci-dessus.
Remarque: Quand votre DCM est connecté à
un ordinateur, il est alimenté électriquement via
le câble USB, ce qui a l’avantage d’économiser
l’énergie de son accu.
Connexion de votre appareil photo
à un ordinateur
Mettez toujours votre module photo sous tension
avant de le connecter à un ordinateur. Ensuite,
connectez-le à l’ordinateur avec le câble USB fourni.
(Avec sa petite broche dans la prise numérique du
module photo et l’autre extrémité du câble dans la
prise USB de l’ordinateur) Si vous connectez votre
module photo pour la première fois à votre ordinateur, ce dernier l’identifiera comme un nouveau
matériel et installera le pilote automatiquement. Attendez jusqu’à ce que votre ordinateur vous informe
de la conclusion de cette installation avant d’essayer
d’accéder aux images ou aux films mémorisés dans
l’appareil photo ou sur la carte SD.
Transfert d’images sur un Windows PC
Ouvrez le symbole Mon ordinateur sur votre ordinateur. Vous verrez alors apparaître un nouveau
symbole intitulé disque amovible. Après un double
clic sur ce symbole, sélectionnez le dossier DCIM
puis le dossier 100_CAM où toutes vos images
sont stockées.
Transfert d’images sur un Apple Mac
Après la connexion et la mise sous tension de votre
module photo, un nouveau symbole Sans nom apparaît sur votre bureau (desktop). Dans ce dossier
45
se trouve un dossier DCIM et un sous-dossier
intitulé 100_CAM où sont stockées toutes vos
images. Vous pouvez donner à ce dossier sans
nom, celui qui vous convient.
Remarque: Vous pouvez aussi utiliser votre
module photo pour mémoriser ou transférer
d’autres données. Pour ce faire, ouvrez le dossier nouvellement baptisé et copiez-y les données que vous voulez mémoriser ou transférer.
Elles seront stockées dans la mémoire de votre
appareil photo.
Appareil
Retardateur
Qualité
Marche
Film
Arrêt
Retardateur
WB
Marche. Un choix que vous confirmerez avec SEL/
OK. Votre module photo se trouve maintenant en
mode RETARDATEUR dont le symbole
s’affiche
sur l’écran.
Utilisation du retardateur
Il ne vous reste plus qu’à cadrer votre image, en
zoomant si vous le souhaitez.
Photographiez-vous vous-même grâce au retardateur: une minuterie déclenchera l’appareil photo
après une temporisation de deux secondes.
Après avoir déclenché, il y aura une temporisation
de dix secondes jusqu’au moment de la prise de
vue effective.
En mode PHOTO, pressez sur SEL/OK pour accéder au menu APPAREIL où vous sélectionnerez
Retardateur. Confirmez via SEL/OK pour accédez
au menu RETARDATEUR où vous sélectionnerez
Réglage de la balance des blancs (WB)
46
Le réglage de la balance des blancs assure une
restitution des couleurs proche de la nature. A sa
Appareil
WB
Appareil
Qualité
Auto
EV
Film
Lumiére du jour
Sortir
Retardateur
Nuageux
WB
Lampe
sortie de l’usine, le module photo est réglé de série
pour un équilibrage automatique de la balance des
blancs. Cependant, lors de conditions d’éclairage
critiques, il est possible d’adapter cet équilibrage
à la situation.
Pour ce faire, en mode PHOTO, pressez sur SEL/OK
pour accéder au menu PHOTO où vous sélectionnerez
WB. Confirmez ce choix avec SEL/OK. Le menu WB
propose 6 réglages à votre choix.
Auto (automatique), Lumière du jour, Nuageux,
Lampe, Lum. artificielle, Nuit
EV
+ 0.3
Compensation des valeurs d’exposition (EV)
Lors de conditions d’éclairage critiques, il est possible d’influer manuellement sur la luminosité des
prises de vue.
Pour ce faire, en mode PHOTO, pressez sur SEL/OK.
Vous accéderez au menu APPAREIL où vous sélectionnerez EV. Confirmez ce choix via SEL/OK. Avec
les boutons HAUT/BAS, vous pourrez augmenter
ou diminuer le temps d’exposition. Ce choix fait,
confirmez-le via SEL/OK
Après avoir effectué votre choix, confirmez-le avec
SEL/OK.
47
Ajustement des réglages de votre
appareil photo
Ouverture du menu RÉGLAGE
Appuyer sur le bouton ON/MODE ujsqu’à apparition du menu RÉGLAGE sur l’écran du moniteur.
À l’aide des boutons HAUT/BAS vous pourrez naviguer parmi les options suivantes:
Réglage
Eteindre
Format
Formatage
Il est possible de formater la mémoire de l’appareil.
Dans ce but, entrer dans le MODE RÉGLAGE où vous
sélectionnerez Format ; Confirmez ce choix avec SEL/
OK puis, Oui. Si vous confirmez avec SEL/OK, toutes
les images, tous les réglages seront effacés.
Réglage de mise hors circuit automatique
En mode RÉGLAGE, sélectionnez Arrêt Automat. :
Confirmez via SEL/OK. Choisissez alors la durée
après laquelle votre module photo devra automatiquement se mettre hors circuit.
Arrêt automat.
Fréquence
Éteindre
Pour mettre le module photo hors circuit, sélectionnez Éteindre et confirmez ce choix avec SEL/OK.
48
Adaptation de la fréquence
Afin de réduire les tremblotements d’images lors de
prises de vue vidéo en lumière artificielle, on peut
ajuster manuellement la fréquence. Sous RÉGLAGE,
sélectionnez Fréquence puis pressez sur SEL/OK
avant de choisir entre 50 Hz ou 60 Hz. Confirmer
ce choix en pressant sur SEL/OK.
Rétablissement des réglages initiaux
Utilisation de la télécommande
Si vous souhaitez revenir aux réglages d’origine
de votre appareil, du mode RÉGLAGE, passez à
Réglages. Confirmez via SEL/OK et sélectionnez
Défaut . Presser sur SEL/OK. Les réglages initiaux
seront rétablis.
La télécommande déclenche l’obturateur à une
distance maximale de 2 mètres.
Choix de la langue
Faire une photo
Pressez le grand bouton rond avec le symbole
caméra.
Vous pouvez sélectionner une langue de communication pour consulter les menus. À partir du mode
REGLAGE, sélectionnez Langue. Confirmez avec
SEL/OK. Choisissez la langue qui vous convient et
confirmez ce choix via SEL/OK.
Faire un vidéo
Pressez le bouton «MODUS P/V» pour activer le
mode vidéo et pressez de nouveau pour arrêter.
49
Le zoom
Maintenance de l'appareil
Pressez le bouton «ZOOM» pour activer le zoom.
Veuillez lire attentivement les informations suivantes afin d’assurer une utilisation optimale de
votre DCM:
Lieux à éviter
Changement de pile
Ouvrez le compartiment de pile en direction indiqué.
Déposez la nouvelle pile CR 2032 dans le compartiment de pile. Faites attention au pôle positif et
négatif. Fermez le compartiment de pile.
Ne rangez pas ou n‘utilisez pas votre appareil dans
les endroits suivants:
• Lieux très humides, sales ou poussiéreux
• Lieux exposés à un rayonnement solaire direct
ou soumis à des températures extrêmes comme,
par exemple, une voiture fermée en été
• Lieux soumis à un froid extrême
• Lieux soumis à fortes vibrations
• Lieux soumis à la fumée ou la vapeur
• Lieux soumis à un champ magnétique intense
(comme par exemple, à proximité de moteurs
électriques, de transformateurs ou d‘aimants)
50
• Lieux où sont stockés pendant une longue
période des produits chimiques agressifs, tels
que pesticides, produits en caoutchouc ou en
vinyle
Recommandation importante: Tenez votre DCM
éloigné du sable et de la poussière. Comme pour
tout autre appareil photo électronique, ces matières
peuvent lui être nocives. Veillez donc à l’en protéger,
notamment à la plage ou dans le désert, où le vent
risque de transporter du sable fin.
Passez-y délicatement un chiffon sec, doux et non
pelucheux. En cas de tache sur l’objectif, humectez
un chiffon optique d’une goutte de produit de nettoyage pour les lentilles. Passez-le doucement sur
la surface de la lentille.
Evitez de rayer le module photo avec un objet dur.
N‘utilisez jamais de substances volatiles telles
que diluants, benzine ou insecticides dont l’action
pourrait provoquer une déformation du boîtier ou
en attaquer le revêtement.
Rangement de votre module photo
Voyages en avion
Si vous prévoyez ne pas utiliser votre DCM pendant un certain temps, il est recommandé d’en
extraire l’accu et de ranger le module photo dans
un endroit sec.
Ne laissez pas votre module photo dans vos bagages
de soute car, une rude manipulation à l’aéroport,
risquerait d’y provoquer des dommages intérieurs,
souvent invisibles de l’extérieur.
Entretien de votre DCM
Utilisez un petit pinceau doux pour éliminer la poussière des surfaces de la lentille ou du moniteur.
51
Informations techniques
Capteur
5,0 MP, Capteur CMOS (3,2 MP effectifs)
Résolution
Vues fixes: 2.560 x 1.920 Pixel (Interpollés),
2.048 x 1.536 Pixel (3,2 MP); Enr. Video: 320 x 240 Pixel
Support d‘enregistrement
Interne: 128 MB Flash Memory
Externe: (en option) Carte SD jusqu‘à 16 GB (suporter SDHC)
Affichage
Moniteur 2,0’’ TFT LCD
Balance des blancs
Automatique, Lumière du jour, Nuageux, Eclairage incandescent,
Eclairage artificiel, Nocturne
Déclencheur
Direct / Télécommande / Retardateur: 2 sec
Zoom
Zoom numérique 4x
format de fichier
Photo: JPEG / Video: AVI
Alimentation
Accumulateur lithium-ion rechargeable / Câble USB
Pilotes
Windows Vista / ME / 2000 / XP; Mac OS X compatible
Dimensions
74 mm (Long.) x 47 mm (Larg.) x 44 mm (Haut.)
Poids
approx. 220 g
52
Clauses de la garantie
En achetant cette caméra MINOX, vous avez acquis
un produit qui a été fabriqué et éprouvé suivant
des normes de qualité particulièrement sévères.
La garantie légale de 2 ans, en vigueur pour ce
produit, est prise en charge par nos soins à compter
du jour de la vente par un négociant agréé dans les
conditions suivantes:
1) Il sera remédié, au cours de la période de garantie,
aux réclamations qui se fondentsur des défauts de
fabrication, gratuitement et, suivant notre propre
appréciation, par le biais d'une remise en état,
d'un changement des pièces défectueuses ou d'un
échange contre un produit en parfait état et de
même type. Les demandes qui dépasseraient ce
cadre, quelle que soit leur nature et quel que soit
leur motif juridique en rapport avec la présente
prestation de garantie, sont exclues.
2) Les droits à la garantie sont supprimés si le défaut
en question est imputable à une manipulationincorrecte – l'utilisation d'accessoires étrangers
pouvant aussi en faire partie – si une intervention
a été effectuée par des personnes et des ateliers
non autorisés ou si le numéro de fabrication a été
rendu méconnaissable.
3) Les droits à la garantie ne peuvent être invoqués
que sur présentation d'un justificatif d'achat imprimé émanant d'un négociant autorisé.
4) En cas de recours à la garantie, veuillez faire
parvenir la caméra MINOX, accompagnée de
l'original du justificatif d'achat imprimé et d'un
exposé de la réclamation, au service clients de la
MINOX GmbH ou à une succursale régionale.
5) En cas de besoin, la succursale du pays de destination correspondant se tient à la disposition des
touristes, conformément aux règles qui régissent
la prestation de garantie de la MINOX GmbH, sur
présentation du justificatif d'achat imprimé.
53
MINOX GmbH
Walter-Zapp-Str. 4
D-35578 Wetzlar
Tel.: +49 (0) 6441 / 917-0
Fax: +49 (0) 6441 / 917-612
eMail: [email protected]
Internet: www.minox.com
54
DCM 5.0 DIGITAL CAMERA MODULE
(3,2 MP Hardware-Auflösung)
• 5.0 Megapixels
(3.2 MP hardware resolution)
• 5.0 Megapixels
(3.2 MP effectifs)
• 2,0” TFT/LCD-Monitor
• 2.0” TFT/LCD-Display
• Moniteur 2,0” TFT/LCD
• 128 MB interner Speicher
• 128 MB internal memory
• Mémoire Interne: 128 MB
• SD-Karten bis 16 GB (optional)
• SD cards up to 16 GB (optional)
• Carte SD jusqu’à 16 GB (en option)
• Aufladbarer Li-Ionen-Akku
• Rechargeable Li-Ion battery
• Accu lithium-ion rechargeable
Änderungen in Konstruktion und Ausführung vorbehalten.
Die Marke MINOX ist eine eingetragene Marke der MINOX GmbH, Wetzlar.
Design subject to alterations without notice.
MINOX is a registered trademark of MINOX GmbH, Wetzlar.
Sous réserve de modifications.
MINOX est une marque déposée par MINOX GmbH,Wetzlar.
MINOX GmbH
Walter-Zapp-Str. 4
D-35578 Wetzlar, Germany
Tel.: +49 (0) 6441 / 917-0
Fax: +49 (0) 6441 / 917-612
e-mail: [email protected]
www.minox.com
99453
• 5,0 Megapixel