1
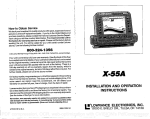
I..
X-55
INSTALLATION AND OPERATION
INSTRUCTIONS
LOWRANCE ELECTRONICS, INC.
LITHO IN U.S.A.
988-0136-07
L!® 12000 E. SKELLY DR., TULSA, OK 74128
PDF compression, OCR, web-optimization with CVISION's PdfCompressor
TABLE OF CONTENTS
INTRODUCTION
MOUNTING
POWER CONNECTIONS
TRANSDUCER
KEYBOARD BASICS
DISPLAY
MENUS
HELP
WINDOWS
VIEWING WINDOWS OPTIONS
MODIFYINGGROUPS
RESETTING ALL GROUPS
SIDESCANOPERATION
SONAROPERATION
AUTOMATIC
SENSITIVITY
RANGE
Upper and Lower Limits
ZOOM Automatic Operation
ZOOM Manual Operation
ALARMS
FISHALARM
ZONEALARM
DEPTHALARMS
ALARMMUTE
1
2
3
3
4
5
s
5
7
7
S
8
g
9
10
r
rr
Cr
100
MENU-PAGE1
CHARTSPEED
GRAYLINE®
FISH LD
DISPLAYCONTRAST
MENU-PAGE2
MENU-PAGES
CHARTCURSOR
DISPLAY ZOOM BAR
DISPLAYZONEBAR
DIGITALSONAR
MENU-PAGE4
FASTRAK
SELECTUNITS OF MEASURE
CLEAR DISTANCELOG
MENU-PAGES
ADJUST CHARTSURFACE CLARITY
ADVANCEDSIGNALPROCESSING(ASP)
SIGNALINTERPRETATION
TRANSDUCERS AND CONE ANGLES
FISHARCI-JES
WATER TEMPERATURE ANDTHERMOCLINES
SURVEYING ALAKE
BAITFISH
SONAR TROUBLESHOOTING
L
GROUP
i I!
'.ã
21
22
22
23
23
23
24
24
24
24
25
25
26
26
26
27
28
28
30
I
I
-
100
GROUP
—
—
29
—
—
35
—
—
'IS
—I— 60
11111
r
GROUP "K"
HJII
SN'JI
FEET I
MPH
n.—I--- r
II
Al
511 FT
— a'a
—.r
I
•'
!QL?JL
• n :iteura':u
Oh
I
65+4
535°F
•ITnliM:4Pa
A:r:'biIJ
I UOLTS I
12.6
--—i
100
GROUP "M"
GROUP L"
4@ag9
IUIW€'
31
32
33
—INi
Copyright5 1992 LowranceElectronics
I
Allrightsreserved.
All featuresand specifications subjectto change withoutnotice.
All screens in this manual are simulated.
°F
-
0
ti'
21
21
l.
:1:
—_— 12
n-
21
ADJUST BACK LIGHTLEVEL
BACKLIGHTON/OFF
SPEAKER VOLUME
TURN DIGITALBOX OFF
CONSTRUCTDIGITAL BOX
I
45.2
100
ft
II
12
13
14
14
15
16
17
18
18
18
19
20
1Ii
GROUP "H"
11
-
N
I FEET
°F
100•
I
6 5 +4 A!36.5
FT
GROUP"O"
GROUP"N"
PDF compression, OCR, web-optimization with CVISION's PdfCompressor
37
INTRODUCTION
WINDOWS SUMMARY
All ofthewindowgroups used bytheX55 are shown on the following pages.
To viewthese groups, simply press the
WINDOWSkey, then repeated press
the down arrow key. This will "cycle"
theunitthrough all groups. Remember,
each group can be customized, however the group will revert to the ones
shown on thesepages whenthe unitis
GROUP
The X-55 is a high quality, wide screen sonar with performance that is
secondto none in its class. Using menufeaturesand "soft-key"operation,
the X-55 is also one of the easiest-to-use sonars that Lowrancehasever
built.Thewide"Clearvision"screen showstheunderwaterworldwithhigh
resolution and detail. Thedisplayand keyboard are also lighted for night
operation. The X-55 also has digital depth, boat speed, surface water
temperature,and distancetravelled (log) displays. In order to use the
digital speed, temperature,and log displays, you must purchase and
install an optional ST-T (transom mount) or ST-H (through-hull mount)
"A"
speed/temperature sensor.
turned off.
rFEET
j,o
tbm
An—r
36.5
ETIWI DEPTH
GROUP
I
fl1DIM
I
MPH
!M
I
I
5.4
48.1
I
IFIILESI
2.0
GROUP 'Sc"
'B"
Readthis manual and takeitwith youthefirstfewtimes youuseyour unit.
It makes a great reference if you need it.
MOUNTING
Install the X-55 in any convenient location, provided there is clearance
behind the unit when it is tilted for the best viewing angle. Holes in the
bracket baseallowwoodscrewor through-bolt mounting. You mayneed
to placea pieceof plywood onthe backofthinfiberglasspanelsto secure
the mountinghardware. Make certain there is enoughroom behindthe
unitto attachthepower and transducer cables.
The smallest holethatwill pass one powerortransducerplugisone inch.
thehole
Afterthe holeisdrilled, passthetransducerconnectorupthrough
it.
down
the
cable
through
first, then pass
power
GROUP
'I?
GROUP
'E"
SLOT
GROUP
GROUP "F"
"0"
Afterthe cableshave been routed, fill the holewith a good marine sealing
cable
compound. Offsetthe bracket to cover the hole. Routethe power
in
the
bracketforthe
one
of
the
other
slots
through the slot and break out
transducercable.
PDF compression, OCR, web-optimization with CVISION's PdfCompressor
36
1
POWER CONNECTIONS
The X-55 works from a twelve-volt battery system. For the bestresults,
attach the powercable directlyto the battery. You can attachthe
power
cable to an accessoryor power buss, howeveryou may have problems
with electrical interference. Therefore, itssaferto goaheadand attach the
powercable directlyto the battery. If thecable is not long enough, splice
#18 gaugewireontoit.Thepowercablehastwowires, red and black. Red
is the positivelead, blackis negative or ground. Make certain to attach the
in-linefuseholdertothe red leadas closetothepowersourceas possible.
Forexample,ifyouhavetoextendthe powercabletothebattery orpower
buss, attach one end of the fuse holder directlyto the batteryor power
buss.This will protectboth the unitand the powercable in the eventof a
short. The X-55 uses a 3-amp fuse.
NOISE
A major causeofsonarproblems is electrical noise. This usuallyappears
onthe sonar'sdisplayas random patterns ofdotsorlines.In severe cases,
it can completely cover the screen with black dots, or cause the unit
operate erraticly, or not at all.
Do notusethisproductwithouta 3-ampfuse wired intothe powercable!
Failure to usea 3-amp fusewill void your warranty.
To eliminate or minimize the effects of electrical noise, first try to
determine the cause. Withthe boat at rest in the water, the firstthingyou
shoulddo isturn all electrical equipment onthe boatoff. Make certain the
engineisoff, also.Turnyour X-55on, then turnoffASP (Advanced Signal
Processing). Thereshould be a steady bottom signal on the display. Now
turn on eachpiece of electrical equipment on the boat andviewtheeffect
on the sonar'sdisplay. For example, turnon the bilge pump and viewthe
sonardisplayfor noise. If no noiseis present, turnthepump off, thenturn
on the VHF radio and transmit. Keep doing this until all electrical
equipmenthas been turned on, their effect on the sonar display noted,
then turned off.
Ifyou'reinstalling an optional speed/temperature sensor, readthespeed/
If youfind noiseinterference froman electrical instrument, trollingmotor,
IMPORTANT!
temperature sensor's installation manual for mounting instructions.
Route the sensor's cableto the X-55's power cable and plug it into the
connector marked "SPEED/TEMP CABLE"
pump, or radio, try to isolate the problem. You can usually re-route the
sonar unit's powercableand transducer cableawayfrom the
wiring that
iscausingthe interference. VHFradio antennacables radiatenoisewhen
transmitting, so becertain to keep thesonar'swiresawayfromit.You may
need to routethe sonar unit'spowercabledirectlytothe batteryto isolate
it from otherwiring on the boat.
Ifno noisedisplaysonthe sonar unitfromelectrical equipment, thenmake
FlED
3amp
FUSE
certain everythingexceptthesonarunitisturned
off,then starttheengine.
Increasethe RPM with the gearshift in neutral. If noise appears on the
display, the problem could be one ofthreethings; sparkplugs, alternator,
or tachometer wiring. Try using resistor spark plugs, alternatorfilters, or
routing the sonar unit's power cable away from engine wiring. Again,
routing the power cable directly to the battery helps eliminate noise
problems. Make certain to usethe in-line fusesupplied with the unitwhen
wiring the powercable to the battery.
When no noise appears on the sonar unitafterall ofthe abovetests, then
the noise source is probably cavitation. Many novices or personswith
SPEED!
TEMP
SENSOR
limited experiencemake hastysonarinstallations whichfunction perfectly
in shallowwater, orwhenthe boat is at rest. In nearlyall cases, thecause
ofthemalfunction will be the location and/orangleof the transducer. The
faceofthe transducermustbe placed ina location that hasa smooth flow
ofwaterat all boat speeds. Read yourtransducer owner'smanual forthe
best mounting position.
X-55 POWER CONNECTIONS
2
35
PDF compression, OCR, web-optimization with CVISION's PdfCompressor
3. Thewater may be deeperthanthe sonar's abilitytofind the bottom. If
the sonar can'tfindthebottom signal while it's in the automatic mode, the
digital willflash continuously. It may change therangeto limitsfar greater
than the water you are in. If this happens, place the unit in the manual
mode,then changetherange to a realistic one, (for example, 0-100feet)
and increase the sensitivity. As you move intoshallowerwater,a bottom
signal shouldappear.
TRANSDUCERCONNECTIONS
See the transducerowner's manual included with the unitfor complete
transducerinstallation instructions.
SIDESCAN
TheX-55 hasoptionalside-scancapability. To usethis feature,youmust
purchase the ScanPac accessory. To install it, follow the instructions
enclosedwith the ScanPac.
4. Check the batteryvoltage. If thevoltage drops, the unit's transmitter
poweralso drops, reducing its abilityto find thebottom or targets.
See the"Side ScanOperation" section in thismanual for information on
Bottom echodisappears at highspeeds or erratic digital reading or
weak bottomecho while boat is moving
1. The transducer may be in turbulent water. It must be mounted in a
smooth flow of waterin orderfor the sonarto workat all boatspeeds. Air
bubbles inthe waterdisrupt the sonarsignals, interfering with itsabilityto
findthebottom or othertargets. The technical term for this is Cavitation.
To usethespeed, temperature, and distance log features, youmustinstall
an optional speed/temperature sensor. Lowrance manufactures a thruhull sensor/transducercombination unit and a transom mount speed/
temp only sensor.
2. Electrical noisefromthe boat's motorcan interfere with thesonar. This
causes the sonar to automatically increase its Discrimination or noise
rejectionfeature. Thiscancausetheunittoeliminateweakersignalssuch
as fish or even structure fromthe display. Try using resistorspark plugs
or routingthe sonar unit'spower and transducer cables awayfrom other
electrical wiring on the boat.
No fish arches when the Fish ID feature is off:
1. Make certain transduceris pointing straight down. This is the most
commonproblem if a partial arch is displayed. See theFishArch section
in your owner's manual for more information.
using the side-scan feature.
SPEED/TEMPERATURE/DISTANCE LOG
KEYBOARD
Thekeyboardhaskeys arranged intwoverticalcolumnsplus ahorizontal
row at the bottom. The keys in the left column are used to enter numbers
and menu selections. The keys in the right columnactivatethewindows
featureand the basicsonarfunctions. The menu key in thebottom right
cornerof the keyboard activates thefirst menu page. The keys along the
bottom of the screen are used to activate the alarm menu, stopthe chart,
and make menu selections with the arrow keys.
WINDOWS- This keygivesyouaccess to thewindowsmode, which lets
you customizedisplays.
2. The sensitivity maynot be high enough. In orderfor the unitto display
afish arch, it hastobe ableto receive thefish'sechofromthetimeitenters
the cone until it leaves. If the sensitivity is not high enough, the unit
displays the fish only when it is in the center of the cone.
SENS - Press this key to adjustthe unit's sensitivity.
3. Use the Zoom feature. It is much easierto display fish arches when
zoomedin on a small range of waterthan a large one. For example, you
will have much better luck seeing fish arches with a 30 to 60 foot range
than a 0 to 60 foot range. Thisenlargesthe targets,allowing thedisplay
to show much more detail.
ZOOM - The X-55 gives you 2X and 4X zoom capabilitywith this key.
4. The boat must be moving at a slow trolling speed to see fish
arches. If the boat is motionless, fish stay in the cone, showing on the
display as straighthorizontal lines.
RANGE- Thiskey lets youadjustthe range whenthe unitis inthemanual
mode.
AUTO - This turns the automatic feature off and on.
MENU
- Press this key to show the menus and gain access to most
functions.
CLEAR - This key clears menus and erases entries from the screen.
PDF compression, OCR, web-optimization with CVISION's PdfCompressor
34
3
ALARM- Press this key to activateany of the sonar alarms.
STOP- Whenthis key is pressed, the chart stops scrolling. This doesn't
affectthe digital display, however.
ARROWKEYS - These keys are used to make menu selections and to
move objectson the screen.
ON - The ON key turns the X-55 on.
If your unit is not working,or if you need technical help, please usethe
followingtroubleshooting section before contactingthefactorycustomer
servicedepartment. It may saveyou the trouble of returning your unit.
Unit won't turn on:
1. Checkthe powercable'sconnection at the unit.Also checkthe wiring.
OFF - Press and HOLD the Off key to turn the X-55 off.
DISPLAY - General
The lightsare turnedon forapproximately ten secondswhen the X-55 is
first turned on. Menus appear at the same time. To keep the lights on,
press the key adjacent to the Lightlabel. It controlsthe backlighting used
on the display and keyboard. If you don't want the lights on, wait ten
secondsandthelights will automatically turn themselves off. Themenus
will also disappearaftertenseconds, oryou canturnthemoffby pressing
the CLEAR key at the bottom of thescreen.
The Metriclabel at the top of the screen worksthesameway. Press the
key adjacentto theMetric labelto change the depth from feet to meters.
This also changes the temperature display to degreesCelsius, speed to
knots, and log to kilometers on the X-55.
The Display menu atthe bottom ofthe screen letsyouadjustthedisplay's
contrastforthe bestviewingangle. Pressing the leftarrow key decreases
the contrast,theright arrow increases it. After settingthe contrastfor the
best viewing angle, press the CLEAR key to erase the menu or wait
approximatelyten seconds anditwillautomatically erase.SeetheDisplay
Contrastsectionfor more information on thisfeature.
-o
12
29
35
3
4
IMPORTANT
SERVICE INFORMATION!
When the X-55 is first turned
on, thedisplaywill appearsimilartothe one at left. Theword
"AUTO" in the upper left corner of the display indicates
the automatic feature is on.
The digital bottom depth is
also displayedin this box.
2. Make certain the powercableiswired properly. The red wire connects
to the positive batteryterminal, blackto negative or ground.
3. Checkthefuse.
4. Measure the batteryvoltage atthe unit'spowerconnector.It should be
at least 11 volts. If it isn't, the wiring to the unit is defective, the battery
terminals or wiring on theterminals are corroded,or the battery needs
charging.
Unit freezes, locks up, or operates erratically:
1. Electrical noisefromtheboat's motor, trolling motor, or an accessory
may be interfering with thesonar unit. Re-routing thepower and transducer cables away from other electrical wiring on the boat may help.
Route the sonar unit's power cable directly to the battery instead of
througha fuse blockor ignition switch
2. Inspectthetransducercablefor breaks, cuts, or pinched wires.
3. Checkboth the transducer and powerconnectors.Make certain both
are securelyplugged in to the unit.
Weak bottomecho, digital readings erratic,or no fish signals:
1. Makecertaintransducer is pointing straight down.Clean thefaceofthe
transducer. Oil, dirt, and fuelcancause a film to formon thetransducer,
reducingits effectiveness. Ifthetransducer is mountedinside thehull, be
sure it is shooting through only one layer of fiberglass and that it is
securelybondedto the hull. Do NOTuseRN siliconerubber adhesive
or Marinetex
2. Electrical noisefromtheboat'smotor caninterferewiththesonar. This
causesthe sonar to automatically increase its Discrimination or noise
rejectionfeature. Thiscancausethe unittoeliminateweakersignalssuch
as fish or even structure from the display.
33
PDF compression, OCR, web-optimization with CVISION's PdfCompressor
With the X-55,anyonecaneliminate guessworkand concentrate on the
areas where fish are likely to be. Even if it's the first time on the lake!
The most efficientway to become acquainted with a bodyof water is to
survey it with your X-55. Start with a map of the lake, if possible, and
indicatethe promising spots in relation to landmarks on shore.
As yougo about your survey, yourX-55will tell youthe depth and typeof
bottom. It will also reveal suspended fish.
Keepafew markerbuoysin the boat, ready totoss overboard.When the
X-55 indicates a school of fish, throwthe buoyout. With the school thus
marked, you canmakeyourturnandcomebacktofish in exactlytheright
spot.This is essentialwhenyou'refarfromshore ona biglake. Unlessyou
mark the schoolof fish whenyou'reover it, you maynot be ableto find it
again.
BAIT FISH
The importance of baitfish to successful fishing can't be over-emphasized. They are the principle food of all game fish in mostwaters.
Baitfisharethe plankton feeding foragefish, such as minnows and shad.
Baitfishcanalso betheyoungofgamefish, suchascrappies, bluegill, and
bass.
Most bait fish concentrate within five feet of the surfacewhere sunlight
promotes the growth ofthe plankton on which theyfeed. Onemethodof
fishing isto usethe X-55to findthe baitfishfirst. Withthe Fish ID feature
off, a school of baitfishwill look likea"cloud"on thedisplay.Usually, game
fish will be nearby, often directly beneath theschool of baitfish.
MENUS
The X-55 uses menus extensively to guide you through
the functions and featuresof
the unit. The menu key accesses many of these features, allowing youto customize the unit to your particular
needs and water conditions.
Although you may have to
leaveone menu and enteranotherto reach thedesiredfunction,allyou havetodo is press
the menu keytoselectthenextmenu. Ifyouevergetlost in amenu,simply
pressthe CLEAR key.
HELP
An extremely usefulfeatureincorporated intothe X-55 seriesistheHelp
menus. Virtuallyeveryfeaturehasa help menu labelthat, when pressed,
gives one or more pages of text describing how to usethat feature. For
example, pressing the AUTOkeybrings up a menu lettingyou switchthe
unitinto or outof theautomatic mode. A help label also appearson the
screen. Pressing the keyadjacenttothe helplabelgives youa description
of how automatic works and how it affectsdifferentfunctions.
WINDOWS
You can changethe displayson the X-55byusingthe windowsfeature.
Thisletsyoucustomizedisplays toyour own fishingor boating situations.
Thisfeature also givesyou 15 window displayscreens on the X-55.
Thescreens available in thewindows mode are dividedintotwo or more
windows per screen. Each
screen of windows is called a
"group".Group 'A"as shown at
right hasthe digital displaysin
onewindowand the sonar chart
in the other.
PDF compression, OCR, web-optimization with CVISION's PdfCompressor
32
5
r
To use the windowsfeature,
firstpressthe WINDOWS key.
A screen similar to the one
shown at left appears. The
menu at the bottom of the
screenletsyouswitchbetween
the"pages" ofdisplays. These
830
are lettered "A" through "0".
Group "A" shows first. Press
the down arrow key to move
forwardthroughthe screens.
Press the up arrow key to
movebackward. Forexample,
pressing the down arrow key
once shows the group "B"
screen which is the side scan
screen. To return to the full
sonar screen, press the key
nexttothe "FULL CHART'label at thetopof thescreen.
—
—UI' fl
!.U
1 1 FT
MENU
INDQWI
q-
I
SURFACE LAYER
ABSORBS HEAT
FROM THESUN
-n
760
WINDOW'-N
750
0.0MPH
THERMOCLINE
Everyoneofthegroupscreens
can be modified to some exMAIN MENU
tent. For example, press the
MENU key while group "A" is
displayed. Four new labels appearon the displayas shownabove. Two
oftheselabelsarewindowmenus. Pressingthekeyadjacenttoone ofthe
"window menu" labels gives youa menu with functionsthat relate only to
that window. For example, if you pressthe key adjacentto the window
menu label on the sonar chart window, the screen will clearand you will
havea new menu with selections suchas "ADJUST CHARTSPEED" and
VAlUES IN DEPTH
DUETO WIND,
560
50°
470
"ADJUST GRAYLINE". Other
_______
_________
MOST PRODUCTIVE
ZONE FOR FISHING
windowmenus letyouchange
theunitsof measure or adjust
______
FISHIO ri
THESE ADJUSTMENTS
AFFECT ALL CHART
bJINOO5JS AND
SCREEN CHART.
JLLL
MORE
6
alarms.
To exit
froma windowmenu,
press the CLEAR key.
SURVEYING A LAKE
The most successful anglers on anybody of water are thosewho fish it
dayafterdayandyear afteryear. Eventually, they learn thehotspotsthat
producefish consistently. Theydiscoverthroughexperiencewhere, and
at what depth, they can expect to find the fish they want at any season.
And theyrealizethattheseproductive areas changethroughout theyear
depending on waterlevel, temperature, food, and otherfactors.
31
PDF compression, OCR, web-optimization with CVISION's PdfCompressor
of the water. For example, from45 to 60 feet. The smallerthesegment,
thebetterthe screen resolution will be. The easiestwayto dothison the
X-55is with the Zoomfeature.This featureexpands the echoes,making
it easierto see detail. For the bestresults, turn the sensitivityup as high
as possible withoutgetting too much noise on the screen. In mediumto
deep water,this method should work to displayfish arches.
If yousee fish signalswhen the unit is in the manual mode, but don't get
fish symbols whenthe Fish l.D.feature is on,tryincreasing thesensitivity.
WATERTEMPERATUREAND THERMOCLINES
Watertemperature hasan important-it not controlling-influence upon the
activitiesofall fish. Fish are cold blooded and their bodiesare alwaysthe
temperature of the surrounding water. During the winter, colderwater
slows down their metabolism. At this time, they need about a fourth as
much food as they consume in the summer.
Mostfishdon'tspawn unlessthewatertemperature iswithin rather narrow
limits. A surface temperature meter helps identifythe desired surface
waterspawningtemperatures forvariousspecies. Troutcan'tsurvivein
streams that get too warm. Bass and otherfish eventuallydie out when
stocked in lakes that remaintoo cold duringthesummer. Whilesomefish
have awidertemperaturetolerance thanothers,each hasacertain range
within whichit triesto stay. Schooling fish suspended over deep waterlie
at the level that provides thistemperature. We assume theyarethe most
comfortable here.
The temperature of water in the lake is seldom constant from top to
bottom. Layers of different temperatures form,andthejunctionofawarm
and cool layerof water is called a thermocline. The depth and thickness
ofthethermoclinecan varywiththeseason ortime of day. In deep lakes
theremaybetwo or moreat different depths. Thermoclines are important
to fishermenbecause they are areas wherefish are active. Manytimes
baitfish will be abovethethermocline while largergame fish will suspend
in or just below it.
The X-55can detect thisinvisible layerinthewater, butthe sensitivitywill
probablyhave to be turned up to see it.
VIEWING WINDOWS
OPTIONS
To seeall of the available window options, press the WINDOWS key, then press the
MENU key. Nowpressthe key
adjacenttothe"MAIN MENU"
label. Finally, press the key
next to the "VIEW ALL WINDOWS" label. The screen at
right appears.
I
FEET
I
58.2
Digital Depth
WATER DEPTH DISPLAY.
DEPTH ALARMS AND
UNITS OF MEASURE
ARE SET IN MENU.
in
the
Thefirstwindowappears
upperright cornerof thescreen. Adescription ofthescreen shows in the
boxatthe bottomofthescreen. Nowpress the keyadjacent tothe"NEXT"
label.This changes thedisplayedwindowand description.
When you've finishedviewingthe windows, pressthe CLEAR key.
MODIFYING GROUPS
Mould AND GROUP
To modify or "customize" a
group, first press the WINDOWS key, then press the
MENU key. Nowpressthe key
adjacentto the"MAIN MENU"
label at the bottom of the
screen. The screenshown below appears.
V EW
At
-U
-IELP
'IDOI,JS
RE—PROGRAM i-i GROUP
ADJUST
I
IJ
SPLA CONTRAS
PAGE
thekeyadjacent to
Now press
the "RE-PROGRAM A
GROUP" label.The screen shown below appears.
'GROUP
AH SELECT 6ROUP
GROUP
E
TO BE flOUP F'
él CHANGED
TGROUP
CGR0UP G'
GROUP
DGROUP
PRESET PILL GROUPS'
CLEAR I
MORE
7
Select the letter of the group
youwishtocustomizeby pressing the key adjacent to the
group'slabel. If the label isn't
shown onthis page, pressthe
key adjacent to the "MORE"
label. In this example, the key
next to the "GROUPA" label
was pressed. The screen
shown at the top of the next
page appears.
PDF compression, OCR, web-optimization with CVISION's PdfCompressor
30
_______________________________ The depth windowappearsin
the upper right corner of the
__________
screen. Press the key adjacent
I_________
to the "NEXTWINDOW" label
NEX I1INDObJI
to move through thewindows.
______
Ifyoureach thelastwindow,or
USE bJINDfl!Ll
if you wish to go backwards
_____
_________
HELP
through thewindows, pressthe
______ key next to the "PREV WIN________
DOW" label.Whenthe desired
________
window
is onthe screen, press
__________
1ST
the
next
to the "USE WINkey
_________
L..W1N00W
DOW" label.Thescreen clears,
placingthenew windowin the upperleft cornerof the screen. If the new
windowtakes up halfthescreen, theunitwill placeiton the leftside of the
screen.
- —46.4
II—
Continue with the windowselections until the screen is filled. The unitwill
stay inthewindowsmode usingyour newcustomized screen. Ifyou don't
want to fill a screen and only use one, two, or three windows in a group,
simply pressthekey adjacentto the "STOP" label. Thissaves thegroup
and exits the modify windowsmode.
8 degree
TRANSDUCER CONE ANGLES
BOAT'S DIRECTION OF TRAVEL
Remember,youcan alwaysreturntothe full screen sonarmodeby
pressing the "0" key in the upper left corner. To switch backto your
customized screen from the full screen sonar, simply press the WINDOWS key, then use the down arrow key to switch to the group you
customized.
NOTE: Turning the unit off erases all customized screens and user
settings!
RESElliNG ALL GROUPS
To return all of thegroupsto their factorysettingswithoutturningtheunit
off and on again, presstheWINDOWS key, then press the MENU key,
then pressthekeyadjacenttothe"MAINMENU" label. Nowpressthe key
adjacentto the"RE-PROGRAM A GROUP"label. Finally, press thekey
nextto the"RESETALL GROUPS" label.
SIDE-SCANOPERATION
Two differentside scan displaysare available when the X-55 is in the
Windows mode. To use the side scan feature, first install the ScanPac
transduceron your trolling motor. Next, pressthe WINDOWS key on the
X-55 unit.
5
I
jjII
11i1r
A
B
29
C
PDF compression, OCR, web-optimization with CVISION's PdfCompressor
TRANSDUCER CONE ANGLES
Thesound waves fromthe transducer spread out intothe waterin a cone
shaped beam. Thislooks much likethe beam fromaflashlight.The angle
between the outside edges of the cone is the cone angle.
Lowrance offers achoice oftransducers witheitheran8 or2Odegree cone
angle. ThetransducersuppliedwiththeX-55hasa2Odegree coneangle.
Typically, wide coneangle transducers (20 degrees) are idealfor operatingin shallowto mediumwaterdepths. The20 degreeconeangleallows
youto seemore of the underwaterworld. In 1 Sfeetofwaterthe20degree
cone covers an area about six feet across. The 8 degree transducer
covers only about a two foot circle.
The20degreetransducer is almostalways the bestto usein fresh water,
the8 degree mostly in salt water. In a deep waterenvironment, (300feet
- fresh water, 100 feet - salt water) the narrow cone angle is more
desirable. Sincethe-oundenergyisconcentrated inasmallerarea,itcan
penetrate to much deeperdepths.
Both 8degree and20 degree transducers give accurate bottom readings,
eventhoughthebottomsignal is muchwideronthe2odegreemodel. This
is because you are seeing moreof the bottom. Remember, the shallow
edge ofthesignal showsyouthetruedepth. Therestofthe signal tellsyou
whetheryou are over rocks, mud, etc.
iftheconepassesover a fishin shallowwater, thesignal displayedon the
X-55 maynot arch at all. This is due to the narrowconediameter and the
resolution limitations of the display.
FISH ARCHES
Fish arches are createdwhenthecone of sound passes over a fish. The
distance to afish whentheconefirst strikes it is shown as "A" onthe next
page. Whenthecenterofthe cone strikes the fish, the distance is shorter
as shown "B". As the cone leaves thefish, thedistanceincreases again
as shown in "C".
Very small fish probablywill not arch at all. Medium sized fish will showa
partial arch, or a shapesimilarto an arch if they're in deep water. Large
fish will arch, but turn the sensitivity up in deeper waterto seethearch.
Because ofwaterconditions, suchas heavy surface clutter, thermoclines,
etc., the sensitivity sometimes cannot be increased enough to get fish
arches.
Oneof the bestwaysto getfish archesisto expand or"zoom"asegment
Now press the down arrow
key until the screen shown at
________
I)
right appears.
ftS
t
These are the side scan windows. Both windowsshow the
K!
digital depth display from the
transducerpointed at the bottom - Not theside scan transducer. Thewindowon the left
shows a Fish ID symbolwhen ______________ ______________
48.1
the unitidentifies atarget as a IIFTSH
36.5 FT]I[DEPTH
________________
_______________
the
When
this
fish.
happens,
digital depth display atthe bottomofthewindowchanges from "DEPTH"
to "FISH" and shows the distancefrom the side scantransducerto the
target shown as a fish symbol.
______
III
The windowon the right showsall return echoes. These echoesappear
as short, horizontal lines. ThethickertheIine,thestrongerthereturn echo.
The distance to these targets can be determined by comparing the
positionof the echo to the range markers on the side of thedisplay.
To change the range, pressthe RANGE key. A new menu appearsat the
bottom ofthe display. Usetheup or downarrow keys to changethe range
ofthe side scanmode fromtentosixtyfeet.Eitherwaitafew secondsafter
you've changed the range and the menus will automatically disappearor
pressthe CLEAR key to erase the menus.
SONAROPERATION - AUTOMATIC
When the X-55 is first turned on, the Automatic feature is enabled. This
is indicated by the word"AUTO" at the topof the screen. The Automatic
featureadjuststhesensitivityand rangeso the bottom signalis displayed
inthe lowerhalfofthescreen at
____________________________
0
all times.
q89FT
12
ToturnAutomatic off,firstpress
the AUTO key. A menu appears at the bottom of the
screen abovethe left and right
arrows. Press the left arrow
key to switch to the manual
mode. The letters "Man" appear in the upper left cornerof
the display, indicating the unit
29
36
PDF compression, OCR, web-optimization with CVISION's PdfCompressor
28
9
is in the manual mode. To turn Automatic on, press the AUTOkey again,
then pressthe right arrow key.
SENSITIVITY
The sensitivity key on theX-55 controls the ability of the unitto pick up
echoes. A low sensitivity level excludes much ofthe bottom information,
fish signals, and othertarget information. High sensitivity levels enables
youtoseethisdetail,but itcanalso clutterthescreen with many undesired
signals. Typically, the best sensitivity level shows a good solid bottom
signal with Graylineand somesurfaceclutter.
Whenthe X-55 is in the Automaticmode,thesensitivity is automatically
adjustedto keep a solid bottom signal displayed, plus a little more. This
gives it thecapabilityto showfish and other detail.
However,situations occur where it becomes necessary to increase or
decreasethe sensitivity. This typically happens when you wish to see
more detail, so an increase in sensitivity is indicated. The procedureto
adjust it isthesamewhethertheunitis in the automatic or manual mode.
Toadjustthe sensitivity, presstheSENSkey. Thesensitivity adjustmenu
appearsat thebottom of the screen.
However, therearetimeswhenyou maywanttoturn the ASPfeatureoff.
Thisallowsyoutoviewall incoming echoesbefore theyare processed by
the ASPfeature.
Tochange the ASP level, press the MENU key five times. Then press the
key nextto the "ADJUST LEVELOF CHARTASP" labeluntil the desired
level is obtained.
SIGNAL INTERPRETATION
Your X-55 gives an accurate picture of the bottom that your boat is
passing. A bottom of firm sand, gravel, shell, or hard clay returns a fairly
widesignal. Ifthe automatic mode isoff and thesignal narrows down,then
it means thatyouhave moved overa mud bottom. Mud absorbsthesound
wave and returns a weaksignal. Turn up the sensitivity to see a better
bottom signal.
Big rocks or stumps on a smooth bottom send back signals above the
bottom level signal. The height of the signal depends on the target's
height. Asyou passover apost, it shouldbe clearly visibleas ashort line
extending abovethe bottomsignal.
A steep
slope returns a wide signal, the steeper the wider. Signals
returned from a high underwater cliff are usuallythe widestof all.
The sensitivity menu has left
and right arrows, plus a horizontal bar graph. The graph
givesa visual indication of the
sensitivity level. The number
above the INC arrow also
showsthe percentage of sensitivityin use.
When the Fish ID. mode is off, the depth of the water will affectthe size
and shapeofthe fish arch due to the coneanglediameter. For example,
ifthe conepassesoverafish inshallowwater,the signal displayed on the
X-55 maynot arch at all. Thisis due tothenarrowconediameter and the
resolution limitations of the display.
To increasethesensitivity level,
press the right arrow key. As
you press the key, the menu's
bar graph will grow wider and
thepercentage will increase in value.You canalso seethedifference on
thechart record as it scrolls. When the sensitivity is atthe desired level,
release the key.
To decreasethe sensitivity level, press the key adjacent to the leftarrow.
The bargraph and percentage will decrease. Whenthe sensitivity is atthe
desired level, release the key.
Whenyou reach either the maximum or minimum limit, a tone sounds.
10
27
PDF compression, OCR, web-optimization with CVISION's PdfCompressor
MENU - PAGE 5
____________________________
ADJUST CHARTSURFACE
To turn the menus off, pressthe key adjacent to the CLEAR key at the
bottom left side of the unit or wait a few secondsand the menus will
disappear.
CLARITY
RANGE- Automatic
When turned onforthefirsttime,theX-S5automatically placesthebottom
signal in the lower half of the screen. This is called Auto Ranging and is
part of the automatic function. The range cannot be changedmanually
whilethe unit is in automatic.
Themarkings extending downward from the zero line on the
chart are called "surfaceclutter." These markings are
caused by wave action, boat
RANGE- Manual
The X-55givesyoucontrol overthe range when it's inthe manual mode.
wakes, temperature inversion,
and othernatural causes.
TheSurfaceClarityControl (5CC) reduces or eliminates surface clutter
signals from the display. 3CC varies the sensitivity of the receiver,
decreasing it nearthe surface and gradually increasing it as the depth
increases. Themaximum depth that5CCwill affect is75%oftheselected
depth range. For example, on a 0-60 foot range with maximum 8CC,
surface clutter will be reduced down to 45 feet.
There are three levels of 8CC available on the X-55: low, medium, and
high. When it'sturnedon forthe firsttime,the8CC level is low. To change
it, press the MENU key five times, then press the key adjacent to the
"ADJUST CHARTSURFACE CLARITY" label until the black boxisonthe
desired 3CC level.
Press the key nextto the "EXIT" label when you're finished.
ASP (Advanced Signal Processing)
The ASP feature is a noise rejection system built into the X-55 that
constantly evaluates the effects of boat speed, water conditions, and
interference. Thisautomatic feature gives youthe bestdisplaypossible
undermostconditions.
TheASP feature is an effectivetool in combating noise. In sonarterms,
noise is anyundesired signal. It is causedby electrical and mechanical
sources such as bilge pumps, engine ignitionsystems and wiring, air
bubbles passing overthe faceof the transducer, even vibrationfrom the
engine. In all cases, noisecan produceunwanted marks on the display.
TheASPfeature hastwo levels - Normal and High. Ifyouhavehighnoise
levels,try using the"Nigh"ASPsetting. However, ifyouare having trouble
with noise, we suggestthat youtake steps to findtheinterference source
and fix it, ratherthan continually usingthe unitwith the highASPsetting.
Tochange therange,firstmake
certaintheX-55 isinthemanual
mode. Next, presstheRANGE
key. The range adjustment
menu appearsinthe lowerright
cornerofthe display. Pressthe
up or down arrow keys to decrease or increase the range.
The available range.s are 0-5,
10, 20, 30, 40, 60, 100, 150,
200, 300, 500, 800, and 1000
feet. After the desired rangeis
9&3FTks
_____________________
a
UPPER LIMIT I
29
I
36
<CHANGE
<CHANGE LOWER LIMIT
_____
(HELPI
___________
40 FT
60 FT III8
100 FT
________________ DEEP SHAL
_________________
S
displayed, press the CLEAR
key to erase the rangemenu.
NOTE: The depth capability of the X-55 depends on the transducer
installation, water and bottom conditions, and otherfactors.
RANGE- Upper and Lower Limits
TheX-55lets youchange the upperand lowerrangelimitswhen it's inthe
manual mode. Thislets you 'zoom' in on segments of the wateras small
as5feet. In otherwords, youcansettheupperlimitto3ofeetandthe lower
limitto 35feet, regardless of the bottomdepth.Thisin essence, givesyou
aSfoot zoom. You can chooseany segmentof the water, as long as the
distancebetween the upper limit and lower limit is 5 feet (2 meters, 1
fathom) or more. Using the zoomfeature (described in the nextsection)
lets you view a segment of the water on the screen's right side (for
example, from 20 to 30 feet), and a zoom of that segmenton the left.
To changethe upper or lower limit, first make certain the unit is in the
manual mode.
PDF compression, OCR, web-optimization with CVISION's PdfCompressor
26
11
Next, press the RANGE key. The menu shown on the previous page
appears. Nowpressthe key nextto the "CHANGE UPPER LIMIT" label
to changetheupperlimitor"CHANGELOWER LIMIT" labeltochangethe
lowerlimit.We'rechangingthe ________
upperlimit in this example. Af- hHs.3 Ri
0
ter pressing thekey nextto the
S1tim
"CHANGE UPPER LIMIT' la12
NUME:ER KEYS Id1
bel, the screen shown at right CHiiNi3E UPPER LIMIT.
29
appears.
USE RIGHT ciRROI.iJ
L
3E
1')
BCKSPPiCE.
36
Usingthe numberedkeys, enter a numberforthe upperlimit _______ —
48
that is at least five feet less
thanthelowerlimit.Inthiscase,
60
we entered 40, giving a20foot
zoom. When you've entered
thedesiredupperlimit, press the up arrow key atthe bottom of the screen.
The unit returnsto the sonar screen with thenew upper limit.
Iri..anI
Changethelower limitthesameway. Using the upperandlowerlimits in
thismannerlets you expand a segmentofwater quicklyand easily.
ZOOM
Enlargingor "zooming" the picture is a common method used to show
smalldetailandfish signals. TheX-55gives youtwodifferentzoom sizes,
plus a split screen zoom option. The zoomoperation and adjustmentis
differentin theautomatic and manual modes.
ZOOM - AUTOMATICMODE
_____
To zoom the display in the 150.3
automatic mode, firstpress the
ZOOM key. All targets on the
displayare enlarged fourtimes
normalsizeautomatically. The
menus shown at right also appear.
Turn the zoom feature on (or
off) by pressing the key adjacent to the "OFF/ON" label.
0
C
12
L4UFFI
________
•' 29
k
_________
36
FLILL I
12
-=fl-
-c
98
--
60
UTU 1
50.9 FT
.
r
--r-.
/29
36
chor. Since the unitis notmoving,fish signalsare long,drawn
out lines on a normal chart
display. FASTRAK converts
thegraph toavertical bargraph
that, with practice, makes a
useful addition to fishing at a
stationary location.
To turn FASTRAK on, press
the menu key fourtimes, then
press the key adjacent to the
'TURN FASTRAK ON" label.
To turn it off, repeat thesame steps.The 'TURN FASTRAK OFF" label
appears instead of the "TURN FASTRAK ON" label.
SELECTUNITS OF MEASURE
TheX-55candisplaythe waterdepth infeet, fathoms, or meters, surface
water temperature in degrees Fahrenheit or Celsius, speed in statute
miles per hour,kilometers per hour, or knots,and distance (log) in miles,
kilometers, or nautical miles.
To change the unitsof measure, press the key adjacent tothe "SELECT
UNITS OF MEASURE" label. The screen shown below appears. The
blackbox on each line showsthe unitof measure currently in use. In the
screen shown below, the units of measure are in feet for the depth,
temperature in degrees Fahrenheit, andboth speedand log areinstatute
miles per hour.
Press the key adjacent to the
unit that you wish to change.
Forexample, press the keynext
totheDEPTH labeltwotimesto
switchfromfeetto meters. This
moves the black boxtwo times
from the"FT" to the "M". When
you have the units of measure
set as desired, press the key
nextto the"EXIT' label.
.ELH
=
FM
=
oc
II
Ii
ED=KNKMH
flNMKM.
!
CLEARDISTANCE LOG
The X-55 startscountingdistanceas soon as the X-55 is turned on. To
reset the distance log to zero, press the MENU key until the "CLEAR
DISTANCE LOG" labelappears, then press the key adjacenttothatlabel.
25
PDF compression, OCR, web-optimization with CVISION's PdfCompressor
menupage appears, thenpressthe keyadjacent tothe"REMOVE ZOOM
BAR" label.
Pressing the key adjacent to
the "2X/4X"labelenlargesech-
Note: Turning the zoom bar on also turns the zoom feature on.
DISPLAY ZONE BAR
When the zone alarm is on, the zone bar doesn't normally show on the
screen. To turn the zone bar on continuously, first press the MENU key
until the3rd menu page appears. Nowpressthekeynexttothe"DISPLAY
ZONE BAR" label.
To turn the zone bar off, press the MENU key until the third menu page
appears,then press the key adjacent tothe "REMOVE ZONEBAR" label.
Note: Turning the zone bar on also turns the zonealarm on.
DIGITAL SONAR
When the X-55 is turned on forthe first time, the digital depth display is
located at the top left corner of the screen. This display comes from a
separate digital sonarbuilt intothe unit. Itdisplays onlythe bottomdepth.
If it loses the bottom, thelast known depthwill flash on thedisplay. When
the digital findsthebottom, it will automatically display the bottom depth
again.
The digital sonar can beturnedoff, however this also turns all automatic
features off also,such as auto sensitivity,auto ranging, and the Fish I.D.
feature.
To turnthe digital sonar off, press the Menu keythreetimes. Now press
the key adjacent to the "TURN DIGITAL SONAROFF" label. To turn it
backon again, repeat thesamesteps.
MENU - PAGE4
FASTRAK
This feature converts all echoestoshorthorizontal lines on
thedisplay'sfar right side.The
graph continues to operate
normally. FASTRAK givesyou
a rapid update of conditions
directly under the boat. This
makes it useful for ice fishing,
or when you're fishing at an-
oes from two times to four
times their normal size.
To switch between the split
screen zoom and full screen
zoom, press the key adjacent
tothe"SPLIT/FULL"label.The
screen instantly splits intotwo
sections as shown at left. All
the
size ofthe oneson theright.
on
the
left
are
shown
atfourtimes
targets
Ifyou switchto the 2Xzoommode, echoes on the leftside of the screen
are shown attwicethe size as the oneson the right. Theechoesthatscroll
acrossthe screen are the exactsameechoes on both sides ofthe screen.
They're simply enlarged on the leftside. This featuretracksthebottom,
keeping it on the display at all times, when the automatic feature is on.
Onceyou've setthe zoom as desired,press the CLEAR key to erase the
menus.
- MANUALMODE
Whenyou pressthe zoom key whiletheunit is in the manual mode,the
screen shown below appears. All of the menus on this screen work
identically as described above. However, one additional menu item is
shown when the unitis in the manual mode: "ADJUST".
ZOOM
To adjust the zoom, press the key adjacent to the "ADJUST' label. A
screen similar to the one belowappears. A zoombar and adjust arrows
appearon thescreen. The echoes on the leftside of the screen are the
onesthat appearbetween thetop and the bottomofthezoombar. Press
the up or down arrow keys to
ove the zoom bar up or down.
As you adjust the zoom bar,
the echoes move on the left
side of the screen at the same
time. The zoom adjustmenus
will automatically clear a few
secondsafteryou've pressed
thelastkey. Remember, theX55won'ttrackthebottom when
it's in themanual mode.
PDF compression, OCR, web-optimization with CVISION's PdfCompressor
24
13
SONARALARMS
The X-55 has three differenttypes of sonar alarms. The first is the Fish
Alarm. It soundswhen the Fish l.D. feature determines an echoor group
of echoes is a fish. Anotheralarm is the ZoneAlarm whichconsistsof a
bar. Any echo that appears inside this bar triggersthe alarm. The last
alarm is calledthe DepthAlarm. Only the bottom signalwill trigger this
alarm. This is useful as an anchor watch, a shallowwater alert, or for
navigation. See the GPS sectionfor information on GPS alarms.
To adjustan alarm,first presstheALARM key. The screen shown below
appears. Press the key next to the "SETDEPTH OR GPS ALARMS" to
adjustthe shallowor deepdigitalalarms. When youpressthe key nextto
the"SET DEPTH OR GPS ALARMS", the menu shown at the top of the
next page appears. The zone
alarm has its own menu which
________ _____
is shown and described in the
zone alarm section.Onceyou
seethisscreen, pressthedown
arrow key untiltheblackboxis
on the desired alarm. In this
example, the shallow alarm is
selected. Now press the key
TURN FIsh FILM Ut
nextto the"CHANGE VALUE"
label. Use the numbered keys
to setthealarm. For example, K.EXIT TURN ZONE ALM Oh I
to settheshallowalarm'svalue
to 10feet, press the1 key, then
pressthe0 key. Whenthe desired valuehas been entered, pressthe key
nextto the "ENTER" label. The unit returns to the ALARMS screen.
Wheneither depth alarm sounds, a "Silence Alarm"label appears at the
bottom ofthe screen. Pressthe"CLEAR" keyto mute thealarm. Whenthe
alarm is triggered again,the alarm will also sound.
The followingsectiondescribes eachsonar alarm and its limits.
FISHALARM
Use the fish alarm for a distinctive audible alarm when fish or other
suspendedobjectsare detectedby the Fish I.D. feature. A differenttone
soundsfor eachfish symbol size shown on the display.
MENU-PAGE 3
CHARTCURSOR
The X-55 has a chart cursor
that allows you to pinpoint a
target's depth. The cursor is
simply a horizontal line that
extends acrossthedisplayfrom
leftto right. Adepth box at the
end ofthe lineon the right side
showsthe line's depth. In the
example below, the cursor
(line) is at 30.0 feet.
PAGE
3
To displaythe chart cursor, press the menu key threetimes. Nowpress
the key adjacent to the 'TURN CHART CURSOR ON" label. A screen
similartotheoneatthe boftom
of this page appears. Use the
AUTO
0
upor downarrow keys to move
FT
52.0
the cursor up or down to the _________
desired depth.
e
To turn the chart cursor off,
press the menu key three
times. Nowpress the key adjacent to the 'TURN CHART
CURSOR OFF" label. The X55 returns tothesonarscreen
withoutthe chart cursor.
12
29
36
98
-
-.
________ 60
DISPLAYZOOM BAR
When the unit is in thezoom mode, the zoombardoesn't normally show
on the screen. Thezoom bar showsthesection of water ontherightside
of the screen that the zoom
AUTO II 33.6
featuredisplays ontheleftside.
FTV
97.0
To turn the zoom bar on continuously,first press theMENU
key until the 3rd menu page
appears. Now press the key
next to the "DISPLAY ZOOM
BAR" label.
Toturn the zoombaroff, press
the MENU key until the third
14
PDF compression, OCR, web-optimization with CVISION's PdfCompressor
23
TURN DIGITAL BOX OFF
Thedigitalboxis displayed in the upperleftcornerofthefull sonarscreen.
It hasthe digital depth and automatic/manual indicators. Toturn this box
off, press the MENU keytwice, then pressthe keyadjacent to the "TURN
DIGITALBOX OFF" label. Repeat the abovesteps to turnthe box on.
CONSTRUCT DIGITAL BOX
TheX-55 can display the depth, speed, surface watertemperature, and
distancelogin the upperleftportion of the screen. When the X-55 is first
turned on, only the depth is displayed. You can turn each digital display
on as desired or turn all of them off, as desired.
To selectthe digital displays menu, first pressthemenu key threetimes.
Next, press the key adjacenttothe"CONSTRUCTDIGITAL BOX" menu.
A screen appears that is similar to the one below.
Now press thekey adjacent to
the desired display. For example, to turnthetemperature
displayon, press the key adjacentto the "INCLUDE TEMP."
label. Once you do this, the
digital display in the corner of
the screen will show the ternperaturein additiontothedepth.
The temperature menu label
nowshows"REMOVE TEMP."
You can turn each display on
or off individually.
PresstheCLEAR key to exit from this menu or wait approximately ten
seconds and the menus will automatically clear.
To turn the entire digital box
off, presstheMENU key twice,
then pressthe key nextto the
"TURN DIGITAL BOX OFF"
label.Theunitwill return tothe
sonar display with the digital
box erased from the screen.
To turn it on again, repeat the
above steps. The label on the
secondmenu page now reads
"TURN DIGITAL BOXON."
AUTO
5'I.? FT
ll
Fl
REMOVE DEP
REMI1IJE
ZONE ALARM
The zone alarm consistsof a
bar that appearson the right
side of the screen. Any echo
that appears on the screen
between thetop and bottom of
the zone alarm's bar will "trip"
the zonealarm.
Note:Thezonealarmisn't available in theWindows mode.
To set the zone alarm, press
theALARM key. Nowpressthe key nextto the "SetZone Alarm" label.
A screensimilarto the one shown below appears.
- _oz
146.6 FTft
12
II
l
E
SET ZONE
flLOWER
29
LIMIT
36
(CHANGE TO UPPER I
—C
-
92
—
60
The zonealarm bar showson
the right side of the screen.
Use the arrow keys to move
the bottomof thebar higheror
lower. To move the top of the
bar, first pressthe key nextto
the "CHANGE TO UPPER"label. Nowusethe arrow keysto
move the top of the bar higher
or lower. When you have the
zonealarm bar setas desired,
press the CLRkeyto erasethe
menus.
The abovestepsautomatically turnthezonealarmon if itwas off. To turn
thezone alarm off, press the ALARM key, then press thekey nextto the
"Turn Zone Alarm Off"label at the bottom ofthe screen.
Normally,the zonealarm bardisappears fromthe screen afteryou make
adjustments. Toleavethezonealarm baronthe screenall ofthetime,see
the "DisplayZoneAlarm Bar"section in this manual for instructions.
tIUL.UOE LOG
PDF compression, OCR, web-optimization with CVISION's PdfCompressor
22
15
cfl
DEPTH ALARMS
__________________________
Thedepth alarms sound atone
when the bottom signal goes _____
__________
shallower than the shallow
DEEP
UN
100
alarm's setting or deeperthan
_____
_____________
the deep alarm's setting. For ____________________________
example, if yousettheshallow
______________
alarmto tenfeet, the alarm will __________
___________
soundatone ifthebottomsig ___________
_________
nal is less than ten feet. It will _____
_____________
continue to sound until you
_____________ ________
E>cI
mute itor until the bottom goes
_______________
_____
deeperthan 10feet. The deep
alarm works justthe opposite. It sounds awarriingtoneifthebottomdepth
goesdeeperthanthealarm's setting. Both depth alarmsworkonly off the
digital bottomdepth signals. No othertargetswilltripthesealarms. These
alarms can be used at the same time or by themselves.
T_
To setthe depth alarms, first pressthe ALARM key, then pressthe key
nextto the "SET DEPTH ALARMS" label. The screen at the top of this
page appears.
To adjust the shallow alarm,
pressthe key nexttothe "Shallow" label. To adjustthe deep
alarm, pressthekeynexttothe
'Deep" labeL Both alarms adjust identically. We'll use the
shallowalarm as an example.
Pressing the key next to the
DEEP
flN
100
"Shallow" label movesthe black
box from the "OFF" postion to
thenumberon the right side of
E'sIT
UFtANGE Lull T
thearrow. Anewlabelappears
E
at the bottom of the screen:
"CHANGE LIMIT." Press the
key nextto that label. A new screen appears as shown at the top of the
nextpage. Usethenumbered keypad on the rightside oftheunitto enter
theshallowalarm setting. We used 10 feet in this example.
MENU.PAGE 2
ADJUST BACK LIGHT
LEVEL
The X-55hasinternal lightsfor
the display and keyboard. To
adjusttheintensityofthelight
fl
—
____________
Tfl!
..a
ADJUST BACK
_____
______
-IGVii
SPEAKER VOLUME
-
LEVEL
nI
L nh
______
TURN DIG[TflLBue'
OFF
ing, press theMENU keytwice,
____________
__________
then pressthe key adjacent to
____________
______________
CONSTRUCT
0 I GITAL
the "ADJUST BACK LIGHT ____
____
____BOX
LEVEL" label. The screen
shown below appears. Now _____
PAGE 2 __________
pressthe leftarrow key to decrease the light level. Press the right arrow key to increase it. The
percentage of back light in usechanges as the arrow keys are pressed.
The bar chart also gives a graphical indication of the level. After you've
made the adjustment, press the CLEAR key to erase the menu.
AUTO HBACK LIGHT ON/OFF
50.5 FTO
To turn the back lighting on, _________
pressthemenu keytwice,then
pressthe key adjacent to the
"BACK LIGHT" label. This
moves the black box from
"OFF'to the"ON"position.To
turn the backlights off, repeat
thesame steps.
___________
I-hoEd
0
12
29
36
XNCI'-
E
SPEAKERVOLUME
The speakervolume hastwo levels: high or low. WhentheX-55 is first
turnedon,thespeakervolumeis high. To change it, press the MENU key
twice,then pressthe key nextto the "SPEAKER VOLUMELOWHIGH"
key. This switches the volumefrom high to low. A short tune sounds,
letting you hearthevolume.To switchbackto high, simplypress the key
again.
To exit from this menu, pressthe CLEAR key.
16
21
PDF compression, OCR, web-optimization with CVISION's PdfCompressor
outwards from a group of limbs is the hardest object for the Fish l.D.
feature to distinguish from fish. You may see Fish l.D. symbols on the
screen when actually, thereare no fish. Practice with the unitin both the
Fish l.D. mode and withoutto becomemore familiar with the Fish l.D.
feature.
To turn the Fish l.D. featureon, pressthe menu key, then pressthe key
adjacent to the 'Turn Fish-ID On" label. Echoeswill continue to scroll
acrossthescreen, however, thesurface clutteratthetopwill no longerbe
displayed.Any targets the micro-computer determines are fish will be
displayedas fishsymbols. Toturnthe Fish l.D. feature offagain,firstpress
themenu key. Next, pressthe keyadjacenttothe'Turn Fishl.D.Off" label.
The menu immediately disappears and thesonar screen returns.
Remember, the Fish l.D. featurecan't be used when the X-55 is in the
manual mode. If you turn the Fish l.D. feature on when the X-55 is in
manual, the micro-computer will turntheautomaticfeatureon. If youturn
automatic off whenthe Fish l.D. feature is on, the Fish l.D. feature will be
turned off also.
DISPLAY CONTRAST
The unit'sdisplaycontrast isadjustable tosuitdifferent lighting conditions.
To adjustit, tirst press the menu key. The first menu page appears. Now
press the key next to the "ADJUST DISPLAY CONTRAST"label. A
screen similarto the one below appears. Nowpressthe key adjacent to
the leftarrowto decrease the contrast. Pressthekeyadjacenttothe right
arrow to increase it. The percentage of contrast in use
changesas the arrow keys are
pressed. The bar chart also
gives a graphical indication of
the contrastlevel. You cansee
the change on the screen as
youpress thekeys. Afteryou've
madetheadjustment, pressthe
CLEARkeyto erase the menu.
After you've entered the desired alarm depth, press the
key next to the 'ACCEPT" label.Thisentersthealarm depth
intomemoryandautomatically
turnstheshallowalarmon. Now
pressthe key nextto the"ACCEPT" label.
The screen shown at right appears next. The shallowalarm
is now set. If the bottom goes
shallower than 10 feet, the
alarm will soundand awarning
message appears on the
screen at the same time. A
label also appearsletting you
mute the alarm, if desired.
SHitLObJ
OFT
10
[JEEP
To returnto the sonar screen,
pressthe keynexttothe"EXIT"
label.
ALARM MUTE
Wheneithertheshallowordeepalarm istriggered, an audiotone sounds.
A differenttone soundsfor the shallowthan thedeep alarm,thus letting
you know which alarm is sounding withoutlookingat the unit. Once a
depth alarm is triggered, it keepssounding until you changedepth. For
example, iftheshallowalarm is setto 10feet, andyou move into and stay
in water that's five feet deep, you're goingto get tired of listening to the
alarm beeping all the time.
To keepthis situationfromhappening, a new labelappearson the sonar
screen whenevera depth alarm sounds. This labelsays "Silence Alarm".
Thisturns thealarm'ssound off until it's triggered again.
PDF compression, OCR, web-optimization with CVISION's PdfCompressor
20
17
MENU- PAGE 1
____
_______
CHARTSPEED
The rate echoes scroll across
the screen is called the chart
speed. It's adjustable by first
_
--
________
pressing the menu key, then
pressing the key adjacent to
the"ADJUST CHARTSPEED"
label. The chart speed menu
appears at the bottom of the
•1
GRAYLINP OFF
GRAYLINE® ON
screen. Increase the chart
speed by pressing the right arrowkeyordecreaseitbypressingthe left arrow key. The percentage of chart speed in use
changesas thearrow keysare
pressed. The bar chart also
gives a graphical indication of
the chart speed. You can see
the change onthescreen(both
on the menu and on thechart
record) as you pressthe keys.
After you've made the adjustment, press the CLEAR key to
erase the menu.
differentGRAYLINE level, also.Thelevel chosenbytheX-55atpoweron
is usually adequatefor mostconditions. Experiment with your unitto find
the GRAYLINE setting that's
____________
To stopthechart, press the"STOP" key in theunit's lowerleftcorner.To
start thechart, press the "STOP"key again.
GRAYLINE®
GRAYLINE lets you distinguish between strong and weak echoes. It
"paints" gray on targetsthat are stronger than apresetvalue.This allows
youto tellthe difference between a hard and soft bottom.Forexample, a
soft,muddy or weedybottom returns aweakersignal whichis shown with
a narrowor no gray line. A hard bottom returns a strong signal which
causesa wide gray line.
Ifyou have two signals of equal size, one with gray andtheotherwithout,
then the target with gray is the stronger signal. This helps distinguish
weedsfrom trees on the bottom, or fish from structure.
best for you.
-o
To adjust GRAYLINE, press
the MENU key, then pressthe
key adjacent to the "ADJUST
GRAYLINE" label. A screen
similar to the one at right ap-
12
29
36
pears.NowpresstheIeft arrow
keyto decreasethegray level.
Press the right arrow key to
increase it. The percentage of
GRAYLINEin usechangesas
the arrow keysarepressed. Thebarchartalso givesagraphical indication
of the GRAYLINE level. You canseethechange on the screen (both on
the menu and on the chart record) as you press the keys. After you've
made the adjustment, pressthe CLEAR key to erase the menu.
FISH I.D.
The Fish l.D. featureidentifies targetsthatmeetcertain conditionsasfish.
The micro-computer analyses all echoes and eliminatessurfaceclutter,
thermoclines,and other signals that are undesirable. In mostinstances,
remainingtargetsarefish. The Fish I.D. featuredisplayssymbols on the
screen in placeoftheactualfish echoes. There are fourfish symbolsizes:
tiny, small, medium,and large. These are usedto designate therelative
size between targets.In otherwords, itdisplays asmall fish symbolwhen
it thinksatarget is a small fish, a mediumfish symbolon a largertarget,etc.
GRAYLINE is adjustable. Since GRAYLINE shows the difference between strong and weaksignals, adjusting the sensitivitymay require a
The micro-computer is sophisticated, but it can be fooled. It cannot
distinguishbetweenfish and other suspended objectssuch as trotlines,
turtles,submerged floats,airbubbles, etc. Individualtreelimbsextending
19
19
PDF compression, OCR, web-optimization with CVISION's PdfCompressor