Download Lenovo NAVIG Z60M User's Manual
Transcript
39T2155
07/27/2005
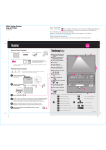
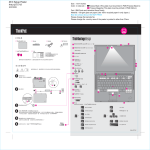
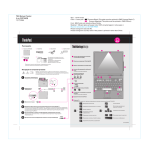
Initial Setup Instructions
For more detailed information, press the ThinkVantage button.
3
1
2
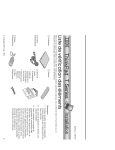
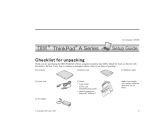
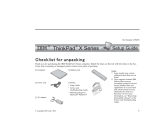
Unpack:
ThinkPad(R) computer
Battery pack
Power cord
2 TrackPoint(R) caps
AC adapter
1
UltraConnect(TM) wireless
LAN antenna
2
ThinkLight(R) keyboard light
3
One - handed latch
1
Books
4
* See reverse for notes about unlisted, missing,
or damaged items and recovery CD.
Note: Read the safety notices in the Service
and Troubleshooting Guide before you use the
computer.
Install battery pack:
Your battery is ready to use.
2
- Setup Instructions (this sheet)
- Service and Troubleshooting Guide
- Other supplements or flyers
4
Wireless WAN antenna*
*Specific models only.
5
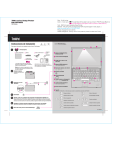
Volume and mute buttons
5
1
2
6
Power button
7
ThinkVantage button
8
Web browser back and forward
7
6
8
11
Connect to power:
1
9
2
3
Fingerprint reader*
*Specific models only.
10
9
10 TrackPoint center button
1
11 Fn key
Use in combination with other keys to access special ThinkPad features
Workstation lock
Enter hibernation
Manage power schemes
ThinkLight on/off
Turn on the power:
Point and click with UltraNav(TM) Multi-pointing Navigation System:
Press the TrackPoint cap or move across the touch pad in the direction you want to move the pointer.
The left and right buttons below the space bar and touch pad function like mouse buttons.
Some models may have only a TrackPoint.
Configure the Operating System following on-screen instructions:
This process takes several minutes, and your computer may restart multiple times.
To learn more, press the ThinkVantage button:
Suspend
Multimedia controls
Configure location profiles
Configure display settings
Change display brightness
Configure input device settings
Magnify screen contents
Manage external devices
P/N: 39T2155
39T2155
07/27/2005
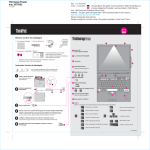
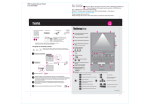
Installing Optional memory
You can increase the amount of memory in your computer.
Pressing the ThinkVantage button on your keyboard opens
the ThinkVantage Productivity Center.
Note: Only use memory types supported by your computer. If you incorrectly install the optional memory or install an
unsupported memory type, a warning beep will sound when you try to start the computer.
1
To learn more about ThinkVantage Technologies and other topics, open Access Help from
the Productivity Center menu and enter a topic in the index or Search keyword fields.
Install the optional SO-DIMM:
Productivity Center
1
Touch a grounded metal object to reduce any static
electricity in your body that could damage the SODIMM. Avoid touching the contact edge of the SODIMM.
2
Turn off the computer.
3
Disconnect the ac adapter and all cables from the
computer.
4
Close the computer display and turn the computer
over.
5
Remove the battery.
8
Rescue and Recovery
System Migration Assistant
Remove the 4 screws.
Align the notch in the contact edge of the SO-DIMM
with the divider in the socket. Firmly insert the SODIMM into the socket at an angle of 20 degrees 1 ,
and then pivot it downward until it snaps into
place 2 .
2
1
2
7
Access Connections
Security
9
6
If a SO-DIMM is already installed, remove it as
shown. Save the SO-DIMM for future use.
Turn the computer over again and remove
the palmrest. It is not necessary to
disconnect the cable trackpad cable.
System Update
* Additional unpacking notes:
1) Some models may contain items that are not listed.
2) If any item is missing or damaged, please contact your place of purchase.
3) Your computer features Disk-to-Disk Recovery. Everything for recovering factoryinstalled files and applications is on your hard disk eliminating the need for a recovery
CD. For more information, see "Recovering Pre-Installed Software" in the Service and
Troubleshooting Guide.
Your name:
1
Company name:
Model number:
Serial number:
10 Replace the palmrest.
11 Turn the computer over and replace the 4 screws.
12 Replace the battery.
2
Verify proper installation of the optional SO-DIMM:
Company or reseller service:
Support Web site:
Support number:
1 Turn on the computer.
2 Press the ThinkVantage button when prompted during startup.
3 Open the BIOS Setup Utility by clicking "Access BIOS" under the "Configure" category.
4 Verify that the "Installed memory" item shows the total amount of memory installed in your computer. For example, if your
computer had 256 MB of standard memory and you install an additional 512 MB SO-DIMM, the quantity shown in
"Installed memory" should be 768 MB.
Printed in China
Copyright Lenovo 2005.
Portions
Copyright International Business Machines Corporation 2005.
All rights reserved.
ThinkPad is a registered trademark of Lenovo.
IBM is a trademark of IBM Corp.
For Barcode Position Only


