Transcript
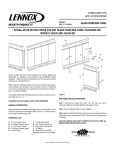
HEARTH PRODUCTS
KITS AND ACCESSORIES
750,213M
05/2006
DRAIN PAN
INSTALLATION INSTRUCTIONS FOR LENNOX OUTDOOR FIREPLACE
DRAIN PAN DPSS36 (P/N H4651) & DPSS42 (P/N H4652)
GENERAL INFORMATION
Although the fireplace is designed to operate safely outdoors, rain
and other sources that may enter the hearth area, condensation and
unusual conditions, will cause water to collect inside the fireplace
bottom.
Threaded
Reducer
³⁄₄” x ¹⁄₂”
(PVC)
Threaded
Elbow ³⁄₄”
@ 90°
(PVC)
To prevent water collection, the builder must provide a means to
drain water from under the fireplace by building or installing a
water collector of the builders choice, before positioning the
fireplace on its location.
Drain Connector Detail
Special care must be taken when the fireplace is installed against an
exterior wall. The enclosure surrounding the fireplace on the sides
and back must be treated as an exterior wall.
Lennox does provide this optional drain pan to assist weatherproofing the fireplace. H4651 DPSS36 Drain Pan for E36ODG, H4652
DPSS42 Drain Pan for E42ODG.
45”
INSTALLATION INSTRUCTIONS
When Planning for the installation of the fireplace, the framing
height must be increased from 46-1/2 inches to 47-1/4 inches,
when installing the drain pan. An additional space below the
fireplace will also be required to plumb a drain line.
Step 1. Seal all joints, gaps and corners around the bottom of the
drain pan before positioning the fireplace on its location (Figure 1 ).
Step 2. On the exposed drain hole, install a PVC threaded
coupling reducer, 3/4" x 1/2" going from the top of the pan, down
through the hole. Apply a silicone-based sealant around the base
and threads before installation.
Seal (4) Places
Drain Pan
Cat. No.
Model
H4651
DPSS36
Drain Pan (36)
Description
H4652
DPSS42
Drain Pan (42)
Drain Pan
Figure 1
Step 3. Holding the reducer coupling with a wrench, thread a 3/4", 90
degree, PVC elbow to the reducer until it is tight to the metal.
Note: To assure proper drainage, the fireplace must be installed on a
leveled surface.
Step 4. Add additional piping to route the drain to an appropriate
location.
NOTE: DIAGRAMS & ILLUSTRATIONS NOT TO SCALE.
Lennox Hearth Products reserves the right to make changes at any time, without notice, in design, materials, specifications, prices and also to discontinue colors, styles and products.
Consult your local distributor for fireplace code information.
Printed in U.S.A. © 2006 by LHP
P/N 750,213M REV. N/C 05/2006
NOTE: DIAGRAMS & ILLUSTRATIONS NOT TO SCALE.
LHP
1110 West Taft Avenue
Orange, CA 92865