1
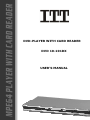
DVD-PLAYER WITH CARD READER DVD 10-101DX USER’S MANUAL Table of Contents CHAPTER 1 GETTING STARTED ...............1 WELCOME............................................................................................................................. 1 Features .......................................................................................................... 1 Special Features .......................................................................................... 1 Compatible Discs......................................................................................... 1 Safety .............................................................................................................. 1 Region code................................................................................................... 1 SAFETY INSTRUCTIONS ....................................................................................................... 2 PLAYER OVERVIEW .............................................................................................................. 4 CHAPTER 2 BASIC OPERATIONS.....................7 PLAYING DVD, CD OR VCD.............................................................................................. 7 ADDITIONAL DISC PLAYBACK OPTIONS ............................................................................ 7 CHAPTER3 SETUP .......................8 SETUP MENU CATEGORIES ................................................................................................. 8 CHAPTER 4 ADVANCED FEATURES ................... 12 1. SELECTING TRACKS ...................................................................................................... 12 2. SKIPPING TRACKS ......................................................................................................... 12 3. MULTISPEED FAST MOTION PLAYBACK ........................................................................ 12 4. FREEZE FRAME AND FRAME ADVANCE) ........................................................................ 13 5. USING THE REPEAT FEATURE ........................................................................................ 13 6. USING THE DISPLAY FEATURE ....................................................................................... 13 7. USING THE A-TIME FEATURE......................................................................................... 14 8. CHANGING THE AUDIO LANGUAGE ................................................................................. 14 9. SUBTITLES .................................................................................................................... 14 10. CHANGING THE CAMERA ANGLE ................................................................................ 14 11. MUTE THE AUDIO OUTPUT .......................................................................................... 14 12. ZOOM IN THE VIDEO IMAGE ........................................................................................ 15 13. REPEAT A SPECIFIC SEGMENT ON THE DISC THAT YOU DEFINE ................................... 15 14. 3D SURROUND MODE ................................................................................................. 15 15. VOLUME CONTROL...................................................................................................... 15 16. PLAYING ........................................................................................................................ 16 17. PROGRAM PLAY ............................................................................................................ 16 18. CARD OR USB PLAY ...................................................................................................... 17 CHAPTER 5 HELP ...................... 18 :: TROUBLESHOOTING ..................................................................................................... 18 :: SPECIFICATIONS .......................................................................................................... 19 GB - 0 Chapter 1 Getting Started Welcome Congratulations on your purchase of this MPEG-4 Receiver Features • • • • • • • • Full compatibility with DVD, SVCD, VCD, CD, MP3 and Kodak Picture CD. Dolby® Digital Decoding Compatible. Component Video, SCART outputs. Digital audio coaxial output. Support 3-in-1 card reader + USB1.1OTG Video horizontal resolution of 500 lines or above 3 Kinds DSP sound field selectable Composite video out Special Features • • Supports ISO MPEG-4 video disc, including DiVX and XViD. Firmware upgradeable Compatible Discs The unit can play discs with the following logos: • DVD Video (from DVD Disc, and DVD±R/RW) • MPEG-4 Video (from CD/DVD Disc, DVD±R/RW and CD-R/RW) • Audio CD (from CD Disc, and CD-R/RW) • Video CD (from CD Disc, and CD-R/RW) • MP3 files (from CD/DVD Disc, DVD±R/RW and CD-R/RW) • Kodak Picture CD (from CD Disc, and CD-R/RW) Safety TO REDUCE THE RISK OF ELECTRIC SHOCK, DO NOT REMOVE THE COVER (OR BACK). NO USER-SERVICEABLE PARTS ARE INSIDE. REFER SERVICING TO QUALIFIED SERVICE PERSONNEL. This symbol indicates important instructions accompanying the product. This symbol indicates “dangerous voltage” inside the product that presents a risk of electric shock or personal injury. CAUTION: THE PLAYERS USE AN INVISIBLE LASER BEAM WHICH CAN CAUSE HAZARDOUS RADIATION EXPOSURE IF DIRECTED. BE SURE TO OPERATE PLAYER CORRECTLY AS INSTRUCTED. WARNING To reduce the risk of fire or shock hazard, do not expose the PLAYER to rain or moisture. Region code The region number of this unit is 2, if the region number printed on the DVD disc does not correspond to the region number of this unit, this unit can not play that disc. DVD labeled “ALL” will also play on this unit. GB - 1 Safety Instructions 1. Read Instructions - All the safety and operating 10. Ventilation - Slots and openings in the cabinet are instructions should be read before the product is provided for ventilation and to ensure reliable operated. operation of the product and to protect it from overheating. These openings must not be blocked or 2. Retain Instructions - The safety and operating covered. instructions should be retained for future reference. The openings should never be blocked, for example, by placing the product on a bed, sofa, rug, or other 3. Heed Warnings - All warnings on the product and in similar surfaces. This product should not be placed in the operating instructions should be adhered to. a built-in installation such as a bookcase or rack unless 4. Follow Instructions - All operating and using proper ventilation is provided or the manufacture instructions have been adhered to. instructions should be followed. 11. Power Sources - This product should be operated 5. Cleaning - Unplug this product from the wall outlet only from the type of power source indicated on the before cleaning. Do not use liquid cleaners or aerosol marking label. If you are not sure of the type of power cleaners. Use a damp cloth for cleaning. supplied to your home, consult your product dealer or local power company. For products intended to 6. Attachments - Do not use attachments not operate from battery power, or other sources, refer to recommended by the product manufacturer as they the operating instructions. may cause hazards. 12. Grounding or Polarization - This product may be 7. Water and Moisture - Do not use this product near equipped with a polarized alternating current line plug water, for example near a bath tub, wash bowl, (a plug having one blade wider than the other). kitchen sink, or laundry tub; in a wet basement; or This plug will fit into the power outlet only one way. near a swimming pool; and the alike. This is a safety feature. If you are unable to insert the plug fully into the outlet, try reversing the plug. If the 8. Accessories - Do not place this product on an plug should still fail to fit, contact your electrician to unstable cart, stand, tripod, bracket, or table. The replace your obsolete outlet. Do not defeat the safety product may fall, causing serious injury to a child or purpose of the polarized plug. adult and serious damage to the product. Use only with a cart, stand, tripod, bracket, or table 13. Power - Cord Protection-Power-supply cords recommended by the manufacturer or sold with the should be routed so that they are not likely to be product. Any mounting of the product should follow walked on or pinched by items placed upon or the manufacturer instructions and a mounting against them, paying particular attention to cords at accessory recommended by the manufacturer should plugs, convenience receptacles, and the point where be used. they exit from the product. 9. Cart Usage - A product and cart 14. Lightning - For added protection for this product combination during a lightning storm or when it is left unattended should be moved with and unused for long periods of time, unplug it from care. stops, the wall outlet and disconnect the antenna or cable and system. This will prevent damage to the product due Quick excessive force, uneven surfaces may to lightning and power-line surges. cause the product and cart combination to overturn. 15. Power Lines - An outside antenna system should GB - 2 not be located in the vicinity of overhead power lines c If the product has been exposed to rain or water. or other electric light or power circuits, or where it can d If the product does not operate normally by fall into such power lines or circuits. When installing following the operating instructions. Adjust only an outside antenna system, extreme care should be those controls that are covered by the operating taken to keep from touching such power lines or instructions as an improper adjustment of other circuits as contact with them might be fatal. controls may result in damage and will often require extensive work by a qualified technician 16. Overloading - Do not overload wall outlets, to restore the product to its normal operation. extension cords, or integral convenience receptacles e If the product has been dropped or damaged in as this can result in a risk of fire or electric shock. any way. f When the product exhibits a distinct change in 17. Object and Liquid Entry - Never push objects of performance-this indicates a need for service. any kind into this product through openings as they may touch dangerous voltage points or short-out 20. Replacement Parts - When replacement parts are parts that could result in a fire or electric shock. Never required, be sure the service technician has used spill liquid of any kind on the product. replacement parts specified by the manufacturer or that have the same characteristics as the original part. 18. Servicing - Do not attempt to service this product Unauthorized substitutions may result in fire, electric yourself as opening or removing covers may expose shock, or other hazards. you to dangerous voltage or other hazards. Refer all servicing to qualified service personnel. 21. Safety check - Upon completion of any service or repairs to this product, ask the service technician to 19. Damage Requiring Service - Unplug this product perform safety checks to determine that the product is from the wall outlet and refer servicing to qualified in proper operating condition. service personnel under the following conditions: a When the power-supply cord or plug is 22. Heat - The product should be situated away from damaged. heat sources such as radiators, heat registers, stoves, b If liquid has been spilled or objects have fallen into the product. or other products (including amplifiers) that produce heat. Dispose At the end of the service life of the appliance, in particular if it is malfunctioning, make the appliance unusable by pulling the mains plug out of the socket and separating the power cable. Dispose of the appliance according to the environmental regulations applicable in your country. Electrical waste may not be disposed of together with household waste. For any advice regarding recycling, contact your local municipal authorities or your dealer. GB - 3 Player Overview Rear Panel 1. Composite video output 10. Right front audio output 2/3/4. Component video output 11. S-Video output 5. Center audio output 12. Digital coaxial audio output 6. Sub-woofer audio output 13. SCART output 7. Left surround audio output 14. Mains Switch 8. Right surround audio output 9. Left front audio output Follow these steps to connect the player to your TV set and audio system. It is recommended that you turn off power on all components while you are connecting the player. Connect TV Choose one appropriate video connection methods: Stereo Audio: Connect to the left/right audio inputs of your TV set; Composite Video: This connection is popular; you can find the composite video input jack on the back panel of most TV set. With this connection, Video Setup should be set to OFF in the VIDEO menu. Component Video: COMPONENT connector is one of video standard in America and China. It can offer the best picture quality, and it can still transmit progress scan signal. To finish this connection you must connect the unit and TV set by using three cables, and each of component video jacks had been marked as Y/Pb/Pr(Y/Cb/Cr), please connect them one to one correctly. With this connection, Video Setup should be set to YUV in the VIDEO menu. S-video: A TV set usually support composite video or s-video input, but s-video connection can offer better picture quality than composite video connection. With this connection, Video Setup GB- 4 should be set to OFF in the VIDEO menu. SCART: SCART connector is one of video standard in Europe; it can transmit both video and audio signals. Connect Audio Components Choose one appropriate audio connection from four methods: 1 ○ Receive other audio sources. This unit can be connected with the other audio sources, which can make use of its amplifier to send high power to the speaker directly 2 Receive the radio signal with antenna. This unit has a built-in turner, so you can receive the AM and FM broadcast signal. 3 Connect to an amplifier with 5.1-channel surround sound discrete input. Connect with 5.1 channels output of the unit and corresponding input of amplifier by audio 5.1 channels cable, please set “5.1ch” mode in “speaker setup page” 4 Connect to an amplifier built-in DOLBY digital decoder with digital audio input. Make sure that your amplifier have a built-in DOLBY decoder or processor before you do this connection, and then setup audio output to “SPDIF/RAW” mode. ○ ○ ○ Front Panel Controls 1. Mains Switch 4. OPEN/CLOSE 7. STOP 2. Front Panel Display 5. PLAY 8. USB CONNECTS 3. Disc Tray 6. PAUSE 9. CARD READER CONNECTS *Although STANDBY is in off position, the appliance is not completely disconnected from power supply. GB- 5 Remote Control 1. STANDBY: Switch the unit standby condition. 2. REPEAT: Repeat titles, chapters, songs, etc. 3. A-B: Specify the parts you want to play repeatedly 4. MUTE: Switch sound on and off 5. 3D: Toggle on the pop-up menu of music adjustment. 6. DISPLAY: Display information about playback status on screen. 7. FAST REWIND: Fast reverse play 8. VOLUME +: Increase the sound output level 9. PREV: Press this to move back to the beginning of the previous chapter/track 10. VOLUME -: Decrease the sound output level 11. STEP/PAUSE: Once press it will stop playback and freeze current picture, press it repeatedly will play one frame at a time, use PLAY to resume normal playback 12. MENU: Recall DVD’s ROOT menu or VCD 2.0 menu during playback 13. TITLE.PBC: Recall DVD’s TITLE menu during playback ; Enable/Disable PBC function during VCD playback, it can allow you play VCD interactively by following the menu on the TV screen 14. J/K/L/M: Use them to navigate on-screen menus 15. AUDIO: Change the status to make Audio change possible 16. SUBTITLE: Change the status to make Subtitle change possible 17. NUMBERS: Select the chapter or track by pressing number buttons directly 18. A-TIME: Go to a specific location on a CD/DVD disc directly 19. OPEN/CLOSE: Open/Close disc tray 20. PROGRAM: Create your own play lists 21. MEDIA: Switch the unit working mode between File mode and Disc mode. In File mode the unit can read the Card and USB devices. 22. FAST FORWARD: Fast forward play 23. NEXT: Press it to move ahead to the beginning of the next chapter/track 24. STOP: Stop playback 25. SETUP: Call the screen for Player's initial setting, such as Menu language, parental level 26. RETURN: Go back to the specified position defined by Contents provider 27. PLAY (ENTER): Start to play back in normal speed, or activates the selected item on interactive menu 28. CLEAR: It is used to clear the play list, or the wrong digit input 29. ANGLE: Switch among available angles if any 30. ZOOM: Zoom in and zoom out when watch video Inserting batteries into the remote control The remote control unit delivered together with the player serves to manage the player’s operation. Insert two ААА batteries into the battery compartment, observing polarity. Direct the remote control unit towards the player. Note: 1. 2. 3. 4. Avoid exposing the remote control to extremes of temperature e.g. direct sunlight. Ensure that no foreign objects enter the battery housing, especially metal objects. If the unit's infrared sensor is bathed in strong direct sunlight, or intense artificial light, then it may not be able to receive signals sent from the handset. If the remote control is not to be used for an extended period’s time then please remove the batteries to avoid leakage and corrosion. GB- 6 Basic Operations Chapter 2 Playing DVD, CD or VCD Follow these steps to play a DVD, CD or VCD disc: 1. Turn on the TV. 2. Set the TV to the AV input connected to the player. 3. Turn down the volume on your amplifier and then power it on. 4. Set the amplifier to the AV input connected to the player. 5. Turn on the POWER button on the back panel. 6. Press OPEN/CLOSE on the remote control or front panel to open the disc tray. 7. Place the disc in the tray with the label side facing up and playback side facing down. If the disc has two sides, place the disc with the desired label facing up. 8. Press OPEN/CLOSE again to close the disc tray. 9. Press PLAY on the remote control or front panel. Many discs will load and begin playing automatically when the disc tray is closed. If the DVD has a disc menu, or more than one title, the disc menu may appear. 10. Adjust the volume of the player by pressing the VOLUME button on the remote control. Additional Disc Playback Options 1. 2. 3. 4. 5. 6. To freeze playback, press PAUSE/STEP. To resume normal playback, press PLAY. To go to the next or previous chapter/track, press NEXT or PREV To scan forward or backward at variable speeds during playback, press F.FWD or F.REW repeatedly. To stop playback, press STOP once. To resume playback from the same place on the disc, press PLAY. To stop playback completely and restart the disc, press STOP twice. To restart the disc, press PLAY. GB- 7 Chapter3 Setup Setup Menu Categories You can adjust player preferences and function on player Setup menu: Setup menu How to setup? 1. Press the Setup button, the main setup menu appears. SYSTEM SETUP z When the main menu displayed, the DVD TV SYSTEM PAL system will auto pause. NTSC 2. Press g/h buttons to highlight the icon of AUTO the desired page, then press j or Right SCREEN SAVER ON OFF arrow button to activate that page. VIDEO INTERLACE-YUV z For example, if you want to setup the TV-RGB system page(Left diagram), Press j P-SCAN YPBPR button to highlight the desired option. Press S-VIDEO TV TYPE 4:3PS Enter or press h to select, the choices of 4:3LB that option appear on the right. 16:9 3. Press the Arrow buttons to highlight the Exit PASSWORD Setup option, then press Enter or Setup RATING 1 KID SAFE 2G again to exit Setup Menu. DEFAULT EXIT SETUP 3 PG 4 PG13 5 PG-R 6R 7 NC-17 8 ADULT RESTORE SYSTEM Setup TV SYSTEM According to the Color System of the TV, you can choose the TV System. AUTO: Choose this settings if your DVD player is connected to a multi-system TV. NTSC: Choose this settings if your DVD player is connected to a NTSC TV. PAL: Choose this settings if your DVD player is connected to a PAL TV. SCREEN SAVER If the screen saver is on, when your DVD player is in Stop, Open, or No Disc state, or there is a frame frozen for more than 60sec, the screen saver will be displayed. This feature can protect the screen from damage. ON: Choose this setting to activate the screen saver. OFF: Choose this setting to cancel the screen saver The default setting is ON. VIDEO Select appropriate video output option for your connection. INTERLACE-YUV: Choose this setting if your DVD player is connected to a TV with Y, Cb, Cr video cables. TV-RGB: Choose this setting if your DVD player is connected to a TV with an S-Video cable or composite video cables. P-SCAN: Choose this setting if your DVD player is connected to a progressive scan TV with Y, Cb, Cr video cables. S-VIDEO: Choose this setting if your DVD player is connected to a progressive scan TV or a monitor with an s-video cable. Notes: When your DVD player output composite video, you can choose the setting randomly. Choose TV-RGB / P-SCAN if your DVD player is connected to a progressive scan TV. The default setting is TV-RGB. GB- 8 TV TYPE Depending on the type of television you have, you may want to adjust the screen setting (aspect ratio) 4:3 PS: You can see the central portion of the Anamorphic widescreen picture on 4:3 TV. The extreme left and right side of movie picture will be cut off. 4:3 LB: You will see the total Anamorphic widescreen picture on 4:3 TV, but black bars will appear at the top and bottom of the screen 16:9: Select it if you are connecting the player to a wide screen TV set. However, DVDs recorded with 4:3 ratio cannot be viewed as the full 16:9 picture even if you made this setup. For example: PASSWORD The password option is initialized locked, and you cannot set the ratings limit or change the password. In order for the Ratings feature work, the password mode must be turned on. If you want to set the ratings limit, you will need to enter the default password, which is 0000, then press Enter to confirm. To change the password, you will be prompted for the old password, then be prompted for a new. Enter a 4-digit number (this is your password). RATING The Rating feature is a rating limit system, like movie ratings. It works with DVD discs that have been assigned a rating. This helps you control the types of DVDs that your family watches. There are 8 rating options: KID SAF, G, PG, PG13, PGR, R, NC17 and ADULT. Notes: If the password option is locked, you cannot set the ratings limit; the rating limit do not work when the password option unlocked. DEFAULT Choose this option to resume all the setup options to default settings. LANGUAGE SETUP OSD LANGUAGE Highlight the OSD LANGUAGE option, and press the Arrow buttons to choose the OSD language you prefer. Press Enter to confirm, and it will display OSD in that language; There are 7 optional OSD languages: English, French, German, Spanish, Italian, Dutch, and Polish. AUDIO LANG Highlight the AUDIO LANG option, and press the Arrow buttons to choose the audio language you prefer. Press Enter to confirm. If the disc you are playing has that language available, it will output audio in that language; There are 7 optional audio languages: English, French, German, Spanish, Italian, Dutch, and Polish. SUBTITLE LANG MENU LANG Highlight the SUBTITLE LANG option, and press the Arrow buttons to choose the subtitle language you prefer. Press Enter to confirm. If the disc you are playing has that language available, it will displays subtitles in that language; There are 8 optional audio languages: English, French, German, Spanish, Italian, Dutch, Polish, and off Highlight the MENU LANG option, and press the Arrow buttons to choose the menu language you prefer. Press Enter to confirm. If the disc you are playing has that language available, it will displays menu in that language; There are 7 optional menu languages: English, French, German, Spanish, Italian, Dutch, and Polish. Notes: If your preferred language isn’t available, the disc’s default language will be played. The default language of your DVD player is German. GB- 9 AUDIO SETUP SPDIF/OFF, SPDIF / RAW, and SPDIF/ PCM. SPDIF/OFF: From the Coaxial Output jack and the AUDIO SETUP AUDIO OUT Optical Output jack, no signal is output. SPDIF/ RAW: Choose this setting if your DVD player is connected to a power amplifier with a coaxial cable or an optical cable; When playing a disc recorded with Dolby Digital, DTS and MPEG audio formats, the corresponding digital signals will be output from the Coaxial Output jack or Optical Output jack. This player’s digital output jacks are designed for a connection to a Dolby Digital, DTS, or MPEG receiver or decoder. SPDIF/OFF SPDIF/RAW SPDIF/PCM EXIT SETUP SPDIF / PCM: Choose this setting if your DVD player AUDIO OUT Highlight the AUDIO OUT option, and press the Arrow buttons to choose the audio output mode you prefer. Press Enter to confirm; There are 3 optional audio output modes: SPDIF/OFF, SPDIF / RAW, and SPDIF/ PCM. is connected to a 2-channel digital stereo amplifier; When playing a disc recorded with Dolby Digital and MPEG audio formats, audio signals will be modulated into a 2-channel PCM signal, and it will be output from the Coaxial Output jack or Optical Output jack. VIDEO SETUP BRIGHTNESS Use the Up and Down arrow button to move the scroll VIDEO SETUP and adjust the brightness. BRIGHTNESS CONTRAST Use the Up and Down arrow button to move the scroll and adjust the contrast HUE CONTRAST HUE SATURATION EXIT SETUP Use the Up and Down arrow button to move the scroll and adjust the hue SATURATION Use the Up and Down arrow button to move the scroll and adjust the saturation SPEAKER SETUP DOWNMIX SPEAKER SETUP DOWNMIX EXIT SETUP LT/RT STEREO VSS Use the Up and Down arrow button to move the scroll and adjust the saturation. LT / RT: Choose this setting; it will be sound like in a movie theatre if the original movie the disc was recorded from was encoded in the Pro Logic Dolby Digital format. STEREO: Choose this setting, when 5.1-channel sound playing, two channels of signals will be output from the left and right soundtrack; when 2-channel sound playing, stereo signal will be output. VSS: Choose this setting, when a disc recorded with 5.1-channel sound format playing, the fictitious surround soundtracks effect will be heard from the main soundtrack. GB- 10 DIGITAL SETUP NIGHT MODE DIGITAL SETUP NIGHT MODE ON OFF DYNAMIC RANGE There are two settings in this option: OFF / ON. ON: Choose this setting to ”ON” input signal. It will be more suitable for playing in the night time, for the output volume is low. OFF: It will be more suitable to choose this setting for playing in the day time, for the output volume is high. DYNAMIC RANGE DUAL MONO STEREO MONO L MONO R MIX MONO When “LINE OUT” is selected, choose this setting to adjust the line out ratio and get different effect. If adjusting to FULL, the audio signal peak value will be the minimum; while adjusting to OFF, maximum. NOTE: This option will be validated when the DOWNMIX OFF. EXIT SETUP DUAL MONO Choose this option to setup the L and R mono output mode; There are four modes in this option: STEREO, MONO L, MONO R, and MIX MONO; It is mainly used in karaoke mode. REFERENCE: To protect your DVD player, the interval between two consecutive Power button operations must be above 30 seconds. No using for a period of time, please pull out the plug from the electronic outlet. The player should be operated only on condition that the type of power supply corresponds to the marking label. Otherwise, it doesn’t work or even be damaged. The player may not be compatible with some encrypted discs. If the player stops playback by accident, please power it on again. GB- 11 Chapter 4 Advanced Features 1. Selecting Tracks (compatible with DVD, SVCD, VCD, CD, CD-G, DTS-CD, HD-CD, WMA, MP3/JPEG, MPEG4/DIVX discs) a) When playing a DVD disc, press Numeric buttons on the menu or title page to select tracks; During DVD playback, you can input desired title number directly. b) As a SVCD or VCD disc, during sequence playback, press Numeric buttons to select tracks. (During Program Playback and PBC is on, you can only press Prev / Next button to select) c) As for CD, CD-G, HD-CD, DTS-CD discs, press Numeric buttons directly to select tracks. d) When playing WMA, MP3 / JPEG discs, press Numeric buttons to select different tracks on current track list. e) When playing MPEG4 / DIVX discs, press Numeric buttons to select different tracks on current track list or press Prev / Next button to select. Notes: To select tracks from 1 to 10, press corresponding Numeric buttons (1-9, 10) To select tracks above 10, press 10+ button. For example, to select the track 15, press 10+ and 5 button. If the selected track is not available, the input would be invalid. 2. Skipping Tracks (compatible with DVD, SVCD, VCD, CD, CD-G, DTS-CD, HD-CD, WMA, MP3/JPEG, MPEG4/DIVX discs) a) To skip forward to the beginning of the next title / chapter / track on a disc, press Next on the remote or the front of the player b) To skip backward to the beginning of the preceding title / chapter / track on a disc, press Prev on the remote or the front of the player. z When playing the last chapter / track on a SVCD or VCD disc with PBC off, pressing Next button will stop the playback; When playing the first chapter / track., pressing Prev button will stop the playback; When stop, pressing Next / Prev button will be invalid z If a DVD disc is loaded, it varies according to how the disc was configurated. z If a MPEG4 / DIVX discs is loaded, it varies according to how the disc was configurated. 3. Multispeed Fast Motion Playback (compatible with DVD, SVCD, VCD, CD, WMA, MP3/JPEG, MPEG4/DIVX discs) You can search in forward or reverse mode during playback. a) Press the F.F button on the remote during playback to search through a disc. Press the button again on the remote to search at the next speed. Fast Forward Playback has four speeds: x 2, x 4, x 8, x 20. With each consecutive press of the button, the search speed increases. If you press the button five times, Fast Forward Playback cycles back to normal playback. During DVD playback, when Fast Forward Playback gets to the beginning of the next title / chapter, it resumes normal playback; During SVCD or VCD playback with PBC on, when Fast Forward Playback gets to the beginning of the next track, it resumes normal playback. z Press Play button to resume normal playback. z During CD, HD-CD, MP3, or WMA playback, with the speed F.F x 2, the player has audio output. b) Press the F.R button on the remote during playback to search through a disc. Press the button again on the remote to search at the next speed. Fast Reverse Playback has four speeds: x 2, x 4, x 8, x 20. With each consecutive press of the button, the search speed increases. If you press the button five times, Fast Reverse Playback cycles back to normal playback. During DVD playback, when Fast Reverse Playback gets to the beginning of the playing title / chapter, it resumes normal playback; During SVCD or VCD playback with PBC on, when Fast Reverse Playback gets to the beginning of the playing track, it resumes normal playback. z Press Play button to resume normal playback. z During CD, HD-CD, MP3, or WMA playback, with the speed F.R x 2, the player has audio output. GB- 12 4. Freeze Frame and Frame Advance (compatible with DVD, SVCD, VCD, CD, CD-G, DTS-CD, HD-CD, WMA, MP3/JPEG, MPEG4/DIVX discs) a) During CD, CD-G, HD-CD, DTS-CD, WMA or MP3 / JPEG playback, press Pause once to freeze playback; Press the Pause button again or Play button to resume normal playback. b) During DVD, SVCD, MPEG4, DIVX or VCD playback, press Pause once to freeze playback; Press the Pause button again to advance the picture one frame at a time; Press Play to resume normal playback. 5. Using the Repeat Feature (compatible with DVD, SVCD, VCD, CD, CD-G, DTS-CD, HD-CD, WMA, MP3/JPEG, MPEG4/DIVX discs) While a disc is playing, press Repeat button once, and the repeat banner appears to show current repeat mode. a) In SVCD, VCD, CD, CD-G, HD-CD, DTS-CD, WMA, or MP3 / JPEG sequence playback mode, press Repeat button again to turn on repeat mode. Press the button again on the remote to turn to the next repeat mode. There are three repeat options: Off, Track Repeat, and Disc Repeat. With each consecutive press of the button, the repeat mode switches. If you press the button four times, repeat mode cycles back to Off. b) In DVD playback, press Repeat button again to turn on repeat mode. There are three repeat options: Off, Chapter Repeat, and Title Repeat. With each consecutive press of the button, the repeat mode switches. If you press the button four times, repeat mode cycles back to Off. c) In WMA, MP3 / JPEG discs, MPEG4 / DIVX discs playback, press Repeat button again to turn on repeat mode. There are four repeat options: Off, Track Repeat, Directory Repeat, and Disc Repeat. With each consecutive press of the button, the repeat mode switches. If you press the button five times, repeat mode cycles back to Off. 6. Using the Display Feature (compatible with DVD, SVCD, VCD, CD, CD-G, DTS-CD, WMA, MP3/JPEG, MPEG4/DIVX discs) a) Loading and playing DVDs (two pages) z Press Display button once to show the first page: “Disc Type, Title * / * (the playing title / total titles), Chapter * / * (the playing chapter / total chapters), Elapsed Time of the Disc”. z Press the button again to show the second page: “Language * / * (the serial number of playing language / the amount of optional languages) or Off, Language Type, Audio Type, Subtitle * / * (the serial number of playing subtitle / the amount of optional subtitles) or Off, Angle * / * (the serial number of playing angle / the amount of optional angles) or Off”. z Press the button for the third time, the display menu fades out. b) Loading and playing SVCD discs (two pages) z Press Display button once to show the first page: “Disc Type, Track * / * (the playing track / total tracks), Mute, PBC, Repeat Mode, Elapsed Time of the Playing Track”. z Press the button again to show the second page: “Language * / * (the serial number of playing language / the amount of optional languages) or Off, Language Type, Audio Type, Subtitle * / * (the serial number of playing subtitle / the amount of optional subtitles) or Off”. z Press the button for the third time, the display menu fades out. c) Loading and playing VCDs z Press Display button once to show the first page: “Disc Type, Track * / * (the playing track / total tracks), Mute, PBC, Repeat Mode, Elapsed Time of the Playing Track”. z Press the button again, the display menu fades out. d) Loading and playing CD, CD-G, DTS-CD, HD-CD, WMA, MP3 / JPEG discs, MPEG4 / DIVX discs. z Press Display button once to show the GB- 13 first page: “Disc Type, Track * / * (the playing track / total tracks), Mute, Repeat Mode, Elapsed Time of the Playing Track”. z Press the button again, the display menu fades out. 7. Using the A-time Feature (compatible with DVD, SVCD, VCD, CD, DTS-CD, HD-CD, MPEG4/DIVX discs) You can use Search feature to select a title / chapter / track number or go to a specific point in a title. Firstly, press A-time (Goto) button on the remote controller to bring up the search menu and enter the edit state; Secondly, press Arrow buttons to highlight the title / chapter / track number or the time option; Thirdly, use Numeric buttons to enter the title / chapter / track you want to play or the elapsed time you want to go to in that title; At last, press Play button to start playback. For example, entering 01:23:56 will start playback one hour, twenty-three minutes and fifty-six seconds into the title. If the input number is illegal, the error information “INVALID KEY” will be displayed on the screen. Notes I. This feature does not work in Program Play mode. II. If PBC is on, it will turn off automatically when A-time Playback starts. III. When playing WMA, MP3 / JPEG discs, A-time Feature does not work. 8. Changing the Audio Language (compatible with DVD, SVCD, MPEG4/DIVX discs) During disc playback, press Language on the remote once, and the audio language info banner appears. When a DVD, SVCD or MPEG4/DIVX discs is recorded whit multiple soundtracks, you can use the Language feature to temporarily change the audio language (the language of the soundtrack) There are 7 supported languages: English, French, German, Spanish, Italian, Dutch, and Polish. With each consecutive press of the Audio button, the audio language switches and the corresponding serial number appears on the screen. For example, “Language Icon: [1 English DTS 6CH] or [Off]” (the availability of the languages are disc-dependent). 9. Subtitles (compatible with DVD, SVCD , MPEG4/DIVX discs) Press the Subtitle button on the remote once, and the subtitle info banner appears. When a DVD or SVCD is recorded with subtitles, you can use the Subtitle feature to view the subtitles on-screen. By default, subtitles are off. The info banner will display Subtitle Off. To display subtitles, press the Subtitle button again. The default language with its corresponding serial number will be displayed in the info banner and subtitles will be displayed in that language. There are 7 supported subtitles: English, German, French, Spanish, Portuguese, Italian, and off. With each consecutive press of the Subtitle button, the subtitle switches. For example, “Language Icon: [1 English] or [Off]” (the availability of the subtitles are disc-dependent). To turn subtitles off, press the Subtitle button until Subtitle Off is displayed. 10. Changing the Camera Angle (compatible with DVD discs) During disc playback, press Angle on the remote once, and the angle icon appears. Some DVDs contain multiple angles of a particular scene or sequence, so you can use the Angle feature to view. Press the Angle button again to go to the next camera angle. If multiple camera angles are available, the Angle icon displays the current angle number and the number of angles available. For example: “Angle Icon: [* / *] or [Off]”; 1 / 4 indicates that angle one is being displayed, and there are four different angles available. (This feature is disc-dependent. If no additional camera angles are available, the “Invalid Key” will be displayed.) 11. Mute the Audio Output (compatible with DVD, SVCD, VCD, CD, CD-G, DTS-CD, HD-CD, WMA, MP3/JPEG, MPEG4/DIVX discs) Pressing the Mute button allows you to reduce sound to an inaudible level, and “MUTE” will be displayed on screen. Press the button again or press the Vol +/- button to return to the normal condition. Notes: z When mute, the microphone also has no audio output. z If the player playback disc without sound, please try to press Mute button to resume. GB- 14 12. Zoom in the Video Image (compatible with DVD, SVCD, VCD, JPEG, MPEG4/DIVX discs) a) The Zoom Function allows you to enlarge or zoom out the video image and to pan though the image. Press Zoom repeatedly to activate the function and choose the required zoom factor: Zoom 1, Zoom 2, Zoom 3, Zoom 1/2, Zoom 1/3, Zoom 1/4, Zoom Off. Notes: z This feature does not work when the Disc Menu appears. b) Use the Arrow buttons to pan across the screen when the zoom factor is 1, 2 or 3. 13. Repeat a Specific Segment on the Disc that You Define (compatible with DVD, SVCD, VCD, CD, CD-G, DTS-CD, HD-CD, WMA, MP3, MPEG4/DIVX discs) a) During the normal of fast motion playback, press the A-B button once, and “REPEAT A-” will appears on the screen. This indicates the start of the loop to be repeated. b) During the normal of fast motion playback, press A-B again, and “REPEAT A-B” will appears on the screen. It indicates the end of the loop. z Looping will run from set point A to set point B until you turn off Repeat. c) Press A-B again to cancel A-B loop mode. z When playing a MPEG4, DIVX, SVCD, VCD, or CD disc, you can repeat a specific segment only in one track. When the next track begins, A-B Repeat turns off automatically. z When playing a DVD disc, you can repeat a specific segment only in one title / chapter. 14. 3D Surround Mode (compatible with SVCD, VCD, CD, CD-G, HD-CD, MP3, MPEG4/DIVX discs) Press the 3D button on the remote once, and current 3D surround mode info will be displayed on the screen. Press the Arrow buttons to highlight the 3D surround setup menu items; Press the 3D button again to turn off the menu. z Use the Up / Down arrow buttons and press Enter to choose surround mode. z “EQ: [STANDARD]” is highlighted, as the graph showed below: z Display the Band z Adjust the key Notes: z When setting SRND, EQ is auto setup to STANDARD. z When setting EQ, SRND is auto setup to OFF. 15. Volume control (compatible with DVD, SVCD, VCD, CD, CD-G, DTS-CD, HD-CD, WMA, MP3/JPEG, MPEG4/DIVX discs) z You can press the Volume button on the front of TV set or the amplifier to control the sound level. z Pressing the Vol+ button on the remote allow you to amplify the sound level; Pressing Vol- will reduce the sound level. Notes: During DVD PCM output playback, this feature does not work. GB- 15 16. Playing DVD, SVCD, VCD, CD, CD-G, DTS-CD, HD-CD, WMA, MP3 and JPEG, MPEG4 / DIVX discs a) Playing WMA, MP3/JPEG, MPEG4/DIVX, SVCD discs Place a MP3 / JPEG, MPEG4/DIVX, SVCD disc into the tray, and the player will auto search the directories saved MP3 / JPEG, MPEG4/DIVX, SVCD files. After searching, it will auto go to the first directory saved MP3 files (to the disc containing both mp3 and jpeg files; To the disc containing single type of files, it will auto go to the first directory) and play the first song in the directory (“01:” is highlighted).The screen displays as the picture below: Current directory name IV. V. Current MP3/JPEG file name. If a JPEG or MPEG4 file playing, the name should be *.jpg. or *.MP4 VI. The playing file is a MP3 music. The playing file is a JPEG picture, The playing file is a MPEG4/DIVX or SVCD movie. File Switch Region: Displays the file type of the playing and the switching. b) Use the Arrow buttons to enter the Directory Region and highlight the desired directory, then the first track under it starts playback; Also you can use the Arrow buttons to enter the File Region and select the file you want to play. Notes: I. Press the Left and Right arrow buttons, you can activate Directory Region, File Region and File Switch Region separately. II. The highlight in Directory Region and File Region is shown as the picture above; While it appears a transparent rectangle in File Switch Region. III. In File Switch Region, you can press the Left and Right arrow buttons to switch the highlight, then press Enter; the “M”, “P”, and “G” button is illustrated in the above picture. For example, if a disc with MP3 and JPEG files but without any NES files is loaded, the color of the letter “M” and “P” will appear to white and “G” black. If a MP3 file playing, “M” turns darker. To the disc with WMA, MP3/JPEG, MPEG4/DIVX, SVCD files, when playing a JPEG picture or MPEG4/DIVX/SVCD discs, press the Return button to return to JPEG or MPEG4/DIVX/SVCD list. When playing JPEG pictures, press the Program button to choose the pictures switched mode. There are 17 switch modes; Press Program repeatedly to activate the function and choose the required switch mode: Spread from Up to Down, Spread from Down to Left, Spread from Left to Right, Spread from Right to Left, Spread from Left Up to Right Down, Spread from Right Up to Left Down, Spread Left Down to Right Up, Spread from Right Down to Left Up, Spread from Center to Up / Down, Fold from Up / Down to Center, Fold from Left / Right to Center, Horizontal Shutter, Vertical Shutter, Fold from the Corners to the Center, Random Play, Off. When a picture playing or pausing, press the Arrow buttons to change the display angle: Up: flip vertical Down: flip horizontal o Left: rotate 90 counter-clockwise Right: rotate 90o clockwise Playing DVD discs Place a DVD disc into the tray, If the disc contain catalogue, then enter the first catalogue position, else player the disc contents automatically 17. Program Play (compatible with DVD, SVCD, VCD, CD, CD-G, DTS-CD, HD-CD, WMA, MP3/JPEG, MPEG4/DIVX discs) The Program Playback option allows you to enter the order in which you want chapters or tracks to play, maximum to 16. z GB- 16 Program Menu: If PBC is on, this operation will turn PBC off while the chapters / tracks plays in programmed order. z According to the highlight, use the Numeric buttons to enter the chapters / tracks in the order you want them to play. Then press Play or use Arrow buttons to highlight the “PLAY” item and press PLAY. The chapters / tracks will play in the programmed order. You can program maximum 16 titles / chapters / tracks. z According to the Direction Indicator on the menu, you can press Arrow buttons to highlight where you want to enter. z During Program Playback, if Program button pressed, the programmed order and the contents will be displayed on the screen, and the Program Playback will be stopped; Also you can press Stop and Play to resume normal playback. Notes: To clear the programmed order, use Arrow buttons to highlight the “CLEAR” item, then press PLAY. To modify the programmed order, use Arrow buttons to highlight the modifying item and enter the new chapter / track you want to program directly. z Meanwhile, the program indicator in the VFD illuminate, and the playing chapter / track also illuminate. 18. Card or USB play (compatible with DVD, SVCD, VCD, CD, CD-G, DTS-CD, HD-CD, WMA, MP3/JPEG, short subject of MPEG4/DIVX) This machine Support 3-in-1 card reader and USB1.1OTG function, can read MP3, WMA, JPG, short subject of MPEG4/ DIVX. Notice: The operations of CARD and USB READER WHEN PLAYER IN DVD MODE. The following Memory Cards can be used: z Memory-Stick z SD-Card z Multi Media Card 1. Insert the Memory Card into the Card Reader. 2. Press the MEDIA-button on the remote control to switch the DVD-Player to file mode. 3. Select the desired file(s) and start the replay, “Selecting file/directory and starting replay”. Using an USB-medium A wide range of devices can be connected to the DVD-Player via the USB-port. Examples for such devices are USB Memory Sticks, external harddisks or digital cameras. 1. Plug an USB-adapter cable into the corresponding port on the DVD-Player. Make sure that the USB-port on the device is a "Mini-B"-port. 2. Connect the USB-device to the adapter cable. 3. Press the MEDIA-button on the remote control to switch the DVD-Player to file mode. NOTE: The DVD-Player will now browse the content of the memory medium for any playable files. With larger memory media this process may take quite a long time. During this time the status message "READ USB" is displayed on screen. 4. Select the desired file(s) and start the replay, “Selecting file/directory and starting replay”. Using Memory Card GB- 17 Chapter 5 Help : : Troubleshooting If a fault occurs, first check the points listed below before taking the set for repair. If you are unable to remedy a problem by following these hints, consult your dealer or service centre. WARNING: Under no circumstances should you try to repair the set yourself. Problems Cause Solution No power indication Power plug not connected TV has not been set to the correct video input Plug the power cord into the power supply Set correct TV video input format for receiving the player’s output signals. Firmly insert the video cable ends to the related terminals. Firmly insert the audio cable ends to the related terminals. Turn on the power of audio apparatus. Setup audio output correctly via the setup menu. Take out the disc and clean. The picture may be distorted during fast forward /backward playback. No picture Video cable not firmly connected. Audio cable not connected tightly No sound Power of audio apparatus is off Audio output setting is incorrect Disc is dirty Picture distortion Brightness unstable or noisy Fast forward/backward is activated Affected by anti-piracy circuit Connect the player directly to TV. No disc Load a disc. Load a compatible disc (Check the disc format and its color system). Check disc if it is put in correctly. Check disc if it is put in correctly. Clean the disc. Change the setting via the setup menu. Disable this function or reset the rating level. Turn off the main switch or pull out the power plug, plug it in and turn on the power again. Point the remote control at the remote sensor. Make sure the remote control range within 7 meters to the remote sensor. Replace with new batteries. Disc not compatible The player does not work The disc is placed upside down The disc not put in the tray correctly Disc is dirty Player settings are incorrect Parental lock is in effect No response to key press Remote control does not work Interference of power wave or other factors such as static interference The remote control not pointed at the remote sensor on the front panel of the player The remote control is out of specified range Battery power exhausted Note: This produce incorporates copyright protection technology that is protected by method claims of certain U.S. patent and other intellectual Property rights owned by Macrovision Corporation and other rights owners. Use of this copyright protection technology must be authorized by Macrovision Corporation and is intended for home and other limited viewing users only, unless otherwise authorized by Macrovision Corporation. Reverse engineering or disassembly is prohibited. Depending on the condition of the recording equipment or the CD-R/RW, DVD±R/RW disc itself, some discs can’t be played on the unit. GB- 18 :: Specifications PLAYER/OUTPUT/ACCESSORIES PLAYER: Power requirements Power consumption Signal format system Frequency Response S/N ratio Audio Dynamic Range Operation condition AC~100-250V 50/60Hz 15W PAL/NTSC DVD VIDEO (PCM 96KHz) 20Hz~44KHz(±1 dB) DVD VIDEO (PCM 48KHz) 20Hz~22KHz(±0.5 dB) CD: 20Hz~22KHz(±0.5 dB) ≥90dB DVD VIDEO: ≥90dB CD: ≥85dB Temp: 0℃~40℃, Operation state: Level surface OUTPUT: 1.0V (P-P), 75Ω 2.0V (rms) (Y) 1.0V (P-P), 75Ω (C) 286Mv (P-P), 75Ω (Y) 1.0V (P-P), 75Ω 0.7V (P-P), 75Ω 0.7V (P-P), 75Ω 0.5V (P-P) 75Ω Video output Analog audio output S-Video output Component video output SCART Video output COAXIAL Audio output ACCESSORIES: User’s Manual …………………………………………………………………. 1 Audio/Video cable …………………………………………………………………. 1 USB cable …………………………………………………………………. 1 Remote Control …………………………………………………………………. 1 Product upgrading may result in not fully coincide with the descriptions in this guide. is a registered trademark of ITT Manufacturing, Inc. and is used under license. GB- 19