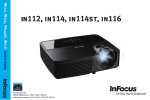
Download InFocus IN112 User's Manual
Transcript
Regulatory model IN112/IN114/IN116 P/N PA139-4000-00 DISPERINDAG No. 0287/1.824.51/09.03 Please read the safety instructions booklet before setting up the projector. Unpack the box 1 Here's what's included: Remote Projector Computer Cable Power Cable Documentation Pack Save the box and packing materials. Put batteries in the remote 2 The remote uses 2 AAA batteries. 1 2 3 Please dispose of batteries in an environmentally proper manner. Buy a Full-Featured Remote and Other Custom Accessories www.infocus.com/store Status Indicator Panel The top of your projector includes a convenient indicator panel with symbols that light up to show important status. POWER TEMP/LAMP For details, see Troubleshooting. QS_IN112_114_116.indb 2 2011/5/30 上午 09:43:18 3 Connect source Color-coded connections make it easy. You can connect more than one source if needed. Connect to: Computer (using VGA) Got an Apple computer? Computer Cable (included) You may need an adapter. For more information, see How-To Guides at www.infocus.com/support/howto Computer OR Connect to: DVD, VCR 1Connect video using either a Composite Video cable, an S-Video cable or an HDMI cable 2 Connect audio using a Mini Plug Audio Y-Cable (not needed for HDMI) Available from A/V dealer or retailer HDMI Cable Best S-Video Cable Better OR Mini Plug Audio Y-Cable (not needed for HDMI) L OR Composite Video Cable R Audio Out Good Video Out HDMI Out DVD, VCR* *Also for game console, cable box, HDTV Receiver QS_IN112_114_116.indb 3 2011/5/30 上午 09:43:18 4 Turn on projector and source 1 Connect the power cord to the projector and to an electrical outlet The power light on the projector will light blue. 2 Turn on the projector Press power (on the projector or remote). The power light will light blue. 3 Wait for the lamp to warm up It will take a minute for the lamp to reach full brightness. 5-10 sec. Warning: Do not look directly into the lens while the projector is being used. 4 Turn on computer or other source You may need to press a specific key combination to activate your laptop's external video port. On most laptops, hold down the FN key while pressing a key labeled CRT/LCD, LCD/ VGA, a monitor icon , or similar. Key combos for popular models: Apple F7 Dell Fn+F8 Fujitsu Fn+F10 HP/Compaq Fn+F4 or Fn+F6 IBM ThinkPad Fn+F7 Sony Fn+F7 Toshiba Fn+F5 Complete laptop activation chart at www.infocus.com/support i 5 Important: If there is still no video, restart your computer (first make sure it's connected to the projector and the projector is turned on). Change source if needed If needed, press SOURCE (on the projector or remote), use and to highlight the desired source, and press the on the projector (or SELECT on the remote) to choose a different source. QS_IN112_114_116.indb 4 2011/5/30 上午 09:43:24 ector ss. 5 Adjust the picture 1Height Need Help? 1 Press the Help button on the remote at any time to get help with connecting sources and improving the picture. 2 1Lift the front of the projector to the desired height. 2Rotate the foot under the front of the projector. Interactive Screen Size and Distance Calculator www.infocus.com/calculator 2Keystone Buy a Screen and Other Custom Accessories www.infocus.com/store keystone Ceiling mount? To flip the image, turn on the Ceiling Mount setting in the Basic menu. Press the keystone buttons to make the picture square. 3Zoom and focus Zoom Focus Adjust zoom first, then focus the center of the image. QS_IN112_114_116.indb 5 2011/5/30 上午 09:43:28 Using the menus 1Press MENU, then press PRESET SOURCE or to review the menu options. To enter a submenu, highlight the desired submenu and 2POWER TEMP/LAMP press on the projector or Select on remote. 3To adjust a menu setting, highlight the desired menu option and press or . 4Press the MENU button to exit the menu system. Note: Most picture settings are disabled (gray) unless a source is being displayed. 6 Turn off the projector Press the power button The power light on the projector will blink while the fan cools the lamp. If you need to unplug the projector, wait until the fan stops. Note: While the power light is blinking, button presses on the projector and remote are ignored. READ THE REFERENCE GUIDE Download it at www.infocus.com/support The Reference Guide is available in multiple languages. It covers advanced setup and operation, including lamp replacement instructions. QS_IN112_114_116.indb 6 2011/5/30 上午 09:43:30 TROUBLESHOOTING If there is no picture or the picture is blank If the power light is off, make sure the power cord is connected and plugged into a live electrical outlet, and then press the POWER button on the keypad or remote. Check video source and cables. Make sure the video source (computer, DVD player, VCR, etc.) is turned on and cables are securely connected between the source and the projector. Make sure your computer's video port is enabled. Press the key combination that activates your laptop's external video port (see step 4 ). If there is still no image, restart your laptop. Press the SOURCE button on the projector or remote and use and to highlight the desired source. Then press the on the keypad (or the SELECT button on the remote) to activate the source. Press the Auto Image button. If "Signal out of range" is shown, or the picture looks bad Press the Auto Image button. If that doesn't help (and the source is a computer), reduce your computer's display resolution or vertical refresh rate. If "Replace lamp" is shown Turn the projector off and wait at least one minute, then turn it on again. If the replace lamp message is displayed again, the lamp needs to be replaced. For lamp replacement instructions, see the Reference Guide, which can be downloaded at www.infocus.com/support Only InFocus genuine lamps are tested for use in this projector. If the projector is overheating POWER TEMP/LAMP Turn the projector off and remove anything that may be blocking the air vents on its sides. Leave the projector off for at least one minute to let it cool before turning it on again. Important: Continuous operation while overheating may reduce the lifetime of the lamp and/or projector. More troubleshooting options are in the Reference Guide Download it at www.infocus.com/support Warning: In the unlikely event of a lamp rupture, particles may be ejected from the projector. Keep out of the area under and around the projector while the projector is in use. See the safety instructions booklet for more details. QS_IN112_114_116.indb 7 2011/5/30 上午 09:43:32 Questions? We’re here to help! Visit us at: www.infocus.com/support We’re here to support you with your new purchase. We can help you with… • Determining screen sizes • Documentation in other languages • Connecting your sources (TV, DVD, Cable/Satellite, Game, etc.) • Selecting optional accessories • Product warranty protection plans USA, Canada, Latin America Customer Support Telephone +1 (503) 207-4700 TOLL FREE: 877-388-8360 Mon-Fri, 6 am - 5 pm Pacific Asia Pacific Customer Support Telephone Singapore: 65 6603 9871 China: 800-888-9288 Australia: 1300-290-922 Australia Direct Sales: 61430-223-138 New Zealand: 008000-4636287 Mon – Fri, 9 a.m. – 5 p.m. SGT [email protected] Europe, Middle East, Africa Customer Support Telephone France: 0800 905-993 Germany: 0800 181-3649 Italy: 0800 877-238 Spain: 900 993-163 UK: 0800 028-6470 Other: 008000 463-6287 Mon-Fri, 08:00 - 17:00 CET [email protected] Hg - Lamp contains mercury. Manage in accordance with local disposal laws. See www.lamprecycle.org Declaration of Conformity Manufacturer: InFocus Corporation, 13190 SW 68th Parkway, Suite 200, Portland, OR 97223-8368 USA We declare under our sole responsibility that this projector conforms to the following directives and norms: ErP Directive 2009/125/ EC, EMC Directive 2004/108/EC, EMC: EN 55022, EN 55024, EN 61000-3-2, EN 61000-3-3, Low Voltage Directive 2006/95/EC, Safety: IEC 60950-1: 2005;EN 60950-1:2006 +A11:2009. Trademarks Apple, Macintosh, and PowerBook are trademarks or registered trademarks of Apple Computer, Inc. IBM is a trademark or registered trademark of International Business Machines, Inc. Microsoft, PowerPoint, and Windows are trademarks or registered trademarks of Microsoft Corporation. Adobe and Acrobat are trademarks or registered trademarks of Adobe Systems Incorporated. DLP® and the DLP logo are registered trademarks of Texas Instruments and BrilliantColor™ is a trademark of Texas Instruments. InFocus, In Focus, and INFOCUS (stylized) are either registered trademarks or trademarks of InFocus Corporation in the United States and other countries. NOTE: This product is covered electrical and electronic equipment under the European Union's Waste from Electrical and Electronic Equipment ("WEEE") Directive (2002/96/EC). The WEEE Directive requires that covered equipment be collected and managed separately from typical household waste in all EU member states. Please follow the guidance of your local environmental authority or ask the shop where you purchased the product for collection or recycling options. FCC Warning This device complies with part 15 of the FCC Rules. Operation is subject to the following two conditions: (1) This device may not cause harmful interference, and (2) this device must accept any interference received, including interference that may cause undesired operation. Note: This equipment has been tested and found to comply with the limits for a Class B digital device, pursuant to part 15 of the FCC Rules. These limits are designed to provide reasonable protection against harmful interference in a residential installation. This equipment generates, uses and can radiate radio frequency energy and, if not installed and used in accordance with the instructions, may cause harmful interference to radio communications. However, there is no guarantee that interference will not occur in a particular installation. If this equipment does cause harmful interference to radio or television reception, which can be determined by turning the equipment off and on, the user is encouraged to try to correct the interference by one or more of the following measures: — Reorient or relocate the receiving antenna. — Increase the separation between the equipment and receiver. — Connect the equipment into an outlet on a circuit different from that to which the receiver is connected. — Consult the dealer or an experienced radio/TV technician for help. Changes or modifications to this equipment that are not expressly approved by InFocus Corp. may void the user’s authority to operate the equipment. Canada This Class B digital apparatus complies with Canadian ICES-003. Cet appareil numérique de la classe B est conforme à la norme NMB003 du Canada. Agency Approvals cULus. Other specific Country Approvals may apply. Please see product certification label. Input ratings: 100-240Vac, 2.6A, 50-60Hz InFocus reserves the right to alter product offerings and specifications at any time without notice. QS_IN112_114_116.indb 8 2011/5/30 上午 09:43:32


