1
HP StorageWorks
Clustered File System 3.6.0
Windows Storage Server Edition
command reference guide
Part Number: 403105–005
Fifth edition: January 2008
Legal and notice information
© Copyright 1999-2008 Hewlett-Packard Development Company, L.P.
Confidential computer software. Valid license from HP required for possession, use or
copying. Consistent with FAR 12.211 and 12.212, Commercial Computer Software,
Computer Software Documentation, and Technical Data for Commercial Items are licensed
to the U.S. Government under vendor's standard commercial license.
The information contained herein is subject to change without notice. The only warranties
for HP products and services are set forth in the express warranty statements accompanying
such products and services. Nothing herein should be construed as constituting an
additional warranty. HP shall not be liable for technical or editorial errors or omissions
contained herein.
Microsoft® is a U.S. registered trademark of Microsoft Corporation.
HP Clustered File System 3.6.0 Windows Storage Server Edition command
reference guide
Contents
Functional Cross Reference
Administrative Commands . . . . . . . . . . . . . . . . . . . . . . . . . . . . . . . . . vii
Diagnostic Commands . . . . . . . . . . . . . . . . . . . . . . . . . . . . . . . . . . . . . . x
1 HP Technical Support
HP Storage website . . . . . . . . . . . . . . . . . . . . . . . . . . . . . . . . . . . . . . . . . 1
HP NAS Services website . . . . . . . . . . . . . . . . . . . . . . . . . . . . . . . . . . . . 2
2 HP Clustered File System Commands
Overview . . . . . . . . . . . . . . . . . . . . . . . . . . . . . . . . . . . . . . . . . . . . . . . . . .
.dll libraries . . . . . . . . . . . . . . . . . . . . . . . . . . . . . . . . . . . . . . . . . . . . .
.reg files . . . . . . . . . . . . . . . . . . . . . . . . . . . . . . . . . . . . . . . . . . . . . . . .
Scripts . . . . . . . . . . . . . . . . . . . . . . . . . . . . . . . . . . . . . . . . . . . . . . . . . .
.exe files . . . . . . . . . . . . . . . . . . . . . . . . . . . . . . . . . . . . . . . . . . . . . . . .
destroypsfs.exe – destroy a PSFS filesystem . . . . . . . . . . . . . . . . . . . .
devrecover.exe – force a system reboot. . . . . . . . . . . . . . . . . . . . . . . . .
diskupdate.exe – reattempt to access a disk. . . . . . . . . . . . . . . . . . . . .
dismount.exe – dismount a PSFS filesystem . . . . . . . . . . . . . . . . . . . .
dledit.exe – assign drive letters and mount points . . . . . . . . . . . . . . .
dlmdebug.exe – debug DLM problems . . . . . . . . . . . . . . . . . . . . . . . .
eventlog.exe – dump the contents of the event log . . . . . . . . . . . . . . .
fsprobe.exe – report filesystem information . . . . . . . . . . . . . . . . . . . .
gcstat.exe – print grpcommd statistics . . . . . . . . . . . . . . . . . . . . . . . . .
get_fenceidentity.exe – retrieve fencing information . . . . . . . . . . . . .
hbaapidump.exe – display LUN information . . . . . . . . . . . . . . . . . . .
hn2ip.exe – determine a server’s IP address . . . . . . . . . . . . . . . . . . . .
idfence.exe – fence a server during a fencing test . . . . . . . . . . . . . . . .
lcl_dump.exe – show information about LCL locks . . . . . . . . . . . . . .
makescldb.exe – create membership partitions . . . . . . . . . . . . . . . . . .
mcs.exe – manipulate the cluster log. . . . . . . . . . . . . . . . . . . . . . . . . . .
mcs log – add a message to the cluster event log . . . . . . . . . . . . .
3
3
3
3
4
4
4
5
5
5
5
6
6
6
6
6
7
7
7
7
8
8
iii
Contents
iv
mcs select – display events from the cluster event log . . . . . . . . . 8
mpdump.exe – back up membership partition data. . . . . . . . . . . . . 12
mpimport.exe – restore membership partition data . . . . . . . . . . . . . 13
mprepair.exe – repair membership partitions . . . . . . . . . . . . . . . . . . 15
msmtool.exe – diagnose the MSM process. . . . . . . . . . . . . . . . . . . . . 21
mx.exe – administer a cluster . . . . . . . . . . . . . . . . . . . . . . . . . . . . . . . . 21
mxcheck.exe – verify configuration requirements . . . . . . . . . . . . . . 21
mxcollect.exe – collect configuration information. . . . . . . . . . . . . . . 22
mxconsole.exe – start the Management Console . . . . . . . . . . . . . . . . 22
mxgenpass.exe – create encrypted passwords. . . . . . . . . . . . . . . . . . 22
mxsancheck.exe – check SAN access. . . . . . . . . . . . . . . . . . . . . . . . . . 23
mxsanconf.exe – configure FibreChannel switches . . . . . . . . . . . . . 23
mxsanlk.exe – display status of SAN locks . . . . . . . . . . . . . . . . . . . . 23
mxservice.exe – container for cluster components . . . . . . . . . . . . . . 26
mxsetsecret.exe – set the network secret password . . . . . . . . . . . . . 27
mxstart.exe – start HP Clustered File System processes . . . . . . . . . 27
mxstop.exe – stop HP Clustered File System processes . . . . . . . . . . 27
partresize.exe – grow a partition . . . . . . . . . . . . . . . . . . . . . . . . . . . . . 27
pathfilter.exe – translate the install path. . . . . . . . . . . . . . . . . . . . . . . 28
PSANcfg.exe – control port operations. . . . . . . . . . . . . . . . . . . . . . . . 28
PSANinfo.exe – show FC logins or Naming Database . . . . . . . . . . . 28
psdcoinst.exe – manage the psd process . . . . . . . . . . . . . . . . . . . . . . 29
psdctl.exe – display device bindings . . . . . . . . . . . . . . . . . . . . . . . . . . 30
psfscheck.exe – check or repair a filesystem . . . . . . . . . . . . . . . . . . . 30
Check a filesystem . . . . . . . . . . . . . . . . . . . . . . . . . . . . . . . . . . . . . . 30
Enable or disable FZBMs. . . . . . . . . . . . . . . . . . . . . . . . . . . . . . . . . 32
Enable sparse files . . . . . . . . . . . . . . . . . . . . . . . . . . . . . . . . . . . . . . 32
Manage quotas . . . . . . . . . . . . . . . . . . . . . . . . . . . . . . . . . . . . . . . . . 32
psfsdebug.exe – obtain a filesystem image. . . . . . . . . . . . . . . . . . . . . 34
psfsdq.exe – save quota data . . . . . . . . . . . . . . . . . . . . . . . . . . . . . . . . 34
psfsformat.exe – create a filesystem . . . . . . . . . . . . . . . . . . . . . . . . . . 35
psfsinfo.exe – report filesystem information . . . . . . . . . . . . . . . . . . . 37
psfslabel.exe – label a filesystem . . . . . . . . . . . . . . . . . . . . . . . . . . . . . 38
psfsquota.exe – manage disk quotas . . . . . . . . . . . . . . . . . . . . . . . . . . 39
psfsresize.exe – resize a filesystem . . . . . . . . . . . . . . . . . . . . . . . . . . . 41
psfsresume.exe – resume a suspended filesystem . . . . . . . . . . . . . . 41
psfsrq.exe – restore quota data. . . . . . . . . . . . . . . . . . . . . . . . . . . . . . . 42
psfssuspend.exe – suspend a filesystem . . . . . . . . . . . . . . . . . . . . . . . 42
psfsunpack.exe – unpack a filesystem image. . . . . . . . . . . . . . . . . . . 43
psvctl.exe – manage dynamic volumes. . . . . . . . . . . . . . . . . . . . . . . . 43
Contents
registry.exe – dump registry contents . . . . . . . . . . . . . . . . . . . . . . . . .
sandiskinfo.exe – show disk or LUN information . . . . . . . . . . . . . .
Disk information. . . . . . . . . . . . . . . . . . . . . . . . . . . . . . . . . . . . . . . .
Options for dynamic volumes . . . . . . . . . . . . . . . . . . . . . . . . . . . .
scsf.exe – shadow copies of shared folders . . . . . . . . . . . . . . . . . . . .
sdmp.exe, sdmp_ctl.exe – protect filesystem integrity . . . . . . . . . . .
sentinels.exe – show service dependencies . . . . . . . . . . . . . . . . . . . .
smds.exe – show UI status . . . . . . . . . . . . . . . . . . . . . . . . . . . . . . . . . .
snapctl – manage snapshot operations . . . . . . . . . . . . . . . . . . . . . . . .
spctl.exe – dump the SanPulse trace buffer . . . . . . . . . . . . . . . . . . . .
spdebug.exe – obtain SanPulse debugging information . . . . . . . . .
spstat.exe – show cluster state information . . . . . . . . . . . . . . . . . . . .
wmtest.exe – test server-based fencing . . . . . . . . . . . . . . . . . . . . . . . .
v
44
44
44
47
48
48
49
49
49
49
50
50
50
3 mx Commands
The matrixrc file . . . . . . . . . . . . . . . . . . . . . . . . . . . . . . . . . . . . . . . . . . . 51
Format of the .matrixrc file . . . . . . . . . . . . . . . . . . . . . . . . . . . . . . . 51
Specify servers in the .matrixrc file . . . . . . . . . . . . . . . . . . . . . . . . 53
Encrypted passwords in the .matrixrc file . . . . . . . . . . . . . . . . . . 54
mx syntax. . . . . . . . . . . . . . . . . . . . . . . . . . . . . . . . . . . . . . . . . . . . . . . . . 55
Class syntax . . . . . . . . . . . . . . . . . . . . . . . . . . . . . . . . . . . . . . . . . . . . 56
mx account – account management commands . . . . . . . . . . . . . . . . 57
mx alert – cluster alert commands. . . . . . . . . . . . . . . . . . . . . . . . . . . . 59
mx application – application commands . . . . . . . . . . . . . . . . . . . . . . 59
mx config – cluster configuration commands . . . . . . . . . . . . . . . . . . 60
mxconfig mp – membership partition commands . . . . . . . . . . . . . . 66
mx config snapshot – snapshot method commands . . . . . . . . . . . . . 68
mx device – device monitor commands . . . . . . . . . . . . . . . . . . . . . . . 70
mx disk – disk commands. . . . . . . . . . . . . . . . . . . . . . . . . . . . . . . . . . . 74
mx dynvolume – dynamic volume commands . . . . . . . . . . . . . . . . . 75
mx eventnotifier – event notification commands . . . . . . . . . . . . . . . 78
mx fs – filesystem commands. . . . . . . . . . . . . . . . . . . . . . . . . . . . . . . . 84
mx matrix – cluster commands . . . . . . . . . . . . . . . . . . . . . . . . . . . . . . 86
mx mfs – Cluster File Share commands . . . . . . . . . . . . . . . . . . . . . . . 88
mx mni – Multi-Node Installer for SQL Instances . . . . . . . . . . . . . . 90
mx netif – network interface commands . . . . . . . . . . . . . . . . . . . . . . 92
mx quota – filesystem quota commands . . . . . . . . . . . . . . . . . . . . . . 94
Commands for filesystems . . . . . . . . . . . . . . . . . . . . . . . . . . . . . . . 95
Commands for users . . . . . . . . . . . . . . . . . . . . . . . . . . . . . . . . . . . . 98
Commands for groups. . . . . . . . . . . . . . . . . . . . . . . . . . . . . . . . . . 101
Contents
mx role – role management commands . . . . . . . . . . . . . . . . . . . . . .
mx server – server commands . . . . . . . . . . . . . . . . . . . . . . . . . . . . . .
mx service – service monitor commands . . . . . . . . . . . . . . . . . . . . .
mx snapshot – snapshot commands . . . . . . . . . . . . . . . . . . . . . . . . .
mx vfs – Virtual CIFS Server commands . . . . . . . . . . . . . . . . . . . . .
mx vfs_share – Virtual File Share commands . . . . . . . . . . . . . . . . .
mx vhost – virtual host commands . . . . . . . . . . . . . . . . . . . . . . . . . .
mx vsql – Virtual SQL Server commands. . . . . . . . . . . . . . . . . . . . .
mx vsqlinstance – Virtual SQL Instance commands . . . . . . . . . . . .
sleep command. . . . . . . . . . . . . . . . . . . . . . . . . . . . . . . . . . . . . . . . . . .
Index
vi
101
103
106
109
111
113
117
119
122
125
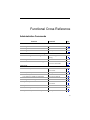
Functional Cross Reference
Administrative Commands
Function
Command
Page
CIFS
Manage Cluster File Shares
mx mfs
88
Manage Virtual CIFS Servers
mx vfs
111
Manage Virtual File Shares
mx vfs_share
113
Add a message to the event log
mx matrix log
mcs log
87
8
Manage event notifier services
mx eventnotifier
78
View events in the cluster event log
mcs select
mx server viewevents
Event notification services and event log
8
105
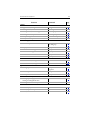
Filesystem
Create a filesystem
psfsformat
mx fs create
35
84
Destroy a filesystem
destroypsfs
Label a filesystem
psfslabel
38
List volumes available for filesystem
mx fs showcreateopt
86
Manage drive letters/paths
mx fs
84
Report filesystem information
psfsinfo
mx fs status
37
86
Report volume information
sandiskinfo
44
Resume a suspended filesystem
psfsresume
41
Suspend a filesystem for backups
psfssuspend
42
4
vii
Functional Cross Reference
Function
viii
Command
Page
Matrix
Applications, manage
mx application
59
Configuration, initial
mx config
60
Configuration, membership partitions
mx config mp
66
Configuration, snapshot method
mx config snapshot
68
Dump configuration information
mx matrix dump
87
Verify cluster requirements on server
mxcheck
21
Create or repair
mprepair
mx config mp
15
66
Display status
mprepair
15
Restore membership partition data
mpimport
13
Save membership partition data
mpdump
12
Restore mxds datastore
mpimport -X
13
Save mxds datastore
mpdump -X
12
Membership partitions
Monitors
Device monitor, manage
mx device
70
Service monitor, manage
mx service
106
Manage quotas
psfsquota
mx quota
39
94
Restore quota data
psfsrq
42
Save quota data
psfsdq
34
Manage operating system accounts that
belong to management roles
mx account
57
Manage roles for cluster operations
mx role
Quotas
Role-Based Security
101
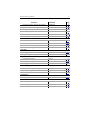
SAN
Disks, display information
sandiskinfo
44
Disks, import or deport
mx disk
74
Disks, show status
mx disk status
74
Functional Cross Reference
ix
Function
Command
Page
Dynamic volumes, display information
sandiskinfo
44
Dynamic volumes, manage
mx dynvolume
75
FC logins, display
PSANinfo
28
LUNs, display information
sandiskinfo
44
LUNs, display LUNs seen by HBAs
hbaapidump
6
Naming database, display
PSANinfo
28
Add, update, enable, or disable server
mx server
103
License file, read
mx server read_license
103
Cluster event file, add message
mx matrix log
87
Verify cluster requirements
mxcheck
21
Servers
Snapshots
Manage snapshots
mx snapshot
109
Snapshot options, display
mx snapshot showcreateopt
110
SQL Server
Install SQL instances
mx mni
90
Manage Virtual SQL Servers
mx vsql
119
Manage Virtual SQL Instances
mx vsqlinstance
122
Users and groups
Accounts, manage role assignments
mx account
57
Quotas, manage
mx quota
94
Roles, assign to accounts
mx role
101
mx vhost
117
Virtual hosts
Manage virtual hosts
Volumes
Back up a dynamic volume
mx dynvolume export
76
Manage dynamic volume
mx dynvolume
76
Recover a dynamic volume
mx dynvolume import
76
Functional Cross Reference
x
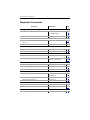
Diagnostic Commands
Function
Command
Page
Configuration
Check status of cluster components
mx config list
mp config mp list
62
67
Test fencing configuration
mx config testfencing
64
Mark server that cannot be fenced as
“down”
mx server markdown
104
Unfence ports on FC switches
PSANcfg
28
Check and repair a filesystem
psfscheck
30
Restore quota data
psfsrq
42
Collect logs for HP Support
mxcollect
22
View events in the cluster event log
mcs select
mx server viewevents
Fencing
Filesystem
Log files
8
105
Matrix
Alert messages, display
mx alert status
59
Cluster requirements, verify on server
mxcheck
21
Restore configuration from dump file
mx --file <dumpfile>
87
mprepair
mx config mp
68
Restore membership partition data
mpimport
13
Restore mxds datastore
mpimport -X
13
Membership partitions
Create or repair membership partitions
15
Monitors
Device monitor, clear event
mx device clear
73
Service monitor, clear event
mx service clear
108
SAN
FC logins, display
PSANinfo
28
Functional Cross Reference
Function
xi
Command
Page
FC switch, unfence ports
PSANcfg
28
SAN disk information, display
sandiskinfo
44
SAN ownership locks, display
mxsanlk
23
Server access to SAN, check
mxsancheck
23
Unfence ports on FC switches
PSANcfg
28
Servers
Mark server as down
mx server markdown
104
Cluster logs, collect for HP Support
mxcollect
22
Cluster requirements, verify
mxcheck
21
Server access to SAN, check
mxsancheck
23
mx dynvolume import
76
Volumes
Recover a dynamic volume
1
HP Technical Support
Telephone numbers for worldwide technical support are listed on the
following HP website: http://www.hp.com/support. From this website,
select the country of origin. For example, the North American technical
support number is 800-633-3600.
NOTE: For continuous quality improvement, calls may be recorded or
monitored.
Be sure to have the following information available before calling:
• Technical support registration number (if applicable)
• Product serial numbers
• Product model names and numbers
• Applicable error messages
• Operating system type and revision level
• Detailed, specific questions
HP Storage website
The HP website has the latest information on this product, as well as the
latest drivers. Access the storage site at:
http://www.hp.com/country/us/eng/prodserv/storage.html. From this website,
select the appropriate product or solution.
1
HP Technical Support
2
HP NAS Services website
The HP NAS Services site allows you to choose from convenient HP Care
Pack Services packages or implement a custom support solution
delivered by HP ProLiant Storage Server specialists and/or our certified
service partners. For more information, see us at
http://www.hp.com/hps/storage/ns_nas.html. For the latest documentation,
go to http://www.hp.com/support/manuals.
2
HP Clustered File System
Commands
Overview
HP StorageWorks Clustered File System includes several commands that can
be helpful for administrators managing an HP Clustered File System cluster.
Other HP Clustered File System commands provide diagnostic information
and should be used only under the direction of HP personnel. HP Clustered
File System also includes commands that are used internally and should not
be run directly.
The HP Clustered File System commands are located in the following
directories on the installation drive:
.dll libraries
The bin directory includes several .dll libraries that are used by the HP
Clustered File System tools. These libraries should not be removed or
changed.
.reg files
The bin and tools directories contain .reg files that are used during installation.
These files should not be executed manually.
Scripts
The bin and tools directories contain scripts that are used by HP Clustered File
System programs. These scripts should not be changed or executed manually.
3
Chapter 2: HP Clustered File System Commands
4
.exe files
The remainder of this chapter describes some of the executable commands
included in the bin and tools directories. Some of these commands are useful
for cluster administration. Other commands are used internally by HP
Clustered File System or should be run only at the request of HP personnel
when diagnosing problems on your system.
NOTE: Commands not documented in this chapter are HP Clustered File
System processes, commands used internally by HP Clustered File
System, or commands for use by HP personnel.
Permissions for HP Clustered File System binary files
By default, the machine local Administrators group has full cluster rights and
can run all HP Clustered File System binaries. It is expected that users who do
not belong to the Administrators group but need to perform cluster
management tasks will be assigned to the appropriate roles via the HP
Clustered File System Role-Based Security feature described in the HP
StorageWorks Clustered File System Administration Guide. These users should
use the HP Management Console or mx commands instead of running the
binaries directly.
The machine local Users group has read-only and execute permission to run
the UI-related binaries in the \bin directory. For example, members of this
group can start the HP Management Console and can run mx commands that
display status.
destroypsfs.exe – destroy a PSFS filesystem
Synopsis
bin\destroypsfs
Description
This command removes the specified PSFS filesystem from the volume on
which it is located.
devrecover.exe – force a system reboot
Synopsis
bin\devrecover
Chapter 2: HP Clustered File System Commands
5
Description
This command forces a system reboot when certain error conditions exist
during HP Clustered File System startup. It is used internally by HP
Clustered File System and should never be run directly.
diskupdate.exe – reattempt to access a disk
Synopsis
bin\diskupdate
Description
This command should be run only at the request of HP personnel.
dismount.exe – dismount a PSFS filesystem
Synopsis
bin\dismount
Description
This command should be run only at the request of HP personnel.
dledit.exe – assign drive letters and mount points
Synopsis
bin\dledit
Description
This command assigns drive letters and mount points to PSFS filesystems. It
is used internally by HP Clustered File System and should never be run
directly.
dlmdebug.exe – debug DLM problems
Synopsis
tools\dlmdebug
Description
This utility should be run only at the request of HP personnel.
Chapter 2: HP Clustered File System Commands
6
eventlog.exe – dump the contents of the event log
Synopsis
tools\eventlog
Description
This command is used internally by the mxcollect utility and should not be
run directly.
fsprobe.exe – report filesystem information
Synopsis
tools\fsprobe
Description
This command should be run only at the request of HP personnel.
gcstat.exe – print grpcommd statistics
Synopsis
tools\gcstat
Description
This command should be run only at the request of HP personnel.
get_fenceidentity.exe – retrieve fencing information
Synopsis
bin\get_fenceidentity
Description
This command is used internally during HP Clustered File System
configuration and should not be run manually.
hbaapidump.exe – display LUN information
Synopsis
tools\hbaapidump
Chapter 2: HP Clustered File System Commands
7
Description
This tool displays information about the LUNs seen by the HBA drivers and
can be used to verify that the HBA libraries are working correctly.
hn2ip.exe – determine a server’s IP address
Synopsis
bin\hn2ip
Description
This command determines a server’s IP address based on its hostname. The
command is used internally during cluster configuration and should not be
run directly.
idfence.exe – fence a server during a fencing test
Synopsis
bin\idfence
Description
The HP Management Console includes an option to test your fencing
configuration. The idfence command is used internally during this test and
should not be run directly.
lcl_dump.exe – show information about LCL locks
Synopsis
tools\lcl_dump
Description
This command should be run only at the request of HP personnel.
makescldb.exe – create membership partitions
Synopsis
bin\makescldb
Chapter 2: HP Clustered File System Commands
8
This command is used internally by HP Clustered File System and should not
be run directly. (To create membership partitions, use the “Configure Cluster”
feature on the HP Management Console.)
mcs.exe – manipulate the cluster log
This utility provides several commands that are used internally by HP
Clustered File System; however the following commands may be useful when
administering a cluster.
mcs log – add a message to the cluster event log
Synopsis
tools\mcs log [-a a12-a18] “<message>”
Description
This command adds a message to the cluster event log.
The option is:
-a a12-a18
The cluster log provides eight categories, User1 through User8, that can be
used for user-defined messages. The default category is User1. In the
command, use a12 to represent User1, a13 to represent User2, and so on
up to a18 for user8. For example:
mcs log -a a13 “This is my message”
mcs select – display events from the cluster event log
Synopsis
tools\mcs select [-b] [-c] [-h [<count-limit>] [--count]] [-t
[<initial-count>]] [<select-columns>] [with <select-filter>]
Description
This command can be used to display events from the cluster event log on the
local server.
The options are:
-b
Display the output in XML format.
Chapter 2: HP Clustered File System Commands
9
-c
Do not display column headings in the output.
-h [<count-limit>]
Display the specified number of events, starting at the beginning of the
log. If <count-limit> is omitted, all matching events will be displayed. (If -t
is also specified, it will not have any effect.)
-h --count
Display the number of matching events but not the events themselves.
-t [<initial count>]
Tail mode (this is the default). Display the output starting with the most
recent event. When <initial count> is used, that number of matching recent
events will be displayed and the utility will then wait for new events to
display. As long as the connection remains open, any new messages will
be displayed as they are logged.
<select columns>
By default, the output includes the following event columns: eventtime,
location, user, eventid, source, message. You can use this parameter to
specify the names of particular columns that you want to view. A column
name can be followed by a positive integer (such as source12) to indicate
the number of characters to be used for that column. If a width of zero is
specified, the column will be sized appropriately for the data. The column
names are:
category
The category assigned to the event. Categories group
related events (for example, SAN and Server are
categories).
categoryid
The ID assigned to a category.
eventid
The ID assigned to the event.
eventtime
The time at which the event occurred on the generating
node.
location
The IP address of the node where the event occurred.
message
The text provided with the logged event.
postedtime
The time the event was stored on the local node.
processid
The process ID of the process logging the event.
Chapter 2: HP Clustered File System Commands
severity
The severity level such as Alert or Critical.
source
The component that generated the message.
subject
The object to which the event relates.
subjecttype
The description of the subject.
subjecttypeid
The ID assigned to the subject.
10
subjecttypename Used to identify the object to programs.
user
The user identified with the event. Audit messages and
certain other messages have users.
with <select-filter>
Filter the output according to a logical statement that can include subtypes
and event fields. The allowed operations and syntactical elements are
described below.
Subtypes. The subtypes are:
alert
Alert event messages.
audit
Audit success/failure messages.
basic
Event messages that are not alerts.
customer
Events that display in the Cluster Event viewer.
global
Events intended for cluster use.
internal
Events generated by an internal or algorithmic error.
Event fields. The filter event fields are:
postedtime
The time the event was stored on the local node. The time
must be specified as YYYY-MM-DDTHH:NN:SS. The
year (YYYY) is the only required element. The month
(MM), day (DD), hour (HH), minute (NN) and second
(SS) must be two digits in length and can include a
leading zero (for example, 2007-11-12T08:01:59). If a
time is specified, the month and day must also be
specified. If a time or date element is not specified, it is
assumed to be zero.
eventtime
The time at which the event occurred on the generating
node. The time is specified in the same manner as the
postedtime field.
Chapter 2: HP Clustered File System Commands
11
location
The IP address from which the event was generated,
specified in dotted-decimal format.
processid
The process ID of the process that logged the event (an
integer between 0 and 65536).
eventid
The ID assigned to the event (the range of values is 0 to
65536).
categoryid
The ID assigned to the category for the event.
severity
The severity level of the event (the values are: success,
debug, info, warning, error, critical, emergency,
auditsuccess, auditfailure).
source
The component that generated the message.
subject
The event subject. This field can be used only with the =
operator. The right-hand side must be an extended
regular expression string surrounded by the “[” and “]”
characters. See the examples below.
message
The text included with the message. This field has the
same restrictions as the subject field.
Operations. The supported filter operations are:
=
Test if a filter event field is equal.
<=
Test if a filter event field is less than or equal.
<>
Test if a filter event field is not equal.
<
Test if a filter event field is less than.
>=
Test if a filter event field is greater than or equal.
>
Test if a filter event field is greater.
Syntactical elements. Expressions can be enclosed in parentheses “( )”
and can contain AND and OR operations, which use the syntax && and ||
respectively. AND and OR operations can be used only to connect filter
event subtypes, filter event fields, and parenthesized statements. Logical
negation is also allowed using the ! character. If there are multiple || and
&& operations within a single parenthesized portion of the filter, they are
given precedence from right to left. For example alert && basic ||
customer is the same as alert && (basic || customer).
Chapter 2: HP Clustered File System Commands
12
Filter examples. These examples are logical statements that could be used
as a <select filter> in an mcs select command.
postedtime > 2007-02-24
eventtime <= 2008
postedtime > 2007-11-12T12:01:59 && postedtime <= 2007-11-12T13
location = 214.4.325.67
(processid <> 1234) && (processid < 1500)
eventid >= 1000 && eventid < 2000
category < 5 || category > 15
postedtime > 2007-02 && !audit
severity > error && !(location = 127.0.0.1)
(subject=[*dev*] && message = [*FATAL ERROR*]) || subject=[]
Sample mcs select commands
Following are some sample mcs select commands.
mcs select
mcs select -t
mcs select -h5
mcs select global && !audit
mcs select with “(eventtime >= 2007-08-01) && (eventtime <= 2007-08-03)”
mpdump.exe – back up membership partition data
Synopsis
bin\mpdump
mpdump -v -l -P -F -X
mpdump -v -l -P -f -x <output-file>
Description
The mpdump utility backs up the membership partition data to a file and/or
the screen. When the utility is invoked with no options, the data is output to
the screen.
Chapter 2: HP Clustered File System Commands
13
The options are:
-F
Send the data to the default membership partition backup file, which is
located by default at %SystemDrive%\Program
Files\\conf\MP.backup{.prev}. This file can subsequently be used as input
to the mpimport utility if needed. If there is an existing backup file, it will
be saved as MP.backup.prev.
-f <output-file>
Send the data to the specified output file.
-v
Output the data to both the screen and the file.
-l
List the membership partitions.
-P
List the MP version number for the current product.
-X
Back up the mxds datastore from the membership partitions to the default
backup file, which is located at %SystemDrive%\Program
Files\\conf\MPmxds.backup.
-x <output-file>
Back up the mxds datastore from the membership partitions to the
specified backup file.
mpimport.exe – restore membership partition data
Synopsis
tools\mpimport <options>
Description
The mpimport utility can be used to import disks or dynamic volumes into an
existing SCL database. (Either -F or -f is required to import a dynamic
volume.) The utility can also be used to deport disks or dynamic volumes
from the SCL database or to replace a specific UID with a different UID.
Chapter 2: HP Clustered File System Commands
14
NOTE: HP Clustered File System must be stopped on all nodes when
mpimport is used. Database corruption can occur if the utility is
executed while HP Clustered File System is running on a node.
mpimport fails if HP Clustered File System is running on the current
node; however, it does not check the other nodes.
mpimport does not check for the physical presence of the disks or subdevices
that it is importing and, for example, allows the devices to be imported even if
they are not physically visible on the server. Consequently, successfully
completion of the utility does not mean that the imported disks are valid.
The options are:
mpimport <uid> [<uid> ...]
Import the set of disks corresponding to the specified UIDs.
mpimport --local <devname> [<devname> ...]
Import the set of disks corresponding to the specified local disknames.
mpimport -p <psdname> <uid>
Import the disk indicated by <uid> and assign the specified psdname to it.
mpimport -p <psdname> --local <devname>
Import the disk indicated by the specified local diskname and assign
psdname to it.
mpimport [-s] [-M] -F [<psdname>|<psvname>...]
Import the specified psd or psv devices. If no devices are specified, import
all disks and dynamic volumes listed in the default mpdump backup file.
If -s is specified, “strict” importing is done; only those disks and dynamic
volumes that can be imported using the psdname indicated in inputfile will
be imported. If -s is not specified, disks and dynamic volumes will be
imported with alternate names if necessary. The -M option recreates the
membership partitions from scratch based on the contents of the backup
file.
mpimport [-s] [-M] -f <inputfile> [<psdname>|<psvname>...]
Import the specified psd or psv devices. If no devices are specified, import
the disks and dynamic volumes listed in inputfile. The inputfile must be in
the format generated by mpdump. If -s is specified, “strict” importing is
done; only those disks and dynamic volumes that can be imported using
Chapter 2: HP Clustered File System Commands
15
the psdname indicated in inputfile will be imported. If -s is not specified,
disks and dynamic volumes will be imported with alternate names if
necessary. The -M option recreates the membership partitions from
scratch based on the contents of the input file.
mpimport -r <psdname>|<psvname> [<psdname>|<psvname> ...]
Remove the specified disks or dynamic volumes from the existing
database.
mpimport --replace <olduid> <newuid>
Replace all occurrences of olduid with newuid throughout the membership
partition data.
mpimport -X
Restore the mxds datastore on the membership partitions using the
default backup file (MPmxds.backup).
mpimport -x <backup-file>
Restore the mxds datastore on the membership partitions using the
specified backup file.
mprepair.exe – repair membership partitions
Synopsis
bin\mprepair
Description
The mprepair utility can be used to repair any problems if a failure causes
servers to have inconsistent views of the membership partitions. This utility is
invoked from the operating system prompt.
NOTE: HP Clustered File System cannot be running when you use mprepair.
To stop the cluster, issue the command net stop matrixserver from the
Command Prompt.
View Membership Partitions and Their Status
To view the current membership partitions, type the following command at
the operating system prompt:
mprepair --get_current_mps
Chapter 2: HP Clustered File System Commands
16
This command lists the current membership partitions according to the
membership file maintained on the server where you are running the utility.
Each server in the cluster has a membership partition file, which is called the
“local MP list.” Each SAN disk containing a membership partition also has its
own list of the membership partitions. Under normal operations, these lists
should all match.
The output from --get_current_mps contains a record for each membership
partition. Following is a sample record:
20:00:00:04:cf:13:33:12::0/1
OK
8001Kb
active
The first field contains the disk UUID followed by a slash and the partition
number (partition 1 in the above example). The second field reports the status
of the membership partition. The third field specifies the size of the
membership partition, and the last field reports whether the membership
partition is active or inactive.
The status reported in the second field will be one of the following:
OK. The membership partition is included in the local membership partition
list. This is the normal status.
FENCED. The server has been fenced and cannot access the SAN. Start HP
Clustered File System if it is not running or reboot the server.
NOT_FOUND. The mprepair utility cannot find the device containing the
membership partition. There may be a problem with the disk or with another
SAN component. When the problem is repaired, the status should return to
OK.
INACCESSIBLE. The mprepair utility cannot access the device containing the
membership partition. There may be a problem with the disk or with another
SAN component. When the problem is repaired, the status should return to
OK.
CORRUPT. The partition is not valid. You will need to resilver the partition.
This step copies the membership data from a valid membership partition to
the corrupted partition.
NOTE: The membership partition may have become corrupt because it was
used by another application. Before resilvering, verify that it is okay to
overwrite any existing data on the partition.
Chapter 2: HP Clustered File System Commands
17
RESILVER. The membership partition is valid but its MP list does not match
the server’s local MP list. You will need to determine which membership
partitions are correct (the partitions specified in the local MP list, or the
partition labeled RESILVER) and resilver accordingly.
CID_MISMATCH. The Cluster-ID is out-of-sync among the membership
partitions and must be reset. See “Reset the Cluster ID” on page 20.
Active and Inactive Membership Partitions
A membership partition can be either active or inactive. (This attribute is
reported in the last field of the record displayed by the mprepair
--get_current_mps command.) The current membership partitions should all
be active. If there are old membership partitions in the cluster, you may want
to either remove them or mark them as inactive.
A cluster could have an old membership partition if the disk containing it
becomes inaccessible and you then add another partition in its place.
When the disk access problem is corrected, the old membership partition will
still be on the disk and will be marked active.
When a membership partition is active, the disk containing the partition
cannot be imported into the cluster. You may see this situation if you want to
import a disk that was previously used by another cluster. To fix this
problem, use the --inactivate_mp option (described under “mprepair
Options” below) to change the state of the membership partition to
“inactive.” You can then import the disk into the cluster.
Sizes for Membership Partitions
HP Clustered File System stores the size of the smallest membership partition
that was created during the HP Clustered File System installation. When you
add or replace a membership partition, the new partition must be at least as
large as that original partition. For example, if you originally created 2-GB,
3-GB, and 4-GB membership partitions, any membership partitions created
later on must be at least 2 GB in size.
Export Configuration Changes
When you change the membership partition configuration with mprepair, it
updates the membership list on the local server. It also updates the lists on the
disks containing the membership partitions specified in the local MP file.
Chapter 2: HP Clustered File System Commands
18
After making changes with mprepair, you will need to export the
configuration to the other servers in the cluster. To do this, start HP Clustered
File System on the server where you ran mprepair and then select the
Configure option on the HP Clustered File System Connect window. When
the Configure Cluster window appears, select the Cluster Wide
Configuration tab. Select the other servers in the Address column and then
click Export.
mprepair Options
HP Clustered File System can operate with either one membership partition
or three membership partitions. To ensure that a membership partition is
always available, we recommend that you use three membership partitions.
Display Membership Partitions. To display information about membership
partitions, type the following command:
mprepair --display_mplists
The output shows the local membership partition list on the server where you
are running mprepair. It then compares this list with the lists located on the
disks containing the membership partitions. The output also includes the
device database records for the disks containing the membership partitions.
Following is an example.
###################################################################
Local membership partition list:
------------------------------------------------------------------Membership partition list -UID/Part:20:00:00:04:cf:13:33:12::0/1
Local Path:\\.\Global\psd1p1
Status:OK (active)
Size:8001Kb
These membership partitions contain a membership partition list
which matches the local membership partition file list:
UID/Part:20:00:00:04:cf:13:33:12::0/1
###################################################################
Contents of UID/Part:20:00:00:04:cf:13:33:12::0/1 -Disk records:
Recid
1: 20:00:00:04:cf:13:33:12::0 psd1
Recid 258: 20:00:00:04:cf:13:3c:92::0 psd2
Host registry entries:
Host ID: 10.10.30.4
fencestatus=0
SAN Loc:10:00:00:00:c9:2d:27:7d::0
idstatus=0 (switch=fcswitch5)
Host ID: 10.10.30.3
fencestatus=0
SAN Loc:10:00:00:00:c9:2d:27:78::0
idstatus=0 (switch=fcswitch5)
Chapter 2: HP Clustered File System Commands
19
Search the SAN for Membership Partitions. To search the SAN for all
partitions that appear to be membership partitions, type this command:
mprepair --search_mps
The output includes each membership partition found by the search and
specifies whether it is active or inactive. The output also includes the
membership list on the disk containing the partition and the database records
for the partitions.
Resilver Membership Partitions. Typically, HP Clustered File System writes
data to one membership partition and then copies, or resilvers, that data to
the other membership partitions. Resilvering takes place automatically when
a change is made to the device naming database or when you add, remove, or
replace a membership partition.
However, in certain situations you may need to perform the resilver
operation manually. For example, a membership partition might become
corrupt or a local membership list might become out of date.
The --resilver operation requires that you specify a good membership
partition. The other membership partitions are then resilvered from that
partition. Type the following command:
mprepair --resilver UID/PART#
UID is the UID for the device and PART# is the number of the partition on the
device.
NOTE: If you resilver from a partition that has a status of RESILVER, the
operation may initialize partitions that are not currently membership
partitions; any existing data on those partitions will be overwritten.
Use the --display_mplists option to see the membership partition lists
for the current membership partitions.
The resilver operation synchronizes all other membership partitions and the
local membership partition list.
Repair a Membership Partition. This command resilvers the specified
membership partition.
mprepair --repair [--force] UID/PART#
Chapter 2: HP Clustered File System Commands
20
UID/PART# indicates the membership partition to be resilvered. UID is the
UID for the device and PART# is the number of the partition on the device.
The membership partition is resilvered from a known valid membership
partition. Without the --force option, the command will fail if mprepair
cannot find two valid membership partitions to use as a source for the resilver
operation. The --force option overrides this requirement and causes the
resilver operation to take place.
Inactivate a Membership Partition. To inactivate membership partitions that
are marked as active but are not part of the current set defined by the
membership partition list, type the following command:
mprepair --inactivate_mp UID/PART#
UID is the UID for the device and PART# is the partition number.
This option is useful if the cluster includes old membership partitions that are
marked active or if you want to import a disk that contains an active
membership partition.
Clear the Host Registry. The --clear_hr option removes all entries from the
server registry. This command should be used only under the direction of HP
Support.
Reset the Cluster ID. When a cluster is created, it is assigned a cluster ID that
is used internally to identify the cluster. This ID is stored in the membership
partitions. If the steps for performing cluster configuration operations or
cluster upgrades are not followed precisely, it is possible for the cluster ID to
become out-of-sync among the membership partitions, preventing HP
Clustered File System from starting.
This condition is unlikely; however, if HP Clustered File System cannot be
started on any server in the cluster, you can use the following command to
determine whether all membership partitions have a valid cluster ID.
mprepair --sync-clusterids
The command displays the cluster IDs found in each membership partition
and flags those partitions containing an invalid ID. You can then specify
whether you want the command to repair the partitions having a mismatched
cluster ID.
Chapter 2: HP Clustered File System Commands
21
mprepair --get_current_mps can also be used to obtain more information
about the membership partitions.
msmtool.exe – diagnose the MSM process
Synopsis
tools\msmtool
Description
This diagnostics tool should be run only under the direction of HP personnel.
mx.exe – administer a cluster
The mx utility provides a command-line interface for administering a cluster
and monitoring its operation. See Chapter 2 for more information about the
commands provided with this utility.
mxcheck.exe – verify configuration requirements
Synopsis
bin\mxcheck
Description
The mxcheck utility can be used to verify that a server meets the
configuration requirements for HP Clustered File System. The utility is run
automatically whenever HP Clustered File System is booted. You can also run
mxcheck manually.
The utility performs the following checks on the server:
• System check: hardware, operating system version, service pack version,
available physical memory.
• Network check: IP network and interface assignments, forward and
reverse hostname lookup.
• Storage check: Host Bus Adapters, drivers, and settings.
• Miscellaneous check: other checks such as the non-paged pool setting.
Output from the utility appears on the screen and is also written to the
Application Log section of the Event Viewer.
Chapter 2: HP Clustered File System Commands
22
mxcollect.exe – collect configuration information
Synopsis
tools\mxcollect
Description
This utility collects configuration information and log files from the cluster.
The utility is typically run under the direction of HP Support.
You will need to run the mxcollect utility on each node. The utility is located
in the %ProgramFiles%\Hewlett-Packard\HP Clustered File System\tools folder.
Go to this location and double-click the file mxcollect.exe. You will then see a
command window that says “Collecting files.” The information collected
from that node is written to the file
mxcollect_machinename_yyyymmdd_hhmmss_default.zip. This file is placed in
the folder %SystemDrive%\Program Files\Hewlett-Packard\HP Clustered File
System\conf\mxcollect.
mxconsole.exe – start the Management Console
Synopsis
bin\mxconsole
Description
The mxconsole command starts the HP Management Console, which is used
to configure and monitor the cluster. The console can be run from either a
cluster server or a local machine outside the cluster. See the HP StorageWorks
Clustered File System Administration Guide for more information about the
console.
mxgenpass.exe – create encrypted passwords
Synopsis
bin\mxgenpass
Description
This command can be used to create encrypted passwords for use in the
.matrixrc file. For an example of using this command, see “Encrypted
passwords in the .matrixrc file” on page 54.
Chapter 2: HP Clustered File System Commands
23
mxsancheck.exe – check SAN access
Synopsis
bin\mxsancheck
Description
The mxsancheck command determines whether a server has SAN access and
is ready to mount filesystems. The command is intended to be used in scripts
and returns 0 on success and 1 on failure.
mxsanconf.exe – configure FibreChannel switches
Synopsis
bin\mxsanconf <FC-switches>
Description
In general, this command should not be run directly.
If a cluster is configured to use fabric fencing, the mxsanconf command must
be successfully run on each node before HP Clustered File System is started.
The command configures the list of FibreChannel switches that will be
managed by HP Clustered File System and creates or updates the files
psSAN.cfg and FCswitches in the directory
<FC-switch> is either the name or IP address of a switch to be managed. All
switches to be configured must be specified in the same command. The node
must be unfenced when the command is run.
If the <switches> parameter is not specified, the command uses the FC
switches listed in the FCswitches file (if the file exists).
mxsanlk.exe – display status of SAN locks
Synopsis
tools\mxsanlk
Description
HP Clustered File System uses a set of disk-based data structures called
SANlocks to protect filesystem integrity. If a problem causes a cluster to split
Chapter 2: HP Clustered File System Commands
24
into two or more network partitions, the SANlocks ensure that only one of the
resulting network partitions has access to the SAN.
Each SANlock is stored in a membership partition. Before a cluster can begin
accessing the SAN, it must first acquire a majority of the SANlocks. The
SANlocks are acquired in order.
mxsanlk displays the status of the SANlock stored in each membership
partition. It can be used to determine whether any of the membership
partitions need to be repaired. Also, if a network partition occurs, mxsanlk
can be used to determine which network partition has control of the SAN.
Following is some sample output. The command was issued on host
10.10.30.3. The SDMP administrator is the administrator for the cluster to
which the host belongs. There are three membership partitions.
# mxsanlk
This host:
10.10.30.3
This host’s SDMP administrator: 10.10.30.1
Membership Partition
-------------------psd1p1
psd2p1
psd3p3
SANlock State
------------held by SDMP administrator
held by SDMP administrator
held by SDMP administrator
Any of these messages can appear in the “SANlock State” column.
• held by SDMP administrator
The SANlock was most recently held by the SDMP administrator of the
cluster to which the host where mxsanlk was run belongs.
• trying to lock, last held by host X.X.X.X
The SANlock was most recently held by host X.X.X.X and may still be held
by that host. The host on which mxsanlk was run is trying to acquire the
SANlock.
• cannot access
The host on which mxsanlk was run is unable to access the SANlock.The
membership partition may need to be repaired.
Chapter 2: HP Clustered File System Commands
25
• trying to lock, cannot access
The host on which mxsanlk was run is trying to acquire the SANlock but
is unable to access it. The membership partition may need to be repaired.
• locked, cannot access
The host on which mxsanlk was run held the SANlock but is now unable
to access it. The membership partition may need repair.
• trying to lock, not yet committed by owner
The SANlock is either not held or has not yet been committed by its
holder. The host on which mxsanlk was run is trying to acquire the
SANlock.
• unlocked, trying to lock
The SANlock does not appear to be held. The host on which mxsanlk was
run is trying to acquire the SANlock.
• unlocked
The SANlock does not appear to be held. If a host holds the SANlock, it
has not yet committed its hold.
• initiating sdmp, not yet examined
This is a transitional state. It indicates that the sdmp process responsible
for the SANlock has been started but has not yet accessed the SANlock.
• sdmp process hung
The SDMP process responsible for the SANlock is unresponsive.
• trying to lock, sdmp process hung
The host on which mxsanlk was run is trying to acquire the SANlock but
the SDMP process responsible for the SANlock is unresponsive.
• locked, sdmp process hung
The host on which mxsanlk was run held the SANlock but the SDMP
process responsible for the SANlock is now unresponsive.
Chapter 2: HP Clustered File System Commands
26
• lock is corrupt, will repair
This transitional state occurs after the SDMP has detected that the
SANlock has been corrupted but before it has repaired the SANlock.
• trying to lock (lock is corrupt, will repair)
The host on which mxsanlk was run is trying to acquire the SANlock. The
SANlock was corrupted but will be repaired.
• locked (lock is corrupt, will repair)
The host on which mxsanlk was run holds the lock. The SANlock was
corrupted but will be repaired.
If a membership partition cannot be accessed, use the mprepair program to
correct the problem.
When you invoke mxsanlk, it checks for the Storage Device Monitor Pulse
(SDMP) process. This process is responsible for grabbing and maintaining the
locks on the membership partitions. Depending on the status of the SDMP
process, you may see one of the following messages:
Checking for SDMP activity, please wait...
Still trying...
The SDSMP is inactive at this host.
The SDMP appears to be inactive at this host.
If the SDMP process is not responding on the host, wait a few seconds and
retry the command. If the command continues to fail, shut down the cluster
and then restart it. This step should restart the SDMP process. If you continue
to have problems, contact HP Support.
mxservice.exe – container for cluster components
Synopsis
bin\mxservice
Description
This single service controls the starting, stopping, and failure detection for all
of the operational components of HP Clustered File System. This command
should not be run directly.
Chapter 2: HP Clustered File System Commands
27
mxsetsecret.exe – set the network secret password
Synopsis
bin\mxsetsecret
Description
This command is used during cluster configuration and should be run
manually only at the request of HP personnel.
mxstart.exe – start HP Clustered File System
processes
Synopsis
bin\mxstart
Description
This command is used internally by HP Clustered File System and should
never be run directly.
mxstop.exe – stop HP Clustered File System
processes
Synopsis
bin\mxstop
Description
This command is used internally by HP Clustered File System and should
never be run directly.
partresize.exe – grow a partition
Synopsis
bin\partresize
Description
The HP Management Console includes an option to increase the size of a
PSFS filesystem and the partition on which it is located. When this option is
Chapter 2: HP Clustered File System Commands
28
used, HP Clustered File System runs the partresize command to increase the
size of the partition. This command is not intended to be run directly.
pathfilter.exe – translate the install path
Synopsis
tools\pathfilter
Description
This command is used by the HP Clustered File System install process and
should never be run directly.
PSANcfg.exe – control port operations
Synopsis
bin\PSANcfg [-hu] [-[lL] <Port WWN>] [switch ...]
Description
The PSANcfg command can be used to add or remove local HBA port
information in the HP Clustered File System configuration and to unfence
ports on FibreChannel switches.
The options are:
-l, -L
The -l command adds the specified HBA port to the list of local ports; the
-L command removes the specified port. The mxsanconf command
invokes PSANcfg with these options; they should not be run directly.
-u switch ...
Unfence all local ports on the specified FC switches.
-h
Print a usage message.
PSANinfo.exe – show FC logins or Naming
Database
Synopsis
bin\PSANinfo [-n] [[-s]|[-u]] <switchname>
Chapter 2: HP Clustered File System Commands
29
Description
The PSANinfo command can be used to print the Naming Database or to get
a snapshot of logins for a particular FibreChannel switch.
The options are:
-n
Print the contents of the Naming Database.
-s
Wait <s> seconds between probes of the FC switch.
-u
Wait <u> microseconds between probes of the FC switch.
If no options are specified, PSANinfo displays the status of the switch one
time only.
Following is a sample snapshot:
Switch 10.10.11.240 : 1588 Fibre Channel Switch.
IP addr 10.10.11.240 WWN 10000060693025CD Fabric ID 10000060693025CD
1 module
Module 1 : 10000060693025CD state 1 has 8 ports
Port 0 : oper 2 admin 1
Port 1 : oper 1 admin 1 Fabric ID 0x111100 attached to 210100E08B255640
Port 2 : oper 1 admin 1 Fabric ID 0x111200 attached to 210000E08B026C65
Port 3 : oper 2 admin 1
Port 4 : oper 1 admin 1 Fabric ID 0x111400 attached to 210000E08B056F21
Port 5 : oper 1 admin 1 Fabric ID 0x111500 attached to 200B00A0B80F2851
Port 6 : oper 2 admin 1
Port 7 : oper 2 admin 1
Poll time: 0.37
psdcoinst.exe – manage the psd process
Synopsis
bin\psdcoinst
Description
psdcoinst is an internal process and should not be run manually.
Chapter 2: HP Clustered File System Commands
30
psdctl.exe – display device bindings
Synopsis
bin\psdctl
Description
This command should be run only at the request of HP personnel.
psfscheck.exe – check or repair a filesystem
Synopsis
bin\psfscheck [options] device
Description
The psfscheck utility looks for a PSFS filesystem on a device, replays
transactions that are to be replayed, and either checks or repairs the
filesystem. This utility can also be used to enable or disable Full Zone Bit
Maps (FZBMs), to enable sparse files, to enable or disable quotas, and to set
quota options for a filesystem. Before running psfscheck, be sure that the
volume is not in use.
The device can be specified in several ways:
• By the drive letter, such as X:
• By the mount point (junction), such as C:\san\vol2
• By the psd or psv name, such as psd2p2 or psv3
Check a filesystem
If a filesystem is not unmounted cleanly, the journal will be replayed the next
time the filesystem is mounted to restore consistency. You should seldom
need to check the filesystem. However, if a filesystem was corrupted by a
hardware or software failure, you can repair it with the psfscheck utility.
When psfscheck is running in default mode, it attempts to fix any corruptions
that can be fixed without using --rebuild-tree. The types of corruption that
can be fixed include bad pointers to data blocks, incorrect st_size and
st_blocks in a directory, directory entries pointing to nowhere, incorrect file
sizes and security descriptors, and objectid sharing.
Chapter 2: HP Clustered File System Commands
31
NOTE: The psfscheck utility requires exclusive access to the device. If it
cannot obtain this access, it will forcibly dismount the volume.
The options for checking a filesystem are as follows:
--rebuild-tree
Rebuilds the filesystem tree using leaf nodes found on the device.
Normally you should use this option only if psfscheck reports errors that
can be fixed only by --rebuild-tree. We strongly recommend that you
make a backup copy of the entire partition before you attempt to run
psfscheck with the --rebuild-tree option.
If --rebuild-tree encounters any files that had been open and unlinked,
psfscheck will move the files into the lost+found directory.
--rebuild-sb
Rebuilds the superblock.
--interactive, -i
Stops psfscheck after each pass is completed.
--quiet, -q
Prevents psfscheck from reflecting its progress.
--logfile filename, -l logfilename
Tells psfscheck to place information about any corruption it finds into the
specified logfile.
--no-modify, -n
Checks the filesystem in read-only mode, preventing psfscheck from
replaying the journal and/or fixing any corruption. If errors are found, it is
strongly recommended that you run psfscheck again, without the
--no-modify option, before running with the --rebuild-tree option. (The
--no-modify option cannot be specified with the --rebuild-tree or
--rebuild-sb options).
--scan-marked-in-bitmap filename, -b filename
Builds a tree of blocks marked in the bitmapfile. This option requires the
--rebuild-tree option.
--create-bitmap-file filename, -c filename
Saves bitmap of found leaves.
Chapter 2: HP Clustered File System Commands
32
-y
Causes psfscheck to answer “yes” to all questions.
Enable or disable FZBMs
The psfscheck utility also provides options to enable or disable Full Zone Bit
Maps (FZBMs). This on-disk filesystem format reduces the amount of data
that the filesystem needs to read when allocating a block. It is particularly
useful for speeding up allocation times on large, relatively full filesystems.
The options are:
--enable-fzbm
Enable the FZBM feature on the specified filesystem.
--disable-fzbm
Disable the FZBM feature on the specified filesystem.
The upgrade-fs and --downgrade-fs options are obsolete.
Enable sparse files
As of the 3.4 release, HP Clustered File System provides support for sparse
files. To enable sparse files on a PSFS filesystem that was created under an
earlier version of HP Clustered File System, use the following option:
--enable-sparse
Enable sparse files on the specified filesystem.
Manage quotas
The psfscheck utility includes options to enable or disable quotas on a
filesystem and to set the default quotas:
--enable-quotas
Build the necessary quota infrastructure on the specified filesystem. The
psfsck utility then examines the existing files and stores current
allocations for each user and group owning a file on the filesystem.
--disable-quotas
Disable quotas on the specified filesystem and free the associated blocks.
--set-dq <size>[T|G|M|K]
Set the default hard quota on the specified filesystem. The optional
modifiers specify that the size is in terabytes (T), gigabytes (G), megabytes
(M), or kilobytes (K). If a modifier is not specified, the size will be
Chapter 2: HP Clustered File System Commands
33
calculated in bytes. (The default is rounded down to the nearest filesystem
block.)
--set-sdq <size>[T|G|M|K]
Set the default soft quota on the specified filesystem. The optional
modifiers specify that the size is in terabytes (T), gigabytes (G), megabytes
(M), or kilobytes (K). If a modifier is not specified, the size will be
calculated in bytes. (The default is rounded down to the nearest filesystem
block.)
--rebuild-quotas
Recalculate quota allocations.
The following options can be used with the --enable-quotas option:
--staticdq
Quota limits for new users are copied from the default quota values set for
the filesystem.
--dynamicdq
Quota limits for new users are linked from the default quota values set for
the filesystem. If the default quota values are changed, the users’ quota
limits will also change.
--enforce-hardlimit
File operations that will result in exceeding a user’s hard limit are denied.
--no-enforce-hardlimit
File operations that will result in exceeding a user’s hard limit are allowed.
--log-hardlimit
File operations that result in exceeding a user’s hard limit are logged in the
system event log.
--no-log-hardlimit
File operations that result in exceeding a user’s hard limit are not logged.
--log-softlimit
File operations that result in exceeding a user’s soft limit are logged in the
system event log.
--no-log-softlimit
File operations that result in exceeding a user’s soft limit are not logged.
--sparse-fullcost
Quota accounting for sparse files reflects the virtual size of the files.
Chapter 2: HP Clustered File System Commands
34
--sparse-realcost
Quota accounting for sparse files reflects the actual allocation of filesystem
space to the files.
psfsdebug.exe – obtain a filesystem image
Synopsis
tools\psfsdebug
Description
This command should be run only under the direction of HP personnel.
psfsdq.exe – save quota data
Synopsis
bin\psfsdq [-f <path>] <filesystem>
Description
The psfsdq command prints a quota summary for all users and groups
having quota information stored on the specified PSFS filesystem.
The -f option specifies the file to which psfsdq will write its output. If the file
already exists, it will be overwritten. If the -f option is not specified, psfsdq
writes to stdout. filesystem is the psd or psv device used for the filesystem.
The psfsrq command can be used to restore the quota data to the filesystem.
The psfsdq and psfsrq commands should be run in conjunction with the
standard filesystem backup utilities, as those utilities do not save the quota
limits set on the filesystem.
For example, the following command saves the quota information for the
filesystem located on device psd1p5.
# psfsdq -f psd1p5.quotadata psd1p5
Chapter 2: HP Clustered File System Commands
35
The next command restores the data to the filesystem:
# psfsrq -f psd1p5.quotadata psd1p5
psfsformat.exe – create a filesystem
Synopsis
bin\psfsformat [-fq] [-n max-nodes] [-l <label>] [-reuse] [-o option
...] <device>
Description
The psfsformat command can be used to create a PSFS filesystem.
The device can be specified in several ways:
• By the drive letter, such as X:
• By the mount point (junction), such as C:\san\vol2
• By the psd or psv name, such as psd2p2 or psv1
The options are:
-f
The -f option (format) can be used if HP Clustered File System is not
running or the disk is not imported. Before using this option, be sure that
the volume is not in use on another node. The format operation will take
place even if the volume is in use.
-q
Suppress messages.
-n <max-nodes>
The maximum number of nodes that can mount a filesystem. This option
is for internal HP Clustered File System use only. It should not be specified
on the psfsformat command line.
-l <label>
The label for the filesystem.
-reuse
Reuse a psd device. If you will be creating a filesystem on a psd device
that was once part of a dynamic volume, the -reuse option must be used to
tell the command to reuse the device. Without this option, the attempt to
Chapter 2: HP Clustered File System Commands
36
create the filesystem will fail because the device contains a volume
signature.
The -o option has the following parameters:
blocksize=#
Specify the block size (either 4096 or 8192) for the filesystem.
disable-fzbm
Create the filesystem without Full Zone Bit Maps (FZBMs). The FZBM
on-disk filesystem format reduces the amount of data that the filesystem
needs to read when allocating a block. It is particularly useful for speeding
up allocation times on large, relatively full filesystems. For details about
FZBM, see the HP Knowledge Base article “Using the FZBM On-Disk
Filesystem Format.”
enable-quotas
Enable quotas on the filesystem.
The following options can be used with enable-quotas:
default=<size>[K|M|G|T]
Set the default hard quota on the specified filesystem. (The default is
rounded down to the nearest filesystem block.) The <size> argument can
include one of the following optional modifiers to specify the unit: K
(kilobytes), M (megabytes), G (gigabytes), or T (terabytes). If one of these
modifiers is not specified, the <size> will be interpreted in bytes. If the
default quota limit is not specified on the command line, the limit will be
set to 0, which means there is no default limit.
softdefault= <size>[T|G|M|K]
Set the default soft quota on the specified filesystem. The optional
modifiers specify that the size is in terabytes (T), gigabytes (G), megabytes
(M), or kilobytes (K). If a modifier is not specified, the size will be
calculated in bytes. (The default is rounded down to the nearest filesystem
block.)
static-default
Quota limits for new users are copied from the default quota values set for
the filesystem.
dynamic-default
Quota limits for new users are linked from the default quota values set for
the filesystem. If the default quota values are changed, the users’ quota
limits will also change.
Chapter 2: HP Clustered File System Commands
37
loghardlimit
File operations that result in exceeding a user’s hard limit are logged in the
system event log.
nologhardlimit
File operations that result in exceeding a user’s hard limit are not logged.
logsoftlimit
File operations that result in exceeding a user’s soft limit are logged in the
system event log.
nologsoftlimit
File operations that result in exceeding a user’s soft limit are not logged.
enforcehardlimit
File operations that will result in exceeding a user’s hard limit are denied.
noenforcehardlimit
File operations that will result in exceeding a user’s hard limit are allowed.
sparse-fullcost
Quota accounting for sparse files reflects the virtual size of the files.
sparse-realcost
Quota accounting for sparse files reflects the actual allocation of filesystem
space to the files.
psfsinfo.exe – report filesystem information
Synopsis
tools\psfsinfo [--feature <feature>] [--version] [--verbose]
<device> ...
Description
The psfsinfo command reports information about the filesystem. With no
options, the information includes the size of the filesystem, the block size, the
version of the filesystem, and whether the disk quota or Full Zone Bit Map
features are enabled.
The device can be specified in several ways:
• By the drive letter, such as X:
• By the mount point (junction), such as C:\san\vol2
Chapter 2: HP Clustered File System Commands
38
• By the psd or psv name, such as psd2p2 or psv1
You do not need to specify the full path name. A name such as psd2p2 or
psv1 will work.
The options are:
--feature <feature>
Report whether the specified feature is enabled in the filesystem indicated
by <device>. The command can test for the following features.
FZBM – the Full Zone Bit Map feature
QUOTA – the disk quota feature
If the feature is enabled, the name of the feature will be displayed. If the
feature is not enabled, “<FEATURE>=0” will be reported. (You can use the
--help option to list the features that can be tested.)
This option also reports the exit value:
– 0 – enabled
– 1 – not enabled
– 2 – could not open or read disk
– 3 – a bad argument was specified
--version
Display the version of the on-disk filesystem format.
--verbose, -v
Enable verbose messages.
psfslabel.exe – label a filesystem
Synopsis
bin\psfslabel <device> “<label>”
Description
The psfslabel command adds a label to the specified device.
Chapter 2: HP Clustered File System Commands
39
psfsquota.exe – manage disk quotas
Synopsis
bin\psfsquota [<options>] <device>
Description
The psfsquota command can be used to enable or disable quotas on a
filesystem and to set quota options.
device is a psd or psv device and can be specified in several ways:
• By the drive letter, such as X:
• By the mount point (junction), such as C:\san\vol2
• By the psd or psv name, such as psd2p2 or psv1
You do not need to specify the full path name. A name such as psd6p4 or
psv1 will work.
The options are:
--enable-quotas
Build the quota infrastructure on the specified filesystem. The psfsquota
utility then examines the existing files and stores current allocations for
each user and group owning a file on the filesystem.
--disable-quotas
Disable quotas on the filesystem and free the associated blocks.
--set-dq <size>[T|G|M|K]
Set the default hard quota on the specified filesystem. The optional
modifiers specify that the size is in terabytes (T), gigabytes (G), megabytes
(M), or kilobytes (K). If a modifier is not specified, the size will be
calculated in bytes. (The default is rounded down to the nearest filesystem
block.)
--set-sdq <size>[T|G|M|K]
Set the default soft quota on the specified filesystem. The optional
modifiers specify that the size is in terabytes (T), gigabytes (G), megabytes
(M), or kilobytes (K). If a modifier is not specified, the size will be
calculated in bytes. (The default is rounded down to the nearest filesystem
block.)
Chapter 2: HP Clustered File System Commands
40
--rebuild-quotas
Recalculate quota allocations.
-y
Answer “yes” to all questions.
The following options can be used with the --enable-quotas option:
--staticdq
Quota limits for new users are copied from the default quota values set for
the filesystem.
--dynamicdq
Quota limits for new users are linked from the default quota values set for
the filesystem. If the default quota values are changed, the users’ quota
limits will also change.
--enforce-hardlimit
File operations that will result in exceeding a user’s hard limit are denied.
--no-enforce-hardlimit
File operations that will result in exceeding a user’s hard limit are allowed.
--log-hardlimit
File operations that result in exceeding a user’s hard limit are logged in the
system event log.
--no-log-hardlimit
File operations that result in exceeding a user’s hard limit are not logged.
--log-softlimit
File operations that result in exceeding a user’s soft limit are logged in the
system event log.
--nologsoftlimit
File operations that result in exceeding a user’s soft limit are not logged.
--enforcehardlimit
File operations that will result in exceeding a user’s hard limit are denied.
--noenforcehardlimit
File operations that will result in exceeding a user’s hard limit are allowed.
--sparse-fullcost
Quota accounting for sparse files reflects the virtual size of the files.
Chapter 2: HP Clustered File System Commands
41
--sparse-realcost
Quota accounting for sparse files reflects the actual allocation of filesystem
space to the files.
The following example enables quotas on volume psv1 and sets the default
hard limit to 20 gigabytes.
psfsquota --enable-quotas --set-dq 20G psv1
psfsresize.exe – resize a filesystem
Synopsis
bin\psfsresize
Description
The HP Management Console includes an option to increase the size of a
PSFS filesystem and the partition on which it is located. When this option is
used, HP Clustered File System runs the psfsresize command to grow the
PSFS filesystem on the expanded partition. This command is not intended to
be run directly.
psfsresume.exe – resume a suspended filesystem
Synopsis
bin\psfsresume <mountpoint>
Description
The psfssuspend and psfsresume utilities affect the specified filesystem on
all servers where it is mounted; however, the utilities should be executed on
only one server in the cluster.
When you have completed your work with the suspended filesystem, use the
psfsresume utility to resume the filesystem. Issue the command from the
server where you executed psfssuspend.
Following are some examples:
psfsresume X:
psfsresume c:\psfs_mount\
Chapter 2: HP Clustered File System Commands
42
NOTE: If an attempt to mount the copied filesystem fails with an “FSID
conflict” error, run the following command. In the command, <device>
is the partition that contains the copied filesystem, and <label> is the
name that should be used to identify the filesystem.
psfslabel <device> “<label>”
psfsrq.exe – restore quota data
Synopsis
bin\psfsrq [-f <path>] <filesystem>
Description
The psfsrq command restores the quota data generated by the psfsdq
command to the specified PSFS filesystem.
The -f option specifies the file that psfsrq should read to obtain the quota
data. If this option is not specified, psfsdq reads from stdin. filesystem is the
psd or psv device used for the filesystem.
The psfsdq and psfsrq commands should be run in conjunction with the
standard filesystem backup utilities, as those utilities do not save the quota
limits set on the filesystem.
psfssuspend.exe – suspend a filesystem
Synopsis
bin\psfssuspend <mountpoint>
Description
The psfssuspend utility suspends a PSFS filesystem in a stable, coherent, and
unchanging state. While the filesystem is in this state, you can copy it for
backup and/or archival purposes. When copying directly from a suspended
device, be sure to use the raw device (/dev/rpsd/...) to ensure that all blocks
copied are up-to-date.
The filesystem is essentially unusable while it is suspended; however,
applications that can tolerate extended waits for I/O do not need to be
terminated.
Chapter 2: HP Clustered File System Commands
43
The psfsresume utility restores a suspended filesystem. The psfssuspend and
psfsresume utilities affect the specified filesystem on all servers where it is
mounted; however, the utilities should be executed on only one server in the
cluster.
To suspend a filesystem, issue a command in the following form on one
server that has mounted the filesystem.
psfssuspend <mountpoint>
The following example uses a drive letter to identify the filesystem:
psfssuspend X:
The next example uses a mount path:
psfssuspend c:\psfs_mount\
The psfssuspend command prevents modifications to the filesystem and
forces any changed blocks associated with the filesystem to disk. The
command performs these actions on all servers that have mounted the
filesystem and then returns successfully.
Any process attempting to modify a suspended filesystem will block until the
filesystem is resumed. These blocked processes may hold resources, thereby
causing other processes to block waiting on these resources.
psfsunpack.exe – unpack a filesystem image
Synopsis
tools\psfsunpack
Description
This command should be run only under the direction of HP personnel.
psvctl.exe – manage dynamic volumes
Synopsis
tools\psvctl
Description
This command should be run only at the request of HP personnel.
Chapter 2: HP Clustered File System Commands
44
registry.exe – dump registry contents
Synopsis
tools\registry.exe
Description
This command is used internally by the mxcollect utility and should not be
run directly.
sandiskinfo.exe – show disk or LUN information
Synopsis
bin\sandiskinfo [-i|-u|-v|-f] [-alr] [-U] [-q][--subdevices]
[--dynvolumes] [--dynvol_properties [volname]]
Description
The sandiskinfo command can display information for both imported and
unimported SAN disks (or LUNs) and also for dynamic volumes. Under
normal operations, the sandiskinfo output should be the same on all servers
in the cluster.
Disk information
With no options, sandiskinfo displays the UID, vendor, model, and capacity
of each imported disk and specifies the FC switch used to access the disk.
Disk: \\.\Global\psd2
Uid:
20:00:00:04:cf:13:38:3a::0
Vendor:
SEAGATE
SAN info: fcswitch5:7
Capacity: 34733M
Following are commonly used options for imported and unimported disks:
sandiskinfo [-i|-u|-v|-f] [-alr] [-U] [-q]
The options are:
-i
Display information for imported disks (the default).
-u
Display information for unimported disks.
-v
Display available volumes.
-f
Display PSFS filesystem volumes.
Chapter 2: HP Clustered File System Commands
-a
Display all information; for -v, display all known volumes.
-l
Additionally display host-local device name.
-r
Additionally display local device route information.
-U
Display output in the format used by the HP Management
Console. This option is used internally by HP Clustered File
System and does not produce human-readable output.
-q
Suppress output of all log messages.
45
Following are some examples of these options.
Show partition information
The -a option also lists the partitions on each disk. When combined with -u, it
displays partition information for unimported disks.
sandiskinfo -a
Disk: \\.\Global\psd1
(Membership Disk)
Uid:
20:00:00:04:cf:13:38:18::0 SAN info: fcswitch5:7
Vendor:
SEAGATE Capacity: 34733M
partition 01: size
16M type
(PSMP/Active)
partition 02: size
9398M type
(PSMP/Inactive)
partition 03: size
16M type
(PSMP/Inactive)
partition 04: size
9421M type
partition 05: size
16M type
partition 06: size
9421M type
(PSFS Filesystem)
partition 07: size
1028M type
partition 08: size
1028M type (unknown)
Disk: \\.\Global\psd2
Uid:
20:00:00:04:cf:13:38:3a::0 SAN info: fcswitch5:7
Vendor:
SEAGATE Capacity: 34733M
partition 01: size
9M type
(PSMP/Active)
partition 02: size
097M type
(PSFS Filesystem)
partition 03: size
97M type
(PSFS Filesystem)
partition 04: size
9220M type (unknown)
Show local device information
The -l option displays the local device name for each disk or LUN, as well as
the default disk information. When combined with -u, it displays local device
names for unimported disks or LUNs.
sandiskinfo -al
Disk: \\.\Global\psd1
(Membership Disk)
Uid:
20:00:00:04:cf:13:38:18::0 SAN info: fcswitch5:7
Vendor:
SEAGATE Capacity: 34733M
Chapter 2: HP Clustered File System Commands
46
Local Device Paths: \\.\Global\PhysicalDrive3
partition 01: size
16M type
(PSMP/Active)
partition 02: size
9398M type
(PSMP/Inactive)
partition 03: size
16M type
(PSMP/Inactive)
partition 04: size
9421M type
partition 05: size
16M type
partition 06: size
9421M type
(PSFS Filesystem)
partition 07: size
1028M type
partition 08: size
1028M type (unknown)
Disk: \\.\Global\psd2
Uid:
20:00:00:04:cf:13:38:3a::0 SAN info: fcswitch5:7
Vendor:
SEAGATE Capacity: 34733M
Local Device Paths: \\.\Global\PhysicalDrive4
partition 01: size
9M type
(PSMP/Active)
partition 02: size
4097M type
(PSFS Filesystem)
partition 03: size
4097M type
(PSFS Filesystem)
partition 04: size
9220M type (unknown)
Show filesystem information
The -f option displays existing PSFS filesystems on imported disks.
Show available volumes
The -v option lists available volumes on imported disks or LUNs. These
volumes are not currently in use for a PSFS filesystem or a membership
partition.
sandiskinfo -v
Volume: \\.\Global\psd1p2
Disk=20:00:00:04:cf:13:38:18::0
Volume: \\.\Global\psd1p3
Disk=20:00:00:04:cf:13:38:18::0
Volume: \\.\Global\psd1p4
Disk=20:00:00:04:cf:13:38:18::0
Volume: \\.\Global\psd1p5
Disk=20:00:00:04:cf:13:38:18::0
Volume: \\.\Global\psd1p7
Disk=20:00:00:04:cf:13:38:18::0
Volume: \\.\Global\psd1p8
Disk=20:00:00:04:cf:13:38:18::0
Volume: \\.\Global\psd2p4
Disk=20:00:00:04:cf:13:38:3a::0
Size:
9398M (PSMP/Inactive)
partition=02 type=
Size:
16M (PSMP/Inactive)
partition=03 type=
Size:
9421M
partition=04 type=
Size:
16M
partition=05 type=
Size:
1028M
partition=07 type=
Size:
1028M
partition=08 type=(unknown)
Size:
9220M
partition=04 type=(unknown)
When combined with -a, the -v option lists all volumes, including those used
for PSFS filesystems and membership partitions.
Chapter 2: HP Clustered File System Commands
47
Options for dynamic volumes
The following sandiskinfo options apply only to dynamic volumes.
Show available subdevices
The --subdevices option lists subdevices that are available for use in
constructing a dynamic volume.
sandiskinfo --subdevices
Subdevice:
Subdevice:
Subdevice:
Subdevice:
Subdevice:
Subdevice:
Subdevice:
Subdevice:
Subdevice:
20:00:00:04:cf:13:38:18::0/2
20:00:00:04:cf:13:38:18::0/7
20:00:00:04:cf:13:38:18::0/8
20:00:00:04:cf:13:38:18::0/9
20:00:00:04:cf:13:38:18::0/10
20:00:00:04:cf:13:38:18::0/11
20:00:00:04:cf:13:38:18::0/12
20:00:00:04:cf:13:38:18::0/13
20:00:00:04:cf:13:38:18::0/14
Size:
Size:
Size:
Size:
Size:
Size:
Size:
Size:
Size:
1950M
490M
490M
490M
490M
490M
490M
490M
490M
psd1p2
psd1p7
psd1p8
psd1p9
psd1p10
psd1p11
psd1p12
psd1p13
psd1p14
Show dynamic volumes
The --dynvolumes option lists all dynamic volumes.
sandiskinfo --dynvolumes
Dynamic Volume: psv1
Dynamic Volume: psv2
Dynamic Volume: psv3
Size:
Size:
Size:
2439M
490M
490M
Stripe=Unstriped
Stripe=Unstriped
Stripe=Unstriped
Show properties for dynamic volumes
The --dynvol_properties [volname] option lists detailed properties for the
specified dynamic volumes. volname is the psv name, such as psv2. If this
option is omitted, the properties for all dynamic volumes are displayed.
sandiskinfo --dynvol_properties
Dynamic Volume: psv1
Size:
2439M Stripe=Unstriped
Subdevice: 20:00:00:04:cf:13:38:18::0/5
Size:
490M psd1p5
Subdevice: 20:00:00:04:cf:13:38:18::0/2
Size: 1950M psd1p2
Dynamic Volume: psv2
Size:
490M Stripe=32K/optimal
Subdevice: 20:00:00:04:cf:13:38:18::0/7
Size: 490M
psd1p7
Dynamic Volume: psv3
Size:
490M Stripe=8K/optimal
Subdevice: 20:00:00:04:cf:13:38:18::0/10
Size: 490M
psd1p10
Chapter 2: HP Clustered File System Commands
48
Display unimported dynamic volumes
The following options can be used to display information about unimported
dynamic volumes:
--unimported-volumes
Lists dynamic volumes that are currently unimported.
--importable-volumes
Lists unimported dynamic volumes that can be imported into the cluster.
--unimportable-volumes
Lists unimported dynamic volumes that cannot be imported into the
cluster.
scsf.exe – shadow copies of shared folders
Synopsis
bin\scsf
Description
This command is used internally by HP Clustered File System and should
never be run directly.
sdmp.exe, sdmp_ctl.exe – protect filesystem
integrity
Synopsis
bin\sdmp
bin\sdmp_ctl
Description
These processes are used by the SanPulse process to ensure that filesystem
corruption does not occur when a communications network failure causes
some servers in a cluster to be unable to communicate with other servers.
These processes are used internally by HP Clustered File System and should
never be run directly.
Chapter 2: HP Clustered File System Commands
49
sentinels.exe – show service dependencies
Synopsis
bin\sentinels
Description
This command is used internally by HP Clustered File System and should
never be run directly.
smds.exe – show UI status
Synopsis
tools\smds
Description
This command should be run only at the request of HP personnel.
snapctl – manage snapshot operations
Synopsis
bin\snapctl
Description
This command is used internally by HP Clustered File System and should not
be run directly.
snmpget, snmpset, snmpwalk – SNMP utilities
These utilities are provided as a convenience.
spctl.exe – dump the SanPulse trace buffer
Synopsis
tools\spctl -l
Description
This command should be run only at the request of HP personnel.
Chapter 2: HP Clustered File System Commands
spdebug.exe – obtain SanPulse debugging
information
Synopsis
tools\spdebug
Description
This command should be run only at the request of HP personnel.
spstat.exe – show cluster state information
Synopsis
tools\spstat
Description
This command should be run only at the request of HP personnel.
wmtest.exe – test server-based fencing
Synopsis
tools\wmtest
Description
This command is used for testing purposes and should be run only at the
request of HP personnel.
50
3
mx Commands
The mx utility provides a command-line interface for administering a cluster
and monitoring its operation.
The matrixrc file
HP Clustered File System can use an optional, external configuration file
named .matrixrc to provide authentication information for cluster
connections. If the file is configured, it will be used when you connect to a
cluster through either the Connect window or the mx command.
The file is created automatically the first time that you add a bookmark on the
Connect window. When you connect to a different server, an entry will be
added for that server if you add the connection to your bookmarks. If you use
only the Connect window to connect to the cluster, you should not need to do
any manual configuration of the .matrixrc file. If you use the mx command
line and you want to use the .matrixrc file, you may want to review mx the
following information.
Format of the .matrixrc file
The matrixrc file optionally specifies user names and passwords for each
server that you want to access. The default location for the file is
%userprofile%\.matrixrc. For security reasons, the file should be readable only
by the owner.
The entries in the matrixrc file have this format:
machine
user
password
default
51
Chapter 3: mx Commands
52
• The first field, machine, is either the name or IP address of the server.
• The second field, user, is optional. It is the name of a user on that server or
the name of a user on a domain to which the server belongs (for example,
mydomain\john).
• The third field is also optional and contains the HP Clustered File System
password for that user. The password is encrypted automatically when you
use the HP Clustered File System Connect window to specify the
password. A utility is also available to encrypt the password. (See
“Encrypted passwords in the .matrixrc file” on page 54.)
• The fourth field, default, specifies that this server will be connected to by
default if a server name is not specified on the command line. Specifying a
default server is optional in HP Clustered File System 3.2.x and later
releases.
Blank lines and lines beginning with a # character are ignored.
Notes regarding the .matrixrc file
When working with the .matrixrc file, you should be aware of the following:
• When editing the .matrixrc file by hand, you need to put quotation marks
around user names or passwords that contain spaces. If there are
backslashes or quotation marks inside the quotation marks, they must be
escaped with the backslash character. For example, if the password is
fr”12 \ad, enter it as “fr\”12 \\ad”. When saving a bookmark on the HP
Clustered File System Connect dialog, the escape characters are added
automatically as necessary.
• Comments can be lost when the .matrixrc file is edited via the HP
Clustered File System Connect dialog.
• In HP Clustered File System releases earlier than 3.x, the mx command
cannot interpret encrypted passwords. If you are using mx and connect to
a cluster running one of these versions of HP Clustered File System, you
will be asked whether you want HP Clustered File System to create a
temporary .matrixrc file that contains clear passwords. The temporary file
will be deleted when the mx command is complete.
Chapter 3: mx Commands
53
Specify servers in the .matrixrc file
If you need to control which server is used for the mx connection, list the
servers individually in the matrixrc file or use the mx --matrix command-line
option. If any server can be used for the connection, you can group the
servers.
List servers individually
Add a line to the file for each server for which you want mx access and
specify the appropriate username and password. This example specifies that
srv3 is the default.
srv1
srv2
srv3
administrator
administrator
administrator
secret1
secret1
secret2
default
When you issue a mx command without specifying a server name, as in the
following example, it connects to the machine specified as the default in the
.matrixrc file.
mx server status
To connect to a different server, include the --matrix option and specify the
server name on the command line. For example, the following command
connects to server acme1 as user admin using the password secret1.
mx --matrix srv1 server status
Use wildcards
You can use wildcards in the .matrixrc file to match machine names:
srv3
srv*
administrator
administrator
secret1
secret1
default
In the following command, --matrix srv8 matches the wildcard. When the
--matrix option is not specified, the connection is made to srv3, the default;
the machine specified as the default cannot contain a wildcard.
mx --matrix srv8 server status
If you specify any server names in addition to the wildcard, the wildcard
must be at the end of the list of servers as in the above example. The wildcard
matches servers according to the order in which they are listed in the file and
can mask other entries that appear below it in the list.
Chapter 3: mx Commands
54
Group servers
This method allows mx to connect to any available server in the cluster
without the need to specify a server name on the command line. To use this
method, enclose the server entries in brackets, as in the following example for
the prod cluster.
# production cluster
prod {
srv1 administrator secret1
srv2 administrator secret1
srv3 administrator secret1 default
}
To connect to the cluster, include the option --matrix prod in the mx
command. mx first attempts to access srv3, the default. If that server is not
available, the command tries the other servers in the group.
If your servers mostly use the same username and password, to simplify
configuring the .matrixrc file, you can specify those values following the
cluster name. You then only need to specify the values if they are different for
a particular server.
In the following example, the values “administrator,” “secret1,” and
“default” are specified. The “default” value tells mx to first attempt to connect
to the default server, and then try the other servers in the list. If “default” is
omitted, the mx command will attempt to connect to the servers in the order
that they are specified in the list.
# production cluster
prod administrator secret1 default {
srv1
srv2
srv3 administrator secret1 default
srv4 administrator secret2
}
Encrypted passwords in the .matrixrc file
Passwords are encrypted automatically when you use the HP Clustered File
System Connect window to specify the password. You can also use the
mxgenpass.exe command to create encrypted passwords for use in the
.matrixrc file. (Using encrypted passwords is optional.) The command is in the
installation directory, which is typically %SystemDrive%\Program Files\.
Chapter 3: mx Commands
55
The mxgenpass.exe command asks for a password and then displays the
encrypted version:
mxgenpass.exe
Enter password:
06c684c5:8cCRCT1aVCjzWb/TL7IHThBmrgY1wkBV6pElkzNr7ZI=
Replace the password in the .matrixrc file with the encrypted password. For
example, you could encrypt the password (secret1) for the entry:
srv1 administrator secret1
Then specify the encrypted password in the password field:
srv1 administrator
06c684c5:8cCRCT1aVCjzWb/TL7IHThBmrgY1wkBV6pElkzNr7ZI=
mx syntax
The mx utility is in the installation directory, which is typically
%SystemDrive%\Program Files\\bin.
The mx utility has the following syntax:
mx [mx_options] class command [command_options]
The mx_options affect an entire mx command session. The options are:
--help
Displays a command summary.
--matrix <hostname>
Specifies the cluster that you want to connect with. cluster can be any node in
the cluster.
--config <file>
Specifies an alternate configuration file to be consulted for server, user, and
password information. The file must have the same format as matrixrc.
--file <file>
Executes the commands from the specified file. If you specify – instead of a
file, the commands will be read from standard input. You can also specify
--continue to tell mx to continue processing the batch file if an error occurs.
Chapter 3: mx Commands
56
--prompt <prompt>
Specifies the prompt string that will be printed when mx is ready for another
command. This option is useful when you initiate an interactive session with
the option --file -. For example, if you invoke an interactive session with the
following command, mx will print a % prompt when it completes a
command.
mx --prompt ’%’ --file –
--numeric
Causes hosts to be specified by their numeric IP addresses instead of by their
hostnames.
--user <username>
Specifies the user to be logged in.
--password <password>
Specifies the user’s password.
Class syntax
The mx utility can configure and monitor these classes of cluster objects.
Specify --help to see a short command synopsis for each class
Class
Cluster Object
account
Operating system accounts specified in management roles
alert
HP Clustered File System alert messages
application
A grouping of HP Clustered File System resources (virtual
hosts, service and device monitors)
config
Initial cluster configuration
config mp
Membership partition configuration
config snapshot
Snapshot method configuration
device
Device monitor
disk
SAN disk
dynvolume
Dynamic volume
eventnotifier
Event notification service
fs
PSFS filesystem
matrix
The entire cluster
mfs
Cluster File Share
mni
Multi-Node Installer for SQL instances
Chapter 3: mx Commands
Class
Cluster Object
netif
Network interface
quota
Disk quota
role
Management roles for cluster operations
server
Server
service
Service monitor
snapshot
Snapshot
vfs
Virtual CIFS Server
vfs_share
Virtual File Share
vhost
Virtual host
vsql
Virtual SQL Server
vsqlinstance
Virtual SQL Server instance
57
To specify a command affecting a class, use this syntax:
mx <class> <command> <arguments>
For example, this command displays the status of servers that are up:
mx server status --up
mx account – account management commands
Use the following mx account commands to manage user and group accounts
that belong to management roles.
Command
Description
assignrole
Assign a role to an account
listroles
List the roles assigned to an account
removerole
Remove a role from an account
assignrole—Assign a role to an account
mx account assignrole --form <ID|NAME> --type <GROUP|UNKNOWN|USER>
<account> <role> ...
This command associates a role with a specific user or group account. The
user or group will be granted the cluster authorization assigned to the role.
Chapter 3: mx Commands
58
The options are:
--form <ID|NAME>
Whether the account is specified by name or ID. The default is NAME.
--type <GROUP|UNKNOWN|USER>
Whether the account is for a user or group, or is unknown. The default is
GROUP.
listroles—List the role memberships of an account
mx account listroles [--form <ID|NAME>] [--type
<GROUP|UNKNOWN|USER>] [--effective] [--noHeaders] [--csv]
[--showBorder] [<account>]
This command lists the roles to which the account belongs. To show
information for the current user, omit the account parameter.
The options are:
--type <GROUP|UNKNOWN|USER>
Whether the account is for a user or group, or is unknown. The default is
GROUP.
[--form <ID|NAME>]
Whether the account is specified by name or ID. The default is NAME.
[--effective]
Display the effective rights for the account. This option can be used only with
the account that is authenticated to run the command. You can view only
your own effective rights.
[--noHeaders]
Do not display column headers in the output.
[--csv]
Display the output in comma-separated value format.
[--showBorder]
Show a table border in the output.
removerole—Remove a role from an account
mx account removerole --form <ID|NAME> --type <GROUP|UNKNOWN|USER>
<account> <role> ...
Chapter 3: mx Commands
59
This command removes the specified role from a specific user or group
account. The user or group will no longer have the cluster authorization
assigned to the role.
The options are:
--type <GROUP|UNKNOWN|USER>
Whether the account is for a user or group, or is unknown. The default is
GROUP.
--form <ID|NAME>
Whether the account is specified by name or ID. The default is NAME.
mx alert – cluster alert commands
Use the following command to view HP Clustered File System alerts.
alert—Display all outstanding alerts
mx alert status [--severity <values>] [--noHeaders] [--csv]
[--showborder]
The options are:
[--severity <values>]
Filters the alerts according to the specified alert level. The levels are: INFO,
WARNING, ERROR, CRITICAL. If you specify more than one alert level, use
commas to separate the levels.
[--noHeaders]
Do not display column headers in the output.
[--csv]
Display the output in comma-separated value format.
[--showborder]
Display borders in the output.
mx application – application commands
Use the following mx application commands to manage HP Clustered File
System applications.
Command
Description
disable
Disable an application
enable
Enable an application
Chapter 3: mx Commands
Command
Description
rename
Rename an application
status
Show the status of applications
60
disable—Disable an application
mx application disable <application_name> <server>
enable—Enable an application
mx application enable <application_name> <server>
rename—Rename an application
mx application rename <current_name> <new_name>
status—Show status for an application
mx application status [--severity OK|WARNING|ERROR] [<application> ...]
mx config – cluster configuration commands
Use the following mx config commands to configure the cluster.
NOTE: If you are performing the initial configuration of a cluster, the mx
config, mx config mp, and mx config snapshot commands must be
entered in a specific order. See Appendix A in the HP StorageWorks
Clustered File System Installation Guide for more information.
Command
Description
check
Check the cluster configuration
description
Set the cluster description
dump
Dump the cluster configuration
export
Export the cluster configuration
fcfencing
Select FibreChannel as the fencing method
fcswitch
Configure a FibreChannel switch into the cluster
import
Import the cluster configuration
license
Install the cluster license
list
Get the cluster configuration
protocol
Set the administrative traffic protocol
santest
Test the switch configuration
Chapter 3: mx Commands
Command
Description
santype
Set the SAN storage type
secret
Set the cluster secret license key
testfencing
Test the fencing configuration
webfencing
Configure the web-based fencing module
61
check—Check the cluster configuration
mx config check
This command specifies whether cluster components are configured or
unconfigured. It does not verify that components are configured correctly. To
see the state of each component, use commands such as mx config list and
mx config mp list. This command can be used when the cluster is either
online or offline.
description—Set the cluster description
mx config description <description>
The description can contain up to 80 characters. This command can be used
only during the initial configuration of the cluster or when the cluster is
online.
dump—Dump the cluster configuration
mx config dump
This command can be used when the cluster is either online or offline.
export—Export the cluster configuration
mx config export <server> ...
This command can be used when the cluster is either online or offline.
fcfencing—Set FibreChannel as the fencing method
mx config fcfencing
This command can be used only when the cluster is offline.
fcswitch—Configure a FibreChannel switch into the cluster
mx config fcswitch [--community <string>] <switch> ...
Chapter 3: mx Commands
62
This command can be used only when the cluster is offline. If you set
FibreChannel as the fencing method, you must also configure the
FibreChannel switches connected to the cluster. This step is optional for
web-based fencing.
The default SNMP community string for HP Clustered File System is private.
If you want to use a custom community string, use the --community option to
enter the appropriate value. The SNMP community string must be set to the
same value on HP Clustered File System and on the SAN switches.
import—Import the cluster configuration
mx config import <server>
This command can be used when the cluster is either online or offline.
license—Set the cluster license file
mx config license <file name>
<file name> specifies the location of the HP Clustered File System license file.
This command can be used when the cluster is either online or offline.
list—Get the cluster configuration
mx config list [--bladeslot] [--fence_module] [--description]
[--hostname] [--hostsuffix] [--ipdelta] [--license] [--mixedvendor]
[--os] [--mps] [--protocol] [--santype] [--servers] [--sharedlogin]
[--snapshots] [--status] [--switches] [--type] [--ruser] [--vendor]
This command can be used when the cluster is either online or offline. With
no options, the command displays the entire cluster configuration. You can
use the options to limit the output to certain components. The options return
the following information:
[--bladeslot]
For the IBM Blade Center only, the blade slot.
[--fence_module]
The currently configured fencing module (FibreChannel or web-based).
[--description]
The description assigned to this cluster.
[--license]
The current license.
Chapter 3: mx Commands
63
[--os]
The name of the operating system.
[--mps]
The current membership partitions.
[--protocol]
The current administrative traffic protocol (either Multicast or Unicast).
Multicast is the default.
[--santype]
The current storage type (either FibreChannel or iSCSI).
[--servers]
The servers currently in the cluster.
[--snapshots]
The snapshots currently in the cluster.
[--status]
The current status of the cluster (STARTING, RUNNING, STOPPING, or
STOPPED).
[--switches]
The FibreChannel switches currently configured in the cluster.
The following options apply only when web-based fencing is used:
[--hostname]
The hostname for the Remote Management Controller.
[--hostsuffix]
The Remote Management Controller ID hostname suffix.
[--ipdelta]
The Remote Management Controller IP delta.
[--mixedvendor]
Whether the vendor and type settings apply to all servers.
[--ruser]
The login name for the Remote Management Controller.
[--sharedlogin]
Whether the login for the Remote Management Controller is shared by all
servers.
Chapter 3: mx Commands
64
[--type]
The fencing action (reset or shutdown).
[--vendor <vendor>]
The remote management controller vendor (dell, hp, ibm, or ipmi).
protocol—Set the administrative traffic protocol:
mx config protocol [Multicast|Unicast]
This command can be used only when the cluster is offline. Specify Multicast
or Unicast as appropriate.
santest—Test the switch configuration
mx config santest --santype [fc|iscsi] <switch> ...
This command can be used only when the cluster is offline. <santype> is either
fc for FibreChannel or iscsi for iSCSI.
santype—Set the SAN storage type:
mx config santype [fc|isci]
This command can be used only when the cluster is offline. Specify the
appropriate type, either fc for FibreChannel or iscsi for iSCSI. The default is
fc.
secret—Set the network secret license key:
mx config secret <alphanumeric key>
This command can be used when the cluster is either online or offline. The
key can be anything you want.
testfencing—Test the fencing configuration
mx config testfencing <server> ...
This command can be used when the cluster is either online or offline.
webfencing—Configure the web-based fencing module
mx config webfencing --ruser <user name> --vendor <vendor>
--mixedvendor yes|no --hostname <name>|--hostsuffix <suffix>
|--ipdelta <delta> [--type reset|shutdown] [--bladeslot <slot>]
[--sharedlogin yes|no] [--rpassword <password>]
Chapter 3: mx Commands
65
This command can be used only when the cluster is offline. The options are as
follows. You will need toHP Clustered File System should identify the
Remote Management Controller associated with each server. Use the
appropriate option for your site (
[--bladeslot <slot>]
For IBM Blade Center only, the blade slot.
--hostname <host name>
The hostname for the Remote Management Controller associated with this
server. You will need to use this method if your Remote Management
Controllers are from different vendors.
--hostsuffix <host suffix>
The common suffix to append to each server name to determine the
associated Remote Management Controller name. For example, if your server
names are server1 and server2 and their Remote Management Controllers are
server1-iLO and server2-iLO, enter -iLO as the suffix.
--ipdelta <ip delta>
The delta to add to each server’s IP address to determine the IP addresses of
the associated Remote Management Controllers. For example, if your servers
are 1.255.200.12 and 1.255.200.15 and their Remote Management Controllers
are 1.255.201.112 and 1.255.201.115, enter 0.0.1.100 as the delta.
--mixedvendor yes|no
Whether the vendor and type settings apply to all servers.
[--rpassword <password>]
The password for the Remote Management Controller.
--ruser <user name>
The user name for the Remote Management Controller.
[--sharedlogin yes|no]
Whether the login is shared by all servers.
--type reset|shutdown
When a server needs to be restricted from the SAN, HP Clustered File System
can either power-cycle the server or shut it down. Select the method that you
want to use (either reset or shutdown).
Chapter 3: mx Commands
66
--vendor <vendor>
The vendor for your remote management controller (dell, hp, ibm, or ipmi).
mxconfig mp – membership partition commands
Use the following commands to manage membership partitions on an online or
offline cluster.
NOTE: If you are performing the initial configuration of a cluster, the mx
config, mx config mp, and mp config snapshot commands must be
entered in a specific order. See Appendix A in the HP StorageWorks
Clustered File System Installation Guide for more information.
Command
Description
dump
Dump the membership partition configuration
list
List the current membership partitions in a running or
stopped cluster
list_avail_disks
List disks that can be used for membership partitions
list_avail_partitions
List partitions that can be used for membership partitions
repair
Repair a membership partition
set
Add or replace membership partitions
In general, these commands can be used when HP Clustered File System is
online or offline. However, when HP Clustered File System is running, the set
and repair commands can be used only under the following circumstances:
• A disk containing a membership partition is out-of-service (use the set
command to move the partition to another disk).
• You need to move one or more membership partitions to different storage
(use the set command to move the partitions one-at-a-time).
• In a cluster with three membership partitions, when HP Clustered File
System started on a server, it reported that a single membership partition
was corrupt (use the repair command to resilver the partition or use set to
replace the partition).
• Your cluster contains a single membership partition and you want to add
two more partitions (use the set command).
Chapter 3: mx Commands
67
• While the cluster is running, two membership partitions are reported to be
corrupt (use the repair command to resilver the partitions or use set to
replace the partitions).
When performing other operations with the set or repair commands, HP
Clustered File System must be offline on all servers in the cluster.
dump—Dump the membership partition configuration to stdout
mx config mp dump
list—List the current membership partitions
mx config mp list [--physical]
The --physical option returns the size of the LUNs containing the
membership partitions. Without this option, the output reports the size of the
membership partitions (the “used” size). The “used” size should be the same
for all three membership partitions, but the physical size can vary and will
always be the same or larger than the “used” size.
list_avail_disks—List disks that can be used for membership partitions
mx config mp list_avail_disks [--noHeaders] [--csv] [--showborder]
The options are:
[--noHeaders]
Do not display column headers in the output.
[--csv]
Display the output in comma-separated value format.
[--showborder]
Display borders in the output.
list_avail_partitions—List partitions that can be used for membership partitions
mx config mp list_avail_partitions [--noHeaders] [--csv]
[--showborder] <disk uuid>
<disk uuid> is the disk that will be checked for available partitions. The options
are:
[--noHeaders]
Do not display column headers in the output.
[--csv]
Display the output in comma-separated value format.
Chapter 3: mx Commands
68
[--showborder]
Display borders in the output.
repair—Repair a membership partition
mx config mp repair [--reuse] <uuid>
This command can be used to resilver a corrupt membership partition. <uuid>
is the disk UID of the membership partition to be repaired. The --reuse option
allows disks that contain existing volume information to be reused. (The
existing data is destroyed.) The --reuse option is available only when the
cluster is offline.
set—Add or replace membership partitions
mx config mp set [--recreate] [--force] [--reuse] <uuid1/partno>
[<uuid2/partno> <uuid3/partno>]
A cluster can use either one or three membership partitions. <uuid1/partno> is
the uuid and partition number of the first membership partition;
<uuid2/partno> is the second membership partition, and <uuid3/partno> is the
third membership partition. The options are:
[--recreate]
Allow existing membership partition information to be destroyed.
[--force]
Force membership partition replacements to occur even if the partitions to be
replaced cannot be invalidated.
[--reuse]
Allow disks that contain existing volume information to be reused. (The
existing data is destroyed.)
mx config snapshot – snapshot method commands
Use the following mx config snapshot commands to manage snapshot
method.
Command
Description
add
Add a new snapshot method configuration
delete
Delete a snapshot method configuration
dump
Dump the snapshot configuration
list
List all existing snapshot method configurations
Chapter 3: mx Commands
Command
Description
showtype
Show available snapshot methods
test
Test an existing snapshot method configuration
69
add—add a new snapshot method configuration
mx config snapshot add --method <type> [--options <method options>]
The options are:
--method <type>
The supported types are hpeva and engenio.
[--options <method options>]
For hpeva, specify the following:
--hostname <hostname>
The hostname for the management appliance.
--username <username>
The user name required to access the management appliance.
--passwd <password>
The password required to access the management appliance.
For engenio, specify the following:
--controllerA <hostname or IP address>
The hostname or IP address for controllerA.
--controllerB <hostname or IP address>
The hostname or IP address for controllerB.
--passwd <password>
The password for the storage array controller.
The mx config snapshot showtype command also lists the options available
for your snapshot method.
delete—delete a snapshot method configuration
mx config snapshot delete --method <type> --hostname
<hostname>|--controllerA <IP_address>
The options are:
--method <type>
The supported types are hpev, and engenio.
Chapter 3: mx Commands
70
--hostname <hostname>|--controllerA <IP_address>
For hpeva, use the --hostname option to specify the hostname for the
management appliance. For engenio, use the --controllerA option to specify
the hostname or IP address for controllerA on the storage array.
list—list all existing snapshot method configurations
mx config snapshot list [--noHeaders] [--csv] [--showBorder]
The options are:
[--noHeaders]
Do not display column headers in the output.
[--csv]
Display the output in comma-separated value format.
[--showBorder]
Include a table border in the output.
showtype—show available snapshot methods
mx config snapshot showtype
test—test an existing snapshot method configuration
mx config snapshot test --method <type> --hostname <IP_address>|
--controllerA <hostname|IP_address>
The options are:
--method <type>
The supported types are hpeva and engenio.
--hostname <hostname>|--controllerA <hostname|IP_address>
For hpeva, use the --hostname option to specify the hostname for the
management appliance. For engenio, use the --controllerA option to specify
the hostname or IP address for controllerA on the storage array.
mx device – device monitor commands
Use the following mx device commands to configure device monitors or to
display their status.
Command
Description
add
Add a device monitor
clear
Clear device monitor error condition and alert
Chapter 3: mx Commands
Command
Description
delete
Remove a device monitor
disable
Disable a device monitor
dump
Dump the device monitor configuration
enable
Enable a device monitor
status
Show the status of device monitors
update
Modify the configuration of a device monitor
71
add—Add a device monitor
mx device add --type <type> --servers <server1>,<server2>,...
[arguments] <devicename>
--type specifies the type of device monitor to be created: CUSTOM, DISK,
GATEWAY, SHARED_FILESYSTEM, or NTSERVICE.
--servers specifies the server or servers that use the monitored device. The
<devicename> can include up to 32 characters.
The optional arguments are:
[--application <application>]
The application associated with this device monitor.
[--timeout <seconds>]
The maximum amount of time to wait for a probe of the device to complete.
For CUSTOM device monitors, the default is 60 seconds. For NTSERVICE device
monitors, the default is 15 seconds. For other device monitors, the default is
five seconds.
[--frequency <seconds>]
The interval at which the monitor probes the device. For GATEWAY device
monitors, the default is five seconds. For CUSTOM device monitors, the default
is 60 seconds. For other device monitors, the default is 30 seconds.
[--probeSeverity nofailover|autorecover|noautorecover]
The failover behavior for the monitor. nofailover prevents failover of virtual
hosts when the monitored device fails. autorecover fails over the virtual
hosts, and when the device is restored, fails the virtual hosts back to the
original network interfaces. noautorecover fails over the virtual hosts but
does not fail them back after the device is restored. The default is autorecover.
These settings work in combination with the virtual host’s failback policy.
Chapter 3: mx Commands
72
[--parameters <parameters>]
The available parameters depend on the type of monitor:
• DISK device monitor. The parameter is a partition on the disk. The
monitor will attempt to read the first block on this partition to determine
whether the disk is operating normally.
• GATEWAY device monitor. The IP address of the gateway device (such as
a router). The IP address must be on a different subnet than the servers
in the cluster.
• CUSTOM device monitor. The parameter is a probe script. The maximum
length of the pathname is 512 characters.
• SHARED_FILESYSTEM device monitor. The first parameter is the device
(for example, psd1p6) containing the filesystem to be monitored. The
second parameter is the name of a file that the monitor probe should
open and attempt to read to determine the health of the filesystem. The
filename should be relative to the mount point of the filesystem. When
the filesystem is mounted, the mountpath will be prepended to the
filename to determine the complete filename path that should be probed.
The second parameter is optional.
• NTSERVICE device monitor. Whether services dependent on the
monitored NT service should also be started when the NT service is
started (specify either Yes or No). If you want the services to be started,
you can also specify the number of attempts that should be made. Use a
semicolon to separate the values (for example, Yes;3).
[--ordering serial|parallel]
Whether HP Clustered File System enforces a strict ordering sequence when
it runs Start or Stop scripts. The default is serial, the strict ordering sequence.
[--recoveryScript <script>]
A script that runs after a monitor probe has failed. The script attempts to
restore the device. The script pathname can be up to 512 characters long.
[--recoveryTimeout <seconds>]
The amount of time to wait for the Recovery script to complete.
[--startScript <script>]
The Start script runs on the active server for a monitored device. The script
pathname can include up to 512 characters.
Chapter 3: mx Commands
73
[--stopScript <script>]
A script that runs on all other servers configured for the monitor to ensure
that the device is not active on those servers. The script pathname can include
up to 512 characters.
[--startTimeout <seconds>]
The amount of time to wait for the Start script to complete.
[--stopTimeout <seconds>]
The amount of time to wait for the Stop script to complete.
[--eventSeverity consider|ignore]
Whether HP Clustered File System takes device monitor events (such as a
failure or timeout of a Start or Stop script) into consideration when it makes
failover decisions. The default is consider.
[--probetype single|multiple]
Whether the monitor probe occurs on only one server or on all of the
configured servers.
[--activitytype single|always|multiple]
Whether the device monitor can be active on only one server or on all of the
configured servers. With single, the monitor is active on only one of the
selected servers. Upon server failure, the monitor will fail over to an active
server unless all associated service and device monitors are down.
With always, the monitor is active on only one of the selected servers. Upon
server failure, the monitor will fail over to an active server even if all
associated service and device monitors are down.
With multiple, the monitor is active simultaneously on all selected servers.
[--vhosts <vhost1>,<vhost2>,...]
The virtual hosts associated with the monitor. These virtual hosts will fail
over when the monitored device fails. The default is all virtual hosts on the
server(s) configured for the monitored device.
clear—Clear an error condition and the corresponding alert for a device monitor
mx device clear <devicename> <server> ...
delete—Delete a device monitor
mx device delete <devicename> ...
Chapter 3: mx Commands
74
disable—Disable a device monitor on a server
mx device disable <devicename> <server> ...
dump—Dump device monitor configuration to stdout
mx device dump
enable—Enable a device monitor on a previously disabled server
mx device enable <devicename> <server> ...
status—Display the status of a device monitor
mx device status [arguments] [<devicename> ...]
The arguments are:
[--up|--down]
[--enabled|--disabled]
[--primary|--backup]
[--active|--inactive]
[--showApplication]
With no arguments, the command displays status for all device monitors.
update—Modify a device monitor
mx device update [arguments] <devicename> ...
The arguments are the same as the device add command; however, the
--servers argument is not required and the monitor type cannot be changed.
mx disk – disk commands
Use the following mx disk commands to import SAN disks into a cluster, to
remove them from a cluster, or to display status information.
Command
Description
deport
Remove a disk from the cluster
dump
Dump disk configuration to stdout
import
Import a disk into the cluster
status
Display information about disks
deport—Remove a disk from the cluster
mx disk deport <uuid> ...
Use the disk status --imported command to determine the uuid for the disk.
Chapter 3: mx Commands
75
dump—Dump disk configuration to stdout
mx disk dump
import—Import a disk into the cluster
mx disk import <uuid> ...
Use the disk status command to determine the uuid for the disk.
This command does not display an error message if the import fails. To verify
that the disk was imported, use the mx disk status --imported command.
status—Display information about disks
mx disk status [--imported]
With no arguments, this command displays the uuid, the size, and a vendor
string for each unimported disk in the SAN. To see this information for
imported disks, include the --imported argument.
mx dynvolume – dynamic volume commands
Use the following mx dynvolume commands to manage dynamic volumes.
Command
Description
convert
Convert a basic device to a dynamic volume
create
Create a dynamic volume
deport
Deport a dynamic volume
destroy
Delete a dynamic volume
dump
Dump dynamic volume configuration to stdout
extend
Extend a dynamic volume
import
Import a dynamic volume
list
Show all dynamic volumes
properties
Display properties for a dynamic volume
showcreateopt
List subdevices available for use in a dynamic volume
convert—Convert a basic device to a dynamic volume
mx dynvolume convert <filesystem>
create—Create a dynamic volume
mx dynvolume create [--reuse] [--stripesize <4KB-64MB>]
<subDeviceName ...>
Chapter 3: mx Commands
76
You can use either spaces or commas to separate the subdevice names. The
--reuse option causes the operation to proceed even though a specified
partition may be associated with an unimported dynamic volume. The
operation will destroy the dynamic volume previously using the partition.
Be sure that you do not need the unimported dynamic volume before doing
this.
deport—Deport a dynamic volume
mx dynvolume deport <volumeName> ...
destroy—Delete a dynamic volume
mx dynvolume destroy <psv | volume GUID> ...
A filesystem cannot be mounted on the volume that will be deleted.
dump—Dump dynamic volume configuration to stdout
mx dynvolume dump
extend—Extend a dynamic volume
mx dynvolume extend [--reuse] <volumeName> <subDeviceName ...>
You can use either spaces or commas to separate the subdevice names. The
--reuse option causes the operation to proceed even though a specified
partition may be associated with an unimported dynamic volume. The
operation will destroy the dynamic volume previously using the partition.
Be sure that you do not need the unimported dynamic volume before doing
this.
import—Import a dynamic volume
mx dynvolume import <volumeGUID> ...
To obtain the <volumeGUID>, run the mx dynvolume list --importable
command. Locate the entry for the volume that you want to import. The
<volumeGUID> appears in the first column of the output.
list—Show all dynamic volumes
mx dynvolume list [--importable] [--unimportable] [--imported]
[--unimported] [--noHeaders] [--csv] [--showBorder]
The options are:
[--importable]
Chapter 3: mx Commands
Show all dynamic volumes that are available to be imported.
[--unimportable]
Show all dynamic volumes that cannot be imported.
[--imported]
Show all dynamic volumes that are currently imported.
[--unimported]
Show all dynamic volumes that are currently unimported.
77
Chapter 3: mx Commands
78
[--noHeaders]
Do not display column headers in the output.
[--csv]
Display the output in comma-separated value format.
[--showBorder]
Include a table border in the output.
properties—Display properties for a dynamic volume
mx dynvolume properties <volumeName>
showcreateopt—List subdevices available for use in a dynamic volume
mx dynvolume showcreateopt
mx eventnotifier – event notification commands
Use the following mx eventnotifier commands to manage event notification
services.
Command
Description
addevents
Add cluster event definitions to a notification service
configureemail
Configure the email event notification service
configurescript
Configure the script event notification service
configuresnmp
Configure the snmp event notification service
disable
Disable a notification service
enable
Enable the notification service
export
Export the event notification settings to a local file
import
Import the event notification settings from a local file
list
Show the event definitions in the event catalog
removeevents
Remove cluster event definitions from a notification service
restoreevents
Restore event definitions to the HP Clustered File System
defaults
test
Test an event notification service
viewconfig
View configuration of event notification services
addevents—Add cluster event definitions to a notification service
mx eventnotifier addevents [--snmp] [--email] [--script] <event IDs
or ID range>
Chapter 3: mx Commands
79
You can specify individual event IDs or a range of IDs to be added. Use
commas to separate the values, for example: 100, 300-400,555.
The options are:
[--snmp]
Add the specified event IDs to the SNMP notification service.
[--email]
Add the specified event IDs to the email notification service.
[--script]
Add the specified event IDs to the script notification service.
If none of the options are specified, the event IDs will be added to all
notification services.
configureemail—Configure the email notification service
mx eventnotifier configureemail --to <email_addresses> --smtpserver
<server_name or IP> [--from <email_address>] [--subject
<long|medium|short>] [--omitdesc] [--smtpport <port number>]
[--smtpuser <username>] [--smtppass <password>]
The options are:
--to <email_addresses>
The email addresses to which event notifier email should be sent. If multiple
addresses will be specified, use semicolons to separate the addresses.
--smtpserver <server_name or IP>
The name or IP address of the SMTP server.
[--from <email_address>]
The email address that will be specified as the sender of the notification
emails. If this option is not included, the server name will be used as the
sender.
[--subject long|medium|short]
The amount of information that will appear in the Subject line of the email.
The short argument prints only the event severity indicator such as [ERROR].
The default is medium, which prints the event severity indicator and the first
78 characters of the event message. long prints the event severity indicator
and the entire event message.
Chapter 3: mx Commands
80
[--omitdesc]
By default, the cluster description assigned to the cluster appears in the
source address for the email. For example, if the cluster description is Cluster
X and the --from <email address> is [email protected], the source address
for the email will be Cluster X [[email protected]]. The --omitdesc option
omits the cluster description from the source address. In this example, the
source address would be [email protected].
[--smtpport <port_number>]
The port to be used on the SMTP server. The default is port 25.
[--smtpuser <username>]
The username used to access the SMTP server. This option is needed only if
the server requires credentials.
[--smtppass <password>]
The password used to access the SMTP server. This option is needed only if
the server requires credentials.
configurescript—Configure the script notification service
mx eventnotifier configurescript --script <pathname>
The <pathname> specifies the full path of the script that should be run when an
event configured for the notifier occurs. If the script does not reside on a
shared filesystem, ensure that it is replicated to the specified path on all
servers.
configuresnmp—configure the SNMP trap event notification service
mx eventnotifier configuresnmp [--addtarget|--removetarget]
[--community <value>] <target>
The <target> is the hostname or IP address for the SNMP trap forwarding
target.
The options are:
[--addtarget]
Add a new SNMP trap forwarding target.
[--removetarget]
Remove an existing target.
[--community <value>]
The community string to be used for a new target. The default is private.
Chapter 3: mx Commands
81
disable—Disable an event notifier
mx eventnotifier disable [--snmp] [--email] [--script]
The options are:
[--snmp]
Disable the SNMP notification service.
[--email]
Disable the email notification service.
[--script]
Disable the script notification service.
If none of the options are specified, all notification services will be disabled.
enable—Enable an event notifier service
mx eventnotifier enable [--snmp] [--email] [--script]
[--snmp]
Enable the SNMP notification service.
[--email]
Enable the email notification service.
[--script]
Enable the script notification service.
If none of the options are specified, all notification services will be enabled.
export—Export the event notification settings to a local file
mx eventnotifier export <file.xml>
The exported settings include all of the event notifiers and their event
definition assignments. The file is written in XML format.
import—Import the event notification settings from a local file
mx eventnotifier import <file.xml>
The entries in the file must be in the format used by mx eventnotifier export.
The imported entries will replace the current event notification settings.
list—show the event definitions in the event catalog
mx eventnotifier list [--noHeaders] [--csv] [--showBorder]
Chapter 3: mx Commands
82
The options are:
[--noHeaders]
Do not display column headers in the output.
[--csv]
Display the output in comma-separated value format.
[--showBorder]
Add borders to the output.
removeevents—remove cluster event definitions from a notification service
mx eventnotifier removeevents [--snmp] [--email] [--script] <event
IDs or ID range>
You can specify individual event IDs or a range of IDs to be removed. Use
commas to separate the values, for example: 100, 300-400,555.
The options are:
[--snmp]
Remove the specified event IDs to the SNMP notification service.
[--email]
Remove the specified event IDs to the email notification service.
[--script]
Remove the specified event IDs to the script notification service.
If none of the options are specified, the event IDs will be removed from all
notification services.
restoreevents—Restore event definitions to the HP Clustered File System defaults
mx eventnotifier restoreevents [--snmp] [--email] [--script]
By default, HP Clustered File System configures the notification services with
certain event IDs. You can then use addevents or removeevents to customize
the notification services with the events that you want to track. The
restoreevents option removes your customizations and returns the event ID
configuration to the original HP Clustered File System settings.
The options are:
[--snmp]
Restore the SNMP notification service configuration to the HP Clustered File
System default settings.
Chapter 3: mx Commands
83
[--email]
Restore the email notification service configuration to the HP Clustered File
System default settings.
[--script]
Restore the script notification service configuration to the HP Clustered File
System default settings.
If none of the options are specified, the restore operation will apply to all of
the notification services.
test—Test an event notifier service
mx eventnotifier test [--snmp] [--email] [--script]
This command verifies that events can be sent to the specified notification
service. An error will be reported if the service is disabled or is not
configured.
The options are:
[--snmp]
Test the SNMP notification service.
[--email]
Test the email notification service.
[--script]
Test the script notification service.
If none of the options are specified, all notification services will be tested.
viewconfig—View the configuration of the event notification services
mx eventnotifier viewconfig [--snmp] [--email] [--script]
The options are:
[--snmp]
Display the configuration of the SNMP notification service.
[--email]
Display the configuration of the email notification service.
[--script]
Display the configuration of the script notification service.
Chapter 3: mx Commands
84
If none of the options are specified, the output will include the configuration
of all event notification services.
mx fs – filesystem commands
Use the following mx fs commands to create PSFS filesystems and to display
status information.
Command
Description
assignpath
Assign a drive letter or path to a filesystem
create
Create a PSFS filesystem
dump
Dump filesystem configuration to stdout
getdriveletters
Display drive letters in use on a server
queryassignments
Display drive letter or path assignments for a filesystem
recreate
Reformat a filesystem
showcreateopt
Display information about storage devices
status
Display status information
unassign
Unassign a drive letter or path
assignpath—Assign a drive letter or path to a filesystem
mx fs assignpath --path <path or driveletter> [--createdir] <ps
device> ALL_SERVERS | <server> ...
If a mount path is specified, the --createdir option can be used to create the
mount path if it does not already exist on each server.
create—Create a PSFS filesystem
mx fs create [optional_arguments] <storageDevice>
A storage device is a basic or dynamic volume. To locate an available volume,
use the fs showcreateopt command.
The options are:
[--label <label>]
The label for the filesystem. It can contain up to 32 characters.
[--blocksize [4K|8K]]
The block size for the filesystem. If you will be using the filesystem with
MxDB for SQL Server, the block size must be 8 KB.
Chapter 3: mx Commands
85
[--reuse]
Reuse a psd device. If you will be creating a filesystem on a psd device that is
associated with an unimported dynamic volume, the -reuse option must be
used to tell the command to reuse the device. Without this option, the attempt
to create the filesystem will fail because the device contains a volume
signature. Be sure that you do not need the unimported dynamic volume
before doing this.
[--quotas]
Enable quotas on the filesystem.
[--defaultUserHardLimit <unlimited | #{K,M,G,T}>]
The default hard limit on the filesystem. unlimited specifies that there is no
default. The optional size modifiers specify that the size is in kilobytes (K),
megabytes (M), gigabytes (G), or terabytes (T). If a modifier is not specified,
the size will be calculated in bytes. (The default is rounded down to the
nearest filesystem block.)
[--defaultUserSoftLimit <unlimited | #{K,M,G,T}>]
The default soft limit on the filesystem. unlimited specifies that there is no
default. The optional size modifiers specify that the size is in kilobytes (K),
megabytes (M), gigabytes (G), or terabytes (T). If a modifier is not specified,
the size will be calculated in bytes. (The default is rounded down to the
nearest filesystem block.)
[--enforceHardLimit <enable | disable>]
Whether file operations that will result in exceeding a user’s hard limit should
be denied (the enable argument) or allowed (the disable argument).
[--logHardLimitViolations <enable | disable>]
Whether file operations that result in exceeding a user’s hard limit should be
logged in the system event log.
[--logSoftLimitViolations <enable | disable>]
Whether file operations that result in exceeding a user’s soft limit should be
logged in the system event log.
[--defaultQuotaType <staticdq | dynamicdq>]
With staticdq, quota limits for new users are copied from the default quota
values set for the filesystem. With dynamicdq, the quota limits are linked
from the default quota values for the filesystem. If the default values are
changed, the user’s quota limits are also changed.
Chapter 3: mx Commands
86
[--sparseFileAccounting <real | virtual>]
How quota accounting for sparse files is managed. real reflects the actual
allocation of filesystem space for the files. virtual reflects the virtual size of
the files.
dump—Dump filesystem configuration to stdout
mx fs dump
getdriveletters—Display drive letters in use on a server
mx fs getdriveletters --server <server> | ALL_SERVERS
queryassignments—Display drive letter or path assignments for a filesystem
mx fs queryassignments <ps device> ALL_SERVERS | <server> ...
recreate—Reformat a filesystem
mx fs recreate [<options>] <filesystem>
showcreateopt—Display information about storage devices
mx fs showcreateopt
status—Display status information
mx fs status [--verbose] [--standard|--snapshots]
The command lists the status of each filesystem. The --verbose option also
specifies the FS type (always PSFS), the size of the filesystem in KB, and the
UUID of the parent disk. The --standard argument shows only standard
filesystems; the --snapshots argument shows only snapshots.
unassign—Unassign a drive letter or path
mx fs unassign <ps device> ALL_SERVERS | <server> ...
mx matrix – cluster commands
Use the following mx matrix commands to perform cluster-wide operations.
Command
Description
destroy
Destroy the cluster
dump
Dump or restore cluster configuration information
log
Insert a “user” event
status
Display status information
Chapter 3: mx Commands
87
destroy—Destroy the cluster
mx matrix destroy
This command attempts to remove your cluster configuration. The command
may fail, based on the resources in use throughout the cluster.
The output from matrix dump, when run prior to matrix destroy, can be
useful in restoring a cluster configuration after it has been destroyed;
however, you may need to perform the reconfiguration manually.
dump—Dump cluster configuration information
The following command dumps configuration information to stdout. The
information includes the configuration of servers, network interfaces, virtual
hosts, service and device monitors, notifiers, disks, and filesystems. It also
includes the sleep setting and alerts.
The dumped information does not include configuration information for the
following: HP Clustered File System license, secret, membership partitions,
fencing configuration, FibreChannel switches.
mx matrix dump
You can also save the configuration in a file for backup purposes:
mx matrix dump > <backup_file>
Use the following command to restore the configuration from the backup file:
mx --continue --file <backup_file>
log—Insert an event message into the cluster event log
mx matrix log <message>
In the log, the source of the message will be set to “User” and the Severity will
be set to “Info.” The ID assigned to the message will be in the range
39000-39999.
status—Display status information
mx matrix status
The current alert messages appear at the end of the output.
Chapter 3: mx Commands
88
mx mfs – Cluster File Share commands
Use the following mx mfs commands to configure Cluster File Shares or to
display their status.
Command
Description
add
Add a Cluster File Share
delete
Delete a Cluster File Share
disable
Disable a Cluster File Share
dump
Dump the Cluster File Share configuration to stdout
enable
Enable a Cluster File Share
status
Display the status of a Cluster File Share
update
Update an existing Cluster File Share
add—Add a Cluster File Share
mx mfs add --path <path> --servers ALL_SERVERS|<server1>,
<server2>,... [arguments] <mfs_name>
--servers specifies the servers on which the Cluster File Share should be
configured.
<mfs_name> is the name for the Cluster File Share. <path> is the location of the
Cluster File Share (such as y:\myshared). This is typically the drive letter or
path assigned to the PSFS filesystem that will be accessed via this share.
Following is an example:
mx mfs add --path y:\myshared --servers ALL_SERVERS mymfs1
The options are:
[--timeout <seconds>]
The maximum amount of time to wait for a probe of the file share to
complete. The default value is five seconds.
[--frequency <seconds>]
The frequency is the interval of time, in seconds, at which the monitor probes
the file share. The default value is 10 seconds.
[--users_limit ALL_USERS|<limit>]
The number of users that will be allowed to access the Cluster File Share
simultaneously. The maximum value is the system maximum, which is
limited by the available memory.
Chapter 3: mx Commands
89
[--comments <comment>]
A description of the file share.
[--access_based_enum enabled|disabled]
Enables or disables the Access-based Enumeration feature provided with
Windows 2003 Service Pack 1. This feature allows users to see only the files
and folders to which they have access on a file share.
[--application <application_name>]
The application that will be associated with this file share.
[--share_subdirs]
Share all subdirectories under the specified path.
[--caching <manual | documents | programs | none>]
Enables or disables offline caching. The arguments are:
• manual. Only the files and programs that users specify will be available
offline. This is the default.
• documents. All files and programs that users open from the share will be
automatically available offline.
• programs. All files and programs that users open from the share will be
automatically available offline. Also, all programs will be automatically
cached so that they can be run locally.
• none. Files or programs from the share will not be available offline.
delete—Deletea Cluster File Share
mx mfs delete <mfs_name> ...
disable—Disable a Cluster File Share
mx mfs disable <mfs_name> [ALL_SERVERS]|<server> ...]
dump—Dump the Cluster File Share configuration to stdout
mx mfs dump
enable—Enable a File Share
mx mfs enable <mfs_name> [ALL_SERVERS|<server> ...]
status—Display the status of a Cluster File Share
mx mfs status [arguments] [<mfs_name> ...]
Chapter 3: mx Commands
90
The arguments are:
[--up|--down]
[--enabled|--disabled]
[--primary|--backup]
[--active|--inactive]
[--showApplication]
With no arguments, the command shows status for all Cluster File Shares.
update—Modify an existing Cluster File Share
mx mfs update [arguments] [--path <path>] [--servers ALL_SERVERS |
<server1>,<server2>,...] <mfs_name>
The arguments are the same as mfs add.
mx mni – Multi-Node Installer for SQL Instances
Use the following commands to install SQL instances via the Multi-Node
Installer.
Command
Description
install
Install or upgrade SQL instances
listinstances
List the SQL Server instances installed on the cluster
listproducts
List all product definitions created with the setproduct
command
listversions
List SQL Server versions that are supported with MxDB for SQL
Server
removeproduct
Remove a product definition
setproduct
Create or modify a product definition
install—Install or upgrade one or more SQL instances on one or more servers
mx mni install --instance “<name> [<name>]...” --product_id <id>
[--template <file>] --mniuser [<domain>\]<username> [--mnipassword
<password>] <server_name [server_name1...]> | ALL_SERVERS
The options are:
--instance “<name> [<name>]...”
The instance names to be created. If you specify multiple names, use spaces to
separate them.
Chapter 3: mx Commands
91
--product_id <id>
A unique identifier for the MxDB for SQL Server product definition to be
installed. See “setproduct—Create or modify a product definition” on page 91
for more information about creating a product definition.
[--template <file>]
The template file to be used for this installation.
--mniuser [<domain>\]<username>
Perform the installation on the behalf of the specified user.
[--mnipassword <password>]
The password for the user specified by --mniuser. When this option is used,
you will see a password prompt once for every server for all installs.
listinstances—List the SQL Server instances installed on the cluster
mx mni listinstances
listproducts—List product definitions that are available for installation
mx mni listproducts [--dump]
Use this command to list the MxDB for SQL Server product definitions that
can be installed on the cluster. (Product definitions are created with the mx
mni setproduct command.) The output includes the product ID for each
product definition. You will need this value to install or remove a product.
The --dump option dumps the product definitions in XML format.
listversions—List the SQL Server versions that are supported with MxDB for SQL
Server
mx mni listversions <base|hf|sp>
Use base to list base products, sp to list service packs, and hf to list hotfixes.
removeproduct—Remove a product definition
mx mni removeproduct <product id>
setproduct—Create or modify a product definition
mx mni setproduct --product_id <id> --description <text> --type
<base|sp|hf> --version <SQL2000|SQL2005> --location <path>
[--force]
The options are:
--product_id <id>
A unique identifier for this product definition.
Chapter 3: mx Commands
92
--description <text>
A short description for the product definition.
--type <base|sp|hf>
The SQL Server product type. base is a base product, sp is a service pack, and
hf is a hotfix.
--version <SQL2000|SQL2005>
The SQL Server version (either SQL2000 or SQL2005).
--location <path>
For a SQL Server base product, <path> is the path to the folder containing the
files needed to install the product. For a Service Pack or Hotfix, <path> points
to the executable file.
--force
Overwrite the existing product definition.
mx netif – network interface commands
Use the following mx netif commands to manage network interfaces or to
display their status.
Command
Description
add
Add a network interface
allowadmintraffic
Make the network interface available for HP
Clustered File System administrative traffic
delete
Remove a network interface
disable
Disable a network interface for virtual hosting
discourageadmintraffic
Use the network interface for HP Clustered File
System administrative traffic only when another
interface is not available
enable
Enable a network interface for virtual hosting
excludeadmintraffic
Do not use the network interface for HP Clustered File
System administrative traffic
noadmin
Do not use the network for administrative traffic
(deprecated)
status
Display status for network interfaces
update
Update a network interface
Chapter 3: mx Commands
93
add—Add a network interface
mx netif add --server <server> --netmask <interface_netmask>
[--adminTraffic <allow|discourage|exclude>] <interface_ip>
--adminTraffic specifies whether the network interface should be available
for HP Clustered File System administrative traffic. allow is the default.
admin—Make a network available for HP Clustered File System administrative traffic
mx netif admin <interface_ip> ...
This command is deprecated in HP Clustered File System 3.6. Use the
allowadmintraffic option instead.
allowadmintraffic—Make a network available for HP Clustered File System
administrative traffic
mx netif allowadmintraffic <interface_ip> ...
delete—Remove a network interface
mx netif delete <interface_ip>
disable—Disable a network interface for virtual hosting
mx netif disable <interface_ip> ...
discourageadmintraffic—Use a network for HP Clustered File System administrative
traffic only when another network is not available
mx netif discourageadmintraffic <interface_ip> ...
enable—Enable a network interface for virtual hosting
mx netif enable <interface_ip> ...
excludeadmintraffic—Do not use the network for HP Clustered File System
administrative traffic
mx netif excludeadmintraffic <interface_ip> ...
noadmin—Do not use the network for administrative traffic
mx netif noadmin <interface_ip> ...
This command is deprecated in HP Clustered File System 3.6. Use the
excludeadmintraffic command instead.
status—Display status for network interfaces
mx netif status [--up|--down] [--enabled|--disabled]
Chapter 3: mx Commands
94
[--allowadmintraffic|--discourageadmintraffic|
--excludeadmintraffic] [--active|--inactive] [--noHeaders] [--csv]
[<interface_ip> ...]
The options are:
[--up|--down]
Select network interfaces that are either operational or down.
[--enabled|--disabled]
Select network interfaces that are either enabled or disabled for virtual
hosting.
[--allowadmintraffic|--discourageadmintraffic|
--excludeadmintraffic]
Select network interfaces that allow, discourage, or exclude administrative
traffic.
[--active|--inactive]
Select interfaces that are currently active (handling administrative traffic) or
inactive.
[--noHeaders]
Do not display column headers.
[--csv]
Use commas to separate the output.
update—Update a network interface
mx netif update --netmask <interface_netmask> [--adminTraffic
<allow|discourage|exclude>] <interface_ip>
The network interface must be down.
mx quota – filesystem quota commands
Use the following mx quota commands to configure or display filesystem
quotas.
Command
Description
Commands for filesystems:
disable
Disable quotas on one or more filesystems
enable
Enable quotas on one or more filesystems
setdefaults
Set the default hard and soft limits for one or more filesystems
Chapter 3: mx Commands
Command
Description
setoptions
Set the quota options on a filesystem
showdefaults
Show the default quotas for one or more filesystems
showoptions
Show the quota options in effect on a filesystem
95
Commands for users:
setuser
Set the filesystem quota for one or more users
showuser
Display quotas for users matching the search criteria
unsetuser
Remove filesystem quotas for one or more users
Commands for groups:
setgroup
Set the filesystem quota for users in one or more groups
showgroup
Display quotas for users in groups matching the search criteria
unsetgroup
Remove quotas for users in one or more groups
Commands for filesystems
These commands allow you to enable or disable quotas on a filesystem and to
set or display the quota options configured on the filesystem.
disable—Disable quotas on one or more filesystems
mx quota disable [opt-args] ALL_FILESYSTEMS | <ps device> ...
The optional arguments are:
[--quiet]
Do not display command output.
[--force]
Continue with the command even if some specified filesystems already have
quotas disabled.
enable—Enable quotas on one or more filesystems
mx quota enable [opt-args] ALL_FILESYSTEMS|<ps device> ...
Quotas can be enabled on all PSFS filesystems or on specific psd or psv
devices. The optional arguments are:
[--defaultUserHardLimit <unlimited | #{K,M,G,T}>]
The default hard limit for the filesystem. unlimited means that the default is
unlimited. The size modifiers are K (kilobytes), M (megabytes), G (gigabytes),
or T (terabytes). If a modifier is not specified, the size is calculated in
Chapter 3: mx Commands
96
kilobytes. (The default is rounded down to the nearest filesystem block.) If
this option is not used, the default will be unlimited.
[--defaultUserSoftLimit <unlimited | #{K,M,G,T}>]
The default soft limit for users on the filesystem who not have not been
assigned an individual limit. unlimited means that the default is unlimited.
The size modifiers are K (kilobytes), M (megabytes), G (gigabytes), or T
(terabytes). If a modifier is not specified, the size is calculated in kilobytes.
(The default is rounded down to the nearest filesystem block.) If this option is
not used, the default will be unlimited.
[--enforceHardLimit <enable|disable>]
Whether hard limits are enforced. The default is disable.
[--logHardLimitViolations <enable|disable>]
Whether violations of the hard limit are logged. The default is disable.
[--logSoftLimitViolations <enable|disable>]
Whether violations of the soft limit are logged. The default is disable.
[--defaultQuotaType <staticdq|dynamicdq>]
Whether the default quotas should be static or dynamic. When staticdq is
used, new users are assigned an explicit limit that is the same as the
filesystem’s default limit. With dyanamicdq, the user’s limit references the
filesystem’s default limit. When the filesystem limit is changed, the user’s
limit also changes to match the new filesystem limit. The default is staticdq.
[--sparseFileAccounting <real|virtual>]
Whether sparse files are counted against the owner’s quota according to the
actual space or the virtual space used by the file. The default is real.
[--quiet]
Do not display command output.
[--force]
Continue with the command even if some specified filesystems already have
quotas enabled.
setdefaults—Set the default hard and soft limits for one or more filesystems
mx quota setdefaults [opt_args] ALL_FILESYSTEMS|<ps device> ...
The optional arguments are:
[--userHardLimit <unlimited | #{K,M,G,T}>]
Chapter 3: mx Commands
97
The default hard limit for all users on the filesystem. unlimited means that
the default is unlimited. The size modifiers are K (kilobytes), M (megabytes),
G (gigabytes), or T (terabytes). If a modifier is not specified, the size is
calculated in kilobytes. (The default is rounded down to the nearest
filesystem block.)
[--usersoftLimit <unlimited | #{K,M,G,T}>]
The default soft limit for all users on the filesystem. unlimited means that the
default is unlimited. The size modifiers are the same as --userHardLimit.
[--force]
Continue with the command even if some specified filesystems do not have
quotas enabled.
setoptions—Set the quota options on a filesystem
mx quota setoptions [opt-args] ALL_FILESYSTEMS|<ps device> ...
The optional arguments are:
[--enforceHardLimit <enable|disable>]
Whether hard limits are enforced.
[--logHardLimitViolations <enable|disable>]
Whether violations of the hard limit are logged.
[--logSoftLimitViolations <enable|disable>]
Whether violations of the soft limit are logged.
[--defaultQuotaType <staticdq|dynamicdq>]
Whether the default quotas should be static or dynamic. When staticdq is
used, new users are assigned an explicit limit that is the same as the
filesystem’s default limit. When dynamicdq is used, the user’s limit references
the filesystem’s default limit. When the filesystem limit is changed, the user’s
limit also changes to match the new filesystem limit.
[--force]
Continue with the command even if some specified filesystems do not have
quotas enabled.
showdefaults—Show the default quotas for one or more filesystems
mx quota showdefaults [opt-args] ALL_FILESYSTEMS|<ps device> ...
The optional arguments are:
[--unit <B,K,M,G,T>]
Chapter 3: mx Commands
98
Whether the output should be in bytes, kilobytes, megabytes, gigabytes, or
terabytes.
[--force]
Continue with the command even if some specified filesystems do not have
quotas enabled.
[--noHeaders]
Do not display column headers in the output.
[--csv]
Display the output in comma-separated value format.
showoptions—Show the quota options in effect on a filesystem
mx quota showoptions [opt-args] ALL_FILESYSTEMS|<ps device> ...
The optional arguments are:
[--noHeaders]
Do not display column headers in the output.
[--csv]
Display the output in comma-separated value format.
Commands for users
These commands allow you to set, display, or remove the filesystem quotas
for individual users.
setuser—Set the filesystem quota for one or more users
mx quota setuser [opt-args] ALL_FILESYSTEMS | <ps device> ...
This command allows you to assign new quotas or change existing quotas for
one or more users. You can also specify a search pattern; the specified quotas
will be assigned to all users matching the pattern.
The optional arguments are:
[--hardLimit <unlimited | dynamic | #{K,M,G,T}>]
The hard limit to be applied to the specified users. The size modifiers are K
(kilobytes), M (megabytes), G (gigabytes), or T (terabytes). If a modifier is not
specified, the size is calculated in kilobytes.
[--softLimit <unlimited | dynamic | #{K,M,G,T}>]
Chapter 3: mx Commands
99
The soft limit to be applied to the specified users. The size modifiers are K
(kilobytes), M (megabytes), G (gigabytes), or T (terabytes). If a modifier is not
specified, the size is calculated in kilobytes.
[--force]
Continue with the command even if some of the specified users already have
quotas.
[--memberOf <group_name>]
A group name for filtering users.
[--id
<ID1,ID2,ID4-8...>]
A user ID or range of IDs.
[--name <name1,name2,...>]
One or more user names. You can also enter a regular expression.
[--regex]
The value specified for --name is a regular expression.
[--hardLimitRange <unlimited|#{K,M,G,T}>-<unlimited|#{K,M,G,T}>]
A range of hard limits.
[--spaceUsedRange <unlimited|#{K,M,G,T}>-<unlimited|#{K,M,G,T}>]
A range of disk space usage.
[--percentUsedRange <#%>-<#%|unlimited>]
A range of percentages of disk space used.
[--dynamic]
The value specified for --name is a regular expression.
showuser—Display quotas for users matching the specified search criteria
mx quota showuser [search-args] ALL_FILESYSTEMS|<ps device> ...
The search arguments are:
[--force]
Continue with the command even if some of the specified users do not have
quotas.
[--memberOf <group_name>]
A group name for filtering users.
[--id
<ID1,ID2,ID4-8...>]
A user ID or range of IDs.
Chapter 3: mx Commands
100
[--name <name1,name2,...>]
One or more user names. You can also enter a regular expression.
[--regex]
The value specified for --name is a regular expression.
[--unit <B,K,M,G,T>]
Whether the output should be in bytes, kilobytes, megabytes, gigabytes, or
terabytes.
[--hardLimitRange <unlimited|#{K,M,G,T}>-<unlimited|#{K,M,G,T}>]
A range of hard limits.
[--spaceUsedRange <unlimited|#{K,M,G,T}>-<unlimited|#{K,M,G,T}>]
A range of disk space usage.
[--percentUsedRange <#%>-<#%|unlimited>
A range of percentages of disk space used.
[--noHeaders]
Do not display column headers in the output.
[--csv]
Display the output in comma-separated value format.
[--showID]
Show user IDs in the output.
unsetuser—Remove filesystem quotas for one or more users
mx quota unsetuser [opt-args] ALL_FILESYSTEMS | <ps device> ...
The optional arguments are as follows. Quotas will be removed from users
matching the specified criteria.
[--force]
Continue with the command even if some of the specified users do not have
quotas.
[--memberOf <group_name>]
A group name for filtering users.
[--id <ID1,ID2,ID4-8...>]
A user ID or range of IDs.
[--name <name1,name2,...>
One or more user names. You can also enter a regular expression.
[--regex]
Chapter 3: mx Commands
101
The value specified for --name is a regular expression.
[--hardLimitRange <unlimited|#{K,M,G,T}>-<unlimited|#{K,M,G,T}>]
A range of hard limits.
[--spaceUsedRange <unlimited|#{K,M,G,T}>-<unlimited|#{K,M,G,T}>]
A range of disk space usage.
[--percentUsedRange <#%>-<#%|unlimited>
A range of percentages of disk space used.
Commands for groups
These commands allow you to set, remove, or display quotas for all of the
users in a particular group.
setgroup—Set the filesystem quota for users in one or more groups
mx quota setgroup [optional-args] ALL_FILESYSTEMS | <ps device> ...
The optional arguments are the same as mx quota setuser except that --name
is a list of group names and the --memberof argument is not used.
showgroup—Display quotas for users in groups matching the specified search criteria
mx quota showgroup [search-args] ALL_FILESYSTEMS|<ps device> ...
The search arguments are the same as mx quota showuser, with the exception
that the --memberof argument is not used.
unsetgroup—Remove quotas for users in one or more groups
mx quota unsetgroup [optional-args] ALL_FILESYSTEMS| <ps device>
...
The optional arguments are the same as mx quota unsetuser, with the
exception that the --memberof argument is not used.
mx role – role management commands
Use the following mx role commands to manage roles.
Command
Description
delete
Delete a cluster role
disable
Disable a cluster role
enable
Enable a cluster role
export
Export role definitions to a file
Chapter 3: mx Commands
Command
Description
import
Import role definitions from a file
list
List cluster roles
listmembers
List members of a cluster role
102
delete—Delete a cluster role
mx role delete <role>
This command deletes a role from the cluster. Accounts belonging to the role
will automatically lose their membership.
disable—Disable a cluster role
mx role disable <role>
This command disables a role. Disabling a role can be a temporary way to
remove all members from the role.
enable—Enable a cluster role
mx role enable <role>
This command enables a previously disabled role.
export—Export role definitions to a file
mx role export [--permissionOnly] <file>
This command exports role definitions to a file. The definitions can then be
reimported to the cluster at a later time or imported to another cluster. The
--permissionOnly option omits the list of role members from the export.
import—Import role definitions from a file
mx role import [--permissionOnly] <file>
This command imports role definitions from the specified file. The file must
have been created by the mx role export command. The --permissionOnly
option omits the list of role members from the import.
list—List cluster roles
mx role list
Chapter 3: mx Commands
103
This command lists the roles that have been configured in the cluster. (To see
the user or group accounts associated with a particular role, use the mx role
listmembers command.)
listmembers—List the members of a cluster role
mx role listmembers <role>
This command lists the user or group accounts that are members of the
specified role.
mx server – server commands
Use the following mx server commands to configure servers or to display
their status.
Command
Description
add
Add a server to the cluster
delete
Delete one or more servers from a cluster
disable
Disable one or more servers
dump
Dump the server configuration to stdout
enable
Enable one or more previously disabled servers
list
List the servers in a cluster
listsoftware
List the operating system and HP software installed
on the server
markdown
Mark a server as down
read_license
Read the license file on a server
start
Start HP Clustered File System on one or more
servers
status
Display server status
stop
Stop HP Clustered File System on one or more
servers
update
Update one or more servers in a cluster
viewevents
View events that have occurred on the server
add—Add a server to the cluster
mx server add [--serverSeverity autorecover|noautorecover] <server>
...
Chapter 3: mx Commands
104
The --serverSeverity argument specifies whether it is possible to
automatically fail back virtual hosts to the original server after that server has
recovered from a complete system outage. The default is autorecover. This
command can be used when the cluster is either running or offline.
delete—Delete one or more servers from a cluster
mx server delete <server> ...
This command can be used when the cluster is either running or offline.
disable—Disable one or more servers
mx server disable <server> ...
dump—Dump the server configuration to stdout
mx server dump
enable—Enable one or more previously disabled servers
mx server enable <server> ...
list—List the servers in a cluster
mx server list
This command can be used when the cluster is either running or offline.
listsoftware—List the operating system and HP software installed on the server
mx server listsoftware [<server> ...]
If the operating system uses the 64-bit architecture, x64 will be specified in the
output. Otherwise, the architecture is assumed to be 32-bit. This command
can be used when the cluster is either running or offline. If a <server> is not
specified and the cluster is online, the connected server is used. If the cluster
is offline, one or more servers must be specified.
markdown—Mark a server as down
mx server markdown <server> ...
This command can be used in situations where HP Clustered File System is
unable to fence a server that is not communicating with the cluster (for
example, because the server has crashed). The command informs HP
Clustered File System that the server has been verified to be down and does
not need to be fenced, as it cannot threaten filesystem integrity. For more
Chapter 3: mx Commands
105
information, see “Server Cannot Be Fenced” in Chapter 17 of the HP
StorageWorks Clustered File System Administration Guide.
CAUTION: Be sure to verify that the server is physically down or physically
disconnected from the shared storage before running the mx server
markdown command. Filesystem corruption can occur is the
server is not actually down and can access shared storage. Note
that if the server is left up but is physically disconnected from the
shared storage, it is critical that the server be rebooted before
reconnecting it to shared storage, or filesystem corruption can
occur.
read_license—Read the license file on a server
mx server read_license <server>
start—Start HP Clustered File System on one or more servers
mx server start <server> ...
This command can be used when the cluster is either running or offline.
status—Display server status
mx server status [--enabled|--disabled] [--up|--down] [<server> ...]
stop—Stop HP Clustered File System on one or more servers
mx server stop <server> ...
This command can be used when the cluster is either running or offline.
update—Update one or more servers in a cluster
mx server update [--serverSeverity autorecover| noautorecover]
<server> ...
viewevents—View the events that have occurred on the server
mx server viewevents [--filter <string>] [--maxevents <number>]
[--timestamp <startTime,endTime>] [--noHeaders] [--csv]
[--showborder] <server>
This command can be used when the cluster is either running or offline. The
options are:
[--filter <string>]
Chapter 3: mx Commands
106
Filter the output, displaying only those events that match the specific <string>.
If this option is not specified, all events will be displayed.
[--maxevents <number>]
The maximum number of events to view. The default is the last 1000 events in
the log file.
[--timestamp <startTime,endTime>]
Filter by a particular time range expressed as <startTime,endTime>.
[--noHeaders]
Do not display column headers in the output.
[--csv]
Display the output in comma-separated value format.
[--showborder]
Display borders in the output.
mx service – service monitor commands
Use the following mx service commands to configure service monitors or to
display their status.
Command
Description
add
Create a service monitor
clear
Clear a service monitor error
delete
Remove a service monitor
disable
Disable a service monitor
dump
Dump the service monitor configuration
enable
Enable a service monitor
status
Show the status of service monitors
update
Modify the configuration of a service monitor
add—Create a service monitor
mx service add --type <type> [arguments] <vhost:port> ...
--type is the type of service monitor to be created: DNS, FTP, HTTP, HTTPS,
IMAP4, NNTP, NTSERVICE, POP3, SMTP, TCP, or CUSTOM.
The optional arguments are:
[--timeout <seconds>]
Chapter 3: mx Commands
107
The maximum amount of time to wait for a probe of the device to complete.
For NTSERVICE monitors, the default is 15 seconds. For CUSTOM service
monitors, the default is 60 seconds. For all other service monitors, the default
is five seconds.
[--frequency <seconds>]
The interval of time at which the monitor probes the service. For CUSTOM
service monitors, the default is 60 seconds. For all other service monitors, the
default is 30 seconds.
[--probetype single|multiple]
This argument applies only to CUSTOM monitors.
[--probeSeverity nofailover|autorecover|noautorecover]
The failover behavior for the service monitor. nofailover prevents failover of
the virtual host when the monitored service fails. autorecover fails over the
virtual host and, when the service is restored, fails the virtual host back to the
original network interface. noautorecover fails over the virtual host but does
not fail it back after the service is restored. autorecover is the default. These
settings work in combination with the virtual host’s failback policy.
Note that this command is case-sensitive.
[--parameters <parameters>]
The parameters are as follows:
• HTTP or HTTPS monitor. The parameter is the URL for the service.
• DNS monitor. The parameter is the address to be resolved.
• NTSERVICE monitor. The parameter specifies whether services dependent
on the monitored NT service should also be started when the NT service is
started (specify either Yes or No). If you want the services to be started,
you can also specify the number of attempts that should be made. Use a
semicolon to separate the values (for example, Yes;3)
• CUSTOM monitor. The parameter is a probe script.
[--ordering SERIAL|PARALLEL]
Whether HP Clustered File System enforces a strict ordering sequence when
it runs Start or Stop scripts. The default is serial, the strict ordering sequence.
[--recoveryScript <script>]
Chapter 3: mx Commands
108
Runs after a monitor probe failure is detected, in an attempt to restore the
service.
[--recoveryTimeout <seconds>]
The amount of time to wait for the script to complete.
[--startScript <script>]
When HP Clustered File System selects the active server for a monitored
service, the Start script runs on that server.
[--stopScript <script>]
A script that runs on all other servers configured for the service monitor to
ensure that the service is not active on those servers.
[--startTimeout <seconds>]
The amount of time to wait for the Start script to complete.
[--stopTimeout <seconds>]
The amount of time to wait for the Stop script to complete.
[--eventSeverity consider|ignore]
Whether HP Clustered File System takes service monitor events (such as a
failure or timeout of a Start or Stop script) into consideration when it makes
failover decisions. The default is consider.
[--priority <priority>]
The priority of the service monitor in relation to other service monitors.
priority is a natural number; 0 is the highest priority. HP Clustered File System
uses the priority when failing over the virtual host associated with the
monitor. If multiple failures have occurred, all of the services associated with
the virtual host may not be available on one server. In this case, HP Clustered
File System will fail over to a network interface on a server running the
highest priority service. The default priority is 0.
clear—Clear an error condition and the associated alert for a service monitor
mx service clear <vhost:port> <netif> ...
<servicename> is either the <vhost:port> for the service monitor or the name of a
custom monitor.
delete—Remove a service monitor
mx service delete <vhost:port>
Chapter 3: mx Commands
109
disable—Disable a service monitor
mx service disable <vhost:port> <netif> ...
dump—Dump the service monitor configuration to stdout
mx service dump
enable—Enable a service monitor
mx service enable <vhost:port> <netif> ...
status—Display the status of a service monitor
mx service status [arguments] [<vhost:port>]
The arguments are:
[--up|--down]
[--primary|--backup]
[--enabled|--disabled]
[--active|--inactive]
[--showApplication]
With no arguments, the command shows status for all service monitors.
update—Modify an existing service monitor
mx service update [arguments] <vhost:port> ...
The arguments are the same as service add, with the exception that the --type
option is not valid.
mx snapshot – snapshot commands
Use the following mx snapshot commands to create or destroy hardware
snapshots.
Command
Description
create
Create a snapshot
destroy
Destroy a snapshot
showcreateopt
Show snapshot options for the storage array associated with a
volume
create—Create a snapshot
mx snapshot create [--method <type>] [--terse] [<options>] <volume>
The options are:
Chapter 3: mx Commands
110
--method <type>
The method can be hpeva or engenio. This option must always be specified
for engenio snapshots. For hpeva snapshots, the option is needed only if more
than one snapshot method is configured on the system.
--terse
On success, only the name of the snapshot volume is printed.
<options>
Any of the options returned by the mx snapshot showcreateopt command, as
described below.
destroy—Destroy a snapshot
mx snapshot destroy <volume>
showcreateopt—Show snapshot options for the storage array associated with a
volume
mx snapshot showcreateopt <volume>
The output specifies the options that are available for the snapshot methods
configured on your system. The following options are available for all
snapshot methods:
--label “<label>”
An identifier for the snapshot. The label must be enclosed in double quotation
marks and can include up to 63 characters. The default is “Snapshot of
volume”.
--scsf false|true
Whether the snapshot should be shared as a shadow copy of a shared folder.
The default is true.
The following option applies to hpeva snapshots:
--allocation_policy fully|demand|copy
The type of snapshot. The allocation policy for all snapshots of a particular
virtual disk is determined by the oldest snapshot of that virtual disk. The
choices here are only a preference. fully reserves the maximum amount of
disk group resources needed at snapshot creation time and is the default.
demand reserves the minimum amount of disk group resources needed. copy
creates a complete copy of the original volume (a snapclone).
The following option applies to engenio snapshots:
Chapter 3: mx Commands
111
--repositoryPercentOfBase
The snapshot process creates a repository on disk that stores pointers to the
data in the source filesystem. As changes are made to the filesystem,
subsequent snapshots will copy the changed data to the repository. This
option asks for the initial size of the repository. The size is specified as a
percentage of the volume holding the filesystem. The default is 20% of the
base volume.
mx vfs – Virtual CIFS Server commands
Use the following mx vfs commands to configure Virtual CIFS Servers or to
display their status.add—Add a new Virtual CIFS Server
mx vfs add [--policy autofailback|nofailback] [--application
<application name>] <ip> <name> ALL_SERVERS <primary network
interface>| <network interface> ...
<ip> <name> asks for the IP address and hostname for the Virtual CIFS Server.
The hostname can include up to 32 characters.
If you specify ALL_SERVERS, the Virtual CIFS Server will be defined on all of
the servers. You will also need to specify the primary interface for the Virtual
CIFS Server, as it determines the order of the interfaces for failover.
If the Virtual CIFS Server should be defined only on certain nodes, you can
specify the appropriate network interfaces on those nodes. The order in
which you specify the network interfaces determines the ordering for failover.
The first network interface is the primary interface; network traffic for the
Virtual CIFS Server goes to the node providing this interface. The remaining
network interfaces are backups. Each network interface must be located on a
different node.
NOTE: If a Virtual CIFS Server is configured with ALL_SERVERS, any new
nodes added to the cluster are also added automatically to the Virtual
CIFS Server. The HP Management Console does not specify whether a
Virtual CIFS Server has been configured with ALL_SERVERS. In
addition, you cannot use the Properties or Rehost options on the HP
Management Console to remove a node from a Virtual CIFS Server
configured with ALL_SERVERS. Instead, you will need to use the mx
vfs update command to reconfigure the Virtual CIFS Server on the
appropriate nodes.
Chapter 3: mx Commands
112
The arguments are:
[--policy autofailback|nofailback]
This argument determines the failback action that the Virtual CIFS Server will
take following a failover to a backup node.
• AUTOFAILBACK. This policy is intended to return the Virtual CIFS Server
to its original configuration, or as close to it as possible. After the Virtual
CIFS Server fails over to a backup node, the ClusterPulse process watches
the health of the nodes that are higher in the list of servers configured for
that Virtual CIFS Server. When the health of one of these nodes is equal to
or greater than the backup node where the Virtual CIFS Server currently
resides, the Virtual CIFS Server will automatically attempt to fail over to
that node.
• NOFAILBACK. This policy is intended to minimize failovers and is the
default. The Virtual CIFS Server remains active on the backup node until a
“healthier” node becomes available, at which point the Virtual CIFS
Server fails over to that node. (On a “healthier” node, more of the services
associated with the Virtual CIFS Server will be up than on the node
currently hosting the Virtual CIFS Server.)
[--application <application>]
The HP Clustered File System application associated with this Virtual CIFS
Server.
delete—Delete a Virtual CIFS Server
mx vfs delete <ip>|<name>
disable—Disable a Virtual CIFS Server
mx vfs disable <ip>|<name>
dump—Dump the Virtual CIFS Server configuration to stdout
mx vfs dump
enable—Enable a Virtual CIFS Server
mx vfs enable <ip>|<name>
move—Rehost a Virtual CIFS Server to the specified interface
mx vfs move <ip>|<name> <target network interface>
Chapter 3: mx Commands
113
The target network interface must be currently configured for the Virtual
CIFS Server.
status—Display the status of a Virtual CIFS Server
mx vfs status [arguments] <ip>|<name>
The arguments are:
[--up|--down]
[--enabled|--disabled]
[--primary|--backup]
[--active|--inactive]
[--showApplication]
update—Modify an existing Virtual CIFS Serve:
mx vfs update [--policy autofailback|nofailback] [--application
<application name>] <ip>|<name> ALL_SERVERS <primary network
interface>| <network interface> ...
This command allows you to add or remove interfaces from the Virtual CIFS
Server configuration and to reorder the interfaces. If you specify a different
primary interface and --policy is set to autofailback, the command will
automatically move the service to the new primary.
If --policy is set to nofailback, the update command will not move the service
to the new primary. You will then need to use the vfs move command shown
below to move the service.
mx vfs_share – Virtual File Share commands
Use the following mx vfs_share commands to configure a Virtual File Share
or to display its status.
Command
Description
add
Add a Virtual File Share
delete
Delete a Virtual File Share
disable
Disable a Virtual File Share
dump
Dump the Virtual File Share configuration to stdout
enable
Enable a Virtual File Share
status
Display the status of a Virtual File Share
update
Modify an existing Virtual File Share
Chapter 3: mx Commands
114
add—Add a Virtual File Share
mx vfs_share add --path <path> [arguments] \\<vfs>\<vshare>
<path> is the location of the Virtual File Share (such as y:\myshared). This is
typically the drive letter or path assigned to the PSFS filesystem that will be
accessed via this share.
<\\vfs>\<vshare>> specifies the name of the Virtual CIFS Server and the
Virtual File Share. Following is an example:
mx vfs_share add --path y:\myshared \\myvfs1\vshare1
The arguments are:
[--timeout <seconds>]
The maximum amount of time to wait for a probe of the Virtual File Share to
complete. The default is five seconds.
[--frequency <seconds>]
The interval of time, in seconds, at which the monitor probes the Virtual File
Share. The default setting is 10 seconds.
[--comments <comment>]
A description of the Virtual File Share.
[--users_limit ALL_USERS|<limit>]
The number of users that will be allowed to access the Virtual File Share
simultaneously. The maximum value is the system maximum, which is
limited by the available memory.
[--share_subdirs]
Share all subdirectories under the specified path.
[--probeSeverity nofailover|autorecover|noautorecover]
This setting works in combination with the Virtual CIFS Server’s failback
policy to determine what happens when the monitor probe fails. In general,
nofailover prevents failover of the Virtual CIFS Server when the probe fails.
autorecover fails over the Virtual CIFS Server and, when the service is
restored, fails the Virtual CIFS Server back to the original network interface.
noautorecover fails over the Virtual CIFS Server but does not fail it back after
the service is restored. autorecover is the default. For more information, see
the FS Option for Windows Administration Guide.
[--priority <priority>]
Chapter 3: mx Commands
115
Used when ClusterPulse fails over Virtual CIFS Servers. Service priorities are
natural numbers, with 0 (zero) representing the highest priority and higher
numbers representing lower priorities. If multiple failures prevent
ClusterPulse from placing a Virtual CIFS Server on a node where all of its
associated services are available, ClusterPulse next looks for a node where the
associated service with the highest priority is available. The default priority is
0.
[--ordering SERIAL|PARALLEL]
When a Virtual CIFS Server is moved from one node to another, this setting
determines whether a strict ordering sequence is used to run Start or Stop
scripts. The default is SERIAL, the strict ordering sequence.
[--recoveryScript <script>]
Runs after a monitor probe failure is detected, in an attempt to restore access
to the Virtual File Share.
[--recoveryTimeout <seconds>]
The amount of time to wait for the Recovery script to complete.
[--startScript <script>]
Runs as the Virtual File Share is becoming active on a server.
[--startTimeout <seconds>]
The amount of time to wait for the Start script to complete.
[--stopScript <script>]
Runs as the Virtual File Share is becoming inactive on a server.
[--stopTimeout <seconds>]
The amount of time to wait for the Stop script to complete.
[--eventSeverity consider|ignore]
Whether ClusterPulse takes monitor events (such as a failure or timeout of a
Start or Stop script) into consideration when it makes failover decisions. The
default is consider.
Chapter 3: mx Commands
116
[--access_based_enum enabled]
Enables the Access-based Enumeration feature provided with Windows 2003
Service Pack 1. This feature allows users to see only the files and folders to
which they have access on a file share.
[--caching <manual | documents | programs | none>]
Enables or disables offline caching. The arguments are:
• manual: Only the files and programs that users specify will be available
offline. This is the default.
• documents: All files and programs that users open from the share will be
automatically available offline.
• programs: All files and programs that users open from the share will be
automatically available offline. Also, all programs will be automatically
cached so that they can be run locally.
• none: Files or programs from the share will not be available offline.
delete—Delete a Virtual File Share
mx vfs_share delete \\<vfs>\<vshare>
disable—Disable a Virtual File Share
mx vfs_share disable \\<vfs>\<vshare> <netif> ...
dump—Dump the Virtual File Share configuration to stdout
mx vfs_share dump
enable—Enable a Virtual File Share
mx vfs_share enable \\<vfs>\<vshare> <netif> ...
status—Display the status of a Virtual File Share
mx vfs_share status [arguments] \\<vfs>\<vshare>
The arguments are:
[--up|--down]
[--primary|--backup]
[--enabled|--disabled]
[--active|--inactive]
[--showApplication]
Chapter 3: mx Commands
117
update—Modify an existing Virtual File Share
mx vfs_share update [arguments] [--path <path>] \\<vfs>\<vshare>
The arguments are the same as mx vfs_share add; however,
--access_based_enum can be set to either enabled or disabled.
mx vhost – virtual host commands
Use the following mx vhost commands to configure virtual hosts or to
display their status.
Command
Description
add
add a new virtual host
delete
delete a virtual host
disable
disable a virtual host
dump
dump the virtual host configuration
enable
enable a virtual host
move
rehost, or move, a virtual host to another server
status
show status for a virtual host
update
modify an existing virtual host
add—Add a new virtual host
mx vhost add [--application <application>] [--policy
nofailback|autofailback] [--activitytype single|always] <vhost>
<<networkinterface> ...|ALL_SERVERS <network interface>>
The options are:
[--application <application>]
The HP Clustered File System application associated with this virtual host. If
you do not specify an application, the IP address for the virtual host will be
used.
[--policy autofailback|nofailback]
The failback action that the virtual host will take following failover to a
backup node. autofailback will fail back when a higher-ranked node
provides equal or greater services than the backup node; nofailback fails
back only if a higher-ranked node provides greater services than the backup
node. autofailback is the default.
Chapter 3: mx Commands
118
[--activitytype single|always]
Whether, upon server failure, the virtual host will move to an active server if
all associated service and device monitors are inactive or down. If always is
specified, the failover will occur. If single is specified, the failover will not
occur and the virtual host will not be made active anywhere. single is the
default.
<vhost> can be either the hostname or the IP address for the virtual host. If you
specify the hostname, it can include up to 32 characters.
The order in which you specify the network interfaces determines the
ordering for failover. The first network interface is the primary interface;
network traffic for the virtual host goes to the server providing this interface.
The remaining network interfaces are backups. Each network interface must
be located on a different server.
delete—Delete a virtual host
mx vhost delete <vhost> ...
disable—Disable a virtual host
mx vhost disable <vhost>
dump—Dump the virtual host configuration to stdout
mx vhost dump
enable—Enable a virtual host
mx vhost enable <vhost>
move—Rehost a virtual host to another server
mx vhost move [--application <application_name>] [--policy
autofailback|nofailback] [--activitytype single|always] <vhost>
<<network_interface> ...|ALL_SERVERS <network_interface>>
The options are the same as mx vhost add.
status—Display the status of a virtual host
mx vhost status [arguments] [<vhost> ...]
The arguments are:
[--up|--down]
[--enabled|--disabled]
[--primary|--backup]
Chapter 3: mx Commands
119
[--active|--inactive]
[--showApplication]
With no arguments, the command displays the status of all virtual hosts.
update—Modify an existing virtual host
mx vhost update [--application <application>] [--policy
autofailback|nofailback] [--activitytype single|always] <vhost>
<<networkinterface> ...|ALL_SERVERS <network interface>>
Use this option to change the arguments or the ordering of the network
interfaces for failover.
mx vsql – Virtual SQL Server commands
Use the following mx vsql commands to configure Virtual SQL Servers or to
display their status.
Command
Description
add
Add a new Virtual SQL Server
delete
Delete a Virtual SQL Server
disable
Disable a Virtual SQL Server
dump
Dump the Virtual SQL Server configuration to stdout
enable
Enable a Virtual SQL Server
maintain
Place a Virtual SQL Server in maintenance mode
move
Rehost a Virtual SQL Server
operate
Return a Virtual SQL Server to operation mode
status
View status for a Virtual SQL Server
update
Modify an existing Virtual SQL Server
add—Add a new Virtual SQL Server
mx vsql add [--policy autofailback|nofailback] [--application
<application_name>] [--msdtc] <ip> <name> <<network_interface> ...>
The options are:
[--policy autofailback|nofailback]
The failback action that the SQL Virtual Server will take following failover to
a backup node. autofailback will fail back when a higher-ranked node
provides equal or greater services than the backup node; nofailback fails back
Chapter 3: mx Commands
120
only if a higher-ranked node provides greater services than the backup node.
autofailback is the default.
[--application <application_name>]
The application tag associated with this Virtual SQL Server. If you do not
specify an application, the IP address for the Virtual SQL Server will be used.
[--msdtc]
Microsoft Distributed Transaction Coordinator (MSDTC) is used to
coordinate transactions between different SQL instances running on different
nodes in the cluster. There is one MSDTC service on each machine.
This option enables transactions that span one or more Virtual SQL Servers.
However, the following limitations exist when using a Virtual SQL Server
with MSDTC:
• Because only one MSDTC resource exists per machine, you can define
MSDTC support for only one Virtual SQL Server per machine. You can,
however, define other Virtual SQL Servers that do not support MSDTC.
• If two MSDTC-enabled Virtual SQL Servers share the same backup and
both Virtual SQL Servers fail, the first server to come up will lock the
MSDTC resource, preventing the other Virtual SQL Server from starting.
• You cannot use COM+ components or MSMQ on a node where MSDTC
has been virtualized.
For more information about MSDTC, see the MxDB for SQL Server
Administration Guide.
<ip> is the IP address for the SQL Virtual Server. <name> is the NetBIOS name
for this Virtual SQL Server; the name can include up to 15 characters.
The order in which you specify the network interfaces determines the
ordering for failover. The first network interface is the primary interface;
network traffic for the Virtual SQL Server goes to the node providing this
interface. The remaining network interfaces are backups. Each network
interface must be located on a different node.
delete—Delete a Virtual SQL Server
mx vsql delete <vsql>
Chapter 3: mx Commands
121
disable—Disable a Virtual SQL Server
mx vsql disable <vsql>
dump—Dump the Virtual SQL Server configuration to stdout
mx vsql dump
enable—Enable a Virtual SQL Server
mx vsql enable <vsql>
maintain—Place a Virtual SQL Server in maintenance mode
mx vsql maintain <vsql>
move—Rehost a Virtual SQL Server
mx vsql move [--policy nofailback|autofailback] [--application
<application_name>] [--msdtc] <ip> <name> <<network_interface> ...>
The options are the same as vsql add. Be sure to specify the --msdtc option if
MSDTC should be virtualized. If this option is omitted, MSDTC will not be
virtualized.
operate—Return a Virtual SQL Server from maintenance mode to operation mode
mx vsql operate <vsql>
status—View status for a Virtual SQL Server
mx vsql status [--up] [--down] [--operational] [--maintenance]
[--primary] [--backup] [--active] [-inactive] [--showApplication]
<vsql>
update—Modify an existing Virtual SQL Server
mx vsql update [--policy nofailback|autofailback] [--application
<application_name>] [--msdtc] [--activitytype single|always] <ip>
<name> <<network_interface> ...>
The options are the same as vsql add. When using this command, be sure to
specify the --msdtc option if MSDTC should be virtualized. If this option is
omitted, MSDTC will not be virtualized.
Chapter 3: mx Commands
122
mx vsqlinstance – Virtual SQL Instance commands
Use the following mx vsqlinstance commands to manage Virtual SQL
Instances.
Command
Description
add
Add a Virtual SQL Instance
clear
Clear a monitor event
delete
Delete a Virtual SQL Instance
disable
Disable a Virtual SQL Instance
dump
Dump the Virtual SQL Instance configuration
enable
Enable a Virtual SQL Instance
status
Show status for a Virtual SQL Instance
update
Modify an existing Virtual SQL Instance
add—Add a Virtual SQL Instance
mx vsqlinstance add --vpath <path> --port <TCP_port> [arguments]
<vsql\instancename>
The arguments are:
--vpath <path>
The full path that will be used for the data files and directories for this virtual
SQL Server instance. This location will store the SQL Data Root that was
created when the SQL Server instance was installed.
--port <TCP_port>
The port number for TCP/IP sockets that the SQL Server instance should
listen on. Specifying a port is required.
[--timeout <seconds>]
The maximum amount of time that will be waited for the probe to complete.
The default is five seconds.
[--frequency <seconds>]
The interval of time, in seconds, at which the monitor runs the probe. The
default is 10 seconds.
[--restarts <number of restarts>]
The number of attempts that should be made to restart the SQL service
instead of immediately failing over the Virtual SQL Server. If you do not
Chapter 3: mx Commands
123
specify a number for this component, the Virtual SQL Server will fail over
immediately to a backup node.
[--probeSeverity nofailover|autorecover|noautorecover]
This setting determines what happens when the SQL monitor probe fails.
With nofailover, when the monitor probe fails, the Virtual SQL Server does
not fail over to a backup node. With autorecover, the Virtual SQL Server fails
over when the monitor probe fails, and failback occurs according to the
Virtual SQL Server policy (either AUTOFAILBACK or NOFAILBACK). With
noautorecover, failover occurs to a backup node and the monitor is disabled
on the original node.
[--ordering SERIAL|PARALLEL]
Whether HP Clustered File System enforces a strict ordering sequence when
it runs Start or Stop scripts. The default is serial, the strict ordering sequence.
[--recoveryScript <script>]
Runs after a monitor probe failure is detected, in an attempt to restore the
SQL service.
[--recoveryTimeout <seconds>]
The amount of time to wait for the script to complete.
[--startScript <script>]
When HP Clustered File System selects the active server for the SQL service,
the Start script runs on that server.
[--stopScript <script>]
A script that runs on all other servers configured for the monitor to ensure
that the SQL service is not active on those servers.
[--startTimeout <seconds>]
The amount of time to wait for the Start script to complete.
[--stopTimeout <seconds>]
The amount of time to wait for the Stop script to complete.
[--eventSeverity consider|ignore]
Whether HP Clustered File System takes service monitor events (such as a
failure or timeout of a Start or Stop script) into consideration when it makes
failover decisions. The default is consider.
Chapter 3: mx Commands
124
[--priority <priority>]
The service priority is used when HP Clustered File System fails over Virtual
SQL Servers. Service priorities are natural numbers, with 0 (zero)
representing the highest priority and higher numbers representing lower
priorities. If multiple failures preventHP Clustered File System from placing a
Virtual SQL Server on a node where all of its associated services are available,
HP Clustered File System next looks for a server where the associated service
with the highest priority is available. The default is 0.
[--revirtualize yes|no]
Whether existing data files should be used for this Virtual SQL Instance.
clear—Clear a monitor event
mx vsqlinstance clear <vsql\instance> <netif> ...
delete—Delete a Virtual SQL Instance
mx vsqlinstance delete <vsql\instance>
disable—Disable a Virtual SQL Instance
mx vsqlinstance disable <vsql\instance> <netif> ...
dump—Dump the Virtual SQL Instance configuration to stdout
mx vsqlinstance dump
enable—Enable a Virtual SQL Instance
mx vsqlinstance enable <vsql\instance> <netif> ...
status—Display the status of a Virtual SQL Instance
mx vsqlinstance status [arguments] <vsql\instance>
The arguments are:
[--up|--down]
[--primary|--backup]
[--enabled|--disabled]
[--active|--inactive]
[--showApplication]
With no arguments, the command shows status for all SQL monitors.
update—Modify a Virtual SQL Instance
mx vsqlinstance update [arguments] <vsql\instancename>
Chapter 3: mx Commands
125
The arguments are the same as vsqlinstance add, with the exception that the
--vpath, --revirtualize, and --port arguments do not apply. If you need to
change the port assignment, first delete the Virtual SQL Instance and then
recreate it using the new port number.
sleep command
The sleep command is useful when executing mx commands from a batch
file. The command can be used when the cluster is either running or offline
and has the following syntax:
sleep [seconds]
The sleep command can be inserted between mx commands in the batch file
and causes mx to pause the specified number of seconds before executing the
next command.
Index
A
accounts, OS
assign to roles 57
remove from roles 58
role memberships 58
alert messages 87
application tags 59
B
basic volume, convert to dynamic 75
C
Cluster ID, reset 20
cluster status information 87
commands
destroypsfs 4
devrecover 4
diskupdate 5
dismount 5
dledit 5
dlmdebug 5
event log 6
fsprobe 6
gcstat 6
get_fenceidentity 6
hbaapidump 6
hn2ip 7
idfence 7
lcl-dump 7
location of 3
makescldb 7
mcs log 8
mcs select 8
mpdump 12
mpimport 13
mprepair 15
mx 21
mx account 57
mx application 59
mx config 60
mx config snapshot 68
mx device 70
mx disk 74
mx dynvolume 75
mx eventnotifier 78
mx fs 84
mx matrix 86
mx mfs 88
mx mp 66
mx netif 92
mx quota 94
mx role 101
mx server 103
mx service 106
mx snapshot 109
mx vfs 111
mx vfs_share 113
mx vhost 117
mx vsql 119
mx vsqlinstance 122
mxcheck 21
mxcollect 22
mxconsole 22
mxgenpass 22, 54
mxmtool 21
mxsancheck 23
mxsanconf 23
mxsanlk 23
mxservice 26
mxsetsecret 27
mxstart 27
mxstop 27, 28
partresize 27
126
Index
PSANcfg 28
psdcoinst 29
psdctl 30
psfscheck 30
psfsdebug 34
psfsdq 34
psfsformat 35
psfsinfo 37
psfslabel 38
psfsquota 39
psfsresize 41
psfsresume 41
psfsrq 42
psfssuspend 42
psfsunpack 43
psvctl 43
registry 44
sandiskinfo 44
sdmp 48
sdmp_ctl 48
sentinels 48, 49
sleep 125
smds 49
snapctl 49
snmpget, snmpset, snmpwalk 49
spctl 49
spdebug 50
spstat 50
sqlreg 50
wmtest 50
configuration
destroy 87
initial 60
membership partitions 66
configuration information
collect 22
dump or restore 87
configuration, snapshot methods 68
D
device bindings, display 30
device monitor
add 70
disable 74
enable 74
modify 74
127
status of monitor 74
disk
deport 74
display information 75
import 74
show information 44
dll files 3
DLM 5
dynamic volume
convert from basic volume 75
create 75
export 76
extend 76
import 76
list all dynamic volumes 76
list with sandiskinfo 47
properties 78
recreate 78
E
email event notifier 79
event log
add a message 8, 87
display events 8
view with mcs select 8
view with mx server
viewevents 105
event notifier services
email 79
enable or disable 81
import or export settings 81
manage 78
script 80
snmp 80
test 83
events, clear
device monitor 73
service monitor 108
Virtual SQL Instance 124
F
FC switches
configure 23
display login information 28
unfence ports 28
Index
filesystems
check 30
convert basic volume 75
create 35
destroy 4
drive letters, assign 5
enable or disable FZBMs 32
image, obtain 34
label 38
mount points, assign 5
quotas
disable 95
enable 94, 95
set options 97
show default limits 97
show options 98
reformat 86
repair 30
report information about 37
resize 41
resume suspended filesystem 41
status information 86
storage devices 86
suspend 42
Full Zone Bit Map (FZBM)
enable or disable 32
G
getting help 1
H
HBA ports
add or remove 28
host registry, clear 20
HP
NAS services website 2
storage website 1
technical support 1
L
license file 105
LUNs
display HBA’s view of LUNs 6
display information with
sandiskinfo 44
128
M
Management Console, start 22
matrixrc file
authentication information 51
encrypted passwords 54
file format 51
wildcards 53
membership partitions 19
active 17
add 66
clear host registry 20
cluster ID, reset 20
configure 66
display 12, 18
inactivate 20
inactive 17
online repair 66
repair 15
resilver 19
resilver, specifying valid
partition 19
mx command
classes 56
options 55
syntax 55
mxds datastore
back up 13
restore 15
N
Naming Database 28
network interface
add 92
administrative traffic 93
enable or disable 93
remove 93
status 93
P
partition, resize 27
passwords, encrypted 22, 54
PSANinfo 28
psd process, enable or remove 29
Index
Q
quotas
back up quota data 34
enable 94
enable or disable via psfscheck 32
filesystem
disable 95
enable 95
set hard and soft limits 96
set options 97
show defaults 97
show options 98
manage 39
restore quota data 42
set default via psfscheck 32
set defaults on filesystem 94
user
remove quotas 100
set quotas 98
show quota information 99
users in group
remove quotas 101
set quotas 101
show quota information 101
129
enable or disable 103
host registry, clear 20
license file 105
list in .matrixrc file 53
mark as down 104
reboot 4
SAN access 23
status of 105
view events 105
service monitor
add 106
delete 109
enable or disable 109
status 109
snapshot methods 68
snapshots
create 109
delete 110
show options 110
snmp event notifier 80
storage device
display available devices 86
T
R
reg files 3
resilver specific partition 19
roles
assign users or groups 57
roles, management
delete 102
enable or disable 102
import or export 102
rename 103
show role information 102
S
SAN locks 23
script event notifier 80
scripts 3
server
add 103
cannot be fenced 104
check configuration 21
delete 103
technical support, HP 1
U
users
display quotas 99
remove quotas 100
set quotas 98
users or groups
manage role assignments 57
V
Virtual CIFS Server
configure 111
delete 112
enable or disable 112
move 112
status 113
Virtual File Share
configure 113
delete 116
enable or disable 116
Index
status 116
virtual host
add 117
delete 118
enable or disable 118
status of 118
Virtual SQL Instance
add 122
delete 124
disable 124
dump configuration 124
enable 124
status 124
update 124
Virtual SQL Server
130
add 119
delete 120
disable 121
dump configuration 121
enable 121
maintenance mode 121
rehost 121
status 121
update 121
W
websites
HP storage 1
NAS Services 2