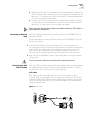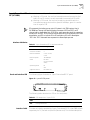
1
Router 6000 Family
Installation Guide
Router 6040 (3C13840)
Router 6080 (3C13880)
http://www.3com.com/
Part No. 10014361
Published June 2004
3Com Corporation
350 Campus Drive
Marlborough, MA
01752-3064
Copyright © 2004, 3Com Corporation. All rights reserved. No part of this documentation may be
reproduced in any form or by any means or used to make any derivative work (such as translation,
transformation, or adaptation) without written permission from 3Com Corporation.
3Com Corporation reserves the right to revise this documentation and to make changes in content from
time to time without obligation on the part of 3Com Corporation to provide notification of such revision or
change.
3Com Corporation provides this documentation without warranty, term, or condition of any kind, either
implied or expressed, including, but not limited to, the implied warranties, terms or conditions of
merchantability, satisfactory quality, and fitness for a particular purpose. 3Com may make improvements or
changes in the product(s) and/or the program(s) described in this documentation at any time.
If there is any software on removable media described in this documentation, it is furnished under a license
agreement included with the product as a separate document, in the hard copy documentation, or on the
removable media in a directory file named LICENSE.TXT or!LICENSE.TXT. If you are unable to locate a copy,
please contact 3Com and a copy will be provided to you.
UNITED STATES GOVERNMENT LEGEND
If you are a United States government agency, then this documentation and the software described herein
are provided to you subject to the following:
All technical data and computer software are commercial in nature and developed solely at private expense.
Software is delivered as “Commercial Computer Software” as defined in DFARS 252.227-7014 (June 1995)
or as a “commercial item” as defined in FAR 2.101(a) and as such is provided with only such rights as are
provided in 3Com’s standard commercial license for the Software. Technical data is provided with limited
rights only as provided in DFAR 252.227-7015 (Nov 1995) or FAR 52.227-14 (June 1987), whichever is
applicable. You agree not to remove or deface any portion of any legend provided on any licensed program
or documentation contained in, or delivered to you in conjunction with, this User Guide.
Unless otherwise indicated, 3Com registered trademarks are registered in the United States and may or may
not be registered in other countries.
3Com and the 3Com logo are registered trademarks of 3Com Corporation.
Intel and Pentium are registered trademarks of Intel Corporation. Microsoft, MS-DOS, Windows, and
Windows NT are registered trademarks of Microsoft Corporation. Novell and NetWare are registered
trademarks of Novell, Inc.
All other company and product names may be trademarks of the respective companies with which they are
associated.
CONTENTS
ABOUT THIS GUIDE
Conventions 5
Related Documentation
1
6
INTRODUCING THE ROUTER 6000 FAMILY
Introduction 7
Router Model and Structure 9
System description 13
Introduction to General Modules
2
14
INSTALLING THE ROUTER
General Site Requirements 19
Safety Recommendations 21
Installation Tools and Meters and Equipment
Installation 23
Installing Modules 24
3
22
CONFIGURING THE ROUTER
Establishing Configuration Environment 29
Router Configuration Fundamentals 34
4
SOFTWARE MAINTENANCE
Software Maintenance Overview 37
Upgrading Program Files Using Xmodem Protocol
Upgrading Application Program via Ethernet Port
5
HARDWARE MAINTENANCE
Hardware Maintenance 49
Power Module Removal and Installation
Fan Removal and Installation 50
RPU Removal and Installation 51
6
49
TROUBLESHOOTING
Troubleshooting Power System 53
Troubleshooting Configuration System
53
44
46
Troubleshooting Application Software Upgrade
7
54
FLEXIBLE INTERFACE CARDS
FIC Categories 57
Remove and Install FIC 57
2-port 10/100 FIC (3C13861) 58
1-port 100 FX MM FIC (3C13860) and
1-port 100 FX SM FIC (3C13862) 60
4-port Enhanced Serial FIC (3C13863)
8-port Enhanced Serial FIC (3C13864) 62
4-port Channelized E1/PRI FIC (3C13866) and 4-port Fractional E1 FIC
(3C13823) 65
4-port Channelized T1/PRI FIC 4T1 (3C13870) and 4-port Fractional T1 FIC 4T1-F
(3C13821) 69
1-port Channelized E3 FIC (3C13888) 71
1-port Channelized T3 1CT3 (3C13889) 72
1-port OC-3 ATM MM FIC (3C13882)
1-port OC-3 ATM SM FIC (3C13884)
1-port OC-3 ATM SML FIC (3C13886) 73
2-port ADSL (over POTS) FIC (3C13872) 75
A
OBTAINING SUPPORT FOR YOUR PRODUCT
Register Your Product to Gain Service Benefits
Purchase Value-Added Services 79
Troubleshoot Online 79
Access Software Downloads 79
Contact Us 80
Telephone Technical Support and Repair 80
79
Conventions
5
ABOUT THIS GUIDE
This guide describes the 3Com® Router 6000 Family of routers and how to install
hardware, configure and boot software, and maintain software and hardware.
This guide also provides troubleshooting and support information for your router.
This guide is intended for the system, or network administrator, who is responsible
for installing, configuring, using, and managing the routers. It assumes a working
knowledge of wide area network (WAN) operations, and familiarity with
communication protocols that are used to interconnect WANs.
Always download the Release Notes for your product from the 3Com World Wide
Web site for the latest updates to product documentation:
http://www.3com.com
Conventions
Table 1 and Table 2 list conventions that are used throughout this guide.
Table 1 Notice Icons
Icon
Notice Type
Description
Information
note
Information that describes
important features or
instructions.
Caution
Information that alerts you to
potential loss of data or potential
damage to an application,
system, or device.
Warning
Information that alerts you to
potential personal injury.
Table 2 Text Conventions
Convention
Description
Screen displays
This typeface represents information as
it appears on the screen.
Keyboard key names
If you must press two or more keys
simultaneously, the key names are
linked with a plus sign (+), for example:
Press Ctrl+Alt+Del
The words “enter” and type”
6
CHAPTER : ABOUT THIS GUIDE
Table 2 Text Conventions
Convention
Description
When you see the
word “enter” in this
guide, you must type
something, and then
press Return or Enter.
Do not press Return or
Enter when an
instruction simply says
“type.”
Words in italics
Italics are used to:
Emphasize a point.
Denote a new term
at the place where
it is defined in the
text.
Identify menu names, menu
commands, and software button names. Examples:
From the Help
menu, select Contents.
Words in bold
Related
Documentation
Click OK.
Boldface type is used to highlight
command names in text. For example,
“Use the display user-interface
command to...”
The following manuals offer additional information necessary for managing your
Router 6000:
n
n
n
3Com Router Command Reference Guide — Provides detailed descriptions
of command line interface (CLI) commands, that are required to manage
the Router 6000.
3Com Router Configuration Guide— Describes how to configure your
Router 6000 using the supported protocols and CLI commands.
Release Notes — Contains the latest information about your product. If
information in this guide differs from information in the release notes, use
the information in the Release Notes.
These documents are available in Adobe Acrobat Reader Portable Document
Format (PDF) on the CD-ROM that accompanies your router, or on the 3Com
World Wide Web site:
http://www.3com.com/
INTRODUCING THE ROUTER 6000
FAMILY
1
Introduction
Flexible Interface Card
Options
ATM and DSL
3Com 6000 Routers are next generation, high-performance edge routers. The
Router 6040 is a 4-slot chassis. The Router 6080 is an 8-slot chassis. 3Com 6000
Routers offer a robust hardware design, supporting Flexible Interface Cards (FICs),
hot swappable Power Supply Unit (PSU), and 1+1 power backup. Following are
the main features of 6000 Routers.
The following FICs are available for 3Com 6000 Routers.
n
1-port 100 FX MM FIC (3C13860)
n
2-port 10/100 FIC (3C13861)
n
1-port 100 FX SM FIC (3C13862)
n
4-port Enhanced Serial FIC (3C13863)
n
8-port Enhanced Serial FIC (3C13864)
n
4-port Channelized E1/PRI FIC (3C13866)
n
4-port Channelized T1/PRI FIC (3C13870)
n
2-port 2-Port ADSL FIC (3C13872)
n
4-port Fractional T1 FIC (3C13821)
n
4-port Fractional E1 FIC (3C13823)
n
1-port OC-3 ATM MM FIC (3C13882)
n
1-port OC-3 ATM, SM FIC (3C13884)
n
1-port OC-3 ATM, SML FIC (3C13886)
n
1-port Channelized E3 FIC (3C13888)
n
1-port Channelized T3 FIC (3C13889)
Digital Subscriber Line (DSL) is a simple, but highly efficient, broadband
technology. A DSL achieves great data transmission capacity over existing copper
wiring, by using digital code modulation technology. The ADSL cards available for
6000 Routers allow medium-to-small-sized enterprises to access the Digital
Subscriber Line Access Multiplexer (DSLAM) equipment via Public Switched
Telephone Network (PSTN) and, then, the Internet.
Asynchronous Transfer Mode (ATM) transmits, multiplexes, and switches
information in cells. 6000 Routers provide 155Mbps cards supporting ATM
Adaption Layer Type 5 (AAL5), and offers traffic services like Constant Bit Rate
(CBR), Variable Bit Rate (VBR) and Unspecified Bit Rate (UBR). Such routers are
well-suited to the high-speed data service and the transmission of large packets,
8
CHAPTER 1: INTRODUCING THE ROUTER 6000 FAMILY
which, implement connection between medium-and-small-sized enterprise
networks and ATM networks.
MPLS
Data security and
reliability
Multiprotocol Label Switching (MPLS) is a combination of IP and ATM
technologies. MPLS replaces the IP header with a short and length-fixed label as
traffic identifier. This information is used by the router to make forwarding
decisions. This provides faster forwarding speed while getting support from IP
routed protocols and control protocols. This meets the requirements that various
new applications put on the network. MPLS VPN is a Virtual Private Network
technology that implements the interconnection of private networks via Label
Switched Paths (LSPs). As a LSP is a tunnel across the public network on its own,
MPLS has an intrinsic advantage in terms of VPN implementation. 6000 Routers
usually act as Label Edge Routers (LERs) to connect to an MPLS domain with
non-MPLS domain or connect to MPLS domains of different service providers.
n
n
n
n
n
n
Online software
upgrading
Abundant fault isolation
methods
Support for NAT. Besides some basic functions, the NAT available for 6000
can limit concurrent connections to a single user, and thus alleviate the
negative impact caused by malicious resources without compromising the
normal network applications. NAT of 6000 also provides the ALG
(Application Layer Gateway) function to FTP and ICMP.
Support the authentication protocols such as PAP, CHAP, and data RADIUS
Implement packet filter and stateful firewall for preventing the intrusion
from an external network.
Support VPN (including GRE, L2TP, and MPLS) and provide IPSec, and IKE.
This ensures the security of the private networks in an Internet environment.
Support the Backup Center and Virtual Router Redundancy Protocol (VRRP)
technologies. This enhances the robustness and reliability of the network by
providing a backup scheme in case of communication line or device failures.
So far, backup center supports backup load sharing.
Support hot swap of fans, interface cards, and power module to ensure
high reliability.
You can upgrade the application programs and Boot ROM programs, and add new
features and functions on line as needed.
n
n
n
You can monitor the states of system configurations, system service
channels, and system resources, as well as fault indication via console and
network management host.
You can monitor the FIC running state by observing the LEDs on FIC panels.
You can use in-service system test, or out-of-service system test. In addition,
loopback test and hardware key module self-test, are allowed.
Router Model and Structure
Router Model and
Structure
6040 Components
9
3Com 6000 Routers include 3Com 6040, and 6080. These models are similar in
chassis structure and layout. They use the mid-backplane allowing front and rear
card insertion and can be mounted in 19-inch standard racks.
The 6040 has five slots on the front panel. Slot 0 is used for the main control unit,
and slots 1 through 4 are used for FICs.
Two PSUs, working in 1+1 backup mode, can be installed in 6040 from the rear of
the chassis. The PSUs provide AC power. The fan module is located at the left rear.
Both PSU and fan module are hot swappable.
6040 Front Panel
The following illustration details the components of the front panel of the 3Com
Router 6040.
Figure 1 Front Panel of the 3Com Router 6040
(1)
(2)
(3)
(4)
n
1. RPU Slot 0
n
2. FIC Slot 1
n
3. FIC Slot 2
n
4. FIC Slot 3
n
5. FIC Slot 4
n
6. ESD-preventive wrist strap port
(5)
(6)
10
CHAPTER 1: INTRODUCING THE ROUTER 6000 FAMILY
6040 Rear Panel
The following illustration details the components of the rear panel of the 3Com
Router 6040 with optional second power supply.
Figure 2 Rear Panel of the 3Com Router 6040
(1)
(3)
6080 Components
(2)
(4)
(5)
n
1. Fan module
n
2. Grounding screw
n
3. ESD-preventive wrist strap port
n
4. Power supply (PWR1) unit (PSU) 1
n
5. PWR2 - for 2nd power supply
The 6080 has nine slots on the front panel, using slot 0 for the main control unit
and slots 1 through 8 for FICs.
Two PSUs, working in 1+1 backup mode, can be installed in the 6080 from the
rear of the chassis. The PSUs provide AC power, and you may make a selection as
needed. The fan module is located at the left rear. Both PSU and fan module are
hot swappable.
Router Model and Structure
11
6080 Front Panel
The following illustration details the components of the front panel of the 3Com
Router 6080.Front Panel of the 3Com Router 6080
n
1. Holes for holding chassis
n
2. RPU Slot0
n
3. FIC Slot1
n
4. FIC Slot2
n
5. FIC Slot3
n
6. FIC Slot4
n
7. FIC Slot5
n
8. FIC Slot6
n
9. FIC Slot7
n
10. FIC Slot8
n
11. ESD-preventive wrist strap port
12
CHAPTER 1: INTRODUCING THE ROUTER 6000 FAMILY
6080 Rear Panel
The following illustration details the components of the rear panel of the 3Com
Router 6080.
Figure 3 Rear Panel of the 3Com Router 6080
(1)
(3)
(2)
(4)
(5)
n
1. Fan module
n
2. Grounding screw
n
3. ESD-preventive wrist strap port
n
4. PWR1 - first power supply
n
5. PWR2 - second power supply
System description
13
System description
Table 3 System Description of 6040 and 6080
Item
6040
6080
FIC slot
4
8
Fixed interface
2 10/100Mbps Ethernet ports
2 10/100Mbps Ethernet ports
1 AUX port
1 AUX port
1 console port
1 console port
Processor
733MHz
733MHz
Boot ROM
1024KB
1024KB
SDRAM
256MB
256MB
NVRAM
512KB
512KB
Flash
32MB
32MB
Dimensions (W x D x
H)
436.2 mm x 420 mm x 130.5
mm
436.2 mm x 420 mm x 219.5 mm
Weight
17.7kg
27.5kg
Input voltage AC
Rated voltage: 100-240V a.c.;
50/60Hz
Max. voltage: 90-264V a.c.;
50/60Hz
Max. current: 4.0A/2.0A
(6080/ 6040)
Max Power
126W
40oC
Operating
temperature
0~
Relative humidity
10 ~ 90% (non-condensing)
213W
0 ~ 40oC
10 ~ 90% (non-condensing)
SDRAM (Synchronous Dynamic Random Access Memory) is also known as the memory that
stores the communication data between the system and CPU.
NVRAM (Non-Volatile Random Access Memory) stores the abnormal alarm information
Flash memory functions as the major file storage medium to store application program files,
abnormal information, and configuration files.
Boot ROM stores the boot program file.
14
CHAPTER 1: INTRODUCING THE ROUTER 6000 FAMILY
Introduction to
General Modules
The 6000 Routers modules include RPU, PSU (PWR), FAN, and FICs.
RPU
The RPU functions primarily to process protocols, forward low-speed packets,
control interfaces, and detect faults. The state monitoring information, such as the
operation states of FAN, PWR, and system can be shown directly via the LEDs on
the RPU, or reported to the network management system. In addition, RPU also
provides the hardware reset button, RESET.
Figure 4 RPU
Introduction to General Modules
15
Figure 5 LEDs and buttons
Table 4 RPU LED and button description
LED and button
RUN
Description
RPU
System operation LED. Blinking means the CPU is
in normal operation, constant ON or OFF means
the CPU has failed.
FAN
FAN operation LED. Constant ON means the FAN
is operating normally.
PWR1
PWR1 operation LED. Constant On means PWR1
is operating normally, and constant OFF means
that PWR1 is not in place or has failed.
PWR2
PWR2 operation LED. Constant ON means PWR2
is operating normally, and constant OFF means
PWR2 is not in place or has failed.
RPU
System failure LED. ON means CPU has recieved
an alarm signal for PWR or FAN (due to
overheating, for example).
FAN
FAN failure LED. ON means the FAN is not in
place or its rotation is obstructed.
PWR1
PWR1 failure LED. ON means PWR1 has failed.
PWR2
PWR2 failure LED. ON means PWR2 ahs failed.
(Green)
ALM
(red)
RESET
10/100BASE-TX LED
Interface
RPU hardware reset button.
LINK (green)
OFF means the link is not connected and ON
means the link is connected.
ACT (yellow)
OFF means no data is being transcieved on the
interface and blinking means data is being
transcieved.
Console interface
Table 5 Console interface attributes
Attribute
Description
Connector
RJ45
Interface standard
RS232
Baud rate
9600bps ~ 115200bps
9600bps by default
Supported service
Connect to the ASCII terminal
Connect to the serial interface of the local PC and run
terminal emulation program on the PC
Command Line Interface (CLI)
16
CHAPTER 1: INTRODUCING THE ROUTER 6000 FAMILY
AUX interface
Table 6 AUX interface attributes
Attribute
Description
Connector
RJ45
Interface standard
RS232
Baud rate
300 ~ 115200bps
Supported service
Modem dialup
Backup
Ethernet interface
The RPU provides two 10/100Base-TX Ethernet ports on its panel (Ethernet 0/0/0
at left and Ethernet 0/0/1 at right). Their attributes are listed in the following table.
Table 7 Ethernet interface attributes
Power Modules
Attribute
Description
Connector
RJ45
Interface type
MDI
Supported frame format
Ethernet_II
Ethernet_SNAP
Operating mode
10M/100Mbps auto-sensing
Full duplex/Half-duplex
The power modules of 3Com 6000 Routers can work in either single-power or
dual-power mode. In dual-power mode, the two Power Modules function in a
redundant loading sharing mode. The input interruption or failure of a PWR does
not affect the operation of another PWR, and this operating PWR will provide all
the power required by the system.
Power Modules control functions of overcurrent protection and overvoltage
protection.You can connect the PWR to the backplane by inserting it from the rear
of router chassis. It is hot swappable and its switchover will not affect the ongoing
system operation.
If you want to install a 6000 Router in a communication equipment room, you
should make sure that the power distribution cabinet can provide the lightning
protection box or arrester against the current of 20KA and above.
Introduction to General Modules
17
Do not connect the AC power cord while inserting or removing a card.
ON/OFF switch should be set to OFF while inserting or removing.
Figure 6 AC Power
LEDs
Figure 7 Front Panel of AC Power Module
Table 8 PWR LED description
FAN
LED
Description
ALM (red)
PWR failure LED. ON means PWR is not in place or has failed.
RUN (green)
PWR operation LED. Constant ON means PWR is operating normally, and
OFF means PWR has failed.
AC OK (red)
PWR input LED. Constant ON means the normal voltage (85 ~ 264V) is
inputting, and OFF means the voltage input is not normal.
The 6040 is configured with six fans, separated into three groups. The 6080 is
configured with eight fans, separated into four groups. The two fans in a group
work in a redundant manner. When all these fans are working normally, the
operating temperature of the system can be maintained in the range of 0 to 55 C.
Failure of a fan will not affect the operation of other fans, the system will still be
able to operate in the normal temperature. The rotating speed of the fans is
controlled by the RPU and is in the range of 50% to 100%.
The FAN controller uses two parameters, low-temperature threshold and
high-temperature threshold, to control the rotation speed of the fans; the former
corresponding to 100% rotating speed, and the latter corresponding to 50%
rotating speed. The system will send out rotation stop alarm signals in case any fan
fails. The alarm, and state LEDs, of FAN are located on the RPU front panel.
18
CHAPTER 1: INTRODUCING THE ROUTER 6000 FAMILY
Figure 8 Fan Location (6080)
INSTALLING THE ROUTER
2
General Site
Requirements
Temperature/Humidity
Requirements
To ensure the proper working of the routers and prolong their service life, the
installation site should meet the requirements described in the following sections.
To ensure normal operation of the Router, the equipment room must maintain
temperature and humidity. Long-lasting moisture can degrade the performance of
the insulating material, which may result in electric leakage, leading to metal
erosion. The following table lists the requirements of 3Com Router 6000 in
temperature and humidity.
Table 1 Temperature/Humidity requirements in the equipment room
Temperature
Relative humidity
0oC to 40oC
10% to 90%
The values of the operating temperature and humidity in router equipment refers
to the values measured at the position 1.5m above the floor and 0.4m ahead of
the router rack; given there are no protective boards in front or at the back of the
router rack.
Cleanliness
Requirements
Dust is harmful to the safe operation of the Router. Dust on the chassis may result
in static absorption, and causes poor contact of the metal connection components
or points.
There should not be explosive, conductive, magnetic, or corrosive dust in the
equipment room where 3Com 6000 Routers are located, and the dust
concentration should meet the following requirements:
Table 2 Limitation on dust content in equipment room
Mechanical active material
Unit
Content
Dust particle
particle/m³
3 x 10⁴
(No visible dust on desk in three days)
Note: Dust particle Diameter 5µm
Besides the dust specifications, the equipment room of the Router should also
meet the rigorous requirements for the content of salt, acid and sulfide. These
harmful gases could accelerate the metal erosion and the aging process of some
parts. The specific limits of these harmful gases are given in the following table.
Table 3 Harmful gas limits in an equipment room
Gas
Max. (mg/m3)
SO2
0.2
H2S
0.006
NH3
0.05
20
CHAPTER 2: INSTALLING THE ROUTER
Table 3 Harmful gas limits in an equipment room
. ESD Preventive
Requirements
Gas
Max. (mg/m3)
Cl2
0.01
Despite careful considerations in preventing ESD in the design of the Router,
excessive static electricity may bring enormous damage to the card circuits and
even the entire Router.
On the communication network connected to the Router, the static electricity is
primarily introduced from the outside electrical fields, such as the outdoor
high-voltage power cable and lightning, and from the inside system, such as
indoor environment, floor material and the equipment frame. To avoid the
damage caused by the static electricity, you should ensure that:
■
The equipment is well connected to ground.
■
The equipment room is dust-proof.
■
There is adequate temperature and humidity.
■
■
■
Electromagnetic
Environment
Requirements
You place the removed circuit board upward on the ESD-preventive
workbench, or into a static shielded bag.
You hold the circuit board by the outer edge, when observing or moving it,
to avoid direct contact with the elements on it.
All interference sources will affect the Router negatively in the conduction patterns
of capacitance coupling, inductance coupling, electromagnetic wave radiation,
and common impedance (including grounding system) coupling. To prevent the
interference:
■
■
■
■
Lightning Protection
Requirements
You always wear the ESD-preventive wrist strap and clothes when
contacting the circuit board.
Take effective measures against electricity net interference with the power
supply system.
Do not use the working ground of the Router together with the grounding
or lightning protection grounding device of the power equipment. Separate
them as far as possible.
Keep the Router far away from strong power wireless launchers, radar
launchers, and high frequency and high-current equipment.
Use electromagnetic shielding if necessary.
Despite the careful considerations that have been taken in lightning protection
when designing the Routersm and the measures that have been adopted, an
excessive-degree of lightning may still damage the Routers. To achieve the best
lightning protection, you are recommended to:
■
■
Keep the grounding wire of the PGND of the chassis in good contact with
the earth ground.
Keep the grounding terminal of the AC power socket in good contact with
the earth ground.
Safety Recommendations
■
■
Check Workbench
■
■
■
Add a special lightning protection facility at the input end of the signal
cables in order to protect the signal cables led to the outdoors, such as ISDN
cable, telephone cable, and E1/T1 cable, from lightning strikes in a more
effective way.
Leave enough clearance at the air intake vents and air exhausting vents to
ensure adequate ventilation of the router chassis.
Make sure that the workbench has a good ventilation system.
Make sure that the workbench is stable enough and can support the weight
of the Router and the installation accessories.
Make sure that the workbench is well-grounded.
When installing or working on a Router, you should:
■
Keep the Router far away from heat sources and water/liquid.
■
Make sure that the Router has been correctly grounded.
■
Wear ESD-preventive wrist strap during installation and maintenance.
■
■
■
Check Router and
Accessories
Add a lightning arrester for power supply onto the front end of the power
input in order to protect the power supply from lightning strikes in a more
effective way.
Following are the rules that you should observe when installing the Router:
■
Safety
Recommendations
21
Connecting the cables to the ports appropriate to them. Above all, do not
insert the telephone cable (including the ISDN cable) into a serial port.
Follow laser cautions. Do not directly stare into the the laser, or the fiber
connector connected to it.
Use Uninterrupted Power Supply (UPS).
After having confirmed that the installation conditions comply with the
requirements, please open the packing cases of the Router.s
Table 4 3Com 6000 Routers and accessorie
Item
Name
Quantity
Note
1
6040/6080
router
1 set
Router chassis
2
Main control
unit
1 PCS
-
3
PSU (AC)
1/2 PCS
To achieve redundancy, you must
equip two PSUs.
4
Fan
1
-
5
FIC
0~2/4/8
You can equip the 6040 with four
FICs, and 6080 with eight
maximum. You must specify FIC
type and quantity when placing an
order.
6
PGND wire
1 PCS
-
7
Console cable
1 PCS
-
22
CHAPTER 2: INSTALLING THE ROUTER
Table 4 3Com 6000 Routers and accessorie
Installation Tools and
Meters and
Equipment
Item
Name
Quantity
Note
8
Technology
documentation
1 SET
Include printed documentation
(Installation Manual for the Router)
and CD-ROM documentation.
9
Installation
1 SET
mechanical part
-
11
External cable
suite
Optional cables, including Ethernet
cable, AUX cable,
synchronous/asynchronous serial
cable, E1 cable, optical cable, etc.
You must specify the cable type
and quantity when placing the
order. Otherwise, they will not be
provided.
1 SET
The following tools are required for proper installation.
■
ESD-preventive wrist strap
■
Static shielding bag
■
Grounding wire and power cord
■
Console cable
■
Optional cables
■
HUB or LAN Switch
■
CSU/DSU (Channel Service Unit/Data Service Unit) or other DCE equipment
■
Console terminal (it could be a common PC)
■
Equipment related to the selected FICs
Installation
Installation
23
The following flow chart details the steps for installing the Router.
Figure 1 6000 Family Router Installation Flow
Rack Mount Router
6000 Routers are designed to fit the 19-inch standard rack. The following table
describes their dimensions.
Table 5 6000 Router dimensions
Model
Dimensions (mm)
6040 (W x D x H)
436.2 x 420 x 130.5
6080 (W x D x H)
436.2 x 420 x 219.5
Take the following steps to mount a Router.
1 Ensure the rack is stable.
2 Fix the mounting brackets (attached with a fixed cabling rack) onto both sides of
the chassis with a Phillips screwdriver. (Skip this step, if you do not fix the router on
the rack.)
3 Install the Router on the shelf/guides and push it into the rack. (Since 6080 Router
is rather heavy, it needs two people to carry from both sides.)
4 Place the Router in the rack by fixing the mounting brackets and the proper pan
head screws.
24
CHAPTER 2: INSTALLING THE ROUTER
Figure 2 Mounting a 6000 Router in a rack
(2)
(1)
(3)
(1)
Bench-Mount Router
Installing Modules
■
1. Mounting screws
■
2. Mounting brackets (carrying cabling racks)
■
3. Guides
(2)
In some cases, 19-inch standard rack is not available and bench mounting is
preferred. This mounting method is simple. Please pay attention to the following
items:
■
Keep the workbench stable and well grounded.
■
Leave the clearance of 10cm around the Router for heat dissipation.
■
Never put heavy things on the Router.
The tasks of general module installation include the installations of RPU, PWR, and
various FICs.
Connect the Ground
(PGND)
The normal connection of PGND wire for the Router is the essential safeguard
against the lightning shocks and interference. Therefore, you must first correctly
connect the PGND wire when installing and using the Router.
6000 Routers provide a separate PGND screw. You must securely connect the
PGND to the ground, ensuring the leakage power to be channeled into the earth
ground. The PGND also provides protection against the high voltage of lightning
shocks caused by external network lines like E1/T1 line and ISDN/PSTN line. The
PGND screw is located at top right-rear of the chassis and identified by a
grounding mark, as shown in the following figure:
Installing Modules
25
Figure 3 Location of Grounding Screw (PGND)
(1)
Connect the ground screw to the earth ground using a PGND cable, requiring a
grounding resistance less than 5-ohm. If you install the Router in a 19-inch
standard rack, you must also ground the rack.
Be sure the router is grounded in the event of lightning.
Connect AC Power Cord
AC power supply
AC power input range: 100 to 240V, 50/60Hz AC.
Figure 4 The power socket of an AC-input Router.
(1)
(2)
■
1. Cable-retention clip
■
2. Power switch
■
3. AC input
(3)
Recommended AC power socket
Use a 3-line single-phase power socket with a grounding terminal; which should
be reliably connected to the ground in the building. Make sure that the power
supply for the building has been well grounded before connecting the AC power
cord.
Connect AC Power Cord
1 Check that the PGND wire has been correctly connected to the ground.
2 Insert one end of the power cord accompanying the Router into the power socket
on the Router’s rear panel, fix the cable onto the cable-retention clip with a cable
26
CHAPTER 2: INSTALLING THE ROUTER
strap, and connect the other end of the cable to the AC outlet that provides
power supply.
3 Check that the POWER LED on the front panel of the Router is ON, which means
the power cord connection is correct.
Connecting the Console
Terminal
Each 6000 Router provides an RS232-compliant asynchronous serial console port
(CON), through which the user can configure the Router.
Console cable
Console cable is an 8-core shielded cable. At one end of the cable is a crimped
RJ45 connector that plugs into the console port of the Router. At the other end of
the cable is a DB9 (female) connector and a DB25 (female) connector.
Figure 5 Console Cable
Connect console cable
Before you can configure the Router at the console terminal, connect the console
cable using the following steps:
1 Select a console terminal. Console terminal can be a standard ASCII terminal
possessing an RS232 serial port, or a regular PC, but the latter is often used.
2 Connect the cable. Power off the Router and console terminal, and connect the
RS232 serial port to the console port on the RPU via a console cable.
3 Power on the Router after verifying the installation. If the Router is working
normally, the system will display the router boot information on the console
terminal.
Connecting Router to
LAN
6000 Routers provide the fixed 10/100BASE-TX interface. 10/100BASE-TX
Ethernet interface uses the category 5 twisted-pair for connection, as shown in
the following figure.
Ethernet cables fit into two categories, straight-through cables and crossover
cables.
Installing Modules
27
■
Straight-through cable: The wire sequences of the twisted pairs crimped in the
RJ45 connectors at both ends are the same. It is used for connecting a terminal
device (e.g., PC and router) to a HUB or LAN Switch. The cables delivered with
the router are straight-through cables.
■
Crossover cable: The wire sequences of the twisted pairs crimped in the RJ45
connectors at both ends are different. It is used for connecting two terminal
devices (e.g., PC and router). Users can make it as needed.
When preparing network cables, please use shielded twisted-pair (STP) cables for
electromagnetic compatibility.
Connecting an Ethernet
cable
When connecting to a LAN Switch, insert the cable to the 10/100BASE-TX port
identified by MDIX.
Follow these steps to connect an Ethernet cable, to the 10/100BASE-TX port, on
the RPU for example:
1 Use a crossover cable to connect the Router to a PC or another Router by
connecting one end of the cable to the Ethernet port on the Router and the other
end to the PC or the peer router. Use a straight-through cable to connect the
Router to a HUB or LAN Switch by connecting one end of the cable to the
Ethernet port on the Router and the other end to the HUB or the LAN Switch.
2 View the LED of 10/100BASE-TX port. If the link has been connected, the green
LED will light.
You must connect a cable to the interface with the appropriate mark.
Connecting the AUX
Port to Modem
AUX is an RS232-compliant asynchronous serial interface that can provide backup
for a WAN interface. Usually, it functions to provide dial connection. In case of
console failure, AUX can function as a console interface.
AUX cable
AUX cable is an 8-core shielded cable. At one end of the cable is an RJ45
connector that can be plugged into the console port of the Router. At the other
end are the DB9 (male) connector and the DB25 (male) connector. You can plug
either of them into the serial port of a modem as needed. The following figure
illustrates the AUX cable.
Figure 6 AUX Cable
28
CHAPTER 2: INSTALLING THE ROUTER
Connecting the AUX
cable
Follow these steps to connect the AUX cable:
1 Insert the RJ45 connector of the cable into the AUX port on the RPU.
2 Insert the DB25 or DB9 connector into the serial port of the analog modem. AUX
port is usually used for remote configuration or dial-up backup. Therefore, you
need to connect the local modem to the remote modem via PSTN and then to the
remote equipment.
Verify Installation
During router installation, you must verify the installation each time you power on
the Router, making sure that:
■
Enough clearance has reserved around the Router for adequate dissipation
and the cabinet is stable enough.
■
The correct power supply is used.
■
The connection of the PGND wire of the Router is correct and secure.
■
The connections with other devices, such as, the console terminal, are
correct.
It is very important for you to check the router installation, as the secure
connection, well grounding, and use of the correct power supply are essential to
the normal operation of the Router.
3
Establishing
Configuration
Environment
Connecting the Router
to a configuration
terminal
CONFIGURING THE ROUTER
When configuring a router for the first time, you can only use Console port or
AUX port. This section introduces the local and remote configuration environment
establishment for your reference
To set up the local configuration environment, RJ45 connector of the console
cable needs to be connected to the console port on the Router, and DB25
connector or DB9 connector to the serial interface of a PC, as shown below.
Figure 1 Local configuration through CON port
RS232 serial port
Quidw ay AR46-20
PC
Console port
Console cable
Setting the parameters
of configuration
terminal
To set the configuration parameters, follow below:
1 Start the configuration terminal and set up a new connection. If the configuration
is performed through a PC, the terminal emulation program (HyperTerminal of
Windows95/98/NT/2000/XP) should be run in the PC to set up a new connection.
2 Enter a name for the new connection and press <OK> button.
30
CHAPTER 3: CONFIGURING THE ROUTER
3 Set terminal parameters. Parameters of the HyperTerminal of Windows98 are set
as follows:
■
Select a connection port. While implementing the local configuration, select
the serial interface to be connected in the Connect Using box, as shown
below. Please notice that the selected serial interface should be consistent
with the actual serial interface connected by the console cable.
Establishing Configuration Environment
31
4 Setting serial interface parameter. As shown below, in the properties dialog box of
the serial interface, the parameters are set as follows: Baud rate 9600, Data bits 8,
Parity check None, Stop bits 1, and Flow control None. Click the <OK> button to
return to the HyperTerminal interface.
32
CHAPTER 3: CONFIGURING THE ROUTER
5 Set HyperTerminal properties. Select [Property/Settings] on the HyperTerminal and
enter the property setting window, shown below. Select VT100 or auto detection
as terminal simulation type, press [Ok] and return to the HyperTerminal window.
Powering on the Router
Perform the following to check items before powering on the router:
■
■
■
Whether the power cord and ground wire are correctly connected.
Whether the voltage of the power supply complies with the requirement of
the Router.
Whether the console cable is correctly connected, whether the PC or
terminal for configuration is started, and whether the settings are done.
Before switching on the power, locate the power switch in the equipment room,
so that, in case of an electrical accident, power can be turned off.
1 Power up the Router. Confirm the following while the router is booting:
■
■
Whether the LEDs on the front panel are normal.
Whether the configuration terminal display is normal. For the local
configuration, the booting interface displays on the configuration terminal
after the Router is powered on.
2 Upon completion of POST, press <Enter> to begin configuring router.
Establishing Configuration Environment
Startup Process
33
Self-test on SDRAM
During the process of powering on the router or resetting the router, the
configuration terminal yields the following output first:
Do you want to go on checking sdram? Yes or not(Y/N)
This information asks if you want to check the SDRAM. If you press <N>, the
system will skip the SDRAM checking.
Checking SDRAM is normally performed by Administrative personnel. This process
may be time consuming. The user will have 5 seconds to decide whether or not to
validate the SDRAM. If SDRAM is checked, the results are displayed on the
console.
Display system information
The following information displays on the screen:
Starting...
*******************************************************
*
*
* Routing Platform 6080 Bootrom, Ver.*
*
*
*******************************************************
Copyright(C) 2001-2004 by 3Com Corporation
Creation date: Jul 14 2003, 10:54:22
CPU type
CPU L2 Cache
CPU Clock Speed
BUS Clock Speed
Memory Size
Press Ctrl+B to enter
: IBM750FX-DD2.2
: 512KB
: 625MHz
: 125MHz
: 256MB
Boot Menu... 0
If you press <Ctrl+B> within 4 seconds, the system will enter Boot menu. Boot
menu mainly provides application downloading and executing.
If you do not press<Ctrl+B>, the system will take the next step.
The system provides Boot ROM master system automatic updating function.
Before executing an application, if it finds the Boot ROM master system version is
different from that recorded in the Boot ROM chip, it will automatically update the
Boot ROM master system and reset it. The following information will display:
Update Bootrom...done!
Select booting device and download applications
If you do not press<Ctrl+B>, the Boot ROM program will automatically select a
booting device according to the configuration of a user and read the application
files from the corresponding device into SDRAM. If a user configures to boot with
Flash, the terminal screen will yield the following information:
Auto-booting...
Booting From Flash...
The Boot File is < flash:/8060.bin >
34
CHAPTER 3: CONFIGURING THE ROUTER
Decompress Application
If the application files read into the SDRAM pass the checking, they will be
decompressed. And the terminal screen displays the following information:
Begin Decompressing
............................................................
Packet Decompress is completed!
Initialize the system
After decompression, the Boot ROM program ends and the depressed application
will be executed. The terminal screen displays the following information:
Booting...
Be Sure The Baudrate Be Set To 9600bps!
Be Sure The Baudrate Be Set To 9600bps!
GT64260 Version->[B].
usrRoot() end
leave BSP
root begin...
Init 28F128...
Begin to start the system, please waiting......
......
line Con 0 is available.
Press ENTER to get started.
Router Configuration
Fundamentals
Basic Configuration
Procedure
In general, the configuration steps are as follows:
1 Before configuring a Router, you will need specific, detailed networking
requirements. They include networking purpose, the role of the Router in the
network, the division of subnets, the type of the WAN and transmission medium,
and the network security policy and reliability.
2 Based on the above requirements, draw a clear and detailed networking diagram.
3 Configure the WAN interface of the Router. First, configure the physical operating
parameters (such as synchronous/asynchronous serial interface, baud rate and
synchronous clock) of the interface according to the transmission medium of the
WAN. For the dial-up interface, you need to configure DCC parameters. Second,
configure the link layer protocol encapsulated on the interface and the related
operating parameters according to the type of the WAN.
4 Configure the IP addresses or IPX network number of all the interfaces of the
Router according to the division of the subnets.
5 Configure the routes. If it is necessary to enable the dynamic routing protocol,
configure the related operating parameters of the protocol.
6 If there is any special security requirement, perform the security configuration for
the Router.
7 If there is any special reliability requirement, perform the reliability configuration
for the Router.
Router Configuration Fundamentals
35
SNMP Management
For help managing routers on your network, you can use 3Com Network Director
software to discover, map, and display network links and IP devices.
To allow Network Director to monitor your routers, you must first configure SNMP
V1 and SNMP Trap support with the following commands:
[3Com]
[3Com]
[3Com]
[3Com]
snmp-agent
snmp-agent
snmp-agent
snmp-agent
sys-info version v1
community read <read-community-string>
community write <write-community-string>
trap enable
In this example, <addr> is the address of the PC on which you have installed
Network Director.
To learn more about Network Supervisor, on the 3Com Corporation World Wide
Web site, enter this URL into your Internet browser:
http://www.3com.com/3nd
Command Line Interface
The command line interfaces provided by 3Com 6000 Series Routers include a
series of configuration commands, through which a user can configure and
manage the router. The command line interface has the following features:
■
■
Users can enter <?> at any time to get online help.
■
Provide prompt help information for user’s convenience.
■
■
Slot Arrangement and
Interface Numbering
Rules
Performs the local or remote configuration through the Telnet command,
which can be used to directly log on and manage other Routers.
■
■
Command line interface
Performs the local configuration through CON port.
Provide network diagnostic tools, such as Tracet and Ping, to quickly
diagnose the availability of the network.
Provide all kinds of detailed debugging information to diagnose network
faults.
The command line interpreter adopts fuzzy search for the keywords of the
command. Any conflict-free keyword will be interpreted. For example, for
the display command, you can just enter <dis>.
3Com 6000 Series Router command line interface provides a rich set of
configuration commands, which are grouped in system view. A group corresponds
to a view. You can switch between different views by using commands. Normally,
only specific commands can be executed in a certain view, although some
common commands, (such as ping, display current-configuration, and interface)
can be used in all views.
3Com 6000 Router supports various interfaces, such as CON port, AUX port,
Ethernet port, (synchronous/asynchronous) Serial port, and Asynchronous port.
The interfaces are configured in the order of sequence number.
36
CHAPTER 3: CONFIGURING THE ROUTER
Figure 2 Example: 6080 Router slot arrangement
Slot 3
Slot 1
Slot 5
Slot 7
Slot 0
Slot 2
Slot 8
Slot 4
Slot 6
Interface numbering rule
6000 interfaces are numbered in three dimensions. The rules are as follows:
■
■
■
The interfaces are numbered in the interface-type X/Y/Z format, in which,
interface specifies the interface type (as serial, asynchronous, ethernet or
ATM, etc.), X specifies the slot number, Y specifies the board number (or is
fixed as 0 when there is no board), and Z specifies the interface sequence
number.
As shown in the above figure, different interfaces of an interface module
share the same slot number X.
For every interface, Y starts from 0, and Z indicates the interface sequence
(from left to right) on the interface module.
SOFTWARE MAINTENANCE
4
Software
Maintenance
Overview
There are three types offiles managed by the Router:
■
Boot ROM program files
■
Application program files
■
Configuration files
The maintenance of the Router involves mainly the three aforementioned types of
files. Only the software maintenance functions listed in Boot menu, for example
upgrading of application files, are discussed here.
Boot Menu
Boot main menu and Boot sub-menu will be used during the maintenance of the
router software. Boot sub-menu can upgrade and start a program. While Boot
main menu upgrades and starts an application program.
Build up a configuration environment and then boot the Router.
1 Enter <N> and the following information will be displayed on the terminal screen:
Press CTRL+A to Stop AutoBoot!
Starting...
2 Press <Ctrl+A> in five seconds after “Starting...” pops up, then the system enters
Boot sub-menu.
In order to access the Boot sub-menu, you shall press <Ctrl+A> within five seconds
after the information “starting…” appears. Otherwise the system will directly enter
Boot main menu if no error is found in system checks.
If you do not press <Ctrl+A> as required, then the system will check the code for
Boot main system when Boot sub-system starts.
38
CHAPTER 4: SOFTWARE MAINTENANCE
Boot Sub-menu
The following information will be displayed on the terminal screen when the
system enters Boot sub-system successfully.
============<SMALL-BOOTROM MENU(Ver 1.07)>=============
| | <1> Update LargeBootrom|
| <2> Boot main system|
===========================================================
Enter your choice(1-2):
Modifying serial port parameters
1 Enter <1> in Boot sub-system and the system will begin to change baudrate of the
serial port on RPU card, as will reduce the time to load necessary files. The system
prompts the following information:
========================<BAUDRATE SET>=========================
|Note: Change The HyperTerminal's Baudrate Accordingly.|
|-----------------------<BaudrateAvaliable>------------------|
| <1> 9600(Default)|
| <2> 19200
|
| <3> 38400
|
| <4> 57600
|
| <5> 115200
|
================================================================
Enter Your Choice(1-5):
The information indicates you to choose the desired baudrate. By default, the
baudrate is 9600 bps.
2 Select a target item and press <Enter>. When you select <5>, the system prompts:
Enter your choice(1-5): 5
Change The BaudRate On PC Side First!
3 Select [File/Attributes] at HyperTerminal in the configuration PC and press
<Configuration> in the dialog box. In the dialog box, change the baudrate to a
desired value and press <OK>.
4 Disconnect the system and resume dialup, to make the new parameter take effect.
The Current BaudRate is 115200
You should reset the HyperTerminal baudrate to the default value 9600bps when
upgrading, by changing rate downloading files, to prevent output information
from being prompted on the terminal screen after system startup or restart.
Upgrading Boot main system (LargeBootrom) through serial port
Enter <2> in Boot sub-system and choose to upgrade Boot main system via
Xmodem.
Starting Boot main system
Enter <3> in Boot sub-system and the system will then copy the files in Boot main
system into SDRAM. It will also decompress and start the files. Then the system
will start Boot main menu.
Software Maintenance Overview
Boot Main Menu
39
The following is prompted on the terminal screen after the system enters Boot
main system.
Copyright(C) 2001-2004 by 3Com Corporation CO.
Creation date: Jul 14 2003, 10:54:22
CPU type
CPU L2 Cache
CPU Clock Speed
BUS Clock Speed
Memory Size
Press Ctrl+B to enter
: IBM750FX-DD2.2
: 512KB
: 625MHz
: 125MHz
: 256MB
Boot Menu... 0
If you press <Ctrl+B> at this time, the system will enter Boot main menu.
Press <Ctrl+B> four seconds after startup to enter Boot main menu. Otherwise the
system will start host program in default mode.
The system will first prompt the following information for you to enter the
password. If the password is correct, the system shows the main menu. If you
enter an incorrect password three times consecutively, the system restarts.
MAIN MENU
=====================<MAIN-BOOTROM MENU>=======================
| <1> Boot With Default Mode|
| <2> Boot From Flash|
| <3> Enter Serial SubMenu|
| <4> Enter Ethernet SubMenu|
| <5> Modify Bootrom Password|
| <6> Reboot
===============================================================
Enter your choice(1-7): _
If you use Flash for the first time, and reading or writing Flash is required, Flash
will be formatted first. Then the following information will be prompted:
Formatting Flash, please waiting several minutes...done
Starting host program in default mode
Enter <1> in Boot main menu and the system will first read, Flash description area
to get start flag (from Flash or from hardware disk) and start file names. Then it
downloads host program files to memory as per start flag and start file names. The
system decompresses and starts the files, and the terminal will display:
Boot With Default Mode
Booting From Flash...
The Boot File is < flash:/6080.bin >
The Router 6000 only supports starting Boot main menu from Flash.
Starting application program from Flash
Enter <2> in Boot main menu and the system will first read Flash description area
to get Flash start file names. Then it downloads host program files to memory as
per start file names. The system decompresses and starts the files. The following
information is prompted on the terminal screen:
40
CHAPTER 4: SOFTWARE MAINTENANCE
Booting from Flash
Entering serial port sub-menu
Enter <2> in Boot main menu and the system will enter serial port sub-menu. The
following information is shown on the terminal screen:
Boot From Serial Port
======================<SERIAL SUB-MENU>========================
| <1> Download Program To SDRAM And Run|
| <2> Download To Flash|
| <3> Change Boot Parameter|
| <4> Exit To Main Menu|
===============================================================
Enter your choice(1-4): _
1 Downloading via serial port application files to memory and starting them.
Enter <1> in serial port sub-menu and the system will download, via serial port,
application files from the configuration PC to memory using Xmodem protocol. It
then decompresses them and runs start file upon skipping to program ingress.
Refer to Upgrading Boot main system (LargeBootrom) through serial port for
loading details.
2 Downloading to Flash
Enter <2> in serial port sub-menu and the system will download the main boot file
to Flash, via serial port using Xmodem protocol.
3 Modifying serial port parameters
Enter <3> in serial port sub-menu to modify baudrate of the serial port on RPU
card. The following information is displayed:
========================<BAUDRATE SET>=======================
|Note: Change The HyperTerminal's Baudrate Accordingly.|
|-------------------<BaudrateAvaliable>-----------------------|
| <1> 9600(Default)|
| <2> 19200
|
| <3> 38400
|
| <4> 57600
|
| <5> 115200
|
===============================================================
Enter Your Choice(1-5):
The information indicates you to choose desired baudrate. By default, the
baudrate is 9600 bps. Select a target item and press <Enter>. When you select
<5>, the system prompts
Enter your choice(1-5): 5
Change The BaudRate On PC Side First!
Change baudrate of the configuration PC as per the prompts. Disconnect the
system and resume dialup, to make the new parameter take effect. See Modifying
serial port parameters, for more details.
4 Returning to Boot main menu
5 Enter <4> in serial port sub-menu to return to Boot main menu.
Software Maintenance Overview
41
Entering Ethernet port sub-menu
Enter <4> in Boot main menu to turn to Ethernet port sub-menu. The following
information is displayed:
=======================<NETWORK SUB-MENU>======================
| <1> Download Program To SDRAM And Run|
| <2> Download Main Boot File To Flash|
| <3> Download Backup Boot File To Flash|
| <4> Download Secure Boot File To Flash
| <5> Change Boot Parameter|
| <6> Exit To Main Menu|
| <Be Sure To Modify Parameter Before Downloading! >
===============================================================
Enter your choice(1-6):
1 Downloading port application files to memory and starting them via Ethernet port.
Enter <1> in Ethernet port sub-menu and the system will download via Ethernet
port from the host to memory. It then decompresses them and runs start file upon
skipping to program ingress.
2 Downloading the main boot file to Flash via Ethernet port
Enter <2> in Ethernet port sub-menu and the system will download the main boot
file from the host to Flash.
3 Downloading the backup boot file to Flash via Ethernet port
Enter <3> in Ethernet port sub-menu and the system will download the backup
boot file from the host to Flash via Ethernet port.
4 Downloading the secure boot file to Flash via Ethernet port
Enter <4> in Ethernet port sub-menu and the system will download the secure
boot file from the host to Flash via Ethernet port.
5 Modifying Ethernet port parameters
Enter <5> in Ethernet port sub-menu to modify parameters of the Ethernet port.
The following information is displayed:
Two protocols for download, tftp & ftp. You can modify the flags following the
menu.
tftp--0x80, ftp--0x0.
Available Boot Device: [wancom]
boot device
: wancom0Ethernet device name
processor number: 0
host name
: host
file name
: c:/share/system.bin Host file name
inet on ethernet (e):
inet on backplane (b):
host inet (h)
: 192.168.0.91Host IP address
gateway inet (g):
user (u)
: FTP username
ftp password (pw) (blank = use rsh): taotaoFTP user password
flags (f)
: 0x0(FTP)/0x80(TFTP) File transfer type
target name (tn):
startup script (s):
42
CHAPTER 4: SOFTWARE MAINTENANCE
other (o)
:
6 Return to Boot main menu. Enter <4> in Ethernet port sub-menu to return to Boot
main menu.
Modifying Flash description area
Enter <5> in Boot main menu and the system will read Flash description area data
first. When data errors occur in Flash description area, the system prompts the
following messages:
Data error in flash description area!
Data error in flash description backup area!
Note: Flash description area will be rewrite!
The following system parameters will be set to default value:
Main Boot File Name = [main.bin]
Backup Boot File Name = [backup.bin]
Secure Boot File Name = [secure.bin]
If the descriptor area containing the information relevant to the main and backup
boot files is completely damaged, the system rewrites the flash descriptor area
automatically.
Then the system enters boot file control menu:
=====================<BOOT FILE CONTROL>=====================
| <1> Show Available Boot File
|
| <2> Set Main Boot File
|
| <3> Set Backup Boot File
|
| <4> Exit To Main Menu
|
=============================================================
Enter your choice(1-4):
Displaying available boot files in the Flash
Enter <1> in Boot file control sub-menu. The system lists all available boot files in
the Flash as follows:
Available boot file(s):
'M' = MAIN, 'B' = BACKUP, 'S' = SECURE
------------------------------------------------------------[No.] [Type]
[Date] [Time] [Size] [Name]
----------------------------------------------------------------------1
M Apr/12/2003 00:38:29 5534020 main.bin
2
B Mar/17/2004 11:27:43 5865492 backup.bin
3
S Apr/04/2003 23:09:24 5749340 secure.bin
4
N/A Apr/04/2003 23:09:24 5749340 router.bin
---------------------------------------------------------------------Press <Enter> to continue
The system first tries to boot from the file marked with ”M”, and if the attempt
fails the backup boot file which is marked with “B”. In case both attempts fail, the
system tries to boot from the secure boot file (the one marked with “S”), which is
the last normal boot means. If this boot attempt fails, the system prompts the
boot failure. The system displays boot file type during the booting process.
Software Maintenance Overview
43
Setting the main boot file
In Boot file control sub-menu, input <2> to set the main boot file. The following
information appears:
Input main boot file name->router.bin
Input the main boot file name behind the right arrow indicator,
The choose <1> to see if it has taken effect
Available boot file(s):
'M' = MAIN, 'B' = BACKUP, 'S' = SECURE
------------------------------------------------------------[No.] [Type]
[Date] [Time] [Size] [Name]
------------------------------------------------------------1
N/A Apr/12/2003 00:38:29 5534020 main.bin
2
B Mar/17/2004 11:27:43 5865492 backup.bin
3
S Apr/04/2003 23:09:24 5749340 secure.bin
4
M Apr/04/2003 23:09:24 5749340 router.bin
------------------------------------------------------------Press <Enter> to continue
As you can see from the information of all the boot files, the file type of
“router.bin” has been changed to “M” and that of the original main boot file
“main.bin” to “N/A”.
Setting the backup boot file
In Boot file control sub-menu, input <3> to set the backup boot file. The following
information appears:
Input backup boot file name->router.bin
Input the backup boot file name behind the right arrow indicator,
The choose <1> to see if it has taken effect
Available boot file(s):
'M' = MAIN, 'B' = BACKUP, 'S' = SECURE
------------------------------------------------------------[No.] [Type]
[Date] [Time] [Size] [Name]
------------------------------------------------------------1
M Apr/12/2003 00:38:29 5534020 main.bin
2
N/A Mar/17/2004 11:27:43 5865492 backup.bin
3
S Apr/04/2003 23:09:24 5749340 secure.bin
4
B Apr/04/2003 23:09:24 5749340 router.bin
------------------------------------------------------------Press <Enter> to continue
As you can see from the information of all the boot files, the file type of
“router.bin” has been changed to “B” and that of the original backup boot file
“backup.bin” to “N/A”.
Returning to Boot main menu
Enter <4> in Boot file control sub-menu to return to Boot main menu.
Modifying Boot ROM Pasword
Enter <6> in Boot main menu. The following information is displayed:
44
CHAPTER 4: SOFTWARE MAINTENANCE
old password:?Enter the old password
New password:?Enter a new password
Verify:
?Acknowledge the new password
Write password to Flash...OK
Both incorrect old password and inconsistency in new password verification can
result in password modification failure. The system then exits.
Ignoring system configuration
Enter <7> in Boot main menu. The system tags the Flash with an ignore flag and
displays:
Flag set successfully.
In this case, the ex-factory configuration is used for booting and the configuration
files saved by the user are ignored.
The flag is cleaned soon after it is read during system booting.
Rebooting the system
Enter <8> in Boot main menu to reboot the system. The following information is
displayed on the terminal screen.
Rebooting...
Upgrading Program
Files Using Xmodem
Protocol
Upgrading Boot ROM
Program
Detailed procedures:
1 Connect the configuration PC as per Figure 4-1.
2 Start the router and press <Ctrl+A> in five seconds when the system prompts
"Starting…" to enter Boot sub-menu.
3 Change the baudrate of the serial port on RPU card to increase loading rate. See
Modifying serial port parameters, for more details.
The baudrate of RPU serial port is 9600bps. Skip this step if you do not want to
modify it. If you have changed the baudrate, remember to reset it to 9600bps
when file transfer is completed.
4 Enter <2> in Boot sub-menu and the system will first download program files from
the configuration PC to memory using Xmodem protocol. The system begins to
upgrade Boot ROM program if no error is found in system checks. The following
information is shown on the terminal screen:
Please Select File.
XMODEM downloading...CC
5 Select [Transfer/Send files] in HyperTerminal when the above information pops up.
Upgrading Program Files Using Xmodem Protocol
45
In [Send files] dialog box, select <Protocol> as Xmodem and enter program path
and files name in <File name>. Then press <Send>. If the configuration PC is not
ready yet, press <Ctrl+X> to exit from loading program files.
Figure 1 Setting Parameters
6 The system prompts the following information after you press <Send>:
Figure 2 Xmodem File
When the loading is completed, the system prompts
XMODEM downloading...CC download successfully!
Update Bootrom...done!
Excluding the time to download program files, it takes 10 seconds to upgrade
Boot ROM program.
46
CHAPTER 4: SOFTWARE MAINTENANCE
Upgrading application
program
Downloading application files via serial port is easy but at low rate.
Detailed procedures:
1 Connect the configuration PC.
2 Change the baudrate of the serial port on RPU card to increase loading rate. See
Modifying serial port parametersModifying serial port parameters, for more
details.
The baudrate of RPU serial port is 9600bps. Skip this step if you do not want to
modify it. Remember to reset the baudrate to 9600bps when file transfer is
completed, if you have changed the baudrate.
3 Start the router and enter Boot main system. Press <Ctrl+B> when the system
prompts “Press Ctrl+B to enter Boot Menu... 3”. Input correct password and enter
Boot main menu.
4 Select <3> in Boot main menu to enter serial port sub-menu.
5 In serial port sub-menu, select <1> to download application files and run them. Or
select <2> to download application files to Flash.
6 Select application files and Xmodem protocol in [Transfer/Send files] in
HyperTerminal.
7 Send files.
8 If you have selected downloading application files to Flash, you need to return to
Boot main menu after the system writes application files into Flash and select <2>
to start the router from Flash.
Upgrading
Application Program
via Ethernet Port
Through Ethernet port, you can upgrade application program at high rate using
FTP or TFTP, but you need to prepare FTP Server or TFTP Server. Detailed procedures
are as follows:
Building up upgrade environment
Figure 3 Building FTP/PPP Upgrade Environment
LAN/WAN
Quidway AR46-20
(FTP/TFTP Client)
PC(FTP/TFTP Server)
1 Connect Ethernet port 0/0/0 in RPU card to a PC with cross-over cable.
Only Ethernet port 0/0/0 can be used in upgrading.
2 Connect the console port of Router to an external console terminal (can be the
external PC connected to an Ethernet interface), and configure the HyperTerminal
with the reference of “II. Setting the parameters of PC and terminal” contained in
the section 4.1.1.
Upgrading Application Program via Ethernet Port
47
3 Copy the target application files to the designated directory and configure IP
address for the PC Ethernet port.
Running TFTP Server or
FTP Server
Start TFTP server or FTP Server and set a path for the target files. For FTP Server, you
should also set username and password.
FTP Server or TFTP Server is not shipped with 3Com series routers, so you have to
buy it separately and install.
Configuring the Router
1 Start the router and press <Ctrl+B> to enter Boot main menu. See Boot Main
Menu for more details.
2 Select <4> in Boot main menu to enter Ethernet port sub-menu.
3 Select <3> in Ethernet port sub-menu to set Ethernet port parameters.
■
For TFTP upgrade mode, you should set the following parameters:
■
■
■
file name: The file name to be downloaded inet on ethernet (e)
The IP address for the downloading port in the router is user-defined and
should not be in conflict with other device addresses in the network. host
inet (h)
■
The IP address of TFTP Server
■
flags (f): Enter 0x80 for TFTP mode.
For FTP upgrade mode, you should set the following parameters:
■
■
file name: The file name to be downloaded
inet on ethernet (e): The IP address for the downloading port in the router,
is user-defined and should not be in conflict with other device addresses in
the network.
■
host inet (h): The IP address of FTP Server
■
user (u): username, which should be consistent with that at FTP Server.
■
■
ftp password (pw) (blank = use rsh); password, which should be consistent
with that at FTP Server.
flags (f): Enter 0x0 for TFTP mode.
FTP usemame and password in Boot main menu should be consistent with those
at FTP Server.
4 Select <1> in Ethernet port sub-menu to download application files and start
them. Or Select <2> in Ethernet port sub-menu to download application files to
Flash. The following information is shown on the terminal screen:
Attached TCP/IP interface to wancom0.
Loading... done
writing Flash................................Done
5 Select <4> in Ethernet port sub-menu to return to Boot main menu. Select <1> in
it to run the new files. Till now the upgrading ends.
48
CHAPTER 4: SOFTWARE MAINTENANCE
5
Hardware
Maintenance
HARDWARE MAINTENANCE
Please review the following cautions before installation or maintenance:
■
■
Power Module
Removal and
Installation
On a mounting screw of 3Com 6000 series router chassis, there is an
anti-dismantle seal of 3Com Corporation. The seal must be kept intact
before the support agent performs maintenance on the switch.
Remember to wear ESD-preventive wrist strap.
6000 Series Routers support 1+1 redundant power system. The power modules
are hot-swappable.
Remove a Power
Module
1 Turn off power switch.
2 Remove the power cord connected to the power module to be removed and
loosen the two captive screws in the top panel of the module.
3 Hold the handle of the module and gently pull the module out along the guides.
Figure 1 Power Module Removal
Install a Power Module
1 Hold the handle of the power module panel, slowly push the module into the
chassis along the guides until it touches the rear power panel inside the power slot
of the chassis.
2 Fasten the two captive screws in the power module panel.
50
CHAPTER 5: HARDWARE MAINTENANCE
3 Plug one end of the power cord shipped with the chassis into the socket in the
power module, and connect the other end to the power supply.
4 Turn on the power switch.
5 Check if the power status indicator ON the RPU is normal.
Fan Removal and
Installation
The fan is used for exhausting air to cool the cards. The fan is installed vertically to
the right side inside the integrated chassis.
Remove a Fan
1 Loosen the two captive screws of a fan.
2 One hand holds the handle attached to the front of the fan and pulls part of it
out, while the other hand holds the bottom of the fan.
3 Pull the whole fan out after it completely stops rotating.
The fan is rather long, and therefore use one hand to hold the bottom of the fan
while the other hand holds the handle attached to the front of the fan and pull it
out slowly. Be careful and do not put your finger into the rotating fan.
Figure 2 Fan Removal
Install a Fan
1 Hold the handle attached to the front of the fan with one hand and hold the
bottom with the other hand. Slowly insert the fan into the chassis along the
guides until it touches the rear panel.
2 Fasten the captive screws of the fan.
3 Check if the fan status indicator on the RPU is normal.
RPU Removal and Installation
51
RPU Removal and
Installation
Remove an RPU
1 Power off the router. (If there are two power modules installed, turn both of them
off.)
2 Loosen the captive screws at both sides of the RPU.
3 Pull the handles at both side of the RPU outward and gently pull the RPU out
along the guides until the whole card is separated from the chassis.
Figure 3 RPU Removal
Install an RPU
1 Power off the router. (If there are two power modules installed, turn both of them
off.)
2 Align the corners of the far edge with the guides in RPU slot and push the RPU
inside the router. At the same time, push the handles at both sides of the RPU
inward until it touches the RPU panel.
3 Fasten the captive screws and fix the RPU on the router.
4 Turn ON power.
5 Check if the fan status indicator on the RPU is normal after powering on the
router.
52
CHAPTER 5: HARDWARE MAINTENANCE
6
TROUBLESHOOTING
Troubleshooting
Power System
Fault: POWER RUN LED
is OFF or blinks.
Please check:
■
If the power switch of the Router is turned on.
■
If the power supply switch is turned on.
■
If the power cord of the Router is properly connected.
■
Troubleshooting
Configuration System
Fault: “nothing being
displayed on the
terminal”
If the power supply meets the requirement of the Router. Steady on means
the input voltage is normal (85-264V), off means the input voltage is
abnormal.
After the Power-On Self-Test (POST) of the Router, if the system operates normally,
the start-up information should be displayed on the console terminal. If the
configuration system has some fault, the terminal may display nothing or only
illegible characters.
After the Power-On Self-Test (POST) of the Router, if the terminal does not display
any information.
Please check:
■
If the power system is normal.
■
If the console cable is connected correctly.
If there's nothing wrong after all the items above have been checked, it is likely
that there is something wrong with the console cable or the terminal (e.g., the
HyperTerminal) parameters. Please check the cable or the parameters.
Fault: “displaying
illegible characters on
the terminal”
After the Power-On Self-Test (POST) of the Router, if the console terminal displays
illegible characters.
Please check the following:
■
Baud: 9600
■
Data bits: 8
■
Stop bit: 1
■
Parity: None
■
Flow control: None
54
CHAPTER 6: TROUBLESHOOTING
■
Terminal emulation: VT100
If the parameter settings do not match the above values, please modify the
configuration.
Troubleshooting
Application Software
Upgrade
Fault 1
Start the Router, upgrade the software with the TFTP approach, and the system
displays the following prompt:
DownLoad Program To Flash Through Net Port
boot device
: ErrDev
unit number
: 0
processor number
: 0
file name
: 6000.bin
inet on ethernet (e) : 1.1.1.1
host inet (h)
: 1.1.1.2
user (u)
: user
ftp password (pw)
: password
flags (f)
: 0x80
Loading... Loading Failed
Troubleshooting
The fault occurs due to the wrong boot device 'ErrDev' using a wrong application.
To solve the problem, just change “ErrDev” to “wancom” which is the application
upgrade device of 6000 Router.
Fault 2
Start the Router, upgrade the application software with the TFTP approach, and
the following information is displayed:
DownLoad Program To Flash Through Net Port
boot device
: wancom
unit number
: 0
processor number
: 0
file name
: 6000.bin
inet on ethernet (e) : 1.1.1.1
host inet (h)
: 1.1.1.2
user (u)
: user
ftp password (pw)
: password
flags (f)
: 0x80
Attached TCP/IP interface to wancom0.
Subnet Mask: 0xffffffc0
Attaching network interface lo0... done.
Loading... Error code 2: Access violation
tftpGet: Error occurred while transferring the file.
A bad file or twisted pair doesn't link correctly!Loading Failed
Troubleshooting Application Software Upgrade
55
Troubleshooting
The problem occurs because the file to be downloaded does not exist or the
network cable is not connected properly. To solve the problem, confirm that the
file to be downloaded is under the TFTP root directory and the cable is connected
properly.
Fault 3
Start the Router, upgrade the software with the TFTP approach, and the system
displays the following prompt:
DownLoad Program To Flash Through Net Port
boot device
unit number
processor number
file name
inet on ethernet (e)
host inet (h)
user (u)
ftp password (pw)
flags (f)
:
:
:
:
:
:
:
:
:
wancom
0
0
6000.bin
1.1.1.1
1.1.1.3
user
password
0x80
Attached TCP/IP interface to wancom0.
Attaching network interface lo0... done.
Loading... tftpGet: Error occurred while transferring the file.
A bad file or twisted pair doesn't link correctly!Loading Failed
Troubleshooting
The problem occurs because the IP address of the computer is not correctly
configured. To solve the problem, make a correct configuration of the IP address.
Fault 4
Start the Router, upgrade the software with the TFTP approach, and the system
displays the following prompt:
DownLoad Program To Flash Through Net Port
boot device
unit number
processor number
file name
inet on ethernet (e)
host inet (h)
user (u)
ftp password (pw)
flags (f)
:
:
:
:
:
:
:
:
:
wancom
0
0
6000.bin
1.1.1.1
1.1.1.2
user
password
0x80
Loading... Done
1000 Bytes Downloaded.Crc Error!
Troubleshooting
The problem occurs because the downloaded file is not the application of 6000
Router. To solve the problem, specify a correct application.
56
CHAPTER 6: TROUBLESHOOTING
Bar code labels display product and maintenance information on the router chassis
and FIC.
7
FIC Categories
Remove and Install FIC
FLEXIBLE INTERFACE CARDS
Following are the FICs available for 6000 Series Routers.
■
1-port 100FX MM FIC (3C13860)
■
2-port 10/100 FIC (3C13861)
■
1-port 100 FX SM FIC (3C13862)
■
4-port Enhanced Serial FIC (3C13863)
■
8-port Enhanced Serial FIC (3C13864)
■
4-port Channelized E1/PRI FIC (3C13866)
■
4-port Channelized T1/PRI FIC (3C13870)
■
2-port 2-Port ADSL FIC (3C13872)
■
4-port Fractional T1 FIC (3C13821)
■
4-port Fractional E1 FIC (3C13823)
■
1-port OC-3 ATM MM FIC (3C13882)
■
1-port OC-3 ATM, SM FIC (3C13884)
■
1-port OC-3 ATM, SML FIC (3C13886)
■
1-port Channelized E3 FIC (3C13888)
■
1-port Channelized T3 FIC (3C13889)
Be aware of the following important considerations before proceeding with the
installation of a FIC.
The shielding fingers on the front panel of FIC achieve special electromagnetic
shielding effect for the whole Router. Please ensure their integrity when
uninstalling or replacing an FIC and never damage them.
If you do not want to install a new FIC after removing the old one, install a blank
filter panel to keep off the dust and ensure the adequate ventilation of the Router.
3Com 6000 Series Routers support on-line removal. Thus, you can remove or
install FICs when the router is running without shutting down the power supply
and removing the power cable. But, you must execute the remove slot
command before removing FICs, otherwise, some unknown errors might
occur. However, you do not need to execute the undo remove slot
command when you reinstall the removed FICs.
If you unintentionally execute the remove slot command, you can cancel that
operation by using the undo remove slot command.
58
CHAPTER 7: FLEXIBLE INTERFACE CARDS
Remove FIC
Use the following procedure to remove a FIC:
1 Issue command to remove FIC.
2 Place the Router with the front panel forward.
3 Remove the cables connected to the FIC.
4 Loosen the captive screws at both sides of the FIC.
5 Pull the ejector levers at both sides of the FIC outward, pull the FIC out of the slot
along the guides until disengaging it totally from the slot.
Install FIC
Use the following procedure to install a FIC:
1 Place the Router with the front panel forward.
2 Align the remote edge of the FIC with the slot edge, push it into the slot, pull the
ejector levers inward until it presses against the FIC panel (the angles thus formed
between the FIC panel and the levers are the minimum angles).
3 Fix the FIC in the chassis by fastening the captive screws.
4 Repeat these steps to install all the other FICs.
Troubleshooting
The 6000 FICs have LEDs for status reporting. Generally, you can locate the
problem by performing the following operations if an FIC is not working normally:
■
■
■
■
■
2-port 10/100 FIC
(3C13861)
View the LEDs on the FIC panel, ensuring that the FIC is working normally.
Execute the configured display command, ensuring that the interface has
accepted the configuration and is working normally.
If anomalies occur without executing the remove slot command, you can
perform the following operation.
Restart the router (sometimes the router automatically restarts), and check if
the problem has been solved.
The 2-port 10/100 FIC is used for the communications between the Router and
LAN(s). The 2-port 10/100 FIC provides two 10/100Mbps RJ45 Ethernet interfaces.
The card supports:
■
Interface Attributes
Check the interface cables, making sure that you have used the correct
cables.
The transmission distance of 100 meters if the category-5 twisted pairs are
used.
■
The operation at the speeds of 100Mbps and 10Mbps, and autosensing.
■
Full duplex and half-duplex, with the former one in common use.
The following table describes the interface attributes of 2-port 10/100 FIC.
Table 1 2-port 10/100 FIC interface attributes
Attribute
Description
2-port 10/100 FIC
Connector
RJ45
Connector number
2
2-port 10/100 FIC (3C13861)
59
Table 1 2-port 10/100 FIC interface attributes
Attribute
Description
Cable
Standard Ethernet cable
Operating mode
Full duplex/Half-duplex
10M/100Mbps auto-sensing
Supported frame format
Ethernet_II
Ethernet_SNAP
Panel and Interface LED
The following figure illustrates an 2-port 10/100 FIC panel.
Figure 1 2-port 10/100BASE-T FIC Panel
Ethernet cable
■
LINK-OFF means the link is not connected and ON means the link is connected
■
ACTIVE-OFF means no data is being transceived on the interface and blinking
means data is being transceived.
As shown in the following figure, Ethernet cable of 2-port 10/100 FIC cards is a
category-5 twisted pair with RJ45 connectors. Pins 1 and 2 of the interface are at
the transmitting terminal, and Pins 3 and 6 are at the receiving terminal.
Figure 2 Ethernet Cable
RJ45
8
1
RJ45
8
1
Make Ethernet cable
Ethernet cable uses the category-5 twisted pair composed of eight cores that are
identified and grouped by their insulation layer colors. Usually a unicolor wire and
the white/unicolor wire for it are in pairs. But sometimes, color dots are used to
indicate which wires belong in pairs.
60
CHAPTER 7: FLEXIBLE INTERFACE CARDS
Ethernet cables fit into two categories, i.e., straight-through cables and crossover
cables.
■
Straight-through cable: The sequences of the twisted pairs crimped in the RJ45
connectors at both ends are the same. It is used for connecting a terminal
device (e.g., PC and router) to a HUB or LAN Switch. The cables delivered with
the router are straight-through cables.
■
Crossover cable: The wire sequences of the twisted pairs crimped in the RJ45
connectors at both ends are different. It is used for connecting two terminal
devices (e.g., PC and router).Users can make it as needed.
When preparing network cables, please use shielded twisted-pair (STP) cables;
they are available for the sake of electromagnetic compatibility.
The interface cables in the standard configuration of FIC cards are
straight-through cables.
Connect Interface Cable
Use the following procedure to connect interface cables:
1 If the Ethernet cable is a straight-through cable, plug one end of the cable into an
Ethernet port on the FIC card, and another end to a HUB or LAN Switch.
2 Power on the Router and check the status of the LINK LED on the FIC panel. ON
means that the link has been connected and OFF means that the link is not
connected. In the latter case, check the line.
You must connect a cable to the interface with the appropriate mark. Misplugging
is prone to impair the interface card and even damage the router mainframe.
1-port 100 FX MM FIC
(3C13860) and
1-port 100 FX SM FIC
(3C13862)
The 1-port 100FX MM FIC provides one 100Mbps Ethernet multi-mode fiber
interface. The 1-port 100FX SM FIC provides one 100Mbps Ethernet single mode
fiber interface. The high reliability and sound transmission quality intrinsic to
optical fibers enable the 1-port 100FX SM FIC to easily accomplish the
communications between the Router and a LAN. The interface can work in
megabit full-duplex mode.
In terms of transmission mode, optical fibers fall into multi-mode optical fiber and
single-mode optical fiber.
Single-mode optical fiber has a very thin core, and transmits only in single mode
on a given wavelength. It features wide band and large transmission capacity.
Multi-mode optical fiber can make the transmission in multiple modes on a given
wavelength. In multi-mode, lights of different modes are transmitted at different
speeds, resulting in phase distortion and hence limiting the transmission band. In
terms of fiber core size, there are two types of multi-mode optical fibers, i.e.,
62.5m and 50m, which are acceptable transmission media in ISO/IEC 11801
standard.
Interface Attributes
The following table describes the interface attributes of The 1-port 100 FX MM FIC
and 100 FX SM.
Table 2 The 1-port 100BASE-F SM FIC interface attributes
Attribute
Description
100 FX SM
100 FX MM
1-port 100 FX MM FIC (3C13860) and 1-port 100 FX SM FIC (3C13862)
61
Table 2 The 1-port 100BASE-F SM FIC interface attributes
Panel and Interface LEDs
Attribute
Description
Connector
SC
Connector number
1
Optical fiber mode
Single-mode
Multimode
Max. transmission
distance
15km
2km
Central wavelength
1310nm (1261~1360nm)
1315nm
(1270-1360nm)
Transmitting optical
power
Min.
-15dBm
20dBm
Max.
-8dBm
-14dBm
Receiving sensitivity
Min.
-31dBm
-31dBm
Max.
-8dBm
-14dBm
Operating mode
Full duplex
100Mbps
Supported frame
format
Ethernet_II
Ethernet_SNAP
The following illustrates the LEDs of the The 1-port 100 FX MM FIC
Figure 3 1-port 100 FX MM FIC panel 1SFX panel
Table 3
Table 4 LED description of the 100BASE-F SM, 100BASE-MM
Interface Optical Fiber
LINK
OFF means Rx link is disconnected, and ON means Rx link has been connected.
ACTIVE
OFF means no data is being transceived on the interface and blinking means
data is being transcieved.
100 FX MM should be connected to multi-mode optical fiber, and 100 FX SM to
single-mode optical fiber. The optical interfaces of both cards are SC optical
receptacles, so the optical fibers with SC connector should be selected.
Figure 4 SC optical fiber connector
62
CHAPTER 7: FLEXIBLE INTERFACE CARDS
Connect Interface
Optical Fiber
When connecting optical fiber, please note:
■
■
■
Do not bend optical fiber with excessive stress. The bend radius should be
no less than 10 cm.
Ensure that the Tx terminal and the Rx terminal of the interface are
connected correctly.
Keep the sectional surface of optical fiber clean and free from dust.
Laser Danger! Do not observe the optical fiber connector connected with the laser
in case the invisible laser radiation harms your eyes.
1 Find the Rx optical port and Tx optical ports on 100 FX MM/100 FX SM. Insert one
end of an optical fiber into the Rx optical port of 100 FX MM/100 FX SM, and the
other end into the Tx optical port of the peer device; insert one end of another
optical fiber into the Tx optical port of 100 FX MM/100 FX SM, and the other end
into the Rx optical port of the peer device.
2 Power on the Router and check the status of the LINK LED on the
100BASE-MM/100BASE-F SM panel. ON means the Rx link has been connected
and OFF means the Rx link is not connected. In the latter case, check the line.
4-port Enhanced Serial
FIC (3C13863)
8-port Enhanced Serial
FIC (3C13864)
Introduction to DTE and
DCE
4-port / 8-port FIC stands for 4-/8-port enhanced high-speed sync/async serial
interface card. The cards function mainly to transmit, receive, and process the data
on the synchronous/asynchronous serial interface. They support both synchronous
and asynchronous modes. In the former case, they support the DTE/DCE mode.
A card is usually connected to an external modem for the dialing purpose. In this
case, an appropriate baud rate must be set.
The synchronous serial interface can work in either DTE or DCE mode. Two devices
directly connected should work as DTE and DCE. The DCE device provides the
synchronization clock and specifies communication rate, and the DTE device
accepts the synchronization clock and communicates at the specified rate.
The Router normally works as a DTE. To know whether the specific equipment
connected with the Router is DTE or DCE, please refer to the manual shipped with
the equipment.
Speed and transmission
distance of
synchronous/asynchron
ous serial interface
In different operating modes, the synchronous/asynchronous serial interface
supports different electric signal specifications and baud rates. In addition, the
maximum signal transmission distance not only depends on the specified baud
rate but also the selected cable. The following table shows how the cable type,
baud rate, and the maximum signal transmission distance related to each other.
Table 5 Speed and transmission distance of V.24 (RS232)/V.35/X.21 cable
V.24 (RS232)
V.35/X.21
Baud rate (bps)
Max.
transmission
distance (m)
Baud rate (bps)
Max. transmission
distance (m)
2400
60
2400
1250
4-port Enhanced Serial FIC (3C13863) 8-port Enhanced Serial FIC (3C13864)
63
Table 5 Speed and transmission distance of V.24 (RS232)/V.35/X.21 cable
V.24 (RS232)
V.35/X.21
4800
60
4800
625
9600
30
9600
312
19200
30
19200
156
38400
20
38400
78
64000
20
56000
60
115200
10
64000
50
-
-
2048000
30
When a V.24 cable is used, the baud rate in synchronous mode shall not exceed
64 Kbps.
Interface Attributes
The interface attributes of 4/8-port Sync/Async FIC are listed in the following table:
Table 6 Interface attributes of 4-port Sync/Async FIC and 8-port Sync/Async FI
Attribute
Description
Synchronous
Connector
Asychronous
DB-28
Number of Connectors 4 (4-port FIC)
8 (8-port FIC)
Interface standard and V.24
operating mode
DTE, DCE
V.35, X. 21, RS-232
DTE
Synchronous
Asychronous
Minimum Baud Rate
1200
1200
Maximum Baud Rate
64k
4.096M
Cable
V.24 (RS232) DTE
V.24 (RS232) DCE
V.35 DTE
V.35 DCE
X.21 DTE
X.21 DCE
DCE
300
2.048M
115.2
64
CHAPTER 7: FLEXIBLE INTERFACE CARDS
Table 6 Interface attributes of 4-port Sync/Async FIC and 8-port Sync/Async FI
Attribute
Description
Services Supported
Dialup
through
Modem
DDN leased line
Terminal access
service
Backup
Async
leased
line
Dumb
terminal
access
Panel and Interface LEDs
The front panel of 4-port FIC is shown as follows:
Figure 5 4-port Sync/Async panel
The meanings of the LEDs on 4-port FIC are given in the following table:
Table 7 4-port FIC LEDs
LINK
OFF means the link is not connected. ON means the link is connected.
ACT
OFF means no data is being transceived. Blinking means data is being
transceived.
The front panel of 8-port FIC is shown as follows:
Figure 6 8-port FIC front panel
On 8-port FIC, each link corresponds to a LED. ON means the link is connected.
Blinking means data is being transceived.
Interface Cable
The FIC uses sync/async serial interface cable with DB28 connector. V.24 (RS232)
DTE cable: DB25 (male) connector at the network end
■
V.24 (RS232) DCE cable: DB25 (female) connector at the network end
■
V.35 DTE cable: 34PIN (male) connector at the network end
■
V.35 DCE cable: 34PIN (female) connector at the network end
4-port Channelized E1/PRI FIC (3C13866) and 4-port Fractional E1 FIC (3C13823)
■
X.21 DTE cable: DB15 (male) connector at the network end
■
X.21 DCE cable: DB15 (female) connector at the network end
65
One end of the cables is connected to the router side via the DB-28 connector, and
the connection of the other end of the cables varies with the network side to
which it is connected.
Connecting the Interface
Cable
Before connecting the FIC, confirm the model of the equipment that is connected
with the signaling criterion required by the access equipment, baud rate, and
synchronous clock.
1 Check interface type of the peer device and choose the sync/async serial interface
cable of correct type.
2 Plug the DB-28 end of the connection cable to the corresponding DB-28 interface
in the FIC.
3 Connect the other end of the FIC cable to the following equipment:
If the WAN is a DDN, please connect the cable to the interface of the CSU/DSU.
If the WAN is a dialup line, please connect the cable to the serial interface of the
analog Modem.
4 Power on the router, and check the status of the LINK LED of the FIC. It is off when
the line is faulty and signal is out of step.
4-port Channelized
E1/PRI FIC (3C13866)
and 4-port Fractional
E1 FIC (3C13823)
4-port Channelized FIC
4-port Channelized FIC function to transmit, receive, and process E1 data flows. In
addition, they provide access to CE1, implementing the ISDN PRI function, so that
one board can serve multiple purposes.
4-port Fractional FIC
4-port Fractional FIC are fractional E1 (E1-F) cards. They are different from 4-port
Channelized FIC primarily in the sense that:
■
■
Interface Attributes
The time slots can only be bundled into one channel at the speed of nx64K,
given n=1-31. However, an E1 card allows the arbitrary grouping of 31
channels and multiple bundling operations.
The E1-F cards do not support PRI mode.
The following table describes the interface attributes of 4-port Channelized FIC
and 4-port Fractional FIC.
Table 8 Interface attributes of 4-port Channelized FIC and 4-port Fractional FIC
Attribute
4-port Channelized FIC
4-port Fractional E1 FIC
Description
66
CHAPTER 7: FLEXIBLE INTERFACE CARDS
Table 8 Interface attributes of 4-port Channelized FIC and 4-port Fractional FIC
Attribute
Description
Connector
DB25
Connector number
1
Interface standard
G.703, G.704
Interface speed
2.048Mbps
Cable
E1 75-ohm non-balanced coaxial cable
E1 120-ohm balanced twisted-pair cable
120-ohm 4E1 adapter cable (4-port
Channelized/4-port Fractional E1 FIC)
75-ohm 4E1 adapter cable (4-port
Channelized/4-port Fractional E1 FIC)
Coaxial connector, network connector,
75-to-120-ohm adapter (with BNC connector)
Operating mode
E1, CE1, ISDN PRI (only supported by 4-port FE1 (only supported by 4-port Fractional
Channelized FIC)
E1 FIC)
Supported service
Backup
Leased line access
ISDN PRI (only supported by 4-port
Channelized FIC)
4-port Channelized E1/PRI FIC (3C13866) and 4-port Fractional E1 FIC (3C13823)
Panel and Interface LED
67
The following figure illustrates the 4-port Channelized FIC panel.
Figure 7 4-port E1/CE1/PRI FIC panel
The following figure illustrates the 4-port Fractional E1 FIC panel.
Figure 8 4-port Fractional E1 FIC panel
The following table describes the LEDs on the card panels.
Table 9 LEDs on the Card Panel.
Interface cables
LINK
OFF means the link is not connected and ON means the link is connected.
ACTIVE
OFF means no data is being transceived on the interface and blinking means
data is being transceived.
4-port Channelized FIC and 4-port Fractional E1 FIC provide two types of 1-to-4
adapter cables, that is, 120-ohm 4E1 adapter cable and 75-ohm 4E1 adapter
cable. At one end of both these two types of cables is the DB25 connector used
for connecting the Router, and at the other end are four DB15 connectors used for
connecting E1 cables. You can distinguish these two types of cables by the main
labels. The identifier printed on the main label of 120-ohm 4E1 adapter cables is
“4E1-120Ohm-CAB“ whereas the identifier of 75-ohm 4E1 conversion cable is
“4E1-75Ohm-CAB”.
The two types of cables have a similar appearance, as illustrated in the following
figures. However, the 75-ohm 4E1 adapter cable uses 8-core coaxial cables but the
120-ohm 4E1 adapter cable uses four twisted-pair cables.
68
CHAPTER 7: FLEXIBLE INTERFACE CARDS
Figure 9 120-ohm 4E1 adapter cable
Figure 10 75-ohm 4E1 adapter cable
Both 75-ohm 4E1 adapter cable and 120-ohm 4E1 adapter cable are required for
4-port Channelized/4-port Fractional E1 FIC, but E1 cable is optional, so you need
to order the E1 cable when purchasing an 4-port Channelized FIC or 4-port
Fractional E1 FIC. Otherwise, it will not be provided.
4-port Channelized T1/PRI FIC 4T1 (3C13870) and 4-port Fractional T1 FIC 4T1-F (3C13821)
Internal DIP Switch
69
Table 10
Card
4-port channelized
FIC 4-port
Fractional E1 FIC
DIP switch
S2
S1
the controlled
E1 interface
Interface 1
Interface 0 Interface 1
S2
S3
S4
Interface 2
Interface 3
Interface cables
1 Select the 4E1/E1 cable appropriate to the type of the port on the remote device,
and correctly set the DIP switches of the 4-port E1/CE1/PRI FIC/4-port Fractional E1
FIC.
■
■
If the impedance of the remote port is 75-ohm, select the E1 75-ohm
unbalanced coaxial cable and 75-ohm 4E1 adapter cable, and set all the DIP
switches on 4-port E1/CE1/PRI FIC/4-port Fractional E1 FIC to the ON
position (that is, the port impedance is 75-ohm).
If the impedance of the remote port is 120-ohm, select the E1 120-ohm
balanced twisted-pair cable and 120-ohm 4E1 adapter cable, and set all the
DIP switches on 4-port E1/CE1/PRI FIC/4-port Fractional E1 FIC to the OFF
position (that is, the port impedance is 120-ohm).
2 Insert the DB25 connector of the 4E1 adapter cable into the desired DB25 port on
4-port E1/CE1/PRI FIC/4-port Fractional E1 FIC port and tighten the thumbscrews.
3 Determine the sequence number of the DB15 connector at the other end of the
4E1 adapter cable, and connect the connector to the E1 cable.
4 Power on the Router, and check the status of the LINK LED on the card panel. An
OFF LED means that the line has failed and the signal has not been synchronized.
Check the line in this case.
4-port Channelized
T1/PRI FIC 4T1
(3C13870) and 4-port
Fractional T1 FIC 4T1-F
(3C13821)
4-port Channelized T1/PRI FIC
4-port Channelized T1/PRI FIC function to transmit, receive, and process T1 data
flows. In addition, they provide CT1 access, implementing the ISDN PRI function,
so that one board can serve multiple purposes.
4-port Fractional T1 FIC
4-port Fractional T1 FIC are fractional T1 (T1-F) cards. They are different from in
the sense that:
■
■
The time slots can only be bundled into one channel at the speed of nx64K
or 56K, given n=1-24. However, a T1 card allows the arbitrary grouping of
24 channels and multiple bundling operations.
The FIC cards do not support PRI mode.
70
CHAPTER 7: FLEXIBLE INTERFACE CARDS
Interface Attributes
The following table describes the interface attributes of the FIC cards.
Table 11 Interface attributes of FICcards
Attribute
Description
Connector
RJ48
Connector number
Panel and Interface LED
4 (4-port T1/C1/PRI FIC/4-port Fractional T1 FIC)
Interface standard
G.703/T1 102, G.704
Interface speed
1.544Mbps
Cable
T1 cable (100-ohm standard shielded cable)
Operating mode
CT1, ISDN PRI 4-port Channelized T1/PRI FIC
FT1 4-port Fractional T1 FIC
Supported service
Backup
Leased line access
ISDN PRI 4-port T1/C1/PRI FIC
The following figure illustrates the 4-port Channelized T1/PRI FIC panel.
Figure 11 4-port Channelized T1/PRI FIC panel
The following figure illustrates the 4-port Fractional T1 FIC panel.
Figure 12 4-port Fractional T1 FIC panel
Table 12 LED description of the FIC-T1/FIC-T1-F cards
LINK
OFF means the link is not connected and ON means the link is connected.
ACTIVE
OFF means no data is being transceived on the interface and blinking means
data is being transceived.
1-port Channelized E3 FIC (3C13888)
1-port Channelized E3
FIC (3C13888)
71
The main functions of 1-port Channelized E3 FIC include:
■
■
Working in E3 mode, the card can transmit/receive and process the fast
traffic of one E3 channel, as well as provide the accessing of E3 traffic.
Working in CE3 mode, the card can provide the subscribers with the
low-speed accessing service at the speed of Nx64kbps, given N is smaller
than or equal to 128.
E3 represents the tertiary group rate of E system in the TDM system, that is,
34.368Mbps.Through the demultiplexing processes of E23 and E12, an E3
channel can be channelized into 16 E1 lines, each supporting both the operating
modes of E1 and CE1. E23 is used to indicate either E2-to-E3 multiplex or E3-to-E2
demultiplex, and E12 to indicate E1-to-E2 multiplex or E2-to-E1 demultiplex.
“E23” and “E12” discussed here represent the demultiplex process.
Interface Attributes
Table 13 1-port Channelized E3 FIC Interface attributes
Attribute
Description
Connector
SMB
Connector number
2
Interface standard
G.703, G.704,
G.751
Interface speed
34.368Mbps
Cable
E3 cable
(75-ohm coaxial
cable)
Operating mode
E3
CE3
Supported service
Panel and Interface LED
E3 leased line
The following figure illustrates an 1-port ChannelizedE3 FIC panel.
Figure 13 1-port E3 FIC panel
The following table describes the LEDs on the card panels.
Table 14 LED description of 1-port E3 FIC
Interface Cable
LINK
OFF means the link is not connected and ON means the link is connected.
ACT
OFF means no data is being transceived on the interface and blinking means data
is being transceived.
The external interface provided by 1-port Channelized E3 FIC is two SMB sockets
respectively for Tx (Transmit end) and Rx (Receive end). The interface adopts the
72
CHAPTER 7: FLEXIBLE INTERFACE CARDS
75ohm unbalanced transmission mode and uses a pair of 75-ohm unbalanced
coaxial cables to connect the peer device.
Figure 14 E3/T3 cable
BNC connector
SMB connector
Connect Interface Cable
Some measures have been taken to protect 1-port Channelized E3 FIC. To achieve
better lightning protection effects, however, you are recommended to add a
special lightning arrester at the input end of the E3/T3 cable if it is led outdoors.
1 Connect the SMB connector of an E3/T3 cable to the Tx port of 1-port E3 FIC and
another end to the Rx port of the peer equipment.
2 Connect the SMB connector of another E3/T3 cable to the Rx port of 1-port E3 FIC
and another end to the Tx port of the peer equipment.
3 Power on the Router, and check the status of the LINK LED on the 1-port E3 FIC
panel. An OFF LED means that the line has failed and the signal has not been
synchronized. Check the line in this case.
1-port Channelized T3
1CT3 (3C13889)
The main functions of 1-port Channelized T3 FIC include:
■
■
Working in T3 mode, the card can transmit/receive and process the fast
traffic of one T3 channel, as well as provide the accessing of T3 traffic.
Working in CT3 mode, the card can provide the subscribers with the
low-speed accessing service at the speed of Nx64kbps, given N is smaller
than or equal to 128.
T3 represents the tertiary group rate of T system in the TDM system, that is,
44.736Mbps.Through the demultiplexing processes of T23 and T12A, a T3
channel can be channelized into 28 T1 lines, each also supporting the operating
mode of CT1. T23 is used to indicate either T2-to-T3 multiplex or T3-to-T2
demultiplex, and T12 to indicate T1-to-T2 multiplex or T2-to-T1 demultiplex.
“T23” and “T12” discussed here represent the demultiplex process.
1-port OC-3 ATM MM FIC (3C13882) 1-port OC-3 ATM SM FIC (3C13884) 1-port OC-3 ATM SML FIC (3C13886)73
Interface Attributes
Table 15 1-port T3 interface attributes
Attribute
Description
Connector
SMB
Connector number
2
Interface standard
G.703, G.704, G.752
Interface speed
44.736Mbps
Cable
T3 cable (75-ohm coaxial cable)
Operating mode
T3
CT3
Supported service
Panel and Interface LED
T3 leased line
The following figure illustrates an 1-port Channelized T3 FIC panel.
Figure 15 1-port Channelized T3 FIC panel
The following table describes the LEDs on the card panel.
Table 16 LED description of 1-port T3 FIC
Interface Cable
1-port OC-3 ATM MM
FIC (3C13882)
1-port OC-3 ATM SM
FIC (3C13884)
1-port OC-3 ATM SML
FIC (3C13886)
LINK
OFF means the link is not connected and ON means the link is connected.
ACT
OFF means no data is being transceived on the interface and blinking means data
is being transceived.
1-port Channelized T3 FIC and 1-port E3 FIC use the same type of interface cables
and make the connection in the same way.
ATM interface cards (including 1-port OC-3 ATM MM SC, 1-port OC-3 ATM SM
SC 15km, and 1-port OC-3 ATM SM SC 30km) function in the system primarily to
provide ATM interfaces for the Router. They can:
■
Support two frame formats, namely, SDH STM-1 and SONET OC-3.
■
Allow scrambling in data transmission.
■
■
Support both line clock (used when working as DTE interface), and internal
clock (used when working as DCE interface)
Support the test measures of local cell loopback, local payload loopback
and remote loop.
74
CHAPTER 7: FLEXIBLE INTERFACE CARDS
Interface Attributes
Table 17
Attribute
Panel and Interface LED
1-port OC ATM
MM
1-port OC-3 ATM SML
1-port OC-3 ATM SML
Optical fiber
connector
SC
Connector
number
1
Interface
standard
SONET
OC-3/SDH
STM-1
Interface speed
155Mbps
Cable and the
max.
transmission
distance
Multi-mode
optical fiber of
2km
transmission
distance
Single-mode optical fiber of Single-mode optical fiber
15km transmission distance of 30km transmission
distance
Transmitter
LD
LED
LD
Transmitting
optical power
Min: -15dBm
Min: -19dBm
Min: -5dBm
Max: -8dBm
Max: -14dBm
Max: 0dBm
Reciever
sensitivity
Min: -28dBm
Min: -19dBm
Min: -34dBm
Max: -8dBm
Max: -14dBm
Max: -10dBm
Central
wavelength
1310mm
1310mm
1310mm
Supported
service
ATM Traffic CBR
(Constant Bit
Rate), rt_VBR
(Variable Bit
Rate-Real Time),
nrt_VBR
(Variable Bit
Rate-Non Real
Time), UBR
(Unspecified Bit
Rate)
The following figure illustrates the 1-port OC-3 ATM MM panel.
Figure 16 1-port OC-3 ATM MM panel
The following figure illustrates the 1-port OC-3 ATM SM panel.
2-port ADSL (over POTS) FIC (3C13872)
75
Figure 17 1-port OC-3 ATM SM panel
The following figure illustrates the 1-port OC-3 ATM SML panel
Figure 18 1-port OC-3 ATM SML
The following table describes the LEDs on the card panels.
Table 18 LED description of the ATM cards
Interface Optical Fiber
LINK
OFF means the link is not connected and ON means the link is connected.
ACT
OFF means no data is being transceived on the interface and blinking means data
is being transceived.
1-port OC-3 ATM MM uses multi-mode optical fibers and 1-port OC-3 ATM SM,
1-port OC-3 ATM SML use single-mode optical fibers. As all these three interface
cards adopt SC optical fiber connectors, the connectors of the optical fibers must
also be SC connectors. The external optical cable suite provides the users with
optical cables of variable lengths. For the connector appearance, optical cable
connection and the safety precautions, refer to the section 8.5.5 Connect
Interface Optical Fiber.
Laser Danger! Do not stare at the optical fiber connector connected with the laser
in case the invisible laser radiation harms your eyes.
1-port OC-3 ATM SML adopts long-distance fiber interface, requiring a
transmission at least longer than 25km. If the transmission distance is lower than
25km, the interface will be unable to receive signals.
1-port OC-3 ATM MM should be connected with multi-mode optical fibers
whereas 1-port OC-3 ATM SM / 1-port OC-3 ATM SML should be connected with
single-mode optical fibers.
2-port ADSL (over
POTS) FIC (3C13872)
ADSL (Asymmetric Digital Subscriber’s Loop) interface card (2-port ADSL FIC)
provide the users with the telephone line-based ADSL access that allow a LAN
subscriber to reach the DSLAM (Digital Subscriber's Loop Access Multiplexer) of
the exchange office through a regular analog subscriber line, and then access the
ATM/IP backbone or Internet. Thus, high-speed data communications and Video
76
CHAPTER 7: FLEXIBLE INTERFACE CARDS
on Demand (VoD) can be fulfilled. As ADSL uses the High Frequency (HF) band
higher than 26 KHz for data transmission, its activities will not interfere the voice
service (which occupies the Low Frequency (LF) band in the range of 0 to 4 KHz)
implemented over the same line. Normally, the subscriber can be provided with a
speed in the range of 32 Kbps to 8 Mbps (downlink rate) and a speed in the range
of 32 Kbps to 1 Mbps (uplink rate).
ADSL interface cards:
■
■
■
■
Interface Attributes
Supportfor ADSL over POTS (Annex A)
Allow manual activation/deactivation of ADSL line, and support SAR
loopback, which facilitates fault isolation.
Support interface standards of G. DMT, G. Lite, and T1.413 and the
configuration of auto-sensing.
Support network lattice coding (except for G. Lite) on ADSL interfaces,
enhancing the stability of ADSL connections.
Table 19 2-port ADSL FIC interface attributes
Attribute
2-port ADSL FIC
Connector
RJ11
Interface number
1 (FIC-1ADSL)
2 (2-port ADSL FIC)
Interface speed
In ADSL Full Rate mode (i.e., ITU-T 992.1 G.DMT/ANSI T1.413)
The downlink speed can reach 8160Kbps, and the uplink speed can
reach 869Kbps.
Interface standard
ITU-T 992.1 G.DMT (Annex A)
ITU-T 992.2G.Lite
ANSI T1.413 Issue 2
Panel and Interface LED
Cable and the max.
transmission distance
The ADSL interface cable is a telephone cable.
Supported service
ADSL access over the telephone line
In full rate, the transmission distance can be as far as 1.8km, or
6000 feet ( the maximum transmission distance depends on the
line quality.
The following figure illustrates the FIC-1ADSL panel.
Figure 19 2-port ADSL FIC panel
2-port ADSL (over POTS) FIC (3C13872)
77
The following table describes the LEDs on the card panels.
Table 20 LED description 2-port ADSL FIC
Interface Cable
LINK
OFF means that the line is inactive, ON means that the line has been activated
and has entered the data mode, and blinking means that the line is being
activated.
ACT
OFF means no data is being transceived on the interface and blinking means data
is being transceived.
2-port ADSL FIC interface cables are regular telephone cables.
The standard equipping package of 2-port ADSL FIC includes the regular
telephone cable(s).You can separately order an external splitter as needed.
Interface Cable
In G. Lite mode, no splitter is required. You can directly connect one end of the
telephone cable to the Router and the other end to the PSTN, and simply connect
the phone-set and the Router in parallel at the cable distribution box.
In full rate mode, a splitter is required. Follow these steps to connect the cables:
1 Plug one end of a telephone cable into the ADSL port on the Router, and the other
end into the inbound ADSL port on the splitter.
2 Connect the telephone to the phone port on the splitter with another telephone
cable.
3 Connect the outbound ADSL port on the splitter to the PSTN with a third
telephone cable.
Figure 20 Connect 2-port ADSL FIC
Router
RJ11 port
Phone port
Splitter
ADSL card
Modem port
PSTN
Lineport
D
S
L
A
M
78
CHAPTER 7: FLEXIBLE INTERFACE CARDS
A
OBTAINING SUPPORT FOR YOUR
PRODUCT
Register Your Product
to Gain Service
Benefits
To take advantage of warranty and other service benefits, you must first register
your product at http://eSupport.3com.com/. 3Com eSupport services are based
on accounts that you create or have authorization to access. First time users must
apply for a user name and password that provides access to a number of eSupport
features including Product Registration, Repair Services, and Service Request.
Purchase Value-Added
Services
To enhance response times or extend warranty benefits, contact 3Com or your
authorized 3Com reseller. Value-added services can include 24x7 telephone
technical support, software upgrades, onsite assistance or advance hardware
replacement. Experienced engineers are available to manage your installation with
minimal disruption to your network. Expert assessment and implementation
services are offered to fill resource gaps and ensure the success of your networking
projects. More information on 3Com Extended Warranty and Professional Services
is available at http://www.3com.com/
Contact your authorized 3Com reseller or 3Com for additional product and
support information.
Troubleshoot Online
You will find support tools posted on the 3Com web site at
http://www.3com.com/
■
3Com Knowledgebase helps you troubleshoot 3Com products. This
query-based interactive tool is located at http://knowledgebase.3com.com
and contains thousands of technical solutions written by 3Com support
engineers.
■
Connection Assistant helps you install, configure and troubleshoot 3Com
desktop and server NICs, wireless cards and Bluetooth devices. This diagnostic
software is located at:
http://www.3com.com/prodforms/software/connection_assistant/ca_th
ankyou.html
Access Software
Downloads
Software Updates are the bug fix / maintenance releases for the version of
software initially purchased with the product. In order to access these Software
Updates you must first register your product on the 3Com web site at
http://eSupport.3com.com/.
First time users will need to apply for a user name and password. A link to
software downloads can be found at http://eSupport.3com.com/, or under the
Product Support heading at http://www.3com.com/
80
APPENDIX A: OBTAINING SUPPORT FOR YOUR PRODUCT
Software Upgrades are the software releases that follow the software version
included with your original product. In order to access upgrades and related
documentation you must first purchase a service contract from 3Com or your
reseller.
Contact Us
3Com offers telephone, e-mail and internet access to technical support and repair
services. To access these services for your region, use the appropriate telephone
number, URL or e-mail address from the list below. You will find a current directory
of support telephone numbers posted on the 3Com web site at
http://csoweb4.3com.com/contactus/
Telephone Technical
Support and Repair
To obtain telephone support as part of your warranty and other service benefits,
you must first register your product at http://eSupport.3com.com/
When you contact 3Com for assistance, please have the following information
ready:
■
Product model name, part number, and serial number
■
A list of system hardware and software, including revision level
■
Diagnostic error messages
■
Details about recent configuration changes, if applicable
To send a product directly to 3Com for repair, you must first obtain a return
authorization number (RMA). Products sent to 3Com, without authorization
numbers clearly marked on the outside of the package, will be returned to the
sender unopened, at the sender’s expense. If your product is registered and under
warranty, you can obtain an RMA number online at
http://eSupport.3com.com/. First time users will need to apply for a user name
and password.
Telephone numbers are correct at the time of publication. Find a current directory
of support telephone numbers posted on the 3Com web site at
http://csoweb4.3com.com/contactus/
Country
Telephone Number
Country
Telephone Number
Philippines
1235 61 266 2602 or
1800 1 888 9469
10800 61 00137 or
021 6350 1590 or
00800 0638 3266
800 6161 463
080 333 3308
00801 611 261
001 800 611 2000
Asia, Pacific Rim Telephone Technical Support and Repair
Australia
Hong Kong
India
Indonesia
Japan
Malaysia
New Zealand
Pakistan
1 800 678 515
800 933 486
+61 2 9424 5179 or
000800 650 1111
001 803 61009
00531 616 439 or
03 5977 7991
1800 801 777
0800 446 398
+61 2 9937 5083
P.R. of China
Singapore
S. Korea
Taiwan
Thailand
You can also obtain support in this region using the following e-mail: [email protected]
Or request a repair authorization number (RMA) by fax using this number:
Europe, Middle East, and Africa Telephone Technical Support and Repair
+ 65 543 6348
Telephone Technical Support and Repair
Country
Telephone Number
From anywhere in these
regions, call:
+44 (0)1442 435529
Country
Telephone Number
Luxembourg
Netherlands
Norway
Poland
Portugal
South Africa
Spain
Sweden
Switzerland
U.K.
342 0808128
0900 777 7737
815 33 047
00800 441 1357
707 200 123
0800 995 014
9 021 60455
07711 14453
08488 50112
0870 241 3901
From the following countries, you may use the numbers shown:
Austria
Belgium
Denmark
Finland
France
Germany
Hungary
Ireland
Israel
Italy
01 7956 7124
070 700 770
7010 7289
01080 2783
0825 809 622
01805 404 747
06800 12813
01407 3387
1800 945 3794
199 161346
You can also obtain support in this region using the following URL: http://emea.3com.com/support/email.html
Latin America Telephone Technical Support and Repair
Antigua
Argentina
Aruba
Bahamas
Barbados
Belize
Bermuda
Bonaire
Brazil
Cayman
Chile
Colombia
Costa Rica
Curacao
Ecuador
Dominican Republic
1 800 988 2112
0 810 444 3COM
1 800 998 2112
1 800 998 2112
1 800 998 2112
52 5 201 0010
1 800 998 2112
1 800 998 2112
0800 13 3COM
1 800 998 2112
AT&T +800 998 2112
AT&T +800 998 2112
AT&T +800 998 2112
1 800 998 2112
AT&T +800 998 2112
AT&T +800 998 2112
You can also obtain support in this region using the following:
Spanish speakers, enter the URL:
http://lat.3com.com/lat/support/form.html
Portuguese speakers, enter the URL:
http://lat.3com.com/br/support/form.html
English speakers in Latin America should send e-mail to:
[email protected]
US and Canada Telephone Technical Support and Repair
1 800 876 3266
Guatemala
Haiti
Honduras
Jamaica
Martinique
Mexico
Nicaragua
Panama
Paraguay
Peru
Puerto Rico
Salvador
Trinidad and Tobago
Uruguay
Venezuela
Virgin Islands
AT&T +800 998 2112
57 1 657 0888
AT&T +800 998 2112
1 800 998 2112
571 657 0888
01 800 849CARE
AT&T +800 998 2112
AT&T +800 998 2112
54 11 4894 1888
AT&T +800 998 2112
1 800 998 2112
AT&T +800 998 2112
1 800 998 2112
AT&T +800 998 2112
AT&T +800 998 2112
57 1 657 0888
81
82
APPENDIX A: OBTAINING SUPPORT FOR YOUR PRODUCT