1
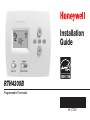
Installation
Guide
RTH4300B
Programmable Thermostat
69-1772EF
TURN OFF POWER at the heating/cooling system or the fuse/circuit breaker panel
before you begin.
MERCURY NOTICE: Do not place your old thermostat in the trash if it contains mercury
in a sealed tube. Contact your local waste management authority for instructions
regarding recycling and proper disposal.
Need Help?
For assistance with this product please visit http://yourhome.honeywell.com
or call Honeywell Customer Care toll-free at 1-800-468-1502
Read and save these instructions.
® U.S. Registered Trademark. Patents pending.
Copyright © 2006 Honeywell International Inc. All rights reserved.
RTH4300B Programmable Thermostat
Table of contents
Getting started
System setup
Installation tips............................................ 2
Pre-installation checklist............................ 3
How to change settings........................... 17
Set system type........................................ 18
Set heating cycle rate............................... 19
Set temperature display........................... 20
Old thermostat removal
Remove old thermostat.............................. 5
Identify and label wires............................... 7
Appendices
In case of difficulty................................... 21
Customer assistance................................ 23
Accessories............................................... 23
1-year limited warranty............................. 24
New thermostat installation
Wallplate mounting................................... 10
Wire connections...................................... 12
Battery installation.................................... 14
Set fan operation switch.......................... 15
Thermostat mounting............................... 16
Installation Guide
Installation is easy — even if you’ve never done it before!
Your new thermostat has been designed for fast, easy installation. Just follow the
simple, step-by-step instructions in the following pages.
Install in three simple steps
• Label wires and remove your old thermostat (see pages 5-8).
• Install and wire your new thermostat (see pages 9-16).
• Set your new thermostat to match your heating/cooling system
(see pages 17-20).
Installation tips
• Have everything you need ready to go before you begin (see pages 3-4).
• Do not use wire color as a guide. Use wire labels instead (see page 8).
RTH4300B Programmable Thermostat
Pre-installation checklist
Check to make sure your package includes the following items:
RTH4300B thermostat
(wallplate attached to back)
Quick
reference
card
Wall anchors
and mounting
screws (2
each)
Operating manual
Wire labels
Installation Guide
Pre-installation checklist
Required tools & supplies
• No. 2 Phillips screwdriver
• Small pocket screwdriver
• Drill
• Drill bit (3/16” for drywall, 7/32” for plaster)
• Hammer
• Pencil
• Electrical tape
• Level (optional)
• Two fresh AA alkaline batteries
RTH4300B Programmable Thermostat
Remove your old thermostat
1. Turn off power at heating/cooling system (or fuse/circuit-breaker panel).
2. Remove cover and thermostat, but leave wallplate with wires attached.
Leave wallplate in place
Is there a sealed tube containing mercury?
If so, see inside front cover of this manual
for proper disposal instructions.
Old thermostat
Cover
Installation Guide
Did you purchase right thermostat? Count wires to check.
Count the number of wires coming out of the wall and attached to terminals in your
old thermostat. If any of them are attached to a terminal marked “C” or “C1” do not
count that wire in your total.
If the total (not counting C or C1) is 5 wires or less, proceed to the next page. If you
have 6 or more wires, your new thermostat may not be compatible with your system.
Stop installation and call 1-800-468-1502 for advice.
Do you have 6 or more wires? If so, stop now.
You may have purchased the wrong replacement
thermostat.
RTH4300B Programmable Thermostat
Identify wires you will not use
If any wires are not attached to terminals in your old thermostat, do not connect them
to your new thermostat.
If a wire is attached to a terminal marked “C” or “C1,” disconnect it. You will not
connect it to your new thermostat.
Wrap the bare metal ends of each unused wire with electrical tape, so it cannot touch
and short out other wires.
Do not use unconnected wires.
Do not use C or C1 wire.
Installation Guide
Label wires and remove old wallplate
Use a screwdriver to disconnect wires one by one. As you disconnect each wire,
wrap it with the label matching the letter on your old thermostat. (Adhesive labels are
supplied in your thermostat package.)
Remove the old wallplate only after all wires are labeled. Be careful not to let loose
wires fall into the wall opening.
Wrap supplied labels securely around each wire.
Do not let wires fall into wall opening!
IGNORE WIRE COLORS: Use only letter designations
to identify wire types.
RTH4300B Programmable Thermostat
Remove wallplate and install quick reference card
Pull at bottom to remove
thermostat from wallplate.
Insert quick reference card after wallplate
is mounted (see mounting instructions on
page 11).
HIPS
PULL HERE
Wallplate
Thermostat
Installation Guide
Mark wallplate mounting position
1. Pull wires through
wallplate.
2. Level wallplate if desired
(lay level across tabs).
10
3. Mark positions of
both screw holes.
RTH4300B Programmable Thermostat
About your
Mount
wallplate
new thermostat
1. Drill holes at pencil-marked locations:
3/16” holes for drywall
7/32” holes for plaster.
2. Use hammer to tap
anchors into holes until
flush with wall.
3. Place wallplate over
anchors and insert screws.
Check level if desired,
then tighten screws.
11
Installation Guide
Connect wires (typical installation)
1. Match each labeled wire with
same letter on terminal.
Remove metal jumper if you
have both R and Rc wires.
2. Use a screwdriver to
loosen screw terminals,
insert wires, then tighten
screws.
3. Push any excess wire back
into the wall opening.
Labels don’t match?
If labels do not match letters on
thermostat, see next page.
12
RTH4300B Programmable Thermostat
Connect wires (less common wire designations)
If labels do not match letters on the thermostat, check the chart at right and connect to
terminal as shown here (see notes, below).
If wires will be connected to both
R and Rc terminals, remove metal
jumper (see page 12).
Do not use C, X, or B. Wrap bare
end of wire with electrical tape.
Do not connect both O and B
if you have a heat pump. Connect
O wire to O. Wrap B wire with
electrical tape and do not use.
13
Installation Guide
Install batteries
Install two fresh AA alkaline
batteries in back of thermostat.
After installation, batteries can
be changed without removing
the thermostat from the wall
(see Operating Manual for more
information).
Back of thermostat
14
RTH4300B Programmable Thermostat
About
Set
fanyour
operation
new thermostat
switch
Move the switch to the proper setting:
F: For gas or oil heating systems, leave
the fan operation switch in this factory-set
position (for systems that control the fan in
a call for heat).
E: Change the switch to this setting for heat
pump or electric heat systems. (This setting
is for systems that allow the thermostat to
control the fan in a call for heat, if a fan wire
is connected to the G terminal.)
15
Installation Guide
About your
Mount
thermostat
new thermostat
and restore electrical power
1. Align the 4 tabs on the wallplate
with corresponding slots on the
back of the thermostat, then push
gently until the thermostat snaps
into place.
Wallplate
2. Restore electrical power at the
heating/cooling system, or at the
fuse/circuit-breaker panel.
Thermostat
TIP: If wires interfere when you
try to mount the thermostat,
push excess wire back into the
wall opening.
16
RTH4300B Programmable Thermostat
About your
System
setup
new
(set
thermostat
thermostat to match your system)
Next, you must set the thermostat to match the heating/cooling system in your home.
Press and hold the s and t buttons to enter system setup.
Function
number
Setting
1
Setup
0
Press t to change settings.
Press s to advance to next function.
Press and hold ts to exit and save settings.
To begin, press and hold the s and t
buttons until the display changes.
17
Installation Guide
About your
Function
1: new
System
thermostat
type
1
Setup
0
Press the t button to select the type
of climate control system you have in your
home:
0 Heating & cooling: Gas, oil or electric
heating with central air conditioning.
1 Heat pump: Outside compressor
provides both heating and cooling.
Press to change setting.
When finished, press to
advance to the next
function.
18
RTH4300B Programmable Thermostat
About your
Function
5: new
Heating
thermostat
cycle rate
5
Setup
5
Press the t button to select your heating system and optimize its operation:
5 Gas or oil furnace: Use this setting if you have
a standard gas or oil furnace that is less than
90% efficient.
9 Electric furnace: Use this setting if you have
any type of electric heating system.
3 Hot water or high-efficiency furnace: Use
this setting if you have a hot water system or a
gas furnace of greater than 90% efficiency.
Press to change setting.
When finished, press to
advance to the next
function.
1 Gas/oil steam or gravity system: Use this
setting if you have a steam or gravity heat
system.
NOTE: If Function 5 does not appear,
please turn to the next page to continue.
19
Installation Guide
About your
Function
14:new
Temperature
thermostatdisplay
14
Setup
0
Press the t button to select Fahrenheit or
Celsius temperature display:
0 Fahrenheit temperature display (°F)
1 Celsius temperature display (°C)
Press to change setting.
When finished, press the RUN button or press and hold both s and t
buttons to exit and save changes
20
RTH4300B Programmable Thermostat
About
In
caseyour
of difficulty
new thermostat
If you have difficulty with your thermostat, please try the following suggestions.
Most problems can be corrected quickly and easily.
Display is blank
•
•
•
•
Check circuit breaker and reset if necessary.
Make sure heating & cooling power switches are on.
Make sure furnace door is closed securely.
Make sure fresh AA alkaline batteries are correctly installed
(see page 14).
Heating or
cooling system
does not respond
• Set System switch to Heat. Make sure the temperature is set higher
than the Inside temperature.
• Set System switch to Cool. Make sure the temperature is set lower than
the Inside temperature.
• Check circuit breaker and reset if necessary.
• Make sure heating & cooling power switches are on.
• Make sure furnace door is securely closed.
• Wait 5 minutes for the system to respond.
21
Installation Guide
About
In
caseyour
of difficulty
new thermostat
Temperature
settings do not
change
Make sure heating and cooling temperatures are set to acceptable ranges:
• Heat: 40° to 90°F (4.5° to 32°C).
• Cool: 50° to 99°F (10° to 37°C).
“Cool On” or
“Heat On” is
flashing
• Compressor protection feature is engaged. Wait 5 minutes for the system
to restart safely, without damage to the compressor.
“Heat On” is not
displayed
• Set the System switch to Heat, and set the temperature level above the
current room temperature.
“Cool On” is not
displayed
• Set the System switch to Cool, and set the temperature level below the
current room temperature.
22
RTH4300B Programmable Thermostat
Customer assistance
Pull at bottom
to remove
thermostat
from wallplate.
Turn thermostat
over to find
model number
and date code.
For assistance with this product, please visit
http://yourhome.honeywell.com.
Or call Honeywell Customer Care toll-free at
1-800-468-1502.
To save time, please note your model number
and date code before calling.
Accessories
To order, please call Honeywell Customer
Care toll-free at 1-800-468-1502.
Cover plate*................. Part No. 50002883-001
*Use to cover marks left by old thermostats.
23
Installation Guide
1-year limited warranty
Honeywell warrants this product, excluding battery, to be free from defects in the workmanship
or materials, under normal use and service, for a period of one (1) year from the date of purchase by the consumer. If at any time during the warranty period the product is determined to
be defective or malfunctions, Honeywell shall repair or replace it (at Honeywell’s option).
If the product is defective,
(i) return it, with a bill of sale or other dated proof of purchase, to the place from which you purchased it; or
(ii) call Honeywell Customer Care at 1-800-468-1502. Customer Care will make the determination whether the product should be returned to the following address: Honeywell Return Goods,
Dock 4 MN10-3860, 1885 Douglas Dr. N., Golden Valley, MN 55422, or whether a replacement
product can be sent to you.
This warranty does not cover removal or reinstallation costs. This warranty shall not apply if it
is shown by Honeywell that the defect or malfunction was caused by damage which occurred
while the product was in the possession of a consumer.
Honeywell’s sole responsibility shall be to repair or replace the product within the terms stated
above. HONEYWELL SHALL NOT BE LIABLE FOR ANY LOSS OR DAMAGE OF ANY KIND,
24
RTH4300B Programmable Thermostat
1-year limited warranty
INCLUDING ANY INCIDENTAL OR CONSEQUENTIAL DAMAGES RESULTING, DIRECTLY OR
INDIRECTLY, FROM ANY BREACH OF ANY WARRANTY, EXPRESS OR IMPLIED, OR ANY
OTHER FAILURE OF THIS PRODUCT. Some states do not allow the exclusion or limitation of
incidental or consequential damages, so this limitation may not apply to you.
THIS WARRANTY IS THE ONLY EXPRESS WARRANTY HONEYWELL MAKES ON THIS
PRODUCT. THE DURATION OF ANY IMPLIED WARRANTIES, INCLUDING THE WARRANTIES
OF MERCHANTABILITY AND FITNESS FOR A PARTICULAR PURPOSE, IS HEREBY LIMITED TO
THE ONE-YEAR DURATION OF THIS WARRANTY.
Some states do not allow limitations on how long an implied warranty lasts, so the above limitation may not apply to you. This warranty gives you specific legal rights, and you may have other
rights which vary from state to state.
If you have any questions concerning this warranty, please write Honeywell Customer Relations,
1985 Douglas Dr, Golden Valley, MN 55422 or call 1-800-468-1502. In Canada, write Retail
Products ON15-02H, Honeywell Limited/ Honeywell Limitée, 35 Dynamic Drive, Toronto, Ontario
M1V4Z9.
25
Automation and Control Systems
Honeywell International Inc.
Honeywell Limited-Honeywell Limitée
1985 Douglas Drive North
35 Dynamic Drive
Golden Valley, MN 55422
Toronto, Ontario M1V 4Z9
http://yourhome.honeywell.com
Printed in U.S.A. on recycled
paper containing at least 10%
post-consumer paper fibers.
® U.S. Registered Trademark.
© 2006 Honeywell International Inc.
69-1772EF M.S. 08-06
Guide
d’installation
RTH4300B
Thermostat programmable
69-1772EF
COUPER L’ALIMENTATION du système de chauffage/climatisation, ou du panneau
à disjoncteurs, avant de commencer.
REMARQUE À PROPOS DU MERCURE : Ne pas jeter l’ancien thermostat aux ordures s’il
contient du mercure scellé dans un tube. Consulter l’administration locale de gestion des
déchets pour connaître les instructions relatives au recyclage et à l’élimination.
Besoin d’aide?
Pour obtenir de l’assistance au sujet de ce produit, consulter le http://yourhome.honeywell.com
ou téléphoner sans frais au Centre de service à la clientèle de Honeywell au 1 800 468-1502
Lire et conserver ces instructions.
® Marque déposée aux É.-U. Brevets en instance.
© 2006 Honeywell International Inc. Tous droits réservés.
Thermostat programmable RTH4300B
À propos
Table
desdu
matières
thermostat
Pour commencer
Réglage du système
Conseils d’installation................................. 2
Liste de vérification avant l’installation....... 3
Comment changer les réglages............... 17
Régler le type de système........................ 18
Régler le rythme de cycle de chauffage.... 19
Régler l’indicateur de température.......... 20
Enlèvement de l’ancien thermostat
Enlever l’ancien thermostat........................ 5
Identifier et marquer les fils........................ 7
Annexes
En cas de problème.................................. 21
Assistance à la clientèle........................... 23
Accessoires............................................... 23
Garantie limitée d’un an........................... 24
Installation du nouveau thermostat
Installation de la plaque murale............... 10
Branchement des fils................................ 12
Installation des piles................................. 14
Translate “Set fan operation switch”....... 15
Installation du thermostat........................ 16
Guide d’installation
À propos du
Installation
facile
thermostat
— même si vous ne l’avez jamais fait auparavant!
Votre nouveau thermostat a été conçu pour être installé rapidement et facilement.
Vous n’avez qu’à suivre les instructions pas à pas des pages suivantes.
Installation en trois étapes toutes simples
• Marquer les fils et enlever l’ancien thermostat (pages 5-8).
• Installer et brancher le nouveau thermostat (pages 9-16).
• Régler le nouveau thermostat en fonction de votre système de chauffage/
climatisation (pages 17-20).
Conseils d’installation
• Préparer ce dont vous aurez besoin avant de commencer (pages 3 et 4).
• La couleur des fils ne doit pas servir de repère. Il faut plutôt se servir des
étiquettes de fils (voir page 8).
Thermostat programmable RTH4300B
Liste de vérification avant l’installation
L’emballage doit contenir les éléments suivants :
Thermostat RTH4300B
(plaque murale fixée à l’arrière)
Carte
de référence
rapide
Fixations
murales et vis
de montage
(2 chacune)
Guide d’utilisation
Étiquettes de fils
Guide d’installation
Liste de vérification avant l’installation
Éléments requis
• Tournevis cruciforme no 2
• Petit tournevis de poche
• Perceuse
• Foret (3/16 pour cloison sèche, 7/32 pour plâtre)
• Marteau
• Crayon
• Ruban isolant
• Niveau (optionnel)
• Deux piles alcalines AA neuves
Thermostat programmable RTH4300B
Enlever l’ancien thermostat
1. Couper l’alimentation du système de chauffage/climatisation (ou du panneau
à disjoncteurs).
2. Enlever le couvercle et le thermostat, mais laisser la plaque murale et les fils en place.
Laisser la plaque murale en place
Y a-t-il un tube hermétique contenant
du mercure? Si c’est le cas, consulter les
directives d’élimination sur la deuxième
de couverture de ce guide.
Ancien thermostat
Couvercle
Guide d’installation
Avez-vous acheté le bon thermostat? Comptez les fils pour vérifier.
Comptez le nombre de fils sortant du mur et branchés aux bornes de l’ancien thermostat.
Si des fils sont branchés à une borne marquée «C» ou «C1» ne pas les ajouter au total.
Si le total (sans compter C ou C1) est de 5 fils ou moins, allez à la page suivante.
Si vous avez 6 fils ou plus, votre nouveau thermostat pourrait ne pas être compatible
avec votre système. Cessez l’installation et appelez au 1 800 468-1502 pour demander
conseil.
Avez-vous 6 fils ou plus? Si c’est le cas,
arrêtez immédiatement. Vous pourriez avoir
acheté le mauvais thermostat de remplacement.
Thermostat programmable RTH4300B
Identifier les fils dont vous ne vous servirez pas
Si des fils ne sont pas branchés aux bornes de l’ancien thermostat, ne pas les brancher
au nouveau thermostat.
Si un fil est branché à une borne marquée «C» ou «C1», débranchez-le. Il ne sera pas
branché au nouveau thermostat.
Recouvrir le bout dénudé de chaque fil non utilisé de ruban isolant, pour éviter qu’ils
ne se touchent et court-circuitent les autres fils.
Ne pas se servir des fils débranchés.
Ne pas se servir du fil C ou C1 débranché.
Guide d’installation
Étiqueter les fils et enlever l’ancienne plaque murale
Employer un tournevis pour débrancher les fils un à un. Enrouler l’étiquette de fil
correspondant à la lettre de l’ancien thermostat sur chaque fil à mesure que vous
les débranchez. (Des étiquettes adhésives sont incluses avec le thermostat.)
Enlever l’ancienne plaque murale seulement après avoir étiqueté tous les fils.
Faire attention à ne pas laisser les fils débranchés tomber dans le mur.
Fixer les étiquettes fournies sur chaque fil.
Ne pas laisser les fils tomber dans le mur!
NE PAS TENIR COMPTE DES COULEURS : Utilisez
seulement les désignations par lettre pour identifier les
types de fil.
Thermostat programmable RTH4300B
Enlever la plaque murale et installer la carte de référence.
Tirer le thermostat par le bas pour le
détacher de la plaque murale.
Insérer l’aide-mémoire après avoir fixé la plaque
murale au mur (voir les directives d’installation à
la page 11).
HIPS
PULL HERE
Plaque murale
Thermostat
Guide d’installation
Marquer l’emplacement d’installation de la plaque murale
1. Passer les fils au
travers de la plaque
murale.
2. Si désiré, niveler la plaque
murale (placer le niveau sur
les languettes).
10
3. Marquer l’emplacement
des deux trous de vis.
Thermostat programmable RTH4300B
À propos l’emplacement
Marquer
du thermostat d’installation de la plaque murale
1. Percer les trous aux endroits marqués :
trous 3/16 pour cloison
sèche et 7/32 pour le plâtre
2. Employer un marteau pour
enfoncer les fixations dans
les trous jusqu’à ce qu’elles
soient encastrées dans le mur.
3. Placer la plaque murale sur
les fixations et insérer les vis.
Si désiré, mettre de niveau,
puis serrer les vis.
11
Guide d’installation
Brancher les fils (installation habituelle)
1. Associer chaque fil étiqueté
à la lettre correspondante
sur la borne.
Enlever le cavalier en métal
si vous avez des fils R et Rc.
2. Employer un tournevis
pour dévisser les bornes
à vis, insérer les fils et
serrer les vis.
3. Repousser tous les fils
excédents dans le mur.
Les étiquettes ne
correspondent pas?
Si les étiquettes ne correspondent pas aux
lettres du thermostat, consulter la page
suivante.
12
Thermostat programmable RTH4300B
Brancher les fils (configurations rares)
Si les étiquettes ne correspondent pas
aux lettres du thermostat, consulter la grille
à droite (voir les notes dessous).
Si des fils seront branchés aux
bornes R et Rc, enlever le cavalier
en métal (page 12).
Ne pas se servir de C, X, ou B.
Enrouler du ruban isolant sur le
bout dénudé du fil.
Ne
pas
brancher
Ne pas brancher O et B si vous avez
une thermopompe. Brancher le fil
O à O. Enrouler du ruban isolant sur le
fil B et ne pas l’utiliser.
13
Guide d’installation
Placer les piles
Placer deux piles alcalines AA
neuves à l’arrière du thermostat.
Après l’installation, les piles
peuvent être remplacées sans
enlever le thermostat du mur
(voir le Guide d’utilisation pour
obtenir plus d’information).
Endos du thermostat
14
Thermostat programmable RTH4300B
À propos du
Réglages
du thermostat
ventilateur
Placer le sélecteur à la position qui
correspond au système :
F : S’il s’agit d’un système de chauffage au
gaz ou au mazout, laisser le sélecteur à la
position réglée en usine (pour les systèmes
qui commandent la mise en marche du
ventilateur lors d’une demande de chaleur).
E : Déplacer le commutateur à cette
position si le système est une thermopompe
ou un appareil de chauffage électrique. (À
cette position, le thermostat commande la
mise en marche du ventilateur lors d’une
demande de chaleur si un fil du ventilateur
est raccordé à la borne G.)
15
Guide d’installation
À proposleduthermostat
Installer
thermostatet rétablir le courant
1. Placer les fentes à l’arrière du
thermostat vis à vis des languettes
correspondantes de la plaque
murale, puis appuyer doucement
jusqu’à ce qu’elles s’engagent une
dans l’autre.
Plaque
murale
2. Rétablir l’alimentation du système
de chauffage/climatisation ou du
panneau à disjoncteurs.
Thermostat
ASTUCE : Si des fils nuisent
à l’installation du thermostat,
pousser les fils non utilisés
dans le mur.
16
Thermostat programmable RTH4300B
Réglage du système (pour faire correspondre le thermostat à votre système)
Ensuite, configurer le thermostat pour le réglage du système de chauffage et de
climatisation de votre résidence. Appuyer sur les touches s et t et les maintenir
enfoncées pour initier la configuration.
Numéro
Réglage
de fonction
1
Setup
0
Appuyer sur t pour modifier les réglages.
Appuyer sur s pour passer à la fonction
suivante. Appuyer sur ts pour quitter la
configuration et enregistrer les réglages.
Pour commencer, enfoncer et tenir
les touches s et t jusqu’à ce que
l’affichage change.
17
Guide d’installation
À propos 1du: Type
Fonction
thermostat
de système
1
Setup
0
Appuyer sur cette touche
pour changer le réglage.
Après avoir terminé, appuyer
sur cette touche pour aller à
la prochaine fonction.
Appuyer sur les touches t pour sélectionner
le type de système de climatisation que
vous avez dans votre résidence :
0 Chauffage et climatisation : Chauffage
au gaz naturel, au mazout ou à
l’électricité avec climatiseur central.
1 Thermopompe : Un compresseur
extérieur fournit le chauffage et la
climatisation.
18
Thermostat programmable RTH4300B
À propos 5du: Rythme
Fonction
thermostat
de cycle de chauffage
5
Setup
5
Appuyer sur cette touche
pour changer le réglage.
Après avoir terminé,
appuyer sur cette touche
pour aller à la prochaine
fonction.
Appuyez sur les touches t pour sélectionner
le système de chauffage et optimiser sont
fonctionnement :
5 Fournaise au gaz naturel ou au mazout : Utiliser
se réglage si la fournaise au gaz naturel ou au
mazout est un modèle standard avec une efficacité
inférieure à 90 %.
9 Fournaise à l’électricité : Utiliser ce réglage pour
tout type de système de chauffage à l’électricité.
3 Eau chaude ou fournaise à haut rendement :
Utiliser ce réglage si le système de chauffage
fonctionne à l’eau chaude ou si la fournaise est un
modèle à efficacité supérieure à 90 %.
1 Systèmes à la vapeur ou gravitaires : Utiliser ce
réglage pour les systèmes de chauffage à la vapeur
ou gravitaires.
REMARQUE : Si la fonction 5 n’apparaît
pas, voir la page suivante pour continuer.
19
Guide d’installation
À propos 14
Fonction
du :thermostat
Affichage de la température
14
Setup
0
Appuyer sur les touches t pour choisir
d’afficher la température en Fahrenheit ou en
Celsius :
0 Affichage de la température
en Fahrenheit (°F)
1 Affichage de la température
en Celsius (°C)
Appuyer sur cette touche pour
changer le réglage.
Une fois terminé, appuyer sur
le bouton RUN ou appuyer
simultanément sur les boutons
s et t et les maintenir
enfoncés pour quitter et
sauvegarder les changements.
20
Thermostat programmable RTH4300B
À propos
En
cas dedu
problème
thermostat
Si le thermostat cause des ennuis, essayer l’une de ces suggestions. La plupart des
problèmes peuvent être réglés rapidement et facilement.
L’écran est vide
• Vérifier le disjoncteur et réinitialiser si nécessaire.
• S’assurer que les commutateurs de chauffage et de climatisation
fonctionnent.
• S’assurer que la porte du système de chauffage est bien fermée.
• S’assurer que les piles alcalines AA ont été bien installées (voir page 14).
Le système de
chauffage ou de
climatisation ne
fonctionne pas
• Régler le commutateur du système à Heat. S’assurer que la
température réglée est supérieure à la température intérieure.
• Régler le commutateur du système à Cool. S’assurer que la
température réglée est inférieure à la température intérieure.
• Vérifier le disjoncteur et réinitialiser si nécessaire.
• S’assurer que les commutateurs de chauffage et de climatisation
fonctionnent.
• S’assurer que la porte du système de chauffage est bien fermée.
• Attendre 5 minutes que le système se mette en marche.
21
Guide d’installation
À propos
En
cas dedu
problème
thermostat
Les réglages de S’assurer que le réglage des températures de chauffage et de climatisation
la température
est acceptable :
ne changent pas
• Heat : 4,5 à 32°C (40 à 90°F)
• Cool : 10 à 37°C (50 à 99°F)
Les mentions
“Cool On” ou
“Heat On”
clignotent
• La fonction de protection du compresseur est activée. Attendre 5
minutes que le système redémarre en toute sécurité, sans endommager
le compresseur.
La mention
“Heat On”
n’apparaît pas
• Régler le commutateur à Heat et, la température au-dessus de la
température ambiante.
La mention
“Cool On”
n’apparaît pas
• Régler le commutateur à Cool et, la température sous la température
ambiante.
22
Thermostat programmable RTH4300B
Assistance à la clientèle
Tirer le thermostat
par le bas pour
le détacher de la
plaque murale.
Pour obtenir de l’aide avec ce produit, veuillez
consulter le site
http://yourhome.honeywell.com.
Regarder au dos
du thermostat
pour connaître le
numéro de modèle
et le code dateur.
Pour gagner du temps, écrire le numéro de
modèle et le code dateur avant d’appeler.
Ou téléphoner sans frais au Centre de service à
la clientèle de Honeywell au 1 800 468-1502.
Accessoires
Pour commander, adressez-vous au Service à
la clientèle de Honeywell en composant sans
frais le 1 800 468-1502.
Couvercle de plaque*.... No de pièce 50002883-001
*Sert à masquer les marques laissées par l’ancien
thermostat.
23
Guide d’installation
Garantie limitée d’un an
Honeywell garantit ce produit, à l’exception des piles, contre tout défaut de pièce ou de maind’oeuvre, durant une période d’un (1)an à partir de la date d’achat si le produit est utilisé et
entretenu convenablement. Si, à n’importe quel moment de la période de garantie, le produit
est défectueux, Honeywell le réparera ou le remplacera (à sa discrétion).
En cas de défectuosité du produit,
(i) le retourner, avec le reçu d’achat ou une autre preuve d’achat datée, à l’endroit où il a été
acheté, ou
(ii) téléphoner au Centre de service à la clientèle de Honeywell au 1 800 468-1502. Le Centre
décidera alors s’il faut retourner le produit à l’adresse suivante : Honeywell Return Goods, Dock 4
MN10-3860, 1885 Douglas Dr. N, Golden Valley, MN 55422, ou s’il vous fera parvenir un produit
de remplacement.
Cette garantie ne couvre pas les frais de démontage ou d’installation. La garantie sera
annulée si Honeywell prouve que la défectuosité a été causée par des dommages apparus alors
que le client était en possession du produit.
La responsabilité d’Honeywell se limite à la réparation ou au remplacement du produit selon
les termes énoncés. HONEYWELL NE PEUT ÊTRE TENUE RESPONSABLE DE PERTE
24
Thermostat programmable RTH4300B
Garantie limitée d’un an
OU DOMMAGE DE TOUTES SORTES, INCLUANT LES DOMMAGES ACCIDENTELS OU
CONSÉCUTIFS RÉSULTANT, DIRECTEMENT OU INDIRECTEMENT, DE TOUT MANQUEMENT À
N’IMPORTE QUELLE GARANTIE, EXPRESSE OU IMPLICITE, OU DE TOUTE AUTRE DÉFAILLANCE
DU PRODUIT. Certains États ou provinces ne permettent pas l’exclusion ou la restriction des
dommages accidentels ou consécutifs, cette restriction pourrait donc ne pas s’appliquer.
CETTE GARANTIE EST LA SEULE GARANTIE EXPRESSE QUE HONEYWELL OFFRE POUR
CE PRODUIT. LA DURÉE DE TOUTE GARANTIE IMPLICITE, INCLUANT LES GARANTIES
DE QUALITÉ MARCHANDE OU D’ADAPTATION À UNE UTILISATION PARTICULIÈRE, EST
LIMITÉE PAR LES PRÉSENTES À LA PÉRIODE D’UNE ANNÉE DE LA PRÉSENTE GARANTIE.
Certains États ou provinces ne permettent aucune restriction sur la durée d’une garantie implicite, la
restriction ci-dessus pourrait donc ne pas s’appliquer. La présente garantie vous confère des droits
juridiques spécifiques, et vous pourriez également jouir d’autres droits selon votre État ou province.
Pour toute question au sujet de la garantie, écrire au Bureau de relations avec les clients de
Honeywell à l’adresse suivante : 1985 Douglas Dr., Golden Valley, MN 55422 ou téléphoner
au 1 800 468-1502. Au Canada, écrire à l’adresse : Retail Products ON15-02H, Honeywell Limited/
Honeywell Limitée, 35, Promenade Dynamic, Scarborough (Ontario) M1V4Z9.
25
Systèmes d’automatisation et de contrôle
Honeywell International Inc.
Honeywell Limited-Honeywell Limitée
1985 Douglas Drive North
35 Dynamic Drive
Golden Valley, MN 55422
Toronto, Ontario M1V 4Z9
http://yourhome.honeywell.com
Imprimé aux É.-U. sur du papier recyclé
contenant au moins 10 % de fibres de
papier recyclées après consommation.
® Marque déposée aux É.-U.
© 2006 Honeywell International Inc.
69-1772EF M.S. 08-06