1
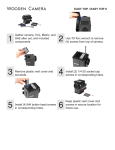
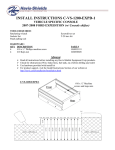
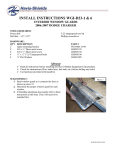
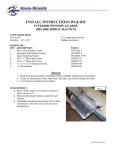
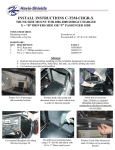
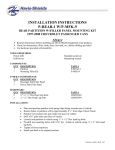
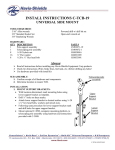
INSTALL INSTRUCTIONS C-VS-1100-F150
VEHICLE SPECIFIC CONSOLE
2004-2007 FORD F-150 PICK UP
TOOLS REQUIRED:
Metric Socket Set
Ratcheting Wrench
Panel Pulling Tool
HARDWARE:
QTY DESCRIPTION
6
#8 x ¾” Phillip Sheet Metal Screws
1
C-HK-1 (32 Torx Screws)
1/8” Drill Bit
Phillips Screwdriver
Power Drill
PART #
GSM33189
CM86508
SUB ASSEMBLY:
1. Remove necessary components to access mounting area.
• Armrest Pad (3 Metric Hex Head screws)
• Forward Console Face Plate (Panel Pulling Tool)
• Rear Console Face Plate (Panel Pulling Tool & 2 Metric Hex Head Screws)
INSTALLATION:
1. ATTACH HAVIS-SHIELDS CONSOLE:
• Position console plate as shown in the above view.
• Pre-drill mounting holes with 1/8” drill bit.
• Attach console plate using #8 x ¾” Sheet Metal Screws.
2. REPLACE COMPONENTS REMOVED IN SUB ASSEMBLY:
• Replace Rear Console Face Plate.
• Replace Forward Console Face Plate.
• Replace Armrest Pad.
3. INSTALL CONTROLS:
• Wire all controls prior to installation.
Note: A hole must be drilled in the bottom of the OEM console for routing of wires.
•
Attach control heads to console plate using equipment brackets or filler panels with
#8 x 3/8” Black Torx Screws.
Note: You may have to drill the console plate in the occasional situation that the mounting slots do not line up
with the equipment bracket.
Front Face Plate
Armrest
Rear Face Plate
C-VS-1100-F150-INST-1-07