1
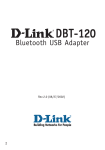
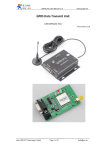
GN-BTD01 Bluetooth User’s Guide GN-BTD01 Bluetooth Neighborhood User Interface User’s Guide http://www.gigabyte.com.tw Rev. 1.0 First Edition GN-BTD01 Bluetooth User’s Guide Contents 1 SAFETY, CARE AND REGULATORY INFORMATION ............................1 2 INTRODUCTION TO GN-BTD01 ....................................................................4 2.1 Package Contents 4 2.2 LED Status 4 2.3 GN-BTD01 User Interface Components 4 2.4 Bluetooth Neighborhood User Interface 5 2.5 Operating System Environment 5 3 GETTING STARTED..........................................................................................6 3.1 3.2 Installing the software 6 Installing the Hardware 7 4 BLUETOOTH TRAY APPLICATION..............................................................8 5 MY BLUETOOTH PLACES............................................................................10 5.1 Device Discovery 11 5.2 Service Discovery 12 5.3 Bluetooth Services (Profiles) 13 5.3.1 Bluetooth Serial Port Service.......................................................13 5.3.2 Dial-up Networking (DUN) Service.............................................14 5.3.3 Network Access Service .............................................................15 5.3.4 FTP Folder...................................................................................17 5.3.5 Information Exchange (INBOX) Service .....................................17 5.3.6 Information Synchronization Service...........................................19 5.3.7 Fax Service .................................................................................20 6 PAIRED DEVICES............................................................................................21 7 TROUBLESHOOTING ....................................................................................22 8 APPENDIX: GLOSSARY.................................................................................24 9 LIMITED WARRANTY ...................................................................................25 GN-BTD01 Bluetooth User’s Guide FEDERAL COMMUNICATIONS COMMISSION INTERFERENCE STATEMENT This equipment has been tested and found to comply with the limits for a Class B digital device, pursuant to Part 15 of the FCC Rules. These limits are designed to provide reasonable protection against harmful interference in a residential installation. This equipment generates, uses and can radiate radio frequency energy and, if not installed and used in accordance with the instructions, may cause harmful interference to radio communications. However, there is no guarantee that interference will not occur in a particular installation. If this equipment does cause harmful interference to radio or television reception, which can be determined by turning the equipment off and on, the user is encouraged to try to correct the interference by one or more of the following measures: -- Reorient or relocate the receiving antenna. -- Increase the separation between the equipment and receiver. -- Connect the equipment into an outlet on a circuit different from that to which the receiver is connected. -- Consult the dealer or an experienced radio/TV technician for help. CAUTION: Any changes or modifications not expressly approved by the grantee of this device could void the user's authority to operate the equipment. FCC RF Radiation Exposure Statement This equipment complies with FCC RF radiation exposure limits set forth for an uncontrolled environment. This equipment should be installed and operated with a minimum distance of 20cm between the radiator and your body. GN-BTD01 Bluetooth User’s Guide 1 Safety, Care and Regulatory Information Important safety information Read and follow all instructions marked on the product and in the documentation before you operate your system. Retain all safety and operating instructions for future use. Switch off the radio components (BLUETOOTH or wireless LAN) when you are in a hospital, an operating room or near a medical electronics system. The transmitted radio waves can impair the operation of the medical devices. Keep the radio components (BLUETOOTH or wireless LAN) at least 20 cm from a pacemaker, as otherwise the proper operation of the pacemaker may be impaired by radio waves. The transmitted radio waves can cause an unpleasant humming in hearing aids. Do not let the radio components (BLUETOOTH or wireless LAN) work near flammable gases or into hazardous environments (e.g. paintshops), as the transmitted radio waves can cause an explosion or a fire. Aircraft To prevent interference with communication systems, do not use this product on the ground without the permission from the crew. 1 GN-BTD01 Bluetooth User’s Guide / for United States of America users only / Federal Communications Commission (FCC) Statement Note: This equipment has been tested and found to comply with the limits for a Class B digital device, pursuant to Part 15 of the FCC Rules. These limits are designed to provide reasonable protection against harmful interference when the equipment is operated in a commercial environment. This equipment generates, uses, and can radiate radio frequency energy and, if not installed and used in accordance with the instruction manual, may cause harmful interference to radio communications. Operation of this equipment in a residential area is likely to cause harmful interference in which case the user will be required to correct the interference at his own expense. Properly shielded and grounded cables and connectors must be used in order to meet FCC emission limits. Neither the provider nor the manufacturer are responsible for any radio or television interference caused by using other than recommended cables and connectors or by unauthorized changes or modifications to this equipment. Unauthorized changes or modifications could void the user's authority to operate the equipment. This device complies with Part 15 of the FCC Rules. Operation is subject to the following two conditions: (1) this device may not cause harmful interference, and (2) this device must accept any interference received, including interference that may cause undesired operation. / for European users only / R&TTE Directive The equipment has been approved in accordance with Council Decision 99/5/EC on radio equipment and terminal telecommunication equipment and the mutual recognition of their conformity. This device complies with the requirements of the R&TTE Directive 1999/5/EC with the * EN 60950 Safety of Information Technology equipment * EN 300 328 Technical requirements for radio equipment * EN 301 489 EMC requirements for radio equipment This notebook is approved for use in Belgium, Denmark, Germany, Finland, Greece, Great Britain, Ireland, Italy, Luxembourg, the Netherlands, Austria, Portugal, Sweden, Switzerland, Spain, Iceland, Liechtenstein and Norway. Contact the corresponding government office of the respective country for current information on possible operating restrictions. If your country is not included in the list, then please contact the corresponding supervisory authority as to whether the use of this product is permitted in your country. 2 GN-BTD01 Bluetooth User’s Guide Restrictions France . Limited frequency range: only the channels 10 to 13 (2457 MHz, 2462 MHz, 2467 MHz or 2472 MHz) may be used in France. It is prohibited to use the device outdoors. Radio frequencies and security standards The following information represents the status of June 2002. Current information is available from the corresponding government office of your country. Wireless network cards and adapters are intended for operation in the ISM (Industrial, Scientific, Medical) frequency range between 2.4 and 2.4835 GHz in accordance with the IEEE standard 802.11b. As each of the 14 usable radio channels requires a bandwidth of 22 MHz due to the DSSS (Direct Sequence Spread Spectrum) process, a maximum of three mutually independent channels (e.g. 3, 8 and 13) are available. In the following tables you will find the channels permitted in your country: 3 GN-BTD01 Bluetooth User’s Guide 2 Introduction to GN-BTD01 The BluetoothTM wireless technology standard has been adopted the world over by countless companies. The BluetoothTM wireless technology makes it possible to transmit signals over short distances between telephones, computers and other devices. The technology will replace many of the proprietary cables we use in the home and office to connect devices together: Telephones, printers, PDA's, desktop and laptop computers, fax machines, keyboards, joysticks. Gigabyte proudly introduces our Bluetooth series product-- GN-BTD01, that provides the solution for seamless integration of Bluetooth wireless technology to the user’s desktop or laptop computer. It will enable wireless connections to the Internet and between Bluetooth-enabled devices (e.g., handheld computers, cellular phones, and personal computers) 2.1 Package Contents The Gigabyte GN-BTD01 Bluetooth USB Dongle package contains the following. - Gigabyte GN-BTD01 Bluetooth USB Dongle x 1 - User’s Guide x 1 - Extention USB cable x 1 - CD (including User’s Guide and Driver) x 1 2.2 LED Status Description Power on Status Right LED blinking every two second Data Linking Right LED & Left LED flash irregularly 2.3 GN-BTD01 User Interface Components The GN-BTD01 user interface consists of three major components: The BTTray Security Manager --- controls and manages Bluetooth security. The Bluetooth Configuration Panel --- configures the GN-BTD01 software through the familiar Windows control panel interface. 4 GN-BTD01 Bluetooth User’s Guide Bluetooth Neighborhood --- uses Windows shell extensions capabilities to integrate GN-BTD01 with Windows Explorer and provide a graphical user interface (“user interface”) that enables the user to : Search for Bluetooth-enabled devices (“device inquiry”). Discover and manage (start / stop) Bluetooth wireless connections (available services include Dial-up Networking, Bluetooth Serial Port, Network Access, FTP, Inbox, Fax, and Information Synchronization.). Configure properties of local services and client applications. 2.4 Bluetooth Neighborhood User Interface The GN-BTD01 Bluetooth Neighborhood user interface provides several ways to execute commands and perform tasks: Icons may be double-clicked to perform a default action. For example, double-click the Generic Serial service and a connection starts; double-click Generic Serial service a second time and the connection stops. Icons may be right-clicked to display a context menu. An option is chosen to perform the desired action. Links (Visible only in the web page view) can be chosen to execute a command. Menus can be displayed and options chosen to perform the desired task. 2.5 Operating System Environment The GN-BTD01 may be installed under several different Windows operating systems. These include: • Windows 2000 • Windows XP • Windows 98SE (Second Edition) • Windows Me (Millennium Edition) The functionality of GN-BTD01 is the same regardless of the Windows version. In some instances, alerts and connection configurations are handled differently in Windows 2000 as compared to other versions of Windows (e.g., Windows 98SE). These are noted in this User’s Guide. 5 GN-BTD01 Bluetooth User’s Guide 3 Getting Started 3.1 Installing the software 1) Insert the CD into the CD/DVD drive on your PC. The CD should start automatically and present you with an installation menu. If the CD fails to start automatically, click on the Start button, select ”Run” and type D:\Setup.exe (assuming your CD/DVD drive is D) then press Enter or click OK. 2) Choose “Install Bluetooth Software” to start the Install Wizard. 3) Click Next. 4) Select “I accept the terms in the license agreement” and click Next. 5) Ensure the device name and type are set correctly then click Next (The device name should be unique). 6) Choose to accept the default folder by clicking Next, or change the location by using the Change option. 7) Click Install. 8) Click Finish. 9) Restart Windows. 6 GN-BTD01 Bluetooth User’s Guide 3.2 Installing the Hardware 1) Insert the Bluetooth USB Adaptor into the USB port. 2) Windows will notify you that new hardware has been discovered and that it is being installed. Note: Windows XP users will need to click Next, Continue Anyway then Finish. 7 GN-BTD01 Bluetooth User’s Guide 4 Bluetooth Tray Application After the installation of the software and hardware are complete, you should have a new item (BTTray icon) on the Windows Taskbar. Right-click on it, select “Setup\Configuration” and you will see the following screen. Here are some points need to pay attention to: 1. The computer name is the same as your computer name or the name you chose during the installation process. 2. The computer type is either ”Desktop” or “Laptop”. This is the device type other Bluetooth users will see when they search for your computer. 3. You can set the security mode setting to High or Medium. The default value is “Medium”, means that anyone can connect to you and use your services without having to type in a password. Note: If your security mode setting is “High” then there will be a message box displayed on the Windows Taskbar while other Bluetooth users want to connect you. Click the Bluetooth Tray icon. Both of you need to enter the same password;after that both of you can be connected. 8 GN-BTD01 Bluetooth User’s Guide Please check your hardware is working on the Hardware tab. If the Device Status is “na” then your USB adaptor has not been detected by the software. If the device is not plugged in, insert it and select this hardware option again. Note: If you want to know more details about the Bluetooth Configuration Panel , click on the Help button. 9 GN-BTD01 Bluetooth User’s Guide 5 My Bluetooth Places After installation of the Bluetooth software, the My Bluetooth Places icon will appear on your desktop. Double-click the icon to open the My Bluetooth Places. 10 GN-BTD01 Bluetooth User’s Guide 5.1 Device Discovery Open the Entire Bluetooth Neighborhood, it will automatically try to search for other Bluetooth device within radio range. The discovered devices will be displayed in the Entire Bluetooth Neighborhood. Subsequence searches can be initiated by clicking “Search For Devices”. If you have not configured any other Bluetooth devices yet, set them up now then click on Search For Devices to re-discover your other Bluetooth devices. 11 GN-BTD01 Bluetooth User’s Guide 5.2 Service Discovery Each device in the Bluetooth Neighborhood you have discovered will have services you can access. Double-click on the device you will see all the services listed. If no services are discovered, you may wish to verify that the device is powered on and within radio range and attempt to discover its services again. 12 GN-BTD01 Bluetooth User’s Guide 5.3 Bluetooth Services (Profiles) 5.3.1 Bluetooth Serial Port Service The Bluetooth Serial Port Profile is used by your computer to connect to a Bluetooth-enabled device through a virtual COM port. The serial connection can be used by legacy applications as it emulates a simple RS232 serial cable link between two Bluetooth devices. Identify the COM Port Numbers: The COM port numbers on your computer and the device will not change from connection to connection. Each time the connection is established, the same COM port numbers will be used. 1) Right-click the “Bluetooth Serial Port” service icon to pop-up the context menu 2) Choose “Properties” from the context menu. The Bluetooth Configuration panel (Local Services tab) will be displayed, followed by the Service Properties dialog box. 3) Make a note of the COM port number. 4) Click Ok . Use the DUN Connection: (e.g., if you want to use a Bluetooth printer) Step1. Click “Search For Devices” to search for the Bluetooth Printer then Double-Click the Bluetooth Printer icon. Step2. Double-Click the Bluetooth Serial Port service to display its Service Properties dialog box. The Service Properties dialog box will show that the communication is using. Now, you can use the Bluetooth Printer. 13 GN-BTD01 Bluetooth User’s Guide 5.3.2 Dial-up Networking (DUN) Service The Dial-Up Networking (DUN) service allows you to establish a Bluetooth wireless connection from your computer to a modem on another Bluetooth-enabled device. The device can be a personal computer, cellular telephone, or Bluetooth-enabled modem. The connection can be used to dial out to an Internet Service Provider (ISP). Establish a DUN Connection 1) Double-click the “Dial-up Networking” icon. The “Connect To” dialog box will be displayed. 2) Enter a User name and Password. If connecting to an ISP, this will be the user’s login name and password. 3) Click on the Connect or Dial button to dial-out. Note: If you want to establish a Bluetooth wireless connection from a Bluetooth-enabled cellular telephone. The Dial number must add the area code where ISP located. (e.g., 718-4496688) 14 GN-BTD01 Bluetooth User’s Guide 5.3.3 Network Access Service The Local Area Network (LAN) Access permits a Bluetooth-enabled personal computer to use an Ethernet connection that is physically located on another Bluetooth-enabled computer or Network Access Point (the “gateway”). Only Point-to-Point Protocol (PPP) is supported. LAP Server Setup (Windows 2000) 1) Click the Start button and then select “Settings”, and “Network and Dial-up Connections”. 2) Double-Click the “Local Area Connection” icon. 3) Click the “Sharing” tab. 4) Click the “Enable Internet Connection Sharing for this connection” box to check it. 5) Click OK to close the window.(Message: “When Internet Connection Sharing is enabled, your LAN adapter will be set to use IP address NNN.NNN.N.N. Your computer may lose connectivity with other computers on your network. If these other computers have static IP address, you should set them to obtain their IP address automatically. Are you sure you want to enable the Internet Connection Sharing? ”) 6) Click Yes to confirm that Internet Connection Sharing should be enabled. The server configuration is now complete. 15 GN-BTD01 Bluetooth User’s Guide LAP Server Setup (Windows 98SE and Windows Me) Internet Protocol routing software (e.g., WinRoute Lite) is required on Windows98SE and Windows Me servers. 1) Click the Start button and then select “Settings”, and “Control Panel”. 2) Double-click the “Network” icon. 3) Click the “Configuration” tab in the Network window and select “TCP/IP->Bluetooth LAN Access Server Driver” entry and then click the Properties button. 4) Click the “IP Address” tab in the TCP/IP Properties window. 5) Choose the “Specify an IP address” option. 6) Enter an IP Address (Suggested value is 192.168.0.1) and a Subnet Mask (Suggested value is 255.255.255.0). 7) Click OK in the TCP/IP Properties window and then in the Network window. 8) Click YES in the System Setting Change dialog box to restart the computer. Next, Configuration the routing software 1) Right-click the WinRoute icon located in the Windows system tray and select Administrator…option. The WinRoute Lite Administration control panel will be displayed. 2) On the Setting tab, select the “2nd networking adapter” radio button. 3) From the “Network adapter” drop-down list, choose any adapter. 4) Click the Settings… button. The Advanced Setting dialog box will be displayed. 5) On the DHCP tab, in the “Adapter” drop-down list, choose any adapter. 6) Select the “Enable DHCP Server” checkbox. 7) “Assign IP address to Client in range”, e.g., From: 210 To: 240. 8) Click OK to save the setting. After the settings are configured, verify that WinRoute Lite is active. The WinRoute icon has two states: engine started and engine stopped. 16 GN-BTD01 Bluetooth User’s Guide 5.3.4 FTP Folder The FTP (File Transfer Protocol) Folder service allows your computer to perform file system actions on another Bluetooth-enabled device, i.e.: Explore, drag/drop, open, print, send to 3.5” Floppy Drive, cut/copy, paste, delete, rename, Properties, Update. Those command are executed through a context menu when you select and right-click a file or folder. Use the Shared Folder: Step1. Right-Click the FTP Folder, select “Properties”. The Bluetooth Properties dialog will be displayed. Step2. Click Browse, select the shared Directory that you want to share. After the setting is ok, other device can access your shared data by clicking your FTP Folder icon. 5.3.5 Information Exchange (INBOX) Service The Information Exchange allows your computer to send items from its personal information manager or PIM (e.g., Microsoft ® Outlook®) to the personal information manager on another Bluetooth-enabled device: Send (“push”), receive (“pull”), and exchange business cards. Send calendar items, email messages, and notes. 17 GN-BTD01 Bluetooth User’s Guide Information Exchange configuration Settings Right-click the Inbox icon, select the “Properties” then the Bluetooth Properties dialog will be displayed. Send Business Card (My Business card) : the path to the directory on this computer that contains your electronic business card. Select the “Send Business Card on Request” option to allow remote devices to obtain your business card. Click the Browse button and navigate to the directory. Receive Business Card (My Inbox Directory) : the path to the directory on this computer where inbound Personal Information Manager items such as Business cards, Notes, Calendar entries and Messages will be saved. Select the types of items you wish to accept by placing a checkmark in the appropriate boxes, and then click the Browse button and navigate to the directory. Double-Click the Bluetooth Device that you want to connect, and then click the Inbox service icon. Right-Click the file, the context menu will be displayed. The Inbox commands include: Send Business Card, Exchange Business Card and Copy. 18 GN-BTD01 Bluetooth User’s Guide 5.3.6 Information Synchronization Service The Information Synchronization service is used to synchronize the information (PIM database) between you and another Bluetooth-enabled device. Right-click the “Information Synchronization” icon, select the “Properties” then the Bluetooth Properties dialog will be displayed. Select the types of items you wish to synchronize by placing a checkmark in the appropriate boxes, and then click the Browse button and navigate to the directory. Double-click the “Information Synchronization” icon to synchronize your computer’s personal information manager (PIM) database with the other device’s PIM. The progress of the synchronization process is displayed in a dialog box. When the synchronization process completes, a message is displayed in the status bar. The message indicates the process completed successfully or that it failed. 19 GN-BTD01 Bluetooth User’s Guide 5.3.7 Fax Service The Fax service allows you to use to fax documents (send only) as through the fax device (e.g., fax modem) is attached physically to your computer. To send a Fax Connections are initiated from the client: 1) In the Folders pane of My Bluetooth Places, select “Entire Bluetooth Neighborhood”. 2) In the right pane of Entire Bluetooth Neighborhood, right-click anywhere except on a device name and select “Refresh” from the pop-up menu. 3) In the Folders pane of My Bluetooth Places, right-click the server that will provide the Fax service and select Discover Available Services from pop-up menu to update the available services list. The available services will be displayed in the right pane of My Bluetooth Places. 4) Double-click the “Fax” icon to start the connection. After the Fax connection has been started, open or create the document to be faxed and use the “Print” or “Send to Fax Recipient” options available in most applications. The Fax connection will be closed automatically when the transmission is complete. Note: Before using FAX service, the Client is required to install the WinFax software in advance. Please refer to the WinFax software installation guide for detail information. 20 GN-BTD01 Bluetooth User’s Guide 6 Paired Devices Paired is the process of associating Bluetooth-enabled device with each other. It is advisable to pair with frequently used Bluetooth-enabled devices. This will establish a permanent security link between the devices and enable quick access to the services provided, without the need to enter passkeys. Once a device is paired, it remains paired even if the user: Stops the connection between the devices. Reboots one or both devices. Stops and starts the services on the devices. When a device is paired, the device will be displayed automatically in Bluetooth Neighborhood when the view is opened or explored. Note: A paired device will be displayed even if the device is not within radio range and/or powered on at the time Bluetooth Neighborhood is opened and explored. 21 GN-BTD01 Bluetooth User’s Guide 7 Troubleshooting Q1: Can’t connect to a paired device? Check the remote paired device is within radio range and powered up and then attempt the connection again. Q2: Can’t discover services on an un-paired remote device? Verify that remote device is powered up and in Connectable mode (Bluetooth Configuration panel \ Accessibility tab). Click the “Search For Devices” to verify that the device is within range. Q3. - Dial-up Networking service does not start? Please check the modem is usable as a local device from the server. Open the “Bluetooth Configuration panel \ Local Services” tab then double-click the “Dial-up Networking” service. Select the one modem that will be used to dial out. Click the OK button to close the dialog box. Click OK button in the Bluetooth Configuration panel to activate the setting. Q4. - Q5. - Q6. - How do I decide the Bluetooth Device Address (BDA) of my device? Open the “Bluetooth Configuration panel \ Hardware” tab. The Bluetooth Device Address will be displayed in the Device Properties section of the dialog box. How do I decide the version number of the Bluetooth Specification that the Host Controller Interface (HCI) complies with? Open the “Bluetooth Configuration panel \ Hardware” tab. The Bluetooth Specification compliance and the Specification Revision information for the Host Controller Interface will be displayed in the Device Properties section of the dialog box. How do I decide the version number of the link Manager Protocol (LMP)? Open the “Bluetooth Configuration panel \ Hardware” tab. The Link Manager Protocol version number and the sub-version number information will be displayed in the Device Properties section of the 22 GN-BTD01 Bluetooth User’s Guide dialog box. Q7. - - Q8. - How to test a Network Access connection? If the device (in the role of a client) is hardwired to the LAN, unplug the hardwired connection to ensure that the test checks the wireless connection rather than the hardwired connection. If the device (in the role of a server) has accessed to the Internet, open a browser on the client and connect to the World Wide Web. You can also Ping the server from the DOS prompt. An Unknown Port The error message “Unknown Port” usually means an attempt was made to connect a port that was in use. To use more than one SPP connection at the same time, you have to add one or more user-defined COM ports. 23 GN-BTD01 Bluetooth User’s Guide 8 Appendix: Glossary Acronyms Meaning BDA Bluetooth Device Address Device Inquiry The process of searching for other Bluetooth devices. DHCP Dynamic Host Control Protocol-when enabled, connecting devices are assigned an Internet Protocol (IP) address by the server FTP File Transfer Protocol HCI Host Controller Interface IrDA Infrared Data Association IrMC Infrared Mobile Communications Link Key An internally-generated unique security key that is exchanged by paired devices as proof of identity before a connection is established. LMP Link Manager Protocol -- used by Bluetooth for internal communications. Me Millennium Edition PAD Personal Digital Assistant Page Scan Mode A Bluetooth mode in which a server is actively listening (scanning) for a client to “page” it. PIM Personal Information Manager PIN Personal Identification Number, as a “passkey” or “password” SE Second Edition 24 GN-BTD01 Bluetooth User’s Guide 9 Limited Warranty 1-Year Warranty Gigabyte warrants to the original consumer/purchaser that the adapter product free from defects in material and workmanship for no limited time from the original manufactory shipment date. This warranty does not cover the adapter product if it is damaged in the process of being installed or improperly used. Gigabyte may replace or repair the adapter product with either new or reconditioned parts. Repaired or replaced adapter products will be returned to you at the same revision level as received or higher at Gigabyte’s option. Gigabyte reverses the right to replace discounted adapter products with an equivalent generation adapter product. KEEP THIS STUB FOR YOUR PURCHASING RECORD Customer: Phone No: Address: Email: Model: Serial: Date of Purchase: Place of Purchase: From Whom: Distributor: 25