1
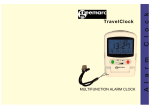
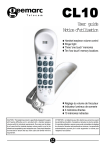
User guide
Telephone radio alarm clock
PETITE TRAC
SETTING UP
FIT A 9 VOLT PP3 BATTERY
Why? Because if you have a power cut or disconnect your Petite Trac for
any reason you won't have to re-set the clock.
- Remove the battery cover underneath the telephone.
- Fit the battery, ensuring that the correct polarity is observed.
- Replace the battery cover.
NOTE: Battery back-up is not designed to support the clock operation for
lengthy periods in the absence of mains supply. It is recommended that the
battery be changed every 6 months or earlier if necessary.
IMPORTANT: Dispose of batteries carefully. Never burn them or let
children play with them.
CONNECTING TELEPHONE
- Connect the handset cord.
- Connect the PTT line cord to the telephone.
- Connect the PTT plug to the wall socket (classified TNV-3 according to
EN60950 standard).
- Connect the AC adaptor plug into the socket at the rear of the base unit.
- Connect the AC adaptor to the wall socket (classified “hazardous voltage”
according to EN60950 standard).
SETTING UP
CLOCK TIME SETTING
The correct time should be set as follows:
- Press and hold down Time button.
- Whilst holding down the Time button, press Hour and then Minute
buttons as necessary to display the correct time.
Note: that the clock is a 12 hour clock; in the case of PM, an indicator will
show to the top left of the clock display.
RINGER SETTING
A switch (Ringer) located on the rear of the base unit allows the ringer to
be switched On or Off.
If you do not wish the telephone to ring, set the switch to the Off position. The
ringer lamp will still flash on receipt of a call.
Outgoing calls can still be made when the switch is set to the Off position.
DIMMER SETTING
A switch (Dimmer) located on the left side of the base unit allows to adjust
(Hi or Lo) the brightness of the display.
USING THE TELEPHONE
ANSWERING INCOMING CALLS
When an incoming call is received, the telephone rings (if the Ringer
switch is On) and/or the lamp flashes.
To answer the call lift the handset and speak.
MAKING A CALL
Lift the handset, await the dial tone and dial required number.
On completion of the call, carefully replace the handset in the cradle.
LAST NUMBER REDIAL
If the telephone number you have called is engaged or you wish to repeat the
call before making further calls, lift the handset, await dialling tone and press
the REDIAL button.
The previously dialled number will be automatically redialled.
RECALL, * & # BUTTONS
These are used with the new services provided on digital exchanges. For
details please contact your network operator.
USING THE TELEPHONE
MUTE BUTTON
- If you wish to speak privately to someone else in the room – without your
caller overhearing – press and hold the MUTE button.
Your caller may still be heard during the MUTE operation.
- To resume normal conversation , release the MUTE button.
For product support and help visit our website at
www.geemarc.com
telephone 01707 384438
or fax 01707 372529
RADIO ALARM CLOCK OPERATE
The radio has 2 wavebands: Medium Wave (AM) and VHF (FM). A built in
aerial is incorporated for Medium Wave reception. For VHF reception, the
thin lead should be unwound and fully extended. Adjust the position of the
lead for best results.
On this unit the Volume control and Tuning control are located at the right
hand side.
The buttons for operating radio (AM/FM and Radio/Off/Auto) are located at
the left hand side.
SET THE RADIO
- Set the radio Radio / Off / Auto switch to the Radio position, the AM /
FM switch to the desired waveband and adjust the Tuning control to your
choice of programme. Adjust the Volume control as required.
- To switch the radio off, slide the Radio / Off / Auto switch to the Off
position.
SET THE ALARM TIME
Press and hold down the Alarm Set button and set the alarm time by using
the Hour and Minute buttons to set the clock.
RADIO ALARM CLOCK OPERATE
WAKE UP TO MUSIC
Set the alarm time and select your desired radio station, adjust the volume
control to your preferred listening level and proceed as follows:
- Slide the Radio / Off / Auto switch to the Auto position (if the radio was
playing this action will switch it off).
The alarm indicator at the bottom left hand of the clock display will
illuminate.
- To switch the radio off after waking up press the Sleep button followed by
the Snooze button.
The radio will turn on again at the same time the next day.
- To switch the radio off permanently after waking up set the Radio / Off /
Auto switch to the Off position.
WAKE TO BUZZER
- Follow the instructions as per Wake up to music but set the volume switch
to Off.
The alarm indicator at the bottom left of the clock display will illuminate.
- To switch the buzzer off after waking up, press the Sleep button followed
by the Snooze button.
The buzzer will turn on again at the same time the next day.
RADIO ALARM CLOCK OPERATE
SNOOZE OPERATION
When the radio is switched on by the alarm, pressing the Snooze button
will silence the radio for approximately 9 minutes. The alarm will then
switch the radio or buzzer on again.
SLEEP TO MUSIC
The radio can be set to play and switch off automatically for a length of
between 1 minute and 1 hour 59 minutes.
- The radio Volume have to be switched on.
- Set the Radio / Off / Auto switch to the Off position. (Note that the
alarm, if set will not operate in this condition).
- Press and hold down the Sleep button.
For a length of time over 59 minutes press the Hour button and release.
- Still holding Sleep button press Min button, the display will indicate 1 hour
59 minutes and will start to count down.
When the chosen sleep time is indicated release the buttons. The radio will
operate for the chosen time and then switch off.
- To switch the radio off before the chosen 'sleep time' is indicated, press the
Snooze button.
For product support and help visit our website at www.geemarc.com
telephone 01707 384438
or fax 01707 372529
RADIO ALARM CLOCK OPERATE
COMBINATION OF SLEEP AND WAKE TO MUSIC OPERATION
The radio can be adjusted to automatically switch off in the 'sleep to music'
operation and to switch on automatically again at the preset alarm time.
- Set the radio as per WAKE UP TO MUSIC operation.
- Slide the Radio / Off / Auto switch to the Auto position.
- Press and hold down the Sleep button.
For a length of time over 59 minutes press the Hour button and release.
- Still holding Sleep button press Min button, the display will indicate 1 hour
59 minutes and will start to count down. When the chosen sleep time is
indicated release the buttons.
Note : if the Radio / Off / Auto was previously switched Radio, ensure
that it is switched to the AUTO position after setting the sleep time.
- The radio will continue to play before switching off by itself and will switch
on again at the preset alarm time.
- To switch the radio off before the chosen ‘sleep time’ has elapsed, press
the Snooze button.
AUTO RADIO MUTING
If there is an incoming telephone call while the radio is playing, the radio
will be muted when the handset is lifted.
GUARANTEE
From the moment your Geemarc product is purchased, Geemarc guarantee it
for the period of one year. During this time, all repairs or replacements (at our
option) are free of charge.Should you experience a problem then contact our
helpline or visit our website at www.geemarc.com.The guarantee does not
cover accidents, negligence or breakages to any parts. The product must not
be tampered with or taken apart by anyone who is not an authorised Geemarc
representative.The Geemarc guarantee in no way limits your legal rights.
IMPORTANT: YOUR RECEIPT IS PART OF YOUR GUARANTEE AND
MUST BE RETAINED AND PRODUCED IN THE EVENT OF A
WARRANTY CLAIM
Please note: The guarantee applies to the United Kingdom only.
Declaration : Hereby Geemarc Telecom SA declares that this product is in
compliance with the essential requirements and other relevant provisions of
the Radio and Telecommunications Terminal Equipment Directive 1999/5/
EEC and in particular article 3 section 1a, 1b and section 3. The telephone
does not operate if the line current is lower than 18 mA.
Electrical connection : The apparatus is designed to operate from a 230V
50Hz supply only. (Classified as «hazardous voltage» according to EN60950
standard).The apparatus does not incorporate an integral power on/off switch.
To disconnect the power, either switch off supply at the mains power socket or
unplug the AC adaptor. When installing the apparatus, ensure that the mains
power socket is readily accessible.
Telephone connection : Voltages present on the telecommunication network
are classified TNV-3 (Telecommunication Network Voltage) according to the
EN60950 standard.
The alarm clock of this equipment may malfunction when there is radio
interference appeared on the enclosure or power line or signal line. The unit will
revert to normal operation when the interference stop.
Under the environment with electrostatic discharge, the alarm clock of this
equipment may malfunction and require user reset.
UGPTRAC ED02