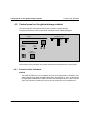
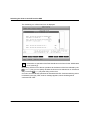
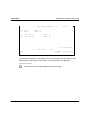
1
1 Introduction
The range of BS2000/OSD servers has been extended by the addition of the S130 series.
The spectrum of user facilities of the new models lies between the S110 and H130 server
series. They are powerful systems for scientific and commercial applications.
The S130 Business Server (or cluster) has a modular structure and can easily be upgraded
on site.
The main memory can be expanded by up to 8 Gbytes. Global storage (GSP or SSU) can
be upgraded to a maximum of 32 Gbytes and if desired can have a battery buffer.
The input/output system consists of 1 or 2 input/output processors. Up to 248 channels can
be configured for connecting peripheral devices with channel interfaces. LAN networking is
possible via the 3970-SKP service/console processor, a connection to the TRANSDATA
network world via front-end processors.
The service processor (SVP) and the external 3970-SKP service/console processor
support common operation, monitoring, diagnosis and maintenance of the computer as well
as TELESERVICE.
The models can easily be integrated into a HIPLEX network.
Like all computers in the 7.500 system family, the business server uses the BS2000
operating system. This offers the portability and compatibility of BS2000 programs.
1.1 Objectives and target group
This manual provides you with all the information you require to operate the S130 Business
Server via the service/console processor, and is thus intended for operators and system
managers.
Knowledge of BS2000 system operation and management as well as basic knowledge of
SINIX are required.
Further manuals with information on the operation of BS2000, SINIX and TELESERVICE
are listed under “Related publications” at the end of this manual.
U25339-J-Z126-1-7600
1
Summary of contents
Introduction
1.2 Summary of contents
This operating manual covers the hardware operating functions of the S130 Business
Server with the 3970-SKP service/console processor.
The chapters “Overview”, “Controls and indicators” and “Standard processing in SVP
mode” provide information on hardware and the operating concept. You should read these
chapters first.
The chapter entitled “Troubleshooting” provides valuable assistance in recognizing and
solving problems.
A keyword index at the end of the manual helps you to find the relevant information quickly.
1.3 Notational conventions
Some text passages are marked using the following symbols:
i
!
Information that is particularly important for the function of the product.
Important instructions, e.g. warnings.
V7
Reference to the “SINIX-2000 V7.0” [1] manual.
Ê
The input symbol indicates actions which must be carried out (e.g. keyboard input).
Ë
This character represents a blank in keyboard input.
[ ... ]
References to relevant literature or optional parameters in commands are given in
square brackets.
This typewriter font is used for names, commands and messages (e.g. the
/DETË*CHA(xx) command).
2
U25339-J-Z126-1-7600
2 Important instructions
This chapter covers the most important safety instructions. It also includes some manufacturer instructions and notes on radio interference.
2.1 Safety instructions
This device fulfills the prevailing safety requirements for information technology equipment,
including electrical office machines.
●
In emergencies (e.g. damaged housing, operating elements or network cables, entry of
liquid or foreign objects), switch off the device immediately (EMERGENCY STOP) and
contact our service department.
EMERGENCY STOP
I
o
S130 Business Server Global storage
Battery unit
Figure 1: EMERGENCY STOP switch on the S130 Business Server, global storage and battery unit
●
The system must have a direct power supply for safety reasons. The systems may only
be installed by authorized trained personnel.
U25339-J-Z126-1-7600
3
Manufacturer instructions
Important instructions
●
The cables must be laid in such a way that there is no danger of anyone tripping over
them and they cannot be damaged.
●
Data transmission lines must not be connected or disconnected during electrical
storms.
●
Ensure that no foreign bodies (e.g. necklaces, paperclips etc.) or liquids find their way
into the device (danger of electric shock, short circuit).
●
Repairs to the device may only be carried out by authorized and trained personnel. All
areas which are secured by locks or can only be opened using tools are maintenance
areas and may only be accessed by trained personnel.
Unauthorized opening of the maintenance area and improper repairs can be dangerous
for the user (electric shock, danger of fire).
2.2 Manufacturer instructions
This product complies with the EC guideline 89/336/EEC "Electronic Compatibility". The product bears the EC certificate.
2.3 RFI suppression
!
WARNING: This is a class A equipment. This equipment may cause interference to
radio and television reception in a residential installation. If it does cause interference, the user may be requested to take appropriate corrective measures at his
or her own cost.
The devices generate and emit high-frequency energy.
If the devices are installed and used other than as instructed in the manual, failures in the
devices or other electric systems may occur. If failures of this type occur it is the task of the
user to carry out measurements and implement measures to solve the problem. Only the
cables supplied with the system or recommended by SNI may be used.
All other devices which are connected to the present product must be radio interference
suppressed in accordance with BMPT Order No. 1046/84 and Order No. 243/91 or EU
Directive 89/336/EEC. Products which satisfy this requirements are provided with an appropriate certificate by the manufacturer and bear the CE mark or the interference suppression
symbol.
4
U25339-J-Z126-1-7600
3 Overview
This chapter provides information on the configuration levels and the configuration of the
S130 Business Server series and the concept of system operation.
S130 Business Server
Global storage
Battery unit
Figure 2: S130 Business Server, global storage and battery unit
The S130 Business Server comprises two cabinets together with an additional cabinet for
channel extensions.
Two global storage units can be connected, each of which is located in a separate cabinet.
The battery unit for global storage consists of three cabinets.
3.1 Configuration levels of the S130 Business Server
The S130 Business Server series consists of five models. Upgrading of the individual
models can easily be carried out on site, so that system downtime is not extended due to
hardware installation.
All the S130 models have multiple processing units, I/O processors and channel groups.
Thus a reconfiguration is possible for these models if there is a partial failure.
If a processing unit fails, the other processors take over its tasks during operation (dynamic
reconfiguration).
U25339-J-Z126-1-7600
5
Configuration levels of the S130 Business Server
Overview
If the HVZ (high-availability feature) option S130K-1H is available, a defective processor can
be replaced with the high-availability processor (the high-availability feature is only available
for the models S130-C, S130-E and S130-P).
Model
Number of processors
Performance factor
S130-C
2 processing units
1.0
S130-E
3 processing units
1.4
S130-K
4 processing units
1.9
S130-P
6 processing units
2.6
S130-T
8 processing units
3.1
Printer
S130
SKP
ATOP
Radio-controlled clock/
GTS
TELESERVICE
I/O channel
LAN
V.24
On/off facility
(optional)
LAN
Figure 3: Hardware overview of the S130 Business Server system with 3970-SKP
6
U25339-J-Z126-1-7600
Overview
Concept of system operation
3.2 Concept of system operation
V7
System operation is described in the chapter “Basics of system operation“ of the
“SINIX-2000 V7.0“ [1] manual.
The following section lists the most important hardware and software components for S130
operation.
3.2.1 Hardware
Secondary
console
serial
Console
SKP
S130
I/O channel
CPU
Radio-controlled clock/
GTS
ATOP
serial
LAN
serial
V.24
SVP
On/off facility
LAN
The following hardware and software components are important for the operation of S130:
●
Service processor (SVP) in the S130 CPU.
This is responsible for the following tasks in the S130 CPU:
– initialization
– monitoring
– controlling
– hardware diagnosis
U25339-J-Z126-1-7600
7
Concept of system operation
●
Overview
The service/console processor (3970-SKP) with the SINIX operating system.
Operation of the S130 system takes place via a local PC: the 3970-SKP service/console
processor.
S130 and 3970-SKP communicate with one another in three ways:
–
–
–
serial line (V.24)
type-2 I/O channel (KT2) or type-S I/O channel
LAN connection
The following components can be operated via the local 3970-SKP screen and remote
secondary consoles:
–
–
–
the 3970-SKP itself
the SVP of the S130
the BS2000 running on the S130
●
Consoles can be set up and operated directly for up to 15 VM2000 guest systems.
●
Automatic Operator (ATOP).
The ATOP is a device which is connected to the 3970-SKP via a serial line.
It makes the following functions possible:
–
automatic switching on and off of the S130
–
automatic operation of the BS2000 system
The customer can program the ATOP to specify which operating functions should
be executed for which conditions.
Examples:
8
–
automatic shutdown of the system in the case of fan failure.
–
automatic command entry in reaction to certain BS2000 console messages.
●
It is possible to connect a radio-controlled clock or Global Time Server (GTS).
●
On/off facility (optional) makes it possible to switch the S130 on and off from the
3970-SKP.
U25339-J-Z126-1-7600
Overview
Concept of system operation
3.2.2 Software
The following software components play an important role in S130 operation:
●
Window interface
The SINIX operating system is run on the 3970-SKP. One component of SINIX is the
window interface based on the X Window system (see the ”SINIX-2000 V7.0” [1]
manual).
V7
A brief introduction to the window system can be found in the chapter entitled
"Brief introduction to the window system" in the "SINIX-2000 V7.0" [1] manual.
Further information can be found in the "SINIX/windows User Environment
V3.0" [3] manual.
The following system components use the window system:
–
–
–
BS2000 (e.g. CONS0 or EM9750 window, see page 34)
SVP (e.g. SVPST0 window, see page 34)
SINIX (e.g. SINIX or EVENT window, see page 34)
The system provides preconfigured windows for operation which are opened automatically when the 3970-SKP is started up.
V7
The number of windows for operating BS2000 and SINIX, the order of the
windows on the screen, their size and some other properties can be changed
using the relevant configuration functions.
Information on this can be found in the chapter entitled "Configuring the
system", in the sections "X screens" and "Virtual screens", in the "SINIX-2000
V7.0" manual.
●
Console distribution program KVP (German acronym)
The operation of the BS2000 from the 3970-SKP is controlled by the Console Distribution Program. KVP carries out the following tasks:
–
–
–
authorization controls
distribution of the BS2000 tasks to several consoles
short and long term logging of the console traffic
KVP requires parameters that are stored in the KVP parameter file of the built-in disk of
the 3970-SKP. The KVP parameters are created in SINIX when the system is generated
and can be changed with the help of the SINIX configuration.
V7
U25339-J-Z126-1-7600
Information on configuring the KVP can be found in the chapter entitled “Configuring
the system”, in the section “KVP”, in the “SINIX-2000 V7.0” manual.
9
Concept of system operation
Overview
3.2.3 Authorization control
The access to operation of the BS2000, SVP and SINIX system components is protected:
●
Access to the BS2000 console
If you try to make an entry in a BS2000 control window after the system has been
started up for the first time, you will be requested to enter a password.
The password is specified when the system is installed and is identical to the password
for the corresponding SINIX user ID (e.g. cons0 for the CONS0 console window). For
further information, see chapter “Operating the BS2000 console” on page 89.
●
Access to the BS2000 system administration
If you want to work as a system administrator in BS2000, you must use a type EM9750
window, fill in the welcome screen, and log in by entering a BS2000 user ID (i.a. tsos)
and - if agreed - a BS2000 password for BS2000.
●
Access to the SINIX system administration
If you want to carry out system administration tasks under SINIX you must log into a
SINIX window by entering a SINIX user ID (i.a. admin, root or sysadm) and password.
●
Access to the EVENT window
Certain functions can be executed using the EVENT window.
If you try to make an entry in this window after the system has been started up for the
first time, you will be requested to enter the password for the SINIX user ID.
●
Access to the SVP operation
After you have filled out and sent off the welcome screen in the window for SVP
operation, the system requests you to enter the password. The password is specified at
the installation of the system and is identical to the password for the corresponding
SINIX user ID (e.g. the ID svpst0 for the SVPST0 window).
10
U25339-J-Z126-1-7600
4 Controls and indicators
The following controls and indicators are provided for the S130 Business Server:
–
control panel on the Business Server cabinet, page 12
–
control panel on the global storage cabinet, page 12
–
EMERGENCY STOP switch, page 19
The S130 is operated using the operator terminals on the service/console processor.
U25339-J-Z126-1-7600
11
Control panel on the Business Server cabinet
Controls and indicators
4.1 Control panel on the Business Server cabinet
The control panel is connected with the service processor (SVP) in the S130 Business
Server.
The physical structure of the control panel is illustrated in the following diagram:
POWER CONTROL
STATUS
LCD BACK LIGHT
POWER ON
POWER OFF
9999 35
POWER
COMPLETE SYSTEM
CHECK
CANCEL/
ALARM STOP
IMPL
Figure 4: Control panel on the cabinet of the S130 Business Server
The function of the indicators and control elements on the control panel is described below.
4.1.1 Function of the indicators
STATUS
The STATUS indicator is an LCD display and can show alphanumeric characters. The
codes change when the Business Server and the IMPL are switched on. No P codes
should be displayed if POWER ON or IMPL has been run without errors (see next
page). If this is not the case, this indicates a malfunction and you should contact the
service department.
12
U25339-J-Z126-1-7600
Controls and indicators
Control panel on the Business Server cabinet
Information is displayed on the LCD display in the following format:
STATUS
CC C CCCC
FFFFFFFFFFFFFFFF
Line 1
Line 2
T Pnnn
DOWN
STOP
WAIT
RUN
LOAD
Displays in line 1
FFFFFFFFFFFFFFFF
Displays in line 2
CM
CE
Meanings:
Line
Display field
Display
Meaning
Line 1
Maintenance
mode
none
User mode
CE
Maintenance mode
CM
Hot system maintenance mode
none
Normal mode
T
Test mode
Pnnn
S130 switched off: P000
Test mode
Cluster status
P codes during the switching on and initialization phase as well as when switching off:
P001 to P379
Line 2
U25339-J-Z126-1-7600
FLAG code
DOWN
Display for the output of a WRITE-CONSOL
message (e.g. SHUTDOWN COMPLETED)
RUN
CPUs in RUN status
WAIT
CPUs in WAIT status
STOP
CPUs in STOP status
LOAD
IPL is being executed
none
Normal state
FFFFFFFFFFFFFFFF
Message or error code:
this display is for the purposes of the service
department.
13
Control panel on the Business Server cabinet
Controls and indicators
POWER COMPLETE
This green light illuminates after the system power controller has terminated the
switching on sequence without errors. The light is extinguished when the POWER OFF
key is pressed.
SYSTEM
This green light illuminates when the processing units are active.
CHECK
This yellow light illuminates when the service processor has decoded a machine error
or an error in the power supply modules of the Business Server. A buzzer sounds at the
same time. The light also illuminates when a WRITE-CONSOL message is output (e.g.
SHUTDOWN COMPLETED) at the operating terminal. Illumination of the CHECK light in this
case, the simultaneous display of DOWN on the LCD display, and the sounding of the
buzzer can be configured by the service department.
Potentiometer for volume
This is used to set the volume of the buzzer.
Potentiometer for brightness
This is used to set the brightness of the LCD display.
Operation hours counter
9999*35
The operation hours counter is on the right-hand side of the control panel.
The counter has an LCD display.
The time is displayed in hours and is accurate to 0.01 hours.
The time counter is active if the following two conditions are fulfilled:
14
–
the system is in user mode
–
one of the processing units within the system configuration is in the RUN state.
U25339-J-Z126-1-7600
Controls and indicators
Control panel on the Business Server cabinet
4.1.2 Button functions
LCD BACK LIGHT
The LCD display STATUS (background) is illuminated for five minutes when you press
this button. The lights go out immediately when you press this button again.
POWER ON
When this button is pressed, the power supply of the entire system is switched on
sequentially. The order is predetermined. It begins with the Business Server system
components and ends with the peripheral devices connected to the PCI (Power Control
Interface). Then an IMPL is carried out. The system is ready for operation when the
display of P codes on the LCD display is extinguished.
If POWER ON IPL is configured, the operating systems is subsequently loaded (see
LOAD PRESET1-Frame on page 70).
POWER OFF
This is the button for switching off the power supply for the entire system. The sequence
begins with the peripheral devices connected to the PCI and ends with the Business
Server system components. The button is protected by a flap so that the system cannot
be switched off unintentionally.
CANCEL / ALARM STOP
When this button is pressed, the buzzer in the control panel is stopped and the CHECK
light is extinguished (same function as the F3 key in SVP console window). If another
malfunction occurs after the light is extinguished, e.g. a machine error or a malfunction
in the power supply, the buzzer and the CHECK light are reactivated.
IMPL
When this button is pressed twice, the IMPL is executed and confirmed. The S130 is
initialized and the firmware is loaded in the individual components (CPU, IOP).
Furthermore, the IORSF selected in the IORSF Control Frame is activated. After the
IMPL is terminated, the P codes in the LCD display are extinguished. Afterwards an IPL
(Initial Program Load) of the BS2000 can be executed on the SKP.
If POWER ON IPL is configured, the operating system is loaded automatically (see
LOAD PRESET1-Frame on page 70).
This button loads another configuration or activates another IORSF.
!
U25339-J-Z126-1-7600
The system will crash if an IMPL is executed during operation.
After you press the IMPL button for the first time the question ARE YOU SURE? is
displayed on the LCD display.
–
If no IMPL is to be executed, the CANCEL / ALARM STOP button must be
pressed.
–
If the IMPL is to be started, the IMPL button must be pressed a second time.
15
Control panel on the global storage cabinet
Controls and indicators
4.2 Control panel on the global storage cabinet
The control panel is connected to the service processor in global storage.
The physical structure of the control panel is illustrated in the following diagram:
BATTERY STATUS
STATUS
LCD BACK LIGHT
BS
BBON
BE
BI
BF
DI
POWER
COMPLETE
SSU
CHECK
DS
CANCEL/
ALARM STOP
Figure 5: Control panel on the global storage cabinet
The functions of the indicators and control elements are described in the control panel.
4.2.1 Function of the indicators
STATUS
The STATUS indicator is an LCD display and can show alphanumeric characters. The
codes change when global storage and the IMPL are switched on. No P codes should
be displayed if POWER ON or IMPL has been executed without errors. If this is not the
case, this indicates a malfunction and you should contact the service department.
16
U25339-J-Z126-1-7600
Controls and indicators
Control panel on the global storage cabinet
The information is shown on the LCD display in the following format:
STATUS
CC C CCCC
FFFFFFFFFFFFFFFF
CM
CE
Line 1
Line 2
T Pnnn
Bnnn
CHK
CNCT
FFFFFFFFFFFFFFFF
Displays in line 1
Displays in line 2
Meanings:
Line
Display field
Display
Meaning
Line 1
Maintenance
mode
none
User mode
CE
Maintenance mode
CM
Hot system maintenance mode
none
Normal mode
T
Test mode
Pnnn
SSU switched off, battery not active: P000
SSU switched off, battery active: P001
Test mode
SSU status
P codes during the switching on and initialization phase as well as when switching off:
P002 to P379
Line 2
U25339-J-Z126-1-7600
FLAG Code
Bnnn
nnn shows the time in hours since the backup
battery became active after the network
failure.
CHK
SSU in check stop state
CNCT
SSU connected to a cluster
none
Normal state
FFFFFFFFFFFFFFFF
Message or error code:
this display is for the purposes of the service
department.
17
Control panel on the global storage cabinet
Controls and indicators
POWER COMPLETE
This green light is lit up after the system power controller has terminated the switching
on sequence without any errors. The light is extinguished when the POWER OFF button
is pressed.
SSU CHECK
The display illuminates if there is an error in global storage. The buzzer sounds at the
same time.
BATTERY STATUS
These indicators indicate the state of the backup battery:
Name
Color
Meaning
BS
green
Backup battery is installed
Measure
BBON
green
Backup battery is active
BI
green
Backup battery is not available
DI
green
Data in the global memory are invalid
DS
green
Indicator is not in use
BE
yellow
Error in backup battery operation
Call service dept.
BF
yellow
Error in the backup battery
Call service dept.
Potentiometer for volume
This is used to set the volume of the buzzer.
Potentiometer for brightness
This is used to set the brightness of the LCD display.
4.2.2 Button functions
LCD BACK LIGHT
The LCD display STATUS (background) is illuminated for five minutes when you press
this button. The lights go out immediately when you press this button again.
CANCEL / ALARM STOP
When this button is pressed, the buzzer in the control panel is stopped and the SSU
CHECK light is extinguished. If another malfunction occurs after the light is extinguished, e.g. a machine error or a malfunction in the power supply, the buzzer and the
SSU CHECK light are reactivated.
18
U25339-J-Z126-1-7600
Controls and indicators
EMERGENCY STOP switch
4.3 EMERGENCY STOP switch
Not only the Business Server cabinet, but also the global storage and battery cabinets each
have an EMERGENCY STOP switch.
If the EMERGENCY STOP switch on the S130 is pressed, global storage is also switched
off. If you wish to cut power to the entire system, the EMERGENCY STOP switch on the
battery cabinet must also be pressed.
EMERGENCY STOP
I
o
S130 Business Server
Global storage
Battery unit
Figure 6: EMERGENCY STOP switch on the Business Server cabinet, global storage and battery unit
This switch should only be used in emergencies. It can only be reset by the service
department.
!
The system can only be switched back on after the switch has been reset.
The system data is not saved when the switch is pressed.
Use the EMERGENCY STOP switch as follows:
Ê
Open the transparent switch cover and press the red switch downwards to the O
position.
U25339-J-Z126-1-7600
19
Eine Dokuschablone von Frank Flachenecker
by f.f. 1992
5 Switching the S130 Business Server on and off
This chapter describes the various technical options for switching the S130 Business
Server on and off, depending on the hardware.
5.1 Switching the S130 on and off using the control panel
Console
SKP
S130
I/O channel
SVP
LAN
LAN
If the SKP is not linked to the S130 via the on/off facility (optional), the S130 must be
switched on and off using the control panel.
Switching on
To switch on the entire system via the control panel, the SKP must first be switched on using
the on/off button (see also the operating instructions for the SKP [2]). Afterwards the S130
can be switched on by pressing the POWER ON on the control panel of the S130.
U25339-J-Z126-1-7600
21
Switching the S130 on and off using the control panel
When both systems are ready, i.e. all windows on the 3970-SKP have been opened and the
LCD display on the S130 no longer shows any P codes, you can log in on the SVP (see
page 34ff) and start the BS2000 system via PROGRAM LOAD FRAME: DETAIL-1 (see
page 51).
If a POWER ON IPL is configured, the system is loaded automatically (see page 70
AUXILIARY FRAME: LOAD PRESET1).
Switching off
After BS2000 has been shut down, the S130 can be switched off by pressing the
POWER OFF button on the S130 control panel (see page 15) or by selecting the menu item
POWER OFF in AUXILIARY FRAME: P-OFF/IMPL (see page 69).
The SKP is switched off as follows:
There are three options for terminating the SINIX system of the SKP:
a) You call the basic menu of your window administration program by clicking on the gray
window background using the right mouse button. This menu contains the item “Exit
system”. Selecting this item allows you to initiate the termination of the system. As a
result of this selection, “<computer name>: shut down” is output. Then carry out the
following actions:
Ê
Activate the root password field using the left mouse button and enter the password
for the user ID root.
Ê
Select the Init status by
Ê
Ê
positioning the cursor over the “Shut down” button,
Ê
pressing the <BSelect> mouse button (by default the left-hand mouse button),
Ê
holding the mouse button down, positioning the cursor on the desired entry of
the opened menu (“Shut down” or “Restart”) and
Ê
releasing the mouse button.
Carry out the desired function by clicking the “Start” button.
b) You can also terminate the SINIX system by
22
Ê
logging in as the system administrator,
Ê
entering the shell command shutdown (for shutting down the system) or
Ê
the shutdown -i6 command (for shutting down and restarting the system).
U25339-J-Z126-1-7600
Switching the S130 on and off from the SKP
c) You can also terminate the SINIX system using the on/off button on the SKP. However,
please make note of the following:
!
If the SKP is switched off using the button, it sends the command /shutdown or a
self-defined /run xxxx command to any running BS2000 system before it switches
itself off after a certain wait time has expired.
V7
You can define the shutdown command and the length of the wait period using the
sysadm forms.
Ê
Select the menu item “sinix_2000 - System Administration SINIX-2000“ on the
UNIX System V, Administration menu.
Ê
Select the menu item “up_down - Startup/shutdown settings“ on the SINIX-2000
system administration menu.
You will find a detailed description of how to configure time-controlled startup/shutdown
in the section “up_down” of the “SINIX-2000 V7.0” manual.
5.2 Switching the S130 on and off from the SKP
Console
SKP
Channel type 2
S130
LAN
COM2
V.24
SVP
On/off facility
LAN
To switch the S130 on and off from the SKP, it must have the optional on/off facility.
The on/off facility is linked to the SKP via the COM2 V.24 interface.
U25339-J-Z126-1-7600
23
Switching the S130 on and off from the SKP
You access the “Switching on / off the host” form via the sysadm menu:
Ê
Select or open a SINIX screen
Ê
Login: root or sysadm
Ê
Enter password
Ê
For login with root: enter sysadm
The SINIX system administration window is displayed.
Ê
24
Select the menu item “sinix_2000” on UNIX System V, Administration menu:
U25339-J-Z126-1-7600
Switching the S130 on and off from the SKP
Ê
Select the menu item “host”:
Ê
Select the menu item “host - The Power ON/OFF of the Host”:
U25339-J-Z126-1-7600
25
Switching the S130 on and off from the SKP
The “Switching on / off the host” form is displayed:
V7
Information on operation of the FMLI interfaces can be found in the “SINIX-2000
V7.0” manual [1].
By entering YES for one of the two questions at the bottom of the form followed by the
P2 (CHOICES) key, you can specify whether the S130 can be switched on or off immediately. Press the P3 (SAVE) key after filling out the form.
On no account should both questions be answered with YES. If a direct switching action
is initiated by the reply YES, another message appears, which should again be
confirmed with YES:
26
U25339-J-Z126-1-7600
Switching the S130 on and off from the SKP
The switching operating is performed after you press the
U25339-J-Z126-1-7600
P3
(SAVE) key.
27
Automatic switching on/off of the S130 via the SKP
5.3 Automatic switching on/off of the S130 via the SKP
Console
SKP
Type-2 channel
S130
LAN
V.24
SVP
COM2
On/off facility
LAN
To switch the S130 on and off from the SKP, it must have the optional on/off facility.
The on/off facility is linked to the SKP via the V.24 interface COM2.
You access the “Switching on / off the host” form for switching on or off via the sysadm forms
(see also the “SINIX-2000 V7.0“ [1] manual).
28
Ê
Select the menu item “sinix_2000” on the UNIX System V, Administration menu.
Ê
Select the menu item “host” on the System Administration SINIX-2000 menu.
U25339-J-Z126-1-7600
Automatic switching on/off of the S130 via the SKP
The “Switching on / off the host” form is displayed:´
By entering YES for the two questions at the top of the window, you can specify whether
the S130 should be switched on automatically if the 3970-SKP is switched on or SINIX
is started on the 3970-SKP, and whether the S130 should be automatically switched off
if the SINIX system is shut down or the 3970-SKP is switched off.
However, it is only switched off automatically if the SINIX system is shut down using
shutdown. If it is shut down and restarted using shutdown -i6, no switching action is
carried out.
U25339-J-Z126-1-7600
29
Time-driven switching on and off of the SKP and S130
5.4 Time-driven switching on and off of the SKP and S130
The SKP can switch itself and the S130 on and off at a certain time.
V7
Definition of the time at which the SKP and the S130 are to be switched on/off, a
shutdown command, and the length of the wait time before the SKP and S130 are
switched off can be specified using the sysadm forms.
Ê
Select the menu item “sinix_2000 - System Administration SINIX-2000“ on the
UNIX System V, Administration menu.
Ê
Select the menu item “up_down - Startup/shutdown settings“ on the SINIX-2000
system administration menu.
You will find a detailed description of how to configure time-controlled startup/shutdown
in the section “up_down” of the “SINIX-2000 V7.0” manual.
In order to switch the S130 on or off from the SKP, you must have the optional on/off facility.
Furthermore, the S130 must be configured to switch on and off automatically as part of the
starting and shutting down procedure for the SKP.
The SKP switches the S130 on. After the IMPL, the BS2000 system is started by the
POWER ON IPL function of the SVP.
When the SKP and S130 are switched off, the shutdown command is sent to the system.
You must ensure that the system has completed all its task. BS2000 can terminate during
the wait period before the S130 is switched off. Once this wait period has expired, the S130
is switched off, the SINIX system is shut down, and the SKP is switched off.
30
U25339-J-Z126-1-7600
Switching the SKP and S130 on and off using ATOP 3914
5.5 Switching the SKP and S130 on and off using ATOP 3914
Console
SKP
Type-2 channel
S130
ATOP
LAN
COM2
V.24
SVP
On/off facility
LAN
The S130 can also be switched on automatically using the SKP in conjunction with the
ATOP 3914. The optional on/off facility is required for this. Furthermore, the S130 must be
configured to switch on and off automatically as part of the starting and shutting down
procedure for the SKP.
The ATOP switches the SKP on via its remote switching interface. The SKP switches the
S130 on. After the IMPL, the BS2000 system is started using the POWER ON IPL function
of the SVP or using the ATOP menu.
The BS2000 system can be operated both via the ATOP and manually by the operator.
To switch off the system, BS2000 must first of all be exited (ATOP/operator). The S130 is
switched off by the SKP when the SKP is switched off by the ATOP.
You will find information on operating and programming the ATOP in the ATOP operating
instructions enclosed.
U25339-J-Z126-1-7600
31
Switching the S130 on and off from a remote system
5.6 Switching the S130 on and off from a remote system
DCU
8323
Modem
DCU
8323
Modem
or
Console
SKP
S130
Type-2 channel
ATOP
Telephone network
LAN
COM2
SVP
V.24
On/off facility
LAN
Switching on and off can be carried out from a remote system using a modem/DCU.
Information on operating the DCU can be found in the data sheet “8323 Data Communication Unit“ [5].
The optional on/off facility is required. In addition, automatic switching on/off of the S130
must be configured as part of the starting and shutting down procedure for the SKP. The
SKP switches the S130 on. After the IMPL, the BS2000 system is started using the POWER
ON IPL function of the SVP.
5.7 Switching global storage on and off
The service processor in global storage is linked via the SPC (System Power Controller)
interface to the service processor in the S130.
Global storage is automatically switched on or off with the S130, regardless of whether this
is performed manually, automatically or using the ATOP.
A battery backup can be installed in the global storage cabinet, which ensures data saving
even in the event of a power failure.
32
U25339-J-Z126-1-7600
6 Standard processing in SVP mode
Jobs are assigned to the service processor via special SVP menus, so-called SVP frames.
All the information you require as an operator working with SVP frames can be found in this
chapter. You will find instructions on the use of all user frames in the original “GS8600
MODEL GROUP OPERATORS GUIDE” (FJ-No. C112-E015-01EN).
After switching on the S130 and 3970-SKP, BS2000 operation must be prepared, i.e. the
BS2000 operating system must be loaded (IPL = Initial Program Load). The following activities may be required for the IPL:
–
select the IORSF (Input/Output Resource File) and start the IMPL (Initial Micro Program
Load)
This is only necessary if you want to load another IORSF.
–
specify the operating mode (Native/VM2000)
This is only necessary if you want to change the mode setting.
–
start IPL using PROGRAM LOAD FRAME
To do this you may have to redefine device parameters in the DETAIL-1 frame.
–
configure an automatic IPL (POWER ON IPL)
The following sections provide examples of standard processing relevant to loading
BS2000. There is also an description of how to select a particular configuration and how to
re-initialize the SVP.
Standard processing at the SKP operator terminal at a glance:
–
–
–
–
–
–
–
selecting IORSF
re-initializing SVP
setting up PROGRAM LOAD FRAME: PRESET-1
setting up PROGRAM LOAD FRAME: PRESET-2
selecting the SSU configuration
setting the operating mode using PROGRAM LOAD FRAME: DETAIL-2 for loading
BS2000 / VM2000
executing IPL in PROGRAM LOAD FRAME: DETAIL-1
All standard processing is carried out at the SKP operating terminal via the X window
system, SVPST0 #1 (computer name) window.
Ê
Select the SVP window by clicking with the left mouse mouse button
(see chapter “Operating the X window system” in the “SINIX-2000 V7.0” [1] manual).
U25339-J-Z126-1-7600
33
Invoking an SVP frame
Standard processing in SVP mode
6.1 Invoking an SVP frame
By default, an SVP window is configured with the label “SVPST0 #1 (computer name)” to
operate the SVP.
Figure 7: Overview of the X window system windows (example)
You can enter into SVP operator mode at the operating terminal by clicking on the
SVPST0 #1 (computer name) window with the left mouse button.
34
U25339-J-Z126-1-7600
Standard processing in SVP mode
Invoking an SVP frame
Figure 8: SVPST0 #1 window
Ê
Select the “Standard partner ($KVPHV0)” function by pressing the
“Last connection ($KVPHV0)” by pressing the C key.
Confirm with the ENTER key.
U25339-J-Z126-1-7600
S
key or
35
Invoking an SVP frame
Standard processing in SVP mode
The password entry window is displayed:
Figure 9: SVPST0 #1 window (password entry)
Enter the password for the specified user ID and press
Ê
ENTER
.
If the correct password has been entered, the following window appears after a short pause:
–
after starting the S130: the MODE SELECTION FRAME (see page 47)
–
after closing and reopening the “SVPST0 #1” window or
opening another SVP window on the secondary console: the last frame shown in the
“SVPST0 #1” window.
!
36
If the “SVPST0 #1” window or another SVP window on the secondary console is
opened, the contents of the window are not output completely. Press the K2 key.
This causes the screen to be refreshed, i.e. the frame that was last output is
displayed again in its entirety.
U25339-J-Z126-1-7600
Standard processing in SVP mode
General frame structure
6.2 General frame structure
---- FRAME XXXXXX: YYYYYY ----
Line
Display area
1-21
22-23
24
25
System status messages
SVP messages
Command entry
Hardware status
Status displays at the operating terminal
Column: 50 51
Figure 10: General structure of an SVP frame
Each SVP frame is divided into different areas:
Lines 1 - 21
This is the display area of a frame. Here the functions and parameters that
may be selected or output are displayed. Hardware-related information is
also output.
Line 22 + 23
System status messages and SVP messages are displayed here.
Line 24
Commands can be entered here. Information on the hardware status is
shown as of column 51.
Line 25
This line is used for the status displays of the emulated operating terminal.
U25339-J-Z126-1-7600
37
General frame structure
Standard processing in SVP mode
6.2.1 System status messages in line 22
1
2
3
4
5
6
7
8
.... + .... 0 .... + .... 0 .... + .... 0 .... + .... 0 .... + .... 0 .... + .... 0 .... + .... 0 .... + .... 0
CL-n
HOST
GUEST
CPU-n
CHP-n
Cluster ID
HOST/GUEST
Target CPU
CLKSTP SYS-DOWN
I-STEP CL-STOP
H-STOP CHK-STOP
COMP-STOP
STOP
PSW-LOOP
WAIT
RUN
LOAD
PSW = xxxxxxxx xxxxxxxx
PSW contents
Target CHP
System states
Rate control
Figure 11: Format of the status display in line 22
Meaning of the status information in line 22:
38
Column Symbol
Meaning
16 - 19
CL -n
Cluster ID of the S130; normally CL - 0
22 - 27
none
HOST
GUEST
The system is operated in BS2000-NATIVE mode.
The selected CPU is occupied by the VM2000 monitor system.
The selected CPU is occupied by a VM2000 guest system.
28 - 32
CPU - n
Display of the selected CPU (n = 0 - 7); selection with
33 - 37
CHP - n
Display of the selected channel processor; display is usually CHP - 0.
40 -45
none
CLKSTP
I-STEP
H-STOP
The system is in the normal state.
The system is in the clock-stop state.
The system is in the instruction step state.
The system is in the hardware stop state.
P16
key.
U25339-J-Z126-1-7600
Standard processing in SVP mode
General frame structure
Column Symbol
Meaning
46 - 55
The system may be in the system down state. This display can also
appear when Write-Console messages are output (e.g. SHUTDOWN
COMPLETED) and can be deleted with the F3 key.
In multiple-cluster operation, the selected cluster is in the stop state.
The selected CPU is in the CHECK stop state.
The address comparison stop mode is active and the selected CPU is
in the address comparison stop state.
The selected CPU is in the stop state.
An address loop was determined in the system.
The selected CPU is in the wait state.
The selected CPU is in the run state.
An IPL is executed via the selected CPU.
SYS-DOWN
CL-STOP
CHK-STOP
COMP-STOP
STOP
PSW-LOOP
WAIT
RUN
LOAD
58 -72
U25339-J-Z126-1-7600
none
PSW =
The system is in the run state.
The system is in the stop state on the PSW address
(PSW=Program Status Word).
39
General frame structure
Standard processing in SVP mode
6.2.2 System status messages in line 23
The following picture shows the extended area of the system status messages in line 23:
1
2
3
4
5
6
7
8
.... + .... 0 .... + .... 0 .... + .... 0 .... + .... 0 .... + .... 0 .... + .... 0 .... + .... 0 .... + .... 0
AUTO
SUSP
CLCM
MO CM FD TEST PW CHK
M@ CE HD
D@
E@
X@
AUTO mode
ARMSS mode
Maintenance mode
Hard disk/floppy disk
Test mode
Power alarm
System check
Figure 12: Format of the extended area of the status display in line 23
Meaning of the status messages in line 23:
40
Column
Symbol Meaning
55 - 58
AUTO
SUSP
CLCM
This display does not occur with BS2000 or VM2000.
60 - 61
none
M
MO
M@
D@
E@
X@
ARMSS-Teleservice not permitted.
ARMSS-Teleservice is possible.
An ARMSS connection to the SKP and ARMSS center is established or terminated.
ARMSS is active.
ARMSS is in the remote operation state. The control is at the center.
ARMSS is in the remote operation state. The control is with the SKP and SVP.
ARMSS is possible, line connection is prevented.
63 - 64
none
CE
CM
The system is in the user state.
The system is in the maintenance state.
The system is in the hot system maintenance state.
66 - 67
HD
FD
Hard disk 2 is online.
A floppy disk is active in the FD drive.
70 - 74
none
TEST
The system is not in the test state.
The system is in the test state.
U25339-J-Z126-1-7600
Standard processing in SVP mode
General frame structure
Column
Symbol Meaning
74 - 75
none
PW
The power supply is okay.
(Power Warning) An error has occurred in the power supply of the S130.
78 - 80
none
CHK
No CHK (machine check).
A CHK occurred in S130.
6.2.3 Hardware status display in line 24
The following diagram shows the format of the hardware status display in line 24:
cccc ................................... cccc FLAG CODE = FFFFFFFF FFFFFFFF
LTG
TAST
Figure 13: Format of the status display in lines 24 and 25
Meaning of the status information in line 24:
Column Symbol
1 - 50
51 - 80
Meaning
cccccccc
Command input area
FFFFFFFF FFFFFFFF
FLAG code
The FLAG code represents a message or error code which can be evaluated by service
department personnel. The display appears according to the severity of the FLAG code. As
a rule, the last is shown.
6.2.4 Status displays in line 25
Displays of the emulated terminal 9750 and their meaning:
LTG
Line activated
SAN
Send request
DUE
Data transfer
BEL
Signal
TAST
Keyboard connected
FEHL Invalid input
U25339-J-Z126-1-7600
41
Using frames
Standard processing in SVP mode
6.3 Using frames
You assign a job to the SVP by invoking the relevant frame, selecting the desired function,
and specifying the required parameters. To select a function or specify a parameter, you
must enter the alphanumeric characters shown in the frame in the input fields marked by an
arrow (=>). The input fields can be selected with the tab key . Once you have entered all
the functions and parameters assigned to a job, press the ENTER key. In several frames,
functions can also be initiated with the SVP function keys.
Instead of selecting a function, you can also enter a command in the command input line in
all frames (screen line 24) and assign a job to the SVP in this way. Frames can also be
selected using the FRËFrame-ID, e.g. FR ML (to switch to the MODE SELECTION FRAME).
A command entered in line 24 takes priority over a selected frame function.
General notes on frame operation:
The input is disturbed by the output of messages in line 23 (e.g. SET TIME COMMAND
COMPLETED). The K1 key suppresses output of the message for one minute. In this time the
frame can be filled out and dispatched with ENTER .
6.3.1 SVP function keys
i
An EMDS keyboard mask, which must be ordered separately, is used to operate the
SVP frames:
Order number: U20076-J-Z148-1
EMDS (SINIX Open Desktop) as of V2.1 for DSS 97801-5xx:
Keyboard masks - 6 strips
The following diagram shows the position and labelling of the SVP function keys on the
EMDS keyboard mask:
P11
P12
P13
P14
P15
P16
P17
P18
P19
P20
F1
F2
F3
P1
P2
P3
P4
P5
P6
P7
P8
P9
P10
K1
K2
K3
You can activate various functions on the SVP frames with the help of the P keys
the keys K1 to K3 and F1 to F3 .
42
P1
to
P20 ,
U25339-J-Z126-1-7600
Standard processing in SVP mode
Using frames
Overview of the SVP function keys
The following overview shows the keys and their functions as valid for most SVP frames. In
some SVP frames keys can have another function. This is then shown in the corresponding
SVP frame description.
Some of the keys shown here only have a function in CE mode (see information below) and
are used exclusively by the service department.
i
CE=Customer Engineer; the CE mode on the S130 can only be switched on and off
by the service department using a key switch on the inside of the maintenance
panel.
The designations of the SVP function keys are different on the screen from those on the
EMDS keyboard mask. Column 1 of the following table contains the designation of the SVP
function keys on the screen (example: PF4), column 2 contains the corresponding keys on
the EMDS keyboard mask.
PF . .
P..
Name
Function
PF1
P1
Help
Help functions
PF 2
P2
Index
Only in CE mode : switches to the index frame
PF 3
P3
Return
Switches to the previous frame.
PF 4
P4
Frame-specific function is executed.
PF 5
P5
Frame-specific function is executed.
PF 6
P6
Cancel/Erase Input Command or input is erased.
PF 7
P7
Page up
The previous screen contents are displayed.
PF 8
P8
Page down
The next screen contents are displayed.
PF 9
P9
Frame-specific function is executed.
PF 10
P10
Frame-specific function is executed.
PF 11
P11
Frame-specific function is executed.
PF 12
P12
Frame-specific function is executed.
PF 13
P13
PF 14
P14
Frame-specific function is executed.
PF 15
P15
Frame-specific function is executed.
PF 16
P16
PF 17
P17
U25339-J-Z126-1-7600
Recall
Change CPU
Previous SVP commands are displayed in the
command line; they can then be executed again with
changed operands.
Selects the CPU for which the following commands
are valid. This CPU is then logically connected to the
SVP.
not assigned.
43
Using frames
Standard processing in SVP mode
PF . .
P..
Name
Function
PF 18
P18
Step
Executes the next command if the S130 is in Single
Cycle Instruction Mode.
PF 19
P19
ARMSS control
Changes the user rights of an existing ARMSS
connection.
PF 20
P20
Stop
only in CE mode : stops the selected CPU
PF 21
F1
Start
Starts the selected CPU
PF 22
F2
PF 23
F3
not assigned
Mode Select
–
–
–
–
PF 24
K..
44
Mode Change
K3
Switches to the MODE SELECTION FRAME.
Erases WRITE-CONSOL message on the screen
(e.g. SHUTDOWN COMPLETED).
Erases BEL display in screen line 25
Switches off buzzer on SKP and maintenance
panel of the S130.
Switches back and forth between FJ-PROGRAM
FRAME and SVP FRAME.
Name
Function
K1
Lock message
output
The output (e.g. SET TIME COMMAND COMPLETED) for the SVP
console is delayed for 60 seconds. Each time the key is pressed
again, the lock is prolonged by another 60 seconds.
There is no indication of the lock time.
K2
Refresh /
Clear
The last displayed frame is re-displayed.
All other previous inputs in the current frame are reset.
U25339-J-Z126-1-7600
Standard processing in SVP mode
Using frames
6.3.2 Switching between user frames
A switch between the user frames is only possible within a specified scheme or via an FR
command.
The possible switches between the frames are illustrated below:
FR command
ML MODE SELECTION FRAME
LD PROGRAM LOAD FRAME
ST STATUS DISPLAY FRAME
MA MANUAL OPERATION FRAME
AD ALTER/DISPLAY FRAME
ME MASSAGE FRAME
CH CH/SUBCH STATUS DISPLAY FRAME
AU AUXILIARY FRAME: MENU
1 REAL CLOCK
2 IORSF CONTROL
3 RELATED SCB’S
PF23 / F3
PF3 / P3
4 P-OFF/IMPL
5 LOAD PRESET1
7 SSU-CLUSTER CONFIGURATION
MF MAINTENANCE SUPPORT FRAME
PA PERFORMANCE ANALYZER
Figure 14: Switching between the frames
Explanation of figure 14
The frames are represented by this symbol:
ML MODE SELECTION FRAME
Frame ID
Frame name
Each frame has an ID consisting of two letters derived from the frame name. In the
above example the MODE SELECTION FRAME is also shown with the ID ML.
Arrows and program function keys show where and with which key or combination of
keys you can switch to a frame.
U25339-J-Z126-1-7600
45
User frames
Standard processing in SVP mode
6.3.3 Options for switching between frames on the SKP operating terminal
The following table shows the options for switching to another frame on the SKP operating
terminal.
Operation
Effect
P2
Only in CE mode : by pressing this key you switch from any frame directly to the
index frame. The selection of the desired frame can then be made by entering
the frame ID in the index frame.
P3
Pressing this key (return key) switches back to the previous frame.
This key switches from any frame to the MODE SELECTION FRAME.
F3
Frame selection
Enter a frame code in the MODE SELECTION FRAME
(e.g. ST, AU, AU5)
Change to
subframes
You can change to a subframe by selecting it from the main frame or from a
subframe that has already been invoked. This can be done:
– with program function keys.
The keys are shown in the corresponding frame or subframe.
– by selecting a function with or without entering a parameter.
FR command
It is possible to switch to any frame with the FR command. The command is
entered in the command line (screen line 24) of a frame. It has the following
format:
FR XX (XX is the code of the desired frame; see figure 14 on page 45)
6.4 User frames and subframes
The user frames are used by the operator for sending jobs to the SVP and for receiving
replies from the SVP.
Some frames have up to five subframes. The subframes contain other, more detailed
functions and information which does not fit in the main frame.
i
46
This manual only describes the user frames required by the user.
U25339-J-Z126-1-7600
Standard processing in SVP mode
User frames
6.4.1 (ML) MODE SELECTION FRAME
----- MODE SELECTION FRAME -----
E02L01F
FUNCTION=>
- EXECUTION -
- SELECTION -
*1 CPU STOP
*2 INTERRUPT
*3 TOD ENABLE
*4 SYSTEM RESET
*5 SYSTEM RESET CLEAR
*LD
*ST
*MA
*AD
*ME
*CH
*AU
*MF
*PA
CPU SELECT=>
( 0 1
PROGRAM LOAD
STATUS DISPLAY
MANUAL OPERATION
ALTER/DISPLAY
MESSAGE
CH/SUBCH STATUS
AUXILIARY
MSF
PERFORMANCE ANALYZER
)
STOP/START MODE=>
*1 ALL CPU
>2 TARGET CPU
*6 STORE STATUS
*7 RESTART
CL-0
CPU-0 CHP-0
RUN
M
FLAG CODE = F6C0C100 00000F00
TAST
LTG
Figure 15: MODE SELECTION FRAME screen
By making entries in this frame and pressing
execute various basic functions.
ENTER
, you can switch to other frames or
FUNCTION =>
permits either the entry of a number listed in the EXECUTION column
or a letter combination listed in the SELECTION column.
SELECTION
After entering the appropriate letter combination you can switch to the
following SVP FRAMEs:
LD
ST
MA
AD
ME
CH
AU
MF
PA
U25339-J-Z126-1-7600
PROGRAM LOAD
Load BS2000 ......................................................50
STATUS DISPLAY
Display status .....................................................55
MANUAL OPERATION
Manual operations ..............................................57
ALTER/DISPLAY
Alter/display register ...........................................59
MESSAGE
Display message ................................................62
CH/SUBCH STATUS
Display channel/subchannel ...............................63
AUXILIARY
Auxiliary controls ................................................65
MSF
Display flag codes ..............................................74
PERORMANCE ANALYZER
Performance analysis .........................................76
47
User frames
Standard processing in SVP mode
EXECUTION
The following functions are executed after the appropriate number is
entered in the input fields:
The functions are executed according to the entries in the CPU SELECT and
STOP/START MODE fields (see table on next page)!
!
1
CPU STOP
stops either the CPU selected in the CPU SELECT
and STOP/START MODE fields or all CPUs
2
INTERRUPT
creates an external interrupt for the CPU(s) selected
in the fields CPU SELECT and STOP/START
MODE
3
TOD ENABLE
time entry is enabled
4
SYSTEM RESET
all CPUs, IOPs, channels and controllers are reset
5
SYSTEM RESET CLEAR
as 4; in addition, the working memory is erased
6
STORE STATUS
selected CPU is stopped, the status is stored
7
RESTART
restarts selected CPU
CPU SELECT => A particular CPU, displayed in the next frame line, can be selected here
for the functions in the EXECUTION selection menu (see above).
0 ... 7
Selection of a particular CPU
STOP/START MODE =>
This can be used to indicate whether the functions in the EXECUTION
selection menu (see above) are to be carried out for all CPUs or only for
the CPU in the CPU SELECT field.
48
1
ALL CPU
all CPUs are selected
2
TARGET CPU
only the CPU in the CPU SELECT field is selected
U25339-J-Z126-1-7600
Standard processing in SVP mode
User frames
Note
The following table shows all the functions that can be meaningfully combined:
Function
CPU STOP
INTERRUPT
STORE STATUS
RESTART
TOD ENABLE
SYSTEM RESET
SYSTEM RESET CLEAR
CPU SELECT
STOP/START
MODE
Effect on:
1 All CPU
all CPUs
0 ... 7
2 TARGET CPU
selected CPU
0 ... 7
2 TARGET CPU
selected CPU
-
-
-
all CPUs
- : unusable
U25339-J-Z126-1-7600
49
User frames
Standard processing in SVP mode
6.4.2 (LD) PROGRAM LOAD FRAME: BASIC
----- PROGRAM LOAD FRAME: BASIC -----
E02L01F
-LOAD FUNCTION==>
*1 START AUTO
*2 START FAST
*3 START DIAL
*4 START
*5 SYSTEM DUMP
*ENTER
*PF7
*FR AU5
CL-0
CPU-0 CHP-0
EXECUTE
GO TO DETAIL-1
GO TO PRESET(AU5 FRAME)
RUN
M
FLAG CODE = F6C0C100 00000F00
TAST
LTG
Figure 16: PROGRAM LOAD FRAME: BASIC screen
An IPL is executed by entering a load function and pressing the ENTER key. The predefined
parameters in (AU5) AUXILIARY FRAME: LOAD PRESET are used.
LOAD FUNCTION =>
The following functions are executed after the corresponding number
has been entered:
1
2
3
4
5
START AUTO
START FAST
START DIAL
START
SYSTEM DUMP
executes IPL: automatic startup
executes IPL: fast startup
executes IPL: dialog startup
not used
executes SLED
Special key functions
ENTER
P7
FR AU5
50
Executes IPL / SYSTEM DUMP
Switches to the PROGRAM LOAD FRAME: DETAIL-1 (page 51)
Enters the frame command in line 24:
Switches to the AUXILIARY FRAME: LOAD PRESET1 (page 70)
U25339-J-Z126-1-7600
Standard processing in SVP mode
6.4.2.1
User frames
(LD) PROGRAM LOAD FRAME: DETAIL-1
----- PROGRAM LOAD FRAME: DETAIL-1 -----
E02L01F
-LOAD FUNCTION-IPL DEVICE==>
==> 2
*1 START AUTO
*1 PRESET GROUP ------------------+
*2 START FAST
>*2 CURRENT GROUP --------+
|
*3 START DIAL
*3 UNIT ADDRESS -+
+
+
*4 START
FDE0
FDE0
0214
*5 SYSTEM DUMP
XXXX
00B0
*6 LOAD CLEAR -----+
XXXX
XXXX
*7 LOAD NON CLEAR -+
XXXX
XXXX
|
+MT CONTROL--- DETAIL-2 STATUS --PARMS=> 1
==> 1
VM MODE : EMOS.AVM/EX
>*1 NL
EXA MODE : ENABLE
*2 SL
IPL EXEC : ENABLE
*3 NL-REWIND
*4 SL-REWIND
*ENTER EXECUTE
*PF3
GO TO BASIC FRAME
*PF9
GO TO DETAIL-2
CL-0
CPU-0 CHP-0
RUN
M
FLAG CODE = F6C0C100 00000F00
TAST
LTG
Figure 17: PROGRAM LOAD FRAME: DETAIL-1 screen
By making entries in this screen and pressing the
of an IPL.
ENTER
key you can control the execution
LOAD FUNCTION =>
The following functions are executed after the corresponding number
has been entered:
1
2
3
4
5
6
7
START AUTO
START FAST
START DIAL
START
SYSTEM DUMP
LOAD CLEAR
LOAD NON CLEAR
IPL DEVICE =>
1
U25339-J-Z126-1-7600
executes IPL: automatic startup
executes IPL: fast startup
executes IPL: dialog startup
not used
executes SLED
clears main memory before IPL
does not clear main memory before IPL
By making an entry in this field you can specify from which device an
IPL is to be executed.
PRESET GROUP
The first device address in this column is the device
from which an IPL is to be executed. The order and
number has been specified previously in (AU5)
AUXILIARY FRAME: LOAD PRESET-1.
51
User frames
Standard processing in SVP mode
2
CURRENT GROUP
3
UNIT ADDRESS
PARMS =>
Position 1
If IPL is terminated normally, the device address list
is transferred from the PRESET GROUP to the
CURRENT GROUP.
If the IPL is unsuccessful, the next device address
from the PRESET GROUP is reloaded. If this
loading is terminated normally, this device address
heads the CURRENT GROUP.
The first device address in this column is the device
from which the last IPL was executed.
If the loading from this device is unsuccessful, the
IPL is repeated with the next device address. If it is
terminated normally, this address then heads the
CURRENT GROUP.
A new device address from which the operating
system is to be loaded can be entered here. If the
IPL is terminated normally, this device address is
put in first position of the CURRENT GROUP.
If the IPL is unsuccessful, the loading is not
repeated.
A maximum of 8 characters can be entered in this field. Their position
and meaning are listed below:
Ë
1
load BS2000
load VM2000
Position 2 - 5 mn mnemonic for Write/Read console,
if C2C3 is not generated by default.
Position 6 - 7
Position 8
not used
Ë
1
no function
automatic restart function
MT CONTROL => IPL from tape:
1
2
3
4
52
NL
SL
NL-REWIND
SL-REWIND
from current tape position
skip label then load
rewind then load
rewind, skip label then load
U25339-J-Z126-1-7600
Standard processing in SVP mode
User frames
DETAIL-2 STATUS
In this position the current settings of the PROGRAM LOAD FRAME:
DETAIL-2 are displayed.
Check the settings. If they are correct, execute the IPL by pressing ENTER . If not, press the
P9 key to correct the entries in PROGRAM LOAD FRAME: DETAIL-2.
Special key functions
ENTER
Executes IPL
After selecting this function and pressing
ENTER
, the following prompt will appear
***********************************
*
*
* ARE YOU SURE ? (ENTER Y OR N) N *
*
*
***********************************
!
Ê
The IPL must not be executed during system operation! If this instruction is
is not heeded, BS2000 will be shut down abruptly!
Press Y and then ENTER to execute the IPL, or
cancel the procedure.
N
and then
ENTER
to
P3
Switches to PROGRAM LOAD FRAME: BASIC (page 50)
P9
Switches to the PROGRAM LOAD FRAME: DETAIL-2 (page 54) and stores the
parameters entered.
U25339-J-Z126-1-7600
53
User frames
6.4.2.2
Standard processing in SVP mode
(LD) PROGRAM LOAD FRAME: DETAIL-2
----- PROGRAM LOAD FRAME: DETAIL-2 -----VM MODE==> 3
*1 NATIVE
*2 EMOS
>*3 AVM/EX
-EXA MODE==> 1
>*1 ENABLE
*2 DISABLE
-IPL EXECUTION==> 1
>*1 ENABLE
*2 DISABLE
*ENTER
*PF3
*PF9
CL-0
E02L01F
CPU-0 CHP-0
EXECUTE
GO TO BASIC FRAME
GO TO DETAIL-1
RUN
M
FLAG CODE = F6C0C100 00000F00
TAST
LTG
Figure 18: PROGRAM LOAD FRAME: DETAIL-2 screen
By making an entry in this frame and pressing
VM MODE =>
1
2
3
NATIVE
EMOS
AVM/EX
EXA MODE =>
1
2
ENABLE
DISABLE
IPL EXECUTION =>
1
2
ENABLE
DISABLE
ENTER
, you can set the operating mode.
Selection of the firmware to be loaded from SVP
for BS2000 operation
not used
for VM2000 operation
Selection of addressing mode
extended XA mode
not used
IPL execution
executes IPL
does not execute IPL
If there are changes to the VM MODE and IPL EXECUTION => 2, only the other firmware is
loaded and no IPL is executed.
54
U25339-J-Z126-1-7600
Standard processing in SVP mode
User frames
Special key functions
ENTER
Sets operating mode. If a loading function has previously been stored in PROGRAM
LOAD FRAME: DETAIL-1 with the P9 key, an IPL with the set parameters is
executed.
P3
Switches to PROGRAM LOAD FRAME: BASIC (page 50)
P9
Switches to PROGRAM LOAD FRAME: DETAIL-1 (page 51)
With the exception of the load function, the parameters entered in the subframes are
retained when switching between DETAIL-1 and DETAIL-2-FRAME with the P9 key.
6.4.3 (ST) STATUS DISPLAY FRAME: CLUSTER
----- STATUS DISPLAY FRAME: CLUSTER ----CPU0 (#0)
CPU1 (#1)
ONL RUN
ONL RUN
CHBP0
PON
MSU0
MSU1
SPC
SCI
SVP
SYS
MCU0
CHP0
ONL
CHP2
ONL
E02L01F
ONL
ONL
PON
SYSTEM INFORMATION
MEMORY
3 GB
MODE
EXA
FTOPS2
ENABLE
*PF8
CL-0
CPU-0 CHP-0
SSU FRAME
RUN
M
FLAG CODE = F6C0C100 00000F00
TAST
LTG
Figure 19: STATUS DISPLAY FRAME: CLUSTER screen
This frame displays information on the current status of the S130 and its individual components (Power on/off, online/offline, normal/maintenance state etc.). Unmounted components are not displayed. The memory size, operating system mode (BS2000 or VM2000),
and availability of the SKP (FTOPS2 ENABLE) are important displays.
Special key functions
P8
U25339-J-Z126-1-7600
Switches to the SSU FRAME (see next page)
55
User frames
Standard processing in SVP mode
----- STATUS DISPLAY FRAME: SSU -----
SS0
SS1
(SSU0)
(SSU1)
SSU0
SSU1
PON
PON
512MB
512MB
ONL CNCT
ONL CNCT
E02L01F
BS
BS
512MB
512MB
BS
BS
*PF7
CL-0
CPU-0 CHP-0
CLUSTER FRAME
RUN
M
FLAG CODE = F6C0C100 00000F00
TAST
ssu0
LTG
Figure 20: STATUS DISPLAY FRAME: SSU screen
This displays information on the status of the connected global storage. Memory size,
battery status, power status, online status, and connect status are displayed.
Special key functions
P7
56
Switches to the CLUSTER FRAME (see previous page)
U25339-J-Z126-1-7600
Standard processing in SVP mode
User frames
6.4.4 (MA) MANUAL OPERATION FRAME
----- MANUAL OPERATION FRAME ----E02L01F
ADDRESS COMPARE STOP
ADRS TYPE=>
RATE CONTROL
RATE CONTROL=>
*1 ABSOLUTE
*1 PROCESS
*2 LOGICAL
ADRS COMPARE STOP
*2 I-STEP
ADRS COMP SELECT=>
FIRMWARE DUMP
*1 ANY
*2 OPERAND FETCH(OFETCH)
EXECUTE
*3 OPERAND STORE(OSTORE)
UNIT ADRS=> 0000
*4 INSTRUCTION ADRS(IA)
*5 IA & OFETCH
*6 OFETCH & OSTORE
FUNCTION=>
*1
*2
*3
*X
ADRS SET=> XXXX
=> XXXXXXXX
ADRS COMP MODE=>
*1 RESET
*2 SET
*3 NORMAL
CL-0
CPU-0 CHP-0
RUN
M
FLAG CODE = F6C0C100 00000F00
TAST
LTG
Figure 21: MANUAL OPERATION FRAME screen
By making an entry in this frame and pressing
operations.
ENTER
, you can execute various manual
Instructions on this frame are only executed when the CPU has been stopped
(see message in frame line 23). The CPU status is displayed in line 22.
1. Selection of a CPU with the
P16
key.
2. Stopping of the selected CPU (see (ML) MODE SELECTION FRAME page 47)
FUNCTION =>
1
2
3
X
U25339-J-Z126-1-7600
The following functions are executed after the corresponding number
has been entered and the ENTER key pressed:
RATE CONTROL
ADRS COMPARE STOP
FIRMWARE DUMP
EXECUTE
defines program operation
sets mode for compare address stop
executes firmware dump
executes functions 1 - 3
57
User frames
Standard processing in SVP mode
The following table shows the additional entries required for each of the three main
functions in other input fields:
Input field
Function
RATE
CONTROL
UNIT
ADRS
ADRS
TYPE
ADRS
COMP
SELECT
ADRS
SET
ADRS
COMP
MODE
1 RATE CONTROL
o
x
x
x
x
x
2 ADRS COMP STOP
x
x
o
o
o
o
3 FIRM DUMP
x
o
x
x
x
x
o: entry required
x: entry not required
RATE CONTROL =>
1
2
PROCESS
I-STEP
ADRS TYPE =>
1
2
ABSOLUTE
LOGICAL
ADRS COMP SELECT =>
1
2
3
4
5
6
continual program operation
step-by-step command execution
Entry for address compare stop:
entry under ADRS SET is
an absolute address
a logical address
Address compare stop if compare stop address is same as
ANY
any address
OPERAND FETCH(OFETCH) operand read address
OPERAND(OSTORE)
operands write address
INSTRUCTION ADRS(IA)
instruction address
IA & OFETCH
instruction and operand read address
OFETCH & OSTORE
operand read and write address
UNIT ADRS =>
Device address for firmware dump
ADRS SET =>
Compare stop address
XXXX
XXXXXXXX
58
Defines program operation
Address area larger than 32 bits (not yet used)
32-bit address
U25339-J-Z126-1-7600
Standard processing in SVP mode
User frames
ADRS COMP MODE =>
1
RESET
2
3
SET
NORMAL
Address compare stop mode
Switches off address compare stop and resets
address compare stop conditions in the fields ADRS
TYPE, ADRS COMP SELECT and ADRS SET
Switches on address compare stop
Switches off address compare stop
6.4.5 (AD) ALTER/DISPLAY FRAME
----- ALTER/DISPLAY FRAME ----
E02L01F
FUNCTION =>
*A ALTER
*D DISPLAY
FACILITY =>
-- MEMORY -*L LOGICAL
*R REAL
*P P-VIRTUAL
*S S-VIRTUAL
*ABS
*KEY
*V A-VIRTUAL
*I H-VIRTUAL
*SS SS-REAL
*SV SS-VRTL
ADRS=>
=>
*PF9 CHANGE
FACILITY
CL-0
CPU-0 CHP-0
RUN
M
FLAG CODE = F6C0C100 00000F00
TAST
LTG
Figure 22: ALTER/DISPLAY FRAME screen
You can use this frame to display and change the contents of the main memory, the memory
protect key and global storage. It is a requirement that the selected CPU ( P16 key) is
stopped beforehand (see “(ML) MODE SELECTION FRAME” on page 47).
FUNCTION =>
A ALTER
D DISPLAY
U25339-J-Z126-1-7600
The following functions are executed after the appropriate letter is
entered and ENTER is pressed:
change and modify memory contents
display memory contents
59
User frames
Standard processing in SVP mode
FACILITY =>
Possible displays of memory areas with various addresses:
L LOGICAL
R REAL
P P-VIRTUAL
S S-VIRTUAL
ABS
KEY
V A-VIRTUAL
I H-VIRTUAL
SS SS-REAL
SV SS-VRTL
ADRS =>
logical storage address
real storage address
primary virtual storage address
secondary virtual storage address
absolute address
memory protect key
address areas virtual address
basic address area´s virtual address
SSU real address
SSU virtual address
Memory address
XXXX
XXXXXXXX
address area larger than 32 bits (not yet used)
32-bit address
Special key functions
P9
When you press this key, the following subframe is displayed:
----- ALTER/DISPLAY FRAME ----
E02L01F
FUNCTION =>
*A ALTER
*D DISPLAY
FACILITY =>
-- REGISTER -*GR
*PSW
*CR
*FCR
*FPR
*PRX
*AR
*XCR
*GSR
*EX EPRX
ADRS=>
=>
*PF9 CHANGE
FACILITY
CL-0
CPU-0 CHP-0
LTG
RUN
M
FLAG CODE = F6C0C100 00000F00
TAST
Figure 23: ALTER/DISPLAY FRAME screen
You can use this frame to change and display the contents of important CPU registers. It is
a requirement that the selected CPU ( P16 key) is stopped beforehand (see “(ML) MODE
SELECTION FRAME” on page 47).
60
U25339-J-Z126-1-7600
Standard processing in SVP mode
FUNCTION =>
A ALTER
D DISPLAY
FACILITY =>
GR
PSW
CR
FCR
FPR
PRX
AR
XCR
GSR
EX EPRX
ADRS =>
User frames
The following functions are executed after the appropriate letter is
entered and ENTER is pressed:
change and modify register contents
display register contents
Possible displays of registers:
General register
Program status word
Control register
Feature control register
Floating-point register
Prefix register
Access register
Extended control register
Global scope register
Extended prefix register
no input required
Special key functions
P9
U25339-J-Z126-1-7600
returns to the frame for memory display
61
User frames
Standard processing in SVP mode
6.4.6 (ME) MESSAGE FRAME
----- MESSAGE FRAME ----NEWEST LINE = 0776
LINE ID MESSAGE
0759 01 X2LA9 FUNCTION: ST
0760 01 X2SA9 SSU0
0761 01 E2SA1 COMMAND NOT FOUND
0762 01 X2SA9 PF 8
0763 01 X2SA9 PF 3
0764 01 X2LA9 FUNCTION: MA
0765 01 E2M31 CPU NOT IN STOPPED STATE
0766 01 X2MA9 PF 2
0767 01 E2MA2 UNSUPPORTED PF KEY
0768 01 X2MA9 PF 3
0769 01 X2LA9 FUNCTION: AD
0770 01 E2B31 CPU0 NOT IN STOPPED STATE
0771 01 X2BA9 PF 9
0772 01 X2B00 COMMAND COMPLETED
0773 01 X2BA9 PF 2
0774 01 E2BA2 UNSUPPORTED PF KEY
0775 01 X2BA9 PF 3
0776 01 X2LA9 FUNCTION: ME
CL-0
CPU-0 CHP-0
RUN
E02L01F
MM/DD
05/21
05/21
05/21
05/21
05/21
05/21
05/21
05/21
05/21
05/21
05/21
05/21
05/21
05/21
05/21
05/21
05/21
05/21
HH:MM:SS
14:47:23
14:48:56
14:48:56
14:49:14
14:50:30
14:50:35
14:50:35
14:51:47
14:51:47
14:51:56
14:52:10
14:52:11
14:53:48
14:53:48
14:54:49
14:54:49
14:55:15
14:55:20
M
FLAG CODE = F6C0C100 00000F00
TAST
LTG
Figure 24: MESSAGE FRAME screen
All SVP messages and commands to the SVP are stored in a message file and can be
viewed in the MESSAGE FRAME.
Special key functions
P8
one page forwards, in the direction of the newer entries
P7
one page backwards, in the direction of the older entries
Entering a line command in line 24 permits you to display a certain entry in the uppermost
line.
Example: L 0800
62
U25339-J-Z126-1-7600
Standard processing in SVP mode
User frames
6.4.7 (CH) CH/SUBCH STATUS DISPLAY FRAME: CHANNEL
----- CH/SUBCH STATUS DISPLAY FRAME: CHANNEL ----CHP 0
E02L01F
PCHAD 0000000000000000 1111111111111111 2222222222222222 3333333333333333
0123456789ABCDEF 0123456789ABCDEF 0123456789ABCDEF 0123456789ABCDEF
CHPID 0000000000000000 1111111111111111 2222222222222222 3333333333333333
0123456789ABCDEF 0123456789ABCDEF 0123456789ABCDEF 0123456789ABCDEF
INSTALLED
OP
ON-LINE
CH-TYPE
IF-TYPE
****....****....
****....**.*....
****....**.*....
BBBB....BBBB....
EEEE....EE.E....
****....****....
****....**.*....
****....**.*....
BBBB....BBBB....
EEEE....EE.E....
****....****....
****....****....
****....****....
BBBB....BBBB....
EEEE....EEEE....
****************
***.****........
***..***........
BBBBBBBBBBBBBBBB
CCC.CCCC........
NNN NNNN
FUNCTION =>
1 CH STATUS
2 SUBCH STATUS
CHP NO.=>
CHPID =>
LCHADR=>
LINKADR=>
LCUADR=>
3 LINK STATUS
PCHAD =>
CL-0
CPU-0 CHP-0
*PF11 DISPLAY CHP2
RUN
M
FLAG CODE = F6C0C100 00000F00
TAST
LTG
Figure 25: CH/SUBCH STATUS DISPLAY FRAME: CHANNEL screen
By making entries in the input fields and pressing ENTER , you can display the status of the
I/O system. Further subframes are supplied in connection with FUNCTION 2 and 3.
FUNCTION =>
The following information is displayed on the screen after the corresponding number has been entered:
1
CH STATUS
channel status
(additional input in CHP NO field)
2
SUBCH STATUS
subchannel status
(additional input in the field CHPID or LINKADR)
3
LINK STATUS
LINK status of a type-S channel
(additional input in PCHAD field)
CHP NO =>
0 ... 3
channel processor
CHPID =>
00 ... FF
channel path number
LCHADR =>
logical channel address
no input required
U25339-J-Z126-1-7600
63
User frames
Standard processing in SVP mode
LINKADR =>
01
00 ... FE
link address for type-S channel
without director
with director:
output port address = link address
LCUADR =>
logische control unit address
no input required
PCHAD =>
00 ... FF
physical channel address
Special key functions
64
P10
Display of channel processor with next lower number.
P11
Display of channel processor with next higher number.
U25339-J-Z126-1-7600
Standard processing in SVP mode
User frames
6.4.8 (AU) AUXILIARY FRAME: MENU
----- AUXILIARY FRAME: MENU -----
E02L01F
SELECTION=>
*1 REAL CLOCK
*2 IORSF CONTROL
*3 RELATED SCB
*4 P-OFF/IMPL
*5 LOAD PRESET
*7 CONFIGURATION
CL-0
CPU-0 CHP-0
RUN
M
FLAG CODE = F6C0C100 00000F00
TAST
LTG
Figure 26: AUXILIARY FRAME: MENU screen
You can move to other frames by making entries in this menu frame and pressing
SELECTION =>
1
2
3
4
5
7
U25339-J-Z126-1-7600
ENTER
.
The following subframes are displayed on the screen by entering the
appropriate number:
REAL CLOCK
IORSF CONTROL
RELATED SCB
P-OFF/IMPL
LOAD PRESET
CONFIGURATION
displaying/setting SVP clock ..............................66
displaying/editing IORSF ....................................67
memory size for related SCBs ............................68
executing POWER OFF or IMPL ........................69
presetting LOAD FRAME....................................70
displaying/setting SSU configuration .................72
65
User frames
6.4.8.1
Standard processing in SVP mode
(AU1) AUXILIARY FRAME: REAL CLOCK
----- AUXILIARY FRAME: REAL CLOCK -----
YYYY MM DD
1997.05.21
E02L01F
HH MM SS
15:26:47
*PF6
*PF12
CL-0
CPU-0 CHP-0
CANCEL
TIMER SET
RUN
M
FLAG CODE = F6C0C100 00000F00
TAST
LTG
Figure 27: AUXILIARY FRAME: REAL CLOCK screen
When the screen is invoked, the current date and time of the SVP are displayed. Press the
K1 key before making an entry.
Corrections can be entered in the line below. These corrections take effect when the
key is pressed.
i
P12
The SKP cyclically synchronizes the SVP clock with the SINIX time (message: SET
TIME COMMAND COMPLETED).
Special key functions
66
P6
Delete input
P12
Corrections are carried out by the SVP
U25339-J-Z126-1-7600
Standard processing in SVP mode
6.4.8.2
User frames
(AU2) AUXILIARY FRAME: IORSF CONTROL
----- AUXILIARY FRAME: IORSF CONTROL ----NO.
0
1
P
2
P
3
E02L01F
COMMENT
S130TA1 // \UGENDATA.HW.S130.TA1.OSD.S130TA1 /
DATE 1997.04.30
TIME 16:00
S130TA1X // \UGENDATA.HW.S130.TA1.OSD.S130TA1X
DATE 1997.04.30
TIME 16:07
S130TA1 // \UGENDATA.HW.S130.TA1.OSD.S130TA1 /
DATE 1997.05.14
TIME 15:20
S130TA1X // \UGENDATA.HW.S130.TA1.OSD.S130TA1X
DATE 1997.05.14
TIME 15:43
FUNCTION=>
*1 SET NO
*2 PROTECT
*3 SWAP
07.05.97
/ 07.05.97
20.05.97
/ 20.05.97
CURRENT NO. = 3
NEXT POWER ON RESET NO. => 3
SPECIFY P(PROTECT) OR U(UNPROTECT)
SPECIFY SWAP NO.
<=>
*PF8 NEXT PAGE
CL-0
CPU-0 CHP-0
RUN
M
FLAG CODE = F6C0C100 00000F00
TAST
LTG
Figure 28: AUXILIARY FRAME: IORSF CONTROL screen
The IORSF files are displayed in this file. The file number of the current IORSF is displayed
in the CURRENT NO. = field.
When you select a function and press the ENTER key, parameters are required in the other
input fields. Once you have entered the parameters and pressed the ENTER key, the
functions for the IORSF files are executed.
FUNCTION =>
The following functions are executed when the appropriate number is
entered:
1
SET NO
activates an IORSF. Entry of the set number in the
NEXT POWER ON RESET NO. => field. An IMPL is then
required (see AU4 frame on page 69).
2
PROTECT
engages/disengages IORSF protection from being
overwritten:
enter P or U before the appropriate number
3
SWAP
swaps two IORSFs: enter the numbers in the
SPECIFY SWAP NO fields.
NEXT POWER ON RESET NO. =>
Enter the number of the IORSF file which is to be activated after the next
IMPL. You can only make an entry if you select function 1 beforehand.
U25339-J-Z126-1-7600
67
User frames
Standard processing in SVP mode
SPECIFY SWAP NO.
<=>
Enter two file numbers which are to be swapped. You can only make
entries if you select function 1 beforehand.
Special key functions
6.4.8.3
P8
Sets 4 to 7 are displayed
P7
Sets 0 to 3 are displayed
(AU3) AUXILIARY FRAME: RELATED SCB’S
i
This frame is intended exclusively for use by the service department.
----- AUXILIARY FRAME: RELATED SCB'S -----
NUMBER OF RELATED SCB'S
E02L01F
=> 04 K
NUMBER OF OCLINK-CNC LOGICAL PATH'S => 00000
*PF6 CANCEL
*PF12 CATALOG
CL-0
CPU-0 CHP-0
RUN
M
FLAG CODE = F6C0C100 00000F00
TAST
LTG
Figure 29: AUXILIARY FRAME: RELATED SCB’S screen
An entry in this frame sets the memory size for related SCBs (related Subchannel Control
Block). Values from 01 to 16 are possible.
Special key functions
68
P6
erase input
P12
save input in SVP
U25339-J-Z126-1-7600
Standard processing in SVP mode
6.4.8.4
User frames
(AU4) AUXILIARY FRAME: P-OFF/IMPL
----- AUXILIARY FRAME: P-OFF/IMPL -----
E02L01F
FUNCTION=>
*1 POWER OFF
*2 IMPL
CL-0
CPU-0 CHP-0
RUN
M
FLAG CODE = F6C0C100 00000F00
TAST
LTG
Figure 30: AUXILIARY FRAME: P-OFF/IMPL screen
By making an entry in this frame and pressing
initialize it.
FUNCTION =>
ENTER
, you can switch the S130 off or re-
The following functions are executed when the appropriate number is
entered:
1
POWER OFF
2
IMPL
switches S130 off, order: first devices connectec to
the PCI (Power Control Interface), then CPU (further
information on this can be found on page 15 and
page 22)
executes IMPL
After you have selected a function and pressed
appear:
ENTER
, the following prompt will
***********************************
*
*
* ARE YOU SURE ? (ENTER Y OR N) N *
*
*
***********************************
!
Ê
U25339-J-Z126-1-7600
The IMPL or POWER OFF must not be executed during system operation!
If this instruction is not heeded, BS2000 will be terminated abruptly!
Press Y and ENTER to switch off the system or to execute an IMPL, or
and ENTER to cancel the procedure.
N
69
User frames
6.4.8.5
Standard processing in SVP mode
(AU5) AUXILIARY FRAME: LOAD PRESET1
----- AUXILIARY FRAME: LOAD PRESET1 -----START MODE==> 1
*1 START AUTO
*2 START FAST
>3 START DIAL
*4 START
E02L01F
-IPL DEVICE1 PRESET GROUP -----------------+
2 CURRENT GROUP --------+
|
3 UNIT ADDRESS -+
+
+
08F7
08F7
0214
XXXX
00B0
XXXX
XXXX
XXXX
XXXX
-POWER ON IPL==> 2
*1 ENABLE
>2 DISABLE
-INITIAL FRAME==> 2
*1 LOAD FRAME(BASIC)
>2 LOAD FRAME(DETAIL)
CL-0
*PF12
*PF9
CPU-0 CHP-0
CATALOG
GO TO LOAD PRESET-2
RUN
M
FLAG CODE = F6C0C100 00000F00
TAST
LTG
Figure 31: AUXILIARY FRAME: LOAD PRESET1 screen
You can predefine the execution of an IPL by making an entry in this frame and pressing
ENTER :
START MODE => Predefine the loading mode by entering the appropriate number and
comment for the BS2000 loading mode:
1
2
3
4
START AUTO
START FAST
START DIAL
START
IPL DEVICE =>
1
for automatic startup
for fast startup
for dialog startup
not used
Entries in this field specify from which device an IPL should be
executed.
PRESET GROUP
Up to four unit addresses can be entered in the input
field for PRESET GROUP. The operating system is
loaded from the first device (IPL). In the case of an
error, the IPL is executed by the next device listed.
POWER ON IPL =>
Here you determine the behavior of the SVP after an IMPL.
70
U25339-J-Z126-1-7600
Standard processing in SVP mode
1
2
User frames
ENABLE
DISABLE
automatically executes IPL after IMPL
does not execute IPL, i.e. IPL must be triggered
manually using PROGRAM LOAD FRAME: BASIC
or PROGRAM LOAD FRAME: DETAIL-1.
INITIAL FRAME =>
Here you can set the display form of the PROGRAM LOAD FRAME.
1
2
LOAD FRAME (BASIC)
LOAD FRAME (DETAIL)
PROGRAM LOAD FRAME: BASIC (see page 50)
PROGRAM LOAD FRAME: DETAIL-1 (see page
51)
Special key functions
P12
catalog settings
P9
switches to LOAD PRESET2 screen
----- AUXILIARY FRAME: LOAD PRESET2 -----
-VM MODE==> 1
>1 NATIVE
*2 EMOS
*3 AVM/EX
E02L01F
-EXA MODE==> 1
>1 ENABLE
*2 DISABLE
-START IPL NO==> 1
*1 FIX(1)
>2 CURRENT
*PF12
*PF9
CL-0
CPU-0 CHP-0
CATALOG
GO TO LOAD PRESET-1
RUN
M
FLAG CODE = F6C0C100 00000F00
TAST
LTG
Figure 32: AUXILIARY FRAME: LOAD PRESET2 screen
You can set the operation mode by making an entry in this frame and pressing the
VM MODE =>
1
2
3
U25339-J-Z126-1-7600
NATIVE
EMOS
AVM/EX
P12
key.
Selection of the firmware to be loaded from SVP
for BS2000 operation
not used on the S130 Business Server
for VM2000 operation
71
User frames
Standard processing in SVP mode
EXA MODE =>
1
2
Selection of addressing mode
ENABLE
DISABLE
START IPL NO =>
1
2
FIX(1)
CURRENT
extended XA mode
not used on the S130 Business Server
Selection of the IPL Start Mode number
Start Mode number 1 (automatic start)
Start Mode number of most recently executed IPL.
Special key functions
6.4.8.6
P12
catalogs settings
P9
switches to the LOAD PRESET-1 screen
(AU7) AUXILIARY FRAME: SSU-CLUSTER CONFIGURATION
----- AUXILIARY FRAME: SSU-CLUSTER CONFIGURATION ----E02L01F
FUNCTION=>
DISPLAY CFR
*1 DISPLAY CFR
SSU0 --------------------------------------------+
*2 INIT CFR FILE NO.=> 3 |
CAP=
512 MB
MASTER
|
*3 DISPLAY FILE
| CNCT
C
C
|
| ONL
Y
Y
|
+--------+----+----+----+----+----+----+----+----+
|
|
CLUSTER -+----+----+----+----+----+----+----+----+
*X EXECUTE
| ID
>0
1
|
| ADRS
0
1
|
CFR FILE NO.=>
| STAT
|
*0 CL0-SS0,CL1-SS1
+--------+----+----+----+----+----+----+----+----+
*1 CL0-2SSU
|
|
*2 CL1-2SSU
SSU1 ----+----+----+----+----+----+----+----+----+
*3 2CL-2SSU
| ONL
Y
Y
|
| CNCT
C
C
|
SS0 CAP=
512 MB
|
CAP=
512 MB
|
SS1 CAP=
512 MB
+------------------------------------------------+
DUPLICATE BOUNDARY ADDRESS=
16 GB
CL-0
LTG
CPU-0 CHP-0
RUN
M
FLAG CODE = F6C0C100 00000F00
TAST
Figure 33: AUXILIARY FRAME: SSU-CLUSTER CONFIGURATION screen
This frame shows the status of the connected global storage (only if SSU is connected). By
making entries in the input fields and pressing ENTER , you can display and select configurations.
72
U25339-J-Z126-1-7600
Standard processing in SVP mode
FUNCTION =>
User frames
The following functions are carried out by entering the appropriate
number:
1
2
DISPLAY CFR
INIT CFR FILE NO.
3
DISPLAY FILE
X
EXECUTE
displays current configuration
activates selected FILE after IMPL, enter a number
in the INIT CFR FILE NO. => field
displays configuration file, enter a number in the CFR
FILE NO. => field
executes the last function entered
INIT CFR FILE NO. =>
Selection of a configuration file for function 2
CFR FILE NO. =>
Selection of a configuration file for function 3
0
1
2
3
CL0-SS0, CL1-SS1
CL0-2SSU
CL1-2SSU
2CL-2SSU
configuration file 0 with comments
configuration file 1 with comments
configuration file 2 with comments
configuration file 3 with comments
“Comment” refers to the contents of the configuration file. This is entered by the service
department.
The service department can define configuration files in which links between two S130s
(Cluster 0 and 1) and two SSUs (SSU0 and SSU1) can be configured on ONL (online Y or
N).
A connection (CNCT C) is either set by the service department and IMPL (for OSD V1 and
V2) or (as of OSD V3) by operating system commands. figure 33 shows a configuration with
which a computer connection can be achieved via global storage (SCMP).
U25339-J-Z126-1-7600
73
User frames
Standard processing in SVP mode
6.4.9 (MF) MSF FRAME
----- MSF FRAME: FLAG CODE LOG DISPLAY ----INITIALIZED 1997.02.13 10:26:19
LAST SEQ 3751
SEQ
*3751
*3750
*3749
*3748
*3747
*3746
*3745
*3744
*3743
*3742
3741
3740
3739
3738
UNIT
ICC
ICC
ICC
ICC
ICC
ICC
ICC
ICC
ICC
ICC
ICC
ICC
ICC
ICC
FLAG
7151 10
7151 10
7151 10
7151 10
7A13 10
7A13 10
7A13 10
7A13 10
7A13 10
7A13 10
7151 10
7A13 10
7151 10
7A13 10
A6
A6
A6
A6
A6
A6
A6
A6
A6
A6
A6
A6
A6
A6
CL-0
LTG
CODE
091D1F00
091C1F00
091B1F00
091A1F00
08401F00
49A01F00
18111F00
49941F00
18281F00
49831F00
09111F00
49811F00
09101F00
49801F00
E02L01F
NODE:SELF
1/ 9
LINK INFORMATION
HC29 SP1
HC28 SP4
HC27 SP3
HC26 SP2
HC25
HC24
HC23
HC22
HC21
HC20
HC19
HC18
HC17
HC16
PF8:NEXT PAGE
DATE
TIME
CT KIND
05.21 15:16:21
ATTN
05.21 15:16:10
ATTN
05.21 15:15:59
ATTN
05.21 15:15:48
ATTN
05.21 15:14:24
ATTN
05.21 15:14:13
ATTN
05.21 15:14:02
ATTN
05.21 15:13:51
ATTN
05.21 15:13:40
ATTN
05.21 15:13:29
ATTN
05.21 15:13:17
ATTN
05.21 15:13:06
ATTN
05.21 15:12:55
ATTN
05.21 15:12:44
ATTN
PF1:HELP PF7:PREV PAGE
CPU-0 CHP-0
RUN
M
FLAG CODE = A6715110 091D1F00
TAST
Figure 34: MSF FRAME screen
The SVP logs all FLAG codes, whereby the most recent code is generally shown in line 24.
Special key functions
74
P7
one page backwards, in the direction of the newer entries
P8
one page forwards, in the direction of the older entries
U25339-J-Z126-1-7600
Standard processing in SVP mode
User frames
Frame line 24:
You can switch to FLAG code entries of other components by making the following entries
in line 24:
ssu0: FLAG code entries of SSU0
ssu1: FLAG code entries of SSU1
self: back to the FLAG code entries of the cluster
----- MSF FRAME: FLAG CODE LOG DISPLAY -----
E02L01F
INITIALIZED 1997.02.13 09:56:29
LAST SEQ 0055
SEQ
0055
UNIT
FLAG CODE
FD 7150 00 01001E00
0054
F6 C0A0 00 00001E00
0053
0052
80 8010 20 00560E00
FD 7150 00 01001E00
0051
0050
0049
F0 4098 00 01021E00
F0 4098 00 00011E00
FD 7150 00 01001E00
0048
0047
E0 400C 00 00001E00
F0 4098 00 01021E00
CL-0
LTG
U25339-J-Z126-1-7600
DATE
05.12
05.21
05.12
05.12
05.05
04.24
04.28
04.24
04.24
04.14
04.23
04.11
04.11
TIME
16:33:09
14:01:21
10:48:28
10:50:35
13:42:40
16:41:57
15:38:50
08:25:17
08:17:15
10:45:47
14:40:57
06:33:39
06:19:13
CT KIND
005 SVP
NODE:SSU0
1/ 2
LINK INFORMATION
004 SVP
MCK
003 SVP
SVP
SVP
003 SVP
SVP
SVP
PF1:HELP PF7:PREV PAGE PF8:NEXT PAGE
CPU-0 CHP-0
RUN
M
FLAG CODE = F6C0C100 00000F00
TAST
75
User frames
Standard processing in SVP mode
6.4.10 (PA) PERFORMANCE ANALYZER
---- PERFORMANCE ANALYZER FRAME ---FUNCTION =>
1 ENABLE & ITEM SELECT
2 DISABLE
3 START & DISPLAY
4 START & CH BUSY
5 STOP
6 LOGGING START
7 LOGGING STOP
8 CPU LOG DISPLAY
9 CH LOG DISPLAY
CL-0
E02L01F
STATUS DISABLE / STOP
LOGGING STOP
-- CHP BUSY LEVEL -----------0 < GREEN <
30 (%)
31 < WHITE <
100 (%)
-- INTERVAL TIME -----------SAMPLING ==>
2 SEC
LOGGING
==>
1 MIN
CPU-0 CHP-0
LTG
RUN
M
FLAG CODE = F6C0C100 00000F00
TAST
Figure 35: PERFORMANCE ANALYZER FRAME screen
The PA frame is not intended for use.
76
U25339-J-Z126-1-7600
Standard processing in SVP mode
Selecting IORSF
6.5 Examples of standard processing in SVP mode
6.5.1 Selecting IORSF
The steps listed below are conditions for the loading of a particular IORSF at the next IMPL
or the next time the system is switched on.
In the following example the IORSF is selected with Level 2.
Conditions
You must have selected the “SVPST0 #1 (computer name)” window, created a link to the
$KVPHV0, and entered the correct password.
The MODE SELECTION FRAME is displayed:
----- MODE SELECTION FRAME -----
E02L01F
FUNCTION=>
- EXECUTION -
- SELECTION -
*1 CPU STOP
*2 INTERRUPT
*3 TOD ENABLE
*4 SYSTEM RESET
*5 SYSTEM RESET CLEAR
*LD
*ST
*MA
*AD
*ME
*CH
*AU
*MF
*PA
CPU SELECT=>
( 0 1
PROGRAM LOAD
STATUS DISPLAY
MANUAL OPERATION
ALTER/DISPLAY
MESSAGE
CH/SUBCH STATUS
AUXILIARY
MSF
PERFORMANCE ANALYZER
)
STOP/START MODE=>
*1 ALL CPU
>2 TARGET CPU
*6 STORE STATUS
*7 RESTART
CL-0
CPU-0 CHP-0
RUN
M
FLAG CODE = F6C0C100 00000F00
TAST
LTG
Figure 36: MODE SELECTION FRAME screen
Invoking AUXILIARY FRAME: MENU screen
Ê
Enter AU in the FUNCTION=> field and press
ENTER
or
Ê
Enter the FR AU command in line 24 and press
U25339-J-Z126-1-7600
ENTER
.
77
Selecting IORSF
Standard processing in SVP mode
The AUXILIARY FRAME: MENU screen is displayed
----- AUXILIARY FRAME: MENU -----
E02L01F
SELECTION=>
*1 REAL CLOCK
*2 IORSF CONTROL
*3 RELATED SCB
*4 P-OFF/IMPL
*5 LOAD PRESET
*7 CONFIGURATION
CL-0
CPU-0 CHP-0
RUN
M
FLAG CODE = F6C0C100 00000F00
TAST
LTG
Figure 37: AUXILIARY FRAME: MENU screen
Invoking IORSF Control Frame
Enter 2 in the SELECTION=> field. Press
Ê
i
78
ENTER
.
If the frame code AU2 is entered in the MODE SELECTION FRAME or the FR AU2
command is entered in line 24, the following frame is displayed.
U25339-J-Z126-1-7600
Standard processing in SVP mode
Selecting IORSF
The AUXILIARY FRAME: IORSF CONTROL screen is displayed:
----- AUXILIARY FRAME: IORSF CONTROL ----NO.
0
1
P
2
P
3
E02L01F
COMMENT
S130TA1 // \UGENDATA.HW.S130.TA1.OSD.S130TA1 /
DATE 1997.04.30
TIME 16:00
S130TA1X // \UGENDATA.HW.S130.TA1.OSD.S130TA1X
DATE 1997.04.30
TIME 16:07
S130TA1 // \UGENDATA.HW.S130.TA1.OSD.S130TA1 /
DATE 1997.05.14
TIME 15:20
S130TA1X // \UGENDATA.HW.S130.TA1.OSD.S130TA1X
DATE 1997.05.14
TIME 15:43
FUNCTION=>
*1 SET NO
*2 PROTECT
*3 SWAP
07.05.97
/ 07.05.97
20.05.97
/ 20.05.97
CURRENT NO. = 3
NEXT POWER ON RESET NO. => 3
SPECIFY P(PROTECT) OR U(UNPROTECT)
SPECIFY SWAP NO.
<=>
*PF8 NEXT PAGE
CL-0
CPU-0 CHP-0
RUN
M
FLAG CODE = F6C0C100 00000F00
TAST
LTG
Figure 38: AUXILIARY FRAME: IORSF CONTROL screen
The first four IORSF are displayed in the upper portion of the screen. You can switch to
the next four with the P8 key, and back with the P7 key.
In this example the IORSF with the number 3 is active.
Display: CURRENT NO. = 3
Now you want to activate the IORSF with the number 2:
Ê
Enter 1 in the FUNCTION=> field. Press
Ê
Enter 2 in the NEXT POWER ON RESET NO.=> field and press
U25339-J-Z126-1-7600
ENTER
.
ENTER
.
79
Activating IORSF
Standard processing in SVP mode
6.5.2 Activating IORSF
The set IORSF must be activated with a IMPL:
Conditions
You must be in the AUXILIARY FRAME: IORSF CONTROL screen.
Ê
Press
Ê
Enter 4 in the SELECTION=> field. Press
P3
to switch back to the AUXILIARY FRAME: MENU.
ENTER
.
The AUXILIARY FRAME: P-OFF/IMPL screen is displayed:
----- AUXILIARY FRAME: P-OFF/IMPL -----
E02L01F
FUNCTION=>
*1 POWER OFF
*2 IMPL
CL-0
CPU-0 CHP-0
RUN
M
FLAG CODE = F6C0C100 00000F00
TAST
LTG
Figure 39: AUXILIARY FRAME : P-OFF/IMPL screen
Ê
Enter 2 in the FUNCTION=> field to execute an IMPL. Then press
ENTER
.
The following prompt appears:
***********************************
*
*
* ARE YOU SURE ? (ENTER Y OR N) N *
*
*
***********************************
!
Ê
Press
ENTER
80
The IMPL must not be executed during system operation!
Y
to execute the IMPL or
N
, to cancel the procedure. Confirm your entry with
.
U25339-J-Z126-1-7600
Standard processing in SVP mode
PROGRAM LOAD FRAME PRESET1
6.5.3 Setting up PROGRAM LOAD FRAME PRESET1
In this example, you specify:
●
LOAD function 1 with the name AUTO (AUTO=Automatic Startup) for a POWER ON IPL
●
Device number of the IPL device to be used for a POWER ON IPL (current: 0108)
●
Automatic IPL after a POWER ON
●
The LOAD FRAME should always be displayed as PROGRAM LOAD FRAME: DETAIL1.
Conditions
You must have selected the “SVPST0 #1 (computer name)”’ window, created a link to the
$KVPHV0, and entered the correct password.
The MODE SELECTION FRAME is displayed on the screen (see page 77).
Invoke AUXILIARY FRAME: LOAD PRESET1 screen
Ê
Enter AU in the FUNCTION=> field and then press
ENTER
,
or
Ê
enter the FR AU command in line 24 and press
ENTER
.
The AUXILIARY FRAME: MENU screen is displayed (see page 78).
Ê
Enter 5 in the SELECTION=> field. Press
U25339-J-Z126-1-7600
ENTER
.
81
PROGRAM LOAD FRAME PRESET1
Standard processing in SVP mode
The AUXILIARY FRAME: LOAD PRESET1 screen is displayed:
----- AUXILIARY FRAME: LOAD PRESET1 -----START MODE==> 1
*1 START AUTO
*2 START FAST
>3 START DIAL
*4 START
E02L01F
-IPL DEVICE1 PRESET GROUP -----------------+
2 CURRENT GROUP --------+
|
3 UNIT ADDRESS -+
+
+
A108
A108
0108
XXXX
XXXX
XXXX
XXXX
XXXX
XXXX
-POWER ON IPL==> 1
*1 ENABLE
>2 DISABLE
-INITIAL FRAME==> 2
*1 LOAD FRAME(BASIC)
>2 LOAD FRAME(DETAIL)
CL-0
*PF12
*PF9
CPU-0 CHP-0
CATALOG
GO TO LOAD PRESET-2
RUN
M
FLAG CODE = F6C0C100 00000F00
TAST
LTG
Figure 40: AUXILIARY FRAME : LOAD PRESET1 screen
i
You can reach this screen directly from the MODE SELECTION FRAME by
entering the frame code AU5 in the FUNCTION=> field or the command FR AU5 in
line 24 and pressing ENTER .
START MODE =>
Enter 1 for automatic start of the BS2000.
IPL DEVICE
PRESET GROUP
A unit address from which the operating system is
loaded (IPL) must be entered in the input field for
PRESET GROUP. A maximum of three further
addresses can be entered.
Entry in our example: 0108.
POWER ON IPL =>
Enter 1 for automatic IPL after POWER ON.
INITIAL FRAME =>
Enter 2 for a detailed display of the LOAD FRAME.
Catalog parameters
Ê
Press the
P12
key.
The values entered are saved and thus made known to the SVP. These settings are
accessed for each IPL.
82
U25339-J-Z126-1-7600
Standard processing in SVP mode
PROGRAM LOAD FRAME PRESET2
6.5.4 Setting up PROGRAM LOAD FRAME PRESET2
In the PROGRAM LOAD FRAME PRESET2 you specify which operating mode is to be set
after the S130 system is switched on.
The following are specified in the example below:
●
●
●
VM2000 operating mode
EXA mode
Automatic startup of the operating system
Conditions
You must be in the AUXILIARY FRAME: LOAD PRESET1 screen.
Invoke AUXILIARY FRAME: LOAD PRESET2 screen
Ê
Press the
P9
key in the AUXILIARY FRAME: LOAD PRESET1 screen
The AUXILIARY FRAME: LOAD PRESET2 screen is displayed:
----- AUXILIARY FRAME: LOAD PRESET2 -----VM MODE==> 3
>1 NATIVE
*2 EMOS
*3 AVM/EX
E02L01F
-EXA MODE==> 1
>1 ENABLE
*2 DISABLE
-START IPL NO==> 1
*1 FIX(1)
>2 CURRENT
*PF12
*PF9
CL-0
CPU-0 CHP-0
CATALOG
GO TO LOAD PRESET-1
RUN
M
FLAG CODE = F6C0C100 00000F00
TAST
LTG
Figure 41: AUXILIARY FRAME: LOAD PRESET2 screen
VM MODE =>
Enter 3 for VM2000 operation.
EXA MODE =>
Always enter 1.
START IPL NO =>
Enter 1.
U25339-J-Z126-1-7600
83
IPL in PROGRAM LOAD FRAME: DETAIL-1
Standard processing in SVP mode
Catalog parameters
Ê
Press the
P12
key.
The values entered are saved and thus made known to the SVP. These settings are
accessed for each IPL.
6.5.5 Executing IPL in PROGRAM LOAD FRAME: DETAIL-1
The IPL can be executed manually 1according to the setting using PROGRAM LOAD
FRAME DETAIL-1.
The following are specified in the example below:
●
●
●
loading VM2000
dialog startup
IPL device is specified manually by the entry of the unit address
(here: loading the BS2000 from a device with the unit address A108)
Conditions
You must be in the AUXILIARY FRAME: LOAD PRESET2 screen.
Invoking the PROGRAM LOAD FRAME: DETAIL-1 screen
Ê
Press the
Ê
Enter the frame code LD and press ENTER .
Or enter the FR LD command in line 24 and press
i
84
F3
key to return to the MODE SELECTION FRAME.
ENTER
.
After entering LD or FR LD in the MODE SELECTION FRAME, either the
PROGRAM LOAD FRAME: DETAIL-1 or the PROGRAM LOAD FRAME:
BASIC screen is displayed, depending on the INITIAL FRAME setting in the
AUXILIARY FRAME: LOAD PRESET1 screen (see page 82).
U25339-J-Z126-1-7600
Standard processing in SVP mode
IPL in PROGRAM LOAD FRAME: DETAIL-1
In this example, the PROGRAM LOAD FRAME: DETAIL-1 screen is displayed:
----- PROGRAM LOAD FRAME: DETAIL-1 -----
E02L01F
-LOAD FUNCTION-IPL DEVICE==> 3
==> 3
*1 START AUTO
*1 PRESET GROUP ------------------+
*2 START FAST
>*2 CURRENT GROUP --------+
|
*3 START DIAL
*3 UNIT ADDRESS -+
+
+
*4 START
A108
A108
0108
*5 SYSTEM DUMP
XXXX
XXXX
*6 LOAD CLEAR -----+
XXXX
XXXX
*7 LOAD NON CLEAR -+
XXXX
XXXX
|
+MT CONTROL--- DETAIL-2 STATUS --PARMS=> 1
==> 1
VM MODE : NATIVE
>*1 NL
EXA MODE : ENABLE
*2 SL
IPL EXEC : ENABLE
*3 NL-REWIND
*4 SL-REWIND
*ENTER EXECUTE
*PF3
GO TO BASIC FRAME
*PF9
GO TO DETAIL-2
CL-0
CPU-0 CHP-0
RUN
M
FLAG CODE = F6C0C100 00000F00
TAST
LTG
Figure 42: PROGRAM LOAD FRAME: DETAIL-1 screen
LOAD FUNCTION =>
Enter 3 for dialog startup.
IPL DEVICE =>
Enter 3.
UNIT ADDRESS =>
Enter the device address of the load device.
In this example, the previous IPL was executed
successfully from the current device with device
address A108. Thus the desired address is already
in the UNIT ADDRESS field. It was also entered in the
CURRENT GROUP field by the SVP. Entering a 2 in the
IPL DEVICE field loads the operating system from
the desired device.
PARMS =>
Enter 1 in the first position of the field to load
VM2000.
MT CONTROL =>
1 is preset. This parameter is only important for
loading from tape.
U25339-J-Z126-1-7600
85
IPL in PROGRAM LOAD FRAME: DETAIL-1
DETAIL-2 STATUS
Standard processing in SVP mode
The settings in DETAIL-2 FRAME are displayed in
detail.
Check the settings. If they are correct, execute the
IPL (see below), if not, correct the entries in
DETAIL-2 FRAME (see section “Setting operating
mode via PROGRAM LOAD FRAME: DETAIL-2” on
page 87).
In our example VM MODE: NATIVE, i.e. the firmware
for the BS2000 operation is loaded. This setting
must be changed in DETAIL-2 FRAME for this
example.
Swap to PROGRAM LOAD FRAME: DETAIL-2
Ê
Press the
P9
key.
This saves the entries in DETAIL-1 FRAME in the SVP and opens the DETAIL-2
FRAME.
Execute IPL
Ê
Press
ENTER
after you have checked all the settings.
The following prompt appears on the screen:
***********************************
*
*
* ARE YOU SURE ? (ENTER Y OR N) N *
*
*
***********************************
Press
ENTER
86
Y
to execute the IPL, or
N
to cancel the procedure. Confirm your entry with
.
U25339-J-Z126-1-7600
Standard processing in SVP mode
Setting operating mode
6.5.6 Setting operating mode via PROGRAM LOAD FRAME: DETAIL-2
The operating mode can be reset using the PROGRAM LOAD FRAME: DETAIL-2. This
selects the appropriate firmware for running BS2000 or VM2000.
The following are specified in the example below:
●
VM2000 operating mode
●
executing IPL after reloading the firmware
Conditions
You must be in the PROGRAM LOAD FRAME: DETAIL-1 screen.
Invoke PROGRAM LOAD FRAME: DETAIL-2 screen
Ê
Press the
P9
key.
The PROGRAM LOAD FRAME: DETAIL-2 screen appears:
----- PROGRAM LOAD FRAME: DETAIL-2 -----VM MODE==> 3
*1 NATIVE
*2 EMOS
>*3 AVM/EX
-EXA MODE==> 1
>*1 ENABLE
*2 DISABLE
-IPL EXECUTION==> 1
>*1 ENABLE
*2 DISABLE
*ENTER
*PF3
*PF9
CL-0
E02L01F
CPU-0 CHP-0
EXECUTE
GO TO BASIC FRAME
GO TO DETAIL-1
RUN
M
FLAG CODE = F6C0C100 00000F00
TAST
LTG
Figure 43: PROGRAM LOAD FRAME: DETAIL-2 screen
VM MODE =>
Enter 3 for VM2000 operation.
EXA MODE =>
Always enter 1.
IPL EXECUTION =>
Enter 1.
U25339-J-Z126-1-7600
87
Setting operating mode
Standard processing in SVP mode
Activating settings
Ê
After you have checked all the settings, press
ENTER
.
The following prompt appears:
***********************************
*
*
* ARE YOU SURE ? (ENTER Y OR N) N *
*
*
***********************************
Press
ENTER
88
Y
to execute the IPL or
N
to cancel the procedure. Confirm your input with
.
U25339-J-Z126-1-7600
7 Operating the BS2000 console
Selecting the console window
At the operator terminal, you enter system operating mode by clicking the window
CONS0 #1<computer name> with the left mouse button.
System operation
When the BS2000 console window is opened, no input is permitted. If you attempt to make
an entry, you are prompted to release the window by entering the valid password. You do
this using the MENU function.
Press the
1
1
2
3
4
5
6
7
-
MENU
Main KVP Function Menu
Permit Input (On)
Inhibit Input (Off)
Change Password
View Last Messages
Programmable Function Keys
KVP Administrative Functions
Exit
Use the keys ,
function menu.
Ê
key to display the main KVP function menu.
and
ENTER
to select and start the functions provided on the main KVP
Select function 1 and enter the password for the cons0 user ID. Confirm your input by
pressing the ENTER key.
You can then enter BS2000 commands or respond to queries from the BS2000 system.
Your input is transferred to BS2000 when you press the ENTER key.
V7
U25339-J-Z126-1-7600
You will find further information on the functionality of the main KVP function menu
and on using special key functions in “BS2000 CONSOLE mode” in the “SINIX2000 V7.0“ [1] manual.
89
Eine Dokuschablone von Frank Flachenecker
by f.f. 1992
8 Troubleshooting
This chapter describes what to do out in case of malfunction.
Problems with the S130
page 91
Displays if there is a hardware error
page 92
Carrying out a system dump
page 93
Measures to take if there is an I/O processor failure
page 93
Measures to take if there is a processing computer failure
page 94
Problems with the service/console processor (SKP)
page 97
8.1 Problems with the S130
In the case of a problem with the S130, contact the service department and discuss the
steps to be taken. Depending on the outcome of this discussion, you may be required to
carry out the following tasks:
–
Take a system dump in the case of an inexplicable system failure.
–
Disable defective I/O processors if several I/O processors are available.
You can continue processing with the rest of the system.
–
Disable defective processing units, if several are available.
You can continue processing with the rest of the system.
–
If one of the MCU, SVP, SCI, SPC, or PCI system components is defective, contact the
service department.
The next section explains how the S130 informs you of hardware errors.
U25339-J-Z126-1-7600
91
Problems with the S130
Troubleshooting
8.1.1 Displays in the case of a hardware error
The S130 informs you of hardware errors in the following manner:
●
On the S130 control panel
If the yellow CHECK light illuminates, there may be a hardware error.
At the same time, the FLAG code appears on the LCD display. This can indicate an error
in the service processor or a machine error.
●
On the screen of the SKP console in the SVPST0 window
On the SKP console, displays in line 24 in the SVPST0 window of the SVP frame can
indicate a hardware error. Evaluation of the FLAG code is carried out by the service
department. The following diagram shows the format of the error display:
LTG
FLAG CODE = FFFFFFFF FFFFFFFF
TAST
Figure 44: FLAG code display in line 24 of the SVPST0 screen
The FLAG code FF . . . FF can have different meanings and can therefore require
different measures:
–
A WRITE-CONSOL message is displayed. It can be deleted with the
does not delete the FLAG code display.
–
A warning is issued, e.g. if the room temperature is too high. The cause of the error
must be eradicated. System operation can continue in the meantime.
–
An error has occurred in the S130 or on the interface to the peripheral devices which
was automatically corrected by the hardware. In this case, system operation can
also be continued.
–
An error has occurred which does not permit system operation to be continued.
F3
key. This
In the last case, you can take the following measures:
If the system is down, execute an IMPL. If this does not solve the problem, contact the
service department and discuss what steps should be taken.
92
U25339-J-Z126-1-7600
Troubleshooting
Problems with the S130
8.1.2 Carrying out a system dump
Conditions:
1. Select the SVPST0 window
2. Select LD PROGRAM LOAD FRAME
3. Select LOAD FUNCTION => 5 (SYSTEM DUMP)
The system dump stored on hard disk or cassette by the DUMP program is required for
error diagnosis.
Afterwards, the BS2000/VM2000 system must be reloaded with the IPL.
Information on SLED operation can be found in the “Introductory Guide to Systems
Support“ [6] manual.
i
8.1.3 Measures to take in the case of defective I/O channels or I/O
processors
If an S130 channel or an added secondary I/O processor is defective, you can perform the
following after consulting the service department:
Ê
Disable defective I/O channel during operation.
If an I/O channel has failed due to a hardware failure, it is automatically disabled. If not,
you can disable it using the BS2000 command DETË*CHA(XX).
Ê
Disable defective I/O processor during operation.
If an I/O processor has failed due to a hardware failure, it is automatically disabled. If
not, you can disable it using the BS2000 command
/DETË*CHA(XX,YY)
when doing so, you should enter a list of channels CHPIDxx ,...,CHPIDyy; or enter a
range of channels from CHPIDxx to CHPIDyy using
/DETË*CHA-R(XX,YY)
You can continue processing with the other I/O processors until the repairs are carried
out by the service department. This is only possible if you can reach the peripheral
devices required for your work via non-defective I/O processors.
U25339-J-Z126-1-7600
93
Problems with the S130
Troubleshooting
List of I/O channels:
IOP0 (channel processor CHP 0 and 1) channel range 00 to 7F
IOP1 (channel processor CHP 2 and 3) channel range 80 to FF
If the first I/O processor (IOP0) fails, system operation is no longer possible due to the
lack of a console. If a logical console which works via the front-end processor and a
functioning channel exists, the system can still be used.
Execute IMPL and IPL after system crash with the defective I/O processor disabled by
the SVP.
Ê
8.1.4 Measures to take in the case of processing unit failure
!
If the CPU is defective, you must contact the service department.
A high-availability module (HVZ), S130K-1H, is available for the S130 as a chargeable
option.
S130 without the high availability module
If a CPU is defective for any S130 model without the high availability module and the CPU
has not caused a system crash, the CPU is automatically disabled. If not, you can disable
it with the BS2000 command /DETË*CPU(xx).
xx = number of the CPU: 00 to 07
You can then continue processing with reduced system performance without the defective
CPU until the service department carries out the repairs.
A defective CPU can only be made available to the system via IMPL or IPL after repairs
have been performed.
S130 with the high availability module
If the high availability module is installed on your S130-C, S130-E or S130-P, you can
replace the defective CPU with the high-availability CPU.
!
Ê
94
A high-availability CPU can not be activated during system operation.
Please request support from the service department if you want the high-availability
CPU generated. They will then activate the high-availability CPU as described
below.
Terminate your system with /SHUTDOWN.
U25339-J-Z126-1-7600
Troubleshooting
Ê
Problems with the S130
Once the message SHUTDOWN COMPLETED is displayed, switch the S130 to CE mode by
switching the CE key on the inside of the maintenance panel of the S130 to the position
“Maintenance Mode On”.
The CE mode is indicated by the display CE on the control panel of the S130 (see
page 12f) and in line 23 of the SVPST0 window on the SKP operating terminal (see
page 40).
Ê
Select the SVPST0 window on the SKP operating terminal (see page 36).
Ê
Press the
Ê
Select the Generation Frame by entering the frame code GE and press the
Ê
Enter 1 in the input field SETUP ITEM => to select the SYSTEM FEATURE and press the
ENTER key.
P2
key. It switches to CE mode in the Index Frame.
ENTER
key.
The following frame is displayed:
----- GENERATION FRAME: SYSTEM ------- SYSTEM FEATURE --MODEL => GS8600
FVC => 60
TYPE => /40
IVC => 00
--- INSTALLATION (Y/N) --CPU0 => Y
CPU1 => Y
CPU2 => N
CPU4 => N
CPU5 => N
CPU6 => N
MSU0 => Y
MSU1 => Y
CHP0 => Y
CHP1 => N
CHP2 => Y
IOPA0=> Y
IOPA1=> Y
IOPA2=> N
IOPA4=> Y
IOPA5=> N
IOPA6=> N
E02L01F-01Q+013
FMODEL => 8600
IMODEL => 3090
CPU3 => N
CPU7 => N
CHP3 => N
IOPA3=> N
IOPA7=> N
--- MULTI CLUSTER FEATURE --DOMAIN SSU CAPACITY
=> 00000000 (MB)
GSIGP I/O RESET TIME-OUT => 30 (SEC)
UPDATE => N (Y/N)
CL-0
PF3:RETURN PF6:CANCEL
CPU-0 CHP-0
PF7:PAGE UP
RUN
PF8:PAGE DOWN
M
LTG
CE
TEST
TAST
Figure 45: GENERATION FRAME: SYSTEM screen
Ê
Enter Y in the field UPDATE => to modify the generation. Confirm your input by pressing
the ENTER key.
Ê
Enter N for the defective CPU and Y for the next available CPU. Confirm your input by
pressing the ENTER key.
Ê
Press the
Ê
Respond to the question DO YOU WANT TO SAVE SETUP DATA: ? in the subsequent frame
with Y. Confirm your input by pressing the ENTER key.
U25339-J-Z126-1-7600
P3
key.
95
Problems with the S130
Troubleshooting
Ê
Press the
Ê
Select the frame AU4 by entering the frame code AU4 and press the
Ê
Select the IMPL function by entering 2 (IMPL activates the new setting) and confirm
your input by pressing the ENTER key.
P2
key to return to the Index Frame.
Respond to the following prompt with Y and confirm by pressing the
ENTER
ENTER
key.
key.
***********************************
*
*
* ARE YOU SURE ? (ENTER Y OR N) N *
*
*
***********************************
Ê
After IMPL has terminated (display of the MODE SELECTION frame in the SVPST0 #1
window), execute a IPL of the BS2000/VM2000 (see page 84).
Return the CE key to the position “Maintenance Mode Off“.
8.1.5 Measures to take in the case of defective MCU, SVP, SCI, PCI system
components
When the MCU (Memory Control Unit), SVP, SCI (System Control Interface) or PCI (Power
Control Interface) system component fails, processing cannot be continued with the S130.
If the failure of one of these components causes a complete system failure, you can carry
out the following actions after consultation with the service department:
Ê
execute an IMPL (AU4-FRAME)
or
Ê
switch off the S130 (AU4-FRAME) and then restart it (control panel, SKP menu).
If the shutdown and subsequent IMPL occur without failures, the IPL can be restarted with
the BS2000/VM2000.
96
U25339-J-Z126-1-7600
Troubleshooting
Problems with the service/console processor (SKP)
8.2 Problems with the service/console processor (SKP)
If you have problems with the SKP, contact the service department and discuss the steps
to be taken.
Depending the outcome of this discussion, you may be required to do the following:
1. Reboot the SINIX system.
Make sure that applications under SINIX, e.g. sysadm, have been terminated.
Log in to SINIX under the ID root,
enter the password,
shutdown -i6
or select “Exit system“ from the main menu of the window administration program, enter
the password, select “Restart” and “Start” (see also page 22).
If this is not possible:
Switch off SKP with the OFF switch and then switch it on again.
!
A /shutdown command is sent to BS2000 and it may be terminated (see also
page 22f and the section entitled “up_down” in the “SINIX-2000 V7.0“ [1]
manual).
2. After termination of the SINIX loading process, select the screen CONS0 #1 <computer
name> again and log in with the password.
3. If the BS2000/VM2000 is still in operation, an automatic reconnect to the BS2000
console screen CONS0 is executed.
You can now continue to use BS2000 as described on page 89.
U25339-J-Z126-1-7600
97
Important key combinations
Troubleshooting
8.3 Important key combinations
If your mouse is not working, you can use the keys
windows of the X-Windows window system.
ALT
+
TAB
to move between the
The following key combinations make your work easier:
98
CTRL
+
SysRq
h
Switch from the window system to the SINIX login screen
CTRL
+
SysRq
u
Return to the window system
ALT
+
SysRq
h
Invoke login screen on console
ALT
+
SysRq
P1
Invoke SINIX-Windows
ALT
+
SysRq
P2
Invoke SINIX login screen
ALT
+
CTRL
+
DEL
Reboot command (SINIX not yet loaded)
U25339-J-Z126-1-7600
Related publications
Please apply to your local office for ordering the manuals.
[1]
SINIX-2000 V7.0
Installation, Operation and Administration
User Guide
Target group
This manual is intended for privileged users (operators, system administrators) of the
service/console processor 3970-SKP, the channel adapter 3970-KAx, and the business
servers C80-2 and SR2000.
Contents
The manual contains all the information required to ensure that the systems service/
console processor 3970-SKP/S110 and 3970-SKP/S130, channel adapter 3970-KAx and
business servers C80-2 and SR2000 are ready for use. This includes helpful information on
configuring the systems and a description of important functions for system operation and
administration.
[2]
3970-SKP / 3970-KAx
Operating Manual
Target group
The manual addresses privileged users (operators, system administrators).
Contents
The manual contains all the information required to operate the hardware of the Service/
Console Processor SKP 3970 and the 3970-KAx Channel Adapter.
[3]
SINIX/windows User Environment V3.0
Introduction to Handling and Configuration
(SINIX Desktop)
User Guide
Target group
Users familiar with the basics of SINIX
Contents
The manual presents the components of the SINIX/windows desktop and shows how to
operate the elements of the interface and interactively configure the desktop.
U25339-J-Z126-1-7600
99
Related publications
[4]
TELESERVICE - TSB2000 (BS2000/OSD Server)
User Guide
Target group
The manual addresses the operating personnel of the C50, C70, C80, H100, S110, S130
and SR2000 mainframes. Knowledge of BS2000 and basic SINIX knowledge are required
to operate TELESERVICE.
Contents
Service technicians use TELESERVICE to support, maintain and perform fault diagnostics
on customer systems from the TELESERVICE center. TELESERVICE permits rapid
support by specialists, independent of geographic location and is the fastest method of
response when problems occur. The TELESERVICE TSB component is the interface of the
BS2000 system to the TELESERVICE center.
[5]
8323 Data Communication Unit
SINIX
Data Sheet
Contents
The 8323 Data Communication Unit (DCU) makes it possible to interconnect display
terminals, printers or computers with asynchronous interfaces via dialup telephone connections anywhere in the world.
[6]
BS2000/OSD-BC
Introductory Guide to Systems Support
User Guide
Target group
This manual is addressed to BS2000/OSD systems support staff and operators.
Contents
The manual covers the following topics relating to the management and monitoring of the
BS2000/OSD basic configuration: system initialization, parameter service, job and task
control, memory/device/user/file management, assignment of privileges, accounting and
operator functions.
100
U25339-J-Z126-1-7600
Index
A
ALTER/DISPLAY FRAME (AD) 59
ALTER/DISPLAY FRAME (subframe) 60
ATOP 8
switching the S130 on/off 31
authorization control 10
AUTO 81
AUXILIARY FRAME
IORSF CONTROL 79
LOAD PRESET1 82
LOAD PRESET2 83
MENU 78
MENU (AU) 65
P-OFF/IMPL 80
AUXILIARY FRAME (AU1): REAL CLOCK 66
AUXILIARY FRAME (AU2): IORSF CONTROL 67
AUXILIARY FRAME (AU3): RELATED SCB’S (only service department)
AUXILIARY FRAME (AU4): P-OFF/IMPL 69
AUXILIARY FRAME (AU5): LOAD PRESET1 70
AUXILIARY FRAME (AU5): LOAD PRESET2 71
AUXILIARY FRAME (AU7): SSU-CLUSTER CONFIGURATION 72
B
BS2000 console window
89
C
carrying out a system dump 93
CH/SUBCH STATUS DISPLAY FRAME: CHANNEL
CLUSTER FRAME 55
configuration 5
configuration levels 5
console window, selecting 89
controls and indicators 11
CPU defective 94
U25339-J-Z126-1-7600
68
63
101
Index
D
display
hardware errors 92
hardware status 41
displays
in line 24 41
in line 25 41
E
emergencies 3
EMERGENCY STOP switch 19
battery cabinet 19
global storage 19
executing IPL in DETAIL-1 FRAME
F
form - switching on/off the host
frame code 45
frame name 45
frame structure 37
G
global storage control panel
button functions 18
function of the indicators
84
26
16
H
hardware errors, display 92
hardware status, display 41
high-availability CPU activate 94
HVZ (high-availability feature) 6
I
I/O processor failure 93
important instructions 3
indicators - S130 control panel
IORSF
load 77
select 33, 77
12
K
key combinations 98
KVP console distribution program (German acronym)
KVP function menu, main 89
102
9
U25339-J-Z126-1-7600
Index
L
line 22 + 23, messages
line 23, messages 40
line 24, displays 41
line 25, displays 41
loading BS2000 33
loading IORSF 77
38
M
manual IPL 84
MANUAL OPERATION FRAME (MA) 57
manufacturer instructions 4
MCU (Memory Control Unit) 96
MCU defective 96
MESSAGE FRAME (ME) 62
messages in line 22 + 23 38
messages in line 23 40
MODE SELECTION FRAME 77
MODE SELECTION FRAME (ML) 47
MSF FRAME (MF) 74
O
operating frames 42
operating mode 83
setting 87
operation hours counter 14
operation of the S130
hardware components 7
overview of program keys 43
P
PCI (Power Control Interafce) 96
PCI defective 96
problems with the S110 91
processing unit, defective 94
PROGRAM LOAD FRAME
BASIC (LD) 50
DETAIL-1 51, 85
DETAIL-2 54, 87
R
reconfiguration, dynamic
RFI suppression 4
U25339-J-Z126-1-7600
5
103
Index
S
S130 control panel 12
button functions 15
function of the indicators 12
safety instructions 3
SCI (System Control Interface) 96
SCI defective 96
screen
AUXILIARY FRAME
IORSF CONTROL 79
LOAD PRESET1 82
LOAD PRESET2 83
MENU 78
P-OFF/IMPL 80
MODE SELECTION FRAME 47, 77
PROGRAM LOAD FRAME 85
DETAIL-1 85
DETAIL-2 87
selecting IORSF 77
service/console processor defective 97
setting operating mode 87
setting up
PROGRAM LOAD FRAME PRESET1 81
PROGRAM LOAD FRAME PRESET2 83
SSU FRAME 56
starting IMPL 33
STATUS DISPLAY FRAME (ST)
CLUSTER 55
SSU 56
structure of a frame 37
subframes 46
SVP
defective 96
keys 42
operating frames 33
SVPST0 #1 window (password entry) 36
switching between user frames 45
switching on/off the host - form 26, 29
switching the S130 on
by hand 21
switching the S130 on/off
ATOP 31
104
U25339-J-Z126-1-7600
Index
automatically 28
by hand 21
from a remote system 32
from SKP 23
time-driven 30
using the control panel 21
system components defective 96
system operation 7
system status messages 40
U
user frames 46
switching between
45
X
X window system windows
U25339-J-Z126-1-7600
34
105
Eine Dokuschablone von Frank Flachenecker
by f.f. 1992
Contents
1
1.1
1.2
1.3
Introduction . . . . . . . . . . . . . . . . . . . . . . . . . . . . . . . . . . . . . . . . . . . . . . . . . . . . . . . . . .
Objectives and target group . . . . . . . . . . . . . . . . . . . . . . . . . . . . . . . . . . . . . . . . . . . . . . .
Summary of contents . . . . . . . . . . . . . . . . . . . . . . . . . . . . . . . . . . . . . . . . . . . . . . . . . . . .
Notational conventions . . . . . . . . . . . . . . . . . . . . . . . . . . . . . . . . . . . . . . . . . . . . . . . . . . .
1
1
2
2
2
2.1
2.2
2.3
Important instructions . . . . . . . . . . . . . . . . . . . . . . . . . . . . . . . . . . . . . . . . . . . . . . . . . .
Safety instructions . . . . . . . . . . . . . . . . . . . . . . . . . . . . . . . . . . . . . . . . . . . . . . . . . . . . . .
Manufacturer instructions . . . . . . . . . . . . . . . . . . . . . . . . . . . . . . . . . . . . . . . . . . . . . . . . .
RFI suppression . . . . . . . . . . . . . . . . . . . . . . . . . . . . . . . . . . . . . . . . . . . . . . . . . . . . . . . .
3
3
4
4
3
3.1
3.2
3.2.1
3.2.2
3.2.3
Overview . . . . . . . . . . . . . . . . . . . . . . . . . . . . . . . . . . . . . . . . . . . . . . . . . . . . . . . . . . . . . 5
Configuration levels of the S130 Business Server . . . . . . . . . . . . . . . . . . . . . . . . . . . . . . 5
Concept of system operation . . . . . . . . . . . . . . . . . . . . . . . . . . . . . . . . . . . . . . . . . . . . . . 7
Hardware . . . . . . . . . . . . . . . . . . . . . . . . . . . . . . . . . . . . . . . . . . . . . . . . . . . . . . . . . . . . . 7
Software . . . . . . . . . . . . . . . . . . . . . . . . . . . . . . . . . . . . . . . . . . . . . . . . . . . . . . . . . . . . . . 9
Authorization control . . . . . . . . . . . . . . . . . . . . . . . . . . . . . . . . . . . . . . . . . . . . . . . . . . . 10
4
4.1
4.1.1
4.1.2
4.2
4.2.1
4.2.2
4.3
Controls and indicators . . . . . . . . . . . . . . . . . . . . . . . . . . . . . . . . . . . . . . . . . . . . . . . .
Control panel on the Business Server cabinet . . . . . . . . . . . . . . . . . . . . . . . . . . . . . . . .
Function of the indicators . . . . . . . . . . . . . . . . . . . . . . . . . . . . . . . . . . . . . . . . . . . . . . . .
Button functions . . . . . . . . . . . . . . . . . . . . . . . . . . . . . . . . . . . . . . . . . . . . . . . . . . . . . . .
Control panel on the global storage cabinet . . . . . . . . . . . . . . . . . . . . . . . . . . . . . . . . .
Function of the indicators . . . . . . . . . . . . . . . . . . . . . . . . . . . . . . . . . . . . . . . . . . . . . . . .
Button functions . . . . . . . . . . . . . . . . . . . . . . . . . . . . . . . . . . . . . . . . . . . . . . . . . . . . . . .
EMERGENCY STOP switch . . . . . . . . . . . . . . . . . . . . . . . . . . . . . . . . . . . . . . . . . . . . .
11
12
12
15
16
16
18
19
5
5.1
5.2
5.3
5.4
5.5
5.6
5.7
Switching the S130 Business Server on and off . . . . . . . . . . . . . . . . . . . . . . . . . . . .
Switching the S130 on and off using the control panel . . . . . . . . . . . . . . . . . . . . . . . . .
Switching the S130 on and off from the SKP . . . . . . . . . . . . . . . . . . . . . . . . . . . . . . . . .
Automatic switching on/off of the S130 via the SKP . . . . . . . . . . . . . . . . . . . . . . . . . . .
Time-driven switching on and off of the SKP and S130 . . . . . . . . . . . . . . . . . . . . . . . . .
Switching the SKP and S130 on and off using ATOP 3914 . . . . . . . . . . . . . . . . . . . . . .
Switching the S130 on and off from a remote system . . . . . . . . . . . . . . . . . . . . . . . . . .
Switching global storage on and off . . . . . . . . . . . . . . . . . . . . . . . . . . . . . . . . . . . . . . . .
21
21
23
28
30
31
32
32
U25339-J-Z126-1-7600
107
Contents
6
6.1
6.2
6.2.1
6.2.2
6.2.3
6.2.4
6.3
6.3.1
6.3.2
6.3.3
6.4
6.4.1
6.4.2
6.4.2.1
6.4.2.2
6.4.3
6.4.4
6.4.5
6.4.6
6.4.7
6.4.8
6.4.8.1
6.4.8.2
6.4.8.3
6.4.8.4
6.4.8.5
6.4.8.6
6.4.9
6.4.10
6.5
6.5.1
6.5.2
6.5.3
6.5.4
6.5.5
6.5.6
Standard processing in SVP mode . . . . . . . . . . . . . . . . . . . . . . . . . . . . . . . . . . . . . .
Invoking an SVP frame . . . . . . . . . . . . . . . . . . . . . . . . . . . . . . . . . . . . . . . . . . . . . . . . .
General frame structure . . . . . . . . . . . . . . . . . . . . . . . . . . . . . . . . . . . . . . . . . . . . . . . . .
System status messages in line 22 . . . . . . . . . . . . . . . . . . . . . . . . . . . . . . . . . . . . . . . .
System status messages in line 23 . . . . . . . . . . . . . . . . . . . . . . . . . . . . . . . . . . . . . . . .
Hardware status display in line 24 . . . . . . . . . . . . . . . . . . . . . . . . . . . . . . . . . . . . . . . . .
Status displays in line 25 . . . . . . . . . . . . . . . . . . . . . . . . . . . . . . . . . . . . . . . . . . . . . . . .
Using frames . . . . . . . . . . . . . . . . . . . . . . . . . . . . . . . . . . . . . . . . . . . . . . . . . . . . . . . . .
SVP function keys . . . . . . . . . . . . . . . . . . . . . . . . . . . . . . . . . . . . . . . . . . . . . . . . . . . . .
Switching between user frames . . . . . . . . . . . . . . . . . . . . . . . . . . . . . . . . . . . . . . . . . . .
Options for switching between frames on the SKP operating terminal . . . . . . . . . . . . .
User frames and subframes . . . . . . . . . . . . . . . . . . . . . . . . . . . . . . . . . . . . . . . . . . . . . .
(ML) MODE SELECTION FRAME . . . . . . . . . . . . . . . . . . . . . . . . . . . . . . . . . . . . . . . . .
(LD) PROGRAM LOAD FRAME: BASIC . . . . . . . . . . . . . . . . . . . . . . . . . . . . . . . . . . . .
(LD) PROGRAM LOAD FRAME: DETAIL-1 . . . . . . . . . . . . . . . . . . . . . . . . . . . . . . . . . .
(LD) PROGRAM LOAD FRAME: DETAIL-2 . . . . . . . . . . . . . . . . . . . . . . . . . . . . . . . . . .
(ST) STATUS DISPLAY FRAME: CLUSTER . . . . . . . . . . . . . . . . . . . . . . . . . . . . . . . . .
(MA) MANUAL OPERATION FRAME . . . . . . . . . . . . . . . . . . . . . . . . . . . . . . . . . . . . . .
(AD) ALTER/DISPLAY FRAME . . . . . . . . . . . . . . . . . . . . . . . . . . . . . . . . . . . . . . . . . . .
(ME) MESSAGE FRAME . . . . . . . . . . . . . . . . . . . . . . . . . . . . . . . . . . . . . . . . . . . . . . . .
(CH) CH/SUBCH STATUS DISPLAY FRAME: CHANNEL . . . . . . . . . . . . . . . . . . . . . . .
(AU) AUXILIARY FRAME: MENU . . . . . . . . . . . . . . . . . . . . . . . . . . . . . . . . . . . . . . . . .
(AU1) AUXILIARY FRAME: REAL CLOCK . . . . . . . . . . . . . . . . . . . . . . . . . . . . . . . . . .
(AU2) AUXILIARY FRAME: IORSF CONTROL . . . . . . . . . . . . . . . . . . . . . . . . . . . . . . .
(AU3) AUXILIARY FRAME: RELATED SCB’S . . . . . . . . . . . . . . . . . . . . . . . . . . . . . . . .
(AU4) AUXILIARY FRAME: P-OFF/IMPL . . . . . . . . . . . . . . . . . . . . . . . . . . . . . . . . . . . .
(AU5) AUXILIARY FRAME: LOAD PRESET1 . . . . . . . . . . . . . . . . . . . . . . . . . . . . . . . .
(AU7) AUXILIARY FRAME: SSU-CLUSTER CONFIGURATION . . . . . . . . . . . . . . . . . .
(MF) MSF FRAME . . . . . . . . . . . . . . . . . . . . . . . . . . . . . . . . . . . . . . . . . . . . . . . . . . . . .
(PA) PERFORMANCE ANALYZER . . . . . . . . . . . . . . . . . . . . . . . . . . . . . . . . . . . . . . . .
Examples of standard processing in SVP mode . . . . . . . . . . . . . . . . . . . . . . . . . . . . . .
Selecting IORSF . . . . . . . . . . . . . . . . . . . . . . . . . . . . . . . . . . . . . . . . . . . . . . . . . . . . . .
Activating IORSF . . . . . . . . . . . . . . . . . . . . . . . . . . . . . . . . . . . . . . . . . . . . . . . . . . . . . .
Setting up PROGRAM LOAD FRAME PRESET1 . . . . . . . . . . . . . . . . . . . . . . . . . . . . .
Setting up PROGRAM LOAD FRAME PRESET2 . . . . . . . . . . . . . . . . . . . . . . . . . . . . .
Executing IPL in PROGRAM LOAD FRAME: DETAIL-1 . . . . . . . . . . . . . . . . . . . . . . . .
Setting operating mode via PROGRAM LOAD FRAME: DETAIL-2 . . . . . . . . . . . . . . . .
7
Operating the BS2000 console . . . . . . . . . . . . . . . . . . . . . . . . . . . . . . . . . . . . . . . . . . 89
108
33
34
37
38
40
41
41
42
42
45
46
46
47
50
51
54
55
57
59
62
63
65
66
67
68
69
70
72
74
76
77
77
80
81
83
84
87
U25339-J-Z126-1-7600
Contents
8
8.1
8.1.1
8.1.2
8.1.3
8.1.4
8.1.5
8.2
8.3
Troubleshooting . . . . . . . . . . . . . . . . . . . . . . . . . . . . . . . . . . . . . . . . . . . . . . . . . . . . . .
Problems with the S130 . . . . . . . . . . . . . . . . . . . . . . . . . . . . . . . . . . . . . . . . . . . . . . . . .
Displays in the case of a hardware error . . . . . . . . . . . . . . . . . . . . . . . . . . . . . . . . . . . .
Carrying out a system dump . . . . . . . . . . . . . . . . . . . . . . . . . . . . . . . . . . . . . . . . . . . . .
Measures to take in the case of defective I/O channels or I/O processors . . . . . . . . . .
Measures to take in the case of processing unit failure . . . . . . . . . . . . . . . . . . . . . . . . .
Measures to take in the case of defective MCU, SVP, SCI, PCI system components . .
Problems with the service/console processor (SKP) . . . . . . . . . . . . . . . . . . . . . . . . . . .
Important key combinations . . . . . . . . . . . . . . . . . . . . . . . . . . . . . . . . . . . . . . . . . . . . . .
91
91
92
93
93
94
96
97
98
Related publications . . . . . . . . . . . . . . . . . . . . . . . . . . . . . . . . . . . . . . . . . . . . . . . . . . 99
Index . . . . . . . . . . . . . . . . . . . . . . . . . . . . . . . . . . . . . . . . . . . . . . . . . . . . . . . . . . . . . . 101
U25339-J-Z126-1-7600
109
Eine Dokuschablone von Frank Flachenecker
by f.f. 1992
S130 Business Server
Operating Manual
Target group
The manual addresses privileged users (operators, system administrators) of the S130
Business Server.
Contents
The manual describes the hardware of the S130 Business Server insofar as it is required
for system operation. In addition, all SVP frames are described which are of interest for
system administration.
Edition: Jume 1997
File: S130.PDF
BS2000 is a registered trademark of Siemens Nixdorf Informationssyteme AG.
Copyright © Siemens Nixdorf Informationssysteme AG, 1997.
All rights, including rights of translation, reproduction by printing, copying or similar
methods, even of parts, are reserved.
Offenders will be liable for damages. All rights, including rights created by patent grant or
registration of a utility model or design, are reserved.
Delivery subject to availability; right of technical modifications reserved.
U25339-J-Z126-1-7600
111