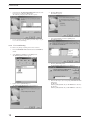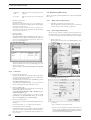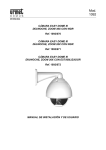
1
INSTRUCTION MANUAL
DIGITAL IMAGE PRINTER
PICTROGRAPHY
3500
PRINTER DRIVER SOFTWARE
Third Edition
PP3-B482E3
LICENSING AGREEMENT
1. Copyright
The copyright for this software is owned by Fuji Photo Film Co., Ltd. (“FUJI”).
2. Prohibitions
You may not (1) copy, modify or adapt any or all parts of this software; (2) provide this software
to a third party in the from of a copy, loan or gift; or (3) reverse engineer this software.
3. After-Sale Service
Should the software fail to function properly due to a defect in the medium within 7 (seven)
days after the date of purchase, please return the software to the place of purchase for a
replacement.
4. Exemptions
(1) FUJI does not guarantee that this software will achieve the results intended by the purchaser.
(2) FUJI is not liable for problems that arise from the quality or performance of this software.
(3) FUJI is not liable for damages incurred directly or indirectly by the purchaser or a third party
through the use of this software.
INTRODUCTION
● This manual gives procedures for installing and using the PICTROGRAPHY 3500 printer driver, as well as
several precautions.
● This software requires a SCSI adapter. Before installation, check that a functioning SCSI adapter has been
installed in your computer.
● For issues directly involving Windows, Macintosh, or other operating systems, please refer to the manual
provided with the particular operating system.
● The functions and screen contents presented in this manual are subject to change as software may be
upgraded at any time. Screen contents and set-up procedures may differ according to the operating environment which is employed (e.g. type of the OS or SCSI adapter).
● This manual may not be copied or transcribed in whole or in part without prior approval from the publisher.
●
●
●
●
●
Adobe Photoshop is a trademark of Adobe Systems Inc. in several nations.
Microsoft, Windows, and Windows NT are registered trademarks of Microsoft Corp. in the US and other countries.
Macintosh, Mac OS, and AppleTalk are registered trademarks of Apple Computer Inc.
PICTROGRAPHY is a registered trademark of Fuji Photo Film.
Other product and company names are registered trademarks of the respective companies.
1
CONTENTS
1. PRINTER DRIVER ........................................................................................................... 4
1.1
1.2
1.3
Outline .......................................................................................................................................... 4
Features ........................................................................................................................................ 4
Operating Environment ................................................................................................................. 4
2. PRECAUTIONS FOR USING THE PRINTER DRIVER ................................................... 5
2.1
Windows ....................................................................................................................................... 5
2.1.1 Setting up the PICTROGRAPHY ....................................................................................... 5
2.1.2 Installing the ASPI Manager .............................................................................................. 5
2.1.3 Network setup (for network printing).................................................................................. 5
2.1.3.1 Setting up a PC to function as a server ............................................................................... 5
2.1.3.2 Setting up a PC as a network client .................................................................................... 5
2.2
2.3
Macintosh (Mac OS 9 or earlier) ................................................................................................... 5
2.2.1 Setting up AppleTalk (to enable network printing) ............................................................. 5
2.2.2 Setup for file sharing (to enable network printing) ............................................................. 5
Macintosh (Mac OS X) .................................................................................................................. 5
3. INSTALLATION ................................................................................................................ 6
3.1
Windows 95 .................................................................................................................................. 6
3.1.1 Connecting the PICTROGRAPHY 3500 for the first time .................................................. 6
3.1.2 For Local Printing .............................................................................................................. 7
3.1.3 For Network Printing .......................................................................................................... 8
3.1.3.1 Installing to the server ......................................................................................................... 8
3.1.3.2 Installing to client computers ............................................................................................... 9
3.2
3.1.4 Uninstall ........................................................................................................................... 11
Windows 98 ................................................................................................................................ 11
3.2.1 Connecting the PICTROGRAPHY 3500 for the first time ................................................ 11
3.2.2 For Local Printing ............................................................................................................ 12
3.2.3 For Network Printing ........................................................................................................ 13
3.2.3.1 Installing to the server ....................................................................................................... 13
3.2.3.2 Installing to client computers ............................................................................................. 14
3.3
3.2.4 Uninstall ........................................................................................................................... 16
Windows NT 4.0 ......................................................................................................................... 16
3.3.1 For Local Printing ............................................................................................................ 16
3.3.2 For Network Printing ........................................................................................................ 19
3.3.2.1 Installing to the server ....................................................................................................... 19
3.3.2.2 Installing to client computers ............................................................................................. 19
3.4
3.3.3 Uninstall ........................................................................................................................... 20
Windows 2000 ............................................................................................................................ 20
3.4.1 For Local Printing ............................................................................................................ 20
3.4.2 For Network Printing ........................................................................................................ 24
3.4.2.1 Installing to the server ....................................................................................................... 24
3.4.2.2 Installing to client computers ............................................................................................. 25
3.5
3.4.3. Uninstall ........................................................................................................................... 26
Windows XP ............................................................................................................................... 26
3.5.1 For Local Printing ............................................................................................................ 27
3.5.2 For Network Printing ........................................................................................................ 30
3.5.2.1 Installing to the server ....................................................................................................... 31
3.5.2.2 Installing to client computers ............................................................................................. 31
3.5.3. Uninstall ........................................................................................................................... 33
2
3.6
Macintosh (Mac OS 9 or earlier) ................................................................................................. 33
3.6.1 For Local Printing ............................................................................................................ 33
3.6.2 For Network Printing ........................................................................................................ 33
3.6.2.1 Installing to the server ....................................................................................................... 33
3.6.2.2 Installing to client computers ............................................................................................. 34
3.7
3.6.3 Uninstall ........................................................................................................................... 35
Macintosh (Mac OS X) ................................................................................................................ 35
3.7.1 For Local Printing ............................................................................................................ 35
3.7.2 For Network Printing ........................................................................................................ 38
3.7.2.1 Installing to the server ....................................................................................................... 38
3.7.2.2 Installing to client computers ............................................................................................. 39
3.7.3 Uninstall ........................................................................................................................... 40
4. USING THE PRINTER DRIVER .................................................................................... 41
4.1
Windows ..................................................................................................................................... 41
4.1.1 Work flow through printing ............................................................................................... 41
4.1.2 Print setup and printing.................................................................................................... 41
4.1.3 Message Monitor ............................................................................................................. 43
4.1.4 Spooler ............................................................................................................................ 43
4.1.5 Printer folder .................................................................................................................... 44
4.1.5.1
4.1.5.2
4.1.5.3
4.1.5.4
4.2
4.3
Windows 95/98 .................................................................................................................. 44
Windows NT 4.0 ................................................................................................................ 46
Windows 2000 ................................................................................................................... 47
Windows XP ...................................................................................................................... 48
4.1.6 ICM .................................................................................................................................. 49
Macintosh (Mac OS 9 or earlier) ................................................................................................. 49
4.2.1 Work flow through printing ............................................................................................... 49
4.2.2 Print setup and printing.................................................................................................... 49
4.2.3 Different printing methods ............................................................................................... 51
4.2.4 Print Monitor .................................................................................................................... 51
4.2.5 ColorSync ........................................................................................................................ 52
Macintosh (Mac OS X) ................................................................................................................ 52
4.3.1 Work flow through printing ............................................................................................... 52
4.3.2 Print setup and printing.................................................................................................... 52
4.3.3 Print Center ..................................................................................................................... 54
4.3.3.1 Print Center Outline ........................................................................................................... 54
4.3.3.2 Checking the print status ................................................................................................... 54
4.3.3.3 Cancelling printing ............................................................................................................. 54
5. ERROR MESSAGES ..................................................................................................... 56
6. RESTRICTIONS ............................................................................................................ 58
6.1
6.2
6.3
Windows ..................................................................................................................................... 58
Macintosh ................................................................................................................................... 58
Others ......................................................................................................................................... 60
3
1. PRINTER DRIVER
1.1 Outline
The PICTROGRAPHY 3500 is capable of delivering ultrahigh,
image-quality prints having a near-photograph appearance coupled
with rich expressive power. Resolution is a high 400 dpi (max.)
and 16,700,000 colors are available, all implemented by a
laser-exposed thermal development transfer system (the silver
halide photographic system). As the PICTROGRAPHY 3500
is designed as environmentally-friendly, it does not require a
processing solution though it is the photographic system.
The PICTROGRAPHY 3500 Printer Driver is a driver software compatible with such diverse computer environments as Macintosh, Windows 95/98, Windows NT 4.0, Windows 2000 and Windows XP
among others.
Software
[Windows]
• ASPI Manager (ASPI Manager needs to be compatible with the
selected SCSI adapter) Ver. 4.01 or higher recommended
• OS
Windows 95: Some versions impose restrictions
Windows 98: With Service Pack 1 installed or second edition or
later.
Windows NT 4.0: With Service Pack 5 or later installed
Windows 2000
Windows XP
1.2 Features
The PICTROGRAPHY 3500 Printer Driver has the following features:
• Supports a variety of OSes.
Allows output of prints from diverse OS environments including
Macintosh, Windows 95/98, Windows NT 4.0, Windows 2000 and
Windows XP, etc.
• Easy-to-use user interfaces
Comes with user interfaces matched to varying OS environments
and allows the user to make fine adjustments to color outputs on
the driver.
1.3 Operating Environment
The PICTROGRAPHY 3500 Printer Driver runs in the personal computer operating environments detailed below:
Hardware
[Windows]
• Model: IBM PC/AT-compatible personal computer
• CPU: Pentium 133 MHz or newer
• Memory: 64MB or more
• HDD: 96MB or more of available space
• SCSI adapter: Adapter made by ADAPTEC (AHA-2910C, AHA2920C, AHA-2940AU, AHA-2940UW, AHA-1540CP, Slim SCSI1460D)
[Macintosh]
• Model: Power Macintosh or greater
• Memory: 5MB or more of available space
• HDD: 64MB or more of available space
• SCSI adapter: SCSI port provided standard on the main body
Adapter made by ADAPTEC (Power Domain 2940UW, Power
Domain 2930U, SCSIConnect2906).
4
[Macintosh]
• OS
Mac OS 7.6.1
Mac OS 8.1
Mac OS 8.6
Mac OS 9 (With some restrictions)
Mac OS X 10.2.1 or later
2. PRECAUTIONS FOR USING THE PRINTER DRIVER
This section explains various items that need to be set up before you can
use the printer driver.
2.1 Windows
2.1.1
Setting up the PICTROGRAPHY
The PICTROGRAPHY 3500 is shipped from the factory with its
device type set to [Printer]. To use the printer with Windows 95 (Version 4.00.950 or 4.00.950a), the device type setting on the
PICTROGRAPHY 3500 primary unit must be changed to [Processor]. Notice that, if you attempt to use the printer without changing
this setting, Windows 95 will not operate properly.
For information on setting this parameter, see the PICTROGRAPHY
3500 instruction manual.
2.1.2
Installing the ASPI Manager
The printer driver requires a SCSI connection between the
PICTROGRAPHY 3500 and your computer. In turn, the SCSI interface requires installation of the ASPI Manager software in addition
to the SCSI driver.
For information on installing the ASPI Manager, see the instruction
manual supplied with your SCSI interface adapter.
2.2 Macintosh (Mac OS 9 or earlier)
2.2.1
Setting up AppleTalk (to enable network
printing)
You need to set up AppleTalk to enable network (Ethernet) printing.
Set up both the server and client computers for AppleTalk, specifying [Ethernet] for the output path (port to be used).
For information on setting this parameter, refer to the Macintosh instruction manual.
2.2.2
Setup for file sharing (to enable network
printing)
Make the appropriate settings for file sharing if you plan to print
across a network (Ethernet).
These settings should permit client computers to access files on the
server. For these settings, refer to your Macintosh instruction manual.
2.3 Macintosh (Mac OS X)
You need to set up TCP/IP to enable network (Ethernet) printing.
Perform setup so as to permit the use of TCP/IP.
* With Windows 95 or Windows 98, ASPI Manager is automatically installed along with system software. Note that ASPI Manager is not automatically installed with Windows NT 4.0, Windows 2000 or Windows XP. Even with Windows 95/98, we recommend manually installing the latest version of ASPI Manager
to improve software reliability.
* Use ASPI Manager Version 4.01 or later.
* If you are currently running Windows 2000 or Windows XP, install ASPI Manager Version 4.70 or later.
2.1.3
Network setup (for network printing)
If you plan to print across a network, you need to make the appropriate network settings on your computer. This subsection covers only
the setup items required to this end. For information on setting these
parameters, see the instruction manual supplied with your copy of
Windows.
2.1.3.1
Setting up a PC to function as a server
• Windows 95/98:
Install a network protocol compatible with your network environment (e.g. TCP/IP).
To allow printer sharing, install the Microsoft network sharing services and make the appropriate settings. Click [File and Printer
Sharing] in the [Network] dialog displayed when you double-click
the [Network] icon on the [Control Panel]. Check [Enable Printer
Sharing] and click [OK].
• Windows NT 4.0:
Install a protocol compatible with your network environment (e.g.
TCP/IP).
• Windows 2000
Install a network protocol compatible with your network environment (e.g. TCP/IP).
• Windows XP
Install a network protocol compatible with your network environment (e.g. TCP/IP).
2.1.3.2
Setting up a PC as a network client
Install the same protocol installed on the server.
5
3. INSTALLATION
3.1 Windows 95
3.1.1
Connecting the PICTROGRAPHY 3500 for
the first time
• If Screen (2) appears:
1.
Insert the PICTROGRAPHY3500 Printer Driver CD-ROM into
the PC.
2.
Click the [Next] button.
The following appears:
3.
Click the [Other Locations...] button.
The [Select Other Location] dialog box is displayed.
4.
Enter the following location in the [Location] field.
For CE Type:
E:\Win95_98English\CE (*If your CD-ROM drive is E: drive)
For UC Type:
E:\Win95_98English\UC (*If your CD-ROM drive is E: drive)
Unless the printer driver is already installed, when you start your
computer with PICTROGRAPHY 3500 for the first time, one of the
following windows is displayed as Windows 95 starts, depending on
your specific version of Windows 95.
• Screen (1)
• Screen (2)
In this case, install the printer driver as explained below. If you would
rather install the printer driver at some later time, click the [Cancel]
button.
• If Screen (1) appears:
6
1.
Insert the PICTROGRAPHY3500 Printer Driver CD-ROM into
the PC.
2.
Select [Driver Provided by Hardware Manufacturer] and click
the [OK] button.
The [Install From Disk] dialog box is displayed.
3.
For the remainder of the installation procedure, skip to step 7 in
"3.1.2 For Local Printing".
5. Click the [OK] button.
The following appears:
for CE type
3. INSTALLATION
for UC type
6.
Click the [Finish] button.
The following is displayed when the file is copied:
In certain cases, the following prompt may be displayed when
you copy the file: [The file ‘PG35. DRV’ on Windows 95 CDROM could not be found. Insert Windows 95 CD-ROM
into the drive selected below, and click OK. ].
If you see this message, enter the following location and press
the [OK] button:
For CE Type:
E:\Win95_98English\CE (*If your CD-ROM drive is E: drive)
For UC Type:
E:\Win95_98English\UC (*If your CD-ROM drive is E: drive)
7.
3.1.2
2.
Select [Setting] > [Printer] from the [Start] menu.
The [Printers] folder window appears.
3.
Double-click the [Add Printer] icon.
The [Add Printer Wizard] dialog box is displayed.
4.
Click the [Next] button.
The following appears:
5.
Select [Local printer] and click the [Next] button.
The following appears:
For the remainder of the installation procedure, skip to step 10
in "3.1.2 For Local Printing".
For Local Printing
To enable local printing, install the printer driver as follows.
1.
Insert the PICTROGRAPHY3500 Printer Driver CD-ROM into
the PC.
7
3. INSTALLATION
6.
Click the [Have Disk] button.
The [Install From Disk] screen appears.
7.
Enter the following location in the [Copy manufacturer’s files
from:] field.
For CE Type:
E:\Win95_98English\CE (*If your CD-ROM drive is E: drive)
For UC Type:
E:\Win95_98English\UC (*If your CD-ROM drive is E: drive)
8.
Click the [OK] button.
The following appears:
10. Select [PICTRO SCSI: FUJIFILM PICTRO SCSI Port ] in
[Available ports:] and click the [Next] button.
The following appears:
11. Specify a printer name in the field currently displaying the name
of the default printer. You may select any printer in place of the
default printer.
If another printer is already installed, you will be prompted as
follows: "Use this printer as the default printer?" Select [Yes] or
[No].
After completing printer selection, click the [Finish] button.
12. If installation of the printer driver is complete, the icon for the
new printer will appear in the [Printers] folder, as shown below.
9.
Confirm that "FUJIFILM PICTROGRAPHY3500" appears in
the [Printers:] field and click the [Next] button.
The following is displayed when the file is copied:
13. Restart the computer.
3.1.3
For Network Printing
For network printing, install printer drivers in both the server and
client computers by the respective procedures described below.
3.1.3.1
8
Installing to the server
1.
To install the printer driver, follow steps 1. through 12. in "3.1.2
For Local Printing".
2.
Select [Setting] > [Printer] from the [Start] menu.
The [Printers] folder window appears.
3. INSTALLATION
3.
4.
Click the [FUJIFILM PICTROGRAPHY3500] icon and click
[Sharing...] on the [File] menu.
Select [Shared As:].
6.
Set a Share Name. The default Share Name is currently displayed
on the screen. You may select any printer in place of the default
printer. Enter the comment and password, if required.
After defining a Share Name, click the [OK] button.
7.
Restart the computer.
1.
Select [Setting] > [Printer] from the [Start] menu.
The [Printers] folder window appears.
3.
Double-click the [Add Printer] icon.
The [Add Printer Wizard] dialog box is displayed.
4.
Click the [Next] button.
The following appears:
5.
Select [Network printer] and click the [Next] button.
The following appears:
The [FUJIFILM PICTROGRAPHY3500 Properties] dialog
box is displayed.
5.
3.1.3.2
2.
Installing to client computers
The server should be started beforehand.
The printer driver must be installed in the server, and the server
and client should be linked across a network.
9
3. INSTALLATION
6.
Make the appropriate setting in [Network path or queue
name:].
Specify the server name to which the PICTROGRAPHY 3500
is connected on the network and its Share Name. For example,
if the computer name for the server is SERVER and the Share
Name for the PICTROGRAPHY 3500 connected to the server
is PG3500, enter the following:
\\SERVER\PG3500
You can also interactively select the printer by clicking the
[Browse...] button.
Clicking the [Browse...] opens the [Browse for Printer] window.
9.
Specify a printer name in the field currently displaying the name
of the default printer. You may select any printer in place of the
default printer.
If another printer is already installed, you will be prompted as
follows: "Use this printer as the default printer?" Select [Yes] or
[No].
After completing printer selection, click the [Next] button.
The following appears:
10. Following installation of the printer driver, select whether or
not to print a test page. Make your selection and click the [Finish] button.
11. If you selected to print the test page in step 10. above, the following screen appears. If the test page prints without problems,
click the [Yes] button. Otherwise, click the [No] button and perform troubleshooting, following the instructions provided onscreen.
7.
When the [Browse for Printer] window opens and the network
computer names appear, double-click to open the computer name
for the server linked to the PICTROGRAPHY 3500 and select a
sharing name for the printer.
Once you have selected the sharing name for the printer, click
the [OK] button.
You will be returned to the screen in step 5. The selected Share
Name for the printer will appear in the [Network path or queue
name:] field.
8.
After entering the [Network path or queue name:], click the
[Next] button.
The following appears:
12. If installation of the printer driver is complete, the icon for the
new printer will appear in the [Printers] folder window, as shown
below:
13. Restart the computer.
10
3. INSTALLATION
3.1.4
Uninstall
3.
Select [Search for best driver for your device [Recommended]
and click the [Next] button.
The following appears:
4.
Check [Specify a location] and enter the following location in
the field where the search location is specified.
For CE Type:
E:\Win95_98English\CE (*If your CD-ROM drive is E: drive)
For UC Type:
E:\Win95_98English\UC (*If your CD-ROM drive is E: drive)
The printer driver uninstall procedure is described below:
1. Select [Setting] > [Printer] from the [Start] menu. The [Printers] folder window appears.
2.
Click the [FUJIFILM PICTROGRAPHY3500] icon, then click
[Delete] from the [File] menu.
You will be prompted to confirm the delete. Click the [Yes] button.
3.
You may also be prompted as follows: "These files are no longer
needed. Delete?" If so, click the [Yes] button.
4.
This completes the uninstall.
3.2 Windows 98
3.2.1
Connecting the PICTROGRAPHY 3500 for
the first time
Unless the printer driver is already installed, when you start up your
computer with the PICTROGRAPHY 3500 connected for the first
time, the following screen is displayed when Windows 98 starts.
5. Click the [Next] button.
The following appears:
for CE type
You can install the printer driver by the procedure described below.
If you would rather install the printer driver at some later time, click
the [Cancel] button.
for UC type
1.
Insert the PICTROGRAPHY3500 Printer Driver CD-ROM into
the PC.
2.
Click the [Next] button.
The following appears:
11
3. INSTALLATION
6.
Confirm that the FUJIFILM PICTROGRAPHY3500 driver file
has been detected. Click the [Next] button.
The following is displayed when the file is copied:
7.
For the remainder of the installation procedure, skip to step 10
in "3.2.2 For Local Printing".
3.2.2
4.
Click the [Next] button.
The following appears:
5.
Select [Local printer] and click the [Next] button.
The following appears:
6.
Click the [Have Disk] button.
The [Install From Disk] dialog box is displayed.
7.
Enter the following location in the [Copy manufacturer’s files
from:] field.
For CE Type:
E:\Win95_98English\CE (*If your CD-ROM drive is E: drive)
For UC Type:
E:\Win95_98English\UC (*If your CD-ROM drive is E: drive)
For Local Printing
To enable local printing, install the printer driver as follows.
1.
Insert the PICTROGRAPHY3500 Printer Driver CD-ROM into
the PC.
2.
Select [Setting] > [Printer] from the [Start] menu.
The [Printers] folder window appears.
3.
12
Double-click the [Add Printer] icon.
The [Add Printer Wizard] dialog box is displayed.
3. INSTALLATION
8.
Click the [OK] button.
The following appears:
9.
Confirm that "FUJIFILM PICTROGRAPHY3500" appears in
the [Printers:] field and click the [Next] button.
The following is displayed when the file is copied:
12. If installation of the printer driver is complete, the icon for the
new printer appears in the [Printers] folder window.
13. Restart the computer.
3.2.3
For Network Printing
For network printing, install printer drivers in both the server and
client computers by the respective procedures described below.
3.2.3.1
10. Select [PICTRO SCSI: FUJIFILM PICTRO SCSI Port] in
[Available ports:] and click the [Next] button.
The following appears:
Installing to the server
1.
To install the printer driver, follow steps 1. through 12. in "3.2.2
For Local Printing".
2.
Select [Setting] > [Printer] from the [Start] menu.
The [Printers] folder window appears.
3.
Click the [FUJIFILM PICTROGRAPHY3500] icon and click
[Sharing...] on the [File] menu.
11. Specify a printer name in the field currently displaying the name
of the default printer. You may select any printer in place of the
default printer.
If another printer is already installed, you will be prompted as
follows: "Use this printer as the default printer?" Select [Yes] or
[No].
After completing printer selection, click the [Finish] button.
13
3. INSTALLATION
4.
The [FUJIFILM PICTROGRAPHY3500 Properties] dialog
box is displayed.
5.
Select [Shared As:].
6.
Set a Share Name. The current default Share Name is displayed.
You may select any printer in place of the default printer. Enter
the comment and password, if required.
After defining the Share Name, click the [OK] button.
7.
Restart the computer.
3.2.3.2
Installing to client computers
1. Start the server computer.
The printer driver should already be installed in the server, and
the server and client should be linked across a network.
2.
14
Select [Setting] > [Printer] from the [Start] menu.
The [Printers] folder window appears.
3.
Double-click the [Add Printer] icon.
The [Add Printer Wizard] dialog box is displayed.
4.
Click the [Next] button.
The following appears:
5.
Select [Network printer] and click the [Next] button.
The following appears:
3. INSTALLATION
6.
Make the appropriate setting in [Network path or queue name:].
Specify the server to which the PICTROGRAPHY 3500 is connected on the network and its sharing name. For example, if the
computer name for the server is SERVER and the Share Name
for the PICTROGRAPHY 3500 connected to the server is
PG3500, enter the following:
\\SERVER\PG3500
You can also interactively select the printer by clicking the
[Browse...] button.
Clicking the [Browse...] opens the [Browse for Printer] window.
9.
Specify a printer name in the field currently displaying the name
of the default printer. You may select any printer in place of the
default printer.
If another printer is already installed, you will be prompted as follows: "Use this printer as the default printer?" Select [Yes] or [No].
After completing printer selection, click the [Next] button.
The following appears:
10. Following installation of the printer driver, select whether or
not to print a test page. Make your selection and click the [Finish] button.
11. If you selected to print the test page in step 10. above, the following screen appears. If the test page prints without problems,
click the [Yes] button. Otherwise, click the [No] button and perform troubleshooting as instructed on-screen.
7.
When the [Browse for Printer] window opens and the network
computer names appear, double-click to open the computer name
for the server connected to the PICTROGRAPHY 3500, and
select the Share Name for the printer.
Once you have selected the Share Name for the printer, click the
[OK] button.
You will be returned to the screen in step 5. The selected sharing
name for the printer is displayed in the [Network path or queue
name:] field.
8.
After entering the [Network path or queue name:], click the
[Next] button.
The following appears:
12. If installation of the printer driver is complete, the icon for the new
printer will appear in the [Printers] folder window, as shown below:
13. Restart the computer.
15
3. INSTALLATION
3.2.4
Uninstall
4.
Select [My Computer] and click the [Next] button.
The following appears:
5.
Click the [Add Port...] button.
The [Printer Ports] dialog box appears:
6.
Click the [New Monitor...] button.
The [Installing Print Monitor] dialog box is displayed.
The printer driver uninstall procedure is described below:
1.
Select [Setting] > [Printer] from the [Start] menu. The [Printers] folder window is displayed.
2.
Click the [FUJIFILM PICTROGRAPHY3500] icon, then click
[Delete] from the [File] menu.
You will be prompted to confirm the delete. Click the [Yes] button.
3.
You may also be prompted as follows: "These files are no longer
needed. Delete?" If so, click the [Yes] button.
4.
This completes the uninstall.
3.3 Windows NT 4.0
Installing printer drivers in Windows NT 4.0 must be performed by a
user assigned to the Administrators' Group.
3.3.1
For Local Printing
To enable local printing, install the printer driver as follows.
1.
Insert the PICTROGRAPHY3500 Printer Driver CD-ROM into
the PC.
2.
Select [Setting] > [Printer] from the [Start] menu.
The [Printers] folder window is displayed.
3.
16
Double-click the [Add Printer] icon.
The [Add Printer Wizard] dialog box is displayed.
3. INSTALLATION
7.
Enter the following location in the [Copy manufacturer’s files
from:] field.
For CE Type:
E:\Win95_98English\CE (*If your CD-ROM drive is E: drive)
For UC Type:
E:\Win95_98English\UC (*If your CD-ROM drive is E: drive)
10. Confirm that [PICTRO SCSI:] in [Available ports:] is checked
and click the [Next] button.
The following appears:
11. Click the [Have Disk] button.
The [Install From Disk] dialog box is displayed.
8.
Confirm that [FUJIFILM PICTRO SCSI Port] appears in the
[Available Printer Ports:] field and click the [New Port...] button.
The following appears when the file is copied.
12. Enter the following location in the [Copy manufacturer’s files
from:] field.
For CE Type:
E:\Win95_98English\CE (*If your CD-ROM drive is E: drive)
For UC Type:
E:\Win95_98English\UC (*If your CD-ROM drive is E: drive)
13. Click the [OK] button.
The following appears:
9.
Click the [Close] button.
The following appears:
17
3. INSTALLATION
14. Confirm that "FUJIFILM PICTROGRAPHY3500" appears in
the [Printers:] field and click the [Next] button.
The following appears.
17. Following installation of the printer driver, select whether or
not to print a test page. Make your selection and click the [Finish] button.
The file is copied.
18. If you selected to print the test page in step 17. above, the following screen appears. If the test page prints without problems,
click the [Yes] button. Otherwise, click the [No] button and perform troubleshooting as instructed on-screen.
15. Specify a printer name in the field currently displaying the name
of the default printer. You may select any printer in place of the
default printer.
If another printer is already installed, you will be prompted as
follows: "Use this printer as the default printer?" Select [Yes] or
[No].
After completing printer selection, click the [Next] button.
The following appears:
19. If installation of the printer driver is complete, the icon for the
new printer will appear in the [Printers] folder window, as shown
below:
16. Select [Not shared] and click the [Next] button.
The following appears:
18
20. Restart the computer.
3. INSTALLATION
3.3.2
For Network Printing
4.
Select [Network printer server] and click the [Next] button.
The [Connect to Printer] dialog box appears:
5.
Enter a network path in the [Printer:] field and specify the server
to which the PICTROGRAPHY 3500 is connected on the network and its Share Name.
For example, if the computer name for the server is SERVER
and the Share Name for the PICTROGRAPHY 3500 connected
to the server is PG3500, enter the following:
\\SERVER\PG3500
You can also select the name of a computer connected to the
network shown in the [Shared Printers:] field. In this case,
double-click the computer name for the server to which the
PICTROGRAPHY 3500 is connected to open it. Select a Share
Name for the printer. This selection sets that network path in the
[Printer:] field.
Once the network path is entered in the [Printer:] field, click the
[OK] button.
6.
If another printer is already installed, the following screen appears.
For network printing, install printer drivers in both the server and
client computers by the respective procedures described below.
3.3.2.1
1.
Installing to the server
To install the printer driver, follow steps 1. through 15. in "3.3.1
For Local Printing".
The following appears:
Then continue installation by the procedure described below.
2.
Select [Shared].
Set a Share Name. The default Share Name is currently displayed.
You may select any printer in place of the default printer.
After defining the sharing name, click the [Next] button.
3.
Continue installation of the printer driver in accordance with
the procedure described in step 17. and the subsequent steps in
"3.3.1 For Local Printing".
3.3.2.2
Installing to client computers
1.
Start the server computer.
The printer driver should already be installed in the server, and
the server and client computers should be linked across a network.
2.
Select [Setting] > [Printer] from the [Start] menu.
The [Printers] folder window is displayed.
3.
Double-click the [Add Printer] icon.
The [Add Printer Wizard] dialog box is displayed.
19
3. INSTALLATION
7.
Choose either [Yes] or [No]. Click the [Next] button.
The following appears:
3.4 Windows 2000
Note the following when installing the printer driver in Windows
2000:
*
*
3.4.1
8.
9.
3.3.3
Click the [Finish] button.
If installation of the printer driver is complete, the icon for the
new printer will appear in the [Printers] folder window.
You must be logged on as a user assigned to the Administrators’
Group.
In the [File signature verification] field in the [Driver Signing
Option] dialog box, check to make sure that either [Ignore-Install all file, regardless of file signature] or [Warm-Display
a message before installing an unsigned file] is specified.
To display the [Driver Signing Option] dialog box, click the
[Control Panel] > [System] > [Hardware] tabs, then click the
[Driver Signing] button.
For Local Printing
To enable local printing, install the printer driver as follows:
1.
Insert the PICTROGRAPHY3500 Printer Driver CD-ROM into
the PC.
2.
Click to select [Settings] > [Printers] from the [Start] menu.
The [Printers] folder window is displayed.
3.
Install [PICTRO SCSI Port].
Click [File] > [Server Properties] in the [Printers] folder.
This displays the [Print Server Properties] dialog box.
Click the [Ports] tab.
The following appears.
Restart the computer.
Uninstall
The printer driver uninstall procedure is described below:
1.
Delete the printer.
Click to select [Setting] > [Printer] from the [Start] menu.
The [Printers] folder window is displayed.
2.
Click the [FUJIFILM PICTROGRAPHY3500] icon, then click
[Delete] from the [File] menu.
You will be prompted to confirm the delete. Click the [Yes] button.
3.
Delete [PICTRO SCSI Port].
In the [Printers] folder window, click [Server Properties] from
the [File] menu.
The [Print Server Properties] dialog box is displayed.
4.
Click the [Ports] tab.
Click [PICTRO SCSI:] from the list of [Ports on this Server],
then click the [Delete Port] button.
You will be prompted to confirm the deletion. Click the [Yes]
button.
20
3. INSTALLATION
4.
Click the [Add Port] button.
The [Printer Ports] dialog box is displayed.
5.
Click the [New Port Type].
The [Installing Print Monitor] dialog box is displayed.
6.
Enter
CE Type
D:\Win2k_XP\English\CE (*If your CD-ROM drive is D: drive)
in the [Copy files from:] field.
UC Type
D:\Win2k_XP\English\UC (*If your CD-ROM drive is D: drive)
in the [Copy files from:] field.
Click the [OK] button.
The following appears.
7.
Confirm that [FUJIFILM PICTRO SCSI Port] appears in the
[Available port types;] field, and then click the [New Port]
button.
The following is displayed when the file is copied.
8.
Confirm that [PICTRO SCSI:] appears in [Ports on this
server], and then click the [Close] button.
This completes the installation of [PICTRO SCSI Port].
21
3. INSTALLATION
9.
Now install the printer.
Click the [Add Printer] icon in the [Printers] folder window.
The [Add Printer Wizard] dialog box is displayed.
10. Click the [Next] button.
The following appears.
12. Select [Use the following port], and then click to select
[PICTRO SCSI:] from the list of ports.
Click the [Next] button.
The following appears.
13. Click the [Have Disk] button.
The [Install From Disk] dialog box is displayed.
Enter:
CE Type
D:\Win2k_XP\English\CE (*If your CD-ROM drive is D: drive)
into the [Copy manufacturer’s files from:] field.
11. Select [Local Printer] and uncheck [Automatically detect and
install my plug and Play printer].
Click the [Next] button.
The following appears.
UC Type
D:\Win2k_XP\English\UC (*If your CD-ROM drive is D: drive)
into the [Copy manufacturer’s files from:] field.
22
3. INSTALLATION
14. Click the [OK] button.
The following appears.
15. Confirm that "FUJIFILM PICTROGRAPHY3500" appears in
the [Printers:] field and click the [Next] button.
The following appears.
16. Specify a printer name in the field where the name of the default
printer is currently displayed. You may select any printer to
replace the default printer.
If another printer is installed, you will be prompted as follows:
"Use this printer as the default printer?", select [Yes] or [No].
After completing printer selection, click the [Next] button.
The following appears.
17. Select [Do not share this printer], and then click the [Next]
button.
The following appears.
18. Choose to print or not print a test page following the completion
of printer driver installation. Make your selection and click the
[Next] button.
The following appears.
19. Click the [Finish] button.
In certain cases, this will display the [Digital Signature Not
Found] dialog box, prompting you as follows: “Continue the
installation?” (figure below). If this message appears, click [Yes]
to continue with the installation.
The file is copied.
23
3. INSTALLATION
20. If you chose to print the test page in step 18, the following screen
is displayed.
If the test page prints without problems, click the [Yes] button.
Otherwise, click the [Troubleshoot] button and perform troubleshooting as instructed on-screen.
21. If installation of the printer driver finishes without problems,
the icon for the new printer appears in the [Printers] folder window, as shown below:
[Installation Procedure]
(1) Install the printer driver to the server computer (Windows NT
4.0) as described in "3.3.2.1 Installing to the server."
(2) Install the printer driver to client computers as described in
"3.4.2.2 Installing to client computers." Do not execute [Print
Test Page].
(3) Click to select [Setting] > [Printer] from the [Start] menu.
This displays the [Printers] folder. Click the [FUJIFILM
PICTROGRAPHY3500] icon and click [Properties] in the
[File] menu.
This displays the [FUJIFILM PICTROGRAPHY3500 Properties] dialog box.
(4) Click the [Advanced] tab.
Click the [New Driver] button.
This displays the [Add Printer Driver Wizard] dialog box.
(5) Click the [Next] button.
From this point, continue installing the printer driver as described
in 13. , with subsequent steps as described in "3.4.1 For Local
Printing".
3.4.2.1
1.
22. Restart the computer.
This completes the installation of the printer driver.
3.4.2
For Network Printing
For network printing, install printer drivers on both server and client
computers by the following procedures:
•
Precautions on the running of Windows NT 4.0 on the server
computer and Windows 2000 on the client computer.
When the printer driver is installed under the following conditions, the Windows NT 4.0 printer driver may end up being installed on a machine running Windows 2000. To avoid this, take
care to follow the installation procedures given below when installing printer drivers under these conditions.
[Conditions]
*
*
24
The server computer is running Windows NT 4.0.
The client computers are running Windows 2000. The Windows
2000 PG3500 printer driver is not yet installed on the client computers.
Installing to the server
When you are running Windows 2000 on the server computer,
install the printer driver to the server by doing steps 1 through
16 in "3.4.1 For Local Printing".
The following appears.
Then continue the installation by following the procedures described below.
2.
Select [Share as].
Set a share name. The default share name is currently displayed.
You may select any printer to replace the default printer.
After defining the share name, click the [OK] button.
The following appears.
3. INSTALLATION
3.
Enter the location of the printer in the [Location] field and the
description of the printer in the [Comment] field, or click the
[Next] button without entering anything.
4.
Continue installation of the printer driver according to the procedure described in step 18 and subsequent steps in "3.4.1 For
Local Printing".
3.4.2.2
Select [Network Printer], then click the [Next] button.
The [Locate Your Printer] dialog box is displayed.
6.
Select [Type the printer name, or click Next to browse for a
printer].
Enter a network path in the [Name] field, or click the [Next]
button without entering anything.
If you enter a network path, specify the server to which the
PICTROGRAPHY 3500 is connected on the network and its
share name. For example, if the computer name of the server is
"SERVER" and the share name for the PICTROGRAPHY 3500
connected to the server is "PG3500", enter the following:
\\SERVER\PG3500
Installing to client computers
1.
Start the server computer.
The printer driver should already be installed on the server, and
the server and client should be linked across a network.
2.
Click to select [Settings] > [Printers] from the [Start] menu.
The [Printers] folder window is displayed.
3.
5.
Double-click the [Add Printer] icon.
The [Add Printer Wizard] dialog box is displayed.
If you entered nothing in the [Name] field, the following screen
is displayed:
4.
Click the [Next] button.
The following appears.
25
3. INSTALLATION
The [Shared Printer] field displays the names of the computers
connected to the network. Double-click the name of the server
to which the PICTROGRAPHY 3500 is connected. Select a
share name for the printer.
This selection sets the network path in the [Printer] field.
After confirming that the network path has been set in the
[Printer] field, click the [Next] button.
7.
9.
Click the [Finish] button.
If installation of the printer driver finishes without problems,
the icon for the new printer appears in the [Printers] folder window.
10. Restart the computer.
This completes the installation of the printer driver.
The following screen is displayed.
3.4.3. Uninstall
The printer driver uninstall procedure is described below.
8.
Select [Yes] or [No], and then click the [Next] button.
The following screen is displayed.
1.
Start by deleting the printer.
Click to select [Setting] > [Printer] from the [Start] menu.
The [Printers] folder window is displayed.
2.
Click the [FUJIFILM PICTROGRAPHY3500] icon, and then
click [Delete] from the [File] menu.
You will be prompted to confirm the deletion. Click the [Yes]
button.
3.
Delete [PICTRO SCSI Port].
In the [Printers] folder window, click [Server Properties] from
the [File] menu.
The [Print Server Properties] dialog box is displayed.
4.
Click the [Ports] tab.
Click [PICTRO SCSI:] in the list of [Ports on this Server],
and then click the [Delete Port] button.
You will be prompted to confirm the deletion. Click the [Yes]
button.
This completes the uninstall of the printer driver.
3.5 Windows XP
Note the following when installing the printer driver in Windows XP:
*
*
26
You must be logged on as a user assigned to the Administration
Group.
In the [What action do you want Windows to take?] field in
the [Driver Signing Options] dialog box, check to make sure
that either [Ignore - Install the software anyway and don’t
ask for my approval] or [Warn - Prompt me each time to
choose an action] is specified. To display the [Driver Signing
Options] dialog box, click the [Control Panel] > [System] >
[Hardware] tabs, then click the [Driver Signing] button.
3. INSTALLATION
3.5.1
For Local Printing
5.
Click the [New Port Type].
The [Installing Print Monitor] dialog box is displayed.
6.
Enter
To enable local printing, install the printer driver as follows.
1.
Insert the PICTROGRAPHY3500 Printer Driver CD-ROM into
the PC.
2.
Click to select [Printers and Faxes] from the [Start] menu.
The [Printers and Faxes] folder window is displayed.
CE Type
D:\Win2k_XP\English\CE (*If your CD-ROM drive is D: drive)
in the [Copy files from:] field.
3.
Install [PICTRO SCSI Port].
Click [File] > [Server Properties] in the [Printers and Faxes]
folder.
This displays the [Print Server Properties] dialog box.
Click the [Ports] tab.
The following appears.
UC Type
D:\Win2k_XP\English\UC (*If your CD-ROM drive is D: drive)
in the [Copy files from:] field.
Click the [OK] button.
The following appears.
4.
Click the [Add Port] button.
The [Printer Ports] dialog box is displayed.
27
3. INSTALLATION
7.
Confirm that [FUJIFILM PICTRO SCSI Port] appears in the
[Available port types] field, click the [New Port] button, and
then click the [Close] button.
The following is displayed when the file is copied.
10. Click the [Next] button.
The following appears.
11. Select [Local printer attached to this computer] and uncheck
[Automatically detect and install my Plug and Play printer].
Click the [Next] button.
The following appears.
8.
Confirm that [PICTRO SCSI:] appears in [Ports on this
server], and then click the [Close] button.
This completes the installation of [PICTRO SCSI Port].
9.
Now install the printer.
Click the [Add a printer] icon in the [Printers and Faxes] folder
window.
The [Add Printer Wizard] dialog box is displayed.
12. Select [Use the following port], and then click to select
[PICTRO SCSI: (FUJIFILM PICTRO SCSI Port)] from the
list of ports.
28
3. INSTALLATION
13. Click the [Next] button.
The following appears.
16. Click the [OK] button.
The following appears.
14. Click the [Have Disk] button.
The [Install From Disk] dialog box is displayed.
17. Confirm that "FUJIFILM PICTROGRAPHY3500" appears in
the [Printers:] field and click the [Next] button.
The following appears.
15. Enter:
CE Type
D:\Win2k_XP\English\CE (*If your CD-ROM drive is D: drive)
into the [Copy manufacturer’s files from] field.
18. Specify a printer name in the field where the name of the default
printer is currently displayed. You may select any printer to replace the default printer.
If another printer is installed, you will be prompted as follows:
"Use this printer as the default printer?", select [Yes] or [No].
After completing printer selection, click the [Next] button.
The following appears.
UC Type
D:\Win2k_XP\English\UC (*If your CD-ROM drive is D: drive)
into the [Copy manufacturer’s files from] field.
29
3. INSTALLATION
19. Select [Do not share this printer], and then click the [Next]
button.
The following appears.
20. Choose to print or not print a test page following the completion
of printer driver installation. Make your selection and click the
[Next] button.
The following appears.
21. Click the [Finish] button.
In certain cases, this will display the [Hardware Installation]
dialog box, prompting you as the figure below. If this message
appears, click [Yes] to continue with the installation.
The file is copied.
22. If you chose to print the test page in step 20, the following screen
is displayed.
If the test page prints without problems, click the [Yes] button.
Otherwise, click the [Troubleshoot] button and perform troubleshooting as instructed on-screen.
23. If the installation of the printer driver finishes without problems,
the icon for the new printer appears in the [Printers and Faxes]
folder window, as shown below.
24. Restart the computer.
This completes the installation of the printer driver.
3.5.2
For Network Printing
For network printing, install printer drivers on both server and client
computers by the following procedures:
•
Precautions on the running of Windows NT 4.0 on the server
computer and Windows XP on the client computer.
When the printer driver is installed under the following conditions, the Windows NT 4.0 printer driver may end up being installed on a machine running Windows XP. To avoid this, take
care to follow the installation procedures given below when installing printer drivers under these conditions.
[Conditions]
*
*
30
The server computer is running Windows NT4.0.
The client computers are running Windows XP. The Windows
XP PG3500 printer driver is not yet installed on the client computers.
3. INSTALLATION
[Installation Procedure]
(1) Install the printer driver to the server computer (Windows NT
4.0) as described in "3.3.2.1 Installing to the server."
(2) Install the printer driver to the client computers as described in
"3.5.2.2 Installing to client computers." Do not execute [Print
Test Page].
(3) Click to select [Printers and Faxes] from the [Start] menu.
This displays the [Printers and Faxes] folder. Click the
[FUJIFILM PICTROGRAPHY3500] icon and then click [Properties] in the [File] menu.
This displays the [FUJIFILM PICTROGRAPHY3500 Properties] dialog box.
(4) Click the [Advanced] tab.
Click the [New Driver] button.
This displays the [Add Printer Driver Wizard] dialog box.
(5) Click the [Next] button.
From this point, continue installing the printer driver as described
in 14., with subsequent steps as described in "3.5.1 For Local
Printing".
3.5.2.1
1.
3.
Enter the location of the printer in the [Location] field and the
description of the printer in the [Comment] field, or click the
[Next] button without entering anything.
4.
Continue installation of the printer driver according to the procedure described in step 20 and subsequent steps in "3.5.1 For
Local Printing".
3.5.2.2
Installing to client computers
1.
Start the server computer.
The printer driver should already be installed on the server, and
the server and client should be linked across a network.
2.
Click to select [Printers and Faxes] from the [Start] menu.
The [Printers and Faxes] folder window is displayed.
3.
Click the [Add a printer] icon.
The [Add Printer Wizard] dialog box is displayed.
4.
Click the [Next] button.
The following appears.
Installing to the server
When you are running Windows XP on the server computer,
install the printer driver to the server by doing steps 1 through
18 in "3.5.1 For Local Printing".
The following appears.
Then continue the installation by following the procedures described below.
2.
Select [Share name].
Set a share name. The default share name is currently displayed.
You may select any printer to replace the default printer.
After defining the share name, click the [OK] button.
The following appears.
31
3. INSTALLATION
5.
Select [A network printer, or a printer attached to another
computer], and then click the [Next] button.
The [Specify a Printer] dialog box is displayed.
6.
Select [Connect to this printer (or to browse for a printer,
select this option and click Next)].
Enter a network path in the [Name] field, or click the [Next]
button without entering anything.
If you enter a network path, specify the server to which the
PICTROGRAPHY 3500 is connected on the network and its
share name. For example, if the computer name of the server is
"SERVER" and the share name for the PICTROGRAPHY 3500
connected to the server is "PICTRO", enter the following:
\\SERVER\PICTRO
If you entered nothing in the [Name] field, the following screen
is displayed:
32
The [Shared printers] field displays the names of the computers connected to the network. Double-click the name of the server
to which the PICTROGRAPHY 3500 is connected. Select a share
name for the printer.
This selection sets the network path in the [Printer] field.
After confirming that the network path has been set in the
[Printer] field, click the [Next] button.
7.
The following appears.
8.
Select [Yes] or [No], and then click the [Next] button.
The following appears.
3. INSTALLATION
9.
Click the [Finish] button.
If installation of the printer driver finishes without problems,
the icon for the new printer appears in the [Printers and Faxes]
folder window.
3.
Copy files 1) through 3) above to the [Extensions] folder in the
System Folder. Copy the [PictroGraphy] folder including all
its files.
4.
Copy the file 4) above to the [ColorSync Profiles] folder in the
System Folder.
*
Since the printer driver supports ColorSync Version 2.5 or later,
it may be used with Mac OS 8.5 and later versions.
5.
Check to confirm that the files were copied to the following
locations:
10. Restart the computer.
This completes the installation of the printer driver.
3.5.3
Uninstall
The printer driver uninstall procedure is described below.
1.
Start by deleting the printer.
Click to select [Printers and Faxes] from the [Start] menu.
The [Printers and Faxes] folder window is displayed.
2.
Click the [FUJIFILM PICTROGRAPHY3500] icon, and then
click [Delete] from the [File] menu.
You will be prompted to confirm the deletion. Click the [Yes]
button.
3.
Delete [PICTRO SCSI Port].
In the [Printers and Faxes] window, click [Server Properties] from the [File] menu.
The [Print Server Properties] dialog box is displayed.
4.
Click the [Ports] tab.
Click [PICTRO SCSI:] in the list of [Ports on this server],
and then click the [Delete Port] button.
You will be prompted to confirm the deletion. Click the [Yes]
button.
This completes the uninstall of the printer driver.
3.6 Macintosh (Mac OS 9 or earlier)
3.6.1
For Local Printing
To enable local printing, install the printer driver as follows.
1.
Insert the PICTROGRAPHY3500 Printer Driver CD-ROM into
the PC.
2.
The following files are contained in the [English] folder within
the CD-ROM [Mac] folder.
1) PictroGraphy 3500
2) PGLauncher
3) PictroGraphy folder (containing PG3500.lib and PGMonitor.)
4) Pictrography3500 PG-D_ER
PictroGraphy 3500
→System Folder: Extensions
PGLauncher
→System Folder: Extensions
PictroGraphy folder
→System Folder: Extensions
PG3500.lib
→System Folder: Extensions: PictroGraphy
PGMonitor
→System Folder: Extensions: PictroGraphy
Pictrography 3500 PG-D_ER
→System Folder: Extensions: ColorSync Profiles
6.
3.6.2
Restart the computer.
For Network Printing
For network printing, install printer drivers in both the server and
client computers by the respective procedures described below.
3.6.2.1
Installing to the server
1.
Connect the PICTROGRAPHY 3500 to the computer and start.
To carry out the procedures described in step 7. and the subsequent steps, the PICTROGRAPHY 3500 must already be connected to the computer.
2.
To install the printer driver, follow steps 1. through 5. in "3.6.1
For Local Printing".
3.
Open the [Extensions] folder in the System Folder.
33
3. INSTALLATION
4.
Click the installed (copied) [PictroGraphy] folder and open the
[Sharing] menu in the Finder.
With Mac OS 8.5 or later versions, select the [File] > [View
Information] > [Sharing] menu in the Finder.
With earlier Mac OS versions, select the [File] > [Sharing] menu
in the Finder.
The following screen appears:
5.
Check in [Share this item and its contents].
To allow users to read and write to the [PictroGraphy] folder,
set [Privilege] for the owner and users who will print to [Read/
Write].
Close the window when setup is complete.
6.
Restart the computer.
7.
As the Macintosh restarts, the Apple menu [Chooser] will open.
8.
Click [PictroGraphy 3500].
The following screen appears.
9.
Click [ID: n] (the SCSI-ID value of the connected
PICTROGRAPHY 3500 appears in the area of n) of [Output
path selection:].
10. Turn [Background printing:] to [On].
11. Confirm that [AppleTalk] is [Active] and close [Chooser].
34
3.6.2.2
Installing to client computers
1.
The server should be started beforehand.
The server should already have printer drivers installed, with
sharing settings set in the [PictroGraphy] folder. The server
should also be connected to the PICTROGRAPHY 3500 and to
any client computers on the network.
2.
To install the printer driver, follow steps 1. through 6. in "3.6.1
For Local Printing".
3.
Open [Chooser] from the Apple menu.
The following screen appears:
4.
Confirm that [AppleTalk] is [Active], click [AppleShare], and
select the server.
Click the [OK] button.
The following screen appears.
5.
Enter the required items and click the [Connect] button.
The following screen appears.
3. INSTALLATION
6.
Choose the [PictroGraphy] folder and click the [OK] button.
This places the server's [PictroGraphy] folder on the desktop.
3.7 Macintosh (Mac OS X)
3.7.1
For Local Printing
To enable local printing, install the printer driver by performing the
following procedure:
7.
Choose the [PictroGraphy 3500] folder on the desktop and click
the [Selection: PictroGraphy] button.
9.
You will be returned to the [Chooser] window. Confirm that
[PictroGraphy 3500] and [Network Printer] are currently selected, then close [Chooser].
1.
Insert the PICTROGRAPHY3500 Printer Driver CD-ROM into
the PC.
2.
Open the [Mac OS X] folder on the CD-ROM.
The following appears.
3.
Double-click the "PG3500SCSI Install.pkg" file in the "Mac OS
X" folder.
The following dialog box appears.
4.
Enter the administrator's name and password, and then click the
[OK] button.
The following dialog box appears.
Click [PictroGraphy 3500] in the [Chooser] window.
You will be prompted as follows: "Connection to server not set.
Set an appropriate server". Click the [OK] button. If this prompt
does not appear and the [Chooser] window remains open, select [Network Printer] and click the [Set] button.
The following screen appears:
8.
3.6.3
1.
Uninstall
Drag the following files previously installed in the [Extensions]
folder in the Macintosh System Folder to the Trash box on the
desktop.
PictroGraphy 3500
PGLauncher
PictroGraphy folder (with all files found in the folder)
2.
Restart the computer.
35
3. INSTALLATION
5.
Click the [Continue] button.
The following dialog box appears.
When the installation of PICTROGRAPHY 3500 Printer Driver for
Mac OS X is completed, perform settings for making prints with the
PICTROGRAPHY 3500 that is connected to the computer.
10. Confirm that the PICTROGRAPHY 3500 and the computer are
connected properly.
11. Turn ON the PICTROGRAPHY 3500 and wait until the "Self
Check" message appears on the LCD display.
When network printing is not performed, proceed to Step 14.
12. Select [System Preferences] from the Apple menu.
6.
Select a destination volume to install the printer driver and then
click the [Continue] button.
The following dialog box appears.
The [System Preferences] window appears.
7.
Click the [Install] button.
The following dialog box appears.
8.
Click the [Continue Installation] button.
When installation is completed, the following appears.
9.
Click the [Restart] button to restart the computer.
Installation of PICTROGRAPHY 3500 Printer Driver for Mac OS X
is completed.
36
3. INSTALLATION
13. Click [Network].
The [Network] window appears.
Select [Built-in Ethernet] from the [Show] pop-up menu and
then click the [TCP/IP] tab.
The following appears.
Confirm that the TCP/IP settings are correct, and then close the
window.
The [Print Center] icon is added as an item in Dock.
16. Click the [Print Center] icon in Dock.
The [Printer List] window appears.
14. Open the [Applications]>[Utilities] folders on the hard disk. The
following appears.
*
If the "You have no printers available" message is displayed,
press the [Add...] button and then proceed to the next step.
17. Click the [Add] button.
The following appears.
15. Drag the [Print Center] file to Dock on the desktop.
37
3. INSTALLATION
18. Select [FUJIFILM Pictro SCSI] from the pop-up menu.
When a PICTROGRAPHY 3500 connected to the computer is
found, its printer name is displayed on the [Product] column.
3.7.2
For Network Printing
For network printing, install printer drivers on both server and client
computers by the following procedures:
*
3.7.2.1
For network printing, Mac OS X 10.2.1 or later must be running
on both server and client computers.
Installing to the server
1.
To install the printer driver, follow Steps 1. through 20. in "3.7.1
For Local Printing".
2.
Select [System Preferences] from the Apple menu.
3.
The [System Preferences] window appears.
4.
Click [Sharing].
The [Sharing] dialog box appears.
19. Select the PICTROGRAPHY 3500 to be used and then click the
[Add] button.
The selected PICTROGRAPHY 3500 is added to the printer list.
20. Select [Quit Print Center] from the [Print Center] menu.
*
After adding a printer, be sure to quit Print Center. If printing is performed without Print Center quit, the following
error message is displayed.
Settings for making prints with the PICTROGRAPHY 3500 are
completed.
38
3. INSTALLATION
5.
Click the [Services] tab.
The following appears.
The [Printer Info] window appears.
10. Click the [Location] box and enter appropriate comments.
The comments entered in this box are also displayed on the client computer.
6.
Mark the [Printer Sharing] check box with a " √ " and close the
[Sharing] window.
Installation of PICTROGRAPHY 3500 Printer Driver for Mac OS X
is completed.
To enter the comment displayed on the [Location] column of the
[Printer List] window, perform the following procedure.
7.
Click the [Print Center] icon in Dock.
The [Printer List] window appears.
3.7.2.2
Installing to client computers
1.
The server should be started beforehand. The printer driver must
be installed in the server, and the server and client must be in the
same network segment of TCP/IP.
2.
To install the printer driver, follow Steps 1. through 9. in "3.7.1
For Local Printing".
This completes the installation of the printer driver.
To display information on shared printers, perform the following procedure.
8.
Click to select the installed PICTROGRAPHY.
9.
Select [Show Info] from the [Printers] menu.
3.
Click the [Print Center] icon in Dock.
The [Printer List] window appears. Shared printers are displayed
with a colored background.
4.
Click to select a shared PICTROGRAPHY.
5.
Select [Show Info] from the [Printers] menu.
39
3. INSTALLATION
The [Printer Info] window appears.
*
3.7.3
Displayed information cannot be changed from the client computers.
Uninstall
The printer driver uninstall procedure is shown below.
Even if the uninstall procedure below is performed, the installed
printer driver files are not deleted. Normally, there is no need to delete the printer driver files.
1.
Click the [Print Center] icon in Dock on the desktop.
The [Printer List] window appears.
2.
Select the printer to be deleted.
3.
Click the [Delete] button.
The selected printer is deleted.
4.
Close the [Printer List] window.
40
4. USING THE PRINTER DRIVER
4.1 Windows
for UC type
This subsection describes printing in Windows 95, Windows 98, Windows NT 4.0, Windows 2000 or Windows XP environments.
4.1.1
Work flow through printing
1.
Starting Windows
After verifying that your computer and the PICTROGRAPHY
3500 are connected, first switch on the PICTROGRAPHY 3500,
then switch on the computer.
2.
Launching an application (preparing print data)
Start the application software and create data to be printed. If
you have already created a data file, open that file.
4.1.2
Print setup and printing
The specific steps involved in printing vary from application to application. For more information, see the instruction manual for the application. The procedure described below uses Adobe PhotoShop 5.0
as an example.
1.
Selecting the printer
With the print data file open, click [Page Setup] on the [File]
menu.
This displays the [Page Setup] dialog box.
Select [PICTROGRAPHY3500] for [Printer Name:].
2.
Selecting a paper size
After choosing the printer name in step 1, click the [Properties]
button.
This opens the [FUJIFILM PICTROGRAPHY3500 Properties] dialog box.
for CE type
for CE type
41
4. USING THE PRINTER DRIVER
for UC type
• ICM
Check this box if you plan to use the Windows color management function (ICM).
* ICM is supported only by Windows 98 (Windows 98 with
Service Pack 1 and Windows 98 Second Edition), Windows
2000 and Windows XP.
• Matching method
Choose a color matching method (Rendering Intent) with ICM.
The following choices are available:
Perseptual:
Performs appearance-matching accompanied by compression of the color reproduction spectrum.
The most suitable color reproduction is obtained when sRGB monitor is chosen as the
input profile.
Relative Colorimetric:
Compensates for white color differences, as
opposed to absolute reproduction.
Saturation:
• Paper size
Select a paper size for printing.
Note that the printable paper size depends on the type of paper
currently loaded in the PICTROGRAPHY 3500.
• Direction of paper
Choose Portrait or Landscape.
• [Help] button
Click this button to display Help for the printer driver.
• [Version information] button
Click this button to display the Version Information screen for
the printer driver.
3.
Image processing setting options
Click the [Image processing setting] tag on the [FUJIFILM
PICTROGRAPHY3500 Properties] dialog box to display the
following:
The same as "Perseptual".
Absolute Colorimetric:
Performs colorimetric matching. Colors outside the color reproduction spectrum are
poorly reproduction.
* ICM is supported only by Windows 98 (Windows 98 with
Service Pack 1 and Windows 98 Second Edition), Windows
2000 and Windows XP.
• Profile
Choose an ICC profile. Here, select [Pictrography3500 PGD_ER].
* This combo-box is not displayed with Windows NT 4.0.
• Brightness
Adjust the print density. Settings toward the right (plus direction) result in lighter prints, while settings toward the left (minus direction) result in darker prints.
• Contrast
Adjust the print contrast. Settings toward the right (plus direction) produce higher contrast, while settings toward the left
(minus direction) produce lower contrast.
• Color balance (Red/Green/Blue)
Adjust color balance for prints. Settings toward the right (plus
direction) result in higher print density of the color specified,
while settings toward the left (minus direction) result in lower
print density of the color specified.
• Image process
Select a color-matching function. This color-matching function refers to the one provided with the PICTROGRAPHY
3500, which provides the following options:
ON1 (CG):
42
Performs color conversions suitable for printing high-chroma images, including computer
graphics.
Intended for monitors having color temperatures of 9300K*1 and γ 2.2*2.
4. USING THE PRINTER DRIVER
ON2 (Photo):
Produces somewhat softer prints.
Intended for monitors having color temperatures of 6500K and γ 1.8.
ON3 (sRGB):
Suitable for printing with an sRGB*3 monitor.
As compored with ON1 setting, ON3 setting enables to print saturated colors lower
in brightness and higher in saturation.
ON4 :
(PG3000 OFF)
A color-matching function will work that
produces results close to that obtained with
PICTROGRAPHY3000 color matching
function set to “OFF”.
OFF:
Disable printer color matching.
With this option selected, gray reproduction
is determined by settings for [Gray balance].
4.1.3
Message Monitor
1.
About the Message Monitor
Message Monitor is a network printing utility for client computers.
When network printing occurs, the software monitors the status
of the printer (server). If any error is detected, it displays an
appropriate alert on the client computer screen.
In Windows 95/98, Message Monitor is launched when network
printing occurs. In Windows NT 4.0, Message Monitor is loaded
on startup.
An icon appears in the task tray to indicate that Message Monitor is running, as shown below:
2.
Setting Message Monitor
Double-click the Message Monitor icon in the task tray to display the [Setting] dialog box.
• Gray balance
Select gray gradation and color balance, if Image process is
set to OFF.
Gray1 :
(2.2/9300)
Suitable for printing with monitors having
color temperatures of 9300K and γ 2.2.
Gray2 :
(1.8/6500)
Suitable for printing with monitors having
color temperatures of 6500K and γ 1.8.
Gray3 (sRGB): Suitable for printing with an sRGB monitor.
4.
*1 Color :
temperature
The color of a light source is indicated in
temperature [Kelvin degrees (K)]. The
higher the temperature is, the more the color
of a light source is bluish. The lower the temperature is, the more the color of a light
source is reddish.
*2 γ (gamma):
This shows reproduction of color tone using
figures. The larger the γ rating is, the more
the color is contrasty. The smaller the γ rating is, the more the color is softer.
*3 sRGB:
This is adopted as the standard RGB color
base.
Printing
Click [Print] from the PhotoShop 5.0 [File] menu.
The [Print] dialog box is displayed.
In the [Interval setting] field, specify the interval at which to
check printer (server) status.
4.1.4
1.
After verifying that [PICTROGRAPHY3500] appears in
[Printer:], set up the necessary items and click the [OK] button.
Printing is executed.
Spooler
Checking the print status
Click to select [Setting] > [Printer] from the [Start] menu.
This opens the [Printers] folder window. Double-click the
[FUJIFILM PICTROGRAPHY3500] icon appearing in the
window.
This opens the [FUJIFILM PICTROGRAPHY3500] dialog
box.
The document name and status are displayed here for any document currently printing or waiting to print, if any.
43
4. USING THE PRINTER DRIVER
2.
4.1.5
Canceling printing
In the [FUJIFILM PICTROGRAPHY3500] window, click the
document for which you want to cancel printing. Then select
[Cancel Print] from the [Document] menu to cancel printing.
* In Windows NT 4.0, Windows 2000 or Windows XP select
[Cancel] on the [Document] menu.
3.
Details
Click the [Details] tab on the [FUJIFILM PICTROGRAPHY3500
Properties] dialog box to display the following:
Printer folder
Click [File] > [Properties] of the [Printers] folder to view the Printer
Properties dialog box. Various printer driver parameters are set here.
4.1.5.1
Windows 95/98
Select [Setting] > [Printer] from the [Start] menu. This opens the [Printers] folder window. Click the [FUJIFILM PICTROGRAPHY3500] icon,
then select [Properties] on the [File] menu.
The [FUJIFILM PICTROGRAPHY3500 Properties] dialog box is
displayed.
• Print to the following port
The port to which the printer is connected or the network printer
path is indicated.
• [Add Port...] button
Click this button to add a new port or to specify a new network
printer path.
• [Delete Port...] button
Click this button to delete a port from the listing of ports.
• Print using the following driver
Various types of printer drivers are displayed here. Do not
change these settings unless absolutely necessary.
1.
2.
Paper setting
Click the [Paper setting] tab on the [FUJIFILM
PICTROGRAPHY3500 Properties] dialog box. For information on setup items, see “4.1.2 Print setup and printing”.
The settings entered here are assumed as default values for the
application software [Print] command.
Image processing setting
Click the [Image processing setting] tab on the [FUJIFILM
PICTROGRAPHY3500 Properties] dialog box. For information on setup items, see “4.1.2 Print setup and printing”.
The settings entered here are assumed as default values for the
application software [Print] command.
• [New Driver...] button
Click this button to add a printer driver.
• [Capture Printer Port...] button
This button is enabled when the computer is connected to a
network printer.
Click the button to assign a port to the network drive.
• [End Capture...] button
This button is enabled when the computer is connected to a
network printer.
Click this button to clear the port assigned to a network drive.
• Timeout settings
You cannot change this setting when the print output port is
[PICTRO SCSI:(FUJIFILM PICTRO SCSI Port)].
44
4. USING THE PRINTER DRIVER
• [Spool Settings...] button
Click this button to change print spool settings.
Clicking the button displays the following window.
No changes need to be made here under normal circumstances.
• Spool print jobs so program finishes printing faster
Spooling a document immediately writes the document print
data to the hard disk, then sends this data to the printer, quickly
releasing an application from print processing.
You can set both the spooling method and spooled data format.
If the PICTROGRAPHY 3500 is connected to your computer,
model number and other information are displayed here.
Click the [Setting] button here to display the [port information] dialog box.
• SCSI ID
Indicates the SCSI ID assigned to the connected PICTROGRAPHY
3500.
• Request timeout value
Set a SCSI communications time-out period here.
If you choose Disabled, no time-out polling occurs. If you
choose Enabled, specify a time-out period in seconds.
4.
Color Management (Windows 98 only)
Click the [Color Management] tab on the [FUJIFILM
PICTROGRAPHY3500 Properties] dialog box.
The following screen appears:
• Print directly to the printer
Print data is sent directly to the printer, without spooling. This
may tie up the application until printing is complete.
We recommend spooling print data unless doing so poses specific problems.
This option is disabled for shared printers.
• Enable bi-directional support for this printer
Selecting this option enables bi-directional communication between a printer and computer.
* Be sure to choose [Support] with the PICTROGRAPHY
3500 printer driver.
• Disable bi-directional support for this printer
Selecting this option disables bi-directional communications
between a printer and computer.
• [Setting] button
Click this button to change settings for the port connected to
the printer.
No changes need to be made here under normal circumstances.
If the print output port is [PICTRO SCSI: (FUJIFILM PICTRO
SCSI Port)], click this button to display the [PICTROGRAPHY
port information] dialog box.
Here, a profile related to the printer may be added or deleted.
The profiles for the PICTROGRAPHY 3500 are added during
printer driver installation. Do not modify the settings unless absolutely necessary.
45
4. USING THE PRINTER DRIVER
4.1.5.2
Windows NT 4.0
1.
Paper setting (Default value)
Click to select [Setting] > [Printer] from the [Start] menu. This
opens the [Printers] folder window. Click the [FUJIFILM
PICTROGRAPHY3500] icon, then select [Properties] on the
[File] menu.
The [FUJIFILM PICTROGRAPHY3500 Properties] dialog
box is displayed.
Click the [Paper setting] tab.
For information on setup items, see “4.1.2 Print setup and printing”.
The settings entered here are assumed as default values for the
application software [Print] command.
2.
Image processing setting (Default value)
Click the [Image processing setting] tab on the [FUJIFILM
PICTROGRAPHY3500 Properties] dialog.
For information on setup items, see “4.1.2 Print setup and printing”.
The settings entered here are assumed as default values for the
application software [Print] command.
3.
Ports
Select [Setting] > [Printer] from the [Start] menu. This opens
the [Printers] folder window. Click the [FUJIFILM
PICTROGRAPHY3500] icon, then select [Properties] on the
[File] menu.
The [FUJIFILM PICTROGRAPHY3500 Properties] dialog
box is displayed.
Click the [Ports] tab.
The following screen appears:
• [Configure Port...] button
Click this button to make port settings.
There is no need to change the port setting under normal circumstances.
Click the [Configure Port...] button after clicking [PICTRO
SCSI:] to display the [PICTROGRAPHY port information]
dialog box.
If a PICTROGRAPHY 3500 is connected to your computer,
model number and other information are displayed here. Click
the [Setting] button to display the [port information] dialog
box.
• SCSI ID
Indicates the SCSI ID for the connected PICTROGRAPHY
3500.
• Request timeout value
Set a SCSI communications time-out period here.
If you choose Disabled, no time-out polling occurs. If you
choose Enabled, specify a time-out period in seconds.
• Enabled (Enable bi-directional support)
This allows the computer to obtain settings and other data from
the printer.
* Be sure to check in here when using the PICTROGRAPHY
3500 printer driver.
• Disabled (Enable printer pooling)
This allows to use of multiple identical printers linked with
one logic printer.
• Print to the following port(s)
The listing of available ports, port monitors for the ports, and
printers connected to the ports is displayed.
Print data is output through the first available port among the
ports checked.
• [Add Port...] button
Click this button to add a new port.
• [Delete Port] button
Click this button to delete a port.
46
4. USING THE PRINTER DRIVER
4.
Scheduling
Click the [Scheduling] tab on the [FUJIFILM
PICTROGRAPHY3500 Properties] dialog box.
The following screen appears:
This setting does not need to be changed for normal use.
5.
Paper setting
Click the [Paper setting] tab on the [FUJIFILM
PICTROGRAPHY3500 Properties] dialog box. You can view,
but not change the settings displayed here.
6.
Image processing setting
Click the [Image processing setting] tab on the [FUJIFILM
PICTROGRAPHY3500 Properties] dialog box. You can view,
but not change the settings displayed here.
4.1.5.3
Windows 2000
1.
Paper setting (Print setup)
Click to select [Setting] > [Printer] from the [Start] menu. This
opens the [Printers] folder window. Click the [FUJIFILM
PICTROGRAPHY3500] icon, then click [Print Setup] on the
[File] menu.
The [FUJIFILM PICTROGRAPHY3500 Print Setup] dialog
box is displayed.
Click the [Paper setting] tab.
For information on setup items, see Subsection "4.1.2 Print setup
and printing."
The settings entered here are used as default values by the application software [Print] command.
2.
Image-processing setting (Print setup)
Click the [Image-processing setting] tab in the [FUJIFILM
PICTROGRAPHY3500 Print Setup] screen.
For information on setup items, see Subsection "4.1.2 Print setup
and printing."
The settings entered here are used as default values for the application software [Print] command.
3.
Ports
Click to select [Setting] > [Printer] from the [Start] menu. This
opens the [Printers] folder window. Click the [FUJIFILM
PICTROGRAPHY3500] icon, then click [Properties] on the
[File] menu.
The [FUJIFILM PICTROGRAPHY3500 Properties] dialog
box is displayed.
Click the [Ports] tab.
For information on setup items, see "3. Ports in Subsection 4.1.5.2
Windows NT 4.0".
4.
Detailed settings
Click the [Advanced] tab in the [FUJIFILM PICTROGRAPHY
3500 Properties] dialog box.
The following appears.
Normally, these settings do not need to be changed.
5.
Color management
Click the [Color Management] tab in the [FUJIFILM
PICTROGRAPHY3500 Properties] dialog box.
The following appears.
47
4. USING THE PRINTER DRIVER
Here, you can add or delete profiles related to the printer.
Note that profiles for the PICTROGRAPHY 3500 were added
when the printer driver was installed. Under normal conditions,
these settings should not be altered.
6.
Paper setting
Click the [Paper setting] tab in the [FUJIFILM
PICTROGRAPHY3500 Properties] dialog box. These settings can be viewed, but not modified.
7.
Image processing setting
Click the [Image processing setting] tab in the [FUJIFILM
PICTROGRAPHY3500 Properties] dialog box. These settings can be viewed, but not modified.
4.1.5.4
4.
Detailed settings
Click the [Advanced] tab in the [FUJIFILM PICTROGRAPHY
3500] dialog box.
The following appears.
Normally, these settings do not need to be changed.
5.
Color management
Click the [Color Management] tab in the [PICTROGRAPHY
3500 Properties] dialog box.
The following appears.
Windows XP
1.
Paper Setting (Print setup)
Click to select [Printers and Faxes] in the [Start] menu. This
opens the [Printers and Faxes] folder window. Click the
[FUJIFILM PICTROGRAPHY3500] icon, and then click [Print
Setup] in the [File] menu.
The [FUJIFILM PICTROGRAPHY3500 Print Setup] dialog
box is displayed.
Click the [Paper Setting] tab.
For information on setup items, see subsection "4.1.2 Print setup
and printing."
The settings entered here are the default values of the application software’s [Print] command.
2.
Image-processing setting (Print setup)
Click the [Image-processing setting] tab in the [FUJIFILM
PICTROGRAPHY3500 Print Setup] screen.
For information on setup items, see subsection "4.1.2 Print setup
and printing."
The settings entered here are the default values of the application software’s [Print] command.
3.
Ports
Click to select [Printers and Faxes] in the [Start] menu. This
opens the [Printers and Faxes] folder window. Click the
[FUJIFILM PICTROGRAPHY3500] icon, and then click
[Properties] in the [File] menu.
The [FUJIFILM PICTROGRAPHY3500 Properties] dialog
box is displayed.
Click the [Ports] tab.
For information on settings, see subsection "4.1.5.2 Windows
NT 4.0."
Here, you can add or delete profiles related to the printer.
Note that profiles for the PICTROGRAPHY 3500 were added
when the printer driver was installed. Under normal conditions,
these settings should not be altered.
6.
48
Paper setting
Click the [Paper setting] tab in the [FUJIFILM PICTRO
GRAPHY3500 Properties] dialog box. These setting can be
viewed but not modified.
4. USING THE PRINTER DRIVER
7.
4.1.6
Image processing setting
Click the [Image processing setting] tab in the [FUJIFILM
PICTROGRAPHY3500 Properties] dialog box. These setting
can be viewed but not modified.
ICM
1.
Color matching by ICM
ICM is a Windows color management function. ICM allows close
matches between the colors displayed on a computer monitor
and those output from printers.
To print with ICM color matching, check and enable [ICM] on
the [Image processing setting] dialog box.
* ICM is supported only by Windows 98 (Windows 98 with
Service Pack 1 and Windows 98 Second Edition), Windows
2000 and Windows XP.
If you use the OS Windows 98, you must install the Service
Pack 1 before using ICM.
2.
Choosing an ICC profile
Before printing with ICM color matching, you must specify an
ICC profile.
Specify [Pictrography3500 PG-D_ER] for [Profile] in the [Image processing setting] dialog box.
ICC profiles for the PICTROGRAPHY 3500 are automatically
installed in the default location when the PICTROGRAPHY 3500
printer driver is first installed.
* When you choose the "Source Profile (Monitor Profile)",
double-click the [Monitor] on the [Control Panel], and then
click the [Setting] tab,the [Details] button on the [Monitor
Property], and the [Color control] tab.
3.
Choosing color matching method
You can specify an execution method (Rendering Intent) for color
matching.
For more information, see “4.1.2 Print setup and printing”.
4.
Color matching and network printing
To implement ICM color matching for network printing, client
computers must also support ICM.
ICM color-matching is active only on clients running Windows
98 (Windows 98 with Service Pack 1 or Windows 98 Second
Edition), Windows 2000 or Windows XP.
4.2.2
Print setup and printing
The specific steps involved in printing vary with applications. For
more information, see the instruction manual for the application. The
procedure described below uses Adobe Photoshop 5.0 as an example.
1.
Selecting the printer
Select [Chooser] from the Apple menu and click [PictroGraphy
3500].
The following screen appears:
Click [ID: n] (the SCSI-ID value of the connected
PICTROGRAPHY 3500 is displayed in the area of n) of [Output path selection:].
To facilitate network printing, click [Network printer] from
[Output path selection:]. When conducting a local print job,
the user can choose either background printing or foreground
printing. To implement background printing, check and enable
[On] in [Background printing:]. To execute foreground printing, check and enable [Off]. For information on the difference
between background printing and foreground printing, please
refer to section "4.2.3 Different printing methods".
Close [Chooser] after completing setup.
2.
Setting a paper size
Open the print data file and select [Paper Set] from the [File] menu.
The following screen appears:
4.2 Macintosh (Mac OS 9 or earlier)
This subsection describes printing with Macintosh computers running
Mac OS 9 or earlier.
4.2.1
1.
Work flow through printing
Starting the Macintosh
After verifying that your computer and the PICTROGRAPHY
3500 are connected, first switch on the PICTROGRAPHY 3500,
then switch on the computer.
• Paper size
Select a paper size for printing.
Note that the printable paper size depends on the type of paper
currently loaded in the PICTROGRAPHY 3500.
• Direction of paper
Choose Portrait or Landscape.
• V1.0 Mode
2.
3.
Setting up file sharing (for network printing)
To enable network printing, you must mount the server's
[PictroGraphy] folder on clients. For instructions on doing this,
see “3.6.2.2 Installing to client computers”.
Launching an application (preparing print data)
Start the application software and create data to be printed. If
you have already created a data file, open that file.
When checked:
* Prints will have same results as the earlier version (1.0X).
* When printing from Photoshop, set the image resolution to
360dpi. If the resolution is set to any other resolution except
360dpi, jaggies may appear on images.
* When printing from Illustrator, check the box.
* When placing image data in Illustrator or PowerPoint, set
the image resolution to 360dpi. If the resolution is set to any
other resolution except 360dpi, jaggies may appear on the
image. After placing an image, jaggies caused by scaling the
image up or down may appear on image.
49
4. USING THE PRINTER DRIVER
When not checked:
* When printing from Photoshop, set the image resolution to
400dpi. If the resolution is set to any other resolution except
400dpi, jaggies may appear on images.
* When placing image data in PowerPoint, set the image resolution to 400dpi. If the resolution is set to any other resolution except 400dpi, jaggies may appear on the image. After
placing an image, jaggies caused by scaling the image up or
down may appear on image.
* The printable size of V1.0 Mode when not checked is smaller
than when checked. Refer to the printable sizes shown in the
table below.
Paper Size
V1.0 Mode checked
V1.0 Mode not checked
A5
204mm x 142.5mm
203.2mm x 139.7mm
A4
204mm x 291mm
203.2mm x 288.9mm
210mm x 133.5mm
209.5mm x 133.3mm
210mm x 273mm
209.5mm x 269.8mm
218mm x 150.5mm
215.9mm x 149.2mm
218mm x 299mm
215.9mm x 298.4mm
Half Letter
Letter
Half Special
Special
3.
• Color balance (Red/Green/Blue)
Adjust color balance for prints. Settings toward the right (plus
direction) result in higher print density of the color specified,
while settings toward the left (minus direction) result in lower
print density of the color specified.
• Image process
Select a color-matching function. This color-matching function refers to the one provided with the PICTROGRAPHY
3500, which provides the following options:
ON1 (CG):
Performs color conversions suitable for printing high-chroma images, including computer
graphics.
Intended for monitors having color temperatures of 9300K*1 and γ 2.2*2.
ON2 (Photo):
Produces somewhat softer prints.
Intended for monitors having color temperatures of 6500K and γ 1.8.
ON3 (sRGB):
Suitable for printing with an sRGB*3 monitor.
As compared with ON1 setting, ON3 setting
enables to print saturated colors lower in
brightness and higher in saturation.
ON4 :
(PG3000 OFF)
A color-matching function will work that
produces results close to that obtained with
PICTROGRAPHY3000 color matching
function set to “OFF”.
OFF:
Disable printer color matching.
With this option selected, gray reproduction
is determined by settings for [Gray balance].
Setting print conditions
Open the print data file and select [Print] from the [File] menu.
The following screen appears:
• Number of copies
Specify the number of copies you plan to print. The maximum
number of copies is 50.
• Page
Specify the range of pages to print. You can select all pages, or
specify a range using page numbers.
4.
Setting image processing options
Click the [Image processing] button on the print condition setup
screen.
The following screen appears:
• Gray balance
Select gray gradation and color balance, if Image process is
set to OFF.
Gray1:
(2.2/9300)
Suitable for printing with monitors having
color temperatures of 9300K and γ 2.2.
Gray2:
(1.8/6500)
Suitable for printing with monitors having
color temperatures of 6500K and γ 1.8.
Gray3 (sRGB): Suitable for printing with an sRGB monitor.
• Brightness
Adjust the print density. Settings toward the right (plus direction) result in lighter prints, while settings toward the left (minus direction) result in darker prints.
• Contrast
Adjust the print contrast. Settings toward the right (plus direction) produce higher contrast, while settings toward the left
(minus direction) produce lower contrast.
50
*1 Color :
The color of a light source is indicated in
temperature [Kelvin degrees (K)]. The higher
the temperature is, the more the color of a
light source is bluish. The lower the temperature is, the more the color of a light source is
reddish.
*2 γ (gamma):
This shows reproduction of color tone using
figures. The larger the γ rating is, the more
the color is contrasty. The smaller the γ rating is, the more the color is softer.
*3 sRGB:
This is adopted as the standard RGB color
base.
4. USING THE PRINTER DRIVER
• ColorSync
Check here to use the Mac OS color management function
(ColorSync).
* The printer driver supports ColorSync version 2.5 or later.
The driver is incompatible with earlier versions.
* For network printing, the server copy of ColorSync must
also be version 2.5 or later.
Checking the ColorSync option displays the following:
2.
4.2.4
1.
Background printing
To enable background printing, check [ON] in [Background
printing:] on the [Chooser] screen. If background printing is
selected, the user is immediately returned to the application as
printing starts and print data is created, permitting further work
within the application. To abort printing, use Print Monitor. For
information on Print Monitor, see the following subsection.
Print Monitor
About Print Monitor
The Print Monitor (PGMonitor) utility monitors the print status
and aborts printing during background printing.
To activate Print Monitor, double-click the PGMonitor icon found
in the System Folder: Extensions: PictroGraphy folder.
Once Print Monitor is launched, the following screen is displayed:
• Matching method
Choose a color matching method (Rendering Intent) with
ColorSync.
The following choices are available:
Profile Default: Identical to “Perseptual”.
Perseptual:
Performs appearance-matching accompanied by compression of the color reproduction spectrum.
The most suitable color reproduction is obtained when sRGB monitor is chosen as the
input profile.
Relative Colorimetric:
Compensates for white color differences, as
opposed to absolute reproduction.
Saturation:
The same as “Perseptual”
Absolute Colorimetric:
Performs colorimetric matching. Colors outside the color reproduction spectrum are
poorly reproduced.
• Profile
Choose an ICC profile for ColorSync. Select [Pictrography3500
PG-D_ER].
5.
4.2.3
1.
Printing
Click [Print] in the dialog box for print condition setup.
Printing is executed.
Different printing methods
Foreground printing
Printing occurs in the foreground if the user checks [OFF] in
[Background printing:] on the [Chooser] screen. In this case,
the following screen appears when the print is initiated and print
data is created. The Macintosh is unable to perform any other
operation until the print data is completely transferred to the
printer.
To abort printing, click the [Cancel] button.
• Status Display area (Upper part of the screen)
The upper part of the Print Monitor screen shows a document
name and the print status for that document, if a print job is
currently being processed.
File icon:
The state of data transfer to the printer is represented by an icon.
Document
Name:
Indicates the name of the document currently
being printed.
User Name:
Indicates the name of the user printing the
file.
Number of
Copies:
Indicates the number of copies to be printed
and the number of copies currently being
printed.
Number of
Pages:
Indicates the number of pages to be printed
and the page numbers currently being
printed.
State:
Indicates the current status.
• Spool list display area (Lower part of the screen)
The lower part of the Print Monitor screen shows a listing of
document names and various data for those documents, if the
print queue contains any jobs (spool files).
If another print job is executed when a print job is underway,
the new job is appended at the bottom of this list.
Document
Name:
Indicates the titles of the documents to be
printed.
Number of
pages:
Indicates the number of pages to be
printed.
Number of
copies:
Indicates the number of copies to be printed.
51
4. USING THE PRINTER DRIVER
2.
3.
Application
name:
Indicates the name of the application for the
print file.
User name:
Indicates the name of the user printing the
file.
Checking the print status
Open Print Monitor.
If a print job is currently in progress, the corresponding document name and other data are displayed in the Status Display
area (upper part of the screen).
Or, if the print queue contains other jobs to be printed, document names and other data are listed in the Spool List Display
area (lower part of the screen).
Canceling printing
Open Print Monitor.
Click [Print queue stop] in the [Printer] menu. If a print job is
currently in progress, printing is suspended and the print job is
moved to the Spool List Display area (lower part of the screen),
where it is stored until printed .
4.3 Macintosh (Mac OS X)
This section describes printing with Macintosh computers running Mac
OS X 10.2.1.
4.3.1
●
4.3.2
Work flow through printing
Launching an application (preparing print data)
Start the application software and create data to be printed. If
you have already created a data file, open that file.
Print setup and printing
The specific steps involved in printing vary with applications. For
more information, see the instruction manual for the application. The
procedure described below uses Adobe Photoshop 7.0 as an example.
1.
Setting a paper size
Open the print data file and then select [Paper Setup...] from
the [File] menu.
The suspended print job is deleted from the Spool List if you
click the document name in the Spool List Display area, then
click the trash box icon.
To resume printing, select [Print queue start] from the [Printer]
menu.
4.2.5
1.
ColorSync
Color matching by ColorSync
ColorSync is a Mac OS color management function that allows
close matches between the colors displayed on a computer monitor and those output from printers.
To use ColorSync, click and check the [ColorSync] option in
the [Image processing] dialog box.
* The printer driver supports ColorSync version 2.5 or later. The
drive is incompatible with earlier ColorSync versions.
2.
Choosing an ICC profile
Before printing with ColorSync color matching, you must specify
an ICC profile (ColorSync properties).
Specify [Pictrography3500 PG-D_ER] for [Profile] in the [Image processing] dialog box.
* You can specify “Source Profile” on screen after you click
[ColorSync] on the [Control Panel] (When you use the OS
Mac 9.0, click [Monitor] on the [Control Panel].).
3.
Choosing a matching method
You can specify an execution method (Rendering Intent) for color
matching.
For more information, see “4.2.2 Print setup and printing”.
4.
52
Color matching and network printing
To implement ColorSync color matching for network printing,
both server and client computers must be running ColorSync.
Both clients and server computers must support ColorSync version 2.5 or later.
The [Page Setup] window appears.
• Format for
Select a destination to print (printer name).
* Be sure to select a destination to print. If another printer (or
volume) is selected in this menu, printing may be performed
incorrectly. If [Any Printer] is selected, printing is performed
with the print size for the default printer.
4. USING THE PRINTER DRIVER
• Paper Size
Select a paper size for printing.
Note that the printable paper size depends on the type of paper
currently loaded in the PICTROGRAPHY 3500.
3.
Setting image processing options
Click the pop-up menu displaying [Copies & Pages] to select
[Image Processing].
The following appears.
• Orientation
Select an orientation of printing.
2.
Setting print conditions
Open the print data file and then select [Print] from the [File]
menu.
• Brightness
Adjust the print density. Settings toward the right (plus direction) result in lighter prints, while settings toward the left (minus direction) result in darker prints.
The [Print] window appears.
• Contrast
Adjust the print contrast. Settings toward the right (plus direction) produce higher contrast, while settings toward the left
(minus direction) produce lower contrast.
• Color balance (Red/Green/Blue)
Adjust color balance for prints. Settings toward the right (plus
direction) result in higher print density of the color specified,
while settings toward the left (minus direction) result in lower
print density of the color specified.
• Image process
Select a color-matching function. This color-matching function refers to the one provided with the PICTROGRAPHY
3500, which provides the following options:
• Printer
Select a destination to print (printer name).
• Copies
Specify the number of copies you plan to print. The maximum
number of copies is 50.
ON1 (CG):
Performs color conversions suitable for printing high-chroma images, including computer
graphics.
Intended for monitors having color temperatures of 9300K *1 and γ 2.2*2.
ON2 (Photo):
Produces somewhat softer prints.
Intended for monitors having color temperatures of 6500K and γ 1.8.
ON3 (sRGB):
Suitable for printing with an sRGB*3 monitor.
As compared with ON1 setting, ON3 setting
enables to print saturated colors lower in
brightness and higher in saturation.
ON4:
(PG3000 OFF)
A color-matching function will work that
produces results close to that obtained with
PICTROGRAPHY 3000 color matching
function set to "OFF".
53
4. USING THE PRINTER DRIVER
OFF:
Disables printer color matching. With this
option selected, gray reproduction is determined by settings for [Gray balance].
• Gray balance
Select gray gradation and color balance, if Image process is
set to OFF.
Gray1:
Suitable for printing with monitors having
(2.2/9300) color temperatures of 9300K and
γ 2.2.
Gray2:
Suitable for printing with monitors having
(1.8/6500) color temperatures of 6500K and
γ 1.8.
4.3.3
Print Center
4.3.3.1
Print Center Outline
Print Center is used to monitor the print status or abort a printing
process during printing. To launch Print Center, click the [Print Center] icon in Dock on the desktop. When Print Center is launched, the
following window opens.
Gray3 (sRGB): Suitable for printing with an sRGB monitor.
*1 Color :
*2 g (gamma):
*3 sRGB:
The color of a light source is indicated in
temperature [Kelvin degrees (K)]. The
higher the temperature is, the more the color
of a light source is bluish. The lower the temperature is, the more the color of a light
source is reddish.
This shows reproduction of color tone using
figures. The larger the g rating is, the more
the color is contrasty. The smaller the g rating is, the more the color is softer.
This is adopted as the standard RGB color
base.
• ColorSync
Check here to use the Mac OS color management function
(ColorSync).
Checking the ColorSync option displays the following:
• Status Display area (Upper part of the screen)
The upper part of the Print Center screen shows a document
name and the print status for that document, if a print job is
currently being processed.
• Spool List Display area (Lower part of the screen)
The lower part of the Print Center screen shows a listing of
document names and various data for those documents, if the
print queue contains any jobs (spool files).
If another print job is executed when a print job is underway,
the new job is appended at the bottom of this list.
4.3.3.2
Checking the print status
Click the [Print Center] icon in Dock on the desktop. The [Print
Center] window appears. If a print job is currently in progress, the
corresponding document name and other data are displayed in the
Status Display area (upper part of the screen).
Or, if the print queue contains other jobs to be printed, document
names and other data are listed in the Spool List Display area (lower
part of the screen).
4.3.3.3
Canceling printing
Click the [Print Center] icon in Dock on the desktop. The [Print
Center] window appears. Click the [Stop Jobs] button. If a print
job is currently in progress, printing is suspended.
• Profile
Chooses an ICC profile for ColorSync.
Select [Pictrography3500PG-D_ER V3.0].
4.
54
Click the [Print] button.
Printing is executed.
4. USING THE PRINTER DRIVER
Printing of the suspended print job is held if you click the document
name in the Spool List Display area and then click the [Hold] button.
The held condition is canceled if you click the [Resume] button.
The suspended print job is deleted from the Spool List if you click
the document name in the Spool List Display area and then click the
[Delete] button.
To resume printing, click the [Start Jobs] button.
55
5. ERROR MESSAGES
This section describes error messages associated with the
PICTROGRAPHY 3500 printer driver.
• PICTROGRAPHY not found.
Check to see if the PICTROGRAPHY 3500 is powered on.
Check to see if the PICTROGRAPHY 3500 and host computer are
properly connected.
Check to see if ASPI Manager is installed in the computer (Windows
only).
• Error detected in PICTROGRAPHY body.
Error code: XXX-X
Take appropriate action for the error code after referring to the instruction manual for the PICTROGRAPHY 3500 main body.
• A communications error with the PICTROGRAPHY has been
detected.
Check to see if the PICTROGRAPHY 3500 and the host computer are
properly connected.
• Wrong paper size.
Print cannot be executed for the paper size specified. Replace the paper currently loaded in the PICTROGRAPHY 3500 with one of the
correct roll width or change the paper size setting.
• Water level detection error.
Insufficient water for coating. Check for clogs in the water supply tube
running from the water bottle.
• Insufficient water (low water level in bottle).
Windows:
• "Bilateral communication function" not enabled.
Windows 95 / 98:
Check in [Enable bi-directional support for this printer] in the screen
displayed when you click the [Spool Setting] button on the [Details]
dialog box of [FUJIFILM PICTROGRAPHY3500 Properties].
Windows NT 4.0 / 2000 / XP:
Check [Enable bi-directional support] in the [Ports] screen of
[FUJIFILM PICTROGRAPHY3500 Properties].
Refill the water bottle to the prescribed water level.
• "file name" not available. File not found or broken.
• Donor has run out.
Replace the donor.
• Paper has run out.
Replace the paper.
• Replace water bottles.
• "file name" version does not match.
Reinstall the PICTROGRAPHY 3500 printer driver.
• Print data do not match.
This error message is displayed if the user attempts to print to PICTRO
SCSI Port using another printer driver. PICTRO SCSI Port does not
support printing with any other printer driver.
Change the water in the bottle.
• Retry time-out. PICTROGRAPHY may be busy.
• Used donors are full.
Dispose of the used donors.
This message indicates either that the PICTROGRAPHY 3500 is offline
or unable to print because it is engaged in some other processing. Put
the PICTROGRAPHY 3500 back online, or resend the print command
after waiting for it to complete the current processing.
• Replace water filters.
Replace the water filters.
• No donor magazine set.
• The message transmission has failed.
Check to see that the server and client computers are connected across
the network.
Load a donor magazine into the machine.
• The PICTROGRAPHY message transmission has failed.
• No paper magazine set.
Load a paper magazine into the machine.
Error code: XXXX
Check to see that the PICTROGRAPHY 3500 and host computer are
properly connected.
• No water bottle available.
Load the water bottle.
• Failed to secure memory.
Increase available memory space by closing other applications.
• No water filter available.
Install the water filter.
• Printing is not possible with the presently loaded paper.
Printing cannot be executed on the paper size specified. Replace the
paper currently loaded in the PICTROGRAPHY 3500 with one of the
correct size, or change the paper size setting.
Example: If the paper type is OHP, you cannot print with [A4 (unframed)] selected for paper size.
56
• Error detected in print monitor. Error code: XXXX
The system has become unstable, or the printer driver may not have
been installed properly. Restart the computer. If this does not correct
the problem, reinstall the FUJIFILM PICTROGRAPHY3500 printer
driver.
5. ERROR MESSAGES
Macintosh:
• Failed to obtain printer information. Reselect printer using selector.
Reselect the PICTROGRAPHY 3500 with [Chooser].
• Connection to server not set. Set an appropriate server.
Network printing requires a server. When the server setup dialog box
is displayed, enter settings in the [PictroGraphy] folder (previously
mounted) on the computer directly connected to the PICTROGRAPHY
3500.
• Connection to server not found. Make sure if it is sharable.
Check to see that the server and client computers are connected across
the network.
Enter settings to enable sharing of the server [PictroGraphy] folder.
Mount the [PictroGraphy] folder on the server.
• Failed to obtain printer information. Reset connection to server.
Reset the connection to the server ([PictroGraphy] folder on the computer directly connected to the PICTROGRAPHY 3500) using the
[Chooser].
• Specified paper differs from that in printer.
Specified paper size: XXXX
The system is unable to print on the specified paper size. Replace the
paper currently loaded in the PICTROGRAPHY 3500 with one of the
correct roll width, or change the paper size setting.
• Printer error. Printer may be offline.
• Printer exclusive use not permitted. Printer may be offline or used
by another computer.
• Failed to obtain paper information since PICTROGRAPHY is
printing or offline.
This message indicates that the PICTROGRAPHY 3500 is offline or
unable to print because it is engaged in some other processing. Put the
PICTROGRAPHY 3500 back online, or resend the print command after waiting for the other process to complete.
• Necessary file not found.
Reinstall the PICTROGRAPHY 3500 printer driver.
• The print server is set to foreground printing.
Setting the server to foreground printing disables network printing. To
implement network printing, set background printing On on the server
side.
• Background printing is in progress. Background printing cannot
be turned off at this time.
To implement network printing, background printing on the server side
must be On. While network printing is in progress, the setting for background printing cannot be set to Off. Wait for all documents to finish
printing, or delete the documents in the queue.
• The specified ColorSync profile not found.
The ColorSync profile specified for network printing is not installed in
the server. Install ColorSync in the server.
• Memory shortage.
Increase available memory by closing other applications.
57
6. RESTRICTIONS
6.1 Windows
1.
2.
drive, take measures (a), (b) or (c) as follows. If Windows
XP has been installed on a FAT32 formatted drive, clients
cannot print using Windows XP as the server OS.
Installing the printer driver without connecting the
PICTROGRAPHY 3500 (Windows 95/98)
While it is possible to install the printer driver in a computer
without first connecting the PICTROGRAPHY, or with the
printer switched off, the PICTROGRAPHY 3500 after installation will then be detected as a new device the next time Windows launches with the PICTROGRAPHY 3500 connected or
powered on, causing the printer driver to be installed again.
We recommend installing the printer driver after first connecting the PICTROGRAPHY 3500.
(a) Use Windows XP in the domain environment. (Put the
Windows XP computer under domain control.)
If Windows XP is used in the work group environment,
take measures (b) or (c) as follows.
(b) Open the [Folder Options] screen, click [View], then in
[Advanced settings:], uncheck the box [Use simple
file sharing (Recommended)].
To open the [Folder Options] screen, click [Start] >
[Control Panel] > [Appearance and Themes] >
[Folder Options].
About setup for paper size
Some applications allow you to set paper size through their own
dialogs. In such cases, paper size settings selected in the printer
driver may be ignored.
3.
About setup for direction of paper
Some applications allow you to specify the direction of paper
through their own dialogs. In such cases, settings for the direction of paper selected in the printer driver may be ignored.
4.
About setup for number of copies
The number of print copies may sometimes be specified through
an application dialog. Some applications may permit even more
copies than the maximum (50) permitted by the
PICTROGRAPHY 3500. If a number greater than 50 is selected,
the printer may output only a single copy.
5.
Precautions for using ICM
The PICTROGRAPHY 3500 printer driver supports color management function by ICM. However, some applications (such
as Photoshop) implement their own color management function.
If you set color management functions for both the application
and the printer driver, you will obtain incorrect color matching.
To use an application's color management function, disable ICM
for the printer driver, set Image Process to OFF, and Gray Balance to Gray3.
6.
Restrictions for Network Printing
When network printing with a shared printer, there are restrictions depending on the printing environment as shown below.
(c) Open the [Local security Settings] window, click [Security Settings] > [Local Policies] > [Security Options] to display the policy list. Next, double-click [Network access: Sharing and security model for local
accounts] on the list and change the setting to [Classic
- local users authenticate as themselves].
To open the [Local Security Settings] window, click
[Start] > [Control Panel] > [Performance and Maintenance] > [Administrative Tools] > [Local Security
Policy].
2. Windows XP Home Edition
Clients cannot print using Windows XP Home Edition as
the server OS.
• Restriction B
When network printing from clients using Windows 2000 or
Windows XP connected to the Windows NT4.0 server OS, the
ICM function cannot be used.
This is because Windows NT4.0 does not support the ICM
function. In a Windows NT-based network, network printing
is processed at the server.
6.2 Macintosh
1.
When printing from Photoshop
When printing from Photoshop, image edges (right side and lower
side) may not be printed for several lines. While
PICTROGRAPHY 3500 provides a print resolution of 400 dpi,
when Photoshop images are printed at this resolution, the number of pixels of the Photoshop images and the printed images
may not match each other exactly.
2.
Treatment of fonts in network printing
In network printing, if you print a document using fonts not installed in the server is printed, those fonts are replaced with other
fonts during printing. Additionally, the font layout may be disrupted due to differences in the character width of some font
types.
When planning on network printing, be sure to install the same
fonts on the server and client side.
3.
About setup for direction of paper
Some applications allow you to specify the direction of paper
through their own dialogs. (FREEHAND, etc.)
In such cases, settings for the direction of paper made in the
printer driver may be ignored.
Network Printing Environment
Server
Client
Win 95
Win 98
Win NT4.0
Win 2000
Win XP
Win 95
Restriction A
Win 98
Restriction A
Win NT4.0
Restriction A
Win 2000
Restriction B
Restriction A
Win XP
Restriction B
Restriction A
• Restriction A
When Windows XP is used as the server OS, depending on the
Windows XP settings clients may not be able to use the printer.
When network printing, change the server Windows XP settings as follows.
* Logon the system by using the “Administrator” account to
change the settings.
1. Windows XP Professional
Clients can use the network printer using Windows XP Professional as the server OS, after taking some of the measures (a), (b) or (c) as follows.
If Windows XP has been installed on an NTFS formatted
58
6. RESTRICTIONS
4.
About the print quality of rotated characters
The print quality obtained when printing rotated characters depends on the application from which printing occurs.
Since the PICTROGRAPHY 3500 printer driver does not support picture comments, the print quality of rotated characters is
often poorer than that of non-rotated characters.
5.
Notes on use of ColorSync
The PICTROGRAPHY 3500 supports the color management
function provided by ColorSync. However, some types of applications from which print is made will support a color management function of their own. (Photoshop, etc.)
In such cases, keep in mind that appropriate color matching will
not be obtained if the color management function is enabled on
both the application and the printer driver side.
To use the color management function provided on the application side, disable ColorSync on the printer driver side and set
Image Process to OFF and Gray Balance to Gray3.
6.
To print on Mac OS9
When printing from Mac OS 9, the following restrictions apply:
• When Multi-user is enabled (ON) in a local printing, an ordinary user may be required to enter the password of the owner.
• When Multi-user is enabled in a local printing, a restricted
user or panel user cannot print.
• When Multi-user is enabled on the server side in a network
printing and print is launched by a restricted user or panel user,
the printer cannot complete the printing process (cannot delete the spool file) and will, therefore, repeat the same printing.
To end the print, log in to the server from the owner or an
ordinary user, and delete the relevant document through the
Print Monitor.
• When Multi-user is enabled on the client side in a network
printing, a restricted user or panel user needs to select [All Printers] for Available Printer on [Multi-user] Control Panel.
• A restricted user or panel user intending to utilize Print Monitor will have to register Print Monitor as [User's Application]
at Multi-user on Control Panel.
The problems mentioned above will not be the case, if Multiuser is deactivated (OFF), or if the owner logs in when Multiuser remains active (ON).
7.
To print on Mac OS X
When printing from Mac OS X, the following restrictions apply:
• After starting up a Photoshop plug-in, if printing is performed
with the printer driver, the following error message is displayed.
Be sure to quit Photoshop when printing is performed with the
printer driver after starting up a plug-in.
• After adding a printer using Print Center, if a Photoshop plugin is started up without Print Center quit, the following error
message is displayed. Be sure to quit Print Center before starting up a Photoshop plug-in.
• Error messages may not be displayed when the
PICTROGRAPHY 3500 is turned OFF, or is not connected to
a network. If printing is not performed while "Printing job" or
"Opening printer connection" remains on the Print Center
screen for a long time, check whether or not the
PICTROGRAPHY 3500 is turned ON, and is connected to a
network correctly.
• When printing is performed with the [Collated] check box
marked with a " √ " (default setting) in [Copies & Pages] of
the [Print] screen, data transfer to the printer is repeated for a
number of times equal to the designated number of copies.
Remove the " √ " mark from the [Collated] check box for higher
efficiency when multiple copies are made for a single-page
document.
• When printing an image from Photoshop 7.0, if the size of the
image is equal to the designated paper size, the image edges
may not be printed for several lines.
• When printing from Illustrator 10, collated printing is not performed even if the [Collated] check box is marked with a " √ "
in [Copies & Pages] of the [Print] screen.
• The print queue or print job in Print Center may not be controlled by the user depending on the timing of operation.
• The positioning or scaling up/down function may not work
correctly depending on applications.
<Restrictions regarding Printer Sharing>
• Install the printer driver onto the client computers as well as
server computer. Even if the printer driver is not installed, client computers can perform printing with a shared
PICTROGRAPHY. However, paper sizes supported by the
shared PICTROGRAPHY cannot be selected.
• When printer sharing is set to "ON" on a computer, all printers
displayed on [Printer List] of Print Center are shared.
• If shared printers are not displayed on the [Printer] pop-up
menu in the [Print] window of an application such as
Photoshop, or on [Printer List] of Print Center, select [Preferences...] from the [Print Center] menu and mark the [Show
printers connected to other computers] with a " √ ".
59
6. RESTRICTIONS
• On [Printer List] of Print Center, shared printers are displayed
with a colored background.
• If a computer runs Mac OS X 10.1.x or earlier (including Mac
OS 9 or earlier), the computer cannot recognize the printers
shared with the printer sharing function of Mac OS X 10.2.1
or later.
• During printing process, print status display of Print Center is
fixed to "Waiting for job to complete..." on the client computer.
• Client computers cannot handle (stop, hold or delete) print jobs.
Only the server computer can handle print jobs.
• An error (wrong-size paper, printer error, etc) is detected during printing process, the error message is displayed only on
the server computer.
• When a printer error is detected while processing a print request from a client computer, if Print Center on the server computer is not active, the error message is not displayed.
6.3 Others
1.
Network printing in a mixed environment of Windows and
Macintosh
If the server is a Windows computer in a network printing situation, the client(s) must also be (a) Windows computer(s).
Likewise, if the server is a Macintosh computer in a network
printing situation, the client(s) must also be (a) Macintosh
computer(s).
Print cannot be made from a Windows client through a Macintosh
server, or conversely, from a Macintosh client through a Windows server.
2.
To print a document with an ESP file linked
The PICTROGRAPHY 3500 is a non-PostScript printer. Therefore, if a document having an EPS (Encapsulated PostScript)
file linked is printed on the printer, image data of the EPS file
will be replaced with a preview image (low-resolution image)
in the print.
Some applications allow to embed the EPS file into the document, instead of linking the file to the document. In that case,
the images created by the applications will be printed (the image quality depending on the applications).
60
FUJI PHOTO FILM CO., LTD.
26-30, Nishiazabu 2-chome, Minato-ku, Tokyo 106-8620, Japan.
<FUJIFILM ABROAD>
in North America
FUJI PHOTO FILM U.S.A., INC.
555 Taxter Road, Elmsford, N.Y. 10523, U.S.A.
FUJI PHOTO FILM CANADA INC.
275 Britannia Road East, Mississauga, Ontario, L4Z 2E7, Canada
FUJI PHOTO FILM HAWAII, INC.
1650 Kalakaua Avenue, Honolulu, Hawaii 96826, U.S.A.
in Europe
FUJI PHOTO FILM (EUROPE) G.m.b.H.
Heesenstrasse 31, 40549 Dusseldorf, Germany
FUJI PHOTO FILM (U.K.) LTD.
Fuji Film House, 125 Finchley Road, Swiss Cottage, London NW3 6JH, England
FUJIFILM ESPAÑA, S.A.
Aragon, 180, 08011-Barcelona, Spain
FUJIFILM FRANCE SA
Parc d'Activites du Pas-du-Lac-2, Avenue Franklin, St.Quentin-en-Yvelines Cedex, France
in South America
FUJI PHOTO FILM DO BRASIL LTDA.
Avenida Vereador Jose Diniz No. 3.400, Campo Belo-CEP 04.604
Cx. Postal 9.959., São Paulo-SP, Brasil
in Asia
FUJI PHOTO FILM CO., LTD., HONG KONG OFFICE
Room 916, Sun Plaza, 28 Canton Road, Tsim Sha Tsui, Kowloon, Hong Kong
FUJI PHOTO FILM (SINGAPORE) PTE. LTD.
10 New Industrial Road, Singapore 536201
FUJI PHOTO FILM (THAILAND) LTD.
S.P. Building, 8th Floor, 388 Phaholyothin Road, Bangkok 10400, Thailand
FUJI PHOTO FILM (MALAYSIA) SDN. BHD.
Letter Box 3, 3rd Floor Office Block 1, Crystal Plaza Lot 4, Jalan 51A/223
46100 Petaling Jaya Selangor Darul Ehsan Malaysia
FUJI PHOTO FILM CO., LTD., TAIPEI OFFICE
Rm. 601, Hung Chong Bldg., No. 38, Sec. 6, Min Chuan E. Rd., Taipei 11412, Taiwan
FUJI PHOTO FILM CO., LTD., SEOUL OFFICE
505-19, Kasan-Dong, Kunchon-Gu, Seoul, Korea 152-020
FUJI PHOTO FILM CO., LTD., BEIJING REPRESENTATIVE OFFICE
Beijing Fortune Bldg. No. 817, 5, Dong Sanhuan Bei-lu, Chaoyang District, Beijing, China 100004
FUJI PHOTO FILM CO., LTD., HO CHI MINH OFFICE
29-31 Ton That Thiep St., Q.I Ho Chi Minh City, Vietnam
FUJI PHOTO FILM CO., LTD., NEW DELHI OFFICE
Le Meridian Commercial Tower 8F Janpath, New Delhi 110001, India
FUJI PHOTO FILM CO., LTD. MANILA OFFICE
24 Sto. Domingo St., Quezon City, Philippines
in Oceania
FUJI PHOTO FILM CO., LTD., SYDNEY REPRESENTATIVE OFFICE
c/o Hanimex Pty. Limited, 114 Old Pittwater Road, Brookvale, NSW 2100, Australia
in the Middle East FUJI PHOTO FILM CO., LTD., DUBAI OFFICE
No. 4G-17, L.O.B. No. 4, P.O.BOX 17212, Jebel Ali, Dubai, U.A.E.
Printed on Recycled Paper
Ref.No.PP3-B482E3 TD-03.02-FG (LF) Printed in Japan