1
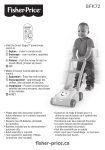
SOUNDS ‘N LIGHTS
PORTABLE ENTERTAINER™
Model Number: 79070
INSTRUCTIONS
Please read and understand these instructions before assembly and use.
Keep these instructions for future reference.
Tool needed for assembly: Phillips Screwdriver (not included).
Maximum weight limit: 26 lbs.
WARNINGS
WARNING
To prevent serious injury or death:
• Use only for a child who is able to hold head upright unassisted and who is
not able to walk.
• Never leave child unattended. Always keep child in view while in product.
• Never use near steps or pools, hot surfaces or areas that may be hazardous
to a child. Product may move during use.
• To avoid tip over, place product on a flat, level surface.
CONSUMER INFORMATION
Occasionally a consumer may experience a problem with one of our products. If this should happen, please call us toll-free, rather than return this
product to the store. Usually we can solve the problem on the telephone or by sending you replacement parts. Please call Fisher-Price® Consumer
Relations, toll-free at 1-800-432-KIDS, 8 AM - 6 PM EST Monday through Friday. Hearing-impaired consumers using TTY/TDD equipment, please
call 1-800-382-7470. Or, write to: Fisher-Price® Consumer Relations, 636 Girard Avenue, East Aurora, New York 14052.
2
PARTS
IMPORTANT! Please remove all parts from
the package and identify them before assembly.
Seat Pad
Toy Bar
Seat Ring
Head
4 Toy Rings
Caterpillar
Tray
3 Screws with
Washer Heads
Hub
Button
Hub
M5 Bolt
M5 Bolt
2 M5 Lock Nuts
5
/16" Washer
Spring
2 Retainers
5
/16" Washer
Spring
Button
Base
Base
4 Screws with Washer Heads
2 Legs
M5 Lock Nut - 2
SHOWN ACTUAL SIZE
M5 39/16" Bolt - 2
5
/16" Washer - 2
SHOWN ACTUAL SIZE
SHOWN ACTUAL SIZE
3
/8" Screw with Washer Head – 7
5
SHOWN ACTUAL SIZE
ASSEMBLY
IMPORTANT! Before each use or assembly, inspect this product for damaged hardware, loose joints, missing parts or sharp edges. Do not use if any
parts are missing or broken. Contact Fisher-Price® for replacement parts and instructions needed. Never substitute parts.
CAUTION
Leg
Leg
3
This product contains small parts in
its unassembled state.
Adult assembly is required.
Treads Down
1
Frame
Treads Down
Button
Highest
Position
• Rotate the legs down.
• Make sure the treads on all four rubber feet are facing down.
If the treads on all four rubber feet are not facing down, you have
assembled the legs incorrectly. Remove the legs from the curved
tubes (press the buttons on the legs to release them from the
curved tubes) and re-read and repeat step 2.
Base
Lowest
Position
• Place a base on a flat surface.
• While pressing the button on the side of the base, lift the frame to
the highest position. The button should be in the highest position.
• Repeat this procedure to raise the other frame on the other base to
its highest position.
• Make sure the button on each base is in the highest position.
Toy Bar
4
Rings
Caterpillar
2
Curved
Tube
Curved
Tube
Hole
Tray
Hole
Treads Up
Leg
• Position a leg so that the buttons are down and the treads on the
rubber feet face up.
• While pressing the buttons on the leg, insert and "snap" the ends
of the leg into the curved tubes on the base.
• Repeat this procedure to attach the other leg to the bases.
4
• Place the tray upright on a flat surface.
• Fit the caterpillar to the top of the tray. From the bottom of the
tray, insert three 5/8" screws with washer heads through the tray and
into the caterpillar. Tighten the screws with a Phillips screwdriver.
Do not over-tighten.
• Slide the four rings onto the toy bar.
• Insert and "snap" the toy bar into the holes in the tray.
• Pull up on the toy bar to make sure it is secure.
ASSEMBLY
5
7
Spring
Slot
Tab
Raised Dot
Hold
Hubs
Button
Hold
Hubs
Hub
Raised Dot
Bottom View
• While holding the hubs in place, pick
the tray up and turn it so that the
Side View
bottom faces you.
• Locate the raised dot on one side of the tray, near the hub.
• Position the hub with the inside facing up.
• Align the tab on the button with the slot in the hub.
• Fit the button into the hub.
• Place a spring inside the button.
• Repeat this procedure to assemble the other button and spring to
the other hub.
8
6
Tray
Hub
Hub
Hub
Hub
Raised Dot
Round Wells
Tray
• Fit the hubs to each side of the tray.
• Hold the hubs in place.
Raised Dot
• Locate the raised dot on one of
the frames.
• Align the raised dot on the tray with
the raised dot on the frame.
• Fit the hubs into the round wells in
the frames.
5
Side View
ASSEMBLY
Head
LP
10
OFF
9
SP
Tray
Slot
Tab
Rib
Tray
Frame
M5 x 39/16" Bolt
M5 Lock Nut
5
Retainer
/16" Washer
Rib
Protruding
Side
• Position the head with the face upright.
• Insert and snap the tab on the head into the slot in the tray.
6
SP
11
LP
• Slide a retainer between the two ribs on one side of the tray,
as shown.
• Fit an M5 lock nut (protruding side facing away from the
retainer) into the hexagonal hole in the retainer.
• Fit a 5/16" washer onto the M5 bolt. Insert the M5 bolt through the
frame, hub, tray and into the retainer. Tighten the bolt with a Phillips
screwdriver. Do not over-tighten.
• Repeat this procedure to fasten the other side of the tray to the
other frame.
OFF
M5 Lock Nut
• Insert two 5/8" screws with washer heads through the front holes
in the tray and into the head. Tighten the screws with a Phillips
screwdriver. Do not over-tighten.
• Insert two 5/8" screws with washer heads through the back holes
in the tray and into the head. Tighten the screws with a Phillips
screwdriver. Do not over-tighten.
ASSEMBLY
Tray
14
OFF
LP
12
SP
Press
Upper
Button
Press
Upper
Button
Seat Ring
Upper
Buttons
• While pressing the upper buttons on both sides of the base, rotate
the tray down until it "snaps" into position. Make sure you hear
a "snap".
IMPORTANT! If the tray does not “snap” into position, you
have assembled the tray to the frame backwards. Remove the
M5 bolt, retainer and M5 lock nut from the frame and tray.
Carefully lift the tray from the round wells in the frame.
Re-read and repeat Assembly steps 7-9.
13
Pegs
Pad
Seat Ring
Ribbed
Side
Pad
Seat Ring
Marking
Red Slot
Red Slot
• Pull the pad through the seat ring and wrap the pad around the
outside of the seat ring.
Fisher-Price®
Logo
Pegs
• Position the seat ring so that the
inside (ribbed side) is up and the
marking is toward you.
• Position the pad so that the
Fisher-Price® logo is facing you
(although it will be upside down!)
• Fit the red slots on the pad (next
to the Fisher-Price® logo) to the
seat ring pegs on either side of the
marking, as shown.
Marking
Top View
7
ASSEMBLY
Peg 3
15
Roller
Peg 2
Peg 4
16
Roller
Seat
Peg 5
Tray
Peg 1
Roller
Peg 6
Roller
Push Seat
Lock In
Roller
Roller
• Push the seat lock to the unlocked position.
• Insert and "snap" the seat into the hole in the tray.
Roller
Roller
IMPORTANT! Assembly is now complete, but you will still need
to properly setup this product for use. Please refer to the
Battery Installation section and the Operation and Use section,
beginning with step 3 for additional instructions.
• Fit the other six slots in the seat pad to the corresponding pegs on
the seat ring.
• Tuck the seat pad behind all four rollers.
8
BATTERY INSTALLATION
Press
Lower
Button
SP
Tray
Release
Button
Battery
Compartment
LP
2
Tray
OFF
1
Tray
Release
Button
Press
Lower
Button
Bottom View
• Face the front of the product
• While pressing the tray release button (lower button) on each side
of the base, rotate the tray up.
• Locate the battery compartment on the bottom of the tray.
• Loosen the screw in the battery compartment door with a
Phillips screwdriver.
• Remove the battery compartment door.
9
BATTERY INSTALLATION
3
4
1.5 x 3
"AA" (LR6)
Tray
SHOWN ACTUAL SIZE
Battery
Compartment
Door
Press
Upper
Button
Press
Upper
Button
Upper
Buttons
Battery
Compartment
• Face the front of the product
• While pressing the tray release buttons (upper buttons) on both
sides of the base, rotate the tray down until it "snaps" into
position. Make sure you hear a "snap".
• Insert three "AA" (LR6) alkaline batteries as shown inside the
battery compartment.
Hint: Use only alkaline batteries for longest battery life.
• Replace the battery compartment door and tighten the screw with
a Phillips screwdriver. Do not over-tighten.
Battery Tips
• Do not mix old and new batteries.
• Do not mix different types of batteries: alkaline, standard (carbonzinc) or rechargeable (nickel-cadmium).
• Remove the batteries during long periods of non-use. Always
remove exhausted batteries from the product. Battery leakage and
corrosion can damage this product. Dispose of batteries safely.
• Never short circuit the battery terminals.
• Non-rechargeable batteries are not to be recharged.
• Only batteries of the same or equivalent type as recommended in
the Battery Installation instructions are to be used.
• If removable rechargeable batteries are used, they are only to be
charged under adult supervision.
• Rechargeable batteries are to be removed from the toy before they
are charged.
• If you use a battery charger, it should be examined regularly for
damage to the cord, plug, enclosure and other parts. Do not use a
damaged battery charger until it has been properly repaired.
IMPORTANT! If sounds and/or lights become faint, or there are no
sounds or lights, remove the batteries and dispose of them properly.
Replace the batteries with three, new "AA" (LR6) alkaline batteries.
10
OPERATION AND USE
IMPORTANT! Before each use or assembly, inspect this product for damaged hardware, loose joints, missing parts or sharp edges. Do not use if any
parts are missing or broken. Contact Fisher-Price® for replacement parts and instructions if needed. Never substitute parts.
Setup
2
WARNING
Tray
LP
SP
Press
Upper
Button
OFF
To prevent serious injury or death:
• Never use near steps or pools, hot
surfaces or areas that may be
hazardous to a child. Product may
move during use.
• To avoid tip over, place product on
a flat, level surface.
Press
Upper
Button
1
• Face the front of the product.
• While pressing the tray release buttons (upper buttons) on each side
of the base, rotate the tray down until it "snaps" into place. Make
sure you hear a "snap".
3
• Place the product on a flat, level surface.
• Rotate the legs down.
IMPORTANT! The legs are not yet locked in place. Please proceed
with setup steps 2-5.
Tray Release Button
in Down Position
11
• Check to be sure the tray is secure. The tray release button should
be in the down position.
OPERATION AND USE
4
5
Head
Push Down on
Both Bases
Lift
Leg
Pull
Down
Leg
Base
Base
• While lifting the head, pull the leg down until it "snaps" into place.
Make sure you hear a “snap”.
• Repeat this procedure (this time lifting the back of the tray) to lock
the other leg into place on the other side of the base.
• Push down on both sides of the base to be sure the legs are
locked into place.
12
OPERATION AND USE
Sounds and Lights!
Adjusting the Height
Frame
6
7
Height
Adjustment
Button
High
Medium
Low
• You can adjust this product to three different heights for baby's
comfort. Make sure baby’s feet touch the floor.
• While pressing the height adjustment button on the side of the
base, lift or lower the frame to the desired position.
• Be sure to adjust the frame height on the other side of
the base to the same height!
Bug Buttons
Long-Play Mode
• Slide the power switch to
for long-play mode.
Baby delights to six songs
and light patterns when a
Power Switch
bug button is pressed.
Short-Play Mode
• Slide the power switch to for short-play mode. Baby enjoys one
song and a light pattern when a bug button is pushed.
Off
• Slide the power switch to • to turn off sound and lights.
IMPORTANT! If sounds and/or lights become faint, or there are no
sounds or lights, remove the batteries and dispose of them properly.
Replace the batteries with three, new "AA" (LR6) alkaline batteries.
Locking the Seat
8
13
Lock Bar
• Baby can turn in the seat or you can lock the seat into place.
• To lock the seat: Align a seat notch (located underneath the seat)
with the lock bar and slide the lock bar in.
• To unlock the seat: Slide the lock bar out.
OPERATION AND USE
Storage
11
Frame
9
High
Press
Buttons
Height
Adjustment
Button
Leg
Base
• You must adjust the height to the highest position for storage.
• While pressing the height adjustment button on the side of the
base, lift the frame to the highest position.
• Be sure to adjust the frame height on the other side of the
base to the highest position!
Leg
• Tip the product on one side
and press the buttons on each
side of the base to release
the leg.
• Lift the leg slightly to the
unlocked position.
Press
Button
10
12
Tray
Press Tray
Release Button
Leg
Leg
Base
• Face the front of the product.
• While pressing the tray release button (lower button) on each side
of the base, rotate the tray up until it "snaps" into place.
• Rotate the leg up.
• Repeat steps 11 and 12 to unlock and rotate the other leg up to the
storage position.
14
CARE
SP
Notch
LP
3
OFF
• Machine wash the pad in cold water and a mild detergent. Do not
use bleach. Tumble dry on low heat and remove promptly.
• Surface wash the base, tray and toys with mild detergent and water.
Do not use bleach. Do not use harsh or abrasive cleaners. Rinse
clean with water to remove residue. Do not immerse the tray.
Notch
To Remove the Pad
1
Notch
Lock Bar
Notch
Bottom View
• While pressing near any notch on
the seat ring, pull the seat ring from
the tray.
• Unlock the seat. Slide the lock bar out.
Top View
2
To Re-assemble the Pad
Tray
• Please refer to the Assembly section, steps 13-16.
Press Tray
Release Button
Base
• Face the front of the product.
• While pressing the tray release button (lower button) on each side
of the base, rotate the tray up until it "snaps" into place.
15
ONE (1) YEAR LIMITED WARRANTY
Fisher-Price, Inc., 636 Girard Avenue, East Aurora, New York 14052 warrants Sounds ’n Lights Portable Entertainer™ is free from all defects in material and
workmanship when used under normal conditions for a period of one (1) year from the date of purchase.
Should the product fail to perform properly, we will repair or replace it at our option, free of charge. Purchaser is responsible for shipping the product to Consumer
Relations at the address indicated above and for all associated freight and insurance cost. Fisher-Price, Inc. will bear the cost of shipping the repaired or replaced
item to you. This warranty is void if the owner repairs or modifies the product. This warranty excludes any liability other than that expressly stated above including
but not limited to any incidental or consequential damages.
SOME STATES DO NOT ALLOW THE EXCLUSION OR LIMITATION OF INCIDENTAL OR CONSEQUENTIAL DAMAGES, SO THE ABOVE LIMITATION OR
EXCLUSION MAY NOT APPLY TO YOU.
THIS WARRANTY GIVES YOU SPECIFIC LEGAL RIGHTS, AND YOU MAY ALSO HAVE OTHER RIGHTS WHICH MAY VARY FROM STATE TO STATE.
If you have any questions about this product: In Canada, call 1-800-567-7724, or write to: Mattel Canada Inc., 6155 Freemont Blvd., Mississauga, Ontario L5R 3W2.
In Great Britain, telephone 01628 500303.
In Australia, call the Fisher-Price Australian Consumer Advisory Service toll-free at 1-800-800-812, or write to: Mattel Pty. Ltd., 658 Church Street, Locked Bag #870, Richmond Victoria, 3121 Australia.
Fisher-Price, Inc., a subsidiary of Mattel, Inc., East Aurora, NY 14052 U.S.A.
©2000 Mattel, Inc. All Rights Reserved. ® and ™ designate U.S. trademarks of Mattel, Inc.
16
79070a-0920
Printed in China