1
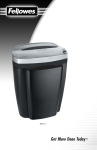
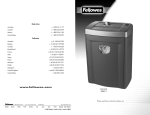
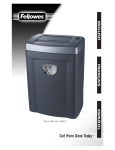
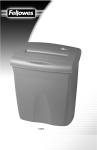
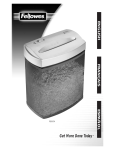
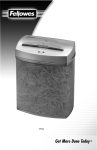
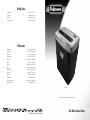
Help Line
Australia
+1-800-33-11-77
Canada
+1-800-665-4339
México
+1-800-234-1185
United States
+1-800-955-0959
Fellowes
Australia
Benelux
Canada
Deutschland
France
Italia
+61-3-8336-97000
+31-(0)-76-523-2090
+ 1-905-475-6320
+ 49-(0)-5131-49770
+ 33-(0)-1-30-06-86-80
+ 39-(0)-71-730041
Japan
+ 81-(0)-3-5496-2401
Korea
+ 82-(0)-2-3462-2884
Malaysia
+ 60-(0)-35122-1231
Polska
+ 48-(22)-771-47-40
Spain
+ 34-91-748-05-01
Singapore
United Kingdom
United States
+(65)-6221-3811
+ 44-(0)-1302-836836
+ 1-630-893-1600
DM10C
Please read these instructions before use
Get More Done Today ™
© 2005 Fellowes. Printed in China. Form No. 401188
Dear Customer,
Thank you for buying a Fellowes Personal Shredder. We have
made many improvements in our personal shredder since its
introduction in 1990 as the first of its kind on the market.
We are confident that it offers you the greatest value for your
money in its product category today. We hope it meets – or even
exceeds – your expectations.
To ensure years of safe, efficient use, please read these few
pages about your new shredder. If this manual doesn’t answer
all your questions or if you wish to comment on this product, we
welcome your call or letter.
Sincerely,
James Fellowes
CEO
Contents
A
B
Product Profile . . . . . . . . . . . . . . . . . . . . . . . . . . . . . . . . . . . . . . . . . . . . . . . . . . . . .3
Important Safety Instructions . . . . . . . . . . . . . . . . . . . . . . . . . . . . . . . . . . . . . . . . . . .3
Set-Up . . . . . . . . . . . . . . . . . . . . . . . . . . . . . . . . . . . . . . . . . . . . . . . . . . . . . . . . . .4
Operation . . . . . . . . . . . . . . . . . . . . . . . . . . . . . . . . . . . . . . . . . . . . . . . . . . . . . . .4
Maintenance . . . . . . . . . . . . . . . . . . . . . . . . . . . . . . . . . . . . . . . . . . . . . . . . . . . . . .5
Troubleshooting . . . . . . . . . . . . . . . . . . . . . . . . . . . . . . . . . . . . . . . . . . . . . . . . . . .5
Limited Warranty . . . . . . . . . . . . . . . . . . . . . . . . . . . . . . . . . . . . . . . . . . . . . . . . . . .6
2
Set-Up
Product Profile
This product is built to shred paper, staples, small paper clips, credit
cards, CDs and DVDs (CDs and DVDs in designated slot). It is not built to
shred transparencies, adhesive labels, newspaper, cardboard, large paper
clips, or plastic (other than items noted above). Attempting to shred items
not intended for this shredder may cause damage.
Confetti-cut (DM10C)
Paper
Sheet capacity*
Paper shred size
Maximum paper width
Speed (at paper capacity)
Maximum running time (duty cycle on)
Automatic cool-down period
Recommended daily capacity
Credit Cards
Credit card capacity
Recommended daily capacity
CDs/DVDs
CDs/DVDs capacity
Recommended daily capacity
10 sheets
5/32" x 1-3/8" (3.9 x 35 mm)
9" (229 mm)
14 ft/min
20 minutes
40 minutes
25-50 shredding passes
1
10
1
10
*Based on 8-1/2 x 11” (75 g/20 lb.) paper with shredder operating at rated voltage; heavier paper, high humidity, or
other than rated voltage may reduce sheet capacity.
NOTE: These products have met international standards for motor temperature rise: Independent product testing
agencies approved each model at the midpoint of its sheet-per-pass limit. In the tests, the agencies also varied the
available voltage 10% below and 6% above its normal range, stopping shredding only to empty the basket.
IMPORTANT SAFETY INSTRUCTIONS
READ ALL INSTRUCTIONS BEFORE USING
While assembling shredder
For safety reasons, this model will operate only if the shredder head (6) is in the correct
position on the cabinet (2) and used with supplied basket (3).
• Position shredder head over cabinet. Place shredder head on top of cabinet as shown in
Figure A.
• Firmly push down on four corners of shredder head to "lock" shredder head into position.
• Push basket into shredder cabinet as shown in Figure B.
Note: To disassemble, pull out basket, hold cabinet down by placing foot on bottom shelf,
and firmly pull up on shredder head.
Operation
For convenience, your shredder is equipped with an automatic-start sensor (8). This
means that when the control switch (9) is in the automatic [I] position, the shredder will
start running when you put paper into it and stop a few seconds after the paper has
passed through. Because the sensor cannot tell the difference between paper and other
objects, this feature can also be a hazard, especially to children and pets. To avoid accidents, turn off the shredder as soon as you are finished. Unplug shredder if it will not be
used for an extended period.
To shred
• Press control switch (9) to automatic [I] position. Green ready light (4) should turn on.
PAPER
• Feed paper straight into entry (1), releasing when shredder begins shredding; see Product
Profile for limits on paper width, shreddable items, sheet capacity, etc.
• Shred no more than 20 minutes; shredding longer will cause shredder to turn itself off for
40 minutes to cool down.
• Press control switch to off [O] position after cutting has stopped.
CDs, or DVDs
• Slide safety cover (12) to the front to expose the CD entry (11).
• Hold CD or DVD at the edge and feed one at a time, straight into entry (11) releasing
when shredding begins. Shredder will stop when item has passed through entry. CDs and
DVDs will be shredded into small particles.
• Slide cover (12) to the back when done shredding media.
CAUTION: Do not hold CD or DVD with finger through the center ring while feeding into
shredder.
• Check shredder for damage or defects; some paper particles in the basket are normal
due to product testing and does not indicate a defect.
• If the cord is damaged do not replace cord or use the machine. Return machine
for a replacement.
• Avoid touching exposed blades on underside of confetti-cut shredder head.
• Plug power cord in an outlet that can easily be reached.
• Do not place shredder near or over a heat or water source.
In case of a paper jam, which may occur if the shredder is pushed beyond its specified
capabilities, press the control switch to the off [O] position and empty the basket if full.
Then:
While operating shredder
2)
• Keep hands and hanging objects (jewelry, ties, loose clothing,
long hair, etc.) away from paper entry.
• Keep children and pets away from the shredder.
3)
When not in use
• Always turn off and unplug shredder
• Unplug before emptying basket
• Do not open shredder head: Danger of electric shock.
NOTE: Do not use flammable synthetic oil, petroleum-based products or
3 aerosols of any kind on or near product at any time.
1)
Press and hold control switch in reverse [R] position and attempt to back paper out of
shredder.
If shredder jams in reverse mode, press control switch to automatic [I] position and
attempt to continue shredding operation.
If shredder jams again, alternate control switch slowly between reverse [R] and automatic [I] positions to attempt to move jammed paper completely through shredder.
If you are unable to clear the jam using this method, turn off and unplug the shredder;
remove the wastebasket from cabinet and carefully remove any paper extending below the
cutting cylinders; empty the wastebasket; insert wastebasket and repeat jam clearing procedure.
4
Maintenance
Regular emptying of the basket is important to ensure the smooth operation of the
cutting cylinders. If you can see paper in the basket window (7), turn off the shredder, pull
out the basket and empty basket contents.
Regular oiling of the shredder is also necessary to ensure proper performance. If you
are running the shredder at or near capacity, we recommend oiling it monthly. Using
Fellowes Powershred Lubricant #35250 or other non-aerosol vegetable-based oil in a
long-nozzle container:
• Apply oil over full width of paper entry (1) with shredder in off [O] position.
• Press control switch to automatic [I] position which will cause shredder to run
for about 2 seconds.
• Press and hold control switch in reverse [R] position for 3-5 seconds.
• Repeat above automatic [I] and reverse [R] sequence three times.
REMINDER: Do not use flammable synthetic oil, petroleum-based products or
aerosol lubricants of any kind in or near the shredder at any time.
Limited Warranty
Fellowes, Inc. warrants the cutting cylinders of the machine to be free from defects in
material and workmanship for 5 years from the date of purchase by the original consumer. Fellowes warrants all other parts of the machine to be free of defects in material
and workmanship for 1 year from the date of purchase by the original consumer. If any
part is found to be defective during the warranty period, your sole and exclusive remedy
will be repair or replacement, at Fellowes’ option and expense, of the defective part.
This warranty does not apply in cases of abuse, mishandling or unauthorized repair. ANY
IMPLIED WARRANTY, INCLUDING THAT OF MERCHANTABILITY OR FITNESS FOR A
PARTICULAR PURPOSE, IS HEREBY LIMITED IN DURATION TO THE APPROPRIATE WARRANTY PERIOD SET FORTH ABOVE. IN NO EVENT SHALL FELLOWES BE LIABLE FOR
ANY CONSEQUENTIAL OR INCIDENTAL DAMAGES ATTRIBUTABLE TO THIS PRODUCT.
This warranty gives you specific legal rights. You may have other legal rights that vary from
this warranty. The duration, terms and conditions of this warranty are valid worldwide,
except where different limitations, restrictions or conditions may be required by local law.
To obtain service under this warranty, please contact us (see back cover) or your dealer.
Troubleshooting
If you have a problem with your shredder, check the symptoms and remedies below. If you
cannot solve the problem this way, contact Fellowes Customer Service. Do not open
shredder head to attempt repair: It could expose you to serious electric shock and will
void your warranty.
Symptom
Remedy
Shredder does not start or stops while
shredding.
• Make sure shredder is plugged in and
switch is in automatic [I] position.
• If paper appears to be jammed. Follow
instructions under Operation.
• Check basket position; basket must be
pushed all the way in the cabinet.
Follow instructions under Set-Up.
Overheat light (10) turns on and shredder
will not operate.
• Wait 40 minutes for shredder to cool
down before trying again.
Red display light (5) turns on and shredder
will not operate.
• If paper appears to be jammed. Follow
instructions under Operation.
• Check basket position; basket must
be pushed all the way in the cabinet.
Follow instructions under Set-Up.
5
Shredder squeaks, grinds or runs below
capacity.
• Oil cutting cylinders. Follow instructions
under Maintenance.
Shredder continues to run for a few seconds after shredding has been completed.
• No action required. This is a self-cleaning function.
6