1
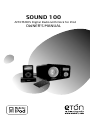
SOUND 100 AM/FM/RDS Digital Radio With Dock for iPod OWNER’S MANUAL SOUND 100 OWNER’S MANUAL Need Help? Contact Us. Etón Corporation, 1015 Corporation Way, Palo Alto, CA 94303, USA. 1-800-872-2228 (U.S.); 1-800-637-1648 (Canada); 650-903-3866 (worldwide); M-F, 8:30-4:00, Pacific Standard Time; www.etoncorp.com. WARNING • Do not expose this appliance to rain or moisture. • Do not submerge or expose for extended period to water. • Protect from high humidity and rain. • Only operate within specified temperature range (0 °C to 40 °C). • Unplug immediately if liquid has been spilled or object have fallen into the apparatus. • Clean only with a dry cloth. Do not use detergents or chemical solvents as this might damage the finish. • Unplug and disconnect external antennas during lightning storms. • Do not remove cover [or back]. • Refer servicing to qualified service personnel. ENVIRONMENT DISPOSAL According to the European Directive 2002/96/EC all electrical and electronic products must be collected separately by a local collection system. Please act according to your local rules and do not dispose of your old products with your normal household waste. 1 SOUND 100 OWNER’S MANUAL WHAT YOUR RADIO INCLUDES Owner’s manual, remote control, FM antenna wire, iPod dock. PREPARING YOUR RADIO FOR USE Plug the AC adapter into the12 VAC socket on the back of the radio. If using the internal AM antenna, select INT AM switch position. If using the external AM antenna, select the EXT SWITCH position. The EXT SWITCH is not for FM antennas, simply attach your FM antenna to the socket. PREPARING THE REMOTE FOR USE Grip the plastic piece on the bottom of the remote unit and pull it out. If the battery drains replace it with a CR/DL2025. See installation diagram on reverse of remote. POWERING THE RADIO Plug the Power Cord into an AC (mains) outlet. When it is first plugged in, it will be in the standby mode. In standby mode, only the clock display is activated and the radio is off. To turn the radio on, use a quick, short press of the power button that’s on the radio or the remote. To place it back into standby mode, use a quick, short press of the power button. BACKUP BATTERIES On the rear of the radio is a backup battery compartment that holds 2 AA alkaline batteries for backup of time in case of power failure. Use only new batteries of exactly the same brand and type. The batteries are not included. 2 SOUND 100 OWNER’S MANUAL VOLUME CONTROL The volume is controlled with the volume knob or the VOL buttons on the remote. Turning the volume knob clockwise increases the volume; counterclockwise decreases volume. Pressing the remote’s VOL + increases the volume; pressing the VOL - button decreases the volume. MUTE BUTTON Use the remote’s mute button to mute the audio. USING THE HEADPHONES/EARPHONES Before placing Earphone/Headphone in/on your ears, turn the volume all the way down. Use Headphone/Earphone with 1/8 inch (3.5 mm) stereo plug. Plug them into the earphone socket on the back of the radio SELCTING AM/FM, AUX-IN OR iPOD After turning on the radio, use sequential presses of the MODE button on the radio or the remote to select AM/FM, AUX-IN or iPod. USING THE RDS BUTTON Use this button to turn on RDS, Radio Data System, on FM stations. Select RDS OFF, RDS PTY or RDS Radio Text. RDS PTY means RDS program type. All stations do not use RDS. THose stations using it will display their call letters in the display and may also display the name of the group singing, the album’s name and the title of the song. Such information is diplayed between RDS PTY and RDS Radio Text selections. 3 SOUND 100 OWNER’S MANUAL MANUAL TUNING Use quick, short presses of the TUNING/SET buttons to tune up down frequency, or use the remote’s TUNE +/- buttons. or AUTO TUNING With auto-tuning the radio stops at the next station with good signal strength. Auto- tuning is engaged by a quick, short press of the remote’s AUTO TUNE button for tuning up-frequency, and a two second press of the same button to auto tune down frequency. USING AUX-IN Use this feature to play other devices that have a line-out feature or earphone output. It accommodates a 1/8th inch stereo plug. Adjust earphone output to low level. Plug the cord into the other device’s line-out or earphone socket first, then into the Etón Sound 100 AUX-IN socket on the back of the unit. USING THE LINE OUT SOCKET This provides input to another device’s line-in socket. It accommodates a 1/8th inch stereo plug. WORKING WITH THE iPOD Use the MENU button to scroll through the menu. Use the buttons to scroll up/down the menu. Use the ENTER button to select the item and to play the song that you’ve selected. Use the button to play/pause the song that’s been selected. Use quick, short presses on the buttons to advance to the next song or skip back to the beginning of the playing song. Press twice to go back to the beginning of the last song. Use continuous pressure on the buttons to skip forward/reverse through the song that’s been selected. 4 SOUND 100 OWNER’S MANUAL WORKING WITH MEMORY PRESETS There are 10 memory presets total, 5 each for AM, FM. Note that the procedures below will also overwrite what has been previously stored into the memory. That is, a memory cannot be ‘erased’, but can be overwritten. Storing on the radio 1. Using the procedures described previously, tune to the radio station the at you wish to store. 2. Press the MEMORY button for 2 seconds; the memory number will flash in the LCD, 3. Immediately select the desired memory number with TUNING/SET buttons. 4. Press the MEMORY button again. Storing with the remote 1. Tune to the station that you wish to store. 2. Press one of the remote’s numeric buttons, 1-5, for two seconds. ACCESSING MEMORY PRESETS 1. Tune to the band of your choice, AM or FM. 2. Use quick, short presses of the MEMORY button to choose the stored station of your choice, or use the remote’s button 1-5. SETTING THE CLOCK, ALARM, AND SLEEP TIMER On the rear of the radio is a battery compartment allowing you to install two AA batteries to save these settings during power loss or when unplugging the radio. The clock, alarm, and sleep timer can be set in either ‘standby’ or ‘on’ mode 5 SOUND 100 OWNER’S MANUAL SETTING THE CLOCK The clock is a 24-hour clock, showing AM and PM in the display. 1. Press the radio’s or the remote’s TIME SET button for 3 seconds; note that the minutes flash. 2. Use the radio’s TUNING/SET buttons or the remote’s TUNE +/buttons to set the minutes. 3. Give the radio’s or the remote’s TIME SET button a quick, short press; note that the hour flashes. 4. Use the radio’s TUNING/SET buttons or the remote’s TUNE +/buttons to set the correct hour. 5. Press the radio’s or the remote’s TIME SET button to complete the new time setting and to exit the time set mode. SETTING THE ALARM TIME 1. Press the radio’s or the remote’s ALARM button for 3 seconds; note that the hour flashes. 2. Use the radio’s TUNING/SET buttons or the remote’s TUNE +/buttons to set the desired wake-up hour. 3. Give the radio’s or the remote’s ALARM button a quick, short press; note that the minutes flash. 4. Use the radio’s TUNING/SET buttons or the remote’s TUNE +/buttons to set the correct minutes. 5. Press the radio’s or the remote’s ALARM button; note that the speaker symbol flashes for 5 seconds and then disappears. The alarm time is now set; when activated it will function for one hour. ACTIVATING THE ALARM The alarm functions for one hour. For the alarm to function it must be activated. To do this, use quick, short presses of the radio’s or the remote’s ALARM button, causing the following to appear in the display: 6 SOUND 100 OWNER’S MANUAL • ALARM with speaker symbol – wakes you up to a beeper sound. • ALARM with musical note symbol – wakes you up to the last radio station selected by either tuning or by selecting a memory. • ALARM, speaker symbol and musical note symbol all disappear from the display, thus deactivating the alarm completely. NOTE: When using the alarm with the musical note symbol, be sure to turn the volume up to a level that will wake you. WAKING TO A MEMORY PRESET Tune to the memory preset of your choice, set the alarm time, activate the alarm and place the radio in standby mode. USING THE SNOOZE FEATURE Once the alarm activates, pressing the radio’s or the remote’s SNOOZE button allows cancellation of the alarm for 5 minutes; then the alarm resumes. Snooze can be activated 12 times. To completely cancel the snooze setting, press the radio’s or the remote’s ALARM button. SETTING THE SLEEP TIMER The sleep timer enables play for a specified amount of time (15-90 minutes) and then shuts off. When the SLEEP function is enabled, the main display shows the sleep symbol. • To activate the sleep timer, turn on the radio and press the radio’s or the remote’s SLEEP button with successive, quick, short presses to select a sleep time of 15-90 minutes (15, 30, 45, 60, 75, or 90). This setup mode is automatically exited after about 4 seconds. 7 SOUND 100 OWNER’S MANUAL • Once activated, you can see the balance of time by pressing the SLEEP button for 2 seconds. • To deactivate the sleep timer, press the radio’s or the remote’s SLEEP button with successive, quick, short presses to select OFF. This setup mode is automatically exited after about 4 seconds. SPECIFICATIONS • • • • • FM Frequency 87.5 – 108 mHz AM Frequency 522-1620 KHz Speaker Output Power 5W. Power Supply: input 230 VAC, 50 Hz; output 12 VAC, 1.6A. Specification and the design are subject to possible modifications without notice due to improvement. NOTE: In case of electrical malfunction, perform a reset. To perform a reset, turn off the unit. Press the MUTE button for 5 seconds; the radio resets setting time back to 12:00. Turn it back on. WARRANTY REGISTRATION To ensure full warranty coverage or product updates, registration of your product should be completed as soon as possible after purchase or receipt. You may use one of the following options to register your product: 1. By visiting our website at http://www.etoncorp.com 2. Mail in enclosed warranty card. 3. Mail your registration card or information to following address; include your name, full mailing address, phone number, email address, model purchased, date purchased, retail vendor name: Etón Corporation 1015 Corporation Way Palo Alto, CA 94303 USA 8 SOUND 100 OWNER’S MANUAL LIMITED WARRANTY Retain the warranty information from your warranty card with your proof of purchase or the Limited Warranty information can also be viewed at www.etoncorp.com. SERVICE FOR YOUR PRODUCT To obtain service for your product, we recommend first contacting an Etón service representative at 1-800-872-2228 US, 1-800-6371648 Canada, (650) 903-3866, [email protected] or your respective country distributor in Europe (see enclosed list) for problem determination and trouble-shooting. If further service is required, the technical staff will instruct how to proceed based on whether the radio is still under warranty or needs non-warranty service. WARRANTY – If your product is still in warranty and the Etón service representative determines that warranty service is needed, a return authorization will be issued and instructions for shipment to an authorized warranty repair facility. Do not ship your radio back without obtaining the return authorization number. NON-WARRANTY – If your product is no longer under warranty and requires service our technical staff will refer you to the nearest repair facility that will be able to best handle the repair. For service outside of North America, please refer to the distributor information included at time of purchase/receipt. LIST OF EUROPEAN DISTRIBUTORS Please see attached Distributors List. 9 10 SOUND 100 MANUAL D’OPÉRATION AVEZ-VOUS BESOIN D’AIDE ? Si vous avez besoin d’aide, contactez-nous SVP, lundi-vendredi, 8:30 – 16:00, heure du Pacifique nord-américain. 1-800-872-2228 des ÉU; 1-800-637-1648 du Canada; 650-903-3866, international; Télécopieur: 650-903-3867; site web, www.etoncorp.com; Etón Corporation , 1015 Corporation Way, Palo Alto, CA 94303, USA AVERTISSEMENT • Ne pas exposer cet appareil à de la pluie ou de la moisissure. • Ne pas submerger dans ou exposer pour de longues périodes à de l’eau. • Protéger de la haute humidité et de la pluie. • Utiliser seulement dans la gamme de température spécifiée (0 °C à 40 °C). • Débrancher immédiatement si du liquide a été déversé ou si un objet est tombé dans l’appareil. • Nettoyer seulement avec un chiffon sec. Ne pas utiliser de déter gents ou de solvants chimiques sous crainte d’endommager la finition. • Débrancher et déconnecter les antennes externes durant les orages. • Ne pas enlever le couvercle [ou l’arrière]. • Référer le service à du personnel qualifié. ENVIRONNEMENT ÉLIMINATION Tous les produits éléctriques et éléctroniques doivent être collectés séparément par un système de collecte lo cal, d’après la European Directive (directive européenne) 2002/96/EC. Prière d’agir selon vos lois locales et de ne pas disposer de vos vieux produits avec vos déchets domestiques normaux. 11 SOUND 100 MANUAL D’OPÉRATION FOURNI AVEC VOTRE RADIO Manuel de l’utilisateur, commande à distance, câble d’antenne FM, station iPod. PRÉPARER VOTRE RADIO À L’EMPLOI Branchez l’adaptateur AC à la prise 12 VAC située au dos de la radio. Si vous utilisez l’antenne interne AM, sélectionnez la position de branchement INT AM. Si vous utilisez l’antenne externe AM, sélectionnez la position EXT SWITCH. La position EXT SWITCH ne convient pas pour les antennes FM, il suffit de brancher votre antenne FM à la prise. PRÉPARER VOTRE TÉLÉOMMANDE À L’EMPLOI Effectuez une pression sur la pièce en plastique dans le bas de la télécommande et retirez-la. Lorsque la pile est vide, remplacez-la par une pile de type CR/DL2025. Voir le diagramme d’installation au dos de la télécommande. METTRE LA RADIO SOUS TENSION Branchez le cordon d’alimentation à la prise de courant AC (réseau électrique). La radio sera en mode veille lors du premier branchement. En mode veille, seul l’écran de l’heure est activé et la radio est éteinte. Pour mettre la radio en marche, appuyez brièvement et rapidement sur le bouton Marche/Arrêt de la radio ou de la télécommande. Pour remettre la radio en mode veille, appuyez brièvement et rapidement sur le bouton Marche/Arrêt. 12 SOUND 100 MANUAL D’OPÉRATION PILES DE MÊMOIRE Le compartiment batterie se trouve à l’arrière de l’appareil. On peut y insérer deux piles alcalines de type AA afin d’assurer le maintien des réglages, de l’heure et des fonctions alarme. Utiliser exclusivement des piles neuves de la même marque et du même type. Les piles ne sont pas comprises dans la livraison. RÉGLAGE DU VOLUME Le volume se règle à l’aide du bouton du volume ou des boutons VOL de la télécommande. Tournez le bouton du volume dans le sens des aiguilles d’une montre pour augmenter le volume ; tournez-le dans le sens inverse des aiguilles d’une montre pour réduire le volume. Appuyez sur le bouton VOL + de la télécommande pour augmenter le volume; Appuyez sur le bouton VOL - pour réduire le volume. BOUTON MUTE Utilisez le bouton « mute » de la télécommande pour couper le son. UTILISER LES OREILLETTES/LES ÉCOUTEURS Avant de placer les oreillettes/les écouteurs dans/ sur vos oreilles, mettez par précaution le volume au minimum. Utilisez les oreillettes/ les écouteurs avec une fiche stéréo de 3.5 mm. Branchez-les à la prise destinée aux écouteurs au dos de la radio. SÉLECTIONNER AM/FM, AUX-IN OU IPOD Après avoir mis la radio en marche, appuyez sur le bouton MODE de la radio ou de la télécommande pour sélectionner AM/FM, AUX-IN ou iPod. 13 SOUND 100 MANUAL D’OPÉRATION UTILISER LE BOUTON RDS Utilisez ce bouton pour activer RDS, Radio Data System, sur les stations FM. Sélectionnez RDS OFF, RDS PTY ou RDS Radio Text. RDS PTY signifie “type de programme RDS ». Les stations l’utilisant afficheront leurs lettres d’appel sur l’écran et éventuellement même le nom du groupe à l’antenne, le nom de l’album et le titre du morceau. Ces informations sont affichées entre RDS PTY et les sélections RDS Radio Text. PROGRAMMATION MANUELLE Appuyez rapidement et brièvement sur les boutons TUNING/SET pour syntoniser la fréquence supérieure ou la fréquence inférieure ou servez-vous des boutons TUNE +/- de la télécommande. L’heure, l’alarme et la fonction Sleep peuvent être programmées en mode ‘veille’ ou en mode ‘marche’. PROGRAMMATION AUTOMATIQUE Avec la programmation automatique, la radio s’arrête à la station suivante et un signal sonore intense retentit. Pour activer la programmation automatique, appuyez rapidement et brièvement sur le bouton AUTO TUNE de la télécommande pour syntoniser la fréquence supérieure et effectuez une pression de deux secondes sur le même bouton pour syntoniser la fréquence inférieure. UTILISER AUX-IN Utilisez cette fonction pour lire d’autres appareils disposant d’une fonction line-out ou d’une sortie pour oreillettes. Une fiche stéréo de 3,5 mm est appropriée. Réglez la sortie des oreillettes au volume minimum. Branchez tout d’abord le câble à la prise line-out ou à la 14 SOUND 100 MANUAL D’OPÉRATION prise pour oreillettes des autres appareils, puis à la prise AUX-IN située au dos du modèle Etón Sound 100. UTILISER LA PRISE LINE-OUT Elle fournit une entrée vers la prise d’autres appareils. Une fiche stéréo de 3,5 mm est appropriée. SE SERVIR DE L’IPOD Utilisez le bouton MENU pour faire défiler le menu. Utilisez les boutons pour faire défiler le menu vers le haut/ vers le bas. Utilisez le bouton ENTER pour choisir le titre et écouter le morceau que vous avez sélectionné. Utilisez le bouton pour lire/ stopper provisoirement le morceau que vous avez sélectionné. Appuyez rapidement et brièvement sur les boutons pour passer au morceau suivant ou revenir au début du morceau en cours. Appuyez deux fois sur pour revenir au début du dernier morceau écouté. Effectuez une pression continue sur les boutons pour avancer/ aller en arrière à partir du morceau que vous avez sélectionné. UTILISER LES PRÉSÉLECTIONS MÉMORISÉES Il existe en tout 10 présélections mémorisées, 5 pour AM et 5 pour FM. Le processus décrit ci-dessous va par conséquent remplacer le contenu qui avait été mémorisé auparavant. Il ne s’agit pas de ‘supprimer’ une mémoire, mais de modifier son contenu. Mémoriser sur la radio : 1. Utilisez le processus décrit précédemment, recherchez la station de radio que vous souhaitez mémoriser. 2. Appuyez sur le bouton MEMORY pendant 2 secondes; le numéro de mémoire s’affiche sur l’écran, 15 SOUND 100 MANUAL D’OPÉRATION 3. Sélectionnez immédiatement le numéro de mémoire désiré à 4. Appuyez une nouvelle fois sur le bouton MEMORY. Mémoriser à l’aide de la télécommande : 1. Recherchez la station de radio que vous souhaitez mémoriser. 2. Appuyez sur l’un des boutons numériques de la télécommande, 1-5, pendant deux secondes. ÉCOUTER LES PRÉSÉLECTIONS MÉMORISÉES 1. Réglez le secteur de votre choix, AM ou FM. 2. Appuyez rapidement et brièvement sur le bouton MEMORY pour sélectionner la station mémorisée de votre choix ou servez-vous des boutons 1-5 de la télécommande. PROGRAMMER L’HEURE, L’ALARME ET LA FONCTIONS SLEEP Le compartiment à piles situé au dos de la radio vous permet d’insérer deux piles AA to afin de sauver ces programmations en cas de coupure de courant ou lorsque vous débranchez la radio. L’heure, l’alarme et la fonction Sleep peuvent être programmées en mode ‘veille’ ou en mode ‘marche’. PROGRAMMER L’HEURE Il s’agit d‘une horloge avec format 24 heures affichant AM et OM sur l’écran. 1. Appuyez pendant 3 secondes sur le bouton TIME SET de la radio ou de la télécommande; les minutes clignotent. 2. Servez-vous des boutons TUNING/SET de la radio ou des boutons TUNE +/- de la télécommande pour programmer les minutes. 3. Appuyez rapidement et brièvement sur le bouton TIME SET de la radio ou de la télécommande; les heures clignotent. 16 SOUND 100 MANUAL D’OPÉRATION 4. Servez-vous des boutons TUNING/SET de la radio ou des bouton TUNE +/- de la télécommande pour programmer l’heure exacte. 5. Appuyez sur le bouton TIME SET de la radio ou de la télécom mande pour appliquer la programmation de la nouvelle heure et quitter le mode de programmation de l’heure. PROGRAMMER L’ALARME 1. Appuyez pendant 3 secondes sur le bouton ALARM de la radio ou de la télécommande; les heures dignotent. 2. Servez-vous des boutons TUNING/SET de la radio ou des boutons TUNE +/- de la télécommande pour programmer l’heure à laquelle vous souhaitez être réveillé. 3. Appuyez rapidement et brièvement sur le bouton ALARM de la radio ou de la télécommande; les minutes dignotent. 4. Servez-vous des boutons TUNING/SET de la radio ou des boutons TUNE +/- de la télécommande pour programmer les minutes exactes. 5. Appuyez sur le bouton ALARM de la radio ou de la télécommande; le symbole speaker dignote pendant 5 secondes et disparaît ensuite. L’heure de l’alarme est maintenant programmée; une fois activée, elle fonctionnera pendant une heure. ACTIVER L’ALARME L’alarme fonctionne pendant une heure. Pour fonctionner, l’alarme doit être activée. Pour cela, appuyez rapidement et brièvement sur le bouton ALARM de la radio ou de la télécommande. Les symboles suivants apparaissent sur l’écran: 17 SOUND 100 MANUAL D’OPÉRATION • ALARM avec le symbole speaker -vous réveille avec une sonerie. • ALARM avec le symbole note de musique -vous réveille avec la dernière station de radio sélectionnée los de la recherche d’une sta tion ou du choix d’une présélection. • ALARM, les symboles speaker et note de musique disparaissent de l’écran, l’alarme est entièrement désactivée. ATTENTION: en procédant au réglage de la fonction réveil à l’aide du symbole clé de sol, veiller à régler la sonorité à une puissance suffisante pour qu’elle soit bien audible. SE RÉVEILLER AVEC UNE PRÉSÉLECTION MÉMORISÉE Recherchez la présélection mémorisée de votre choix, programmez l’heure de l’alarme, activez l’alarme et mettez la radio en mode veille. UTILISER LA FONCTION RÉPÉTITION (SNOOZE) Une fois l’alarme activée, appuyez sur le bouton SNOOZE de la radio ou de la télécommande pour entraîner l’annulation de l’alarme pendant 5 minutes ; ensuite, l’alarme retentit de nouveau. La fonction Snooze peut être activée 12 fois. Pour annuler entièrement la programmation de répétition, appuyez sur le bouton ALARM de la radio ou de la télécommande. PROGRAMMER LA FONCTION SLEEP Avec la fonction Sleep, la radio fonctionne pendant un laps de temps défini (15-90 minutes) et s’éteint ensuite. Lorsque la fonction SLEEP est activée, l’écran principal indique le symbole Sleep. • Pour activer la fonction Sleep, mettez la radio en marche et effectuez des pressions successives, rapides et brèves sur le bouton SLEEP de la radio ou de la télécommande pour 18 SOUND 100 MANUAL D’OPÉRATION sélectionner une durée Sleep de 15-90 minutes (15, 30, 45, 60, 75 ou 90). Ce mode d’installation est activé automatiquement après 4 secondes environ. • Une fois la fonction activée, vous pouvez voir le balancier en appuyant sur le bouton SLEEP pendant 2 secondes. • Pour désactiver la fonction Sleep, effectuez des pressions successives, rapides et brèves sur le bouton SLEEP de la radio ou de la télécommande pour sélectionner OFF : Ce mode d’installation est activé automatiquement après 4 secondes environ. SPÉCIFICATIONS • • • • Fréquence FM : 87.5-108 mHz. Fréquence AM : 522-1620 KHz Sortie son : puissance de 5W. Alimentation électrique : entrée 230 VAC, 50 Hz ; sortie 12 VAC,1,6A. • Ces spécifications, ainsi que le design, pourront être éventuelles modifiées sans que cette amélioration ne soit mentionnée. ENREGISTREMENT DE GARANTIE Il est conseillé d’effectuer l’enregistrement de votre produit dès que possible après l’achat ou la réception afin d’assurer une couverture de garantie complète ou les mises à jour du produit. Vous pouvez enregistrer votre produit de trois manières différentes : 1. En visitant notre site web http://www.etoncorp.com. 2. En envoyant la carte de garantie incluse par la poste. 3. En renvoyant votre carte ou votre information d’enregistrement à l’adresse suivante ; inscrivez votre nom, votre adresse postale complète, votre numéro de téléphone, votre adresse e-mail, le nom du modèle acheté, la date d’achat, le nom du revendeur : 19 SOUND 100 MANUAL D’OPÉRATION Etón Corporation 1015 Corporation Way Palo Alto, CA 94303 USA GARANTIE LIMITÉE Conservez l’information de garantie de votre carte de garantie avec votre preuve d’achat ou consultez l’information de garantie limitée sur www.etoncorp.com. SERVOCE DE VOTRE PRODUIT Pour bénéficier d’un service de garantie pour votre produit, nous vous conseillons de contacter en premier lieu un représentant du service de garantie Etón au 1-800-872-2228 pour les États-Unis, 1800-637-1648 pour le Canada ou (650) 903-3866, customersvc@ etoncorp.com ou le revendeur dans votre pays en Europe (voir liste ci-jointe) qui constatera le problème et vous dépannera. Si une intervention supplémentaire s’avère nécessaire, le personnel technique vous informera de la marche à suivre. Elle diffère si votre radio est toujours sous garantie ou si elle est soumise à une réparation hors garantie. GARANTIE – Une autorisation de retour sera émise avec des instructions pour l’expédition à un établissement de réparations de garanties autorisé si votre produit est toujours sous garantie et que le représentant de service Etón détermine que du service sous garantie est requis. Ne renvoyez pas votre radio sans obtenir le numéro d’autorisation de retour. HORS-GARANTIE – Si votre produit n’est plus sous garantie et doit être réparé, notre représentant du service de garantie Etón vous conseillera l’atelier de réparation le plus proche qui sera en mesure de réparer votre produit. 20 SOUND 100 MANUAL D’OPÉRATION Pour le service de réparation hors Amérique du Nord, consultez l’information fournie par le revendeur au moment de l’achat/de la réception. LISTE DES REVENDEURS EUROPÉENS Voir la liste des revendeurs ci-jointe. 21 22 SOUND 100 BETRIEB HANDBUCH BENÖTIGEN SIE HILFE? WENDEN SIE SICH AN UNS. Falls Sie Hilfe benötigen, erreichen Sie uns von Montag-Freitag, 8:30 - 16:00, US Pazifische Standardzeit. 1-800-872-2228 aus den USA; 1-800-637-1648 aus Kanada; +1-650-903-3866, weltweit; FAX: +1-650-903-3867; Internet: www.etoncorp.com; Etón Corporation , 1015 Corporation Way, Palo Alto, CA 94303, USA ACHTUNG • Setzen Sie das Gerät weder Wasser noch Feuchtigkeit aus. • Tauchen Sie das Gerät nicht in Wasser. • Schützen Sie das Gerät vor hoher Luftfeuchtigkeit und Regen. • Betreiben Sie das Gerät nur im angegebenen Temperaturbereich (0 °C bis 40 °C). • Ziehen Sie sofort den Netzstecker, wenn Flüssigkeit auf das Gerät geschüttet wurde oder Gegenstände in das Gerät gefallen sind. • Reinigen Sie das Gerät nur mit einem trockenen Tuch. Verwenden Sie keine Reini gungsmittel oder chemische Lösungsmittel, da dadurch die Oberfläche beschädigt werden könnte. • Ziehen Sie während eines Gewitters den Netzstecker und trennen Sie externe Antennen. • Entfernen Sie nicht das Gehäuse [oder die Rückseite]. • Überlassen Sie Wartungs- oder Reparaturarbeiten immer qualifi ziertem Fachpersonal. UMWELT ENTSORGUNG Gemäß der europäischen Richtlinie 2002/96/EC müssen alle elektrischen und elektronischen Geräte über lokale Sammelstellen getrennt entsorgt werden. Bitte beachten Sie die lokalen Vorschriften und entsorgen Sie Ihre Altgeräte nicht mit dem normalen Haushaltsmüll. 23 SOUND 100 BETRIEB HANDBUCH LIEFERUMFANG DES RADIOS Bedienungsanleitung, Fernbedienung. FM-Drahtantenne, Docking Station für iPod VOR DER INBETRIEBNAHME DES GERÄTS Netzteil in den dafür vorgesehenen Steckplatz an der Rückseite des Geräts einstecken (12 VAC). Für die Verwendung der internen AM-Antenne Schalter auf INT AM stellen. Für die Verwendung der externen AM-Antenne Schalter auf EXT AM stellen. EXT SWITCH ist nicht für FM-Antennen ausgelegt; FM-Antenne einfach einstecken. VOR DER INBETRIEBNAHME DER FERNDIENUNG Das Kunststoffteil unterhalb der Fernbedienung herausziehen. Nur Batterien vom Typ CR/DL2025 verwenden. Installationsabbildung auf der Rückseite der Fernbedienung beachten. ANSCHLUSS AN DIE STROMVERSORGUNG Das Netzkabel des Geräts an die Steckdose anschließen. Beim ersten Anschließen an die Stromversorgung befindet sich das Gerät im Standby-Modus. Im Standby-Modus ist nur die Uhrzeitanzeige aktiv, das Radio ist ausgeschaltet. Zum Einschalten kurz auf die AN/AUS-Taste am Gerät oder auf der Fernbedienung drücken. Durch erneutes Drücken auf die AN/AUS-Taste kehrt das Gerät in den Standby-Modus zurück. BACKUP-BATTERIEN Das Batteriefach befindet sich an der Rückseite des Geräts. Hier können zwei Alkali-Batterien vom Typ AA eingelegt werden, damit 24 SOUND 100 BETRIEB HANDBUCH Einstellungen, Uhrzeit und Alarmfunktionen erhalten bleiben. Ausschließlich neue Batterien der gleichen Marke und des gleichen Typs verwenden. Die Batterien sind nicht enthalten. LAUTSTÄRKEREGELUNG Die Lautstärke lässt sich über den Lautstärkeregler am Gerät oder über die VOL-Tasten auf der Fernbedienung einstellen. Durch Drehen des Knopfes im Uhrzeigersinn wird die Lautstärke erhöht, gegen den Uhrzeigersinn verringert. Durch Drücken der Taste VOL + wird die Lautstärke erhöht, mit der Taste VOL - ässt die Lautstärke verringern. MUTE-TASTE (STUMMSCHALTUNG) Um den Ton abzustellen die MUTE-Taste auf der Fernbedienung drücken. VERWENDUNG VON KOPFHÖRERN Vor dem Aufsetzen der Kopfhörer die Lautstärke komplett nach unten regulieren. Kopfhörer mit einem 3,5-mm-Stereoanschluss verwenden. Kopfhörer in den dafür vorgesehenen Steckplatz an der Rückseite des Geräts einstecken. AUSWAHL NOV UKW/MW, AUX-IN ODER IPOD Bei eingeschaltetem Gerät durch mehrfaches Drücken der MODETaste an dem Gerät oder der Fernbedienung zwischen UKW/WM, AUX-IN oder iPod wählen. 25 SOUND 100 BETRIEB HANDBUCH VERWENDUNG DER RDS-TASTE Über diese Taste lässt sich das Radio-Daten-System bei UKW-Sendern nutzen. Wählbar sind RDS OFF, RDS PTY oder RDS Radio Text (übermittelt Zusatzinformationen, wie z. B. den aktuellen Musiktitel und Interpreten oder Kontaktdaten der Station). RDS PTY steht für „Programme Type“ und ermöglicht die Einteilung der Sender nach Sparten. Bei Sendern, die RDS-Daten ausstrahlen, wird die Senderkennung angezeigt sowie eventuell Name des Interpreten, des Albums und Titel des Songs. Diese Informationen werden unter den Einstellungen RDS PTY und RDS RADIO TEXT angezeigt. MANUELLE SENDERWAHL Durch kurzes Drücken der TUNING/SET-Tasten wird der Frequenzbereich nach oben oder unten abgesucht, die gleiche Funktion steht über die TUNE +/- auf der Fernbedienung zur Verfügung. AUTOMATISCHE SENDERSUCHE Beim automatischen Sendersuchlauf wird der nächste Sender mit klarem Signal eingestellt. Durch kurzes Drücken der Taste AUTO TUNE auf der Fernbedienung startet der automatische Sendersuchlauf aufwärts, durch zweimaliges kurzes Drücken dieser Taste werden die Frequenzen abwärts automatisch durchsucht. AUX-IN-EINGANG Hiermit können andere Geräte mit Ausgangsleitung oder Kopfhörerausgang angeschlossen werden. Diese Geräte müssen über einen 3,5-mm-Stereoanschluss verfügen. Kopfhörerausgang auf geringe Lautstärke stellen. Das Kabel zuerst an den Ausgang des anderen Geräts bzw. der Kopfhörer anschließen. Anschließend auf der Rückseite des Radios an den Steckplatz AUX-IN anschließen. 26 SOUND 100 BETRIEB HANDBUCH STECKPLATZ FÜR AUSGANGSLEITUNG Hieran können über einen 3.5-mm-Stereostecker weitere Geräte mit Eingangsleitung angeschlossen werden. ARBEITEN MIT DEM IPOD Über die MENU-Taste lässt sich das Menü durchsuchen. Über die Tasten im Menü nach oben bzw. nach unten springen. Durch Drücken der ENTER-Taste den markierten Titel auswählen. Mit der Taste den Titel abspielen/unterbrechen. Über kurzes Drücken der Tasten und kann zum nächsten Titel gesprungen werden bzw. zurück an den Anfang des laufenden Titels. Bei zweimaligem Drücken der Taste startet der letzte Titel von vorne. Durch Gedrückthalten der Tasten bewegt man sich innerhalb der gewählten Titel vorwärts bzw. rückwärts. ABSPEICHERN VON LIEBLINGSSENDERN Das Gerät cerfügt insgesamt über 10 Speicherplätze für Lieblingssender (jeweils 5 für UKW and MW). Hinweis: Speicher können nicht gelöscht werden, sondern lediglich durch die nachfolgend beschriebene Prozedur überschrieben werden. Abspeichem am Radio: 1. Den gewünschten Sender wie oben beschrieben suchen. 2. Die MEMORY-Taste für 2 Sekunden drücken; die Ziffer des Speicherplatzes blinkt dann in der LCD-Anzeige. 3. Über die TUNNING/SET-Tasten sofort die gewünschte Ziffer wählen. 4. MEMORY-Taste erneut drücken. Abspeichem mit der Fernbedienung: 1. Den gewünschten Sender einstellen. 2. Zwei Sekunden lang eine der Ziffern (1-5) auf dem Nummernfeld der Fernbedienung drücken. 27 SOUND 100 BETRIEB HANDBUCH GESPEICHERTEN LIEBLINGSSENDER ANWÄHLEN 1. Den gewünschten Wellenbereich (UKW oder MW) wählen. 2. Durch kurzes Drücken der MEMORY-Taste am Gerät oder über die Tasten 1-5 auf der Fernbedienung die gewünschtz Ziffer wählen. EINSTELLEN DER UHRZEIT, DER WECK-UND SCHLAFFUNNKTION Auf der Rückseite des Radios befindet sich das Batteriefach für zwei AA-Batterien. Durch Einlegen von Batterien bleiben die Einsteillungen auch bei Stromausfall oder Trennung des Geräts von der Stromversorgung erhalten. Die Uhrzeit, Weck- und Schlaffunktion lassen sich sowohl im Standby-Modus als auch bei eingeschaltetem Gerät einstellen. UHRZEIT EINSTELLEN Die Uhrzeit wird im 24-Stundenformat angezeigt. Von 0:00 bis 11:59 Uhr erscheint der Zusatz AM (vormittags) und von 12:00 bis 23:59 Uhr der Zusatz PM (nachmittags). 1. Am Gerät oder auf der Fernbedienung die Taste TIME SET 3 Sekun den gedrückt halten, bis die Minutenan zeige blinkt. 2. Über die Tasten TUNING/SET am Radio bzw. TUNE +/- auf der Fernbedienung die Minuten einstellen. 3. Am Gerät oder auf der Fernbedienung die Taste TIME SET einmal kurz drücken, so dass die Stundenanzeige blinkt. 4. Über die Tasten TUNING/SET am Radio bzw. TUNE +/- auf der Fernbedienung die Stunden einstellen. 5. Durch Drücken der TIME SET-Taste am Gerät oder auf der Fern bedienung wird die Uhrzeiteinstellung abge schlossen und der Einstellmodus beendet. 28 SOUND 100 BETRIEB HANDBUCH WECKZEIT EINSTELLEN 1. Am Gerät oder auf der Fernbedienung die Taste ALARM 3 Sekun den gedrückt halten, bis die Stundenanzeige blinkt. 2. Über die Tasten TUNING/SET am Radio bzw. TUNE +/- auf der Fernbedienung die gewünschte Weckzeit (Stunde) einstellen. 3. Am Gerät oder auf der Fernbedienung die Taste ALARM einmal kurz drücken, so dass die Minutenanzeige blinkt. 4. Über die Tasten TUNING/SET am Radio bzw. TUNE +/- auf der Fernbedienung die Minuten einstellen. 5. Am Gerät oder auf der Fernbedienung die Taste ALARM drücken, 5 Sekunden lang blinkt das Lautsprechersymbol und erlischt dann wieder. Die Weckzeit ist nun eingestellt. Der Der WECKFUNKTION AKTIVIEREN Alarm dauert eine Stunde. Nach Einstellen der Weckzeit muss jedoch die Weckfunktion erst aktiviert werden. Am Gerät oder auf der Fernbedienung die ALARM-Taste drücken. Es erscheinen folgende Symbole auf der Anzeige: • ALARM mit Lautsprechersymbol – Wecken mit Summton. • ALARM mit Notenschlüsselsymbol – Wecken mit Musik (zuletzt gehörter Sender durch Sendereinstellung oder Speicher platz). • ALARM, Lautsprecher- und Notenschlüsselsymbol werden nicht angezeigt, d. h., dass die Weckfunktion deaktiviert ist. HINWEIS: Beim Einstellen der Weckfunktion mit Notenschlüsselsymbol darauf achten, dass die Lautstärke zum Wecken ausreichend hoch eingestellt ist. WECKEN MIT MUSIK EINES GESPEICHERTEN LIEBLINGSSENDERS Den gewünschten Speicherplatz anwählen, die Weckzeit einstellen und die Weckfunktion aktivieren. Dann das Gerät in Standby-Modus schalten. 29 SOUND 100 BETRIEB HANDBUCH SNOOZE-FUNKTION Wenn sich der Alarm einschaltet, kann er durch Drücken der SNOOZETaste am Gerät oder der Fernbedienung für 5 Minuten unterbrochen werden. Danach schaltet sich der Alarm automatisch wieder ein. Die SNOOZE-Taste kann bis zu 12 Mal verwendet werden. Zum Ausschalten des Alarms die ALARM-Taste am Gerät oder auf der Fernbedienung drücken. SCHLAFFUNKTION EINSTELLEN Über die Schlaffunktion lässt sich das Gerät nach einer bestimmten Zeit (15-90 Minuten) automatisch ausschalten. Bei aktivierter SLEEP Funktion wird im Display das entsprechende Symbol angezeigt. • Zum Aktivieren der Schlaffunktion die SLEEP-Taste am Gerät oder auf der Fernbedienung drücken und anschließend über mehrmaliges kurzes Drücken die gewünschte Ausschaltzeit von 15-90 Minuten eingeben (15, 30, 45, 60, 75 oder 90). Der Einstellmodus endet automatisch nach ca. 4 Sekunden. • Nach Aktivierung der Schlaffunktion kann die verbleibende Zeit über Drücken der SLEEP-Taste (2 Sekunden lang) angezeigt werden. • Zum Deaktivieren der Schlaffunktion die SLEEP-Taste am Gerät oder auf der Fernbedienung drücken und anschließend durch mehrmaliges kurzes Drücken OFF wählen. Der Einstellmodus endet automatisch nach ca. 4 Sekunden. SPEZIFIKATIONEN • • • • UKW: 87,5-108 mHz MW: 522-1620 KHz Lautsprecherleistung: 5 W Stromversorgung: 230 VAC, 50 Hz (Eingang); 12 VAC, 1,6 A (Ausgang) 30 SOUND 100 BETRIEB HANDBUCH • Spezifikationen und Design können ohne Ankündigung aufgrund von Verbesserungen geändert werden. PRODUKTREGISTRIERUNG Registrieren Sie Ihr Gerät möglichst umgehend nach dem Kauf bzw. Erhalt, um eine vollständige Garantieabdeckung und Produkt-Updates zu gewährleisten. Zur Registrierung stehen Ihnen verschiedene Möglichkeiten zur Verfügung: 1. Auf unserer Webseite unter http://www.etoncorp.com. 2. Rücksenden der beigefügten Garantiekarte 3. Senden Sie die Registrierungskarte oder Daten ausgefüllt mit Ihrem Namen, der vollständigen Adresse, Telefonnummer, E-Mail-Adresse, Modell, Kaufdatum und Händler an folgende Adresse: Etón Corporation 1015 Corporation Way Palo Alto, CA 94030 USA GARANTIEBESTIMMUNGEN Bewahren Sie die Garantiekarte mit den Garantiebestimmungen und den Kaufbeleg auf. Die Garantiebestimmungen können Sie auch unter www.etoncorp.com nachlesen. KUNDENDIENST Wir empfehlen, sich zur Problembestimmung und Fehlerbehebung zuerst an einen Kundendienstmitarbeiter von Etón oder Ihren Generalvertreter des jeweiligen Landes zu wenden. Sie erreichen uns unter 1-800-872-2228 (USA) oder 1-800-637-1648 (Kanada), (650) 903-3866, [email protected] bzw. über das beigefügte Händlerverzeichnis (Europa). Sollte eine Reparatur erforderlich sein, werden Sie unsere technischen Kundendienst¬mitarbeiter über 31 SOUND 100 BETRIEB HANDBUCH das weitere Vorgehen informieren, abhängig davon, ob für das Gerät noch Garantie besteht oder nicht. MIT GARANTIE – Sollte das Gerät innerhalb der Garantiezeit eine Reparatur benötigen, erhalten Sie eine Genehmigungsnummer für die Rücksendung sowie Informationen zum Versand. Senden Sie das Gerät NICHT ohne Genehmigungsnummer zurück. OHNE GARANTIE – Sollte die Garantiezeit bereits abgelaufen und eine Reparatur erforderlich sein, wird Sie unser Mitarbeiter an den nächstgelegenen und für die Reparatur fachlich geeigneten Kundendienst verweisen. Informationen zum Kundendienst außerhalb Nordamerikas erhalten Sie beim Kauf von Ihrem Händler. Händlerverzeichnis (Europa) Siehe beigefügtes Händlerverzeichnis. 32 33 34 SOUND 100 MANUALE DI ISTRUZIONI SERVE AIUTO? Se hai bisogno di aiuto contattaci dal lunedì al venerdì, 8:30 - 16:00, Fuso orario Pacifico. 1-800-872-2228 dagli Stati Uniti; 1-800-6371648 dal Canada; 650-903-3866 dal resto del mondo; FAX: 650903-3867; pagina Web: www.etoncorp.com; Etón Corporation , 1015 Corporation Way, Palo Alto, CA 94303, USA ATTENZIONE • Non esporre l’apparecchio alla pioggia o all’umidità. • Non immergerlo o esporlo a lungo all’acqua. • Proteggilo dall’umidità elevata e dalla pioggia. • Servitene soltanto se la temperatura è compresa tra 0 °C e 40 °C. • Scollegalo immediatamente se è stato versato del liquido o se qualcosa è caduto nell’ap parecchio. • Puliscilo soltanto con un panno asciutto. Non usare detergenti o solventi chimici che potrebbero rovinare la finitura. • Scollega l’apparecchio e le antenne esterne in caso di temporale. • Non rimuovere il coperchio (o il pannello posteriore). • Affida l’assistenza a personale di assistenza qualificato. AMBIENTE ELIMINAZIONE Ai sensi della Direttiva europea 2002/96/CE tutti i prodotti elettrici ed elettronici devono essere oggetto di raccolta selettiva nell’ambito di un sistema di raccolta locale. Conformati alle norme locali e non buttare via i prodotti vecchi con i normali rifiuti domestici. 35 SOUND 100 MANUALE DI ISTRUZIONI QUELLO CHE INCLUDE LA RADIO ACQUISTATA Il manuale dell’utente, telecomando, filo antenna FM, dock iPod. PREPARARE LA RADIO ALL’UTILIZZO Collega l’adattatore a corrente alternata nella presa di corrente a 12 volt sul retro della radio. Se usi l’antenna AM interna, seleziona la posizione INT AM. Se usi l’antenna esterna, seleziona la posizione EXT. La posizione EXT non è adatta per antenne di tipo FM, in tal caso connetti semplicemente la tua antenna FM all’attacco. PREPARARE IL TELECOMANDO ALL’UTILIZZO Togli lo sportello in plastica del vano batterie dietro il telecomando. Se le batterie si scaricano sostituiscile con batterie di tipo CR/DL2025. Vedi lo schema di installazione sul retro del telecomando. ACCENDERE LA RADIO Collega il cavo d’alimentazione ad una presa a corrente alternata (principale). Quando è collegato all’inizio, l’apparecchio sarà in modalità stand-by. In modalità stand-by solamente il display dell’orologio è attivo, la radio è spenta. Accendi la radio e premere velocemente per un breve intervallo di tempo il tasto di accensione/spegnimento o sul telecomando o sull’apparecchio. Per riportare la radio in modalità stand-by, premere di nuovo velocemente e per un breve intervallo di tempo tasto di accensione/spegnimento BATTERIE DI BACKUP Sul retro della radio si trova uno scomparto per batterie di backup che può contenere 2 batterie alcaline AA utili per non perdere le im 36 SOUND 100 MANUALE DI ISTRUZIONI postazioni di memoria, orologio e sveglia. Utilizzare soltanto batterie nuove che siano esattamente della stessa marca e dello stesso tipo. Le batterie non sono incluse.. CONTROLLO VOLUME Il volume si regola con la manopola volume o premendo i tasti VOL sul telecomando. Girando la manopola volume in senso orario si aumenta il volume; in senso antiorario avviene il contrario. Premendo il tasto VOL + sul telecomando si aumenta il volume; premendo il tasto VOL - si diminuisce il volume. TASTO MUTE Usa il tasto MUTE sul telecomando per eliminare del tutto l’audio. USO DI CUFFIE/AURICOLARI Prima di indossare cuffie/auricolari e di porre gli altoparlanti interni a contatto con le orecchie, accertarsi di non avere il volume al massimo. Usa cuffie/auricolari con jack stereo da 1/8 pollici (3.5 mm). Collega il jack nell’attacco cuffie sul retro della radio. SELEZIONARE AM/FM, AUX-IN IPOD Dopo avere acceso la radio, premendo il tasto MODE sulla radio o sul telecomando si potrà selezionare la modalità di funzionamento desiderata: AM/FM, AUX-in o iPod. USO DEL TASTO RDS Usa questo tasto per accedere tramite sistema RDS, Radio Data System, alle stazioni FM. Scegli tra RDS OFF, RDS PTY o RDS Radio Text. 37 SOUND 100 MANUALE DI ISTRUZIONI RDS PTY sta per “RDS program type”(tipo di programma RDS). Per quelle stazioni che usano questa tecnologia comparirà sul display il nome della stazione e si potranno visualizzare anche il nome del cantante, dell’album e del titolo del brano in esecuzione. Tale informazione è visualizzata tra l’ RDS PTY e le voci dell’ RDS Radio Text. TUNING MANUALE Premi velocemente per un breve intervallo di tempo i tasti TUNING/ SET: premi il tasto per passare alla frequenza successiva o il tasto per passare alla frequenza precedente, per la sintonizzazione man ale si possono anche utilizzare i tasti TUNE +/- sul telecomano. SINTONIZZAZIONE AUTOMATICA Con la sintonizzazione automatica la ricerca si ferma automaticamente alla successiva stazione radio con un buon segnale. La sintonizzazione automatica è attivabile premendo velocemente per un breve intervallo di tempo il tasto AUTO-TUNE sul telecomando, con una pressione dello stesso tasto per circa due secondi si avvia la ricerca delle stazioni precedenti. USO DELL’AUX-IN Usa questo ingresso per collegare altre apparecchiature che hanno un LINE-OUT o una uscita per le cuffie. C’è una predisposizione per un jack stereo da 1/8 pollici. Regola le cuffie in uscita ad un volume basso. Collega prima il cavo all’altra apparecchiatura nell’uscita detta LINE-OUT o nella presa cuffie, poi nella presa AUX-in dell’Etón Sound 100 sul retro dell’apparecchio. 38 SOUND 100 MANUALE DI ISTRUZIONI USO DELLA PRESA LINE-OUT Questo presuppone la presenza di un ingresso (tipo line-in) su un’altra apparecchiatura. C’è una predisposizione per un jack stereo da 1/8 pollici. USARE L’IPOD Usa il tasto MENU per sfogliare le opzioni nel menu. Usa i tasti per scorrere verso l’alto / il basso il menu. Usa ENTER per selezionare il brano ed ascoltare la canzone prescelta. Usa il tasto per far partire / mettere in pausa il brano selezionato. Premi velocemente per un breve intervallo di tempo i tasti , per passare alla canzone seguente o per ritornare all’inizio del brano in corso. Premi due volte il tasto per ritornare all’inizio della canzone precedente. Tenendo premuto uno dei due tasti , si può avanzare o tornare indietro all’interno della canzone in corsi. MEMORIZZAZIONE STAZIONI C’è un totale di 10 possibili stazioni memorizzabili diverse, 5 per AM e 5 per FM. Nota che le procedure di memorizzazione, come indicate sotto, andranno a sovrascrivere eventuali programmi già memorizzati sullo stesso canale prescelto. Ciò che è in memoria non può essere ‘cancellato’, ma solo sovrascritto. Memorizza le stazioni radio sull’apparecchio: 1. Seguendo la procedura prima descritta, sintonizzati sulla stazione radio che si desidera salvare. 2. Premi il tasto MEMORY per 2 secondi; un numero di memoria as sociato automaticamente lampeggerà nel display, 3. Seleziona immediatamente il numero di memoria desiderato, utiliz zando i tasti di TUNING/SET. 4. Premi di nuovo il tasto MEMORY. 39 SOUND 100 MANUALE DI ISTRUZIONI Memorizza le stazioni radio con il telecomando: 1. Sintonizzati sulla stazione che si desidera salvare. 2. Premi , per due secondi, uno dei tasti numerici sul telecomando, da 1 a 5. ACCEDERE ALLE STAZIONI MEMORIZZATE 1. Sintonizzarsi sulla banda di propria scelta, AM o FM. 2. Premi velocemente per un breve intervallo di tempo il tasto MEMORY per scegliere la stazione radio memorizzata, che sia di proprio gradimento. Un altro metodo è quello di premere i tasti da 1 a 5 sul telecomando. REGOLARE L’OROLOGIO, LA SCEGLIA E LO SLEEP TIMER Sul retro della radio c’è uno scomparto batterie che permette di installare due batterie di tipo AA, che permette di salvare queste impostazioni durante i cali di tensione o dopo aver staccato la spina. IMPOSTARE L’OROLOGIO L’orologio, allarme, e lo sleep timer possono essere impostati su “stand-by” o su “on” (acceso). L’orologio (formato 24 ore) mostra sul display l’indicazione AM o PM. 1. Premi sulla radio o sul telecomando il tasto TIME-SET per tre secondi; I led dei minuti cominciano a lampeggiare. 2. Usa I tasti TUNING/SET sulla radio o I tasti + / - sul telecoman do per impostare i minuti. 3. Premi velocemente per un breve intervallo di tempo il tasto TIME-SET sulla radio o sul telecomando; nota il lampeggiare dei numeri delle ore. 4. Usa i tasti TUNING/SET della radio o i tasti + / - sul teleco mando per impostare l’ora correttamente. 40 SOUND 100 MANUALE DI ISTRUZIONI 5. Premi il tasto TIME-SET sulla radio o sul telecomando per com pletare la procedura di impostazione dell’orologio ed uscire dalla modalità time-set. IMPOSTARE LA SVEGLIA 1. Premi il tasto ALARM sul telecomando o sulla radio per 3 secondi; si noti il consueto lampeggiare. 2. Usa i tasti TUNING/SET della radio o i tasti + / - sul telecomando per impostare la sveglia all’ora desiderata. 3. Premi velocemente per un breve intervallo di tempo il tasto ALARM sulla radio o sul telecomando: nota il lampeggiare delle cifre dei minuti. 4. Usa i tasti TUNING/SET della radio o i tasti + / - sul telecomando per impostare i minuti correttamente. 5. Premi il tasto ALARM sul telecomando o sulla radio; nota che il simbolo altoparlante lampeggia per 5 secondi e poi scompare. La sveglia è ora impostata correttamente all’ora desiderata; se at tivata, funziona per un’ora. ATTIVARE LA SVEGLIA La funzione sveglia funziona per un’ora. La sveglia per funzionare deve essere attivata. Per fare questo, premi velocemente per un breve intervallo di tempo il tasto ALARM sulla radio o sul telecomando. Comparirà così sul display: • ALARM con il simbolo dell’altoparlante . La sveglia funziona così emettendo un beep coninuo. • ALARM con il simbolo di una nota musicale . La sveglia funziona accendendo la radio sintonizzata sull’ultima stazione radio selezio nata in fase di sintonizzazione o di memoriz zazione stazioni. • ALARM, sia col simbolo dell’altoparlante sia col simbolo della nota 41 SOUND 100 MANUALE DI ISTRUZIONI musicale, scompaiono dal display, indicando così la com pleta disat tivazione dell’allarme. NOTA: nel momento in cui si decide di utilizzare la funzione sveglia, il cui simbolo è una nota musicale, accertarsi che il volume sia regolato su un livello tale da essere acusticamente udibile al momento dell’attivazione della sveglia. FUNZIONE SVEGLIA, CON L’ATTIVAZIONE UNA STAZIONE RADIO MEMORIZZATA Cambia canale sintonizzandosi su una stazione radio memorizzata di propria scelta, impostare la sveglia all’ora desiderata, attivare la sveglia e impostare la radio in modalità stand-by. USARE LA FUNZIONE SNOOZE Una volta che la sveglia è attiva, se si preme sulla radio o sul telecomando il tasto SNOOZE si permette il rinvio della sveglia di 5 minuti; poi la sveglia riprende a suonare. Lo SNOOZE può essere attivato 12 volte. Per annullare la funzione SNOOZE, premi sul telecomando o sulla radio il tasto ALARM. USARE LA FUNZIONE SNOOZE Lo sleep timer permette alla radio di restare accesa per un intervallo prestabilito di tempo (15-90 minuti) per poi spegnere l’apparecchio. Quando la funzione SLEEP è abilitata, sul display principale compare il simbolo del sonno. • Attiva lo sleep timer, accendere la radio e premere sulla radio o sul telecomando il tasto SLEEP premendo consecutivamente in maniera breve e rapida per selezionare l’intervallo di tempo desiderato tra 15-90 minuti (15, 30, 45, 60, 75, o 90). Da 42 SOUND 100 MANUALE DI ISTRUZIONI questa modalità setup si esce automaticamente dopo approssi mativamente 4 secondi. • Una volta che la funzione è attiva, si può vedere l’intervallo di tempo premendo il tasto SLEEP per 2 secondi. • Per disattivare lo sleep timer, premi consecutivamente il tasto SLEEP sul telecomando o sulla radio in maniera rapida e breve, per selezionare OFF (disattivazione). Da questa modalità setup si esce automaticamente dopo approssimativamente 4 secondi. SPECIFICHE TECNICHE • • • • Frequenza FM: 87.5-108 mHz. Frequenza AM: 522-1620 KHz Uscita altoparlante: alimentazione 5W. Alimentazione supplementare: input 230 V, 50 Hz; output 12 V, 1.6A. • Per un processo di continuo aggiornamento e miglioramento del prodotto dettagli e disegni sono soggetti a possibili modifiche senza preavviso. REGISTRAZIONE DELLA GARANZIA Per garantire la copertura completa della garanzia e consentire l’aggiornamento del prodotto, il prodotto deve essere registrato prima possibile dopo l’acquisto o il ricevimento. La registrazione del prodotto può essere effettuata in diversi modi: 1. Visita la nostra pagina Web: http://www.etoncorp.com. 2. Spedendo il certificato di garanzia allegato. 3. Spedendo la scheda di registrazione o le informazioni necessarie all’indirizzo indicato sotto; indicare il nome, l’indirizzo completo, il numero di telefono, l’indirizzo e-mail, il modello acquistato, la data di acquisto, il nome del rivenditore Etón Corporation 1015 Corporation Way Palo Alto, CA 94303 USA 43 SOUND 100 MANUALE DI ISTRUZIONI LIMITAZIONI DI GARANZIA Conserva le informazioni di garanzia riportate sulla scheda di garanzia con la prova di acquisto. Le informazioni relative alle limitazioni di garanzia sono consultabili anche all’indirizzo www.etoncorp.com. ASSISTENZA PER IL PRODOTTO ACQUISTATO Per ottenere assistenza circa il prodotto acquistato, si consiglia di contattare il servizio clienti Etón al numero 1-800-872-2228 USA, 1-800-637-1648 Canada, (650) 903-3866, customersvc@etoncorp. com o il distributore locale in Europa (si veda l’elenco allegato) al fine di determinare l’entità del problema e risolverlo. Nel caso fosse necessaria ulteriore assistenza, il servizio tecnico fornirà le istruzioni su come procedere, a seconda che l’apparecchio sia ancora in garanzia o necessiti di interventi non coperti da garanzia. GARANZIA – Se l’apparecchio è ancora coperto da garanzia e il servizio clienti Etón stabilisce che è necessario un intervento in garanzia, sarà autorizzata la restituzione e verranno fornite le indicazioni necessarie. NON restituire l’apparecchio senza previa autorizzazione. INTERVENTI NON COPERTI DA GARANZIA –Se l’apparecchio non è più coperto da garanzia e si rende necessario un intervento di riparazione, il servizio clienti Etón vi indicherà il centro di assistenza più vicino a voi, cui rivolgersi per le riparazioni. Per assistenza al di fuori del Nord America, fare riferimento all’elenco dei distributori fornito al momento dell’acquisto/ricevimento. 44 SOUND 100 MANUALE DI ISTRUZIONI ELENCO DI DISTRIBUTORI EUROPEI Si veda l’elenco allegato. 45 46 GUÍA DE FUNCIONADMIENTO DE SOUND 100 ¿NECESITA AYUDA? Si necesita ayuda, contáctenos de lunes a viernes, de 8:30-16:00 (8:30 a.m. a 4:00 p.m.), hora estándar del Pacífico de EE. UU. 1-800872-2228 desde los EE UU; 1-800-637-1648 desde Canadá; 650903-3866 desde el resto del mundo; FAX: 650-903-3867; sitio Web, www.etoncorp.com; Etón Corporation, 1015 Corporation Way, Palo Alto, CA 94303, USA ATTENZIONE • No exponga este aparato a la lluvia o a la humedad. • No exponga o sumerja este aparato al agua durante un periodo largo. • Proteja el aparato de gran humedad y lluvia. • Utilice la unidad solamente dentro de un rango de temperatura especificado (0 °C a 40 °C). • Desenchufe la unidad inmediatamente si ha caído líquido u objetos dentro de la radio. • Limpie la unidad solamente con un paño seco. No utilice detergentes o disolventes que puedan dañar la cubierta de la unidad. • Desenchufe y desconecte las antenas externas durante tormentas con relámpagos. • No quite la cubierta [o la parte posterior]. • Si este producto muestra algún problema, póngase en contacto con personal cualificado de servicio. MEDIO AMBIENTE ELIMINACIÓN DE APARATOS ELÉCTRICOS Y ELECTRÓNICOS De acuerdo a la Directiva Europea 2002/96/EC todos los aparatos eléctricos y electrónicos deben ser recolectados en forma separada por un sistema local de recolección. 47 GUÍA DE FUNCIONADMIENTO DE SOUND 100 Por favor, actúe según las normas de su localidad y no elimine los aparatos antiguos en su basura del hogar usual. SU RADIO INCLUYE Manual de usuario, control remoto, cable de antena AM, estación para iPod. PREPARACIÓN SU RADIO PARA EL USO Enchufe el adaptador AC en el enchufe de 12 V AC en la parte posterior de la radio. En caso de utilizar una anterna AM interna, seleccione la posición INT AM del conmutador. En caso de utilizar una antena AM externa, seleccione la posición EXT SWITCH. No utilice EXT SWITCH para antenas de FM; coloque la antena FM simplemente en el enchufe. PREPARACIÓN DEL CONTROL REMOTO PARA EL USO Sujete la pieza plástica en la parte inferior de la unidad remota para extraerla. En caso de un derrame de la batería, debe reemplazarse ésta con un CR/DL2025. Véase el diagrama de instalación en el lado reverso del control remoto. CONEXIÓN LA RADIO A LA ALIMENTACIÓN DE CORRIENTE Enchufe el cable de alimentación en una toma de corriente AC. En caso de su primera conexión, se encuentra en modo standby. En este modo, sólo el reloj indica su estado activado y la radio está apagada. Para encender al radio, pulse brevemente el botón de poder que se encuentra en la radio y también en el control remoto. Para conmutar la radio nuevamente al modo standby, pulse brevemente el botón de poder. 48 GUÍA DE FUNCIONADMIENTO DE SOUND 100 BATERÍAS DE RESPALDO En la parte posterior de la radio se encuentra un compartimiento de baterías para 2 baterías alcalinas del tipo AA para el respaldo de las funciones de memoria, reloj y alarma. Utilice sólo baterías de las misma marca y tipo. Las baterías no están incluidas. CONTROL DE VOLUMEN El volumen se controla con el botón de volumen o los botones VOL en el control remoto. El giro del botón de volumen en sentido de las agujas del reloj aumenta el volumen, su giro contra el sentido de las agujas del reloj reduce el volumen. La pulsación del botón VOL + aumenta el volumen, mientras que la pulsación del botón VOL - reduce el volumen. BOTÓN MUTE Utilice el botón Mute en el control remoto para dejar la radio en mudo. UTILIZACIÓN DE AURICULARES Antes de colocar los auriculares en sus orejas, reduzca el volumen al mínimo. Utilice auriculares con un enchufe estéreo de 1/8 pulgada (3,5 mm). Los auriculares se deben enchufar en el enchufe ubicado en la parte posterior de la radio. SECECCIÓN DE AM/FM, AUX-IN O IPOD Después de encender la radio, pulse repetidamente el botón MODE en la radio o en el control remoto para seleccionar AM/FM, AUX-IN o iPod. 49 GUÍA DE FUNCIONADMIENTO DE SOUND 100 UTILIZACIÓN DEL BOTÓN RDS Utilice este botón para activar la opción de RDS, el sistema de datos de radio para las estaciones FM. Seleccione RDS OFF, RDS PTY o RDS Radio Text. RDS PTY significa tipo de programa de RDS. Aquellas estaciones que utilizan esta opción, indican sus carácteres de llamado en la pantalla y pueden indicar también el nombre del grupo que toca, el nombre del albúm y el título de la canción. Esta información se indica entre RDS PTY y las selecciones de Texto de Radio RDS. SINTONIZACIÓN MANUAL Mediante pulsaciones breves y rápidas de los botones TUNING/SET se sintoniza la frecuencia hacia arriba o hacia abajo ; alternativamente se pueden utilizar los botones TUNE +/- en el control remoto. SINTONIZACIÓN AUTOMÁTICA Al utilizar la función de sintonización automática, la radio se detiene en la siguiente estación con buena intensidad de señal. La sintonización automática se habilita con una pulsación breve y rápida del botón AUTO TUNE en el control remoto para sintonizar la frecuencia hacia arriba, y pulse el mismo botón durante dos segundos para sintonizar la frecuencia hacia abajo. UTILIZACIÓN DE AUX-IN Utilice esta función para integrar otros equipos que cuentan con la opción de línea de salida o una salida para auriculares. Apto para un enchufe estéreo de 1/8 pulgada. Ajuste el nivel de auriculares en un rango bajo. Enchufe primero el cable en la salida del otro equipo o en el enchufe de auriculares, para enchufar luego el Etón Sound 100 AUX-IN en la parte posterior de la unidad. 50 GUÍA DE FUNCIONADMIENTO DE SOUND 100 UTILIZACIÓN DE ENCHUFE DE LÍNEA DE SALIDA Permite la entrada de otro equipo en el enchufe de línea de entrada. Apto para un enchufe estéreo de 1/8 pulgada. TRABAJAR CON EL IPOD Utilice el botón MENU para desplazarse dentro del menú. Utilice los botones para desplazarse dentro del menú hacia arriba o hacia abajo. Utilice el botón ENTER para seleccionar el ítem y para tocar la canción previamente seleccionada. Utilice el botón para tocar/interrumpir la canción previamente seleccionada. Pulse en forma breve y rápida los botones para avanzar a la siguiente canción o para volver al inicio de la canción que está tocando. Pulse dos veces para volver al inicio de la última canción. Pulse continuamente los botones para saltar hacia adelante o atrás entre las canciones previamente seleccionadas. TRABAJAR CON LAS ESTACIONES PREAJUSTADAS Existe un total de 10 memorias para estaciones preajustadas, 5 respectivamente para AM y FM. Observe que al realizar el siguiente procedimiento, se sobreescriben las estaciones previamente almacenadas en la memoria. Esto significa que la memoria no se puede ‘eliminar’, pero sí se puede sobreescribir. Almacenamiento en la radio. 1. Con los procedimientos previamente descritos, sintonice la estación de radio que desea almacenar. 2. Pulse el botón MEMORY durante 2 segundos; luego parpadea el número de memoria en el LCD, 3. Seleccione inmediatamente el número de memoria deseado con los botones TUNING/SET. 4. Pulse nuevamente el botón MEMORY. 51 GUÍA DE FUNCIONADMIENTO DE SOUND 100 Almacenamiento con el control remoto: 1. Sintonice la estación que desea almacenar. 2. Pulse durante 2 segundos uno de los botones numéricos (1 a 5) del control remoto. ACCESO A LAS ESTACIONES PREAJUSTADAS 1. Sintonice la banda requerida, AM o FM. 2. Pulse en forma breve y rápida el botón MEMORY para seleccionar la estación almacenada de su selección o bien utilice alternativa mente el botón 1-5 del control remoto. AJUSTE DE RELOJ, ALARMA Y TEMPORIZADOR En la parte posterior de la radio se encuentra una casilla de baterías en la cual se pueden colocar dos baterías AA para salvaguardar estos ajustes en caso de interrupción de la alimentación de corriente o al desenchufar la radio. El reloj, la alarma y el temporizador se pueden ajustar en los modos standby y CON. AJUSTE DEL RELOJ El reloj indica la hora con el sistema de 24 horas, indicando AM y PM en la pantalla. 1. Pulse durante 3 segundos el botón TIME SET en la radio o en el control remoto; el minuto empieza a parpadear. 2. Utilice los botones TUNING/SET en la radio o los botones TUNE +/- en el control remoto para ajustar los minutos. 3. Pulse en forma breve y rápida el botón TIME SET en la radio o en el control remoto; la hora empieza a parpadear. 4. Utilice los botones TUNING/SET en la radio o los botones TUNE +/- en el control remoto para ajustar la hora correcta. 5. Pulse el botón TIME SET en la radio o en el control remoto para terminar el ajuste del nuevo tiempo y para salir del modo de 52 GUÍA DE FUNCIONADMIENTO DE SOUND 100 ajuste de tiempo. AJUSTE DEL TIEMPO DE ALARMA 1. Pulse durante 3 segundos el botón ALARM en la radio o en el control remoto; la hora empieza a parpadear. 2. Utilice los botones TUNING/SET en la radio o los botones TUNE + +/- en el control remoto para ajustar la hora requerida para despertar. 3. Pulse en forma breve y rápida el botón ALARM en la radio o en el control remoto; el minuto empieza a parpadear. 4. Utilice los botones TUNING/SET en la radio o los botones TUNE +/- en el control remoto para ajustar los minutos correctos. 5. Pulse el botón ALARM en la radio o en el control remoto; el símbolo de altavoz parpadea durante 5 segundos y desaparece luego. El tiempo de alarma está ahora ajustado; tras su activación funcionará durante una hora. ACTIVACIÓN DE LA ALARMA La alarma funciona durante una hora. Para que funcione la alarma, se debe haber activado previamente. Para esto se debe pulsar en forma rápida y breve el botón ALARM en la radio o en el control remoto, de modo que se indique lo siguiente en la pantalla: • ALARM con símbolo de altavoz – despierta con un sonido de pío. • ALARM con símbolo de nota musical – despierta con la última estación de radio seleccionada mediante sintonización o selección con la función de memoria. • ALARM, símbolo de altavoz y símbolo de nota musical desaparecen de la pantalla y la alarma se desactiva completamente. NOTA: Al usar la alarma con el símbolo de nota musical, asegúrese de aumentar el volumen a tal nivel que podrá escucharlo para despertar. 53 GUÍA DE FUNCIONADMIENTO DE SOUND 100 FUNCIÓN DE DESPERTADOR CON UNA ESTACIÓN PREAJUSTADA Sintonice la memoria preajustada, ajuste el tiempo de alarma, active la alarma y conmute la radio al modo de standby. UTILIZACIÓN DE LA FUNCIÓN DE SNOOZE Después de la activación de la alarma, la pulsación del botón SNOOZE en la radio o en el control remoto permite la cancelación de la alarma para 5 minutos; luego se reinicia la alarma. La función de snooze se puede activar 12 veces. Para cancelar el ajuste de snooze completamente, pulse el botón ALARM en la radio en el control remoto. AJUSTE DEL TEMPORIZADOR El temporizador permite el uso del equipo durante un tiempo especificado (15 a 90 minutos). Tras la activación de la función SLEEP, la pantalla principal indica el símbolo . • Para activar el temporizador, active la radio y pulse breve y succesivamente el botón SLEEP en la radio o en el control remoto para ajustar el tiempo de desactivación entre 15 y 90 minutos (15, 30, 45, 60, 75 o bien 90). Este modo de ajuste se abandona automáticamente después de aprox. 4 segundos. • Después de su activación, usted puede revisar el balance de tiempo transcurrido pulsando durante 2 segundos el botón SLEEP. • Para desactivar el temporizador, pulse el botón SLEEP en la radio o en el control remoto breve y succesivamente para seleccionar la opción OFF. Este modo de ajuste se abandona automáticamente después de aprox. 4 segundos. 54 GUÍA DE FUNCIONADMIENTO DE SOUND 100 ESPECIFICACIÓNES • • • • Frecuencia FM: 87,5-108 mHz. Frecuencia AM: 522-1620 KHz Salida de altavoz: Poder de 5 W. Alimentación de corriente: Entrada 230 VAC, 50 Hz; salida 12 VAC, 1,6A. • Las especificaciones y el diseño están sujetos a posibles modificio nes sin aviso previo para aplicar mejoras. REGISTRO DE GARANTÍA Para asegurar la cobertura completa de la garantía o adquirir actualizaciones del producto, debe registrar su producto tan pronto posible después de la compra o recibo del producto. Usted puede utilizar una de las siguientes opciones para registrar su producto: 1. Ya sea visitando nuestro sitio Web en http://www.etoncorp.com. 2. Enviando por correo la tarjeta de garantía suministrada. 3. Envíe por correo su tarjeta de registro o información a la dirección siguiente; escriba su nombre, dirección postal completa, número de teléfono, dirección de e-mail, modelo comprado, fecha de compra, nombre del distribuidor del producto donde ha adquirido el producto: Etón Corporation 1015 Corporation Way Palo Alto, CA 94303 EE.UU. GARANTÍA LIMITADA Conserve la información de garantía de su tarjeta de garantía con su prueba de compra (factura) o la información de Garantía Limitada puede ser también leída en www.etoncorp.com. 55 GUÍA DE FUNCIONADMIENTO DE SOUND 100 SERVICIO PARA SU PRODUCTO Para solicitar algún servicio para su producto, le recomendamos contactar primero al representante de servicio de Etón llamando al número de teléfono 1-800-872-2228 para los U.S.A.., o al número de teléfono 1-800-637-1648 para Canadá ó (650) 903-3866, [email protected] o bien su distribuidor respectivo del país dentro de Europa (véase la lista adjunta) para la localización y resolución del problema. Si requiere un servicio adicional, el equipo técnico lo instruirá de como proceder considerando si la radio aún posee garantía o si necesita servicio técnico para un producto que ya no posee garantía. GARANTÍA – Si su producto aún posee garantía y el representante de servicio de Etón determina el servicio de garantía que sea necesario, se le enviará una autorización de retorno e instrucciones para envío a una unidad de servicio de reparación autorizada de la garantía. No envíe su radio de regreso sin haber recibido el número de autorización de retorno. SIN GARANTÍA – Si su producto ya no posee garantía y requiere servicio de nuestro equipo técnico, diríjare a la unidad de reparación más cercana de su localidad que pueda ofrecer el mejor servicio de reparación. Para servicio fuera de América del Norte, por favor, consulte la información del distribuidor incluido en la fecha de la compra o del recibo. LISTA DE DISTRIBUIDORES EUROPEOS Por favor, revise la lista adjunta de distribuidores. 56 iPod is a trademark of Apple Computer, Inc., registered in the U.S. and other countries. 57 Etón Corporation Corporate Headquarters 1015 Corporation Way Palo Alto, California 94303 USA tel +1 650-903-3866 tel +1 800-872-2228 fax +1 650-903-3867 Etón Europe/Lextronix Germany Rosenstrasse 2 D-10178 Berlin, Germany tel +49 [0]30 243102142 Etón Canada 1 Yonge Street, Suite 1801 Toronto, Ontario M5E 1W7 Canada tel + 1 416-214-6885 Designed by Etón California and assembled in China. I © Copyright 2007 Etón Corporation. All rights reserved. v.03-2-07