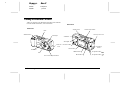
1
L Poppy+ A5 size 5/8/98 Rev.C Cover pass 0 Where to Find Information This User’s Guide Provides you with detailed information on using your EPSON PhotoPC 700, the Direct Print program, and optional products; from setting up to troubleshooting. EPSON Photo!2/EPSON Photo File Uploader User’s Guide Provides you with information on EPSON Photo!2 software and uploading utilities including EPSON Photo File Uploader. Online Help Provides you with detailed information and instructions for the software that controls your PhotoPC 700. Online help is installed automatically when you install the digital camera software. See EPSON Photo!2 User’s Guide for information on accessing online help. Color Guide (may not be available in some countries) Explains the basics of color imaging and shows you how to get impressive results from your PhotoPC 700 and other EPSON products. See this User’s Guide for information on accessing the Color Guide. Proof Sign-off: Hida Bowen Poppy+ _______ _______ _______ A5 size 5/8/98 ® COLOR DIGITAL CAMERA User’s Guide Rev.C Front pass 0 R L Poppy+ A5 size 5/8/98 Rev.C Front pass 0 IMPORTANT NOTICE All rights reserved. No part of this publication may be reproduced, stored in a retrieval system, or transmitted in any form or by any means, electronic, mechanical, photocopying, recording, or otherwise, without the prior written permission of SEIKO EPSON CORPORATION. No patent liability is assumed with respect to the use of the information contained herein. Neither is any liability assumed for damages resulting from the use of the information contained herein. Neither SEIKO EPSON CORPORATION nor its affiliates shall be liable to the purchaser of this product or third parties for damages, losses, costs, or expenses incurred by the purchaser or third parties as a result of: accident, misuse, or abuse of this product or unauthorized modifications, repairs, or alterations to this product, or (excluding the U.S.) failure to strictly comply with SEIKO EPSON CORPORATION’s operating and maintenance instructions. SEIKO EPSON CORPORATION shall not be liable against any damages or problems arising from the use of any options or any consumable products other than those designated as Original EPSON Products or EPSON Approved Products by SEIKO EPSON CORPORATION. EPSON is a registered trademark of SEIKO EPSON CORPORATION. PhotoPC is a trademark of SEIKO EPSON CORPORATION. Macintosh is a registered trademark of Apple Computer, Inc. Microsoft and Windows are registered trademarks of Microsoft Corporation. CompactFlash is a trademark of SanDisk Corporation. General Notice: Other product names used herein are for identification purposes only and may be trademarks of their respective owners. EPSON disclaims any and all rights in those marks. Copyright©1998 by SEIKO EPSON CORPORATION, Nagano, Japan. ii Declaration of Conformity According to ISO/IEC Guide 22 and EN 45014 Manufacturer: Address: Representative: Address: SEIKO EPSON CORPORATION 3-5, Owa 3-chome, Suwa-shi, Nagano-ken 392 Japan EPSON EUROPE B.V. Prof. J. H. Bavincklaan 5 1183 AT Amstelveen The Netherlands Declares that the Product: Product Name: Model: Digital Still Camera G690A Conforms to the following Directive(s) and Norm(s): Directive 89/336/EEC: EN 55022 Class B EN 50082-1 IEC 801-2 IEC 801-3 IEC 801-4 EN 61000-3-2 (Using AC Adapter Model EU-20) EN 61000-3-3 (Using AC Adapter Model EU-20) June, 1998 Y. Ishii President of EPSON EUROPE B. V . A NOTE CONCERNING RESPONSIBLE USE OF COPYRIGHTED MATERIALS Like photocopiers, digital cameras can be misused by improper photographing of copyrighted material. Unless you have the advice of a knowledgeable attorney, be responsible and respectful by not photographing published material without the permission of the copyright holder. Poppy+ A5 size 5/8/98 R Rev.C Front pass 0 Contents Introduction Chapter 2 PhotoPC 700 Features . . . . . . . . . . . . . . . Options . . . . . . . . . . . . . . . . . . . . . . . For United Kingdom users - use of options Safety Instructions . . . . . . . . . . . . . . . . . Warnings, Cautions, and Notes . . . . . . . . . Chapter 1 . . . . . . . . . . . . . . . . . . . . . . . . . 0-1 0-2 0-2 0-3 0-4 . . . . . . . . . . . . . . . . . . . . . . . . . . . . . . . . . . . . . . . . . . . . . 1-1 1-2 1-4 1-5 1-7 1-7 1-8 1-9 1-9 Getting Started Unpacking Your PhotoPC 700 . . . . . . Getting to Know the Camera . . . . . . . Installing Batteries . . . . . . . . . . . . . Handling batteries . . . . . . . . . . Attaching the Hand Strap . . . . . . . . Setting the Language . . . . . . . . . . . Setting the Date and Time . . . . . . . . Using the Camera With Your Computer Viewing the Color Guide . . . . . . . . . . . . . . . . . . . . . . . . . . . . . . . . . . . . . . . . . . . . . Taking Pictures with PhotoPC 700 Turning the Camera On and Off . . . . . Auto Shut-off . . . . . . . . . . . . . . . . The Display Panel . . . . . . . . . . . . . Checking Battery Power . . . . . . . . . . Activating the Shutter . . . . . . . . . . . Using the viewfinder . . . . . . . . . Using the LCD monitor . . . . . . . . Picture-taking Range . . . . . . . . . . . . Adjusting Settings . . . . . . . . . . . . . Image quality . . . . . . . . . . . . . . Flash . . . . . . . . . . . . . . . . . . Self timer . . . . . . . . . . . . . . . . Macro mode . . . . . . . . . . . . . . Using the Function Button . . . . . . . . Adjusting the exposure . . . . . . . . Erasing your photos . . . . . . . . . . Checking the Picture Counter . . . . . . Playing Back Your Photos . . . . . . . . . Displaying photos on the LCD screen Displaying photos on a television . . . . . . . . . . . . . . . . . . . . . . . . . . . . . . . . . . . . . . . . . . . . . . . . . . . . . . . . . . . . . . . . . . . . . . . . . . . . . . . . . . . . . . . . . . . . . . . . . . . . . . . . . . . . . . . . . . . . . . . . . . . . . . . . . . . . . . . . . . . . . . . . . . . . . . . . . . . . . . . . . . . . . . . . . . . . . . . . . . . . . . 2-1 2-2 2-3 2-3 2-4 2-4 2-5 2-6 2-6 2-8 2-9 2-9 2-10 2-11 2-11 2-13 2-13 2-14 2-14 2-15 iii L Poppy+ A5 size 5/8/98 Chapter 3 Rev.C Front pass 0 Using the LCD Monitor Menus Working with LCD Monitor Menus . . . . Using the Panorama/Zoom Menu . . . . . Using the Conditions Menu . . . . . . . . . Setting the continuous shooting mode Adjusting the white balance . . . . . . Adjusting the exposure . . . . . . . . . Adjusting the sensitivity . . . . . . . . Using the Information Menu . . . . . . . . Using the Settings Menu . . . . . . . . . . Setting the clock . . . . . . . . . . . . . Setting the alert beep . . . . . . . . . . Setting LCD brightness . . . . . . . . . Setting the energy saving mode . . . . Using the Information Menu . . . . . . . . Using the Playback Menu . . . . . . . . . . Using the Magnification Menu . . . . . . . Using the Photo Control Menu . . . . . . . Erasing photos . . . . . . . . . . . . . . Locking photos . . . . . . . . . . . . . . Getting memory information . . . . . . Copying photos . . . . . . . . . . . . . Formatting memory cards . . . . . . . Using the Slide Show Menu . . . . . . . . Using the Software Menu . . . . . . . . . . Using the Language Menu . . . . . . . . . iv . . . . . . . . . . . . . . . . . . . . . . . . . . . . . . . . . . . . . . . . . . . . . . . . . . . . . . . . . . . . . . . . . . . . . . . . . . . Chapter 4 . . . . . . . . . . . . . . . . . . . . . . . . . . . . . . . . . . . . . . . . . . . . . . . . . . . . . . . . . . . . . . . . . . . . . . . . . . . . . . . . . . . . . . . . . . . . . . . . . . . . . . . . . . . . . . . . . . . . . . . . . . . . . 3-1 3-4 3-4 3-4 3-5 3-5 3-6 3-6 3-7 3-7 3-7 3-8 3-8 3-8 3-9 3-9 3-10 3-10 3-11 3-13 3-13 3-14 3-14 3-15 3-16 Using the Direct Print Program Features . . . . . . . . . . . . . . . . . . . Preparing to Use the Direct Print Program Connecting Your Camera to the Printer . Available Paper Type . . . . . . . . . . . Using the Direct Print Program . . . . . . Accessing the Direct Print program . Printing your images . . . . . . . . . . LCD Screen and Display Panel Messages Printed Image Dimensions . . . . . . . . Chapter 5 . . . . . . . . . . . . . . . . . . . . . . . . . . . . . . . . . . . . . . . . . . . . . . . . . . . . . . . . . . . . . . . . . . . . . . . 4-1 4-2 4-2 4-3 4-4 4-4 4-4 4-15 4-16 . . . . . . . . . . . . . . . . . . . . . . . . . . . . . . . . . . . . . . . . . . . . . . . . . . . . . . . . 5-1 5-2 5-3 5-3 5-4 5-6 5-6 5-7 Camera Options Using CompactFlash Memory Cards Installing a CompactFlash Card Removing a CompactFlash Card Using the PCMCIA Adapter . . . . . Using the AC Adapter . . . . . . . . Using the Ni-MH Battery Charger . Important Safety Instructions . . Operating instructions . . . . . . . . . . . . . . . . . . . . . . . . . . . . . . . . . . . . . . Poppy+ A5 size 5/8/98 Chapter 6 Maintenance and Troubleshooting Maintenance . . . . . . . Cleaning the camera Storing the camera . Problems and Solutions . Camera problems . . Picture Problems . . . . . . . . . . . . . . . . . . . . . . . . . . . . . . . . . . . . . . Appendix B . . . . . . . . . . . . . . . . . . . . . . . . . . . . . . . . . . . . . . . . . . . . . . . . . . . . . . . . . . . . . . . . . . 6-1 6-1 6-1 6-2 6-2 6-4 Camera . . . . . . . . . . . . . . . . . . Physical dimensions . . . . . . . . Product type . . . . . . . . . . . . . Recorded image . . . . . . . . . . . Optical . . . . . . . . . . . . . . . . Functional . . . . . . . . . . . . . . Interface . . . . . . . . . . . . . . . Power . . . . . . . . . . . . . . . . . Optional CompactFlash Card . . . . . Optional PCMCIA Adapter . . . . . . Optional AC Adapter . . . . . . . . . . Optional Battery Charger and Batteries . . . . . . . . . . . . . . . . . . . . . . . . . . . . . . . . . . . . . . . . . . . . . . . . . . . . . . . . . . . . . . . . . . . . . . . . . . . . . . . . . . . . . . . . . . . . . . . . . . . . . . . . . . . . . . . . . . . . . . . . A-1 A-1 A-1 A-1 A-2 A-2 A-3 A-3 A-4 A-4 A-4 A-5 Appendix A . . . . . . Specifications R Rev.C Front pass 0 Contacting Customer Support For United Kingdom and the Republic of Ireland Users World Wide Web . . . . . . . . . . . . . . . . . . . . Faxon EPSON . . . . . . . . . . . . . . . . . . . . . . Bulletin Board Service for latest drivers and utilities Customer and Warranty Support . . . . . . . . . . . Pre Sales Enquiry Desk . . . . . . . . . . . . . . . . . For Australian Users . . . . . . . . . . . . . . . . . . . . . EPSON FAXBACK . . . . . . . . . . . . . . . . . . . . EPSON Bulletin Board System . . . . . . . . . . . . . Internet URL http://www.epson.com.au . . . . . . Your dealer . . . . . . . . . . . . . . . . . . . . . . . . EPSON Helpdesk . . . . . . . . . . . . . . . . . . . . For Singapore Users . . . . . . . . . . . . . . . . . . . . . For Hong Kong Users . . . . . . . . . . . . . . . . . . . . Internet home page . . . . . . . . . . . . . . . . . . . Electronic bulletin board system . . . . . . . . . . . . Technical Support Hotline . . . . . . . . . . . . . . . For Philippines Users . . . . . . . . . . . . . . . . . . . . B-1 B-1 B-2 B-2 B-2 B-2 B-3 B-3 B-3 B-3 B-3 B-3 B-4 B-4 B-4 B-4 B-4 B-4 Glossary Index v L Poppy+ A5 size 5/8/98 vi Rev.C Front pass 0 Proof Sign-off: Hida Bowen Poppy+ _______ _______ A5 size 5/8/98 R Rev.C Introduction pass 1 Introduction Your new EPSON® PhotoPC 700 is a revolutionary, easy-to-use digital camera that enables you to take full-color pictures and use them right away with your computer. The PhotoPC 700 comes with everything you need, including EPSON Photo!2 software that lets you transfer your pictures to your computer’s hard disk. You can then edit, enhance, and organize your pictures or simply place them into your documents. To use EPSON Photo!2, see your digital camera software manual. Create professional letters, documents, and presentations with real life images right on your desktop. Share pictures with business colleagues or friends over the Internet. Add color and visual appeal to your newsletters, flyers, and brochures. Anything you can display on your screen or print will look better with images from your PhotoPC 700. PhotoPC 700 Features PhotoPC 700 is a complete system for capturing digital images, and includes the following features: o o o o o o o o o 1.3 Mega pixel CCD 24-bit color image capture High resolution (1280 × 960 pixels) 4MB internal memory that holds approximately 6 super fine quality color or monochrome images, 12 to 13 fine quality color or monochrome images, or 40 to 43 standard quality color images (the number differs for NTSC and PAL models; see page A-2 for details) Three color and two monochrome image quality settings Built-in color LCD monitor for previewing and playing back pictures Optical real image viewfinder Macro, digital ×2 zoom, and panorama photo formats Continuous shooting of up to 10 pictures in sequence Introduction 1 L Poppy+ A5 size 5/8/98 o o o o o o o o o o o o 2 Rev.C Introduction pass 1 Automatic or fixed white balance Automatic or manual exposure setting Automatic date and time recording for each picture Video cable for displaying your pictures on a television monitor Built-in flash with automatic, forced flash, and flash off settings Self timer Automatic shut-off to save batteries Serial cables for transferring photos to your computer EPSON Photo!2 software that lets you transfer your pictures to your computer EPSON Photo File Uploader software that allows you to convert images stored in your computer to EPSON Photo file format and upload them to your camera EPSON Program Uploader software that lets you upload optional programs to the camera from your computer Use your pictures with Windows® and Macintosh® applications Introduction Options The following PhotoPC 700 options are available from EPSON: o o o CompactFlash Cards (4MB: B808311, 15MB: B808301) PCMCIA adapter (B867041) AC Adapter (B86703]) for use with a standard electrical outlet o Power Pack (B81812]) which includes the Ni-MH Battery Charger and Ni-MH Rechargeable Batteries o Ni-MH Rechargeable Batteries (B81811]) Note: The asterisk is a substitute for the last digit of the product number, which varies by country. For United Kingdom users - use of options EPSON (UK) LTD shall not be liable against any damages or problems arising from the use of any options or consumable products other than those designated as Original EPSON Products or EPSON Approved Products by EPSON (UK) LTD. Poppy+ A5 size 5/8/98 Safety Instructions Read all these instructions and save them for later reference. Follow all warnings and instructions marked on the camera and options. o o o o o o o To reduce the risk of electric shock, do not remove the cover of the camera or options and do not open any compartments except as instructed in this User’s Guide. o o o Do not insert objects into any openings. o To prevent fire or electric shock, do not expose the camera or options to rain or moisture. o To prevent fire or explosion, do not use the camera where inflammable or volatile gas is stored. Do not use outdoors during a thunderstorm. If the camera or option shows unusual signs such as noise, odor, or smoke, stop usage and turn off immediately. Remove the batteries and/or disconnect the AC adapter from the camera, and unplug the AC adapter from the electrical outlet. o o R Rev.C Introduction pass 1 To avoid damage to the optics of the camera, do not expose the lens to direct sunlight for extended periods of time. Do not store the camera or options near sources of bright light, direct sunlight, high humidity, heat, excessive dirt or dust, or where they will be exposed to strong vibrations or magnetic fields. Always keep your camera in its case when you’re not using it. To prevent possible injury, do not take flash pictures close to the subject’s eyes. Avoid sudden temperature changes, which can cause moisture to form on the camera and options. Keep the camera and options in a case or bag if you need to move them from a cold environment to a warm one. Allow time for the camera and options to adjust to temperature changes before using them. Use only the type of power source indicated in this User’s Guide. Do not use damaged or frayed power cords. Do not use harsh or abrasive cleaners. Wipe off dust with a clean, dry cloth. Introduction 3 L Poppy+ A5 size 5/8/98 o Rev.C Introduction pass 1 Remove the batteries and/or unplug the camera and refer servicing to qualified service personnel in the following circumstances: o The power cord or plug is damaged; liquid has entered the camera or options; the camera or options have been dropped or the case damaged; the camera or options do not operate normally or exhibit a distinct change in performance. Never adjust controls that are not mentioned in the operating instructions. o If you plan to use the camera and options in Germany, observe the following: To provide adequate short-circuit protection and over-current protection for the products, the building installation must be protected by a 16 Amp circuit breaker. Bei Anschluß des Produkts an die Stromversorgung muß sichergestellt werden, daß die Gebädeinstallation mit einem 16 A-Überstromschalter abgesichert ist. If you plan to dispose of the batteries in The Netherlands, do not dispose of them with ordinary refuse. Instead, dispose them as small chemical waste in accordance with local laws, and the following Dutch Government Gazette 45, KCA Marking: Bij dit produkt zijn batterijen geleverd. Wanneer deze leeg zijn, moet u ze niet weggooien maar inleveren als KCA. o If the liquid crystal solution contained in the display panel or in the screen on the LCD monitor leaks out and gets on your hands, wash them thoroughly with soap and water. If it gets into your eyes, flush them immediately with water. Warnings, Cautions, and Notes w c Warnings must be followed carefully to avoid bodily injury. Cautions must be observed to avoid damage to your equipment. Notes contain important information and useful tips on the operation of your camera and options. 4 Introduction Proof Sign-off: Hida Bowen _______ _______ Poppy+ Rev.C A5 size 5/8/98 Chapter 1 pass 0 R Chapter 1 1 Getting Started This chapter prepares you to use your PhotoPC 700. It covers the following: Unpacking your PhotoPC 700 Unpacking Your PhotoPC 700 Make sure you have all the parts shown below. Getting to know the camera Installing the batteries Attaching the hand strap batteries (4) camera Setting the language Setting the date and time hand strap serial cable Using the camera with your computer Viewing the Color Guide Macintosh adapter cable video cable CD-ROM and/or floppy disks (media type and quantity varies depending on country) camera case Getting Started 1-1 L Poppy+ Rev.C A5 size 5/8/98 Chapter 1 pass 0 Getting to Know the Camera After you unpack your PhotoPC 700, take a few minutes to learn about its features, as shown below. Back view Front view display panel monitor mode switch flash shutter button timer light memory card cover viewfinder status light connector cover function button hand strap holder LCD monitor viewfinder SELECT button lens lens cover and power switch 1-2 Getting Started BACK button navigation button navigation button Poppy+ Rev.C A5 size 5/8/98 Chapter 1 pass 0 R 1 Bottom view Top view shutter button battery cover lock tripod socket image quality setting memory card eject lever display panel macro mode setting flash setting battery cover self timer setting Getting Started 1-3 L Poppy+ Rev.C A5 size 5/8/98 Chapter 1 pass 0 2. Insert all four batteries into the compartment, positioning the + and - ends as shown below. Installing Batteries Depending on the country of purchase, your PhotoPC 700 comes with four AA (LR6) alkaline batteries or Ni-MH rechargeable batteries (charge before use). Make sure the camera is off, and follow these steps to insert the batteries. 1. Turn the camera upside down with the lens facing you. Push the battery cover lock down and slide it to the right, then open the cover. 1 3. Close the battery cover and make sure the lock snaps into place as shown below. 2 battery cover lock 1-4 Getting Started Poppy+ Rev.C A5 size 5/8/98 Chapter 1 pass 0 o o o o Handling batteries o When your PhotoPC 700 batteries wear out, you can replace them with any of the following: o Single-use AA (LR6) alkaline batteries Single-use AA (FR6) lithium batteries R To avoid the danger of fire or explosion, do not mix different types of batteries. Keep the batteries from making contact with metal objects such as coins or keys, which could short out the batteries’ circuits. Do not drop, puncture, disassemble, mutilate, or short circuit batteries. Do not put the batteries near or into fire or water. Do not insert batteries into wall outlets or other power sources such as a car cigarette lighter socket. Do not solder lead wires or terminals directly to a battery. To avoid fire or electric shock, do not use batteries that are leaking or damaged in any way. Note the following when handling batteries: Rechargeable AA Ni-Cd batteries Rechargeable AA Ni-MH batteries w Warning: o If battery acid gets into your eyes or on your skin, immediately rinse the affected area well with water and seek medical treatment. If the battery is swallowed, seek medical treatment immediately. o o o Do not use manganese batteries. Replace all four batteries at the same time. When the camera is not used for long periods of time, remove the batteries and store them at a low temperature in a dry location. Getting Started 1-5 1 L o o Poppy+ Rev.C A5 size 5/8/98 Chapter 1 pass 0 Dispose of used batteries according to the manufacturer’s instructions and in compliance with all applicable laws. Contact your local government agency for information about battery recycling and disposal. If you plan to dispose of the batteries in The Netherlands, do not dispose of them with ordinary refuse. Instead, dispose them as small chemical waste in accordance with local laws, and the following Government Gazette 45, KCA Marking: o Use a damp cloth for cleaning. If you have EPSON Ni-MH Rechargeable batteries, see the following: w o o Bij dit produkt zijn batterijen geleverd. Wanneer deze leeg zijn, moet u ze niet weggooien maar inleveren als KCA. o o o o 1-6 If you use rechargeable Ni-Cd or Ni-MH batteries, replace them with four fully-charged batteries. If you find that your batteries run out faster after you recharge them a number of times, make sure you discharge them completely before recharging. Battery life varies depending on the battery type and the manufacturer. Always use batteries from the same package as a set. Do not mix old and new batteries. Do not keep batteries loose in your pockets, to avoid short-circuiting. Getting Started Warning: o Use only the EPSON Ni-MH Battery Charger, Model EU-23, EU-27, or EU-28 to charge the EPSON Ni-MH Batteries Model EU-24. o The batteries should only be used in EPSON Digital Cameras as specified in this manual. Never use EPSON Ni-MH batteries in combination with any other type of batteries. To guard against short-circuiting, do not remove the outside sleeves. Instructions for storage w Warning: o Do not store batteries with metal objects, which could short out the batteries’ circuits. Also, avoid storing batteries in extremely hot or humid locations. o Store batteries out of reach of children. Attaching the Hand Strap To attach the hand strap, loop the strap around the holder on the side of the camera as shown below. Poppy+ Rev.C A5 size 5/8/98 Chapter 1 pass 0 R 1. Slide the monitor mode switch on the back of the camera to Playback. For PAL model cameras, a message stating you need to set the language appears on the LCD screen. Press the SELECT, BACK, or navigation buttons, or wait 5 seconds. The language setting screen appears. monitor mode switch SELECT button navigation buttons BACK button Setting the Language For PAL model cameras, you need to set the language for messages displayed on the LCD monitor the first time you use it. Depending on the country of purchase, you can choose English, Japanese, French, German, Italian, Portuguese, or Spanish. 2. Press the SELECT button until the language you want is highlighted. 3. Press the BACK button to save your selection and return to the View or Playback mode. If you want to change the language setting, see page 3-16 for instructions. Follow these steps to set the language: Getting Started 1-7 1 L Poppy+ Rev.C A5 size 5/8/98 Chapter 1 pass 0 Setting the Date and Time When you install the batteries for the first time, you need to set the date (year, month, and day) and time (hour and minutes). After installing the batteries, follow these steps to set the clock on the LCD monitor, and to have the date and time of each picture automatically recorded. Note: If you connect PhotoPC 700 to your computer and access EPSON Photo!2 when the camera’s clock is not set, the camera’s date and time will be set to that of the computer’s automatically. For instructions on connecting the camera to the computer and accessing EPSON Photo!2, see your digital camera software manual. 1. Slide the monitor mode switch on the back of the camera to View or Playback. A message stating that you need to reset the clock appears on the screen. 2. Press the SELECT button to set the clock. The clock setting screen appears with the setting for the year highlighted in red. Note: If you do not want to set the clock, press the BACK button to return to the View or Playback mode. 1-8 Getting Started 3. Press the button to increase the number, or the button to decrease the number, until the year is correct. 4. Press the SELECT button. The year setting is saved and the month setting is highlighted. 5. Adjust the month, day, hour, and minutes settings as described above until the date and time are correctly adjusted and saved. Note: If you want to reset any previous item, simply press the BACK button until the item you want to reset turns red. When you finish making the minutes setting, press the SELECT button. The LCD screen returns to the View or Playback mode. You’re now ready to take pictures with your PhotoPC 700. Turn to Chapter 2 for simple, step-by-step instructions. Using the Camera With Your Computer After you have taken pictures, you can connect the camera to your computer and transfer the images. You can then use them in your letters, presentations, or just about anything you create on your computer. See your digital camera software manual for more details, including the following: o o o o o o o Installing EPSON Photo!2 and Photo File Uploader Connecting PhotoPC 700 to your computer Transferring pictures to your computer Erasing pictures from the camera Using pictures in your documents Uploading EPSON photo images to the camera Uploading programs to the camera Poppy+ Rev.C A5 size 5/8/98 Chapter 1 pass 0 R Viewing the Color Guide Using an HTML browser in your computer, you are able to view the Color Guide. This provides tips for handling color imaging data, using several color imaging products, and other general information about color imaging. You need one of the following browsers to view the Color Guide, or an equivalent: o o Netscape Navigator 3.0 or later Microsoft Internet Explorer 3.0 or later If a browser is not installed in your computer, you need to obtain one and install it, or you can install the browser that comes with your Color Guide CD-ROM. For further details, double-click the Readme.txt (for Windows) or Read Me First icon (for Macintosh), and follow the instructions. To view the Color Guide, double-click on the following icon: For Windows: For Macintosh: color.htm Color Guide Then follow the instructions on the screen. Getting Started 1-9 1 L 1-10 Poppy+ Rev.C A5 size 5/8/98 Chapter 1 pass 0 Getting Started Proof Sign-off: Hida Bowen _______ _______ Poppy+ Rev.C A5 size 5/8/98 Chapter 2 pass 2 R Chapter 2 Taking Pictures with PhotoPC 700 Using PhotoPC 700 to take pictures is similar to using a traditional “point and shoot” camera. This chapter tells you everything you need to know about the following: Turning the camera on and off Auto shut-off The display panel 2 Turning the Camera On and Off To turn the camera on, simply rotate the lens cover counterclockwise. The lens cover opens and the display panel on the top of the camera lights up. The status light on the back of the camera flashes red for a few seconds, then turns green. The camera is now ready to take pictures. Checking battery power Activating the shutter Picture-taking range On Adjusting settings Using the function button Checking the picture counter Off Playing back your photos Rotate the lens cover clockwise to turn off the camera. The lens cover closes and the display panel turns off. Taking Pictures with PhotoPC 700 2-1 L Poppy+ Rev.C A5 size 5/8/98 Chapter 2 pass 2 Auto Shut-off To save battery power, the camera turns itself off automatically after 60 seconds if no buttons are pressed (when the lens cover is open and the LCD monitor is off). The camera also shuts off after 60 seconds when you take pictures using the viewfinder with the LCD monitor off. To turn the camera back on, press the shutter button, or close the lens cover then open it again. When your camera is connected to the optional AC adapter, the auto shut-off feature is disabled. Note: When the camera is connected to your computer, it shuts itself off after 5 minutes of inactivity. It comes back on automatically when you use any of the software camera controls in your EPSON Photo!2 software. LCD monitor power saving features Because the LCD monitor consumes additional power, the LCD monitor turns off automatically in the following cases: o o 2-2 When you turn off the camera with the LCD monitor in View mode When the camera is not used for 30 seconds with the LCD monitor in View mode Taking Pictures with PhotoPC 700 o o When the camera is connected to a computer with the LCD monitor in View mode When the camera is connected to a television In the following cases, you can turn the LCD monitor back on by simply pressing the shutter button, or sliding the monitor mode switch to OFF, then sliding it back to View or Playback. o o Right after you take a picture, when your camera is default set to SAVE in energy saving mode After 30 seconds of image processing, when your camera is set to NORM in energy saving mode Note: In Playback mode, you can set the energy saving mode to SAVE or NORM. For instructions on setting the energy saving mode, see page 3-8. o o When the camera is not used for 5 minutes with the LCD monitor in Playback mode When the camera is not turned on within 15 seconds of switching the LCD monitor to View mode Note: When your camera is connected to the optional AC adapter, the LCD monitor auto shut-off feature is disabled. The Display Panel Poppy+ Rev.C A5 size 5/8/98 Chapter 2 pass 2 R Checking Battery Power The display panel keeps track of how many pictures you can take and gives you information on camera settings and the battery level. number of pictures remaining (see page 2-13) flash (see page 2-9) When the battery power is almost out, a low battery icon appears on the display panel. When this icon is flashing, you cannot take pictures until you change the batteries. When battery power runs out with the LCD monitor in the Playback or View mode, the low battery icon appears on the LCD screen for five seconds, then the monitor and the camera turn off automatically. You should use the low battery icon only as a rough guide to the power remaining. Even after the low battery icon appears, you can turn off the LCD monitor and take several more pictures using the viewfinder. Note that several factors can affect battery life, including the surrounding temperature and the type of batteries you use. Low temperatures (especially below 10°C) will drain your batteries more rapidly. See 1-4 for information about changing batteries. image quality (see page 2-8) low battery icon (see page 2-3) macro mode (see page 2-10) self timer (see page 2-9) Taking Pictures with PhotoPC 700 2-3 2 L Poppy+ Rev.C A5 size 5/8/98 Chapter 2 pass 2 Activating the Shutter 4. Press the shutter button the rest of the way down to take the photo. Follow the steps below to take photos using the viewfinder or the LCD monitor. You can also take photos from your computer using EPSON Photo!2. To use this feature, see your digital camera software manual. 5. Hold the camera still until the status light starts flashing red and the camera beeps. Then release the shutter button. Using the viewfinder status light 1. Turn the camera on and wait until the status light beside the viewfinder turns green. 2. Look straight through the viewfinder and center your subject in the cross-hairs. Note: The frame in the viewfinder indicates the area captured when taking pictures at close range. 3. Hold the shutter button halfway down to lock the auto focus. The status light beside the viewfinder changes from green to orange. If you wish, you can now move your subject off-center without altering the focus. 2-4 Taking Pictures with PhotoPC 700 viewfinder shutter button The flashing red light indicates that the image is captured and the camera is processing it. When the light stops flashing and turns green, the image is saved. Saved images remain in the memory for years, even when the camera is turned off and the batteries are removed. You can take another photo when the status light turns green. Using the LCD monitor 1. Turn the camera on and slide the monitor mode switch on the back of the camera to View. You will see a live preview on the LCD screen. Center your subject on the screen. monitor mode switch Poppy+ Rev.C A5 size 5/8/98 Chapter 2 pass 2 R Note: Icons indicating the image quality setting , the number of photos you can take , and the number of photos taken appear at the bottom of the LCD screen. 2. Hold the shutter button halfway down to lock the auto focus. A small green circle appears on the upper right corner of the LCD screen, and the status light beside the viewfinder changes from green to orange. If you wish, you can now move your subject off-center without altering the focus. 3. Press the shutter button the rest of the way down to take the photo. 4. Hold the camera still until the status light starts flashing red and the camera beeps. Then release the shutter button. LCD screen When you press the shutter button, the LCD monitor freezes and displays the picture until the camera finishes processing it, then the monitor returns to live preview. Taking Pictures with PhotoPC 700 2-5 2 L Poppy+ Rev.C A5 size 5/8/98 Chapter 2 pass 2 Note: When battery power is low and the flash is used to take a picture, the return to live preview may be delayed while the camera recharges the flash. The LCD screen will be blank during this period. You can erase the photo you have just taken. Press the function button and BACK button at the same time, while your camera is still processing the photo. Picture-taking Range The camera should be at least 50 cm away from the subject when composing a shot through the viewfinder. Close-up photos can be taken from as near as 10 cm to the subject using the macro mode. See page 2-10 for instructions. When you use the flash in macro mode, you may find your pictures come out too light, since the flash is close to the subject. In this case, try setting the flash to Flash off. Note: When you are taking pictures outdoors, make sure the sun is behind you. In very bright light (for example, at the beach or in snow) your pictures may come out too light. However, you can adjust the exposure manually to make your photos brighter or darker. For instructions, see page 2-11. You can also correct these problems from your computer using image-editing software. Adjusting Settings The buttons on the top of the camera allow you to control the following PhotoPC 700 features: Note: To make sure your subject is framed accurately, use of the LCD monitor rather than the viewfinder is recommended when taking photos in macro mode. Image quality (see page 2-8) You can take flash pictures within a range of 20 cm to 2.4 m. See page 2-9 for more information on using the built-in flash. Macro mode (see page 2-10) 2-6 Taking Pictures with PhotoPC 700 Flash (see page 2-9) Self timer (see page 2-9) Poppy+ Rev.C A5 size 5/8/98 Chapter 2 pass 2 R image quality monitor mode switch 2 navigation buttons function button macro flash self timer When the LCD monitor on the back of your camera is switched to View, you can select modes and make menu settings as follows: o o o Panorama and Zoom LCD monitor Note: Some camera settings return to their default settings when you remove or change the batteries, or when you turn off the camera. Shooting Conditions; such as continuous, white balance, exposure, and sensitivity Information display For instructions, see page 3-2. Taking Pictures with PhotoPC 700 2-7 L Poppy+ Rev.C A5 size 5/8/98 Chapter 2 pass 2 Image quality The PhotoPC 700 has three color and two monochrome image quality settings. Press the image quality control button to cycle from one setting to another. The settings appear on the display panel as shown below. Fine (default setting) Super fine Monochrome fine Monochrome super fine Standard Note: When the power is turned off, the image quality condition inside the camera does not change. 2-8 Taking Pictures with PhotoPC 700 Fine Images are captured in color at 1280 × 960 pixels. Your pictures include moderate detail, and the camera holds approximately 12 to 13 pictures. Super fine Images are captured in color at 1280 × 960 pixels. Your pictures include greater detail, and the camera holds approximately 6 pictures. Monochrome fine Images are captured in black and white at 1280 × 960 pixels. Your pictures include moderate detail, and the camera holds approximately 12 to 13 pictures. Monochrome super fine Images are captured in black and white at 1280 × 960 pixels. Your pictures include greater detail, and the camera holds approximately 6 pictures. Standard Images are captured at 640 × 480 pixels. The camera holds approximately 40 to 43 pictures, and the images are less detailed. Poppy+ Rev.C A5 size 5/8/98 Chapter 2 pass 2 Automatic The flash fires automatically whenever more lighting is needed. Note: If you select one of the monochrome image quality settings when the LCD monitor is in View mode, the image turns from color to black and white, a blue frame appears around the image, and MONOCHROME appears briefly on the screen. Forced flash The flash fires with every picture you take. Use this setting to compensate for backlighting; for example, when you are facing the sun. You can switch freely between these settings and mix pictures of varying quality in the camera. The camera’s image capacity will vary accordingly. Flash off The flash is disabled, even when adequate lighting is not available. Use this setting for special effects, or when flash photography is prohibited. Flash The PhotoPC 700’s built-in flash is effective within a range of 20 cm to 2.4 m. Press the flash control button to cycle through the three flash settings. The settings appear on the display panel as shown below. Automatic (default setting) Forced flash R Note: After taking a flash photo, the flash icon blinks until the flash is fully recharged. Self timer Setting the self timer creates a 10-second delay between the time you press the shutter button and the actual image capture. This allows you to take a picture of yourself. The timer icon appears on the display panel when you use the timer. Follow these steps to take a picture with the timer: Flash off Taking Pictures with PhotoPC 700 2-9 2 L Poppy+ Rev.C A5 size 5/8/98 Chapter 2 pass 2 1. Secure the camera on a flat surface or a tripod. Macro mode 2. Turn on the camera and wait until the status light turns green. 3. Press the timer button. The timer icon appears on the display panel. 4. Press the shutter button. The timer icon and the red timer light on the front of the camera flash slowly for eight seconds, then rapidly for two seconds before the shutter releases. The camera beeps when the image is captured. The status light on the back of the camera flashes red as the PhotoPC 700 processes the image. When the status light stops flashing and turns green, you can take another picture. You need to press the timer button again each time you want to take a picture using the self timer. You can use this mode along with the continuous shooting mode so that the camera continues to take up to 10 pictures in sequence. For instructions, see page 3-4. 2-10 Taking Pictures with PhotoPC 700 Use the macro mode to take close-up pictures within a range of 10 cm to 50 cm. Follow these steps to take a picture in the macro mode: 1. Press the macro button. The macro mode icon appears on the display panel. When you are using the LCD monitor, a green frame appears around the previewed image and MACRO appears briefly on the LCD screen. 2. Press the shutter button. Note: o To make sure your subject is framed accurately, use of the LCD monitor rather than the viewfinder is recommended when taking photos in macro mode. o When you use the flash in macro mode, you may find your pictures come out too light, since the flash is close to the subject. In this case, try setting the flash to Flash off. To turn off macro mode, simply press the macro button again. Using the Function Button Using the function button and other control buttons, you can adjust exposure and erase photos in the camera easily. Adjusting the exposure o o o o The camera adjusts the exposure of your photos automatically. However, you can manually adjust the exposure to change the darkness or brightness of your photos for certain conditions. o o o o o you want to make your photos lighter. the photo you have taken is too dark, and you want to increase the brightness. Rev.C A5 size 5/8/98 Chapter 2 pass 2 R you are taking photos at the beach or in the snow on sunny days, or taking photos of an object with a white background. 2 Adjust the exposure to - when: Exposure refers to the amount of light the camera captures when a photo is taken. Adjust the exposure to + when: Poppy+ you want to make your photos darker. the photo you have taken is too bright, and you want to increase the darkness. you are taking pictures of a black object which may tend to look grayish in the photos. you are taking pictures of an object with a black background. To adjust the exposure of your photos manually, follow these steps: 1. Set the exposure adjustment to MANUAL using the View mode. For instructions, see page 3-5. you are taking pictures of a white object which may tend to look grayish in the photos. you are taking pictures of an object with a bright background, such as windows facing the sun. Taking Pictures with PhotoPC 700 2-11 L Poppy+ Rev.C A5 size 5/8/98 Chapter 2 pass 2 2. Press the function button. You will see the display panel has changed from showing the number of pictures remaining, to showing exposure adjustment information. You can also see adjustment information on the top of the LCD monitor. While pressing the function button, press the and buttons to change the number. Keep pressing the or buttons to cycle from one setting to another, as follows: adjust -2 adjust -1 Note: If you take your finger off the function button, the information on the display panel changes to show the number of pictures remaining. To see the exposure setting again, simply press the function button again. 3. When you are finished making the setting, just take your fingers off the buttons. Note: o Experience and knowledge of photography is necessary to correctly adjust exposure. Make sure your exposure adjustment setting is correct when taking important photos. o no adjustment (default setting) o adjust +1 adjust +2 2-12 Taking Pictures with PhotoPC 700 When the conditions for photography are not very good, we recommend you take several photos of the same object using different exposures. The exposure adjustment value changes back to AUTO when the front rotary switch is turned off, or the camera shuts down due to powerfail. Poppy+ Rev.C A5 size 5/8/98 Chapter 2 pass 2 R Erasing your photos monitor mode switch You can erase the photos in your camera one at a time easily using the function button, as follows: 2 In View Mode 1. When you take a picture and want to erase it immediately after it has been taken, press the function button and BACK button simultaneously. You can erase images being processed one at a time. select button function button back button 2. When the confirmation message appears, press SELECT to erase the photo. In Playback Mode 1. Slide the monitor mode switch to Playback. 2. Press the function button and BACK button simultaneously to erase the images displayed on the LCD screen one at a time. Checking the Picture Counter The large number in the center of the camera’s display panel shows how many pictures you can take. number of pictures remaining 3. When the confirmation message appears, press SELECT to erase the photo. You can erase selected photos or all the photos at once, using the Photo Control menu. For instructions, see page 3-10. Taking Pictures with PhotoPC 700 2-13 L Poppy+ Rev.C A5 size 5/8/98 Chapter 2 pass 2 The number of pictures remaining depends on the image quality setting you have chosen. If you change this setting, the number of pictures remaining will also change. When the camera’s memory is full, you will see the number on the display panel reads 0. The status light on the back of the camera turns red, and you are unable to press the shutter button. You need to erase some or all of the images in your camera before you can take any more pictures. See page 2-13 or 3-10 for instructions on erasing photos using the LCD monitor. If you want to save your photos before you erase them, connect the camera to your computer and transfer the photos as described in the digital camera software manual. If you install an optional CompactFlash Card, the number of pictures you can store in the memory card appears in brackets on the camera’s display panel as shown below. For instructions on using optional memory cards, see page 5-1. number of pictures remaining in the CompactFlash Card brackets 2-14 Taking Pictures with PhotoPC 700 You can use the LCD monitor to find out how many photos you have taken. See page 3-6 or 3-8 for instructions. Playing Back Your Photos When the LCD monitor is in Playback mode, you can view photos on your camera’s LCD screen or on a regular television set. You can also view your photos on the computer using EPSON Photo!2. To use this feature, see your digital camera software manual. Displaying photos on the LCD screen To playback your photos on the LCD screen, follow the steps below. 1. Slide the monitor mode switch to Playback. The last photo you took appears on the LCD screen along with the date and time that the photo was taken. Icons indicating the image quality setting , frame number , and the number of photos taken appear at the bottom of the screen. monitor mode switch Poppy+ Rev.C A5 size 5/8/98 Chapter 2 pass 2 R Note: Color television telecasting specifications are different depending on the country. If you have an NTSC camera model, your television must meet NTSC color television telecasting specifications. If you have a PAL camera model, your television must meet PAL specifications. Follow these steps to connect PhotoPC 700 to your television: 1. Make sure the camera and television are turned off. 2. Open the connector cover on the side of the camera. LCD screen 2. Press the or next photos. button to display the previous or Note: You can also display up to nine consecutive “thumbnail” images at a time using the Multi-photo Playback mode, or automatically playback your photos in sequence using the Slide Show feature. See page 3-9 or 3-14 for instructions. connector cover Displaying photos on a television You can display the pictures in your camera on a regular television just as you can on the LCD screen simply by using the video cable that came with your PhotoPC 700. Taking Pictures with PhotoPC 700 2-15 2 L Poppy+ Rev.C A5 size 5/8/98 Chapter 2 pass 2 3. Connect the video cable to the Video Out port on the camera as shown below. 5. Turn on the television and switch it to video mode. 6. Slide the monitor mode switch to Playback. The last picture you took appears on the television screen. Note: If you use the optional AC adapter, you can see the pictures on both the television and the LCD screen. 4. Connect the other end of the video cable to the video input port on the television. 2-16 Taking Pictures with PhotoPC 700 R Proof Sign-off: Hida Bowen _______ _______ Poppy+ Rev.C A5 size 5/12/98 Chapter 3 pass 1 Chapter 3 Using the LCD Monitor Menus When the LCD monitor is in View or Playback modes, you can access the LCD monitor menus, where you can erase selected photos and make a variety of camera and option settings. This chapter explains how, including: Working with LCD monitor menus Setting Panorama or Zoom Setting shooting conditions Displaying photo information Working with LCD Monitor Menus The LCD monitor features three menus in View mode and eight menus in Playback mode, that allow you to delete selected photos from the camera, and make a variety of camera and option settings. You can open all the menus described in this chapter from the monitor’s View or Playback mode. By pressing the SELECT, BACK, and navigation buttons as described in this chapter, you can access and make settings on each menu. Making camera settings Playing back your photos monitor mode switch Magnifying your photos Controlling photos SELECT button Setting up the camera’s software Setting the language navigation buttons BACK button Using the LCD Monitor Menus 3-1 3 L Poppy+ Rev.C A5 size 5/12/98 Chapter 3 pass 1 Follow these steps to access the LCD monitor menus: 1. Slide the monitor mode switch to View or Playback, then press the SELECT button. Menu icons appear at the top of the LCD screen with the currently selected menu framed in orange. 2. Press the and buttons to view the settings for other menus. The orange frame indicates the selected menu. 3. Press the SELECT button to choose your setting. Depending on the menu, you may have to press the SELECT button several times. 4. To exit the LCD monitor menus, press the BACK button until the menu icons and settings disappear. Depending on the menu, you may have to press the BACK button several times to return to the Playback mode. Following are the three LCD monitor menus in View mode: Panorama/Zoom See page 3-4. This menu allows you to choose from the following shooting modes: 3-2 Using the LCD Monitor Menus Conditions See page 3-4. This menu allows you to change the following shooting conditions: Continuous shooting Panorama Zoom White balance Exposure Sensitivity Information See page 3-6. Read the following menu descriptions and instructions on changing the settings for each menu. → ← This menu allows you to choose whether or not to have photo information displayed on the LCD screen. → ← R Poppy+ Rev.C A5 size 5/12/98 Chapter 3 pass 1 Following are the eight LCD monitor menus in Playback mode: Settings See page 3-7. → ← This menu allows you to change the following settings: Information See page 3-8. → ← See page 3-9. → ← This menu allows you to choose to display a single photo or nine photos at a time by switching between Normal and Multi. This menu allows you to choose whether or not to have photo information displayed on the LCD screen. clock Playback Magnification See page 3-9. This menu allows you to magnify the picture for detailed viewing. alert beep LCD brightness energy saving Photo control See page 3-10. This menu allows you to do the following: erase photos lock photos get memory information copy photos format memory cards → ← Slide Show See page 3-14. This menu allows you to play back all the photos in your camera one-by-one automatically. → ← Software See page 3-15. This menu allows you to install, use, and delete optional programs available for use with your camera. → ← Language See page 3-16. Depending on the country, you can choose the following languages for displaying information on the LCD screen: English, Japanese, French, German, Italian, Portuguese, or Spanish Using the LCD Monitor Menus 3-3 → ← 3 L Poppy+ Rev.C A5 size 5/12/98 Chapter 3 pass 1 Using the Panorama/Zoom Menu The Panorama/Zoom menu allows you to take pictures in zoom or panorama mode. Access the LCD monitor menus in View mode and select the Panorama/Zoom menu as described on page 3-2, then press the SELECT button to choose from the menu. Panorama This mode allows you to take wide-angle panoramas. Use the image quality control button on top of the camera to select fine or super fine image quality (1280 × 480 pixels). See page 2-8 for more information on image quality settings. Zoom This mode allows you to enlarge the image by as much as two times. In zoom mode, images are captured at standard quality (640 × 480 pixels). Using the Conditions Menu The Conditions menu allows you to take photos by continuous shooting, fix white balance, set exposure to change manually, and set sensitivity to high. Follow the instructions below for the shooting condition feature you want to use. Setting the continuous shooting mode This mode allows you to take almost two photos a second, with up to ten photos in sequence. The shooting mode is useful when you want to break down a complex motion into a series of easy-to-see steps. It is also useful to take several pictures, and then choose from those the ones you like best. Standard If you do not want any special photo format, choose standard. 1. Access the LCD monitor menus in View mode and select the Conditions menu as described on page 3-2, then press the SELECT button. Icons for each setting appear on the screen, with the continuous shooting icon highlighted in orange. Note: When you are taking pictures in panorama or zoom mode, you cannot set the camera to continuous shooting mode. 2. Press the SELECT button again to choose ON or OFF. The current selection is highlighted. 3-4 Using the LCD Monitor Menus R 3. Press the BACK button to save your setting and return to the Conditions menu. You will see CONTINUOUS appears briefly on the screen. 4. To take pictures in continuous shooting mode, keep pressing the shutter button until your camera stops taking pictures. Note: When the camera is set in panorama or zoom mode, you cannot take pictures in, or set the continuous shooting mode. You can set the self timer along with the continuous shooting mode to create a 10-second delay between the time you press the shutter button and the actual image captures. For instructions, see page 2-9. Poppy+ Rev.C A5 size 5/12/98 Chapter 3 pass 1 When taking pictures at dusk, for example, adjust white balance to FIX to increase reddish color tones in your images. When taking pictures under white light, however, keep white balance set to AUTO to avoid white appearing greenish in your images. 1. Access the LCD monitor menus in View mode and select the Conditions menu as described on page 3-2, then press the SELECT button. Icons for each setting appear on the screen, with the uppermost icon highlighted in orange. 2. Press the button to select the white balance icon ; then press the SELECT button to choose AUTO or FIX. Your selection is highlighted. 3. Press the BACK button to save your setting and return to the Conditions menu. Adjusting the white balance The camera’s white balance is default set to AUTO, which means white balance is adjusted for your photos automatically. At certain times you may want to adjust the white balance setting, so that the colors in your images appear more like those seen by the eye. Adjusting the exposure The camera’s exposure is default set to AUTO, which means exposure is adjusted for your photos automatically. When you set the exposure to MANUAL, you can change the exposure to take lighter or darker photos. To change the exposure setting between AUTO and MANUAL, follow these steps, then see page 2-11 to adjust the exposure manually using the function button. Using the LCD Monitor Menus 3-5 3 L Poppy+ Rev.C A5 size 5/12/98 Chapter 3 pass 1 1. Access the LCD monitor menus in View mode and select the Conditions menu as described on page 3-2, then press the SELECT button. Icons for each setting appear on the screen, with the uppermost icon highlighted in orange. 1. Access the LCD monitor menus in View mode and select the Conditions menu as described on page 3-2, then press the SELECT button. Icons for each setting appear on the screen, with the uppermost icon highlighted in orange. 2. Press the button to select the exposure icon ; then press the SELECT button to choose AUTO or MANUAL. Your selection is highlighted. 2. Press the button to select the sensitivity icon then press the SELECT button to choose STD or HIGH. Your selection is highlighted. 3. Press the BACK button to save your setting and return to the Conditions menu. Then see the steps on page 2-11 to adjust the exposure manually between +2 and -2. 3. Press the BACK button to save your setting and return to the Conditions menu. Using the Information Menu Adjusting the sensitivity The camera’s sensitivity is default set to STD, which means the camera’s sensitivity is standardized automatically. When taking photos while moving fast however, or in the dark without a flash, you can set the sensitivity to HIGH so that the camera can adjust to the less than favorable conditions. It is recommended sensitivity is set back to STD at all other times, as image quality is higher when set to STD. 3-6 Using the LCD Monitor Menus The Information menu allows you to choose whether or not to have photo information displayed on the LCD screen. If you choose ON, you can get information on the date and time that the photo was taken, the image quality setting, frame number, and the number of photos taken. Access the LCD monitor menus in View or Playback mode and select the Information menu as described on page 3-2. The current setting is highlighted. To change the setting, press the SELECT button. Then press the BACK button to save your setting. ; R Using the Settings Menu The Settings menu allows you to change settings for the camera’s internal clock, the alert beep, the LCD brightness level, and the energy saving mode. Poppy+ Rev.C A5 size 5/12/98 Chapter 3 pass 1 5. Press the SELECT button after you change one setting, and want to change another clock setting. 6. Repeat steps 3 through 5 until the date and time are correctly adjusted and saved. Press the SELECT button or BACK button to return to the Settings menu. 3 Follow the instructions below for the changing settings. Setting the alert beep Setting the clock Follow these steps to adjust the date (year, month, day) and the time (hour and minutes). 1. Access the LCD monitor menus in Playback mode and select the Settings menu as described on page 3-2, then press the SELECT button. Icons for each setting appear on the screen, with the clock icon highlighted in orange. To turn the camera’s alert beep on or off, follow these steps: 1. Access the LCD monitor menus in Playback mode and select the Settings menu as described on page 3-2, then press the SELECT button. Icons for each setting appear on the screen, with the uppermost icon highlighted in orange. 2. Press the SELECT button again to enter the clock setting mode. 2. Press the button to select the beep setting icon then press the SELECT button to select ON or OFF. The current selection is highlighted. 3. Press the SELECT button until the item you want to adjust is selected. The selected item turns red. 3. Press the BACK button to save your setting and return to the Settings menu. 4. Press the button to increase the number, or the button to decrease the number, until the item you want to adjust is correct. Using the LCD Monitor Menus 3-7 ; L Poppy+ Rev.C A5 size 5/12/98 Chapter 3 pass 1 Setting LCD brightness To adjust the brightness of the LCD screen, follow these steps: Setting the energy saving mode To set the energy saving mode to SAVE or NORM, follow these steps: 1. Access the LCD monitor menus in Playback mode and select the Settings menu as described on page 3-2, then press the SELECT button. Icons for each setting appear on the screen, with the uppermost icon highlighted in orange. 1. Access the LCD monitor menus in Playback mode and select the Settings menu as described on page 3-2, then press the SELECT button. Icons for each setting appear on the screen, with the uppermost icon highlighted in orange. 2. Press the button until the brightness icon is highlighted in orange, then press the SELECT button again. The mark on the brightness setting slide bar turns orange. 2. Press the button to select the energy saving icon then press the SELECT button to select SAVE or NORM. The current selection is highlighted. 3. Slide the mark on the bar by pressing the and buttons to adjust the screen brightness. The lightness increases towards right, and decreases towards left. 4. Press the SELECT or BACK button to save your setting and return to the Settings menu. 3-8 Using the LCD Monitor Menus 3. Press the BACK button to save your setting and return to the Settings menu. Using the Information Menu The Information menu allows you to choose whether or not to have photo information displayed on the LCD screen. If you choose ON, you can get information on the date and time that the photo was taken, the image quality setting, frame number, and the number of photos taken. ; R Access the LCD monitor menus in View or Playback mode and select the Information menu as described on page 3-2. The current setting is highlighted. To change the setting, press the SELECT button. Then press the BACK button to save your setting. Using the Playback Menu The Playback menu allows you to switch between Normal and Multi-photo Playback modes. Access the LCD monitor menus in Playback mode and select the Playback menu as described on page 3-2. The current setting is highlighted. Press the SELECT button to make your setting, and press BACK to save your setting and exit this menu. If you choose Normal, one selected picture is displayed. If you switch to Multi, nine small “thumbnail” images of the last photos you took appear on the screen, with the currently selected image framed in white. Poppy+ Rev.C A5 size 5/12/98 Chapter 3 pass 1 Press the and buttons to move the white selection frame forward and back through the images on screen. When the frame reaches the first or last photo of the current group, the previous or next group of up to nine images is displayed. 3 Using the Magnification Menu The Magnification menu allows you to magnify the picture you have taken. Access the LCD monitor menus in Playback mode and select the Magnification menu as described on page 3-2, then press the SELECT button. You can see a selected area magnified by two, and the image is divided into nine parts. At first you will see an enlarged view of the center of the image. Scroll to the left and right, top and bottom, using the and buttons. An icon in the top corner of the screen indicates which of the nine sections of the image you are viewing. When you magnify the panorama picture, your image is divided into three parts, and you can scroll to only the left and right. To exit the Magnification menu and return to the Playback mode, press the BACK button. Using the LCD Monitor Menus 3-9 L Poppy+ Rev.C A5 size 5/12/98 Chapter 3 pass 1 Using the Photo Control Menu The Photo Control menu allows you to erase, lock, or unlock images in your camera, and to get information on the camera’s internal and CompactFlash Card’s memory. This menu also allows you to format memory cards and copy images between the camera and the card. Access the LCD monitor menus in Playback mode and select the Photo Control menu as described on page 3-2, then follow the instructions below for the Photo Control feature you want to use. Erasing photos There are two ways to erase photos from your camera: Select Photo or Erase All. Use Select Photo to erase one or several photos at a time; use Erase All to erase all photos from the camera’s memory. Follow the steps below for the method you want to use. Note: Be sure to unlock the photos before erasing them. See “Locking photos” on page 3-11 for instructions. 3-10 Using the LCD Monitor Menus Select Photo 1. With the Photo Control menu selected, press the SELECT button. The Photo Control features appear on the screen, with the Erase option highlighted in orange. 2. Press the SELECT button to enter the Erase mode, then press the or button to choose Select Photo. 3. Press the SELECT button, then press the or button to move forward or back through the images in the camera until the photo you want to erase appears on the screen. 4. Press the SELECT button. A confirmation message appears asking if you are sure you want to erase that image. Press the SELECT button to erase, or press BACK to cancel your job. If you want to erase other photos at the same time, use the or button to display them, then press the SELECT button to select them. Note: o To cancel the selection of a photo, simply press the SELECT button again. o If you try to select a locked photo, the camera beeps and you cannot select that photo until you unlock it, as described on page 3-11. R 5. When you have selected all the photos you want to erase, press the BACK button. A message appears asking you to confirm your selections. 6. Press the SELECT button to erase the images and return to the Photo Control menu; press BACK to return to the Photo Control menu without erasing the photos. Poppy+ Rev.C A5 size 5/12/98 Chapter 3 pass 1 Locking photos The lock feature keeps your photos from being accidentally erased. You can lock and unlock selected photos from the Select Photo mode, or lock all the photos in the camera from the Lock All mode. To unlock all photos, use the Unlock All menu. Follow the steps below for each procedure: Erase All 1. With the Photo Control menu selected, press the SELECT button. The Photo Control features appear on the screen, with the Erase option highlighted in orange. 2. Press the SELECT button to enter the Erase mode, then press the or button to choose Erase All. 3. Press the SELECT button. A message appears asking you to confirm you want to erase all photos. Press the SELECT button to erase the photos and return to the Photo Control menu; press the BACK button to cancel your job and return to the Photo Control menu. Note: If there are locked photos in your camera, the camera beeps and a message appears on the screen before the erase photos confirmation message. Press the SELECT button to erase only the unlocked images from the camera, or press the BACK button to cancel. Select Photo 1. With the Photo Control menu selected, press the SELECT button. The Photo Control features appear on the screen, with the Erase option highlighted in orange. 2. Press the button to select the Lock option, then press the SELECT button to enter the Lock mode. Then press the or button to choose Select Photo. 3. Press the SELECT button, then press the or button to move forward or back through the images in the camera until the photo you want to lock or unlock appears on the screen. Using the LCD Monitor Menus 3-11 3 L Poppy+ Rev.C A5 size 5/12/98 Chapter 3 pass 1 4. Press the SELECT button. A lock icon appears at the bottom of the screen when the photo is locked, and disappears when the photo is unlocked. If you want to lock or unlock other photos at the same time, use the or button to display them, then press the SELECT button. 5. When you have selected all the photos you want to lock or unlock, press the BACK button. A message appears asking you to confirm your selections. 6. Press the SELECT button to lock or unlock the images and return to the Photo Control menu; press the BACK button to return to the Photo Control menu without locking or unlocking the photos. Lock All 1. With the Photo Control menu selected, press the SELECT button. The Photo Control features appear on the screen, with the Erase option highlighted in orange. 2. Press the button to select the Lock option, then press the SELECT button to enter the Lock mode. Then press the or button to choose Lock All. 3-12 Using the LCD Monitor Menus 3. Press the SELECT button. A message appears asking you to confirm you want to lock all the photos in the camera. Press the SELECT button to lock the photos and return to the Photo Control menu; press the BACK button to return to the Photo Control menu without locking the photos. Unlock All 1. With the Photo Control menu selected, press the SELECT button. The Photo Control features appear on the screen, with the Erase option highlighted in orange. 2. Press the button until Lock is highlighted in orange. Press the SELECT button to enter the Lock Photos mode, then press the or button to choose Unlock All. 3. Press the SELECT button. A message appears asking you to confirm that you want to unlock all the photos in the camera. Press the SELECT button to unlock the photos and return to the Photo Control menu; press the BACK button to return to the Photo Control menu without unlocking the photos. R Getting memory information The memory information mode allows you to get information on both your camera’s internal memory and optional CompactFlash memory cards. With the Photo Control menu selected, press the SELECT button. Then press the button until Memory Info is highlighted. Press the SELECT button. Information on internal and external memory appears, including the number of photos you can take , the number of photos stored in internal memory and external memory , and the total number of photos that can be stored at the current image quality setting . Copying photos When an optional CompactFlash memory card is installed in your camera, you can use the copy mode to copy photos between the camera’s internal memory and the memory card. Follow these steps: 1. Make sure the memory card is installed in the camera. 2. With the Photo Control menu selected, press the button until Copy SELECT button. Then press the is highlighted in orange. Poppy+ Rev.C A5 size 5/12/98 Chapter 3 pass 1 3. Press the SELECT button to enter the Copy mode, then press the or button to select Camera→Card or Card→Camera as the copy destination. 4. Press the SELECT button, then press the or button to move forward or back through the images in the camera until the photo you want to copy appears on the screen. 5. Press the SELECT button. An orange frame appears around the photo. If you want to copy several photos at the same time, use the or button to display them and press the SELECT button each time. Note: o If you select more photos than the card or camera can hold, the error message “Insufficient Memory” appears. o If no external memory card is installed, the error message “No Card” appears. 6. When you have selected all the photos you want to copy, press the BACK button. A message appears asking you to confirm your selections. 7. Press the SELECT button to copy the images and return to the Photo Control menu; press the BACK button to cancel and return to the Photo Control menu. Using the LCD Monitor Menus 3-13 3 L Poppy+ Rev.C A5 size 5/12/98 Chapter 3 pass 1 Formatting memory cards To format optional CompactFlash Cards, follow these steps: c Caution: When you format a memory card, all the data on the card is lost, including any locked images. Note: EPSON CompactFlash Cards are already formatted when you buy them. You need to format a card only if you want to erase all the data on the card or if a message on the LCD screen instructs you to do so. 1. Make sure the memory card is installed in the camera. 2. With the Photo Control menu selected, press the button until SELECT button. Then press the Format Card is highlighted. 3. Press the SELECT button. A message appears stating that all data on the card will be erased and asking you to confirm the procedure. Press the SELECT button again to format the card and return to the Photo Control menu; press the BACK button to return to the Photo Control menu without formatting the card. 3-14 Using the LCD Monitor Menus Note: If no memory card is installed in the camera, the error message “No Card” appears. Using the Slide Show Menu The Slide Show menu allows you to automatically play back all the photos in your camera one by one. Access the LCD monitor menus in Playback mode and select the Slide Show menu as described on page 3-2, then press the SELECT button. The LCD monitor begins playing back the photos in your camera one at a time at regular intervals. To move forward or back through the photos manually, press the or button. To pause the slide show on a particular photo, press the SELECT button. The pause icon and current picture count appear at the bottom of the screen. Note: A message saying No Photos in Memory appears when there are no recorded images in the camera. To stop the slide show and return to Playback mode, press the BACK button. R Using the Software Menu The Software menu allows you to install, use, or delete software programs available for use with your camera. Access the LCD monitor menus in Playback mode and select the Software menu as described on page 3-2, then press the SELECT button. The names of any programs already installed in your camera appear on the menu, along with an Add/Delete command, which you can use to install programs from a memory card or delete programs from your camera. Note: For information on the availability of CompactFlash Cards which contain software, contact your dealer. To use an installed software program, press the SELECT button then press the or button to select the optional program you want to use. Press the SELECT button again to open the program. To use the Direct Print program, see Chapter 4. To copy a program from a CompactFlash memory card to your camera, or to delete an optional program from your camera, use the Add/Delete command following these steps: Poppy+ Rev.C A5 size 5/12/98 Chapter 3 pass 1 Note: You can also upload software programs to your camera from your computer. See your digital camera software manual for instructions. 1. If there are any photos in the camera’s internal memory, transfer the ones you want to your computer or to a CompactFlash Card, then erase all the photos from the camera. c Caution: If any images are left in the camera’s memory when you upload an optional program, the camera may not work properly. 2. Insert the memory card into your camera as described on page 5-2. With the Software menu selected, press the SELECT button then press the or button to select Add/Delete. 3. Press the SELECT button, then use the to select Add or Delete. or button 4. Press the SELECT button. If you selected Add, a message appears asking you to confirm you want to install the program. Using the LCD Monitor Menus 3-15 3 L Poppy+ Rev.C A5 size 5/12/98 Chapter 3 pass 1 If you selected Delete, a list of the programs installed in your camera appears. Use the or button to choose the program you want to delete, then press the SELECT button. A message appears asking you to confirm you want to delete the program. 5. Press the SELECT button to install or delete the program and return to the Software menu; press the BACK button to return to the Software menu without installing or deleting the program. Using the Language Menu The Language menu allows you to select the language used to display camera information on the LCD screen. Depending on the country of purchase, you can choose English, Japanese, French, German, Italian, Portuguese, or Spanish. Access the LCD monitor menus in Playback mode and select the Language menu as described on page 3-2. The current setting is highlighted. To select a different language, press the SELECT button until the language you want is highlighted. Press BACK to return to the Playback mode. 3-16 Using the LCD Monitor Menus Proof Sign-off: Hida Bowen R _______ _______ Poppy+ Rev.C A5 size 5/8/98 Chapter 4 DR, pass 0 Chapter 4 Using the Direct Print Program Features Preparing the Direct Print program Connecting your camera to the printer Features The Direct Print program is software that allows you to print images directly from your PhotoPC 700 with simple procedure. This software includes the following features: Available paper types o Using the Direct Print program o LCD screen and display panel messages Printed image dimensions o Color, monochrome, blue, and sepia printing Full-size, 5 × 7 size, Card, Album, Sticker, and Index (contact sheet) printing modes Fast and Fine printing modes Using the Direct Print Program 4-1 4 Poppy+ Rev.C A5 size 5/8/98 Chapter 4 DR, pass 0 L Preparing to Use the Direct Print Program Connecting Your Camera to the Printer You need the following items to use the Direct Print Program. Follow these steps to connect the camera to the appropriate EPSON printer. Digital camera: EPSON PhotoPC 700 Printer: EPSON STYLUS PHOTO, EPSON STYLUS PHOTO 700, EPSON STYLUS PHOTO EX, EPSON STYLUS COLOR 600, EPSON STYLUS COLOR 800, EPSON STYLUS COLOR 850 1. Make sure both the camera and the printer are turned off. Printer cable: Apple System Serial-8 cable (8-pin mini-circular connector) Note: Use of the optional AC adapter (B86703]) is also recommended, to avoid batteries running out while printing. The Direct Print program is already installed in EPSON PhotoPC 700. If you uninstalled the program and want to use it again, you can reinstall the program (the Direct Print kit is packed with your camera). For instructions on installation, see your digital camera software manual. 4-2 Using the Direct Print Program 2. Connect one end of the interface cable to the serial connector on the back of the printer. Note: The interface cable must be purchased separately (see previous section). Do not use the PC connection cable or Macintosh adapter cable that came with the camera. R Poppy+ Rev.C A5 size 5/8/98 Chapter 4 DR, pass 0 3. Open the connector cover on the side of the camera. mark flat surface or arrow 4. Depending on the type of serial cable you have, line up either the arrow or the flat surface of the cable connector with the mark on the camera’s serial port, then insert the connector. c Caution: Be sure to position the cable correctly before pushing it into the connector. Otherwise, the cable’s pins may be damaged. Available Paper Type You can use any of the paper types listed below when printing with the Direct Print program. Photo Quality Ink Jet Paper: Use this paper for standard photo quality printing. EPSON Photo Quality Ink Jet Paper (A4) EPSON Photo Quality Ink Jet Card (A6) EPSON Photo Quality Ink Jet Paper (Letter) Using the Direct Print Program S041061 S041026 S041054 S041029 S041062 4-3 4 Poppy+ Rev.C A5 size 5/8/98 Chapter 4 DR, pass 0 L Photo Quality Glossy Paper: Use this paper for photo quality glossy prints. EPSON Photo Quality Glossy Paper (A4) EPSON Photo Paper (A4) EPSON Photo Quality Glossy Paper (Letter) EPSON Photo Paper (Letter) EPSON Photo Paper (4 × 6 in.) Accessing the Direct Print program S041126 S041140 S041124 S041141 S041134 1. Slide the monitor mode switch on your camera to Playback. 2. Press the SELECT button on the back of the camera. Menu icons appear at the top of the LCD screen with the currently selected menu highlighted in orange. Photo Quality Glossy Film: Use glossy film to get high gloss photo quality prints. 3. Press the or button until the Software menu is highlighted, then press the SELECT button. EPSON Photo Quality Glossy Film (A4) EPSON Photo Quality Glossy Film (A6) EPSON Photo Quality Glossy Film (Letter) EPSON Photo Stickers (A6) 4. After selecting Direct Print, press the SELECT button to display the Direct Print modes. S041071 S041107 S041072 S041144 Note: o The availability of special media varies by country. o Ink jet printers are particularly sensitive to the condition of your paper. Keep unused paper in its original packaging and store it in a cool, dark place. Using the Direct Print Program Follow the instructions in this section to access the software and print out images. 4-4 Using the Direct Print Program To print, see the instructions in the next section for the print mode you want to use. Printing your images The Direct Print program features the following print modes. Note: When printing, you can choose to use either the Fast or Fine mode. If you select Fast, printing is faster; if you select Fine, printing is finer quality. R o Full Size The Full Size print mode allows you to print a single image full-size onto a sheet of paper. You can print several copies of individual images. o Poppy+ Rev.C A5 size 5/8/98 Chapter 4 DR, pass 0 5 × 7 size The 5 × 7 size print mode allows you to print a 5 × 7 in. (176 × 132 mm) picture. Item Choices Item Choices Photo All or Select Photo All or Select Paper Paper Size: Type: Size: Type: Copies 1 to 99 Copies 1 to 99 Time On or Off Time On or Off (Photo paper excluded) Color Color, Monochrome, Blue, Sepia Color Color, Monochrome, Blue, Sepia Mode Fast or Fine Mode Fast or Fine Photo paper A4, Letter, A6, Photo paper Glossy paper, Glossy film, Inkjet paper Photo paper panorama A6 A6 Panorama A4/Letter A4, Letter Glossy paper, Glossy film, Inkjet paper A4/Letter Panorama See page 4-9 for instructions on printing with this mode. A4/Letter A4/Letter Panorama See page 4-8 for instructions on printing with this mode. Using the Direct Print Program 4-5 4 Poppy+ Rev.C A5 size 5/8/98 Chapter 4 DR, pass 0 L o Card The Card print mode allows you to print one image on an A6-sized card. Album The Album print mode allows you to print up to three images on A4 or Letter size paper, or up to two images on A6 size paper. Item Choices Photo All or Select Item Choices Size: Type: Photo All or Select Paper Size: Type: Position Right, Center, Left, Covered Binding (A4 or Letter only) Time On or Off Paper A6 Glossy paper, Glossy film, Inkjet paper Position Top, Center, Bottom, Full size Copies 1 to 99 Time On or Off Color Color, Monochrome, Blue, Sepia Mode Fast or Fine A6 Top A6 Center A6 Bottom A6 Full-size See page 4-10 for instructions on printing with this mode. 4-6 o Using the Direct Print Program A4, Letter, A6 Glossy paper, Glossy film, Inkjet paper Color Color, Monochrome, Blue, Sepia Mode Fast or Fine A4/Letter Left A4/Letter Center A4/Letter Right A6 See page 4-11 for instructions on printing with this mode. R o Sticker The Sticker print mode allows you to print onto EPSON Photo Stickers. This mode prints 16 small copies of the selected image onto each Photo Sticker sheet. o Poppy+ Rev.C A5 size 5/8/98 Chapter 4 DR, pass 0 Index (contact sheet) The Index print mode allows you to print A4, Letter, or A6 size contact sheets consisting of small “thumbnail” images of all the photos in your camera. Item Choices Item Choices Photo All or Select Photo All or Select Paper Paper Size: Type: Size: Type: Time On or Off (if you choose On, the photo number will also be shown with the time and date.) Color Color, Monochrome, Blue, Sepia Mode Fast or Fine Sticker Glossy film Color Color, Monochrome, Blue, Sepia Adjust Right or Left in 0.2 mm increments (maximum of 2.0 mm) Mode Fast or Fine A4, Letter, A6 Glossy paper, Glossy film, Inkjet paper Photo sticker See page 4-12 for instructions on printing with this mode. A4/Letter A6 See page 4-13 for instructions on printing with this mode. Using the Direct Print Program 4-7 4 Poppy+ Rev.C A5 size 5/8/98 Chapter 4 DR, pass 0 L To print, access the Direct Print program as described on page 4-4, then follow the instructions below for the print mode you want to use. Full-Size print mode Follow these steps to print using the Full Size print mode: 1. Access the Direct Print program as described on page 4-4. Press the button to highlight Layout, then press the SELECT button. With Full size selected, press the SELECT button again. 2. Select Photo and press the SELECT button. Choose All if you want to print all the images, then press the SELECT button once more. If you want to print an individual image, choose Select. Thumbnail images of the first nine photos in your camera appear with the currently selected image framed in blue. Press the or button to frame the image you want to print, then press SELECT. You can select several images at the same time. 3. To change the paper size and type, number of copies (1-99), color, printing mode, and whether to print the time and date the photo was taken, press the or button to select the option you want to change, then press the SELECT button. The settings for that option appear on the screen. 4-8 Using the Direct Print Program Note: If you select to print on Photo paper, you cannot select Time ON. 4. Press the or button to select a setting, then press the SELECT button. 5. Connect the camera to the printer as described on page 4-2, then turn on the printer and load the size and type of paper you selected. For paper loading instructions, see your printer User’s Guide. 6. When you are ready to start printing, press the button to select Print. 7. Press the SELECT button. The camera starts sending the image data to the printer. While the camera is sending data and printing, the LCD screen goes blank and star icons move across the display panel on the top of the camera. Note: To cancel printing, hold down the camera’s BACK button for about three seconds. A message stating printing is canceled appears on the LCD screen for three seconds, before returning to the Direct Print menu. The printer stops printing and ejects the paper. R 8. When printing is finished, the LCD screen returns to the Direct Print menu, and the display panel returns to normal. When you finish printing, close the Direct Print program by pressing the BACK button. Then slide the monitor mode switch to OFF and turn off the printer. 5 × 7 size print mode Follow these steps to print using the 5 × 7 size print mode: 1. Access the Direct Print program as described on page 4-4. Press the button to highlight Layout, then press the SELECT button. With 5 × 7 Size selected, press the SELECT button again. 2. Select Photo and press the SELECT button. Choose All if you want to print all the images, then press the SELECT button once more. If you want to print an individual image, choose Select. Thumbnail images of the first nine photos in your camera appear with the currently selected image framed in blue. Press the or button to frame the image you want to print, then press SELECT. You can select several images at the same time. Poppy+ Rev.C A5 size 5/8/98 Chapter 4 DR, pass 0 3. To change paper size and type, number of copies (1-99), color, printing mode, and whether to print the date and time that the photo was taken, press the or button to select the option you want to change, then press the SELECT button. The settings for that option appear on the screen. 4. Press the or button to select a setting, then press the SELECT button. 5. Connect the camera to the printer as described on page 4-2, then turn on the printer and load the size and type of paper you selected. For paper loading instructions, see your printer User’s Guide. 6. When you are ready to start printing, press the button to select Print. 7. Press the SELECT button. The camera starts sending the image data to the printer. While the camera is sending data and printing, the LCD screen goes blank and star icons move across the display panel on the top of the camera. Using the Direct Print Program 4-9 4 Poppy+ Rev.C A5 size 5/8/98 Chapter 4 DR, pass 0 L Note: To cancel printing, hold down the camera’s BACK button for about three seconds. A message stating printing is canceled appears on the LCD screen for three seconds, before returning to the Direct Print menu. The printer stops printing and ejects the paper. If you want to print an individual image, choose Select. Thumbnail images of the first nine photos in your camera appear with the currently selected image framed in blue. Press the or button to frame the image you want to print, then press SELECT. You can select several images at the same time. 8. When printing is finished, the LCD screen returns to the Direct Print menu, and the display panel returns to normal. 3. To change the paper type, position (top, center, bottom, or full-size), number of copies (1-99), color, printing mode, and whether to print the date and time the photo was taken, press the or button to select the option you want to change, then press the SELECT button. The settings for that option appear on the screen. When you finish printing, close the Direct Print program by pressing the BACK button. Then slide the monitor mode switch to OFF and turn off the printer. Card print mode 1. Access the Direct Print program as described on page 4-4. Press the button to highlight Layout, then press the SELECT button. With Card selected, press the SELECT button again. 2. Select Photo and press the SELECT button. Choose All if you want to print all the images, then press the SELECT button once more. 4-10 Using the Direct Print Program 4. Press the or button to select a setting, then press the SELECT button. 5. Connect the camera to the printer as described on page 4-2, then turn on the printer and load the size and type of paper you selected. For paper loading instructions, see your printer User’s Guide. 6. When you are ready to start printing, press the button to select Print. R 7. Press the SELECT button. The camera starts sending the image data to the printer. While the camera is sending data and printing, the LCD screen goes blank and star icons move across the display panel on the top of the camera. Note: To cancel printing, hold down the camera’s BACK button for about three seconds. A message stating printing is canceled appears on the LCD screen for three seconds, before returning to the Direct Print menu. The printer stops printing and ejects the paper. 8. When printing is finished, the LCD screen returns to the Direct Print menu, and the display panel returns to normal. When you finish printing, close the Direct Print program by pressing the BACK button. Then slide the monitor mode switch to OFF and turn off the printer. Album print mode Follow these steps to print using the Album print mode: 1. Access the Direct Print program as described on page 4-4. Press the button to highlight Layout, then press the SELECT button. With Album selected, press the SELECT button again. Poppy+ Rev.C A5 size 5/8/98 Chapter 4 DR, pass 0 2. Select Photo and press the SELECT button. Choose All if you want to print all the images, then press the SELECT button once more. If you want to print selected images, choose Select. Thumbnail images of the first nine photos in your camera appear with the currently selected image framed in blue. Press the or button to frame the image you want to print, then press the SELECT button. Continue to press the or button to select the image you want to print, then press the SELECT button again. Note: You can print up to three images on an A4 or Letter size sheet, or up to two images on an A6 size sheet. 3. To change paper size and type, color, printing mode, and whether to print the date and time the photo was taken, press or button to select the option you want to change, then press the SELECT button. The setting for that option appears on the screen. To select the printing position, select Position and press the SELECT button. Then choose the position of right, center, left, or covered binding. If you choose covered binding, the images are printed on the right side on right pages, and left side on left pages. Using the Direct Print Program 4-11 4 Poppy+ Rev.C A5 size 5/8/98 Chapter 4 DR, pass 0 L 4. Press the or button to select a setting, then press the SELECT button. 5. Connect the camera to the printer as described on page 4-2, then turn on the printer and load the size and type of paper you selected. When a message telling you how many sheets to load appears at the bottom of the Album print options screen, be sure to load at least that many sheets. For paper loading instructions, see your printer User’s Guide. 6. When you are ready to start printing, press the button to select Print. 7. Press the SELECT button. The camera starts sending the image data to the printer. While the camera is sending data and printing, the LCD screen goes blank and star icons move across the display panel on the top of the camera. Note: To cancel printing, hold down the camera’s BACK button for about three seconds. A message stating printing is canceled appears on the LCD screen for three seconds, before returning to the Direct Print menu. The printer stops printing and ejects the paper. 4-12 Using the Direct Print Program 8. When printing is finished, the LCD screen again displays thumbnail images of the photos in your camera selected for Album print mode, and the display panel returns to normal. To print a new group of photos, follow these instructions from step 2. To finish printing, close the Direct Print program by pressing the BACK button. Then slide the monitor mode switch to OFF and turn off the printer. Sticker print mode Follow these steps to print using the Sticker print mode: 1. Access the Direct Print program as described on page 4-4. Press the button to highlight Layout, then press the SELECT button. With Sticker selected, press the SELECT button again. 2. Select Photo and press the SELECT button. Choose All if you want to print all the images, then press the SELECT button once more. If you want to print an individual image, choose Select. Thumbnail images of the first nine photos in your camera appear with the currently selected image framed in blue. Press the or button to frame the image you want to print, then press SELECT. You can select several images at the same time. R 3. To change color and printing mode, press or button to select the option you want to change, then press the SELECT button. The setting for that option appears on the screen. When the photo is not printed in the correct position, select Adjust and press the SELECT button. Then follow the instructions on the LCD screen to move the print left or right a maximum of 2.0 mm in 0.2 mm increments, so that printing occurs in the correct position. 4. Press the or button to select a setting, then press the SELECT button. 5. Connect the camera to the printer as described on page 4-2, then turn on the printer and load EPSON Photo Stickers. See the loading instructions that came with the Photo Stickers. 6. When you are ready to start printing, press the button to select Print. 7. Press the SELECT button. The camera starts sending the image data to the printer. While the camera is sending data and printing, the LCD screen goes blank and star icons move across the display panel on the top of the camera. Poppy+ Rev.C A5 size 5/8/98 Chapter 4 DR, pass 0 Note: To cancel printing, hold down the camera’s BACK button for about three seconds. A message stating printing is canceled appears on the LCD screen for three seconds, before returning to the Direct Print menu. The printer stops printing and ejects the paper. 8. When printing is finished, the LCD screen returns to the Direct Print menu, and the display panel returns to normal. When you finish printing, close the Direct Print program by pressing the BACK button. Then slide the monitor mode switch to OFF and turn off the printer. Index print mode Follow these steps to print using the Index print mode: 1. Access the Direct Print program as described on page 4-4. Press the button to highlight Layout, then press the SELECT button. With Index selected, press the SELECT button again. 2. Select Photo and press the SELECT button. Choose All if you want to print all the images, then press the SELECT button once more. Using the Direct Print Program 4-13 4 Poppy+ Rev.C A5 size 5/8/98 Chapter 4 DR, pass 0 L If you want to print an individual image, choose Select. Thumbnail images of the first nine photos in your camera appear with the currently selected image framed in blue. Press the or button to frame the image you want to print, then press SELECT. You can select several images at the same time. 3. To change paper type and size, color, printing mode, and whether to print the date and time the photo was taken, press the or button to select the option you want to change, then press the SELECT button. The settings for that option appear on the screen. 4. Press the or button to select a setting, then press the SELECT button. 5. Connect the camera to the printer as described on page 4-2, then turn on the printer and load the size and type of paper you selected. For paper loading instructions, see your printer User’s Guide. 6. When you are ready to start printing, press the button to select Print. 7. Press the SELECT button. The camera starts sending the image data to the printer. While the camera is sending data and printing, the LCD screen goes blank and star icons move across the display panel on the top of the camera. 4-14 Using the Direct Print Program Note: To cancel printing, hold down the camera’s BACK button for about three seconds. A message stating printing is canceled appears on the LCD screen for three seconds, before returning to the Direct Print menu. The printer stops printing and ejects the paper. 8. When printing is finished, the LCD screen returns to the Direct Print menu, and the display panel returns to normal. When you finish printing, close the Direct Print program by pressing the BACK button. Then slide the monitor mode switch to OFF and turn off the printer. R LCD Screen and Display Panel Messages When printing with the Direct Print program, a variety of status messages may appear on the camera’s LCD screen and display panel. For detailed explanations of these messages, see the following tables. Poppy+ Rev.C A5 size 5/8/98 Chapter 4 DR, pass 0 No photos in memory This message appears when there are no photos in the memory. Press SELECT to return to the main menu. Print setting is returned to default. This message appears when an error occurs while the Direct Print program is working. The setting you have made is returned to the default value. Press the SELECT button to go back to the main menu, and make your print setting again. LCD screen messages Message Check Printer Model. Print: SELECT Cancel: BACK Explanation The camera is not connected to an appropriate printer. Connect the camera to a printer described in page 4-2, then press the SELECT button to begin printing. (If you want to cancel printing, press the BACK button.) Battery is low. Use AC adapter. Battery power is almost out. Connect the camera to the optional AC adapter. Check Printer Connection or Printer Error. Printing stopped because of a printer error. Clear the error, then start printing again from the beginning. (For information about how to clear printer errors, refer to your printer User’s Guide.) Printing Canceled This message appears when you hold down the BACK button for more than 3 seconds while printing. The printer stops printing and ejects the paper. The main menu will be displayed automatically after 3 seconds. Display panel messages Message Explanation E51: Another interface is active The printer is receiving a print job through another interface. When the print job ends, the printer begins printing from the Direct Print Program automatically. E54: Paper jam Printing stopped because paper is jammed in the printer. To remove the paper from the printer, see your printer’s User’s Guide. E55: No ink Printing stopped because the printer ran out of ink. Replace ink cartridges as needed and start printing again from the beginning. (For information about how to replace ink cartridges, refer to your printer User’s Guide.) Using the Direct Print Program 4-15 4 Poppy+ Rev.C A5 size 5/8/98 Chapter 4 DR, pass 0 L E56: No paper Load paper into the printer, and then press the printer’s load/eject button (E) to begin printing. (Or press the camera’s BACK button to cancel printing.) Album mode A4/Letter: A6: 108 × 81 mm 72 × 54 mm Sticker mode Photo Stickers: Printed Image Dimensions Index mode Full-size mode A4/Letter/A6: Layout setting Paper Size setting Framed Photo A6 108 × 81 mm Photo Print Photo Paper 157 × 106 mm Panorama Full size Image Dimensions A4/Letter 228 × 86 mm A6/Photo Paper 108 × 40 mm A4/Letter 228 × 172 mm 5 × 7 size mode A4/Letter 176 × 132 mm Card mode A6 A6 (Panorama) 4-16 28 × 21 mm 85.5 × 64 mm 85.5 × 32 mm Using the Direct Print Program 36 × 27 mm Proof Sign-off: Hida Bowen _______ _______ Poppy+ Rev.C A5 size 5/8/98 Chapter 5 pass 1 R Chapter 5 Camera Options A variety of options are available that expand the flexibility of your PhotoPC 700. Optional CompactFlash Cards allow you to increase the camera’s storage capacity, and if used with the optional PCMCIA adapter, you can access images stored on CompactFlash Cards directly from your computer. Battery power can be saved with the use of the optional AC adapter, particularly when previewing and transferring pictures to your computer. The optional Ni-MH Battery Charger and rechargeable batteries enable you to recharge batteries quickly, and allow the batteries to last longer in your camera. Also, you do not have to buy new batteries every time your batteries run out. This chapter describes the following: Using CompactFlash Memory Cards PhotoPC 700 comes with 4MB of internal memory, which holds up to approximately 6 super fine quality pictures (1280 × 960 pixels), approximately 12 to 13 fine quality pictures (1280 × 960 pixels), or approximately 40 to 43 standard quality pictures (640 × 480 pixels). You can add to the camera’s storage capacity by installing an optional 4MB (B808311) or 15MB (B808301) CompactFlash Card. The storage capacity of the camera’s internal memory and of each CompactFlash Card is shown in the following table. Internal Memory (PAL) Internal Memory (NTSC) 4MB CompactFlash Card Standard 43 40 60 227 Fine 13 12 19 72 Super fine 6 6 9 36 Using CompactFlash Cards Using the PCMCIA adapter Using the AC adapter Using the Ni-MH Battery Charger 5 15MB CompactFlash Card Note: EPSON recommends use of EPSON CompactFlash Cards only. Other memory cards may be incompatible with the EPSON PhotoPC 700. Camera Options 5-1 L Poppy+ Rev.C A5 size 5/8/98 Chapter 5 pass 1 If your computer is equipped with a Type II PCMCIA memory card slot, you can access images stored on memory cards directly from your computer by using the optional PCMCIA adapter (B867041). See page 5-3 for more information on this option. Installing a CompactFlash Card 3. After you have installed the memory card, close the memory card cover. When a memory card is installed, photos you take are stored in the card’s memory rather than the camera’s internal memory. The number of pictures you can store in the memory card appears in brackets on the camera’s display panel. Follow these steps to install a memory card in the camera: 1. Before you open the memory card cover, make sure the camera and the monitor mode switch are turned off. 2. Open the memory card cover, and insert the card all the way into the memory card slot, as shown below. brackets When a memory card is installed, you may notice a delay between the time you press the shutter button and when the camera beeps. To avoid blurring, be sure to hold the camera still until the camera beeps. The photo processing time also increases by a few seconds when using the memory card. c arrow mark 5-2 Camera Options Caution: Never remove the card while the camera is accessing it. Data in the card may be lost or damaged. Removing a CompactFlash Card Follow these steps to remove a memory card from the camera: 1. Before you open the memory card cover, make sure the camera and the monitor mode switch are turned off. 2. Open the memory card cover, and slide the lever on the bottom of the camera to eject the memory card. Poppy+ Rev.C A5 size 5/8/98 Chapter 5 pass 1 c R Caution: o Never remove the card while the camera is accessing it. Data in the card may be lost or damaged. o Avoid using or storing the card in direct sunlight, or in places that are extremely hot, humid, or dusty. Using the PCMCIA Adapter 3. Remove it by hand, then close the memory card cover. The optional PCMCIA adapter allows you to access images stored on CompactFlash Cards directly from your computer. To use this adapter, your computer must be equipped with a Type II PCMCIA memory card slot. Macintosh users must enable the PC Exchange extension software to access files on CompactFlash Cards. See your Macintosh user’s manual for more information. Follow these steps to use the optional adapter: Camera Options 5-3 5 L Poppy+ Rev.C A5 size 5/8/98 Chapter 5 pass 1 1. Insert the memory card into the optional adapter all the way, as shown below. Note: It is easy to use EPSON Photo!2 to access the photo images in the memory card, since you can see the thumbnail on the screen. To use EPSON Photo!2, see your digital camera software manual. Using the AC Adapter 2. Insert the adapter into your computer’s Type II PCMCIA slot. The AC adapter (B86703]) allows you to connect your PhotoPC 700 to a standard electrical outlet. This is especially useful when you are transferring pictures and operating the camera from your computer. The adapter powers the camera, but does not charge the batteries. In some locations the AC adapter comes with a separate AC power cable. Note: o The asterisk in the product number (B86703]) is a substitute for the last digit, which varies by country. o 3. Now you can access the photos in the memory card from your computer. You can find the images in the Photo_1 folder. Double-click on the name of your selected file to open the thumbnail. 5-4 Camera Options You should also read the AC adapter User’s Guide before you use this product. w Warning: Use only the AC adapter designed for PhotoPC 700. Use of any other adapter could cause fire, electrical shock, or injury. Do not use the AC power cable and the adapter for any purpose other than powering your PhotoPC 700. If the AC plug doesn’t fit your outlet, have a proper outlet installed by a qualified electrician. To avoid radiation danger, do not expose or remove the ferrite core. To avoid losing any images or settings, make sure the camera is finished processing and is turned off before you connect or disconnect the AC adapter. Then follow these steps: Poppy+ Rev.C A5 size 5/8/98 Chapter 5 pass 1 R 2. Open the connector cover on the side of the camera. connector cover 3. Plug the adapter cable into the DC port on the camera. 1. If your AC adapter has a separate AC power cable, push the cable connector firmly into the AC inlet. 4. Plug the AC adapter into an electrical outlet. Camera Options 5-5 5 L Poppy+ Rev.C A5 size 5/8/98 Chapter 5 pass 1 c Caution: Place the camera and the AC adapter near an electrical outlet where the plug can be easily unplugged. Note for French-speaking users: Placez l’appareil photographique et ses options près d’une prise de courant où la prise peut être débranchée facilement. Avoid electrical outlets controlled by wall switches or automatic timers. Also, avoid outlets on the same circuit as large motors or other appliances that can cause fluctuations in line voltage. For the battery charger o o Always charge four batteries at one time. o Do not charge primary (non-rechargeable) batteries. o o Important Safety Instructions o Warning: o Read all relevant safety and operating instructions before using this product. o o o You should also read the AC adapter User’s Guide before you use this product. o 5-6 Camera Options Use only with EPSON Ni-MH Rechargeable Batteries, Model EU-24 (1400 mAh). Never attempt to charge other types of batteries in this charger as they may explode, leak, overheat, or cause personal injury. o Using the Ni-MH Battery Charger w Beware of shock hazard. Use the type of power source indicated on the label. Always supply power directly from a standard domestic electrical outlet. Be sure your AC power cable meets relevant safety standards of the area where you plan to use this product. Do not use this product near water or handle it with wet hands. Unplug the charger if the batteries are not fully charged after four hours. Unplug the charger immediately if it shows unusual signs such as smoke, odor, or noise. Do not attempt to service this product yourself. Refer all servicing to qualified service personnel. o o Keep away from heat sources. Do not use the charger outside the temperature range of 0°C to 35°C (2°F to 95°F). Do not insert objects through any openings as they may touch dangerous voltage points or short out parts that could result in fire or electric shock. o o Never disassemble or modify this product. o o Indoor, dry location use only. o Do not expose to rain or moisture. o o o Unplug this product from the wall outlet before cleaning. o Use a damp cloth for cleaning; do not use liquid or aerosol cleaners. Keep the charger terminals clean by wiping them with a dry cloth. Be sure to disconnect the battery charger from the power outlet before cleaning. A5 size 5/8/98 Chapter 5 pass 1 R For battery handling o o Rev.C Operating instructions Do not insert batteries into the charger backward as they may explode, leak, overheat, or cause personal injury. o Poppy+ o Always charge batteries that have never been used or haven’t been used for a long time. Charge new batteries two or three times before use. Use batteries regularly so they continue to charge well. Batteries which have not been used for a long time will return to normal with regular use. Discharge batteries completely before recharging them. If the batteries are not fully discharged before recharging, your camera’s operating time may decrease temporarily. Be sure to replace batteries when camera operating time becomes short. Rechargeable batteries wear out with repeated use. As their charging capacity decreases, your camera’s operating time becomes shorter. See page 1-4 for instructions on handling, installing, and removing the batteries. Keep the charger out of reach of children. Camera Options 5-7 5 L Poppy+ Rev.C A5 size 5/8/98 Chapter 5 pass 1 For battery charging 1. If your battery charger has a cover, open the cover. 2. Install the batteries into the compartments, positioning the + and - ends as shown. w 5-8 Warning: Be sure you install four batteries to fill all compartments. Camera Options 3. If your battery charger has a cover, close the cover firmly. (The battery charger cover also acts as a power switch, so be sure to close the cover completely.) 4. Extend the retractable plug located on the back of the charger, or connect the battery charger to the power cord as shown below. Poppy+ Rev.C A5 size 5/8/98 Chapter 5 pass 1 R Note: o If your battery charger has a cover, do not open it while charging. o The charger lights flash to indicate changes in battery temperature and voltage. If the charger lights continue to flash more than half an hour, the batteries may be damaged or worn out. Replace them with four new Ni-MH batteries. 6. After the lights go off, unplug the charger. To avoid overcharging, don’t leave the charger plugged in for long periods of time after the lights go off. 5. Plug the charger into an electrical outlet. The light(s) turn red indicating that the charger is working. (If your charger has 2 lights, wait until both SIDE A and SIDE B lights turn red.) 7. Just after charging, the batteries are very hot (approximately 65°C). Wait one hour until the batteries cool before removing them from the charger. 8. Before storing the charger, close the retractable plug or disconnect the AC cable. When the batteries are fully charged after about two and half to three hours, the lights go off. To charge your batteries again, open and then close the charger again, or unplug the AC power cord then plug it in again. Camera Options 5-9 5 L 5-10 Poppy+ Rev.C A5 size 5/8/98 Chapter 5 pass 1 Camera Options Proof Sign-off: Hida Bowen _______ _______ Poppy+ Rev.C A5 size 5/8/98 Chapter 6 pass 0 R Chapter 6 Maintenance and Troubleshooting Your PhotoPC 700 is easy to take care of, and any problems you may have should be easy to solve. See the following section for guidance on cleaning and storing the camera. For solutions to common camera problems, see the section beginning on page 6-2. o o o Maintenance Your PhotoPC 700 camera requires only basic care. Before you do any maintenance procedures on the camera, be sure to read the Safety Instructions in the Introduction. Then follow these guidelines: o Cleaning the camera Use a clean, dry cloth to keep the camera free of dust. Do not use harsh or abrasive cleaners. To avoid scratching the lens, be careful not to press too hard. If necessary, clean the battery contacts with a dry cloth. Storing the camera o o o To clean the lens, first blow off any loose dust or dirt. Then breathe on the lens and wipe off all moisture with a soft, lint-free cloth or lens cleaning tissue. Make sure the camera’s power is off and keep your camera in its case when you are not using it. When the camera is not used for long period of time, remove the batteries and store them at a low temperature in a dry location. This prevents camera damage from battery leaks or corrosion. Do not store the camera in the following locations: o Where it will be exposed to direct sunlight; for example, on a car dashboard Maintenance and Troubleshooting 6-1 6 L o o o o Poppy+ Rev.C A5 size 5/8/98 Chapter 6 pass 0 Near sources of bright light or high humidity Near heat sources or in a closed car In areas of excessive dirt or dust Where it will be exposed to strong vibrations or magnetic fields Problems and Solutions Before you call for help, check this list of problems and possible solutions. Camera problems The camera has no power. Make sure the lens cover is open all the way. The power comes on automatically when the lens cover is opened fully. The camera may have shut off automatically. To turn the power back on, press the shutter button, or close and reopen the lens cover. Check the batteries and make sure they are installed correctly. Replace the batteries if necessary, following the instructions on page 1-4. If you are using the AC adapter, make sure it is plugged into a working outlet. You cannot take a picture with the camera. The flash may be recharging. Wait until the status light beside the viewfinder turns green, and try again. The camera may be connected to your computer. When it is connected, you cannot use any of the controls on the camera itself. See your digital camera software manual for instructions on taking pictures from your computer. The camera’s memory may be full. Check the picture counter on the display panel. Erase some pictures using the LCD monitor, or transfer the pictures to your computer and then erase them. Note: o To use the LCD monitor to erase pictures, see page 2-13. To use your computer to transfer and erase pictures, see the digital camera software manual. o 6-2 Maintenance and Troubleshooting Installing an optional CompactFlash Card allows you to take more pictures without deleting any images in the camera. See page 5-1 for details. Taking a picture takes too long. You may be pressing the shutter button all the way down at once. Hold the shutter button halfway down to lock the auto focus, then press the shutter button the rest of the way down to take the photo. For more information, see page 2-4. Note: When you try to take a picture by clicking the shutter once, the camera tries to process focus, exposure etc., all at the same time. This is why it seems it is taking too long to take a picture. The flash does not work. Make sure the flash is set to Automatic or Forced Flash. See page 2-9 for more information on setting the flash. Check the batteries and make sure they are installed correctly. Replace the batteries if necessary, following the instructions on page 1-4. Nothing appears on the LCD screen in View mode. Make sure the power is on. Power comes on automatically when the lens cover is opened fully. Poppy+ Rev.C A5 size 5/8/98 Chapter 6 pass 0 R Check the batteries and make sure they are installed correctly. Replace the batteries if necessary, following the instructions on page 1-4. The camera may have shut off automatically. To turn the power back on, press the shutter button, or close and open the lens cover. Nothing appears on the LCD screen in Playback mode. Check the batteries and make sure they are installed correctly. Replace the batteries if necessary, following the instructions on page 1-4. The camera may have shut off automatically. To turn the power back on, press the shutter button, or close and reopen the lens cover. The image on the LCD monitor screen is too dark, or is not visible at all. Adjust the brightness of the LCD screen if necessary, following the instructions on page 3-8. You cannot select the mode you want on the LCD monitor. Some modes cannot be selected because of other selections; for example, panorama and continuous shooting modes cannot be set at the same time. Check this User’s Guide for possible selections. Maintenance and Troubleshooting 6-3 6 L Poppy+ Rev.C A5 size 5/8/98 Chapter 6 pass 0 Nothing appears on the TV monitor when the camera is connected to your television. Check the video cable is connected correctly, as described on page 2-15. Make sure the LCD monitor is switched to the Playback mode. Check the television is switched to the video mode. Make sure the camera’s batteries have enough power and are installed correctly. Replace the batteries if necessary, following the instructions on page 1-4. Your camera may not be compatible with local television broadcasting standards. Cameras purchased in countries using the NTSC standard can only be used with NTSC televisions, and cameras purchased in countries conforming to the PAL standard can only be used with PAL televisions. Note: Also check your television user’s manual for possible solutions. You cannot take a picture with the camera when an optional CompactFlash Card is installed. Check your camera’s LCD monitor for messages. If you get a message indicating that you need to format or eject the card, follow the instructions. Your card’s memory may be full. Check the picture counter on the display panel. If the card is full, change to another card, erase some pictures using the LCD monitor, or transfer the pictures to your computer and then erase them. Even after you take a picture, the number of pictures remaining showing on the picture counter stays the same. The number on the picture counter shows how many more pictures you can take. The number may not change, depending on the image quality or complexity of the photo. Picture Problems If you are not satisfied with the pictures you get from PhotoPC 700, you may need to adjust some of the camera settings, or else you may need to brush up on your photography techniques. Read the suggestions listed below and give them a try. 6-4 Maintenance and Troubleshooting Your pictures display poor image quality on the screen or when you print them out. PhotoPC 700 captures images in 24-bit color (16 million colors). Your pictures will not display maximum image quality if your monitor or your computer’s video controller does not support this color depth. You may need to upgrade your system to achieve the best possible image quality. If your pictures look better on the screen than when you print them out, you may need to upgrade your printer. An EPSON color ink jet printer, for example, will provide excellent image quality. Your picture is blurry or out of focus. Make sure your subject is within the camera’s range. You should be at least 50 cm away to take a picture without the flash, and 20 cm to 2.4 m away to take a picture with the flash. You can take a picture as close as 10 cm with or without the flash in macro mode. Make sure the subject is not moving. Be careful to hold the camera steady while the image is being captured. Poppy+ Rev.C A5 size 5/8/98 Chapter 6 pass 0 R Your picture is too dark (underexposed). You may need to use the flash. Set the flash to Automatic or Forced Flash, following the instructions on page 2-9. If you are using the flash, make sure your subject is within the range of 20 cm to 2.4 m. You can adjust the exposure manually to make your photos brighter. For instructions, see page 2-11. Use an image-editing program to adjust the picture’s brightness and contrast. If you are using the macro mode to take close-up photos, be sure to provide adequate lighting for your subject, since the camera’s aperture is automatically set to the smallest setting in this mode. Your picture is too light (overexposed). If you are using the forced flash setting, it may be too bright. Try setting the flash to Automatic. See page 2-9. You can adjust the exposure manually to make your photos darker. For instructions, see page 2-11. Make sure your flash is not set to Flash off. Maintenance and Troubleshooting 6-5 6 L Poppy+ Rev.C A5 size 5/8/98 Chapter 6 pass 0 When you use the flash in macro mode, you may find your pictures come out too light, since the flash is close to the subject. In this case, try setting the flash to Flash off. If you are facing a bright light source, you may need to take your picture from a different angle. Use an image-editing program to adjust the picture’s brightness and contrast. Part of your picture is missing. Make sure you are not blocking the lens with your finger, hand strap, clothing, or other object. A horizontal or vertical red line appears on your picture. Red lines are caused by glare. Avoid photographing very shiny surfaces that reflect light into your lens. The wrong date and/or time is displayed on your camera. If you remove the batteries and leave the camera for a certain time period, you will need to reset the clock. See page 3-7 to use the LCD monitor to set the clock. You can also set the clock from your computer. For instructions, see your digital camera software manual. 6-6 Maintenance and Troubleshooting The color in your picture does not look right. When you take pictures under certain artificial lighting conditions, the colors may be slightly distorted. You can use image-editing software to adjust color. When you want to get more realistic colored images, for example, reddish images at dusk, set the white balance mode to FIXED. For instructions, see page 3-5. Your pictures do not look as good as they used to. Your camera’s lens may be dirty or dusty. Try cleaning it following the instructions on page 6-1. The area captured in the photo is different from what you saw in the viewfinder. Take care to look straight through the viewfinder. When taking photos in macro mode, we recommend you use the LCD monitor rather than the viewfinder to frame your subject. Keep in mind that the area visible through the viewfinder is slightly smaller than the area captured in the actual photo. Proof Sign-off: Hida Bowen Poppy+ _______ _______ A5 size 5/8/97 R Rev.C Appendix A pass 0 Appendix A Specifications Product type Camera Type Digital still AF camera with LCD monitor CCD 1/2.7 inch color area CCD (1,300,000 pixels) LCD monitor 2-inch color LCD monitor (110,000 pixels) Internal memory 4MB (recorded image data, program memory) Physical dimensions Width 144.2 mm Height 69.8 mm Depth 49.3 mm Weight 280 g (without batteries and hand strap) Temperature Operating: 5 to 35°C Non-operating: -20 to 60°C Humidity (non-condensing) Operating: 30% to 90% Non-operating: 10% to 90% Recorded image Data type JPEG (16 million colors, 24 bit) Image size 1280 × 960 pixels, 1280 × 480 pixels (panorama), 640 × 480 pixels Specifications A A-1 L Poppy+ A5 size 5/8/97 Rev.C Appendix A pass 0 Image quality modes Super fine image quality (1280 × 960 pixels, 1280 × 480 pixels) Fine image quality (1280 × 960 pixels, 1280 × 480 pixels) Standard image quality (640 × 480 pixels) Alternative formats Monochrome, macro, digital ×2 zoom, panorama, continuous shooting Optical Lens f = 5.5 mm F2.8 (equivalent to a 36 mm lens on a 35 mm camera) Range 0.5 m to infinity 0.1 m to 0.5 m (macro mode) Focus Automatic focus Sensitivity Equivalent to ISO 60/120 Aperture f2.8, f5.6, f11 Shutter Electric iris with mechanical shutter 1/4 second to 1/500 second (flash off mode), 1/30 second to 1/500 second (auto flash and forced flash modes) Exposure control Program auto exposure Manual adjustment (-2 to +2) White balance TTL automatic white balance Viewfinder Real-image optical (view range over 80%) Self timer 10 seconds Flash Automatic luminance control flash Flash modes Automatic, forced flash, flash off Flash range 0.2 to 2.4 m Functional Average storage capacity NTSC model A-2 Specifications PAL model Standard 43 40 Fine 13 12 Super fine 6 6 Fine/ panorama 26 24 Super fine/ panorama 13 12 Zoom/ continuous shooting 43 40 Poppy+ A5 size 5/8/97 Note: o Figures shown here represent storage capacity when optional programs are not installed in the camera’s internal memory. If you remove the Direct Print program from the camera, the storage capacity will increase and you can take more pictures. o The number of pictures you can take depends on the complexity of each photo, even if the image quality is the same for all the photos. R Rev.C Appendix A pass 0 Interface Serial interface 8-pin mini-DIN, RS-232C-compatible special interface for PC, Macintosh, and EPSON printers Communication speed: 19.2 Kbps or higher (max 230.4 Kbps) Video out NTSC (NTSC model) PAL (PAL model) Photo processing time (approximate) Time (seconds) Standard 2 Fine 4 Super fine 6 Power Sources LCD monitor photo displaying time (approximate) Time (seconds) Standard 3 Fine 6 Super fine 7 4 AA batteries (single-use alkaline (LR6), single-use Ni-Cd, single-use lithium (FR6), rechargeable Ni-Cd, or rechargeable Ni-MH Optional AC Adapter (B86703]) Battery life* LCD monitor off Alkaline batteries Approximately 800 pictures LCD monitor on View mode Approximately 80 pictures Playback mode Approximately 90 minutes Ni-MH batteries Approximately 1000 pictures View mode Approximately 260 pictures Playback mode Approximately 120 minutes * Battery life varies depending on the type and the manufacturer. Specifications A-3 A L Poppy+ A5 size 5/8/97 Rev.C Appendix A pass 0 Optional CompactFlash Card Optional PCMCIA Adapter 4MB CompactFlash Card (B808311) Interface PCMCIA PC Card ATA Storage capacity Card slot type Type II 4MB Physical Dimensions: Physical Dimensions: Width 42.8 mm Width 54.0 mm Height 36.8 mm Height 85.6 mm Depth 3.3 mm Depth 5.0 mm 15MB CompactFlash Card (B808301) Storage capacity 15MB Physical Dimensions: Optional AC Adapter Model EU-18 Width 42.8 mm Output DC 7V/2.0A Height 36.8 mm Input AC 110, 50/60 Hz Depth 3.3 mm Physical Dimensions: A-4 Specifications Width 50 mm Height 30 mm (47 mm including plug) Depth 95 mm Poppy+ A5 size 5/8/97 Model EU-19 R Rev.C Appendix A pass 0 Optional Battery Charger and Batteries Output DC 7V/2.0A Input AC 120V, 50/60 Hz Physical Dimensions: Battery Charger Model EU-23 Width 50 mm Input AC 120V, 60Hz Height 30 mm (47 mm including plug) Output DC 1.2V 650mA × 4 Depth 95 mm Compatible batteries EPSON Ni-MH Batteries (model EU-24/1400 mAh) Charging time Approx. 160 minutes Model EU-20 Output DC 7V/2.0A Power consumption Approx. 8W Input AC 127/220/230/240V, 50/60 Hz Charging temperature 0 to 35°C Dimensions 76 × 112 × 22mm Weight Approx. 110g Physical Dimensions: Width 60 mm Height 34 mm Depth 95 mm A Model EU-27 Input AC 110V, 60Hz Output DC 1.2V 650mA × 4 Compatible batteries EPSON Ni-MH Batteries (model EU-24/1400 mAh) Charging time Approx. 160 minutes Specifications A-5 L Poppy+ A5 size 5/8/97 Rev.C Appendix A pass 0 Power consumption Approx. 8W Charging temperature 0 to 35°C Model EU-24 Dimensions 76 × 112 × 22mm Type name Cylindical sealed Nickel-Metal Hydride rechargeable battery Weight Approx. 110g Size AA (IEC LR6 Battery compatible) Ratings DC 1.2V/1400 mAh Temperature Charging: Discharging: Storage: Humidity 45 to 85% RH Weight Approx. 25g Model EU-28 Input AC 220/230/240V, 50/60Hz Output DC 1.2V 490mA × 4 Compatible batteries EPSON Ni-MH Batteries (model EU-24/1400 mAh) Charging time Approx. 180 minutes Power consumption Approx. 8W Charging temperature 0 to 35°C Dimensions 76 × 115 × 28.5mm (without AC inlet) Weight Approx. 120g A-6 Specifications Battery 0 to 35 °C 0 to 50 °C -20 to 30 °C Proof Sign-off: Hida Bowen Poppy+ _______ _______ A5 size 4/27/98 R Rev. C Appendix B pass 0 Appendix B Contacting Customer Support If your camera is not operating properly and you cannot solve the problem using the troubleshooting information in this guide, contact customer support services for assistance. We will be able to help you much more quickly if you give us the following information: Serial number of your camera: (The serial number label is on the back of the camera.) Camera model: Brand and model of your computer: Camera software version: (Click the About button in your camera software.) Windows version (for example, 95 or 3.1) you are using: Software applications you normally use with your camera and their version numbers: For United Kingdom and the Republic of Ireland Users If you purchased your printer in the UK or the Republic of Ireland, EPSON (UK) LTD provides a range of customer services and technical support: o o o o o World Wide Web Faxon EPSON Faxback Bulletin Board Service Customer and Warranty Support Pre Sales Enquiry Desk See the following sections for details. B World Wide Web If you can connect to the Internet and have a Web browser, you can access our Web site at http://www.epson.co.uk. Here you will find information on the latest EPSON products, software drivers, on-line user guides, and answers to frequently asked questions. Contacting Customer Support B-1 L Poppy+ A5 size 4/27/98 Rev. C Appendix B pass 0 Faxon EPSON Contact Faxon EPSON faxback service for support information including troubleshooting tips, switch settings, and driver information. When you first connect to the Bulletin Board Service, you will be asked for your name, company name, phone number, and a password (which you can invent yourself). Customer and Warranty Support To use Faxon EPSON, call 01442 227332 in the UK or 0044 1442 227332 from the Republic of Ireland using a touch-tone phone. You will be asked to follow a simple routine to register your document request. Once you have entered your telephone and fax numbers, Faxon EPSON will fax a copy of the document catalogue to your fax machine. Our Customer and Warranty Support teams can be contacted by calling 0870 163 7766 in the UK or 0044 0870 163 7766 from the Republic of Ireland. They can provide the following services: When you have found the documents that you need in the catalogue, call Faxon EPSON again and enter the document ID numbers. The documents will be faxed to you automatically. o Bulletin Board Service for latest drivers and utilities You can call the EPSON Bulletin Board Service on 01442 227479 in the UK or 0044 1442 227479 from the Republic of Ireland. No membership is required. Make sure that your communications software is set to 8 data bits, 1 stop bit, no parity bit, ANSI terminal mode emulation, and a modem speed of up to 28.8 Kbps. Downloading protocols supported include Xmodem, Ymodem, and Zmodem. See the documentation that came with your communications software and modem for more information. B-2 Contacting Customer Support o Technical information on installing, configuring, and operating your EPSON products Arranging for faulty EPSON products to be repaired within the warranty period A full list of EPSON Customer and Warranty Support services is available on the technical support section of our world wide web pages at http://www.epson.co.uk/support/ and on Faxon EPSON faxback service in document number 5085. Pre Sales Enquiry Desk The Enquiry Desk team can be contacted by calling 0800 220546 in the UK or 1 800 409132 from the Republic of Ireland, by faxing 01442 227271 in the UK or 0044 1442 227271 from the Republic of Ireland, and via Email at [email protected]. They can provide the following information: Poppy+ A5 size 4/27/98 o o Pre Sales information and literature on new EPSON products (also available via our world wide web site at http://www.epson.co.uk) Where to purchase genuine EPSON consumables, accessories, and options For Australian Users EPSON Australia wishes to provide you with a high level of Customer Service. As well as this User’s Guide, we provide the following sources for obtaining information: R Rev. C Appendix B pass 0 Internet URL http://www.epson.com.au Access the Epson Australia World Wide Web pages. Worth taking your modem here for the occasional surf! You can get the same information as offered on the EPSON FAXBACK and the EPSON Bulletin Board plus more. Your dealer Don’t forget that your dealer can often help identify and resolve problems. The dealer should always be the first call for advice on problems. They can often solve problems quickly and easily as well as give you advice on the next step to take. EPSON FAXBACK EPSON FAXBACK will fax you the latest specifications and pricing for most EPSON products offered in Australia. There is also technical information including details of the latest software and drivers available. Phone (02) 9903 9075 and the system will guide you through a number of choices before faxing the information to your fax machine. EPSON Helpdesk EPSON Helpdesk is provided as a final backup to make sure our clients have access to advice. Operators on the Helpdesk can aid you in diagnosing hardware and software problems. They can also advise you on the latest EPSON products and where the nearest dealer or service agent is located. Many types of queries are answered here. EPSON Bulletin Board System This is where you can download the latest software and drivers. Visit the BBS to check out the latest versions. If you have a modem, phone (02) 9417 5090. The Helpdesk numbers are: Phone: Fax: B (02) 9903 9040 (02) 9903 9189 Contacting Customer Support B-3 L Poppy+ A5 size 4/27/98 Rev. C Appendix B pass 0 We encourage you to have all the relevant information on hand when you ring. The more information you prepare, the faster we can help solve the problem. This information includes the User’s Guide for your EPSON product, type of computer, operating system, application programs, and any other information you feel is required. For Singapore Users Contact the telephone and fax numbers below: Phone: (065) 337-7911 Fax: (065) 334-1185 o Latest versions of EPSON camera software Users can access our World Wide Web home page at: http://www.epson.com.hk. Electronic bulletin board system An electronic bulletin board system (BBS) is also available to obtain camera information and the latest versions of camera software. You can log on to the following number for the BBS service: BBS: (852) 2827-4244 Technical Support Hotline For Hong Kong Users To obtain technical support as well as other after-sales services, users are welcome to contact EPSON Hong Kong Limited. Internet home page EPSON Hong Kong has established a local home page in both Chinese and English on the Internet to provide users with the following information: o o B-4 Product information Answers to Frequently Asked Questions (FAQs) Contacting Customer Support You can also contact our technical staff at the following telephone and fax numbers: Phone: (852) 2585-4399 Fax: (852) 2827-4383 For Philippines Users To obtain technical support as well as other after sales services, users are welcome to contact the EPSON Philippines Representative Office at the telephone and fax numbers below: Phone: (632) 813-6552 Fax: (632) 813-6545 BBS: (632) 814-0595 Proof Sign-off: Hida Bowen _______ _______ Poppy+ Rev.C A5 size 5/7/98 Glossary pass 1 R Glossary application Image A software program that helps you carry out a particular task, such as word processing, image editing, or financial planning. Data representing a two-dimensional scene. A digital image is composed of pixels arranged in a rectangular array with a certain height and width. Each pixels may consist of one or more bits of information, representing the brightness of the image at that point. bit Short for binary digit. The smallest unit of data in computer processing. A bit can represent two values: on and off, or 1 and 0. bps (bits per second) A measure of data transmission speed. browser (HTML browser) An application which allows the users to view HTML documents. default A value or setting that takes effect when the equipment is turned on, reset, or initialized. Also known as a factory setting. exposure The amount of light the camera captures when a photo is taken. HTML Hyper Text Markup Language. A language used to write documents on the World Wide Web. ink jet printer A printer that transfers ink onto paper by spraying the ink through a number of small nozzles. interface A piece of hardware, a method, or a standard used for connection between the computer and the camera. macro An enlargement or a close-up of an image. NTSC National Television Standards Committee. A video encoding standard largely used in North America and Japan. PAL Phase Alternation Line. A video encoding standard largely used in Europe and Australia. Glossary 1 L Poppy+ Rev.C A5 size 5/7/98 Glossary pass 1 pixel Short for picture element. Each image is composed of a number of pixels. Pixels are also counted in units of dots. port An interface channel through which data is transmitted between devices. resolution Indication of how finely an image is resolved into pixels. thumbnails Small representations of images. TWAIN A type of interface protocol that makes input peripherals, such as scanners or digital cameras, easier to access directly from application programs. white balance The balance between the whiteness and color in your image. When the white balance is fixed to the environment where the picture is taken, the colors in your images appear more like those seen by the eye. zoom To show a smaller area of an image at a higher magnification (“zoom in”) or a larger area at a lower magnification (“zoom out”). 2 Glossary Proof Sign-off: Hida Bowen Poppy+ _______ _______ A5 size 5/8/98 R Rev.C Index pass 2 Index 5 × 7 size print mode, 4-5, 4-9–10, 4-16 A AC adapter, 2, 5-4–6 specifications, A-4–5 Activating the shutter, 2-4–6 Adjusting camera settings flash, 1-3, 2-9 image quality, 1-3, 2-8–9 macro, 1-3, 2-10 self timer, 1-3, 2-9–10 Album print mode, 4-6, 4-11–12, 4-16 Alert beep, 3-7 Attaching the hand strap, 1-7 Auto shut-off, 2-2 B BACK button, 1-2 Batteries handling, 1-5–6 installing, 1-4–5 checking, 2-3 life, A-3 Battery charger, 2, 5-6–9 specifications, A-5–6 Beep, 3-7 Brightness LCD monitor, 3-8 picture, 6-5–6 Buttons, 1-2−3 C Cables serial, 1-1 video, 1-1, 2-15–16 Camera buttons, 1-2–3 cleaning, 6-1 getting to know, 1-2–3 parts of, 1-1 problems, 6-2–4 storage capacity, 2-8, 5-1, A-2 storing, 6-1–2 turning on and off, 2-1 Card print mode, 4-6, 4-10–11, 4-16 Checking battery, 2-3 picture counter, 2-13–14 Clock, setting, 3-7 Color Guide, 1-9 Index 1 L Poppy+ A5 size 5/8/98 Rev.C Index pass 2 CompactFlash Cards, 2 formatting, 3-14 installing and removing, 5-2–3 installing programs from, 3-15–16 specifications, A-4 storage capacity, 5-1 Computer, using the camera with, 1-9 Conditions menu, 3-2, 3-4–6 Continuous shooting mode, 3-4–5 Copying photos, 3-13 Customer support, Appendix B F D I Date and time, setting, 1-8 Direct Print, available paper type, 4-3–4 connecting the camera to the printer, 4-2–3 LCD screen and display panel messages, 4-15–16 preparing, 4-2 printed image dimensions, 4-16 using, 4-4–14 Display panel, 1-2, 2-3 messages, 4-15–16 Displaying photos on a television, 2-15–16 Image quality settings, 2-8–9 Index print mode, 4-7, 4-13–14, 4-16 Information menu, 3-2, 3-3, 3-6, 3-8–9 Installing batteries, 1-4–5 CompactFlash Cards, 5-2 optional programs in the camera, 3-15–16 Interface, A-3 E Energy saving mode, 3-8 Erasing photos using the function button, 2-13 using the Photo Control menu, 3-10–11 Exposure, 2-11–12, 3-5–6 2 Index Fine image quality setting, 2-8 Flash settings, 2-9 Formatting memory cards, 3-14 Full size print mode, 4-5, 4-8–9, 4-16 Function button, 1-2, 2-11–13 G Getting memory information, 3-13 Getting photo information, 3-6, 3-8–9 L Language menu, 3-3, 3-16 Language, setting, 1-7, 3-16 LCD monitor brightness, 3-8 menus, 3-2–3 photo displaying time, A-3 playing back photos, 2-14–16 problems, 6-3 using to take photos, 2-5–6 Poppy+ A5 size 5/8/98 LCD screen and display panel messages, 4-15–16 Lights status, 1-2, 2-4–5 timer, 1-2, 2-9–10 Locking photos, 3-11–12 M Macro mode setting, 2-10 Magnification menu, 3-3, 3-9 Maintenance, 6-1–2 Memory information, 3-13 Menus, LCD monitor, 3-2–3 Monitor mode switch, 1-2 Monochrome image quality settings, 2-8 Multi-photo Playback mode, 3-9 N Navigation buttons, 1-2 O Opticals, A-2 Options, 2, Chapter 5 AC adapter, 5-4–6, A-4–5 Battery charger, 5-6–9, A-5–6 CompactFlash Memory Cards, 5-1–3, A-4 PCMCIA adapter, 5-3–4, A-4 Rechargeable batteries, 5-6–9, A-6 R Rev.C Index pass 2 P Panorama/Zoom menu, 3-2, 3-4 PCMCIA adapter, 2, 5-3–4 specifications, A-4 Photo Control menu, 3-3, 3-10–14 Photo processing time, A-3 Physical dimensions, A-1 Picture counter, 2-13–14 problems, 6-4–6 taking range, 2-6 Pictures copying, 3-13 erasing, 2-13, 3-10–11 locking, 3-11–12 taking, 2-4–6 Playback menu, 3-3, 3-9 Playback mode, 2-13, 2-14–16, 3-3, 4-4 Playing back photos on a television, 2-15–16 on the LCD monitor, 2-14–15 using the playback menu, 3-9 using the slide show feature, 3-14 Ports DC, 5-5 video, 2-15–16 Power, A-3 Power saving features, LCD monitor, 2-2 Printed image dimensions, 4-16 Problems camera, 6-2–4 picture, 6-4–6 Index 3 L Poppy+ A5 size 5/8/98 Rev.C Index pass 2 R Rechargeable batteries, 2, 5-6–9 specifications, A-6 Removing, CompactFlash Cards, 5-3 S Storage capacity CompactFlash Cards, 5-1 internal memory, 2-8, 5-1, A-2 Storing the camera, 6-1–2 Super fine image quality setting, 2-8 T Safety instructions, 3–4 battery charger, 5-6–7 SELECT button, 1-2 Self timer, 2-9–10 Sensitivity, 3-6 Setting, date and time, 1-8 language, 1-7, 3-16 Settings, adjusting, 2-6–10 menu, 3-3, 3-7–8 Shutter, clicking on the camera, 2-4–6 Slide Show menu, 3-3, 3-14 Software menu, 3-3, 3-15–16 Specifications, AC Adapter, A-4–5 Battery charger and rechargeable batteries, A-5–6 Camera, A-1–3 CompactFlash Card, A-4 PCMCIA Adapter, A-4 Standard image quality setting, 2-8 Status light, 1-2, 2-4–5 Sticker print mode, 4-7, 4-12–13, 4-16 4 Index Taking pictures, 2-4–6 Troubleshooting, 6-2–6 Turning the camera on and off, 2-1 U Unpacking your camera, 1-1 V View mode, 2-5, 2-6–7, 2-13, 3-2 Viewfinder, 1-2, 2-3–4 W White balance, 3-5 Z Zoom, Panorama/Zoom menu, 3-2, 3-4