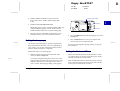
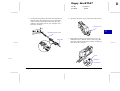
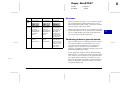
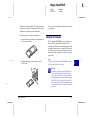
1
Proof Sign-off: Yano Norum Poppy Rev.B/TCAT _______ _______ _______ A5 size 97/09/18 R Introduction pass 0 Contents ® EPSON Introduction Getting Started Taking Pictures with PhotoPC 600 COLOR DIGITAL CAMERA Using PhotoPC 600 with Your Computer Using the LCD Monitor Menus On-line User’s Guide Using the Uploader Utilities Camera Options Maintenance and Troubleshooting Using the Direct Print Kit Specifications rr Point & Click here for tips on using this On-line Guide Contacting Customer Support Important Notice & Declaration of Conformity Glossary EUL 07/10/97 Index S i 1 2 3 4 5 6 7 8 A B G ? Proof Sign-off: Yano Norum _______ _______ _______ Poppy Rev.A/TCAT A5 size 97/09/18 Declaration of Conformity IMPORTANT NOTICE All rights reserved. No part of this publication may be reproduced, stored in a retrieval system, or transmitted in any form or by any means, electronic, mechanical, photocopying, recording, or otherwise, without the prior written permission of SEIKO EPSON CORPORATION. No patent liability is assumed with respect to the use of the information contained herein. Neither is any liability assumed for damages resulting from the use of the information contained herein. Neither SEIKO EPSON CORPORATION nor its affiliates shall be liable to the purchaser of this product or third parties for damages, losses, costs, or expenses incurred by the purchaser or third parties as a result of: accident, misuse, or abuse of this product or unauthorized modifications, repairs, or alterations to this product, or (excluding the U.S.) failure to strictly comply with SEIKO EPSON CORPORATION’s operating and maintenance instructions. SEIKO EPSON CORPORATION shall not be liable against any damages or problems arising from the use of any options or any consumable products other than those designated as Original EPSON Products or EPSON Approved Products by SEIKO EPSON CORPORATION. EPSON is a registered trademark of SEIKO EPSON CORPORATION. PhotoPC is a trademark of SEIKO EPSON CORPORATION. Macintosh is a registered trademark of Apple Computer, Inc. Microsoft and Windows are registered trademarks of Microsoft Corporation. CompactFlash is a trademark of SanDisk Corporation. General Notice: Other product names used herein are for identification purposes only and may be trademarks of their respective owners. EPSON disclaims any and all rights in those marks. Copyright©1997 by SEIKO EPSON CORPORATION, Nagano, Japan. Cover pass 3 According to ISO/IEC Guide 22 and EN 45014 Manufacturer: Address: Representative: Address: SEIKO EPSON CORPORATION 3-5, Owa 3-chome, Suwa-shi, Nagano-ken 392 Japan EPSON EUROPE B.V. Prof. J. H. Bavincklaan 5 1183 AT Amstelveen The Netherlands Declares that the Product: Product Name: Type Name: Model: Digital Still Camera EPSON PhotoPC 600 G660A Conforms to the following Directive(s) and Norm(s): Directive 89/336/EEC: EN 55022 Class B EN 50082-1 IEC 801-2 IEC 801-3 IEC 801-4 EN 61000-3-2 (Using AC Adapter Model EU-20) EN 61000-3-3 (Using AC Adapter Model EU-20) July, 1997 Y. Ishii President of EPSON EUROPE B. V . A NOTE CONCERNING RESPONSIBLE USE OF COPYRIGHTED MATERIALS Like photocopiers, digital cameras can be misused by improper photographing of copyrighted material. Unless you have the advice of a knowledgeable attorney, be responsible and respectful by not photographing published material without the permission of the copyright holder. R Poppy Rev.B/TCAT A5 size 97/09/18 R Introduction pass 0 S Contents Introduction Chapter 2 PhotoPC 600 Features . . . . . . . . . . . . . . . Options . . . . . . . . . . . . . . . . . . . . . . . For United Kingdom users - use of options System Requirements . . . . . . . . . . . . . . . PCs . . . . . . . . . . . . . . . . . . . . . . . Macintosh Computers . . . . . . . . . . . . Safety Instructions . . . . . . . . . . . . . . . . . Warnings, Cautions, and Notes . . . . . . . . . Chapter 1 . . . . . . . . . . . . . . . . . . . . . . . . . 7 . 8 . 8 . 8 . 8 . 9 . 9 . 11 . . . . . . . . . . . . . . . . . . . . . . . . . . . . . . . . . . . . . . . . . . . . . . . . . . . . . . . . . . . . Getting Started Unpacking Your PhotoPC 600 . . . . . . . . . Getting to Know the Camera . . . . . . . . . . Installing Batteries . . . . . . . . . . . . . . . . Handling batteries . . . . . . . . . . . . . Attaching the Hand Strap . . . . . . . . . . . Installing EPSON Photo!2 Software . . . . . . Installing the software in your Macintosh Installing EPSON Photo File Uploader . . . . Installing the software in your PC . . . . Installing the software in your Macintosh Setting the Language . . . . . . . . . . . . . . Setting the Date and Time . . . . . . . . . . . Contents . . . . . . . . . . . . . . . . . . . . 12 13 15 16 17 17 18 18 19 19 20 20 Taking Pictures with PhotoPC 600 Turning the Camera On and Off . . . Auto Shut-off . . . . . . . . . . . . . . The Display Panel . . . . . . . . . . . Checking the Battery . . . . . . . . . . Clicking the Shutter . . . . . . . . . . Using the viewfinder . . . . . . . Using the LCD monitor . . . . . . Picture-taking Range . . . . . . . . . . Adjusting Settings . . . . . . . . . . . Image quality . . . . . . . . . . . . Flash . . . . . . . . . . . . . . . . Self timer . . . . . . . . . . . . . . Macro mode . . . . . . . . . . . . Special photo formats . . . . . . . Checking the Picture Counter . . . . . Playing Back Your Photos . . . . . . . Displaying photos on a television . . . . . . . . . . . . . . . . . . . . . . . . . . . . . . . . . . . . . . . . . . . . . . . . . . . . . . . . . . . . . . . . . . . . . . . . . . . . . . . . . . . . . . . . . . . . . . . . . . . . . . . . . . . . . . . . . . . . . . . . . . . . . . . . . . . . . . . . . . . . . . . . . . . . . . . . . . . . . . . . . . . . . . . . . . . . . . . . . . . . . . . . . . . 22 23 24 24 24 24 25 26 27 28 29 29 30 30 32 33 34 3 Poppy Rev.B/TCAT A5 size 97/09/18 R Introduction pass 0 S Chapter 3 Using PhotoPC 600 with Your Computer Connecting PhotoPC 600 to Your Computer . . . Connecting to a PC . . . . . . . . . . . . . . . Connecting to a Macintosh . . . . . . . . . . Accessing EPSON Photo!2 . . . . . . . . . . . . . For Windows users . . . . . . . . . . . . . . . For Macintosh users . . . . . . . . . . . . . . . Working with EPSON Photo!2 . . . . . . . . . . . Closing EPSON Photo!2 . . . . . . . . . . . . Getting help . . . . . . . . . . . . . . . . . . . Getting status and progress information . . . Using the Camera Menu . . . . . . . . . . . . . . Selecting images . . . . . . . . . . . . . . . . . Transfering selected photos . . . . . . . . . . Saving selected photos to a folder . . . . . . . File names . . . . . . . . . . . . . . . . . . . . Transferring pictures to your documents . . Erasing selected pictures from your camera . Getting photo information . . . . . . . . . . . Using the Folder Menu . . . . . . . . . . . . . . . Selecting images . . . . . . . . . . . . . . . . . Transfering photos . . . . . . . . . . . . . . . Finding the folder containing your photos . . Uploading photos . . . . . . . . . . . . . . . . Transferring pictures to your documents . . Erasing selected files from a folder . . . . . . Getting photo information . . . . . . . . . . . Using the Controls Menu . . . . . . . . . . . . . . Controlling the camera from your computer Contents . . . . . . . . . . . . . . . . . . . . . . . . . . . . . . . . . . . . . . . . . . . . . . . . . . . . . . . . . . . . . . . . . . . . . . . . . . . . . . . . . . . . . . . . . . . . . . . . . . . . . . . . . . . . . . . . 36 37 38 40 40 41 41 42 42 42 43 43 44 44 45 45 48 48 48 49 49 50 50 51 51 51 52 52 Taking pictures from your computer . Erasing photos . . . . . . . . . . . . . . Using the Setup Menu . . . . . . . . . . . . Making computer connection settings Making camera settings . . . . . . . . . Chapter 4 . . . . . . . . . . . . . . . . . . . . . . . . . . . . . . . . . . . . . . . . 53 54 55 55 56 . . . . . . . . . . . . . . . . . . . . . . . . . . . . . . . . . . . . . . . . . . . . . . . . . . . . . . . . . . . . . . . . . . . . . . . . . . . . . . . . . . . . . . . . . . 58 60 60 61 61 62 62 62 63 63 63 65 66 66 67 68 68 69 Using the LCD Monitor Menus Working with LCD Monitor Menus . . . . Using the Settings Menu . . . . . . . . . . Setting the clock . . . . . . . . . . . . . Setting the alert beep . . . . . . . . . . Setting LCD brightness . . . . . . . . . Setting the multi-frame shooting time . Using the Information Menu . . . . . . . . Using the Playback Mode Menu . . . . . . Using the Erase Photo Menu . . . . . . . . Using the Photo Control Menu . . . . . . . Erasing photos . . . . . . . . . . . . . . Locking photos . . . . . . . . . . . . . . Getting memory information . . . . . . Copying photos . . . . . . . . . . . . . Formatting memory cards . . . . . . . Using the Slide Show Menu . . . . . . . . . Using the Option Menu . . . . . . . . . . . Using the Language Menu . . . . . . . . . . . . . . . . . . . . . . . . . . . . . . . . . . . . . . . . . . . . . . . . . . . . . . . . . . . . . . . 4 Poppy Rev.B/TCAT A5 size 97/09/18 R Introduction pass 0 S Chapter 5 Using the Uploader Utilities Uploading Images to the Camera . . . . . . Uploading images from your PC . . . . Uploading images from your Macintosh Making Screen Copies . . . . . . . . . . . . . For Windows users . . . . . . . . . . . . For Macintosh users . . . . . . . . . . . . Uploading Programs to the Camera . . . . . Uploading programs . . . . . . . . . . . Removing programs . . . . . . . . . . . Chapter 8 . . . . . . . . . . . . . . . . . . . . . . . . . . . . . . . . . . . . . . . . . . . . . . . . . . . . . . . . . . . . . . . 70 71 73 75 75 77 78 78 79 Preparing to Use the Direct Print Kit . . Connecting Your Camera to the Printer . Paper Types . . . . . . . . . . . . . . . . . Using the Direct Print Kit . . . . . . . . . Accessing the Direct Print program . Printing your images . . . . . . . . . LCD Screen and Display Panel Messages Printed Image Dimensions . . . . . . . . Appendix A Chapter 6 Camera Options Using CompactFlash Memory Cards . . . . . . . . Installing a CompactFlash Card . . . . . . . . . Removing a CompactFlash Card . . . . . . . . Using the optional PCMCIA adapter . . . . . . Using the AC Adapter . . . . . . . . . . . . . . . . For United Kingdom users - safety information Chapter 7 . . . . . . . . . . . . 80 81 82 82 83 85 . . . . . . 86 86 86 86 87 90 Maintenance and Troubleshooting Caring for the Camera . Caution . . . . . . . . Cleaning the camera Storing the camera . Camera Problems . . . . Picture Problems . . . . . Contents . . . . . . . . . . . . . . . . . . . . . . . . . . . . . . . . . . . . . . . . . . . . . . . . . . . . . . . . . . . . . . . . . . . . . . . . . . . . . . . . . . . . . . . . . . . . . . . . . . . . . . . . . . . . Using the Direct Print Kit . . . . . . . . . . . . . . . . . . . . . . . . . . . . . . . . . . . . . . . . . . . . . . . . . . . . . . . . . . . . . . . . . 92 . 93 . 94 . 95 . 95 . 95 . 101 . 102 . . . . . . . . . . . . . . . . . . . . . . . . . . . . . . . . . . . . . . . . . . . . . . . . . . . . . . . . . . . . . . . . . . . . . . . . . . . . . . . . . . . . . . . . . 103 . 103 . 103 . 103 . 104 . 104 . 105 . 105 . 105 . 106 . 106 Specifications Camera . . . . . . . . . . . . Product type . . . . . . . Recorded Image . . . . . Optical . . . . . . . . . . . Functional . . . . . . . . . Interface . . . . . . . . . . Power . . . . . . . . . . . Physical Dimensions . . Optional CompactFlash Card Optional PCMCIA Adapter . Optional AC Adapter . . . . . . . . . . . . . . . . . . . . . . . . . . . . . . . . . . . . . . . . . . . . . . . . . . . . . . . . . . . . . . . . . . . . . . . . . . . . . . . . . 5 Poppy Rev.B/TCAT A5 size 97/09/18 R Introduction pass 0 S Appendix B Contacting Customer Support For United Kingdom and the Republic of Ireland Users Customer Support . . . . . . . . . . . . . . . . . . . . Faxon EPSON . . . . . . . . . . . . . . . . . . . . . . EPtec - Bulletin Board Service for latest drivers and utilities . . . . . . . . . . . . . . . . . . . . . . . . . . World Wide Web . . . . . . . . . . . . . . . . . . . . For United States Users . . . . . . . . . . . . . . . . . . . Electronic support services . . . . . . . . . . . . . . . For Australian Users . . . . . . . . . . . . . . . . . . . . EPSON FAXBACK . . . . . . . . . . . . . . . . . . . EPSON Bulletin Board System . . . . . . . . . . . . . Internet URL http://www.epson.com.au . . . . . . Your dealer . . . . . . . . . . . . . . . . . . . . . . . . EPSON Helpdesk . . . . . . . . . . . . . . . . . . . . For Hong Kong Users . . . . . . . . . . . . . . . . . . . . Internet home page . . . . . . . . . . . . . . . . . . . Electronic bulletin board system . . . . . . . . . . . Technical Support Hotline . . . . . . . . . . . . . . . For Philippines Users . . . . . . . . . . . . . . . . . . . . For Singapore Users . . . . . . . . . . . . . . . . . . . . . Contents Glossary 107 108 108 108 108 109 109 110 110 110 110 110 110 111 111 111 111 111 112 . . . . . . . . . . . . . . . . . . . . . . . . . . . . . . . . . 113 Index . . . . . . . . . . . . . . . . . . . . . . . . . . . . . . . . . 114 6 Proof Sign-off: Yano Norum _______ _______ _______ Poppy Rev.B/TCAT A5 size 97/09/18 R Introduction pass 6 i Introduction Your new EPSON® PhotoPC 600 is a revolutionary, easy-to-use digital camera that enables you to take full-color pictures and immediately use them with your computer. PhotoPC 600 comes with everything you need, including EPSON Photo!2 software that lets you transfer your pictures to your computer’s hard disk drive. You can then edit, enhance, and organize your pictures or simply place them into your documents. Create professional letters, documents, and presentations with real life images right on your desktop. Share pictures with business colleagues or friends over the Internet. Add color and visual appeal to your newsletters, flyers, and brochures. Anything you can display on your screen or print will look better with PhotoPC 600 pictures. ❏ 4MB internal memory holds approximately 8 super fine quality color or monochrome images, 18 fine quality color or monochrome images, or 56 standard quality color images. ❏ Three color and two monochrome image quality settings ❏ Built-in color LCD monitor for previewing and playing back pictures ❏ Optical viewfinder ❏ Macro, zoom, panorama, and multi-frame photo formats ❏ Automatic date and time recording for each picture ❏ Video cable for displaying your pictures on a television monitor PhotoPC 600 Features PhotoPC 600 is a complete system for capturing digital images, and includes the following features: ❏ Built-in flash with automatic, forced flash, and flash off settings ❏ Self timer ❏ 24-bit color image capture ❏ Automatic shut-off to save batteries ❏ High resolution (1024 × 768 pixels) ❏ Serial cables for transferring photos to your computer Introduction 7 Poppy Rev.B/TCAT A5 size 97/09/18 ❏ EPSON Photo!2 software lets you transfer your pictures to your computer. ❏ EPSON Photo File Uploader software allows you to convert images stored in your computer to EPSON Photo file format and upload them to your camera. ❏ EPSON Photo!2 Program Uploader software lets you upload optional programs to the camera from your computer. ❏ Use your pictures with Windows® and Macintosh® applications R Introduction pass 6 For United Kingdom users - use of options Epson (UK) Limited shall not be liable against any damages or problems arising from the use of any options or consumable products other than those designated as Original EPSON Products or EPSON Approved Products by Epson (UK) Limited. System Requirements PCs Options The following PhotoPC 600 options are available from EPSON: IBM®-compatible PC with 386 or higher processor (with Windows NT®, 486 or higher processor is required) Serial port with standard RS-232C interface and a communication speed of 19200 bps or higher ❏ CompactFlash Cards (4MB: B808311, 15MB: B808301) 8MB RAM (with Windows NT, at least 16MB is required) ❏ PCMCIA adapter (B867041) Hard disk drive with at least 30MB free space ❏ AC Adapter (B86703✽) for use with a standard electrical outlet VGA or SVGA monitor with at least 16-color display Note: The asterisk is a substitute for the last digit of the product number, which varies by country. Introduction Microsoft® Windows 3.1 or later, Microsoft Windows for Workgroups® 3.11 or later, Windows 95, or Windows NT Version 3.51 or later 8 i Poppy Rev.B/TCAT A5 size 97/09/18 Macintosh Computers Macintosh with 68040 or Power PC processor Serial port and a communication speed of 19200 bps or higher 8MB RAM Hard disk drive with at least 30MB free space Monitor with minimum resolution of 640x480 Macintosh System 7.1 or later (System 7.5 or later is required to access optional CompactFlash Card memory directly from the Macintosh) Safety Instructions Read all of these instructions and save them for later reference. Follow all warnings and instructions marked on the camera and its options. ❏ To reduce the risk of electric shock, do not remove the cover of the camera or any of its options and do not open any compartments except as instructed in this User’s Guide. ❏ Do not insert objects through any openings. Introduction R Introduction pass 6 i ❏ To prevent fire or electric shock, do not expose the camera or its options to rain or moisture. ❏ To prevent fire or explosion, do not use the camera where inflammable or volatile gas is stored. ❏ Do not use outdoors during a thunderstorm. ❏ If the camera or any of its options shows unusual signs such as noise, odor, or smoke, stop using it and turn the camera off immediately. Remove the batteries and/or disconnect the AC adapter, and unplug the AC adapter from the electrical outlet. ❏ Do not use harsh or abrasive cleaners. Wipe off dust with a clean, dry cloth. ❏ To avoid damage to the optics of the camera, do not expose the lens to direct sunlight for extended periods of time. ❏ Handle the camera gently and avoid subjecting it to strong shocks or vibrations. If the camera is dropped or otherwise jarred, the following errors may occur even if the camera is not permanently damaged: The camera’s date and time settings may be lost. If the camera is jarred while processing an image, the camera may fail to record the image in its memory. 9 Poppy Rev.B/TCAT A5 size 97/09/18 ❏ Do not store the camera or its options near sources of bright light, direct sunlight, high humidity, heat, excessive dirt or dust, or where they will be exposed to strong vibrations or magnetic fields. ❏ Always keep your camera in its case when you’re not using it. ❏ To prevent possible eye injury, do not take flash pictures of faces at close range. ❏ Avoid sudden temperature changes, which can cause moisture to condense on the camera and its options. Keep the camera and its options in a case or bag if you need to move them from a cold environment to a warm one. Allow time for the camera and its options to adjust to temperature changes before using them. ❏ Use only the type of power source indicated in this User’s Guide. ❏ Do not use a damaged or frayed power cord. ❏ If you use an extension cord with the optional AC adapter, make sure the total ampere rating of the devices plugged into the extension cord does not exceed the cord’s ampere rating. Also, make sure the total ampere rating of all devices plugged into the wall outlet does not exceed the wall outlet’s ampere rating. Introduction R Introduction pass 6 ❏ Remove the batteries and/or unplug the camera and refer servicing to qualified service personnel under the following conditions: If the power cord or plug is damaged; if liquid has entered the camera or its options; if the camera or its options have been dropped or the case damaged; if the camera or its options do not operate normally or exhibit a distinct change in performance. Adjust only those controls that are covered by the operating instructions. ❏ If you plan to use the camera and its options in Germany, observe the following: To provide adequate short-circuit protection and over-current protection for the products, the building installation must be protected by a 16 Amp circuit breaker. Bei Anschluß des Produkts an die Stromversorgung muß sichergestellt werden, daß die Gebädeinstallation mit einem 16 A-Überstromschalter abgesichert ist. ❏ If the liquid crystal solution contained in the display panel or in the screen on the LCD monitor leaks out and gets on your hands, wash them thoroughly with soap and water. If it gets into your eyes, flush them immediately with water. 10 i Poppy Rev.B/TCAT A5 size 97/09/18 R Introduction pass 6 i Warnings, Cautions, and Notes w c Warnings must be followed carefully to avoid bodily injury. Cautions must be observed to avoid damage to your equipment. Notes contain important information and useful tips on the operation of your camera and its options. Introduction 11 Proof Sign-off: Yano Norum _______ _______ _______ Poppy Rev.B/TCAT A5 size 97/09/18 R Chapter 1 pass 7 Chapter 1 Getting Started This chapter helps you get ready to use your PhotoPC 600. It covers the following: Unpacking your PhotoPC 600 1 Unpacking Your PhotoPC 600 Make sure you have all the parts shown below. Getting to know the camera Installing the batteries Attaching the hand strap batteries (4) camera Installing your EPSON Photo!2 software Installing your EPSON Photo File Uploader software hand strap serial cable Macintosh adapter cable video cable CD-ROM and/or floppy disks (media type and quantity varies depending on area) Getting Started camera case 12 Poppy Rev.B/TCAT A5 size 97/09/18 R Chapter 1 pass 7 Getting to Know the Camera After you unpack your PhotoPC 600, take a few minutes to learn about its features, as shown below. 1 Back view Front view display panel monitor mode switch flash shutter button timer light memory card slot viewfinder status light connector cover photo format button hand strap holder LCD monitor viewfinder SELECT button lens lens cover and power switch Getting Started BACK button navigation button navigation button 13 Poppy Rev.B/TCAT A5 size 97/09/18 Bottom view R Chapter 1 pass 7 1 Top view battery cover lock shutter button tripod socket image quality setting memory card eject lever display panel macro mode setting flash setting battery cover self timer setting Getting Started 14 Poppy Rev.B/TCAT A5 size 97/09/18 R Chapter 1 pass 7 2. Insert all four batteries into the compartment, positioning the + and - ends as shown below. Installing Batteries 1 Your PhotoPC 600 comes with four AA (LR6) alkaline batteries. Make sure the camera is off, and follow these steps to insert the batteries: 1. Turn the camera upside down with the lens facing you. Push the battery cover lock down and slide it to the right, then open the cover. 1 2 3. Close the battery cover and make sure the lock snaps into place as shown below. battery cover lock Getting Started 15 Poppy Rev.B/TCAT A5 size 97/09/18 Handling batteries When your PhotoPC 600 batteries wear out, you can replace them with any of the following: Single-use AA (LR6) alkaline batteries Single-use AA (FR6) lithium batteries (longest battery life) Rechargeable AA Ni-Cd batteries Rechargeable AA Ni-MH batteries w Warning: To avoid the danger of fire or explosion, do not mix different types of batteries. Do not allow the battery contacts to touch metal objects such as coins or keys, which could short out the battery’s circuits. R Chapter 1 pass 7 ❏ When the camera is not used for long periods of time, remove the batteries and store them at a low temperature in a dry location. ❏ Dispose of used batteries according to the battery manufacturer’s instructions and in compliance with all applicable laws. Contact your local government agency for information about battery recycling and disposal. ❏ If you use rechargeable Ni-Cd or Ni-MH batteries, replace them with four fully-charged batteries. If you find that your batteries run out faster after you recharge them a number of times, make sure you discharge them completely before recharging. ❏ Battery life varies depending on the battery type and the manufacturer. Note the following when handling batteries: ❏ Do not use manganese batteries. ❏ Replace all four batteries at the same time. ❏ Do not drop, puncture, disassemble, or mutilate batteries. Do not get them wet or expose them to fire. Getting Started 16 1 Poppy Rev.B/TCAT A5 size 97/09/18 Attaching the Hand Strap To attach the hand strap, loop the strap around the holder on the side of the camera as shown below. R Chapter 1 pass 7 Installing the software in your PC Follow the steps in this section to install your EPSON Photo!2 software. 1 For Windows 95 or NT 4.0 1. Insert the camera software CD shipped with your camera in the CD-ROM drive. (If you use the floppy disk version, insert it in a disk drive.) 2. Double-click the My Computer icon. 3. Double-click the CD-ROM icon. You see the EPSON folder. (If you use the floppy disk version, double-click the floppy disk icon.) 4. Open the EPSON folder and double-click Disk 1. Installing EPSON Photo!2 Software PhotoPC 600 comes with EPSON Photo!2 software that lets you transfer your pictures from the camera to your computer and place them into documents. You can also use this software to take pictures and change camera settings from your computer. Depending on the country, the EPSON folder may contain multiple-language versions of the software. Double-click the folder for your preferred language and double-click Disk 1. 5. Double-click the SETUP.EXE icon. Follow the instructions on the screen. Note: When you install EPSON Photo!2, the EPSON Photo!2 Program Uploader utility is also installed automatically. Getting Started 17 Poppy Rev.B/TCAT A5 size 97/09/18 For Windows 3.1x or NT 3.51 1. Insert the camera software CD shipped with your camera in the CD-ROM drive. (If you use the floppy disk version, insert it in a disk drive.) 2. Open File Manager, then click the CD-ROM drive. (If you use the floppy disk version, click the floppy disk drive.) 3. Open the EPSON directory and the Disk 1 subdirectory. Depending on the country, the EPSON directory may contain multiple-language versions of the software. Double-click the subdirectory for your preferred language and double-click Disk 1. 4. Double-click SETUP.EXE. Follow the instructions on the screen. Installing the software in your Macintosh Follow the steps below to install EPSON Photo!2 software in your Macintosh. R Chapter 1 pass 7 2. Double-click the CD-ROM icon. (If you use the floppy disk version, double-click the floppy disk icon.) 1 3. Double-click the EPSON Photo!2 folder. Depending on the country, the EPSON Photo!2 folder may contain multiple-language versions of the software. Double-click the folder for your preferred language. 4. Double-click the Photo!2 Installer - Part 1 icon to start the installation program. Follow the instructions on the screen. Installing EPSON Photo File Uploader PhotoPC 600 also comes with EPSON Photo File Uploader software that lets you convert digital images to EPSON Photo file format and transer them from the computer to your camera. You can then display the images on the camera’s LCD screen or on a television monitor. 1. Insert the camera software CD shipped with your camera in the CD-ROM drive. (If you use the floppy disk version, insert it in a disk drive.) Getting Started 18 Poppy Rev.B/TCAT A5 size 97/09/18 Installing the software in your PC Follow the steps in this section to install the EPSON Photo File Uploader software for Windows. For Windows 95 or NT 4.0 1. Insert the camera software CD shipped with your camera in the CD-ROM drive. (If you use the floppy disk version, insert it in a disk drive.) 2. Double-click the My Computer icon. 3. Double-click the CD-ROM icon. You see the FUPLOAD folder. (If you use the floppy disk version, double-click the floppy disk icon.) 4. Open the FUPLOAD folder and double-click Disk 1. Depending on the country, the FUPLOAD folder may contain multiple-language versions of the software. Double-click the folder for your preferred language and double-click Disk 1. 5. Double-click the SETUP.EXE icon. Follow the instructions on the screen. Getting Started R Chapter 1 pass 7 For Windows 3.1x or NT 3.51 1. Insert the camera software CD shipped with your camera in the CD-ROM drive. (If you use the floppy disk version, insert it in a disk drive.) 2. Open File Manager, then click the CD-ROM drive. (If you use the floppy disk version, click the floppy disk drive.) 3. Open the FUPLOAD directory and double-click Disk 1. Depending on the country, the CD-ROM may contain multiple-language versions of the software. Double-click the subdirectory for your preferred language and double-click Disk 1. 4. Double-click SETUP.EXE. Follow the instructions on the screen. Installing the software in your Macintosh Follow the steps below to install EPSON Photo File Uploader Software in your Macintosh. 1. Insert the camera software CD shipped with your camera in the CD-ROM drive. (If you use the floppy disk version, insert it in a disk drive.) 19 1 Poppy Rev.B/TCAT A5 size 97/09/18 2. Double-click the CD-ROM icon. (If you use the floppy disk version, double-click the floppy disk icon.) Chapter 1 pass 7 monitor mode switch Depending on the country, the File Uploader folder may contain multiple-language versions of the software. Double-click the folder for your preferred language. Setting the Language You need to set the language for messages displayed on the LCD monitor the first time you use it. Depending on your country, you can choose English, Japanese, French, German, Italian, Portuguese, or Spanish. Follow these steps to set the language. 1. Slide the monitor mode switch on the back of the camera to View or Playback. A message in English stating that you need to set the language appears on the LCD screen. Press any of the monitor control buttons to the right of the screen, or wait 5 seconds. The language setting screen appears. Getting Started 1 SELECT button 3. Double-click the File Uploader folder. 4. Drag the contents of the folder to the folder on your hard drive where you want to install the software. R BACK button 2. Press the SELECT button until the language you want is highlighted. 3. Press the BACK button to save your selection and return to the View or Playback mode. If you want to change the language setting, see page 69 for instructions. Setting the Date and Time When you install the batteries for the first time or when you replace them, you need to set the date (year, month, and day) and time (hour and minute). After installing the batteries, follow these steps to set the clock on the LCD monitor and to have the time and date of each picture automatically recorded. 20 Poppy Rev.B/TCAT A5 size 97/09/18 Note: If you connect PhotoPC 600 to your computer when the camera’s clock is not set, the camera is set to your computer’s time and date automatically. For instructions on connecting the camera to the computer, see page 36. 1. Slide the monitor mode switch on the back of the camera to View or Playback. A message stating that you need to reset the clock appears on the screen. 2. Press the SELECT button to set the clock. The clock setting screen appears with the setting for the year highlighted in red. Note: If you do not want to set the clock, press the BACK button to return to the View or Playback mode. R Chapter 1 pass 7 5. Adjust the month, day, hour, and minute settings as described above until the date and time are correctly adjusted and saved. Note: If you want to reset any previous item, simply press the BACK button until the item you want to reset turns red. When you finish making the minute setting and press the SELECT button, the LCD screen returns to the View or Playback mode. You’re now ready to take pictures with your PhotoPC 600. Turn to Chapter 2 for simple, step-by-step instructions. 3. Press the button to increase the number, or the button to decrease the number, until the year is correct. 4. Press the SELECT button. The year setting is saved and the month setting is highlighted. Getting Started 1 21 Proof Sign-off: Yano Norum Poppy Rev.B/TCAT _______ _______ _______ A5 size 97/09/18 R Chapter 2 pass 6 Chapter 2 Taking Pictures with PhotoPC 600 Using PhotoPC 600 to take pictures is similar to using a traditional "point and shoot" camera. This chapter tells you everything you need to know about the following: Turning the camera on and off Auto shut-off 2 Turning the Camera On and Off To turn the camera on, simply rotate the lens cover counterclockwise. The lens cover opens and the display panel on the top of the camera lights up. The status light on the back of the camera flashes red for a few seconds, then turns green. The camera is ready to take pictures. The display panel Checking the battery Clicking the shutter On Picture-taking range Adjusting settings Checking the picture counter Playing back your photos Displaying photos on a television Taking Pictures with PhotoPC 600 Off Rotate the lens cover clockwise to turn off the camera. The lens cover closes and the display panel turns off. 22 Poppy Rev.B/TCAT A5 size 97/09/18 Auto Shut-off To save battery power, the camera turns itself off automatically after 60 seconds if no buttons are pressed. To turn the camera back on, close the lens cover then open it again. When your camera is connected to the optional AC adapter, the auto shut-off feature is disabled. Note: ❏ If you want, you can change the 60 second time period for auto shut-off by using your EPSON Photo!2 software. For more information, see page 57. ❏ When the camera is connected to your computer, it shuts itself off after 5 minutes of inactivity. It comes back on automatically when you use any of the software camera controls in your EPSON Photo!2 software. R Chapter 2 pass 6 ❏ When the camera is not used for 30 seconds with the LCD monitor in View mode ❏ When the camera is not used for 5 minutes with the LCD monitor in Playback mode ❏ When the camera is not turned on within 15 seconds of switching the LCD monitor to View mode ❏ When the camera is connected to a computer with the LCD monitor in View mode ❏ When the camera is connected to a television To turn the LCD monitor back on, slide the monitor mode switch to OFF then slide it back to View or Playback. When your camera is connected to the optional AC adapter, the LCD monitor auto shut-off feature is disabled. LCD monitor power saving features Because the LCD monitor consumes additional power, the LCD monitor turns off automatically in the following cases: ❏ When you turn off the camera with the LCD monitor in View mode Taking Pictures with PhotoPC 600 23 2 Poppy Rev.B/TCAT A5 size 97/09/18 The Display Panel R Chapter 2 pass 6 Checking the Battery The display panel keeps track of how many pictures you can take and gives you information on camera settings and the battery level. number of pictures remaining (see page 32) flash (see page 29) When the battery power is almost out, a low battery icon appears on the display panel. When this icon is flashing, you cannot take pictures until you change the batteries. When the battery power runs out with the LCD monitor in the Playback or View mode, the low battery icon appears on the LCD screen for five seconds, then the monitor and the camera turn off automatically. You should use the low battery icon only as a rough guide to remaining power. Note that several factors can affect battery life, including the surrounding temperature and the type of batteries you use. Low temperatures (especially below 10°C) will drain your batteries more rapidly. See page 15 for information about changing batteries. image quality (see page 28) Clicking the Shutter low battery icon (see page 24) macro mode (see page 30) self timer (see page 29) Follow the steps below to take photos using the viewfinder or the LCD monitor. Using the viewfinder 1. Turn the camera on and wait until the status light beside the viewfinder turns green. Taking Pictures with PhotoPC 600 24 2 Poppy Rev.B/TCAT A5 size 97/09/18 2. Look straight through the viewfinder and center your subject in the cross-hairs. Note: The frame in the viewfinder indicates the area captured when taking pictures at close range. 3. Hold the shutter button halfway down to lock the auto focus. The status light beside the viewfinder changes from green to orange. If you wish, you can now move your subject off-center without altering the focus. Press the shutter button the rest of the way down to take the photo. 4. Hold the camera still until the status light starts flashing red and the camera beeps. R Chapter 2 pass 6 The flashing red light indicates that the image is captured and the camera is processing it. (If you try to press the shutter button while the status light is flashing red, you will hear two “error” beeps.) When the light stops flashing and turns green, the image is saved. Saved images remain in memory for years, even when the camera is turned off and the batteries are removed. You can take another photo when the status light turns green. Using the LCD monitor 1. Turn the camera on and slide the monitor mode switch on the back of the camera to View. You will see a live preview on the LCD screen. Center your subject on the screen. status light monitor mode switch viewfinder shutter button LCD screen Taking Pictures with PhotoPC 600 25 2 Poppy Rev.B/TCAT A5 size 97/09/18 Note: Icons indicating the image quality setting , the number of photos you can take , and the number of photos taken appear at the bottom of the LCD screen. 2. Hold the shutter button halfway down to lock the auto focus. A small green circle appears on the corner of the LCD screen, and the status light beside the viewfinder changes from green to orange. If you wish, you can now move your subject off-center without altering the focus. Press the shutter button the rest of the way down to take the photo. 3. Hold the camera still until the status light starts flashing red and the camera beeps. When you press the shutter button, the LCD monitor displays the picture you took with a processing icon in the center of the screen until the camera finishes processing it, then the monitor returns to live preview. R Chapter 2 pass 6 Picture-taking Range When composing a shot through the viewfinder, you should be at least 50 cm away from your subject. When using the LCD monitor, you can use the camera’s macro mode to take photos as close as 20 cm. See page 30 for instructions. You can take flash pictures within a range of 20 cm to 2.4 m. See page 29 for more information on using the built-in flash. Note: When you are taking pictures outdoors, make sure the sun is at your back. In very bright light (at the beach or in snow, for example) your pictures may come out too light. However, you can correct most over-exposure problems from your computer using image-editing software. Note: ❏ When battery power is low and the flash was used to take the picture, the return to live preview may be delayed while the camera recharges the flash. The LCD screen will be blank during this period. ❏ The live preview image may appear to flicker when viewed under strong fluorescent lighting, depending on the lighting’s frequency. This is normal. Taking Pictures with PhotoPC 600 26 2 Poppy Rev.B/TCAT A5 size 97/09/18 Adjusting Settings The buttons on the top of the camera allow you to control the following PhotoPC 600 features: Image quality (see page 28) R Chapter 2 pass 6 When the LCD monitor on the back of your camera is switched to View, you can use the buttons surrounding the monitor to select these special photo formats: Zoom 2 Panorama Flash (see page 29) Multi-frame Self timer (see page 29) Macro mode (see page 30) monitor mode switch image quality photo format button macro flash LCD monitor self timer All control button settings (except the self timer) remain in effect even after you turn off the camera. Taking Pictures with PhotoPC 600 Note: All camera settings return to their factory defaults when you remove or change the batteries. 27 Poppy Rev.B/TCAT A5 size 97/09/18 Image quality PhotoPC 600 has three color and two monochrome image quality settings. Press the image quality control button to cycle from one setting to another. The settings appear on the display panel as shown below. Fine Super fine Monochrome fine Monochrome super fine Standard Fine Images are captured in color at 1024 x 768 pixels. Your pictures include moderate detail, and the camera holds approximately 18 pictures. Taking Pictures with PhotoPC 600 R Chapter 2 pass 6 Super fine Images are captured in color at 1024 x 768 pixels. Your pictures include greater detail, but the camera only holds approximately 8 pictures. 2 Monochrome fine Images are captured in black and white at 1024 x 768 pixels. Your pictures include moderate detail, and the camera holds approximately 18 pictures. Monochrome super fine Images are captured in black and white at 1024 x 768 pixels. Your pictures include greater detail, but the camera only holds approximately 8 pictures. Standard Images are captured at 640 x 480 pixels. The camera holds approximately 56 pictures, but the images include less detail. Note: If you select one of the monochrome image quality settings when the LCD monitor is in View mode, the image turns from color to black and white, a blue frame appear around the image, and MONOCHROME appears briefly on the screen. 28 Poppy Rev.B/TCAT A5 size 97/09/18 You can switch freely between these settings and mix pictures of varying quality in the camera. The camera’s image capacity will vary accordingly. Forced flash The flash fires with every picture you take. Use this setting to compensate for backlighting; for example, when you are facing the sun. Flash off The flash is disabled, even when adequate lighting is not available. Use this setting for special effects, or where flash photography is prohibited. Flash PhotoPC 600’s built-in flash is effective within a range of 20 cm to 2.4 m. Press the flash control button to cycle through the three flash settings. The settings appear on the display panel as shown below. Automatic R Chapter 2 pass 6 Note: After taking a flash photo, the flash icon blinks until the flash is fully recharged. Self timer Forced flash Flash off Automatic The flash fires automatically whenever it is needed for adequate lighting (factory setting). Taking Pictures with PhotoPC 600 Setting the self timer creates a 10-second delay between the time you press the shutter button and the actual image capture. This allows you to take a picture of yourself. The timer icon appears on the display panel when you use the timer. Follow these steps to take a picture with the timer: 1. Secure the camera on a flat surface or a tripod. 2. Turn on the camera and wait until the status light turns green. 29 2 Poppy Rev.B/TCAT A5 size 97/09/18 3. Press the timer button. The timer icon appears on the display panel. 4. Press the shutter button. The timer icon and the red timer light on the front of the camera flash slowly for eight seconds, then rapidly for two seconds before the shutter releases. The camera beeps when the image is captured. The status light on the back of the camera flashes red as PhotoPC 600 processes the image. When the status light stops flashing and turns green, you can take another picture. You need to press the timer button again each time you want to take a picture using the self timer. Macro mode Use the macro mode to take pictures at close range. This mode enables you to take pictures within a range of 20 cm to 50 cm. Follow these steps to take a picture in the macro mode: R Chapter 2 pass 6 3. Press the shutter button. Note: To make sure your subject is framed accurately, we recommend that you use the LCD monitor rather than the viewfinder when taking a photo in macro mode. To turn off macro mode, simply press the macro button again. Special photo formats Your camera features three special photo format modes: zoom, panorama, and multi-frame. Zoom mode allows you to enlarge the image by as much as three times. In panorama mode you can shoot wide-angle panoramas. Shooting in multi-frame mode causes the shutter to release nine times in rapid sequence, producing a single image composed of nine stop-action frames. This mode can be useful if you want to break down a complex motion, such as your golf swing, into a series of easy-to-see steps. 1. Turn the camera on and slide the monitor mode switch to View. A live preview appears on the LCD screen. 2. Press the macro button. The macro mode icon appears on the display panel. A green frame appears around the previewed image and MACRO appears briefly on the LCD screen. Taking Pictures with PhotoPC 600 30 2 Poppy Rev.B/TCAT A5 size 97/09/18 To use these special photo formats, follow these steps: 1. Turn the camera on and slide the monitor mode switch to View. A live preview appears on the LCD screen. 2. Use the photo format button and navigation buttons surrounding the LCD monitor to control the photo format modes, as described below. navigation buttons Zoom To select the zoom mode, press the photo format button. An orange frame appears around the previewed image, and ZOOM is displayed briefly on the screen along with the zoom power and a zoom icon . Taking Pictures with PhotoPC 600 You can increase the zoom rate from 1 (normal) to 1.3, 1.6, 2, 2.5, or 3 times normal by pressing the button. To decrease the rate from 3 back down to 1, press the button. (If the zoom rate is already 1, pressing the button switches the photo format mode to panorama.) In zoom mode, images are captured at standard image quality (640 x 480 pixels). Panorama To select the panorama mode, press the photo format button, then press the button once. PANORAMA appears briefly on the screen along with a panorama icon and the LCD screen is framed with black margins at the top and bottom. monitor mode switch photo format button R Chapter 2 pass 6 While in panorama mode, you can use the image quality control button on top of the camera to select fine or super fine image quality (1024 x 384 pixels). See page 28 for more information on image quality settings. Multi-frame To select the multi-frame mode, press the photo format button, then press the button twice. A red frame appears around the previewed image, and MULTI is displayed briefly on the screen along with a multi-frame icon . Images are captured at standard image quality (640 x 480 pixels). 31 2 Poppy Rev.B/TCAT A5 size 97/09/18 Note: You can switch freely between these settings and mix these formats in the camera. 3. Once you have selected a photo format mode, press the shutter button. In multi-frame mode, the LCD screen goes black for a moment, then displays the nine stop-action frames one by one. When all nine frames appear, you have finished taking the multi-frame picture. Note: If your camera is for use with PAL television broadcasting standard, when you press and release the shutter button, the LCD screen goes black and the status light flashes red. When all nine frames are captured, the camera beeps. After a few seconds, the multi-frame image appears on the LCD screen. When the camera finishes processing the image, the monitor returns to live preview and the status light turns green. You can then take another photo. To exit the photo format mode, simply press the photo format button again. Taking Pictures with PhotoPC 600 R Chapter 2 pass 6 Checking the Picture Counter The large number in the center of the camera’s display panel shows you how many pictures you can take. 2 number of pictures remaining The number of pictures remaining depends on the image quality setting you have chosen. If you change this setting, the number of pictures remaining will change. When the camera’s memory is full, the number on the display panel reads 0. The status light on the back of the camera turns red, and you cannot press the shutter button. You need to erase some or all of the images in your camera before you can take any more pictures. See page 63 for instructions on erasing photos using the LCD monitor. If you want to save your photos before you erase them, connect the camera to your computer and transfer the photos as described in Chapter 4. 32 Poppy Rev.B/TCAT A5 size 97/09/18 If you install an optional CompactFlash Card, the number of pictures you can store in the memory card appears in brackets on the camera’s display panel as shown below. For instructions on using optional memory cards, see page 80. number of pictures remaining in the memory card R Chapter 2 pass 6 Note: Since you do not need to turn on the camera to play back your photos, we recommend leaving the camera off to save battery power. 1. Slide the monitor mode switch to Playback. The last photo you took appears on the LCD screen along with the date and time that the photo was taken. Icons indicating the image quality setting , frame number , and the number of photos taken appear at the bottom of the screen. brackets You can use the LCD monitor to find out how many photos you have already taken. See page 25 for instructions. monitor mode switch Playing Back Your Photos When the LCD monitor is in Playback mode, you can play back photos on your camera’s LCD screen or on a regular television set. To play back your photos, follow the steps below. LCD screen 2. Press the or next photos. Taking Pictures with PhotoPC 600 button to display the previous or 33 2 Poppy Rev.B/TCAT A5 size 97/09/18 Note: You can also display up to nine consecutive "thumbnail" images at a time using the Multi-photo Playback mode, or automatically play back your photos in sequence using the Slide Show feature. See Chapter 4 for instructions. R Chapter 2 pass 6 Follow these steps to connect PhotoPC 600 to your television: 1. Make sure the camera and television are turned off. 2. Open the connector cover on the side of the camera. Displaying photos on a television You can display the pictures in your camera on a regular television just as you can on the LCD screen simply by using the video cable that came with your PhotoPC 600. Note: Color television telecasting specifications are different depending on the country. If you have an NTSC camera model, your television must meet NTSC color television telecasting specifications. If you have a PAL camera model, your television must meet PAL specifications. Taking Pictures with PhotoPC 600 connector cover 3. Connect the video cable to the Video Out port on the camera as shown below. 34 2 Poppy Rev.B/TCAT A5 size 97/09/18 R Chapter 2 pass 6 4. Connect the other end of the video cable to the video input port on the television. 2 5. Turn on the television and switch it to video mode. 6. Slide the monitor mode switch to Playback. The last picture you took appears on the television instead of the LCD monitor screen. Note: If you use the optional AC adapter, you can see the pictures on both the television and the LCD screen. Taking Pictures with PhotoPC 600 35 Proof Sign-off: Yano Norum _______ _______ _______ Poppy Rev.B/TCAT A5 size 97/09/18 R Chapter 3 pass 6 Chapter 3 Using PhotoPC 600 with Your Computer When your are finished taking pictures, you can connect the camera to your computer and transfer the images. Then you can use them in your letters, presentations, or just about anything you create on your computer. This chapter tells you how, including: Connecting PhotoPC 600 to your computer Transferring pictures to your computer Erasing pictures from the camera Using pictures in your documents Uploading EPSON Photo images to the camera Using PhotoPC 600 with Your Computer Connecting PhotoPC 600 to Your Computer Before you start, make sure the camera is finished processing, then locate the serial cables that came with your PhotoPC 600. The long cable is for connecting the camera to a PC, and both the long and short cables are needed to connect it to a Macintosh computer. If you have the optional AC adapter, you can save on batteries by using the adapter whenever you connect the camera to your computer. Note: When the camera is connected to your computer, you cannot use any of the control buttons or the shutter button on the camera. You can only operate the camera through your computer. 36 3 Poppy Rev.B/TCAT A5 size 97/09/18 The camera’s auto shut-off feature remains in effect when the camera is connected to your computer, but it takes place after 5 minutes of inactivity. To turn the camera back on, you can close and reopen the lens cover, or you can use any of the software camera controls on your computer. R Chapter 3 pass 6 3. Line up the serial connector on the cable with one of the serial ports on your computer, and insert the connector. Then tighten the screws. Connecting to a PC Follow these steps to connect the camera: serial port on computer serial cable (long cable) 1. Make sure the camera and your computer are turned off. Also make sure the LCD monitor is turned off. 2. Locate a serial port on the back of your computer. You may have two serial ports labeled COM1 and COM2, or the ports may be labeled with icons. If you have two serial ports available, use port 1 to connect your camera. 4. Open the connector cover on the side of the camera. Connector cover Using PhotoPC 600 with Your Computer 37 3 Poppy Rev.B/TCAT A5 size 97/09/18 5. Depending on the type of cable you have, line up either the arrow or the flat surface of the cable connector with the mark on the camera’s serial port. Then insert the connector. R Chapter 3 pass 6 Connecting to a Macintosh Follow these steps to connect the camera: 1. Make sure the camera and your computer are turned off. Also make sure the LCD monitor is off. 2. Locate the modem port and the printer port on the back of your computer. The ports should be labeled with icons. mark flat surface modem port printer port arrow surface 6. Turn on the camera and your computer system. c Caution: Keep the entire computer system away from potential sources of electromagnetic interference, such as loudspeakers or the base units of cordless telephones. Using PhotoPC 600 with Your Computer 38 3 Poppy Rev.B/TCAT A5 size 97/09/18 3. Connect the long cable to the short cable (Macintosh adapter cable), then tighten the screws. Line up the serial connector on the short cable with either the modem or the printer port on your computer, and insert the connector. R Chapter 3 pass 6 4. Open the connector cover on the side of the camera. connector cover 3 Macintosh adapter cable serial cable 5. Depending on the type of cable you have, line up either the arrow or the flat surface of the long cable connector with the mark on the camera’s serial port. Then insert the connector. mark flat surface arrow surface Using PhotoPC 600 with Your Computer 39 Poppy Rev.B/TCAT A5 size 97/09/18 6. Turn on the camera and your computer system. c Caution: ❏ If you connected the camera to a serial port that you use for another device and AppleTalk is turned on, turn off AppleTalk. The computer may not recognize the camera if AppleTalk is turned on. ❏ Keep the entire computer system away from potential sources of electromagnetic interference, such as loudspeakers or the base units of cordless telephones. Accessing EPSON Photo!2 Once your camera and computer are connected and turned on, you are ready to start working with the EPSON Photo!2 software that came with PhotoPC 600. This software allows you to download your photos to your computer so that you can use them in your documents. R Chapter 3 pass 6 Note: If the camera’s clock was not set when you connected it to your computer, the camera is set to your computer’s date and time automatically after opening EPSON Photo!2. For Windows users To open EPSON Photo!2 directly, simply double-click its icon in the EPSON Photo!2 program group (for Windows 3.1x and NT 3.51) or click its icon in the EPSON Photo!2 folder (for Windows 95 and NT 4.0). To access EPSON Photo!2 from an application program that supports the TWAIN image acquisition standard, choose EPSON PhotoPC 600 as the TWAIN data source on your application’s File menu, then acquire the image. To access EPSON Photo!2 from an application that supports OLE2 (object linking and embedding), choose EPSON PhotoPC 600 Object on the Insert Object menu and click OK. If you have not installed EPSON Photo!2 yet, do so now, following the instructions on page 17. Then follow the instructions in this section to access the software. Using PhotoPC 600 with Your Computer 40 3 Poppy Rev.B/TCAT A5 size 97/09/18 For Macintosh users R Chapter 3 pass 6 menu tabs To open EPSON Photo!2 directly, simply double-click its icon, located in the EPSON Photo!2 folder. To access EPSON Photo!2 from an application program that supports the TWAIN image acquisition standard, choose PhotoPC 600 as the TWAIN data source from your application’s File menu, then acquire the image. Note: The exact way to access EPSON Photo!2 from TWAIN- or OLE2-compliant applications varies depending on your software. Refer to your software manual for detailed instructions on selecting TWAIN data sources or inserting OLE objects. Working with EPSON Photo!2 When you open EPSON Photo!2, an introductory screen appears briefly in the EPSON Photo!2 window, then the Camera menu appears, indicating your camera and computer are connected properly. Using PhotoPC 600 with Your Computer 3 Help button Close button status bar progress meter If the Setup menu appears in place of the Camera menu, your camera and computer may not be properly connected. Make sure your camera is correctly connected to your computer. If the Camera menu still does not appear, see page 55 for instructions on using the Setup menu to establish the proper connection. Note: While the camera and the computer are communicating, star icons move across the camera’s display panel. Avoide opening or using other applications during this time; otherwise the communications may be interrupted. 41 Poppy Rev.B/TCAT A5 size 97/09/18 Click the menu tabs along the top of the EPSON Photo!2 window to open the following four menus: Camera The Camera menu displays small thumbnail images of all the photos stored in the camera so you can easily select which images you want to transfer to the computer or erase from the camera. If an optional CompactFlash Card is installed in the camera, the Camera menu displays the images stored in the card instead of the images stored in the camera’s internal memory. Folder The Folder menu displays thumbnail images of photos that have been saved to a folder. From this menu you can select thumbnails and transfer photos to your application or erase them from the folder. Also, you can upload images from your computer to your camera. Controls The Controls menu allows you to see a live preview on your computer screen, take photos from your computer, and change the camera settings. R Chapter 3 pass 6 Setup The Setup menu allows you to make the communication link settings needed to connect the computer to the camera. From this menu you can also make the camera’s internal time, date, and identification settings, and change the camera’s auto shut-off time. 3 Closing EPSON Photo!2 You can close EPSON Photo!2 by clicking Close on any of the menus. Getting help Click Help on any of the EPSON Photo!2 menus for help related to the items on that menu. Getting status and progress information In addition to the Close and Help buttons, EPSON Photo!2 displays the status bar and progress meter no matter what menu is currently displayed. Status bar The status bar tells you what operation EPSON Photo!2 is currently performing. Using PhotoPC 600 with Your Computer 42 Poppy Rev.B/TCAT A5 size 97/09/18 Chapter 3 pass 6 Progress meter photo transfer button The progress meter shows the progress of lengthy operations, such as downloading images from the camera. R photo save button Using the Camera Menu 3 When you open EPSON Photo!2, the Camera menu appears and EPSON Photo!2 starts downloading thumbnail images of the photos stored in your camera. The images are downloaded in the order that they were taken and are displayed in the image selection window. You can change the downloading order by clicking on the blank thumbnail frames for the photos you want to see first. Note: If the camera is not connected properly, the Setup menu will appear instead of the Camera menu. Check the serial port settings of your computer to confirm the settings are appropriate and the port is working. See page 55 for more information on using the Setup menu. Using PhotoPC 600 with Your Computer Selecting images image selection window You can use the Select All button to select all the photos in your camera at once, or you can select individual photos by clicking the thumbnail images in the image selection window. Blue borders appear around selected images. You can click the Select All button even while EPSON Photo!2 is still downloading your images, so they appear in the image selection window pre-selected and ready to be transferred to your application or to a folder. 43 Poppy Rev.B/TCAT A5 size 97/09/18 You can select individual photos or groups of photos in a number of ways depending on your system, as described in this table: Windows TWAIN Button Name Get Photos R Chapter 3 pass 6 OLE Stand Alone Get Photo Save To Folder Transfers a selected photo from the camera to your application. Displays a dialog box that allows you to save selected photos as EPSON Photo files in JPEG format. Only one image can be transferred at a time. File names are created automatically. Macintosh Selecting a single thumbnail Click Click Selecting multiple thumbnails CTRL + click COMMAND + click Selecting a continuous range of thumbnails Click the first image in the range. Then SHIFT + click the last image in the range. Click the first image in the range. Then SHIFT + click the last image in the range. Cancelling the selection of a single thumbnail in a selected group CTRL + click COMMAND + click Transfers Button Function selected photos from the camera to your application. Notes Some TWAIN applications will only accept one image at a time. Saving selected photos to a folder Transfering selected photos The name and function of the photo transfer button located in the top right corner of the Camera menu varies depending on whether EPSON Photo!2 is opened directly, or from a TWAIN- or OLE2-compliant application program. The following table describes the characteristics of the photo transfer button depending on how EPSON Photo!2 is opened. Using PhotoPC 600 with Your Computer The name and function of the photo save button located below the photo transfer button on the Camera menu varies depending on whether EPSON Photo!2 is opened directly, or from a TWAIN- or OLE2-compliant application program. The following table describes the characteristics of the photo save button depending on how EPSON Photo!2 is opened. 44 3 Poppy Rev.B/TCAT A5 size 97/09/18 TWAIN Button Name Save To Folder Displays a dialog Button Function box that allows you to save selected photos as EPSON Photo files in JPEG format. Notes File names are created automatically. OLE Stand Alone Save To Folder Export Photos Displays a dialog box that allows you to save selected photos as EPSON Photo files in JPEG format. Displays a dialog box that allows you to name and save photos in JPEG, BMP, or PCX format. On the Macintosh the PICT format is also supported. File names are created automatically. If you assign a single file name to more than one photo, a counter is added to each file sharing the same name. R Chapter 3 pass 6 File names When you transfer a picture to your computer using the Save To Folder button, EPSON Photo!2 saves it as an EPSON Photo file in JPEG format, and names it with the date and order in which it was taken. When you transfer a picture to your computer using the Export Photos button, you can name the file yourself and save it as a JPEG, BMP, or PCX file. On the Macintosh you can also choose the PICT file format. Transferring pictures to your documents After you select pictures in the image selection window, you can insert them in your documents. You can use your pictures in many different types of application programs, such as word processors, presentation programs, spreadsheets, database managers, page layout and desktop publishing packages. If your application supports OLE2 or TWAIN, EPSON Photo!2 allows you to directly transfer your photos from your camera to your document. If your application does not support OLE2 or TWAIN, you need to save your photos as JPEG, BMP, or PCX files, and then open them from your application. On the Macintosh, you can also save photos as PICT files. Using PhotoPC 600 with Your Computer 45 3 Poppy Rev.B/TCAT A5 size 97/09/18 Inserting photos directly into documents You can use two methods to add pictures directly to your documents: ❏ Photo transfer button ❏ Drag and drop (Windows only) Transferring pictures with the photo transfer button You can use this method to transfer pictures to Windows applications supporting OLE2 (object linking and embedding), or Windows and Macintosh applications supporting TWAIN. Some examples of applications supporting OLE2 are Microsoft Word 6.0 & 7.0 and WordPerfect® 6.1. Some examples of applications supporting TWAIN are HotShots, Photoshop, PicturePublisher and Photostyler. If you are not sure whether your application supports OLE2 or TWAIN, give it a try. If it does not work, you can always insert the photo by first saving it in EPSON Photo!2 as a JPEG, BMP, or PCX file and opening it from your application. On the Macintosh, you can also save the photo as a PICT file. Using PhotoPC 600 with Your Computer R Chapter 3 pass 6 Following is a typical procedure for directly transferring a photo to an OLE2- or TWAIN-compliant application: 1. Start your word processor or other application. 2. Open the document or file where you want to use the picture. 3. Position the cursor where you want to insert the picture. 3 4. For OLE2-compliant applications, choose Object from the Insert menu and double-click EPSON PhotoPC 600 Object in the Object Type list box. For TWAIN-compliant applications, select EPSON PhotoPC 600 (or PhotoPC 600 for Macintosh) as the TWAIN data source, then acquire the image. Note: The exact method for accessing EPSON Photo!2 varies depending on the application. Please refer to your software manual for detailed instructions. 5. Select the picture you want use. Then click the photo transfer button. A copy of the picture appears in your document. 46 Poppy Rev.B/TCAT A5 size 97/09/18 Transferring a picture with drag and drop (Windows only) R Chapter 3 pass 6 Inserting a picture by importing 1. Make sure EPSON Photo!2 is open and the picture you want to use is in the image selection window. If your application program does not support OLE2 or TWAIN, you need to export your photos to a folder, and open them from your application. If your application cannot handle JPEG files, you need to change the picture’s file type to BMP or PCX. (On the Macintosh, you can also change the file type to PICT.) Follow these steps to insert a picture by importing: 2. Start your word processor or other application. 1. Open EPSON Photo!2 by clicking its icon. 3. Open the document or file where you want to use the picture. 2. Select the picture you want to use in the image selection window. 4. Arrange your screen so that both the application window and the EPSON Photo!2 window can be seen. 3. Click the Export Photos button. A dialog box appears in which you can select a folder, specify a file name, select a file format, and save the photos. 5. Select the picture you want to use. 4. Start your application. 6. Drag the picture from the image selection window to your document. After a few seconds you see the drop cursor. If your application does not support drag and drop, the drop cursor will not appear. 5. Open the document or file where you want to use the picture. You can use this method to transfer a picture to any Windows application supporting OLE2 (object linking and embedding). 7. Position the drop cursor where you want the picture and release the mouse button. A copy of the picture appears in your document. Using PhotoPC 600 with Your Computer 6. Position the cursor where you want to insert the picture. 7. Choose the Insert Picture or Import File command. The command may have a different name in your application. It may appear on the File menu, the Insert menu, or another menu. 47 3 Poppy Rev.B/TCAT A5 size 97/09/18 After you choose the command, you see a box where you can enter the file name of your picture or choose from a list of files. 8. Enter the file name or use the list to locate and select your picture. 9. Click OK. The picture appears in your document. You can use the Camera menu’s Erase Photos button to erase selected images from your camera, as described below: Chapter 3 pass 6 Getting photo information The thumbnail images in the image selection window are quite small and you may have problems seeing what is actually in the picture. Click the Photo Info button on the Camera menu to see a double-size view of a selected thumbnail image along with the date, time, image quality setting, and zoom rate, as well as the flash , macro Erasing selected pictures from your camera R , and lock symbols when applicable. You can also get this enlarged view by clicking the image with the right mouse button when running Windows, or on a Macintosh by clicking the image while the control key is pressed. The Photo Info button is disabled when multiple images are selected. 1. Select the images you want to erase. 2. Click the Erase Photos button. A dialog box appears asking you to confirm that you want to erase these photos. 3. Click Yes. The image you selected are erased. If any of the photos are locked, a dialog box appears asking you whether you want to leave the photos in your camera or erase them. Click Yes to leave the photos in your camera, or click No to erase them. Using PhotoPC 600 with Your Computer Using the Folder Menu When you click the Folder menu, the Folder menu opens and thumbnails of images in the currently selected folder appear in the image selection window. The name of the currently selected folder is displayed below the image selection window. The images displayed in the Folder menu’s image selection window can be transferred to your application using the methods described on page 51. 48 3 Poppy Rev.B/TCAT A5 size 97/09/18 The only differences between the Folder menu and the Camera menu are that the Folder menu does not have a photo save button, and does have a Browse button and an Upload Photos button. The Browse button allows you to select the folder containing the image files you want to display in the image selection window. The Upload Photos button allows you to upload images saved in EPSON Photo file format from your computer to your camera. photo transfer button R Chapter 3 pass 6 Selecting images Click on an image in the image selection window to select it. The border around an image turns blue when it is selected. Click the Select All button to select all the photos at once. You can use the same methods to select multiple images on the Folder menu as you can on the Camera menu. See page 44 for details. Transfering photos Upload Photos button Using PhotoPC 600 with Your Computer As on the Camera menu, the name and function of the Folder menu’s photo transfer button varies depending how you open your EPSON Photo!2 software. See the table on the next page for a summary. 49 3 Poppy Rev.B/TCAT A5 size 97/09/18 TWAIN OLE Stand Alone Button Name Get Photos Get Photo Export Photos Button Function Transfers selected photos to your application. Transfers a selected photo to your application. Displays a dialog box that allows you to name and save photos in JPEG, BMP, or PCX format. On the Macintosh the PICT format is also supported. Notes Some TWAIN applications will only accept one image at a time. Only one image can be transferred at a time. If you assign a single file name to more than one photo, a counter is added to each file sharing the same name. Finding the folder containing your photos Click the Browse button to open a dialog box that allows you to locate the folder containing the images you downloaded from your PhotoPC 600. Select the folder where you stored the photos and click OK. Using PhotoPC 600 with Your Computer R Chapter 3 pass 6 Uploading photos Click the Upload Photos button to upload selected photos to the camera or to an optional CompactFlash memory card installed in your computer. When you click this button, the following dialog box appears. 3 Uploaded images are added to the camera or the memory card in the order they appear in the Folder menu’s image selection window. Note: Image files that were not originally downloaded from the camera using the Save To Folder button or were not converted to EPSON Photo file format using the EPSON Photo File Uploader utility cannot be uploaded using this button. For instructions on using this utility to convert files to EPSON Photo file format, see "Uploading Images to the Camera" on page 70. 50 Poppy Rev.B/TCAT A5 size 97/09/18 Transferring pictures to your documents After you select pictures in the Folder menu’s image selection window, you can insert them in your documents. You can use your pictures in many different types of application programs, such as word processors, presentation programs, spreadsheets, database managers, page layout and desktop publishing packages. If your application supports OLE2 or TWAIN, you can directly transfer your photos. If it does not, you need to save your photos in a file format your application can use, and open the file from the application. You can use the same methods to transfer and insert your photos as described in the Camera menu section on page 45. However, from the Folder menu, images are not transferred from your camera but from the folder where you downloaded the images. R Chapter 3 pass 6 Erasing selected files from a folder Click the Erase Files button to erase selected pictures from a folder. A dialog box appears asking you to confirm that you want to erase these pictures. If any of the photos are locked, a dialog box appears asking you whether you want to leave the photos in your camera or erase them. Click Yes to leave the photos in your camera, or click No to erase them. Getting photo information The thumbnail images in the image selection window are quite small and you may have problems seeing what is actually in the picture. Click the Photo Info button to see a double-size view of a selected thumbnail image along with the date, time, image quality setting, and zoom rate, as well as the flash , macro symbols when applicable. , and lock You can also get this enlarged view by clicking the image with the right mouse button when running Windows, or on a Macintosh by clicking the image while the control key is pressed. The Photo Info button is disabled when multiple images are selected. Using PhotoPC 600 with Your Computer 51 3 Poppy Rev.B/TCAT A5 size 97/09/18 Using the Controls Menu When you click the Controls tab, the Controls menu appears. The Controls menu allows you to see a live preview on your computer screen, take photos from your computer, and change the camera settings. When your camera is not connected to the computer, this menu is not accessible. R Chapter 3 pass 6 Controlling the camera from your computer The Control Options box contains a display panel and settings that correspond to the control buttons on the top of your camera. You can change camera settings by using the controls in this box, just as you would use the control buttons on the top of the camera. When the camera is connected to the computer, the only control you can use on the camera itself is the power switch. The display panel in this box and the display panel on the camera are updated whenever the image quality setting, flash mode, or picture count changes. The auto shut-off feature remains in effect when the camera is connected to your computer (except when you use live preview). However, it takes place after 5 minutes of inactivity. Any action you take with the camera via EPSON Photo!2, for example clicking the Start button, will wake the camera up. Or you can close and open the lens cover again to turn the camera back on. Using PhotoPC 600 with Your Computer 52 3 Poppy Rev.B/TCAT A5 size 97/09/18 Selecting the image quality setting Use the arrow beside the Mode list to select the following settings: Standard (640 x 480 pixels) Fine (1024 x 768 pixels) Super Fine (1024 x 768 pixels) Monochrome Fine (1024 x 768 pixels) Monochrome Super Fine (1024 x 768 pixels) You can switch freely between these settings and mix pictures of varying image quality in the camera. Keep in mind that the camera’s picture capacity will vary accordingly. See page 28 for more information on the image quality settings. Selecting the flash mode You can use the arrow beside the Flash list to select the following settings: Off Automatic Forced See page 29 for more details on the flash modes. Using PhotoPC 600 with Your Computer R Chapter 3 pass 6 Setting the self timer Click the Self Timer check box to activate the self timer. See page 29 for more information on using the self timer. Selecting macro mode Click the Macro check box to select macro mode. See page 30 for details on the macro mode. 3 Taking pictures from your computer When the camera is connected to your computer, you can take pictures and use PhotoPC 600 features through the EPSON Photo!2 software on your computer. The only control you can use on the camera itself is the power switch. When you take pictures from your computer, you can use the camera’s viewfinder to set up your shot, or you can see a live preview of the shot on your computer screen before you capture it. This live preview feature works something like a video camera, except that the image moves more slowly. See the next section for details on using the live preview feature. 53 Poppy Rev.B/TCAT A5 size 97/09/18 Displaying a live preview on your screen Position the camera facing the subject. Using a tripod will give you maximum flexibility in setting up your shots. Click the Start button in the Live Preview box on the Controls menu to display your image in the Live Preview window. To stop the live preview, click the Stop button in the Live Preview box, or select another menu tab. Note: ❏ Using the live preview feature uses a lot of battery power. Use of the optional AC adapter is recommended. See page 83 for more information about using the AC adapter. ❏ You cannot turn off the camera when you are using live preview. Click the Stop button in the Live Preview box on the Controls menu to turn off the live preview feature, and then turn off the camera. R Chapter 3 pass 6 Setting the auto-stop timer You can move or tilt the camera until you see the image you want to capture in the window. EPSON Photo!2 updates the live preview image every few seconds for the amount of time specified in the Auto-Stop Timer list. The settings available for the auto-stop timer are: 30 Seconds 1 Minute (default value) 3 Minutes 5 Minutes 3 Clicking the shutter To take a picture from your computer, simply click the Take a Picture button on the Controls menu. The status light beside the viewfinder on your camera flashes red and the camera beeps. When the light stops flashing and turns green, the image is saved and you can shoot another picture. Erasing photos To erase the last picture you took, click the Erase Last button. To erase all the photos in your camera, click the Erase All button. Using PhotoPC 600 with Your Computer 54 Poppy Rev.B/TCAT A5 size 97/09/18 Using the Setup Menu When you click the Setup tab, the Setup menu appears. The Setup menu allows you to change computer connection settings and to make other camera settings, such as the date and time. R Chapter 3 pass 6 Making computer connection settings You can change settings for communication between your computer and camera with the Port and Speed options. You can also test the connection and establish communication by clicking the Test Connection button. Connection information appears in the Computer Connection window. Note: Do not change the Port and Speed settings from Auto unless you know the configuration of the serial port you want to use. If you change the Port and Speed settings, you may lose the connection between the camera and your computer. Computer Connection window The window in the Computer Connection box displays the current status of the camera and its connection to the computer. If there is a problem with the connection, EPSON Photo!2 provides information in this window to help you solve the problem. Note: If you get an error message in the Computer Connection window: 1. Using PhotoPC 600 with Your Computer Make sure that both Port and Speed are set to Auto. 55 3 Poppy Rev.B/TCAT A5 size 97/09/18 2. Make sure that the cable is connected correctly, as described on page 36. 3. Make sure the camera is turned on and the batteries have enough power. 4. Make sure the serial port to which you connected the camera is enabled and properly configured on your computer. 5. Click the Test Connection button to confirm the connection between your camera and the computer. Test Connection button Click the Test Connection button to update information on the camera’s status and its connection to the computer. This information appears in the Computer Connection window. Port The Port option allows you to change the communication port that is connected to the camera. When Auto is selected, EPSON Photo!2 automatically selects the port that is connected to the camera. If the port is changed, EPSON Photo!2 tests the connection and reports the results in the Computer Connection window. R Chapter 3 pass 6 Speed The Speed option allows you to change the speed at which EPSON Photo!2 communicates with the camera. When Auto is selected, EPSON Photo!2 automatically selects the fastest possible communication speed. If the speed is changed, EPSON Photo!2 tests the communication link with the camera and reports the results in the Computer Connection window. The speed choices for Windows are Auto, 19200, 38400, 57600, and 115200 bps. For Macintosh, the choices are Auto, 19200, 38400, and 57600 bps. Making camera settings You can see the camera’s internal time and date settings in the Time and Date fields, and you can change these settings with the Set Time button. You can also change the camera’s auto shut-off time by clicking the arrow beside the Auto Shut-off Time list. The Camera ID edit box allows you to change the camera’s internal identification setting. The port choices for Windows are Auto, COM1, COM2, COM3 and COM4. For Macintosh, the choices are Auto, Modem Port and Printer Port. Using PhotoPC 600 with Your Computer 56 3 Poppy Rev.B/TCAT A5 size 97/09/18 Setting the clock PhotoPC 600 can record the date and time of your pictures automatically. When you transfer the pictures from the camera to your computer, you can see exactly when each shot was taken. In order to have the time and date recorded, you need to set the camera’s clock by using the camera’s LCD monitor or by using the Set Time feature described below. The PhotoPC 600 clock will continue to keep time accurately until you replace the batteries. See page 20 for instructions on setting the camera’s clock by using the LCD monitor. Follow these steps to set the camera’s clock from your computer: 1. Click the Set Time button. The Set Camera Time and Date dialog box below appears. The way the time and date are displayed in this dialog box depends on the time and date display settings for your computer. R Chapter 3 pass 6 2. Use the arrows to change the time and date. Or you can just click the Copy From Computer button to set your camera to your computer’s current date and time. 3. Click OK. EPSON Photo!2 updates the date and time in your camera. Setting auto shut-off time PhotoPC 600’s power-saving feature automatically shuts off the camera if you wait more than 60 seconds before taking a picture. You can adjust this time period by connecting the camera to your computer. Click the arrow on the Auto Shut-off Time list to change the setting. You can select from 1 to 5 minutes. Auto shut-off takes place after 5 minutes when the camera is connected to your computer. You cannot change this time period. Changing the camera ID If you want to change the name that is used to identify the camera when it is connected to a computer, simply type a new name into the Camera ID edit box. The camera name appears on the introductory screen when you start EPSON Photo!2 and in the About dialog box. Using PhotoPC 600 with Your Computer 57 3 Proof Sign-off: Yano Norum _______ _______ _______ Poppy Rev.B/TCAT A5 size 97/09/18 R Chapter 4 pass 3 Chapter 4 Using the LCD Monitor Menus When the LCD monitor is in Playback mode, you can access the LCD monitor menus, where you can erase selected photos and make a variety of camera and option settings. This chapter explains how, including: Working with LCD monitor menus Using the Settings menu Using the Information menu Using the Playback Mode menu Working with LCD Monitor Menus The LCD monitor features eight menus that allow you to delete selected photos from the camera, and to make a variety of camera and option settings. You can open all of the menus described in this chapter from the monitor’s Playback mode. The Settings and Information menus can also be accessed from the View mode. By pressing the SELECT, BACK, and navigation buttons as described in this chapter, you can access and make settings on each menu. Using the Erase Photo menu Using the Photo Control menu Using the Slide Show menu Using the Option menu Using the Language menu SELECT button navigation buttons BACK button Using the LCD Monitor Menus 58 4 Poppy Rev.B/TCAT A5 size 97/09/18 R Chapter 4 pass 3 Following are the eight LCD monitor menus: Settings See page 60 → ← You can change the following settings: Information See page 62 → ← alert beep See page 62 → ← You can choose to display a single photo or 9 photos at a time by switching between Normal and Multi. You can choose whether or not to have photo information displayed on the LCD screen by switching between ON and OFF . clock Playback Mode Erase Photo → ← See page 63 This menu allows you to erase the currently displayed photo. 4 LCD brightness multi-frame shooting time Photo control See page 63 → ← This menu allows you to do the following: erase photos lock photos get memory information copy images format memory cards Using the LCD Monitor Menus Slide Show See page 68 This menu let you play back all the photos in your camera one-by-one automatically. → ← Option Menu See page 68 This menu allows you to install, use, and delete optional programs available for use with your camera. → ← Language See page 69 Depending on the country, you can choose one of the following languages for displaying information on the LCD screen: English, Japanese, French, German, Italian, Portuguese, or Spanish 59 Poppy Rev.B/TCAT A5 size 97/09/18 Follow these steps to access the LCD monitor menus: 1. Slide the monitor mode switch to Playback, then press the SELECT button. Menu icons appear at the top of the LCD screen with the currently selected menu framed in orange. The settings for this menu are displayed on the screen. 2. Press the and buttons to view the settings for other menus. The orange frame indicates the currently selected menu. Note: To exit the LCD monitor menus, press the BACK button until the menu icons and settings disappear. (Depending on the menu, you may have to press this button several times to return to the Playback mode.) Read the following menu descriptions for instructions on changing the settings for each menu. R Chapter 4 pass 3 Using the Settings Menu The Settings menu allows you to change settings for the camera’s internal clock, the alert beep, the LCD brightness level, and the shooting time for the multi-frame photo format. (See page 30 for details on the multi-frame photo format). You can also access the Settings menu from the LCD monitor’s View mode. Follow the instructions below for the settings you want to change. Setting the clock Follow these steps to adjust the date (year, month, day) and the time (hour and minute). 1. With the Settings menu selected, press the SELECT button. Icons for each setting appear on the screen, with the clock icon highlighted in orange. 2. Press SELECT again to enter the clock setting mode. 3. Press the SELECT button until the item you want to adjust is selected. The selected item turns red. Using the LCD Monitor Menus 60 4 Poppy Rev.B/TCAT A5 size 97/09/18 4. Press the button to increase the number, or the button to decrease the number, until the item you want to adjust is correct. R Chapter 4 pass 3 3. Press the BACK button to save your setting and return to the Settings menu. 5. Repeat steps 3 and 4 until the date and time are correctly adjusted and saved. Press the SELECT button or BACK button to return to the Settings menu. Setting LCD brightness To adjust the brightness of the LCD screen, follow the steps below: 1. With the Settings menu selected, press the SELECT button. Icons for each setting appear on the screen, with the clock icon highlighted in orange. Note: You need to reset the time and date whenever you replace the camera’s batteries. In this case, you can enter the clock setting mode directly rather than going through the Settings menu. See page 20 for instructions. 2. Press thebutton until the brightness icon is highlighted in orange, then press the SELECT button again. The mark on the brightness setting slide bar turns orange. Setting the alert beep To turn the camera’s alert beep on or off, follow these steps: 3. Slide the mark on the bar by press the buttons to adjust the screen brightness. 1. With the Settings menu selected, press the SELECT button. Icons for each setting appear on the screen, with the clock icon highlighted in orange. 2. Press the button to select the beep setting icon then press the SELECT button to select ON or OFF. The current selection is highlighted. Using the LCD Monitor Menus ; and 4. Press the SELECT or BACK button to save your setting and return to the Settings menu. 61 4 Poppy Rev.B/TCAT A5 size 97/09/18 Setting the multi-frame shooting time Follow these steps to set the total time the camera takes to shoot nine frames in multi-frame photo format. 1. With the Settings menu selected, press the SELECT button. Icons for each setting appear on the screen, with the clock icon highlighted in orange. 2. Press the button until the multi-frame icon is highlighted. Then press the SELECT button to select 0.5, 1, 2, or 3 seconds as the total shooting time. The current selection is highlighted. 3. Press the BACK button to save your setting and return to the Settings menu. Using the Information Menu On this menu you can choose whether or not to have photo information displayed on the LCD screen. Choosing ON for this setting allows you to get information on the date and time that the photo was taken, the image quality setting, frame number, and the number of photos taken. Using the LCD Monitor Menus R Chapter 4 pass 3 The current setting is highlighted. To change the setting, press the SELECT button. Then press the BACK button to save your setting. This menu is also accessible when the LCD monitor is in View mode. In this case, choosing ON allows you to get information on the image quality setting, the number of photos you can take, and the number of photos taken. 4 Using the Playback Mode Menu This menu allows you to switch between Normal and Multi-photo Playback modes. Press SELECT to make your setting, and press BACK to save your setting and exit this menu. If you switch to Multi-photo Playback mode, small "thumbnail" images of the last photos you took appear on the screen, with the currently selected image framed in white. Press the and buttons to move the white selection frame forward and back through the images on screen. When the frame reaches the first or last photo of the current group, the previous or next group of up to nine images is displayed. 62 Poppy Rev.B/TCAT A5 size 97/09/18 Using the Erase Photo Menu This menu allows you to erase the currently displayed image. Before accessing the LCD monitor menus, make sure the photo you want to erase is displayed and is not locked. (See page 65 for instructions on locking and unlocking photos.) Then select the Erase Photo menu as described on page 60, and press the SELECT button. A message appears asking you confirm that you want erase the image. Press SELECT again to erase the image, or press BACK to preserve the image and return to the Playback mode. Note: If you try to erase a locked photo, a message stating that the photo is locked appears on the screen. Press any of the monitor control buttons to the right of the LCD screen to exit the Erase Photo menu, then open the Photo Control menu and unlock the photo as described on page 65. R Chapter 4 pass 3 Using the Photo Control Menu You can use the Photo Control menu to erase, lock, or unlock images in your camera and to get information on the camera’s internal and CompactFlash card memory. This menu also allows you to format memory cards and copy images between the camera and the card. Access the LCD monitor menus and select the Photo Control menu as described on page 60, then follow the instructions below for the Photo Control feature you want to use. Erasing photos This mode gives you two ways to erase photos from your camera: Select Photo or Erase All. Use Select Photo to erase one or several photos at a time; use Erase All to erase all photos from the camera’s memory. Follow the steps below for the method you want to use. Note: Be sure to unlock the photos before erasing them. See "Locking photos" on page 65 for instructions. Using the LCD Monitor Menus 63 4 Poppy Rev.B/TCAT A5 size 97/09/18 Select Photo 1. With the Photo Control menu selected, press the SELECT button. The Photo Control features appear on the screen, with the Erase option highlighted in orange. 2. Press the SELECT button to enter the Erase mode, then press the or button to choose Select Photo. 3. Press the SELECT button, then press the or button to move forward or back through the images in the camera until the photo you want to erase appears on the screen. 4. Press the SELECT button. An orange frame appears around the image. If you want to erase other photos at the same time, use the or button to display them, then press the SELECT button to select them. Note: ❏ To cancel the selection of a photo, simply press the SELECT button again. ❏ If you select a locked photo, the camera beeps and you can’t select the photo until you unlock it, as described on page 65. R Chapter 4 pass 3 6. Press the SELECT button to erase the images and return to the Photo Control menu; press BACK to return to the Photo Control menu without erasing the photos. Erase All 1. With the Photo Control menu selected, press the SELECT button. The Photo Control features appear on the screen, with the Erase option highlighted in orange. 2. Press the SELECT button to enter the Erase mode, then press the or button to choose Erase All. 3. Press the SELECT button. A message appears asking you to confirm that you want to erase all photos. Press the SELECT button to erase the photos and return to the Photo Control menu; press the BACK button to return to the Photo Control menu without erasing the photos. Note: If there are locked photos in your camera, a message appears on the screen before the erase photos confirmation message. Press the SELECT button to erase only the unlocked images from the camera. 5. When you have selected all the photos you want to erase, press the BACK button. A message appears asking you to confirm your selections. Using the LCD Monitor Menus 64 4 Poppy Rev.B/TCAT A5 size 97/09/18 Locking photos The lock feature allows you keep your photos from being accidentally erased. You can lock and unlock selected photos from the Select Photo menu, or lock all the photos in the camera from the Lock All menu. To unlock all photos, use the Unlock All menu. Follow the steps below for each procedure: Select Photo 1. With the Photo Control menu selected, press the SELECT button. The Photo Control features appear on the screen, with the Erase option highlighted in orange. 2. Press the button to select the Lock option, then press the SELECT button to enter the Lock mode. Then press the or button to choose Select Photo. 3. Press the SELECT button, then press the or button to move forward or back through the images in the camera until the photo you want to lock or unlock appears on the screen. Using the LCD Monitor Menus R Chapter 4 pass 3 4. Press the SELECT button. A lock icon appears at the bottom of the screen, or disappears if it was locked originally. If you want to lock or unlock other photos at the same time, use the or button to display them, then press the SELECT button. 5. When you have selected all the photos you want to lock or unlock, press the BACK button. A message appears asking you to confirm your selections. 6. Press the SELECT button to lock or unlock the images and return to the Photo Control menu; press BACK to return to the Photo Control menu without locking or unlocking the photos. Lock All 1. With the Photo Control menu selected, press the SELECT button. The Photo Control features appear on the screen, with the Erase option highlighted in orange. 2. Press the button to select the Lock option, then press the SELECT button to enter the Lock mode. Then press the or button to choose Lock All. 65 4 Poppy Rev.B/TCAT A5 size 97/09/18 3. Press the SELECT button. A message appears asking you to confirm that you want to lock all the photos in the camera. Press the SELECT button to lock the photos and return to the Photo Control menu; Press the BACK button to return to the Photo Control menu without locking the photos. Unlock All 1. With the Photo Control menu selected, press the SELECT button. The Photo Control features appear on the screen, with the Erase option highlighted in orange. 2. Press the button until Lock is highlighted in orange. Press the SELECT button to enter the Lock Photos mode, then press the or button to choose Unlock All. 3. Press the SELECT button. A message appears asking you to confirm that you want to unlock all the photos in the camera. Press the SELECT button to unlock the photos and return to the Photo Control menu; press the BACK button to return to the Photo Control menu without unlocking the photos. R Chapter 4 pass 3 Getting memory information This mode allows you to get information on both your camera’s internal memory and on optional CompactFlash memory cards. With the Photo Control menu selected, press the SELECT button. Then press the button until Memory Info is highlighted. Press the SELECT button. Information on internal and external memory appears, including the number of photos you can take , the number of photos stored in internal memory and external memory , and the total number of photos that can be stored at the current image quality setting . Copying photos When an optional CompactFlash memory card is installed in your camera, you can use the Copy mode to copy photos between the camera’s internal memory and the memory card. Follow these steps: 1. Make sure the memory card is installed in the camera. 2. With the Photo Control menu selected, press the button until Copy SELECT button. Then press the is highlighted in orange. Using the LCD Monitor Menus 66 4 Poppy Rev.B/TCAT A5 size 97/09/18 3. Press the SELECT button to enter the Copy mode, then press the or button to select Camera→Card or Card→Camera as the copy destination. 4. Press the SELECT button, then press the or button to move forward or back through the images in the camera until the photo you want to copy appears on the screen. 5. Press the SELECT button. An orange frame appears around the photo. If you want to copy several photos at the same time, use the or button to display them and press the SELECT button each time. Note: ❏ To cancel the selection of a photo, simply press the SELECT button again. The orange frame disappears. ❏ If you select more photos than the card or camera can hold, an error message appears. 6. When you have selected all the photos you want to copy, press the BACK button. A message appears asking you to confirm your selections. 7. Press the SELECT button to copy the images and return to the Photo Control menu; press BACK to return to the Photo Control menu without copying the photos. Using the LCD Monitor Menus R Chapter 4 pass 3 Formatting memory cards Use this feature to format optional CompactFlash memory cards. Follow these steps: c Caution: When you format a memory card, all the data on the card is lost, including any locked images. Note: EPSON CompactFlash Cards are already formatted when you buy them. You only need to format a card only if you want to erase all the data on the card or if a message on the LCD screen instructs you to do so. 1. Make sure the memory card is installed in the camera. 2. With the Photo Control menu selected, press the button until SELECT button. Then press the Format Card is highlighted. 3. Press the SELECT button. A message appears stating that all data on the card will be erased and asking you to confirm the procedure. Press the SELECT button again to format the card and return to the Photo Control menu; press the BACK button to return to the Photo Control menu without formatting the card. 67 4 Poppy Rev.B/TCAT A5 size 97/09/18 Using the Slide Show Menu This menu allows you to automatically play back all the photos in your camera one-by-one. Select this menu as described on page 60, then press the SELECT button. The LCD monitor begins playing back the photos in your camera one-at-a-time at regular intervals. To move forward or back through the photos manually, press the or button. To pause the slide show at a particular photo, press the SELECT button. The pause icon and current picture count appear at the bottom of the screen. To stop the slide show and return to normal Playback mode, press the BACK button. R Chapter 4 pass 3 Using the Option Menu This menu allows you to install, use, or delete optional programs available for use with your camera. Access the LCD monitor menus and select the Option menu as described on page 60. The names of any programs already installed in your camera will appear on the menu, along with an Add/Delete command, which you can use to install programs from a memory card or delete programs from your camera. To use an installed optional program, press the SELECT button then press the or button to select the optional program you want to use. Press the SELECT button again to open the program. Use the Add/Delete command to copy a program from a CompactFlash memory card to your camera, or to delete an optional program from your camera. Follow these steps: Note: You can also upload optional programs to your camera from your computer. See page 78 for instructions. Using the LCD Monitor Menus 68 4 Poppy Rev.B/TCAT A5 size 97/09/18 1. If there are any photos in the camera’s internal memory, transfer the ones you want to your computer or to a CompactFlash Card, then erase all the photos from the camera. c Caution: If any images are left in the camera’s memory when you upload an optional program, the camera may not work properly. 2. Insert the memory card into your camera. With the Option menu selected, press the SELECT button then press the or button to select Add/Delete. 2. Press the SELECT button, then use the to select Add or Delete. or button R Chapter 4 pass 3 4. Press the SELECT button to install or delete the program and return to the Option menu; press the BACK button to return to the Option menu without installing or deleting the program. Using the Language Menu With this menu you can select the language used to display camera information on the LCD screen. Depending on the country, you can choose English, Japanese, French, German, Italian, Portuguese, or Spanish. The current setting is highlighted. To select a different language, press the SELECT button until the language you want is highlighted. Press BACK to return to the Playback mode. 3. Press the SELECT button. If you selected Add, the camera starts installing the program. A message appears asking you to confirm that you want to install the program. If you selected Delete, a list of the programs installed in your camera appears. Use the or button to choose the program you want to delete, then press the SELECT button. A message appears asking you to confirm that you want to delete the program. Using the LCD Monitor Menus 69 4 Proof Sign-off: Yano Norum _______ _______ _______ Poppy Rev.B/TCAT A5 size 97/09/18 R Chapter 5 pass 4 Chapter 5 Using the Uploader Utilities EPSON Photo PC 600 comes with two uploader utility programs that allow you to upload images and optional programs from your computer to your camera. This chapter explains how, including: Uploading images to the camera Uploading optional programs Uploading Images to the Camera The EPSON Photo File Uploader software included on the CD-ROM that came with your camera allows you to convert any JPEG or BMP image to EPSON Photo file format and upload it to your camera or to a flash memory card. You can also use this software to make and save “screen captures” of everything displayed on the computer screen. Use this feature to turn any of the documents you create, for example PowerPoint presentations, into image files that you can upload to the camera or to a memory card. You can upload images in 640 x 480 pixel, 1024 x 768 pixel, or 1024 x 384 pixel sizes. Note: EPSON Photo File Uploader automatically converts images from their original size to whichever of these three sizes you choose. Using the Uploader Utilities 70 5 Poppy Rev.B/TCAT A5 size 97/09/18 To use EPSON Photo File Uploader, you need to install it in your computer along with the EPSON Photo!2 software. If you have not yet installed these programs, do so now, following the instructions on page 17. R Chapter 5 pass 4 2. Open your EPSON Photo File Uploader program. The EPSON Photo File Uploader window appears with the Upload To Camera menu displayed. Uploading images from your PC Follow these steps to upload images to your camera from PCs running Windows 3.1, Windows 95, or Windows NT versions 3.51 or 4.0: 1. Make sure the camera is connected to the computer, and that both the computer and the camera are turned on. Also make sure EPSON Photo!2 is not open and the LCD monitor is turned off. 5 3. Select a file type from the File Type list. From the Folder list, double-click the folder containing the images you want to upload. Note: To upload images from a network drive, you may need to map the drive before opening EPSON Photo File Uploader. Using the Uploader Utilities 71 Poppy Rev.B/TCAT A5 size 97/09/18 4. Select the images you want to upload in the File Name list. Then click the -> button. If you want to upload all the images in the list at once, simply click the >> button. R Chapter 5 pass 4 5. For each file in the Selected Files List, select an image size from the Image Size box. The selected files appear in the Selected Files List in the order they will be uploaded. If you want to change your selection, click the <- button to remove selected files or click the << button to remove all the files from the Selected Files list. If you want to rearrange the uploading order, select the image you want to rearrange, then click the ↑ or ↓ Sort arrows. 5 During the uploading process, EPSON Photo File Uploader converts your files to EPSON Photo file format with the image sizes you specified. If you want to save copies of the converted files on your computer, click the Save file to checkbox before uploading the photos. Click Browse, then select the folder where you want to save the files. Click OK. The folder you selected is displayed to the right of the Browse button. Using the Uploader Utilities 72 Poppy Rev.B/TCAT A5 size 97/09/18 Note: If you want to preview a selected image and confirm its size, click the Preview checkbox. 6. Click the Start button. EPSON Photo!2 opens with the Folder menu displayed. The images you want to upload appear in the image selection window. 7. Click the Select All button to select all the images, or select individual images by clicking the thumbnails in the image selection window. R Chapter 5 pass 4 Uploading images from your Macintosh Follow these steps to upload images to your camera from your Macintosh: 1. Make sure the camera is connected to the computer, and that both the computer and the camera are turned on. Also make sure EPSON Photo!2 is not open and the LCD monitor is turned off. 2. Double-click the EPSON Photo File Uploader icon. The EPSON Photo File Uploader window appears. 8. Click the Upload Photos button. The Upload Photos dialog box appears. Click the Camera radio button to upload the images to your camera, or click the Compact Flash Memory Card radio button to upload the images to a compact flash card installed in your computer; then click OK. The images are uploaded to the destination you selected. 5 If you clicked the Save file to checkbox in the EPSON Photo File Uploader window, the converted images are also saved to the folder you specified. Using the Uploader Utilities 73 Poppy Rev.B/TCAT A5 size 97/09/18 3. Click the Add button. The Select Files dialog box appears. Double-click the folder containing the images you want to upload, then select each file you want to upload and click the Select button. R Chapter 5 pass 4 4. For each file in the Selected Files List, select an image size from the Image Size box. 5 When you finish selecting image files, click Done to close the Select Files dialog box. The selected images appear in the Selected Files List in the order they will be uploaded. If you want to remove files from this list, select the files and click the Remove button. During the uploading process, EPSON Photo File Uploader converts your files to EPSON Photo file format with the image sizes you specified. Using the Uploader Utilities 74 Poppy Rev.B/TCAT A5 size 97/09/18 If you want to save copies of the converted files on your computer, click the Save file to checkbox before uploading the photos. Click Browse, then select the folder where you want to save the files. Click OK. The folder you selected is displayed to the right of the Browse button. Note: If you want to preview a selected image and confirm its size, click the Preview checkbox. 5. Click the Upload button. EPSON Photo!2 opens with the Folder menu displayed. The images you want to upload appear in the image selection window. 6. Click the Select All button to select all the images, or select individual images by clicking the thumbnails in the image selection window. 7. Click the Upload Photos button. The Upload Photos dialog box appears. Click the Camera radio button to upload the images to your camera, or click the Flash Memory Card radio button to upload the images to a flash memory card installed in your Macintosh; then click OK. The images are uploaded to the destination you selected. R Chapter 5 pass 4 Making Screen Copies If you want to upload a document to your camera that is not saved as a standard image file, you can turn the document into an image file by making a copy, or "screen capture," of your computer desktop with the document open on it. Windows users can make screen captures from within the EPSON Photo File Uploader utility; Macintosh users need to use the standard Macintosh screen shot function. For Windows users 5 Follow these steps to make screen captures: 1. Make sure the camera is connected to the computer, and that both the computer and the camera are turned on. Also make sure EPSON Photo!2 is not open and the LCD monitor is turned off. 2. Open your EPSON Photo File Uploader program. The EPSON Photo File Uploader window appears. If you clicked the Save file to checkbox in the EPSON Photo File Uploader window, the converted images are also saved to the folder you selected. Using the Uploader Utilities 75 Poppy Rev.B/TCAT A5 size 97/09/18 3. Click the Screen Capture menu tab. The Screen Capture menu appears. R Chapter 5 pass 4 5. Specify the key combination you want to use for screen captures using the Hot Key Settings box. Click the ALT, CTRL, or SHIFT checkbox, then select a key from the hot key list. The default hot key is the F5 key. 6. Click Start to register the key combination. When the key combination is registered, the Start button will change to a Stop button. The key combination remains registered only for the current session. Pressing the Stop button erases the hot key combination. 7. Start your application and open the file you want to capture, then press the hot key combination you selected. 4. From the Folder list, double-click the folder where you want to save the screen capture. If you need to create a new folder for the images, click the New Folder button. Note: To select a folder located on a network drive, you may need to map the drive before opening EPSON Photo File Uploader. Using the Uploader Utilities You can make as many screen captures as you’d like; simply open each file you want to capture and press your screen capture key combination again. Note: File names are created automatically. 8. When you are finished making screen captures, close your application and click the Stop button in the Screen Capture menu. The key combination you selected is erased. 76 5 Poppy Rev.B/TCAT A5 size 97/09/18 If you want to upload your screen captures to the camera right away, click the Upload To Camera menu tab. The screen capture files appear in the File Name list. Follow the uploading directions from step 4 on page 72 to upload the screen captures. For Macintosh users EPSON Photo File Uploader for the Macintosh does not have a screen shot feature. However, you can make screen shots using your Macintosh system software, then use EPSON Photo File Uploader to upload the screen shots to your camera. The instructions below are representative of many Macintosh computers, but the procedure may be different depending on your Macintosh. See your computer manual for detailed instructions on making screen shots. R Chapter 5 pass 4 2. Open the EPSON Photo!2 folder and double-click the EPSON Photo File Uploader icon. The EPSON Photo File Uploader window appears. 3. Start your application and open the file you want to capture, then press SHIFT+COMMAND+3 on your computer keyboard. Your Macintosh names and saves the screen shot on your hard drive. You can make as many screen shots as you’d like; simply repeat this step. 4. When you are finished making screen shots, close your application. To upload your screen shots to the camera, click the EPSON Photo File Uploader window to make it active, then follow the uploading instructions from step 3 on page 74. Follow these steps to make screen shots of your Macintosh desktop: 1. Make sure the camera is connected to the computer, and that both the computer and the camera are turned on. Also make sure EPSON Photo!2 is not open and the LCD monitor is turned off. Using the Uploader Utilities 77 5 Poppy Rev.B/TCAT A5 size 97/09/18 Uploading Programs to the Camera The EPSON Photo!2 Program Uploader utility allows you to upload up to five optional programs from your PC or Macintosh to your PhotoPC 600. Note: ❏ When you install your EPSON Photo!2 software, EPSON Photo!2 Program Uploader is installed automatically. ❏ When uploading optional programs, the number of pictures you can store in your camera’s internal memory decreases. ❏ You can also upload optional programs from CompactFlash memory cards. See page 68 for instructions. R Chapter 5 pass 4 Uploading programs Follow these steps to upload optional programs to the camera: 1. Make sure the camera is connected to the computer, and that both the computer and camera are turned on. Also make sure that EPSON Photo!2 is not open and the LCD monitor is turned off. 2. If there are any photos in the camera’s internal memory, transfer the ones you want to you computer or to a CompactFlash Card, then erase all the photos from the camera. c Caution: If any images are left in the camera’s memory when you upload an optional program, the camera may not work properly. 3. Click or double-click the EPSON Photo!2 Program Uploader icon in the EPSON Photo!2 program group or folder. The EPSON Photo!2 Program Uploader window appears. Note: If the camera is not connected to the computer, an error dialog box appears. Check the cable connections and make sure the camera is turned on. If necessary, adjust the communication port and speed settings in this dialog box. Using the Uploader Utilities 78 5 Poppy Rev.B/TCAT A5 size 97/09/18 4. Click the Browse button to select the folder that contains the programs you want to upload. 5. Select the programs you want to upload from the Applications in Folder list. 6. Click the Upload button. EPSON Photo!2 Program Uploader begins uploading the selected programs. When the uploading process is finished, the uploaded programs appear in the Applications in Camera list. Now you can use the programs in your camera. See page 68 for instructions on opening the programs. Removing programs Follow these steps to remove optional programs from the camera: R Chapter 5 pass 4 2. Click or double-click the EPSON Photo!2 Program Uploader icon in the EPSON Photo!2 program group or folder. The EPSON Photo!2 Program Uploader window appears. Note: If the camera is not connected to the computer, an error dialog box appears instead of the confirmation message. Check the cable connections and make sure the camera is turned on. If necessary, adjust the communication port and speed settings in this dialog box. 3. Click the programs you want to remove in the Applications in Camera list. 4. Click the Remove button. A confirmation message appears. 5. Click OK. The selected programs are removed from the camera and from the Applications in Camera list. Note: You can also remove programs by using the Option menu in the camera’s LCD monitor menus. See page 68 for instructions. 1. Make sure the camera is connected to the computer, and that both the computer and camera are turned on. Also make sure that EPSON Photo!2 is not open and the LCD monitor is turned off. Using the Uploader Utilities 79 5 Proof Sign-off: Yano Norum Poppy Rev.B/TCAT _______ _______ _______ A5 size 97/09/18 R Chapter 6 pass 4 Chapter 6 Camera Options A variety of options are available that expand the flexibility of your PhotoPC 600. Optional CompactFlash Cards allows you to increase the camera’s storage capacity. If you use the optional PCMCIA adapter, you can access images stored on CompactFlash Cards directly from your computer. The optional AC Adapter helps you save battery power, particularly when previewing and transferring pictures to your computer. This chapter describes the following: Using optional CompactFlash Cards Using CompactFlash Memory Cards PhotoPC 600 comes with 4MB of internal memory, which holds up to approximately 8 super fine quality pictures (1024 x 768 pixels), approximately 18 fine quality pictures (1024 x 768 pixels), or approximately 56 standard quality pictures (640 x 480 pixels). You can increase the camera’s storage capacity as described in the following table by installing an optional 4MB (B808311) or 15MB (B808301) CompactFlash Card: 4MB Internal Memory Using the optional PCMCIA adapter Using the AC Adapter 15MB CompactFlash Card 238 Standard 56 63 Fine 18 21 79 8 9 35 Super fine Camera Options 4MB CompactFlash Card 80 6 Poppy Rev.B/TCAT A5 size 97/09/18 Note: EPSON recommends use of EPSON CompactFlash Cards only. Other memory cards may be incompatible with the EPSON PhotoPC 600. Also, if your computer is equipped with a Type II PCMCIA memory card slot, you can access images stored on memory cards directly from your computer by using the optional PCMCIA adapter (B867041). R Chapter 6 pass 4 3. Loop the card slot cover string around the hand strap holder. 1 2 4. Align the tabs on the back of the cover with the installed memory card, as shown below. Installing a CompactFlash Card Follow these steps to install a memory card in the camera: 1. Make sure the camera and the monitor mode switch are turned off. 2. Insert the card all the way into the memory card slot, as shown below. 6 5. Press the cover onto the memory card so that the memory card slot is completely sealed. Note: Always attach the card slot cover to your camera when you use optional CompactFlash Cards. arrow mark Camera Options 81 Poppy Rev.B/TCAT A5 size 97/09/18 When a memory card is installed, photos you take are stored in the card’s memory rather than the camera’s internal memory. The number of pictures you can store in the memory card appears in brackets on the camera’s display panel. R Chapter 6 pass 4 3. Slide the lever on the bottom of the camera to eject the memory card. 4. Remove it by hand. 2 When a memory card is installed, you may notice a delay between the time you press the shutter button and when the camera beeps. To avoid blurring, make sure to hold the camera still until the camera beeps. c Caution: Never remove the card while the camera is accessing it. Data in the card may be lost or damaged. Removing a CompactFlash Card Follow these steps to remove a memory card from the camera: 1. Make sure the camera and the monitor mode switch are turned off. 2. Remove the card slot cover. Camera Options 1 c Caution: ❏ Never remove the card while the camera is accessing it. Data in the card may be lost or damaged. 6 ❏ Avoid using or storing the card in dusty places, in direct sunlight, or in places that become extremely hot or humid. Using the optional PCMCIA adapter The optional PCMCIA adapter allows you to access images stored on CompactFlash Cards directly from your computer. To use this adapter, your computer must be equipped with a Type II PCMCIA memory card slot. 82 Poppy Rev.B/TCAT A5 size 97/09/18 Macintosh users must enable the PC Exchange extension software to access files on CompactFlash Cards. See your Macintosh user’s manual for more information. Follow these steps to use the optional adapter: 1. Insert the memory card into the optional adapter all the way, as shown below. 2. Insert the adapter into your computer’s Type II PCMCIA slot. Chapter 6 pass 4 Now you can access the photos in the memory card from your computer. Using the AC Adapter The AC Adapter (B86703✽) allows you to connect your PhotoPC 600 to a standard electrical outlet. This is especially useful when you are transferring pictures and operating the camera from your computer. The adapter powers the camera, but does not charge the batteries. In some locations the AC adapter comes with a separate AC power cable. Note: The asterisk in the product number (B86703✽) is a substitute for the last digit, which varies by country. w Camera Options R Warning: Use only the AC adapter designed for PhotoPC 600. Use of any other adapter could cause fire, electrical shock, or injury. Do not use the AC power cable and the adapter for any purpose other than powering your PhotoPC 600. If the AC plug doesn’t fit your outlet, have a proper outlet installed by a qualified electrician. To avoid radiation danger, do not expose or remove the ferrite core. 83 6 Poppy Rev.B/TCAT A5 size 97/09/18 To avoid losing any images or settings, make sure the camera is finished processing and is turned off before you connect or disconnect the AC adapter. Then follow these steps: R Chapter 6 pass 4 3. Plug the adapter cable into the DC port on the camera. 1. If your AC adapter has a separate AC power cable, push the cable connector firmly into the AC inlet. 4. Plug the AC adapter into an electrical outlet. c 2. Open the connector cover located on the side of the camera. Caution: Place the camera and the AC adapter near an electrical outlet where the plug can be easily unplugged. Note for French-speaking users: Placez l’appareil photographique et ses options près d’une prise de courant où la prise peut être débranchée facilement. connector cover Avoid electrical outlets controlled by wall switches or automatic timers. Also, avoid outlets on the same circuit as large motors or other appliances that can cause fluctuations in line voltage. Camera Options 84 6 Poppy Rev.B/TCAT A5 size 97/09/18 For United Kingdom users - safety information w Warning: This appliance must be earthed. Refer to rating plate for voltage and check that the appliance voltage corresponds to the supply voltage. R Chapter 6 pass 4 The brown wire must be connected to the terminal in the plug marked with the letter L. If damage occurs to the plug, replace the cord set or consult a qualified electrician. Replace fuses only with a fuse of the correct size and rating. IMPORTANT: The wires in the mains lead fitted to this appliance are coloured in accordance with the following code: Green and yellow - Earth Blue - Neutral Brown - Live 6 If you have to fit a plug: As the colours of the mains lead of this appliance may not match coloured markings used to identify the terminals in a plug, please proceed as follows: The green and yellow wire must be connected to the terminal in the plug which is marked with the letter E or the Earth symbol ( ). G The blue wire must be connected to the terminal in the plug marked with the letter N. Camera Options 85 Proof Sign-off: Yano Norum Poppy Rev.B/TCAT _______ _______ _______ A5 size 97/09/18 R Chapter 7 pass 2 Chapter 7 Maintenance and Troubleshooting Your PhotoPC 600 is easy to take care of, and any problems you may have are easy to solve. See the following section for guidance on cleaning the camera. For solutions to common camera problems, see the section beginning on page 87. ❏ If the camera is jarred while processing an image, the camera may fail to record the image in its memory. Cleaning the camera ❏ Use a clean, dry cloth to keep the camera free of dust. Caring for the Camera Your PhotoPC 600 camera requires only the most basic care. Before you do any maintenance procedures on the camera, be sure to read the Safety Instructions in the Introduction. Then follow these guidelines: Caution Handle the camera gently and avoid subjecting it to strong shocks or vibrations. If the camera is dropped or otherwise jarred, the following errors may occur even if the camera is not permanently damaged. ❏ The camera’s date and time settings may be lost. Maintenance and Troubleshooting ❏ Do not use harsh or abrasive cleaners. ❏ To clean the lens, first blow off any loose dust or dirt. Then breathe on the lens and wipe off all moisture with a soft, lint-free cloth or lens cleaning tissue. ❏ To avoid scratching the lens, be careful not to press too hard. ❏ If necessary, clean the battery contacts with a dry cloth. Storing the camera ❏ Make sure the camera’s power is off and keep your camera in its case when you are not using it. 86 7 Poppy Rev.B/TCAT A5 size 97/09/18 ❏ When the camera is not used for long period of time, remove the batteries and store them at a low temperature in a dry location. This prevents camera damage from battery leaks or corrosion. R Chapter 7 pass 2 The camera may have shut off automatically. Close and open the lens cover to turn the power back on. Do not store the camera in the following locations: Check the batteries and make sure they are installed correctly. Replace the batteries if necessary, following the instructions on page 15. ❏ Where it will be exposed to direct sunlight, for example, on a car dashboard If you are using the AC adapter, make sure it is plugged into a working outlet. ❏ Near sources of bright light or high humidity ❏ Near heat sources or in a closed car ❏ In areas of excessive dirt or dust ❏ Where it will be exposed to strong vibrations or magnetic fields Camera Problems Before you call for help, check this list of problems and possible solutions. The camera has no power. Make sure the lens cover is open all the way. The power comes on automatically when the lens cover is opened fully. Maintenance and Troubleshooting You cannot take a picture with the camera. The flash may be recharging. Wait until the status light beside the viewfinder turns green, and try again. The camera may be connected to your computer. When it is connected, you cannot use any of the controls on the camera itself. See page 53 for instructions on taking pictures from your computer. The camera’s memory may be full. Check the picture counter on the display panel. Erase some pictures using the LCD monitor, or transfer the pictures to your computer and then erase them. Note: ❏ To use the LCD monitor to delete pictures, see page 63. To use your computer to transfer and erase pictures, see page 44. 87 7 Poppy Rev.B/TCAT A5 size 97/09/18 ❏ Installing an optional CompactFlash Card allows you to take more pictures without deleting any images currently in the camera. See page 80 for details. The flash does not work. Make sure the flash is set to Automatic or Forced Flash. See page 29 for more information on setting the flash. Check the batteries and make sure they are installed correctly. Replace the batteries if necessary, following the instructions on page 15. Nothing appears on the LCD screen in View mode. Make sure the power is on. It comes on automatically when the lens cover is opened fully. Check the batteries and make sure they are installed correctly. Replace the batteries if necessary, following the instructions on page 15. Nothing appears on the LCD screen in Playback mode. Check the batteries and make sure they are installed correctly. Replace the batteries if necessary, following the instructions on page 15. Maintenance and Troubleshooting R Chapter 7 pass 2 The image on the LCD monitor screen is too dark, or is not visible at all. Adjust the the brightness of the LCD screen if necessary, following the instructions on page 61. The EPSON Photo!2 Setup menu appears instead of the Camera menu when you connect the camera to your computer and open EPSON Photo!2. Make sure the cable is connected correctly, as described on page 36. Make sure the camera is turned on and the batteries have enough power. Check the serial port settings on the Setup menu of your EPSON Photo!2 software. You may need to change the Port and Speed serial connection settings to Auto. Make sure the port to which your camera is connected is properly configured and that the Base I/O port address and the Interrupt Request Number (IRQ) assigned to the port are not in conflict with other devices. If you are a Macintosh user and the camera is sharing a serial port with another device, make sure AppleTalk is turned off. 88 7 Poppy Rev.B/TCAT A5 size 97/09/18 An error message appears when you are using EPSON Photo!2 with the camera connected to the computer. Make sure the cable is connected correctly, as described on page 36. Make sure the camera is turned on and the batteries have enough power. Check the serial port settings on the Setup menu of your EPSON Photo!2 software. You may need to change the Port and Speed serial connection settings to Auto. Avoid opening or working with applications unrelated to the photo transfer process while the camera and computer are communicating. Note: When the camera and computer are communicating, star icons move across the camera’s display panel. Nothing appears on the TV monitor when the camera is connected to your television. Make sure the video cable is connected correctly, as described on page 34. R Chapter 7 pass 2 Make sure the television is switched to the video mode. Make sure the camera’s batteries have enough power. Your camera may not be compatible with local television broadcasting standards. Cameras purchased in countries using the NTSC standard can only be used with NTSC televisions, and cameras purchased in countries conforming to the PAL standard can only be used with PAL televisions. Note: Also check your television user’s manual for possible solutions. You cannot take a picture with the camera when an optional CompactFlash Card is installed. Check your camera’s LCD monitor for messages. If you get a message indicating that you need to format or eject the card, follow the instructions. Your card’s memory may be full. Check the picture counter on the display panel. If the card is full, change to another card, erase some pictures using the LCD monitor, or transfer the pictures to your computer and then erase them. Make sure the LCD monitor is switched to the Playback mode. Maintenance and Troubleshooting 89 7 Poppy Rev.B/TCAT A5 size 97/09/18 Picture Problems If you are not satisfied with the pictures you get from PhotoPC 600, you may need to adjust some of the camera settings. Or maybe you need to brush up on your photography techniques. Read the suggestions listed below and give them a try. Your pictures display poor image quality on the screen or when you print them out. PhotoPC 600 captures images in 24-bit color (16 million colors). Your pictures will not display maximum image quality if your monitor or your computer’s video controller does not support this color depth. You may need to upgrade your system to achieve the best possible image quality. If your pictures look better on the screen than when you print them out, you may need to upgrade your printer. An EPSON color ink jet printer, for example, will provide excellent image quality. R Chapter 7 pass 2 Make sure the subject is not moving. Be careful to hold the camera steady while the image is being captured. Make sure your flash is not set to Flash Off. Your picture is too dark (underexposed). You may need to use the flash. Set the flash to Automatic or Forced Flash, following the instructions on page 29. If you are using the flash, make sure your subject is within the range of 20 cm to 2.4 m. Use an image-editing program to adjust the picture’s brightness and contrast. If you are using macro mode to take a close-up photo, make sure to provide adequate lighting for your subject, since the camera’s aperture is automatically set to its smallest setting when in this mode. Your picture is blurry or out of focus. Make sure your subject is within the camera’s range. You should be at least 50 cm away to take a picture without the flash, and 20 cm to 2.4 m away to take a picture with the flash. You can take a picture as close as 20 cm in macro mode. Maintenance and Troubleshooting 90 7 Poppy Rev.B/TCAT A5 size 97/09/18 Your picture is too light (overexposed). If you are using the forced flash setting, it may be too bright. Try setting the flash to Automatic. See page 29. If you are facing a bright light source, you may need to shoot your picture from a different angle. Use an image-editing program to adjust the picture’s brightness and contrast. Part of your picture is missing. Make sure you are not blocking the lens with your finger, hand strap, clothing, or other object. A horizontal or vertical red line appears on your picture. Red lines are caused by glare. Avoid photographing very shiny surfaces that reflect a glare of light into your lens. The wrong date and/or time are displayed on your camera. Whenever you change batteries in the camera you need to reset the clock. See page 60 to use the LCD monitor to set the clock, or see page 57 to set the clock from your computer. Maintenance and Troubleshooting R Chapter 7 pass 2 If the camera has been subjected to a strong shock or viration the camera’s date and time settings may be lost. The colors in your picture do not look right. When you take pictures under certain artificial lighting conditions, the colors may be slightly distorted. You can use image-editing software to adjust the colors. Your pictures do not look as good as they used to. Your camera’s lens may be dirty or dusty. Try cleaning it following the instructions on page 86. The area captured in the photo is different from what you saw in the viewfinder. Take care to look straight through the viewfinder. When taking photos in macro mode, we recommend you to use the LCD monitor rather than the viewfinder to frame your subject. Keep in mind that the area visible through the viewfinder is slightly smaller than the area captured in the actual photo. 91 7 Proof Sign-off: Yano Norum _______ _______ _______ Poppy Rev.B/TCAT A5 size 97/09/19 R Chapter 8 pass 2 Chapter 8 Using the Direct Print Kit The Direct Print Kit is software and a cable which allow you to print images directly from your PhotoPC 600 on an EPSON Stylus Photo inkjet printer. Preparing to Use the Direct Print Kit You need the following items to use the Direct Print Kit. The software includes the following features: Digital camera: EPSON PhotoPC 600 ❏ Color, monochrome, blue, and sepia printing Printer: EPSON Stylus Photo ❏ Standard, Album, Index (contact sheet), and Sticker printing modes Printer cable: Apple System Peripheral-8 cable (8-pin mini-circular connector) This chapter explains how to print directly from your PhotoPC 600, including: Preparing to Use the Direct Print Kit Connecting Your Camera to the Printer Paper Types Using the Direct Print Kit Note: We also recommend using the optional AC adapter (B86703✽) to make sure that the batteries do not run out while printing. Before you can print directly from your camera, you need to upload the Direct Print Kit software to your PhotoPC 600. See page 78 for instructions on how to upload programs to the camera. 8 LCD Screen and Display Panel Messages Printed Image Dimensions Using the Direct Print Kit 92 Poppy Rev.B/TCAT A5 size 97/09/19 Connecting Your Camera to the Printer R Chapter 8 pass 2 3. Open the connector cover on the side of the camera. Follow these steps to connect the camera to the EPSON Stylus Photo printer. connector cover 1. Make sure that both the camera and the printer are turned off. 2. Connect one end of the interface cable to the serial connector on the back of the printer. Note: Use the Apple System Peripheral-8 cable (8-pin mini-circular connector) cable. Do not use the PC connection cable or Macintosh adapter cable that also came with the camera. 4. Depending on the type of serial cable you have, line up either the arrow or the flat surface of the cable connector with the mark on the camera’s serial port. Then insert the connector. c Caution: Be sure to position the cable correctly before pushing it into the connector. Otherwise, the cable’s pins may be damaged. 8 mark flat surface arrow Using the Direct Print Kit 93 Poppy Rev.B/TCAT A5 size 97/09/19 R Chapter 8 pass 2 Note: ❏ The availability of special media varies by country. Paper Types You can use any of the paper types listed below. ❏ Ink jet printers are particularly sensitive to the condition of your paper. Keep unused paper in its original packaging and store it in a cool, dark place. Photo Quality Ink Jet Paper Use this paper for standard photo quality printing. EPSON Photo Quality Ink Jet Paper (A4) EPSON Photo Quality Ink Jet Card (A6) EPSON Photo Quality Ink Jet Paper (Letter) S041061 S041026 S041054 S041062 Photo Quality Glossy Paper Use this paper for photo quality glossy prints. EPSON Photo Quality Glossy Paper (A4) EPSON Photo Quality Glossy Paper (Letter) EPSON Photo Paper (4 × 6 in.) S041126 S041124 S041134 Photo Quality Glossy Film 8 Use glossy film to get high gloss photo quality images. EPSON Photo Quality Glossy Film (A4) EPSON Photo Quality Glossy Film (A6) EPSON Photo Quality Glossy Film (Letter) EPSON Photo Stickers (A6) Using the Direct Print Kit S041071 S041107 S041072 S041144 94 Poppy Rev.B/TCAT A5 size 97/09/19 Using the Direct Print Kit Once you have uploaded the Direct Print software to your camera, follow the instructions in this section to access the software and print out images. Accessing the Direct Print program 1. Slide the monitor mode switch on your camera to Playback. 2. Press the SELECT button on the back of the camera. Menu icons appear at the top of the LCD screen with the currently selected menu highlighted in orange. 3. Press the or button until the Option menu is highlighted, then press the SELECT button. 4. Press the or button until Direct Print is highlighted. Then press the SELECT button to display the Direct Print modes. To print, see the instructions in the next section for the print mode you want to use. Using the Direct Print Kit R Chapter 8 pass 2 Printing your images The Direct Print Kit features the following print modes: ❏ Standard The Standard Print mode allows you to print a single image on each sheet. In this mode you can select the paper size and type, layout (printing position), color, number of copies, and whether to print the time and date that the photo was taken. See page 96 for instructions on printing with this mode. ❏ Album Lets you to print up to three images on A4 or letter size paper, or up to two images on A6 size paper. The options in this mode allow you to select the paper size and type, and whether to print the time and date that the photo was taken. See page 97 for instructions on printing with this mode. ❏ Index (contact sheet) The index Print mode allows you to print A4, Letter, or A6 size contact sheets consisting of small “thumbnail” images of all the photos in your camera. In this mode you can select the paper size and type, and whether to print the date that the photos were taken. See page 98 for instructions on printing with this mode. 95 8 Poppy Rev.B/TCAT A5 size 97/09/19 ❏ Sticker The Sticker Print mode allows you to print on EPSON Photo Stickers. This mode prints 16 small copies of the image you select onto each Photo Sticker sheet. See page 99 for instructions on printing with this mode. To print, access the Direct Print program as described on page 95, then follow the instructions below for the print mode you want to use. Standard Print mode Follow these steps to print using the Standard Print mode: R Chapter 8 pass 2 3. After selecting an image, press the SELECT button. The Standard Print options and current settings appear on the screen. 4. To change a setting, press the or button to select the option you want to change, then press the SELECT button. The settings for that option appear on the screen. 5. Press the or button to select a setting, then press the SELECT button. Note: The settings available for some options depend on the type of image selected. For example, A4 and Letter paper size settings are only available for panorama photos. 1. Access the Direct Print program as described on page 95, then press the or button to highlight Standard Print. Press the SELECT button. Thumbnail images of the first nine photos in your camera appear with the currently selected image framed in blue. 6. Connect the camera to the printer as described on page 93, then turn on the printer and load the size and type of paper you selected. For paper loading instructions, see your printer User’s Guide. 2. Press the or button until the image you want to print is framed in blue. 7. When you are ready to start printing, press the button to select Print. To see an enlarged view of a selected image, press the photo format button to the left of the LCD screen. To return to the thumbnail view, press any button on the camera. Using the Direct Print Kit or 8. Press the SELECT button. The camera starts sending the image data to the printer. 96 8 Poppy Rev.B/TCAT A5 size 97/09/19 While the camera is sending data, the LCD screen goes blank and star icons move across the display panel on the top of the camera. When printing starts, the display panel returns to normal. Note: To cancel printing, hold down the camera’s BACK button for about three seconds. A message stating that printing is canceled appears on the LCD screen for five seconds, then the screen returns to the Direct Print menu. The printer stops printing and ejects the paper. 9. When printing is finished, the LCD screen returns to the Direct Print menu. When you finish printing, close the Direct Print program by pressing the BACK button. Then slide the monitor mode switch to OFF and turn off the printer. Album Print mode Follow these steps to print using the Album Print mode: 1. Access the Direct Print program as described on page 95, then press the or button to highlight Album Print. Press the SELECT button. Thumbnail images of the first nine photos in your camera appear with the currently selected image framed in blue. Using the Direct Print Kit R Chapter 8 pass 2 2. Press the or button until the first image in the series you want to print is framed in blue. Then press the SELECT button. To see an enlarged view of a selected image, press the photo format button to the left of the LCD screen. To return to the thumbnail view, press any button on the camera. 3. Press the or button to select the last image in the series you want to print, then press the SELECT button. The Album Print options and current settings appear on the screen. Note: You can print up to three images on an A4 or letter size sheet, or up to two images on an A6 size sheet. 4. To change a setting, press the or button to select the option you want to change, then press the SELECT button. The settings for that option appear on the screen. 5. Press the or button to select a setting, then press the SELECT button. 97 8 Poppy Rev.B/TCAT A5 size 97/09/19 6. Connect the camera to the printer as described on page 93, then turn on the printer and load the size and type of paper you selected. If a message telling you how many sheets to load appears at the bottom of the Album Print options screen, be sure to load at least that many sheets. For paper loading instructions, see your printer User’s Guide. 7. When you are ready to start printing, press the button to select Print. or 8. Press the SELECT button. The camera starts sending the image data to the printer. While the camera is sending data, the LCD screen goes blank and star icons move across the display panel on the top of the camera. When printing starts, the display panel returns to normal. Note: To cancel printing, hold down the camera’s BACK button for about three seconds. A message stating that printing is canceled appears on the LCD screen for five seconds, then the screen returns to the Direct Print menu. The printer stops printing and ejects the paper. 9. When printing is finished, the LCD screen again displays thumbnail images of the photos in your camera in Album Print mode. Using the Direct Print Kit R Chapter 8 pass 2 To print a new group of photos, follow these instructions from step 2. To finish printing, close the Direct Print program by pressing the BACK button. Then slide the monitor mode switch to OFF and turn off the printer. Index Print mode Follow these steps to print using the Index Print mode: 1. Access the Direct Print program as described on page 95, then press the or button to highlight Index Print. Press the SELECT button. Thumbnail images of the first nine photos in your camera appear with the currently selected image framed in blue. 2. Press the or button until the first image in the series you want to print is framed in blue. Then press the SELECT button. To see an enlarged view of a selected image, press the photo format button to the left of the LCD screen. To return to the thumbnail view, press any button on the camera. 3. Press the or button to select the last image in the series you want to print, then press the SELECT button. The Index Print options and current settings appear on the screen. 98 8 Poppy Rev.B/TCAT A5 size 97/09/19 4. To change a setting, press the or button to select the option you want to change, then press the SELECT button. The settings for that option appear on the screen. 5. Press the or button to select a setting, then press the SELECT button. 6. Connect the camera to the printer as described on page 93, then turn on the printer and load the size and type of paper you selected. If a message telling you how many sheets to load appears at the bottom of the Album Print options screen, be sure to load at least that many sheets. For paper loading instructions, see your printer User’s Guide. 7. When you are ready to start printing, press the button to select Print. or 8. Press the SELECT button. The camera starts sending the image data to the printer. While the camera is sending data, the LCD screen goes blank and star icons move across the display panel on the top of the camera. When printing starts, the display panel returns to normal. Using the Direct Print Kit R Chapter 8 pass 2 Note: To cancel printing, hold down the camera’s BACK button for about three seconds. A message stating that printing is canceled appears on the LCD screen for five seconds, then the screen returns to the Direct Print menu. The printer stops printing and ejects the paper. 9. When printing is finished, the LCD screen returns to the Direct Print menu. When you finish printing, close the Direct Print program by pressing the BACK button. Then slide the monitor mode switch to OFF and turn off the printer. Sticker Print mode Follow these steps to print using the Sticker Print mode: 1. Access the Direct Print program as described on page 95, then press the or button to highlight Sticker Print. Press the SELECT button. Thumbnail images of the first nine photos in your camera appear with the currently selected image framed in blue. 2. Press the or or button until the image you want to print is framed in blue. 99 8 Poppy Rev.B/TCAT A5 size 97/09/19 To see an enlarged view of a selected image, press the photo format button to the left of the LCD screen. To return to the thumbnail view, press any button on the camera. 3. After selecting an image, press the SELECT button. The Print option appears on the screen. R Chapter 8 pass 2 6. When printing is finished, the LCD screen returns to the Direct Print menu. When you finish printing, close the Direct Print program by pressing the BACK button. Then slide the monitor mode switch to OFF and turn off the printer. 4. Connect the camera to the printer as described on page 93, then turn on the printer and load EPSON Photo Stickers. See the loading instructions that came with the PhotoStickers. 5. When you are ready to start printing, press the SELECT button. The camera starts sending the image data to the printer. While the camera is sending data, the LCD screen goes blank and star icons move across the display panel on the top of the camera. When printing starts, the display panel returns to normal. 8 Note: To cancel printing, hold down the camera’s BACK button for about three seconds. A message stating that printing is canceled appears on the LCD screen for five seconds, then the screen returns to the Direct Print menu. The printer stops printing and ejects the paper. Using the Direct Print Kit 100 Poppy Rev.B/TCAT A5 size 97/09/19 R Chapter 8 pass 2 LCD Screen and Display Panel Messages When printing with the Direct Print Kit, a variety of status messages may appear on the camera’s LCD screen and display panel. For detailed explanations of these messages, see the following tables. LCD screen messages Display panel messages Message Explanation Message Explanation Check Printer Model. The camera is not connected to an EPSON Stylus Photo printer. Connect the camera to an EPSON Stylus Photo printer, then press the SELECT button to begin printing. (If you want to cancel printing, press the BACK button.) E51: Another interface is active The printer is recieving a print job through another interface. When the print job ends, the printer begins printing from the Direct Print Kit automatically. E55: No ink Printing stopped because the printer ran out of ink. Replace the ink cartridges as needed and start printing again from the beginning. (For information about how to replace ink cartridges, refer to your printer User’s Guide.) E56: No paper Load paper into the printer, and then press the printer’s (E) load/eject button to begin printing. (Or press the camera’s BACK button to cancel printing.) Print: SELECT Cancel: BACK Battery is low. Use AC adapter. Battery power is almost out. Connect the camera to the optional AC adapter. Check Printer Connection or Printer Error. Printing stopped because of a printer error. Clear the error, then start printing again from the beginning. (For information about how to handle printer errors, refer to your printer User’s Guide.) Printing Canceled This message appears when you hold down the BACK button for more than 3 seconds while printing. The printer stops printing and ejects the paper. Using the Direct Print Kit 101 8 Poppy Rev.B/TCAT A5 size 97/09/19 R Chapter 8 pass 2 Printed Image Dimensions Standard Print mode Layout setting Paper Size setting Image Dimensions Framed Photo A6 108 × 81 mm Top, Center, Bottom A6/Photo Paper 72 × 54 mm Photo Print Photo Paper 157 × 106 mm Panorama A4/Letter 252 × 93 mm A6/Photo Paper 108 × 40 mm Album Print mode A4/Letter: A6: 108 × 81 mm 72 × 54 mm Index Print mode A4/letter/A6: 36 × 27 mm 8 Sticker Print mode Photo Stickers: Using the Direct Print Kit 26 × 19.5 mm 102 Proof Sign-off: Yano Norum Poppy Rev.B/TCAT _______ _______ _______ A5 size 97/09/18 R Appendix A pass 2 Appendix A Specifications Camera Product type Type Digital still AF camera with LCD monitor CCD 1/3 inch color area CCD (810,000 pixels) LCD monitor 2-inch color LCD monitor (110,000 pixels) Internal memory 4MB (record image data, program memory) Recorded Image Image quality modes Super fine image quality (1024 x 768 pixels, 1024 x 384 pixels) Fine image quality (1024 x 768 pixels, 1024 x 384 pixels) Standard image quality (640 x 480 pixels) Alternative formats Monochrome, macro, digital step zoom (zoom rate 1.0 to 3.0 times), panorama, multi-frame Optical Lens f = 5 mm F2.8 (equivalent to a 36 mm lens on a 35 mm camera) Range 0.5 m to infinity 0.2 m to 0.5 m (macro mode) Data type JPEG (16 million colors, 24 bit) Focus Automatic focus Image size 1024 x 768 pixels, 1024 x 384 pixels (panorama), 640 x 480 pixels Sensitivity Equivalant to ISO 100 Aperture F2.8, F5.6, F11 Specifications A 103 Poppy Rev.B/TCAT A5 size 97/09/18 Shutter Electric iris with mechanical shutter 1/4 second to 1/500 second (flash off mode), 1/30 second to 1/500 second (auto flash and forced flash modes) Exposure control Program auto expose White balance TTL automatic white balance Viewfinder Real-image optical Self timer 10 seconds Appendix A pass 2 Note: ❏ Figures shown here represent storage capacity when optional programs are not installed in the camera’s internal memory. ❏ The number of pictures you can take depends on the complexity of each photo even if the image quality is the same for all the photos. Photo processing time (approximate) LCD monitor off Flash Automatic luminance control flash Flash modes Automatic, forced flash, flash off Flash range 0.2 to 2.4 m Standard 7 seconds LCD monitor on 11 seconds Fine 7 11 Super fine 10 14 LCD monitor photo displaying time (approximate) Functional Time (seconds) Storage capacity Minimum Average Standard 48 53 Fine 16 17 Super fine 6 8 Fine/ monochrome 16 17 Super fine/ monochrome 6 8 Fine/ panorama 32 35 Super fine/ panorama 13 16 Standard 3 Fine 6 Super fine 8~9 Interface Serial interface Video out Specifications R 8-pin mini-DIN, RS-232C-compatible special interface for PC, Macintosh and EPSON printers Communications speed: 19.2 Kbps or higher (max 115.2 Kbps) NTSC (NTSC model) PAL (PAL model) 104 A Poppy Rev.B/TCAT A5 size 97/09/18 Power Sources R Appendix A pass 2 Optional CompactFlash Card 4 AA batteries (single-use alkaline (LR6), single-use lithium (FR6), rechargeable Ni-Cd, or rechargeable Ni-MH) Optional AC Adapter (B86703✻) Battery life* LCD monitor off LCD Monitor on Approximately 400 pictures View mode Approximately 30 minutes Playback mode Approximately 90 minutes * AA (LR6) alkaline batteries. Battery life varies depending on the type and manufacturer. 4MB CompactFlash Card (B808311) Storage capacity 4MB Physical Dimensions: Width 42.8 mm Height 36.8 mm Depth 3.3 mm 15MB CompactFlash Card (B808301). Storage capacity 15MB Physical Dimensions: Physical Dimensions Width 42.8 mm Width 142.5 mm Height 36.8 mm Height 69.8 mm Depth 3.3 mm Depth 48.8 mm Weight 280 g (without batteries) Temperature Operating: 5 to 35°C Non-operating: -20 to 60°C Humidity (non-condensing) Operating: 30% to 90% Non-operating: 10% to 90% Specifications A 105 Poppy Rev.B/TCAT A5 size 97/09/18 Optional PCMCIA Adapter Interface PCMCIA PC Card ATA Card slot type Type II R Appendix A pass 2 Model EU-19 Output DC7V/2.0A Input AC 120V, 50/60 Hz Physical Dimensions: Physical Dimensions: Width 54.0 mm Height 85.6 mm Depth 5.0 mm Width 50 mm Height 30 mm (47 mm including plug) Depth 95 mm Model EU-20 Optional AC Adapter Model EU-18 Output DC7V/2.0A Input AC 127/220/230/240V, 50/60 Hz Physical Dimensions: Output DC 7V / 2.0A Width 60 mm Input AC 110/120V, 50/60 Hz Height 34 mm Depth 95 mm Physical Dimensions: Width 50 mm Height 30 mm (47 mm including plug) Depth 95 mm Specifications A 106 Proof Sign-off: Yano Norum _______ _______ _______ Poppy Rev.B/TCAT A5 size 97/09/18 R Appendix B pass 3 Appendix B Contacting Customer Support If your camera is not operating properly and you cannot solve the problem using the troubleshooting information in this guide, contact customer support services for assistance. We will be able to help you much more quickly if you give us the following information: Serial number of your camera: (The serial number label is on the underside of the camera.) Camera model: Brand and model of your computer: Camera software version: (Click the About button in your camera software.) For United Kingdom and the Republic of Ireland Users If you purchased your camera in the UK or the Republic of Ireland, Epson (UK) Limited provides a range of customer services and technical support. Note: For customers in the Republic of Ireland, please use the correct dialing codes when dialing the UK telephone numbers listed in the following sections. For example the Customer Support telephone number, 01442 227478, should be dialed as 00 44 1442 227478 from the Republic of Ireland. Windows version (for example, 95 or 3.1) you are using: Software applications you normally use with your camera and their version numbers: B Contacting Customer Support 107 Poppy Rev.B/TCAT A5 size 97/09/18 Customer Support Our Customer Support team can provide the following services: ❏ Technical information on installing, configuring, and operating your EPSON products ❏ Arranging for faulty EPSON products to be repaired within the warranty period The Customer Support team can be contacted by calling 01442 227478 in the UK or 00 44 1442 227478 from the Republic of Ireland. R Appendix B pass 3 EPtec - Bulletin Board Service for latest drivers and utilities You can call the EPSON Bulletin Board Service on 01442 227479. No membership is required. Make sure that your communications software is set to 8 data bits, 1 stop bit, no parity bit, ANSI terminal mode emulation and a modem speed of up to 28.8 Kbps. Downloading protocols supported include Xmodem, Ymodem and Zmodem. See the documentation that came with your communications software and modem for more information. When you first connect to the Bulletin Board Service, you will be asked for your name, company name, phone number and a password (which you can invent yourself). Faxon EPSON Contact Faxon EPSON Faxback Service for: ❏ Literature and specifications on the latest EPSON products ❏ Support information including troubleshooting tips, switch settings and driver information World Wide Web If you can connect to the Internet and have a Web browser, you can access EPSON’s World Wide Web site at http://www.epson.com. Here you will find information on the latest EPSON products, software drivers, and answers to frequently asked questions. To use Faxon EPSON, call 01442 227332 using a touch-tone phone. You will be asked to follow a simple routine to register your document request and once you have entered your telephone and fax numbers, Faxon EPSON will fax a copy of the document catalogue to your fax machine. B When you have found the documents that you need in the catalogue, call Faxon EPSON again and enter the document ID numbers. The documents will be faxed to you automatically. Contacting Customer Support 108 Poppy Rev.B/TCAT A5 size 97/09/18 For United States Users If you purchased your camera in the United States or Canada, EPSON provides customer support and service through a network of authorized EPSON Customer Care Centers. Dial (800) 922-8911 for the nearest location or the following services: ❏ Fax-on-Demand access to EPSON’s technical information library ❏ Literature on current and new products ❏ The location of your nearest Authorized EPSON Reseller or Customer Care Center ❏ Technical information on installation, configuration, and operation of EPSON products ❏ Customer relations. For answers to commonly asked questions about EPSON products 24 hours a day, 7 days a week, call EPSON Sound Advice at (800) 442-2110. You can purchase manuals, accessories, or parts from EPSON Accessories at (800) 873-7766 (U.S. sales only). In Canada, please call (800) 873-7766 for dealer referral. If you need help using software with an EPSON product, see the documentation for that program for technical support information. Contacting Customer Support R Appendix B pass 3 Electronic support services You can access helpful tips, specifications, DIP switch or jumper settings, drivers, FAQs, sample files, application notes, and EPSON product bulletins 24 hours a day, 7 days a week, using a modem and one of the online services below. World Wide Web From the Internet, you can reach EPSON’s home page at http://www. epson. com EPSON Internet FTP site If you have Internet FTP capability, use your Web browser (or other software for FTP downloading) to log onto ftp.epson.com with the user name anonymous and your e-mail address as the password. EPSON Download Service You can call the EPSON Download Service BBS at (800) 442-2007. Set your communications software to 8 data bits, 1 stop bit, no parity. Modem speed can be up to 28.8 Kbps. EPSON Fax-on-Demand Service You can access EPSON’s technical information library by calling (800) 442-2110 or (800) 922-8911 and selecting the appropriate phone option. You must provide a return fax number to use Fax-on-Demand. 109 B Poppy Rev.B/TCAT A5 size 97/09/18 EPSON Forum on CompuServe® Members of CompuServe can type GO EPSON at the menu prompt to reach CompuServe’s Epson America Forum. As an owner of an EPSON product, you are eligible for a free introductory CompuServe membership, which entitles you to an introductory credit and your own user ID and password. To take advantage of this offer in the U.S. or Canada, call (800) 848-8199 and ask for representative #529. For Australian Users EPSON Australia wishes to provide you with a high level of Customer Service. As well as this User’s Guide, we provide the following sources for obtaining information: EPSON FAXBACK EPSON FAXBACK will fax you the latest specifications and pricing for most EPSON products offered in Australia. There is also technical information including details of the latest software and drivers available. Phone (02) 9903 9075 and the system will guide you through a number of choices before faxing the information to your fax machine. EPSON Bulletin Board System This is where you can download the latest software and drivers. Visit the BBS to check out the latest versions. If you have a modem, phone (02) 9417 5090. Contacting Customer Support R Appendix B pass 3 Internet URL http://www.epson.com.au Access the Epson Australia World Wide Web pages. Worth taking your modem here for the occasional surf! You can get the same information as offered on the EPSON FAXBACK and the EPSON Bulletin Board plus more. Your dealer Don’t forget that your dealer can often help identify and resolve problems. The dealer should always be the first call for advice on problems. They can often solve problems quickly and easily as well as give you advice on the next step to take. EPSON Helpdesk EPSON Helpdesk is provided as a final backup to make sure our clients have access to advice. Operators on the Helpdesk can aid you in diagnosing hardware and software problems. They can also advise you on the latest EPSON products and where the nearest dealer or service agent is located. Many types of queries are answered here. Access to the Helpdesk is at no charge to purchasers of new products for the first 12 months of that product’s life. After that period, a different phone number is used and charges are debited to your telephone account. The current charge rates are specified when you ring the chargeable support number. You are asked to signify your acceptance before any charges are incurred. 110 B Poppy Rev.B/TCAT A5 size 97/09/18 The Helpdesk numbers are: first 12 months after 12 months fax number R Appendix B pass 3 Electronic bulletin board system (02) 9903 9040 1 902 263 192 (02) 9903 9189 We encourage you to have all the relevant information on hand when you ring. The more information you prepare, the faster we can help solve the problem. This information includes the User’s Guide for your EPSON product, type of computer, operating system, application programs, and any other information you feel is required. For Hong Kong Users To obtain technical support as well as other after-sales services, users are welcome to contact EPSON Hong Kong Limited. Internet home page EPSON Hong Kong has established a local home page in both Chinese and English on the Internet to provide users with the following information: ❏ Product information ❏ Answers to Frequently Asked Questions (FAQs) An electronic bulletin board system (BBS) is also available to obtain camera information and the latest versions of camera software. You can log on to the following number for the BBS service: BBS: (852) 2827-4244 Technical Support Hotline You can also contact our technical staff at the following telephone and fax numbers: Phone: Fax: (852) 2585-4399 (852) 2827-4383 For Philippines Users To obtain technical support as well as other after sales services, users are welcome to contact the EPSON Philippines Representative Office at the telephone and fax numbers below: Phone: Fax: BBS: (632) 813-6552 (632) 813-6545 (632) 814-0595 B ❏ Latest versions of EPSON camera software Users can access our World Wide Web home page at: http://www.epson.com.hk. Contacting Customer Support 111 Poppy Rev.B/TCAT A5 size 97/09/18 R Appendix B pass 3 For Singapore Users Contact the telephone and fax numbers below: Phone: Fax: (065) 337-7911 (065) 334-1185 B Contacting Customer Support 112 Proof Sign-off: Yano Norum Poppy Rev.B/TCAT _______ _______ _______ A5 size 97/09/18 R Glossary pass 0 Glossary application JPEG A software program that helps you carry out a particular task, such as word processing or financial planning. A file format for storing color and grayscale images in compressed files. Data in JPEG files receives greater compression than TIFF and other formats. BMP A Windows file format for storing image data. OLE bps (bits per second) A way to transfer and share information between Windows-based applications. A measure of data transmission speed. PCX default A file format for storing color and grayscale images. A value or setting that takes effect when the equipment is turned on, reset, or initialized. PICT A file format widely used for Macintosh graphics. drag and drop Method for moving an on-screen object by holding the pointer over the object, pressing and holding the mouse button, dragging the mouse, then releasing the mouse button to drop the object in a new location. pixel Short for picture element. Each image is composed of a number of pixels. Pixels are also counted in units of dots. thumbnails ink jet printer Small representations of images. A printer that transfers ink onto the paper by spraying it through a number of small nozzles. TWAIN interface The connection between the computer and the camera. Glossary A type of interface protocol that makes input peripherals, such as scanners or digital cameras, easier to access directly from application programs. 113 G Proof Sign-off: Yano Norum Poppy Rev.B/TCAT _______ _______ _______ A5 size 97/09/18 R Index pass 0 Index A C AC adapter, 83-85 Adjusting camera settings flash, 29, 53 image quality, 28, 53 macro, 30, 53 self timer, 29, 53 special photo formats, 30 Attaching the hand strap, 17 Auto shut-off, 23 setting, 57 Cables printer, See Direct Print Kit serial, 12, 36 video, 12, 34 Camera ID, 57 Camera buttons, 13-14 caring for, 86 cleaning, 86 getting to know, 13 menu, 43 parts of, 12 problems, 87 storage capacity, 28, 1048 Checking battery, 24 picture counter, 32 Clicking the shutter, from the computer, 54 on the camera, 24 Clock, setting, from the camera, 20 from the computer, 57 CompactFlash Cards, 80 formatting, 67 installing and removing, 81, 82 installing programs from, 68 uploading photos to, 50 B BACK button, 20, 58 Batteries handling, 16 installing, 15 checking, 24 life, 105 Beep, 29 setting, 61 Brightness LCD monitor, 61 picture, 91 Buttons, 13-14 Index 114 ? Poppy Rev.B/TCAT A5 size 97/09/18 Computer connection settings, 55 Connecting the camera to a Macintosh, 38 to a PC, 37 Controlling the camera from the computer, 52 Controls menu, 52 Copying photos, 66 Customer Support, 107 D Date and time, setting from the camera, 20 from the computer, 57 Direct Print Kit, 92-102 album printout, 95, 97 cable, 92, 93 connecting your camera to the printer, 93 EPSON Stylus Photo printer, 92, 93, 101 error messages, 101 index printout (contact sheet), 95, 98 LCD screen and display panel messages, 101 paper types, 94 preparing to use the Direct Print Kit, 92 printed image dimensions, 102 printing images directly from your camera, 92 printing your images, 95-100 printout modes, 95-96 standard printout, 95, 96 sticker printout, 96, 99-100 uploading the Direct Print Kit to your camera, 92, 78 using the Direct Print Kit, 95 Index R Index pass 0 Displaying photos on a television, 34 Display panel, 12, 24 E EPSON Direct Print Kit, See Direct Print Kit EPSON Photo!2 Program Uploader, 78 EPSON Photo!2 software accessing, 40 installing, 17 using, 41 EPSON Photo! File Uploader installing, 18 making screen copies, 75 uploading images, 70 EPSON Stylus Photo printer, See Direct Print Kit Erase Photo menu, 63 Erasing photos from a folder, 51 using EPSON Photo!2, 54 using the Erase Photo menu, 63 using the Photo Control menu, 63 Error messages when printing, See Direct Print Kit F File names, 45 Finding the folder containing your photos, 50 Fine image quality setting, 28, 53 Flash settings, 29, 53 Folder menu, 48 Formatting memory cards, 67 115 ? Poppy Rev.B/TCAT A5 size 97/09/18 G Getting memory information, 66 Getting photo information from the computer, 48 from the LCD monitor, 62 H Help EPSON Photo!2, 42 I Image quality settings, 28, 53 Image selection window, 43, 48-49 Information menu, 62 Inserting a picture by importing, 47 Installing batteries, 15 CompactFlash Cards, 81 Direct Print Kit, 92 EPSON Photo!2 software, 17 EPSON Photo! File Uploader software, 18 optional programs in the camera, 68-69, 78-79 L Language menu, 69 Language, setting, 20 LCD monitor brightness, 61 error messages when printing, See Direct Print Kit menus, 58-69 using to take photos, 25-26 Index R Index pass 0 Lights status, 13, 25 timer, 13, 29-30 Live preview displaying on computer screen, 54 displaying on the LCD monitor, 25-26 M Macro mode setting, 30, 53 Making screen copies, 75 Menus EPSON Photo!2, 42 LCD monitor, 59 Monitor mode switch, 13, 20 Monochrome image quality settings, 28, 53 Multi-frame photo format, 30-32 Multi-frame shooting time, setting, 62 Multi-photo Playback mode, 62 N Navigation buttons, 13, 31, 58 O Option menu, 68-69 Options, 80-85 AC adapter, 83-85 CompactFlash Cards, 80-82 PCMCIA adapter, 82-83 116 ? Poppy Rev.B/TCAT A5 size 97/09/18 P Panorama photo format, 30-32 PCMCIA adapter, 82-83 Photo Control menu, 63-67 Picture counter, 32 printing, See Direct Print Kit problems, 90-91 taking range, 26 Pictures inserting by importing, 47-48 erasing, 48, 51, 54, 63-64 taking from the computer, 54 transferring from a folder to a document, 51 transferring from the camera to a document, 45-46 Playback mode, 33, 58 Playback Mode menu, 62 Playing back photos on the LCD monitor, 33 on a television, 34-35 using the slide show feature, 68 Port option, 56 Ports DC, 84 serial, 37-38 video, 34 Power saving features LCD monitor, 23 Preview option, EPSON Photo File Uploader, 72-79, 74-75 Printer, See Direct Print Kit Printing images directly from your camera, See Direct Print Kit Index R Index pass 0 Problems camera, 87 printing with Direct Print Kit, See Direct Print Kit picture, 90-91 Progress meter, 43 S Saving selected photos to a folder, 44-45 Screen Capture menu, 76 SELECT button, 20-21, 58 Selecting images, EPSON Photo!2, 43-44, 49 Self timer, 29-30, 53 Settings menu, 60-62 Setup menu, 55-57 Shutter clicking on the camera, 24-26 clicking from the computer, 54 Slide Show menu, 68 Special photo formats, 30-32 Specifications, 103-106 Speed option, 56 Standard image quality setting, 28, 53 Status bar, 42 Status light, 13, 24-25 Storage capacity CompactFlash Cards, 80 internal memory, 28, 104 Storing the camera, 86-87 Stylus Photo printer, See Direct Print Kit Superfine image quality setting, 28, 53 Support (contacting customer support), 107 117 ? Poppy Rev.B/TCAT A5 size 97/09/18 T V Taking pictures from the computer, 53-54 Test Connection button, 56 Transferring pictures from the camera to your documents, 45-48 pictures from a folder to your documents, 49-51 Troubleshooting camera problems, 87-89 Direct Print Kit, 92, 101 picture problems, 90-91 Viewfinder, 13, 24-25 View mode, 25, 27, 31 R Index pass 0 Z Zoom, 30-32 U Unpacking your camera, 12 Uploading Direct Print Kit, See Direct Print Kit images, 50, 70-75 programs to the camera, 78-79 Uploader utilities EPSON Photo!2 Program Uploader, 78-79 EPSON Photo File Uploader, 70-77 Upload Photos button, 50 Upload To Camera menu, 71 Index 118 ? Poppy Rev.B/TCAT A5 size 97/09/18 R Chapter 1 pass 7 Using this On-line User’s Guide You should view this document with the follow settings on the toolbar: ❏ Display bookmarks and the page • Display Bookmarks and the page • Selects the hand tool • First page • Previous • Next • Last • Make the pages fit inside the Window • Find text ❏ Make the page fit inside the window • Drag this ❏ Hand tool. scroll box up or down to jump to a specific page The diagram and annotations on this page show the main toolbar buttons and document navigation methods to use when viewing this on-line user’s guide. For more information on using documents in Adobe Acrobat, select Acobat on-line guide or Acrobat tutorial from the Help menu. Point and Click anywhere on this page to go to the Font Cover contents page. • Point & Click on these bookmark headings to jump to a section • Point & Click on these links to jump to a section 119