1
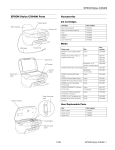
EPSON Stylus C80
®
Start
Here
Start
Here
1
Unpack Everything
4 Turn On the Printer
1
Before you begin, make sure your computer is set up completely.
1
Remove all the tape and packing material from the printer before you set up, as shown
here. The tape may be in slightly different locations on your printer, so be sure to check
inside and all around the printer for tape and other packing material.
2
With the printer and computer still turned off,
plug the printer’s power cord into the AC inlet on
the back of the printer. Then plug the power cord
into a grounded electrical outlet.
Press the
power button to turn on the printer.
The
power light flashes and the ink cartridge
holders begin to move. Don’t turn on your
computer yet.
Always use the
power button to turn the
printer on or off. Never use an external switch,
such as a power strip switch or wall switch.
2
5
Your printer comes with the items shown here. Make sure you’ve also got a USB or
parallel cable to connect your printer.
Install the Ink Cartridges
1
Lower the printer’s output tray and open
the cover.
Keep ink cartridges out of the reach of
children. If ink gets on your skin, wash the
area thoroughly with soap and water. If ink
gets in your eyes, flush them immediately
with water.
paper support
ink cartridges
CD-ROM
2
Don’t remove the cartridge labels, or ink may leak.
power cord
Printer Basics
printer
3
Follow all the “Safety Instructions” listed in the Printer Basics book.
2
Shake each ink cartridge four or five times.
Then unwrap the cartridges.
Wait for the ink cartridge holders to move into loading
position. Then lower each ink cartridge into its holder.
The color of the cartridge label should match the sticker
on the holder.
Put On the Paper Support
Locate the paper support slots on the back of the printer.
Position the paper support as shown here, then slide it into
the slots. (Don’t place it in the paper feeder.)
3
Connect the Printer to
Your Computer
Connect the printer to either a USB port or parallel port. Don’t connect both cables; you
only use one or the other. Follow the instructions in the appropriate section below.
Shut down your computer before connecting the cable. In Windows®, click Start and select your
Shut Down or Turn Off option.
If You Have a USB Port
Install all four ink cartridges, and leave them installed for all types of printing,
or the printer won‘t work.
4
5
Gently push each cartridge down until it clicks into place.
Press the
ink button and close the printer cover.
(USB connection is not supported for Windows® 95 or
Windows NT® 4.0.)
1
2
3
Make sure the printer and computer are
turned off.
Connect the
square end of the USB cable to
your printer’s USB port.
Connect the
flat end of the cable to your
computer’s USB port or a first tier USB hub port.
If You Have a PC Parallel Port
1
2
3
Make sure the printer and computer are turned off.
Connect the larger end of the parallel cable to your
printer’s parallel port. Then secure it with the wire clips
by pushing them inwards, as shown.
Ink charging takes about 90 seconds. You will see the
power light flash and
hear the printer charging your ink. Don’t turn off the printer during this process or
you’ll waste ink.
Never turn off the printer when the
power light is flashing, unless the printer
hasn’t moved or made any noise for more than 5 minutes.
Connect the other end of the cable to your computer’s
parallel port and secure it as necessary.
Turn over
EPSON Stylus C80
6 Put in Paper
1
Don’t load
paper above
this arrow
Fan a few sheets of paper and load them
against the right edge guide. Then slide
the left edge guide against the paper.
Make sure the paper lies flat against the
paper support.
If you see this screen
Click Cancel. Then follow the steps below to install
printer software:
1
2
3
2
Pull out the output tray extensions.
4
5
Output tray
extensions
6
7
7
Install Your Windows Software
Locate the CD-ROM that came with your printer. Check to see which version of Windows
you have, then follow the right set of instructions for your system.
Windows XP
Your computer may have the EPSON printer software already installed. Make sure the
printer is still turned on, then turn on your computer.
If you see this message in the
bottom right corner of your screen
You’re ready to start printing!
If you see this screen
Click Cancel. Then follow the steps below
to install printer software:
1
2
3
4
5
6
7
8
9
10
8
9
10
Click Install Printer Driver. The installer copies files
and displays a series of windows on your screen.
If you see a screen asking you to turn on the printer,
make sure the printer is connected and turned on.
Wait for a minute for the screen to disappear.
Do not click Stop searching.
When setup is finished, click OK. You see the
EPSON Product Registration screen.
Register your printer as instructed. At the last screen,
click Done or close your browser. Now you’re ready
to print!
If you want to share photos on EPSON’s free photosharing website, click Share Photos Online at
EPSON PhotoCenter. You see the EPSON PhotoCenter SM screen.
Click Add icon to place a link to the EPSON PhotoCenter website on your desktop,
then click OK.
Click Back, and then click Exit to close the Main Menu. Remove the CD-ROM.
You’re ready to start printing!
If you’re using Macintosh® OS X, see the Read This First booklet for instructions on installing
and using the software.
1
2
Press the
power button to turn on your printer, if it’s not already on.
Turn on your Macintosh and wait until you see your desktop icons. Then insert your
printer software CD-ROM in your drive.
If you see a message that you need to install software for a USB device, click OK.
3
Click Start, click
My Computer, double-click
EPSON, and then double-click
EPSON.
4
Read the license agreement and click Agree.
5
6
7
When you see a message that setup is complete or the
printer port has been set, click OK. The EPSON Product
Registration screen appears.
Double-click
EPSON in the CD-ROM folder. (If your CD-ROM folder doesn’t open
automatically, double-click the
EPSON icon on your desktop.)
Read the license agreement and click Agree.
You see the Main Menu.
Click Install Printer Driver.
At the installer screen, click Install. Follow the
instructions to install your printer driver and restart
your Macintosh.
After restarting, you see the EPSON Product
Registration screen. Follow the on-screen instructions
to register your printer with EPSON. At the last screen, click Quit.
If you choose to print a registration form, you’ll need to select your printer
in the Chooser (described in the next steps) before your form will print.
Register your printer as instructed. At the last screen,
click Done or close your browser. Now you’re ready
to print!
8
9
To place a link to EPSON’s free photo-sharing
website on your desktop, click Share Photos Online
at EPSON PhotoCenter. On the next screen, click
Add Icon, then click OK.
10
Click Back, and then click Exit to close the Main Menu.
Remove the CD-ROM. You’re ready to start printing!
11
Windows 98, Me, and 2000
Read the license agreement and click Agree.
You see the Main Menu.
®
If you see a screen asking What do you want
Windows to do?, click Cancel.
If you see this screen, make sure the printer is connected
and turned on. Wait for a minute for the screen to
disappear. Do not click Stop searching.
Double-click
My Computer, double-click the
Epson CD-ROM icon, then double-click the
EPSON icon.
8 Install Your Macintosh Software
When you see the Windows icons on your monitor,
put the EPSON CD-ROM in your CD-ROM or DVD drive.
At the Main Menu, click Install Printer Driver.
Wait while the files are copied to your computer.
When you see the Windows icons on your monitor,
put the EPSON CD-ROM in your CD-ROM or DVD drive.
12
Open the Chooser from the Apple® menu.
Click the C80 Series icon, then click your USB port icon. Turn on background printing,
if you want. Close the Chooser.
If you want to share photos on EPSON’s free photo-sharing website, double-click
the
EPSON icon in the EPSON CD-ROM folder. Then click Share Photos Online
at EPSON PhotoCenter. You see the EPSON PhotoCenter screen.
Click Add Icon to place a link to the EPSON PhotoCenter website on your desktop,
then click OK.
Click Back, and then click Exit to close the Main menu. Remove the CD-ROM.
You’re ready to start printing!
Your computer may have the EPSON printer software files already installed.
Make sure the printer is still turned on, then turn on your computer.
If you see this message
Your software is already installed. Click OK.
You’re ready to start printing!
EPSON and EPSON Stylus are registered trademarks of SEIKO EPSON CORPORATION. EPSON PhotoCenter is a service mark of Epson America, Inc.
General Notice: Other product names used herein are for identification purposes only and may be trademarks of their respective owners.
EPSON disclaims any and all rights in those marks.
Copyright © 2001 by Epson America, Inc.
Printed on recycled paper. 11/01
CPD-12669R2
4014241-01
Printed in USA