1
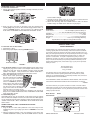
SB700 OWNER'S MANUAL
SpongeBob SquarePantsTM MP3 Speaker System
LOCATION OF CONTROLS
Thank you for purchasing the SpongeBob SquarePants Speaker
System from Emerson. Please read this manual before operating this
unit to become familiar with its features and obtain the performance
that will bring you continued enjoyment for many years. In the event
you require technical assistance, please call the Emerson Radio
Consumer Affairs Department at: 800-898-9020.
SAFETY PRECAUTIONS
CAUTION
RISK OF ELECTRIC SHOCK
DO NOT OPEN
USER INFORMATION
NOTE: This equipment has been tested and found to comply with the limits for a
class B digital device, pursuant to Part 15 of the FCC Rules. These limits are
designed to provide reasonable protection against harmful interference in a
residential installation. This equipment generates, uses and can radiate radio
frequency energy and, if not installed and used in accordance with the instructions,
may cause harmful interference to radio communications. However, there is no
guarantee that interference will not occur in a particular installation. If this
equipment does cause harmful interference to radio or television reception, which
can be determined by turning the equipment on and off, the user is encouraged to
try to correct the interference by one or more of the following measures:
1) Reorient or relocate the receiving antenna.
2) Increase the separation between the equipment and the receiver.
0-8
WARNING!
Choking Hazard–Small Parts and Packaging Materials.
Also, Electronically Operated Product. Not for children
under 8 years.
Copyright 2006 Viacom international Inc. All Rights Reserved.
Nickelodeon, Nicktronics, SpongeBob SquarePants and all related titles,
logos and characters are trademarks of Viacom International Inc.
Created by Stephen Hillenburg.
iPod is a trademark of Apple Computer, Inc. Registered in the US and other countries.
–
FCC INFORMATION
FCC WARNING: This equipment meets the limits for a class B digital device,
pursuant to Part 15 of FCC rules. Only the accessories supplied with the unit
should be used. Operation with other accessories is likely to result in
interference to radio and TV reception and could void the user’s authorization to
operate this equipment.
This device complies with Part 15 of the FCC Rules. Operation is subject to the
following two conditions:
1) This device may not cause harmful interference.
2) This device must accept any interference received, including interference
that may cause undesired operation.
Changes or modifications not expressly approved by the manufacturer may void
the user’s authority to operate this equipment.
POWER SOURCES
BATTERY INSTALLATION
When the Power indicator becomes
dim or the unit turns off
–
+
automatically, insert new batteries.
1. Remove the Battery Compart–
+
ment door by sliding it out.
2. Insert four (4) “AA” batteries (not
included) according to the
polarity diagram inside the
Battery Compartment. Alkaline batteries are recommended for the
longest playing time.
+
ATTENTION:
The exclamation point within an equilateral triangle is intended
to alert the user to the presence of important operating and
maintenance (servicing) instructions in the literature
accompanying the appliance.
Power Indicator
DC 6V Jack Z
Stereo Audio Cable
Left Speaker
Ledge
POWER Switch
Right Speaker
Battery Compartment (Rear of Unit)
–
DANGEROUS VOLTAGE:
The lightning flash with arrowhead symbol within an equilateral
triangle is intended to alert the user to the presence of
uninsulated dangerous voltage within the product’s enclosure
that may be of sufficient magnitude to constitute a risk of
electric shock to persons.
1.
2.
3.
4.
5.
6.
7.
8.
+
CAUTION:
TO REDUCE THE RISK OF ELECTRIC SHOCK, DO NOT REMOVE
COVER (OR BACK). NO USER-SERVICEABLE PARTS INSIDE.
REFER SERVICING TO QUALIFIED SERVICE PERSONNEL.
AC OPERATION
To operate the unit using AC power, connect the AC adapter
(included) to an AC outlet having 120V, 60Hz AC only. Plug the small
end into the DC 6V jack on the top of the unit and connect the other
end into an AC outlet. The batteries are automatically disconnected
when an AC adapter is used.
CAUTION: When not using AC power, disconnect the AC adapter from
the wall outlet by pulling the plug (not the cord). Do not touch the AC
adapter with wet hands. Fully insert the plug without exposing any part
of the blade.
OPERATION
OPERATION (CONTINUED)
INSERTING AN iPod® / MP3 PLAYER
For the iPod and iPod mini:
1. Pull the right and left speakers outward, until fully extended, as shown
in FIGURE 1 below.
FIGURE 5
FIGURE 1
2. Rest your iPod / iPod mini on the ledge. Push the speakers back
inward gently until your iPod / iPod mini fits snugly between them, as
shown in FIGURE 2 below. Then proceed to the “USING YOUR
iPod® / MP3 / PORTABLE CD PLAYER WITH THIS UNIT” section.
Power indicator will light.
3. Operate the iPod / MP3 player as per its owner’s manual and the
sound will be heard through this unit’s speakers.
4. When done listening, slide the POWER switch to OFF; the Power
indicator will go out. Make sure to also turn off your player.
SPECIFICATIONS
GENERAL:
Power Source ...............................DC 6V Adapter (Center Positive) or
.....................................4 x “AA” size batteries (max play time 8 hours)
Speakers..............................................................................2 x 4 ohms
Output Power ............................................................................2 x 2W
Dimensions ....................................................5 L x 4.5 W x 2 D inches
Weight ...............................................10.6 oz. (not including batteries)
Specifications are subject to change without notice.
WARRANTY
FIGURE 2
For the iPod nano or iPod shuffle:
1. Follow Step 1 above.
2. Select the proper adapter, following FIGURE 3 below.
iPod nano adapter
FIGURE 3
iPod shuffle adapter
3a.For the iPod shuffle: Insert the shuffle adapter into the main unit by
aligning the pegs at the bottom of the adapter with the holes in the
ledge of the main unit. Once the adapter is secure, insert your iPod
shuffle in the adapter. Then proceed to the “USING YOUR iPod® /
MP3 / PORTABLE CD PLAYER WITH THIS UNIT” section.
3b.For the iPod nano: Plug the
Stereo Audio cable (attached to
the main unit) into the Headphone
jack on your player. Then insert
your iPod nano in the adapter as
shown in FIGURE 4 (the Stereo
Audio cable’s plug will be resting
on the adapter). Insert the adapter
into the main unit by aligning the
pegs at the bottom of the adapter
FIGURE 4
with the holes in the ledge of the
main unit, and secure snugly between the speakers. Then proceed to
Step 2 in the “USING YOUR iPod® / MP3 / PORTABLE CD PLAYER
WITH THIS UNIT” section.
For other MP3 players:
Other MP3 players can not rest directly on the ledge of this unit, neither
with nor without an adapter. However, the sound from other MP3 players
can be heard through this unit’s speakers. Follow the instructions in the
“USING YOUR iPod® / MP3 / PORTABLE CD PLAYER WITH THIS
UNIT” section.
EMERSON RADIO CORP.
LIMITED WARRANTY
Emerson Radio Corp. warrants manufacturing defects in original material,
including original parts and workmanship, under normal use and conditions,
for a period of ninety (90) days from the date of original purchase in the U.S.
With your dated proof of purchase, we will provide repair service at no charge
for labor and parts at an authorized Depot Repair Facility, or replace the
product in our discretion. For repair or replacement, pack your unit in a
padded box, enclose your check or money order payable to Emerson Radio
Corp. in the amount of $9.00 (not required by California residents) to cover
shipping and handling costs, and enclose a copy of your proof of purchase.
Send your unit to:
Emerson Radio Corp.
5101 Statesman Drive
Irving, TX 75063
This warranty does not cover damage from negligence, misuse, abuse,
accident, failure to follow operating instructions, commercial use, rental,
repairs by an unauthorized facility, or products purchased, used, serviced or
damaged outside of the United States.
THIS WARRANTY GIVES YOU SPECIFIC LEGAL RIGHTS, AND YOU MAY
ALSO HAVE OTHER RIGHTS WHICH VARY FROM STATE TO STATE.
AU898M
The serial number of your system is located on a label on the rear cabinet.
Please take a moment now to locate the serial number and write the number
in the space provided below. You may be asked to provide this number when
calling for product service.
Model Number:
Serial Number:
SB700
__________________________________________
USING YOUR iPod® / MP3 / PORTABLE CD PLAYER
WITH THIS UNIT
1. Plug the Stereo Audio cable (attached to the main unit) into the
Headphone jack on your player (as shown in FIGURE 5 in the next
column).
2. With the batteries inserted or the unit operating on AC power (see
“POWER SOURCES” section), slide the POWER switch to ON; the
SB700–092706–02
Printed in China