1
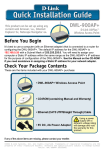
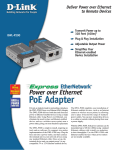
Building Networks for People Quick Installation Guide 802.11n Unified Access Point This document will guide you through the basic installation process for your new D-Link Unified Wireless Access Point. DWL-3600AP Quick Installation Guide About This Guide This installation guide provides basic instructions for installing the DWL-3600AP Wireless Access Point on your network. For additional information about how to use the Access Point, please refer to the User Manual, which is available on the D-Link support website. System Requirements - Windows®, Macintosh®, or Linux-based operating system - Computer with an Ethernet adapter, or a router or switch - Internet Explorer 7.0, Safari 5.0, Firefox 4.0, or higher Unpacking the Product Open the shipping carton and carefully unpack its contents. Refer to the package contents located below to make sure all items are present and undamaged. If any item is missing or damaged, please contact your local D-Link reseller for replacement. -- DWL-3600AP 802.11n Unified Access Point -- Power Adapter -- Mounting Ring -- Ethernet Cable -- Console Cable* Note: Using a power supply with a different voltage than the one included with the DWL-3600AP may cause damage and will void the warranty for this product. *The console cable is an optional accessory and not included in the package in Armenia, Azerbaijan, Belarus, Georgia, Israel, Kaliningrad, Kazakhstan, Kyrgyzstan, Latvia, Lithuania, Moldova, Mongolia, Russia, Turkey, Turkmenistan, Ukraine, and Uzbekistan. If a cable is required, please contact your reseller to order it (Model: ACS-AP-CONSOLE). 2 D-Link DWL-3600AP Quick Install Guide Optional Accessories - PoE Base Unit (Model: DPE-101GI) Note: These accessories are not included in the package. If any of these items are required, please contact your reseller to order it. Hardware Overview LEDs Figure 1. DWL-3600AP LEDs 2.4 GHz – When this LED is lit, the access point’s 2.4 GHz radio is enabled. It will blink when there is wireless traffic. LAN – When this LED is lit, the device’s Ethernet port is connected to an active router or switch. The LED will blink when there is Ethernet traffic. POWER – When the LED is lit, the access point is powered and ready for use. Connections 5V 2.5A Power Receptor RESET LAN Port (PoE) Console Port Reset Port Figure 2. DWL-3600AP Rear Panel D-Link DWL-3600AP Quick Install Guide 3 Installation Power on the access point To power on the DWL-3600AP, you can use ONE of the following methods: 1. Connect the supplied power adapter OR 2. Plug one end of an Ethernet cable into the LAN port of the DWL-3600AP and the other end into a port on a power over Ethernet (PoE) switch. Configure the access point To set up and manage the DWL-3600AP, use one of the following methods: • Manage the access point from the computer: Connect the access point and your computer directly via a straight-through Ethernet cable. • Manage the access point from the computer via the Switch or Router: Connect the access point and your computer to the same switch or router. • Manage the access point from the computer via the Unified Wireless Switch or Wireless Controller: Connect the access point to a Unified Wireless Switch or Wireless Controller. Connect your computer to the same network as that of the Unified Wireless Switch or Wireless Controller. 4 D-Link DWL-3600AP Quick Install Guide Mounting Options You can mount a DWL-3600AP access point on any of the following types of surfaces: • Solid surface wall or ceiling • Tabletop Cable Requirement Use a CAT5 cable with an even sheath. The Ethernet ports on the DWL-3600AP access point cannot accept a CAT5 cable that has an uneven sheath; the RJ-45 connector on the cable will not fit properly into the receptacle on the access point. Wall Installation Recommendations If you plan to install the DWL-3600AP on a wall or other vertical surfaces, orient the top of the access point (the side with the LEDs) toward the intended coverage area. The radio antennas transmit through the top of the access point, not through the bottom (where the bracket is). Warning: The DWL-3600AP is designed to receive PoE power only from an 802.3af-compliant source, or from a D-Link-approved power injector. Connecting an access point to a Power over Ethernet (PoE) device that is not approved by D-Link can damage the equipment. D-Link DWL-3600AP Quick Install Guide 5 Solid Wall or Ceiling Installation 1. Place the plastic wall mounting ring on a wall or ceiling. 2. Mark the points where you will insert the screws. Take out the mounting ring. 3. Drill holes in the marked points and insert the plastic wall anchors. 4. Use the supplied screws to attach the mounting ring to the wall. Figure 3. Insert screws through mounting ring 5. Plug the CAT5 cable into the LAN port on the access point. Figure 4. Plug cable into access point 6 D-Link DWL-3600AP Quick Install Guide 6. To attach the access point to the mounting ring, first locate the right side of the access point that has a small lock symbol on it, and make sure to line up this side with the side of the mounting ring that has Open - Close written on it. Figure 5. Insert access point into mounting ring 7. Twist counter-clockwise to lock the access point onto the ring. The lock symbol on the access point must point directly to the Close text on the mounting ring. D-Link DWL-3600AP Quick Install Guide 7 Technical Support D-Link’s website contains the latest user documentation and software updates for D-Link products. U.S. and Canadian customers can contact D-Link Technical Support through our website or by phone. United States Telephone (877) 354-6555 World Wide Web http://support.dlink.com Canada Telephone (877) 354-6560 World Wide Web http://support.dlink.com Version 1.0 June 19, 2012 Copyright ©2012 D-Link Corporation/D-Link Systems, Inc. All rights reserved. D-Link, and the D-Link logo are registered trademarks of D-Link Corporation or its subsidiaries in the United States and other countries. Other trademarks are the property of their respective owners. Product specifications, size and shape are subject to change without notice, and actual product appearance may differ from that depicted on the packaging. Visit www.dlink.com for more details. 8 D-Link DWL-3600AP Quick Install Guide