Transcript
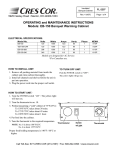
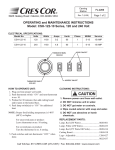
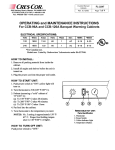
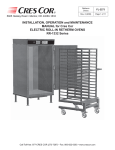
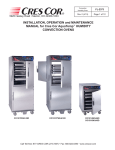
5925 Heisley Road • Mentor, OH 44060-1833
IFW61WF &
IFW61WFRR
FL-2333
Rev. 2 (10/08)
Page 1 of 1
INSTALLATION and OPERATING INSTRUCTIONS
for STAR SERIES CARVING STATIONS
MODELS IFW61WF AND IFW61RR
HOW TO INSTALL:
1. Place the warmer assembly on the cutting board
with the star design facing up.
2. Look underneath and line up the (2) holes in the
board with the (2) holes in the base of the warmer
assembly.
3. Screw the wing screws provided from the bottom
up through the board to secure the warmer.
4. Place the 18” x 26” pan under the board in the
grooves to catch the scraps and meat drippings.
5. Screw lamp into hood socket.
FIGURE 1
HOW TO CLEAN:
1.Let warmer cool before cleaning.
2.Unplug warmer from wall outlet.
3.Do NOT put warmer in water or spray with
water.
Wipe off grease and food splatters immediately with
a damp cloth and dish detergent.
CAUTION: Hood my be HOT!
EVERYDAY:
Wipe warmer hood, plastic-coated arm, and base with
a damp cloth.
Do no use gritty cleaners unless really necessary.
REPLACEMENT PARTS:
DESCRIPTION
CMP PART#
Toggle Switch Seal............................................0808-051
Switch (120V)................................................... 0808-002C
Switch (240V)................................................... 0808-122
Power Supply Cord (120V)...............................0810-042
Power Supply Cord (240V)...............................0810-139
Lamp, Red (250 Watts)..................................... 0820-001
Lamp, White (250 Watts).................................. 0820-033
Lamp, Red (275 Watts, 240V)...........................0820-014
Bun Pan, 18” x 26”............................................1038-010
Cutting Board.................................................... 1004-025
Wingb Screw..................................................... 0567-783
Call Toll-free: 877-CRES COR (273-7267) • Fax: 800-822-0393 • www.crescor.com