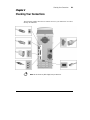
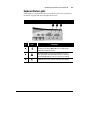
1
Including:
• Model-Specific Features
• Safety & Comfort Guide
• Service & Support Information
Internet PC User’s Guide
Table of Contents
i
Contents
CHAPTER 1
Using this Guide
Text Conventions...................................................................................................................1-1
Special Messages .................................................................................................................1-2
Locating Help ........................................................................................................................1-2
Glossary ........................................................................................................................1-2
Index .............................................................................................................................1-2
Troubleshooting.............................................................................................................1-2
Understanding Your Service and Support Options ..........................................................1-3
CHAPTER 2
Checking Your Connections
Identifying the Front Components on Your Internet PC ...........................................................2-2
Identifying the Rear Components on Your Internet PC ............................................................2-4
Rear Connectors ...................................................................................................................2-5
CHAPTER 3
Turning On and Turning Off Your Internet PC
Turning On Your Internet PC ..................................................................................................3-2
Recovering from a Locked Program or System ......................................................................3-2
Recovering from a Locked Program ...............................................................................3-2
Recovering from a Locked System.................................................................................3-2
Turning Off Your Internet PC..................................................................................................3-3
Shutting Down Your Internet PC Using the Microsoft Windows Start Menu .....................3-3
Shutting Down Your Internet PC Using the Power Button................................................3-4
ii
Table of Contents
Recovering from a Loss of Electrical Power........................................................................... 3-4
Power Surges and Sags ................................................................................................ 3-4
Using a Surge Suppressor ............................................................................................. 3-5
Restarting Your Computer After a Power Failure ............................................................ 3-5
Electrical Storms ........................................................................................................... 3-5
CHAPTER 4
Saving Energy Using Sleep and Power Management
Accessing the Microsoft Windows Power Management Settings ........................................... 4-1
Preset Power Schemes ................................................................................................. 4-1
Creating a Personal Power Scheme ...................................................................................... 4-2
Identifying the Power Status Lights ....................................................................................... 4-3
The Power Status Light ................................................................................................. 4-3
The Hard Drive Activity Light ......................................................................................... 4-3
Using the Power Button ........................................................................................................ 4-4
Activating the Sleep Mode .................................................................................................... 4-4
Activating Sleep through the Microsoft Windows Start Menu ......................................... 4-5
Activating Sleep Using the Sleep Button ........................................................................ 4-5
Waking Up Your Computer ............................................................................................ 4-5
CHAPTER 5
Introducing the Features of Your Internet PC
Working with the Internet Keyboard ...................................................................................... 5-1
Using the Internet Button Suite ............................................................................................. 5-1
Using the Multimedia Easy Access Buttons ........................................................................... 5-4
Using Additional Button Features of Your Keyboard ............................................................... 5-5
Reprogramming Your Easy Access Buttons ........................................................................... 5-6
Disabling and Enabling the Easy Access Buttons ........................................................... 5-6
Working with the Standard Keyboard Keys............................................................................ 5-7
Keyboard Status Lights ......................................................................................................... 5-9
Table of Contents
iii
Using the Scroll Mouse........................................................................................................5-10
Understanding Scroll Mouse Functions................................................................................5-11
Scrolling and Zooming with the Mouse................................................................................5-12
Choosing Scroll Mouse Options ...........................................................................................5-12
Using CyberJump and HyperJump.......................................................................................5-13
Inserting and Removing a CD or DVD...................................................................................5-16
Playing an Audio CD ............................................................................................................5-17
Playing a non DVD Video CD................................................................................................5-17
Identifying Your Storage Drives............................................................................................5-18
Identifying Your Hard Drive Size ..........................................................................................5-18
Using Your Diskette Drive....................................................................................................5-19
Write-Protecting a Diskette ..........................................................................................5-19
CHAPTER 6
Introducing Microsoft Windows
Finding Help..........................................................................................................................6-1
Windows Help................................................................................................................6-1
Customizing the Windows Desktop........................................................................................6-2
Arranging Icons .............................................................................................................6-3
Selecting a Background .................................................................................................6-3
Adding a Screen Saver ..................................................................................................6-4
Searching for Files ................................................................................................................6-4
Creating New Folders ............................................................................................................6-5
Deleting Files and Folders .....................................................................................................6-5
Creating Shortcuts ................................................................................................................6-6
Using Microsoft Windows Accessories...................................................................................6-7
Installing Additional Software ................................................................................................6-8
Installing Software from a CD or Diskette.......................................................................6-8
Installing a Downloaded Program File ............................................................................6-9
iv
Table of Contents
CHAPTER 7
Identifying and Removing Computer Viruses
Recognizing a Computer Virus .............................................................................................. 7-1
Using McAfee Anti-Virus Software......................................................................................... 7-1
Scanning for Viruses ..................................................................................................... 7-2
Creating an Anti-Virus Emergency Diskette ................................................................... 7-3
Using an Anti-Virus Emergency Diskette........................................................................ 7-4
Keeping Your Anti-Virus Software Current............................................................................. 7-5
CHAPTER 8
Learning about Your Modem (available on select models only)
Performance Features .......................................................................................................... 8-1
Identifying Your Modem ........................................................................................................ 8-1
Connecting Your 56K V.90 Modem........................................................................................ 8-2
56K ITU V.90 Standard.......................................................................................................... 8-3
Understanding Point-to-Point Connections ............................................................................ 8-3
Getting the Latest Modem Information .................................................................................. 8-3
CHAPTER 9
Surfing the Internet
Internet Addresses (URLs)..................................................................................................... 9-1
Understanding the World Wide Web ...................................................................................... 9-2
Choosing an Internet Service Provider................................................................................... 9-2
Using a Web Browser ........................................................................................................... 9-3
Microsoft Internet Explorer ............................................................................................ 9-3
Surfing the Internet with Your Keyboard................................................................................ 9-4
Surfing Tips .......................................................................................................................... 9-6
Accessing a Search Engine ........................................................................................... 9-6
Using a Search Engine .................................................................................................. 9-7
Table of Contents
v
CHAPTER 10
Maintaining Your Internet PC
Cleaning Your Internet PC....................................................................................................10-1
Exterior Surfaces .........................................................................................................10-1
Keyboard .....................................................................................................................10-1
Monitor........................................................................................................................10-1
Mouse .........................................................................................................................10-1
Using System Maintenance Features...................................................................................10-2
CHAPTER 11
Upgrading Your Internet PC
Preparing to Upgrade Your Internet PC ................................................................................11-2
Identifying the Major Components of Your Internet PC .........................................................11-3
Removing the Cover ............................................................................................................11-5
Replacing the Cover ............................................................................................................11-5
Identifying Power Supply and Data Cables...........................................................................11-6
Power Supply Cables ...................................................................................................11-6
Data Cables .................................................................................................................11-7
Moving the Power Supply....................................................................................................11-8
Identifying System Board Components ..............................................................................11-10
Installing an Expansion Card..............................................................................................11-12
Determining Expansion Card Compatibility.................................................................11-12
Inserting an Expansion Card ......................................................................................11-12
Adding or Replacing Memory Modules ..............................................................................11-15
Installing Additional Memory......................................................................................11-16
Replacing the Real-Time Clock Battery..............................................................................11-18
Locating the Battery...................................................................................................11-19
Replacing a Battery....................................................................................................11-20
vi
Table of Contents
CHAPTER 12
Understanding Your Service and Support Options
Compaq Support................................................................................................................. 12-1
Using Compaq Diagnostics ................................................................................................. 12-2
Testing Equipment ...................................................................................................... 12-3
System Record ................................................................................................................... 12-4
Compaq Service Connection ............................................................................................... 12-5
Overview..................................................................................................................... 12-5
Turning Compaq Service Connection On and Off.......................................................... 12-5
How it Works............................................................................................................... 12-6
Compaq Service Connection Privacy and Data Security Statement .............................. 12-6
Internet Support.................................................................................................................. 12-7
Drivers................................................................................................................................ 12-8
Installing Drivers for New Hardware ............................................................................ 12-8
Reinstalling Deleted Drivers......................................................................................... 12-8
CHAPTER 13
Troubleshooting Guide
Helpful Hints....................................................................................................................... 13-1
Understanding This Guide ................................................................................................... 13-1
Contacting a Compaq Authorized Service Provider ............................................................ 13-18
Table of Contents
vii
CHAPTER 14
Safety and Comfort
Promoting a Safe and Comfortable Work Environment.........................................................14-2
Important Choices........................................................................................................14-2
Take Action for Safety and Comfort..............................................................................14-2
Key Principles .....................................................................................................................14-3
Finding Your Comfort Zone..................................................................................................14-4
A Range of Positions....................................................................................................14-4
Feet, Knees, and Legs .................................................................................................14-6
Back............................................................................................................................14-7
Forearms, Wrists, and Hands .......................................................................................14-8
Shoulders and Elbows .................................................................................................14-9
Eyes ..........................................................................................................................14-10
Arranging Your Work Area .................................................................................................14-11
Monitor......................................................................................................................14-11
Keyboard and Pointing Device....................................................................................14-13
Arm Supports and a Palm Rest ..................................................................................14-15
Papers and Books......................................................................................................14-16
Phone........................................................................................................................14-17
Working in Comfort ...........................................................................................................14-18
Using a Notebook Computer ......................................................................................14-18
Typing Style...............................................................................................................14-19
Pointing Style ............................................................................................................14-21
Using a Keyboard on a Sofa .......................................................................................14-22
Taking Breaks and Varying Your Tasks ......................................................................14-23
Monitoring Your Health Habits and Exercise ...............................................................14-25
Organizing Your Adjustments ............................................................................................14-26
From the Ground Up ..................................................................................................14-26
From the Top Down ...................................................................................................14-26
viii
Table of Contents
Self-Check........................................................................................................................ 14-27
Seated Position ......................................................................................................... 14-27
Shoulders, Arms, Wrists, and Hands.......................................................................... 14-27
Eyes.......................................................................................................................... 14-28
Typing Style .............................................................................................................. 14-28
Keyboard and Pointing Device ................................................................................... 14-28
Monitor ..................................................................................................................... 14-29
Notebook Computing................................................................................................. 14-29
General Prevention.................................................................................................... 14-30
Electrical and Mechanical Safety Information .................................................................... 14-31
Introduction............................................................................................................... 14-31
Product Safety Policy and General Practice................................................................ 14-31
Installation Requirements.......................................................................................... 14-32
General Precautions for Compaq Products................................................................. 14-33
Precautions for Portable Computer Products.............................................................. 14-38
Precautions for Server and Network Products............................................................ 14-38
Precautions for Products with External Television Antenna Connectors..................... 14-40
Antenna Grounding ................................................................................................... 14-42
Precautions for Products with Modems, Telecommunications, or
Local Area Network Options ...................................................................................... 14-43
Precautions for Products with Laser Devices ............................................................. 14-44
Laser Information ...................................................................................................... 14-45
For More Information ........................................................................................................ 14-46
Table of Contents
ix
CHAPTER 15
Government Approvals
Federal Communications Commission Notice ......................................................................15-1
Modifications...............................................................................................................15-1
Cables .........................................................................................................................15-1
Declaration of Conformity for Products Marked with the FCC Logo (United States Only) .......15-2
Canadian Notice ..........................................................................................................15-2
Telecom Network Approvals................................................................................................15-3
U.S. Regulations Governing the Use of Modems ..................................................................15-3
Ringer Equivalence Number (REN) ...............................................................................15-4
Telephone Consumer Protection Act of 1991 .......................................................................15-5
Safety .................................................................................................................................15-5
Batteries......................................................................................................................15-5
Power Cords................................................................................................................15-6
Laser Assemblies ........................................................................................................15-6
CDRH Regulations........................................................................................................15-6
Using the Computer .....................................................................................................15-8
Locating the Regulatory Compliance Markings Labels..................................................15-9
Energy Compliance ...........................................................................................................15-10
Glossary
Index
x
Table of Contents
Using this Guide
1-1
Chapter 1
Using this Guide
Thank you for buying a Compaq Internet PC. This User’s Guide will help you to
familiarize yourself with the features of your Internet PC, as well as with safety
and government approval information.
Please take a moment to familiarize yourself with the special text and messages
used throughout this guide.
Text Conventions
The examples below explain the specially formatted text used in this guide.
•
Keyboard key names appear in bold type: Home, End, Backspace, Tab
•
Keyboard keys that must be pressed at the same time to perform a task appear
in bold type with a plus (+) between the key names: Ctrl+Home
•
Drives appear as capital letters: drive C
•
Folder names appear with initial capital letters: Favorites
•
File names appear in italics with an initial capital letter: Setup.exe
•
Command line statements appear in lower case bold type: a:\install
•
Names of icons appear in bold type followed by a picture of the icon:
My Computer G icon
•
Menu items appear in bold type: Programs, Accessories
+
NOTE: The appearance of your computer may differ from that shown in this guide,
depending on model and geographic location.
1-2
Using this Guide
Special Messages
The following words and symbols have special meaning in this guide.
*
HINT: Helpful hints that will make using your computer easier and faster.
+
NOTE: Important information concerning the operation of your Internet PC.
`
CAUTION: Failure to follow directions may result in equipment damage or loss of
data.
a
WARNING: Failure to follow directions may result in bodily harm or loss of life.
Locating Help
Compaq provides you with several resources to help you learn about your Internet
PC. These resources include the following:
Glossary
Computer terms that may be unfamiliar to you are identified in the glossary.
Index
The index is a comprehensive list of the topics covered in this guide.
Troubleshooting
The Troubleshooting section shows how to fix many common computer-related
issues.
Using this Guide
1-3
Understanding Your Service and Support Options
Your Internet PC is equipped with several helpful programs that will aid you in
identifying and solving common computer problems.
If you need further technical support, visit the Compaq Web site at:
www.compaq.com
Compaq Technical Support telephone numbers are listed in the Limited Warranty
Statement.
+
NOTE: Locate the model and serial numbers for your computer before you call
technical support. Write these numbers below for future use.
Computer Information
Purchase Date
Store Name
Computer Model Number
Computer Serial Number
Monitor Model Number
Monitor Serial Number
1-4
Using this Guide
Checking Your Connections
2-1
Chapter 2
Checking Your Connections
The following graphics show how to connect devices to your Internet PC as well as
identify all connectors.
+
NOTE: The view shown may differ slightly from your Internet PC.
2-2
Checking Your Connections
Identifying the Front Components on Your Internet PC
No.
Components
1
CD Drive
2
CD Drive Status Light
3
Diskette Drive
4
Diskette Drive Activity Light
5
Hard Drive Activity Light
6
CD Drive Eject/Load Button
7
Diskette Drive Eject Button
8
Power Button
9
Power Status Light
Checking Your Connections
This page was
intentionally
left blank.
2-3
2-4
Checking Your Connections
Identifying the Rear Components on Your Internet PC
+
NOTE: The view shown may differ slightly from your Internet PC.
Checking Your Connections
2-5
Rear Connectors
No.
Icon
1
Z
2
T
Internet Keyboard
3
W
USB Ports (2)
4
X
Serial Port
5
²
Parallel Port
6
V
SVGA Monitor Port
7
½
Audio Out
8
¾
Audio In
9
:
Microphone
-
S
Gameport
q
t
Voltage Select Switch
w
ä
AC Power Connector
^
Modem Line In (*The appearance of your modem may vary.)
ð
Modem Line Out (*The appearance of your modem may vary.)
e
r
or Line
or Phone
Component
Mouse
* For more information on the 56K V.90 PCI modem, refer to the Learning About Your Modem section or for
information on the digital modem, refer to the DSL/56K modem feature guide.
2-6
Checking Your Connections
Turning On and Turning Off Your Internet PC
Chapter 3
Turning On and Turning Off Your Internet PC
Your Internet PC is equipped with a Power button on the front of the computer.
Power Button and Status Lights
No.
Components
1
Power Button
2
Hard Drive Activity Light
3
Power Status Light
3-1
3-2
Turning On and Turning Off Your Internet PC
Turning On Your Internet PC
To turn on the computer, press the Power button on the front of the computer. The
power status light will glow green, showing that the computer is on.
+
NOTE: The Sleep button on the Compaq Internet Keyboard will only put the computer
into the Sleep mode or wake it from the Sleep mode. The Sleep button will not turn
on or shut down the computer.
Recovering from a Locked Program or System
Recovering from a Locked Program
To close a program that has stopped responding, complete the following steps:
1. Press Ctrl+Alt+Delete. The Close Program window is displayed.
2. Select the name of the program that is not responding.
3. Click End Task.
4. A message prompting you to close the program is displayed. Click End Task.
+
NOTE: Learn to save your work often. Work that has not been saved may be lost
when a program or the computer stops responding.
Recovering from a Locked System
If the computer stops responding to mouse movement or pressing a key on the
keyboard has no effect, complete the following steps:
1. To turn off the computer, press and hold the Power button for 4 seconds.
5. Press the Power button again to turn on the computer.
ScanDisk, a Microsoft Windows utility program, will automatically run. ScanDisk
will determine if the improper shutdown caused any errors on the hard drive.
Errors may occur if the Microsoft Windows operating system was not able to
properly close all files before the shutdown. If no errors are found, the restart
process will continue. If ScanDisk does detect errors, follow the instructions shown
to continue the restart process. Work that was not saved prior to the lockup may be
lost.
Turning On and Turning Off Your Internet PC
3-3
Turning Off Your Internet PC
To protect your data, save and close all files and exit all programs before shutting
down your Internet PC.
`
CAUTION: Pressing the Power button for 4 seconds or more will completely turn off
the computer without properly shutting down Microsoft Windows. The 4-second off
feature should only be used when it is necessary to restart the computer if you
experience a system lockup. You will not be prompted to save open files; work that
you have not saved will be lost.
You can shut down your Internet PC by pressing the Power button or by using the
Microsoft Windows Start menu.
Shutting Down Your Internet PC Using the Microsoft Windows
Start Menu
To shut down your Internet PC, complete the following steps:
1. Save and close all open files.
6. Exit all programs.
7. From the Windows Taskbar, click the Start button, then click Shut Down.
8. Click Shut down the computer.
9. Click OK.
Within a short time, the power status light will cease to glow, indicating that the
computer is off.
To turn on the computer again, press the Power button.
3-4
Turning On and Turning Off Your Internet PC
Shutting Down Your Internet PC Using the Power Button
To shut down your Internet PC, complete the following steps:
1. Save and close all open files.
10. Exit all programs.
11. Press the Power button.
If you have inadvertently left any files open, you will be prompted to save your
work. Once you save any open files, the shut down process will automatically
continue.
Within a short time, the power status light will cease to glow, indicating that the
computer is off.
To turn on the computer again, press the Power button.
Recovering from a Loss of Electrical Power
Loss of electrical power will cause your Internet PC to automatically turn off. This
may cause loss of data because the Microsoft Windows operating system is not
able to properly close all files and programs. To protect your data, learn to save
your work frequently.
Loss of power may be caused by one of the following:
•
Electrical power service is interrupted.
•
Power cord is accidentally disconnected.
Power Surges and Sags
If power surges or sags, the display and status lights may flicker and the computer
may automatically restart. If an improper shutdown occurs, ScanDisk, a Microsoft
Windows utility program, will automatically run once power is restored to the
computer. ScanDisk will determine if the improper shutdown caused any errors on
the hard disk. These errors may occur if the Microsoft Windows operating system
was not able to properly close all files before the shutdown. If no errors are found,
the restart process will continue. If ScanDisk does detect errors, follow the
instructions shown to continue the restart process. Work that was not saved prior to
the lockup may be lost.
Turning On and Turning Off Your Internet PC
3-5
Using a Surge Suppressor
Use of a surge suppressor, line conditioner, or uninterruptible power supply (UPS),
may help to protect your computer from damage that may be caused by power
surges or sags.
Restarting Your Computer After a Power Failure
If a power failure occurs or you accidentally disconnect the power cord while the
computer is turned on, turn off the computer until you are sure normal service has
been restored. The next time you turn on the computer, ScanDisk may run to check
the hard disk for errors that may have been caused by the improper shutdown.
Electrical Storms
If you are expecting an electrical storm to pass through your area, it is a good idea
to ensure that your Internet PC is turned off. You should disconnect the modem
line from the telephone wall jack and remove all the computer power cords from
electrical outlets.
3-6
Turning On and Turning Off Your Internet PC
Saving Energy Using Sleep and Power Management
4-1
Chapter 4
Saving Energy Using Sleep and Power Management
Microsoft Windows is equipped with a power management utility program that
enables you to reduce the power consumed by your Internet PC. You can set the
power management properties so that certain devices turn off after a predetermined
period of inactivity.
Accessing the Microsoft Windows Power Management
Settings
To access the Microsoft Windows Power Management program, complete the
following steps:
1. From the Windows Taskbar, click the Start button, point to Settings, and then
click Control Panel.
2. Double-click the Power æ icon. The Power Management Properties window
is displayed.
Preset Power Schemes
The following preset power schemes are available:
Microsoft Windows Power Schemes
Preset Option
System goes to
Standby after
Monitor turns off
after
Hard Disk turns off
after
Home/Office Desk
20 minutes of no
activity
15 minutes of no
activity
30 minutes of no
activity
Portable/Laptop
20 minutes of no
activity
15 minutes of no
activity
30 minutes of no
activity
Always On
Never
15 minutes of no
activity
1 hour of no activity
Your Internet PC power scheme is set to Home/Office Desk. Once the specified
amount of time has elapsed, the device enters Sleep mode. Components in Sleep
mode rapidly return to a fully active state once activity is detected.
4-2
Saving Energy Using Sleep and Power Management
Creating a Personal Power Scheme
If you find that the preset power management schemes do not fit your work habits,
you can create a personal power scheme.
To create your own personal power scheme, complete the following steps:
1. From the Windows Taskbar, click Start, point to Settings, and then click
Control Panel.
2. Click the Power Management æ icon.
3. Complete the following steps in the Power Management Properties window:
a. Ensure the Home/Office Desk power scheme is selected.
b. Click the down arrow next to System standby and select the amount of
time that passes before the computer goes into Sleep mode.
c. Click the down arrow next to Turn off monitor and select the amount of
time that passes before the monitor goes into Sleep mode.
d. Click the down arrow next to Turn off hard disks and select the amount
of time that passes before the hard drive goes into Sleep mode.
4. Click Save As and type in a name for your personal power scheme.
5. Click OK. Your personal power scheme is now activated.
Saving Energy Using Sleep and Power Management
Identifying the Power Status Lights
The status lights on the front of your Internet PC indicate the present state of the
computer. The power status light next to the sun ˜ icon indicates the current
power status of your computer. The light next to the hard drive activity ¡ icon
glows when the hard drive is active.
Power Button and Status Lights
No.
Components
1
Power Button
2
Hard Drive Activity Light
3
Power Status Light
The Power Status Light
The power status light will glow green, amber, or will be off.
•
Green indicates that the computer is in the Active mode.
•
Amber indicates that the computer is in the Sleep mode.
•
No light indicates that the computer is off.
The Hard Drive Activity Light
The hard drive activity light glows green when the hard drive is active.
4-3
4-4
Saving Energy Using Sleep and Power Management
Using the Power Button
When pressed, the Power button can perform the following functions:
•
Turns on the computer.
•
Wakes your computer from the Sleep mode.
•
Shuts down the computer.
•
Completely turns off the computer if pressed for more than 4 seconds.
`
CAUTION: Pressing the Power button for 4 seconds or more will completely turn off
the computer without properly shutting down Microsoft Windows. The 4-second off
feature should only be used when it is necessary to restart the computer if you
experience a system lockup. You will not be prompted to save open files; work that
you have not saved will be lost.
It is very important that you save all data before your computer enters the Sleep
mode. Unsaved data may be lost if the following events occur:
•
Computer is shut down while in the Sleep mode.
•
Electrical power fails while your computer is in Sleep mode.
`
CAUTION: Unsaved information will be lost if you shut down your computer or it
loses power prior to wakeup.
Activating the Sleep Mode
The Sleep mode is a low power standby state that reduces the amount of electrical
power consumed by your Internet PC while you are not actively using it. Microsoft
Windows Power Management will automatically put your Internet PC into the
Sleep mode once the power scheme timers expire. Or, you may choose to activate
Sleep mode immediately using one of the following methods:
+
NOTE: The Sleep button on your Compaq Internet Keyboard can only be used to put
the computer into the Sleep mode. Pressing it will not turn on or turn off the
computer.
Saving Energy Using Sleep and Power Management
4-5
Activating Sleep through the Microsoft Windows Start Menu
To put your computer into Sleep mode through the Microsoft Windows Start menu,
complete the following steps:
1. Save all your work and exit all programs.
2. From the Windows Taskbar, click the Start button, then click Shut Down.
3. Click Standby.
4. Click OK.
The power status light will become amber, indicating that the computer is in the
Sleep mode.
Activating Sleep Using the Sleep Button
To put your computer into the Sleep mode, you can press the Sleep button on your
Compaq Internet Keyboard.
No.
1
Components
The Sleep Button
Waking Up Your Computer
To wake your computer from the Sleep mode, press the Power button on the front
of the computer or press the Sleep button on your Compaq Internet Keyboard. The
power status light on your computer will become green, indicating that the system
is active.
4-6
Saving Energy Using Sleep and Power Management
Introducing the Features of Your Internet PC
5-1
Chapter 5
Introducing the Features of Your Internet PC
Working with the Internet Keyboard
Your Compaq Internet Keyboard offers an assortment of Easy Access buttons that
make accessing the Internet and using your favorite software programs easier and
faster. Along with the standard computer keyboard, the Internet Keyboard provides
the following:
•
Internet Button Suite
•
Multimedia Easy Access buttons
Using the Internet Button Suite
The Internet buttons allow easy access to the following:
•
e-mail
•
Internet searches
•
your favorite Web sites
•
electronic shopping
5-2
Introducing the Features of Your Internet PC
Internet Button Suite
No.
1
2
3
4
Icon
United States
All Other Countries Outside
the United States
Instant E-Mail provides one-touch
access for sending and reading your
E-mail.
Instant E-Mail provides one-touch
access for sending and reading your
E-mail using Microsoft Outlook
Express.
Daily Destination takes you to
personalized news, weather, sports,
and financial information from around
the world.
Community takes you to a
predefined Web site that provides
unique services for communication
over the Internet.
$
My Presario is your instant
connection to Compaq for product
information, helpful hints,
performance updates, service, and
more.
My Presario is your instant
connection to Compaq for product
information, helpful hints,
performance updates, service, and
more.
3
Instant Internet provides your daily
start point to the Internet. It connects
you to a personalized Web page filled
with local weather, news, sports, and
financial information.
Instant Internet provides your daily
start point to the Internet. It connects
you to a personalized Web page filled
with local weather, news, sports, and
financial information.
2
-
Introducing the Features of Your Internet PC
All Other Countries Outside
the United States
No.
Icon
5
©
Instant Search accesses a default
Web site that helps you locate
information on the Internet.
Instant Search accesses a default
Web site that helps you locate
information on the Internet.
*
Online MarketPlace takes you to an
electronic shopping experience.
Compaq has partnered with several
companies to provide you with the
convenience of catalog shopping at
the touch of a button.
Instant Answer provides you with a
central location to obtain specific
information about your Internet PC.
Retail Central provides an instant
connection to your computer store
and a variety of leading consumer
companies.
Secure E-Commerce/Featured Web
Site takes you to an electronic
shopping experience. Compaq has
partnered with several companies to
provide you with the convenience of
catalog shopping at the touch of a
button.
6
7
+
°
United States
5-3
NOTE: For the Internet Button Suite to operate, you must be connected to the
Internet. Until you set up your Internet service provider (ISP), each Internet button will
launch the Compaq Internet Setup process.
5-4
Introducing the Features of Your Internet PC
Using the Multimedia Easy Access Buttons
The Multimedia Easy Access buttons allow you to easily do the following:
•
control your CDs and DVDs
•
change the volume
•
skip tracks
•
mute the sound
•
eject or load CDs and DVDs
These buttons are not programmable.
Multimedia Easy Access Buttons
No.
1
2
3
4
5
Icon
ˆ
‹
Œ
‘
’
Component
Play/Pause starts or stops CD or DVD temporarily.
Rewind/Previous Track skips to the previous track.
Fast Forward/Next Track skips to the next track.
Stop ends the CD or DVD playback.
Eject/Load ejects or loads the CD or DVD.
Introducing the Features of Your Internet PC
5-5
Using Additional Button Features of Your Keyboard
Your Internet Keyboard is equipped with several special purpose buttons.
Additional Keyboard Buttons
No.
1
2
3
4
5
6
Icon
²
k
„
@
…
n
Component
Quick Print enables you to quickly print from your Microsoft
compatible programs. This button is programmable.
Launch enables you to launch Microsoft Works/Microsoft Word
(depending on your computer). This button is programmable.
Minus allows you to decrease the volume of your PC audio.
Mute button allows you to temporarily mute your PC audio.
Plus allows you to increase the volume of your PC audio.
Sleep puts your computer into a low power state, as well as wakes
your computer. The light on the Sleep button glows green when the
system is awake, and amber when the system is asleep.
5-6
Introducing the Features of Your Internet PC
Reprogramming Your Easy Access Buttons
You can reprogram the Easy Access buttons to reflect your personal preferences.
+
NOTE: The Easy Access Internet Buttons can only be reprogrammed to other URL’s
(Web sites).
The Easy Access ¸ icon is located on the Windows desktop Status bar. It can
also be accessed by clicking the Start button, then Programs and choosing
Reprogram Easy Access Buttons.
To reprogram your Easy Access buttons, complete the following steps:
1. From the Status bar, right-click the Easy Access ¸ icon and choose
Reprogram Easy Access Buttons. The Compaq Easy Access Button Settings
window is displayed.
2. Click the button you wish to change.
3. Follow the instructions provided.
After you have reprogrammed the button, Hover Help will display your choices as
you move the cursor over each button. Select the choice you prefer.
Disabling and Enabling the Easy Access Buttons
You can turn off all Easy Access buttons from the Easy Access Button program.
When the buttons are disabled, only the Sleep and Volume Control buttons will
operate. The Easy Access ¸ icon located on the Status bar will appear with a red
X on top. You can still access the button functions if you click the Easy Access
¸ icon.
To disable the Easy Access buttons, complete the following steps:
1. From the Status bar, right-click the Easy Access ¸ icon.
4. Click Disable Easy Access Buttons.
To enable the Easy Access buttons, complete the following steps:
1. From the Status bar, right-click the Easy Access ¸ icon.
5. Click Enable Easy Access Buttons.
Introducing the Features of Your Internet PC
5-7
Working with the Standard Keyboard Keys
The standard keyboard has four major types of keys:
•
main keys (typewriter-style)
•
function keys (F1 through F12)
•
arrow keys Å Æ Ç È
•
numeric keys (calculator-style)
Some keys have special functions, either alone or when combined with other keys.
The functions may vary depending on the programs you are using. Refer to Help to
learn how these keys can be used in combination with other keys to develop
shortcuts in your programs.
Key/Button
Description
ÅÆÇÈ
Arrow moves the cursor left, right, up, and down.
±
Windows opens the Start menu.
)
Windows Application usually has the same effect as a right mouse click.
Alt
Alt is frequently used in combination with other keys. By pressing Alt, the
focus moves from the cursor to the menu bar. The effect depends on the
program you are using.
Backspace
Backspace moves the cursor left one space and deletes the character in
that space.
Caps Lock
Caps Lock capitalizes all letters when typed. The Caps Lock light on the
keyboard glows when the key is active.
Ctrl
Control is normally used in combination with other keys. The effect
depends on the program you are using.
Delete
Delete deletes the character to the right of the cursor and moves the
following text left one space.
End
End moves the cursor to the end of the text line, table cell, or document. It
can also be used in combination with other keys.
Esc
Esc exits a program, moves back one window, or cancels a command,
depending on the program you are using.
5-8
Introducing the Features of Your Internet PC
Key/Button
Description
F1-F12
Function keys are assigned specific tasks, depending on the program you
are using. Some tasks include shortcuts, spelling and grammar, and
activating the menu bar. Refer to Help for details on specific key
combinations.
Home
Home moves the cursor to the beginning of the text line, table cell, or
document. Home can also be used in combination with other keys.
Insert
Insert switches typing between insert and overtype modes. For example,
after pressing this key, new text is either inserted into the current text or
replaces it.
Num Lock
Num Lock switches the calculator pad between numeric mode and edit
mode. The Num Lock light on the keyboard glows when this key is active.
Page Up/
Page Down
Page Up/Page Down moves the cursor or the page up or down.
Pause
Pause temporarily stops screen scrolling. The effect depends on the
program you are using.
Print Scrn
Print Screen prints the displayed screen in most programs.
Scroll Lock
Scroll Lock prevents automatic scrolling in some programs and allows
scrolling to be controlled by the arrow keys. The Scroll Lock light on the
keyboard glows when this key is activated. The effect depends on the
program you are using.
Shift
Shift is frequently used in combination with other keys. The effect
depends on the program you are using.
Introducing the Features of Your Internet PC
5-9
Keyboard Status Lights
Status lights provide information about your computer’s operation. Your Internet
Keyboard is equipped with the status lights shown below.
Keyboard Status Lights
No.
Icon
Component
Num Lock indicates that use of the 10-key number pad will produce
only numbers. Pressing the Num Lock key on the keyboard will
activate and deactivate this function.
1
â
2
á
Caps Lock capitalizes letters when typed. When this function is
active, the keyboard status light will glow. Select this function by
pressing the Caps Lock key on the left of your Internet Keyboard.
3
5
Scroll Lock indicates that automatic scrolling has been disabled.
5-10
Introducing the Features of Your Internet PC
Using the Scroll Mouse
The scroll mouse is similar to other computer mice except that it has a small wheel
button between the two mouse buttons. This wheel allows you to scroll through
most documents or windows without using the scroll bar.
Scroll Mouse
Introducing the Features of Your Internet PC
5-11
Understanding Scroll Mouse Functions
The scroll mouse offers standard mouse functions in addition to unique scrolling
functions. Basic mouse techniques that are used with any mouse include the
following:
Key/Button
Description
Click
Press and release the left mouse button once.
Double-click
Press and release the left mouse button twice, quickly. If you double-click
too slowly, the computer will respond as if you single-clicked.
For graphics:
1. Position the cursor over the graphic.
2. Press and hold down the left mouse button while dragging the graphic
to the new location.
3. Release the button.
Drag and drop
For text:
1. Point to the text.
2. Place the cursor inside the selected text.
3. Press and hold down the left mouse button while dragging the text to
its new location.
4. Release the button.
In menus: Point to the menu item and click.
Select
Right click
In most programs: Point to the beginning of your selection, hold down
the left mouse button, and move the cursor to the end of your selection.
Release the mouse button.
Click the right mouse button once to produce a context-specific Shortcut
menu.
5-12
Introducing the Features of Your Internet PC
Scrolling and Zooming with the Mouse
In addition to the typical mouse functions, the scroll mouse has the ability to move
right, left, and diagonally.
Key/Button
Description
AutoScroll
1. Open a program and press the center mouse button (wheel) that is
assigned to AutoScroll.
2. Move the mouse once in the direction you want to scroll (vertically,
horizontally, or diagonally). The farther you move the cursor from the
starting point, the faster the scrolling.
3. To stop AutoScroll, press any mouse button.
Wheel Scroll
• To scroll up, move the wheel forward.
• To scroll down, move the wheel backward.
Zoom
1. Place the mouse cursor in a program.
2. Press and hold the Ctrl key on the keyboard.
3. To zoom in, move the wheel forward. To zoom out, move the wheel
backward.
Choosing Scroll Mouse Options
You can choose features for setting up the mouse, making button assignments, and
controlling cursor movements.
To access the Scroll Mouse properties, complete the following steps:
1. Click the Start button.
6. Select Settings, then click Control Panel.
7. Double-click the Mouse Z icon.
8. From the Mouse Properties window, select the settings you prefer. The settings
are as follows:
•
Quick Setup displays button and scroll wheel functions.
•
Pointers select different schemes to use with the pointer.
•
Buttons changes the button and wheel functions. Click the Options button
to change your mouse button assignment options. For more information,
click Help.
•
Motion sets the cursor speed and acceleration. You can also enable Smart
Moves and create a pointer trail.
Introducing the Features of Your Internet PC
•
Orientation allows you to set up your mouse in a new position (for
example, a new angle).
•
Devices adds another mouse or device that you prefer to use as your
mouse.
•
Device Setup enables you to set up the mouse.
5-13
Using CyberJump and HyperJump
The CyberJump and HyperJump features combine commonly used tasks into one
convenient grid. CyberJump is used in an Internet window, while HyperJump is
used in your documents.
Before you can use this feature, you must first assign either function, CyberJump
or HyperJump, to a mouse button. You can make your left button, right button, or
the wheel work with CyberJump or HyperJump.
To assign a mouse button or the wheel to CyberJump or HyperJump, complete the
following steps:
1. Click the Start button.
9. Select Settings, then click Control Panel.
10. Double-click the Mouse Z icon.
11. Select the Buttons tab.
12. Click the Options button and from the dropdown menus, assign CyberJump
or HyperJump to the appropriate scroll mouse button, then click Ok.
13. Open a document.
14. Press the assigned button or wheel to display the CyberJump or HyperJump
grid.
15. Move the cursor to an icon on the grid and click an icon to execute a command.
To perform a double-click with the button assigned to CyberJump or HyperJump,
complete the following steps:
1. Click the Start button.
16. Select Settings, then click Control Panel.
17. Double-click the Mouse Z icon.
18. Select the Buttons tab.
19. Click the Options button, select the CyberJump or HyperJump tab and select
double-click.
20. Press and release the button quickly when using the double-click function.
5-14
Introducing the Features of Your Internet PC
CyberJump Functions
No.
Components
1
Menu activates the CyberMenu.
2
Go to Bookmark displays the Bookmark window.
3
Add Bookmark adds current page to Bookmark window.
4
Go Back returns to previous page.
5
Vertical Scroll jumps to the vertical scroll bar.
6
Start activates the Windows Start menu.
7
Horizontal Scroll jumps to the horizontal scroll bar.
8
Stop returns to the previous page.
Introducing the Features of Your Internet PC
HyperJump Functions
No.
Components
1
Menu activates the HyperMenu.
2
Minimize reduces the size of the window.
3
Close closes the window.
4
Recall returns to the last active window.
5
Vertical Scroll jumps to the vertical scroll bar.
6
Start activates the Windows Start menu.
7
Horizontal Scroll jumps to the horizontal scroll bar.
8
Resize allows you to resize the window.
5-15
5-16
Introducing the Features of Your Internet PC
Inserting and Removing a CD or DVD
If your computer has a tray-load CD or DVD drive, perform the following steps:
1. To insert a disc into the drive, press the Load/Eject ’ button located on the
front of your CD or DVD drive or from your Internet keyboard.
21. Carefully lift the disc from its case by holding the disc only at the inner and
outer edges so that you avoid touching the surface.
22. Place the disc, label side up, (unless it is a double-sided DVD) into the round
area of the tray. If the tray contains support tabs, carefully slide the disc under
the tabs to position it correctly in the tray.
23. Press the Load/Eject ’ button again to close the drive.
To remove a disc from the CD or DVD drive, press the Load/Eject ’ button on
the drive or on your Internet keyboard.
+
NOTE: To manually eject a disc from a tray-load CD or DVD drive, gently push the tip
of a paper clip into the hole under the drive. Complete this operation while your
computer is on.
Manually Ejecting a Disc from the CD or DVD Drive
Introducing the Features of Your Internet PC
5-17
Playing an Audio CD
To play a self-starting audio CD, insert the disc into the CD or DVD drive. After a
few seconds, the disc automatically starts playing.
To play a non self-starting audio, press the Play button on your Internet keyboard
or complete the following steps:
1. Click the Start button from the Windows Taskbar.
24. In the Start menu, point first to Programs, then to Accessories, and then to
Entertainment.
25. Click CD Player. The CD Player window is displayed.
26. Click the Play button. The CD begins playing.
Click the Stop button to stop playing the CD.
To remove a disc from the drive, click the Load/Eject ’ button.
Playing a non DVD Video CD
For a video CD to play automatically, insert the CD into the CD or DVD drive and
playback begins.
To manually play a video CD, complete the following steps:
1. Click the Start button on the Windows Taskbar.
27. Select Programs, then Accessories, then Entertainment, and then Media
Player. The Media Player opens.
28. Select Device, then Active Movie from the menu.
29. Go to Select CD Disc.
30. Double-click the CD Drive ž icon. You should see a list of files and file
folders. CD movies are usually stored in a file folder that begins with the letters
MPEG.
31. Double-click the folder that contains the CD movie files.
32. Select a movie file and click the Open button. A view window for the movie is
displayed.
33. Click the Play button on the window and the movie begins to play.
+
NOTE: It may take a moment for the CD or DVD drive to read the disc when you use
the Play, Pause, Next Track, and Previous Track buttons.
5-18
Introducing the Features of Your Internet PC
Identifying Your Storage Drives
Your diskette drive, hard drive, CD or DVD, and Zip drive are designated with
icons and letters of the alphabet.
To determine your drive letters, complete the following steps:
1. From the Windows desktop, double-click the My Computer m icon. The
icons for your drives will be displayed in the My Computer window. The drive
letters are found next to the corresponding icons.
34. Use the icons below to identify your drive.
+
H
Q
Drive ________
Diskette Drive
Drive ________
Hard Drive
ž
n
Drive ________
CD/DVD Drive
Drive ________
Zip Drive
NOTE: The CD or DVD drive and the Zip drive are available only on select models.
Identifying Your Hard Drive Size
To determine the size of your hard drive, complete the following steps:
1. From the Windows desktop, double-click the My Computer m icon.
35. In the My Computer window, right-click the hard drive Q icon.
36. Click the Properties menu option. The size of the hard drive is found under the
General tab.
Introducing the Features of Your Internet PC
5-19
Using Your Diskette Drive
To insert a diskette into the diskette drive, hold the diskette with the label facing up
and the arrow on the diskette pointing towards the drive, and gently push the
diskette into the drive.
To remove a diskette, press the Eject button on the diskette drive.
`
CAUTION: Removing a diskette when the drive is reading from or writing to the
diskette can damage the diskette or damage the information stored on it. Wait until
the diskette drive activity is complete before removing a diskette.
If the diskette does not eject, contact your local Compaq-authorized dealer,
reseller, or service provider.
Write-Protecting a Diskette
The write-protect tab on a standard 3.5-inch diskette serves the purpose of not
allowing you to save data to or delete data from the diskette.
The write-protect tab functions the same way as on a standard 3.5-inch diskette. If
the hole is covered, you can read and write to the diskette. If the hole is open, you
can only read from the diskette.
5-20
Introducing the Features of Your Internet PC
Introducing Microsoft Windows
6-1
Chapter 6
Introducing Microsoft Windows
Microsoft Windows is the latest innovation in PC operating system technology.
An operating system is the software that gives your computer the ability to run
programs, display your work, and connect to printers, keyboards, and other
devices.
The Windows operating system allows you to perform tasks by clicking menu
items and small pictures (called icons). Windows also allows more than one
program to run at a time, and each program to share information with other
programs.
Before you can begin using your Compaq Internet PC, you must complete the
Microsoft Windows setup process and register your new computer. When you turn
on your computer for the first time, the Microsoft Windows setup begins
automatically.
Finding Help
If you are not familiar with the many features of Microsoft Windows, you have the
following tools that have been included with your computer.
Windows Help
Windows Help is a valuable tool that can provide answers to many of your
questions about Microsoft Windows.
To search for information in Windows Help, complete the following steps:
1. Click the Start button, then click Help.
2. Select the Content, Index, or Find tab for help.
6-2
Introducing Microsoft Windows
Customizing the Windows Desktop
The Windows desktop is the screen you see when the Windows startup is
complete. You can arrange your desktop just the way you want it.
Windows Desktop
Components
1
Icons represent files, folders,
programs, and other objects that you
use.
3
Start button displays a menu of
commands for starting programs,
changing system settings, locating
files, updating your system, and
getting help.
2
Windows Desktop is the basic
Windows work area.
4
Windows taskbar provides a way to
organize your programs and files, and
navigate between files.
Introducing Microsoft Windows
6-3
Arranging Icons
You can arrange the icons on your desktop for quick and easy access to frequently
used items.
To arrange icons, complete the following steps:
1. Right-click anywhere on the Windows desktop.
2. From the Shortcut menu, select Arrange Icons.
3. Choose the method by which you want to arrange the icons. You can arrange
icons in the following ways:
•
By Name (alphabetically)
•
By Type (file extension)
•
By Size (size of the file)
•
By Date (date the file was created or edited)
•
AutoArrange (automatic icon arrangement)
You can also arrange your icons in organized rows. Right-click the Windows
desktop and choose Line Up Icons from the Shortcut menu.
Selecting a Background
To change the background on your desktop, complete the following steps:
1. Right-click the Windows desktop and select Properties from the Shortcut
menu.
2. Select the Background tab and click Pattern.
3. From the Patterns list, choose the background you prefer.
4. Click OK.
6-4
Introducing Microsoft Windows
Adding a Screen Saver
To add a screen saver, complete the following steps:
1. Right-click the Windows desktop and select Properties from the Shortcut
menu.
2. Select the Screen Saver tab.
3. From the Screen Saver drop-down menu, choose the design you prefer.
4. Click the Settings button to choose the options for your screen saver. For
example, you can set the length of time you want the computer to be inactive
before the screen saver begins.
5. Click Preview to view the screen saver.
6. Once you have the screen saver you prefer, click Apply.
7. Click OK.
For more information on customizing your desktop, refer to Microsoft Windows
Help.
Searching for Files
In Windows you can search for files or folders by entering a complete or partial
name, the date the file was created, or the file type or size.
To search for a file or folder, complete the following steps:
1. From the Windows Taskbar, click the Start button.
2. Point to Find and choose File or Folders.
3. From the Name & Location tab, type the name of the file or folder, or as much
as you can remember, in the Named box.
4. From the Look in box, select the location to be searched.
5. Click the Include subfolders checkbox.
6. From the Date tab, you can specify All Files, or Find all files and provide a
time frame in which the file was created or modified.
7. From the Advanced tab, you can specify the type of document to search for or
the size of the document.
8. Click Find Now.
Introducing Microsoft Windows
6-5
Creating New Folders
Microsoft Windows allows you to create folders to organize your files. For
example, you can create a folder and name it Budget99. In this folder you could
store all of your files related to expenses, profits, taxes, and so forth.
To create a folder, complete the following steps:
1. Right-click the Start button and choose Explore from the Shortcut menu to
open Windows Explorer.
2. From Windows Explorer, click the drive where you want to place the new
folder so that it is selected.
3. Right-click in Explorer and choose New from the Shortcut menu.
4. Choose Folder.
5. Type a name for the new folder and press Enter.
Deleting Files and Folders
To delete a file or folder, complete the following steps:
1. Click the file or folder you want to delete.
2. Press Delete. The message “Are you sure you want to send to the Recycle
Bin?” is displayed.
3. Click Yes if you want to delete the file or folder. If you do not want to delete
the file or folder click No or Cancel.
6-6
Introducing Microsoft Windows
Creating Shortcuts
Shortcuts are used to open files and programs without having to select them from
the Start menu or from their permanent location on the hard drive. If you frequently
use a certain file or folder, you can place a shortcut for it on your desktop as an
icon or on the Start menu for quick access.
To create a shortcut to a file or folder, complete the following steps:
1. Right-click the Start button and choose Explore from the Shortcut menu to
open Windows Explorer.
2. From Windows Explorer, locate the file or folder you want to use to create the
shortcut.
3. Click the file or folder to select it.
4. Right-click the selected file or folder and choose Create Shortcut from the
Shortcut menu.
5. Right-click and drag the shortcut to any of the following areas:
• on the Windows desktop
• in a particular folder
6. When Windows prompts you with a Shortcut menu, choose Create Shortcut
Here.
To use the shortcut, double-click the new shortcut icon.
Introducing Microsoft Windows
6-7
Using Microsoft Windows Accessories
Microsoft Windows is equipped with a number of accessories. Brief descriptions of
the accessories available to you are provided as follows:
•
Accessibility allows you to configure Windows for your vision, hearing, and
mobility needs.
•
Communications offers the following features:
–
Dial-Up Networking enables you to connect to another computer or to a
network.
–
Direct Cable Connection enables you to quickly and easily establish a
direct serial or parallel cable connection between two computers.
•
HyperTerminal enables you to connect to a remote computer, send and
receive files, and connect to computer bulletin boards or similar information
services.
•
Phone Dialer enables you to place calls using your computer. It also stores a
list of your calls for you to review as needed.
•
Entertainment offers the following features:
–
ActiveMovie Control provides a way to view ActiveMovie files, usually
encountered on the Web.
–
CD Player allows you to play audio CDs in your CD drive while you work
in other programs.
–
Media Player allows you to play multimedia files (audio and video) saved
in these formats: .wav, .mid, .rmi, .avi, and .mpg.
–
Sound Recorder allows you to play audio files. You can also record
sounds using a microphone attached to your computer.
–
Volume Control provides the power to control Windows sound. You can
control the balance between your left and right speakers, change the
volume, and mute certain devices.
•
Games provides several activities for your entertainment.
•
System Tools offers various utilities for your system, including Clipboard
Viewer, Disk Cleanup, Disk Defragmenter, and ScanDisk.
•
Calculator provides a means to perform simple and complex calculations.
•
Imaging allows you to view, zoom, rotate, and print a previewed image.
•
Notepad offers a place to work with unformatted text.
6-8
Introducing Microsoft Windows
•
Paint allows you to create and edit graphics.
•
WordPad provides basic word processing features.
To use any one of these accessories, complete the following steps:
1. From the Windows Taskbar, click the Start button, then point to Programs.
2. Click Accessories and choose the feature you want to use.
Installing Additional Software
Once you have become accustomed to using your Internet PC and have explored
the pre-installed software, you may wish to purchase and install additional
software. When selecting software for your Internet PC, make sure it states on the
packaging that it is compatible with your Microsoft Windows operating system.
*
HINT: If the software documentation contains installation instructions, use those
instructions. If not, you can complete the following steps for installing software from
a CD or diskette.
Software can be installed from a CD, a diskette, or downloaded from a Web site.
Many software CDs automatically begin the installation process when placed in the
CD drive. If you have a software CD that does not automatically begin the
installation process, you can install the software by using the Microsoft Windows
Add/Remove Programs utility.
Installing Software from a CD or Diskette
To install software from a CD that does not automatically install, or from a
diskette, complete the following steps:
1. Close all open programs.
2. From the Windows Taskbar, click the Start button, point to Settings, and then
click Control Panel.
3. Double-click the Add/Remove Programs » icon. The Add/Remove
Programs Properties window is displayed. Click Install.
4. Insert the CD or diskette into the proper drive and click Next.
Microsoft Windows will find the CD or diskette and begin the installation process.
Introducing Microsoft Windows
6-9
Installing a Downloaded Program File
*
HINT: If you choose to download software from a Web site, follow the installation
instructions that may be included on the Web page. If installation instructions are not
available, complete the steps below.
To install a program file that you have downloaded from the Internet to your hard
drive, complete the following steps:
1. Terminate your Internet connection.
2. Close all open programs.
3. From the Windows Taskbar, click the Start button, point to Settings, and then
click Control Panel.
4. Double-click the Add/Remove Programs » icon. The Add/Remove
Programs Properties window is displayed. Click Install. The Install Program
from Floppy Disk or CD-ROM window is displayed. Click Next. The Run
Installation Program window is displayed. Click Browse.
5. Locate and select the Setup.exe or Install.exe file for the downloaded software.
6. Click Open to begin the installation process.
6-10
Introducing Microsoft Windows
Identifying and Removing Computer Viruses
7-1
Chapter 7
Identifying and Removing Computer Viruses
Recognizing a Computer Virus
A computer virus is a program that damages or erases files or programs. Your
computer can become “infected” with a virus when you open a contaminated
program or file. Some signs that your computer may be infected include:
•
Strange characters or crude statements suddenly appearing on your screen
•
Hard drive, memory, or software error messages
•
Damage to files or directories for no apparent reason
•
Strange responses to commands
•
Sharp decrease in system performance or program speed
Using McAfee Anti-Virus Software
Your Internet PC is equipped with anti-virus software. Scanning your computer for
viruses is an important part of keeping your files safe from becoming infected with
computer viruses. However, hundreds of new viruses are created each month, so
you should update the anti-virus tool often.
7-2
Identifying and Removing Computer Viruses
Scanning for Viruses
To configure and perform a virus scan of your diskettes, your local hard drive, or a
network drive, complete the following steps:
1. From the Windows desktop, double-click the Compaq Support $ icon.
2. Double-click the McAfee VirusScan ö icon. The VirusScan Launcher is
displayed.
3. Click Scan. The McAfee VirusScan window is displayed. If you want to
perform an Advanced Scan, refer to the Perform an Advanced On-Demand
Scan in the McAfee on-line Help.
4. Select the Where & What tab. The C:\ drive, your local hard drive, is the
default. If you want to scan a different drive, click Browse and select another
drive letter.
5. Select the Include Subfolders option, if you want to scan the subfolders.
6. Select one of the following options:
•
Scan All Files
•
Program Files Only
If you select Program Files Only, click Extensions to view a list of file
extensions that VirusScan will scan. You can edit the list.
7. Select the Compressed Files option to include files created with file
compression utilities. For more information on Scanning Compressed Files,
refer to the McAfee on-line Help.
+
NOTE: Because VirusScan decompresses these file types in memory before checking
for viruses, this option can increase the time it takes to complete a scan.
8. Determine if you want to start scanning immediately or to continue
customizing your scan. To start VirusScan immediately, click Scan Now. If
you want to continue configuring your scan, select one of the following tabs:
•
Action tab
•
Report tab
9. Click Stop to halt a VirusScan after it has started, or click New Scan to start a
new scan and change your configuration choices to the VirusScan defaults.
Identifying and Removing Computer Viruses
7-3
Creating an Anti-Virus Emergency Diskette
Having an Anti-Virus Emergency Diskette available to use is an essential part of an
effective virus prevention program. If your system becomes infected, you may not
be able to access your hard drive or start Windows. The Emergency Diskette will,
at a minimum, diagnose and resolve infections on your hard drive, enabling you to
start your computer from a virus-free environment.
Use VirusScan’s Emergency Diskette utility to create an Emergency Diskette. If
you ever need to start your computer from the Emergency Diskette, we recommend
you perform a scan of your computer and its contents immediately after starting
your computer.
To create an Emergency Diskette, complete the following steps:
1. Get a blank, formatted 3.5-inch, high-density diskette.
10. From the Windows desktop, double-click the Compaq Support $ icon.
11. Double-click the McAfee VirusScan ö icon. The VirusScan Launcher is
displayed.
12. Click Tools. The Utility Toolbox is displayed.
13. Click Emergency Disk. The Emergency Disk Wizard is displayed.
14. If you have inserted a formatted diskette, click the Don't Format option. Click
Next. You are instructed to insert the diskette into your computer’s diskette
drive.
15. Insert the diskette and click Next. The Emergency Disk Utility scans the
diskette for viruses and copies the files necessary to scan your system for
viruses. A window informs you when the process is complete.
16. Click Finish.
17. Remove the diskette from the diskette drive, label it “VirusScan Emergency
Diskette,” and store it in a safe place.
You will now have a diskette that contains the system files necessary to start your
computer.
7-4
Identifying and Removing Computer Viruses
Using an Anti-Virus Emergency Diskette
If you need to use the emergency diskette, complete the following steps:
1. Shut down your computer using the Main Power button.
+
NOTE: Do not use the Restart command from the Start menu. Do not use your
computer Reset button.
18. Insert the emergency diskette into the diskette drive.
19. Turn on the computer and follow the on-screen instructions.
20. When the scan is complete, press Ctrl+Alt+Del to restart your computer.
+
NOTE: The emergency disk scans your computer for viruses in the MS-DOS mode,
not the Windows mode. Scanning takes about 15 to 20 minutes. However, the length
of time depends on the size of your hard drive and the number of files to be scanned.
Identifying and Removing Computer Viruses
7-5
Keeping Your Anti-Virus Software Current
By registering with McAfee Anti-Virus, you can receive free anti-virus software
updates for one year. Once you have registered, you will be able to simply
download the updates at any time. To register and begin downloading updates,
complete the following steps:
1. From the Windows desktop, double-click the Compaq Support $ icon.
21. Double-click the McAfee VirusScan ö icon. The McAfee VirusScan
Launcher will display.
+
NOTE: The McAfee VirusScan Launcher shows how many days have elapsed since
the last update.
22. Click the Update button. The Welcome to McAfee VirusScan! window is
displayed. Read the information on the screen.
23. Click the Update button. The Welcome to McAfee SecureCast Online!
window will display. Select Yes if you have access to the Internet, or select No
if you do not have an Internet connection.
24. Click Next. The User Registration Information window is displayed.
25. Enter your information in the User Identification and Additional Information
areas.
26. Click the Next button. The Online Activity Status window displays the status
of the download.
Once the download is complete, your anti-virus software will be prepared to detect
the latest viruses. It is recommended that you download updates at least once a
month.
7-6
Identifying and Removing Computer Viruses
Learning about Your Modem
8-1
Chapter 8
Learning about Your Modem (available on select models only)
Your Internet PC is equipped with a 56K V.90 data/fax modem. Before using your
modem to connect to the Internet, you must establish an account with an Internet
service provider (ISP).
If your Internet PC is equipped with a digital modem, please refer to the digital
modem features guide.
Performance Features
Your modem has several features that significantly enhance its performance. These
features include the following:
•
56K ITU V.90 compliant – Your modem is ready to operate using the
International Telecommunications Union V.90 standard.
•
K56flex compliant – If your ISP uses the K56flex protocol, the modem will
automatically use this protocol to establish a connection.
Identifying Your Modem
To learn more about the modem installed on your computer, complete the
following steps:
1. From the Windows Taskbar, click the Start button, point to Settings, and then
click Control Panel.
2. Double-click the Modems I icon.
In the Modem Properties window, the names of the installed modems are
displayed.
8-2
Learning about Your Modem
Connecting Your 56K V.90 Modem
To locate the exact location of the modem in your Internet PC, refer to the Compaq
Hardware and Software Setup poster. Choose the picture below that resembles
your modem. The connectors are identified directly below the picture.
If your Internet PC is equipped with a digital modem, refer to the feature guide for
instructions on connecting the modem.
56K V.90 PCI Modem
No.
1
2
Icon
Component
^
Line in from telephone wall jack
ð
Line out to telephone set
or Line
or Phone
Learning about Your Modem
8-3
56K ITU V.90 Standard
If you are able to connect to an ISP using the V.90 standard, the modem will be
able to download files at a maximum speed of 56 kilobits per second (Kbps), over
standard telephone lines. Download speeds will vary with telephone line
conditions.
When using the V.90 standard, download speeds are faster than upload speeds. The
maximum download speed is 56 Kbps and the maximum upload speed is
33.6 Kbps. Transmission rates will vary depending on telephone line conditions.
The V.90 and K56flex protocols are designed only to increase the download
transmission rate from V.90 or K56flex compliant digital sources. Maximum
achievable download transmission rates are currently unknown, may not reach
56 Kbps, and will vary with telephone line conditions.
Understanding Point-to-Point Connections
You can set up your modem to call another modem directly. This is known as a
point-to-point connection. During a direct modem-to-modem call, the download
and upload speeds are limited to 33.6 Kbps.
Getting the Latest Modem Information
For the latest information on your Compaq modem, visit the Compaq Web site at:
www.compaq.com/products/networking/modems/pci56k
8-4
Learning about Your Modem
Surfing the Internet
9-1
Chapter 9
Surfing the Internet
The Internet is a worldwide network of computer networks. Computer networks
are two or more computers linked or connected together by cables or phone lines.
These computers are linked together to provide seemingly endless amounts of
information for research, education, commerce, and entertainment purposes. This
information is stored on computers called Web servers. Web servers are set up
exclusively for Internet users to access this information.
The graphic below illustrates how a Web site stored on a Web server in North
America can be viewed all around the world.
The Internet
When you “surf” the Internet, you are accessing these millions of computers and
reviewing the information that they have stored on their Web servers.
Internet Addresses (URLs)
Surfing the Internet is made possible by the addresses assigned to these linked
computers. The Web address (also called the Uniform Resource Locator, or URL)
allows other computers to view the information as Web pages. For example, the
Compaq Web site address is www.compaq.com. When you access this address, the
Compaq Web site and all associated Web pages can be viewed on your
Internet PC.
9-2
Surfing the Internet
Understanding the World Wide Web
The World Wide Web, also known as the Web, is a popular format that has been
set up on the Internet specifically for publishing and accessing information.
This information is formatted into attractive pages in the form of text, graphics,
animation, audio, and video called Web sites. Web sites also contain hyperlinks to
other Web sites so you can easily follow a path of associated ideas. Hyperlinks
provide a means for moving from page to page, computer to computer, and idea to
idea on the Web.
To begin surfing the Internet, you must have the following:
•
A physical connection to the Internet, such as a modem through a telephone
line – a modem is the hardware that your computer uses to send and receive
information on the Internet through standard telephone lines.
•
An active Internet Service Provider (ISP) account – an Internet service
provider serves as your entry point to the Internet and to the Web.
•
A Web browser installed on your computer – a Web browser is a software
program that allows you to view Web sites.
Choosing an Internet Service Provider
Compaq makes it easy to connect to the Internet by offering Compaq Easy Internet
Access, but if you choose to install a third party ISP account, refer to their
documentation for setup instructions. Any ISP of your choice can be installed at
anytime; however, it is recommended that you first complete the initial system
registration process.
Surfing the Internet
Using a Web Browser
A Web browser is a program that allows you to see Web sites on the Internet.
Your Internet PC comes preinstalled with Microsoft Internet Explorer and
Netscape Navigator browsers.
Microsoft Internet Explorer
To begin surfing the Internet with Internet Explorer, complete one of the
following:
•
From the Windows desktop, double-click the Internet Explorer ! icon.
•
From the Windows Taskbar, click the Start button, point to Programs, and
then click the Internet Explorer ! icon.
+
NOTE: For America Online users, you must start AOL and log on before starting
Internet Explorer.
9-3
9-4
Surfing the Internet
Surfing the Internet with Your Keyboard
A quick and easy way to access the Internet is by using your Compaq Internet
Keyboard.
+
NOTE: Before you can use your Internet keyboard to surf, you must set up an ISP
account.
Your Internet keyboard buttons are one-touch buttons that direct access to the
Internet and Internet features. These buttons are programmed to do the following:
Internet Button Suite
Button
United States
All Other Countries Outside
the United States
2
Instant E-Mail provides one-touch
access for sending and reading your
E-mail.
Instant E-Mail provides one-touch
access for sending and reading your
E-mail using Microsoft Outlook Express.
-
Daily Destination takes you to
personalized news, weather, sports, and
financial information from around the
world.
Community provides one-touch access
for sending and reading your E-mail
using Microsoft Outlook Express.
$
My Presario is your instant connection
to Compaq for product information,
helpful hints, performance updates,
service, and more.
My Presario is your instant connection
to Compaq for product information,
helpful hints, performance updates,
service, and more.
3
Instant Internet provides your daily start
point to the Internet. It connects you to a
personalized Web page filled with local
weather, news, sports, and financial
information.
Instant Internet provides your daily start
point to the Internet. It connects you to a
personalized Web page filled with local
weather, news, sports, and financial
information.
©
Instant Search accesses a default Web
site that helps you locate information on
the Internet.
Instant Search accesses a default Web
site that helps you locate information on
the Internet.
Surfing the Internet
9-5
Internet Button Suite
Button
*
°
United States
All Other Countries Outside
the United States
Online MarketPlace takes you to an
electronic shopping experience. Compaq
has partnered with several companies to
provide you with the convenience of
catalog shopping at the touch of a
button.
Instant Answer provides you with a
central location to obtain specific
information about your Internet PC.
Retail Central provides an instant
connection to your computer store and a
variety of leading consumer companies.
Secure E-Commerce/Featured Web
Site takes you to an electronic shopping
experience. Compaq has partnered with
several companies to provide you with
the convenience of catalog shopping at
the touch of a button.
These buttons may be reprogrammed to other URLs only (web sites). For
instructions on reprogramming these buttons, please refer to Working With Your
Internet Keyboard.
9-6
Surfing the Internet
Surfing Tips
After you have set up an Internet connection with your ISP and you log on to the
Internet, you are ready to surf. To help your surfing experience be productive, we
have provided a few tips, after a quick review on the Internet.
To begin surfing the Internet you must use a Web browser, such as Internet
Explorer or Netscape Navigator. However, some ISPs, such as America Online,
require you to log on to their service before you can use a Web browser.
There are two ways to connect to the Internet:
•
By starting the ISP program.
•
By starting the Web browser program.
If you start the ISP first, there are two ways to begin surfing the Internet:
•
By using the ISP connection to the Internet (usually an icon on the task menu).
•
By minimizing the ISP program and starting the Web browser from the
Windows desktop.
Each of the browsers has a default “home” page. The home page is the first page
displayed as the browser launches. Compaq has configured the browser to launch a
Compaq-recommended Web site, which you can customize to your own taste. Of
course you can change this home page if you want to start at another Web site.
Look in the browser Help files for instructions on resetting the default home page.
Accessing a Search Engine
Once you access the Internet, your can begin searching for information using a
search engine.
A search engine is a type of program found on various Web sites that allows you to
search the Internet for keywords you type in. The search engine will return a list of
Web pages that have your keywords in them.
There are many search engines to choose from on the Internet, such as AltaVista.
To go to one of these search engines, type in the URL, such as www.altavista.com
in the Address box. This will take you to the AltaVista home page.
The browsers have a Search button that will automatically take you to their
recommended search engine, and your Internet PC comes with a button that takes
you to a search engine.
Surfing the Internet
9-7
Using a Search Engine
The following points are additional tips on how to find information on the Internet
using a search engine:
•
When entering keywords, you can enter an entire sentence to limit the search to
a more specific topic. For example, for information on carving a turkey, type
carving a turkey in the keyword box instead of just turkey.
•
After entering a keyword search, the search engine that you are using will
return a list of all Web sites that contain your keywords. You must click the
link to a Web site to find more detailed information.
•
Some Web sites are connected to other Web sites with hyperlinks often
appearing as colored, underlined text. When you click a hyperlink, you access
the Web page associated with that link. The new Web page may be from the
same Web site or a Web site in another country.
For practice, search for the Compaq Web site by typing the following URL into the
Address box of your Web browser:
www.compaq.com/athome/exploration
9-8
Surfing the Internet
Maintaining Your Internet PC
Chapter 10
Maintaining Your Internet PC
Cleaning Your Internet PC
Exterior Surfaces
To clean exterior surfaces, wipe with a slightly damp cloth.
Keyboard
To clean the keyboard, gently wipe the surfaces with a soft, clean cloth.
Monitor
Refer to the monitor manufacturer documentation for cleaning instructions.
Mouse
To clean the mouse, complete the following steps:
1. Unscrew the ball cover on the underside of the mouse.
2. Remove the ball.
3. Wipe the ball with a damp, lint-free cloth. Do not use paper towels.
4. Use your small finger to remove any accumulated dust or lint that may be
lodged in the ball compartment.
5. Reinsert the ball.
6. Reattach the ball cover.
10-1
10-2
Maintaining Your Internet PC
Using System Maintenance Features
Optimize your system by using the System Maintenance features offered in
Microsoft Windows. You can use the Maintenance Wizard to check your hard
drive for problems, manage your hard drive space, and delete unnecessary files.
The Maintenance Wizard is a one-step feature that combines ScanDisk, Disk
Defragmenter, Disk Cleanup, Compression Agent, and many other tools. Setting
up a regular maintenance schedule will ensure your programs run faster, you utilize
more hard drive space, and your system performs at its best.
To run the Maintenance Wizard, complete the following steps:
1. From the Start menu, click Programs, then choose Accessories.
2. Click System Tools, then choose Maintenance Wizard.
When the Maintenance Wizard window is displayed, complete the instructions
provided.
Upgrading Your Internet PC
11-1
Chapter 11
Upgrading Your Internet PC
Your Internet PC is fully upgradable. Items that you can add or replace include the
following:
•
PCI expansion card
•
ISA expansion card (available on select models only)
•
Memory modules
•
System battery
If you would like to replace the system board or microprocessor, please consult a
Compaq Authorized Service Provider. To find the nearest service provider in your
area, visit the Compaq Web site at:
www.compaq.com
11-2
Upgrading Your Internet PC
Preparing to Upgrade Your Internet PC
Your safety is important. Before proceeding with any procedures involving the
internal components of your Internet PC, please take a few moments to read the
following Warning and Caution statements. Following the guidelines in these
statements will help to reduce the risk of personal injury or equipment damage.
WARNING: To reduce the risk of electric shock and damage to the equipment:
• Do not disable any 3-prong grounding plug. The grounding pin on a 3-prong
a
plug is an important safety feature. Removal of the grounding pin increases the
risk of computer damage. If you cannot fit the plug into your electrical outlet,
contact an electrician for information on having grounded outlets installed.
• Use only grounded electrical outlets when plugging in your computer. These
outlets should be easily accessible at all times.
• When connecting a power cord to a grounded electrical outlet, ensure that
nothing rests on the power cord.
WARNING: To reduce the risk of electrical shock and damage to the computer,
BEFORE REMOVING THE COVER always ensure the following:
a
`
•
•
•
•
•
The computer is turned off.
The computer power cord is unplugged.
The modem line is disconnected from the telephone jack.
All network cables are disconnected.
All cables and power cords are disconnected from the computer.
CAUTION: To prevent damage to the computer by electrostatic discharge, you must
become static-free before removing the cover. To become static-free, touch an
unpainted metal surface or one of the screws on the computer cover. As you work,
avoid touching exposed metal on any of the computer circuit boards.
Upgrading Your Internet PC
11-3
Identifying the Major Components of Your Internet PC
Your Internet PC has been constructed using a cover design. Familiarize yourself
with the major components that include the following:
The Computer
+
NOTE: The view shown may differ slightly from your Internet PC.
11-4
Upgrading Your Internet PC
The Computer Cover
+
NOTE: The view shown may differ slightly from your Internet PC.
Upgrading Your Internet PC
Removing the Cover
Before beginning the upgrade procedure, it is recommended that you move the
computer to a suitable workspace. Choose a clean, spacious, and well-lit area.
1. Using a screwdriver, remove the three cover retaining screws.
Removing the Cover Retaining Screws
+
NOTE: The view shown may differ slightly from your Internet PC.
2. Slowly pull back and upward on the computer cover.
3. Place the cover off to the side.
Replacing the Cover
To replace the cover, perform the removal steps in reverse order.
11-5
11-6
Upgrading Your Internet PC
Identifying Power Supply and Data Cables
When performing upgrade procedures, you may find it necessary to disconnect
power supply and data cables.
*
HINT: If you must disconnect a cable, mark the cable with a piece of masking tape
labeled with the name of the device for future reference.
Refer to the following graphics for assistance in identifying power supply and data
cables.
Power Supply Cables
Power supply cables usually have a white connector that consolidates several
colored wires.
View of a Typical Power Supply Cable
Upgrading Your Internet PC
Data Cables
Data cables are thin wide cables that usually have black connectors.
View of a Typical Data Cable
11-7
11-8
Upgrading Your Internet PC
Moving the Power Supply
Once you have removed the cover, you may notice that the power supply box
restricts access to certain internal components. If you must move the power supply,
complete, the following steps:
1. Using a screwdriver, remove the power supply retaining screws.
Removing the Power Supply Retaining Screws
+
NOTE: The view shown may differ slightly from your Internet PC.
Upgrading Your Internet PC
11-9
4. Carefully turn over the computer. Slide out the power supply 1, then pull
it up 2.
Storing the Power Supply
*
HINT: If you find it necessary to disconnect any of the power supply cables, be sure to
identify each cable so that you can reconnect them properly. To disconnect a power
supply cable, gently rock the connector back and forth as you ease it out of the
receptacle.
+
NOTE: The view shown may differ slightly from your Internet PC.
11-10 Upgrading Your Internet PC
Identifying System Board Components
The following graphics show the location of various system board components.
System Board
+
NOTE: The view shown may differ slightly from your Internet PC.
Upgrading Your Internet PC
No.
11-11
Components
1
ISA Expansion Card Slot (open)
2
Combination PCI/ISA Expansion Card Slot (open)
3
Combination PCI/ISA Expansion Card Slot (open)
4
PCI Expansion Card Slot (open)
5
PCI Expansion Card Slot (modem)
6
Front Side Bus Switch Setting
7
Frequency Multiplier/Core Voltage Switch Setting
8
Data Cable Connector (diskette drive)
9
Primary IDE Data Cable Connector (hard drive)
-
Secondary IDE Data Cable Connector (CD or DVD – DVD available on select models only)
q
Memory Module Slots
w
Real-Time Clock Battery
+
NOTE: Either a single ISA expansion card or a single PCI expansion card can be
installed in slot 2 and 3.
11-12 Upgrading Your Internet PC
Installing an Expansion Card
Expansion cards, such as a scanner card or a modem, increase the capabilities of
your computer. There are many different types of expansion cards available.
Before purchasing an expansion card or equipment that requires the installation of
an expansion card, ensure that the new card and equipment is compatible with your
Internet PC.
Determining Expansion Card Compatibility
The types of cards compatible with your Internet PC include the following:
•
Plug and Play Peripheral Component Interconnect (PCI) cards
•
Industry Standard Architecture (ISA) cards (available on select models only)
*
HINT: Plug and Play PCI cards are automatically recognized and resourced upon
installation by the Microsoft Windows operating system and Basic Input Output
System (BIOS).
The operating system and the BIOS do not automatically recognize ISA cards. The
card jumper settings may require manual adjustment based on your currently
available system resources, such as the IRQ (Interrupt ReQuest) and DMA (Direct
Memory Access). Then you must adjust the operating system settings to reflect these
resource settings according to the card manufacturer’s instructions.
Inserting an Expansion Card
To install a card, complete the following steps:
1. Read all the manufacturer’s documentation for the new card.
5. Close all programs.
6. Remove all diskettes and CDs.
7. From the Windows Taskbar, click the Start button, click Shut Down, select
Shut Down, and then click OK.
8. Unplug the computer power cord from the electrical outlet.
9. Disconnect all cables and power cords from the back of the computer.
10. Remove the computer cover.
Upgrading Your Internet PC
11-13
11. Using a screwdriver, remove the metal knockout plate as shown.
Removing the Knockout Plate
+
NOTE: The view shown may differ slightly from your Internet PC.
12. Using the system board graphic as a guide, locate an open expansion card slot.
11-14 Upgrading Your Internet PC
13. Firmly press the new card into the slot on the system board, using a slight
rocking motion.
14. Replace the slot retaining screw as shown.
Inserting an Expansion Card
+
NOTE: The view shown may differ slightly from your Internet PC.
15. Replace the computer cover.
If you installed a PCI card, the next time you turn on the computer, Microsoft
Windows will automatically detect the new card. If you installed an ISA card,
follow the manufacturer’s instructions to complete the installation.
Upgrading Your Internet PC
Adding or Replacing Memory Modules
System Board
No.
1
+
Components
Memory Module Slots
NOTE: The view shown may differ slightly from your Internet PC.
NOTE: The order of memory module install is important. Always start with the
far-right DIMM slot on the system board and move left.
11-15
11-16 Upgrading Your Internet PC
Installing Additional Memory
Adding memory can improve computer and software performance. Contact a
Compaq Authorized Service Provider for information on compatible memory
module types as well as memory module installation.
To determine the amount memory currently installed on your computer, complete
the following steps:
1. From the Windows Taskbar, click the Start button, select Settings, and then
click Control Panel.
16. Double-click the System M icon.
17. Select the General tab.
Please be advised that the amount of memory displayed may not include the
amount of memory automatically allocated for video display functions.
+
NOTE: If you use non-Compaq memory modules, you must ensure they are installed
by a Compaq Authorized Service Provider to preserve your Warranty rights.
To add memory, complete the following steps:
1. Read all the manufacturer’s documentation for the new memory.
18. Close all programs.
19. Remove all diskettes and CDs.
20. From the Windows Taskbar, click the Start button, select Shut Down, and
then click OK.
21. Unplug the computer power cord from the electrical outlet.
22. Disconnect all cables and power cords from the back of the computer.
23. Remove the computer cover.
Upgrading Your Internet PC
11-17
24. Using the system board graphic, locate the memory module slots.
25. Align the memory module with the slot (DIMM 1) and firmly press it down
until it clicks into position 1, then push the latches 2 in to secure the memory
module.
Inserting a Memory Module
+
NOTE: The view shown may differ slightly from your Internet PC.
26. Replace the computer cover.
11-18 Upgrading Your Internet PC
Replacing the Real-Time Clock Battery
Your Internet PC is equipped with a lithium or nickel cadmium battery that
provides power to the real time clock when your system is shut down. If you must
replace the battery, please observe the following safety guidelines.
For more information about real-time clock battery replacement, contact a
Compaq Authorized Service Provider.
a
WARNING: Your computer is provided with a battery-powered, real-time clock
circuit. Danger of explosion and risk of personal injury exists if the battery is
incorrectly replaced or mistreated. Do not attempt to recharge the battery,
disassemble it, remove it, immerse it in water, or dispose of it in fire.
.
CAUTION: Do not dispose of batteries with general household waste. To dispose of
them or recycle them, use the public collection system in accordance with local
regulations or return them to a Compaq Authorized Service Provider
Upgrading Your Internet PC
Locating the Battery
System Board
No.
1
+
Components
System Battery
NOTE: The view shown may differ slightly from your Internet PC.
11-19
11-20 Upgrading Your Internet PC
Replacing a Battery
1. Read all the manufacturer’s documentation for the new battery.
27. Close all programs.
28. Remove all diskettes and CDs.
29. From the Windows Taskbar, click the Start button, select Shut Down, and
then click OK.
30. Unplug the computer power cord from the electrical outlet.
31. Disconnect all cables and power cords from the back of the computer.
32. Remove the computer cover.
33. Using the system board graphic, locate the memory module slots.
34. To remove the battery, push in the direction of arrow 1 then lift the battery out
as shown by arrow 2.
Upgrading Your Internet PC
11-21
35. To insert a battery, slide the edge of the battery under the clips and then press it
firmly into the battery compartment.
+
NOTE: The plus sign µ on the battery should be facing up.
36. Replace the computer cover.
11-22 Upgrading Your Internet PC
Understanding Your Service and Support Options
12-1
Chapter 12
Understanding Your Service and Support Options
Your Internet PC has many tools to make computing easier. If you have a computer
problem or question, check the following resources for answers:
•
Review the Troubleshooting section in this guide for suggestions on how to fix
the problem.
•
Review the tools in this section to find answers.
•
Look in the Compaq Warranty Statement (included with your computer) or
Service and Support Card to find your regional Compaq Service telephone
number.
Compaq Support
Double-clicking the Compaq Support $ icon located on the Windows desktop
provides access to the following tools:
Compaq Support Tools
Tool
Description
Compaq Diagnostics
Diagnoses problems with your Internet PC. This software provides an
easy way to check attributes of your Internet PC.
System Record
Reports all of the devices that came with your Internet PC and all of
the devices you have added or changed since you purchased your
Internet PC.
Compaq Service
Connection
Provides automated software updates and general information on
using your Internet PC.
Internet Support
Allows you to access the Compaq Service and Support Web page for
your country. Compaq's Service and Support Web page provides you
with software updates, maintenance tips, and tools to help make using
your Internet PC easier.
McAfee Anti-Virus
Provides anti-virus scanning and free software updates for one year
through the Internet. For more information on computer viruses and
how to run McAfee Anti-Virus software, refer to the Identifying and
Removing Computer Viruses section of this guide.
12-2
Understanding Your Service and Support Options
Using Compaq Diagnostics
Compaq Diagnostics provides an easy way to perform system checks and diagnose
problems. When you double-click the Compaq Diagnostics û icon located in the
Compaq Support $ folder on the Windows desktop, a progress bar is displayed
while the application analyzes your Internet PC for information about its
components. After approximately one minute, a Summary window with the
component information is displayed.
A row of icons is located at the top of the window. Clicking these icons displays
information about the components being tested. Refer to the following table for
descriptions of the tabs.
Compaq Diagnostics
Tab
Description
Overview
Contains information about your computer
Test
Selects the devices you want tested
Status
Shows progress of tests and faults detected
Log
Shows a record of all device tests and detailed results
Error
Reports details of errors detected
Understanding Your Service and Support Options
12-3
Testing Equipment
You may conduct a Quick, Complete, or Custom test. If you choose the Quick test,
it can be run in either the Interactive or Unattended mode.
Complete or Custom tests are completed only in the interactive mode, since they
test the audio and video components of your Internet PC. You must be present to
confirm the test results. Complete testing takes about 10 minutes.
The Test tab has the following main regions: Type of Test, Test Mode, an
Information Window, and a Component List (under the Type of Test box). The
Component List resembles Windows Explorer: Click the + to open a component
folder, then click the component to get information about it. The information
window may show further tests that can be performed on certain components. You
can request any or all of these subtests.
To run a test, complete the following steps:
1. Click the Test tab.
2. Choose the type of test: Quick, Complete, or Custom. In Custom, you will
need to check the boxes in the Component List for each test you want.
3. Select Interactive Mode or Unattended Mode.
*
HINT: You can select Quick or Complete as a starting point for a Custom test. If you
select Interactive Mode, stay with your computer for the interactive test portions.
4. Click the Begin Test button at the bottom of the window. The Status tab will
automatically replace the Test tab on your window. You can follow the
progress of individual tests on this window.
When the tests are complete, the progress bar in the Status window will be green if
the test was successful and red if the test failed. The lower part of this tab gives
details of the tests that have been completed.
The Log tab lists all the tests and also gives information about the number of times
each test was run, the time taken for the test, and the number of errors detected.
You can save this information by clicking the Save button at the bottom of the
window.
The Error tab provides details about the errors detected, including error codes. This
code is useful information for a Compaq technician, who can advise you on how to
fix your computer.
12-4
Understanding Your Service and Support Options
System Record
System Record reports all of the devices that came with your computer and all of
the devices you have added or changed since you purchased your computer.
System Record highlights these changes in red. This allows you to isolate and
diagnose possible problems with your computer.
To access System Record, complete the following steps:
1. From the Windows desktop, double-click the Compaq Support $ icon.
2. Double-click the System Record ¢ icon.
The System Record tab displays the Base.log, all of the devices that came with
your computer, and the Now.log, which displays all of the devices you have added
or changed. The changes you have made to your computer are highlighted in red.
For example, if your computer came with 64 megabytes (MB) of memory and you
upgrade it to 96 MB of memory, your Base.log displays 64 MB of memory and the
Now.log displays 96 MB. The memory line in the Base.log and the memory line in
the Now.log are noted in red lettering, which indicates a change has been made to
your computer's original amount of memory.
Understanding Your Service and Support Options
12-5
Compaq Service Connection
Overview
The Compaq Service Connection software installed on your computer is an
innovative way of correcting problems before they begin. The service
automatically sends you free software updates that will keep your computer in peak
operating condition. You decide when to install the updates.
A small notice, displayed as a rotating $, will appear on the bottom-right corner
of the Windows desktop when an update is available.
Turning Compaq Service Connection On and Off
If you wish to manually turn on Compaq Service Connection, complete the
following steps:
1. Double-click the Compaq Support $ icon on the Windows desktop.
2. Double-click the Service Connection $ icon.
+
NOTE: If the Service Connection $ icon is visible in the Windows Taskbar, the
service is already active.
The Compaq Service Connection will remain active and will be ready to perform
updates when you log on the Internet.
To turn off Compaq Service Connection, complete the following steps:
1. Right-click the Service Connection $ icon on the Windows Taskbar.
2. Select Shutdown Compaq Service Connection.
12-6
Understanding Your Service and Support Options
How it Works
The Compaq Service Connection software operates in the background while you
are performing other tasks on your computer. You will only be aware that it is
working when a Notice is displayed.
If you are actively using your modem when the Compaq Service Connection
software initiates an update, it waits until the modem is idle before downloading
any information. You will not be interrupted while using your Web browser or email programs.
When a Notice is displayed, complete the following steps to obtain the update:
1. Double-click the Notice, usually displayed as a rotating $, to reveal the update
identification.
2. Install, postpone, or delete the download by clicking the appropriate button.
•
If you ignore the Notice, it will disappear after a minute or two. However,
the update will still be available for you to download at any time during the
next 10 days.
•
If you have not downloaded the update within 10 days, it will automatically
be cancelled.
To view the updates you have downloaded and the updates that are still available,
double-click the Compaq Support $ icon on the Windows desktop, then doubleclick the Service Connection $ icon. The window displays a list of updates and
highlights in bold the updates that have not yet been accepted.
Compaq Service Connection Privacy and Data Security Statement
Compaq Service Connection is committed to providing you with beneficial
software updates and information. To provide you with these updates and
information, non-personal information limited to your computer model number,
serial number, and software ID files is communicated to the Compaq server. Files
sent to your PC are protected by a personalized security number, similar to a
Personal Identification Number (PIN), to ensure that you receive the correct
information. Compaq Service Connection does not access, share, or send any
personal information, files, or data on your system over the Internet.
If you no longer wish to receive updates from Compaq Service Connection, you
can turn it off at any time.
Understanding Your Service and Support Options
12-7
Internet Support
The Internet Support § icon allows you to access the Compaq Service and
Support Web page for your country. The Compaq Service and Support Web page
provides you with tools and information to help make using your Internet PC easier
than ever.
To access the Service and Support Web page, complete the following steps:
1. Make sure your computer is connected to the Internet.
2. From the Windows desktop, double-click the Compaq Support $ icon.
3. Double-click the Internet Support § icon. A window will display icons
representing flags of various countries.
4. Click on the icon that represents your country’s flag.
You will be connected to your country’s specific Service and Support web page.
*
HINT: You can also access Internet Support through the Instant Answer button
(available on select models) on your keyboard.
12-8
Understanding Your Service and Support Options
Drivers
Installing Drivers for New Hardware
If you add new hardware such as a printer or a gamepad to your computer, you
may be prompted to insert the Windows Installation CD or diskettes. If this occurs,
complete the following steps:
1. At the Add New Hardware Wizard, click Next to begin installing the drivers
and files necessary to make the new hardware work.
2. Select the Search for the best driver for your device (Recommended) option
and click Next.
3. Select the Specify a location option. If C:\WINDOWS\OPTIONS\CABS is
not displayed in the drop-down box, either select it from the drop-down menu
or type it in the box and click Next. The Add New Hardware Wizard will begin
installing the necessary files and drivers for the new hardware.
4. When the Add New Hardware Wizard completes installing the files and
drivers, click the Finish button.
You may need to restart your computer for the new hardware to be recognized by
your computer.
Reinstalling Deleted Drivers
If a driver is accidentally deleted or the operating system is reinstalled, drivers may
be reinstalled by selecting the Selective Restore option from the QuickRestore
CD. Refer to the QuickRestore instructions for more information on how to
reinstall drivers using the Selective Restore option.
To reinstall a driver, complete the following steps:
1. From the Windows Taskbar, click Start, point to Programs, and click
Windows Explorer.
2. Navigate to the CPQDRV folder on the hard drive and double-click it.
3. Find the folder of the device you wish to reinstall and double-click it.
4. Double-click the setup program for the driver you wish to reinstall.
5. Follow the on-screen instructions.
Troubleshooting Guide
13-1
Chapter 13
Troubleshooting Guide
This guide provides useful information on how to identify and correct common
problems that may occur with your Internet PC.
Helpful Hints
If you encounter minor problems with your Internet PC, monitor, or software, refer
to the following list of general suggestions before taking further action:
•
Check that the computer and monitor are plugged into a working electrical
outlet.
•
Check to see that the computer is turned on and the amber power light is on.
•
Check to see that the monitor is turned on and the power light is on.
•
Turn up the brightness and contrast controls of the monitor if the monitor is
dim.
•
Check all cable connections for loose or incorrect connections.
•
Remove the diskette from the diskette drive before turning on your computer.
•
Run Windows Diagnostics to determine and repair minor problems.
Understanding This Guide
This guide has been divided into three columns: Symptom, Problem, and Solution.
The Symptom column describes the symptom or warning that made you realize
you had a problem. The Problem column identifies one or more reasons why the
symptom has occurred, and the Solution column describes what you should do to
try to fix the problem listed.
If a solution does not fix your problem, try all solutions for the symptom or try the
solution a second time.
If a problem persists and you are unable to resolve it yourself, please review
Understanding Your Service and Support Options or contact a Compaq Authorized
Service Provider. Refer to your Warranty Statement for details.
13-2
Troubleshooting Guide
Audio
Symptom
No sound.
Problem
Solution
Speaker cables are not
properly connected.
Shut down your Internet PC using the
normal Windows shutdown procedure.
Reconnect the speakers. Refer to the
Compaq Hardware and Software Setup
poster for detailed instructions.
Volume has been muted.
On the Taskbar, click the Volume ¶ icon
and clear the Mute check box.
Internet PC is in Sleep mode.
This mode is identified when
the power status light on the
front of your Internet PC turns
amber.
Press the Power button to wake your
Internet PC.
Windows does not detect
audio driver.
1. On the Taskbar, click the Start button
and point to Settings.
2. Click Control Panel.
3. Double-click the System M icon.
4. Click the Device Manager tab.
5. Click the µ plus sign next to Sound,
video and game controllers, and select
the installed audio driver.
6. Click the Remove button, and click
OK.
7. Restart your Internet PC and let
Windows redetect the audio driver.
Sound is too low.
Volume has been set too low.
Click the Volume ¶ icon on the Taskbar,
and click the Volume slider bar and then
drag it up, or press the Volume Up button
on your Compaq Internet Keyboard.
Sound is distorted.
Volume is too high.
Click the Volume ¶ icon on the Taskbar,
and click the Volume slider bar and drag
it down, or press the Volume Down button
on your Compaq Internet keyboard.
Speakers may be damaged.
Call a Compaq Authorized Service
Provider. See your Warranty Statement for
details.
Troubleshooting Guide
13-3
Audio
Symptom
Audio recordings
from digital video
camera sound is
distorted.
Problem
DVD is not set up properly.
Solution
Change settings in the DVDeck program.
1. From the Taskbar, click the Start
button.
2. Point to Programs, and DVDeck, and
then DVDeck.
3. Click the Options tab.
4. Click AVI Interleave Options button.
5. In the Interleave Factor area, change
the default setting to 4:1.
6. Click OK and close the window.
Audio CD or DVD
does not play.
See troubleshooting topic CD or DVD in this section.
Volume ¶ icon is
missing from
Windows Taskbar.
Multimedia settings have been
changed.
1. On the Taskbar, click the Start button.
2. Click Control Panel.
3. Double-click Multimedia.
4. Select the Show volume control on
taskbar option, and click OK.
13-4
Troubleshooting Guide
CD or DVD
Symptom
CD or DVD drive
cannot read a disc or
takes too long to
start.
Problem
Solution
CD has been inserted upside
down.
Reinsert the CD with the label facing up.
The DVD drive will take longer
to start because it has to
determine the type of media,
such as audio or video being
played, before it can begin
playing.
Wait at least 30 seconds to let the DVD
drive determine the type of media being
played. If disc still does not start, see the
solutions for related problems.
CD or DVD disc is dirty.
Clean CD or DVD with a CD cleaning kit
available in most computer stores.
Windows does not detect CD
or DVD driver.
1. On the Taskbar, click the Start button
and point to Settings.
2. Click Control Panel and double-click
System M icon.
3. Click the Device Manager tab.
4. Click the µ next to the CD or DVD
disc, and select the installed driver.
5. Click the Remove button, and click
OK twice.
6. Restart your Internet PC and let
Windows redetect the CD or DVD
driver.
Troubleshooting Guide
13-5
Diskette Drive, SuperDisk, or Zip Disk
Symptom
Not reading drive:
“Abort, Retry, Fail?”
message appears.
Problem
A non-formatted diskette has
been inserted.
Solution
Format the diskette by following these
steps:
1. Double-click the My Computer G
icon on the desktop.
2. Select the 3 1/2 Floppy (A:) drive.
3. Click File, and point to Format.
4. Select desired options, and click Start
to begin formatting the diskette.
“Non-system disk or
disk error” message
is displayed.
Diskette is damaged.
Replace the diskette with a new one.
A diskette that does not
contain system files needed to
start your Internet PC has
been inserted in drive.
When drive activity stops, remove the
diskette and press the spacebar. System
should start up.
System files have been
damaged.
1. Insert a startup disk in the diskette
drive.
2. Restart your Internet PC.
3. At the A:\ prompt, type SYS C: and
press the Enter key. The following
message is displayed: ‘SYSTEM
TRANSFERRED’. This task will restore
the system files to your hard drive.
4. Restart your Internet PC.
Hard drive has failed.
Call a Compaq Authorized Service
Provider. Refer to your Warranty Statement
for details.
13-6
Troubleshooting Guide
Diskette Drive, SuperDisk, or Zip Disk
Symptom
Diskette drive light
stays on.
Diskette drive
cannot save
information to
diskette.
Problem
Solution
Diskette has been improperly
inserted.
Remove the diskette and reinsert the
diskette as follows: Insert the edge with
the sliding cover into drive first face up,
and push all the way in until the diskette
stops.
Diskette is damaged.
Remove the diskette and reinsert a new
diskette. If a problem persists, run the
Windows Maintenance Wizard to repair the
drive. Refer to Maintaining Your Internet
PC in the User’s Guide.
Diskette is not formatted.
Format the diskette by following these
steps:
1. Double-click the My Computer G
icon on the desktop.
2. Select the 3 1/2 Floppy (A:) drive.
3. Click File, and point to Format.
4. Select desired options, and click Start
to begin formatting the diskette.
Diskette is write-protected.
Slide the write-protection tab to the
unlocked position on the diskette.
Diskette is full or file is too
big.
Use another diskette or compress the file
to reduce the size.
File save command not
properly executed.
When saving information to the diskette
drive, verify you are using the correct drive
letter.
Diskette is damaged.
Replace the damaged diskette.
Diskette drive has failed.
Call a Compaq Authorized Service
Provider. Refer to your Warranty Statement
for details.
Troubleshooting Guide
13-7
Diskette Drive, SuperDisk, or Zip Disk
Symptom
Diskette drive
cannot read a
diskette.
Problem
Diskette is not formatted.
Solution
Format the diskette by following these
steps:
1. Double-click the My Computer G
icon on the desktop.
2. Select the 3 1/2 Floppy (A:) drive.
3. Click File, and point to Format.
4. Select desired options, and click Start
to begin formatting the diskette.
Zip drive (available
on select models)
cannot read a disk.
Zip drive (available
on select models)
indicator light
continuously blinks.
The wrong diskette type is
being used.
Check the type of drive you have and use
the correct diskette type.
Diskette drive has failed.
Call a Compaq Authorized Service
Provider. Refer to your Warranty Statement
for details.
Windows does not detect Zip
driver.
Reinstall your Zip drive driver.
Wrong disk is being used.
Verify the disk you have inserted is a Zip
disk and is compatible with your Zip drive.
Windows is not enabled.
Zip drive cannot be used in DOS mode.
Zip disk is not inserted
properly.
Push the Disk Eject button to remove
disk, and then reinsert it.
13-8
Troubleshooting Guide
Diskette Drive, SuperDisk, or Zip Disk
Symptom
SuperDisk drive
(available on select
models) cannot read
or write to a
diskette.
Problem
Windows does not detect
SuperDisk driver.
Solution
1. Click the Start button and point to
Settings.
2. Click Control Panel and double-click
System G icon.
3. Click the Device Manager tab.
4. Click the µ next to Disk drives, and
select the LS-120 driver.
5. Click the Remove button, and click
OK.
6. Restart your Internet PC and let
Windows redetect the SuperDisk
driver.
Wrong disk is being used.
Verify that the disk is a SuperDisk, 720K,
or 1.44MB diskette.
SuperDisk has failed.
Call a Compaq Authorized Service
Provider. Refer to your Warranty Statement
for details.
Cannot copy
SuperDisk (available
on select models)
diskette using Disk
Copy.
Disk Copy command does not
support 120MB diskettes.
Use the SuperDisk Copy Disk program
included on the SuperDisk Tools Kit to
copy the SuperDisk.
SuperDisk (available
on select models)
performance is slow.
SuperDisk Accelerator and
Staging Enabled are not
enabled.
Enable the SuperDisk Accelerator and the
Staging Enabled. Refer to SuperDisk
Accelerator in the User’s Guide for details.
Cannot eject the
SuperDisk (available
on select models).
After copying files to the
SuperDisk, the Performance
Accelerator (PA) is enabled.
The PA locks the drive until
the copy process is complete.
Wait for the copy process to complete, and
then try to eject the SuperDisk.
The SuperDisk has not been
inserted properly.
If the SuperDisk does not eject when the
Eject button is pressed, manually eject the
disk. Refer to SuperDisk Drive in User’s
Guide for details.
Troubleshooting Guide
13-9
Diskette Drive, SuperDisk, or Zip Disk
Symptom
“Disk Full” message
displayed when
copying files to
SuperDisk (available
on select models).
Problem
Solution
Root directory of SuperDisk is
full.
Make folders and copy files into the
folders.
SuperDisk capacity of 120MB
has been exceeded.
Copy files to a new SuperDisk, or verify
information on SuperDisk is not critical
and consider deleting files to create space
on SuperDisk for new files.
Display
Symptom
Problem
Solution
Screen is blank and
monitor power light
is not lit.
Monitor power cable is not
connected to monitor or wall
outlet.
Reconnect the monitor’s power plug on
rear of monitor and wall outlet.
Screen is blank.
Monitor is not turned on.
Press the monitor’s Power button.
Monitor connector cable is not
properly connected to rear of
Internet PC.
Inspect the monitor’s video connector for
bent pins. If bent pins do not exist,
reconnect the monitor connector cable on
rear of Internet PC.
Screen saver is enabled.
Press any key or move mouse to make
screen display.
Internet PC is in Sleep mode.
This mode is identified when
the power status light on the
front of your Internet PC turns
amber.
Press the Power button to wake your
Internet PC.
If you are using a Flat-Panel
Monitor (available on select
models), you may need a
Digital Video Interface and
connector.
Call a Compaq Authorized Service
Provider. Refer to your Warranty Statement
for details.
13-10
Troubleshooting Guide
Display
Symptom
Display only fills part
of the screen.
Problem
If you are using a Flat-Panel
Monitor (available on select
models), your resolution
settings are not set properly.
Solution
1. On the Taskbar, click the Start button
and point to Settings.
2. Click Control Panel.
3. Double-click Display.
4. Click the Settings tab.
5. In the Display area, click the
resolution slider for the Screen and
drag it to the right. Repeat this step
for the Desktop resolution slider.
Increase the resolutions to the
maximum allowable.
6. Click OK to accept the new settings
then close the Control Panel window.
Display is too faint.
Brightness and contrast
controls are not set properly.
Adjust the brightness and contrast controls
on your monitor.
Resolution cannot be
adjusted to desired
setting.
Windows does not detect
display driver.
1. On the Taskbar, click the Start button
and point to Settings.
2. Click Control Panel.
3. Double-click the System G icon.
4. Click the Device Manager tab.
5. Click the µ next to Display Adapters
and select the installed display
adapter.
6. Click the Remove button, and click
OK.
7. Restart your Internet PC and let
Windows redetect the display driver.
Troubleshooting Guide
13-11
Games
Symptom
Game crashes
frequently.
Graphic distortion or
blank screen exists
during game’s
introduction.
Problem
Solution
Minimum hardware or
software requirements set by
Game manufacturer have not
been met.
Review the game documentation or
packaging for minimum requirements.
Game was not set up properly
when installed.
Reinstall the program, noting any settings
and default selections that pertain to your
Internet PC, and restart the game.
Incorrect version of game.
Contact game manufacturer for updated
version of game.
Hard Drive
Symptom
Problem
Solution
Internet PC seems to
have locked up.
Program in use has stopped
responding to commands.
Attempt a normal Windows shutdown.
If this fails, restart your Internet PC by
pressing the Power button for 4 or more
seconds to power it off. To restart your
Internet PC, press the Power button again.
Hard drive error
message is
displayed.
Part of hard drive has failed.
Run the Windows Maintenance Wizard to
repair the drive. Refer to Maintaining Your
Internet PC in the User’s Guide.
Hard drive fault
protection error
message is
displayed.
Part of hard drive has potential
to fail or could already have
failed.
Call a Compaq Authorized Service
Provider. Refer to your Warranty Statement
for details.
Insufficient memory
message is
displayed.
All memory in Internet PC is
being used by open programs
and memory is needed for
desired task.
Close one or more programs and retry.
It may also be necessary to restart
Windows to recover memory should this
fail.
13-12
Troubleshooting Guide
Internet
Symptom
Cannot connect to
the Internet.
Problem
Solution
Internet Service Provider (ISP)
account is not set up properly.
Verify Internet settings, or contact your ISP
for assistance.
Modem is not set up properly.
Reconnect the modem, verifying the
following connections: Telephone Line to
Telephone (for external phone sets) and
Telephone Line to Wall Jack (from Internet
PC to wall).
Web browser is not set up
properly.
Verify your Web browser is installed and
set up to work with your ISP.
Internet keyboard failed.
Call a Compaq Authorized Service
Provider. Refer to your Warranty Statement
for details.
Cannot
automatically launch
Internet programs.
If using America Online (AOL)
as your ISP, you must log in to
AOL before some programs
will start.
Log in to AOL and launch your desired
program.
Cannot use the
Internet because the
fax modem is busy
or no dial tone
found.
Telephone or modem line
connections are not connected
properly.
Reconnect the modem, verifying the
following connections: Telephone Line to
Telephone (for external phone sets) and
Telephone Line to Wall Jack (from Internet
PC to wall).
If no dial tone is found,
another telephone handset on
the same line is not on the
receiver.
Verify all telephone handsets on the same
line are on the receiver.
Messages have not been
cleared from answering
service.
If you use an answering service that
modifies your telephone’s dial tone to
inform you of messages, clear all
messages and try your call again.
Troubleshooting Guide
13-13
Internet
Symptom
Internet takes too
long to download
Web sites.
Problem
Modem is not set up properly.
Solution
Verify correct modem speed and COM port
are selected.
1. Click the Start button and point to
Settings.
2. Click Control Panel and double-click
Modems.
3. Windows will detect the modem you
have installed. Click the Properties
button.
4. Verify that the correct modem port is
set and the maximum speed of your
modem is selected. Reset these
settings if necessary, and click OK.
5. Close the Control Panel window.
Keyboard and Mouse
Symptom
Keyboard commands
and typing are not
recognized by
Internet PC.
Problem
Keyboard connector is not
properly connected.
Solution
Shut down your Internet PC using your
mouse.
1. On the Taskbar, click the Start button.
2. Click Shut Down...
3. Select the Shut down option and click
OK.
After the shutdown is complete, reconnect
the keyboard connector on the rear of your
Internet PC and restart the computer.
Program in use has stopped
responding to commands.
Shut down your Internet PC using your
mouse. Refer to the problem “Keyboard
connector is not properly connected.”
13-14
Troubleshooting Guide
Keyboard and Mouse
Symptom
Mouse does not
respond to
movement or is too
slow.
Problem
Solution
Keyboard needs repair.
Call a Compaq Authorized Service
Provider. Refer to your Warranty Statement
for details.
Mouse connector is not
properly connected.
Shut down your Internet PC using your
keyboard.
1. Press the Ctrl and Esc keys
simultaneously.
2. From the Windows Start menu, use
the arrow keys to select Shut
Down..., and press the Enter key.
3. Select the Shut down option (you may
need to use the arrow keys to select
it).
4. Click OK.
After the shutdown is complete, reconnect
the mouse connector on the rear of your
Internet PC and restart the computer.
Mouse will only
move vertically or
horizontally.
Mouse roller ball is dirty.
Remove roller ball cover from bottom of
mouse and clean with mouse cleaning kit
available in most computer stores.
Program in use has stopped
responding to commands.
Shut down your Internet PC using your
keyboard. Refer to the problem “Mouse
connector is not properly connected” for
details on how to shut down using your
keyboard.
Mouse roller ball is dirty.
Remove roller ball cover from bottom of
mouse and clean with mouse cleaning kit
available in most computer stores.
Mouse needs repair.
Replace mouse. Call a Compaq Authorized
Service Provider. See your Warranty
Statement for details.
Troubleshooting Guide
13-15
Memory
Symptom
Memory parity error.
Problem
Solution
Wrong memory modules were
used in upgrade.
Review Upgrading Your Internet PC that
came with your Internet PC to verify the
correct type of memory modules to use.
Memory modules failed.
Call a Compaq Authorized Service
Provider. Refer to your Warranty Statement
for details.
Power
Symptom
Internet PC will not
turn on.
Problem
Solution
Power button on the front of
your Internet PC has not been
pressed.
Press the Power button on the front of
your Internet PC.
Power plug is not properly
connected to back of Internet
PC or wall outlet.
Reconnect the power plug to rear of
Internet PC and wall outlet.
Line voltage selection switch
is not in the proper position for
your region (115V/230V).
Refer to Checking Your Connections in the
User’s Guide, or call a Compaq Authorized
Service Provider for assistance. Refer to
your Warranty Statement for details.
Wall outlet is bad.
Test the outlet by connecting a different
electrical device to outlet.
13-16
Troubleshooting Guide
Power
Symptom
Internet PC will not
start.
Problem
System files may have been
damaged. You will need to
insert a startup disk or
Windows Startup disk to
restart your Internet PC.
Solution
1. Insert a startup disk in the diskette
drive.
2. Restart your Internet PC.
3. At the A:\ prompt, type SYS C: and
press the Enter key. The following
message will be displayed: ‘SYSTEM
TRANSFERRED’. This task will restore
the system files to your hard drive.
4. Restart your Internet PC.
If this task does not restart your Internet
PC, call a Compaq Authorized Service
Provider. Refer to your Warranty Statement
for details.
Wrong memory modules were
used in upgrade, or memory
modules were installed in the
wrong location.
Verify the installation of memory modules
by calling a Compaq Authorized Service
Provider . Refer to your Warranty
Statement for details.
Hard drive has been damaged.
Call a Compaq Authorized Service
Provider. Refer to your Warranty Statement
for details.
Troubleshooting Guide
13-17
Power
Symptom
“Illegal Operation
has Occurred” error
message is
displayed.
“Non-system disk or
disk error” message
is displayed.
Problem
Solution
Program being used is not
certified for Windows by
Microsoft.
Verify program is certified by Microsoft
(see program packaging for this
information).
Configuration files are corrupt
If possible, save all data, close all
programs, and restart your Internet PC.
If the error message returns you may need
to back up your personal data and use the
Quick Restore utility. See Understanding
Your Service and Support Options for
details.
a WARNING: Quick Restore reformats
your hard drive, all files will be lost.
A diskette that does not
contain system files needed to
start your Internet PC has
been inserted in drive.
When drive activity stops, remove the
diskette and press the spacebar. Your
Internet PC will start up.
Disk error has occurred.
Restart your Internet PC. If the error
returns, see the next problem “System
files have been damaged.”
System files have been
damaged.
1. Insert a startup disk in the diskette
drive.
2. Restart your Internet PC.
3. At the A:\ prompt, type SYS C: and
press the Enter key. The following
message will be displayed: ‘SYSTEM
TRANSFERRED’. This task will restore
the system files to your hard drive.
4. Restart your Internet PC.
Hard drive has failed.
Call a Compaq Authorized Service
Provider. Refer to your Warranty Statement
for details.
13-18
Troubleshooting Guide
Contacting a Compaq Authorized Service Provider
If you were unable to fix your Internet PC using this troubleshooting guide, refer to
the Warranty Statement that came with your computer for the technical support
telephone numbers.
Safety and Comfort
14-1
Chapter 14
Safety and Comfort
a
WARNING: There may be a risk of serious physical injuries from working at your
computer workstation. Read and follow the recommendations in this section to
minimize the risk of injury and to increase your comfort.
Some studies have suggested that long periods of typing, improper workstation
setup, incorrect work habits, stressful work conditions and relationships, or
problems in your personal health may be linked to injuries. These injuries could
include carpal tunnel syndrome, tendinitis, tenosynovitis, and other
musculoskeletal disorders.
The warning signs of these disorders can occur in the hands, wrists, arms,
shoulders, neck, or back, and can include:
•
Numbness, burning, or tingling
•
Soreness, aching, or tenderness
•
Pain, throbbing, or swelling
•
Tightness or stiffness
•
Weakness or coldness
Symptoms may be felt during typing, while using a mouse, or at other times when
no work with the hands is being performed, including during the night when these
symptoms might awaken you. If you experience these symptoms, or any other
persistent or recurring pain or discomfort that you think may be related to using a
computer, you should promptly consult a qualified physician and, if available, your
company’s health and safety department. The earlier a problem is properly
diagnosed and treated, the less chance there is that it will progress to a disabling
condition.
The following pages describe proper workstation setup, posture, and health and
work habits for computer users. In addition, this Guide contains product safety
information applicable to all Compaq products.
14-2
Safety and Comfort
Promoting a Safe and Comfortable Work Environment
Posture, lighting, furniture, work organization, and other work conditions and
habits may affect the way you feel and how well you work. By adjusting your work
environment and personal practices, you may be able to minimize fatigue and
discomfort, and reduce the risk of resulting strains that some scientists believe can
lead to injury.
Important Choices
If you share a computer with others, readjust the work environment to your needs.
Each time you sit down to work, adjust into your comfort zone.
Whenever you use a computer, you make choices that can affect your comfort and
potentially your safety. This is true whether you use a full-size keyboard and
monitor on a desk, a notebook computer, or a wireless keyboard on your lap. In
every case, you choose your working posture and your body’s position relative to
your keyboard, pointing device, monitor, remote control, phone, and any reference
books and papers. You may also have some control over lighting and other factors.
Take Action for Safety and Comfort
Many factors in our work environment determine whether we work efficiently and
in a manner that promotes good health and safety.
By considering, acting on, and periodically reevaluating the recommendations in
this Section, it is possible to create a safer, more comfortable, healthful, and
efficient work environment.
+
NOTE: Some scientists believe that working intensely, or for a long time in
uncomfortable or unnatural positions, may pose risks, such as those mentioned in
the warning. The information included in this Section is designed to help you work
more safely by recommending ways to work more comfortably and effectively.
*
SELF-CHECK: After reviewing the information in this chapter, double-check your
postures and habits using the section, "Self-Check.”
Safety and Comfort
Key Principles
To promote safety and comfort, follow these principles whenever you use your
computer.
Adjust
Adjust your body position and your work
equipment. There is no one “right” position.
Find your comfort zone, as described in this
Section, and when working at your computer,
frequently adjust within this zone.
Move
Vary your tasks so that you can move around;
avoid sitting in one posture all day. Perform
tasks that require walking.
Relax
Build positive relationships at work and home.
Relax and strive to reduce sources of stress.
Stay aware of physical tension such as
clenching your muscles and shrugging your
shoulders. Continually release tension. Take
frequent short breaks.
Listen
Listen to your body. Pay attention to any
tension, discomfort, or pain you may feel, and
take immediate action to relieve it.
14-3
14-4
Safety and Comfort
Remember
Remember to exercise regularly and maintain
general fitness. Doing this will help your body
withstand the rigors of sedentary work. Respect
any medical conditions you may have or other
health factors you may know of. Adjust your
work habits accordingly.
Finding Your Comfort Zone
A Range of Positions
Rather than working in a single posture, find your comfort zone. Your comfort
zone is a range of positions that is generally appropriate and comfortable for your
given work situation.
Vary Your Posture
Depending on your tasks, you may find a range
of seated and standing postures that are
comfortable. Within your comfort zone, change
postures often throughout the day.
Move
Sitting still for long periods can cause discomfort and muscle fatigue. Changing
postures is good for many parts of your body, including your spine, joints, muscles,
and circulatory system.
Within your comfort zone, change postures often throughout the day. Take
frequent short breaks: stand up, carefully stretch, or walk around. Frequently
switch to brief tasks that require getting up, such as retrieving output from a
printer, filing paperwork, or consulting a colleague down the hall.
If your furniture offers a wide range of adjustments, you might find it comfortable
to switch back and forth between sitting and standing positions.
Safety and Comfort
14-5
Different Tasks, Different Postures
Your choice of posture within your comfort zone may vary with your task. For
example, you may find a reclined posture most comfortable for computer tasks,
and a more upright posture more comfortable for tasks requiring frequent reference
to papers or books.
Organizing Your Adjustments
The order in which you make various adjustments to your body position and work
area may vary depending on the adjustability of your furniture. For tips on how to
order your adjustments see the section, “Organizing Your Adjustments.”
*
AVOID!
HINT: THAT AFTERNOON SLUMP: Pay particular attention to adjusting your posture in
the afternoon when you may tend to get fatigued.
HINT: EVERYTHING IS CONNECTED: When you reposition any one part of your body,
you may need to adjust other parts as well.
• Don't sit in one fixed posture all day.
• Avoid slouching forward.
• Be sure not to lean back too far.
14-6
Safety and Comfort
Feet, Knees, and Legs
Make sure your feet can rest solidly and comfortably on the floor while sitting. Use
an adjustable work surface and chair that allow your feet to rest firmly on the floor,
or use a footrest. If you use a footrest, be sure it is wide enough to accommodate
different leg positions within your comfort zone.
Providing Enough Leg Room
Be sure you have sufficient space under your work surface for your knees and legs.
Avoid concentrated pressure points along the underside of your thigh near the knee
and the back side of your lower leg. Stretch your legs and vary your leg posture
throughout the day.
RIGHT!
Rest your feet firmly on the floor or a footrest.
WRONG!
Don't dangle your feet and compress your thighs.
*
AVOID!
HINT: WALK: Get up from your desk frequently and take brief walks.
HINT: LEG COMFORT: Vary your leg positions throughout the day.
WARNING: Avoid placing boxes or other items under your desk that limit your leg room.
You should be able to pull yourself all the way up to your desk without interference.
Safety and Comfort
14-7
Back
Use your chair to fully support your body. Distribute your weight evenly and use
the entire seat and backrest to support your body. If your chair has adjustable low
back support, match the contours of the chair’s backrest to the natural curve of
your lower spine.
Getting comfortable
Always make sure your lower back is well-supported. Make sure it feels
comfortable in the position in which you are working.
RIGHT!
Distribute your weight evenly and use the entire
seat and backrest to support your body.
WRONG!
Don't slouch forward.
*
AVOID!
HINT: ADJUST OFTEN: If your chair is adjustable, experiment with the adjustments to
find numerous comfortable positions, then adjust the chair frequently.
If you get a new adjustable chair, or if you share a chair with someone else, don’t
assume the settings are properly set for you.
14-8
Safety and Comfort
Forearms, Wrists, and Hands
Keep your forearms, wrists, and hands aligned in a straight, neutral position,
whether you are working at a desk or table, or sitting on a couch or bed. Avoid
bending or angling your wrists while typing or using a pointing device.
Don't Anchor Your Wrists
When typing, do not anchor or rest your wrists on your work surface, your thighs,
or a palm rest (sometimes called a wrist rest). Resting your palms while typing may
be harmful because it can cause you to bend your wrists back and can apply
pressure to the undersides of your wrists. A palm rest is designed to provide
support during pauses, when you are not typing.
RIGHT!
Hold a straight, neutral wrist position while
typing.
WRONG!
Don’t rest your palms on a work surface while
typing.
RIGHT!
Hold a straight, neutral wrist position while
typing.
Safety and Comfort
14-9
WRONG!
Don’t angle your wrists; this may cause
unnecessary strain.
Split Keyboards
*
AVOID!
HINT: If you find it difficult to type with a straight, neutral wrist position, you may
want to try a split keyboard. Be aware, however, that improper setup or posture while
using a split keyboard can increase bending in your wrists. So if you try one, set it up
properly to align your forearms, wrists, and hands
Be sure not to rest your wrists on sharp edges
Shoulders and Elbows
Adjust your chair height or keyboard height so that your shoulders are relaxed and
your elbows hang comfortably at your sides. Adjust your keyboard slope so that
your wrists are straight.
Checking Elbow Height
Position your elbows in a zone that is near the height of your keyboard’s home row
(the row that includes the letters G and H). This position allows you to relax your
shoulders. If you have long upper arms, you may find you need to position your
elbows a bit below the height of home row in order to provide enough space under
the work surface for your knees and legs.
RIGHT!
Turn your chair to the side to help determine if
your elbow height is near the height of your
keyboard’s home row.
*
RELAX: Remember to relax, particularly in areas where muscle tension often builds,
such as your shoulders.
14-10 Safety and Comfort
Eyes
Working at your computer for long periods can be a visually demanding task and
may cause your eyes to become irritated and fatigued. Therefore, you should give
special attention to vision care, including the following recommendations:
Resting Your Eyes
Give your eyes frequent breaks. Periodically look away from the monitor and focus
at a distant point. This may also be a good time to stretch, breathe deeply, and
relax.
Cleaning Your Monitor and Glasses
Keep your display screen and your glasses or contact lenses clean. If you use a
glare-reduction filter, clean it according to the manufacturer’s directions.
Having Your Eyes Examined
To be sure that your vision is adequately corrected, have your eyes examined
regularly by a vision care specialist. Consider having glasses made that are
specifically suited for working with a computer monitor. If you wear bifocals or
trifocals, you may find these special monofocal glasses more comfortable for
computer use. For more information, see “Adjusting Monitor Height for Bifocal
and Trifocal Users” in this section.
Eye Comfort
*
While looking at your monitor and also while resting your eyes, remember to blink.
This helps keep your eyes naturally protected and lubricated and helps prevent
dryness, a common source of discomfort.
Eye Break
Give your eyes frequent rests by focusing them on a distant point.
Safety and Comfort
14-11
Arranging Your Work Area
You may find a range of monitor heights that allows your head to be balanced
comfortably over your shoulders.
Monitor
You will reduce eye strain and muscle fatigue in your neck, shoulders, and upper
back by properly positioning your monitor and adjusting its angle.
Positioning the Monitor
Place the monitor directly in front of you. To determine a comfortable viewing
distance, stretch your arm toward the monitor and notice the location of your
knuckles. Place your monitor near that location. You should be able to clearly see
the text on your monitor.
Adjusting the Monitor Height
Your monitor position should allow your head to be balanced comfortably over
your shoulders. It should not cause your neck to bend forward uncomfortably or
backward to any degree. You may find it more comfortable to position the monitor
so that the top line of text is just below your eye height. Your eyes should look
slightly downward when viewing the middle of the screen.
Many computer designs allow you to place the monitor on top of the system unit. If
this places the monitor too high, you may want to move the monitor to the desktop.
On the other hand, if the monitor sits on your work surface and you feel any
discomfort in your neck or upper back, the monitor may be too low. In that case,
try using a thick book or a monitor stand to raise the monitor.
14-12 Safety and Comfort
Tilting the Monitor
Tilt the monitor so that it faces your eyes. In general, the monitor screen and your
face should be parallel to each other. To check for correct monitor tilt, have
someone hold a small mirror in the center of the viewing area. When sitting in your
normal work posture, you should be able to see your eyes in the mirror.
*
AVOID!
Eye Height
Your eye height will change considerably whether you use a reclining or upright
posture, or some posture in between. Remember to adjust your monitor’s height and
tilt each time your eye height changes as you move through your comfort zone.
If you look at the monitor more than you look at paper documents, avoid placing your
monitor to the side.
Adjusting Monitor Height for Bifocal and Trifocal Users
If you wear bifocals or trifocals, it’s especially important to properly adjust your
monitor height. Avoid tilting your head back to view the screen through the lower
portion of your glasses; this could lead to muscle fatigue in your neck and back.
Instead, try lowering your monitor. You may want to consider using monofocal
glasses that are specially made for computer use.
WRONG!
If you wear bifocals or trifocals, don't position
your monitor so high that you have to tilt your
head back to view the screen.
Notebook Viewing
*
Whenever using a notebook computer for long periods, you may find it more
comfortable to connect a full-size monitor. A separate monitor gives you a wider
range of viewing distance and height options.
Adjusting Brightness and Contrast
Reduce the potential for eye discomfort by using brightness and contrast controls on
your monitor to improve the quality of text and graphics.
Safety and Comfort
14-13
Eliminating Glare and Reflections on Your Monitor
Take the time to eliminate glare and reflections. To control daylight, use blinds,
shades, or drapes, or try other glare-reducing measures. Use indirect or reduced
lighting to avoid bright spots on your display screen.
If glare is a problem, consider these actions:
•
Move your monitor to a place where glare and bright reflections are eliminated.
•
Turn off or reduce ceiling lights and use task lighting (one or more adjustable
lamps) to illuminate your work.
•
If you cannot control the ceiling lights, try positioning your monitor between
rows of lights instead of directly beneath a row of lights.
•
Attach a glare-reduction filter to your monitor.
•
Place a visor on your monitor. This device may be as simple as a piece of
cardboard extending out over the monitor’s top front edge.
•
Avoid tilting or swiveling your display in a way that leads to an uncomfortable
head or upper back posture.
*
AVOID!
Eliminating Glare
Try positioning your monitor so that its side faces the windows.
• Avoid compromising your posture to compensate for glare or reflections.
• Try to avoid bright light sources in your field of vision. For example, don’t face
an uncovered window during daylight hours.
Keyboard and Pointing Device
Place your keyboard, mouse, and other input devices, so that you can use them
with your body in a relaxed, comfortable position. In this way, you don’t have to
reach or shrug your shoulders while working.
Positioning the Keyboard
Position the keyboard directly in front of you to avoid twisting your neck and torso.
This makes it possible to type with your shoulders relaxed and your upper arms
hanging freely at your sides.
14-14 Safety and Comfort
Adjusting the Keyboard Height and Slope
Your elbow height should be near the height of your keyboard’s home row (see
illustration under “Shoulders and Elbows”). Adjust your keyboard slope so that
your wrists are straight.
Aligning the Mouse and Keyboard
When using a mouse or detached trackball, position the device immediately to the
right or left of your keyboard.
Using a Keyboard Tray Comfortably
If you use a keyboard tray, make sure it is wide enough to accommodate your
pointing device, such as a mouse or trackball. Otherwise, you will probably place
the mouse on your desktop, higher and farther away than the keyboard. This will
lead you to stretch forward repeatedly, and uncomfortably, to reach the mouse.
RIGHT!
Position your pointing device immediately to
the right or left of your keyboard.
WRONG!
Don’t position your keyboard and pointing
device at different levels and distances.
Safety and Comfort
14-15
Arm Supports and a Palm Rest
You may find that supports for your forearms or hands allow you to be more
relaxed and comfortable.
Using Arm Supports
Some chairs and desks provide padded areas for resting your arms. You may find it
comfortable to rest the middle of your forearms on these supports while typing,
pointing, or pausing. Arm supports are properly adjusted when your shoulders are
in a comfortable position and your wrists are straight.
Using a Palm Rest
A palm rest is designed to provide support during pauses, not during typing or
pointing. While typing or using a pointing device, keep wrists free to move, not
anchored or resting on a palm rest, the desk, or your thighs.
RIGHT!
You may find that arm supports help you relax
your shoulders and keep your wrists free to
move while typing.
*
For Pauses Only
Palm rests should only be used during pauses, when you are not typing or using your
pointing device.
Armrests should not cause you to:
AVOID!
• Shrug or drop your shoulders.
• Put excessive pressure on your elbows.
• “Wing” your arms (extend elbows out to the sides).
14-16 Safety and Comfort
Papers and Books
Select a work surface or surfaces that are large enough to hold the computer
equipment and any additional items required for your work. To help minimize eye
fatigue, position any materials to which you frequently refer at about the same
viewing distance.
Minimizing Your Reach
Arrange your frequently used papers, books, or other items to minimize the
distance you reach for them. If you frequently refer to books, papers, and writing
materials, and if you use a keyboard tray, make sure the tray, when extended,
doesn’t cause you to lean forward or reach excessively. This can stress your
shoulders and back. If you find that such stress occurs, you may want to consider a
different type of work setup.
Using a Document Holder
If you use a document holder, position it near the monitor at the same distance,
height, and angle as the monitor. Positioning the holder in this way can increase
your neck comfort as you refer back and forth between your papers and the display
screen, by helping you keep your head balanced over your shoulders.
If your primary task is typing from paper documents, you may find it more
comfortable to place your document holder directly in front of you and your
monitor slightly to one side, or on a slant board between your monitor and
keyboard. Consider this option only if you spend more time looking at the paper
than at your monitor.
WRONG!
Don’t arrange your work area in a way that
causes you to repeatedly strain forward to see
and reach frequently used items such as books,
papers, or a phone.
Safety and Comfort
14-17
Phone
Cradling your phone between your ear and shoulder may lead to neck, shoulder,
and back discomfort. If you use your phone a lot, try using a headset or positioning
your phone so you pick it up with your non-dominant hand. This frees your
dominant hand for note-taking. When not in use, place the phone within easy
reach.
RIGHT!
Use a headset to free your hands and help you
avoid uncomfortable positions.
WRONG!
Don’t cradle your phone between your ear and
shoulder.
14-18 Safety and Comfort
Working in Comfort
Using a Notebook Computer
Maintaining a high level of comfort when using a notebook computer may be more
challenging than when using a desktop computer. Therefore, you should be
especially alert to your body’s signals, such as any feeling of discomfort. Also, be
sure to adhere to the key principles presented earlier in this Section.
The following strategies are intended to help you maintain comfort when using a
notebook computer:
On the Road
In a hotel, use a blanket for padding your chair and a rolled towel as an inventive
way to support your lower back area.
Seeking Comfort
When working with a notebook computer, keep your shoulders and neck relaxed
and your head balanced over your shoulders. You may find it comfortable to
periodically use a support surface (your briefcase, a bed table, firm blanket, pillow,
or large book) between your lap and your notebook computer.
Safety and Comfort
14-19
Being Inventive
Use pillows, blankets, towels, and books to:
•
Raise the height of your seat.
•
Create a footrest, if needed.
•
Support your back.
•
Raise your computer to elevate the keyboard and display.
•
Provide arm supports, if you are working on a couch or bed.
•
Provide padding wherever needed.
Transporting the Computer
If you load up your carrying case with accessories and papers, avoid shoulder
strain by using a cart or a carrying case with built-in wheels.
Notebook Comfort
*
When you must work where proper seating or support may not be available, such as
on airplanes or in wilderness areas, change your position often while working and
take brief breaks more frequently.
Long Hours of Use
You may find it more comfortable to use a full-size keyboard, monitor, and detached
mouse or trackball with your notebook computer. This is especially important when
working on your notebook computer for long hours.
Typing Style
Observe your typing style and notice how you use your fingers and hands. Avoid
keeping any unnecessary tension in your thumbs and fingers. Observe whether you
have a heavy touch or a light touch while typing. Use the minimum amount of
force needed to depress the keys.
Reaching for Keys and Key Combinations
To reach keys that are not near your keyboard’s home row, move your whole arm;
avoid stretching your fingers and angling your wrists. When pressing two keys
simultaneously, such as Ctrl+C or Alt+F, use two hands instead of contorting one
hand to reach both keys.
14-20 Safety and Comfort
RIGHT!
Relax your thumbs and fingers while typing
and pointing; notice and release excess tension.
WRONG!
Don’t type or point with unnecessary tension in
your thumbs and fingers.
Keep it Light
*
AVOID!
If your typing is on the heavy side, teach yourself to lighten up. Press the keys more
gently.
“Hunt-and-Peck” Typing
Non-touch-typing causes the neck to bend forward repeatedly. To minimize this
repetitive movement, learn how to touch-type so you don’t need to look down at the
keyboard as often.
Avoid banging on the keys. Don't use more force than needed to press the keys.
Safety and Comfort
14-21
Pointing Style
Use your whole arm and shoulder to move the mouse, not just your wrist. Don’t
rest or anchor your wrist while using your pointing device; keep your wrist, arm,
and shoulder free to move.
Adjusting Software Controls
You can use the software control panel to adjust the properties of your pointing
device. For example, to reduce or eliminate mouse-lifting, try increasing the
acceleration setting. If you use a pointing device with your left hand, the software
control panel will allow you to switch the button assignments for maximum
comfort.
Clean Frequently
Dirt can make pointing more difficult. Remember to clean your mouse or trackball
frequently.
RIGHT!
Keep your wrist in a straight, neutral position
when using your pointing device.
14-22 Safety and Comfort
WRONG!
Don't angle your wrist when using your
pointing device.
Pointing Comfort
*
When using a mouse or trackball, hold it loosely. Keep your hand relaxed, and click
the buttons using a light touch. When you are not using your pointing device, don’t
hold onto it; let it go.
Switch Hands
To give your hand a break, you may choose to control your mouse or trackball with
the opposite hand for a while.
AVOID!
Avoid gripping or pinching your mouse tightly.
Using a Keyboard on a Sofa
Even if you use your keyboard in a seemingly comfortable place such as a sofa,
bed, or your favorite lounge chair, you can still cause discomfort by sitting in an
awkward position or in one position for long periods. Remember to frequently
make changes to your position, within your comfort zone, and to take short breaks.
Aligning Forearms, Wrists, and Hands
When working on a keyboard on your lap, keep your forearms, wrists, and hands
comfortably aligned with each other in a straight, neutral line. Avoid bending or
angling your wrists. If your keyboard has palm rests, use them during pauses, not
while typing or using a pointing device.
Safety and Comfort
14-23
RIGHT!
Experiment with positioning pillows under
your forearms; they may help keep your
shoulders relaxed and your wrists straight.
*
AVOID!
Even on a sofa
Remember to properly support your lower back.
•
•
•
•
Avoid slouching.
Be sure not to recline too much; this may fatigue your neck and upper back.
Don't bend or angle your wrists.
Avoid sitting completely still and working without breaks for long periods.
Taking Breaks and Varying Your Tasks
As noted earlier in this Section, your furniture placement, office equipment, and
lighting are only a few of the factors that determine comfort. Your work habits are
also very important. Remember the following:
Take Breaks
When you work at your computer for long periods, take short breaks at least once
per hour and preferably more often. You may find that frequent, short breaks will
benefit you more than fewer, longer breaks.
If you find that you forget to take breaks, use a timer or specialized software.
Several software tools are available that remind you to take breaks at intervals you
specify.
During your breaks, stand up and stretch, especially any muscles and joints you
may have held in an extended static posture while using the computer.
14-24 Safety and Comfort
Vary Your Tasks
Examine your work habits and the types of tasks you perform. Break up the routine
and try to vary your tasks during the day. By doing so, you may avoid sitting in one
position or performing the same activities continuously for several hours using
your hands, arms, shoulders, neck, or back. For example, you could print out your
work to proofread rather than proofing from your monitor.
Reduce Sources of Stress
Take an inventory of things at work that are stressful to you. If you perceive that
your physical or psychological health is being affected, take time to evaluate what
changes you can make to reduce or eliminate the sources of stress.
Try it and see
*
Contrary to what some may believe, several studies have found that productivity
does NOT decline when frequent short breaks are added to the day.
Breathe deeply
Breathe fresh air deeply and regularly. The intense mental concentration that may
accompany computer use may tend to cause breath-holding or shallow breathing.
Safety and Comfort
14-25
Monitoring Your Health Habits and Exercise
The comfort and safety of working at your computer can be affected by your
general state of health. Studies have shown that a variety of health conditions may
increase the risk of discomfort, muscle and joint disorders, or injuries.
These preexisting conditions include:
•
Hereditary factors
•
Arthritis and other connective tissue disorders
•
Diabetes and other endocrine disorders
•
Thyroid conditions
•
Vascular disorders
•
Generally poor physical condition and dietary habits
•
Prior injuries, traumas, and musculoskeletal disorders
•
Excessive weight
•
Stress
•
Smoking
•
Pregnancy, menopause, and other conditions affecting hormone levels and
water retention
•
Advancing age
Monitoring Personal Tolerance Levels and Limits
Different users of computers have different levels of tolerance for intensive work
over a long period. Monitor your personal tolerance levels and avoid regularly
exceeding them.
If any of the listed health conditions apply to you, it is particularly important to
know and monitor your personal limits.
Cultivating Health and Fitness
Additionally, your overall health and tolerance for the rigors of work typically can
be improved by avoiding adverse health conditions and by exercising regularly to
improve and maintain your physical fitness.
14-26 Safety and Comfort
Organizing Your Adjustments
The order in which you follow the advice in the proceeding chapters depends on
the adjustability of your work surface.
If your work surface height adjusts, then systematically adjust yourself and your
computer “from the ground up.”
If you have a fixed desk or table, systematically adjust yourself and your computer
“from the top down.”
From the Ground Up
1. Seat height: you should be able to plant your feet firmly on the floor.
2. Chair back angles and lower back support: your back should be well supported.
3. Keyboard height: home row should be near your elbow height.
4. Keyboard slope: wrists should be straight.
5. Pointing device: should be placed to the immediate left or right of your
keyboard.
6. Optional forearm supports: shoulder should not be elevated or dropped.
7. Monitor distance, height, and angle: should allow your head to be balanced
comfortably over your shoulders.
8. Document holder, phone, and reference materials: frequently used items should
be within easy reach.
From the Top Down
1. Seat height: elbow height should be near your keyboard’s home row.
2. Footrest, if you need one.
3. Follow steps 2 through 8 above.
*
Be Inventive
Adjustable furniture designed for computer use may not always be available.
However, you can use towels, pillows, blankets, and books in many ways, such as
to:
• Raise the height of your chair.
• Create a footrest.
• Support your back.
• Elevate the keyboard or display.
• Provide arm supports if you are working on a sofa or bed.
• Provide padding wherever needed.
Safety and Comfort
14-27
Self-Check
To increase your comfort and reduce potential safety risks, use this checklist to
help you evaluate your work posture and habits.
Seated Position
•
Have you found a range of seated postures that are most comfortable for you?
•
Are you changing postures within your “comfort zone” throughout the day,
especially in the afternoon?
•
Are your feet firmly planted?
•
Are the undersides of your thighs near your knees free of pressure?
•
Are the backs of your lower legs free of pressure?
•
Is there sufficient space under your work surface for your knees and legs?
•
Is your lower back supported?
Shoulders, Arms, Wrists, and Hands
•
Are your shoulders relaxed?
•
Are your hands, wrists, and forearms aligned in a straight, neutral position?
•
If you use arm supports, are they adjusted so that your shoulders are relaxed
and your wrists are straight?
•
Are your elbows in a relaxed position near your body?
•
Do you avoid resting your hands and wrists while typing or pointing?
•
Do you avoid resting your hands and wrists on sharp edges?
•
Do you avoid cradling the phone between your ear and shoulder?
•
Are items you use frequently, such as your phone and reference materials, easy
to reach?
14-28 Safety and Comfort
Eyes
•
Do you rest your eyes frequently by focusing on a distant point ?
•
Do you get your eyes examined regularly by a vision care specialist?
•
Do you blink enough?
•
If you wear bifocals or trifocals, do you avoid tilting your head back to see the
monitor?
Typing Style
•
Are you training yourself to lighten up when you find you are pounding on the
keys?
•
If you are not a touch typist, have you been taking typing lessons?
•
Are you training your fingers to relax when they become tense?
•
Do you use your whole arm to reach for keys not located near the home row?
Keyboard and Pointing Device
•
Is your keyboard positioned directly in front of you?
•
Are your keyboard height and slope adjusted so that your wrists are straight
and your shoulders relaxed?
•
If you are typing with the keyboard on your lap, are your shoulders relaxed and
your wrists straight?
•
If you are using a mouse or detached trackball, is it placed to the immediate
right or left of your keyboard?
•
If you are using a mouse or trackball, are you holding it loosely, with a relaxed
hand?
•
Do you let go of your pointing device when you are not using it?
•
Are you using a light touch when you click the buttons on your pointing device
(mouse, trackball, touchpad, or pointing stick)?
•
Are you cleaning your mouse or trackball frequently?
Safety and Comfort
14-29
Monitor
•
Is your monitor positioned in front of you and at a comfortable viewing
distance, about arm’s length? Or if you look at a paper document more than
your monitor, is your document holder in front of you with your monitor to one
side?
•
Are the text and images on your monitor easily visible in a comfortably seated
position?
•
Have you eliminated glare and bright reflections on your monitor, without
compromising your posture?
•
Is your monitor’s entire viewing area located just below your eye height?
•
Is your monitor tilted so your face and the monitor are parallel?
•
Have you adjusted the brightness and contrast controls to improve the quality
of text and graphics?
•
Is your document holder positioned near the monitor, at the same distance,
height, and angle as the monitor?
Notebook Computing
•
Do you change postures frequently?
•
Do you avoid resting your wrists on your thighs while typing?
•
To avoid neck fatigue when using the computer on a sofa or bed, do you avoid
reclining too far?
•
Where possible, have you tried using a full-size keyboard and detached
pointing device, such as a mouse or trackball, with your notebook computer?
•
Similarly, have you tried using a full-size monitor?
14-30 Safety and Comfort
General Prevention
•
Do you take breaks and walk around briefly, at least once per hour?
•
Do you exercise regularly?
•
Periodically, do you take inventory of the stress in your life and change what is
within your control to change?
•
If you experience any symptoms that you think may relate to your using a
computer, whether you experience them during work or at other times, have
you consulted a doctor and, if available, your company’s health and safety
department?
Double-Check
*
• Review your postures and habits using this checklist.
• Periodically reread this section.
• Listen to your body.
Anytime you make changes to your tasks, work area, or posture, "listen" to your
body. Its signals of comfort or discomfort will help you know whether your
adjustments are right.
Safety and Comfort
14-31
Electrical and Mechanical Safety Information
Introduction
Compaq products are designed to operate safely when installed and used according
to general safety practices. The guidelines included in this section explain the
potential risks associated with computer operation and provide important safety
practices designed to minimize these risks. By carefully following the information
contained in this section, you can protect yourself from hazards and create a safer
computer work environment.
This section provides information on the following topics:
•
Product safety policy
•
Product installation requirements
•
General safety precautions for all Compaq products
If you have a serious concern regarding the safe use of the equipment that your
Compaq authorized service provider cannot address, call Compaq Customer
Support for your area.
Product Safety Policy and General Practice
Compaq products are designed and tested to meet IEC 950, the Standard for the
Safety of Information Technology Equipment. This is the International
Electrotechnical Commission's safety standard covering the type of equipment that
Compaq manufactures. Testing may include evaluation according to other criteria
such as many of the international, national, and regional standards based on
deviations to IEC 950.
14-32 Safety and Comfort
Safety Standards
The IEC 950 standards provide general safety design requirements that reduce the
risk of personal injury to both the computer user and the service provider. These
standards protect against the following hazards:
•
Electric shock
Hazardous voltage levels contained in parts of the product
•
Fire
Overloads, temperature, material flammability
•
Mechanical
Sharp edges, moving parts, instability
•
Energy
Circuits with high energy levels (240 volt amperes) or potential as burn hazards
•
Heat
Accessible parts of the product at high temperatures
•
Chemical
Chemical fumes and vapors
•
Radiation
Noise, ionizing, laser, ultrasonic wav
Installation Requirements
Compaq products operate safely when used according to their marked electrical
ratings and product usage instructions. Use facilities that comply with the
following electrical codes to ensure the safe operation of Compaq products:
•
In the United States, operate the product in commercial or residential structures
that have electrical installation in compliance with American National
Standards Institute/National Fire Protection Association (ANSI/NFPA) 70,
United States National Electric Code, or ANSI/NFPA 75, Protection of
Electronic Computer/Data Processing Equipment, with branch circuit current
protection of up to 20 amperes.
•
In Canada, operate the product in commercial or residential structures that have
electrical installation in compliance with the Canadian Standards Association
(CAN/CSA) C22.1, Canadian Electrical Code.
Safety and Comfort
•
14-33
In all other countries, operate the product in commercial or residential
structures that have electrical installation in compliance with local and regional
office and residential electrical wiring codes such as International
Electrotechnical Commission (IEC) 364 parts 1 through 7.
+
NOTE: Do not use Compaq products in areas classified as hazardous locations. Such
areas include patient care areas of medical and dental facilities, oxygen-laden
environments, or industrial facilities. Contact your local electrical authority governing
building construction, maintenance, or safety for more information regarding the
installation of any product.
For more information, please consult the information, manuals, and literature
provided with your product or contact your local sales representative.
General Precautions for Compaq Products
Retain the product’s safety and operating instructions for future reference. Follow
all operating and usage instructions. Observe all warnings on the product and in the
operating instructions.
To reduce the risk of fire, bodily injury, and damage to the equipment, observe the
following precautions.
Damage Requiring Service
Unplug the product from the electrical outlet and take the product to a Compaq
authorized service provider under the following conditions:
•
The power cord, extension cord, or plug is damaged.
•
Liquid has been spilled or an object has fallen into the product.
•
The product has been exposed to water.
•
The product has been dropped or damaged in any way.
•
There are noticeable signs of overheating.
•
The product does not operate normally when you follow the operating
instructions.
14-34 Safety and Comfort
Servicing
Except as explained elsewhere in the Compaq documentation, do not service any
Compaq product yourself. Opening or removing covers that are marked may
expose you to electric shock. Service needed on components inside these
compartments should be done by a Compaq authorized service provider.
Mounting Accessories
Do not use the product on an unstable table, cart, stand, tripod, or bracket. The
product may fall, causing serious bodily injury and serious damage to the product.
Use only with a table, cart, stand, tripod, or bracket recommended by the
manufacturer, or sold with the product. Any mounting of the product should follow
the manufacturer’s instructions, and should use a mounting accessory
recommended by the manufacturer.
Ventilation
Slots and openings in the product are provided for ventilation and should never be
blocked or covered, since these ensure reliable operation of the product and protect
it from overheating. The openings should never be blocked by placing the product
on a bed, sofa, carpet, or other similar, flexible surface. The product should not be
placed in a built-in apparatus such as a bookcase or rack unless the apparatus has
been specifically designed to accommodate the product, proper ventilation is
provided for the product, and the manufacturer’s instructions have been followed.
Water and Moisture
Do not use the product in a wet location.
Grounded (Earthed) Products
Some products are equipped with a three-wire electrical grounding-type plug that
has a third pin for grounding. This plug only fits into a grounded electrical outlet.
This is a safety feature. Do not defeat the safety purpose of the grounding-type
plug by trying to insert it into a non-grounded outlet. If you cannot insert the plug
into the outlet, contact your electrician to replace the obsolete outlet.
Safety and Comfort
14-35
Power Sources
The product should be operated only from the type of power source indicated on
the product’s electrical ratings label. If you have questions about the type of power
source to use, contact your Compaq authorized service provider or local power
company. For a product that operates from battery power or other power sources,
refer to the operating instructions included with the product.
Accessibility
Be sure that the power outlet you plug the power cord into is easily accessible and
located as close to the equipment operator as possible. When you need to
disconnect power to the equipment, be sure to unplug the power cord from the
electrical outlet.
Voltage Select Switch
Ensure that the voltage select switch is in the correct position for the type of
voltage you use (115 VAC or 230 VAC).
Internal Battery
Your computer may contain an internal battery-powered real-time clock circuit. Do
not attempt to recharge the battery, disassemble it, immerse it in water, or dispose
of it in fire. Replacement should be done by a Compaq authorized service provider
using the Compaq spare part for the computer.
14-36 Safety and Comfort
Power Cords
If you have not been provided with a power cord for your computer or for any ACpowered option intended for use with your computer, you should purchase a power
cord that is approved for use in your country.
The power cord must be rated for the product and for the voltage and current
marked on the product’s electrical ratings label. The voltage and current rating of
the cord should be greater than the voltage and current rating marked on the
product. In addition, the diameter of the wire must be a minimum of 0.75
mm2/18AWG and the cord should be between 5 and 6.5 feet (1.5 and 2 meters)
long. If you have questions about the type of power cord to use, contact your
Compaq authorized service provider.
Route the power cord so that it will not be walked on, tripped over, or pinched by
items placed upon or against it. Pay particular attention to the plug, electrical
outlet, and the point where the cord exits the product.
Protective Attachment Plug
In some countries, the product cord set may be equipped with a wall plug having
overload protection. This is a safety feature. If the plug needs to be replaced, be
sure the Compaq authorized service provider uses a replacement plug specified by
the manufacturer as having the same overload protection as the original plug.
Extension Cord
If an extension cord or power strip is used, make sure that the cord or strip is rated
for the product and that the total ampere ratings of all products plugged into the
extension cord or power strip do not exceed 80% of the extension cord or strip
ampere ratings limit.
Overloading
Do not overload an electrical outlet, power strip, or convenience receptacle. The
overall system load must not exceed 80% of the branch circuit rating. If power
strips are used, the load should not exceed 80% of the power strip input rating.
Safety and Comfort
14-37
Cleaning
Unplug the product from the wall outlet before cleaning. Do not use liquid cleaners
or aerosol cleaners. Use a damp cloth for cleaning.
Heat
The product should be placed away from radiators, heat registers, stoves, or other
pieces of equipment (including amplifiers) that produce heat.
Replacement Parts
When replacement parts are required, be sure the service provider uses replacement
parts specified by Compaq.
Safety Check
Upon completion of any service or repairs to the product, have your Compaq
authorized service provider perform safety checks to determine that the product is
in proper operating condition.
Options and Upgrades
Use only the options and upgrades recommended by Compaq.
Hot Surfaces
Allow the equipment’s internal components and hot-pluggable drives to cool
before touching them.
Object Entry
Never push a foreign object through an opening in the product.
14-38 Safety and Comfort
Precautions for Portable Computer Products
In addition to the general precautions described earlier in this section, be sure to
observe the following precautions when operating a portable computer product.
Failure to observe these precautions could result in fire, bodily injury, and damage
to the equipment.
•
Monitor Support Cover
Do not place a monitor with an unstable base or a monitor heavier than 55
pounds (25 kilograms) on top of a monitor support cover. Instead, place the
monitor on a work surface next to the docking base.
•
Rechargeable Battery Pack
Do not crush, puncture, or incinerate the battery pack or short the metal
contacts. In addition, do not attempt to open or service the battery pack.
•
Docking Base
To avoid pinching your fingers, do not touch the rear of the computer when
docking it into a base.
Precautions for Server and Network Products
In addition to the general precautions described earlier in this section, be sure to
observe the following precautions when operating server and network products.
Failure to observe these precautions could result in fire, bodily injury, and damage
to the equipment.
Safety Interlocks and Enclosures
To prevent access to areas containing hazardous energy levels, some servers are
provided with enclosures and safety interlocks. Many Compaq servers are
interlocked so that the power supply is disabled when the enclosure cover is
removed. For servers provided with safety interlocks, observe the following
precautions:
•
Do not remove enclosure covers or attempt to defeat the safety interlocks.
•
Do not repair accessories and options inside enclosed or interlocked areas of
the system. Repair should be performed only by individuals who are qualified
in servicing computer equipment and trained to deal with products capable of
producing hazardous energy levels.
Safety and Comfort
14-39
Accessories and Options
Installation of accessories and options in safety interlocked areas should performed
only by individuals who are qualified in servicing computer equipment and trained
to deal with products capable of producing hazardous energy levels.
Products with Casters
Products provided with casters should be moved with care. Quick stops, excessive
force, and uneven surfaces may cause the product to overturn.
Hot-Pluggable Power Supplies
Observe the following guidelines when connecting and disconnecting power to the
power supplies:
•
Install the power supply before connecting the power cord to the power supply.
•
Unplug the power cord before removing the power supply from the server.
•
If the system has multiple sources of power, disconnect power from the system
by unplugging all power cords from the power supplies.
Floor Standing Products
Be sure the bottom stabilizers on the equipment are installed and fully extended.
Ensure that the equipment is properly stabilized and supported before installing
options and cards.
Rack-Mountable Products
Because the rack allows you to stack computer components vertically, you must
take precautions to provide for rack stability and safety:
•
Do not move large racks by yourself. Due to the height and weight of the rack,
Compaq recommends a minimum of two people to accomplish this task.
•
Before working on the rack, be sure the leveling jacks (feet) extend to the floor
and that the full weight of the rack rests on the floor. Also install stabilizing
feet on a single rack or join multiple racks together before starting work.
•
Always load the rack from the bottom up, and load the heaviest item in the rack
first. This makes the rack bottom-heavy and helps prevent the rack from
becoming unstable.
14-40 Safety and Comfort
•
Ensure that the rack is level and stable before extending a component from the
rack.
•
Extend only one component at a time. The rack may become unstable if more
than one component is extended.
•
Use caution when pressing the component rail release latches and sliding a
component into the rack. The slide rails could pinch your fingers.
•
Do not overload the AC supply branch circuit that provides power to the rack.
The total rack load should not exceed 80% of the branch circuit rating.
Precautions for Products with External Television
Antenna Connectors
In addition to the general precautions described earlier in this section, be sure to
observe the following precautions when using external television antennas with
your product. Failure to observe these precautions could result in fire, bodily
injury, and damage to the equipment.
Compatibility
Compaq television tuner cards with antenna connections should be used only with
Compaq personal computers that are intended for home use.
External Television Antenna Grounding
If an outside antenna or cable system is connected to the product, be sure the
antenna or cable system is electrically grounded to protect against voltage surges
and built-up static charges. Article 810 of the National Electrical Code,
ANSI/NFPA 70, provides information about proper electrical grounding of the
mast and supporting structure, grounding of the lead-in wire to an antenna
discharge unit, size of grounding conductors, location of antenna-discharge unit,
connection to grounding electrodes, and requirements for the grounding electrode.
Safety and Comfort
14-41
Lightning Protection
To protect a Compaq product during a lightning storm or when it will be
unattended and unused for long periods of time, unplug the product from the
electrical outlet and disconnect the antenna or cable system. This prevents damage
to the product due to lightning and power line surges.
Power Lines
Do not place an outside antenna system in the vicinity of overhead power lines or
other electric light or power circuits, or where it can fall into power lines or
circuits. When installing an outside antenna system, take extreme care to avoid
touching power lines or circuits, as contact with them could be fatal.
In addition to the general precautions described earlier in this section, be sure to
observe the following precautions when operating telecommunications and
network equipment. Failure to observe these precautions could result in fire, bodily
injury, and damage to the equipment.
•
Do not connect or use a modem or telephone (other than a cordless type)
during a lightning storm. There may be a remote risk of electric shock from
lightning.
•
Never connect or use a modem or telephone in a wet location.
•
Do not plug a modem or telephone cable into the Network Interface Card
(NIC) receptacle.
•
Disconnect the modem cable before opening a product enclosure, touching or
installing internal components, or touching an uninsulated modem cable or
jack.
•
Do not use a telephone line to report a gas leak while you are in the vicinity of
the leak.
14-42 Safety and Comfort
Antenna Grounding
This reminder is provided to call the CATV (cable television) system installer’s
attention to Section 820-40 of the NEC (National Electrical Code), which provides
guidelines for proper grounding and, in particular, specifies that the cable ground
shall be connected to the grounding system of the building, as close to the point of
cable entry as practical.
1 Electric Service Equipment
2 Power Service Grounding Electrode System (NEC Art 250, Part H)
3 Ground Clamps
4 Grounding Conductors (NEC Section 810-21)
5 Antenna Discharge Unit (NEC Section 810-20)
6 Ground Clamp
7 Antenna Lead in Wire
Antenna Grounding
Safety and Comfort
14-43
Precautions for Products with Modems, Telecommunications, or
Local Area Network Options
In addition to the general precautions described earlier in this section, be sure to
observe the following precautions when operating telecommunications and
network equipment. Failure to observe these precautions could result in fire, bodily
injury, and damage to the equipment.
•
Do not connect or use a modem or telephone (other than a cordless type)
during a lightning storm. There may be a remote risk of electric shock from
lightning.
•
Never connect or use a modem or telephone in a wet location.
•
Do not plug a modem or telephone cable into the Network Interface Card
(NIC) receptacle.
•
Disconnect the modem cable before opening a product enclosure, touching or
installing internal components, or touching an uninsulated modem cable or
jack.
•
Do not use a telephone line to report a gas leak while you are in the vicinity of
the leak.
14-44 Safety and Comfort
Precautions for Products with Laser Devices
All Compaq systems equipped with a laser device comply with safety standards,
including International Electrotechnical Commission (IEC) 825. With specific
regard to the laser, the equipment complies with laser product performance
standards set by government agencies for a Class 1 laser product. The product does
not emit hazardous light; the beam is totally enclosed during all modes of customer
operation and maintenance.
•
Laser Safety Warnings
In addition to the general precautions described earlier in this section, be sure
to observe the following warnings when operating a product equipped with a
laser device. Failure to observe these warnings could result in fire, bodily
injury, and damage to the equipment.
WARNING: To reduce the risk of exposure to hazardous radiation:
a
• Do not try to open the unit enclosure. There are no user-serviceable components
inside.
• Do not operate controls, make adjustments, or perform procedures to the laser
device other than those specified herein.
• Allow only Compaq Authorized Service technicians to repair the unit.
•
Compliance with CDRH Regulations
The Center for Devices and Radiological Health (CDRH) of the U.S. Food and
Drug Administration implemented regulations for laser products on August 2,
1976. These regulations apply to laser products manufactured from August 1,
1976. Compliance is mandatory for products marketed in the United States.
•
Compliance with International Regulations
All Compaq systems equipped with a laser device comply with appropriate
safety standards including IEC 825 and IEC 950.
Safety and Comfort
•
14-45
Laser Product Label
The following label or equivalent is located on the surface of your laser device.
This label indicates that the product is classified as a CLASS 1 LASER
PRODUCT.
Laser Information
Laser Type
Wave Length
Divergence
Angle
Output Power
Polarization
Numerical
Aperture
Semiconductor GaAIAs
780 nm + / - 35 nm
53.5 degrees + / - 0.5 degrees
-2
Less than 0.2 m W or 10,869W m sr
Circular 0.25
0.45 inches + / - 0.04 inches
-1
14-46 Safety and Comfort
For More Information
If you want more information about arrangement of work space and equipment or
safety standards, consult the following references:
"American National Standard for Human Factors Engineering of Visual Display
Terminal Workstations," ANSI/HFS Standard No. 100-1988. Human Factors
Society, Inc., P.O. Box 1369, Santa Monica, CA 90406.
Working Safely with Your Computer. Washington, D.C.: National Safety Council,
1991.
Or write to:
American National Standards Institute
11 West 42nd St.
New York, NY 10036
TEL: (212) 642-4900
FAX: (212) 398-0023
http://www.ansi.org
EMAIL: [email protected]
National Institute for Occupational Safety and Health (NIOSH)
NIOSH Publications
4676 Columbia Pkwy, MS C-13
Cincinnati, OH 45226-1998
TEL: (800) 356-4674
FAX: (513) 533-8573
http://www.cdc.gov/niosh/homepage.html
EMAIL: [email protected]
Human Factors and Ergonomics Society
ANSI/HFS 100-1988 Standard
P.O. Box 1369
Santa Monica, CA 90406-1369
TEL: (310) 394-1811
FAX: (310) 394-2410
http://hfes.org
EMAIL: [email protected]
Safety and Comfort
International Standards Organization (ISO)
Central Secretariat
International Organization for Standardization
1, rue de Varembé
Case postale 56
CH-1211 Genève 20, Switzerland
TEL: +41 22 749 01 11
FAX: +41 22 733 34 30
http://www.iso.ch
http://www.iso.ch/infoe/stbodies.html
EMAIL: [email protected]
National Safety Council Library
1121 Spring Lake Dr.
Itasca, IL 60143-3201
TEL: (630) 775-2199
FAX: (630) 285-0242
http://www.nsc.org
EMAIL: [email protected]
Occupational Safety and Health Administration (OSHA)
Publications Office
U.S. Department of Labor
200 Constitution Ave. NW, Room N3101
Washington, DC 20210
http://www.osha.gov
http://www.osha-slc.gov/ergo
http://www.osha.gov/oshpubs/oshapubs
TCO Information Center
150 North Michigan Ave., Suite 1200
Chicago, IL 60601-7594
TEL: (312) 781-6223
FAX: (312) 346-0683
http://www.tco-info.com/chicago.html
EMAIL: [email protected]
14-47
14-48 Safety and Comfort
Government Approvals
15-1
Chapter 15
Government Approvals
Federal Communications Commission Notice
This equipment has been tested and found to comply with the limits for a Class B
digital device, pursuant to Part 15 of the FCC Rules. These limits are designed to
provide reasonable protection against harmful interference in a residential
installation. This equipment generates, uses, and can radiate radio frequency
energy and, if not installed and used in accordance with the instructions, may cause
harmful interference to radio communications. However, there is no guarantee that
interference will not occur in a particular installation. If this equipment does cause
harmful interference to radio or television reception (which can be determined by
turning the equipment off and on), the user is encouraged to try to correct the
interference by one or more of the following measures:
•
Reorient or relocate the receiving antenna.
•
Increase the separation between the equipment and the receiver.
•
Connect the equipment into an outlet on a circuit different from that to which
the receiver is connected.
•
Consult the dealer or an experienced radio or television technician for help.
Modifications
The FCC requires the user to be notified that any changes or modifications made to
this device that are not expressly approved by Compaq Computer Corporation may
void the user's authority to operate the equipment.
Cables
Connections to this device must be made with shielded cables with metallic
RFI/EMI connector hoods in order to maintain compliance with FCC Rules and
Regulations.
15-2
Government Approvals
Declaration of Conformity for Products Marked with the
FCC Logo (United States Only)
This device complies with Part 15 of the FCC Rules. Operation is subject to the
following two conditions: (1) this device may not cause harmful interference, and
(2) this device must accept any interference received, including interference that
may cause undesired operation.
For questions regarding your product, call 800.652.6672 (800.OK.COMPAQ) or
contact:
Compaq Computer Corporation
P.O. Box 692000, Mail Stop 530113
Houston, Texas 77269-2000
For questions regarding this FCC declaration, call 281.514.3333 or contact:
Compaq Computer Corporation
P.O. Box 692000, Mail Stop 510101
Houston, Texas 77269-2000
To identify this product, refer to the Part, Series, or Model number found on the
product.
Canadian Notice
This Class B digital apparatus meets all requirements of the Canadian InterferenceCausing Equipment Regulations.
Government Approvals
15-3
Telecom Network Approvals
These two icons and associated statements may be found on desktop and minitower computers. They are intended to communicate how to access the
telecommunications regulatory approval information for your product. On
notebook computers, the approval information will appear on the bottom of the
computer.
Modem Statement from Product Label
As an alternative to viewing the approval information on your product, country
approval information may also be found on the Compaq Web site. To view this
approval information, visit www.compaq.com and perform a site search for the
words, “telecom network approvals.” If a selection is available for your product,
you may view and print the approval information.
U.S. Regulations Governing the Use of Modems
This equipment complies with Part 68 of the FCC rules. Located on the bottom of
the portable computers and on the modem in desktop computers is a label that
contains, among other information, the FCC Registration Number and Ringer
Equivalence Number (REN) for this equipment. Upon request, you must provide
this information to your telephone company.
15-4
Government Approvals
Ringer Equivalence Number (REN)
The REN is useful to determine the quantity of devices you may connect to your
telephone line and still have all of the devices ring when your telephone number is
called. In most areas (but not all), the sum of the RENs of all devices connected to
one line should not exceed five (5.0). To be certain of the number of devices you
may connect to your telephone line, as determined by the REN, you should contact
your local telephone company to determine the maximum REN for your calling
area.
The REN for the modem contained in this product does not exceed 1.0.
A FCC Compliant 6-position modular plug is provided with this equipment. This
equipment is designed to be connected to the telephone network or premises wiring
using a compatible 6-position modular jack that is FCC Part 68 Compliant.
If your telephone equipment causes harm to the telephone network, the telephone
company may discontinue your service temporarily. If possible, they will notify
you in advance. However, if advance notice is not practical, you will be notified as
soon as possible. You will also be informed of your right to file a complaint with
the FCC.
Your telephone company may make changes in its facilities, equipment,
operations, or procedures that could affect the proper functioning of your
equipment. If they do, you will be notified in advance to give you an opportunity to
maintain uninterrupted telephone service.
If you experience trouble with this telephone equipment, contact your local
telephone company for information on obtaining service or repairs. Your telephone
company may ask that you disconnect this equipment from the network until the
problem has been corrected or until you are sure that the equipment is not
malfunctioning.
This equipment may not be used on coin service provided by the telephone
company. Connection to party lines is subject to state tariffs.
Government Approvals
15-5
Telephone Consumer Protection Act of 1991
The Telephone Consumer Protection Act of 1991 makes it unlawful for any person
to use a computer or other electronic device to send any message via a telephone
facsimile machine unless such message clearly contains, in a margin at the top or
bottom of each transmitted page, or on the first page of the transmission, the date
and time it is sent and an identification of the business, or entity, or individual
sending the message and the telephone number of the sending machine or such
business, or entity, or individual.
Safety
Safety is important when you are operating your computer. Follow the guidelines
in this section to enjoy your computing experience.
Batteries
a
WARNING: Your computer is provided with a battery-powered, real-time clock
circuit. Danger of explosion and risk of personal injury exists if the battery is
incorrectly replaced or mistreated. Do not attempt to recharge the battery,
disassemble it, remove it, immerse it in water, or dispose of it in fire.
For information about real-time clock battery replacement, contact your Compaqauthorized dealer, reseller, or service provider.
a
WARNING: This computer may contain a lithium-ion or nickel-metal-hydride battery
pack. There is a risk of fire and chemical burn if the battery pack is handled
improperly. Do not disassemble, crunch, puncture, or short external contacts,
dispose of in water or fire, or expose to temperatures higher than 140°F (60°C).
.
CAUTION: Do not dispose of batteries with general household waste. To dispose of
them or recycle them, use the public collection system in accordance with local
regulations or return them to Compaq, an authorized Compaq Partner, or the pointof-sale. In North America, dispose of nickel-metal-hydride or lithium-ion batteries by
taking advantage of the Compaq battery recycling program. You will be provided
with a postage-paid battery pack mailer pre-addressed to a reclamation facility
where the metals are recycled
15-6
Government Approvals
Power Cords
If you were not provided with a power cord for your computer or for an AC power
accessory intended for use with your computer, you should purchase a power cord
that is approved for use in your country.
The power cord must be rated for the product and for the voltage and current
marked on the product’s electrical ratings label. The voltage and current rating of
the cord should be greater than the voltage and current rating marked on the
2
product. In addition, the diameter of the wire must be a minimum of 0.75 mm /18
AWG, and the length of the cord must be between 5 feet (1.5 m) and 6.5 feet (2 m).
If you have questions about the type of power cord to use, contact your CompaqAuthorized Service Provider.
A power cord should be routed so that it is not likely to be walked on or pinched by
items placed upon it or against it. Particular attention should be paid to the plug,
electrical outlet, and the point where the cord exits from the product.
Laser Assemblies
All Compaq systems equipped with CD drives comply with appropriate safety
standards including IEC 825. In addition, the equipment complies with laser
product performance standards set by government agencies as a Class 1 laser
product. The equipment does not emit hazardous radiation; the beam is totally
enclosed during all modes of customer operation and maintenance.
CDRH Regulations
The Center for Devices and Radiological Health (CDRH) of the U.S. Food and
Drug Administration implemented regulations for laser products on August 2,
1976. These regulations apply to laser products manufactured since August 1,
1976. Compliance is mandatory for products marketed in the United States.
a
WARNING: Use of controls or adjustments or performance of procedures other than
those specified in your Compaq documentation set may result in hazardous radiation
exposure
Government Approvals
15-7
The CD drive is classified as a Class 1 laser product. This label is located on the
outside of the CD drive:
Figure A-1. Laser Label
Laser Information
Laser Type
Semiconductor GaAIAs
Wavelength
650-780 +/- 35 nm
Divergence Angle
53.5 Degree +/- 5 Degree
Output Power
Less than 0.2 mW or 10.869 W/m2sr
Polarization
Circular
Numerical Aperture
0.45 +/- 0.04
a
WARNING: Only authorized technicians trained by Compaq should attempt to repair
this equipment. All troubleshooting and repair procedures are detailed to allow only
subassembly/module-level repair. Because of the complexity of the individual boards
and subassemblies, no one should attempt to make repairs at the component level
or to make modifications to any printed wiring board. Improper repairs can create a
safety hazard.
15-8
Government Approvals
Using the Computer
a
WARNING: A very small portion of the population may experience epileptic seizures
when viewing certain kinds of flashing lights or patterns that are commonly present
in our daily environment. These persons may experience seizures while watching
some kinds of television pictures or playing certain games, including games played
on the Internet PC. Players who have not had any previous seizures may nonetheless
have an undetected epileptic condition. Consult your physician if you experience any
of the following symptoms while playing games: altered vision, muscle twitching,
other involuntary movements, loss of awareness of your surroundings, mental
confusion, or convulsions.
WARNING: Some studies have suggested that long periods of typing, improper
workstation setup, incorrect work habits, or problems in your personal health may be
linked to discomfort or serious injuries. Refer to your Safety & Comfort Guide for
more information about choosing a workspace and creating a comfortable work
environment.
Government Approvals
Locating the Regulatory Compliance Markings Labels
Other labels containing safety or regulatory information about your specific
computer are located on the inside and outside of your computer. The following
illustrations show typical Regulatory Compliance Markings labels that apply to
your Compaq personal computer.
Typical Agency Label
No.
Components
1
Manufacturing Site
2
Modem Regulation Statement
3
Patent Information
4
Power Supply Caution
5
Grounding Information
6
Voltage Ratings
7
Agency Approvals
15-9
15-10 Government Approvals
Energy Compliance
Agency labels are located on the back of the computer. For examples of typical
agency labels, refer to the Safety section.
,
Energy Star Compliance
The Energy Star logo is your assurance that your computer is in compliance with
the EPA Energy Star Computers Program 2.0 guidelines for energy efficiency.
Your computer may not meet these guidelines if it is not marked with the Energy
Star logo.
Compaq Internet PC products marked with the Energy Star Logo are compliant
with Energy Star Computers Program 2.0 standard of the U.S. Environmental
Protection Agency (EPA). The EPA Energy Star Logo does not imply endorsement
by the EPA. As an Energy Star Partner, Compaq Computer Corporation has
determined that products marked with the Energy Star Logo meet the Energy Star
guidelines for energy efficiency.
The Energy Star Computers Program was created by the EPA to promote energy
efficiency and reduce air pollution through more energy-efficient equipment in
homes, offices, and factories. Compaq products achieve this standard by reducing
power consumption when not being used. Instructions for using the energy saving
features of your computer are located in the power management section of the
documentation that came with your computer.
The power management feature of your computer is supported when used with the
following operating system: Microsoft Windows Operating System.
The power management feature, when used in conjunction with an external Energy
Star compliant monitor, will support the power-down features of the monitor. The
power management feature allows an external monitor to go into low-power mode
when the screen saver timeout occurs. To take advantage of these energy savings,
the monitor’s power management feature has been preset to power down the
monitor after a period of system inactivity. Refer to the power management section
of the documentation that came with your computer for instructions on modifying
or disabling this feature.
`
CAUTION: Using the Energy Save Monitor feature with non-Energy Star compliant
monitors may cause video distortion when the screen saver timeout occurs.
CAUTION: The power management feature is not compatible with some nonCompaq bus-mastering ISA devices. Using the power management feature with
some of these devices may cause errors when the system is placed in the low power
state.
Glossary-1
Glossary
10BaseT – Unshielded twisted pair cable used to connect computers on an
Ethernet network. See Ethernet.
American National Standards Institute (ANSI) – A private, non-profit
organization that facilitates the development of national technical standards by
establishing consensus among qualified public and private sector groups.
American Standard Code for Information Interchange (ASCII) – The code
used to represent the conversion of keyboard characters into binary digits that can
be processed by the computer. See American National Standards Institute.
analog – A continuous electronic current of varying frequency. Digital data from a
computer must be converted to an analog signal by a modem before it can be
transmitted over standard telephone lines. Contrast digital.
ANSI – See American National Standards Institute.
anti-virus utility – A program that detects and in many cases repairs the damage
caused by harmful program code. See virus, utility.
application – A software program that facilitates the performance of useful work,
such as a word processing program.
ASCII – See American Standard Code for Information Interchange.
backup – A copy of one or more files for safekeeping.
Basic Input Output System (BIOS) – An instruction set stored on the read-only
memory chip of a computer that handles how the hardware reacts to commands
from software.
binary – A number system that uses only the symbols 0 and 1. Used to represent
digital data.
binary digit – A representation of the basic building block of all computer
information using the symbols 0 and 1. The data represented by one binary digit is
equal to one bit. See bit, byte.
BIOS – See Basic Input Output System.
bit – A unit of measurement used to describe the smallest possible piece of
computer information, represented as a binary digit. Eight bits is equal to one byte.
See byte; binary digit.
Glossary-2
boot – To start up a computer. During the start up process, information necessary
for the computer to operate is loaded into the memory.
browser – A program used to access and view information. See Web browser.
bug – An error in computer program code.
bulletin board – A computerized meeting and announcement system that can be
accessed directly by dialing the bulletin board system telephone number using a
modem or through an ISP connection and the Internet.
bus – The main communication path used by the components of a computer.
byte – A unit of measurement used to describe a quantity of data, equal to eight
bits. A character is one byte in size. See bit.
CAB files (CABinet files) – Files in the Windows directory on your hard disk that
contain the Microsoft Windows operating system distribution files. These files are
automatically accessed when necessary.
cable modem – A device that provides constant access to the Internet through a
cable Internet service provider.
cache – A portion of memory where frequently used information is duplicated for
the purpose of instant access. See memory.
CardBus PC Card – A 32-bit PC Card. See PC Card.
CD – See compact disc, digital versatile disc, digital video disc.
CD-ROM – See compact disc.
central processing unit (CPU) – Controls the operation of a computer. Arithmetic
and logic operations, as well as the decoding and execution of instructions are
performed by the central processing unit. See chip, microprocessor.
channel – A communication path.
Channel Bar – A feature of the Microsoft Windows 98 active desktop that
provides single-click access to featured Web sites.
chip – A tiny silicon wafer that contains miniature transistors and circuits. See
central processing unit, microprocessor.
client – A computer workstation on a network that has access to the data and
services of a central computer known as a server. Contrast server.
Glossary-3
compact disc (CD) – A circular piece of plastic that can store a maximum of 650
MB of digital data on one side using laser technology. Types of CDs include the
following:
•
CD-ROM (read only memory) – Contains read-only information.
•
CD-RW (rewritable) – Information can be saved to the disc using a rewritable
or recordable CD drive.
CD-ROM – See compact disc.
configure – To set up a computer or change program settings.
connector – A receptacle designed to accept the insertion of a specific cable plug,
usually located on the back of the computer or device. Some connectors are built
into the front of computers for easy access. See parallel port connector, PS2
connector, serial port connector, Universal Serial Bus.
CPU – See central processing unit.
Creativity Action Center – A set of easily accessible connectors situated on the
front of select models of Compaq Internet PCs.
cursor – The blinking symbol on a computer screen that shows where the next
typed character will be displayed.
daisy chain – To add a device to the last one in a chain of USB or IEEE-1394
devices. See Universal Serial Bus, IEEE-1394 High Performance Serial Bus.
database – An organized collection of data designed to facilitate the extraction of
useful information.
DCIC – See Digital Creativity Imaging Center.
debug – To remove errors from computer program code.
dedicated line – A leased communication path that provides constant access to the
Internet.
default – An automatic setting that a program uses unless alternative instructions
are entered.
desktop – See Windows desktop.
desktop computer – A personal computer designed to be set up on a desk, as
opposed to an easily-transportable notebook computer. Contrast laptop computer,
notebook computer.
Glossary-4
desktop publishing – The use of a personal computer with word processing,
graphics, or page-layout programs to produce professional-quality documents.
device driver – See driver.
dialog box – A window that is automatically displayed when information must be
entered to continue.
dial-up networking – A method of accessing a network through a modem and a
standard telephone line. Usually refers to accessing the Internet through an Internet
service provider. Contrast dedicated line.
digital – Electrical signals that carry data in the form of bits. Contrast analog.
Digital Creativity Imaging Center (DCIC) – a set of easily accessible connectors
situated on the front of select models of Compaq Internet PCs.
digital subscriber line (DSL) – A broadband communication technology that
utilizes the bandwidth not used for voice communications on standard telephone
lines for data communications. See DSL modem.
digital versatile disc (DVD) – A CD-sized disc capable of storing a maximum of
17 GB of digital audio, video, or data using both sides of the disc. Types of DVDs
include the following:
•
DVD-ROM (read only memory) – Contains read-only information.
•
DVD-R (rewritable) – Information can be recorded to the disc only once using
a rewritable DVD drive.
•
DVD-RAM (random access memory) – Information can be saved to the disc
using a rewritable DVD drive.
•
DVD+RW (rewritable) –– Information can be saved to the disc using a
recordable DVD drive.
digital video disc – A CD-sized disc capable of storing a maximum of 135 minutes
of video, as well as the associated audio and subtitles in 8 different languages.
Contrast compact disc, digital versatile disc.
directory – An area on a disk where the names and locations of files are stored.
disc – See compact disc.
diskette –A storage device made of flexible plastic film coated with iron oxide
cased in a hard plastic shell. Also known as a 3.5" or floppy diskette. See floppy.
Glossary-5
diskette drive – A device that enables a computer to read data from and write data
to diskettes.
Disk Operating System (DOS) – The generic name for the Microsoft Disk
Operating System (MS-DOS).
DOS – See Disk Operating System.
double-click – To press the left mouse button twice in rapid succession.
download – To transfer a copy of a file from a remote computer. Contrast upload.
drive – A device that enables the reading and sometimes writing of data to a
storage device. See CD drive, diskette drive, DVD drive, hard drive, Zip drive.
driver – A program that enables the Microsoft Windows operating system and the
BIOS to recognize and operate devices installed in or attached to a computer, such
as a PCI card or a printer. See Plug and Play.
DSL – See digital subscriber line.
DSL modem – A device used to connect to the Internet using digital subscriber
line service through standard telephone lines. See digital subscriber line.
duplex – Describes a communication channel that is always open in both
directions. In telecommunications, it refers to the ability of both parties to transmit
and receive signals at the same time. Also known as full duplex. Contrast half
duplex.
DVD – See digital versatile disc.
e-mail – See electronic mail.
electronic mail – A method of sending messages and files across a network or the
Internet.
enabling software – An instruction set that must be installed before the associated
hardware device can function.
Ethernet – A family of data link protocols that specifies how data is transferred
over a network.
expansion slot – A receptacle on the system board that accepts a device that adds
functionality to the computer, such as a modem.
Explorer – See Microsoft Internet Explorer, Microsoft Windows Explorer.
Glossary-6
extranet – An intranet that is accessible to those not part of the organization by
special permission. See intranet.
File Transfer Protocol (FTP) – An instruction set that specifies how files are
downloaded or uploaded. See download, upload.
floppy – Informal term for diskette. Also known as 3.5" floppy. See diskette.
FTP – See File Transfer Protocol.
full duplex – See duplex.
gamepad – A device that permits more realistic game play than is possible with a
mouse or touchpad.
gameport – See MIDI/Gameport.
GB – See gigabyte.
gigabyte (GB) – a unit of measurement used to describe data quantity. One GB is
equal to approximately one billion bytes. See byte.
graphical user interface (GUI) –The collection of images and text shown on the
monitor display that facilitates the entry of commands and data. The Windows
desktop is a graphical user interface.
GUI – See graphical user interface.
half duplex – Describes a communication channel that is only open in a single
direction at any given time. In telecommunications, it refers to the ability of only
one party to transmit data at any given time. Contrast duplex.
hard disk – An internal data storage device made of hard aluminum disks coated
with iron oxide.
hard drive – A device that enables a computer to read data from and write data to
a hard disk.
hardware – The physical components of a computer.
hertz (Hz) – a unit of measurement used to describe frequency rate. One hertz is
equal to one cycle per second. See megahertz, microprocessor, refresh rate.
Glossary-7
hibernation – Applies to notebook computers only. A state of decreased power
consumption. When the notebook computer enters this state, the contents of the
memory are automatically written to the hard disk for safe storage. Your notebook
computer automatically enters hibernation if any of the following events occur:
•
The notebook computer has been in the Sleep mode for more than one hour
(while connected to battery power only).
•
The battery reaches the low charge state.
•
The power button is pressed briefly while the computer is on.
high-performance addressing (HPA) – A liquid crystal display technology that
provides high quality realism especially when viewing video or playing 3D games.
hotplug – To connect or disconnect equipment, such as a PC Card or USB device,
without restarting the computer.
hover help – The information that may be displayed when the mouse pointer is
placed on an icon, button, or toolbar item, such as the name of the button or an
explanation of the button function.
HPA – See high-performance addressing.
HTML – See Hypertext Markup Language.
HTTP – See Hypertext Transport Protocol.
hub – A switching device used to connect computers to a network.
hyperlink – Colored and underlined hypertext that when clicked provides
immediate access to a file, a specific location within a file, or a Web page. See
hypertext, link.
hypertext – Specially formatted words in a document or on a Web page that serves
as a link to another location. See hyperlink, link.
Hypertext Markup Language (HTML) – A standard language used for creating
and publishing documents on the World Wide Web.
Hypertext Transport Protocol (HTTP) – An instruction set that specifies how
information is published on the Internet. See Hypertext Markup Language.
Hz – See hertz.
icon – A small picture incorporated into the graphical user interface that represents
a link or shortcut to a file, folder, or program.
Glossary-8
IEEE – See Institute of Electrical and Electronics Engineers.
IEEE-1394 High Performance Serial Bus – A Plug-and-Play digital interface
that allows up to 63 devices to be connected sequentially into a single external port.
See daisy chain, IEEE-1394 port, Plug and Play.
IEEE-1394 port – A device that transmits data at a maximum rate of 400 Mbps. A
variety of devices are supported, such as IEEE-1394 digital cameras, video
cameras, and storage devices. See IEEE-1394 High Performance Serial Bus.
Intel VideoPhone – A software package developed by the Intel Corporation that
makes it possible to place and receive video telephone calls through the Internet or
through standard telephone lines using a video camera.
Institute of Electrical and Electronics Engineers (IEEE) – A non-profit group
involved in the development of technology and standards in the areas of computer
engineering and consumer electronics.
interactive – A term used to describe a program, such as a computer game, that
immediately reacts to commands.
interface – See graphical user interface.
International Organization for Standardization (ISO) – A non-governmental
organization established to promote the development of standards in the areas of
intellectual, scientific, technical, and economic activity.
International Telecommunication Union (ITU) – An agency of the United
Nations responsible for the regulation, standardization, coordination, and
development of international telecommunications standards.
Internet – The largest decentralized computer network in the world. Every
computer or network that is linked to the Internet uses TCP/IP. See network,
TCP/IP.
internet – Two or more networks connected together.
Internet Explorer – See Microsoft Internet Explorer.
Internet keyboard – A keyboard equipped with special buttons programmed to
access the Internet, a favorite program, or perform other frequently-used tasks with
a touch of a button.
Internet service provider (ISP) – A business organization that provides Internet
access through dial-up networking or dedicated line access. See dial-up
networking, dedicated line.
Glossary-9
intranet – An information site usually implemented by businesses, schools, or
other large institutions designed to provide information to members of the
organization. An intranet can be thought of as a smaller, private version of the
World Wide Web. See extranet.
ISO – See International Organization for Standardization.
ISP – See Internet service provider.
ITU – See International Telecommunication Union.
joystick – A device that permits more realistic game play than is possible with a
mouse or touchpad.
K56flex – A data communication protocol developed by Lucent Technologies
Incorporated and Rockwell International Corporation designed to transfer data at a
maximum rate of 56 Kbps over standard telephone lines using a modem. See
modem. See V.90 Standard.
KB – See kilobyte.
Kbps – See kilobits per second.
keyboard – The primary device used for entering alphanumeric data.
kilobits per second (Kbps) – A unit of measurement used to describe the rate of
data transfer.
kilobyte (KB) – A unit of measurement used to describe data quantity. One KB is
equal to approximately one thousand bytes. See byte.
LAN – See local area network.
laptop computer – A portable computer, usually weighing approximately eight
pounds. Contrast desktop computer, notebook computer.
LCD – See liquid crystal display.
LED – See light-emitting diode.
light-emitting diode (LED) – A device that glows when an electric current passes
through it. Status lights on computers are often LEDs.
link – An item that provides direct access to a file, program, directory, or Web site.
See hyperlink, shortcut.
Glossary-10
liquid crystal display (LCD) – A type of display that uses chemicals, or liquid
crystals, that respond to polarized light and electrical signals. A notebook computer
has a liquid crystal display.
listserv – See mailing list.
local area network (LAN) – Two or more computers linked together for the
purpose of sharing resources, such as files, programs, or printers. A local area
network is usually contained within a single building. Contrast wide area network.
log on – To gain authorized access to a network or Internet service provider
account by providing a user name and password.
mailing list – A mail forwarding service that allows subscribers to send e-mail to a
single address where the message is copied and sent to all subscribers to that
particular list.
maillist – See mailing list.
MB – See megabyte.
Mbps – See megabits per second.
megabits per second (Mbps) – A unit of measurement used to describe the rate of
data transfer.
megabyte (MB) – A unit of measurement used to describe data quantity. One MB
is equal to approximately one million bytes. See byte.
megahertz (MHz) – A unit of measurement used to describe microprocessor
speed. One megahertz is equal to one million hertz, or one million cycles per
second. See hertz.
memory – The place where data and instructions are stored for use by the
processor. There are several different types of memory that include the following:
•
random-access memory (RAM) – The space where programs and data are
stored as they are used.
•
read-only memory (ROM) – The space where data needed to run the computer
is stored. The computer can access but not change this data.
•
virtual memory – The use of hard disk file space to extend the capability of
random-access memory.
MHz – See megahertz.
Glossary-11
microprocessor – An integrated circuit on the system board that contains the
entire central processing unit. May be considered the brain of the computer. The
speed of a microprocessor is measured in megahertz. See hertz, megahertz.
Microsoft Internet Explorer – A Web browser developed by the Microsoft
Corporation; used to view hypertext documents on intranet web sites as well as
documents on the World Wide Web.
Microsoft Windows – The family of GUI-based computer operating systems
developed by the Microsoft Corporation.
Microsoft Windows Explorer – A browser program used to access and view the
contents of data storage drives available to the computer.
Microsoft Windows NT – A network operating system developed by the
Microsoft Corporation.
MIDI – See Musical Instrument Digital Interface.
MIDI/Gameport connector – A receptacle that accepts a gamepad, joystick, or
similar device to permit more realistic game play than is possible with a mouse or
touchpad.
MMX – See multimedia extension.
modem (modulator/demodulator) – A device that converts data from a digital to
analog format at the originating computer so that it can be transmitted over
standard telephone lines. The modem at the receiving end of the transmission then
converts the data from analog back to digital format so that the receiving computer
can read it. See analog, digital.
motherboard – See system board.
Motion Picture Expert Group (MPEG) – A working group of the International
Organization for Standardization (ISO), responsible for generating data
compression standards for digital video and audio data.
mouse – A device used to move a pointer on the display as well as make selections
by clicking the buttons. See double-click, left-click, right-click.
MPEG – See Motion Picture Expert Group.
multimedia – The presence of two or more formats, such as audio, animation,
graphics, text, or video.
Glossary-12
Multimedia Extension (MMX) – A microprocessor technology developed by the
Intel Corporation that runs multimedia programs faster and more efficiently.
Musical Instrument Digital Interface (MIDI) – A computer file format used to
represent musical sounds. MIDI files can be identified by the file extension .mid.
navigate – To move from one site or directory to another site or directory.
Netscape Navigator – A Web browser developed by the Netscape
Communications Corporation; used to view hypertext documents on intranet Web
sites as well as documents on the World Wide Web.
network – Two or more computers linked together for the purpose of sharing
resources, such as files, programs, or printers. See local area network, wide area
network.
network adapter – See network interface card.
network interface card – A device that enables a computer to be physically
connected to and participate in data communications on a network.
newsgroup – A public special-interest forum on a network similar to a bulletin
board. Subscribers can read and post messages to the newsgroup site.
NIC – See network interface card.
notebook computer – A portable computer about the size of a large notebook
usually weighing about four pounds. Contrast desktop computer, laptop computer.
online – The state of being connected to a network, especially the Internet.
online Help – Program-specific information stored on the hard disk that can be
accessed through the Help option on the program menu bar.
operating system (OS) – A set of system software programs that control how the
computer works.
OS – See operating system.
parallel port – A device that transfers bits of data simultaneously through the eight
separate wires in a parallel cable. Printers are often connected to a parallel port.
partition – To format a hard disk so that it behaves as if it is two or more smaller
hard disks.
PC – Personal computer.
Glossary-13
PC Card – A credit card-sized device that can be plugged into a PC Card slot on a
notebook computer to expand its functionality. Formerly known as a PCMCIA
Card. See Personal Computer Memory Card International Association.
PCI – See Peripheral Component Interconnect.
PCMCIA – See Personal Computer Memory Card International Association.
peripheral – A device connected to a computer, such as a monitor or a printer.
Peripheral Component Interconnect (PCI) – A local bus capable of transferring
data at a maximum rate of 137 Mbps. The PCI bus was the first bus to incorporate
the Plug and Play setup. See bus, Plug and Play.
Personal Computer Memory Card International Association – An industry
group organized to promote standards for credit card-sized memory and
input/output devices that fit into a notebook or laptop computer.
pixel – One of the individual dots that make up a graphical image.
playlist – Tracks chosen for play from a CD or DVD.
Plug and Play – Refers to a device that when connected to a computer is
automatically recognized by the operating system and BIOS.
Point-to-Point Protocol (PPP) – An instruction set that enables a computer to
gain authorized access to a network using dial-up networking, a modem, and a
standard telephone line. Many Internet service providers use PPP.
pop-up menu – A list of choices that is displayed when an item on a menu bar is
selected.
port – A point through which data flows between computers or between a
computer and a peripheral device. See parallel port, serial port.
PPP – See Point-to-Point Protocol.
processor – See microprocessor.
Product Key – The Microsoft Windows operating system product identification
code printed on the lower right corner of the cover of the Microsoft Windows
Getting Started guide. You must enter this code during the Microsoft Windows
Setup.
program – Software installed on a computer that facilitates the performance of
useful work, such as a word processing program.
Glossary-14
proprietary – Refers to software or hardware technology owned by a company or
individual that has exclusive rights to it.
protocol – A formal standard or instruction set.
RAM – See memory.
random access memory (RAM) – See memory.
RAS – See remote access server, Remote Access Service.
read-only memory (ROM) – See memory.
real-time clock (RTC) – An battery powered clock inside your computer that
keeps time even when the computer is turned off.
refresh rate – The number of times a monitor redraws the display, measured in
hertz. A refresh rate of 75 Hz indicates that the monitor updates its display 75
times per second.
remote access server (RAS) – a computer configured as a server that permits
authorized access to a network using specially configured dial-up networking. See
Remote Access Service.
Remote Access Service (RAS) – A feature of Microsoft Windows NT that permits
authorized access to a network using dial-up networking through a specially
configured server computer. See remote access server.
right-click – To press the right mouse button.
ROM – See memory.
RTC – See real-time clock.
screen saver – A blank screen or a moving image that automatically is displayed
after the computer has not been used for a predetermined amount of time. Screen
savers were designed to prevent damage to the screen. As monitor technologies
continue to improve and damage is no longer a concern, screen savers are now
used to provide privacy and entertainment.
scroll mouse – A device used to move a pointer on the display as well as make
selections by clicking the buttons. The scroll mouse also has a scroll wheel located
between the two mouse buttons that allows automatic scrolling in documents.
serial port – A device that transfers data one bit at a time through a serial cable.
Glossary-15
server – A specially configured computer running network software that provides
access to network resources for client workstation computers.
shortcut – An icon on the Windows desktop that provides a direct link to a
program, directory, or file. Shortcuts are identifiable by the small arrow located in
the lower left corner of the icon image.
Sleep mode – A low power consumption state that components of the computer
enter after a predetermined amount of time.
software – Programs that contain computer operation instructions. There are two
types of software; application software and system software. See application,
operating system.
Super Video Graphics Adapter (SVGA) – A video card that typically supports
resolutions of 1024 x 728 pixels with over 65,000 colors. See pixel.
surf – To browse or navigate through the information on the Internet and the
World Wide Web.
surge protector – A device that protects electrical devices from brief bursts of
excessive voltage.
SVGA – See Super Video Graphics Array.
system board – The main circuit board inside a computer. Also known as
motherboard.
taskbar –See Windows Taskbar.
TCP/IP – See Transmission Control Protocol/Internet Protocol.
touchpad – A small, touch-sensitive pad used as a pointing device on some
portable computers. By tracing a finger or other object along the pad, you can
move the pointer on the display screen. You select a menu option by tapping on the
pad (if this feature is enabled).
Transmission Control Protocol/Internet Protocol (TCP/IP) – An industry
standard instruction set that specifies how data is transmitted through a network.
TCP/IP enables cross-platform communications, that is, a computer running a
Microsoft Windows operating system can access data and information provided by
a computer running a different operating system. Every computer and network that
is connected to the Internet uses TCP/IP.
uninterruptible power supply (UPS) – A device that provides surge protection
and, in the event of a power failure, short-term battery backup power.
Glossary-16
Uniform Resource Locator (URL) – An Internet address that specifies the
location of information. Also known as Universal Resource Locator.
Universal Resource Locator (URL) – See Uniform Resource Locator
Universal Serial Bus (USB) – A Plug-and-Play interface that allows up to 127
devices to be connected sequentially into a single external USB port. See daisy
chain, USB port.
upload – To send a copy of a file to a remote computer. Contrast download.
UPS – See uninterruptible power supply.
URL – See Uniform Resource Locator.
USB – See Universal Serial Bus.
USB port – A device that transmits data at a rate of 12 Mbps through a USB cable.
A variety of devices are supported, such as USB monitors, keyboards, and printers.
See Universal Serial Bus.
utility – A program that assists with the operation of a computer, such as a power
management program or anti-virus program.
V.90 Standard – A standard endorsed by the International Telecommunication
Union that makes it possible for modems to communicate without regard to
technological differences. The k56flex standard is incorporated into the V.90
standard, ensuring compatibility between V.90-enabled and K56flex-enabled
modems.
Video CD – See digital video disc.
videophone – See Intel VideoPhone.
virtual memory – See memory.
virus – A harmful computer program that may cause damage to data or programs.
See anti-virus utility.
WAN – See wide area network.
Web – See World Wide Web.
Web browser – A program that makes it possible to access and view hypertext
documents.
Glossary-17
wide area network – Geographically separated computers linked together for the
purpose of sharing resources, such as data. The Internet is the largest wide area
network in the world. Contrast local area network.
Windows NT – See Microsoft Windows NT.
Windows desktop – The work area shown on the monitor display that contains the
Windows Taskbar as well as icons that represent links to programs or shortcuts to
programs and files. See link, shortcut, Windows Taskbar.
Windows Taskbar – A thin band that contains the Microsoft Windows Start
button, the current time, as well as icons that provide links to frequently used
programs.
wizard – A utility program that automatically presents the steps necessary to
complete a task, such as installing a printer.
World Wide Web – A universal database that provides a consistent means to
access large amounts of information. Web documents facilitate the quick retrieval
of information through the use hypertext links.
WWW – See World Wide Web.
Zip disk – A storage device with a 100 or 250 MB capacity that is compatible with
a Zip drive.
Zip drive – A device that can read and write data to a Zip disk.
Glossary-18
Index-1
Index
A
Add/Remove Programs utility 6-8
anti-virus See McAfee Anti-Virus
anti-virus emergency diskette 7-3
creating 7-3
using 7-4
B
battery
battery warning 15-5
browsing 9-6
buttons
Instant Answer 12-7
C
cables
data 11-6
power supply 11-6
CD
troubleshooting 13-4
CD/DVD drive 5-17
inserting a CD or DVD 5-16
removing 5-16
CD/DVDs
playing a video CD 5-17
playing an audio CD 5-17
CDRH Regulations See government
approvals
Class B digital device See government
approvals
cleaning
exterior surfaces 10-1
the keyboard 10-1
the monitor 10-1
the mouse 10-1
Compaq Service Connection 12-1
Compaq Support 12-1
diagnostic testing equipment 12-3
Diagnostics 12-1
Internet Support 12-1
McAfee Anti-Virus 12-1
System Record 12-1
Compression Agent 10-2
computer virus 7-1
recognizing 7-1
connection speeds 8-3
Ctrl+Alt+Delete 3-2
D
Disk Cleanup 10-2
Disk Defragmenter 10-2
diskette
troubleshooting 13-17
write protecting 5-19
Diskette Drive 5-19
download speeds 8-3
drivers 12-8
installing new 12-8
reinstalling deleted drivers 12-8
drives
CD/DVD 5-17
DVD
troubleshooting 13-4
E
energy compliance 15-10
Energy Star compliance 15-10
expansion cards
compatibility 11-12
installing 11-12
ISA 11-12
PCI 11-12
Index-2
F
files
searching for 6-4
fixing problems 13-1
flat-panel monitor
troubleshooting 13-9
G
game
troubleshooting 13-11
government approvals
CDRH regulations 15-6
class B digital device 15-1
real-time clock battery
replacement 15-5
ringer equivalence number 15-4
safety 15-5
telephone consumer protection act
of 1991 15-5
typical agency labels 15-9
H
hard drive activity light 4-3
Hard Drive Size 5-18
home page 9-6
hyperlink 9-2, 9-7
I
installing hardware 12-8
installing software
downloaded from the Internet 6-9
from a CD 6-8
from a diskette 6-8
Instant Answer button 12-7
International Telecommunications
Union 8-1
Internet
accessing a search engine 9-6
address 9-1
defined 9-1
home page 9-6
hyperlink 9-2
modem usage 9-2
surfing tips 9-6
surfing with keyboard 9-4
using search engine 9-7
Web browser 9-2
Web server 9-1
Web site 9-1
World Wide Web 9-2
WWW 9-2
Internet service provider
choosing 9-2
defined 9-2
Internet Support 12-1, 12-7
ISP 9-2
troubleshooting 13-12
ITU See International
Telecommunications Union
K
K56flex 8-1
keyboard
disable Easy Access buttons 5-6
function keys (F1 through F12) 5-7
Launch button 5-5
Multimedia Easy Access buttons 5-4
Quick Print button 5-5
reprogram Easy Access buttons 5-6
Sleep button 5-5
standard keyboard keys 5-7
status lights 5-9
surfing the Internet 9-4
Index-3
keyboard
Community 5-2, 9-4
Daily Destination 5-2, 9-4
Instant Answer 5-3, 9-5
Instant E-Mail 5-2, 9-4
Instant Internet 5-2, 9-4
Instant Search 5-2, 9-4
My Presario 5-2, 9-4
Online MarketPlace 5-3, 9-5
Retail Central 5-3
Secure E-Commerce/Featured Web
Site 5-3, 9-5
L
laser safety 15-6
Laser safety See government approvals
locked program
recovering from a 3-2
locked system
recovering from a 3-2
M
Maintenance Wizard 10-2
McAfee Anti-Virus 7-5, 12-1
free software updates 12-1
scanning for viruses 7-2
VirusScan 7-3
memory
adding 11-15
installing 11-16
location of 11-15
Microsoft Windows
accessibility 6-7
accessories 6-7
activemovie control 6-7
calculator 6-7
CD player 6-7
communications 6-7
creating shortcuts 6-6
entertainment features 6-7
games 6-7
Help 6-1
hyperterminal 6-7
media player 6-7
notepad 6-7
operating system 6-1
paint 6-8
phone dialer 6-7
sound recorder 6-7
volume control 6-7
Windows Explorer 6-5
wordpad 6-8
modem 8-1
56K 8-1
connecting 8-2
data/fax 8-1
digital 8-2
identifying 8-1
properties 8-1
monitor
troubleshooting 13-9
P
personal power scheme
creating a 4-2
playing a video CD 5-17
playing an audio CD 5-17
point-to-point connection 8-3
power button 3-1, 3-2, 4-4
4-second off feature 3-3, 4-4
power cords See government approvals
power management utility 4-1
power schemes 4-1
power status light 3-2, 3-4
power supply
moving 11-8
problems
solving common 13-1
Index-4
R
real-time clock
replacing the battery 11-18
real-time clock battery replacement See
government approvals
recovering from
a locked program 3-2
a locked system 3-2
restarting the computer 3-2
Ringer Equivalence Number (REN) See
government approvals
S
safety 15-5
battery warning 15-5
laser safety 15-6
power cords 15-6
Safety See also government approvals
ScanDisk 3-2
screen
troubleshooting 13-9
scroll mouse 5-10
CyberJump 5-13
functions 5-11
HyperJump 5-13
options 5-12
scrolling and zooming 5-12
search engine
using 9-7
serial numbers 1-3
shutting down
using Microsoft Windows 3-3
using the power button 3-4
Sleep button 3-2, 4-4
Sleep mode 3-2, 4-4
activating 4-5
deactivating 4-5
software
compatibility 6-8
installing 6-8
sound
troubleshooting 13-2
speaker cable
troubleshooting 13-2
status lights 4-3
Storage Drives 5-18
sun status light 3-3
SuperDisk
troubleshooting 13-8
Support
diagnostics 12-1
surfing tips 9-6
system board
components 11-10
System Maintenance 10-2
System Record 12-1, 12-4
Base.log 12-4
Now.log 12-4
T
testing equipment
complete 12-3
custom 12-3
quick 12-3
text conventions 1-1
troubleshooting 13-1
CD 13-4
diskette 13-17
DVD 13-4
flat-panel monitor 13-9
games 13-11
helpful hints 13-1
monitor 13-9
screen 13-9
sound 13-2
speaker cable 13-2
SuperDisk 13-8
volume 13-2
Zip disk 13-7
Zip drive 13-7
turning off the computer 3-3
turning on the computer 3-2
Index-5
U
Uniform Resource Locator 9-1
upgrading
expansion cards 11-12
identifying major components 11-3
memory 11-15
preparing for 11-2
removing the cover 11-5
replacing the cover 11-5
upload speed 8-3
URL 9-1
V
V.90 standard 8-1, 8-3
virus 7-2
McAfee Anti-Virus 12-1
volume
troubleshooting 13-2
W
waking the computer 4-5
Web address
Compaq address 9-1
Web browser
defined 9-2
Microsoft Internet Explorer 9-3
using 9-3
web page 9-1
Web server 9-1
Web site 9-1, 9-2
World Wide Web 9-2
write protecting 5-19
WWW 9-2
Z
Zip disk
troubleshooting 13-7
Zip drive
troubleshooting 13-7
Zip Drive 13-7
Index-6
The information in this guide is subject to change without notice.
COMPAQ COMPUTER CORPORATION SHALL NOT BE LIABLE FOR TECHNICAL OR
EDITORIAL ERRORS OR OMISSIONS CONTAINED HEREIN; NOR FOR INCIDENTAL OR
CONSEQUENTIAL DAMAGES RESULTING FROM THE FURNISHING, PERFORMANCE,
OR USE OF THIS MATERIAL.
This guide contains information protected by copyright. No part of this guide may be photocopied
or reproduced in any form without prior written consent from Compaq Computer Corporation.
© 1999 Compaq Computer Corporation. All rights reserved. Printed in the U.S.A., Brazil,
Canada, Japan, Korea, Singapore, Taiwan, and the U.K. Compaq and Presario are registered in
the U.S. Patent and Trademark Office.
Microsoft, MS-DOS, and Windows are registered trademarks of Microsoft Corporation.
The software described in this guide is furnished under a license agreement or nondisclosure
agreement. The software may be used or copied only in accordance with the terms of
the agreement.
Product names mentioned herein may be trademarks and/or registered trademarks of their
respective companies.
165291-002