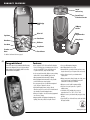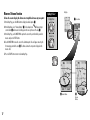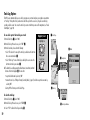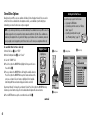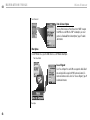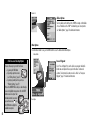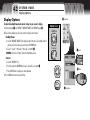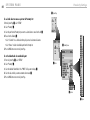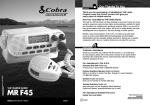
1
Owner’s Manual
GPS 1000
Printed in China
Part No. 480-038-P
GLOBAL POSITIONING SYSTEM RECEIVER
Nothing comes close to a Cobra®
ENGLISH
I M P O R TA N T I N F O R M AT I O N
Cautions and Warnings
Caution: The user is responsible for operating this product wisely.
This product is intended for use only as a navigational aide and
should not be used when precise measurement of direction, location,
distance or topography is required.
Caution: GPS (Global Positioning System) is operated by the
U.S. government. The U.S. government is solely responsible for its
accuracy and maintenance. The system is subject to changes, which
could affect the accuracy and performance of GPS equipment.
Caution: Remove the batteries from the receiver if you do not
expect to use it for months at a time. As with any batteries, leakage
can occur. When re-installing batteries, observe proper polarity.
Non-English Manuals
Customer Assistance
This GPS receiver is equipped to communicate in the language
of your choice: English, Dutch, French, German, Italian,
Portuguese, Spanish or Swedish (see “System Page Settings:
Languages,” page 83).
In this user’s manual, you should find all the information you need to
operate your GPS receiver. If you require further assistance after
reading through this manual, the Cobra Electronics Corporation offers
the following customer support services.
For operating instructions in Dutch, French, German,
Italian, Portuguese, Spanish, or Swedish please visit
www.cobra.com/GPS-manuals.html
In the USA:
FCC Compliance
This device complies with Class B of the FCC rules.
Operation is subject to the condition that this device does not
cause harmful interference. It must accept any interference
received, including that which may cause undesirable operation.
Warning: If you choose to use this device in a vehicle, it is the sole
responsibility of the operator of the vehicle to use this device in a safe
manner. Be careful to avoid being distracted from safe and proper
Cobra Electronics Corporation reserves the right to change or improve
driving practices.
Warning: If you choose to use this device in a vehicle, it is the sole information in this manual without notice. Please visit
responsibility of the operator to secure this GPS receiver so that it will www.cobra.com for updates or questions.
not cause damage or personal injury in the event of an accident.
DO NOT mount this GPS receiver over airbag panels or in a place
where the driver or passengers are likely to have an impact with the
device in an accident or collision.
A1
Automated Help Desk is available in English
24 hours a day, 7 days a week at 773-889-3087.
Customer Service Operator Support is available
in English and Spanish at 773-889-3087 Monday through Friday,
8:00 a.m. to 6:00 p.m. CST.
Questions can be faxed to 773-622-2269.
E-Mail Technical Assistance is available in
English or Spanish 24 hours, 7 days a week via e-mail at:
[email protected]
On-line answers to frequently asked questions
(in English only) can be found at: www.cobra.com.
Outside the U.S.A., please contact your local dealer.
P R O D U C T F E AT U R E S
Lanyard
Connector Loop
External Power/
PC Interface Connection
Backlit Display
Screen
SD Memory
Card Slot
Rocker Pad
Page Button
Menu Button
power
page
find
menu
Enter Button
enter
zoom
Power Button
Battery
Compartment Door
D-Ring Fastener
Find Button
esc
Escape Button
Zoom Out
Button
Zoom In Button
For details of each button’s function see page 4.
A3
Congratulations!
Features:
You’ve made a smart choice by purchasing this Global Positioning
System receiver. Designed to give access to the most advanced
satellite navigation technology available, this GPS receiver offers
sophisticated features and capabilities.
• Cobra’s exclusive A.S.A.P. II (Accelerated Satellite Acquisition
Protocol II Technology) gets you running up to twice as fast as
the other recreational GPS receivers and provides superior
reception in urban areas, canyons and dense foliage
• Locks onto signals from satellites. Delivers accurate positioning
within as little as 3 meters with WAAS signal correction
• Already programmed with continental U.S. highways
• Stores up to 500 navigational waypoints
• Over 100 map datums to choose from
• Automatically tracks your travel and shows you how to return
along the same track (up to 10 separate tracks can be stored)
• Indicates direction of travel to your destination with a
compass pointer
• Already programmed with continental U.S. state, Canadian
provincial and European country boundaries
• Displays current position, altitude, bearing, time of day, current
speed of travel, average speed throughout your trip and
estimated time of arrival at your destination
• Lets you program and store up to 50 different navigational
routes, using up to 50 points in each route
• Display screen can be backlit for maximum visibility
• With optional mapping software, interface cable and
SD memory card you can connect to a PC to transfer data and
take advantage of powerful mapping functions*
• Allows you to navigate to cities and exits already programmed
into the receiver’s memory
• Mapping capabilities for displaying and navigating roads,
highways, intersections, addresses and points of interest
• Easy-to-use rocker panel operates like a “joystick” to
simplify operation
• Is waterproof to IPX7 standards and can operate in
temperatures from 5°F to 158°F (-15°C to 70°C)
• Displays the route to your destination and your progress along
that route
• Powered by SiRF, one of the world’s most sensitive and reliable
GPS engines available
*Windows platform required
TA B L E O F C O N T E N T S
Important Information …………………A1
3 Navigation Tools ………………24–67
5 Alerts …………………………85–87
Product Features ……………………A2–A3
3.1 Editing or Entering Text & Symbols ……25
6 Appendix ………………………88–94
1 Basic Operation……………………2–9
3.2 Tracks …………………………27
6.1 General Information ………………88
1.1 Battery Installation …………………3
SD Memory Card Installation …………3
3.3 Waypoints ………………………32
6.2 Worldwide City Time Zones …………90
3.4 Cities …………………………39
6.3 Interference/Errors ………………91
3.5 Points of Interest …………………44
6.4 Data Field Choice Descriptions ………92
3.6 Addresses ………………………50
6.5 WAAS …………………………93
Map Datum………………………93
North Reference …………………93
1.2 Buttons and Rocker Pad ……………4
1.3 Power……………………………5
Powersaver Mode …………………5
1.4 Six Main Pages and Find Screen ………6
1.5 Navigation ………………………8
2 Instrumentation Information ……10–23
2.1 Map Page ………………………11
2.2 Gauges Page ……………………20
2.3 Trip Meter Page …………………22
3.7 Intersections ……………………54
3.8 Exits ……………………………58
3.9 Routes …………………………63
4 System Page ……………………68–84
4.1 Satellites ………………………73
4.2 Display Options……………………74
4.3 Interface Options …………………75
4.4 Alerts Screen Options ………………76
4.5 Proximity Screen Options ……………78
4.6 Maps Screen Options ………………81
4.7 Settings Screen Options ……………82
6.6 Specifications ……………………94
6.7 Maintenance ……………………95
Product Service……………………95
Trademark Acknowledgements ………95
7 Warranty …………………………96
8 Index …………………………97–99
9 Accessories & Order Form ……100–101
1 . 0 B A S I C O P E R AT I O N
Making Travel Easier
Your GPS receiver makes travel easier through the following ways:
1 2 GoTo a Waypoint, City/Town, Point of Interest, Address, Intersection
or Exit
GoTo a Waypoint 1 – This GPS receiver guides you in a straight line to a single point.
GoTo a City/Town 1 – This GPS receiver is already programmed with hundreds of cities/towns worldwide and can guide you in a
straight line to a selected city/town.
NOTE: A city/town is much larger than the precise location indicated by the coordinates stored in your GPS receiver. See page 39 for details.
GoTo a Point of Interest, Address, Intersection or Exit 2 – With optional computer software and an interface cable, this GPS
receiver can be connected to a computer to take advantage of powerful mapping programs and to transfer data back and forth between the
computer and your receiver. POI, addresses, intersections and exits transferred from a computer can be saved as waypoints to be used as
points within routes for navigation purposes or your receiver can guide you in a straight line to a selected POI, address, intersection or exit.
Navigate a Route 3 – This GPS receiver gives you the opportunity to select two or more points to create a route. You can then use your
GPS receiver to guide you in a straight line from point to point through your stored route.
Navigate a Track 4 – This GPS receiver automatically keeps a record of your progress as you travel and gives you a graphic
representation of a “track log” of the path or track you have taken. You can use the track log to create a track that you can recall for
navigation. The track can be navigated in the forward or the reverse direction of the original travel.
Your GPS receiver is already programmed with a Base Map that includes locations of hundreds of worldwide cities; U.S. state, Canadian provincial
and European country boundaries; U.S. interstate freeways, highways and exits; and land cover (inland bodies of water). By using the data
interface, optional SD memory card and optional mapping software, you can also download maps and points of interest from your computer.
The manual is designed to help you take advantage of these and many other features. We suggest that you begin by reading the “General
Information” and “Instrumentation Information” sections first. If you are not familiar with computer-based satellite navigation technology, these
sections will help you understand the basics.
3 Navigate a Route
4 Navigate a Track
1.1
B A S I C O P E R AT I O N
Installation
Battery Installation
1
2
Your GPS receiver operates on two standard AA batteries (not included). Always use high quality
alkaline batteries.
To install batteries:
1. Twist the D-ring connector counterclockwise 1.
2. Remove the battery compartment door.
3. Insert two AA batteries, ensuring correct polarity alignment 2.
4. Replace the battery compartment door.
5. Twist the D-ring clockwise to lock.
As an optional power source, a vehicle power adapter (see “Optional Accessories,” page 100) can be
used with your GPS receiver.
SD Memory Card Installation
Your GPS receiver’s memory is expandable with use of an optional SD memory card. A SD memory
card is required when using the optional mapping software.
To install a SD memory card:
1. Twist the D-ring connector counterclockwise 1.
2. Remove the battery compartment door.
3. Insert SD memory card according to illustration inside the battery compartment 3.
4. Replace the battery compartment door.
5. Twist the D-ring clockwise to lock.
3
3
1.2
B A S I C O P E R AT I O N
Buttons and Rocker Pad
Buttons and Rocker Pad
You can access all features of your GPS receiver by using the seven buttons and the Rocker Pad.
The PAGE Button
The ROCKER PAD
The POWER Button
Pressing the PAGE button allows you to cycle through the six main pages.
Pressing up, down, left or right on the ROCKER PAD allows you to scroll
through menus and options. A side scroll bar next to a menu indicates that
more selections can be viewed by scrolling beyond the bottom or top of the
list that is currently visible.
Pressing and holding the POWER button for 2 seconds will turn the device
on or off.
If you have proceeded from a main page to any menu or screen, pressing the
PAGE button returns you to that main page.
Pressing and holding the PAGE button at any time for 2 seconds will display
the “Page List” menu. From this menu you can go directly to any main page.
The MENU Button
Whenever the menu icon
appears in the upper right hand corner of the
display, pressing the MENU button will bring up a menu of selections related
to the current screen. Pressing the MENU button again will exit the menu.
With the receiver turned on, pressing and releasing the POWER button will
turn on or off the display backlight.
The ROCKER PAD is used to move or pan around the Map Page.
The FIND Button
power
page
find
menu
enter
zoom
Pressing the FIND button will display the Find Screen, which allows you to
search for various navigation points: waypoints, points of interest, cities,
addresses, intersections or exits.
esc
The ENTER Button
The ESCAPE Button
After using the ROCKER PAD to highlight a selection on any screen, pressing
the ENTER button accepts the highlighted selection.
The ZOOM IN/OUT Button
If you have proceeded from a main page through a series of screens/menus,
pressing the ESCAPE button allows you to “back up” to previous
screens/menus one at a time.
When a map is displayed, you can use the ZOOM IN/OUT button to zoom in
or zoom out on the image of the map.
Pressing the ESCAPE button allows you to cycle through the six main pages in
reverse order.
The ENTER button can also be used as a Waypoint Shortcut.
To mark a new waypoint using current location, press and hold the ENTER
button for 2 seconds. A confirmation window will pop up.
1.3
B A S I C O P E R AT I O N
Power/Powersaver Mode
Power
1 Startup Screen
To turn your GPS receiver on or off:
1. Press and hold the POWER button for 2 seconds.
power
A start-up screen appears for a few seconds 1, followed by a screen that shows the receiver is attempting to lock
onto signals from GPS satellites 2. Once three satellite signals have been acquired, the screen will automatically switch to the Map Page 3
and the receiver is ready to use.
You can jump to the Map Page while the receiver continues to acquire satellite signals by selecting “Continue
Acquiring? – YES.” On the Map Page, a pointer arrow will appear in the middle of the display once three signals
have been acquired 3. To use the non-navigational features of your receiver, select “Continue Acquiring? – No.”
p
p
ter
zoom
esc
enter
CAUTION: For optimum use, when you use this GPS receiver for the first time, have not used the
receiver for over 3 months or have changed geographic regions:
• It will take approximately 50 seconds to lock onto the GPS satellites
• Keep the receiver turned on for at least 15 minutes after locking onto the GPS satellites.
3 Map Page
NOTE: The receiver must be outside with a clear view of the sky to acquire satellite signals for navigation.
Powersave Mode
To save battery power while using just the non-navigational features of your receiver, you can turn GPS navigation off. To do so, while still in the
Acquiring Satellites screen, highlight using the ROCKER PAD and select “Continue Acquiring? – No,” by pressing the ENTER button. See “Turning
GPS Off and On,” page 73 for details and instructions on turning GPS navigation off after the screen automatically
p
changes to the Map page.
p
In Powersave Mode, no GPS functions will be available until you turn GPS back on.
5
NOTE: You can turn GPS off at any time. See “Turning GPS Off and On,” page 73 for details and instructions.
ter
zoom
esc
enter
2 Startup Screen
1.4
B A S I C O P E R AT I O N
Six Main Pages and Find Screen
Six Main Pages and Find Screen
1 Map Page
2 Gauges Page
3 Trip Meter Page
4 Routes Page
This is a quick introduction to the six main pages and Find Screen that give you access to all of the GPS receiver’s features. Detailed information
on each page/screen is available as indicated.
Map Page 1
The Map Page displays a map of your current position in relation to any waypoints, points of interest, cities, and roads that you have selected.
It can show you the distance between any two points, and details about displayed mapping information. Using navigational features, the Map
Page also shows you the direction of travel to a selected destination. If you have created a route or saved a track, the map can show you that
route or track and your current position on it. See page 11 for details and instructions.
Gauges Page 2
The Gauges Page displays a compass that shows your current direction of travel or the direction to your next waypoint. The data fields currently
showing “TIME TO DEST” (Time to Destination) and “LOCATION” are user selectable. See page 20 for details and instructions.
Trip Meter Page 3
The Trip Meter Page displays a number of user selectable fields with information about your current location, the progress you have made, your
direction of travel, your speed of travel and the time of your trip. See page 22 for details and instructions.
Routes Page 4
The Routes Page allows you to create and edit a string of points for navigation. It also gives you details about routes currently being navigated
such as distance to the next point or from the last point. See page 63 for details and instructions.
Tracks Page 5
The Tracks Page allows you to create tracks and clear track logs from the receiver’s automatic tracking feature. It also allows you to recall and
retrace tracks you have saved. See page 27 for details and instructions.
5 Tracks Page
6 System Page
System Page 6
The System Page allows you to choose the various settings and formats the receiver uses to navigate and display information. It also give you
access to the receiver’s data interface capabilities. See page 68 for details and instructions.
Find Screen 7
The Find Screen gives you access to Waypoints, Points of Interest, Cities, Addresses, Intersections, and Exits options such as creating new
waypoints, downloading POIs, searching for an address or sorting a list of cities. See individual sections under “Navigation Tools” pages 24-67
for details and instructions.
7 Find Screen
NOTE: Whenever satellite lock is lost or GPS is turned “OFF,” certain animation icons (below) appear on screen and continue to loop until GPS
is “ON” and/or satellite lock is re-acquired. See page 73 for details and instructions.
Animation sequence that appears when satellite lock is lost.
Animation sequence that appears when GPS is turned OFF.
7
B A S I C O P E R AT I O N
Six Main Pages and Find Screen
1.5
B A S I C O P E R AT I O N
Navigation
Navigation
1 Track
2 Waypoints
3 Cities
4 Exits
Your GPS receiver receives signals from Global Positioning System satellites that are in fixed orbits (stationary relative to the ground) around the
earth. By acquiring—or locking onto—the signals from at least 3 satellites, your receiver can use triangulation to precisely determine your
current position, elevation above sea level and bearing (the direction you are traveling). As you travel, the receiver automatically acquires the
strongest satellite signals available at your current location.
Your GPS receiver is already programmed with U.S. state, Canadian provincial and European country boundaries; worldwide cities; U.S.
interstate freeways and highways; and U.S. interstate freeway and highway exits and exit details. With optional mapping software, interface
cable and SD Memory Card (needed for map downloading), you can access a computer mapping database to download additional mapping
information that includes points of interest, local roads and streets, intersections and addresses.
By becoming familiar with the receiver’s basic operating features, you will be able to use its powerful navigational capabilities.
Tracks 1
Your GPS receiver automatically keeps a record of your travel, called a track. The receiver shows you a map-like picture of your track. You can
create and store up to 10 different tracks. Each track can be recalled and used for navigation as the receiver shows you how to retrace the track
again (either forward or in the reverse direction), how far off course you are in relationship to the track and information such as your current
speed or distance to destination in your track navigation. When traveling in unfamiliar territory, this is a quick and easy way to make sure you
always know how to get back to your starting point. See page 27 for details and instructions.
Waypoints 2
In this manual, you will learn how to mark your current location as a waypoint, save cities, addresses, intersections, points of interests or exits
as waypoints or set the coordinates for a waypoint anywhere in the world. You can create and store up to 500 waypoints. You can have the
receiver show you the direction of travel to an individual waypoint or how to navigate along a series of waypoints in a route. The receiver can
also show you how far off course you are in relationship to the waypoint navigation and information such as your current speed or distance to
the destination in your waypoint navigation. See page 32 for details and instructions.
Cities or Exits 3 4
Already stored in your GPS receiver are coordinates for cities throughout the world; U.S. interstate freeways and highways; U.S. interstate
freeway and highway exits and exit details; and continental U.S. state, Canadian provincial and European country boundaries. You can have the
receiver show you the direction of travel to an individual city or exit or select the city or exit as a point to be used to navigate along a series of
points in a route. The receiver can also show you how far off course you are in relationship to the current navigation and information such as
your current speed or distance to the destination in your navigation. See page 39 for “Cities” details and instructions. See page 58 for “Exits”
details and instructions.
Points of Interest, Addresses or Intersections 5 6 7
With optional mapping software and interface cable, you can access a computer mapping database to download hundreds of points of interest,
addresses and intersections. You can use these for navigation. You can have the receiver show you the direction of travel to an individual POI,
address or intersection; or use the POI, address or intersection as a point to be used to navigate along a series of points in a route. The receiver
can also show you how far off course you are in relationship to the navigation and information such as your current speed or distance to the
destination in your navigation. See page 44 for “Points of Interest” details and instructions. See page 50 for “Addresses” details and
instructions. See page 54 for “Intersections” details and instructions.
5 Points of Interest
6 Address
7 Intersection
8 Route
Routes 8
A route is a series of points which you choose that can be used in forward or reverse navigation. You can create and store up to 50 separate
routes. As many as 50 points may be stored in each route. Once you have created a route, your GPS receiver will guide you in a straight line
from point to point. As you reach each point, the receiver automatically begins navigating to the next one. The receiver can also show you how
far off course you are in relationship to the route and information such as your current speed or distance to the destination in your route
navigation. See page 63 for details and instructions.
9
B A S I C O P E R AT I O N
Navigation
I N S T R U M E N TAT I O N I N F O R M AT I O N
Instrumentation Information
The GPS receiver instrumentation helps you see where you are, plan where to go, get there and then retrace your path.
Map Page
Selected Point’s Details
The Map Page shows your location on the relevant map and
provides information such as your speed, odometer reading or
direction of travel. You can “pan” to see more of the map in any
direction. See page 11 for details and instructions.
Gauges Page
Bearing Pointer
Gauges Page
Course Pointer
The Gauges Page displays a compass and provides information
such as location, distance to a destination or accuracy in
relationship to a current navigation. The Gauges Page also includes
the direction in which you are currently traveling or the direction of
travel to your next point. See page 20 for details and instructions.
Trip Meter Page
3 Fields Option
Trip Meter Page
10 Fields Option
The Trip Meter Page can display from 3 to 10 information
fields with up to 20 different types of data. These can include your
current position as well as details about the navigation in process
such as speed, time and trip odometer. See page 22 for details
and instructions.
2.1
I N S T R U M E N TAT I O N I N F O R M AT I O N
Map Page
Map Page
The Map Page displays a graphic representation of the
navigation currently in progress. Your GPS receiver comes
equipped with a Base Map that includes locations of hundreds of
worldwide cities; U.S. state, Canadian provincial and European
country boundaries; U.S. interstate freeways, highways and
exits; and land cover (inland bodies of water). You can choose
to display or hide any waypoints, points of interest, cities, exits,
route line, latitude and longitude grid, GoTo line, track line or
track log.
You can use optional computer software, interface cable and
SD Memory Card (needed for map downloading) to download
more detailed mapping data from a computer database. With
this additional information, the Map Page could include local
roads and streets, additional waypoints and points of interest.
11
In normal display mode, a black triangle in the middle of the
map points in the direction you are currently traveling. As you
travel, the map adjusts while the black triangle remains in the
center of the display. Up to two data fields at the bottom of the
screen show you information of your choosing about your
position or navigation. If navigation is in progress, a small
“hiker” icon will appear at the lower right of the map
image. You have various options for customizing the display, and
a number of useful features including the ZOOM IN/OUT button
are available.
Panning Mode
p
Press on the ROCKER PAD to enter the Panning Mode and see any portion of the map image that is beyond the left, right,
top,
or bottom edge of the screen. See “Moving Around the Map,” page 18 for details and instructions.
p
Viewing Details 3 4
While in the Panning Mode, highlight and/or select any map detail such as a waypoint, city, POI, road, track,
route or exit to access information and other options of that map detail. See “Moving Around the Map,”
page 18 for details and instructions.
1 Map Page
2 Panning Mode
3 Panning and Highlighting Point
p
p
enter
nter
zoom
esc
enter
ter
4 Viewing Details
zoom
esc
12
I N S T R U M E N TAT I O N I N F O R M AT I O N
Map Page
Menu Options
Selecting Options
From the Map Page, when you see the menu
icon
press the MENU button to display the available
p
menu options. Press on the
ROCKER PAD to scroll up or down p menu
through a screen or to highlight
enter
various options. Press the ENTER
enter
button to select an option.
From the Map Page, press the MENU button to access the Map Page Menu Options.
Map Page
Stop Navigation
Select “Stop Navigation” to stop your current type of navigation. One of
three screens will appear, depending on the type of navigation currently
in progress: “Stop GoTo,” “Stop Route,” or “Stop Track.” Select “OK” to
stop current navigation and return to the Map. To return to the Map
Page without stopping navigation, press the ESCAPE button.
p
er
zoom
esc
p
menu
enter
Menu Options
Map Setup
Select “Map Setup” to cycle through four Map Setup Screens that will
allow you to set the parameters used by the Map Page. See “Map
Setup,” page 14 for details and instructions.
Measure Distance
Select “Measure Distance” to have the receiver show the distance between
any two points you select. See “Measure Distance Function,” page 17 for
details and instructions.
Map Page
Data Fields
Under Data Fields, select “Show” or “Hide” to show or hide data fields at the
bottom of the map. The current option is grayed out. Select “Set” to set the
data that is to be displayed in each information field. After selecting “Set,”
select the field you want to change then select the new data from the data
choices list. See “Data Field Descriptions,” page 92 for details.
p
menu
enter
Menu Options
Restore Defaults
Select “Restore Defaults” to restore all Map Page default settings. Select
“YES” to restore original settings (see page 72 for a complete list of
defaults). Select “NO” to maintain all current settings.
13
14
I N S T R U M E N TAT I O N I N F O R M AT I O N
Map Page
Map Page
Map Setup
p
To set the parameters used by the Map Page:
1. On the Map Page, press the MENU button to display the available options 1.
menu
p
2. On the Map Menu, select “Map Setup” 1.
menu
3. On the Map Setup Screens, choose from the following options:
Highlight/Select
icon 2 lets you set the following:
To highlight use
• The
AUTO ZOOM
On
Off
2
enter
enter
3
p
Display automatically zooms in or out to keep the entire navigation
(GoTo, route or track) shown on the map.
Display can be zoomed in or out manually.
DETAIL
4
pter
zoom
To select use
enter
High
Map shows all streets that have been downloaded, major U.S. state and interstate
highways, and U.S. state, Canadian provinical and European country boundaries.
Medium
Map only shows main local streets (if map data has been downloaded) and major highways.
Low
Map only shows major state and interstate highways.
SHADE
Land
Land areas will be shaded, water areas clear.
Water
Water areas will be shaded, land areas clear.
esc
5
1 Menu Options
2 Map Setup - Magnifying Icon
• The
3 Map Setup - World Icon
icon 3 lets you set the following:
ORIENTATION
North Up
Screen always represents magnetic north to the top of the screen. The
change in direction.
black triangle will rotate with your
Track Up
Screen always represents your direction of travel to the top of the screen. The map rotates around
a stationary black triangle.
LAT & LON GRID
Off:
Grid for the selected map will not appear on the map.
Level:
Sets the zoom level value at which the grid for the selected map will begin to appear on the map.
(Zoom level appears at the lower left of the map image.)
• The
icon 4 lets you set the following for waypoints, points of interest, cities, exits and land cover (inland bodies of water):
4 Map Setup - Text Icon
TEXT
Off:
Label text for the selected map element will not appear on the map.
Small:
Label text for the selected map element is small.
Medium:
Label text for the selected map element is medium.
Large:
Label text for the selected map element is large
ZOOM
Off:
Icon and label text for the selected map element will not appear on the map.
Level:
Sets the zoom level value at which the icon and label text for the selected element will begin to appear on the
map. (Zoom level appears at the lower left of the map image.)
continued
15
16
I N S T R U M E N TAT I O N I N F O R M AT I O N
• The
Map Page
5 Map Setup - Line Icon
icon 5 lets you set the following for the GoTo line, route line, track line and track log
ZOOM
Off:
The selected element will not appear on the map from 20 feet to 800 miles.
Level
Sets the zoom level value at which the selected element will begin to appear on the map (zoom level appears at
the lower left of the map image).
4. Press the ESCAPE button or the PAGE button to return to the main Map Page.
NOTE: To restore default settings for any individual Map Setup Screen, press the MENU button, while in the
selected Setup Screen, then select “Restore Defaults”.
esc
page
Measure Distance Function
To have the receiver display the distance in a straight line between any two points:
1. On the Map Page, press the MENU button to display the available options 1.
2. On the Map Menu, select “Measure Distance” 1. A ruler-shaped cursor
will appear at your
current location 2 and a measure field will appear in the lower right corner of the map 3.
3. On the Map Page, use the ROCKER PAD to position the cursor at the point from which you wish to
measure and press the ENTER button.
4. Use the ROCKER PAD to move the cursor to the destination point. A line will appear connecting the
first measuring point and the cursor 3. The distance between the two points is displayed in the
measure field.
Map Page
Highlight/Select
To highlight use
1 Options Menu
p
p
nter
p
zoom
esc
menu
To select use
enter
enter
5. Press the ESCAPE button to return to the main Map Page.
find
esc
2 Measure Distance
3
Measure
Distance
17
18
I N S T R U M E N TAT I O N I N F O R M AT I O N
Map Page
Moving Around the Map
1 Map Page
2 Panning Mode
From the Map Page, you can zoom in or zoom out on the map image by pressing the ZOOM IN/OUT button. The data fields on
the map image can be hidden by selecting “Hide” (see “Menu Options,” page 12). A section of map outside the current viewing area can be
seen by panning. Information and other options about map details such as a waypoint, city, POI, road, track, route or exit can be accessed
while in the panning mode.
Panning Mode
p
To see any portion of the map image that is beyond the left, right, top, or bottom edge of the screen:
1. On the Map Page 1, press on the ROCKER PAD in any direction to enter panning mode. An arrow-shaped cursor
will appear 2.
nter
zoom
esc
p
2. Move the cursor in any direction by pressing left, right, up or down on the ROCKER PAD. When the cursor reaches an
edge of the map image, the image will “pan” in that direction 3.
ter
zoom
3. To exit panning mode and have your current location again in the center, press the ESCAPE button.
esc
3 Panning
esc
Various Features in Panning Mode
1 Map Page
2 Panning Mode
To access information and other options of waypoints, cities, points of interest, roads, exits, a track or a route
shown on the map while in panning mode:
1. On the Map Page 1, press on the ROCKER PAD in any direction to enter panning mode. An arrow-shaped cursor
will appear 2.
p
2. Move the cursor to the map detail about which you want to access information 3. Selectable map details will highlight
when panned over by the cursor.
– If the cursor reaches an edge of the map, the image will “pan” in that direction.
– Distance from your current location to the highlighted map detail is displayed in the bottom right of the screen.
3. Press the ENTER button to select the map detail.
er
zoom
p
p
ter
zoom
esc
enter
4. Select from the detail’s options 4 or press the ESCAPE button to return to the Map Page.
NOTE: Some map details will not have other options available.
esc
find
esc
3 Select Map Detail
4 Detail Options
19
I N S T R U M E N TAT I O N I N F O R M AT I O N
Map Page
2.2
I N S T R U M E N TAT I O N I N F O R M AT I O N
Gauges Page
Gauges Page
Menu Options
The Gauges Page displays a compass that indicates direction
of travel. It can show the direction you are currently traveling
or the direction from your current position to the next point in
your navigation.
From the Gauges Page, press the MENU button to access the Gauges Page Menu Options.
Gauges Page
The two data fields at the bottom can show you further
information. If a navigation is in progress, a small “hiker” icon
appears to the lower right of the compass and the name of the
next destination (plus your current distance from it) are shown to
the upper left of the display. You have various options for
customizing the display.
Stop Navigation
Select “Stop Navigation” to stop your current type of navigation. One of
three screens will appear, depending on the type of navigation currently in
progress: “Stop GoTo,” “Stop Route,” or “Stop Track.” Select “OK” to
stop current navigation and return to the Map. To return to the Gauges
Page without stopping navigation, press the ESCAPE button.
p
menu
enter
Pointer Options
Choose from the following Pointer Options to set the compass gauge. The
current option is grayed out.
Bearing Pointer
Select “Bearing Pointer” to show your direction
of travel.
Menu Options
Course Pointer
Select “Course Pointer” to show the direction to
your next destination if navigation is in progress.
The arrows next to the pointer indicate if you are on
course, left of course or right of course. The upper right
of the display also shows how many feet off course
you are currently.
Gauges Page
Set Data Field
Select “Set Data Field” to set the data that is to be in the information fields
at the bottom of the screen. Select the field you want to change then select
the new data from the list. See “Data Field Descriptions,” page 92 for details.
p
menu
enter
Menu Options
Restore Defaults
Select “Restore Defaults” to restore all Gauges Page default settings. Select
“YES” to restore original settings (see page 72 for a complete list of
defaults). Select “NO” to maintain all current settings.
Selecting Menu and Options
From the Gauges Page, when you see the menu
icon
press the MENU button to display the available
p
menu options. Press on the
ROCKER PAD to scroll up or down p menu
through a screen or to highlight
enter
various options. Press the ENTER
button to select an option.
enter
p
ter
21
zoom
esc
I N S T R U M E N TAT I O N I N F O R M AT I O N
Gauges Page
2.3
I N S T R U M E N TAT I O N I N F O R M AT I O N
Trip Meter Page
Trip Meter Page
Menu Options
The Trip Meter Page displays information about your current
position, the navigation in progress and the other available data.
The receiver displays 6 data fields by default. It can also display
your choice of 3 to 10 information fields from a total of 20
different types of data.
From the Trip Meter Page, press the MENU button to access the Trip Meter Menu Options.
Trip Meter Page
Stop Navigation
Select “Stop Navigation” to stop your current type of navigation. One of
three screens will appear, depending on the type of navigation currently in
progress: “Stop GoTo,” “Stop Route,” or “Stop Track.” Select “OK” to
stop current navigation and return to the Map. To return to the Trip Meter
Page without stopping navigation, press the ESCAPE button.
p
menu
enter
Set Data Fields
Select “Set Data Fields” to set the data that is to be displayed in the
information fields. Select the field you want to change, then select the new
data from the list. See “Data Field Descriptions,” page 92 for details.
Menu Options
22
Trip Meter Page
p
menu
enter
Reset
Select ”Reset” to reset any or all Trip Meter values to zero.
Select “SELECT ALL” to reset all data field values to 0 [zero].
Select individual information field choices: “MAX SPEED” (maximum speed),
“AVG SPEED” (average speed), “MOV AVG SPEED” (moving average speed),
“STOP TIME,” “MOVING TIME,” “TOTAL TIME,” “TRIP ODOM” (trip odometer)
or “ODOMETER” to reset individual values to 0 [zero]. See “Data Field
Descriptions,” page 92 for details.
Display
This lets you choose the number of fields displayed.
Select “3 Fields” to display 3 data fields with large type.
Select “6 Fields” to display 6 data fields with medium type.
Select “10 Fields” to display 10 data fields with small type.
Selecting Menu and Options
From the Trip Meter Page, when you see the menu
icon
press the MENU button to display the available
p
menu options. Press on the
ROCKER PAD to scroll up or down p menu
through a screen or to highlight
enter
various options. Press the ENTER
button to select an option.
enter
Menu Options
Restore Defaults
Select “Restore Defaults” to restore all Trip Meter Page default settings. Select
“YES” to restore original settings (see page 72 for a complete list of
defaults). Select “NO” to maintain all current settings.
p
ter
23
zoom
esc
I N S T R U M E N TAT I O N I N F O R M AT I O N
Trip Meter Page
N AV I G AT I O N T O O L S
Navigation Tools
Your GPS receiver automatically keeps a record of your travel as a
track log. You can save all or part of the track log as up to 10
tracks for future navigation. When traveling in unfamiliar territory,
this is a quick and easy way to make sure you always know how to
get back to your starting point. See “Tracks,” page 27 for details
and instructions.
This GPS receiver comes equipped with mapping data including
locations of hundreds of worldwide cities; U.S. state, Canadian
provincial and European country boundaries; and U.S. interstate
freeways, highways and exits. By using the Data Interface to
download additional mapping data such as points of interest, local
Track
Waypoints
Cities
streets from a computer (see “Interface Options,” page 75), you
will also be able to find addresses or intersections. You can save any
of these locations as waypoints.
You can use a series of up to 50 points (waypoints, cities, points of
interest, addresses, intersection or exits) to create up to 50 routes.
See “Routes,” page 63 for details and instructions.
Waypoints are specific locations you have the receiver record. In the
following sections, you can learn how to mark you current location
as a waypoint; save cities, addresses, intersections, points of interest
or exits as waypoints; and set coordinates for a waypoint anywhere
in the world. This GPS receiver can store up to 500 waypoints which
can be recalled to show you the direction of travel to the individual
point or in a series of points or route navigation. See “Waypoints,”
page 32 for details and instructions.
The following sections will explore your options, such as navigation
and editing, for tracks, waypoints, cities, points of interest,
addresses, intersections, exits and routes.
Address
Intersection
Points of Interest
Exits
Route
3.1
N AV I G AT I O N T O O L S
Editing or Entering Text and Symbols
Editing or Entering Text and Symbols
To enter or change the information displayed for a waypoint, track or route:
1. From any screen that allows you to enter letters or numbers (names of waypoints/tracks/routes, dates,
etc.), highlight and select the field you want to edit 1.
1 Highlight Field to Edit
p
p
2. Pressing left or right on the ROCKER PAD, highlight the space where you want to insert or change a character
or symbol 2.
ter
zoom
esc
enter
3. Press up or down on the ROCKER PAD to scroll through the characters or symbols to choose from. Press left or right on the ROCKER PAD
to accept the new character or symbol and move to the next space or character. The next character or symbol is highlighted 3.
– To clear a selected character and all characters that follow it, highlight the Large Dash “–” symbol (it comes after the 9.)
When editing characters, repeat the same procedure to change the next character if desired. Press left or right on the ROCKER PAD to skip
characters you do not want to change.
4. Press the ENTER button to accept the new characters or symbol.
If necessary, press up or down on the ROCKER PAD to scroll to the next field you want to edit and follow the same procedure to enter or change
characters or symbols.
continued
25
3 Next Character is Highlighted
2 Highlight Character
26
N AV I G AT I O N T O O L S
To enter information into a search field:
1. From any screen that allows you to enter letters or numbers (names of cities, POIs, streets, etc.), highlight
and select the field you want to search 1.
Editing or Entering Text and Symbols
1 Address
2 Highlight First Space
3 Enter Other Characters
4 Available Data
p
p
2. Press left or right on the ROCKER PAD to highlight the first space in the line in the search field 2.
ter
zoom
esc
enter
3. Press up or down on the ROCKER PAD to scroll through the characters or symbols to choose from. Press left or
right on the ROCKER PAD to accept the new character or symbol and move to the next space or character. The next character or symbol is
highlighted. A list of available data starting with that new character will appear below the search field 2.
Repeat the same procedure to change the next character if desired 3. Press left or right on the ROCKER PAD to skip characters you do
not want to change. The list of available data will update with each new character.
4. Press the ENTER button to accept the current data in the search field.
5. Choose from the following:
• Press the ENTER button to accept the current highlighted data on the list 4.
• Scroll to the data you are searching for and press the ENTER button to accept the highlighted data on the list.
If necessary, press up or down on the ROCKER PAD to scroll to the next field you want to search in and follow the same procedure to enter
characters.
3.2
N AV I G AT I O N T O O L S
Tracks
Tracks
Log Options
This GPS receiver automatically keeps a record of your progress
as you travel and gives you a graphic representation or “track
log” of the path or track you have taken. Each time you turn the
receiver on, it begins a new track log recording, called a
“session.” You can use the track log to create a track that you
can recall for navigation.
Select “LOG” to save a session as a track or to clear the track log. Select
“SAVE” to save “This Session” (the track log recorded since the receiver was
last turned on) or to save the “Entire Log.” Select “CLEAR” to delete the entire
track log. See “Track Log Options,” page 29 for details and instructions.
You can create and store up to 10 different tracks. Each track
can be recalled and used for navigation as the receiver shows
you how to retrace the track again, either forward or in the
reverse direction. When traveling in unfamiliar territory, this is a
quick and easy way to make sure you always know how to get
back to your starting point.
To assist in your Track navigation, your GPS receiver is already
programmed with locations of hundreds of worldwide cities; U.S.
state, Canadian provincial and European country boundaries; and
U.S. interstate freeways, highways and exits. With optional
computer software, interface cable and
SD Memory Card (needed for map downloading), you can
access a computer mapping database to transfer in additional
mapping information that includes points of interest, local roads
and streets, intersections and addresses.
27
Saved Track Options
Tracks Page
Select any saved track on the Track List to “NAVIGATE” through that track, to
see that track on the “MAP,” to see “DETAILS” of that selected track such as
the name and total distance or to “DELETE” that individual track. See “Saved
Track Options,” page 30 for details and instructions.
Selecting Options
From the Tracks Page, press on
the ROCKER PAD to scroll up or p
down through a screen or to
highlight various options. Press the
ENTER button to select an option.
p
menu
p
enter
enter
ter
zoom
esc
28
N AV I G AT I O N T O O L S
Tracks
Menu Options
Selecting Menu and Options
From the Tracks Page, press on the ROCKER PAD
to scroll up or down through a screen or to highlight
p
various options. Press the ENTER
button to select an option. When p menu
you see the menu icon
press
enter
the MENU button to display the
available menu options.
enter
From the Tracks Page, press the MENU button to access the Tracks Page Menu Options.
Tracks Page
p
ter
p
zoom
esc
menu
enter
Stop Navigation
Select “Stop Navigation” to stop your current type of navigation. One of three
screens will appear, depending on the type of navigation currently in progress:
“Stop GoTo,” “Stop Route,” or “Stop Track.” Select “OK” to stop current
navigation and return to the Tracks Page. To return to the Tracks Page without
stopping navigation, press the ESCAPE button.
A track that is currently being navigated will have a flashing hiker icon
beside it.
Menu Options
Delete All Tracks
Select “Delete All Tracks” to delete all saved tracks. Select “YES” to delete all
saved tracks. Select “NO” to maintain all current saved tracks.
Track Log Options
This GPS receiver automatically keeps a record of your progress as you travel and gives you a graphic representation
or “track log” of the path or track you have taken. Each time you turn the receiver on, it begins a new track log
recording, called a session. You can use the track log to create a track that you can recall for navigation (see “Saved
Track Options,” page 30.)
To save all or part of the track log as a track:
1. On the Tracks Page 1, select “LOG.”
Highlight/Select
To highlight use
2. On the Track Log Preview Screen, select “SAVE” 2.
3. On the Save Menu, choose from the following:
• Select “This Session” to save only the track log recorded since the last time
the receiver was turned on 3.
• Select “Entire Log” to save all track log recorded by the receiver since the
last time the track log was cleared 3.
1 Tracks Page
p
4 Details
nter
p
zoom
esc
3 Save Options
To select use
enter
4. The Details Screen will appear with a default name (current date) and total
distance of the track displayed 4. You can either:
• accept the default name by selecting “OK.”
• rename the track (see “Editing or Entering Text and Symbols,” page 25) and then accept the new name by
selecting “OK.”
Selecting “OK” will return you to the Tracks Page.
2 Track Log
To clear the track log:
1. On the Tracks Page 1, select “LOG.”
2. On the Track Log Preview Screen, select “CLEAR” 2.
3. Select “YES” to delete all track log recordings 5.
29
5 Clear Log Confirmation
30
N AV I G AT I O N T O O L S
Tracks
Saved Track Options
1 Tracks Page
This GPS receiver automatically keeps a record of your progress as you travel as a track log. You can use the track
log to create a track that you can recall for navigation. You can create and store up to 10 different tracks (see “Track
Log Options,” page 29.) Each track can be recalled and used for navigation as the receiver shows you how to
retrace the track again, either forward or in the reverse direction.
To start navigation on a select track:
1. On the Tracks Page 1, select a saved track from the Track List.
• Select “Begin” to start at the beginning of the track or navigate forward
through the track.
• Select “End” to start at the end of the track or navigate in reverse through
the track.
3 Start At Options
Highlight/Select
To highlight use
2. On the Track Preview Screen, select “NAVIGATE” 2.
3. On the Start At Menu 3, choose from the following:
4 Map Page
p
p er
zoom
esc
To select use
enter
This will jump you to the Map Page 4 and show you the selected track and your
current location in relationship to that track.
To see a select track on the Map Page:
1. On the Tracks Page 1, select a saved track from the Track List.
2. On the Track Preview Screen, select “MAP” 2. This will jump you to the Map Page and show you the selected
track and your current location in relationship to that track 5.
2 Track
Preview
5 Map Page
To see name and total distance details about a select track:
1. On the Tracks Page 1, select a saved track from the Track List.
1 Tracks Page
2. On the Track Preview Screen, select “DETAILS” 2 to see name and total distance of that track. In the Details
Screen, the track name can be edited 3 (see “Editing or Entering Text and Symbols,” page 25.)
3 Details
3. Select “OK” to return to the Track Preview Screen.
To delete a select track:
1. On the Tracks Page 1, select a saved track from the Track List.
2. On the Track Preview Screen, select “DELETE” 2.
3. Select “YES” to delete the selected track 4.
2 Track
Preview
4 Delete Confirmation
31
N AV I G AT I O N T O O L S
Tracks
3.3
N AV I G AT I O N T O O L S
Waypoints
Waypoints
Find Screen
Waypoints are specific locations you have the receiver record. You
can mark your current location as a waypoint or manually set
coordinates for a waypoint anywhere in the world.
Search Option
Select “Search” to search through the Waypoints List alphabetically by name.
Select an individual waypoint to navigate or GoTo that point, see that point on
the Map Page in relationship to your current position or delete the individual
point. See “Search the Waypoint List,” page 36 for details and instructions.
This GPS receiver can store up to 500 waypoints which can be
recalled to show you the direction of travel to the individual point
or in a series of points or route navigation. See “Routes,” page
63 for details and instructions.
To assist in your navigation, your GPS receiver is already
programmed with locations of hundreds of worldwide cities; U.S.
state, Canadian provincial and European country boundaries; and
U.S. interstate freeways, highways and exits. With optional
computer software, interface cable and SD Memory Card (needed
for map downloading), you can access a computer mapping
database to transfer in additional mapping information that
includes points of interest, local roads and streets, intersections
and addresses.
New Waypoint Option
Waypoint Options
Select “New Waypt” (New Waypoint) to create a new waypoint. An editable
default name and symbol will be assigned to your current location and
elevation. The location and elevation can also be edited. See “Marking a New
Waypoint,” page 35 for details and instructions.
Sort Options
Choose from the following Sort Options to sort the Waypoints List. See “Sort the Waypoint List,” page 37 for details and instructions.
Find Screen
Nearest
Select “Nearest” to sort the Waypoints List by the nearest point to your
current location. Select an individual waypoint to navigate or GoTo that point,
see that point on the Map Page in relationship to your current position or
delete the individual point.
Symbol
Select “Symbol” to sort the Waypoints List by common symbol. Points with
the same symbol will be sorted alphabetically by name. Select an individual
waypoint to navigate or GoTo that point, see that point on the Map Page in
relationship to your current position or delete the individual point.
Find Screen and Selecting Options
There are three ways to get to the Find Screen:
– by pressing the FIND button
find
– by inserting a point into a route
(see “Editing a Route,” page 67)
esc
– by setting a proximity alert to a point (see
“Proximity Settings,” page 79)
Press on the ROCKER PAD to scroll up
p or down
through a screen or to highlight various
options. Press the ENTER button to
select an option.
enter
Waypoint Options
p
ter
33
zoom
esc
Most Recent
Select “Most Recent” to sort the Waypoints List by most recently saved
points. Select an individual waypoint to navigate or GoTo that point, see that
point
on the Map Page in relationship to your current position or delete the
individual point.
34
N AV I G AT I O N T O O L S
Waypoints
Waypoints List
Selecting Menu and Options
Press on the ROCKER PAD to scroll up or down through
a screen or to highlight various options. Press the ENTER
p
button to select an option. From
the Waypoints Screen, when you p menu
see the menu icon
press the
enter
MENU button to display the
available menu options.
enter
Individual Waypoint Options
Select any saved waypoint on a Waypoint List to “GOTO” or navigate to that
waypoint, to see that waypoint on the “MAP” in relationship to your current
position or to “DELETE” that individual waypoint. See “Saved Waypoint
Options,” page 36 for details and instructions.
p
ter
zoom
esc
Menu Options
From a Waypoints List, press the MENU button to access the Waypoints Screen Menu Options.
Waypoints List
New Waypoint
p
menu
Select “New Waypt” (New Waypoint) to create a new waypoint. An editable
default name and symbol will be assigned to your current location and
elevation. The location and elevation can also be edited. See “Marking a New
Waypoint,” page 35 for details and instructions.
enter
Menu Options
Delete All Waypoints
Select “Delete All Waypts” (Delete All Waypoints) to delete all saved
waypoints. Select “YES” to delete all saved waypoints. Select “NO” to
maintain all currently saved waypoints. See “Deleting a Select or All
Waypoints,” page 38 for details and instructions.
New Waypoint Option
Getting to the Find Screen
A waypoint can be created new or from other points that are preprogrammed in the receiver (such as cities or exits)
or that are downloaded from a computer (such as POIs or intersections.) The following instructions explain how to
create a new waypoint through the Find Screen using or editing your current location.
There are three ways to get to the Find Screen:
– by pressing the FIND button
– by inserting a point into a route (see “Editing a
Route,” page 67)
– by setting a proximity alert to a point
find
(see “Proximity Settings,” page 79)
Waypoint Shortcut: To mark a new waypoint using current location, press and hold the ENTER button for
2 seconds. A confirmation window will pop up.
To mark a new waypoint:
1. On the Find Screen 1, select “WAYPOINTS.”
To highlight use
2. On the Waypoints Options Menu, select “New Waypoint” 2.
3. A New Waypoint Screen will appear 3. Choose from the following:
• Edit the default name, default symbol, current location or current elevation (see
“Editing or Entering Text and Symbols,” page 25.) Accept the changes by
selecting “SAVE.”
• Accept the default name and symbol and current location and elevation by
selecting “SAVE.”
1 Find Screen
p
pter
zoom
esc
To select use
enter
NOTE: Elevation does not need to be entered to save your new waypoint.
To save a city, POI, address, intersection or exit as a waypoint, see their respective
instructions.
35
esc
Highlight/Select
2 Waypoint Options
3 New Waypoint
36
N AV I G AT I O N T O O L S
Waypoints
Saved Waypoints Options
Getting to the Find Screen
Once you have saved one or more waypoints, you can search or sort the Waypoint List to use individual waypoints
for navigation or a GoTo, see an individual waypoint on the Map Page in relationship to your current location or
delete an individual or all waypoints.
To search the Waypoint List for a select point:
1. On the Find Screen 1, select “WAYPOINTS.”
Highlight/Select
To highlight use
2. On the Waypoints Options Menu, select “Search” 2.
3. Select the “SEARCH” field.
4. Press left or right on the ROCKER PAD to highlight the first space in the line in the
search field 3.
5. Press up or down on the ROCKER PAD to scroll through the available characters.
Press left or right on the ROCKER PAD to accept the character and move to the
next space or character. The next character is highlighted. A list of available data
starting with that new character will appear below the search field.
There are three ways to get to the Find Screen:
– by pressing the FIND button
– by inserting a point into a route (see “Editing a
Route,” page 67)
– by setting a proximity alert to a point
find
(see “Proximity Settings,” page 79)
p er
zoom
esc
To select use
3 Highlight First Space
enter
Repeat steps 4 through 5 to change the next character if desired. Press left or right on the ROCKER PAD to skip
characters you do not want to change. The list of available data will update with each new character.
6. Press the ENTER button to accept the current data in the search field 4.
7. Choose from the following:
• Press the ENTER button to accept the current highlighted data on the list.
• Scroll to the data you are searching for and press the ENTER button to accept the highlighted data on the list.
8. Continue your previous activities.
esc
1 Find Screen
p
2 Waypoint Options
4 Select a Waypoint
To sort the Waypoint List for a select point by nearest point to your current location, by
common symbol or by most recently saved point:
1. On the Find Screen 1, select “WAYPOINTS.”
1 Find Screen
3 Sort by Nearest
2. Choose from the following:
• On the Waypoints Options Menu 2, select “Nearest” to sort the Waypoints List by the nearest point to your
current location 3.
• On the Waypoints Options Menu 2, select “Symbol” to sort the Waypoints List by common symbol. Points
with the same symbol will be sorted alphabetically by name 4.
4 Sort by Symbol
• On the Waypoints Options Menu 2, select “Most Recent” to sort the Waypoints List by most recently saved
points 5.
3. Select a point.
4. Continue your previous activities.
2 Waypoint
continued
Options
5 Sort by Most Recent
37
38
N AV I G AT I O N T O O L S
Waypoints
2 Map Page
To navigate or GoTo a select point:
1. After using the Search or Sort Options to organize the Waypoints List (see “Search the Waypoint List,” page 36
or “Sort the Waypoint List,” page 37), select a waypoint.
2. On the Waypoint Details Screen 1, select “GOTO.” This will jump you to the Map Page and show you the
straight-line path between your current position and your selected point 2
To see a select waypoint on the Map Page in relation to your current location
1. After using the Search or Sort Options to organize the Waypoints List (see “Search the Waypoint List,” page 36
or “Sort the Waypoint List,” page 37), select a waypoint.
3 Map Page
1 Waypoint Details
2. On the Waypoint Details Screen 1, select “MAP.” This will jump you to the Map Page and show you the
relationship between your current position and your selected point 3.
Deleting a Select or All Waypoints
To delete a select point:
4 Delete Confirmation
1. After using the Search or Sort Options to organize the Waypoints List (see “Search the Waypoint List,” page 36
or “Sort the Waypoint List,” page 37), select a waypoint.
2. On the Waypoint Details Screen 1, select “DELETE.”
3. Select “YES” to delete the selected waypoint 4.
NOTE: Once a waypoint has been deleted, it cannot be retrieved again.
5 Waypoints List
7 Delete All
p
6 Menu Options
To delete all waypoints:
1. On the Waypoints Screen 5 when you see the menu icon
press the MENU button.
2. From the Waypoints Menu 6, select “Delete All Waypt” (Delete All Waypoints.)
3. Select “YES” to delete all saved waypoints 7.
menu
enter
Waypoints Confirmation
3.4
N AV I G AT I O N T O O L S
Cities
Cities
Find Screen
Select “Search” to search through the Cities List alphabetically by name.
Select an individual city to see details including name, state, postal code,
country and distance from your current location and to navigate or GoTo that
point or see that point on the Map Page in relationship to your current
position. See “Search the Cities List,” page 41 for details and instructions.
Already stored in your GPS receiver are coordinates for
hundreds of cities throughout the world. You can have the
receiver show you the direction of travel to an individual city or
select the city as a point to be used to navigate along a series of
points in a route.
A city is much larger than the precise location indicated by
the coordinates stored in your GPS receiver. The coordinates
assigned to a city correspond to a location somewhere within
the city’s limits. These coordinates are intended only for
navigation to the city, and not for finding a specific location such
as the downtown, commercial area or geographic center. A
waypoint or point of interest can be used for more precise
navigation within a city.
To assist in your navigation, your GPS receiver is already
programmed with locations of hundreds of worldwide cities;
U.S. state, Canadian provincial and European country boundaries;
and U.S. interstate freeways, highways and exits. With optional
computer software, interface cable and SD Memory Card
(needed for map downloading), you can access a computer
mapping database to transfer in additional mapping information
that includes points of interest, local roads and streets,
intersections and addresses.
39
Search Options
Sort Options
Cities Options
Choose from the following Sort Options to sort the Cities List. See “Sort the
Cities List,” page 42 for details and instructions.
Nearest
Select “Nearest” to sort the Cities List by the nearest point to your current
location. Select an individual city to see details including name, state, postal
code, country and distance from your current location and to navigate or
GoTo that point or see that point on the Map Page in relationship to your
current position.
Last Selected
Select “Last Selected” to sort the Cities List by most recently selected city.
Select an individual city to see details including name, state, postal code,
country and distance from your current location and to navigate or GoTo
that point or see that point on the Map Page in relationship to your
current position.
40
N AV I G AT I O N T O O L S
Cities
Cities List
Find Screen and Selecting Options
There are three ways to get to the Find Screen:
– by pressing the FIND button
find
– by inserting a point into a route
(see “Editing a Route,” page 67)
esc
– by setting a proximity alert to a point (see
“Proximity Settings,” page 79)
Press on the ROCKER PAD to scroll up or down through a
screen or to highlight various options. Press the ENTER
p
button to select an option. From
the City Details Screen, when you p menu
see the menu icon
press the
enter
MENU button to display the
available menu options.
enter
City Details Options
Select any city on a City List to “GOTO” or navigate to that city or to see that
city on the “MAP” in relationship to your current position. See “Stored Cities
Options,” page 41 for details and instructions.
Menu Options
From the Cities Details Screen, press the MENU button to access the Cities Details Menu Options.
City Details
p
ter
zoom
esc
p
menu
enter
Menu Option
Save as Waypoint
Select “Save as Waypoint” to save the city as a waypoint. An editable default
name and symbol will be assigned to the city’s location and elevation. The
location and elevation can also be edited. See “Saving as a Waypoint,” page
43 for details and instructions
Stored Cities Options
Getting to the Find Screen
Already stored in your GPS receiver are coordinates for hundreds of cities throughout the world. You can search or
sort the Cities List to use individual cities for navigation or a GoTo, see an individual city on the Map Page in
relationship to your current location or save a city as a waypoint.
There are three ways to get to the Find Screen:
– by pressing the FIND button
– by inserting a point into a route (see “Editing a
Route,” page 67)
– by setting a proximity alert to a point
find
(see “Proximity Settings,” page 79)
NOTE: A city is much larger than the precise location indicated by the coordinates stored in your GPS receiver. The
coordinates assigned to a city correspond to a location somewhere within the city’s limits. These coordinates are
intended only for navigation to the city, and not for finding a specific location such as the downtown, commercial
area or geographic center. A waypoint or point of interest can be used for more precise navigation within a city.
To search the Cities List for a select city:
1. On the Find Screen 1, select “CITIES.”
Highlight/Select
4. Press left or right on the ROCKER PAD to highlight the first space in the line in
the search field 3.
5. Press up or down on the ROCKER PAD to scroll through the available characters.
Press left or right on the ROCKER PAD to accept the character and move to the
next space or character. The next character is highlighted. A list of available
data starting with that new character will appear below the search field.
p
pter
zoom
esc
To select use
enter
Repeat steps 4 through 5 to change the next character if desired. Press left or right on the ROCKER PAD to skip
characters you do not want to change. The list of available data will update with each new character.
6. Press the ENTER button to accept the current data in the search field 4.
continued
41
1 Find Screen
To highlight use
2. On the Cities Options Menu 2 , select “Search.”
3. Select the “SEARCH” field.
esc
2 Cities Options
3 Select by Name
4 Select a City
42
N AV I G AT I O N T O O L S
Cities
7. Choose from the following:
• Press the ENTER button to accept the current highlighted data on the list.
• Scroll to the data you are searching for and press the ENTER button to accept the highlighted data on the list.
8. Continue your previous activities.
To sort the Cities List for a select city by the nearest to your current location or by the city
you last selected:
1. On the Find Screen 1, select “CITIES.”
1 Find Screen
3 Sort by Nearest
2. Choose from the following:
• On the Cities Options Menu 2, select “Nearest” to sort the Cities List by the nearest city to your current
location 3.
4 Sort by Last Selected
• On the Cities Options Menu 2, select “Last Selected” to sort the Cities List by most recently selected city 4.
3. Select a city.
4. Continue your previous activities.
2 Cities Options
2 Map Page
To navigate or GoTo a select city:
1. After using the Search or Sort Options to organize the Cities List (see “Search the Cities List,” page 41 or “Sort
the Cities List,” page 42), select a city.
2. On the City Details Screen 1, select “GOTO.” This will jump you to the Map Page and show you the straightline path between your current position and your selected city 2.
To see a select city on the Map Page in relation to your current location:
1. After using the Search or Sort Options to organize the Cities List (see “Search the Cities List,” page 41 or “Sort
the Cities List,” page 42), select a city.
3 Map Page
1 City Details
2. On the City Details Screen 1, select “MAP.” This will jump you to the Map Page and show you the relationship
between your current position and your selected city 3.
To save the city as a waypoint:
1. After using the Search or Sort Options to organize the Cities List (see “Search the Cities List,” page 41 or “Sort
the Cities List,” page 42), select a city.
2. On the City Details Screen 4 when you see the menu icon
, press the MENU button.
3. Select “Save as Waypoint” 5.
6 New Waypoint
4 City Details
4. A New Waypoint Screen will appear. Choose from the following 6:
• Edit the default name, default symbol, current location or current elevation (see “Editing or Entering Text and
Symbols,” page 25.) Accept the changes by selecting “SAVE.”
5 Menu Option
p
menu
• Accept the default name, default symbol, current location and current elevation by selecting “SAVE.”
NOTE: Elevation does not need to be entered to save a city as a waypoint.
43
N AV I G AT I O N T O O L S
enter
Cities
3.5
N AV I G AT I O N T O O L S
Points of Interest
Points of Interest
Find Screen
With optional computer software and interface cable, you
can access a computer mapping database to download hundreds
of points of interest. POIs will be directly downloaded into
categories and subcategories already programmed in the receiver.
Within these categories and subcategories, you can have the
receiver show you the direction of travel to an individual POI or
use the POI as a point to be used to navigate along a series of
points in a route.
To assist in your navigation, your GPS receiver is already
programmed with locations of hundreds of worldwide cities;
U.S. state, Canadian provincial and European country boundaries;
and U.S. interstate freeways, highways and exits. With optional
computer software, interface cable and SD Memory Card (needed
for map downloading), you can access a computer mapping
database to transfer in additional mapping information that
includes points of interest, local roads and streets, intersections
and addresses.
POI Options
Search Option
Points of Interest
Categories
POI Subcategories
Select the category and, when offered, subcategory for the type of POI for
which you are searching. Select “Search” to search through the POI List
alphabetically by name. Select an individual POI to see details including name,
address, phone number and distance from your current location and to navigate
or GoTo that point or see that point on the Map Page in relationship to your
current position. See “Search the POI List,” page 47 for details and
instructions.
Sort Options
Choose from the following Sort Options to sort the POI List. See “Sort the POI List,” page 48 for details and instructions.
Find Screen
POI Options
Nearest
Select the category and, when offered, subcategory for
the type of POI for which you are searching. Select
“Nearest” to sort the POI List by the nearest point to
your current location. Select an individual POI to see
details including name, address, phone number and
distance from your current location and to navigate or
GoTo that point or see that point on the Map Page in
relationship to your current position.
Find Screen and Selecting Options
There are three ways to get to the Find Screen:
– by pressing the FIND button
find
– by inserting a point into a route
(see “Editing a Route,” page 67)
esc
– by setting a proximity alert to a point (see
“Proximity Settings,” page 79)
Press on the ROCKER PAD to scroll up or down through a
screen or to highlight various options. Press the ENTER
button to select an option. From the Points
of Interest
p
Details Screen, when you see the
menu icon
press the MENU p menu
button to display the available
enter
menu options.
Points of Interest
Categories
p
enter
45
ter
zoom
esc
POI Subcategories
Last Selected
Select the category and, when offered, subcategory for
the type of POI for which you are searching. Select
“Last Selected” to sort the POI List by most recently
selected POI. Select an individual POI to see details
including name, address, phone number and distance
from your current location and to navigate or GoTo that
point or see that point on the Map Page in relationship
to your current position.
46
N AV I G AT I O N T O O L S
Points of Interest
Points of Interest List
Points of Interest Options
Select any Point of Interest on a Point of Interest List to “GOTO” or navigate
to that POI or to see that POI on the “MAP” in relationship to your current
position. See “Downloaded Points of Interest Options,” page 47 for details
and instructions.
Menu Options
From the POI Details Screen, press the MENU button to access the POI Details Menu Options.
Point of Interest Details
p
menu
enter
Menu Option
46
Save as Waypoint
Select “Save as Waypoint” to save the POI as a waypoint. An editable default
name and symbol will be assigned to the POI’s location and elevation. The
location and elevation can also be edited. See “Save as a Waypoint,” page 49
for details and instructions.
Downloaded Points of Interest Options
Getting to the Find Screen
Once you have downloaded one or more points of interest, you can search or sort the POI List to use individual POIs
for navigation or a GoTo, see an individual POI on the Map Page in relationship to your current location or save a
POI as a waypoint.
Highlight/Select
To search the POI List for a select POI:
To highlight use
1. On the Find Screen 1, select “POINTS OF INTEREST.”
2. On the Points of Interest Category List 2, select type of POI for which you are
searching.
3. If an option, select a subcategory for the type of POI for which you are
searching.
4. On the Points of Interest Options Menu, select “Search” 3.
There are three ways to get to the Find Screen:
– by pressing the FIND button
– by inserting a point into a route (see “Editing a
Route,” page 67)
– by setting a proximity alert to a point
find
(see “Proximity Settings,” page 79)
p
1 Find Screen
pter
zoom
esc
esc
3 POI Options
To select use
enter
5. Select the “SEARCH” field.
6. Press left or right on the ROCKER PAD to highlight the first space in the line in the search field 4.
7. Press up or down on the ROCKER PAD to scroll through the available characters. Press left or right on the ROCKER
PAD to accept the character and move to the next space or character. The next character is highlighted. A list of
available data starting with that new character will appear below the search field.
Repeat steps 6 through 7 to change the next character if desired. Press left or right on the ROCKER PAD to skip
characters you do not want to change. The list of available data will update with each new character.
8. Press the ENTER button to accept the current data in the search field 5.
9. Choose from the following:
• Press the ENTER button to accept the current highlighted data on the list.
• Scroll to the data you are searching for and press the ENTER button to accept the highlighted data on the list.
10. Continue your previous activities.
47
2 Points of Interest Categories
and Subcategories
4 Enter Text
continued
5 Select POI
48
N AV I G AT I O N T O O L S
To sort the POI List for a select POI by nearest to your current location or by the POI you
last selected:
1. On the Find Screen 1, select “POINTS OF INTEREST.”
Points of Interest
1 Find Screen
4 Sort by Nearest
2. On the Points of Interest Category List, select type of POI for which you are searching 2.
3. If an option, select a subcategory for the type of POI for which you are searching 3.
4. Choose from the following:
• On the POI Options Menu, select “Nearest” to sort the POI List by the nearest POI to your current location 4.
3 POI Options
• On the POI Options Menu, select “Last Selected” to sort the POI List by most recently selected POI 5.
5. Select a POI.
6. Continue your previous activities.
5 Sort by Last Selected
2 Points of Interest Categories
and Subcategories
2 Map Page
To navigate or GoTo a select POI:
1. After using the Search or Sort Options to organize the Points of Interest List (see “Search the POI List,” page 47
or “Sort the POI List,” page 48), select a POI.
2. On the POI Details Screen 1, select “GOTO.” This will jump you to the Map Page and show you the straight-line
path between your current position and your selected POI 2.
To see a select POI on the Map Page in relation to your current location:
1. After using the Search or Sort Options to organize the Points of Interest List (see “Search the POI List,” page 47
or “Sort the POI List,” page 48), select a POI.
3 Map Page
1 POI Details
2. On the POI Details Screen, select “MAP” 1. This will jump you to the Map Page and show you the relationship
between your current position and your selected POI 3.
To save the POI as a waypoint:
1. After using the Search or Sort Options to organize the Points of Interest List (see “Search the POI List,” page 47
or “Sort the POI List,” page 48), select a POI.
2. On the POI Details Screen 4 when you see the menu icon
, press the MENU button.
3. Select “Save as Waypoint” 5.
4. A New Waypoint Screen will appear. Choose from the following 6:
• Edit the default name, default symbol, current location or current elevation (see “Editing or Entering Text and
Symbols,” page 25.) Accept the changes by selecting “SAVE.”
• Accept the default name, default symbol, current location and current elevation by selecting “SAVE.”
NOTE: Elevation does not need to be entered to save a POI as a waypoint.
49
N AV I G AT I O N T O O L S
6 New Waypoint
4 POI Details
5 Menu Option
p
menu
enter
Points of Interest
3.6
N AV I G AT I O N T O O L S
Addresses
Addresses
Find Screen
With optional computer software and interface cable, you can
access a computer mapping database to download street level
maps. With additional maps downloaded, you can have the
receiver show you the direction of travel to an individual address
or use the address as a point to be used to navigate along a
series of points in a route.
Matches List
Find Options
Select the “NUMBER” field to enter the street number. Select the “STREET”
field to enter the street name. If necessary, select the “CITY” field to enter the
city. If necessary, select the “MAPS” field to change the current map
database. Select “FIND.” Select an address from the Matches List to see
details including address and distance from your current location and to
navigate or GoTo that address or see that address on the Map Page in
relationship to your current position. See “Find an Address,” page 52 for
details and instructions.
To assist in your navigation, your GPS receiver is already
programmed with locations of hundreds of worldwide cities; U.S.
state, Canadian provincial and European country boundaries; and
U.S. interstate freeways, highways and exits. With optional
computer software, interface cable and SD Memory Card (needed
for map downloading), you can access a computer mapping
database to transfer in additional mapping information that
includes points of interest, local roads and streets, intersections
and addresses.
Address Screen
Matches List
Address Options
Select any address on the Matches List to “GOTO” or navigate to that address
or to see that address on the “MAP” in relationship to your current position.
See “Address Options,” page 52 for details and instructions.
Menu Options
From the Address Details Screen, press the MENU button to access the Address Details Menu Options.
Address Details
Find Screen and Selecting Options
There are three ways to get to the Find Screen:
– by pressing the FIND button
find
– by inserting a point into a route
(see “Editing a Route,” page 67)
esc
– by setting a proximity alert to a point (see
“Proximity Settings,” page 79)
Press on the ROCKER PAD to scroll up or down through a
screen or to highlight various options. Press the ENTER
p
button to select an option. From
the Address Details Screen, when p menu
you see the menu icon
press
enter
the MENU button to display the
available menu options.
enter
p
menu
enter
Menu Option
p
ter
51
zoom
esc
Save as Waypoint
Select “Save as Waypoint” to save the address as a waypoint. An editable
default name and symbol will be assigned to the address’ location and
elevation. The location and elevation can also be edited. See “Saving as a
Waypoint,” page 53 for details and instructions.
52
N AV I G AT I O N T O O L S
Addresses
Address Options
Once you have downloaded street level map information, you can search the address/intersection data by the street
number, street and/or city to use individual addresses for navigation or a GoTo, see an individual address on the Map
Page in relationship to your current location or save an address as a waypoint.
To find an address by entering the street number, street and/or city:
1. On the Find Screen 1, select “ADDRESS.”
2. a) On the Address Screen 2, select the “NUMBER” field.
b) Enter the street number 3 (see “Editing or Entering Text and Symbols,”
page 25.)
3. a) On the Address Screen 2, select the “STREET” field.
b) On the Street Screen, select the “SEARCH” field 3.
c) Enter the street name (see “Editing or Entering Text and Symbols,”
page 25.)
4. a) If necessary, on the Address Screen 2, select the “CITY” field.
b) On the Cities Screen, select the “SEARCH” field 3.
c) Enter the city (see “Editing or Entering Text and Symbols,” page 25.)
1 Find Screen
Getting to the Find Screen
There are three ways to get to the Find Screen:
– by pressing the FIND button
– by inserting a point into a route (see “Editing a
Route,” page 67)
– by setting a proximity alert to a point
find
(see “Proximity Settings,” page 79)
Highlight/Select
esc
To highlight use
p
pter
zoom
esc
To select use
enter
2 Address Screen
3 Enter or Select Information
5. a) If necessary, on the Address Screen 2, select the “MAPS” field.
b) Select a map 3.
6. Select “FIND” 4.
7. Select an address from the Matches List 5.
8. Continue your previous activities.
4 Select Find
5 Matches List
To navigate or GoTo an address:
1. After using the Find Option to organize the Address Matches List (see “Find an Address,” page 52),
select an address.
2 Map Page
2. On the Address Details Screen 1 select “GOTO.” This will jump you to the Map Page and show you the
straight-line path between your current position and your selected address 2.
To see an address on the Map Page in relation to your current location:
1. After using the Find Option to organize the Address Matches List (see “Find an Address,” page 52),
select an address.
3 Map Page
1 Address Details
2. On the Address Details Screen 1, select “MAP.” This will jump you to the Map Page and show you the
relationship between your current position and your selected address 3.
To save an address as a waypoint:
1. After using the Find Option to organize the Address Matches List (see “Find an Address,” page 52),
select an address.
2. On the Address Details Screen 4 when you see the menu icon
, press the MENU button.
3. Select “Save as Waypoint” 5.
4. A New Waypoint Screen will appear 6. Choose from the following:
• Edit the default name, default symbol, current location or current elevation (see “Editing or Entering Text and
Symbols,” page 25.) Accept the changes by selecting “SAVE.”
• Accept the default name, default symbol, current location and current elevation by selecting “SAVE.”
NOTE: Elevation does not need to be entered to save an address as a waypoint.
53
N AV I G AT I O N T O O L S
6 New Waypoint
4 Address Details
5 Menu Option
p
menu
enter
Addresses
3.7
N AV I G AT I O N T O O L S
Intersections
Intersections
Find Screen
With optional computer software and interface cable, you can
access a computer mapping database to download street level
maps. With additional maps downloaded, you can have the
receiver show you the direction of travel to an individual
intersection or use the intersection as a point to be used to
navigate along a series of points in a route.
Matches List
Find Options
Select the “STREET 1” field to enter a street name. Select the “STREET 2”
field to enter a street name. If necessary, select the “CITY” field to enter the
city. If necessary, select the “MAPS” field to change the current map
database. Select “FIND.” Select an intersection from the Matches List to see
details including street names and distance from your current location and to
navigate or GoTo that intersection or see that intersection on the Map Page in
relationship to your current position. See “Find an Intersection,” page 56 for
details and instructions.
To assist in your navigation, your GPS receiver is already
programmed with locations of hundreds of worldwide cities; U.S.
state, Canadian provincial and European country boundaries; and
U.S. interstate freeways, highways and exits. With optional
computer software, interface cable and SD Memory Card (needed
for map downloading), you can access a computer mapping
database to transfer in additional mapping information that
includes points of interest, local roads and streets, intersections
and addresses.
Intersection Screen
Matches List
Intersection Options
Select any intersection on the Matches List to “GOTO” or navigate to that
intersection or to see that intersection on the “MAP” in relationship to your
current position. See “Intersection Options,” page 56 for details and
instructions.
Menu Options
From the Intersection Details Screen, press the MENU button to access Intersections Details Menu Options.
Intersection Details
Find Screen and Selecting Options
There are three ways to get to the Find Screen:
– by pressing the FIND button
find
– by inserting a point into a route
(see “Editing a Route,” page 67)
esc
– by setting a proximity alert to a point (see
“Proximity Settings,” page 79)
Press on the ROCKER PAD to scroll up or down through a
screen or to highlight various options. Press the ENTER
p
button to select an option. From
the Intersection Details Screen, p menu
when you see the menu icon
enter
press the MENU button to display
the available menu options.
enter
p
menu
enter
Menu Option
p
ter
55
zoom
esc
Save as Waypoint
Select “Save as Waypoint” to save the intersection as a waypoint. An editable
default name and symbol will be assigned to the intersection’s location and
elevation. The location and elevation can also be edited. See “Saving as a
Waypoint,” page 57 for details and instructions.
56
N AV I G AT I O N T O O L S
Intersections
Intersection Options
Once you have downloaded street level map information, you can search the address/intersection data by street,
city and/or postal code to use an individual intersection for navigation or a GoTo, see an individual intersection on
the Map Page in relationship to your current location or save an intersection as a waypoint.
1 Find Screen
To find an intersection by entering the street number, street and/or city:
1. On the Find Screen 1, select “INTERSECTION.”
Highlight/Select
2. a) On the Intersection Screen 2, select the “STREET 1” field.
b) On the Street Screen, select the “SEARCH” field.
c) Enter the street name 3 (see “Editing or Entering Text and Symbols,”
page 25.)
3. a) On the Intersection Screen 2, select the “STREET 2” field.
b) On the Street Screen, select the “SEARCH” field.
c) Enter the street name 3 (see “Editing or Entering Text and Symbols,”
page 25.)
4. a) If necessary, on the Intersection Screen 2, select the “CITY” field.
b) On the Cities Screen, select the “SEARCH” field.
c) Enter the city 3 (see “Editing or Entering Text and Symbols,” page 25.)
Getting to the Find Screen
There are three ways to get to the Find Screen:
– by pressing the FIND button
– by inserting a point into a route (see “Editing a
Route,” page 67)
– by setting a proximity alert to a point
find
(see “Proximity Settings,” page 79)
To highlight use
esc
p
nter
p
zoom
esc
To select use
enter
2 Intersection Screen
3 Enter or Select Information
5. a) If necessary, on the Intersection Screen 2, select the “MAPS” field.
b) Select a map 3.
6. Select “FIND” 4.
7. Select an intersection from the Matches List 5.
8. Continue your previous activities.
4 Select Find
5 Matches List
2 Map Page
To navigate or GoTo an intersection:
1. After using the Find Option to organize the Intersection Matches List (see “Find an Intersection,” page 56), select
an intersection.
2. On the Intersection Details Screen 1 select “GOTO.” This will jump you to the Map Page and show you the
straight-line path between your current position and your selected intersection 2.
To see an intersection on the Map Page in relation to your current location:
1. After using the Find Option to organize the Intersection Matches List (see “Find an Intersection,” page 56), select
an intersection.
3 Map Page
1 Intersection Details
2. On the Intersection Details Screen 1, select “MAP.” This will jump you to the Map Page and show you the
relationship between your current position and your selected intersection 3.
To save an intersection as a waypoint:
1. After using the Find Option to organize the Intersection Matches List (see “Find an Intersection,” page 56), select
an intersection.
2. On the Intersection Details Screen 4 when you see the menu icon
, press the MENU button.
3. Select “Save as Waypoint” 5.
4. A New Waypoint Screen will appear 6. Choose from the following:
• Edit the default name, default symbol, current location or current elevation (see “Editing or Entering Text
and Symbols,” page 25.) Accept the changes by selecting “SAVE.”
• Accept the default name, default symbol, current location and current elevation by selecting “SAVE.”
NOTE: Elevation does not need to be entered to save an intersection as a waypoint.
57
N AV I G AT I O N T O O L S
6 New Waypoint
4 Intersection Details
5 Menu Option
p
menu
enter
Intersections
3.8
N AV I G AT I O N T O O L S
Exits
Exits
Find Screen
Already stored in your receiver are coordinates and details for
hundreds of exits across the U.S. Organized into categories, you
can have the receiver show you the direction of travel to an
individual exit or use the exit as a point to be used to navigate
along a series of points in a route.
Exits List Menu Options
From the Exits List Screen, press the MENU button to access Exits List Menu Options.
To assist in your navigation, your GPS receiver is already
programmed with locations of hundreds of worldwide cities; U.S.
state, Canadian provincial and European country boundaries; and
U.S. interstate freeways, highways and exits. With optional
computer software, interface cable and SD Memory Card (needed
for map downloading), you can access a computer mapping
database to transfer in additional mapping information that
includes points of interest, local roads and streets, intersections
and addresses.
Nearest Road
Select “Nearest Road” to sort the Exits List by exit nearest to your current
location on the current nearest road. Select an exit from the Exits List to see
details including available services and distance from your current location and
to navigate or GoTo that exit or see that exit on the Map Page in relationship
to your current position. See “Sort the Exit List,” page 60 for details and
instructions.
p
menu
enter
Select Road
Select “Select Road” to sort the Exits List by exit nearest to your current
location on a selected specific road. Select an exit from the Exits List to see
details including available services and distance from your current location and
to navigate or GoTo that exit or see that exit on the Map Page in relationship
to your current position. See “Sort the Exit List,” page 61 for details and
instructions.
Menu Options
Exits List
Exit Details Options
Select any exit on a Exit List to “GOTO” or navigate to that exit or to see that
exit on the “MAP” in relationship to your current position. See “Exit Options,”
page 60 for details and instructions.
Exit Details Screen Menu Options
From the Exit Details Screen, press the MENU button to access Exits Detail Menu Options.
Exit Details
Find Screen and Selecting Options
There are three ways to get to the Find Screen:
– by pressing the FIND button
find
– by inserting a point into a route
(see “Editing a Route,” page 67)
esc
– by setting a proximity alert to a point (see
“Proximity Settings,” page 79)
Press on the ROCKER PAD to scroll up or down through a
screen or to highlight various options. Press the ENTER
button to select an option. From the Exit
p Screen or Exit
Details Screen Screen, when you
menu
see the menu icon
press the p
enter
MENU button to display the
available menu options.
p
menu
enter
Menu Option
p
enter
59
ter
zoom
esc
Save as Waypoint
Select “Save as Waypoint” to save the exit as a waypoint. An editable default
name and symbol will be assigned to exit’s location and elevation. The location
and elevation can also be edited. See “Saving as a Waypoint,” page 62 for
details and instructions.
60
N AV I G AT I O N T O O L S
Exits
1 Find Screen
Exits Options
Getting to the Find Screen
You can search the exit data by nearest road or a select road to use individual exits for navigation or a GoTo, see an
individual exit on the Map Page in relationship to your current location or save an exit as a waypoint.
To sort the Exits List for nearest exits to your current location by
the nearest road to your current location:
1. On the Find Screen 1, select “EXITS.”
2. On the Exits Categories List 2, select the type of exit for which you are
searching.
The current road the exits are on is displayed at the top of the screen. As you scroll
through the Exits List the distance to that exit from your current location is displayed
at the bottom of the screen.
3. On the Exits List 3 when you see the menu icon
There are three ways to get to the Find Screen:
– by pressing the FIND button
– by inserting a point into a route (see “Editing a
Route,” page 67)
– by setting a proximity alert to a point
find
(see “Proximity Settings,” page 79)
Highlight/Select
To highlight use
p
esc
4 Menu Options
nter
p
esc
zoom
p
To select use
, press the MENU button.
menu
enter
4. On the Exits Options Menu 4, select “Nearest Road.”
5. Exits will be sorted by nearest to your current location 5. The road the exit is on is displayed at
the top of the screen. Choose from the following:
• Press the ENTER button to accept the current highlighted exit on the list.
enter
2 Exits Categories
p
menu
enter
3 Exits List
• Scroll to the exit you are searching for and press the ENTER button to accept the highlighted exit on the list.
On the Exits Details Screen, if available, the exit’s services are displayed in the “SERVICES” field.
6. Continue your previous activities.
5 Exits List
To sort the Exits List for nearest exits to your current location by a select specific road:
1. On the Find Screen 1, select “EXITS.”
1 Find Screen
2. On the Exits Categories List 2, select the type of exit for which you are searching.
The current road the exits are on is displayed at the top of the screen. As you scroll through the Exits List the
distance to that exit from your current location is displayed at the bottom of the screen.
3. On the Exits List 3 when you see the menu icon
, press the MENU button.
4. On the Exits Options Menu 4, select “Select Road.”
4 Menu Options
5. Select the “SEARCH ROADS” field 5 and then use the ROCKER PAD to scroll and enter available characters. A
list of available roads will appear below the search field. As you continue entering new characters, the list of
available roads will update. Press the ENTER button to accept the current road in the search field 6.
6. Exits will be sorted by nearest to your current location on the selected road. The road the exit is on is displayed
at the top of the screen. Choose from the following:
p
menu
2 Exits Categories
enter
• Press the ENTER button to accept the current highlighted exit on the list.
• Scroll to the exit you are searching for and press the ENTER button to accept the highlighted exit on the list.
On the Exits Details Screen, if available, the exit’s services are displayed in the “SERVICES” field.
3 Exits List
7. Continue your previous activities.
continued
5 Highlight First Space
61
6 Select Road
62
N AV I G AT I O N T O O L S
Exits
2 Map Page
To view an exit’s services:
1. After sorting to organize the Exits List (see “Sort the Exits List,” page 60), select an exit 1.
2. Continue your previous activities.
To navigate or GoTo an exit:
1. After sorting to organize the Exits List (see “Sort the Exits List,” page 60-61), select an exit.
2. On the Exits Details Screen 1, select “GOTO.” This will jump you to the Map Page and show you the
straight-line path between your current position and your selected exit 2.
3 Map Page
1 Exit Details
To see an exit or exit’s service on the Map Page in relation to you current location:
1. After sorting to organize the Exits List (see “Sort the Exits List,” page 60-61), select an exit.
2. On the Exits Details Screen 1, select “MAP.” This will jump you to the Map Page and show you the relationship
between your current position and your selected exit 3.
To save an exit or exit’s service as a waypoint:
1. After sorting to organize the Exits List (see “Sort the Exits List,” page 60-61), select an exit.
2. On the Exits Details Screen 4 when you see the menu icon
, press the MENU button.
6 New Waypoint
4 Exit Details
5 Menu Option
3. Select “Save as Waypoint” 5.
4. A New Waypoint Screen will appear 6. Choose from the following:
• Edit the default name, default symbol, current location or current elevation (see “Editing or Entering Text or
Symbols,” page 25.) Accept the changes by selecting “SAVE.”
• Accept the default name, default symbol, current location and current elevation by selecting “SAVE.”
NOTE: Elevation does not need to be entered to save an exit as a waypoint.
p
menu
enter
3.9
N AV I G AT I O N T O O L S
Routes
Routes
New Route
A route is a series of points which you choose that can be used
in forward or reverse navigation. You can create and store up to
50 separate routes. As many as 50 points (waypoints, cities,
points of interest, addresses, intersections or exits) may be stored
in each route. Once you have created a route, your GPS receiver
will guide you in a straight line from point to point. As you reach
each point, the receiver automatically begins navigating to the
next one.
Select “NEW” to create a new series of points or a route. As an option, you
can select the “NAME” field to edit the default name. Select the first blank
row in the “POINTS” field to insert a point. Continue inserting points to create
the new route. See “New Route Option,” page 65 for details and instructions.
To assist in your navigation, your GPS receiver is already
programmed with locations of hundreds of worldwide cities;
U.S. state, Canadian provincial and European country boundaries;
and U.S. interstate freeways, highways and exits. With optional
computer software, interface cable and SD Memory Card (needed
for map downloading), you can access a computer mapping
database to transfer in additional mapping information that
includes points of interest, local roads and streets, intersections
and addresses.
63
Saved Route Options
Routes Page
Select any saved route on the Route List to “NAVIGATE” through that route, to
see that route on the “MAP,” to see “DETAILS” of that selected route such as
the name, points and distance to or from a point or to “DELETE” that individual
route. See “Saved Route Options,” page 66 for details and instructions.
64
N AV I G AT I O N T O O L S
Routes
Menu Options
Selecting Menu and Options
From the Routes Page, when you see the menu
icon
press the MENU button to display
the available
p
menu options. Press on the
ROCKER PAD to scroll up or down p menu
through a screen or to highlight
enter
various options. Press the ENTER
enter
button to select an option.
From the Routes Page, press the MENU button to access Routes Page Menu Options.
Routes Page
p
er
zoom
p
esc
menu
enter
Stop Navigation
Select “Stop Navigation” to stop your current type of navigation. One of three
screens will appear, depending on the type of navigation currently in progress:
“Stop GoTo,” “Stop Route,” or “Stop Track.” Select “OK” to stop current
navigation and return to the Routes Page. To return to the Routes Page
without stopping navigation, press the ESCAPE button.
A route that is currently being navigated will have a flashing hiker icon
beside it.
Menu Options
Delete All Routes
Select “Delete All Routes” to delete all saved routes. Select “YES” to delete
all saved routes. Select “NO” to maintain all current saved routes.
New Route Option
1 Routes Page
A route is created from up to 50 points (waypoints, cities, points of interest, addresses, intersections or exits.)
To create a new route:
1. On the Routes Page 1, select “NEW.”
Highlight/Select
To highlight use
2. On the New Route Screen 2, choose from the following:
• accept the default name by scrolling to the next field.
• rename the route (see “Editing or Entering Text or Symbols,” page 25) and
then scroll to the next field.
3. Select the first (or next when adding more points) blank line in the “POINTS”
field 3.
3 New Point
p
p er
zoom
esc
To select use
4. On the Edit Route Menu, select “Insert Point” 4.
enter
5. Using the Find Screen 5, find and select the first point (waypoint, city,
point of interest, address, intersection or exit) you want in the route (see “Waypoints,” page 32; “Cities,”
page 39; “Points of Interest,” page 44; “Addresses,” page 50; “Intersections,” page 54; “Exits,” page 58.)
2 New Route
Repeat steps 3 through 5 adding up to 50 points in a sequence you want the route to follow.
6. Press the ESCAPE button or PAGE button to save the new route and return to the main Routes Page.
The distance between points in the route is displayed on the Route Details Screen in the Points Screen under Leg
Distance.
See “Editing a Route,” page 67, to insert or remove a point in the route.
4 Edit Route Options
5 Find Screen
65
66
N AV I G AT I O N T O O L S
Routes
Saved Routes Options
1 Routes Page
Once you have created a route, you can navigate that route in forward or reverse, review details about a route such
as name, points and distance to or from each point, insert or remove points, see a select route on the Map Page in
relationship to your current location or delete the entire route.
To start navigation on a select route:
1. On the Routes Page 1, select a route from the Route List.
The Map Page 4 will appear with your selected route and your current location in
relationship to that route.
To see a select route in the Map Page:
1. On the Routes Page 1, select a route from the Route List.
To highlight use
5 Delete
p
Confirmation
p er
zoom
esc
To select use
enter
2. On the Route Preview Screen 2, select “MAP.” This will jump you to the Map Page an show you the selected
route and your current location in relationship to that route 5.
To delete a select route:
1. On the Routes Page 1, select a route from the Route List.
2. On the Route Preview Screen 2, select “DELETE.”
3. Select “YES” to delete the selected route 6
3 Start At Options
Highlight/Select
2. On the Route Preview Screen 2, select “NAVIGATE.”
3. On the Start At Menu 3, choose the point from which you want to start
navigating.
4 Map Page
2 Route
Preview
6 Map Page
To see details including name, points and distance to or from each point:
1. On the Routes Page 1, select a route from the Route List.
1 Routes Page
2. On the Route Preview Screen 2, select “DETAILS.”
The Route Details Screen will appear 3. From this screen, you can edit the route (see “Editing a Route,” below.)
Editing a Route:
To insert a point into a route:
3 Route Details
1. On the Routes Page 1, select a route from the Route List.
4 Edit Route Options
2. On the Route Preview Screen 2, select “DETAILS.”
3. On the Route Details Screen 3, select the point that will come immediately before the one you want to add.
4. On the Edit Route Menu, select “Insert Point” 4.
5. Using the Find Screen 5, find and select the waypoint, city, point of interest, address, intersection or exit you
want in the route (see “Waypoints,” page 32; “Cities,” page 39; “Points of Interest,” page 44; “Addresses,”
page 50; “Intersections,” page 54; “Exits,” page 58.)
2 Route Preview
An updated Route Details Screen will appear.
To remove a point from a route:
1. On the Routes Page 1, select a route from the Route List.
2. On the Route Preview Screen 2, select “DETAILS.”
3. On the Route Details Screen, select the point that you want to remove 3.
4. On the Edit Route Menu, select “Remove Point” 4.
An updated Route Details Screen will appear.
5 Find Screen
67
N AV I G AT I O N T O O L S
Routes
4 . 0 S Y S T E M PA G E
System Page
Satellites Options
The System Page gives you various options for changing the
system settings used by your GPS receiver. From this page
you can turn GPS navigation on and off, and adjust the
settings for the features such as display, sounds, time,
compass, map, method of navigation, activate WAAS, change
map datums, etc.
To turn GPS navigation On or Off or to reset satellite acquisition, select
“SATELLITES” from the System Page. Select “On” to access your receiver’s
navigational features. Select “Off” to disable receiver’s navigational features.
Select “Reset” to clear and reacquire the receiver’s navigational features.
(Turning GPS Status Off preserves the battery power.) See “Turning GPS Off
and On,” page 73 for details and instructions.
You can also turn on your GPS receiver’s data port to enable data
exchange with computer mapping software. Optional accessories,
are required. See “Setting the Data Port,” page 75.
Display Options
To adjust the display and Backlight settings, select “DISPLAY.” Select
“BACKLIGHT TIME OUT” to change the length of time the backlight remains on.
Select “CONTRAST” to increase or decrease the screen contrast by pressing left
or right on the ROCKER PAD. See “Adjusting the Backlight and Contrast,”
page 74 for details and instructions.
System Page
Interface Options
Select “INTERFACE” and then select “DATA PORT” to set the data port settings
to transfer information from a computer-based mapping program. Select “On”
to activate the data port. Select “Off” to deactivate the data port. Select
“NMEA” to activate the data port with a direct connection to a computer
running a GPS-compatible software resulting in a real-time display of your
position on the computer screen. See “Setting the Data Port,” page 75 for
details and instructions.
Extras Options
From the Systems Page, select “EXTRAS” to access the Alerts Screen Options, Proximity Screen Options and Maps Screen Options.
Find Screen
Alerts Screen
Select “Alerts” to turn the Alert Alarm (an automatic alarm sound when you
come within a certain distance or Alarm Radius from the following) for the
Anchor Drag Alert, Approach Alert, Arrival Alert or Off Course Alert to “On” or
“Off” and to set the individual Alarm Radius for each alert. You can restore the
Alerts defaults through the Alerts Menu. See “Alerts Screen,” page 76 for
details and instructions.
Proximity Screen
Select “Proximity” to automatically sound an alarm when you come within a
certain distance or Alarm Radius of any point you choose. To use Proximity, you
must add points you wish to use to the Proximity List and select an Alarm
Radius for each one. You can restore the Proximity defaults and remove all
added points through the Proximity Menu. See “Proximity Screen,” page 78 for
details and instructions.
Extras
Selecting Options
Press on the ROCKER PAD to scroll up or down through a
p
screen or to highlight various
options. Press the ENTER button
to select an option.
p
ter
69
zoom
esc
enter
Maps Screen
Select “Maps” to Include, Exclude or Delete a specific map you have
transferred from a computer. The “Base Map” cannot be deleted. See
“Excluding/Including or Deleting Maps,” page 81 for details and instructions.
70
S Y S T E M PA G E
System Page
Settings Options
Select “SETTINGS” to change the following system settings: Clock Format,
Time Zone, Daylight Savings Time (Summer Time), Language, Measurement
Units, Sounds, WAAS, Compass, Map Datum, Positions Format, North
Reference, Battery Saver (Refresh Rate.)You can restore the Settings Screen
defaults through the Settings Screen Menu. See “Using the Settings Screen,”
page 82 for details and instructions.
About
Select “ABOUT” to display Serial Number, Software Version and Patent
Numbers.
System Page
Status Bar Indicators
The status bar at the bottom of the System Page updates information
automatically. You can see whether the backlight is on or off, current date and
time. You can also determine the present status of the battery as the battery
symbol decreases the amount of black from right to left as it discharges.
“EXT PWR” will be displayed when using external power. See “Optional
Accessories,” page 100 for details.
Menu Options
From the System Page, press the MENU button to access System Page Menu Options.
System Page
p
menu
enter
Restore All Defaults
Select “Restore All Defaults” to restore all original defaults settings for the
entire GPS receiver system. Select “YES” to restore original settings (see charts
on page 72.) Select “NO” to maintain all current settings.
Menu Options
Delete Saved Data
Select “Delete Saved Data” to delete all user saved data including waypoints,
tracks and routes. Select “YES” to delete all user saved data. Select “NO” to
maintain all current settings.
Selecting Menu and Options
From the System Page, when you see the menu
icon
press the MENU button to display the available
p
menu options. Press on the
ROCKER PAD to scroll up or down p menu
through a screen or to highlight
enter
various options. Press the ENTER
enter
button to select an option.
p
ter
71
zoom
esc
72
S Y S T E M PA G E
System Page
Map Page Defaults
Gauges Page Defaults
Trip Meter Page Defaults
System Page Defaults
Function
Data Fields
Function
Pointer
Data Fields
Function
Data Fields
6 fields (default)
Function
GPS Status
Backlight Timeout
Data Port
Clock Format
Time Zone
Daylight Savings Time
(Summer Time)
Language
Measurement Units
Sounds
WAAS
Compass
Map Datum
Position Format
North Reference
Battery Saver
Alert Alarms
Alarm Radius
Proximity Alarms
Alarm Radius
Maps
Auto Zoom
Detail
Shade
Waypoints
Points of Interest
Cities
Exits
Land Cover
GoTo Line
Route Line
Track Line
Track Log
Orientation
Latitude
& Longitude Grid
Default
Speed
Odometer
On
High
Water
Small
Medium
Small
Off
Off
800 ft
800 ft
800 ft
800 ft
North Up
Off
Default
Bearing
Speed
Location
Data Fields
3 fields (when set)
Data Fields
10 fields (when set)
Reset Values
Default
Average Speed
Stop Time
Total Time
Accuracy
Odometer
Date
Average Speed
Stop Time
Total Time
Average Speed
Stop Time
Total Time
Accuracy
Odometer
Date
Moving Time
Moving Average
Speed
Maximum Speed
Trip Odometer
All
Default
On
15 Seconds
Off
12 Hour
Current Location
Auto
English
English
On
On
Cardinal
WGS 84
hddd°mm.mm
True
Refresh 1 sec
On
50 ft
On
50 ft
Base Map
4.1
S Y S T E M PA G E
Satellites
1 System Page
Satellites
When indoors, you can turn GPS navigation off, allowing you to use the non-navigational features of your GPS receiver while preserving battery
power. When you turn GPS off, the receiver stops searching for signals from satellites. When you turn GPS back on to receive signals, the
receiver must re-acquire signals from at least three satellites before it can begin navigation.
NOTE: The receiver must be outside with a clear view of the sky to acquire satellite signals for navigation.
To turn GPS off:
1. On the System Page 1, select “SATELLITES.” The Satellites screen appears 2, showing the satellite signals
being received with the signal strength of each indicated. The satellites that are currently acquired by the
receiver for navigation are highlighted.
Highlight/Select
To highlight use
3 Options
p
2. Select “GPS STATUS.”
3. Select “Off” 3. The receiver will immediately turn GPS off and stop receiving satellite signals.
4. Press the PAGE button to return to the System Page.
To turn GPS on:
1. On the System Page 1, select “SATELLITES.” A blank Satellites screen appears 2.
p
er
zoom
esc
To select use
enter
2. Select “GPS STATUS.”
2 Satellites Screen
3. Select “On” 3. The receiver will begin searching for satellite signals from at least three satellites.
4. Press the PAGE button to return to the System Page.
73
page
4.2
S Y S T E M PA G E
Display Options
Display Options
1 System Page
To adjust the backlight timeout and contrast settings for your receiver’s display:
1. On the System page 1, select “DISPLAY.” “BACKLIGHT TIMEOUT” and “CONTRAST” appear 2.
Highlight/Select
To highlight use
2. Choose from the following (you only need to select the settings you want to change.)
• Backlight Timeout
a) Select the “BACKLIGHT TIMEOUT” field to change the length of time the screen’s backlight remains lit
each time you turn it on or when you press and release the POWER button.
b) Select “15 Seconds,” “30 Seconds,” “60 Seconds” or “Stay On” 3.
WARNING: If you choose “Stay On,” battery life will significantly decrease.
p
p er
esc
zoom
To select use
3 Options
enter
• Contrast
a) Select the “CONTRAST” field.
b) Press left or right on the ROCKER PAD to increase or decrease the screen contrast 4.
c) Press the ENTER button to complete your contrast adjustment.
3. Press the PAGE button to return to the System Page.
4 Options
p
er
zoom
esc
page
2 Display Screen
4.3
S Y S T E M PA G E
Interface Options
Interface Options
1 System Page
Your GPS receiver is designed to let you exchange data with computer mapping programs. With optional software, interface cable and SD
Memory Card (needed for map downloading, see “Optional Accessories,” page 100) you will be able to:
• Download maps to your receiver from the computer to enable the receiver’s mapping capabilities and for assistance in navigation.
• Download to your receiver worldwide points of interest, addresses or intersections from the computer for use in navigation.
• Upload your waypoints, tracks and routes into the computer and view your travel with powerful mapping software.
To set the receiver’s data port (see optional CD-ROM for further instructions):
1. On the System Page 1, select “INTERFACE.” The receiver will display the current status of the data port, the
total card memory in the receiver and the current card memory available 2.
2. Select “DATA PORT.”
Highlight/Select
To highlight use
3 Options
p
3. Choose from the following:
• Select “On” to turn the data port on 3. The data port must be set to “On” before you can use the data
interface.
p er
zoom
esc
To select use
• Select “Off” to turn the data port off 3.
enter
• Select “NMEA” to activate the data port with a direct connection to a computer running a
GPS-compatible software resulting in a real-time display of your position on the computer screen.
4. Press the PAGE button to return to the System Page.
NOTE: In order to conserve battery power, make sure the data port is set to “Off” whenever you are not using the interface.
75
2 Interface Screen
page
4.4
S Y S T E M PA G E
Alerts Screen Options
Alerts Screen Options
Menu Options
The Alerts Screen allows you to set the Alert Alarm (an
automatic alarm sound when you come within a certain distance
or Alarm Radius from the following) for the Anchor Drag Alert,
Approach Alert, Arrival Alert or Off Course Alert to “On” or “Off”
and to set the individual Alarm Radius for each alert. You can
restore the Alerts defaults through the Alerts Menu.
From the Alerts Screen, press the MENU button to access the Alerts Screen Menu Option.
System Page
Selecting Menu and Options
Extras
Anchor Drag Alert – sounds when you drift more than
the specified distance from a particular location.
Approach Alert – sounds when you reach the specified
distance from the next point in your current navigation.
To get to the Alerts Screen:
– on the System Page, select “Extras”
– on the Extras Screen, select “Alerts”
From the Alerts Screen, when you see the menu
icon
press the MENU button to display the available
p
menu options. Press on the
ROCKER PAD to scroll up or down p menu
through a screen or to highlight
enter
various options. Press the ENTER
enter
button to select an option.
p
Arrival Alert – sounds when you reach the specified
distance from your final destination.
Menu Option
p
Off Course Alert – sounds when you deviate the
specified distance from you course.
ter
zoom
esc
menu
enter
Alerts Screen
Restore Defaults
Select “Restore Defaults” to restore all Alerts Screen defaults to original Alerts
Screen settings. Select “YES” to restore original settings (see page 72 for a
complete list of defaults.) Select “NO” to maintain all current settings.
Alerts Settings
1 System Page
To set the Alert Alarm:
1. On the System Page 1, select “EXTRAS.”
Highlight/Select
To highlight use
2. Select “Alerts” 2.
3. Select the “ALARM” field 3.
4. Choose from the following:
• Select “On” to automatically sound an alarm within an Alarm Radius set for
the Anchor Drag Alert, Approach Alert, Arrival Alert or Off Course Alert 4.
• Select “Off” to override all individual alert alarm settings to “Off” 4. The
individual values set for each Alert will not change.
p
pter
zoom
esc
To select use
enter
3 Alerts Screen
4 Options
5. Press the PAGE button to return to the System Page.
To set the Alarm Radius for the Anchor Drag Alert, Approach Alert, Arrival Alert
or Off Course Alert:
1. From the System Page 1, select “EXTRAS.”
page
2 Extras
2. Select “Alerts” 2.
3. Select the individual “Alarm Radius” in the “ALERTS” field you what to change 3.
4. Select the value at which you want an automatic alarm to sound 5.
5. Press the PAGE button to return to the System Page.
5 Options
77
S Y S T E M PA G E
Alerts Screen Options
4.5
S Y S T E M PA G E
Proximity Screen Options
Proximity Screen Options
The Proximity Screen allows you to set the Proximity Alarm (an
automatic alarm sound when you come within a certain distance
or Alarm Radius from the listed points) for any point saved in the
receiver that you add to the Proximity List to “On” or “Off” and
to set the individual Alarm Radius for each point. You can restore
the Proximity defaults and remove all listed points through the
Proximity Menu.
Menu Options
From the Proximity Screen, press the MENU button to access the Proximity Screen Menu Options.
System Page
Extras
Menu Options
Selecting Menu and Options
p
To get to the Proximity Screen:
– on the System Page, select “Extras”
– on the Extras Screen, select “Proximity”
From the Proximity Screen, when you see the menu
icon
press the MENU button to display
the available
p
menu options. Press on the
ROCKER PAD to scroll up or down p menu
through a screen or to highlight
enter
various options. Press the ENTER
enter
button to select an option.
menu
enter
Proximity Screen
p
ter
78
Restore Defaults
Select “Restore Defaults” to restore all Proximity Screen defaults to original
Proximity Screen settings. Select “YES” to restore original settings (see page
72 for a complete list of defaults.) Select “NO” to maintain all current
settings.
zoom
esc
Remove All
Select “Remove All” to remove all points listed in the Proximity List. This will
not delete or remove the point from the receiver. Select “YES” to remove all
listed points. Select “NO” to maintain all points currently listed.
Proximity Settings
Highlight/Select
To set the Proximity Alarm:
1. On the System Page 1, select “EXTRAS.”
2. Select “Proximity” 2.
3. Select the “ALARM” field 3.
4. Choose from the following:
1 System Page
To highlight use
p
nter
p
zoom
esc
To select use
• Select “On” to automatically sound an alarm within an Alarm Radius set for
each individual point 4.
enter
3 Proximity Screen
• Select “Off” to override all individual alert alarm settings to “Off” 4. The
individual values set for each point will not change.
5. Press the PAGE button to return to the System Page.
4 Options
page
To add a point to the Proximity List:
1. On the System Page 1, select “EXTRAS.”
2 Extras
2. Select “Proximity” 2.
3. Scroll down the Points List to highlight and select the blank space 3.
4. Using the Find Screen 5, select the point at which you want an automatic alarm to sound (see “Waypoints,”
page 32; “Cities,” page 39; “Points of Interest,” page 44; “Addresses,” page 50; “Intersections,” page 54; or
“Exits,” page 58.)
5. Choose from the following:
• Set the Proximity Alarm Radius (see next page.)
• Accept the default Alarm Radius by pressing the PAGE button to return to the System Page.
continued
79
6 Find Screen
80
S Y S T E M PA G E
Proximity Settings
1 System Page
To see details about or remove a point on the Proximity List:
1. On the System Page 1, select “EXTRAS.”
2. Select “Proximity” 2.
3. Select the point from the Proximity List you want to see details about or remove from the list 3.
4. Choose from the following 4:
• Select “See Details” to see details about that specific point such as location and elevation.
3 Proximity Screen
• Select “Remove” to delete the individual point from the Proximity List.
5. Press the PAGE button to return to the System Page.
To set the Alarm Radius for an individual point:
1. From the System Page 1, select “EXTRAS.”
2. Select “Proximity” 2.
2 Extras
3. Select the individual “Alarm Radius” in the “POINTS” field you want to change 3.
4. Select the value at which you want an automatic alarm to sound 5.
5. Press the PAGE button to return to the System Page.
4 Options
5 Options
4.6
S Y S T E M PA G E
Maps Screen Options
Maps Screen Options
1 System Page
2 Extras
The Map Page allows you to Include, Exclude or Delete a specific map you have transferred from a computer. The “Base Map” cannot be deleted.
To include, exclude or delete a map:
1. On the System Page 1, select “EXTRAS.”
Highlight/Select
To highlight use
2. Select “Maps” 2.
3. Select the Map you want to Include, Exclude or Delete 3. The “Base Map” cannot be deleted.
4. Choose from the following 4:
• Select “Include” to include the map in the map display, search screens or sort screens.
• Select “Exclude” to exclude the map from the map display, search screens or sort screens.
• Select “Delete” to remove the map from the receiver.
p
pter
zoom
esc
4 Options
To select use
enter
5. Press the PAGE button to return to the System Page.
page
3 Maps Screen
81
4.7
S Y S T E M PA G E
Settings Screen Options
Settings Screen Options
Menu Options
The Settings Screen allows you to change the following system
settings: Clock Format, Time Zone, Daylight Savings Time
(Summer Time), Language, Measurement Units, Sounds, WAAS,
Compass, Map Datum, Positions Format, North Reference and
Battery Saver (Refresh Rate.) You can restore the Settings
Screen defaults through the Settings Screen Menu.
From the Settings Screen, press the MENU button to access the Settings Screen Menu Option.
System Page
Menu Option
p
menu
enter
Selecting Menu and Options
From the Settings Screen, when you see the
menu icon
press the MENU button to display
the available menu options. Press on the ROCKER PAD
to scroll up or down through a
p
screen or to highlight various
options. Press the ENTER button
to select an option.
enter
p
ter
zoom
esc
Settings Screen
Restore Defaults
Select “Restore Defaults” to restore all Settings Screen defaults to
original Settings Screen settings. Select “YES” to restore original settings
(see page 72 for a complete list of defaults.) Select “NO” to maintain all
current settings.
Settings Screen Settings
Highlight/Select
To change the various settings listed below:
1. On the System Page 1, select “SETTINGS.”
2. Select the field you want to change2.
3. Choose from the following (you only need to select the fields you want to change.)
• Clock Format 3
Select the “CLOCK FMT” (Clock Format) field to set the receiver to use a 12 hour or 24
hour clock display format.
1 System Page
2 Settings Screen
To highlight use
p
pter
zoom
esc
To select use
3 Clock Format
4 Time Zone
5 Daylight Savings
6 Language
7 Measurement
8 Sounds
enter
• Time Zone 4
Select the “TIME ZONE” field to set the time zone in which you want the receiver to format the time and date. Select
“Use Current Location” to have the receiver use the time zone at your current location. Select a specific city within a
time zone to have the receiver use a specific time zone. See “Worldwide City Time Zones,” page 90 for details. The
small window at the top of the screen shows you the difference in hours from the Universal Time Coordinate.
• Daylight Savings Time (Summer Time) 5
Select the “DAYLIGHT SAV” (Daylight Savings) field to set the receiver to use Daylight Saving Time (Summer Time) in
the time and date. Select “Auto” to have the clock switch to Daylight Savings Time automatically. Select “On” to
manually switch to Daylight Savings Time. Select “Off” to manually switch to Standard Time (Winter Time [GMT].)
• Language 6
Select the “LANGUAGE” field to set the receiver’s screen language to “English,” “Dutch,” “French,” “German,”
“Italian,” “Portuguese,” “Spanish” or “Swedish.”
• Measurement Units 7
Select the “UNITS” field to set the receiver’s measurement system to “English,” Metric” or “Nautical.”
• Sounds 8
Select the “SOUNDS” field to set the receiver’s sounds to “On” or “Off.”
83
continued
84
S Y S T E M PA G E
Settings Screen Settings
• WAAS 9
Select the “WAAS” field to turn the WAAS receiver “On” or “Off.” See “WAAS,” page 93 for details.
9 WAAS
q0 Compass
qq Map Datum
qw Position Format
qe North Reference
qr Battery Saver
• Compass q0
Select the “COMPASS” field to set the method of indicating direction. Select your choice of “Cardinal” (standard
N–S–E–W), “Degrees” (<0˚-360˚) or “Mils” (0000-6400.)
• Map Datum qq
Select the “MAP DATUMS” field to change the datum used by your receiver when comparing information with a paper map
or other navigational reference. Select your choice from those listed. See “Map Datum,” page 93 for details.
NOTE: The most widely used datum is WGS 84.
• Position Format qw
Select the “POSITION FMT” (Position Format) field to change the format the receiver uses to display the location
coordinates. Select your choice from those listed.
• North Reference qe
Select the “NORTH REF” (North Reference) field to change the receiver’s method of orientation to the earth’s magnetic
field. Select “True” for true north, “Magnetic” for magnetic north, or “Grid” for grid north. See “North Reference” page
93 for details.
• Battery Saver (Refresh Rate) qr
Select the “BATTERY SAV” (Batter Saver) field to set the interval at which your receiver updates or refreshes its
navigational information. The “Off” interval uses more power, draining the receiver’s battery more quickly. Select from
the following: “Off,” “Extended,” “Maximum.”
4. Press the PAGE button to return to the System Page.
page
5.0 ALERTS
1 Can’t Acquire Satellites
Continue Searching?
Alerts
As you use your GPS receiver, you may see the following
alert messages.
3 Alert
Arriving At Destination!
Continue Searching?
2 Resume Navigation
GoTo, Route, Track
Resume Navigation 2
Resume GoTo “[specified point],”
Resume Route “[specified route],”
Resume Track “[specified track]”
If a navigation (GoTo, route, or track) was in progress when
you last turned the receiver off, you will see this alert after
satellite lock is achieved when you turn the receiver on again.
Select “YES” to resume the same navigation. Select “NO”
to stop navigation.
85
Arriving At Destination!
If you are navigating, you will see this message when you come
within your chosen distance to your destination. Select “OK” to
clear the message. The message will reappear if you travel
outside your chosen distance and back in again. See “Alerts
Screen” page 76 for details.
Can’t Acquire Satellites 1
You will see this alert if, for any reason, satellite lock is lost.
When you see this message, the receiver is automatically trying
to re-acquire satellite signals. If you do nothing, the receiver will
continue to search for signals and the message will disappear
when satellite lock is regained. Select “YES” to continue
searching and clear the alert message. If satellite lock is not
regained within 5 minutes, the alert will reappear. Select “NO” to
turn off GPS navigation and clear the message.
Alert 3
4 Alert
Approaching
“[specified point]”
Alert 4
Approaching “[specified point]”
You will see this alert when you come within your chosen
distance to the next point in your navigation, which is named in
the alert. Select “OK” to clear the message. See “Alerts Screen”
page 76 for details.
continued
86
ALERTS
5 Alert
Anchor Dragging!
Alerts
Alert 5
Anchor Dragging!
8 Warning
Memory Full!
Off Course!
Alert 6
Off Course!
You will see this alert if you deviate more than your chosen
distance from your current navigational course. Select “OK” to
clear the message. See “Alerts Screen” page 76 for details.
7 Alert
Within Proximity
“[specified point]”
9 Warning
Track Log Almost Full!
Warning 9
Track Log Almost Full!
This message appears when the track log memory bank is 90%
full. Select “OK” to clear the message. The message will reappear
each time you turn on the receiver until you clear the track log or
the track log becomes 100% full (see below.) See “Track Log
Options” page 29 for instructions on clearing the track log.
Alert 7
Within Proximity “[specified point]”
You will see this message when you come within your chosen
distance to your chosen location. Select “OK” to clear the
message. See “Proximity Screen” page 78 for details.
Memory Full!
You will see this message if you try to save a waypoint when the
list is full (you can save a maximum of 500 waypoints.) Select
“OK” to clear the message. You will continue to see the message
when trying to save a waypoint until you delete one or more
waypoints from memory. See “Waypoints” page 32 for details.
You will see this alert if you drift more than your specified
distance from your chosen location. Select “OK” to clear the
message. See “Alerts Screen” page 76 for details.
6 Alert
Warning 8
q0 Warning
Track Log Full!
Warning q0
Track Log Full!
You will see this message when the track log memory bank is
full. The receiver will not be able to store any more track log
points until you clear the track log. Select “OK” to clear the
message. The message will reappear each time you turn on the
receiver until the track log is cleared. See “Track Log Options”
page 29 for instructions on clearing the track log.
qq Notice
Name Already Used!
Notice qq
Name Already Used!
qr Warning
Batteries Low!
When naming a waypoint, track, or route, you will see this
message if the name you enter is already being used. Select
“OK” to clear the message. Enter a different name.
qw Notice
Too Many Found.
Enter City.
When using Find to search for an address or intersection, you will
see this alert if too many entries are found. Select “OK” to clear
the message. Enter a city to narrow the search. See “Navigation
Tools” page 24 for details.
qe Notice
None Found.
Notice qe
None Found.
When using Find to search for an address or intersection, you will
see this alert if no entries are found. Select “OK” to clear the
message. See “Navigation Tools,” page 24 for details.
87
ALERTS
Batteries Low!
This message appears approximately 30 minutes before your
batteries need to be replaced. Select “OK” to clear the message.
Replace the batteries as soon as possible. The message will
reappear every 10 minutes until the batteries are replaced or the
receiver automatically shuts off.
Notice qw
Too Many Found.
Enter City.
Warning qr
qt Notice
GPS is Off
Current Position Unknown
Turn GPS On?
Notice qt
GPS is Off
Current Position Unknown
Turn GPS On?
This message is displayed any time an action is requested that
typically uses GPS satellite tracking (example marking a waypoint
or navigating a route). While GPS mode is set off, select “YES”
to turn GPS on. Select “NO” to have the GPS receiver assume
you are at your last calculated position.
Alerts
6.1
APPENDIX
General Information
GPS General Information
GPS Basics
The Global Positioning System (GPS) is a space-based radionavigation system. It consists of 24 satellites which orbit the earth
at an altitude of approximately 11,000 miles and ground stations.
GPS provides users with accurate information on position, velocity
and time. This is available anywhere in the world and in most
weather conditions.
GPS was initiated by The United States Department of Defense in
1973 to reduce the proliferation of navigation aids. By creating a
robust system that overcame the limitations of many previously
existing navigation systems, GPS became attractive to a broader
spectrum of users. GPS has been successful in classic applications
such as aviation and marine navigation since it was first developed.
Since then, it has become useful for a wide range of people because
its capabilities are accessible using small, affordable equipment.
What was once available only in very expensive equipment, the
Cobra Electronics Corporation brings to you with our high quality line
of affordable handheld GPS receivers.
How GPS Works
GPS uses a global network of 24 satellites that transmit radio signals
to earth from high earth orbit. Thankfully for users, The United States
has offered free use of the system to the international community.
Many international user groups have accepted GPS as the core for
their international civil satellite navigation system.
GPS service provides users with extremely accurate positioning
information anywhere on or near the surface of the earth. To
accomplish this, each of the 24 satellites emits signals to receivers
below. GPS determines location by computing the difference
between the time that a signal is sent and the time it is received.
GPS satellites carry atomic clocks that provide extremely accurate
time information. The time information is placed in the codes
broadcast by the satellite so that a receiver can continuously
determine the time the signal was broadcast. The signal contains
data that your GPS receiver uses to compute the locations of the
satellites and to make other adjustments needed for accurate
positioning. Your GPS receiver uses the time difference between the
time of signal reception and the broadcast time to compute the
distance, from the receiver to the satellite. With information about
the distance to four satellites and the location of each satellite when
the signal was sent, your receiver can compute its own threedimensional position: latitude, longitude and altitude. People think of
GPS as having three segments: control, space and user.
Control Segment
The Control Segment of GPS consists of the Master Control Station,
Monitor Stations and Ground Antennas.
The one master control station, located at Falcon Air Force Base in
Colorado Springs, Colorado, USA is responsible for overall
management of the remote monitoring and transmission sites. As
the center for support operations, it calculates any position or clock
errors for each individual satellite, based on information received
from the monitor stations. Then it “orders” the appropriate ground
antennas to relay the corrective information back to that satellite.
Five monitor stations are located at Falcon Air Force Base in
Colorado, Hawaii, Ascension Island in the Atlantic Ocean, Diego
Garcia Atoll in the Indian Ocean and Kwajalein Island in the South
Pacific Ocean. Each of the monitor stations checks the exact altitude,
position, speed and overall health of the orbiting satellites. The
control segment uses measurements collected by the monitor stations
to predict each satellite’s orbit and clock. The prediction data is
up-linked, or transmitted, to the satellites for transmission back to
the users. The control segment also ensures that the GPS satellite
orbits and clocks remain as designed. A station can track up to 11
satellites at a time. Each station performs this “check-up” twice a
day, as the satellites complete their journeys around the earth.
Noted variations, such as those caused by the gravity of the moon,
sun and the pressure of solar radiation, are passed along to the
master control station.
The last of the three pieces of the control segment of GPS are the
ground antennas. Ground antennas monitor and track the satellites
from horizon to horizon. They also transmit correction information to
individual satellites.
Space Segment
The space segment includes the satellites and the Delta rockets that
launch the satellites from Cape Canaveral in Florida. GPS
satellites fly in circular orbits at an altitude of 10,900 miles
(17,500 km) and with a period of 12 hours. The orbits are tilted to
the earth’s equator by 55 degrees to ensure coverage of the polar
regions. Powered by solar cells, the satellites continuously orient
themselves to point their solar panels toward the sun and their
antenna toward the earth. Each of the 24 satellites, positioned in 6
orbital planes, circles the earth twice a day.
The satellites are composed of three major subsystems: Solar
Panels, Internal Components and External Components.
Solar Panels
Each satellite is equipped with solar array panels. These panels
capture energy from the sun, which provides power for the satellite
throughout its life.
Internal Components
Internal Components are subsystems such as atomic clocks and
radio transmitters. Each satellite contains four atomic clocks. The
89
APPENDIX
clocks are accurate to a billionth of a second or a nanosecond. The
atomic clocks within satellites are so accurate because even an
extremely small inaccuracy would translate into an extremely large
position difference (1/100 of a second inaccuracy translates to a
position difference of 1,860 miles to any GPS receiver.)
Selectivity Availability (SA)
Selectivity Availability (SA) was used by the U.S. Department of
Defense to degrade the accuracy of civilian GPS to within 100 meters
(about 300 feet.) This was discontinued on May 1, 2000. The military
will only use regional degradation when needed in the future.
External Components
The exterior of the GPS satellite has a variety of antennas. The
signals generated by the radio transmitter are sent to your GPS
receiver via L-band antennas. Another component of the satellite is
the radio transmitter, which generates the signal. Each of the 24
satellites transmits its own unique code in the signal.
User Segment
You and your GPS receiver are a part of the user segment along
with many other private individuals and military personnel and their
GPS receivers. Military GPS equipment has been integrated into
fighters, bombers, tankers, helicopters, ships, submarines, tanks,
jeeps and soldiers’ equipment. GPS is also used on Space Shuttles.
Cutting edge satellite navigation technology coupled with your GPS
receiver can help overcome many of the hardships and hazards
associated with recreation. Your GPS receiver allows you to go
practically anywhere with confidence knowing
precisely where you are at all times. With your GPS receiver, you
will be able to accurately record any location and return to that
precise spot time and again, anytime, anywhere.
General Information
6.2
APPENDIX
Worldwide City Time Zones
Worldwide City Time Zones
Longitudinal Zone
Offset
E172.50 to W172.50 ........................................................-12
IDLW (International Date Line West)
W052.50 to W037.50 ........................................................-3
Rio de Janeiro
E082.50 to E097.50 ..........................................................+6
Dhuburi
W172.50 to W157.50 ......................................................-11
Nome
W037.50 to W022.50 ........................................................-2
Fernando de Noronha
E097.50 to E112.50 ..........................................................+7
Bangkok
W157.50 to W142.50 ......................................................-10
Honolulu
W022.50 to W007.50 ........................................................-1
Azores Island
E112.50 to E127.50 ..........................................................+8
Hong Kong
W142.50 to W127.50 ........................................................-9
Yukon STD
W007.50 to E007.50 ................................................GMT + 0
London
E127.50 to E142.50 ..........................................................+9
Tokyo
W127.50 to W112.50 ........................................................-8
Los Angeles
E007.50 to E022.50 ..........................................................+1
Rome
E142.50 to E157.50 ........................................................+10
Sydney
W112.50 to W097.50 ........................................................-7
Denver
E022.50 to E037.50 ..........................................................+2
Cairo
E157.50 to E172.50 ........................................................+11
Solomon Islands
W097.50 to W082.50 ........................................................-6
Chicago
E037.50 to E052.50 ..........................................................+3
Moscow
E172.50 to W172.50 ......................................................+12
Auckland
W082.50 to W067.50 ........................................................-5
New York
E052.50 to E067.50 ..........................................................+4
Abu Dhabi
W067.50 to W052.50 ........................................................-4
Caracas
E067.50 to E082.50 ..........................................................+5
Maldives
6.3
APPENDIX
Interference/Errors
Interference / Errors
GPS receivers have the potential for position errors due to interference, primarily from the following sources:
Ionosphere and troposphere delays
The satellite signal slows as it passes through the atmosphere. The
system uses a built-in model that calculates an average – though
not exact – amount of delay.
Most common error
Most common error is not having a clear view of the sky, or being
under very cloudy conditions, when a satellite signal may not
be received.
When satellite lock is lost
Whenever satellite lock is lost, the
following animation sequence appears on
screen and continues to loop until satellite lock is re-acquired.
Signal multi-path
Number of satellites visible
When GPS is turned Off
This occurs when the GPS signal is reflected off objects such as tall
buildings before it reaches the receiver. This increases the travel time
of the signal, causing errors.
The more satellites the receiver can see, the better the accuracy.
Buildings, terrain, electronic interference or even dense foliage can
block signal reception, resulting in position errors or possibly no
position reading at all. In general, the clearer the view of the sky is
at your location, the better the reception will be. GPS receivers will
not work indoors, underwater or underground.
Whenever GPS is turned Off, the following animation
sequence occurs and continues to loop until search is
activated by user.
Receiver clock errors
The built-in clock can have very slight timing errors.
Orbital errors
Also known as ephemeris errors, these are inaccuracies of the
satellite’s reported location.
91
Due to the errors that might occur, it is recommended that the serious
navigator use a second navigational tool, such as a magnetic compass
or map.
Also, some data fields appear blank until GPS is turned On and
satellite lock is re-acquired.
6.4
APPENDIX
Data Field Choice Descriptions
Data Field Choice Descriptions
Your GPS receiver has the ability to display various types of information to you. In order to take advantage
of the rich information available to you, it is important that you understand the function
of certain data fields. Below is a list of data fields and their descriptions.
Accuracy – the distance within which the receiver can accurately
locate a position
Maximum Speed – the highest speed you traveled during the
current navigation
Average Speed – average speed throughout the current navigation
Moving Avg Speed – the average speed you traveled
while moving
Bearing – the direction in which you are currently heading
Compass – your current bearing shown as a compass heading
Date – the current date
Distance to Next – the distance to the next point in your
current navigation
Distance to Dest – the distance to the final destination of your
current navigation
Elevation – your current elevation above sea level
ETA to Next – your estimated time of arrival at the next point in
your current navigation, based on your current average speed
ETA to Dest – your estimated time of arrival at the final destination
in your current navigation, based on your current average speed
Location – your current location shown in degrees/minutes of
latitude and longitude
Moving Time – the total time spent moving during your
current navigation
Odometer – total cumulative distance traveled since the last time
the odometer was reset
Power – power icon showing power source (external or battery),
battery charge level, and backlight on or off
Speed – your current speed
Stop Time – the total time spent stopped during your
current navigation
Total Time – the total elapsed time during your current navigation
Trip Odometer – the distance traveled since the last time the trip
odometer was reset
6.5
APPENDIX
WAAS, Map Datum, North Reference
WAAS
Map Datum
North Reference
Wide Area Augmentation System (WAAS) is a GPS-based navigation
system that provides precision above and beyond what GPS can do
on its own. WAAS was designed to improve the accuracy and ensure
the integrity of information coming from GPS satellites.
Maps and charts are essentially grids created from a starting
reference point called a “datum.” Many maps being used today
were originally created decades ago. Over the years, technology has
allowed us to improve our surveying skills and create more accurate
maps. However, there is still a need to adapt GPS receivers to use
with older maps.
The vertical grid lines on any map can be aligned in one of three
different ways.
WAAS is a network of 25 ground reference stations that cover the
entire U.S. plus parts of Canada and Mexico. Implemented by the
Federal Aviation Administration (FAA) for aviation users, these reference
stations are located at precisely surveyed spots and compare GPS
distance measurements to known values. When the WAAS signal is
available, WAAS-capable receivers typically have a much higher
accuracy than non-WAAS receivers.
Most navigational charts and maps will have the datum listed. This
GPS receiver includes up to 100 map datums that allow you to
switch to a setting that matches your map. The most common US
map datums are World Geodetic System 1984 (WGS 84) North
American Datum 1983 (NAD 83) and North American Datum 1927
(NAD 27)
NOTE: Using a map datum that does not match the chart you are
using can result in significant differences in position information.
93
“True North” means that the vertical lines are aligned with the
geographic north pole. This is the most common method of
orienting maps.
“Magnetic North” means that the vertical lines are aligned in the
direction indicated as north by a compass, which can differ from True
North to varying amounts, depending on where you are on the Earth
(this difference is called “inclination” and “declination”.)
“Grid North” refers to the direction in which the straight lines on a
map are actually aligned, which may be slightly different from True
North, because the rounded surface of the Earth can not be
accurately depicted on the flat surface of a map.
6.6
APPENDIX
Specifications
Specifications
Specifications subject to change.
Temperature rating for this GPS receiver may exceed the usable
range of some batteries. Alkaline batteries can rupture at high
temperatures.
Alkaline batteries lose a significant amount of the capacity as
temperature decreases.
Use lithium batteries when operating this GPS receiver in below
freezing conditions.
Extensive use of screen backlighting will significantly reduce
battery life.
External power can be applied using the the Cobra Electronics
Corporation external power cord.
PERFORMANCE
Receiver: .............................12 parallel channels
Acquisition Time: ................Approximately 8 seconds. (warm)
Approximately 38 seconds. (cold)
Approximately 45 seconds (first time)
Update Rate: ......................1/second, continuous (selectable)
Position Accuracy: ..............up to 3 meters (10 feet)
Velocity Accuracy: ..............0.1 knot / 0.1 km/h
Dynamics:............................Performs to specifications to 6 g’s
Antenna:..............................Built-in patch antenna
Internal Memory: ...............4MB (megabytes) built-in
Expandable with SD card (optional)
PHYSICAL
Case: ....................................Fully gasketted, high impact ABS
plastic, waterproof to 1 meter for
30 minutes (IPX7 standards)
Size: .....................................6.1” H x 2.8” W x 1.3” D
(15.5 cm x 7.1 cm x 3.3 cm)
Weight:................................8.8 ounces (250g)
Operating Temperature: ....5˚F to 158˚F (-15˚C to 70˚C)
Storage Temperature: ........-40˚F to 176˚F (-40˚C to 80˚C)
POWER
Input: ...................................Two 1.5 volt AA batteries and/or
12-volt dc external power (vehicle
power adapter)
Battery Life:........................Up to 14 hours in battery
save mode.
Up to 10 hours in continuous
operation out of save mode.
6.7
APPENDIX
Maintenance, Product Service, Trademarks
Maintenance
Product Service
Your GPS receiver is designed and built to give you years of trouble-free
performance without the need for service. No routine maintenance is
required.
If you suspect that your receiver requires service,
please call 773-889-3087 BEFORE shipping it to
Cobra Electronics Corporation. This will ensure that
you receive service as quickly as possible.
If you are asked to send your receiver to the the Cobra Electronics
Corporation factory, please follow these steps:
If your receiver does not appear to be operating properly, please
follow these trouble-shooting steps:
• Make sure you are using fresh batteries and they are installed
properly.
• Make sure you are outdoors and away from buildings and
obstructions. Also, make sure you have a clear view of the sky.
• Make sure you have not accidentally turned GPS off
(see page 73.)
1. Send the complete receiver.
2. For warranty repair, enclose some form of proof-of-purchase, such
as a photocopy or carbon copy of a sales receipt. If you send the
original receipt, it cannot be returned to you.
3. Enclose a typed or clearly written description of the problem you
are having with your receiver, plus the name and address where
you want the receiver returned.
4. Pack the receiver securely to prevent damage during transit. If
possible, use the original packing materials.
5. Ship prepaid and insured using a traceable carrier such as United
Parcel Service (UPS), Federal Express or first class mail with
delivery confirmation. Ship to:
Cobra Factory Service
Cobra Electronics Corporation
6500 West Cortland Street
Chicago, IL 60707 USA
95
6. Please allow 3 to 4 weeks before contacting us about the status
of your service. Call 773-889-3087 for assistance.
If your receiver is under warranty, it will either be repaired or
replaced upon receipt, depending on the model. If your receiver is
out of warranty, you will receive a letter informing you of the repair
or replacement charge.
Trademark
Acknowledgements
Cobra®, Cobra Snake Logo, HighGear®, microTALK®, Safety Alert
Traffic Warning System®, and Nothing comes close to a Cobra® are
registered trademarks of Cobra Electronics Corporation.
A.S.A.P.™, Accelerated Satellite Acquisition Protocol Technology™,
Cobra Electronics Corporation™, CobraMarine™ and RoadReady™
are trademarks of Cobra Electronics Corporation.
Rand McNally® and StreetFinder® are registered trademarks of Rand
McNally & Company.
SiRF® is a registered trademark of SiRF Technology Incorporated.
Windows® is a registered trademark of Microsoft Corporation.
7 . 0 WA R R A N T Y
Cobra Electronics Corporation
6500 West Cortland Street, Chicago, Illinois 60707 USA
www.cobra.com
COBRA ELECTRONICS CORPORATION warrants that its GPS
receiver, and the component parts thereof, will be free of defects in
workmanship and materials for period of one (1) year from the date
of first consumer purchase. This warranty may be enforced by the
first consumer purchaser, provided that the product is utilized within
the U.S.A.
You must pay any initial shipping charges required to ship the product
for warranty service, but the return charges will be at Cobra
Electronics Corporation’s expense, if the product is repaired or
replaced under warranty.
The Cobra Electronics Corporation will, without charge, repair or
replace, at its option, defective GPS receiver, products or component
parts upon delivery to the Cobra Factory Service Department,
accompanied by proof of the date of first consumer purchase, such
as a duplicated copy of a sales receipt.
Exclusions: This limited warranty does not apply; 1) to any
product damaged by accident; 2) in the event of misuse or abuse of
the product or as a result of unauthorized alterations or repairs; 3) if
the serial number has been altered, defaced or removed; 4) if the
owner of the product resides outside the U.S.A.
This warranty gives you specific rights, and you may also have other
rights which vary from state to state.
All implied warranties, including warranties of merchantability and
fitness for a particular purpose are limited in duration to the length
of this warranty.
The Cobra Electronics Corporation shall not be liable for any
incidental, consequential or other damages; including, without
limitation, damages resulting from loss of use or cost of installation.
Some states do not allow limitations on how long an implied
warranty lasts and/or do not allow the exclusion or limitation of
incidental or consequential damages, so the above limitations may
not apply to you.
8.0 INDEX
A
Accessories ............................................100
Accuracy, distance ....................................92
Addresses ......................................9, 50-53
Saved Options ....................................51
Alarm Radius
Alerts ................................................77
Proximity............................................80
Alerts ..............................................85-87
Alarm Radius ......................................77
Options ..................................69, 76-77
Settings..............................................77
Average Speed ........................................92
97
B
Backlight ..........................................68, 74
Batteries....................................................3
Battery Saver ..........................................84
Bearing Pointer ........................................20
Bearing ..................................................92
Buttons
Enter Button....................................A2, 4
Escape Button ................................A2, 4
Find Button ....................................A2, 4
Menu Button ..................................A2, 4
Page Button....................................A2, 4
Power Button ..................................A2, 4
Rocker Pad ....................................A2, 4
Zoom In/Out Button ........................A2, 4
C
Cautions ..................................................A1
Cities ..........................................9, 39-43
Saved Options ....................................40
Clock Format............................................83
Compass ..........................................84, 92
Contrast ............................................68, 74
Course Pointer ..........................................20
Customer Assistance ..................................A1
D
Data Fields
Descriptions ........................................92
Display, on Map Page ..........................13
Display, on Trip Meter Page ..................23
Reset ................................................23
Set
on Gauges Page ............................21
on Map Page ................................13
on Trip Meter Page ........................22
Data Port ..........................................68, 75
Date ....................................................92
Daylight Savings Time ..............................83
Defaults
Gauges Page ......................................72
Map Page ..........................................72
Restore
Alerts ............................................76
All ................................................71
Gauges Page..................................21
Map Page......................................13
Proximity ......................................78
Settings Screen ..............................82
Trip Meter Page ..............................23
System Page ......................................72
Trip Meter Page ..................................72
Delete
All
Saved Data....................................71
Routes ..........................................64
Tracks ..........................................28
Waypoints ..............................34, 38
Individual
Route......................................63, 66
Track ............................................31
Waypoint ................................34, 38
Details
Route ..........................................63, 67
Track............................................27, 31
Display ............................................68, 74
Distance to Final Destination ......................92
Distance to Next Point ..............................92
Dutch Manual ..........................................A1
E
Edit
Route ................................................67
Symbols ............................................25
Text ..................................................25
Elevation ................................................92
Enter
Symbols ........................................25-26
Text ..............................................25-26
Enter Button ........................................A2, 4
Errors ....................................................91
Escape Button ......................................A2, 4
ETA to Final Destination ............................92
ETA to Next Point......................................92
Exit Services ............................................62
Exits ..........................................9, 58-62
Saved Options ....................................59
External Power Connection ........................A2
Extras ....................................................69
continued
98
INDEX
F
FCC Compliance Statement ........................A1
Features ..................................................A3
Find
Address ........................................50, 52
Intersection ..................................54, 56
Find Button..........................................A2, 4
Find Screen................................................7
French Manual..........................................A1
G
Gauges Page ..................................6, 20-21
General Information..............................88-89
German Manual........................................A1
GPS Components ................................88-89
GPS On/Off/Reset ............................68, 73
I
Installation
Batteries ..............................................3
SD Memory Card ..................................3
Interface............................................68, 75
Interference ............................................91
Intersections....................................9, 54-57
Saved Options ....................................55
Italian Manual ..........................................A1
L
Language ................................................83
Lanyard Connector Loop ............................A2
Location ..................................................92
M
Maintenance ............................................95
Map Datums ......................................84, 93
Map Details, Viewing ..........................11, 19
Map Page ......................................6, 11-19
Map Preview
Address ........................................51, 53
City ..........................................................
40, 43
Exit ............................................59, 62
Intersection ..................................55, 57
Point of Interest ............................46, 49
Route ..........................................63, 66
Track............................................27, 30
Waypoint......................................34, 38
Map Setup....................................12, 14-16
Maps ............................................69, 81
Measure Distance ..............................12, 17
Measurement Units ..................................83
Menu Button ........................................A2, 4
Menu Option(s)
Addresses ..........................................51
Alerts ................................................76
Cities ................................................40
Exit Details ........................................59
Exit List ..............................................58
Gauges Page ..................................20-21
Intersections........................................55
Map Page ......................................12-13
Points of Interest ................................46
Proximity............................................78
Routes ..............................................64
Settings Screen ..................................82
System Page ......................................71
Tracks ................................................28
Trip Meter Page ..............................22-23
Waypoints ..........................................34
Moving Average Speed ..............................92
Moving Time ............................................92
N
Navigation
Start
Address ..................................51, 53
City ........................................40, 43
Exit ........................................59, 62
Intersection..............................55, 57
Point of Interest ......................46, 49
Route......................................63, 66
Track ......................................27, 30
Waypoint ................................34, 38
Stop
on Gauges Page ............................20
on Map Page ................................12
on Routes Page..............................64
on Tracks Page ..............................28
on Trip Meter Page ........................22
Navigation ..........................................2, 8-9
NMEA ............................................68, 75
North Reference..................................84, 93
O
Odometer ................................................92
Order Form ............................................101
P
Page Button ........................................A2, 4
Panning Mode ..............................11, 18-19
Patent Numbers........................................70
PC Interface Connection ............................A2
Pointer Options ........................................20
Points of Interest ............................9, 44-49
Saved Options ....................................46
Portuguese Manual....................................A1
Position Format ........................................84
Power Button ......................................A2, 4
Power ..............................................5, 92
Powersaver Mode ......................................5
Product Service ........................................95
Proximity
Add Point............................................79
Options ..................................69, 78-80
Points
Alarm Radius..................................80
Remove All ....................................78
Remove Individual ..........................78
See Details ..................................78
Settings ........................................79-80
99
INDEX
R
Refresh Rate ............................................84
Rocker Pad ..........................................A2, 4
Routes Page ..............................................6
Routes ..............................................9, 63
Saved Options ..............................63, 66
S
Satellites ..........................................68, 73
Save
Address as Waypoint ......................51, 53
City as Waypoint ..........................40, 43
Exit as Waypoint ..........................59, 62
Intersection as Waypoint ................55, 57
New Route ..................................63, 65
New Waypoint ........................32, 34, 35
Point of Interest as Waypoint ..........46, 49
SD Memory Card ........................................3
Search
Cities ..........................................39, 41
Points of Interest ..........................44, 47
Waypoint......................................32, 36
Serial Number ..........................................70
Settings
Options ..................................70, 82-84
Setting ..........................................83-84
Software Version ......................................70
Sort
Last Selected
Cities ......................................39, 42
Points of Interest ......................45, 48
Most Recent, Waypoint ..................33, 37
Nearest
Cities ......................................39, 42
Points of Interest ......................45, 48
Waypoint ................................33, 37
Nearest Road, Exits........................58, 60
Select Road, Exits..........................58, 61
Symbol, Waypoint ........................33, 37
Sounds....................................................83
Spanish Manual........................................A1
Specifications ..........................................94
Speed, current..........................................92
Speed, maximum ....................................92
Status Bar ..............................................70
Summer Time ..........................................83
Swedish Manual ......................................A1
System Page ......................................68-72
System Page..............................................7
T
Time Zone(s) ....................................83, 90
Time, stop ..............................................92
Time, total ..............................................92
Track Log
Clear............................................27, 29
Options ........................................27, 29
Save............................................27, 29
Tracks Page ....................................7, 27-31
Tracks ......................................................8
Saved Options..........................27, 30-31
Trademark Acknowledgements....................95
Trip Meter Page ..............................6, 22-23
Trip Odometer ..........................................92
U
Units of Measurement ..............................83
W
WAAS ............................................84, 93
Warnings ................................................A1
Warranty ................................................96
Waypoint Shortcut ................................4, 35
Waypoints ......................................8, 32-38
Saved Options..........................32, 36-38
Z
Zoom In/Out Button ............................A2, 4
9.0 ACCESSORIES & ORDER FORM
Optional Accessories
Part Number
You can find these fine accessories at your local Cobra Electronics
Corporation dealer. If you wish, you can order directly from Cobra
Electronics Corporation.
GPA 12VC ....................................................7 Ft. 12Volt DC power cord. For in-vehicle power.
To order by phone
Call 773.889.3087
(Press 1 from the main menu 8 a.m.-6 p.m. M-F CST. )
GPA 1500 IC ................................................7 ft. PC interface cord. 9-pin serial port connector for
downloading mapping and points of interest from PC.
To order by mail or fax
Call 773.889.3087 for pricing. Please fill out order form on next
page, and mail/fax directly to Cobra Electronics Corporation.
Fax: 773.622.2269
Description
GPA 1500 CC ..............................................7 ft. Combination PC Interface/12Volt DC power cord. 9-pin
serial port connector with vehicle power plug for downloading
mapping and points of interest from PC.
To order online
Go to www.cobra.com.
GPA 1500 SW ............................................Cobra GPS Solutions software featuring Rand McNally
StreetFinder. Includes street level mapping, routing capabilities
and Points of Interest.
GPA 1000 SCB ............................................Automotive Bracket with suction cups and swivel arm.
GPA 1000 MB..............................................Marine mounting bracket with flat swivel base and swivel arm.
Item #
Description
Cost Ea.
Qty.
Amount
Please print clearly
Name
Address (No P.O. Box)
Amount
Shipping/
Handling
$10.00 or less
$10.01- $25.00
$25.01- $50.00
$50.01- $90.00
$90.01- $130.00
$130.01- $200.00
$200.01plus
$3.00
$5.50
$7.50
$10.50
$13.50
$16.50
10% of purchase
Tax Table
California residents add 7.25%
Illinois residents add 8.75%
Indiana residents add 6%
Michigan residents add 6%
Ohio residents add 6%
Wisconsin residents add 5%
Subtotal
(Tax if applicable)
Shipping/handling
Total
City
State
For AK, HI and PR add additional $26.95 for FedEx Next Day or
$10.95 for FedEx 2nd Day. Excludes weekends and holiday shipments.
Zip
Please allow 2-3 weeks delivery for Ground shipments within the Continental
U.S. Prices subject to change without notice.
Telephone (
)
Credit Card No.
For credit card orders fill out order
form and fax to: 773.622.2269
or call 773.889.3087
(Press 1 from the main menu)
8:00 am - 6:00 pm, Monday-Friday
Central Standard Time.
101
Make check or money order
payable to:
Cobra Electronics Corporation
6500 West Cortland Street
Chicago, IL 60707 USA
ATTN: Accessories Dept.
To order online, please visit our website
at: www.cobra.com.
ACCESSORIES & ORDER FORM
Exp. Date
Circle One: Visa
MasterCard
Discover
Customer Signature
Order form
The Cobra Electronics Corporation line of quality products includes:
CB radios
microTALK ® radios
Radar/Laser Detectors
GPS
®
Safety Alert Traffic Warning Systems
Accessories
HighGear® Accessories
CobraMarine™ VHF Radios
Power Inverters
For more information or to order any of our products,
please visit our website:
www.cobra.com
Nothing comes close to a Cobra®
©2003 Cobra Electronics Corporation
6500 West Cortland Street
Chicago, IL 60707 USA