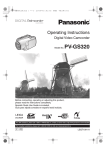
1
&ODULRQ (XURSD *PE+
VXSSOLHU
V QDPH
+HVVHQULQJ 0|UIHOGHQ:DOOGRUI *(50$ 1<
Owner’s manual
Mode d’emploi
Bedienungsanleitung
Istruzioni per l’uso
Gebruiksaanwijzing
Manual de instrucciones
Bruksanvisning
Manual de instruções
DGGUHVV
GHFODUH XQGHU RXU VROH UHVSRQVLELOLW\ WKDW WKH SURGXFW
&$5 5$',2 ZLWK &' 3/$<(5
02'(/';=503 ';=503
3URGXFW FRGH 3(
7<3( 02'(/ GLIIHUHQFH ,//80,1$7,21 &2/25 QDPH W\SH RU PRGHO SRVVLEO\ VRXUFHV DQG QXPEHUV RI LWHPV
WR ZKLFK WKLV GHFODUDWLRQ UHODWHV LV LQ FRQIRUPLW\ ZLWK WKH IROORZLQJ
VWDQGDUGV RU RWKHU QRUPDWLYH GRFXPHQWV
DXZ378RMP
DXZ379RMP
(1 $ (1 $ WLWOH DQGRU QXPEHU DQG GDWH RI LVVXH RI WKH VWDQGDUGV RU
RWKHU QRUPDWLYH GRFXPHQWV
LI DSSOLFDEOH IROORZLQJ WKH SURYLVLRQV RI ((& 'LUHFWLYH
$QG IROORZLQJ WKH SURYLVLRQV RI (& 'LUHFWLYH
DFFRUGLQJWRSDUDJUDSKRI $QQH[,
PHHWVWKHOLPLWVGHILQHGLQSDUDJUDSKDQGRI $QQH[,
VXSSOLHU
V FRPPHQW 0|UIHOGHQ:DOOGRUI *(50$1< 6XVXPX <DPDNDZD 129 3UHVLGHQW 3ODFH DQG GDWH RI LVVXH
QDPH DQG VLJQDWXUH RU HTXLYDOHQW
PDUNLQJ RI DXWKRUL]HG SHUVRQ
5HI1R 5&19 ')'4&$
7(/
)$;
2006/12
VAROITUS
Suojakoteloa si saa avata. Laite sisältää
laserdiodin, joka lähettää näkymätöntä
silmille vaarallista lasersäteilyä.
!CAUTION
USE OF CONTROLS OR
ADJUSTMENTS OR PERFORMANCE OF
PROCEDURES OTHER THAN THOSE
SPECIFIED IN THE OWNER’S MANUAL
MAY RESULT IN HAZARDOUS
RADIATION EXPOSURE.
ADVARSEL.
Denne mærking er anbragt udvendigt
på apparatet og indikerer, at apparatet
arbejder med laserstråler af klasse 1,
hvilket betyder, at der anvendes
laserstråler af svageste klasse, og at
man ikke på apparatets yderside kan
blive udsat for utilladelig kraftig
stråling.
APPARATET BØR KUN ÅBNES AF
FAGFOLK MED SÆRLIGT KENDSKAB
TIL APPARATER MED
LASERSTRÅLER!
Indvendigt i apparatet er anbragt den
her gengivne advarselsmækning, som
advarer imod at foretage sådanne
indgreb i apparatet, at man kan komme
til at udsaætte sig for laserstråling.
CD/MP3/WMA RECEIVER WITH CeNET CONTROL
AUTORADIO CD/MP3/WMA / AVEC COMMANDE CeNET
CD/MP3/WMA-RECEIVER MIT CeNET-STEUERUNG
SINTOLETTORE CD/MP3/WMA CON CONTROLLO CeNET
CD/MP3/WMA-RADIO-COMBINATIE MET CeNET-BEDIENING
RECEPTOR CD/MP3/WMA CON CONTROL CeNET
CD/MP3/WMA-RADIO MED CeNET-KONTROLL
RECEPTOR CD/MP3/WMA COM CONTROLO CeNET
Clarion Co., Ltd.
All Rights Reserved. Copyright © 2006: Clarion Co., Ltd.
Printed in China / Imprimé en Chine / Gedruckt in China / Stampato in Cina
Gedrukt in China / Impreso en China / Tryckt i Kina / Impresso na China
OBS!
Apparaten innehåller laserkomponenten
som avger laserstrålning överstigande
gränsen för laserklass 1.
Italiano
:H
CAUTIONS:
This appliance contains a laser system
and is classified as a “CLASS 1 LASER
PRODUCT”. To use this model properly,
read this Owner’s Manual carefully and
keep this manual for your future
reference. In case of any trouble with
this player, please contact your nearest
“AUTHORIZED service station”. To
prevent direct exposure to the laser
beam, do not try to open the enclosure.
Português Svenska Español Nederlands
&( '(&/$5$7,21 2) &21)250,7<
PE-2906E
280-8454-00
Deutsch Français
English
DXZ378RMP_cover.fm 1 ページ 2007年1月18日 木曜日 午後5時47分
Be sure to unfold and read the next page. / Veuillez déplier et vous référer à la page suivante.
Bitte ausbreiten und die nächste Seite lesen. / Assicurarsi di aprire e leggere la pagina successiva.
Volgende pagina uitvouwen en doorlezen a.u.b. / Cerciórese de desplegar y de leer la página siguiente.
Glöm inte att vika ut och läsa nästa sida. / Não deixe de abrir e ler a próxima página.
DXZ378RMP/DXZ379RMP
i
DXZ378RMP_cover.fm 2 ページ 2007年1月18日 木曜日 午後5時47分
Français Deutsch
Main unit / Appareil principal / Hauptgerät / Apparecchio principale
Hoofdapparaat / Unidad principal / Huvudenhet / Unidade principal
[DIRECT] (1-3)
[SCN], [RPT], [RDM]
[SRC]
[
Thank you for purchasing this Clarion product.
∗ Please read this owner’s manual in its entirety before operating this equipment.
∗ After reading this manual, be sure to keep it in a handy place (e.g., glove compartment).
∗ Check the contents of the enclosed warranty card and keep it carefully with this manual.
∗ This manual includes the operating procedures of the iPod ® interface, CD/DVD changer, DAB
and TV tuner connected via the CeNET cable. The iPod interface, CD/DVD changer and TV
tuner have their own manuals, but no explanations for operating them are described.
“iPod” is a trademark of Apple Computer, Inc., registered in the U.S. and other countries.
Contents
]
[IR RECEIVER]
English
English
CONTROLS/LES COMMANDES/BEDIENELEMENTE/CONTROLLI
BEDIENINGSORGANEN/CONTROLES/KONTROLLER/CONTROLOS
[AUX]
1. PRECAUTIONS......................................................................................................................3
Flip Down Panel..................................................................................................................... 3
Handling Compact Discs........................................................................................................ 4
[OPEN]
+LJK7HFK+LJK7RXFK
CONTROLS ..................................................................................................................................ii
Italiano
2. NOMENCLATURE .................................................................................................................5
Names of the Buttons and Their Functions............................................................................ 5
Display Items ......................................................................................................................... 6
LCD Screen ........................................................................................................................... 6
ª ',&+,$5$=,21( ', &21)250,7$¶ ©
'0 DJRVWR QR
,R )DEEULFDQWH 0DQGDWDULR QHOO¶8(
&ODULRQ (XURSD *PE+
+HVVHQULQJ 0|UIHOGHQ:DOOGRUI
3. DCP ........................................................................................................................................7
[ROTARY]
[TA]
[BND]
[DIRECT] (4-6)
Nederlands Español Svenska Português
[
] (SOUND)
[DISP]
With the FLIP DOWN PANEL opened / Ouvrez le PANNEAU INCLINABLE
Bei geöffnetem KLAPPBILDSCHIRM / A CONSOLE APRIBILE aperta
Met het KANTELEND BEDIENINGSPANEEL geopend / Apertura del PANEL ABATIBLE
Med den NEDFÄLLBARA KONSOLEN öppen / Com a CONSOLA RECLINÁVEL aberta
[
] (EJECT)
[CD SLOT]
4. REMOTE CONTROL..............................................................................................................8
Functions of Remote Control Unit Buttons............................................................................. 8
Inserting the Battery............................................................................................................. 10
5. OPERATIONS ......................................................................................................................11
Basic Operations.................................................................................................................. 11
Radio Operations ................................................................................................................. 14
RDS Operations................................................................................................................... 16
CD/MP3/WMA Operations ................................................................................................... 20
Operations Common to Each Mode..................................................................................... 24
6. OPERATIONS OF ACCESSORIES.....................................................................................27
iPod BB Operations ............................................................................................................. 27
CD Changer Operations ...................................................................................................... 29
DVD Changer Operations .................................................................................................... 30
TV Operations...................................................................................................................... 31
Digital Radio / DAB Operations............................................................................................ 32
'LFKLDUR FKH LO SURGRWWR
$XWRUDGLR FRQ &'
';=503';=503
q FRQIRUPH DOOH GLVSRVL]LRQL FRQWHQXWH QHO VXGGHWWR
GHFUHWR UHODWLYDPHQWH DOOD SUHYHQ]LRQH H O¶HOHPLQD]LRQH
GHL GLVWXUEL UDGLRHOHWWULFL SURYRFDWL GDL ULFHYLWRUL GL
UDGLRGLIIXVLRQH VRQRUD H WHOHYLVLYD
,R )DEEULFDQWH 0DQGDWDULR QHOO¶8(
'DWD
1RYHPEUH &ODULRQ (XURSD *PE+
+HVVHQULQJ 0|UIHOGHQ:DOOGRUI
7. IN CASE OF DIFFICULTY ...................................................................................................35
8. ERROR DISPLAYS..............................................................................................................36
9. SPECIFICATIONS................................................................................................................37
)LUPD
3%/1R,519&
,'&)07):/+&
7(/
)$;
Note: Be sure to unfold this page and refer to the front diagrams as you read each chapter.
Remarque: Veuillez déplier cette page et vous référer aux schémas quand vous lisez chaque chapitre.
Hinweis: Bitte diese Seite ausfalten und beim Lesen der einzelnen Kapitel die Frontdiagramme beachten.
Nota: Assicurarsi di aprire questa pagina e fare riferimento a questi diagrammi quando si legge ciascun capitolo.
Opmerking: Vouw deze pagina uit en zie tevens de afbeeldingen van het voorpaneel tijdens het doorlezen van de volgende hoofdstukken.
Nota: Cuando lea los capítulos, despliegue esta página y consulte los diagramas.
Observera: Vik ut denna sida för att kunna se bilderna över bilstereons framsida, medan du läser de olika kapitlen.
Nota: Certifique-se de abrir esta página e consulte os diagramas frontais conforme realiza a leitura de cada capítulo.
ii
DXZ378RMP/DXZ379RMP
2
DXZ378RMP/DXZ379RMP
DXZ378RMP/DXZ379RMP
303
DXZ378RMP_EN.book 3 ページ 2006年11月27日 月曜日 午後2時22分
1. This unit is applicable for on-road 4 wheel
vehicle purpose only. Use for tractor, fork
truck, bulldozer, off road vehicle, 2 or 3
wheel motor bicycle, marine boat or other
special purpose vehicle is not appropriate.
2. When the inside of the car is very cold and
the player is used soon after switching on the
heater moisture may form on the disc or the
optical parts of the player and proper
playback may not be possible. If moisture
forms on the disc, wipe it off with a soft cloth.
If moisture forms on the optical parts of the
player, do not use the player for about one
hour. The condensation will disappear
naturally allowing normal operation.
3. Driving on extremely bumpy roads which
cause severe vibration may cause the sound
to skip.
INFORMATION FOR USERS:
CHANGES OR MODIFICATIONS TO THIS
PRODUCT NOT APPROVED BY THE
MANUFACTURER WILL VOID THE
WARRANTY.
English
1. PRECAUTIONS
Flip Down Panel
This unit uses a flip-down structure that makes
possible large-size displays.
CAUTION
When opening and closing the FLIP DOWN
PANEL, be careful not to catch your fingers.
They could be injured.
1. Always use this unit with the FLIP DOWN
PANEL closed.
2. Do not force operations or use this device
abnormally when opening or closing the
FLIP DOWN PANEL.
3. Do not use the FLIP DOWN PANEL as a tray
to place objects on when it is open.
4. When closing the FLIP DOWN PANEL, do
not press the [OPEN] button.
5. Strong impacts to the operating or display
section can cause damage or deformation.
6. If the FLIP DOWN PANEL does not open
fully, gently open it with your hand.
DXZ378RMP/DXZ379RMP
3
DXZ378RMP_EN.book 4 ページ 2006年11月27日 月曜日 午後2時22分
Handling Compact Discs
English
Use only compact discs bearing the
or
Storage
Do not play heart-shaped, octagonal, or other
specially shaped compact discs.
Some CDs recorded in CD-R/CD-RW mode
may not be usable.
• Do not expose compact discs to direct
sunlight or any heat source.
• Do not expose compact discs to excess
humidity or dust.
• Do not expose compact discs to direct heat
from heaters.
Handling
Cleaning
• Compared to ordinary music CDs, CD-R and
CD-RW discs are both easily affected by high
temperature and humidity and some of CD-R
and CD-RW discs may not be played.
Therefore, do not leave them for a long time
in the car.
• New discs may Ball-point pen
have some
roughness
Roughness
around the
edges. If such
discs are used,
the player may
not work or the
sound may
skip. Use a ball-point pen or the like to
remove any roughness from the edge of the
disc.
• Never stick labels on the surface of the
compact disc or mark the surface with a
pencil or pen.
• Never play a compact disc with any
cellophane tape or other glue on it or with
peeling off marks. If you try to play such a
compact disc, you may not be able to get it
back out of the CD player or it may damage
the CD player.
• Do not use compact discs that have large
scratches, are misshapen, cracked, etc. Use
of such discs may cause misoperation or
damage.
• To remove a compact disc from its storage
case, press down on the center of the case
and lift the disc out, holding it carefully by the
edges.
• Do not use commercially available CD
protection sheets or discs equipped with
stabilizers, etc. These may damage the disc
or cause breakdown of the internal
mechanism.
• To remove fingermarks and dust, use a soft
cloth and wipe in a straight line from the
center of the compact disc to the
circumference.
• Do not use any solvents, such as
commercially available cleaners, anti-static
spray, or thinner to clean compact discs.
• After using special compact disc cleaner, let
the compact disc dry off well before playing it.
mark.
4
DXZ378RMP/DXZ379RMP
DXZ378RMP_EN.book 5 ページ 2006年11月27日 月曜日 午後2時22分
English
2. NOMENCLATURE
Note:
• Be sure to read this chapter referring to the front diagrams of chapter “CONTROLS” on page ii (unfold).
Names of the Buttons and Their Functions
[OPEN] button
[ROTARY] knob
• Deeply push in [OPEN] button to unlock the
flip down panel.
• Adjust the volume by turning the knob
clockwise or counterclockwise.
[DIRECT] buttons
[BND] button
• Store a station into memory or recall it directly
while in the radio mode.
• Switch the band, or seek tuning or manual
tuning while in the radio mode.
• Play a first track while in the CD/MP3/WMA
mode.
• Press the button to change the character.
[SCN] button
• Perform scan play for 10 seconds of each
track while in the CD/MP3/WMA mode.
• Press and hold the button for 1 second or
longer to perform folder scan play while in the
MP3/WMA mode.
[RPT] button
• Perform repeat play while in the CD/MP3/
WMA mode.
• Press and hold the button for 1 second or
longer to perform folder repeat play while in
the MP3/WMA mode.
[RDM] button
• Perform random play while in the CD/MP3/
WMA mode.
• Press and hold the button for 1 second or
longer to perform folder random play while in
the MP3/WMA mode.
[
] (SOUND) button
• Use the button to switch to the sound adjust
mode.
• Press and hold the button for 1 second or
longer to turn on or off the MAGNA BASS
EXTEND mode.
[DISP] button
• Switch the display indication.
• Press and hold the button for 1 second or
longer to enter the adjust mode.
[TA] button
• Use the button to set the TA (Traffic
Announcement) standby mode.
[x], [v] buttons
• Press the button to turn on the power.
• Press and hold the button for 1 second or
longer to turn off the power.
• Switch the operation mode among the radio
mode, etc.
• Select a station while in the radio mode or
select a track while in the CD/MP3/WMA
mode.
This button is used to make various settings.
• Press and hold the button for 1 second or
longer to enter the fast-forward or fastbackward mode.
[
[w] (UP), [z] (DN) buttons
[SRC] button
] button
• Perform preset scan while in the radio mode.
When the button is pressed and held, auto
store is performed.
• Play or pause a track while in the CD/MP3/
WMA mode.
• Confirm various settings.
[IR RECEIVER]
• Receiver for remote control unit. (Operating
range: 30° in all directions)
• Select the folder while in the MP3/WMA
mode.
• Use the buttons to perform various settings.
[Q] (EJECT) button
• Eject a disc when it is loaded into the unit.
[CD SLOT]
• CD insertion slot.
[AUX] input jack
• The input jack for connecting an external
device.
DXZ378RMP/DXZ379RMP
5
DXZ378RMP_EN.book 6 ページ 2006年11月27日 月曜日 午後2時22分
Display Items
English
Operation status indication
Titles, band, preset channel, track No.,
disc No., folder No., etc. are displayed.
Operation status indication
Source, Titles, CT (clock time) are displayed.
Z-ENHANCER 1, 2, 3 indication
: Manual indication
: Enter indication
: Disc No. indication
Preset channel
indication (1 to 6)
: MP3 indication
: WMA indication
: Alternative frequency indication
: Regional indication
: Traffic announcement indication
: Traffic programme indication
: Programme type indication
: Information indication for DAB
: DAB indication
: Stereo indication for DAB
: Disc or folder random/repeat/scan indication
: Random indication
: Repeat indication
: Scan indication
: MAGNA BASS EXTEND indication
: Mute indication
LCD Screen
In extreme cold, the screen movement may slow down and the screen may darken, but this is normal.
The screen will recover when it returns to normal temperature.
6
DXZ378RMP/DXZ379RMP
DXZ378RMP_EN.book 7 ページ 2006年11月27日 月曜日 午後2時22分
The control panel can be detached to prevent
theft. When detaching the control panel, store it
in the DCP (DETACHABLE CONTROL PANEL)
case to prevent scratches.
We recommend taking the DCP with you when
leaving the car.
Attaching the DCP
1. Insert the right side of the DCP into the main
unit.
2. Insert the left side of the DCP into the main
unit.
2.
Removing the DCP
1. Press the [SRC] button for 1 second or
longer to turn off the power.
2. Deeply push in [OPEN] button to unlock the
flip down panel.
∗ If the flip down panel does not open fully,
gently open it with your hand.
[OPEN] button
DCP
1.
Storing the DCP in the DCP Case
Hold the DCP, in the orientation as shown in the
figure below, and put it into the supplied DCP
case. (Ensure the DCP is in the correct
orientation.)
DCP
DCP
3. Pull the DCP toward you and remove it.
DCP
DCP case
CAUTION
4. Close the HOLD FLAP.
HOLD FLAP
CAUTION
Be sure to close the HOLD FLAP for safety
when removing the DCP.
• The DCP can easily be damaged by
shocks. After removing it, be careful not to
drop it or subject it to strong shocks.
• If the FLIP DOWN PANEL is kept open, the
DCP may drop due to vibration of the car.
This results in damage to the DCP. So
close the FLIP DOWN PANEL or remove
the DCP to store into the case.
• The connector connecting the source unit
and the DCP is an extremely important
part. Be careful not to damage it by
pressing on it with fingernails,
screwdrivers, etc.
Note:
• If the DCP is dirty, wipe off the dirt with a soft, dry
cloth only.
DXZ378RMP/DXZ379RMP
7
English
3. DCP
DXZ378RMP_EN.book 8 ページ 2006年11月27日 月曜日 午後2時22分
English
4. REMOTE CONTROL
Functions of Remote Control Unit Buttons
∗ Some buttons on the remote control unit have different functions from the corresponding buttons on the main
unit.
Signal transmitter
[SRC]
[BND]
[
]
[
], [
[ ], [ ]
[MUTE]
[TA]
[PS/AS]
]
[DISP]
[PTY]
[AF]
● Shared modes
[AF] button
[SRC] button
• Press to cancel an emergency broadcast
during an ALARM interrupt.
• Use to alternate operation mode among the
various modes.
• Press to cancel a traffic announcement
broadcast, an emergency broadcast, and a
PTY broadcast during a TA, ALARM or PTY
interrupt.
[w], [z] buttons
• Increases and decreases volume.
[PTY] button
• Press to cancel a PTY broadcast during a
PTY interrupt.
[DISP] button
• Press to alternate among main display, title
display and CT (clock time) display.
[MUTE] button
● Radio (RDS) / DAB modes
• Turns mute function on and off.
[BND] button
[TA] button
• Switches reception band.
• TA on and off.
• Press to cancel a traffic announcement
broadcast during a TA interrupt.
[x], [v] buttons
• Moves preset channels up and down.
[PS/AS] button
• Press to perform preset scan.
• Press and hold the button for 2 seconds or
longer to perform auto store.
8
DXZ378RMP/DXZ379RMP
DXZ378RMP_EN.book 9 ページ 2006年11月27日 月曜日 午後2時22分
Functions of Remote Control Unit Buttons
• AF function on and off.
• Press and hold the button for 1 second or
longer to perform REG function on and off.
• Press and hold the button for 1 second or
longer to perform disc repeat play.
[PTY] button
• PTY mode on and off.
• Press to perform random play.
• Press and hold the button for 1 second or
longer to perform disc random play.
[PTY] button
English
[AF] button
● CD/MP3/WMA modes
● iPod BB mode
[BND] button
[x], [v] buttons
• Press to play the first track.
• Press to move the tracks up and down.
• Press and hold the button for 1 second or
longer to perform fast-forward/fast-backward.
[x], [v] buttons
• Press to move the tracks up and down.
• Press and hold the button for 1 second or
longer to perform fast-forward/fast-backward.
[
[
[AF] button
] button
• Switches between playback and pause.
[PS/AS] button
• Press to perform scan play.
• When in MP3/WMA mode, press and hold the
button for 1 second or longer to perform
folder scan play.
[AF] button
• Press to perform repeat play.
• When in MP3/WMA mode, press and hold the
button for 1 second or longer to perform
folder repeat play.
] button
• Switches between playback and pause.
• Press to perform repeat play.
• Press and hold the button for 1 second or
longer to perform all repeat play.
[PTY] button
• Press to perform random play.
• Press and hold the button for 1 second or
longer to perform all random play.
● TV mode
[BND] button
• Switches reception band.
[PTY] button
[x], [v] buttons
• Press to perform random play.
• When in MP3/WMA mode, press and hold the
button for 1 second or longer to perform
folder random play.
[PS/AS] button
● CD changer/DVD changer modes
[BND] button
• Moves preset channels up and down.
• Press to perform preset scan.
• Press and hold the button for 2 seconds or
longer to perform auto store.
[PTY] button
• Press to alternate between TV and VTR.
• Press to switch to next disc in ascending
order.
[x], [v] buttons
• Press to move the tracks up and down.
• Press and hold the button for 1 second or
longer to perform fast-forward/fast-backward.
[
] button
• Switches between playback and pause.
[PS/AS] button
• Press to perform scan play.
• Press and hold the button for 1 second or
longer to perform disc scan play.
[AF] button
• Press to perform repeat play.
DXZ378RMP/DXZ379RMP
9
DXZ378RMP_EN.book 10 ページ 2006年11月27日 月曜日 午後2時22分
Inserting the Battery
English
1 Turn over the remote control unit and slide
the cover in the direction indicated by the
arrow in the illustration.
2 Insert the battery (CR2025) into the insertion
guides, with the printed side (+) facing
upwards.
3 Press the battery in the direction indicated by
the arrow so that it slides into the
compartment.
4 Replace the cover and slide in until it clicks
into place.
10
DXZ378RMP/DXZ379RMP
CR202
5
Notes:
Misuse may result in rupture of the battery,
producing leakage of fluid and resulting in personal
injury or damage to surrounding materials. Always
follow these safety precautions:
• Use only the designated battery.
• When replacing the battery, insert properly, with
+/– polarities oriented correctly.
• Do not subject battery to heat, or dispose of in fire
or water. Do not attempt to disassemble the
battery.
• Dispose of used batteries properly.
Insertion guide
DXZ378RMP_EN.book 11 ページ 2006年11月27日 月曜日 午後2時22分
English
5. OPERATIONS
Note:
• Be sure to read this chapter referring to the front diagrams of chapter “CONTROLS” on page ii (unfold).
Basic Operations
CAUTION
Be sure to lower the volume before
switching off the unit power or the ignition
key. The unit remembers its last volume
setting. If you switch the power off with the
volume up, when you switch the power back
on, the sudden loud volume may hurt your
hearing and damage the unit.
Turning on/off the power
Note:
• Be careful about using this unit for a long time
without running the engine. If you drain the car’s
battery too far, you may not be able to start the
engine and this can reduce the service life of the
battery.
1. Press the [SRC] button.
2. The illumination and display on the unit light
up. The unit automatically remembers its last
operation mode and will automatically switch
to display that mode.
3. Press and hold the [SRC] button for 1
second or longer to turn off the power for the
unit.
Adjusting the volume
1. Turning the [ROTARY] knob clockwise
increases the volume; turning it
counterclockwise decreases the volume.
∗ The volume level is from 0 (minimum) to 33
(maximum).
Switching the display
Press the [DISP] button to select the desired
display.
∗ Once selected, the preferred display becomes
the display default. When a function
adjustment such as volume is made, the
screen will momentarily switch to that
function’s display, then revert back to the
preferred display several seconds after the
adjustment.
∗ For information on how to enter a title, refer to
the subsection “Entering titles” in section
“Operations Common to Each Mode”.
∗ When CT data is not received, “CT– –:– –”
appears in the display.
Note:
• The first time this unit is turned on after the wire
connections are completed, it must be checked
what equipment is connected. When the power is
turned on, the “SYSTEM CHECK” appears in the
display. The system check starts within the unit.
When the system check is complete, press the
[SRC] button again.
Selecting a mode
1. Press the [SRC] button to change the
operation mode.
2. Each time you press the [SRC] button, the
operation mode changes in the following
order:
Radio ➜ (DAB) ➜ CD/MP3/WMA ➜ (iPod
BB) ➜ (CD changer) ➜ (DVD changer) ➜
(TV) ➜ AUX ➜ Radio...
∗ External equipment not connected with
CeNET is not displayed.
DXZ378RMP/DXZ379RMP
11
DXZ378RMP_EN.book 12 ページ 2006年11月27日 月曜日 午後2時22分
Basic Operations
English
Sound Adjustment
You can adjust a sound effect or tone quality to
your preference.
To change sound setting
1. Press the [
] button to switch to the
sound adjustment selection display.
∗ The factory default sound setting is “ZEHCR”.
2. Then press the [x] or [v] button to
select the sound adjustment mode.
Each time you press the [x] or [v]
button, the sound adjustment mode
changes as following order:
“Z-EHCR” ↔ “BASS” ↔ “TREBLE” ↔
“BALANCE” ↔ “FADER”
∗ In the case of display blinking “ENT”, you
can press the [
] button to adjust the
setting value.
3. Press the [w] or [z] button to adjust the
selected audio mode.
4. After completing settings, press the [
]
button to return to the previous mode.
● Setting the Z-Enhancer
This unit are provided with 3 types of sound
tone effects stored in memory.
Select the one you prefer.
∗ The factory default setting is “OFF”.
2-1. Select “Z-EHCR”.
3-1. Each time you press the [w] or [z]
button, the tone effect changes in the
following order:
“EXCITE” ↔ “IMPACT” ↔ “B-BOOST” ↔
“OFF”
EXCITE : bass and treble emphasized
mid deemphasized
IMPACT : bass and treble emphasized
B-BOOST : bass emphasized
OFF
: no sound effect
When “EXCITE” is set:
3-2. Press the [
] button.
3-3. Press the [w] or [z] button to adjust the
bass and treble in the range of +3 to –3.
∗ The factory default setting is “0”.
3-4. Press the [
mode.
12
] button to return to previous
DXZ378RMP/DXZ379RMP
When “IMPACT” is set:
3-2. Press the [
] button.
3-3. Press the [w] or [z] button to adjust the
bass and treble in the range of +3 to –3.
∗ The factory default setting is “0”.
3-4. Press the [
] button to return to previous
mode.
When “B-BOOST” is set:
3-2. Press the [
] button.
3-3. Press the [w] or [z] button to adjust the
bass in the range of +3 to –3.
∗ The factory default setting is “0”.
3-4. Press the [
mode.
] button to return to previous
● Adjusting the bass
This adjustment can be performed only when
the Z-Enhancer is set to “OFF”.
2-1. Select “BASS”.
3-1. Press the [w] or [z] button to adjust the
bass.
∗ The factory default setting is “0”.
(Adjustment range: +8 to –8)
● Adjusting the treble
This adjustment can be performed only when
the Z-Enhancer is set to “OFF”.
2-1. Select “TREBLE”.
3-1. Press the [w] or [z] button to adjust the
treble.
∗ The factory default setting is “0”.
(Adjustment range: +7 to –7)
● Adjusting the balance
2-1. Select “BALANCE”.
3-1. Press the [w] or [z] button to adjust the
balance of the right and left speakers.
∗ The factory default setting is “CENTER”
(center). (Adjustment range: RIGHT12 to
LEFT12 (right 12 to left 12))
● Adjusting the fader
2-1. Select “FADER”.
3-1. Press the [w] or [z] button to adjust the
balance of the rear and front speakers.
∗ The factory default setting is “CENTER”
(center). (Adjustment range: FRONT12 to
REAR12 (front 12 to rear 12))
Note:
• During SOUND adjustment mode, if no operation
is performed for more than 10 seconds, this
mode can be cancelled and return to previous
mode.
DXZ378RMP_EN.book 13 ページ 2006年11月27日 月曜日 午後2時22分
Basic Operations
CT (Clock Time) function
The MAGNA BASS EXTEND does not adjust
the low frequencies like the normal sound
adjustment function, but emphasizes the deep
bass frequencies to provide you with a dynamic
sound.
The CT function receives CT data sent from an
RDS station and displays the time.
∗ The factory default setting is “OFF” (off).
1. Press and hold the [
] button for 1 second
or longer to turn on the MAGNA BASS
EXTEND effect. “M-B EX” lights in the
display.
2. Press and hold the [
] button for 1 second
or longer to turn off the MAGNA BASS
EXTEND effect. “M-B EX” goes off.
∗ If a CT data is not being received, “CT– –:– –”
appears in the display.
Note:
• CT data is not transmitted in some countries and
by some broadcast stations. Also, in some areas,
the CT may not display accurately.
DXZ378RMP/DXZ379RMP
13
English
Setting the MAGNA BASS EXTEND
DXZ378RMP_EN.book 14 ページ 2006年11月27日 月曜日 午後2時22分
Radio Operations
English
Listening to the radio
1. Press the [SRC] button and select the radio
mode. The frequency or PS and PTY
appears in the display.
∗ PS: Programme service name
∗ PTY: Programme type
2. Press the [BND] button and select the radio
band. Each time the button is pressed, the
radio reception band changes in the
following order:
FM1 ➜ FM2 ➜ FM3 ➜ AM (MW/LW) ➜
FM1...
3. Press the [x] or [v] button to tune in the
desired station.
Tuning
There are 3 types of tuning mode available,
seek tuning, manual tuning and preset tuning.
Seek tuning
There are 2 types of seek tuning: DX SEEK and
LOCAL SEEK.
DX SEEK can automatically tune in to
receivable broadcast stations; LOCAL SEEK
can tune in to only broadcast stations with a
good reception sensitivity.
1. Press the [BND] button and select the
desired band (FM or AM (MW/LW)).
2. Tune into a station.
∗ If “MANU” is lit in the display, press and hold
the [BND] button for 1 second or longer.
“MANU” in the display goes off and seek
tuning is now available.
∗ If “TA” is lit in the display, TP stations are
automatically sought.
● DX SEEK
Press the [x] or [v] button to automatically
seek a station.
When the [v] button is pressed, the station is
sought in the direction of higher frequencies; if
the [x] button is pressed, the station is sought
in the direction of lower frequencies.
∗ When seek tuning starts, “DX SEEK” appears in
the display.
14
DXZ378RMP/DXZ379RMP
● LOCAL SEEK
If the [x] or [v] button is pressed and held
in position for 1 second or longer, local seek
tuning will be enabled. Broadcast stations with
good reception sensitivity are selected.
∗ When local seeking starts, “LO SEEK” appears in
the display.
Manual tuning
There are 2 ways available: Quick tuning and
step tuning.
When you are in the step tuning mode, the
frequency changes one step at a time. In the
quick tuning mode, you can quickly tune the
desired frequency.
1. Press the [BND] button and select the
desired band (FM or AM (MW/LW)).
∗ If “MANU” is not lit in the display, press and
hold the [BND] button for 1 second or longer.
“MANU” is lit in the display and manual tuning
is now available.
2. Tune into a station.
● Quick tuning
Press and hold the [x] or [v] button for 1
second or longer to tune in a station.
● Step tuning
Press the [x] or [v] button to manually tune
in a station.
∗ If no operation is performed for more than 7
seconds, manual tuning is cancelled and the
display returns to the previous mode.
DXZ378RMP_EN.book 15 ページ 2006年11月27日 月曜日 午後2時22分
Radio Operations
Preset scan
A total of 24 preset positions (6-FM1, 6-FM2, 6FM3, 6-AM) exists to store individual radio
stations in memory. Pressing the corresponding
[DIRECT] button or the [w] / [z] button recalls
the stored radio frequency automatically.
1. Press the [BND] button and select the
desired band (FM or AM (MW/LW)).
2. Press the corresponding [DIRECT] button or
the [w] / [z] button to recall the stored
station.
Preset scan receives the stations stored in
preset memory in order. This function is useful
when searching for a desired station in memory.
1. Press the [
] button.
2. When a desired station is tuned in, press the
[
] button again to continue receiving that
station.
Note:
• Press and hold one of the [DIRECT] buttons for 2
seconds or longer to store that station into preset
memory.
Note:
• Be careful not to press and hold the [
] button
for 2 seconds or longer, otherwise the auto store
function is engaged and the unit starts storing
stations.
Manual memory
1. Select the desired station with seek tuning or
manual tuning.
2. Press and hold one of the [DIRECT] buttons
for 2 seconds or longer to store the current
station into preset memory.
Auto store
Auto store is a function for storing up to 6
stations that are automatically tuned in
sequentially. If 6 receivable stations cannot be
received, a previously stored station remains
unoverwritten at the memory position.
1. Press the [BND] button and select the
desired band (FM or AM (MW/LW)).
2. Press and hold the [
] button for 2 seconds
or longer. The stations with good reception
are stored automatically to the preset
channels.
DXZ378RMP/DXZ379RMP
15
English
Recalling a preset station
DXZ378RMP_EN.book 16 ページ 2006年11月27日 月曜日 午後2時22分
RDS Operations
English
RDS (Radio Data System)
This unit has a built-in RDS decoder system that
supports broadcast stations transmitting RDS
data.
This system can display the name of the
broadcast station being received (PS) and can
automatically switch to the broadcast station
with the best reception as you move long
distances (AF switching).
Also, if a traffic announcement or programme
type is broadcast from an RDS station, no
matter what mode you are in, this broadcast is
received.
Additionally, if EON information is received, this
information enables automatic switching of
other preset stations on the same network and
interruption of the station being received with
traffic information from other stations (TP). This
function is not available in some areas.
When using the RDS function, always set the
radio to FM mode.
• AF
: Alternative Frequency
• PS
: Programme Service Name
• PTY : Programme Type
• EON : Enhanced Other Network
• TP
: Traffic Programme
∗ RDS interrupt does not function during AM radio
reception or in TV mode.
∗ When set receives RDS signal, and can read PS
data, PS appears in the display.
AF function
The AF function switches to a different
frequency on the same network in order to
maintain optimum reception.
∗ The factory default setting is “ON”.
1. Press and hold the [DISP] button for 1
second or longer to switch to the RDS
adjustment selection display.
2. Press the [x] or [v] button to select
“AF”.
3. Press the [w] or [z] button to select “ON”
or “OFF”.
• ON:
“AF” in the display lights and AF function
turns on.
• OFF:
“AF” in the display goes off and AF function
turns off.
16
DXZ378RMP/DXZ379RMP
4. Press the [DISP] button to return to the
previous mode.
∗ If the reception of the current broadcast station
deteriorates, “PI SEARCH” appears in the display
and the radio searches for the same programme
on another frequency.
REG (Regional programme)
function
When the REG function is ON, the optimum
regional station can be received. When this
function is OFF, if the regional station area
switches as you drive, a regional station for that
region is received.
∗ The factory default setting is “OFF”.
Notes:
• This function is disabled when a national station
such as BBC R2 is being received.
• The REG function ON/OFF setting is valid when
the AF function is ON.
1. Press and hold the [DISP] button for 1
second or longer to switch to the RDS
adjustment selection display.
2. Press the [x] or [v] button to select
“REG”.
3. Press the [w] or [z] button to select “ON”
or “OFF”.
• ON:
“REG” in the display lights and REG function
turns on.
• OFF:
“REG” in the display goes off and REG
function turns off.
4. Press the [DISP] button to return to the
previous mode.
DXZ378RMP_EN.book 17 ページ 2006年11月27日 月曜日 午後2時22分
RDS Operations
1. This function is valid when the AF function is
ON and the REG function is OFF.
Note:
• This function can be used when a regional
broadcast of the same network is received.
2. Press any one of the [DIRECT] buttons to
call out the regional station.
3. If the reception condition of the called out
station is bad, press the [DIRECT] button of
the same number. The unit receives a local
station on the same network.
TA (Traffic Announcement)
In the TA standby mode, when a traffic
announcement broadcast starts, the traffic
announcement broadcast is received as top
priority regardless of the function mode so you
can listen to it. Traffic programme (TP)
automatic tuning is also possible.
∗ This function can only be used when “TP” is lit in
the display. When “TP” is lit, this means that the
RDS broadcast station being received has traffic
announcement programmes.
● Setting the TA standby mode
If you press the [TA] button when only “TP” is lit
in the display, “TP” and “TA” light in the display
and the unit is set into the TA standby mode
until a traffic announcement is broadcast. When
a traffic announcement broadcast starts, “ TRA
INFO” appears in the display. If you press the
[TA] button while a traffic announcement
broadcast is being received, the traffic
announcement broadcast reception is cancelled
and the unit goes into the TA standby mode.
● Cancelling the TA standby mode
As “TP” and “TA” lit in the display, press the [TA]
button. The “TA” in the display goes off and the
TA standby mode is cancelled.
∗ If “TP” is not lit, pressing the [TA] button searches
for a TP station.
● Searching for a TP station
When “TP” is not lit, if you press the [TA] button,
“TA” in the display lights and the unit
automatically receives a TP station.
Auto store function for TP stations
You can automatically store up to 6 TP stations
into preset memory. If the number of TP can be
received less than 6, broadcast stations already
stored in memory and left without being
overwritten.
As “TA” lit in the display, press and hold the
[
] button for 2 seconds or longer. The TP
stations with the good reception sensitivity are
stored into preset memory.
∗ Even if you select FM1 or FM2, a TP station is
stored into memory for FM3.
PTY (Programme Type)
This function enables you to listen to a
broadcast of the selected programme type even
if the unit is on a function mode other than radio.
∗ Some countries do not yet have PTY broadcast.
∗ In the TA standby mode, a TP station has priority
over a PTY broadcast station.
∗ The factory default setting is “OFF”.
1. Press and hold the [DISP] button for 1
second or longer to switch to the RDS
adjustment selection display.
2. Press the [x] or [v] button to select
“PTY”.
3. Press the [w] or [z] button to select “ON”
or “OFF”.
• ON:
“PTY” in the display lights and PTY standby
mode is turned on. When the selected PTY
broadcast starts, the PTY item name
appears in the display.
• OFF:
“PTY” in the display goes off and PTY
standby mode is cancelled.
4. Press the [DISP] button to return to the
previous mode.
● Cancelling a PTY interrupt broadcast
Press the [TA] button during the PTY interrupt
broadcast, the PTY interrupt is cancelled and
the unit returns to PTY standby mode.
Note:
• If a TP station is not received, the unit continues
the search operation. Pressing [TA] button again
goes off “TA” in the display and stops TP station
searching.
DXZ378RMP/DXZ379RMP
17
English
Manually tuning a regional station
in the same network
DXZ378RMP_EN.book 18 ページ 2006年11月27日 月曜日 午後2時22分
RDS Operations
English
Selecting PTY
1. Press and hold the [DISP] button for 1
second or longer to switch to the RDS
adjustment selection display.
2. Press the [x] or [v] button to select
“PTY SELECT”.
3. Press the [
] button.
4. Press any one of the [DIRECT] buttons.
Alternatively, press the [w] or [z] button to
select the desired PTY.
5. Press the [DISP] button to return to the
previous mode.
∗ Below are the factory default settings stored
for the [DIRECT] buttons.
4. Press the [w] or [z] button to select the
desired PTY.
The 29 types of PTY below can be selected.
5. If you press and hold any one of the
[DIRECT] buttons for 2 seconds or longer,
the selected PTY is stored into that preset
channel memory.
PTY item
ENGLISHe
ContentsA
Newsa
News
Affairsa
Today’s events
Infoa
Information
Sporta
Sports
Educatea
Education
ENGLISHd ContentsA
Dramaa
Drama
1
Newsb
News
Culturea
Culture
2
Info
Information
Sciencea
Science
3
Pop M
Pop Music
Varieda
Variety
4
Sport
Sports
Pop Ma
Pop music
5
Classics
Serious Classical Music
Rock Ma
Rock music
6
Easy M
Easy Listening Music
Easy Ma
Easy music
Light Ma
Light music
Classicsa
Classics
Preset
number
PTY item
∗ The PTY select mode is cancelled
automatically 7 seconds after a PTY is
selected.
Other Ma
Other music
PTY seek
Weathera
Weather
1. Press and hold the [DISP] button for 1
second or longer to switch to the RDS
adjustment selection display.
2. Press the [x] or [v] button to select
“PTY SELECT”.
3. Press the [
] button.
4. Press the [v] button to search for a PTY
broadcast in the direction of higher
frequencies; press the [x] button to search
in the direction of lower frequencies.
Financea
Finance
Childrena
For children
Sociala
Social
∗ If no station with the selected PTY broadcast
can be received, the unit returns to the PTY
select mode.
Religiona
Religion
Phone Ina
Phone in
Travela
Travel
Leisurea
Leisure
Jazza
Jazz
Countrya
Country
Nation Ma
Nation music
Oldiesa
Oldies
PTY preset memory
Folk Ma
Folk music
1. Press and hold the [DISP] button for 1
second or longer to switch to the RDS
adjustment selection display.
2. Press the [x] or [v] button to select
“PTY SELECT”.
3. Press the [
] button.
Documenta
Documentaries
18
DXZ378RMP/DXZ379RMP
DXZ378RMP_EN.book 19 ページ 2006年11月27日 月曜日 午後2時22分
RDS Operations
If an emergency broadcast is received, all the
function mode operations are stopped.
“ALARM !” appears in the display and the
emergency broadcast can be heard.
● Cancelling an emergency broadcast
If you press the [TA] button, emergency
broadcast reception is cancelled.
Switching the PTY display language
You can select one of 4 languages (English,
German, Swedish or French) for the PTY
displayed in the display.
Volume setting of TA, emergency
broadcast (Alarm) and PTY
The volume for TA, Alarm and PTY interrupts
can be set during TA, Alarm or PTY interrupt.
∗ The factory default setting is “15”.
During a TA, Alarm or PTY interrupt, turn the
[ROTARY] knob to set the volume to the
desired level (0 to 33).
∗ When the TA, Alarm or PTY interrupt ends, the
volume returns to the level it had before the
interrupt.
∗ The factory default setting is “ENGLISH”.
1. Press the [DISP] button to switch to the
adjustment selection display.
2. Press the [x] or [v] button to select
“LANGUAGE”.
3. Press the [w] or [z] button to select the
desired language.
4. Press the [DISP] button to return to the
previous mode.
DXZ378RMP/DXZ379RMP
19
English
Emergency broadcast
DXZ378RMP_EN.book 20 ページ 2006年11月27日 月曜日 午後2時22分
CD/MP3/WMA Operations
English
MP3/WMA
What is MP3?
MP3 is an audio compression method and
classified into audio layer 3 of MPEG standards.
This audio compression method has penetrated
into PC users and become a standard format.
This MP3 features the original audio data
compression to about 10 percent of its initial
size with a high sound quality. This means that
about 10 music CDs can be recorded on a CDR disc or CD-RW disc to allow a long listening
time without having to change CDs.
What is WMA?
WMA is the abbreviation of Windows Media
Audio, an audio file format developed by
Microsoft Corporation.
Notes:
• If you play a file with DRM (Digital Rights
Management) for WMA remaining ON, no audio
is output (The WMA indicator blinks).
• Windows Media™, and the Windows ® logo are
trademarks, or registered trademarks of Microsoft
Corporation in the United States and/or other
countries.
● To disable DRM (Digital Rights
Management)
1. When using Windows Media Player 8, click
on TOOLS ➜ OPTIONS ➜ COPY MUSIC
tab, then under COPY SETTINGS, unclick
the check box for PROTECT CONTENT.
Then, reconstruct files.
2. When using Windows Media Player 9, click
on TOOL ➜ OPTIONS ➜ MUSIC RECORD
tab, then under Recording settings, unclick
the Check box for RECORD PROTECTED
MUSIC. Then, reconstruct files.
Personally constructed WMA files are used
at your own responsibility.
20
DXZ378RMP/DXZ379RMP
Precautions when creating MP3/
WMA disc
● Usable sampling rates and bit rates
1. MP3: Sampling rate 8 kHz-48 kHz,
Bit rate 8 kbps-320 kbps / VBR
2. WMA: Bit rate 48 kbps-192 kbps
● File extensions
1. Always add a file extension “.MP3” or
“.WMA” to MP3 or WMA file by using single
byte letters. If you add a file extension other
than specified or forget to add the file
extension, the file cannot be played.
2. Files without MP3/WMA data will not play.
The indication “– –:– –” appears in the play
time display if you attempt to play files
without MP3/WMA data.
● Logical format (File system)
1. When writing MP3/WMA file on a CD-R disc
or CD-RW disc, please select “ISO9660 level
1, 2 or JOLIET or Romeo” as the writing
software format. Normal play may not be
possible if the disc is recorded on another
format.
2. The folder name and file name can be
displayed as the title during MP3/WMA play
but the title must be within 64 single byte
alphabetical letters and numerals (including
an extension).
3. Do not affix a name to a file inside a folder
having the same name.
● Folder structure
1. A disc with a folder having more than 8
hierarchical levels will be impossible.
● Number of files or folders
1. Up to 255 files can be recognized per folder.
Up to 510 files can be played.
2. Tracks are played in the order that they were
recorded onto a disc. (Tracks might not
always be played in the order displayed on
the PC.)
3. Some noise may occur depending on the
type of encoder software used while
recording.
DXZ378RMP_EN.book 21 ページ 2006年11月27日 月曜日 午後2時22分
CD/MP3/WMA Operations
Listening to a disc already loaded
in the unit
When a single disc holds both normal CD type
tracks and MP3/WMA type tracks, use this
command to select which type of track to play.
Press the [SRC] button to select the CD/MP3/
WMA mode.
When the unit enters the CD/MP3/WMA mode,
play starts automatically.
If there is no disc loaded, the indication “NO
DISC” appears in the title display.
The mode changes each time the [SRC] button
is pressed. (Modes are not displayed for
equipment that is not connected.)
Radio ➜ (DAB) ➜ CD/MP3/WMA ➜ (iPod BB)
➜ (CD changer) ➜ (DVD changer) ➜ (TV) ➜
AUX ➜ Radio ...
∗ Default setting is “MULTI-SESS CD”.
• When only one type of track (either music CD
or MP3/WMA) is recorded on a disc, selecting
either type will allow playback of the disc.
• When playing CCCD (copy-control CDs), set
to CD type.
1. Press and hold the [BND] button for 1
second or longer.
Each time the button is held pressed in this
way, the playback type alternates between
CD type and MP3/WMA type.
• MULTI-SESS CD
When playing music CD only.
• MULTI-SESS MP3
When playing music MP3/WMA only.
2. When setting is completed, remove the disc
and reinsert it.
Backup Eject function
Just pressing the [Q] button, ejects the disc
even if the power to the unit was not turned on.
1. Press the [OPEN] button to open the FLIP
DOWN PANEL.
Note:
• If the FLIP DOWN PANEL will not open far
enough, open it gently with your hand.
2. Press the [Q] button. Remove the disc after
it is ejected.
3. Close the FLIP DOWN PANEL.
Notes:
• Always close the FLIP DOWN PANEL once you
take out the disc.
• If you force a CD into before auto reloading, this
can damage the CD.
• If a CD (12 cm) is left in the ejected position for 15
seconds, the CD is automatically reloaded (Auto
reload).
Loading a CD
1. Press the [OPEN] button to access the CD
SLOT behind the FLIP DOWN PANEL.
2. Insert a CD into the center of the CD SLOT
with the labeled side facing up. The CD plays
automatically after loading.
Notes:
• Never insert foreign objects into the CD SLOT.
• If the CD is not inserted easily, there may be
another CD in the mechanism or the unit may
require service.
• Discs not bearing the
or
mark and
CD-ROMs cannot be played by this unit.
• Some CDs recorded in CD-R/CD-RW mode may
not be usable.
3. Close the FLIP DOWN PANEL.
CAUTION
Be careful not to catch your hand or fingers
while closing the FLIP DOWN PANEL.
Notes:
• If the FLIP DOWN PANEL does not open fully,
gently open with your hand.
• After loading a CD, always close the FLIP DOWN
PANEL.
DXZ378RMP/DXZ379RMP
21
English
Set the type of file to be played
(multi-session function)
DXZ378RMP_EN.book 22 ページ 2006年11月27日 月曜日 午後2時22分
CD/MP3/WMA Operations
English
Pausing play
Fast-forward/fast-backward
1. Press the [
] button to pause play.
“PAUSE” appears in the display.
2. To resume CD play, press the [
] button
again.
● Fast-forward
1. Press and hold the [v] button for 1 second
or longer.
● Fast-backward
1. Press and hold the [x] button for 1 second
or longer.
Displaying CD titles
This unit can display title data for CD-text/MP3/
WMA disc and user titles input with this unit.
1. Each time you press the [DISP] button to
change the title display.
● CD-TEXT disc
User ➜ Track ➜ Disc (Artist) ➜ User ...
● MP3/WMA disc
Track ➜ Folder ➜ Title (Album) ➜ Artist ➜
Track ...
Notes:
• If the CD playing is not a CD-text CD or no user
title has been input, “NO TITLE” appears in the
display.
• If MP3/WMA disc is not input TAG, “NO TAG”
appears in the display.
• For MP3, supports ID3 Tags V2.3 / 2.2 / 1.1 / 1.0.
• Tag displays give priority to V2.3 / 2.2.
• In the case of album Tags for WMA, the
information written into the extension header is
displayed.
• Only ASCII characters can be displayed in Tags.
Selecting a track
● Track-up
1. Press the [v] button to move ahead to the
beginning of the next track.
2. Each time you press the [v] button, the
track advances ahead to the beginning of the
next track.
● Track-down
1. Press the [x] button to move back to the
beginning of the current track.
2. Press the [x] button twice to move back to
the beginning of the previous track.
22
DXZ378RMP/DXZ379RMP
∗ For MP3/WMA discs, it takes some time until the
start of searching and between tracks. In addition,
the playing time may have a margin of error.
Folder Select
This function allows you to select a folder
containing MP3/WMA files and start playing
from the first track in the folder.
1. Press the [z] or [w] button.
Press the [w] button to move the next
folder. Press the [z] button to move the
previous folder.
2. To select a track, press the [x] or [v]
button.
Top function
The top function resets the CD player to the first
track of the disc. Press the [BND] button to play
the first track (track No. 1) on the disc.
∗ In case of MP3/WMA, the first track of a folder
being played will be returned.
DXZ378RMP_EN.book 23 ページ 2006年11月27日 月曜日 午後2時22分
CD/MP3/WMA Operations
● Folder repeat play
● Scan play
This function allows you to play a track currently
being played in the MP3/WMA folder
repeatedly.
1. Press and hold the [RPT] button for 1 second
or longer to perform folder repeat play.
“ALL RPT” appears in the display.
This function allows you to locate and play the
first 10 seconds of all the tracks recorded on a
disc.
1. Press the [SCN] button to perform scan play.
“TRACK SCN” appears in the display.
∗ Scan play starts from the next track after the
track currently being played.
● Folder scan play
This function allows you to locate and play the
first 10 seconds of the first track of all the folders
on an MP3/WMA disc.
1. Press and hold the [SCN] button for 1
second or longer to perform folder scan play.
“ALL SCN” appears in the display.
∗ Folder scan play starts from the next folder
after the folder currently being played.
● Repeat play
This function allows you to play the current track
repeatedly.
1. Press the [RPT] button to perform repeat
play.
“TRACK RPT” appears in the display.
● Random play
This function allows you to play all tracks
recorded on a disc in a random order.
1. Press the [RDM] button to perform random
play.
“TRACK RDM” appears in the display.
● Folder random play
This function allows you to play all the tracks of
all the folders recorded on an MP3/WMA disc in
a random order.
1. Press and hold the [RDM] button for 1
second or longer to perform folder random
play.
“ALL RDM” appears in the display.
● To cancel play
1. Press the operating button previously
selected.
DXZ378RMP/DXZ379RMP
23
English
Other various play functions
DXZ378RMP_EN.book 24 ページ 2006年11月27日 月曜日 午後2時22分
Operations Common to Each Mode
English
To change adjustment setting
1. Press and hold the [DISP] button for 1
second or longer to switch to the
adjustment selection display.
2. Press the [x] or [v] button to select
the “item name”.
“CONTRAST” ↔ “ILLUMI” ↔ “SCRN
SVR” ↔ “MESSAGE INPUT” ↔
“SCROLL” ↔ “DIMMER” ↔ “BLINK LED”
↔ “A-CANCEL” ↔ “TEL-SEL” ↔ “TELSP” ↔ “TEL-SW” ↔ “SYSTEM CHECK”
3. Press the [w] or [z] button to select the
“desired setting value”.
∗ In the case of display blinking “ENT”, you
can press the [
] button to adjust the
setting value.
∗ After completing settings, press the [DISP]
button to return to the previous mode.
● Setting the contrast
You can adjust the display contrast to match the
angle of installation of the unit.
∗ The factory default setting is “10”. (Adjustment
level: 1 to 16)
2-1. Select “CONTRAST”.
3-1. Press the [w] or [z] button to adjust the
contrast.
● Setting the button and the display
illumination (DXZ379RMP only)
∗ The factory default setting is “AMBER”.
2-1. Select “ILLUMI”.
3-1. Press the [w] or [z] button to select
“GREEN” or “AMBER”.
● Turning the screen saver function on
or off
This unit is provided with the screen saver
function which allows you to show various kinds
of patterns and characters in the operation
status indication area of the display in a random
order. You can turn on or off this function. If the
button operation is performed with the screen
saver function on, the operation display
corresponding to the button operation is shown
for about 30 seconds and the display returns to
the screen saver display.
∗ The factory default setting is “ON”.
2-1. Select “SCRN SVR”.
3-1. Press the [w] or [z] button to select the
setting.
24
DXZ378RMP/DXZ379RMP
Each time you press the [w] or [z]
button, the setting changes in the following
order:
“MESSAGE” ↔ “ON” ↔ “OFF”
● Entering message information
Message up to 30 characters long can be stored
in memory and displayed as a type of screen
saver setting.
∗ The factory default setting is “WELCOME TO
CLARION”.
2-1. Select “MESSAGE INPUT”.
3-1. Press the [
] button.
3-2. Press and hold the [BND] button for 1
second or longer to clear the old message.
3-3. Press the [x] or [v] button to move the
cursor.
3-4. Press the [BND] button to select a
character type. Each time you press the
[BND] button, the character type changes
in the following order:
Capital letters ➜ Numbers ➜ Symbols ➜
Umlaut ➜ Capital letters…
3-5. Press the [w] or [z] button to select the
desired character.
3-6. Repeat step 3-3 to 3-5 to enter up to 30
characters for message.
3-7. Press and hold the [
] button for 2
seconds or longer to store the message in
memory.
∗ Press and hold the [BND] button for 1
second or longer to cancel the input
message. Then press and hold the [
]
button for 2 seconds or longer to store the
message and the message return to default
setting.
● Setting the method for title scroll
Set how to scroll in CD-TEXT, MP3/WMA title.
∗ The factory default setting is “ON”.
2-1. Select “SCROLL”.
3-1. Press the [w] or [z] button to select “ON”
or “OFF”.
• ON:
To scroll automatically.
• OFF:
To scroll just 1 time.
DXZ378RMP_EN.book 25 ページ 2006年11月27日 月曜日 午後2時22分
Operations Common to Each Mode
You can set the dimmer control “ON” or “OFF”.
∗ The factory default setting is “ON”.
2-1. Select “DIMMER”.
3-1. Press the [w] or [z] button to select “ON”
or “OFF”.
● Setting the car speaker output for the
cellular phone
∗ The factory default setting is “RIGHT”.
∗ To output the telephone calls, set the cellular
phone interrupt to “ON”.
2-1. Select “BLINK LED”.
3-1. Press the [w] or [z] button to select “ON”
or “OFF”.
2-1. Select “TEL-SP”.
3-1. Press the [w] or [z] button to select
“RIGHT” or “LEFT”.
• RIGHT:
Telephone calls can be heard on the front
right speaker connected to this unit.
• LEFT:
Telephone calls can be heard on the front
left speaker connected to this unit.
● Setting the external amplifier
● Cellular phone interrupt setting
● Anti-theft indicator
The red Anti-theft indicator is a function for
preventing theft. When the DCP is removed
from the unit, this indicator blinks.
∗ The factory default setting is “OFF”.
∗ The factory default setting is “OFF”.
2-1. Select “A-CANCEL”.
3-1. Press the [w] or [z] button to select “ON”
or “OFF”.
• ON:
Use with connected AMP.
• OFF:
Use with inside AMP.
● Set the cellular phone connection
mode (AUX/CeNET)
You can listen to your telephone calls from the
speakers connected to this unit.
∗ The factory default setting is “AUX”.
2-1. Select “TEL-SEL”.
3-1. Press the [w] or [z] button to select
“AUX” or “CENET”.
• AUX:
AUX input jack in front panel is for cellular
phone audio input, when the AUX input
jack is used to connect an AUX
BLUETOOTH BB (BLT373) (sold
separately).
• CENET:
CENET input cable is for cellular phone
audio input, when a CeNET cable is used
to connect a cellular phone (BLT433 or
TEL-002) (sold separately).
If you connect this unit and your cellular phone
with a separately sold cable, you can listen to
your telephone calls on your car speakers.
∗ The factory default setting is “OFF”.
2-1. Select “TEL-SW”.
3-1. Press the [w] or [z] button to select the
setting. Each time you press the [w] or
[z] button, the setting changes in the
following order:
“ON” ↔ “OFF” ↔ “MUTE”
• ON:
You can listen to your telephone calls from
the speakers connected to this unit.
∗ When listening to your calls on your car
speakers, you can adjust the volume by
turning the [ROTARY] knob.
• OFF:
This unit continues normal operation even
when the cellular phone is used.
• MUTE:
The sound from this unit is muted during
telephone calls.
Note:
• If connecting a hands-free kit, please ensure the
setting is ON to receive the telephone audio
through the system.
DXZ378RMP/DXZ379RMP
25
English
● Setting the dimmer control
DXZ378RMP_EN.book 26 ページ 2006年11月27日 月曜日 午後2時22分
Operations Common to Each Mode
English
● Performing a system check
Clearing titles
This function allows you to perform a system
check from the adjust mode when required.
2-1. Select “SYSTEM CHECK”.
3-1. Press and hold the [
] button for 1
second or longer.
“SYSTEM CHECK” appears in the display,
then the unit returns to the previous
operation mode.
1. Select and play a CD in the CD changer or
tune in to a TV station for which you want to
clear the title.
2. Press and hold the [DISP] button for 1
second or longer.
3. Press the [x] or [v] button to select
“TITLE INPUT”.
4. Press the [
] button.
The display switches to the title input display.
5. Press and hold the [BND] button for 1
second or longer.
All characters in the title disappear.
6. Press and hold the [
] button for 2 seconds
or longer to store the setting.
Entering titles
Titles up to 10 characters long can be stored in
memory and displayed for CD, CD changer and
TV stations. The number of titles that can be
entered for each mode are as follows.
Mode
Number of titles
CD mode
50 titles
AUX function
TV mode
20 titles
This system has an external input jack on the
front panel so you can listen to sounds and
music from external devices connected to this
unit.
CD changer mode
Number of titles
DCZ628 connected
100 titles
1. Press the [SRC] button to select the mode
you want to enter a title (CD, CD changer or
TV).
2. Select and play a CD in the CD changer or
tune in to a TV station for which you want to
enter the title.
3. Press and hold the [DISP] button for 1
second or longer.
4. Press the [x] or [v] button to select
“TITLE INPUT”.
5. Press the [
] button.
The display switches to the title input display.
6. Press the [x] or [v] button to move the
cursor.
7. Press the [BND] button to select a character
type. Each time you press the [BND] button,
the character type changes in the following
order:
Capital letters ➜ Numbers ➜ Symbols ➜
Umlaut ➜ Capital letters…
8. Press the [w] or [z] button to select the
desired character.
9. Repeat steps 6 to 8 to enter up to 10
characters for the title.
10.Press and hold the [
] button for 2 seconds
or longer to store the title into memory.
26
DXZ378RMP/DXZ379RMP
● Selecting AUX IN sensitivity
Make the following settings to select the
sensitivity when sounds from external devices
connected to this unit are difficult to hear even
after adjusting the volume.
∗ The factory default setting is “MID”.
1. Press and hold the [DISP] button for 1
second or longer.
2. Select “AUX SENS”.
3. Press the [w] or [z] button to select
“LOW”, “MID” or “HIGH”.
DXZ378RMP_EN.book 27 ページ 2006年11月27日 月曜日 午後2時22分
English
6. OPERATIONS OF ACCESSORIES
iPod BB Operations
● iPod BB
This section describes operations when
connected to a CeNET iPod Interface (EA1276E). (Hereinafter, “iPod Interface (EA1276E)” is abbreviated as iPod BB.)
Note:
• See the iPod BB Owner’s Manual for details
regarding iPod BB connections and operation
conditions.
Connecting an iPod
When an iPod is connected to the iPod BB
interface, the “Repeat” set on the iPod will
become “All repeat play” instead. Likewise,
“Shuffle” set on the iPod will become as follows:
• “Shuffle (Albums)” play ➜ Random play
• “Shuffle (Songs)” play ➜ All random play
The iPod BB interface has two modes, the “Play
mode” and the “iPod menu mode” for selecting
tracks. Switch between these modes by
pressing the [BND] button.
Other various play functions
(in Play mode)
Notes:
• These functions are not supported when in the
iPod menu mode.
• The Random function set on the iPod or when
connected to iPod BB, remains the same after
attachment/ detachment of the iPod.
• The iPod BB can be set simultaneously for All
repeat and All random. The display will appear as
follows:
(Function)
All random
+
All repeat
Random
+
All repeat
(Display)
● Repeat play
Play back one track repeatedly.
1. Press the [RPT] button.
Select iPod BB Interface
● All repeat play
1. Press the [SRC] button.
Playback will begin from the last file that was
played on the iPod alone or through the iPod
BB.
Repeatedly play all tracks within a selected
category.
1. Press and hold the [RPT] button for 1 second
or longer.
Note:
• The following operations in Play mode operate
the same as in CD mode:
∗Track selection: [x], [v]
∗Fast-forward/fast-backward: [x], [v]
∗Pause: [
]
See “CD/MP3/WMA Operations” (page 20-23)
for details.
● Random play
Play all albums within a selected category, in
random order. (Corresponds to “Shuffle
(Albums)” command on iPod.)
1. Press the [RDM] button.
● All random play
Play all tracks within a selected category, in
random order. (Corresponds to “Shuffle
(Songs)” command on iPod.)
1. Press and hold the [RDM] button for 1
second or longer.
● To cancel play
1. Press the same play button once again.
Note:
• When the all repeat play mode is canceled,
playback will stop when all tracks have been
played.
DXZ378RMP/DXZ379RMP
27
DXZ378RMP_EN.book 28 ページ 2006年11月27日 月曜日 午後2時22分
iPod BB Operations
English
Selecting category from the iPod
menu
Selecting category using preset
memory
1. Press the [BND] button to select the iPod
menu mode.
The iPod menu categories will be displayed.
1. Press the [BND] button to select the iPod
menu mode.
The category can be set as follows in the
[DIRECT] (1-6) buttons.
[1] : PLAY LISTS
[2] : ARTISTS
[3] : ALBUMS
[4] : SONGS
[5] : GENRES
[6] : COMPOSERS
2. Press the desired [DIRECT] (1-6) button to
select the category.
Note:
• Repeat and Random mode operations are not
supported when in the iPod menu mode.
2. Press the [w] or [z] button to switch
between categories.
The iPod menu categories alternate in the
following order:
“PLAY LISTS” ↔ “COMPOSERS” ↔
“GENRES” ↔ “SONGS” ↔ “ALBUMS” ↔
“ARTISTS” ↔ ...
Note:
The iPod menu mode can be canceled by
performing one of the following operations:
• Press the [BND] button.
• When the category select screen is displayed,
press the [v] button.
3. Press the [v] button to select the category.
4. When the track name display is showing,
press the [v] button.
Playback will begin from the first track in the
selected category, and the iPod menu mode
will be canceled.
∗ Subfolders may be displayed, depending on
the category.
In this case, use the [w] and [z] buttons to
switch between subfolders, then use the [v]
button to select the desired subfolder.
∗ When the track name display is showing,
pressing the [x] button will return to the
currently playing folder name display.
5. Use the [w] and [z] buttons to select a
track within a category.
28
DXZ378RMP/DXZ379RMP
∗ Subfolders may be displayed, depending on
the category.
In this case, use the [w] and [z] buttons to
switch between subfolders, then use the [v]
button to select the desired subfolder.
3. When the track name display is showing,
press the [v] button.
Playback will begin from the first track in the
selected category, and the iPod menu mode
will be canceled.
∗ Use the [w] and [z] buttons to select a track
within a category.
About title display
This unit supports the display of title information
transmitted from a connected iPod.
• Character code information is UTF-8;
displayable characters include English
alphanumerics, some symbols, and some
umlaut characters.
• Unsupported characters will be replaced by
asterisks (*).
DXZ378RMP_EN.book 29 ページ 2006年11月27日 月曜日 午後2時22分
CD Changer Operations
Set “SCROLL” to “ON” or “OFF”.
(The factory default setting is “ON”. Refer to the
subsection “Setting the method for title scroll”
in section “Operations Common to Each
Mode”.)
● When set to “ON”
The title is automatically kept scrolling.
● When set to “OFF”
To scroll just 1 time.
CD changer functions
Selecting a CD
When an optional CD changer is connected
through the CeNET cable, this unit controls all
CD changer functions. This unit can control a
total of 2 changers.
Press the [SRC] button and select the CD
changer mode to start play. If 2 CD changers
are connected, press the [SRC] button to select
the CD changer for play.
1. Press the [w] or [z] button to select the
desired disc.
∗ If “NO MAG” appears in the display, insert the
magazine into the CD changer. “D-CHECK”
appears in the display while the player loads
(checks) the magazine.
∗ If “NO DISC” appears in the display, eject the
magazine and insert discs into each slot. Then,
reinsert the magazine back into the CD changer.
Note:
• Some CDs recorded in CD-R/CD-RW mode may
not be usable.
CAUTION
CD-ROM discs cannot be played from every
CD changer, it’s depended on the model.
Displaying CD titles
This unit can display title data for CD-text CDs
and user titles input with this unit.
∗ Title data for CD-text CDs can be displayed with
this unit only when it is connected to DCZ628.
1. Press the [DISP] button to change the title
display.
Notes:
• If the CD playing is not a CD-text CD or no user
title has been input, “NO TITLE” appears in the
display.
• If a CD-text CD is not input its disc title or a track
title, “NO TITLE” appears in the display.
∗ If a CD is not loaded in a slot of magazine,
pressing the [w] or [z] button can not work.
Other various play functions
● Disc scan play
Disc scan play locates and plays the first 10
seconds of the first track on each disc in the
currently selected CD changer. This function
continues automatically until it is cancelled.
∗ Disc scan play is useful when you want to select a
desired CD.
1. Press and hold the [SCN] button for 1
second or longer. “ALL SCN” appears in the
display and disc scan play starts.
● Disc repeat play
After all the tracks on the current disc have been
played, disc repeat play automatically replays
the current disc over from the first track. This
function continues automatically until it is
cancelled.
1. Press and hold the [RPT] button for 1 second
or longer. “ALL RPT” appears in the display
and disc repeat play starts.
● Disc random play
The disc random play selects and plays
individual tracks or discs automatically in no
particular order. This function continues
automatically until it is cancelled.
1. Press and hold the [RDM] button for 1
second or longer. “ALL RDM” appears in the
display and disc random play starts.
● To cancel play
1. Press the operating button previously
selected.
DXZ378RMP/DXZ379RMP
29
English
Procedure to scroll a title
Note:
• The following operations are the same as for CD
mode:
∗Pause
∗Track selection
∗Fast-forward/fast-backward
∗Scan play
∗Repeat play
∗Random play
See “CD/MP3/WMA Operations” (page 20-23)
for details.
DXZ378RMP_EN.book 30 ページ 2006年11月27日 月曜日 午後2時22分
DVD Changer Operations
English
By connecting an optional DVD changer that
supports CeNET wiring, this unit can be used to
control the DVD changer. To view DVDs, an
optional monitor is required.
• The DVD control and display functions
supported by this unit are limited; the unit
does not support all the functions possible on
a DVD changer.
For fullest functionality, use the remote
control unit provided with your DVD changer
to control its operations. For details, consult
the Owner’s Manual provided with your DVD
changer.
30
DXZ378RMP/DXZ379RMP
Note:
• The following operations are the same as for CD
and CD Changer modes:
∗Pause
∗Track selection
∗Fast-forward/fast-backward
∗Scan play
∗Repeat play
∗Random play
See “CD/MP3/WMA Operations” (page 20-23)
and “CD Changer Operations” (page 29) for
details.
DXZ378RMP_EN.book 31 ページ 2006年11月27日 月曜日 午後2時22分
TV Operations
TV tuner functions
When an optional TV tuner is connected
through the CeNET cable, this unit controls all
TV tuner functions. To watch TV requires a TV
tuner and monitor.
Watching a TV
1. Press the [SRC] button and select the TV
mode.
2. Press the [BND] button to select the desired
TV band (TV1 or TV2). Each time the button
is pressed, the input selection toggles
between TV1 and TV2.
3. Press the [x] or [v] button to tune in the
desired TV station.
Watching a video
The TV tuner has a VTR input terminal to which
1 external device can be connected. Connect a
12 V video cassette player (VCP) or video
cassette recorder (VCR) to the TV tuner input
terminal.
Setting the TV area
When you select the TV area (TV reception
area), the TV tuner area setting changes.
1. Press and hold the [DISP] button for 1
second or longer to switch to the adjustment
selection display.
2. Press the [x] or [v] button to select “TV
AREA”.
3. Press the [w] or [z] button to select the
reception area.
4. Press the [DISP] button to return to the
previous mode.
Setting the TV diver
You can change the reception setting for the TV
antenna connected to the TV tuner.
∗ The factory default setting is “ON”.
1. Press and hold the [DISP] button for 1
second or longer to switch to the adjustment
selection display.
2. Press the [x] or [v] button to select “TV
DIVER”.
3. Press the [w] or [z] button to set to “ON” or
“OFF”.
• ON:
Sets the diver setting to ON.
• OFF:
Sets the diver setting to OFF.
4. Press the [DISP] button to return to the
previous mode.
∗ The factory default setting is “TV”.
1. Press and hold the [DISP] button for 1
second or longer to switch to the adjustment
selection display.
2. Press the [x] or [v] button to select “TV/
VTR”.
3. Press and hold the [
] button for 1 second
or longer to set to “VTR”.
4. To return to the TV broadcast, press and
hold the [DISP] button for 1 second or longer
to switch to the adjustment selection display.
5. Press the [x] or [v] button to select “TV/
VTR”.
6. Press and hold the [
] button for 1 second
or longer to set to “TV”.
DXZ378RMP/DXZ379RMP
31
English
Note:
• The following operations are performed the same
as for radio mode:
∗Channel selection
∗Storing channels in memory
∗Calling channels from memory
∗Auto store
∗Preset scan
See “Radio Operations” (page 14-15) for details.
DXZ378RMP_EN.book 32 ページ 2006年11月27日 月曜日 午後2時22分
Digital Radio / DAB Operations
English
DAB control function
When a CeNET cable is used to connect a DAB
(DAH923) (sold separately), all functions can be
operated.
Listening to the DAB station
1. Press the [SRC] button to select the DAB
mode.
2. When the unit receives a DAB station, the
display changes in the following order:
Frequency channel ➜ service label
Switching displays
1. Press the [DISP] button to select the desired
display.
Notes:
• The number of programmes and broadcasting
times depend on the DAB stations.
• When the strength of DAB signals is weak, audio
output is muted.
Seek tuning
1. Press the [SRC] button to select the DAB
mode.
2. Press and hold the [x] or [v] button for
1 second or longer.
“DAB” lights up in the display when the main
unit receives a DAB station.
∗ The main unit stops the seek tuning when it
cannot find a DAB station. The display returns
to the previous mode.
Manual tuning
1. Press the [SRC] button to select the DAB
mode.
2. Press and hold the [BND] button for 1
second or longer. “MANU” lights up in the
display.
3. Press the [x] or [v] button to select a
station.
∗ If no operation is performed for more than 7
seconds, manual tuning is cancelled and the
display returns to the previous mode.
Switching programmes
1. Press the [SRC] button to receive a DAB
station.
2. Press the [x] or [v] button to switch
programmes in the DAB station.
Note:
• The programme name may be the same
depending on DAB programmes.
Programme scan
This function scans through each receivable
programme in a DAB station being received for
10 seconds sequentially. This is useful when
you want to search for a desired programme.
1. Press the [SRC] button to receive a DAB
station.
2. Perform the following operation depending
on the connected model.
Press the [
] button. “SRVC SCN” appears
in the display and the unit starts scanning
each programme for 10 seconds
sequentially. Each time the main unit scans,
the programme name is shown in the
display.
3. To stop programme scan when a desired
programme is tuned in.
Press the [
] button.
Manual memory
The main unit has a manual memory function
for DAB programmes. Up to 18 programmes (6
programmes each) can be preset in the preset
buttons.
[M1], [M2] and [M3]
1. Press the [SRC] button to select the DAB
mode.
2. Press and hold the [BND] button for 1
second or longer to select any one shown
above.
3. Press the [x] or [v] button to select a
desired programme.
4. Press and hold one of the [DIRECT] buttons
(1 to 6) for 2 seconds or longer to store the
programme.
Note:
• The interrupt programme (PTY or INFO) cannot
be written into a manual memory.
32
DXZ378RMP/DXZ379RMP
DXZ378RMP_EN.book 33 ページ 2006年11月27日 月曜日 午後2時22分
Digital Radio / DAB Operations
1. Press the [SRC] button to select the DAB
mode.
2. Press the [BND] button. Each time you press
the [BND] button, the display changes in the
following order:
[M1] ➜ [M2] ➜ [M3] ➜ [M1]...
3. Press one of the [DIRECT] buttons or the
[w] / [z] button to recall a preset
programme.
Note:
• Press and hold the [DIRECT] button for 2
seconds or longer to store the programme
currently being received. (Manual memory)
INFO (Announcement)
In the INFO standby mode, when the selected
announcement programme starts, the main unit
switches to the selected announcement
programme automatically.
● Setting the INFO standby mode
If you press and hold the [TA] button for 1
second or longer, “INFO” lights in the display
and the main unit is set into the INFO standby
mode until the selected announcement is
broadcast. When the selected announcement
broadcast starts, the announcement item
appears in the display. If you press and hold the
[TA] button for 1 second or longer while the
selected announcement broadcast is being
received, the selected announcement broadcast
reception is cancelled and the main unit goes
into the INFO standby mode.
● Cancelling INFO standby mode
To cancel the INFO standby mode, press and
hold the [TA] button for 1 second or longer.
● Information select
This is a function for selecting INFORMATION
ON or OFF in the Information interrupt mode.
You can set ON up to 6 information items.
You can select any of the 6 items below:
INFORMATION item
ENGLISHe
ContentsA
Travelc
Transport flash
Warninga
Warning / Service
Newsc
News flash
Weathera
Area weather flash
Eventa
Event announcement
Speciala
Special event
1. Perform the following operation depending
on the connected model.
Press and hold the [DISP] button for 1
second or longer to switch to the RDS
adjustment selection display.
2. Press the [x] or [v] button to select
“INFO SELECT”, then press the [
] button
to enter “INFO SELECT” mode.
3. Press the [x] or [v] button to select an
information item. You can select any of 6
items:
Travelc➜ Warninga➜ Newsc➜ Weathera
➜ Eventa➜ Speciala➜ Travelc➜ ...
4. Press the [w] or [z] button to set the
information item for ON or OFF.
5. Press the [
] button to return to the
previous mode.
6. Press the [DISP] button to return to the
previous display.
DXZ378RMP/DXZ379RMP
33
English
Recalling a preset programme
DXZ378RMP_EN.book 34 ページ 2006年11月27日 月曜日 午後2時22分
Digital Radio / DAB Operations
English
● AF function between RDS and DAB
When the same programme is broadcasted by
both RDS and DAB, and this function is ON, the
unit switches to receive the broadcast with the
better reception automatically.
∗ This function only operates when the DAH923
DAB unit, sold separately, is connected.
∗ The factory default setting is “ON”.
1. Press and hold the [DISP] button for 1
second or longer to switch to the RDS
adjustment selection display.
2. Press the [x] or [v] button to select
“LINK ACT”.
3. Press the [w] or [z] button to select “ON”
or “OFF”.
• ON:
AF switching between DAB and RDS
enabled.
• OFF:
AF switching between DAB and RDS
disabled.
4. Press the [DISP] button to return to the
previous mode.
34
DXZ378RMP/DXZ379RMP
For the following items, see “RDS
Operations” on page 16.
● AF function
∗ If the reception of the current broadcast station
deteriorates, “SEARCHING” appears in the
display and the radio searches for the same
programme on another frequency.
● TA (Traffic Announcement)
● PTY
● Emergency broadcast
● Switching the PTY and INFO display
language
● Volume setting of TA, INFO emergency
broadcast (ALARM) and PTY
DXZ378RMP_EN.book 35 ページ 2006年11月27日 月曜日 午後2時22分
General
Problem
Cause
Measure
Power does not
turn on.
(No sound is
produced.)
Fuse is blown.
Replace with a fuse of the same amperage. If the fuse
blows again, consult your store of purchase.
Incorrect wiring.
Consult your store of purchase.
No sound output
when operating
the unit with
amplifiers or
power antenna
attached.
1. Turn the unit off.
Power antenna lead is
shorted to ground or
2. Remove all wires attached to the power antenna
excessive current is required
lead. Check each wire for a possible short to
for remote-on the amplifiers
ground using an ohm meter.
or power antenna.
3. Turn the unit back on.
4. Reconnect each amplifier remote wire to the power
antenna lead one by one. If the amplifiers turn off
before all wires are attached, use an external relay
to provide remote-on voltage (excessive current
required).
Nothing happens
when buttons are
pressed.
The microprocessor has
malfunctioned due to noise,
etc.
Display is not
accurate.
Turn off the power, then press
the [OPEN] button and remove
the DCP.
Press the reset button for about
2 seconds with a thin rod.
Reset button
CD/MP3/WMA
DCP or main unit connectors Wipe the dirt off with a soft cloth moistened with
are dirty.
cleaning alcohol.
No sound heard
The speaker protection circuit 1. Turn down sound volume. Function can also be
is operating.
restored by turning the power off and on again.
(Speaker volume is reduced automatically when
the speaker protection circuit operates).
2. If the sound is muted again, consult our service
department.
No sound heard
MP3/WMA files are absent in Write MP3/WMA files onto the disc properly.
a disc.
Files are not recognized as
an MP3/WMA file.
Use MP3/WMA files encoded properly.
File system is not correct.
Use ISO9660 level 1, 2 or JOLIET or Romeo file
system.
Sound skips or is
noisy.
Compact disc is dirty.
Clean the compact disc with a soft cloth.
Compact disc is heavily
scratched or warped.
Replace with a compact disc with no scratches.
Sound is cut or
skipped.
Noise is
generated or
noise is mixed
with sound.
MP3/WMA files are not
encoded properly.
Use MP3/WMA files encoded properly.
Sound is bad
directly after
power is turned
on.
Water droplets may form on Let dry for about 1 hour with the power on.
the internal lens when the car
is parked in a humid place.
Wrong filename
File system is not correct.
Use ISO9660 level 1, 2 or JOLIET or Romeo file
system.
DXZ378RMP/DXZ379RMP
35
English
7. IN CASE OF DIFFICULTY
DXZ378RMP_EN.book 36 ページ 2006年11月27日 月曜日 午後2時22分
If an error occurs, one of the following displays is displayed.
Take the measures described below to eliminate the problem.
DVD changer
CD changer
CD/MP3/WMA
Error Display
Cause
Measure
ERROR 2
A CD is caught inside the CD This is a failure of CD deck’s mechanism and consult
deck and is not ejected.
your store of purchase.
ERROR 3
A CD cannot be played due
to scratches, etc.
ERROR 6
A CD is loaded upside-down Eject the disc then reload it properly.
inside the CD deck and does
not play.
ERROR 2
A CD inside the CD changer
is not loaded.
This is a failure of CD changer’s mechanism and
consult your store of purchase.
ERROR 3
A CD inside the CD changer
cannot be played due to
scratches, etc.
Replace with a non-scratched, non-warped disc.
ERROR 6
A CD inside the CD changer
cannot be played because it
is loaded upside-down.
Eject the disc then reload it properly.
ERROR 2
A DISC inside the DVD
changer cannot be played.
This is a failure of DVD mechanism and consult your
store of purchase.
ERROR 3
A DISC cannot be played due Retry or replace with a non-scratched, non-warpedto scratches, etc.
disc.
ERROR 6
A DISC inside the DVD
changer cannot be played
because it is loaded upsidedown.
Eject the disc then reload it properly.
ERROR P
Parental level error
Set the correct Parental level.
ERROR R
Region code error
Eject the disc and replace correct region code disc.
ERROR 1
Disconnect the iPod, then connect it again.
A communication error
occurs between the iPod and
the iPod CeNET Controller.
NO IPOD
There is no iPod connected.
iPod
English
8. ERROR DISPLAYS
Replace with a non-scratched, non-warped-disc.
Please connect the iPod.
If an error display other than the ones described above appears, press the reset button. If the problem
persists, turn off the power and consult your store of purchase.
36
DXZ378RMP/DXZ379RMP
DXZ378RMP_EN.book 37 ページ 2006年11月27日 月曜日 午後2時22分
Radio section
General
Tuning System: PLL synthesizer tuner
Receiving Frequencies:
FM : 87.5 to 108 MHz (0.05 MHz steps)
MW : 531 to 1602 kHz (9 kHz steps)
LW : 153 to 279 kHz (3 kHz steps)
Output Power: 4 ✕ 25 W (DIN 45324, +B=14.4V)
Power Supply Voltage:
14.4 V DC (10.8 to 15.6 V allowable),
negative ground
Power Consumption: Less than 15 A
Speaker Impedance: 4 Ω (4 to 8 Ω allowable)
Weight:
Main unit: 1.25 kg
Remote control unit: 40 g (including battery)
Dimensions:
Main unit:
178 (W) ✕ 50 (H) ✕ 155 (D) mm
Remote control unit:
44 (W) ✕ 113 (H) ✕ 11 (D) mm
CD player section
System: Compact disc digital audio system
Frequency Response: 5 Hz to 20 kHz (± 1 dB)
Signal to Noise Ratio: 100 dB (1 kHz)
Dynamic Range: 95 dB (1 kHz)
Distortion: 0.01%
Note:
• Specifications and design are subject to change without notice for further improvement.
DXZ378RMP/DXZ379RMP
37
English
9. SPECIFICATIONS
DXZ378RMP_cover.fm 2 ページ 2007年1月18日 木曜日 午後5時47分
Français Deutsch
Main unit / Appareil principal / Hauptgerät / Apparecchio principale
Hoofdapparaat / Unidad principal / Huvudenhet / Unidade principal
[DIRECT] (1-3)
[SCN], [RPT], [RDM]
[SRC]
[
Thank you for purchasing this Clarion product.
∗ Please read this owner’s manual in its entirety before operating this equipment.
∗ After reading this manual, be sure to keep it in a handy place (e.g., glove compartment).
∗ Check the contents of the enclosed warranty card and keep it carefully with this manual.
∗ This manual includes the operating procedures of the iPod ® interface, CD/DVD changer, DAB
and TV tuner connected via the CeNET cable. The iPod interface, CD/DVD changer and TV
tuner have their own manuals, but no explanations for operating them are described.
“iPod” is a trademark of Apple Computer, Inc., registered in the U.S. and other countries.
Contents
]
[IR RECEIVER]
English
English
CONTROLS/LES COMMANDES/BEDIENELEMENTE/CONTROLLI
BEDIENINGSORGANEN/CONTROLES/KONTROLLER/CONTROLOS
[AUX]
1. PRECAUTIONS......................................................................................................................3
Flip Down Panel..................................................................................................................... 3
Handling Compact Discs........................................................................................................ 4
[OPEN]
+LJK7HFK+LJK7RXFK
CONTROLS ..................................................................................................................................ii
Italiano
2. NOMENCLATURE .................................................................................................................5
Names of the Buttons and Their Functions............................................................................ 5
Display Items ......................................................................................................................... 6
LCD Screen ........................................................................................................................... 6
ª ',&+,$5$=,21( ', &21)250,7$¶ ©
'0 DJRVWR QR
,R )DEEULFDQWH 0DQGDWDULR QHOO¶8(
&ODULRQ (XURSD *PE+
+HVVHQULQJ 0|UIHOGHQ:DOOGRUI
3. DCP ........................................................................................................................................7
[ROTARY]
[TA]
[BND]
[DIRECT] (4-6)
Nederlands Español Svenska Português
[
] (SOUND)
[DISP]
With the FLIP DOWN PANEL opened / Ouvrez le PANNEAU INCLINABLE
Bei geöffnetem KLAPPBILDSCHIRM / A CONSOLE APRIBILE aperta
Met het KANTELEND BEDIENINGSPANEEL geopend / Apertura del PANEL ABATIBLE
Med den NEDFÄLLBARA KONSOLEN öppen / Com a CONSOLA RECLINÁVEL aberta
[
] (EJECT)
[CD SLOT]
4. REMOTE CONTROL..............................................................................................................8
Functions of Remote Control Unit Buttons............................................................................. 8
Inserting the Battery............................................................................................................. 10
5. OPERATIONS ......................................................................................................................11
Basic Operations.................................................................................................................. 11
Radio Operations ................................................................................................................. 14
RDS Operations................................................................................................................... 16
CD/MP3/WMA Operations ................................................................................................... 20
Operations Common to Each Mode..................................................................................... 24
6. OPERATIONS OF ACCESSORIES.....................................................................................27
iPod BB Operations ............................................................................................................. 27
CD Changer Operations ...................................................................................................... 29
DVD Changer Operations .................................................................................................... 30
TV Operations...................................................................................................................... 31
Digital Radio / DAB Operations............................................................................................ 32
'LFKLDUR FKH LO SURGRWWR
$XWRUDGLR FRQ &'
';=503';=503
q FRQIRUPH DOOH GLVSRVL]LRQL FRQWHQXWH QHO VXGGHWWR
GHFUHWR UHODWLYDPHQWH DOOD SUHYHQ]LRQH H O¶HOHPLQD]LRQH
GHL GLVWXUEL UDGLRHOHWWULFL SURYRFDWL GDL ULFHYLWRUL GL
UDGLRGLIIXVLRQH VRQRUD H WHOHYLVLYD
,R )DEEULFDQWH 0DQGDWDULR QHOO¶8(
'DWD
1RYHPEUH &ODULRQ (XURSD *PE+
+HVVHQULQJ 0|UIHOGHQ:DOOGRUI
7. IN CASE OF DIFFICULTY ...................................................................................................35
8. ERROR DISPLAYS..............................................................................................................36
9. SPECIFICATIONS................................................................................................................37
)LUPD
3%/1R,519&
,'&)07):/+&
7(/
)$;
Note: Be sure to unfold this page and refer to the front diagrams as you read each chapter.
Remarque: Veuillez déplier cette page et vous référer aux schémas quand vous lisez chaque chapitre.
Hinweis: Bitte diese Seite ausfalten und beim Lesen der einzelnen Kapitel die Frontdiagramme beachten.
Nota: Assicurarsi di aprire questa pagina e fare riferimento a questi diagrammi quando si legge ciascun capitolo.
Opmerking: Vouw deze pagina uit en zie tevens de afbeeldingen van het voorpaneel tijdens het doorlezen van de volgende hoofdstukken.
Nota: Cuando lea los capítulos, despliegue esta página y consulte los diagramas.
Observera: Vik ut denna sida för att kunna se bilderna över bilstereons framsida, medan du läser de olika kapitlen.
Nota: Certifique-se de abrir esta página e consulte os diagramas frontais conforme realiza a leitura de cada capítulo.
ii
DXZ378RMP/DXZ379RMP
2
DXZ378RMP/DXZ379RMP
DXZ378RMP/DXZ379RMP
303
&ODULRQ (XURSD *PE+
VXSSOLHU
V QDPH
+HVVHQULQJ 0|UIHOGHQ:DOOGRUI *(50$ 1<
Owner’s manual
Mode d’emploi
Bedienungsanleitung
Istruzioni per l’uso
Gebruiksaanwijzing
Manual de instrucciones
Bruksanvisning
Manual de instruções
DGGUHVV
GHFODUH XQGHU RXU VROH UHVSRQVLELOLW\ WKDW WKH SURGXFW
&$5 5$',2 ZLWK &' 3/$<(5
02'(/';=503 ';=503
3URGXFW FRGH 3(
7<3( 02'(/ GLIIHUHQFH ,//80,1$7,21 &2/25 QDPH W\SH RU PRGHO SRVVLEO\ VRXUFHV DQG QXPEHUV RI LWHPV
WR ZKLFK WKLV GHFODUDWLRQ UHODWHV LV LQ FRQIRUPLW\ ZLWK WKH IROORZLQJ
VWDQGDUGV RU RWKHU QRUPDWLYH GRFXPHQWV
DXZ378RMP
DXZ379RMP
(1 $ (1 $ WLWOH DQGRU QXPEHU DQG GDWH RI LVVXH RI WKH VWDQGDUGV RU
RWKHU QRUPDWLYH GRFXPHQWV
LI DSSOLFDEOH IROORZLQJ WKH SURYLVLRQV RI ((& 'LUHFWLYH
$QG IROORZLQJ WKH SURYLVLRQV RI (& 'LUHFWLYH
DFFRUGLQJWRSDUDJUDSKRI $QQH[,
PHHWVWKHOLPLWVGHILQHGLQSDUDJUDSKDQGRI $QQH[,
VXSSOLHU
V FRPPHQW 0|UIHOGHQ:DOOGRUI *(50$1< 6XVXPX <DPDNDZD 129 3UHVLGHQW 3ODFH DQG GDWH RI LVVXH
QDPH DQG VLJQDWXUH RU HTXLYDOHQW
PDUNLQJ RI DXWKRUL]HG SHUVRQ
5HI1R 5&19 ')'4&$
7(/
)$;
2006/12
VAROITUS
Suojakoteloa si saa avata. Laite sisältää
laserdiodin, joka lähettää näkymätöntä
silmille vaarallista lasersäteilyä.
!CAUTION
USE OF CONTROLS OR
ADJUSTMENTS OR PERFORMANCE OF
PROCEDURES OTHER THAN THOSE
SPECIFIED IN THE OWNER’S MANUAL
MAY RESULT IN HAZARDOUS
RADIATION EXPOSURE.
ADVARSEL.
Denne mærking er anbragt udvendigt
på apparatet og indikerer, at apparatet
arbejder med laserstråler af klasse 1,
hvilket betyder, at der anvendes
laserstråler af svageste klasse, og at
man ikke på apparatets yderside kan
blive udsat for utilladelig kraftig
stråling.
APPARATET BØR KUN ÅBNES AF
FAGFOLK MED SÆRLIGT KENDSKAB
TIL APPARATER MED
LASERSTRÅLER!
Indvendigt i apparatet er anbragt den
her gengivne advarselsmækning, som
advarer imod at foretage sådanne
indgreb i apparatet, at man kan komme
til at udsaætte sig for laserstråling.
CD/MP3/WMA RECEIVER WITH CeNET CONTROL
AUTORADIO CD/MP3/WMA / AVEC COMMANDE CeNET
CD/MP3/WMA-RECEIVER MIT CeNET-STEUERUNG
SINTOLETTORE CD/MP3/WMA CON CONTROLLO CeNET
CD/MP3/WMA-RADIO-COMBINATIE MET CeNET-BEDIENING
RECEPTOR CD/MP3/WMA CON CONTROL CeNET
CD/MP3/WMA-RADIO MED CeNET-KONTROLL
RECEPTOR CD/MP3/WMA COM CONTROLO CeNET
Clarion Co., Ltd.
All Rights Reserved. Copyright © 2006: Clarion Co., Ltd.
Printed in China / Imprimé en Chine / Gedruckt in China / Stampato in Cina
Gedrukt in China / Impreso en China / Tryckt i Kina / Impresso na China
OBS!
Apparaten innehåller laserkomponenten
som avger laserstrålning överstigande
gränsen för laserklass 1.
Italiano
:H
CAUTIONS:
This appliance contains a laser system
and is classified as a “CLASS 1 LASER
PRODUCT”. To use this model properly,
read this Owner’s Manual carefully and
keep this manual for your future
reference. In case of any trouble with
this player, please contact your nearest
“AUTHORIZED service station”. To
prevent direct exposure to the laser
beam, do not try to open the enclosure.
Português Svenska Español Nederlands
&( '(&/$5$7,21 2) &21)250,7<
PE-2906E
280-8454-00
Deutsch Français
English
DXZ378RMP_cover.fm 1 ページ 2007年1月18日 木曜日 午後5時47分
Be sure to unfold and read the next page. / Veuillez déplier et vous référer à la page suivante.
Bitte ausbreiten und die nächste Seite lesen. / Assicurarsi di aprire e leggere la pagina successiva.
Volgende pagina uitvouwen en doorlezen a.u.b. / Cerciórese de desplegar y de leer la página siguiente.
Glöm inte att vika ut och läsa nästa sida. / Não deixe de abrir e ler a próxima página.
DXZ378RMP/DXZ379RMP
i