1
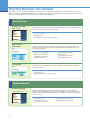
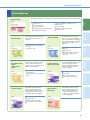
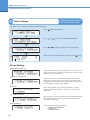
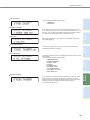
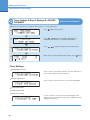
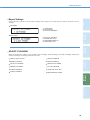
Easy
Operation
Guide
To Suit Your Needs
CONTENTS
Preface
How the Manuals Are Divided ..................... 1
What You Can Do with This Machine ......... 3
The Control Panel ...................................... 5
Facsimile Functions
Sending a Fax ............................................ 7
What You Can Do with This Machine (FA X
Basic Features) ................................. 9
What You Can Do with This Machine (FA X
Special Features) ............................ 11
Printing Functions
Printing from Your Computer (Printer
Driver) ............................................. 13
Remote UI Functions
Operating the Machine from a Computer
(Remote UI) ..................................... 17
Additional Functions ..................................... 19
Store this guide next to the machine for future reference.
Troubleshooting ............................................. 28
How the Manuals Are Divided
The manuals for the machine are divided as follows. Please read them as required to benefit fully from the machine.
Manuals included with optional equipment are included in the list below. Depending on the model you have purchased
and the system configuration, you may not have some of these manuals.
Basic Manuals
Easy Operation Guide
Basic Features
Easy
Operation
Guide
Read this manual to learn about the standard operations of the machine. Keep
it next to the machine for future reference.
The Control Panel
Making a Copy
The Additional Functions Mode for Copying
Basic Features
CONTENTS
Preface
How the Manuals Are Divided .................... 1
What You Can Do with This Machine ......... 3
The Control Panel ..................................... 5
Copying Functions
Making a Copy ............................................ 7
What You Can Do with This Machine
Reference Guide
(Copy Standard Features) ................ 9
What You Can Do with This Machine
(Copy Standard Features) .............. 11
What You Can Do with This Machine
User’s Guide
(Copy Optional Features) ............... 13
Additional Functions .................................... 15
Store this guide next to the machine for future reference.
Troubleshooting ............................................. 22
Read this manual to learn about what needs taking care of when using the
machine, basic operations, optional equipment, machine maintenance, and
removing paper jams.
Before Using the Machine
Operating the LCD Display
Using Optional Equipment
Additional Functions
Copying Guide
System Manager Settings
Loading Paper
Replacing Toner Cartridges
Removing Paper Jams
Read this manual to learn how to copy documents and the various copying/
scanning features.
Basic Copying Procedure
Useful Copying
Changing the Settings to Suit Your Needs
Optional Manuals
Easy Operation Guide
To Suit Your Needs
Easy
Operation
Guide
To Suit Your N e e d s
CONTENTS
Preface
How the Manuals Are Divided ..................... 1
What You Can Do with This Machine ......... 3
The Control Panel ...................................... 5
Facsimile Functions
Sending a Fax ............................................ 7
What You Can Do with This Machine
(Fax Basic Features) ......................... 9
What You Can Do with This Machine
(Fax Special Features) .................... 11
Printing Functions
Printing from Your Computer
(Printer Driver) ................................ 13
Remote UI Functions
Operating the Machine
from a Computer (Remote UI) ......... 17
Additional Functions ..................................... 19
Store this guide next to the machine for future reference.
1
Troubleshooting ............................................. 28
Read this manual to learn about the optional operations of the machine,
grasp a basic knowledge of the machine’s capabilities, and discover its useful
functions what kind of useful functions it has. Keep it next to the machine for
future reference.
The Control Panel
Using the Fax Functions
Using the Printer Functions
Using the Remote UI Functions
The Additional Functions Mode
How the Manuals Are Divided
Optional Manuals
Remote UI Guide
Using the Machine in a TCP/IP
Network
Troubleshooting
PCL/UFR II Printer
Guide
UFR II Printer
Guide
Read these manuals to learn
how to edit the settings in
order to use the machine as a
UFR ll or PCL printer.
PCL Driver Guide
UFR ll Driver Guide
Read this manual to learn
how to install and use the
driver which enables you to
fax documents created on a
computer with the machine.
Printing
Functions
Confirming the Status of the
Machine
Operating Jobs
Editing the Address Book and
the Various Settings of the
Machine
Setting the Various Items in the
Settings Menu
Setting the Various Items in Utility
Menu
Fax Driver Guide
Read this manual to learn
how to access the machine
from a computer for operating
and confirming jobs, and edit
the various settings of the
machine.
Remote UI
Functions
Read this manual to learn how
to connect the machine to a
network.
Read these manuals to learn
how to install the printer
driver for Windows, how to
print, and how to edit the
printer settings.
Installing the Drivers
How to Print
Various Printer Features
Displaying the Online Help
Network Quick
Start Guide
Additional
Functions
Network Guide
Registering/Editing an Address in the
Address Book
System Settings
Printing Communication Reports
Troubleshooting
Facsimile
Functions
Fax Functions
Basic Fax Methods
Useful Fax Functions
Checking/Changing the Fax Status
Customizing Fax Settings
Preface
Read this manual to learn how to send scanned documents to fax destinations.
Troubleshooting
Facsimile Guide
Read this manual to learn
how to install and use the
driver which enables you
to use the machine as a
scanner to scan documents
to your computer.
Installing the Driver
Sending a Fax
Displaying the Online Help
Using the Cover Sheet Editor
2
What You Can Do with This Machine
The iR2020/iR2016 brings you all the features you will ever
need in a digital multitasking machine.
The iR2020 /iR2016 incorporates a rich array of input and output features that can
greatly enhance your efficiency. Equipped with features that meet the needs of
document work in a digitized office, the iR2020 /iR2016 represents the ultimate in
digital multitasking machines.
Original
Send Outside the Company
Fax
Fax
Functions
1
2
3
4
Copy
Functions
4
3
2
1
Copy/Print
LAN
Print
Functions
1
2
Remote UI
Functions
3
4
In-company Computers
3
Telephone
Line
What You Can Do with This Machine
Selecting a Destination from the Address Book ................ P. 9
Selecting a Destination from the Coded Dial .................... P. 9
Facsimile Functions
Selecting a Destination from the One-Touch Dial ............. P. 9
To Recall the Last Destination ......................................... P. 10
Enables you to fax scanned documents an inbox. You
can also send to multiple destinations, and forward
received faxes as well.
To Stamp Originals Which Have Already Been Scanned P. 10
Sending a Fax Directly ..................................................... P. 10
To Send Data From a Computer by Fax .......................... P. 10
To Specify the Time to Start Sending .............................. P. 11
Dialing Through a Switchboard ....................................... P. 11
To Send a Two-Sided Document ..................................... P. 12
To Send Faxes Clearly ..................................................... P. 12
Printing
Functions
Printing Functions
Enables you to print on both sides of paper, output
sets of printouts, and various other useful features
when printing documents from a computer by
optional equipment.
* Optional UFR II Printer Kit is required.
Additional Functions
You can set Copy settings or other settings in
Additional Functions. For more information, consult
the Reference Guide or other guides.
Quality .............................................................................. P. 16
Remote UI
Functions
Print Functions
Paper Source ................................................................... P. 15
To Check the Remaining Amount of Paper and Toner from
Your desk ............................................................... P. 18
Fax Settings/Address Book Set. ..................................... P. 19
Printer Settings ................................................................ P. 23
Timer Settings & Report Settings & ADJUST./CLEANING .. P.
25
System Settings ............................................................... P. 27
Troubleshooting ............................................................... P. 28
4
Additional
Functions
To Edit the Address Book from a Computer .................... P. 18
Troubleshooting
The Remote UI software allows you to access and
manage a device connected to a network using a web
browser. If you specify the address of the machine
in your web browser, the Remote UI screen appears
from where you can manage and control the machine.
Finishing ........................................................................... P. 14
To Operate the Machine from Your desk ......................... P. 17
Remote UI Functions
Remote UI Functions
Page Settings ................................................................... P. 13
Additional Functions
* One of the optional UFR II Printer Kit or PCL Printer Kit is
required.
Facsimile
Functions
Facsimile Functions
* The optional Super G3 FAX Board is required.
Preface
Refer to this manual for examples of the useful
ways in which you can use your machine.
The Control Panel
The control panel consists of the LCD, physical keys for copying and faxing, numeric keys, additional functions key,
and indicators. The following is an explanation of the keys used in this manual. For more information, see Chapter 1,
“Before You Start Using This Machine,” in the Reference Guide. This Illustrations uses control panel attached to the
optional Super G3 FAX Board-T1.
[Paper Select] Key
Press to select paper (Paper drawer
1-4, Stack bypass).
[COPY] Key
Press to use the Copy functions.
FAX
COPY
[FAX] Key
Press to use the Fax functions.
Coded Dial
Address Book
Redial/Pause
Hook
R
Delayed TX
Direct TX
Stamp
[ Coded Dial] Key
Press to perform Coded Speed
Dialing.
01
02
03
04
05
06
07
08
09
10
11
12
13
14
15
16
17
18
19
20
[Address Book] Key
Press to search by name for fax/
phone numbers pre-registered with
One-Touch Speed Dialing Keys or
Coded Speed Dialing Keys.
[Redial/Pause] Key
Inserts a pause when entering a
phone number. Press to redial the
last dialed number when fax is
standing by.
21~40
O
41~60
[Hook] Key
Press when you want to dial without
lifting the handset.
[One-Touch Speed Dial] Keys
[R] Key
Press to use One-Touch Speed
Dialing (Pre-registered frequently
used numbers).
Press to dial an outside line access
number or an extension number
when the unit is connected through
a switchboard (PBX).
Press to enlarge or reduce copy ratio.
,
[ Delayed TX] Key
Press to set Delayed TX.
[Copy Ratio] Key
Key
Press to decrease or increase the value
for various settings. Also press to view the
previous or next item in the menu.
[ Two-Sided] Key
Press to set two-sided copying or faxing.
[ Direct TX] Key
Press to set Direct TX.
[ Stamp] Key
Press to set Stamp.
5
[OK] Key
Press to accept a set function or mode.
[Two-Page Separation] Key
Press to set two-page separation.
The Control Panel
LCD
Displays messages and prompts during operation. Displays
selection, text, and numbers when adjusting the settings.
[Density] Key
Press to adjust copy and fax density.
[ View Settings] Key
Press to confirm settings.
/
[Collate/Staple] Key
Press to make collate or staple copies.
Preface
[Reset] Key
Press to return the device to standby mode.
[Image Quality] Key
Press to select image quality for copy and fax.
[System Monitor] Key
1
GHI
DEF
2
3
JKL
4
PQRS
MNO
6
8
9
[Numeric] Keys
0
#
5
TUV
7
WXYZ
T
OK
Log In/Out
ID
[ Counter Check] Key
Press to display counter status.
(Press again to close counter
status.)
C
Printing
Functions
ABC
[ON/OFF] Key
Press to turn the Control Panel
on/off. Also press to go into the Sleep
mode or to manually resume normal
mode.
Use to enter alphanumeric
characters.
[Tone] Key
Press to switch from rotary pulse to
tone dialing.
Remote UI
Functions
ON/OFF
Facsimile
Functions
Press to check fax transmission,
print, copy, or report output status.
[Stop] Key
Press to stop copying or scanning.
[Start] Key
Additional
Functions
Press to start copying, scanning and
faxing.
[Clear] Key
Press to clear entered alphanumeric
characters.
[Log In/Out] Key
Troubleshooting
[Different Size Originals] Key
Press to set different size originals for copying.
Press to enter password for the
device (Enter password
Press
[Log In/Out] to enable Copy and
Fax functions. Press
[Log In/Out]
again after operation to return to the
screen for entering password). To
register a password,
[Additional
Functions]
<SYSTEM
SETTINGS>
<MANAGE DEPT.
ID>.
[2 on 1] Key
Press to set 2 on 1 Copying.
[ Frame Erase] Key
Press to set frame erase for copying.
[Additional Functions] Key
Press to select or cancel modes in Additional
Functions.
6
Facsimile Functions
Sending a Fax
The following is a description of the basic procedure for sending a fax. For more information on the settings, see the
references in each step.
Preparation
FAX
Press
Place Your Originals
COPY
Coded Dial
Address Book
Redial/Pause
Hook
R
Delayed TX
Direct TX
Stamp
01
02
03
04
05
06
07
08
09
10
11
12
[FAX] to switch to the fax mode.
If ID Management is set, it is necessary to enter
an ID and password. (If an optional card reader
is attached, insert a control card.)
Placed in the feeder
Place your originals.
For bound or irregular sized originals, place them
on the platen glass.
For more information, see Chapter 2, “Basic
Operations,” in the Reference Guide.
Registering a Destination
Before you can use one-touch speed dialing, you
need to register the recipients’ fax/telephone
numbers. You can register up to 60 numbers for onetouch speed dialing.
Before you can use coded speed dialing, you need
to register the recipients’ fax/telephone numbers.
You can register up to 140 numbers for coded speed
dialing.
Before you can use group dialing, you need to
register the recipients’ fax/telephone numbers. You
can register up to 199 groups, which can include
one-touch speed dialing keys and/or coded speed
dialing codes. Each time you program a one-touch
speed dialing key or coded speed dialing code, the
amount of available group dials is reduced by one.
For more information on registering destinations in the
address book, see “Address Book Set.” on p. 20.
7
ADDRESS BOOK SET.
1.1-TOUCH SPD DIAL
ADDRESS BOOK SET.
2.CODED SPD DIAL
ADDRESS BOOK SET.
3.GROUP DIAL
Sending a Fax
ABC
GHI
DEF
JKL
TUV
9
6
WXYZ
8
9
0
#
T
WXYZ
8
MNO
5
7
6
TUV
7
PQRS
MNO
5
4
PQRS
JKL
4
3
2
1
GHI
Start Sending the Fax
Preface
Enter the Fax Number
Log In/Out
ID
#
0
C
Facsimile
Functions
T
Log In/Out
C
ID
Enter the fax number.
Press
[Start].
Coded Dial
Address Book
Redial/Pause
Hook
R
Delayed TX
Direct TX
Stamp
01
02
03
04
05
06
07
08
09
10
11
12
13
14
15
16
19
20
17
18
21~40
41~60
By pressing one-touch speed dialing keys, you can also
specify destinations you have registered in advance.
By pressing [Coded Dial], you can also specify
destinations you have registered in advance.
By pressing group dialing keys allocated to one-touch
or coded speed dialing keys, you can also specify
destinations you have registered in advance.
Remote UI
Functions
COPY
To send a clear fax, set a high resolution. You
can set the resolution by pressing
[Image
Quality] or
[Density].
FAX RESOLUTION
FINE
DENSITY
-LT
Additional
Functions
FAX
When faxing is complete, remove your originals.
DK+
Dialling an overseas number may involve pausing
between certain digits of the number.
Troubleshooting
You can select from three sending methods: memory
sending, direct sending, manual sending see Chapter
2, “Basic Sending Methods,” in the Facsimile Guide.
Printing
Functions
When <ORIGINAL SIZE> appears on the LCD
display, press
or
to select the size, and
press
[Start] again.
For more information on registering fax
destinations, see “Address Book Set.” on p. 20.
For information on useful fax features, see
“What You Can Do with This Machine (FAX
Basic Features),” on p. 9.
By pressing [Address Book], you can also specify
destinations you have registered in advance.
8
Facsimile Functions
What You Can Do with This Machine
(FAX Basic Features)
The following is a description of functions commonly used
when sending a fax.
For more detailed procedures, see the Facsimile Guide.
FAX
COPY
Coded Dial
Address Book
Redial/Pause
Hook
R
Delayed TX
Direct TX
Stamp
Fax Features keys
Selecting a Destination from the Address Book
[Address Book]
ADDRESS BOOK
:A
When you use address the book, you can quickly find a
fax/telephone number by entering the destination name you
have registered to one-touch dialing keys or coded speed
dialing keys. If you know the destination name, but you are
not sure which type of speed dialing (one-touch dialing key,
coded speed dialing key, or group dialing) you registered
for the fax/telephone number, the address book is useful
for reference.
Selecting a Destination from the Coded Dial
[Coded Dial]
Facsimile Guide Chapter 2
Facsimile Guide Chapter 2
Dial by pressing [Coded Dial] followed by a three-digit code
using the numeric keys on the Control Panel.
Before you can use coded speed dialing, you need to
register the recipients’ fax/telephone numbers.
TEL=
[* ]
<NOT REGISTERED> appears if no fax/telephone number
is assigned to the coded dialing key you pressed.
Selecting a Destination from the One-Touch Dial
Facsimile Guide Chapter 2
Dial by pressing a one-touch speed dialing key on the Control Panel.
Before you can use one-touch dialing, you need to register recipients’ fax/telephone numbers.
<NOT REGISTERED> appears if no fax/telephone number is assigned to the One-Touch dialing key you
pressed.
9
What You Can Do with This Machine (FAX Basic Features)
To Recall the Last Destination
The last destination you specified using the numeric keys is
displayed.
Preface
[Redial/Pause]
Facsimile Guide Chapter 2
To Stamp Originals Which Have Already Been
Scanned
Facsimile Guide Chapter 3
Sending a Fax Directly
[Direct TX]
Stamp
Facsimile Guide Chapter 3
Remote UI
Functions
Stamp
Printing
Functions
You can stamp every page on the
documents that was you send or scanned
for sending faxes using the stamp features.
If you place the document horizontally on
the feeder, it will be stamped at the position
shown in the illustration.
[Stamp]
Facsimile
Functions
TEL=123XXXXXX
To Send Data From a Computer by Fax
Additional
Functions
With direct sending, the machine sends the document on
the feeder as it scans one page, without storing all pages
into the memory at once. You can send a document ahead
of other documents stored in memory.
Fax Driver Guide
1
Troubleshooting
3
4
2
Select the print function from the application
on your computer
press [Print].
After entering the destination, press [Add to
Recipient List].
* It is necessary to install the fax driver to send faxes from your computer. The display may differ according to the OS (operating
system) you are using and the fax driver. For more information, see the Fax Driver Guide.
10
Facsimile Functions
What You Can Do with This Machine
(FAX Special Features)
The following is a description of the features often used
when using the Fax functions of the machine. For more
detailed procedures, see the Facsimile Guide.
FAX
COPY
Coded Dial
Address Book
Redial/Pause
Hook
R
Delayed TX
Direct TX
Stamp
Fax Features keys
To Specify the Time to Start Sending
[Delayed TX]
Facsimile Guide Chapter 3
Use the delayed transmission to store a document in
memory and then to have it sent at a preset time, for
example, when telephone rates are lower. You can set up
to 70 documents for delayed sending.
TX TIME SETTING
17:00
Dialing Through a Switchboard
[R]
R
11
Facsimile Guide Chapter 7
A PBX (Private Branch Exchange) is an on-site telephone
switchboard. If your machine is connected through a PBX or other
telephone switching system, you have to dial the outside line access
number first, then the number of the party you are calling.
To facilitate this procedure, you can register the PBX access type
and the outside line access number under [R]. This way, you only
need to press this key before dialing the fax/telephone number you
require.
What You Can Do with This Machine (FAX Special Features)
[Density]
Preface
Facsimile
Functions
Image Quality
You can adjust the image quality (resolution) of the
document you send. You can select from STANDARD/
FINE/PHOTO/SUPER FINE/ULTRA FINE.
Printing
Functions
[Image Quality]
Facsimile Guide Chapter 3
Density
Density is the difference between light and dark areas of
an image.
Remote UI
Functions
To Send Faxes Clearly
You can set the machine to automatically turn over twosided originals that are placed in the feeder, and scan each
side separately.
Additional
Functions
[Two-Sided]
Facsimile Guide Chapter 3
Troubleshooting
To Send a Two-Sided Document
12
Printing Functions
Printing from Your Computer (Printer Driver)
For more information, see the PCL/UFR ll Printer Guide and the PCL Driver Guide, or the UFR ll Printer Guide and the
UFR ll Driver Guide.
* The following screenshots are when the PCL/UFR II printer driver is installed, and may differ from the ones you see, according to the
driver or operating system you are using.
Page Settings
Profile
Enables you to set the printer
driver simply by selecting
an item from the list. Printer
drivers settings for different
purposes are registered.
Add Profile
Enables you to save the current
settings as a profile.
Output Method
Output Size
Enables you to select the
output method for a print
job.
Enables you to select the size of
the paper to print on.
Edit Profile
Enables you to edit the
contents of registered
profiles.
Page Layout
Enables you to print multiple
pages onto one sheet of paper, or
one page onto multiple sheets of
paper.
Page Size
Enables you to select the
size of a document you have
created in an application.
Manual Scaling
Enables you to print each page of the
document on one sheet of paper, using manual
zooming.
Page Options
Enables you to add page
frames, the date, a user
name, and page numbers.
You can also select whether
to use the Overlay mode to
print.
View Settings
Enables you to check a list of
all the current sheet settings.
Watermark
Enables you to add transparent text and print
the original.
Edit Watermark
Enables you to edit the
position and direction of
a watermark, or create an
original watermark.
* The screens shown on this page are from the iR2020 UFR ll, however procedures for the iR2020/iR2016 UFR ll or PCL will be the
same unless otherwise noted.
13
Printing from Your Computer (Printer Driver)
Print With Mixed Paper Sizes/
Orientations
Preface
Finishing
Finishing Details
Enables you to specify detailed finishing settings.
Enables you to print a document with a
combination of paper sizes and orientation.
Print Banner Page
Facsimile
Functions
Enables you to print a banner page for each print job. A
banner page shows user name, date, and file name.
Print with Upper Left of Sheet as Starting
Point
Enables you to expand print area.
Rotate Print Data 180 Degrees
Printing
Functions
Enables you to rotate the image 180 degrees when
printing.
Advanced Settings
When you have trouble outputting with
finishing options, this enables you to display
the [Advanced Settings] dialog box.
Remote UI
Functions
Image Refinement
Enables you to set whether to perform smoothing.
Smoothing allows you to soften the jagged edges of text
and figures when printing.
Enables you to specify the point to start printing. Depending on the application
you are using, left, right, top, and bottom margins may differ, and printing may not
be performed properly. In this case, use this function to shift the position to start
printing. Set the position in [Upwards] and [Right]. This is useful for removing the
header of a received fax document, etc.
EMF Spooling
Additional
Functions
Shift the Position to Start Printing
Detailed Settings for Booklet
Print Style
Enables you to set the booklet
mode.
Binding Location
Enables you to select long edge (left) or
short edge (top) binding for prints, when
you have selected 1-sided Printing or
2-sided Printing for the Print Style.
Gutter
Enables you to specify booklet printing options.
Selectable when you have selected Booklet
Printing for Print Style.
Enables you to specify the gutter width.
* The screens shown on this page are from the iR2020 UFR ll, however procedures for the iR2020/iR2016 UFR ll or PCL will be the
same unless otherwise noted.
14
Troubleshooting
Enables you to specify to spool the print data in the EMF (metafile) format.
Select this to perform spooling in the EMF format, and make the software you
are using send print data to the machine faster. Deselect this to print in the RAW
format.
Printing Functions
Printing from Your Computer (Printer Driver)
* The following screenshots are when the PCL/UFR II printer driver is installed, and may differ from the ones you see, depending to the
driver or operating system you are using.
Paper Source
Select by
Enables you to select [Paper
Source] or [Paper Type] for the
selection method.
Same Paper for All Pages
Enables you to set all pages to use the same paper type. You can still
select the paper sources.
Different for First, Others, and Last
Enables you to set a different paper type for the first page, last page, and
the other pages. This is useful when you want to add a cover, etc.
Transparency Interleaving
When you are printing transparencies, enables you to insert
another type of paper between each transparency.
Different for First, Second, Others, and Last
Enables you to set a different paper type for the first page, second page,
last page, and the other pages.
Different Cover and Others
Enables you to set a different paper type for the cover when
making a booklet.
* The screens shown on this page are from the iR2020 UFR ll, however procedures for the iR2020/iR2016 UFR ll or PCL will be the
same unless otherwise noted.
15
Printing from Your Computer (Printer Driver)
Preface
Quality
Objective
Facsimile
Functions
Enables you to print a document with the ideal print settings
according to its content. When you select an item, a comment
is displayed below the list. To specify more detailed settings,
click [Details], which is on the right.
Details
Grayscale Adjustment
Enables you to set or edit the matching mode and matching method
(minimize colour difference, make colours more vibrant, and adjust colors
to your monitor).
Troubleshooting
Enables you to adjust the brightness and
contrast.
Matching
Additional
Functions
Remote UI
Functions
Printing
Functions
Enables you to specify the graphics mode, rendering rate, host side
rasterization and the toner save mode.
* The screens shown on this page are from the iR2020 UFR ll, however procedures for the iR2020/iR2016 UFR ll or PCL will be the
same unless otherwise noted.
16
Remote UI Functions
Operating the Machine from a Computer (Remote
UI)
For more information, see the Remote UI Guide.
* The Remote UI function is available only if the optional UFR ll Printer Driver is installed.
To Operate the Machine from Your desk
The Remote UI enables you to control functions, such as confirming the status of the machine, and job
operations, all from your PC’s web browser. For more information, see the Remote UI Guide.
2
1
Enter the IP address of the machine into the Web
browser on your computer to access the Remote UI.
You can perform various functions from the Remote
UI, such as editing the Address Book.
* The IP address in the above screenshot is fictitious. Ask your
system administrator for the IP address of your machine.
Register Address
Management Settings
Network
17
Preferences
Operating the Machine from a Computer (Remote UI)
Preface
To Edit the Address Book from a Computer
Facsimile
Functions
The Remote UI enables you to edit the Address Book of the machine using the Web browser on your computer.
Select the Address Book in the Remote UI, and enter a new destination. Destinations registered using the
Remote UI are stored in the Address Book of the machine. For more information, see the Remote UI Guide.
2
Printing
Functions
1
Enter the destination in <Fax Number>
necessary information for the address
enter other
press [OK].
Remote UI
Functions
Press [None] to display the screen for registering
destinations. When the Address Details screen is
displayed, press [Edit].
To Check the Remaining Amount of Paper and Toner from Your desk
Troubleshooting
Additional
Functions
The Remote UI enables you to check the machine’s current status, such as the amount of paper remaining in the
various paper sources, and the amount of remaining toner. This is useful as a guide for knowing when to load
paper and toner.
Select [Device] in the
Remote UI.
Check the remaining amount of paper and toner.
18
Additional Functions
Additional Functions
1
Fax Settings/Address Book Set.
Facsimile Guide Chapter 6, 10
Enables you to specify the settings for FAX or Tel registration functions.
1
ADD. FUNCTIONS
1.COMMON SETTINGS
Press
2
ADD. FUNCTIONS
3.FAX SETTINGS
Press
or
and select <FAX SETTINGS> or
<ADDRESS BOOK SET.>
3
FAX SETTINGS
1.USER SETTINGS
Press
4
100% AUTO
A TEXT
When you have finished making the settings, press
O1
[Additional Functions]
or
or [OK] to change the following settings
Fax Settings
USER SETTINGS
FAX SETTINGS
1.USER SETTINGS
You can make the following settings:
<1.UNIT TELEPHONE #>
<2.UNIT NAME>
<3.TX TERMINAL ID>
<4.SCANNING DENSITY>
<5.TEL LINE TYPE>
<6.VOLLUME CONTROL>
<7.FAX DEFAULT>
<8.INIT. FAX STD SET>
TX SETTINGS
FAX SETTINGS
2.TX SETTINGS
You can make the following settings:
<1.ECM TX>
<2.PAUSE TIME>
<3.AUTO REDIAL>
<4.TIME OUT>
<5.STAMP DOCUMENT>
<6.DIALING LINE CHCK>
<7.ROTATE TX>
RX SETTINGS
FAX SETTINGS
3.RX SETTINGS
19
You can make the following settings:
<1.ECM RX>
[Stop]
Additional Functions
PRINTER SETTINGS
<1.SELECT DRAWER>
<2.RECEIVE REDUCTION>
<3.TWO-SIDED PRINT>
<4.CONT. PRINTING>
Address Book Set.
1-TOUCH SPD DIAL
ADDRESS BOOK SET.
1.1-TOUCH SPD DIAL
Register a fax/telephone number for one-touch speed dialing,
then to dial the number simply press the one-touch speed
dialing key assigned to that number.
ADD. FUNCTIONS
1.COMMON SETTINGS
1 Press
ADD. FUNCTIONS
4.ADDRESS BOOK SET.
2 Press
or
press [OK].
to select <ADDRESS BOOK SET.>
ADDRESS BOOK SET.
1.1-TOUCH SPD DIAL
3 Press
[OK].
to select <1-TOUCH SPD DIAL>
ADDRESS BOOK SET.
[01] NOT REGISTERED
or
to select a one-touch speed dialing key
4 Press
(01 to 60)
press [OK] twice.
You can also select a key by pressing the one-touch speed
dialing key.
TEL NUMBER ENTRY
5 Use the numeric keys to enter the fax/telephone number
you want to register (max. 120 digits, including spaces and
press [OK] twice.
pauses)
NAME
100% AUTO
A TEXT
:A
O1
6 Use the numeric keys to enter a name for the one-touch
speed dialing key (max. 16 characters, including spaces)
press [OK].
When registering the numbers for the one-touch speed
dialing, you can set the transmission feature such as
international call, transmission speed, ECM transmission,
etc.
7 Press
[Stop] to return to the standby display.
20
Remote UI
Functions
press
Additional
Functions
or
Printing
Functions
[Additional Functions].
Facsimile
Functions
Preface
You can make the following settings:
Troubleshooting
FAX SETTINGS
4.PRINTER SETTINGS
Additional Functions
Additional Functions
CODED SPD DIAL
ADDRESS BOOK SET.
2.CODED SPD DIAL
Register a fax/telephone number for coded speed dialing,
then to dial the number, simply press [Coded Dial]
enter
the three-digit code assigned to that number.
ADD. FUNCTIONS
1.COMMON SETTINGS
1 Press
ADD. FUNCTIONS
4.ADDRESS BOOK SET.
or
2 Press
press [OK].
to select <ADDRESS BOOK SET.>
ADDRESS BOOK SET.
2.CODED SPD DIAL
3 Press
[OK].
to select <CODED SPD DIAL>
CODED SPD DIAL
[*000]NOT REGISTERED
4 Press
or
to select a coded speed dialing code (000
to 139)
press [OK] twice.
You can also select a code by pressing [Coded Dial]
entering the three-digit code with the numeric keys.
TEL NUMBER ENTRY
5 Use the numeric keys to enter the fax/telephone number
you want to register (max. 120 digits, including spaces and
press [OK] twice.
pauses)
NAME
100% AUTO
A TEXT
:A
O1
[Additional Functions].
or
press
6 Use the numeric keys to enter a name for the coded speed
dialing code (max. 16 characters, including spaces)
press [OK].
When registering the numbers for the coded speed dialing,
you can set the transmission feature such as international
call, transmission speed, ECM transmission, etc.
7 Press
[Stop] to return to the standby display.
GROUP DIAL
ADDRESS BOOK SET.
3.GROUP DIAL
21
Register a group of fax/telephone numbers for group dialing,
then to send a document to all numbers in that group, simply
press the one-touch speed dialing key, or press [Coded Dial]
enter the three-digit assigned to that group.
Additional Functions
1 Press
ADD. FUNCTIONS
4.ADDRESS BOOK SET.
or
2 Press
press [OK].
to select <ADDRESS BOOK SET.>
ADDRESS BOOK SET.
3.GROUP DIAL
3 Press
to select <GROUP DIAL>
To register a group under a coded speed dialing code:
Press [Coded Dial] or [#]
press
or
to select
a coded dialing number (000 to 139)
press [OK]
twice.
5 Select the speed dialing numbers you want to register in the
press [OK] twice.
group
TEL=
TEL=123XXXXXX
[01]CANON
To enter in the group a number stored under a one-touch
speed dialing key, press the desired one-touch speed
dialing key(s).
TEL=321XXXXXX
[*000]TOKYO
To enter a number stored under a coded speed dialing
enter the three-digit code
code, press [Coded Dial] or [#]
for the number using the numeric keys. For multiple entries,
press [Coded Dial] between each entry.
NAME
100% AUTO
A TEXT
:A
O1
6 Use the numeric keys to enter a name for the group (max.
16 characters, including spaces)
press [OK].
7 Press
[Stop] to return to the standby display.
22
Facsimile
Functions
Printing
Functions
4 Specify an empty one-touch speed dialing key or coded
speed dialing code that you want to set as the group dial.
To register a group under a one-touch speed dialing key:
Press
or
to select a one-touch speed dialing
number (01 to 60)
press [OK] twice.
Remote UI
Functions
press [OK].
Additional
Functions
GROUP DIAL
[*001]NOT REGISTERED
or
Troubleshooting
GROUP DIAL
[02] NOT REGISTERED
[Additional Functions].
Preface
ADD. FUNCTIONS
1.COMMON SETTINGS
Additional Functions
Additional Functions
2
PCL/UFR II Printer Guide Chapter 2
UFR II Printer Guide Chapter 2
Printer Settings
Enables you to specify the settings for printer functions.
1
ADD. FUNCTIONS
1.COMMON SETTINGS
Press
2
ADD. FUNCTIONS
5.PRINTER SETTINGS
Press
3
PRINTER SETTINGS
1.DEFAULT PAPERSIZE
Press
4
100% AUTO
A TEXT
When you have finished making the settings, press
O1
[Additional Functions]
or
,
and select <PRINTER SETTINGS>
or [OK] to change the following settings
[Stop]
Printer Settings
DEFAULT PAPERSIZE
PRINTER SETTINGS
1.DEFAULT PAPERSIZE
This parameter defines the default paper size used when the
paper size cannot be set within the application software, when
no paper source is specified.
DEFAULT PAPERTYPE
PRINTER SETTINGS
2.DEFAULT PAPERTYPE
This parameter sets the default paper type to be used for
print jobs. If a paper source has not been selected through
the application, the machine automatically selects the default
print settings for the paper type and size.
COPIES
PRINTER SETTINGS
3.COPIES
This setting enables you to specify the number of copies
printed. The default setting is ‘1’, but you can specify up to
999 copies.
2-SIDED PRINTING
PRINTER SETTINGS
4.2-SIDED PRINTING
This parameter selects one-sided or two-sided printing. When
two-sided printing is specified, the document is printed on
both sides of the paper.
PRINT QUALITY
PRINTER SETTINGS
5.PRINT QUALITY
23
You can make the following settings:
<1.IMAGE REFINEMENT>
<2.DENSITY>
<3.TONER SAVER>
Additional Functions
PAGE LAYOUT
You can make the following settings:
Preface
PRINTER SETTINGS
6.PAGE LAYOUT
<1.BINDING>
<2.MARGIN>
ERROR TIME OUT
If the data for a job does not end, the machine will not start
the next job even if it receives other print commands. In cases
like this, use the Error Time Out setting to force jobs to finish
if no data is received during the set period of time.
Facsimile
Functions
PRINTER SETTINGS
7.ERROR TIME OUT
COLLATE
PRINTER SETTINGS
8.COLLATE
This setting enabeles you to select the collating methods of
the printing pages.
INIT. PRINTER SET
Printing
Functions
The menu settings can be reset to the factory defaults by
initializing the printer settings.
PCL SETTINGS
To display the PCL menu, the optional PCL Printer Kit-J1 must
be installed.
You can make the following settings:
<1.ORIENTATION>
<2.FONT NUMBER>
<3.POINT SIZE>
<4.PITCH>
<5.FORM LINES>
<6.SYMBOL SET>
<7.CUSTOM PAPER>
<8.APPEND CR TO LF>
<9.ENLARGE A4>
Remote UI
Functions
PRINTER SETTINGS
10.PCL SETTINGS
RESET PRINTER
If you want to clear all print jobs in progress as well as data
that has been received in the memory, you must reset the
printer function. Resetting the printer deletes print jobs in the
machine’s memory and the print data that has been
received by all interfaces.
Troubleshooting
PRINTER SETTINGS
11.RESET PRINTER
Additional
Functions
PRINTER SETTINGS
9.INIT. PRINTER SET
24
Additional Functions
Additional Functions
3
Timer Settings & Report Settings & ADJUST./
CLEANING
Reference Guide Chapter 5, 7
Enables you to specify the settings for timer, reports, or cleaning functions.
1
ADD. FUNCTIONS
1.COMMON SETTINGS
Press
2
ADD. FUNCTIONS
6.TIMER SETTINGS
or
and select <TIMER SETTINGS> or
Press
<REPORT SETTINGS> or <ADJUST./CLEANING>
3
TIMER SETTINGS
1.DATE&TIME SETTING
Press
4
100% AUTO
A TEXT
When you have finished making the settings, press
[Additional Functions]
,
or [OK] to change the following settings
[Stop]
O1
Timer Settings
DATE&TIME SETTING
TIMER SETTINGS
1.DATE&TIME SETTING
You can set the current date and time. The date and time set
here is when required for other functions.
DATE TYPE SELECT
TIMER SETTINGS
2.DATE TYPE SELECT
You can set the date format to be used on the LCD display.
AUTO SLEEP TIME
AUTO CLEAR TIME
DAYLIGHT SV.TIME
TIMER SETTINGS
5.DAYLIGHT SV.TIME
25
In some countries, clocks are put forward throughout the
summer season. The period in which this is applied is called
“Daylight Saving Time.”
Additional Functions
Report Settings
Preface
You can print the contents of the machine settings. These reports are useful when you want to check the current
settings.
SETTINGS
<1.TX REPORT>
<2.RX.REPORT>
<3.ACTIVITY REPORT>
Facsimile
Functions
REPORT SETTINGS
1.SETTINGS
LIST PRINT
<1.ACTIVITY REPORT>
<2.SPEED DIAL LIST>
<3.ADD BOOK DETAILS>
<4.USER DATA LIST>
Printing
Functions
REPORT SETTINGS
2.LIST PRINT
ADJUST./CLEANING
DRUM CLEANING
SPECIAL MODE P
FIX.UNIT CLEANING
BOND SP.FIX. MODE
FEEDER CLEANING
FIX. UNIT OFFSET
SPECIAL MODE M
AUTO ADF DRTY ADJ
SPECIAL MODE N
MAINTENANCE CODE
Additional
Functions
SPECIAL MODE O
Troubleshooting
TRANS. ROLR CLEAN
Remote UI
Functions
When you load paper, replace toner cartridge, drum cartridge, stamp cartridge, and staple cartridge, and perform
routine cleaning, the following functions are used.
26
Additional Functions
Additional Functions
4
System Settings
Reference Guide Chapter 6
Enables you to specify the settings for system functions.
1
ADD. FUNCTIONS
1.COMMON SETTINGS
Press
2
ADD. FUNCTIONS
9.SYSTEM SETTINGS
Press
3
SYSTEM SETTINGS
1.SYS. MANAGER INFO
Press
4
100% AUTO
A TEXT
When you have finished making the settings, press
O1
[Additional Functions]
or
,
and select <SYSTEM SETTINGS>
or [OK] to change the following settings
[Stop]
System Settings
SYS. MANAGER INFO
DEVICE INFO
MANAGE DEPT. ID
MANAGE USER ID
SYSTEM SETTINGS
4.MANAGE USER ID
You can set whether or not to use the User ID Management.
NETWORK SETTINGS
SYSTEM SETTINGS
5.NETWORK SETTINGS
You can specify the interface settings for communication
between the machine and computers on your network. You
can specify the machine’s protocol settings for communication
between the machine and computers using the machine.
COMMUNICATIONS
SYSTEM SETTINGS
6.COMMUNICATIONS
27
You can make the following settings:
<1.TX START SPEED>
<2.RX START SPEED>
<3.MEMORY LOCK>
<4.R-KEY SETTING>
Additional Functions/Troubleshooting
SYSTEM SETTINGS
7.REMOTE UI
You can set whether to enable the Remote UI to operate the
machine and change settings.
Preface
REMOTE UI
ACCESS TO DEST.
You can make the following settings:
<1.RESTRICT NEW ADD.>
<2.FAX DRIVER TX>
Facsimile
Functions
SYSTEM SETTINGS
8.ACCESS TO DEST.
CHECKING THE LOG
Printing
Functions
USE DEVICE USB
Troubleshooting
When problems have occurred when using the machine, and you want to know how to solve them, see the following
references to the other guides.
Guide
Chapter
Title
Facsimile
9
LCD Messages
When the density of a copy or print is different to
the original
Reference
5
Adjusting the Printer Density
When a print is dirty
Reference
7
Routine Cleaning
When you cannot send
Facsimile
9
Sending Problems
When you cannot receive
Facsimile
9
Receiving Problems
When communications are slow
Facsimile
9
Faxing Problems
When the power does not turn ON
Reference
8
List of Error Message
When the Error code message is displayed.
Reference
8
Service Call Message
Remote UI
Functions
Symptom
Scanning trouble
When memory becomes full during scanning
Additional
Functions
Printing trouble
Troubleshooting
Communications problems
Other problems
When an error message is displayed that is not covered by the above, see Chapter 8, “List of Error Message,” in the Reference Guide, and see Chapter 9,
“LCD Messages,” in the Facsimile Guide.
28
Canon
Canon Inc.
30-2, Shimomaruko 3-chome,
Ohta-ku, Tokyo 146-8501, Japan
Europe, Africa and Middle East
Canon Europa N.V.
P.O. Box 2262,
1180 EG Amstelveen, Netherlands
Specifications subject to change without notice.
© Canon Europa N.V. 2005
Canon Middle East FZ-LLC
P.O. Box 27616
Dubai
United Arab Emirates
email: [email protected]