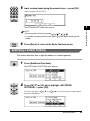
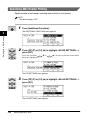
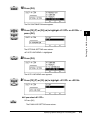
1
0
Ot¯
imageCLASS 2300
Sending Guide
Manuals for the Machine
The manuals for this machine are divided as follows. Please refer to them for detailed information.
Some of the manuals listed below are only supplied with the Network Model of this machine.
Guides with this symbol are printed manuals.
CD-ROM
• Installing and Setting Up the Machine
• Network and Printer Settings
• Basic Operations
• Machine Settings
• Troubleshooting
• Copying Instructions
• Fax Instructions
• Sending Instructions
• Remote User Interface Instructions
• Network Connectivity and Setup Instructions
• PCL Printer Instructions
• PCL Printer Driver Installation and
Instructions
• Fax Driver and Cover Sheet Editor
Installation and Instructions
The machine illustration on the cover may differ slightly from your machine.
Guides with this symbol are PDF manuals included on the
accompanying CD-ROM.
Set-Up Sheet
for the Machine
Set-Up Sheet
for Networking and Printing
Basic Guide
Reference Guide
Copying Guide
Facsimile Guide
Sending Guide
(This Document)
Remote UI Guide
CD-ROM
Network Guide
CD-ROM
PCL Printer Guide
CD-ROM
PCL Driver Guide
CD-ROM
Fax Driver Guide
with Cover Sheet Editor
CD-ROM
How This Manual Is Organized
Chapter 1
Overview
Chapter 2
Setting the Network
Chapter 3
Setting Up a Mail Account
Chapter 4
Checking Settings and Registering Destinations
Chapter 5
Transmission and Reception
Chapter 6
Appendix
Includes Samples, Formats, Error Code Table, the Glossary and index.
Considerable effort has been made to ensure that this manual is free of inaccuracies and omissions. However, as we are constantly improving our
products, if you need an exact specification, please contact Canon.
Contents
Preface . . . . . . . . . . . . . . . . . . . . . . . . . . . . . . . . . . . . . . . . . . . . . . . . . . . . . . . . . . 7
How to Use This Manual . . . . . . . . . . . . . . . . . . . . . . . . . . . . . . . . . . . . . . . . . . . . 7
Symbols Used in This Manual . . . . . . . . . . . . . . . . . . . . . . . . . . . . . . . . . . . . . . 7
Keys Used in This Manual . . . . . . . . . . . . . . . . . . . . . . . . . . . . . . . . . . . . . . . . . 7
Legal Notices . . . . . . . . . . . . . . . . . . . . . . . . . . . . . . . . . . . . . . . . . . . . . . . . . . . . . 9
Trademarks. . . . . . . . . . . . . . . . . . . . . . . . . . . . . . . . . . . . . . . . . . . . . . . . . . . . . 9
Copyright . . . . . . . . . . . . . . . . . . . . . . . . . . . . . . . . . . . . . . . . . . . . . . . . . . . . . . 9
Disclaimers. . . . . . . . . . . . . . . . . . . . . . . . . . . . . . . . . . . . . . . . . . . . . . . . . . . . . 9
Chapter 1
Overview
What is I-Fax?. . . . . . . . . . . . . . . . . . . . . . . . . . . . . . . . . . . . . . . . . . . . . . . . . . . 1-2
Preparation Before Use . . . . . . . . . . . . . . . . . . . . . . . . . . . . . . . . . . . . . . . . . . . 1-3
Chapter 2
Setting the Network
Setting the Network . . . . . . . . . . . . . . . . . . . . . . . . . . . . . . . . . . . . . . . . . . . . . . 2-2
Automatically Allocating an IP Address . . . . . . . . . . . . . . . . . . . . . . . . . . . . . 2-2
Manually Specifying an IP Address . . . . . . . . . . . . . . . . . . . . . . . . . . . . . . . . 2-5
Specifying a Subnet Mask . . . . . . . . . . . . . . . . . . . . . . . . . . . . . . . . . . . . . . . 2-7
Specifying a Default Gateway . . . . . . . . . . . . . . . . . . . . . . . . . . . . . . . . . . . . 2-9
Specifying a DNS Server Address . . . . . . . . . . . . . . . . . . . . . . . . . . . . . . . . 2-11
Specifying DNS Dynamic Setting . . . . . . . . . . . . . . . . . . . . . . . . . . . . . . . . . 2-13
Specifying a Host Name. . . . . . . . . . . . . . . . . . . . . . . . . . . . . . . . . . . . . . . . 2-14
Specifying a Domain Name . . . . . . . . . . . . . . . . . . . . . . . . . . . . . . . . . . . . . 2-16
Chapter 3
Setting Up a Mail Account
Specifying Mail Basic Items . . . . . . . . . . . . . . . . . . . . . . . . . . . . . . . . . . . . . . . 3-2
Registering an SMTP Server . . . . . . . . . . . . . . . . . . . . . . . . . . . . . . . . . . . . . 3-3
Registering a POP3 Server . . . . . . . . . . . . . . . . . . . . . . . . . . . . . . . . . . . . . . 3-5
Specifying a Mail Reception Protocol. . . . . . . . . . . . . . . . . . . . . . . . . . . . . . . 3-7
Specifying a POP3 Mail Check Interval . . . . . . . . . . . . . . . . . . . . . . . . . . . . . 3-9
Specifying the Number of Retries . . . . . . . . . . . . . . . . . . . . . . . . . . . . . . . . 3-11
Specifying a Retry Interval . . . . . . . . . . . . . . . . . . . . . . . . . . . . . . . . . . . . . . 3-13
Specifying the Time Zone. . . . . . . . . . . . . . . . . . . . . . . . . . . . . . . . . . . . . . . 3-15
Specifying a Port Number . . . . . . . . . . . . . . . . . . . . . . . . . . . . . . . . . . . . . . 3-17
4
Specifying the Maximum Reception Data Size . . . . . . . . . . . . . . . . . . . . . . .3-20
Specifying the Transmission Mode. . . . . . . . . . . . . . . . . . . . . . . . . . . . . . . . .3-22
Specifying if Received Text is to be Printed . . . . . . . . . . . . . . . . . . . . . . . . . .3-24
Specifying How to Handle a Large Size E-Mail . . . . . . . . . . . . . . . . . . . . . . .3-26
Specifying How to Handle Error Mail . . . . . . . . . . . . . . . . . . . . . . . . . . . . . . .3-28
Specifying a Mail Address Format . . . . . . . . . . . . . . . . . . . . . . . . . . . . . . . . .3-30
Specifying Mail Header Printing. . . . . . . . . . . . . . . . . . . . . . . . . . . . . . . . . . .3-32
Registering a Mail Address . . . . . . . . . . . . . . . . . . . . . . . . . . . . . . . . . . . . . . .3-34
Specifying Optional Settings for Transmitting Mail . . . . . . . . . . . . . . . . . . . .3-38
Setting to Receive Mail Via a POP3 Server . . . . . . . . . . . . . . . . . . . . . . . . . . .3-47
Chapter 4
Checking Settings and Registering Destinations
Checking Settings . . . . . . . . . . . . . . . . . . . . . . . . . . . . . . . . . . . . . . . . . . . . . . . .4-2
Checking the IP Address . . . . . . . . . . . . . . . . . . . . . . . . . . . . . . . . . . . . . . . . .4-2
Checking by the User Data List . . . . . . . . . . . . . . . . . . . . . . . . . . . . . . . . . . . .4-4
Registering Destinations (Mail Addresses) . . . . . . . . . . . . . . . . . . . . . . . . . . .4-5
Registering Mail Addresses for One-Touch/Coded Speed Dialing . . . . . . . . .4-5
Specifying Mail Transmitting Conditions. . . . . . . . . . . . . . . . . . . . . . . . . . . . . .4-9
Registering Destinations (FTP Server) . . . . . . . . . . . . . . . . . . . . . . . . . . . . . .4-17
Registering FTP Server Name for One-Touch/Coded Speed Dialing . . . . . .4-17
Specifying Settings for Transmitting Mail to an FTP Server . . . . . . . . . . . . . .4-22
Chapter 5
Transmission and Reception
I-Fax Transmission and Reception. . . . . . . . . . . . . . . . . . . . . . . . . . . . . . . . . . .5-2
Transmitting I-Fax by One-Touch Speed Dialing, Coded Speed
Dialing, or Access Code. . . . . . . . . . . . . . . . . . . . . . . . . . . . . . . . . . . . . . . . . .5-2
Manual I-Fax Transmitting . . . . . . . . . . . . . . . . . . . . . . . . . . . . . . . . . . . . . . . .5-4
Receiving I-Fax . . . . . . . . . . . . . . . . . . . . . . . . . . . . . . . . . . . . . . . . . . . . . . . .5-6
Transmitting to an FTP Server . . . . . . . . . . . . . . . . . . . . . . . . . . . . . . . . . . . . . .5-8
Transmitting to an FTP Server . . . . . . . . . . . . . . . . . . . . . . . . . . . . . . . . . . . . .5-8
Types and Usage of Memory Boxes . . . . . . . . . . . . . . . . . . . . . . . . . . . . . . . .5-10
How to Use the Relay Box and Transfer Box . . . . . . . . . . . . . . . . . . . . . . . . .5-10
Chapter 6
Appendix
Samples and Formats . . . . . . . . . . . . . . . . . . . . . . . . . . . . . . . . . . . . . . . . . . . . .6-2
Report Samples . . . . . . . . . . . . . . . . . . . . . . . . . . . . . . . . . . . . . . . . . . . . . . . .6-2
Image Transmission Format. . . . . . . . . . . . . . . . . . . . . . . . . . . . . . . . . . . . . . .6-3
Transmission Format of Message Text and Signature . . . . . . . . . . . . . . . . . . .6-4
5
Error Code Table. . . . . . . . . . . . . . . . . . . . . . . . . . . . . . . . . . . . . . . . . . . . . . . . . 6-5
Glossary . . . . . . . . . . . . . . . . . . . . . . . . . . . . . . . . . . . . . . . . . . . . . . . . . . . . . . . 6-9
Index . . . . . . . . . . . . . . . . . . . . . . . . . . . . . . . . . . . . . . . . . . . . . . . . . . . . . . . . . 6-13
6
Preface
Thank you for purchasing the Canon imageCLASS 2300. Please read this manual
thoroughly before operating the machine in order to familiarize yourself with its capabilities,
and to make the most of its many functions. After reading this manual, store it in a safe place
for future reference.
How to Use This Manual
Symbols Used in This Manual
The following symbols are used in this manual to explain procedures, restrictions,
handling precautions, and instructions that should be observed for safety.
.
WARNING
Indicates a warning concerning operations that may lead to death or
injury to persons if not performed correctly. In order to use the machine
safely, always pay attention to these warnings.
.
CAUTION
Indicates a caution concerning operations that may lead to injury to
persons, or damage to property if not performed correctly. In order to
use the machine safely, always pay attention to these cautions.
IMPORTANT
Indicates operational requirements and restrictions. Be sure to read
these items carefully in order to operate the machine correctly, and to
avoid damage to the machine.
NOTE
Indicates a clarification of an operation, or contains additional
explanations for a procedure. Reading these notes is highly
recommended.
.
.
Keys Used in This Manual
The following symbols and key names are a few examples of how keys to be
pressed are expressed in this manual:
• Control
Panel Keys: <Key icon> + (Key Name)
Example:
(Start)
(Stop)
7
• Function
Keys: <Key icon> + (Key Function)
Example:
8
F3
Press [F3] (DENSITY)
F4
Press [F4] (▲)
Legal Notices
Trademarks
Canon, the Canon logo, and imageCLASS are trademarks of Canon Inc.
Other product and company names herein may be the trademarks of their
respective owners.
Copyright
Copyright 2003 by Canon Inc. All rights reserved.
No part of this publication may be reproduced or transmitted in any form or by any
means, electronic or mechanical, including photocopying and recording, or by any
information storage or retrieval system without the prior written permission of
Canon Inc.
Disclaimers
The information in this document is subject to change without notice.
CANON INC. MAKES NO WARRANTY OF ANY KIND WITH REGARD TO THIS
MATERIAL, EITHER EXPRESS OR IMPLIED, EXCEPT AS PROVIDED HEREIN,
INCLUDING WITHOUT LIMITATION, THEREOF, WARRANTIES AS TO
MARKETABILITY, MERCHANTABILITY, FITNESS FOR A PARTICULAR
PURPOSE OF USE OR AGAINST INFRINGEMENT OF ANY PATENT. CANON
INC. SHALL NOT BE LIABLE FOR ANY DIRECT, INCIDENTAL, OR
CONSEQUENTIAL DAMAGES OF ANY NATURE, OR LOSSES OR EXPENSES
RESULTING FROM THE USE OF THIS MATERIAL.
9
10
Overview
1
CHAPTER
This chapter describes the overview of I-Fax (Internet Fax), and what you need to do before
using I-Fax.
What is I-Fax?. . . . . . . . . . . . . . . . . . . . . . . . . . . . . . . . . . . . . . . . . . . . . . . . . . . . . . . . . . 1-2
Preparation Before Use . . . . . . . . . . . . . . . . . . . . . . . . . . . . . . . . . . . . . . . . . . . . . . . . . . 1-3
1-1
What is I-Fax?
1
Overview
I-Fax (Internet Facsimile) enables you to transmit and receive a scanned original
document converted to TIFF (Tag Image File Format) image data or PDF (Portable
Document Format) as an attachment of an e-mail, to/from any facsimile with I-Fax
capability or any personal computer with e-mail through the Internet. I-Fax has two
transmission modes: the Simple Mode and the E-Mail Mode.
■ Simple Mode
In the Simple Mode, a scanned original document is converted to TIFF (MH) image data.
Size of the converted image data is limited to LTR, and its resolution is fixed to 200 x 200
dpi or 100 x 200 dpi, adhering to the common I-Fax standard. The image format, image
size, and resolution are restricted in the Simple Mode.
To exchange image data with other facsimiles with I-Fax capability, select the <SIMPLE
MODE> when specifying the transmission mode. (In case it is between imageCLASS
2300 with I-Fax, you can exchange image data, except for PDF in the 'E-Mail Mode'). You
can also exchange image data with personal computers with e-mail.
■ E-Mail Mode
In the E-Mail Mode, a scanned original document is converted to PDF, TIFF (MMR
(Modified Modified Read)), TIFF (MR (Modified Read)) or TIFF (MH (Modified Huffman))
image data. To select an image data format, see "Registering Mail Addresses for
One-Touch/Coded Speed Dialing," on p. 4-5.
If you select 'E-Mail Mode' as the transmission mode, you can exchange image data with
personal computers with e-mail.
To specify a transmission mode, see "Specifying Mail Transmitting Conditions," on p. 4-9,
and "Specifying Mail Basic Items," on p. 3-2. You can specify a transmission mode in two
ways: by registering one-touch speed dialing/coded speed dialing, or specifying the mail
user settings. The transmission mode specified by registering one-touch speed dialing/
coded speed dialing has higher priority.
Furthermore, I-Fax enables you to:
• Select POP3 or SMTP as a reception protocol.
• Set the machine to check mail periodically.
• Set the timer to transmit I-Fax, up to five times a day for time setting. Settings for the
same day every week is also possible.
• Upload image data to an FTP server.
1-2
What is I-Fax?
Preparation Before Use
1. Network Settings
2. Mail Transmission/Reception Settings
3. Registering mail addresses in one-touch speed dialing and coded speed dialing.
■ Network Settings
Specify the machine's parameters in the network. To transmit/receive data using I-Fax on
the network, specify settings for the TCP/IP communication protocol. (See "Setting the
Network," on p. 2-1.)
■ Mail Transmission/Reception Settings
Specify settings of a subject, message text, signature, etc. for each registered mail
address. Also, specify items related to e-mail transmission and reception. (See
"Specifying Mail Basic Items," on p. 3-2.) For values of the network settings, contact a
network administrator.
■ Registering Mail Addresses in the One-Touch/Coded Speed Dialing
Register mail addresses, so that you can transmit mail with I-Fax by specifying the
destinations with one-touch/coded speed dialing or access code. You can also register the
transmission start time, transmission mode, etc., as well as the mail addresses in each
one-touch or coded speed dial address. (See "Registering Destinations (Mail
Addresses)," on p. 4-5.)
Preparation Before Use
1-3
Overview
1
Before using I-Fax, it is necessary to specify the following settings from the
machine's control panel.
Overview
1
1-4
Preparation Before Use
Setting the Network
2
CHAPTER
This chapter describes how to specify the network settings, such as the IP Address, Subnet
Mask, Default Gateway, and so on.
Setting the Network . . . . . . . . . . . . . . . . . . . . . . . . . . . . . . . . . . . . . . . . . . . . . . . . . . . . . 2-2
Automatically Allocating an IP Address . . . . . . . . . . . . . . . . . . . . . . . . . . . . . . . . . . . . . . . . . . . .2-2
Manually Specifying an IP Address . . . . . . . . . . . . . . . . . . . . . . . . . . . . . . . . . . . . . . . . . . . . . . .2-5
Specifying a Subnet Mask . . . . . . . . . . . . . . . . . . . . . . . . . . . . . . . . . . . . . . . . . . . . . . . . . . . . . .2-7
Specifying a Default Gateway . . . . . . . . . . . . . . . . . . . . . . . . . . . . . . . . . . . . . . . . . . . . . . . . . . .2-9
Specifying a DNS Server Address . . . . . . . . . . . . . . . . . . . . . . . . . . . . . . . . . . . . . . . . . . . . . . .2-11
Specifying DNS Dynamic Setting. . . . . . . . . . . . . . . . . . . . . . . . . . . . . . . . . . . . . . . . . . . . . . . .2-13
Specifying a Host Name. . . . . . . . . . . . . . . . . . . . . . . . . . . . . . . . . . . . . . . . . . . . . . . . . . . . . . .2-14
Specifying a Domain Name . . . . . . . . . . . . . . . . . . . . . . . . . . . . . . . . . . . . . . . . . . . . . . . . . . . .2-16
2-1
Setting the Network
Before using I-Fax, it is necessary to specify the following network settings:
• IP
Address (auto/manual)
Mask
• Default Gateway
• DNS Server Address
• DNS Dynamic Setting
• Host Name
• Domain Name
2
Setting the Network
• Subnet
IMPORTANT
Specified settings become effective after the machine is restarted (when you turn the
main power back on).
NOTE
For the values of the network settings, contact your network administrator.
Automatically Allocating an IP Address
This section describes how to automatically allocate an IP address using DHCP,
BOOTP, or RARP.
To input the already allocated IP address in the NETWORK SETTINGS, see
"Manually Specifying an IP Address," on p. 2-5.
Additional Functions
1
Press [Additional Functions].
The ADDITIONAL FUNCTIONS menu appears.
2-2
Setting the Network
F3
2
F4
Press [F3] (▼) or [F4] (▲) to highlight <06 SYSTEM
SETTINGS> ➞ press [OK].
Each time you press
becomes highlighted.
OK
F3
(▼) or
F4
(▲), the next or previous menu option
The SYSTEM SETTINGS menu appears.
IMPORTANT
When <ENTER A MANAGEMENT ID NUMBER> is displayed, input the System
Administration ID and the System Password. For how to input the System
Administration ID and the System Password, see Chapter 5, "System Manager
Settings," in the Reference Guide.
F3
3
F4
Press [F3] (▼) or [F4] (▲) to highlight <03 NETWORK
SETTINGS> ➞ press [OK].
OK
The NETWORK SETTINGS menu appears.
F3
F4
4
Press [F3] (▼) or [F4] (▲) to highlight <01 IP ADDRESS
AUTO.> ➞ press [OK].
OK
The IP ADDRESS AUTO. menu appears.
Setting the Network
2-3
Setting the Network
2
F3
5
F4
Press [F3] (▼) or [F4] (▲) to highlight <01 AUTO> ➞ press
[OK].
OK
2
Setting the Network
The AUTO menu appears.
F3
6
F4
Press [F3] (▼) or [F4] (▲) to highlight <01 DHCP>, <02
BOOTP> or <03 RARP> ➞ press [OK].
OK
The display for specifying the highlighted IP address allocation protocol appears.
F3
7
F4
Press [F3] (▼) or [F4] (▲) to highlight <01 ON> or <02 OFF> ➞
press [OK].
OK
The NETWORK SETTINGS menu returns.
8
Reset
2-4
9
Repeat steps 6 and 7 to set DHCP, BOOTP, and RARP, as
necessary.
Press [Reset] to return to the Basic Features screen.
Setting the Network
Manually Specifying an IP Address
This section describes how to manually specify an IP address in the NETWORK
SETTINGS menu when an IP address is already allocated, or when you cannot
automatically obtain an IP address.
To automatically allocate an IP address using DHCP, BOOTP or RARP, see
"Automatically Allocating an IP Address," on p. 2-2.
Additional Functions
1
Setting the Network
2
Press [Additional Functions].
The ADDITIONAL FUNCTIONS menu appears.
F3
F4
OK
2
Press [F3] (▼) or [F4] (▲) to highlight <06 SYSTEM
SETTINGS> ➞ press [OK].
Each time you press
becomes highlighted.
F3
(▼) or
F4
(▲), the next or previous menu option
The SYSTEM SETTINGS menu appears.
IMPORTANT
When <ENTER A MANAGEMENT ID NUMBER> is displayed, input the System
Administration ID and the System Password. For how to input the System
Administration ID and the System Password, see Chapter 5, "System Manager
Settings," in the Reference Guide.
Setting the Network
2-5
F3
3
F4
Press [F3] (▼) or [F4] (▲) to highlight <03 NETWORK
SETTINGS> ➞ press [OK].
OK
2
Setting the Network
The NETWORK SETTINGS menu appears.
F3
4
F4
Press [F3] (▼) or [F4] (▲) to highlight <01 IP ADDRESS
AUTO.> ➞ press [OK].
OK
The IP ADDRESS AUTO. menu appears.
F3
5
F4
Press [F3] (▼) or [F4] (▲) to highlight <02 FIXED> ➞ press
[OK].
OK
The NETWORK SETTINGS menu returns.
F3
F4
6
Press [F3] (▼) or [F4] (▲) to highlight <02 IP ADDRESS> ➞
press [OK].
OK
The display for entering the IP address appears.
2-6
Setting the Network
@.
ABC
DEF
1
2
3
GHI
JKL
MNO
4
5
6
PRS
TUV
WXY
7
8
9
OPER
SYMBOLS
7
Input an IP address using the numeric keys ➞ press [OK].
Specify the IP address for the machine with 4 numbers delimited by periods (.)
(from 0 to 255).
0
Input Example: 192.168.0.215
OK
Setting the Network
2
The NETWORK SETTINGS menu returns.
NOTE
F2
F3
• You can move the cursor by pressing
( ) or
( ).
• If a number has been previously input, press C (Clear) before entering a new
number.
8
Reset
Press [Reset] to return to the Basic Features screen.
Specifying a Subnet Mask
This section describes how to specify a subnet mask.
Additional Functions
1
Press [Additional Functions].
The ADDITIONAL FUNCTIONS menu appears.
Setting the Network
2-7
F3
2
F4
Press [F3] (▼) or [F4] (▲) to highlight <06 SYSTEM
SETTINGS> ➞ press [OK].
Each time you press
becomes highlighted.
OK
F3
(▼) or
F4
(▲), the next or previous menu option
Setting the Network
2
The SYSTEM SETTINGS menu appears.
IMPORTANT
When <ENTER A MANAGEMENT ID NUMBER> is displayed, input the System
Administration ID and the System Password. For how to input the System
Administration ID and the System Password, see Chapter 5, "System Manager
Settings," in the Reference Guide.
F3
3
F4
Press [F3] (▼) or [F4] (▲) to highlight <03 NETWORK
SETTINGS> ➞ press [OK].
OK
The NETWORK SETTINGS menu appears.
F3
F4
4
Press [F3] (▼) or [F4] (▲) to highlight <03 SUBNET MASK> ➞
press [OK].
OK
The display for entering the subnet mask appears.
2-8
Setting the Network
@.
ABC
DEF
1
2
3
GHI
JKL
MNO
4
5
6
PRS
TUV
WXY
7
8
9
OPER
SYMBOLS
5
Input a subnet mask using the numeric keys ➞ press [OK].
Input Example: 255.255.255.0
0
OK
2
Setting the Network
The NETWORK SETTINGS menu returns.
NOTE
F2
F3
• You can move the cursor by pressing
( ) or
( ).
• If a number has been previously input, press C (Clear) before entering a new
number.
6
Reset
Press [Reset] to return to the Basic Features screen.
Specifying a Default Gateway
This section describes how to input the address of a default gateway.
Additional Functions
1
Press [Additional Functions].
The ADDITIONAL FUNCTIONS menu appears.
F3
F4
OK
2
Press [F3] (▼) or [F4] (▲) to highlight <06 SYSTEM
SETTINGS> ➞ press [OK].
Each time you press
becomes highlighted.
F3
(▼) or
F4
(▲), the next or previous menu option
Setting the Network
2-9
The SYSTEM SETTINGS menu appears.
IMPORTANT
When <ENTER A MANAGEMENT ID NUMBER> is displayed, input the System
Administration ID and the System Password. For how to input the System
Administration ID and the System Password, see Chapter 5, "System Manager
Settings," in the Reference Guide.
3
F3
2
Setting the Network
F4
Press [F3] (▼) or [F4] (▲) to highlight <03 NETWORK
SETTINGS> ➞ press [OK].
OK
The NETWORK SETTINGS menu appears.
4
F3
F4
Press [F3] (▼) or [F4] (▲) to highlight <04 DEFAULT
GATEWAY> ➞ press [OK].
OK
The display for entering the default gateway appears.
@.
ABC
1
2
3
GHI
JKL
MNO
4
5
6
PRS
TUV
WXY
7
8
9
OPER
SYMBOLS
DEF
5
Input a default gateway using the numeric keys ➞ press [OK].
0
OK
The NETWORK SETTINGS menu returns.
NOTE
F2
F3
• You can move the cursor by pressing
( ) or
( ).
• If a number has been previously input, press C (Clear) before entering a new
number.
2-10
Setting the Network
6
Reset
Press [Reset] to return to the Basic Features screen.
Specifying a DNS Server Address
This section describes how to input a DNS server address.
1
2
Press [Additional Functions].
Setting the Network
Additional Functions
The ADDITIONAL FUNCTIONS menu appears.
F3
F4
OK
2
Press [F3] (▼) or [F4] (▲) to highlight <06 SYSTEM
SETTINGS> ➞ press [OK].
Each time you press
becomes highlighted.
F3
(▼) or
F4
(▲), the next or previous menu option
The SYSTEM SETTINGS menu appears.
IMPORTANT
When <ENTER A MANAGEMENT ID NUMBER> is displayed, input the System
Administration ID and the System Password. For how to input the System
Administration ID and the System Password, see Chapter 5, "System Manager
Settings," in the Reference Guide.
Setting the Network
2-11
3
F3
F4
Press [F3] (▼) or [F4] (▲) to highlight <03 NETWORK
SETTINGS> ➞ press [OK].
OK
2
Setting the Network
The NETWORK SETTINGS menu appears.
4
F3
F4
Press [F3] (▼) or [F4] (▲) to highlight <05 DNS SERVER ADD.>
➞ press [OK].
OK
The display for entering the DNS server address appears.
@.
ABC
1
2
3
GHI
JKL
MNO
4
5
6
PRS
TUV
WXY
7
8
9
OPER
SYMBOLS
DEF
5
Input a DNS server address using the numeric keys ➞ press
[OK].
Input Example: 192.168.1.0
0
OK
The NETWORK SETTINGS menu returns.
NOTE
F2
F3
• You can move the cursor by pressing
( ) or
( ).
• If a number has been previously input, press C (Clear) before entering a new
number.
Reset
2-12
6
Press [Reset] to return to the Basic Features screen.
Setting the Network
Specifying DNS Dynamic Setting
Specify whether the DNS will automatically update in case it is changed.
Additional Functions
1
Press [Additional Functions].
The ADDITIONAL FUNCTIONS menu appears.
F3
2
F4
Press [F3] (▼) or [F4] (▲) to highlight <06 SYSTEM
SETTINGS> ➞ press [OK].
Each time you press
becomes highlighted.
OK
Setting the Network
2
F3
(▼) or
F4
(▲), the next or previous menu option
The SYSTEM SETTINGS menu appears.
IMPORTANT
When <ENTER A MANAGEMENT ID NUMBER> is displayed, input the System
Administration ID and the System Password. For how to input the System
Administration ID and the System Password, see Chapter 5, "System Manager
Settings," in the Reference Guide.
F3
F4
3
Press [F3] (▼) or [F4] (▲) to highlight <03 NETWORK
SETTINGS> ➞ press [OK].
OK
The NETWORK SETTINGS menu appears.
Setting the Network
2-13
4
F3
F4
Press [F3] (▼) or [F4] (▲) to highlight <06 DNS DYNAMIC SET>
➞ press [OK].
OK
2
Setting the Network
The DNS DYNAMIC SET menu appears.
5
F3
F4
Press [F3] (▼) or [F4] (▲) to highlight <01 OFF> or <02 ON> ➞
press [OK].
OK
The NETWORK SETTINGS menu returns.
6
Reset
Press [Reset] to return to the Basic Features screen.
Specifying a Host Name
This section describes how to specify a Host Name.
Additional Functions
1
Press [Additional Functions].
The ADDITIONAL FUNCTIONS menu appears.
2-14
Setting the Network
F3
2
F4
Press [F3] (▼) or [F4] (▲) to highlight <06 SYSTEM
SETTINGS> ➞ press [OK].
Each time you press
becomes highlighted.
OK
F3
(▼) or
F4
(▲), the next or previous menu option
The SYSTEM SETTINGS menu appears.
IMPORTANT
When <ENTER A MANAGEMENT ID NUMBER> is displayed, input the System
Administration ID and the System Password. For how to input the System
Administration ID and the System Password, see Chapter 5, "System Manager
Settings," in the Reference Guide.
F3
3
F4
Press [F3] (▼) or [F4] (▲) to highlight <03 NETWORK
SETTINGS> ➞ press [OK].
OK
The NETWORK SETTINGS menu appears.
F3
F4
4
Press [F3] (▼) or [F4] (▲) to highlight <07 HOST NAME> ➞
press [OK].
OK
The display for entering the host name appears.
Setting the Network
2-15
Setting the Network
2
@.
ABC
DEF
1
2
3
GHI
JKL
MNO
4
5
6
PRS
TUV
WXY
7
8
9
OPER
SYMBOLS
5
Input a Host Name using the numeric keys ➞ press [OK].
Input Example: HOST_NAME
F4
Press
(Input Mode) to change the input mode according to the characters
you need to enter. (See Chapter 2, "Basic Operations," in the Reference Guide.)
0
OK
Setting the Network
2
The NETWORK SETTINGS menu returns.
6
Reset
Press [Reset] to return to the Basic Features screen.
Specifying a Domain Name
This section described how to enter a domain name.
Additional Functions
1
Press [Additional Functions].
The ADDITIONAL FUNCTIONS menu appears.
F3
F4
OK
2
Press [F3] (▼) or [F4] (▲) to highlight <06 SYSTEM
SETTINGS> ➞ press [OK].
Each time you press
becomes highlighted.
F3
(▼) or
F4
The SYSTEM SETTINGS menu appears.
2-16
Setting the Network
(▲), the next or previous menu option
IMPORTANT
When <ENTER A MANAGEMENT ID NUMBER> is displayed, input the System
Administration ID and the System Password. For how to input the System
Administration ID and the System Password, see Chapter 5, "System Manager
Settings," in the Reference Guide.
3
F3
F4
Press [F3] (▼) or [F4] (▲) to highlight <03 NETWORK
SETTINGS> ➞ press [OK].
2
The NETWORK SETTINGS menu appears.
4
F3
F4
Press [F3] (▼) or [F4] (▲) to highlight <08 DOMAIN NAME> ➞
press [OK].
OK
The display for entering the domain name appears.
@.
ABC
1
2
3
GHI
JKL
MNO
4
5
6
PRS
TUV
WXY
7
8
9
OPER
SYMBOLS
DEF
5
Input a domain name using the numeric keys ➞ press [OK].
Input Example: organization_company.com
F4
Press
(Input Mode) to change the input mode according to the characters
you need to enter. (See Chapter 2, "Basic Operations," in the Reference Guide.)
0
OK
The NETWORK SETTINGS menu returns.
Reset
6
Press [Reset] to return to the Basic Features screen.
Setting the Network
2-17
Setting the Network
OK
Setting the Network
2
2-18
Setting the Network
Setting Up a Mail Account
3
CHAPTER
This chapter describes the procedures to set up the mail user and the SMTP/POP3 server.
Specifying Mail Basic Items . . . . . . . . . . . . . . . . . . . . . . . . . . . . . . . . . . . . . . . . . . . . . . . 3-2
Registering an SMTP Server . . . . . . . . . . . . . . . . . . . . . . . . . . . . . . . . . . . . . . . . . . . . . . . . . . . .3-3
Registering a POP3 Server. . . . . . . . . . . . . . . . . . . . . . . . . . . . . . . . . . . . . . . . . . . . . . . . . . . . . .3-5
Specifying a Mail Reception Protocol . . . . . . . . . . . . . . . . . . . . . . . . . . . . . . . . . . . . . . . . . . . . .3-7
Specifying a POP3 Mail Check Interval . . . . . . . . . . . . . . . . . . . . . . . . . . . . . . . . . . . . . . . . . . . .3-9
Specifying the Number of Retries . . . . . . . . . . . . . . . . . . . . . . . . . . . . . . . . . . . . . . . . . . . . . . .3-11
Specifying a Retry Interval . . . . . . . . . . . . . . . . . . . . . . . . . . . . . . . . . . . . . . . . . . . . . . . . . . . . .3-13
Specifying the Time Zone. . . . . . . . . . . . . . . . . . . . . . . . . . . . . . . . . . . . . . . . . . . . . . . . . . . . . .3-15
Specifying a Port Number . . . . . . . . . . . . . . . . . . . . . . . . . . . . . . . . . . . . . . . . . . . . . . . . . . . . .3-17
Specifying the Maximum Reception Data Size . . . . . . . . . . . . . . . . . . . . . . . . . . . . . . . . . . . . .3-20
Specifying the Transmission Mode . . . . . . . . . . . . . . . . . . . . . . . . . . . . . . . . . . . . . . . . . . . . . .3-22
Specifying if Received Text is to be Printed . . . . . . . . . . . . . . . . . . . . . . . . . . . . . . . . . . . . . . . .3-24
Specifying How to Handle a Large Size E-Mail . . . . . . . . . . . . . . . . . . . . . . . . . . . . . . . . . . . . .3-26
Specifying How to Handle Error Mail . . . . . . . . . . . . . . . . . . . . . . . . . . . . . . . . . . . . . . . . . . . . .3-28
Specifying a Mail Address Format . . . . . . . . . . . . . . . . . . . . . . . . . . . . . . . . . . . . . . . . . . . . . . .3-30
Specifying Mail Header Printing. . . . . . . . . . . . . . . . . . . . . . . . . . . . . . . . . . . . . . . . . . . . . . . . .3-32
Registering a Mail Address. . . . . . . . . . . . . . . . . . . . . . . . . . . . . . . . . . . . . . . . . . . . . . . 3-34
Specifying Optional Settings for Transmitting Mail . . . . . . . . . . . . . . . . . . . . . . . . . . . . . 3-38
Setting to Receive Mail Via a POP3 Server . . . . . . . . . . . . . . . . . . . . . . . . . . . . . . . . . . 3-47
3-1
Specifying Mail Basic Items
This section describes procedures for specifying I-Fax transmitting and receiving
conditions.
You can specify the following items in MAIL USER SETTINGS:
Item
Setting Up a Mail Account
3
3-2
Description
01 SMTP SERVER
Register a SMTP server address.
02 POP3 SERVER
Register a POP3 server address.
Setting
03 EMAIL RX PROTOCOL Specify a reception protocol.
'POP3*', 'SMTP'
04 CHECK INTERVAL
Specifying a checking interval (in
minutes) of POP3 mail.
0-60
0*
05 RETRY
Specifying the number of retries to 0-5
2*
reconnect to the network after
failure.
06 RETRY INTERVAL
Specifying a retry interval (in
minutes) to reconnect to the
network after failure.
07 TIME ZONE SETTING
Specifying the time zone for the
machine.
08 PORT NO.
Specifying a connection port
number of each item.
09 MAX. RX DATA SIZE
Specifying the maximum reception 0-9999
data size.
1000*
10 TX MODE
Specifying the I-Fax transmission
mode.
'SIMPLE MODE*',
'E-MAIL MODE'
11 RX TEXT PRINT
Specifying if message text is to be
printed when received mail has a
text message.
'ON',
'AUTO*',
'OFF'
12 LARGE MAIL
Specifying whether mail is to be
left on a server when it is larger
than the size specified in the
<MAX. RX DATA SIZE> screen.
'LEAVE ON SERVER*',
'ERASE FROM
SERVER'
13 ERROR MAIL
Specifying if error mail is to be left
on the server.
'LEAVE ON SERVER*',
'ERASE FROM
SERVER'
Specifying Mail Basic Items
1-60
2*
00001-65535
25* (SMTP)
110* (POP3)
Item
Description
Setting
14 ADDRESS FORMAT
Specify a mail address format.
'NAME <ADDRESS>*',
'ADDRESS (NAME)',
'ADDRESS ONLY'
15 PRINT MAIL HEADER
Specify whether the mail header
(including date and subject) is to
be printed.
'OFF*', 'ON'
An asterisk (*) indicates the default setting.
Registering an SMTP Server
3
Additional Functions
1
Setting Up a Mail Account
If you transmit and receive I-Fax using an SMTP (Simple Mail Transfer Protocol)
server, you need to register the SMTP server address.
Press [Additional Functions].
The ADDITIONAL FUNCTIONS menu appears.
F3
F4
OK
2
Press [F3] (▼) or [F4] (▲) to highlight <03 FAX SETTINGS> ➞
press [OK].
Each time you press
becomes highlighted.
F3
(▼) or
F4
(▲), the next or previous menu option
The FAX SETTINGS menu appears.
Specifying Mail Basic Items
3-3
3
F3
F4
Press [F3] (▼) or [F4] (▲) to highlight <08 LAN SETTINGS> ➞
press [OK].
OK
The LAN SETTINGS menu appears.
4
F3
3
Setting Up a Mail Account
F4
Press [F3] (▼) or [F4] (▲) to highlight <01 MAIL USER
SETTING> ➞ press [OK].
OK
The MAIL USER SETTING menu appears.
5
F3
F4
Press [F3] (▼) or [F4] (▲) to highlight <01 SMTP SERVER> ➞
press [OK].
OK
The display for entering the SMTP server address appears.
@.
ABC
1
2
3
GHI
JKL
MNO
4
5
6
PRS
7
TUV
DEF
Input an SMTP server address using the numeric keys ➞
press [OK].
WXY
8
9
OPER
SYMBOLS
0
6
For details on how to input characters, see Chapter 2, "Basic Operations," in the
Reference Guide.
OK
The MAIL USER SETTING menu returns.
3-4
Specifying Mail Basic Items
NOTE
You can input an IP address as well as an SMTP server address.
7
Reset
Press [Reset] to return to the Basic Features screen.
Registering a POP3 Server
If you receive I-Fax using a POP3 (Post Office Protocol 3) server, register a POP3
server address.
3
Additional Functions
1
Setting Up a Mail Account
NOTE
If you use an SMTP server for both transmission and reception, it is not necessary to
register a POP3 server.
Press [Additional Functions].
The ADDITIONAL FUNCTIONS menu appears.
F3
F4
OK
2
Press [F3] (▼) or [F4] (▲) to highlight <03 FAX SETTINGS> ➞
press [OK].
Each time you press
becomes highlighted.
F3
(▼) or
F4
(▲), the next or previous menu option
The FAX SETTINGS menu appears.
Specifying Mail Basic Items
3-5
3
F3
F4
Press [F3] (▼) or [F4] (▲) to highlight <08 LAN SETTINGS> ➞
press [OK].
OK
The LAN SETTINGS menu appears.
4
F3
3
Setting Up a Mail Account
F4
Press [F3] (▼) or [F4] (▲) to highlight <01 MAIL USER
SETTING> ➞ press [OK].
OK
The MAIL USER SETTING menu appears.
5
F3
F4
Press [F3] (▼) or [F4] (▲) to highlight <02 POP3 SERVER> ➞
press [OK].
OK
The display for entering the POP3 server address appears.
@.
ABC
1
2
3
GHI
JKL
MNO
4
5
6
PRS
7
TUV
DEF
Input a POP3 server address using the numeric keys ➞ press
[OK].
WXY
8
9
OPER
SYMBOLS
0
6
For details on how to input characters, see Chapter 2, "Basic Operations," in the
Reference Guide.
OK
The MAIL USER SETTING menu returns.
3-6
Specifying Mail Basic Items
NOTE
You can input an IP address as well as a POP3 server address.
7
Reset
Press [Reset] to return to the Basic Features screen.
Specifying a Mail Reception Protocol
Specify whether the machine is to receive I-Fax via an SMTP server or a POP3
server.
3
Additional Functions
1
Setting Up a Mail Account
NOTE
The default setting is 'POP3'.
Press [Additional Functions].
The ADDITIONAL FUNCTIONS menu appears.
F3
F4
OK
2
Press [F3] (▼) or [F4] (▲) to highlight <03 FAX SETTINGS> ➞
press [OK].
Each time you press
becomes highlighted.
F3
(▼) or
F3
(▲), the next or previous menu option
The FAX SETTINGS menu appears.
Specifying Mail Basic Items
3-7
F3
3
F4
Press [F3] (▼) or [F4] (▲) to highlight <08 LAN SETTINGS> ➞
press [OK].
OK
The LAN SETTINGS menu appears.
F3
3
4
Setting Up a Mail Account
F4
Press [F3] (▼) or [F4] (▲) to highlight <01 MAIL USER
SETTING> ➞ press [OK].
OK
The MAIL USER SETTING menu appears.
F3
5
F4
Press [F3] (▼) or [F4] (▲) to highlight <03 EMAIL RX
PROTOCOL> ➞ press [OK].
OK
The EMAIL RX PROTOCOL menu appears.
F3
6
F4
Press [F3] (▼) or [F4] (▲) to highlight <01 POP3> or <02
SMTP> ➞ press [OK].
OK
The MAIL USER SETTING menu returns
Reset
3-8
7
Press [Reset] to return to the Basic Features screen.
Specifying Mail Basic Items
Specifying a POP3 Mail Check Interval
Specify a POP3 mail check interval (in minutes).
NOTE
The default setting is '0 (minutes)'.
1
Press [Additional Functions].
The ADDITIONAL FUNCTIONS menu appears.
F3
2
F4
Press [F3] (▼) or [F4] (▲) to highlight <03 FAX SETTINGS> ➞
press [OK].
Each time you press
becomes highlighted.
OK
3
F3
(▼) or
F4
(▲), the next or previous menu option
The FAX SETTINGS menu appears.
F3
F4
3
Press [F3] (▼) or [F4] (▲) to highlight <08 LAN SETTINGS> ➞
press [OK].
OK
The LAN SETTINGS menu appears.
Specifying Mail Basic Items
3-9
Setting Up a Mail Account
Additional Functions
F3
4
F4
Press [F3] (▼) or [F4] (▲) to highlight <01 MAIL USER
SETTING> ➞ press [OK].
OK
The MAIL USER SETTING menu appears.
F3
3
5
Setting Up a Mail Account
F4
Press [F3] (▼) or [F4] (▲) to highlight <04 CHECK INTERVAL>
➞ press [OK].
OK
The display for entering the check interval time appears.
F2
6
F3
Press [F2] (-) or [F3] (+) to specify an interval (in minutes) for
periodically checking mail ➞ press [OK].
OK
The MAIL USER SETTING menu returns.
NOTE
• You can specify an interval from 0 to 60 (minutes).
• You can specify an interval using the numeric keys.
• If you specify the interval to '0', the machine will not periodically check mail.
Therefore, to receive mail, you would have to receive them manually.
Reset
3-10
7
Press [Reset] to return to the Basic Features screen.
Specifying Mail Basic Items
Specifying the Number of Retries
Specify the number of retries for reconnecting to the network after failure.
NOTE
The default setting is '2 (times)'.
1
Press [Additional Functions].
The ADDITIONAL FUNCTIONS menu appears.
F3
2
F4
Press [F3] (▼) or [F4] (▲) to highlight <03 FAX SETTINGS> ➞
press [OK].
Each time you press
becomes highlighted.
OK
3
F3
(▼) or
F4
(▲), the next or previous menu option
The FAX SETTINGS menu appears.
F3
F4
3
Press [F3] (▼) or [F4] (▲) to highlight <08 LAN SETTINGS> ➞
press [OK].
OK
The LAN SETTINGS menu appears.
Specifying Mail Basic Items
3-11
Setting Up a Mail Account
Additional Functions
F3
4
F4
Press [F3] (▼) or [F4] (▲) to highlight <01 MAIL USER
SETTING> ➞ press [OK].
OK
The MAIL USER SETTING menu appears.
F3
3
5
Setting Up a Mail Account
F4
Press [F3] (▼) or [F4] (▲) to highlight <05 RETRY> ➞ press
[OK].
OK
The display for entering the number of retries appears.
F2
6
F3
Press [F2] (-) or [F3] (+) to specify the number of retries ➞
press [OK].
OK
The MAIL USER SETTING menu returns.
NOTE
• You can specify the number of retries from 0 to 5.
• You can specify the number of retries using the numeric keys.
Reset
3-12
7
Press [Reset] to return to the Basic Features screen.
Specifying Mail Basic Items
Specifying a Retry Interval
Specify a retry interval (in minutes) to reconnect to the network after failure.
NOTE
The default setting is '2 (minutes)'.
1
Press [Additional Functions].
The ADDITIONAL FUNCTIONS menu appears.
F3
2
F4
Press [F3] (▼) or [F4] (▲) to highlight <03 FAX SETTINGS> ➞
press [OK].
Each time you press
becomes highlighted.
OK
3
F3
(▼) or
F4
(▲), the next or previous menu option
The FAX SETTINGS menu appears.
F3
F4
3
Press [F3] (▼) or [F4] (▲) to highlight <08 LAN SETTINGS> ➞
press [OK].
OK
The LAN SETTINGS menu appears.
Specifying Mail Basic Items
3-13
Setting Up a Mail Account
Additional Functions
F3
4
F4
Press [F3] (▼) or [F4] (▲) to highlight <01 MAIL USER
SETTING> ➞ press [OK].
OK
The MAIL USER SETTING menu appears.
F3
3
5
Setting Up a Mail Account
F4
Press [F3] (▼) or [F4] (▲) to highlight <06 RETRY INTERVAL>
➞ press [OK].
OK
The display for entering the retry interval appears.
F2
6
F3
Press [F2] (-) or [F3] (+) to specify a retry interval (in minutes)
➞ press [OK].
OK
The MAIL USER SETTING menu returns.
NOTE
• You can specify a retry interval from 1 to 60 (minutes).
• You can specify a retry interval using the numeric keys.
Reset
3-14
7
Press [Reset] to return to the Basic Features screen.
Specifying Mail Basic Items
Specifying the Time Zone
Specify the time zone of the machine.
Additional Functions
1
Press [Additional Functions].
The ADDITIONAL FUNCTIONS menu appears.
F3
2
F4
Press [F3] (▼) or [F4] (▲) to highlight <03 FAX SETTINGS> ➞
press [OK].
Each time you press
becomes highlighted.
OK
F3
(▼) or
F4
(▲), the next or previous menu option
The FAX SETTINGS menu appears.
F3
F4
3
Press [F3] (▼) or [F4] (▲) to highlight <08 LAN SETTINGS> ➞
press [OK].
OK
The LAN SETTINGS menu appears.
Specifying Mail Basic Items
3-15
Setting Up a Mail Account
3
F3
4
F4
Press [F3] (▼) or [F4] (▲) to highlight <01 MAIL USER
SETTING> ➞ press [OK].
OK
The MAIL USER SETTING menu appears.
F3
3
5
Setting Up a Mail Account
F4
Press [F3] (▼) or [F4] (▲) to highlight <07 TIME ZONE
SETTING> ➞ press [OK].
OK
The TIME ZONE SETTING menu appears.
F3
6
F4
Press [F3] (▼) or [F4] (▲) to specify one of the thirty (30) time
zones ➞ press [OK].
OK
The MAIL USER SETTING menu returns.
NOTE
Settings of the Time Zone are based on Greenwich Mean Time.
Reset
3-16
7
Press [Reset] to return to the Basic Features screen.
Specifying Mail Basic Items
Specifying a Port Number
Specify a connection port number for each item.
NOTE
• The default settings are '25' for SMTP and '110' for POP3.
• It is recommended to use the machine with the default settings.
1
Press [Additional Functions].
3
The ADDITIONAL FUNCTIONS menu appears.
F3
2
F4
Press [F3] (▼) or [F4] (▲) to highlight <03 FAX SETTINGS> ➞
press [OK].
Each time you press
becomes highlighted.
OK
F3
(▼) or
F4
(▲), the next or previous menu option
The FAX SETTINGS menu appears.
F3
F4
3
Press [F3] (▼) or [F4] (▲) to highlight <08 LAN SETTINGS> ➞
press [OK].
OK
The LAN SETTINGS menu appears.
Specifying Mail Basic Items
3-17
Setting Up a Mail Account
Additional Functions
F3
4
F4
Press [F3] (▼) or [F4] (▲) to highlight <01 MAIL USER
SETTING> ➞ press [OK].
OK
The MAIL USER SETTING menu appears.
F3
3
5
Setting Up a Mail Account
F4
Press [F3] (▼) or [F4] (▲) to highlight <08 PORT NO.> ➞ press
[OK].
OK
The PORT NO. (port number) menu is displayed, and <01 SMTP TX> is
highlighted.
OK
6
Press [OK].
The display for entering the port number for SMTP TX appears.
F2
F3
7
Press [F2] (-) or [F3] (+) to specify a port number ➞ press
[OK].
OK
The PORT NO. menu returns.
3-18
Specifying Mail Basic Items
NOTE
• You can specify a port number from 00001 to 65535.
• You can specify a port number using the numeric keys.
F3
8
F4
OK
Press [F3] (▼) or [F4] (▲) to highlight <02 POP3 RX> or <03
SMTP RX> ➞ press [OK].
● If you highlight <02 POP3 RX>:
❑ The display for entering the port number for POP3 RX appears.
❑ Press [F2] (-) or [F3] (+) to specify a port number ➞ press [OK].
F2
3
Setting Up a Mail Account
F3
OK
The PORT NO. menu returns.
NOTE
• You can specify a port number from 00001 to 65535.
• You can specify a port number using the numeric keys.
● If you highlight <03 SMTP RX>:
❑ The display for entering the port number for SMTP RX appears.
❑ Press [F2] (-) or [F3] (+) to specify a port number ➞ press [OK].
F2
F3
OK
The MAIL USER SETTING menu returns.
NOTE
• You can specify a port number from 00001 to 65535.
• You can specify a port number using the numeric keys.
Reset
9
Press [Reset] to return to the Basic Features screen.
Specifying Mail Basic Items
3-19
Specifying the Maximum Reception Data Size
Specify the maximum reception data size, in kilobytes.
NOTE
The default setting is '1000 (KB)'.
Additional Functions
1
Press [Additional Functions].
The ADDITIONAL FUNCTIONS menu appears.
Setting Up a Mail Account
3
F3
2
F4
Press [F3] (▼) or [F4] (▲) to highlight <03 FAX SETTINGS> ➞
press [OK].
Each time you press
becomes highlighted.
OK
F3
(▼) or
F4
(▲), the next or previous menu option
The FAX SETTINGS menu appears.
F3
F4
3
Press [F3] (▼) or [F4] (▲) to highlight <08 LAN SETTINGS> ➞
press [OK].
OK
The LAN SETTINGS menu appears.
3-20
Specifying Mail Basic Items
F3
4
F4
Press [F3] (▼) or [F4] (▲) to highlight <01 MAIL USER
SETTING> ➞ press [OK].
OK
The MAIL USER SETTING menu appears.
5
F4
3
Press [F3] (▼) or [F4] (▲) to highlight <09 MAX. RX DATA
SIZE> ➞ press [OK].
OK
The display for entering the maximum reception data size appears.
F2
6
F3
Press [F2] (-) or [F3] (+) to input the maximum reception data
size (in kilobytes) ➞ press [OK].
OK
The MAIL USER SETTING menu returns.
NOTE
• You can specify the maximum reception data size from 0 to 9999.
• If you specify 0KB, the maximum reception data size will be inactive (there would
be no limit).
• You can specify the maximum reception data size using the numeric keys.
Reset
7
Press [Reset] to return to the Basic Features screen.
Specifying Mail Basic Items
3-21
Setting Up a Mail Account
F3
Specifying the Transmission Mode
Specify the transmission mode of I-Fax.
NOTE
The default setting is 'SIMPLE MODE'.
Additional Functions
1
Press [Additional Functions].
The ADDITIONAL FUNCTIONS menu appears.
Setting Up a Mail Account
3
F3
2
F4
Press [F3] (▼) or [F4] (▲) to highlight <03 FAX SETTINGS> ➞
press [OK].
Each time you press
becomes highlighted.
OK
F3
(▼) or
F4
(▲), the next or previous menu option
The FAX SETTINGS menu appears.
F3
F4
3
Press [F3] (▼) or [F4] (▲) to highlight <08 LAN SETTINGS> ➞
press [OK].
OK
The LAN SETTINGS menu appears.
3-22
Specifying Mail Basic Items
F3
4
F4
Press [F3] (▼) or [F4] (▲) to highlight <01 MAIL USER
SETTING> ➞ press [OK].
OK
The MAIL USER SETTING menu appears.
5
F4
Press [F3] (▼) or [F4] (▲) to highlight <10 TX MODE> ➞ press
[OK].
OK
The TX MODE menu appears.
F3
F4
6
Press [F3] (▼) or [F4] (▲) to highlight <01 SIMPLE MODE> or
<02 E-MAIL MODE> ➞ press [OK].
OK
● If you select the <01 SIMPLE MODE>:
❑ The MAIL USER SETTING menu returns.
● If you select the <02 E-MAIL MODE>:
❑ The IMAGE FORMAT menu appears.
F3
❑ Press [F3] (▼) or [F4] (▲) to highlight an image format ➞ press [OK].
F4
OK
The MAIL USER SETTING menu returns.
Specifying Mail Basic Items
3-23
3
Setting Up a Mail Account
F3
7
Reset
Press [Reset] to return to the Basic Features screen.
Specifying if Received Text is to be Printed
Specify whether message text is to be printed when received images have
message text.
• If
you specify 'ON', message text will always be printed.
• If you specify 'AUTO', whether message text will be printed depends on the format
of the received message.
• If you specify 'OFF', message text will not be printed.
Setting Up a Mail Account
3
NOTE
The default setting is 'AUTO'.
Additional Functions
1
Press [Additional Functions].
The ADDITIONAL FUNCTIONS menu appears.
F3
F4
OK
2
Press [F3] (▼) or [F4] (▲) to highlight <03 FAX SETTINGS> ➞
press [OK].
Each time you press
becomes highlighted.
F3
(▼) or
The FAX SETTINGS menu appears.
3-24
Specifying Mail Basic Items
F4
(▲), the next or previous menu option
F3
3
F4
Press [F3] (▼) or [F4] (▲) to highlight <08 LAN SETTINGS> ➞
press [OK].
OK
The LAN SETTINGS menu appears.
4
F4
3
Press [F3] (▼) or [F4] (▲) to highlight <01 MAIL USER
SETTING> ➞ press [OK].
OK
The MAIL USER SETTING menu appears.
F3
5
F4
Press [F3] (▼) or [F4] (▲) to highlight <11 RX TEXT PRINT> ➞
press [OK].
OK
The RX TEXT PRINT menu appears.
F3
6
F4
Press [F3] (▼) or [F4] (▲) to highlight <01 ON>, <02 AUTO> or
<03 OFF> ➞ press [OK].
OK
The MAIL USER SETTING menu returns.
Reset
7
Press [Reset] to return to the Basic Features screen.
Specifying Mail Basic Items
3-25
Setting Up a Mail Account
F3
Specifying How to Handle a Large Size E-Mail
Specify whether mail is to be left on a server when it is larger than the specified
size.
NOTE
The default setting is 'LEAVE ON SERVER'.
Additional Functions
1
3
Press [Additional Functions].
Setting Up a Mail Account
The ADDITIONAL FUNCTIONS menu appears.
F3
2
F4
Press [F3] (▼) or [F4] (▲) to highlight <03 FAX SETTINGS> ➞
press [OK].
Each time you press
becomes highlighted.
OK
F3
(▼) or
F4
(▲), the next or previous menu option
The FAX SETTINGS menu appears.
F3
F4
3
Press [F3] (▼) or [F4] (▲) to highlight <08 LAN SETTINGS> ➞
press [OK].
OK
The LAN SETTINGS menu appears.
3-26
Specifying Mail Basic Items
F3
4
F4
Press [F3] (▼) or [F4] (▲) to highlight <01 MAIL USER
SETTING> ➞ press [OK].
OK
The MAIL USER SETTING menu appears.
5
F4
Press [F3] (▼) or [F4] (▲) to highlight <12 LARGE MAIL> ➞
press [OK].
OK
The LARGE MAIL menu appears.
F3
6
F4
Press [F3] (▼) or [F4] (▲) to specify <01 LEAVE ON SERVER>
or <02 ERASE FROM SERVER> ➞ press [OK].
OK
The MAIL USER SETTING menu returns.
Reset
7
Press [Reset] to return to the Basic Features screen.
Specifying Mail Basic Items
3-27
3
Setting Up a Mail Account
F3
Specifying How to Handle Error Mail
Specify whether error mail is to be left on the server.
NOTE
The default setting is 'LEAVE ON SERVER'.
Additional Functions
1
Press [Additional Functions].
The ADDITIONAL FUNCTIONS menu appears.
Setting Up a Mail Account
3
F3
2
F4
Press [F3] (▼) or [F4] (▲) to highlight <03 FAX SETTINGS> ➞
press [OK].
Each time you press
becomes highlighted.
OK
F3
(▼) or
F4
(▲), the next or previous menu option
The FAX SETTINGS menu appears.
F3
F4
3
Press [F3] (▼) or [F4] (▲) to highlight <08 LAN SETTINGS> ➞
press [OK].
OK
The LAN SETTINGS menu appears.
3-28
Specifying Mail Basic Items
F3
4
F4
Press [F3] (▼) or [F4] (▲) to highlight <01 MAIL USER
SETTING> ➞ press [OK].
OK
The MAIL USER SETTING menu appears.
5
F4
Press [F3] (▼) or [F4] (▲) to highlight <13 ERROR MAIL> ➞
press [OK].
OK
The ERROR MAIL menu appears.
F3
6
F4
Press [F3] (▼) or [F4] (▲) to highlight <01 LEAVE ON
SERVER> or <02 ERASE FROM SERVER> ➞ press [OK].
OK
The MAIL USER SETTING menu returns.
Reset
7
Press [Reset] to return to the Basic Features screen.
Specifying Mail Basic Items
3-29
3
Setting Up a Mail Account
F3
Specifying a Mail Address Format
Specify a mail address display format for transmitting and receiving e-mail.
NOTE
The default setting is 'NAME <ADDRESS>'.
Additional Functions
1
Press [Additional Functions].
The ADDITIONAL FUNCTIONS menu appears.
Setting Up a Mail Account
3
F3
2
F4
Press [F3] (▼) or [F4] (▲) to highlight <03 FAX SETTINGS> ➞
press [OK].
Each time you press
becomes highlighted.
OK
F3
(▼) or
F4
(▲), the next or previous menu option
The FAX SETTINGS menu appears.
F3
F4
3
Press [F3] (▼) or [F4] (▲) to highlight <08 LAN SETTINGS> ➞
press [OK].
OK
The LAN SETTINGS menu appears.
3-30
Specifying Mail Basic Items
F3
4
F4
Press [F3] (▼) or [F4] (▲) to highlight <01 MAIL USER
SETTING> ➞ press [OK].
OK
The MAIL USER SETTING menu appears.
5
F4
3
Press [F3] (▼) or [F4] (▲) to highlight <14 ADDRESS
FORMAT> ➞ press [OK].
OK
The ADDRESS FORMAT menu appears.
F3
6
F4
Press [F3] (▼) or [F4] (▲) to highlight a mail address format ➞
press [OK].
OK
The MAIL USER SETTING menu returns.
Reset
7
Press [Reset] to return to the Basic Features screen.
Specifying Mail Basic Items
3-31
Setting Up a Mail Account
F3
Specifying Mail Header Printing
Specify whether a mail header (including date and title) is to be printed.
NOTE
The default setting is 'OFF'.
Additional Functions
1
Press [Additional Functions].
The ADDITIONAL FUNCTIONS menu appears.
Setting Up a Mail Account
3
F3
2
F4
Press [F3] (▼) or [F4] (▲) to highlight <03 FAX SETTINGS> ➞
press [OK].
Each time you press
becomes highlighted.
OK
F3
(▼) or
F4
(▲), the next or previous menu option
The FAX SETTINGS menu appears.
F3
F4
3
Press [F3] (▼) or [F4] (▲) to highlight <08 LAN SETTINGS> ➞
press [OK].
OK
The LAN SETTINGS menu appears.
3-32
Specifying Mail Basic Items
F3
4
F4
Press [F3] (▼) or [F4] (▲) to highlight <01 MAIL USER
SETTING> ➞ press [OK].
OK
The MAIL USER SETTING menu appears.
5
F4
3
Press [F3] (▼) or [F4] (▲) to highlight <15 PRINT MAIL
HEADER> ➞ press [OK].
OK
The PRINT MAIL HEADER menu appears.
F3
6
F4
Press [F3] (▼) or [F4] (▲) to highlight <01 OFF> or <02 ON> ➞
press [OK].
OK
The LAN SETTINGS menu returns.
Reset
7
Press [Reset] to return to the Basic Features screen.
Specifying Mail Basic Items
3-33
Setting Up a Mail Account
F3
Registering a Mail Address
This section describes how to register a mail address and name of a mail sender.
Up to five mail addresses can be registered.
Additional Functions
Setting Up a Mail Account
3
1
Press [Additional Functions].
The ADDITIONAL FUNCTIONS menu appears.
F3
2
F4
Press [F3] (▼) or [F4] (▲) to highlight <03 FAX SETTINGS> ➞
press [OK].
Each time you press
becomes highlighted.
OK
F3
(▼) or
F4
(▲), the next or previous menu option
The FAX SETTINGS menu appears.
F3
F4
3
Press [F3] (▼) or [F4] (▲) to highlight <08 LAN SETTINGS> ➞
press [OK].
OK
The LAN SETTINGS menu appears.
3-34
Registering a Mail Address
F3
4
F4
Press [F3] (▼) or [F4] (▲) to highlight <02 E-MAIL ADD
SETTNG> ➞ press [OK].
OK
The display for highlighting a mail address appears.
5
F4
3
Press [F3] (▼) or [F4] (▲) to highlight any number under
which you register a mail address ➞ press [OK].
Setting Up a Mail Account
F3
OK
The E-MAIL ADD SETTNG menu appears.
NOTE
• Register the default mail address as the value under '01'.
• Up to five mail addresses can be registered.
F3
F4
6
Press [F3] (▼) or [F4] (▲) to highlight <01 SMTP SETTINGS>
➞ press [OK].
OK
The SMTP SETTINGS menu appears.
<01 MAIL ADD. (From)> is highlighted.
NOTE
<02 POP3 SETTINGS> is to be highlighted to receive mail via a POP3 server. (See
"Setting to Receive Mail Via a POP3 Server," on p. 3-47.)
Registering a Mail Address
3-35
OK
7
Press [OK].
The display for entering the e-mail address appears.
@.
Setting Up a Mail Account
3
ABC
DEF
1
2
3
GHI
JKL
MNO
4
5
6
PRS
TUV
WXY
7
8
9
OPER
SYMBOLS
8
Input a mail address using the numeric keys ➞ press [OK].
Input Example: [email protected]
For details on how to input characters, see Chapter 2, "Basic Operations," in the
Reference Guide.
0
OK
The SMTP SETTINGS menu returns.
<02 NAME> is highlighted.
OK
9
Press [OK].
The display for entering the name appears.
@.
ABC
1
2
3
GHI
JKL
MNO
4
5
6
PRS
TUV
WXY
7
8
9
OPER
SYMBOLS
0
DEF
10 Input a name using the numeric keys ➞ press [OK].
Input Example: R. LOUIS
For details on how to input characters, see Chapter 2, "Basic Operations," in the
Reference Guide.
OK
3-36
Registering a Mail Address
The SMTP SETTINGS menu returns.
The 03 OPTIONAL SETTING menu is highlighted.
OK
11 Press [OK].
If you select '01 OFF', the SMTP SETTINGS menu returns. To continue registering
another e-mail address option, repeat the above procedure from step 5.
If you select '02 ON', the OPTIONAL SETTING menu appears. Proceed to
"Specifying Optional Settings for Transmitting Mail," on p. 3-38.
The OPTIONAL SETTING menu appears.
Reset
12 Press [Reset] to return to the Basic Features screen.
Registering a Mail Address
3
Setting Up a Mail Account
In the OPTIONAL SETTING menu, you can specify optional settings, including
the Reply Address, Subject, Message Text, Signature, Priority, RX Confirmation,
and Auto Line Wrap.
3-37
Specifying Optional Settings for Transmitting Mail
This section describes how to specify the optional settings for transmitting mail. You
can specify the following items as options.
Item
Setting Up a Mail Account
3
Description
01 REPLY ADDRESS
Enter a mail address for the reply
mail destination.
02 SUBJECT
'AUTO*', 'FIXED'
Specify whether a subject is
automatically set or a fixed subject.
If you specify 'FIXED', enter a
subject.
03 MESSAGE TEXT
Specify whether message text is to 'ON', 'OFF*'
be attached to a transmitting mail.
If you are to attach message text,
edit the message text first.
04 SIGNATURE
Specify whether a sender's
signature is to be attached to a
transmitting mail. If you are to
attach a signature, edit the
signature first.
'ON', 'OFF*'
05 PRIORITY
Specify the priority of a
transmitting mail.
'HIGH', 'STANDARD*',
'LOW'
06 RX CONFIRMATION
Specify whether you want
confirmation that a transmitted
mail has been received by the
other party.
'ON', 'OFF*'
07 AUTO LINE WRAP
'ON*', 'OFF'
Specify whether message text is
automatically line wrapped at an
appropriate position. When you
specify automatic line wrap, set the
number of characters to be
wrapped.
An asterisk (*) indicates the default setting.
3-38
Setting
Specifying Optional Settings for Transmitting Mail
Additional Functions
1
Press [Additional Functions].
The ADDITIONAL FUNCTIONS menu appears.
2
F4
Press [F3] (▼) or [F4] (▲) to highlight <03 FAX SETTINGS> ➞
press [OK].
Each time you press
becomes highlighted.
OK
F3
(▼) or
F4
(▲), the next or previous menu option
The FAX SETTINGS menu appears.
F3
3
F4
Press [F3] (▼) or [F4] (▲) to highlight <08 LAN SETTINGS> ➞
press [OK].
OK
The LAN SETTINGS menu appears.
F3
F4
4
Press [F3] (▼) or [F4] (▲) to highlight <02 E-MAIL ADD
SETTNG> ➞ press [OK].
OK
The display for highlighting a mail address appears.
Specifying Optional Settings for Transmitting Mail
3-39
3
Setting Up a Mail Account
F3
F3
5
F4
Press [F3] (▼) or [F4] (▲) to highlight any number under
which you register a mail address ➞ press [OK].
OK
The E-MAIL ADD SETTNG menu appears.
NOTE
• Register the default mail address as the value under '01'.
• Up to five mail addresses can be registered.
Setting Up a Mail Account
3
F3
6
F4
Press [F3] (▼) or [F4] (▲) to highlight <01 SMTP SETTINGS>
➞ press [OK].
OK
The SMTP SETTINGS menu appears.
F3
7
F4
Press [F3] (▼) or [F4] (▲) to highlight <03 OPTIONAL
SETTING> ➞ press [OK].
OK
The OPTIONAL SETTING menu appears.
<01 REPLY ADDRESS> is highlighted.
OK
3-40
8
Press [OK].
Specifying Optional Settings for Transmitting Mail
The display for entering the reply mail address appears.
ABC
DEF
1
2
3
JKL
MNO
4
5
6
PRS
TUV
WXY
7
8
9
OPER
SYMBOLS
0
OK
9
Input a reply mail address using the numeric keys ➞ press
[OK].
Input Example: [email protected]
For details on how to input characters, see Chapter 2, "Basic Operations," in the
Reference Guide.
3
Setting Up a Mail Account
@.
GHI
The OPTIONAL SETTING menu returns.
<02 SUBJECT> is highlighted.
OK
10 Press [OK].
The SUBJECT menu appears.
F3
F4
11 Press [F3] (▼) or [F4] (▲) to highlight <01 AUTO> or <02
FIXED>.
● If you select <01 AUTO>:
OK
❑ Press [OK].
The OPTIONAL SETTING menu returns.
<03 MESSAGE TEXT> is highlighted.
❑ Proceed to step 12.
Specifying Optional Settings for Transmitting Mail
3-41
● If you select <02 FIXED>:
❑ Press [OK].
OK
The display for entering the subject appears.
@.
ABC
❑ Input a subject ➞ press [OK].
DEF
1
2
3
GHI
JKL
MNO
For details on how to input characters, see Chapter 2, "Basic Operations," in
the Reference Guide.
4
5
6
PRS
TUV
WXY
7
8
9
OPER
SYMBOLS
0
OK
Setting Up a Mail Account
3
The OPTIONAL SETTING menu returns.
<03 MESSAGE TEXT> is highlighted.
NOTE
You can input up to 60 characters in the ALPHA INPUT or NUMBER INPUT mode.
OK
12 Press [OK].
The MESSAGE TEXT menu appears.
F3
13 Press [F3] (▼) or [F4] (▲) to highlight <01 OFF> or <02 ON>.
F4
● If you select <01 OFF>:
OK
❑ Press [OK].
The OPTIONAL SETTING menu returns.
<04 SIGNATURE> is highlighted.
❑ Proceed to step 14.
3-42
Specifying Optional Settings for Transmitting Mail
● If you select <02 ON>:
❑ Press [OK].
OK
The display for entering the message text appears.
ABC
DEF
1
2
3
JKL
MNO
4
5
6
PRS
TUV
WXY
7
8
9
OPER
SYMBOLS
❑ Input message text ➞ press [OK].
For details on how to input characters, see Chapter 2, "Basic Operations," in
the Reference Guide.
0
OK
3
Setting Up a Mail Account
@.
GHI
The OPTIONAL SETTING menu returns.
<04 SIGNATURE> is highlighted.
NOTE
You can input up to 250 characters in the ALPHA INPUT or NUMBER INPUT
mode.
OK
14 Press [OK].
The SIGNATURE menu appears.
F3
15 Press [F3] (▼) or [F4] (▲) to highlight <01 OFF> or <02 ON>.
F4
● If you select <01 OFF>:
OK
❑ Press [OK].
The OPTIONAL SETTING menu returns.
<05 PRIORITY> is highlighted.
❑ Proceed to step 16.
Specifying Optional Settings for Transmitting Mail
3-43
● If you select <02 ON>:
❑ Press [OK].
OK
The display for entering the signature appears.
@.
ABC
❑ Input a signature ➞ press [OK].
DEF
1
2
3
GHI
JKL
MNO
For details on how to input characters, see Chapter 2, "Basic Operations," in
the Reference Guide.
4
5
6
PRS
TUV
WXY
7
8
9
OPER
SYMBOLS
0
OK
Setting Up a Mail Account
3
The OPTIONAL SETTING menu returns.
<05 PRIORITY> is highlighted.
NOTE
You can input up to 120 characters in the ALPHA INPUT or NUMBER INPUT
mode.
OK
16 Press [OK].
The PRIORITY menu appears.
F3
F4
17 Press [F3] (▼) or [F4] (▲) to highlight <01 HIGH>, <02
STANDARD> or <03 LOW> ➞ press [OK].
OK
The OPTIONAL SETTING menu returns.
<06 RX CONFIRMATION> is highlighted.
3-44
Specifying Optional Settings for Transmitting Mail
OK
18 Press [OK].
The RX CONFIRMATION menu appears.
F4
19 Press [F3] (▼) or [F4] (▲) to highlight <01 OFF> or <02 ON> ➞
press [OK].
OK
The OPTIONAL SETTING menu returns.
<07 AUTO LINE WRAP> is highlighted.
OK
20 Press [OK].
The AUTO LINE WRAP menu appears.
F3
21 Press [F3] (▼) or [F4] (▲) to highlight <01 OFF> or <02 ON>.
F4
● If you select <01 OFF>:
OK
❑ Press [OK].
The E-MAIL ADD SETTNG menu returns.
Specifying Optional Settings for Transmitting Mail
3
Setting Up a Mail Account
F3
3-45
● If you select <02 ON>:
OK
❑ Press [OK].
The display for entering the number of characters to be wrapped appears.
F2
F3
❑ Press [F2] (-) or [F3] (+) to specify the number of characters to be wrapped ➞
press [OK].
OK
Setting Up a Mail Account
3
The E-MAIL ADD SETTNG menu returns.
NOTE
• You can specify the number of characters from 20 to 99.
• You can specify the number of characters using the numeric keys.
Reset
3-46
22 Press [Reset] to return to the Basic Features screen.
Specifying Optional Settings for Transmitting Mail
Setting to Receive Mail Via a POP3 Server
This section describes the necessary setting procedure to receive mail via a POP3
server.
1
Press [Additional Functions].
3
The ADDITIONAL FUNCTIONS menu appears.
F3
2
F4
Press [F3] (▼) or [F4] (▲) to highlight <03 FAX SETTINGS> ➞
press [OK].
Each time you press
becomes highlighted.
OK
F3
(▼) or
F4
(▲), the next or previous menu option
The FAX SETTINGS menu appears.
F3
F4
3
Press [F3] (▼) or [F4] (▲) to highlight <08 LAN SETTINGS> ➞
press [OK].
OK
The LAN SETTINGS menu appears.
Setting to Receive Mail Via a POP3 Server
3-47
Setting Up a Mail Account
Additional Functions
F3
4
F4
Press [F3] (▼) or [F4] (▲) to highlight <02 E-MAIL ADD
SETTNG> ➞ press [OK].
OK
The display for highlighting a mail address appears.
F3
3
5
Setting Up a Mail Account
F4
Press [F3] (▼) or [F4] (▲) to highlight any number under
which you register a mail address ➞ press [OK].
OK
The E-MAIL ADD SETTNG menu appears.
F3
6
F4
Press [F3] (▼) or [F4] (▲) to highlight <02 POP3 SETTINGS> ➞
press [OK].
OK
The POP3 SETTINGS menu appears.
<01 POP3 ACCOUNT> is highlighted.
OK
7
Press [OK].
The display for entering the POP3 account name appears.
3-48
Setting to Receive Mail Via a POP3 Server
@.
ABC
DEF
1
2
3
GHI
JKL
MNO
4
5
6
PRS
TUV
WXY
7
8
9
OPER
SYMBOLS
8
Input the identifier for the POP3 account ➞ press [OK].
For details on how to input characters, see Chapter 2, "Basic Operations," in the
Reference Guide.
0
OK
The POP3 SETTINGS menu returns.
<02 POP3 PASSWORD> is highlighted.
Setting Up a Mail Account
3
NOTE
Input an identifier using the numeric keys.
OK
9
Press [OK].
The display for entering the POP3 password appears.
@.
ABC
1
2
3
GHI
JKL
MNO
4
5
6
PRS
TUV
WXY
7
DEF
8
9
OPER
SYMBOLS
0
10 Input the password necessary to receive mail via the POP3
server ➞ press [OK].
For details on how to input characters, see Chapter 2, "Basic Operations," in the
Reference Guide.
OK
The E-MAIL ADD SETTNG menu returns.
NOTE
Input the password using the numeric keys.
Reset
11 Press [Reset] to return to the Basic Features screen.
Setting to Receive Mail Via a POP3 Server
3-49
Setting Up a Mail Account
3
3-50
Setting to Receive Mail Via a POP3 Server
Checking Settings and
Registering Destinations
4
CHAPTER
This chapter describes various methods for checking settings, and registering destinations,
such as for mail address and FTP Server.
Checking Settings. . . . . . . . . . . . . . . . . . . . . . . . . . . . . . . . . . . . . . . . . . . . . . . . . . . . . . . 4-2
Checking the IP Address . . . . . . . . . . . . . . . . . . . . . . . . . . . . . . . . . . . . . . . . . . . . . . . . . . . . . . .4-2
Checking by the User Data List . . . . . . . . . . . . . . . . . . . . . . . . . . . . . . . . . . . . . . . . . . . . . . . . . .4-4
Registering Destinations (Mail Addresses). . . . . . . . . . . . . . . . . . . . . . . . . . . . . . . . . . . . 4-5
Registering Mail Addresses for One-Touch/Coded Speed Dialing . . . . . . . . . . . . . . . . . . . . . . .4-5
Specifying Mail Transmitting Conditions . . . . . . . . . . . . . . . . . . . . . . . . . . . . . . . . . . . . . . . . . . .4-9
Registering Destinations (FTP Server) . . . . . . . . . . . . . . . . . . . . . . . . . . . . . . . . . . . . . . 4-17
Registering FTP Server Name for One-Touch/Coded Speed Dialing . . . . . . . . . . . . . . . . . . . .4-17
Specifying Settings for Transmitting Mail to an FTP Server . . . . . . . . . . . . . . . . . . . . . . . . . . . .4-22
4-1
Checking Settings
This section describes how to check the settings of the IP address, network, and
mail account.
You can check the settings with the machine's display or by printing the user data
list.
Checking the IP Address
Checking Settings and Registering Destinations
4
You can check the currently operating IP address, subnet mask, default gateway,
etc., on the machine's display.
IMPORTANT
If you change settings, the new settings will become effective when the machine is
restarted after the procedure.
Additional Functions
1
Press [Additional Functions].
The ADDITIONAL FUNCTIONS menu appears.
F3
F4
OK
2
Press [F3] (▼) or [F4] (▲) to highlight <06 SYSTEM
SETTINGS> ➞ press [OK].
Each time you press
becomes highlighted.
F3
(▼) or
F4
The SYSTEM SETTINGS menu appears.
4-2
Checking Settings
(▲), the next or previous menu option
IMPORTANT
When <ENTER A MANAGEMENT ID NUMBER> is displayed, input the System
Administration ID and the System Password. For how to input the System
Administration ID and the System Password, see Chapter 5, "System Manager
Settings," in the Reference Guide.
F3
3
F4
Press [F3] (▼) or [F4] (▲) to highlight <03 NETWORK
SETTINGS> ➞ press [OK].
OK
F3
4
F4
Press [F3] (▼) or [F4] (▲) to highlight <09 VIEW IP ADDRESS>
➞ press [OK].
OK
The currently operating IP address, subnet mask, default gateway and such are
displayed.
F4
5
Check the settings ➞ press [F4] (OK).
You can view different settings by pressing
F2
(▼) or
F3
(▲).
The NETWORK SETTINGS menu returns.
Reset
6
Press [Reset] to return to the Basic Features screen.
Checking Settings
4-3
Checking Settings and Registering Destinations
4
The NETWORK SETTINGS menu appears.
Checking by the User Data List
You can check settings of the network and mail account by printing the user data
list.
For an output example of a user data list, see Chapter 14, "Appendix," in the
Facsimile Guide.
FAX
1
Press [FAX].
The fax indicator lights up, and the machine displays the Fax Basic Features
screen.
Checking Settings and Registering Destinations
4
2
Open all three one-touch speed dialing panels ➞ press
[Report].
Report
The REPORT menu appears.
F3
F4
3
Press [F3] (▼) or [F4] (▲) to highlight <03 USER DATA> ➞
press [OK].
OK
The Fax Basic Features screen returns, and the user data list is printed out.
4-4
Checking Settings
Registering Destinations (Mail Addresses)
You can register mail addresses for destinations in one-touch speed dialing and
coded speed dialing.
Registering Mail Addresses for One-Touch/Coded Speed
Dialing
You can register up to 63 destinations for one-touch speed dialing, and 137
destinations for coded speed dialing.
You can register a mail address and destination name for each one-touch speed
dialing or coded speed dialing entry. You can also input other optional settings, such
as an access code and transmission start time.
Additional Functions
1
Press [Additional Functions].
The ADDITIONAL FUNCTIONS menu appears.
F3
F4
OK
2
Press [F3] (▼) or [F4] (▲) to highlight <04 ADD.
REGISTRATION> ➞ press [OK].
Each time you press
becomes highlighted.
F3
(▼) or
F4
(▲), the next or previous menu option
The ADD. REGISTRATION menu appears.
Registering Destinations (Mail Addresses)
4-5
Checking Settings and Registering Destinations
4
F3
3
F4
Press [F3] (▼) or [F4] (▲) to highlight <01 1-TOUCH SPD
DIAL> or <02 CODED SPD DIAL> ➞ press [OK].
OK
The display for selecting the type of destination for One-Touch or Coded Speed
Dialing appears.
NOTE
Group Dial can only register previously registered One-Touch and Coded Speed
Dial destinations.
Checking Settings and Registering Destinations
4
F3
4
F4
Press [F3] (▼) or [F4] (▲) to highlight <02 E-MAIL ADDRESS>
➞ press [OK].
Screen Example: Registering a mail address for one-touch speed dialing.
OK
The display for highlighting a registration number appears.
F3
F4
OK
5
Press [F3] (▼) or [F4] (▲) to highlight any registration number
for one-touch speed dialing or coded speed dialing ➞ press
[OK].
If the number has already been registered, the name and phone number of its
destination will be displayed.
The E-MAIL ADDRESS menu appears.
<01 ENTER E-MAIL ADD.> is highlighted.
4-6
Registering Destinations (Mail Addresses)
OK
6
Press [OK].
The display for entering the e-mail address appears.
@.
ABC
DEF
1
2
3
GHI
JKL
MNO
4
5
6
PRS
TUV
WXY
7
8
9
OPER
SYMBOLS
7
Input a mail address using the numeric keys ➞ press [OK].
4
0
Checking Settings and Registering Destinations
OK
The E-MAIL ADDRESS menu returns.
<02 NAME> is highlighted.
OK
8
Press [OK].
The display for entering a name appears.
@.
ABC
DEF
1
2
3
GHI
JKL
MNO
4
5
6
PRS
TUV
WXY
7
8
9
OPER
SYMBOLS
9
Input a destination name using the numeric keys ➞ press
[OK].
0
OK
The destination name is registered, and the E-MAIL ADDRESS menu returns.
<03 OPTIONAL SETTING> is highlighted.
Registering Destinations (Mail Addresses)
4-7
NOTE
• For details on how to input characters, see Chapter 2, "Basic Operations," in the
Reference Guide.
• You can input up to 16 characters in the ALPHA INPUT or NUMBER INPUT mode.
OK
10 Press [OK].
The OPTIONAL SETTING menu appears.
4
Checking Settings and Registering Destinations
F3
11 If you want to specify an optional setting, press [F3] (▼) or
F4
[F4] (▲) to highlight <02 ON> ➞ press [OK].
OK
If you do not want to specify an optional setting, highlight <01 OFF> ➞ press
(OK).
If you highlight '01 OFF', the E-MAIL ADDRESS menu returns. To continue
registering another one-touch speed dialing option, repeat the above procedure
from step 5.
If you highlight '02 ON', the OPTIONAL SETTING menu appears. Proceed to
"Specifying Mail Transmitting Conditions," on p. 4-9.
In the OPTIONAL SETTING menu, you can specify optional settings, including
Access Code, TX Mode, TX File Name, TX Time Setting, and Sender Name.
Reset
12 To finish registering destinations of one-touch speed dialing
and coded speed dialing, press [Reset].
Registration of destinations for one-touch speed dialing and coded speed
dialing is finished, and the Basic Features screen returns.
4-8
Registering Destinations (Mail Addresses)
Specifying Mail Transmitting Conditions
When you register a mail address in one-touch speed dialing, you can also register
the following transmitting conditions.
Description
Setting
01 ACCESS CODE
Register a 2 to 5 digit access code, 2 to 5 digit
so that you can easily specify a
destination when transmitting.
02 TX MODE
Specify whether transmission
mode will be 'SIMPLE MODE',
adhering to the common I-Fax
standard, or 'E-MAIL MODE', in
which you can select one of four
image formats.
03 TX FILE NAME
'SIMPLE MODE*', 'E-MAIL
MODE'
4
Checking Settings and Registering Destinations
Item
'AUTO*', 'FIXED', 'FIXED +
Specify whether transmitting file
names will be automatically given TX TIME'
as "communication administrative
number" + "consecutive number"
(AUTO), your input name (FIXED),
or "your input name + transmission
starting time" (FIXED + TX TIME).
04 TX TIME SETTNG If you specify the transmission start 00:00 to 23:59
time, the document stored in the
memory will be transmitted at the
specified time.
05 SENDER NAME
If you register the sender name,
documents will be transmitted with
the registered sender name
attached.
An asterisk (*) indicates the default setting.
Additional Functions
1
Press [Additional Functions].
The ADDITIONAL FUNCTIONS menu appears.
Registering Destinations (Mail Addresses)
4-9
F3
2
F4
Press [F3] (▼) or [F4] (▲) to highlight <04 ADD.
REGISTRATION> ➞ press [OK].
Each time you press
becomes highlighted.
OK
F3
(▼) or
F4
(▲), the next or previous menu option
The ADD. REGISTRATION menu appears.
F3
4
3
Checking Settings and Registering Destinations
F4
Press [F3] (▼) or [F4] (▲) to highlight <01 1-TOUCH SPD
DIAL> or <02 CODED SPD DIAL> ➞ press [OK].
OK
The display for selecting the type of destination for One-Touch or Coded Speed
Dialing appears.
NOTE
Group Dial can only register previously registered One-Touch and Coded Speed
Dial destinations.
F3
F4
OK
4
Press [F3] (▼) or [F4] (▲) to highlight <02 E-MAIL ADDRESS>
➞ press [OK].
Screen Example: Registering a mail address for one-touch speed dialing.
The display for highlighting a registration number appears.
4-10
Registering Destinations (Mail Addresses)
F3
5
F4
OK
Press [F3] (▼) or [F4] (▲) to highlight any registration number
for one-touch speed dialing or coded speed dialing ➞ press
[OK].
If the number has already been registered, the name and phone number of its
destination will be displayed.
The E-MAIL ADDRESS menu appears.
6
F4
4
Press [F3] (▼) or [F4] (▲) to highlight <03 OPTIONAL
SETTING> ➞ press [OK].
OK
The OPTIONAL SETTING menu appears.
F3
7
Press [F3] (▼) or [F4] (▲) to highlight <02 ON> ➞ press [OK].
F4
OK
The OPTIONAL SETTING menu appears.
F3
F4
8
Press [F3] (▼) or [F4] (▲) to highlight <01 ACCESS CODE> ➞
press [OK].
OK
The display for entering the access code appears.
Registering Destinations (Mail Addresses)
4-11
Checking Settings and Registering Destinations
F3
@.
ABC
DEF
1
2
3
GHI
JKL
MNO
4
5
6
PRS
TUV
WXY
7
8
9
OPER
SYMBOLS
9
Input an access code using the numeric keys ➞ press [OK].
0
OK
The OPTIONAL SETTING menu returns.
<02 TX MODE> is highlighted.
OK
10 Press [OK].
Checking Settings and Registering Destinations
4
The TX MODE menu appears.
F3
F4
11 Press [F3] (▼) or [F4] (▲) to highlight <01 SIMPLE MODE> or
<02 E-MAIL MODE> ➞ press [OK].
OK
NOTE
Highlight '01 SIMPLE MODE' to transmit or receive mail between facsimiles with
I-Fax functions.
● If you select <01 SIMPLE MODE>:
❑ The OPTIONAL SETTING menu returns. <03 TX FILE NAME> is highlighted.
Proceed to step 12.
● If you select <02 E-MAIL MODE>:
F3
F4
❑ The IMAGE FORMAT menu appears. Press [F3] (▼) or [F4] (▲) to specify an
image format to be attached to e-mail ➞ press [OK].
OK
4-12
Registering Destinations (Mail Addresses)
The OPTIONAL SETTING menu returns.
<03 TX FILE NAME> is highlighted.
OK
12 Press [OK].
The TX FILE NAME menu appears.
13 Press [F3] (▼) or [F4] (▲) to highlight <01 AUTO>, <02 FIXED>,
F3
or <03 FIXED + TX TIME> ➞ press [OK].
F4
OK
● If you select <01 AUTO>:
❑ The OPTIONAL SETTING menu returns. <04 TX TIME SETTNG> is
highlighted. Proceed to step 14.
● If you select <02 FIXED> or <03 FIXED + TX TIME>:
@.
ABC
DEF
1
2
3
GHI
JKL
MNO
4
5
6
PRS
TUV
WXY
7
8
9
OPER
SYMBOLS
❑ The display for entering the file name for transmission appears. Input a file
name ➞ press [OK].
0
OK
The OPTIONAL SETTING menu returns.
<04 TX TIME SETTNG> is highlighted.
Registering Destinations (Mail Addresses)
4-13
Checking Settings and Registering Destinations
4
NOTE
• For details on how to input characters, see Chapter 2, "Basic Operations," in the
Reference Guide.
• Input a file name using numeric keys.
• If you highlight '01 AUTO', a file name for transmission will be given as follows
(Extension will be automatically assigned according to the image data format.):
- AAAABBBB.tif (AAAA: communication administrative number, BBBB: consecutive
number of attached file)
• If you highlight '02 FIXED', a file name for transmission will be given as follows
(Extension will be automatically assigned according to the image data format.):
- CCCC.tif (CCCC: a file name you input)
• If you highlight <03 FIXED + TX TIME>, a file name for transmission will be given
as follows (Extension will be automatically assigned according to the image data
format.):
- CCCXXXX.tif (CCC: file name you input, XXXX: Year, Month, Time, Minutes,
Second)
Checking Settings and Registering Destinations
4
OK
14 Press [OK].
The TX TIME SETTNG menu appears.
F3
F4
OK
15 Press [F3] (▼) or [F4] (▲) to highlight any number from <01>
to <05> ➞ press [OK].
You can register up to five transmission start times (numbered, 1 to 5).
The display for entering the transmission start time appears.
4-14
Registering Destinations (Mail Addresses)
DEF
ABC
1
2
3
JKL
MNO
4
5
6
PRS
TUV
WXY
7
8
9
OPER
SYMBOLS
16 Input the transmission start time using the numeric keys ➞
press [OK].
0
OK
The TX TIME SETTNG menu returns.
NOTE
• Input the transmission start time in 24-hour notation (00:00 to 23:59).
• If you make a mistake when inputting time, return to the beginning of the incorrect
number and overwrite it with the correct number. Press C (Clear) to start inputting
from the beginning.
17 To specify other transmission start times, repeat the above
procedure from step 15.
BACK
18 To finish specifying the transmission start time(s), press
[BACK].
The OPTIONAL SETTING menu returns.
F3
F4
19 Press [F3] (▼) or [F4] (▲) to highlight <05 SENDER NAME> ➞
press [OK].
OK
The SENDER NAME menu appears.
F3
F4
20 Press [F3] (▼) or [F4] (▲) to highlight any sender name ➞
press [OK].
OK
Registering Destinations (Mail Addresses)
4-15
4
Checking Settings and Registering Destinations
@.
GHI
The display for highlighting a registration number returns.
NOTE
The sender names need to have been registered beforehand. For details on how to
register sender names, see Chapter 1, "Before You Use the Fax Functions," in the
Facsimile Guide.
Reset
21 Press [Reset] to return to the Basic Features screen.
Checking Settings and Registering Destinations
4
4-16
Registering Destinations (Mail Addresses)
Registering Destinations (FTP Server)
You can register an FTP server name in one-touch speed dialing and coded speed
dialing.
Registering FTP Server Name for One-Touch/Coded Speed
Dialing
Additional Functions
1
Press [Additional Functions].
The ADDITIONAL FUNCTIONS menu appears.
F3
F4
OK
2
Press [F3] (▼) or [F4] (▲) to highlight <04 ADD.
REGISTRATION> ➞ press [OK].
Each time you press
becomes highlighted.
F3
(▼) or
F4
(▲), the next or previous menu option
The ADD. REGISTRATION menu appears.
Registering Destinations (FTP Server)
4-17
4
Checking Settings and Registering Destinations
You can upload an image to an FTP server by registering an FTP server name and
password, in one-touch speed dialing and coded speed dialing.
F3
3
F4
Press [F3] (▼) or [F4] (▲) to highlight <01 1-TOUCH SPD
DIAL> or <02 CODED SPD DIAL> ➞ press [OK].
OK
F3
4
F4
Press [F3] (▼) or [F4] (▲) to highlight <03 FTP SERVER> ➞
press [OK].
OK
Screen Example: Registering an FTP server for one-touch speed dialing.
Checking Settings and Registering Destinations
4
The display for highlighting a registration number appears.
F3
5
F4
OK
Press [F3] (▼) or [F4] (▲) to highlight any registration number
for one-touch speed dialing or coded speed dialing ➞ press
[OK].
If a number has already been registered, the name and phone number of the
destination will be displayed.
The FTP SERVER menu appears.
<01 FTP SERVER NAME> is highlighted.
OK
4-18
6
Press [OK].
Registering Destinations (FTP Server)
The display for entering the FTP server name appears.
@.
ABC
DEF
1
2
3
GHI
JKL
MNO
4
5
6
PRS
TUV
WXY
7
8
9
OPER
SYMBOLS
7
Input an FTP server name using the numeric keys ➞ press
[OK].
0
OK
The FTP SERVER menu returns.
<02 NAME> is highlighted.
4
OK
8
Checking Settings and Registering Destinations
NOTE
You can also input an IP address for the FTP server instead of an FTP server
name.
Press [OK].
The display for entering the name appears.
@.
ABC
DEF
1
2
3
GHI
JKL
MNO
4
5
6
PRS
TUV
WXY
7
8
9
OPER
SYMBOLS
9
Input a destination name using the numeric keys ➞ press
[OK].
0
OK
The destination name is registered, and the FTP SERVER menu returns.
<03 LOGIN NAME> is highlighted.
NOTE
• For details on how to input characters, see Chapter 2, "Basic Operations," in the
Reference Guide.
• You can input up to 16 characters in the ALPHA INPUT or NUMBER INPUT mode.
Registering Destinations (FTP Server)
4-19
OK
10 Press [OK].
The display for entering the login name appears.
@.
ABC
DEF
1
2
3
GHI
JKL
MNO
4
5
6
PRS
TUV
WXY
7
8
9
OPER
SYMBOLS
4
11 Input a login name using the numeric keys ➞ press [OK].
0
Checking Settings and Registering Destinations
OK
The FTP SERVER menu returns.
<04 PASSWORD> is highlighted.
NOTE
• For details on how to input characters, see Chapter 2, "Basic Operations," in the
Reference Guide.
• You can input up to 60 characters in the ALPHA INPUT or NUMBER INPUT mode.
OK
12 Press [OK].
The display for entering the password appears.
@.
ABC
1
2
3
GHI
JKL
MNO
4
5
6
PRS
7
TUV
DEF
13 Input a password using the numeric keys ➞ press [OK].
WXY
8
9
OPER
SYMBOLS
0
OK
The FTP SERVER menu returns.
4-20
Registering Destinations (FTP Server)
<05 UPLOAD DIRECTORY> is highlighted.
OK
14 Press [OK].
The display for entering the upload directory appears.
ABC
DEF
1
2
3
JKL
MNO
4
5
6
PRS
TUV
WXY
7
8
9
OPER
SYMBOLS
15 Input an upload directory for the image using the numeric
keys ➞ press [OK].
4
0
OK
The FTP SERVER menu returns.
<06 OPTIONAL SETTING> is highlighted.
NOTE
• If you do not specify a folder for uploading an image, the default folder at the time of
login will be used as the upload folder.
• For details on how to input characters, see Chapter 2, "Basic Operations," in the
Reference Guide.
OK
16 Press [OK] to specify optional settings.
The OPTIONAL SETTING menu appears.
F3
F4
OK
17 If you want to specify optional settings, press [F3] (▼) or [F4]
(▲) to highlight <02 ON> ➞ press [OK].
If you do not want to specify optional settings, highlight <01 OFF> ➞ press [OK].
Registering Destinations (FTP Server)
4-21
Checking Settings and Registering Destinations
@.
GHI
If you highlight <01 OFF>, the screen for registering FTP SERVER returns. To
continue registering other one-touch speed dialing, repeat the above procedure
from step 5.
If you highlight <02 ON>, the OPTIONAL SETTING menu appears. Proceed to
"Specifying Settings for Transmitting Mail to an FTP Server," on p. 4-22.
In the OPTIONAL SETTING menu, you can specify optional settings, including
Access Code, Put File Name, Image Format, Control Port Number, Use Control
File, TX Time Setting, and Sender Name.
Checking Settings and Registering Destinations
4
Reset
18 Press [Reset] to return to the Basic Features screen.
Registering of one-touch speed dialing and coded speed dialing destinations is
finished, and the Basic Features screen returns.
Specifying Settings for Transmitting Mail to an FTP Server
When you register an FTP server name in one-touch/coded speed dialing, you can
also register the following transmitting conditions.
Item
4-22
Description
Setting
01 ACCESS CODE
Register a 2 to 5 digits access code, so
that you can easily specify a destination
when transmitting.
02 PUT FILE NAME
'AUTO*', 'FIXED',
Specify whether transmitting file names
'FIXED + TX
will be automatically given as
"communication administrative number" + TIME'
"consecutive number" (AUTO), your input
name (FIXED), or "your input name +
transmission starting time" (FIXED + TX
TIME).
03 IMAGE FORMAT
Specify transmitting image format from
PDF, TIFF(MMR), TIFF(MR), or
TIFF(MH).
'PDF',
'TIFF(MMR)',
'TIFF(MR)', or
'TIFF(MH)*'
04 CONTROL PORT NO.
Specify a connecting port number.
00000 to 65535
(21*)
05 USE CONTROL FILE
This function is not available in this
model. Specify 'Off'.
'OFF*', 'ON'
Registering Destinations (FTP Server)
2 to 5 digits
Item
Description
06 TX TIME SETTNG
If you specify the transmission start time,
the document stored in the memory will
be transmitted at that specified time.
07 SENDER NAME
If you register the sender name,
documents will be transmitted with the
registered sender name attached.
Setting
00:00 to 23:59
An asterisk (*) indicates the default setting.
Additional Functions
1
Press [Additional Functions].
The ADDITIONAL FUNCTIONS menu appears.
F3
2
F4
Press [F3] (▼) or [F4] (▲) to highlight <04 ADD.
REGISTRATION> ➞ press [OK].
Each time you press
becomes highlighted.
OK
F3
(▼) or
F4
(▲), the next or previous menu option
The ADD. REGISTRATION menu appears.
F3
F4
3
Press [F3] (▼) or [F4] (▲) to highlight <01 1-TOUCH SPD
DIAL> or <02 CODED SPD DIAL> ➞ press [OK].
OK
The display for selecting the type of destination for One-Touch or Coded Speed
Dialing appears.
Registering Destinations (FTP Server)
4-23
Checking Settings and Registering Destinations
4
NOTE
Group Dial can only register previously registered One-Touch and Coded Speed
Dial destinations.
F3
4
F4
Press [F3] (▼) or [F4] (▲) to highlight <03 FTP SERVER> ➞
press [OK].
OK
Screen Example: Registering an FTP server for one-touch speed dialing.
4
Checking Settings and Registering Destinations
The display for highlighting a registration number appears.
F3
5
F4
OK
Press [F3] (▼) or [F4] (▲) to highlight any registration number
for one-touch speed dialing or coded speed dialing ➞ press
[OK].
If the number has already been registered, the name and phone number of its
destination will be displayed.
The FTP SERVER menu appears.
F3
F4
6
Press [F3] (▼) or [F4] (▲) to highlight <06 OPTIONAL
SETTING> ➞ press [OK].
OK
The OPTIONAL SETTING menu appears.
4-24
Registering Destinations (FTP Server)
7
F3
Press [F3] (▼) or [F4] (▲) to highlight <02 ON> ➞ press [OK].
F4
OK
The OPTIONAL SETTING menu appears.
8
F3
F4
Press [F3] (▼) or [F4] (▲) to highlight <01 ACCESS CODE> ➞
press [OK].
OK
The display for entering the access code appears.
@.
ABC
DEF
1
2
3
GHI
JKL
MNO
4
5
6
PRS
TUV
WXY
7
8
9
OPER
SYMBOLS
9
Input an access code using the numeric keys ➞ press [OK].
0
OK
The OPTIONAL SETTING menu returns.
<02 PUT FILE NAME> is highlighted.
OK
10 Press [OK].
The PUT FILE NAME menu appears.
Registering Destinations (FTP Server)
4-25
Checking Settings and Registering Destinations
4
11 Press [F3] (▼) or [F4] (▲) to highlight <01 AUTO>, <02 FIXED>,
F3
or <03 FIXED + TX TIME> ➞ press [OK].
F4
OK
● If you select <01 AUTO>:
❑ The OPTIONAL SETTING menu returns. Proceed to step 12.
● If you select <02 FIXED> or <03 FIXED + TX TIME>:
Checking Settings and Registering Destinations
4
@.
ABC
❑ The display for entering the file name appears. Input a file name ➞ press [OK].
DEF
1
2
3
GHI
JKL
MNO
4
5
6
PRS
TUV
WXY
7
8
9
OPER
SYMBOLS
0
OK
The OPTIONAL SETTING menu returns.
<03 IMAGE FORMAT> is highlighted.
NOTE
• For details on how to input characters, see Chapter 2, "Basic Operations," in the
Reference Guide.
• Input a file name using the numeric keys.
• If you highlight <01 AUTO>, a file name for transmission will be given as follows
(Extension will be automatically assigned according to the image data format.):
- AAAABBBB.tif (AAAA: communication administrative number, BBBB: consecutive
number of attached file)
• If you highlight <02 FIXED>, a file name for transmission will be given as follows
(Extension will be automatically assigned according to the image data format.):
- CCCC.tif (CCCC: file name you input)
• If you highlight <03 FIXED + TX TIME>, a file name for transmission will be given
as follows (Extension will be automatically assigned according to the image data
format.):
- CCCXXXX.tif (CCC: file name you input, XXXX: Year, Month, Time, Minutes,
Second)
4-26
Registering Destinations (FTP Server)
OK
12 Press [OK].
The IMAGE FORMAT menu appears.
F3
F4
13 Press [F3] (▼) or [F4] (▲) to highlight the image format to be
attached to an e-mail ➞ press [OK].
OK
Checking Settings and Registering Destinations
4
The OPTIONAL SETTING menu returns.
<04 CONTROL PORT NO.> is highlighted.
OK
14 Press [OK].
The display for entering the control port number appears.
Registering Destinations (FTP Server)
4-27
F2
15 Press [F2] (-) or [F3] (+) to decrease or increase for specifying
F3
a port number ➞ press [OK].
OK
You can also specify a port number using the numeric keys.
The OPTIONAL SETTING menu returns.
NOTE
Leave the USE CONTROL FILE setting '01 OFF'. This function is not available in
this model.
Checking Settings and Registering Destinations
4
F3
F4
16 Press [F3] (▼) or [F4] (▲) to highlight <06 TX TIME SETTNG>
➞ press [OK].
OK
The TX TIME SETTNG menu appears.
F3
F4
OK
17 Press [F3] (▼) or [F4] (▲) to highlight any number from <01>
to <05> ➞ press [OK].
You can register up to five transmission start times (numbered, 1 to 5).
The display for entering the transmission start time appears.
4-28
Registering Destinations (FTP Server)
DEF
ABC
1
2
3
JKL
MNO
4
5
6
PRS
TUV
WXY
7
8
9
OPER
SYMBOLS
18 Input the transmission start time using the numeric keys ➞
press [OK].
0
OK
The TX TIME SETTNG menu returns.
NOTE
• Input the transmission start time in 24-hour notation (00:00 to 23:59).
• If you make a mistake when inputting time, return to the beginning of the incorrect
number and overwrite it with the correct number. Press C (Clear) to start inputting
from the beginning.
19 To specify other transmission start times, repeat the above
procedure from step 17.
BACK
20 To finish specifying transmission start time(s), press [BACK].
The OPTIONAL SETTING menu returns.
F3
F4
21 Press [F3] (▼) or [F4] (▲) to highlight <07 SENDER NAME> ➞
press [OK].
OK
The SENDER NAME menu appears.
F3
F4
22 Press [F3] (▼) or [F4] (▲) to highlight your sender name ➞
press [OK].
OK
The display for highlighting a registration number returns.
Registering Destinations (FTP Server)
4-29
4
Checking Settings and Registering Destinations
@.
GHI
NOTE
The sender names need to have been registered beforehand. For details on how to
register sender names, see Chapter 1, "Before You Use the Fax Functions," in the
Facsimile Guide.
Reset
23 Press [Reset] to return to the Basic Features screen.
Checking Settings and Registering Destinations
4
4-30
Registering Destinations (FTP Server)
Transmission and Reception
5
CHAPTER
This chapter describes the various procedures of transmission and reception.
I-Fax Transmission and Reception . . . . . . . . . . . . . . . . . . . . . . . . . . . . . . . . . . . . . . . . . . 5-2
Transmitting I-Fax by One-Touch Speed Dialing, Coded Speed Dialing, or
Access Code . . . . . . . . . . . . . . . . . . . . . . . . . . . . . . . . . . . . . . . . . . . . . . . . . . . . . . . . . . . . . . . .5-2
Manual I-Fax Transmitting . . . . . . . . . . . . . . . . . . . . . . . . . . . . . . . . . . . . . . . . . . . . . . . . . . . . . .5-4
Receiving I-Fax. . . . . . . . . . . . . . . . . . . . . . . . . . . . . . . . . . . . . . . . . . . . . . . . . . . . . . . . . . . . . . .5-6
Transmitting to an FTP Server . . . . . . . . . . . . . . . . . . . . . . . . . . . . . . . . . . . . . . . . . . . . . 5-8
Transmitting to an FTP Server . . . . . . . . . . . . . . . . . . . . . . . . . . . . . . . . . . . . . . . . . . . . . . . . . . .5-8
Types and Usage of Memory Boxes . . . . . . . . . . . . . . . . . . . . . . . . . . . . . . . . . . . . . . . . 5-10
How to Use the Relay Box and Transfer Box . . . . . . . . . . . . . . . . . . . . . . . . . . . . . . . . . . . . . . .5-10
5-1
I-Fax Transmission and Reception
This section describes how to transmit and receive mail with the I-Fax functions of
the machine.
Transmitting I-Fax by One-Touch Speed Dialing, Coded
Speed Dialing, or Access Code
This section describes the basic procedure to transmit mail by one-touch speed
dialing, coded speed dialing, or access code.
For sequential broadcasting, specify mail addresses to register in a mailing list
using one-touch speed dialing keys, coded speed dialing codes, or access codes.
Mail will be sequentially transmitted to the mail addresses registered in the mailing
list. You can also broadcast mail by specifying multiple mail addresses using
one-touch speed dialing keys or coded speed dialing codes, instead of using a
mailing list.
Transmission and Reception
5
NOTE
If a transmission start time is set in one-touch speed dialing or coded speed dialing with
the destination specified, the mail will be transmitted at that preset time. For details on
setting a delayed transmission start time for one-touch speed dialing or coded speed
dialing, see "Specifying Mail Transmitting Conditions," on p. 4-9.
FAX
1
Press [FAX].
The fax indicator lights up, and the Fax Basic Features screen appears.
5-2
I-Fax Transmission and Reception
Line/Mail
2
Press [Line/Mail] to display <I-FAX>.
The machine is ready to transmit.
3
Place a document.
NOTE
For details on how to place a document, see Chapter 3, "Basic Sending," in the
Facsimile Guide.
OK
4
Specify the transmitting conditions ➞ press [OK].
NOTE
To specify a sender name, open all three one-touch speed dialing panels, then
press [TTI Selector] and select a sender name. When you do not specify a sender
name, the mail will be sent under the name registered in '01'.
01
63
5
Specify a destination by one-touch speed dialing, coded
speed dialing, or access code.
Coded
Dial
NOTE
For details on how to specify a destination by one-touch speed dialing, coded
speed dialing, or access code, see Chapter 2, "Speed Dialing," in the Facsimile
Guide.
I-Fax Transmission and Reception
5-3
Transmission and Reception
5
6
Start
Press [Start].
The machine scans the document.
NOTE
• To cancel transmitting, press
(Stop) while scanning the document or while on
standby for transmitting. You cannot cancel while transmitting, even if you press
(Stop).
• If the machine fails to transmit due to transmitting error, etc., it will retransmit for the
number of times specified in RETRY of the MAIL USER SETTING menu. In this
case, the retry interval will be as specified in RETRY INTERVAL of the MAIL USER
SETTING menu. For specification details of Retry and Retry Interval, see
"Specifying Mail Basic Items," on p. 3-2.
Manual I-Fax Transmitting
This section describes the basic procedure to transmit mail manually by using the
numeric keys.
Transmission and Reception
5
For sequential broadcasting, specify mail addresses to register in a mailing list
using the numeric keys. Mail will be sequentially transmitted to the mail addresses
registered in the mailing list. You can also broadcast mail by specifying multiple mail
addresses using the numeric keys, instead of using a mailing list.
1
FAX
Press [FAX].
The fax indicator lights, and the Fax Basic Features screen appears.
Line/Mail
2
Press [Line/Mail] to display <I-FAX>.
The machine is ready to transmit.
5-4
I-Fax Transmission and Reception
3
Place a document.
NOTE
For details on how to place a document, see Chapter 3, "Basic Sending," in the
Facsimile Guide.
4
Specify the transmitting conditions ➞ press [OK].
NOTE
To specify a sender name, open all three one-touch speed dialing panels, then
press [TTI Selector] and select a sender name. When you do not specify a sender
name, the mail will be sent under the name registered in '01'.
@.
ABC
1
2
3
GHI
JKL
MNO
4
5
6
PRS
TUV
7
DEF
5
Specify a destination using the numeric keys ➞ press [OK].
WXY
8
9
OPER
SYMBOLS
0
OK
NOTE
For details on how to input characters, see Chapter 2, "Basic Operations," in the
Reference Guide.
Start
6
Press [Start].
The machine scans the document.
NOTE
• To cancel transmitting, press
(Stop) while scanning the document or while on
standby for transmitting. You cannot cancel while transmitting, even if you press
(Stop).
• If the machine fails to transmit due to transmitting error, etc., it will retransmit for the
number of times specified in RETRY of the MAIL USER SETTING menu. In this
case, the retry interval will be as specified in RETRY INTERVAL of the MAIL USER
SETTING menu. For specification details of Retry and Retry Interval, see
"Specifying Mail Basic Items," on p. 3-2.
I-Fax Transmission and Reception
5-5
5
Transmission and Reception
OK
Receiving I-Fax
If you set EMAIL RX PROTOCOL to SMTP on the MAIL USER SETTING menu, or
set EMAIL RX PROTOCOL to POP3 and specify an interval in the CHECK
INTERVAL menu, the machine will automatically receive mail. (See "Specifying
Mail Basic Items," on p. 3-2.)
If you set EMAIL RX PROTOCOL to POP3 in the MAIL USER SETTING menu, you
can also receive mail manually. (See "Specifying Mail Basic Items," on p. 3-2.)
This section describes the procedure to manually receive mail.
1
FAX
Press [FAX].
The fax indicator lights up, and the Fax Basic Features screen appears.
Transmission and Reception
5
Line/Mail
2
Press [Line/Mail] to display <I-FAX>.
The machine is ready to receive mail.
TTI Selector
OK
3
Open all three one-touch speed dialing panels ➞ press [TTI
Selector] ➞ highlight a sender name ➞ press [OK].
NOTE
If you do not specify a sender name, the machine will receive mail transmitted to
the mail address of the sender registered in '01'.
5-6
I-Fax Transmission and Reception
4
Press [Start].
The machine receives mail.
NOTE
• To cancel receiving mail, press
(Stop). When "CANCEL DURING TX/RX?" is
displayed, press
(OK).
• If data size of the transmitted mail is larger than that specified at MAX. RX DATA
SIZE of the MAIL USER SETTING menu, the machine will not receive that mail,
and skips to the next mail. (See "Specifying Mail Basic Items," on p. 3-2.)
5
Transmission and Reception
Start
I-Fax Transmission and Reception
5-7
Transmitting to an FTP Server
This section describes the procedure to transmit a document to an FTP server.
Transmitting to an FTP Server
The document to be transmitted to an FTP server will be converted to TIFF image
or PDF format data according to the mode specified in TX MODE of the MAIL
USER SETTING menu.
Transmission and Reception
5
1
FAX
Press [FAX].
The fax indicator lights up, and the Fax Basic Features screen appears.
Line/Mail
2
Press [Line/Mail] to display <I-FAX>.
The machine is ready to transmit.
3
Place a document.
For details on how to place a document, see Chapter 3, "Basic Sending," in the
Facsimile Guide.
5-8
Transmitting to an FTP Server
NOTE
To specify a sender name, open all three one-touch speed dialing panels, then
press [TTI Selector] and select a sender name. When you do not specify a sender
name, the mail will be sent under the sender name registered in '01'.
01
4
63
Specify an FTP server destination with one-touch speed
dialing, coded speed dialing, or access code.
Coded
Dial
NOTE
You cannot specify an FTP server destination using the numeric keys.
5
Press [Start].
The machine scans the document.
NOTE
To cancel transmitting, press
(Stop) while scanning the document or while on
standby for transmitting. You cannot cancel while transmitting, even If you press
(Stop).
Transmitting to an FTP Server
5-9
Transmission and Reception
5
Start
Types and Usage of Memory Boxes
You can use the Relay Box and Transfer Box with I-Fax transmission and reception
and FTP transmission. The use of these memory boxes is the same as that of
normal fax functions. (See Chapter 6, "Memory Features," in the Facsimile Guide.)
NOTE
• The destination can receive mail from either other facsimiles or other I-Fax compatible
facsimiles.
• Relay Transmitting and Transferring destination can transmit mail to any other I-Fax
compatible facsimile or to an FTP server.
How to Use the Relay Box and Transfer Box
Transmission and Reception
5
To use the Relay Box, specify the MAIL ADDRESS (To) to TRIGGER. (See Chapter
7, "Relay Broadcasting," in the Facsimile Guide.)
To use the Transfer Box, register the fax number to transfer the document. (See
Chapter 5, "Receiving Documents," in the Facsimile Guide.)
5-10
Types and Usage of Memory Boxes
Appendix
6
CHAPTER
Samples and Formats. . . . . . . . . . . . . . . . . . . . . . . . . . . . . . . . . . . . . . . . . . . . . . . . . . . . 6-2
Report Samples . . . . . . . . . . . . . . . . . . . . . . . . . . . . . . . . . . . . . . . . . . . . . . . . . . . . . . . . . . . . . .6-2
Image Transmission Format . . . . . . . . . . . . . . . . . . . . . . . . . . . . . . . . . . . . . . . . . . . . . . . . . . . . .6-3
Transmission Format of Message Text and Signature . . . . . . . . . . . . . . . . . . . . . . . . . . . . . . . . .6-4
Error Code Table. . . . . . . . . . . . . . . . . . . . . . . . . . . . . . . . . . . . . . . . . . . . . . . . . . . . . . . . 6-5
Glossary . . . . . . . . . . . . . . . . . . . . . . . . . . . . . . . . . . . . . . . . . . . . . . . . . . . . . . . . . . . . . . 6-9
Index . . . . . . . . . . . . . . . . . . . . . . . . . . . . . . . . . . . . . . . . . . . . . . . . . . . . . . . . . . . . . . . . 6-13
6-1
Samples and Formats
Report Samples
Transmission and reception results of I-Fax, and transmission results to an FTP
server will be displayed in the Transmission Mode column.
The following is a sample of the Activity Report.
NOTE
"OK" will not be displayed in the RESULT column as the result of transmitting of an I-Fax/
e-mail. This is because the machine can only confirm that a server has received the
I-Fax/e-mail, but cannot confirm if the other party has received it.
Appendix
6
6-2
Samples and Formats
Image Transmission Format
When relaying or transferring a received image, its resolution and data size will vary
according to the transmission mode of the destination, as listed below:
Transmission Mode When Relaying and Transferring
Destination
Fax
I-Fax
(Simple
Mode)
Resolution:
Depends on
the
destination
machine's
reception
resolution.
Size:
Depends on
the
destination
machine's
paper size.
I-Fax (Simple
Mode)
I-Fax
(E-mail
Mode)
FTP
Resolution: Higher
than Fine ➞ Fine,
Standard ➞
Standard
Resolution:
Same as the
recepti on
resolution.
Resolution:
Same as
the
reception
resolution.
Size: Larger than Size: Same
LTR ➞ Reduced to as reception
size.
LTR, Less than
LTR ➞ LTR with
margin.
Size: Same
as
reception
size.
Resolution: Same
as the reception
resolution.
Size: Same as
reception size.
I-Fax
(E-mail
Mode)
6
Appendix
Fax
Resolution: Higher
than Fine ➞ Fine,
Standard ➞
Standard
Size: Larger than
LTR ➞ Reduced to
LTR, Less than
LTR ➞ LTR with
margin.
Samples and Formats
6-3
Transmission Format of Message Text and Signature
When relaying or transferring message text and/or signature attached to your
received image, its format will vary according to the reception mode of a
destination, as listed below:
Transmission Mode When Relaying and Transferring
Fax
Destination
6
Fax
-
I-Fax (Simple
Mode)
-
-
FTP
-
I-Fax (Simple
Mode)
Transmit after Transmit as
converting to text data.
image data.
Transmit as Transmit as
text data.
text data.
I-Fax (E-mail
Mode)
Transmit after Transmit as
converting to text data.
image data.
Transmit as Transmit as
text data.
text data.
Appendix
*You cannot add new message text or signature while relaying and/or transferring.
6-4
I-Fax
(E-mail
Mode)
Samples and Formats
Error Code Table
If an error occurs when transmitting or receiving an I-Fax, an error code will be
displayed on each report.
This section describes specific error displays of I-Fax.
When a transmitting job is not completed properly, the completion code is printed
on the RESULT column of the Activity Report or the TX Report. Take the
recommended solution procedure that corresponds to the completion code.
NOTE
For error codes displayed while performing normal fax transmitting and receiving, see
Chapter 12, "Troubleshooting," in the Facsimile Guide.
Meaning
Solution
#0037
-The memory is full (Memory
for I-Fax reception is full).
-Reception is rejected
because the printer is not
ready to print.
-Wait until automatically
recovered.
-Print out documents stored
in the memory with
MEMORY RX or
RECEIVED IN MAIL BOX.
-If an error occurs in the
printer, eliminate the cause.
#0751
-FTP server is not set up.
-The network with the FTP
server is cut off. (Cannot
connect to the destination, or
the line is severed in the
middle.)
-Check the destination.
-Check the network.
-Check the FTP server
settings.
#0752
-Incorrect settings of SMTP/
POP3 server name for e-mail
or I-Fax.
-The server is not set up.
-The network is cut off.
-Check settings of the
SMTP/POP3 server name
in Additional Functions.
-Check that the SMTP/
POP3 server works
properly.
-Check the network
conditions.
Error Code Table
6-5
6
Appendix
Completion Code
Completion Code
Solution
#0753
-An error occurs in TCP/IP
when transmitting to the FTP
server, transmitting e-mail,
and/or I-Fax transmission/
reception. (Error of Socket,
Select, etc.)
-Check the network cable
and connector conditions.
-If the machine does not
work properly after those
conditions are adjusted,
restart the machine.
#0801
-A timeout error occurs during
communication with the
SMTP server to transmit an
e-mail, or to transmit/receive
I-Fax, due to a problem with
the server.
-The SMTP server returned
an error message during the
SMTP connection.
-Incorrect settings for the
e-mail address.
-Check the SMTP works
properly.
-Check the network
conditions.
-Check the e-mail address
settings.
#0802
-Incorrect setting of the SMTP
server and/or the DNS server
name for e-mail/I-Fax in
Additional Functions.
-Failed to connect to the DNS
server.
-Check settings of the
SMTP server name, the
DNS server name, the
Domain name, and the Host
name in Additional
Functions.
-Check that the DNS server
works properly.
#0804
-The specified directory was
not found when transmitting to
the FTP server.
-Incorrect upload directory.
-Access to the upload
directory not allowed.
-Change the upload
directory for the destination.
-Configure the server to
allow access.
#0806
-The login name or password -Change the login name or
specified when transmitting to password to the destination.
the FTP server is incorrect.
#0808
-An error occurs in the server
when transmitting to the FTP
server.
Appendix
6
6-6
Meaning
Error Code Table
-Transmit again after a few
minutes.
-Ask the server
administrator to take
necessary
countermeasures, such as
resetting the server.
Meaning
Solution
#0810
-A connection error for the
POP3 server occurs when
receiving I-Fax.
-The POP3 server returned
an error message during the
POP3 connection.
-A timeout error occurs during
connection with the POP3
server due to the server's
problem.
-Check the POP3 server
name settings in Additional
Functions.
-Check that the POP3
server works properly.
-Check the network
conditions.
#0812
-A password error occurs
when the POP3 server's user
authentication to receive
I-Fax.
-Check the password
setting for the POP3
account in Additional
Functions.
#0813
-A user account error occurs
when the POP3 server's user
authentication to receive
I-Fax.
-Check the POP3 account
settings in Additional
Functions.
#0819
-Due to corruption of data of
the e-mail or I-Fax, failure to
separate the message text
from the image data.
-Ask the sender to resend
the data.
#0820
-The attached image format is -Ask the sender to change
the image format and
not of Base64/uuencode
resend it.
format, or corruption of the
data failed to print the
received image.
#0821
-The received image format is -Ask the sender to change
not compatible to the
the image format and
machine.
resend it.
Error Code Table
6
6-7
Appendix
Completion Code
Completion Code
Solution
#0829
-The received image exceeds -If the server is set up to
the maximum size the
keep error messages,
machine can receive.
allocate more space for
incoming mail or retrieve
the file with another
computer.
-If the server is not set up to
keep error messages or is
set to the SMTP receiving
mode, allocate more space
for incoming mail and ask
the sender to re-send the
image. Alternatively, you
could ask the sender to
reduce the file size by
lowering the image
resolution or dividing it into
smaller files.
#0835
-The received text contains in
excess of maximum number
of lines that can be received
at a time.
Appendix
6
6-8
Meaning
Error Code Table
-Ask the sender to reduce
the number of lines in the
text and resend it.
(Maximum receivable lines:
approximately 300 lines = 3
pages in LTR size format)
-Ask the sender not to send
the text in uuencode format
in the case that the sender
is using Outlook Express as
mailing software.
Glossary
B
BOOTP
BOOTstrap Protocol. A protocol that enables a client machine to automatically obtain
network setup information from a server over a TCP/IP network. BOOTP enables a
client to automatically locate such information as the host name, domain name, and
IP address, so that it is not necessary to create these items manually.
D
Delimiter
A special character that separates individual items in a program or set of data.
Dynamic Host Configuration Protocol. A protocol that automatically specifies the
network settings of a client on a TCP/IP network. Many of the settings required to set
up TCP/IP, which is the standard protocol of the Internet, can be made automatically.
DNS
Domain Name System. The system that associates the IP address assigned to a
computer with the domain name.
DNS Server
Domain Name System server. The system that maintains a database that translates
the domain names of Internet servers, such as www.w3.org, into Internet Protocol
(IP) addresses, such as "8.176.0.26".
Domain
Management concept that divides large scale networks into groups for identifying
individual computers and users. The Internet is managed by classifying domains
according to country, type (business, organization, education, etc.), company, etc.
DPI (Dots Per Inch)
A unit of measurement for indicating screen resolution.
Glossary
6-9
Appendix
6
DHCP
E
E-mail Mode
A scanned original document is converted to PDF, TIFF (MMR [Modified Modified
Read]), TIFF (MR [Modified Read]), or TIFF (MH [Modified Huffman]) image data.
F
FTP (File Transfer Protocol)
A client-server protocol allowing a user to transfer files on one computer to and from
another computer over a TCP/IP network. FTP also governs the client program with
which the user transfers files.
G
Gateway Address
The default address of a network or Web site. It provides a single domain name and
point of entry to the site.
6
Appendix
I
I-Fax (Internet Fax)
I-Fax enables you to transmit and receive a scanned original document converted to
TIFF (Tag Image File Format) image data or PDF (Portable Document Format) as an
attachment of an e-mail to/from any facsimile with I-Fax compatibility or personal
computer with e-mail functionality through the Internet.
Internet Protocol (IP)
The underlying set of networking rules that describes how data is transmitted across
the Internet. Internet Protocol allows data from one computer to be split into packets
to be sent to another computer with a specific IP address.
IP Address
Internet Protocol address. A 32-bit numeric address used by IP (internet protocol) to
specify a computer on the Internet. The IP address is usually written as four numbers
separated by periods. An example is 128.121.4.5.
M
Modified Huffman (MH)
Coding system that horizontally scans and compresses extended areas of white and
black dots.
6-10
Glossary
Modified Modified Read (MMR)
An adaptation of Modified Read, originally for use in digital machines. Faster than
MR.
Modified Read (MR)
Coding system that horizontally and vertically scans and compresses white and black
areas. Faster than MH.
P
PDF (Portable Document Format)
A file format run by Adobe Systems' Acrobat software which is not restricted by
device nor resolution. PDF displays documents in a way that is independent of the
original application software, hardware, and operating system used to create those
documents. A PDF document can contain any combination of text, graphics, and
images.
POP3 (Post Office Protocol)
Protocol
A set of rules that govern the transmission of data across a network. Examples of
protocols are FTP, DHCP, BOOTP, RARP, IPP and TCP/IP.
R
RARP
Reserve Address Resolution Protocols. A protocol that associates a network adapter
address (MAC address) with an Internet Protocol (IP) address.
S
Simple Mode
A scanned original document is converted to TIFF (MH) image data. Size of the
converted image data is limited to LTR, and its resolution is fixed to 200 X 200 dpi or
100 X 200 dpi adhering to the common I-Fax standard.
SMTP (Simple Mail Transfer Protocol)
SMTP is a protocol used by the Mail Servers to route to each other over the network.
Glossary
6-11
6
Appendix
POP is a program that allows PC and Mac machines to read e-mail that has arrived to
the mail server machine. POP3 means that is the third version of the POP protocol.
Subnet Mask
SUBNETwork mask. The method used to determine which subgroup, or subnet, an IP
address belongs to. On TCP/IP networks, all devices whose IP addresses have the
same prefix would belong to the same subnet. Dividing a network into subnets is
useful for both security and performance reasons.
T
TCP/IP (Transmission Control Protocol/Internet Protocol)
The protocol used to connect to the Internet and to wide-area networks.
TIFF (Tag Image File Format)
A file format that saves images as high-density bitmaps and is suitable for large
amounts of image data. The information field (tag) at the start of each image data
record indicates the type of data represented.
Appendix
6
6-12
Glossary
Index
A
E
ACCESS CODE, 4-9, 4-22
EMAIL RX PROTOCOL, 3-2
ADDRESS FORMAT, 3-3
Error Code Table, 6-5
AUTO LINE WRAP, 3-38
ERROR MAIL, 3-2
Automatically Receive Mail, 5-6
Error Mail Handling, 3-28
B
F
BOOTP, 2-2, 2-4, 6-9
Fax, 6-3
FTP, 6-3, 6-10
6
FTP Server, 1-2, 4-17, 5-8
CHECK INTERVAL, 3-2
Check Settings, 4-2
By the User Data List, 4-4
Appendix
C
G
Gateway Address, 6-10
IP Address, 4-2
Coded Speed Dialing, 4-5
CONTROL PORT NO., 4-22
H
Host Name, 2-14
D
Default Gateway, 2-9
Delayed Transmission, 5-2
Delimiter, 6-9
DHCP, 2-2, 2-4, 6-9
DNS, 6-9
Dynamic Setting, 2-13
Server, 6-9
Server Address, 2-11
Domain, 6-9
Domain Name, 2-16
DPI, 6-9
I
I-Fax, 1-2, 5-2, 6-3, 6-10
E-mail Mode, 1-2, 6-10
Simple Mode, 1-2, 6-11
IMAGE FORMAT, 4-22
Image Transmission Format, 6-3
Internet Protocol (IP), 6-10
IP Address, 6-10
Allocated Automatically, 2-2
Checking, 4-2
Index
6-13
Specified Manually, 2-5
P
PDF, 1-2, 6-11
L
POP3, 1-2, 6-11
POP3 Mail Check Interval, 3-9
LARGE MAIL, 3-2
POP3 RX, 3-19
Large Size E-Mail Handling, 3-26
POP3 Server, 3-2, 3-5
PORT NO., 3-2, 3-18
Port Number, 3-17
M
Preparation, 1-3
Mail Address, 3-30
Appendix
6
Preset Time, 5-2
Format, 3-30
PRINT MAIL HEADER, 3-3
Registration, 3-34
Print Received Text, 3-24
Mail Basic Items, 3-2
PRIORITY, 3-38
Mail Header Printing, 3-32
Protocol, 6-11
Mail Reception Protocol, 3-7
PUT FILE NAME, 4-22
Mail Reception Settings, 1-3
Mail Transmission Settings, 1-3
Mail Transmitting Conditions, 4-9
R
MAIL USER SETTINGS, 3-2
RARP, 2-2, 2-4, 6-11
MAX. RX DATA SIZE, 3-2
Receive Mail Manually, 5-6
Maximum Reception Data Size, 3-20
Receiving I-Fax, 5-6
Memory Boxes, 5-10
Receiving Mail Via a POP3 Server, 3-47
Modified Huffman (MH), 1-2, 6-10
Reception Data Size, 3-20
Modified Modified Read (MMR), 1-2, 6-11
Registering a Mail Address, 3-34
Modified Read (MR), 1-2, 6-11
Registering FTP Server Name, 4-17
Coded Speed Dialing, 4-17
One-Touch Speed Dialing, 4-17
N
Registering Mail Addresses, 1-3, 4-5
Network Settings, 1-3, 2-2
Number of Retries, 3-11
Coded Speed Dialing, 4-5
One-Touch Speed Dialing, 4-5
Registering Mail Destinations, 4-5
Relay Box, 5-10
O
Retransmit, 5-4, 5-5
One-Touch Speed Dialing, 4-5
RETRY INTERVAL, 3-2
Optional Settings for Transmitting Mail, 3-38
Retry Interval, 3-13
RETRY, 3-2
RX CONFIRMATION, 3-38
RX TEXT PRINT, 3-2
6-14
Index
S
SENDER NAME, 4-23
Sequential Broadcasting, 5-2, 5-4
SMTP, 1-2, 6-11
SMTP RX, 3-19
SMTP SERVER, 3-2
SMTP Server, 3-3
SMTP TX, 3-18
Subnet Mask, 2-7, 6-12
T
TCP/IP, 6-12
TIFF, 1-2, 6-12
Time Zone, 3-15
TIME ZONE SETTING, 3-2
6
Appendix
Timer, 1-2
Transfer Box, 5-10
Transmission Format of Text, 6-4
Transmission Mode, 1-2, 3-22
Transmitting I-Fax, 5-2
Access Code, 5-2
Coded Speed Dialing, 5-2
Manually, 5-4
One-Touch Speed Dialing, 5-2
Transmitting Mail, 3-38
Transmitting to FTP Server, 4-22, 5-8
TRIGGER, 5-10
TX MODE, 3-2
TX TIME SETTNG, 4-23
U
USE CONTROL FILE, 4-22
Index
6-15