1
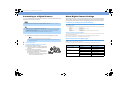
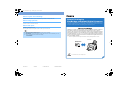
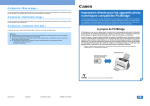
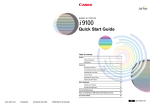
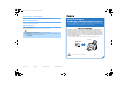
PictBridge_A2200_UK.fm Page 1 Tuesday, May 6, 2003 3:19 PM
About “Layout” and “Trimming”
Direct Printing for
PictBridge-compliant Digital Cameras
By default, “Borderless” is selected in “Layout” and “Off (No trimming)” is selected in “Trimming” for this printer.
About “Image optimize”
This printer supports PictBridge. By connecting a PictBridge-compliant digital still camera to a
PictBridge-compliant printer with a single cable, users can easily control the print setting
using their cameras and produce high-quality photos without using a PC.
By default, “On (ExifPrint)” is selected for this printer.
About “Date print”
About PictBridge
By default, “Off” is selected for this printer.
The shooting date recorded in Exif image data is printed in the lower-right corner of each photo.
PictBridge is an Industry standard enabling a range of digital photo solutions, including the
direct printing of photos from a digital still camera* without the need to use a computer.
z This printer can handle only Exif/JPEG image data to produce photos using PictBridge.
z Never disconnect the USB cable during printing.
z When disconnecting the USB cable between the digital camera and printer, follow the instructions given in the
Instruction Manual.
z Controls of the digital camera cannot be used for the following:
• Print quality setting
• Printer maintenance
Until now, each company had its own proprietary solution for direct printing between digital
still cameras and printers, so users were allowed to use only limited combinations of printers
and digital still cameras. From now on, you can produce high-quality photos directly using the
controls of the camera regardless of its brand and model if both the digital still camera and
printer are PictBridge-compliant.
*
Hereafter, the digital still camera and digital video camera are collectively called a digital camera or camera.
Canon Printer
PictBridge-compliant
digital still camera
This mark indicates that the product is PictBridge-compliant.
Latest Inforfmation about PictBridge
For the latest information about PictBridge, please select [Support] at http://canon.jp/.
QA7-2823-V01
XX2003XX
© CANON INC. 2003
PRINTED IN VIETNAM
PictBridge_A2200_UK.fm Page 2 Tuesday, May 6, 2003 3:19 PM
Connecting to a Digital Camera
About Digital Camera Settings
To connect a PictBridge-compliant digital camera to this printer, use the USB cable supplied with the
digital camera (for connection to a computer).
When operating the camera, be sure to follow the instructions given in the Instruction Manual supplied
with the camera. Let’s take a look at the paper size, paper type, layout, image optimization modes,
and date printing modes that can be set on the PictBridge-compliant camera connected to the printer.
Do not connect any equipment other than the camera ready for “PictBridge” or Canon “Bubble Jet Direct” to the Direct Print
Port of the printer. If you do so, electric shock, fire, or damage to the camera could result.
z When producing photos with the digital camera connected to the printer, it is advisable to use the AC adapter supplied
with the camera. If you use the camera battery, be sure to charge it fully.
z Depending on the model or brand of your camera, you may have to select a mode of producing photos compliant with
“PictBridge” before connecting the camera.
You may also have to turn on the camera or select Play mode manually after connecting the camera to the printer.
Perform necessary operations according to the Instruction Manual supplied with your camera.
1
Set up the printer.
z Follow the procedure explained in the Quick Start Guide supplied with your printer.
z Open the front cover and adjust the paper thickness lever to the left position.
z The print head cannot be aligned using the controls of the digital camera. To align the print head, connect
the printer to the computer.
2
3
Turn on the printer.
Connect the digital camera to the printer.
(1) Make sure the camera is turned off.
(2) Connect the camera to the printer using the USB
cable (for connection to a computer) supplied with
the camera.
(3) Set up the camera for direct printing.
When the connection between the camera and
printer has been established, the POWER lamp on
the printer flashes once in green.
* The power-on sequence may differ depending
on the model or brand of the camera.
Confirming or Changing the Camera Settings
When a PictBridge-compliant camera is connected and printing is started with no printing option selected, this printer operates based on
the following default settings:
To change the paper size or paper type, operate the camera to select the PictBridge print setup mode and confirm or check the settings.
– Paper size....................................... 10×15cm / 4"×6"
– Paper type ...................................... Photo (Photo Paper Plus Glossy)
– Layout ............................................. Borderless
– Trimming......................................... Off (No trimming)
– Image optimize ............................... On (ExifPrint)
– Date print ........................................ Off (Shooting date is printed in the lower-right corner of each photo.)
About the Settings Explained Below
The settings explained below cannot be made depending on the brand or model of your camera. If any setting cannot be made, the
default setting explained above is used.
Names of settings that are displayed on Canon PictBridge-compliant cameras are used in the description given below.
Different names may be displayed on your camera depending on the brand or model.
About “Paper Size” and “Paper Type”
By default, 10×15cm / 4"×6" is selected in “Paper Size” and “Photo “(Photo Paper Plus Glossy) is selected in “Paper Type” for this
printer.
To use Photo Paper Pro, select “Fast Photo” in “Paper type”.
The following sizes and types of paper can be loaded in the printer by selecting options in “Paper Size” and “Paper Type”.
“Paper Size” setting
“Paper Type” setting
Paper loaded in printer
10×15cm / 4"×6" (Default)
Photo (Default)
Photo Paper Plus Glossy
Fast Photo
Photo Paper Pro
Photo
Photo Paper Plus Glossy
Fast Photo
Photo Paper Pro
Photo
Photo Paper Plus Glossy
Fast Photo
Photo Paper Pro PR-101
13×18cm / 5"×7"
A4
PictBridge_A2200_UK.fm Page 1 Tuesday, May 6, 2003 3:19 PM
About “Layout” and “Trimming”
Direct Printing for
PictBridge-compliant Digital Cameras
By default, “Borderless” is selected in “Layout” and “Off (No trimming)” is selected in “Trimming” for this printer.
About “Image optimize”
This printer supports PictBridge. By connecting a PictBridge-compliant digital still camera to a
PictBridge-compliant printer with a single cable, users can easily control the print setting
using their cameras and produce high-quality photos without using a PC.
By default, “On (ExifPrint)” is selected for this printer.
About “Date print”
About PictBridge
By default, “Off” is selected for this printer.
The shooting date recorded in Exif image data is printed in the lower-right corner of each photo.
PictBridge is an Industry standard enabling a range of digital photo solutions, including the
direct printing of photos from a digital still camera* without the need to use a computer.
z This printer can handle only Exif/JPEG image data to produce photos using PictBridge.
z Never disconnect the USB cable during printing.
z When disconnecting the USB cable between the digital camera and printer, follow the instructions given in the
Instruction Manual.
z Controls of the digital camera cannot be used for the following:
• Print quality setting
• Printer maintenance
Until now, each company had its own proprietary solution for direct printing between digital
still cameras and printers, so users were allowed to use only limited combinations of printers
and digital still cameras. From now on, you can produce high-quality photos directly using the
controls of the camera regardless of its brand and model if both the digital still camera and
printer are PictBridge-compliant.
*
Hereafter, the digital still camera and digital video camera are collectively called a digital camera or camera.
Canon Printer
PictBridge-compliant
digital still camera
This mark indicates that the product is PictBridge-compliant.
Latest Inforfmation about PictBridge
For the latest information about PictBridge, please select [Support] at http://canon.jp/.
QA7-2823-V01
XX2003XX
© CANON INC. 2003
PRINTED IN VIETNAM