1
Unified Messaging Configuration Guide
BCM450 1.0
Business Communications Manager
Document Status: Standard
Document Number: NN40160-504
Document Version: 01.01
Date: August 2008
Copyright © Nortel Networks Limited 2006-2008, All rights reserved.
The information in this document is subject to change without notice. The statements, configurations, technical data, and
recommendations in this document are believed to be accurate and reliable, but are presented without express or implied
warranty. Users must take full responsibility for their applications of any products specified in this document. The
information in this document is proprietary to Nortel Networks.
Trademarks
Nortel, the Nortel logo, and the Globemark are trademarks of Nortel Networks.
Microsoft, MS, MS-DOS, Windows, and Windows NT are registered trademarks of Microsoft Corporation.
All other trademarks and registered trademarks are the property of their respective owners.
3
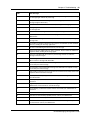
Task List
Getting started . . . . . . . . . . . . . . . . . . . . . . . . . . . . . . . . . . . . . . . . . . . . . . . . . 7
Configuring your system for Unified Messaging . . . . . . . . . . . . . . . . . . . . 13
To check that Business Communications Manager is not configured to use DNS........15
To check that a Host Name is entered on the BCM ......................................................15
To configure access to the BCM on a subscriber computer ..........................................16
Installing and configuring Unified Messaging . . . . . . . . . . . . . . . . . . . . . . 17
To uninstall Unified Messaging......................................................................................19
To install Unified Messaging..........................................................................................20
To set the default e-mail client.......................................................................................24
To specify where to deliver e-mail messages................................................................25
To set Unified Messaging options .................................................................................26
To define the CallPilot mailbox settings.........................................................................26
To configure access to the CallPilot Address Book .......................................................27
To configure text formatting ...........................................................................................27
To remove the CallPilot Message Store ........................................................................28
To configure GroupWise for Unified Messaging ............................................................28
To update the Mail database design manually ..............................................................31
To remove the Lotus Notes password prompt for Unified Messaging ...........................32
To configure an IMAP account on Outlook or Outlook Express ....................................32
To configure an LDAP directory service for Outlook Express or Outlook ......................34
To configure special settings for Outlook Express or Outlook in Internet Mail mode ....35
To test the Outlook Express or Outlook in Internet Mail mode IMAP account...............36
Providing access to the Nortel Fax/Nortel Fax Batch printers .......................................38
Printing faxes.................................................................................................................39
To manually configure Unified Messaging.....................................................................40
To manually configure CallPilot Desktop Messaging for Outlook 2000 .........................44
To update the database design from the Lotus Notes server........................................46
To add the CallPilot database to the Lotus Notes workspace .......................................47
To set up the automatic update utility............................................................................47
To disable the Notes password prompt for Unified Messaging .....................................48
To manually configure CallPilot .....................................................................................49
Troubleshooting . . . . . . . . . . . . . . . . . . . . . . . . . . . . . . . . . . . . . . . . . . . . . . 53
To obtain the Unified Messaging version number .........................................................53
To define Outlook as the default mail client:..................................................................54
To determine the level of access control for a subscriber .............................................54
To keep and show deleted messages in your Inbox .....................................................58
To reset the CallPilot Message Store in Outlook 2002 ..................................................58
To access the Outbox Fix utility in Outlook 2002 ..........................................................59
To update the Mail database design .............................................................................60
To fix the Outbox ...........................................................................................................63
To replace the database design from the user’s computer ...........................................71
To replace the database design (Notes server) ............................................................71
To access online Help ...................................................................................................73
To reset CallPilot message store for Microsoft Outlook 2000 .......................................74
Unified Messaging Configuration Guide
4
Task List
NN40160-504
5
Contents
Chapter 1
Getting started . . . . . . . . . . . . . . . . . . . . . . . . . . . . . . . . . . . . . . . . . . . . . . . . . 7
About this guide . . . . . . . . . . . . . . . . . . . . . . . . . . . . . . . . . . . . . . . . . . . . . . . . . . . . . . . 7
About CallPilot Unified Messaging . . . . . . . . . . . . . . . . . . . . . . . . . . . . . . . . . . . . . 7
Software requirements . . . . . . . . . . . . . . . . . . . . . . . . . . . . . . . . . . . . . . . . . . . . . . 8
Audience . . . . . . . . . . . . . . . . . . . . . . . . . . . . . . . . . . . . . . . . . . . . . . . . . . . . . . . . . . . . 9
Acronyms . . . . . . . . . . . . . . . . . . . . . . . . . . . . . . . . . . . . . . . . . . . . . . . . . . . . . . . . . . . . 9
Symbols and text conventions . . . . . . . . . . . . . . . . . . . . . . . . . . . . . . . . . . . . . . . . . . . 10
Related publications . . . . . . . . . . . . . . . . . . . . . . . . . . . . . . . . . . . . . . . . . . . . . . . . . . 11
Chapter 2
Configuring your system for Unified Messaging . . . . . . . . . . . . . . . . . . . . 13
Before you install Unified Messaging . . . . . . . . . . . . . . . . . . . . . . . . . . . . . . . . . . . . . 13
Configuring IMAP/LDAP/SMTP servers for Unified Messaging . . . . . . . . . . . . . . . . . 13
Configuring environments without a DNS . . . . . . . . . . . . . . . . . . . . . . . . . . . . . . . 14
Configuring Unified Messaging with IP address only . . . . . . . . . . . . . . . . . . . . . . 15
Chapter 3
Installing and configuring Unified Messaging . . . . . . . . . . . . . . . . . . . . . . 17
Installation information . . . . . . . . . . . . . . . . . . . . . . . . . . . . . . . . . . . . . . . . . . . . . . . . . 17
Fax feature requirements . . . . . . . . . . . . . . . . . . . . . . . . . . . . . . . . . . . . . . . . . . . 19
Uninstalling an earlier version of Unified Messaging . . . . . . . . . . . . . . . . . . . . . . 19
Installing Unified Messaging . . . . . . . . . . . . . . . . . . . . . . . . . . . . . . . . . . . . . . . . . . . . 20
Setting the default e-mail client . . . . . . . . . . . . . . . . . . . . . . . . . . . . . . . . . . . . . . . . . . 24
Configuring forwarding or replying mail delivery settings . . . . . . . . . . . . . . . . . . . 24
Configuring mail delivery folders for Outlook . . . . . . . . . . . . . . . . . . . . . . . . . . . . . . . . 25
Configuring Outlook 2002 and 2003 . . . . . . . . . . . . . . . . . . . . . . . . . . . . . . . . . . . . . . 26
Using Outlook 2002 and 2003 as an Internet mail client . . . . . . . . . . . . . . . . . . . . 26
Configuring Novell GroupWise . . . . . . . . . . . . . . . . . . . . . . . . . . . . . . . . . . . . . . . . . . 28
Removing the CallPilot Message Store . . . . . . . . . . . . . . . . . . . . . . . . . . . . . . . . . 28
Configuring Lotus Notes . . . . . . . . . . . . . . . . . . . . . . . . . . . . . . . . . . . . . . . . . . . . . . . 30
Updating the Mail database . . . . . . . . . . . . . . . . . . . . . . . . . . . . . . . . . . . . . . . . . 30
Updating the database automatically . . . . . . . . . . . . . . . . . . . . . . . . . . . . . . . . . . 30
Updating the database manually . . . . . . . . . . . . . . . . . . . . . . . . . . . . . . . . . . . . . . 31
Removing password prompts . . . . . . . . . . . . . . . . . . . . . . . . . . . . . . . . . . . . . . . . 31
Configuring Internet Mail clients . . . . . . . . . . . . . . . . . . . . . . . . . . . . . . . . . . . . . . . . . 32
Configuring Outlook Express or Outlook in Internet Mail mode . . . . . . . . . . . . . . . . . . 32
Installing Unified Messaging in a Citrix Thin Client environment . . . . . . . . . . . . . . . . . 37
Supported Platforms . . . . . . . . . . . . . . . . . . . . . . . . . . . . . . . . . . . . . . . . . . . . . . . 37
Unified Messaging Configuration Guide
6
Contents
Installing Unified Messaging on the Windows Terminal Server . . . . . . . . . . . . . . 37
Configuring Unified Messaging in a Citrix Thin Client environment . . . . . . . . . . . 38
Citrix Thin Client Configuration overview . . . . . . . . . . . . . . . . . . . . . . . . . . . . . . . . . . . 39
Configuring Microsoft Outlook . . . . . . . . . . . . . . . . . . . . . . . . . . . . . . . . . . . . . . . . 39
Manual Outlook 2002 (XP) and 2003 Configuration . . . . . . . . . . . . . . . . . . . . . . . 40
Manual Outlook 2000 Configuration . . . . . . . . . . . . . . . . . . . . . . . . . . . . . . . . . . . 44
Configuring Lotus Notes . . . . . . . . . . . . . . . . . . . . . . . . . . . . . . . . . . . . . . . . . . . . 46
Configuring Novell GroupWise . . . . . . . . . . . . . . . . . . . . . . . . . . . . . . . . . . . . . . . 48
Configuring Internet Mail clients . . . . . . . . . . . . . . . . . . . . . . . . . . . . . . . . . . . . . . 49
Feature Limitations . . . . . . . . . . . . . . . . . . . . . . . . . . . . . . . . . . . . . . . . . . . . . . . . . . . 50
Microsoft Outlook . . . . . . . . . . . . . . . . . . . . . . . . . . . . . . . . . . . . . . . . . . . . . . . . . 50
Lotus Notes . . . . . . . . . . . . . . . . . . . . . . . . . . . . . . . . . . . . . . . . . . . . . . . . . . . . . . 50
Audio Player . . . . . . . . . . . . . . . . . . . . . . . . . . . . . . . . . . . . . . . . . . . . . . . . . . . . . 50
Fax Application . . . . . . . . . . . . . . . . . . . . . . . . . . . . . . . . . . . . . . . . . . . . . . . . . . . 50
Tracing . . . . . . . . . . . . . . . . . . . . . . . . . . . . . . . . . . . . . . . . . . . . . . . . . . . . . . . . . 50
Localization . . . . . . . . . . . . . . . . . . . . . . . . . . . . . . . . . . . . . . . . . . . . . . . . . . . . . . 51
Installation . . . . . . . . . . . . . . . . . . . . . . . . . . . . . . . . . . . . . . . . . . . . . . . . . . . . . . . 51
Security . . . . . . . . . . . . . . . . . . . . . . . . . . . . . . . . . . . . . . . . . . . . . . . . . . . . . . . . . 51
Windows XP . . . . . . . . . . . . . . . . . . . . . . . . . . . . . . . . . . . . . . . . . . . . . . . . . . . . . 51
Chapter 4
Troubleshooting. . . . . . . . . . . . . . . . . . . . . . . . . . . . . . . . . . . . . . . . . . . . . . . 53
Troubleshooting during installation . . . . . . . . . . . . . . . . . . . . . . . . . . . . . . . . . . . . . . . 53
Troubleshooting logon problems . . . . . . . . . . . . . . . . . . . . . . . . . . . . . . . . . . . . . . . . . 56
Vista Windows Mail purge messages fail due to Microsoft limitations . . . . . . . . . . . . . 58
Troubleshooting Outlook 2002 problems . . . . . . . . . . . . . . . . . . . . . . . . . . . . . . . . . . . 58
Accessing CallPilot support tools in Outlook 2002 . . . . . . . . . . . . . . . . . . . . . . . . 58
Troubleshooting Lotus Notes logon problems . . . . . . . . . . . . . . . . . . . . . . . . . . . . . . . 60
Troubleshooting after logging on . . . . . . . . . . . . . . . . . . . . . . . . . . . . . . . . . . . . . . . . . 62
Internet Mail client error messages . . . . . . . . . . . . . . . . . . . . . . . . . . . . . . . . . . . . . . . 68
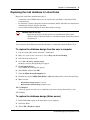
Replacing the mail database in Lotus Notes . . . . . . . . . . . . . . . . . . . . . . . . . . . . . . . . 71
Accessing Unified Messaging online Help . . . . . . . . . . . . . . . . . . . . . . . . . . . . . . . . . . 73
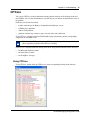
Using Unified Messaging Support Tools . . . . . . . . . . . . . . . . . . . . . . . . . . . . . . . . . . . 74
Resetting the CallPilot message store for Microsoft Outlook . . . . . . . . . . . . . . . . 74
CPTrace . . . . . . . . . . . . . . . . . . . . . . . . . . . . . . . . . . . . . . . . . . . . . . . . . . . . . . . . . . . 75
Using CPTrace . . . . . . . . . . . . . . . . . . . . . . . . . . . . . . . . . . . . . . . . . . . . . . . . . . . 75
Index . . . . . . . . . . . . . . . . . . . . . . . . . . . . . . . . . . . . . . . . . . . . . . . . . . . . . . . . 77
NN40160-504
7
Chapter 1
Getting started
About this guide
The Unified Messaging Configuration Guide describes how to install, configure, and troubleshoot
Unified Messaging on a Business Communications Manager (BCM) system and on subscribers’
computers.
You can install CallPilot Unified Messaging on subscribers’ computers, or subscribers can
perform some configuration and troubleshooting tasks under your guidance.
About CallPilot Unified Messaging
CallPilot Unified Messaging is a multimedia messaging application. Unified Messaging works
with e-mail clients to provide a single graphical interface for e-mail messages and CallPilot voice,
fax, and text messages.
You can also start an Instant Messaging (IM) session from a CallPilot or e-mail message through
Microsoft Windows / MSN Messenger or a Nortel Multimedia PC Client (MCS 5100).
The maximum number of Unified Messaging clients supported on the Business Communications
Manager is 300.
Hardware requirements
The following list contains both the minimum and recommended hardware that Unified Messaging
software needs for operation.
•
•
•
•
•
IBM PC or compatible:
— minimum Pentium/586 or faster system with 16 megabytes (MB) of RAM minimum; 32
MB recommended
Monitor:
— 16-color VGA 640 x 480 capability minimum; 256-color SVGA 800 x 600 capability
recommended
Disk drive space:
— To install Unified Messaging, subscribers need 110 MB of disk space. After the
installation is complete, the temporary files are automatically deleted to recover 55 MB of
disk space. You or the subscriber must manually delete the
CallPilotDesktopMessaging.exe file to recover the additional 55 MB. The.exe file is
located where you downloaded it.
CD-ROM drive
Windows-compatible mouse and keyboard
Unified Messaging Configuration Guide
8
Chapter 1 Getting started
•
LAN connection to Business Communications Manager. Subscribers can access their CallPilot
messages over the LAN through ISDN, ADSL, dial-up modem or Ethernet.
Note: When it is installed, Unified Messaging takes up 25MB of space
on the subscriber’s hard disk.
Optional hardware
•
•
a sound card and a set of speakers for playing messages on a computer
a microphone for recording messages on a computer
Software requirements
Windows operating systems
You can use Unified Messaging with:
•
•
•
Windows 2000 Professional
Windows XP Professional
Windows Vista Business, Ultimate, and Enterprise- both 32-bit and 64-bit versions are
supported
Unified Messaging also supports the following Thin Clients:
•
•
•
Citrix Metaframe Presentation Server 4.0 on Windows 2003 Server (All Editions)
Citrix Metaframe XP on Windows 2000 Server (All Editions) and Windows 2003 Server
Citrix Metaframe Presentation Server 3.0 on Windows 2003 Server
Supported Integrated clients
Integrated clients, also called groupware, is software designed for group collaboration. Integrated
clients run with a corporate e-mail server. Unified Messaging for integrated clients provides access
to commands and Unified Messaging Help directly from the client. During installation, Unified
Messaging customizes integrated clients to make messaging tasks simpler and more efficient.
Unified Messaging automatically performs most or all of the groupware configuration during
installation.
You can use Unified Messaging with one or more of these clients:
•
•
•
•
•
•
Microsoft Outlook 2007
Microsoft Outlook 2003
Microsoft Outlook 2002/XP
Microsoft Outlook 2000
Novell GroupWise 6.5, 7.0 and 7.0.1
Lotus Notes 6.0, 6.5, and 7.0
NN40160-504
Chapter 1 Getting started
9
CallPilot Desktop Messaging 4.0 does not support Groupwise 7.x on Microsoft Vista operating
systems.
Supported Internet mail clients
Internet mail clients are also called IMAP clients. It is an e-mail client that enables you to manage
CallPilot messages from a folder in the e-mail client using the IMAP protocol. You must manually
configure the Internet mail client with the settings required to connect to your system.
You can use Unified Messaging with these IMAP Internet clients:
•
•
Microsoft Outlook Express 6.0
Microsoft Outlook 2000, 2002 (XP), 2003, and 2007 in Internet mail mode
Format for voice messages
Business Communications Manager uses the G711 format to record and store voice messages.
CallPilot 150 uses G723.1. Since the Unified Messaging player records and plays messages in
WAV format, Business Communications Manager or CallPilot messages must be converted to
WAV before playing, and composed messages must be converted to G711 or G723.1 to be stored
on Business Communications Manager or CallPilot 150. This decoding and encoding is done on
the desktop client.
Audience
This guide is for system administrators who configure and maintain CallPilot and Unified
Messaging on a BCM system.
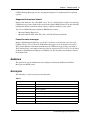
Acronyms
The following is a list of acronyms used in this guide.
Table 1
Acronym
Description
BCM
Business Communications Manager
CLID
Calling Line Identification
DN
Directory Number
DNS
Domain Name System
IMAP
Internet Message Access Protocol
ISDN
Integrated Services Digital Network
LAN
Local Area Network
LDAP
Lightweight Directory Access Protocol
Unified Messaging Configuration Guide
10
Chapter 1 Getting started
Table 1
Acronym
Description
SMTP
Simple Mail Transfer Protocol
VPIM
Voice Profile for Internet Mail
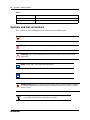
Symbols and text conventions
These symbols are used to Highlight critical information for the BCM system:
Caution: Alerts you to conditions where you can damage the equipment.
Danger: Alerts you to conditions where you can get an electrical shock.
Warning: Alerts you to conditions where you can cause the system to fail or work
improperly.
Note: A Note alerts you to important information.
Tip: Alerts you to additional information that can help you perform a task.
!
Security note: Indicates a point of system security where a default should be changed,
or where the administrator needs to make a decision about the level of security required
for the system.
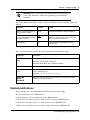
Warning: Alerts you to ground yourself with an antistatic grounding
strap before performing the maintenance procedure.
NN40160-504
Chapter 1 Getting started
11
Warning: Alerts you to remove the BCM main unit and expansion unit
power cords from the ac outlet before performing any maintenance
procedure.
These conventions and symbols are used to represent the Business Series Terminal display and
dialpad.
Convention
Example
Used for
Word in a special font (shown in
the top line of the display)
Pswd:
Command line prompts on display telephones.
Underlined word in capital letters
(shown in the bottom line of a two
line display telephone)
PLAY
Display option. Available on two line display
telephones. Press the button directly below the
option on the display to proceed.
Dialpad buttons
£
Buttons you press on the dialpad to select a
particular option.
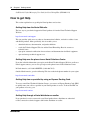
These text conventions are used in this guide to indicate the information described.
Convention
Description
bold Courier
text
Indicates command names and options and text that you need to enter.
Example: Use the info command.
Example: Enter show ip {alerts|routes}.
italic text
Indicates book titles
plain Courier
text
Indicates command syntax and system output (for example, prompts
and system messages).
Example: Set Trap Monitor Filters
FEATURE
HOLD
RELEASE
Indicates that you press the button with the coordinating icon on
whichever set you are using.
Related publications
This section provides a list of additional documents referred to in this guide.
Keycode Installation Guide (NN40010-301)
CallPilot Manager Set Up and Operation Guide (NN40160-304)
CallPilot 4.0 Unified Messaging User Guide for Internet Clients (NN40090-108)
CallPilot 4.0 Unified Messaging User Guide for Lotus Notes (NN40090-109)
CallPilot 4.0 Unified Messaging User Guide for Microsoft Outlook (NN40090-110)
Unified Messaging Configuration Guide
12
Chapter 1 Getting started
CallPilot 4.0 Unified Messaging User Guide for Novell GroupWise (NN40090-111)
How to get Help
This section explains how to get help for Nortel products and services.
Getting Help from the Nortel Web site
The best way to get technical support for Nortel products is from the Nortel Technical Support
Web site:
http://www.nortel.com/support
This site provides quick access to software, documentation, bulletins, and tools to address issues
with Nortel products. More specifically, the site enables you to:
•
download software, documentation, and product bulletins
•
search the Technical Support Web site and the Nortel Knowledge Base for answers to
technical issues
•
sign up for automatic notification of new software and documentation for Nortel equipment
•
open and manage technical support cases
Getting Help over the phone from a Nortel Solutions Center
If you don’t find the information you require on the Nortel Technical Support Web site, and have a
Nortel support contract, you can also get help over the phone from a Nortel Solutions Center.
In North America, call 1-800-4NORTEL (1-800-466-7835).
Outside North America, go to the following Web site to obtain the phone number for your region:
http://www.nortel.com/callus
Getting Help from a specialist by using an Express Routing Code
To access some Nortel Technical Solutions Centers, you can use an Express Routing Code (ERC)
to quickly route your call to a specialist in your Nortel product or service. To locate the ERC for
your product or service, go to:
http://www.nortel.com/erc
Getting Help through a Nortel distributor or reseller
If you purchased a service contract for your Nortel product from a distributor or authorized
reseller, contact the technical support staff for that distributor or reseller.
NN40160-504
13
Chapter 2
Configuring your system for Unified Messaging
Before you install Unified Messaging
Before using Unified Messaging:
•
•
In Element Manager, enable the Unified Messaging keycode and the (optional) Fax keycode.
For information on enabling software keycodes, refer to the Keycode Installation Guide.
In CallPilot Manager, ensure that the number of maximum outcalling channels is enough to
accommodate the expected CallPilot telephone player usage. This value governs the number of
simultaneous channels used for outcalling. For information on setting the outcalling channels,
refer to the CallPilot Manager Set Up and Operation Guide.
Unified Messaging and data network security
Due to the complexity and diversity of network configurations, this guide does not cover data
network security issues. Discuss security issues with a security specialist or data network
administrator.
Configuring IMAP/LDAP/SMTP servers for Unified Messaging
CallPilot supports IMAP/LDAP protocols, which let Unified Messaging subscribers access their
CallPilot mailboxes using Microsoft Outlook, Lotus Notes, Novell GroupWise, and selected
third-party Internet mail clients: Microsoft Outlook Express, Microsoft Outlook, Netscape
Messenger, and Qualcomm Eudora Pro.
Each type of desktop client is configured and used slightly differently. To configure a specific
desktop client, refer to “Installing and configuring Unified Messaging” on page 17.
Although you individually configure each desktop client you use for Unified Messaging, you
configure Business Communications Manager the same way for all the desktop clients it supports.
Follow the instructions in this chapter to configure the IMAP/LDAP/ SMTP servers.
IMAP
Internet Message Access Protocol (IMAP) lets a client access and use electronic mail messages on
a server. These messages are always stored on Business Communications Manager.
Unified Messaging Configuration Guide
14
Chapter 2 Configuring your system for Unified Messaging
IMAP lets subscribers check for messages from any location with an Internet connection. IMAP
also lets subscribers access messages from multiple locations. IMAP is a method of accessing
electronic mail or bulletin board messages that are kept on a shared mail server. IMAP lets a client
e-mail program access remote message stores as if they were local. For example, e-mail stored on
an IMAP server can be accessed from a computer at home, a workstation at the office, and a
notebook computer while traveling, without the need to transfer messages or files between these
computers.
LDAP
Lightweight Directory Access Protocol (LDAP) is a set of protocols for accessing information
directories. LDAP supports TCP/IP, which is necessary for any type of Internet access. LDAP lets
a client search for and use information entries on a directory server, such as the Business
Communications Manager. For example, a typical entry in the CallPilot directory contains
attributes of a subscriber such as name, telephone number, and CallPilot mail address. Internet
clients can use LDAP to query address book information from the CallPilot directory, perform
address resolution, or search for specific subscribers (if this functionality is implemented by the
Internet client).
Note: Unified Messaging clients require LDAP authentication of the CallPilot
mailbox directory number and password to begin a search on a Business
Communications Manager LDAP directory.
SMTP
Simple Mail Transfer Protocol (SMTP) is a protocol for sending e-mail messages between servers.
Most e-mail systems that send mail over the Internet use SMTP to send messages from one server
to another. These messages can then be retrieved with an e-mail client using IMAP. SMTP is also
generally used to send messages from a mail client to a mail server. This is why you must specify
both the IMAP server and the SMTP server when you configure your e-mail application.
Since Voice Profile for Internet Mail (VPIM) Networking also uses SMTP, you do much of the
configuration for IMAP in the same places you set up VPIM Networking.
Configuring environments without a DNS
The Domain Name System (DNS) is an Internet service that translates domain names into IP
addresses. Because domain names are alphabetic, they are easier for subscribers to remember. The
Internet is based on IP addresses. Every time you use a domain name, therefore, a DNS must
translate the name into the corresponding IP address. For example, the domain name
www.example.com can translate to 198.105.232.4.
If one DNS server does not know how to translate a particular domain name, it asks another one,
and so on, until the correct IP address is returned.
Unified Messaging uses Domain Name resolution, which is provided by a DNS. If your network
does not have a DNS, then you must configure Unified Messaging to use IP addresses.
NN40160-504
Chapter 2 Configuring your system for Unified Messaging
15
For Internet Mail clients, the format for addressing a message is <SMTP/VPIM prefix><Mailbox
number>@<BCM HOST name>.localdomain.
Configuring Unified Messaging with IP address only
If you do not use DNS to resolve domain names, configure the Business Communications
Manager system and client computers to use an IP address only:
1
Ensure the Business Communications Manager is not configured to use DNS.
2
Ensure that Business Communications Manager is configured with a host name. If it is not,
enter the host name on the Business Communications Manager system.
3
Configure computers running Unified Messaging with the IP address of the Business
Communications Manager system.
To check that Business Communications Manager is not
configured to use DNS
Note: Before you check that the Business Communications Manager is not
configured to use DNS, ensure the Business Communications Manager is using a
static IP address and DHCP is disabled.
1
Start Element Manager.
2
On the Configuration tab, choose the Data Services folder.
The system tasks appear.
3
Choose the DNS task.
The Domain Name Service tab appears.
4
Ensure the Enable DNS box is not selected.
5
Ensure the Primary (& Sec.) Server IP Addr field is empty. If it is not, delete any entries.
To check that a Host Name is entered on the BCM
1
Start Element Manager.
2
On the Configuration tab, choose the System folder.
The system tasks appear.
3
Choose the Identification task.
The System Identification tab appears.
4
Enter a system name in the System Name box, if one is not entered.
A system name can be any name (for example, myCompany).
Unified Messaging Configuration Guide
16
Chapter 2 Configuring your system for Unified Messaging
To configure access to the BCM on a subscriber computer
On each subscriber computer:
1
Start Unified Messaging for the first time on the client computer.
The Unified Messaging Logon page appears.
2
In the Server box, type the IP address.
3
In the Password and Mailbox boxes, enter the subscriber’s password and mailbox number.
The e-mail client opens.
NN40160-504
17
Chapter 3
Installing and configuring Unified Messaging
It takes approximately 10 minutes to install Unified Messaging. Depending on the subscribers’
expertise, you can ask them to install Unified Messaging on their computer.
For information about Microsoft Outlook, Novell GroupWise, Lotus Notes, and Internet Clients to
address, compose, open, delete, and perform other CallPilot unified messaging operations, see:
•
•
•
•
CallPilot 4.0 Desktop Messaging User Guide for Microsoft Outlook
CallPilot 4.0 Desktop Messaging User Guide for Novell Groupwise
CallPilot 4.0 Desktop Messaging User Guide for Lotus Notes
CallPilot 4.0 Desktop Messaging User Guide for Internet Clients
Installation information
Before you install Unified Messaging on a subscriber’s computer:
•
Make sure the subscriber’s computer has the correct hardware and software requirements.
Refer to “Hardware requirements” on page 7 and “Software requirements” on page 8.
•
If the subscriber has any version of Unified Messaging other than 4.0, you must uninstall the
earlier version before you do the installation procedure. Refer to “Uninstalling an earlier
version of Unified Messaging” on page 19.
•
Ensure that the microphones, speakers, and sound cards that are connected to the subscriber’s
computer are configured. Refer to the manufacturer’s documentation.
•
If the subscriber is going to install Unified Messaging and wants to install the Fax Printer
Driver, the subscriber must have the right to impersonate a client after authentication. Refer to
the online Microsoft Knowledge Base article Q821546 for more information.
•
Have this information available:
— the fully qualified domain name (FQDN) of the Business Communications Manager
system, or the IP address, if you do not have a DNS
— the SMTP/VPIM prefix of the Business Communications Manager. If you use Message
Networking, include this prefix
Unified Messaging Configuration Guide
18
Chapter 3 Installing and configuring Unified Messaging
— the subscriber’s mailbox number
Note: If the subscriber uses Novell GroupWise, the subscriber must have Windows
Messaging 4.0 installed on their computer. Windows Messaging is usually installed
when Windows is installed on a computer. However, if Windows Messaging 4.0 is not
installed, the GroupWise installation gives you these options:
• Install the complete Windows Messaging system.
• Leave Windows Messaging as is.
Install the Complete Windows Messaging system even if Windows Messaging is already
installed. This ensures that the GroupWise option is available during Unified Messaging
installation.
NN40160-504
Chapter 3 Installing and configuring Unified Messaging
19
Fax feature requirements
Fax features for Unified Messaging:
•
•
•
Fax Mail Merge
Custom Fax Cover Sheets
Integrated Fax Messaging Controls
The CallPilot Fax Mail Merge feature allows you to customize and send fax messages to multiple
recipients using Microsoft Word’s Mail Merge utility.
When you use the Fax Mail Merge feature, you do not receive a delivery receipt to confirm the
recipients received the fax.
You do receive a failure notification, if any or all of the recipients do not receive the fax.
Note: You must select the Install Fax batch driver for mail merge
option during the installation of Unified Messaging to use the Fax Mail
Merge feature.
The Custom Fax Cover Sheets allow you to customize your fax cover sheets from the CallPilot
desktop client. You can use any digital image as the basis for the cover sheet and customize it for
each fax by providing sender information and a cover sheet memo. This information is
automatically merged with your cover sheet image when you fax the document.
Note: You can download the Custom Fax Cover Sheets from the
Administrator Applications Unified Messaging page on the Business
Communications Manager web page.
Integrated Fax Messaging Controls allow you to create CallPilot messages, attach documents, and
view, annotate, and modify fax documents through the CallPilot custom form. This feature is
available only to the Windows Groupware clients: Microsoft Outlook, Lotus Notes, and Novell
GroupWise.
Uninstalling an earlier version of Unified Messaging
If the subscriber has any version of Unified Messaging older than 2.5 on their computer, uninstall
it before you do the installation procedure.
To uninstall Unified Messaging
1
Quit any open applications, including the CallPilot installation program.
If you use Microsoft Outlook, it can take an additional minute or two for the mail services to
shut down.
2
Click the Windows Start button.
3
Click Control panel.
The Control Panel window opens.
Unified Messaging Configuration Guide
20
Chapter 3 Installing and configuring Unified Messaging
4
Click Add/Remove Programs icon.
The Add/Remove Programs properties dialog box appears.
5
In the list, select Nortel Unified Messaging and click the Remove button.
The dialog window opens to confirm the deletion.
6
Click OK.
Installing Unified Messaging
You install Unified Messaging from the Business Communications Manager web page.
To install Unified Messaging
1
Exit any Windows programs that are running.
2
Start a browser session and connect to the Business Communications Manager web page.
The Business Communications Manager Login dialog box appears.
3
Enter your user name and password and click the OK button.
The Welcome to Business Communications Manager page appears.
4
Click the User Applications link.
The User Applications page appears.
5
Click the CallPilot Unified Messaging link.
The CallPilot Unified Messaging download page appears. There are two Download CallpIlot
Unified Messaging links. One link supports English, French, simplified Chinese, and Dutch.
The other link supports Italian, Japanese, Spanish, and German.
You can also install the Custom Fax Cover Sheets from this page if you have enabled the fax
capabilities on your Business Communications Manager.
6
Click the Download CallPilot Unified Messaging link that supports your language.
The File Download dialog box appears.
7
Click the Save button and save the application to where you want to install it.
8
After the application downloads, double-click it to launch the installation, and follow the
instructions in the installation wizard.
NN40160-504
Chapter 3 Installing and configuring Unified Messaging
9
21
The setup program starts and the Welcome window appears.
10 Click the Next button.
The CallPilot Server Information window appears.
11 In the Server name or TCP/IP address box, type the FQDN or IP address of the Business
Communications Manager system.
12 In the VPIM network prefix box, type the VPIM prefix of the CallPilot subscriber’s address.
If CallPilot Networking is not enabled on the Business Communications Manager system,
leave this box blank, otherwise use the value defined in the Local Prefix field in the Digital
Networking Properties page in CallPilot Manager.
Unified Messaging Configuration Guide
22
Chapter 3 Installing and configuring Unified Messaging
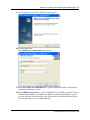
13 In the Language box, select the language you want to use and click Next.
The Setup Type window appears.
14 Select Complete or Custom.
If you select Complete, the installer automatically installs CallPilot Desktop Messaging for all
email clients found on the computer with the following exception. If Microsoft Outlook and
Novell GroupWise are installed on the same computer, the Novell GroupWise desktop client is
installed and the Microsoft Outlook desktop client is not. CallPilot Desktop Messaging does
not support Microsoft Outlook and Novell GroupWise on the same computer.
If you select Custom, you may choose which features to install. Only features valid for the
computer will display.
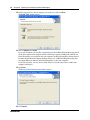
15 Click Next.
The Ready to Install the Program windows appears.
16 Click Install.
NN40160-504
Chapter 3 Installing and configuring Unified Messaging
23
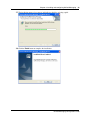
17 The installation progress bar appears and indicates that files are being copied.
18 Click the Finish button to complete the installation.
Unified Messaging Configuration Guide
24
Chapter 3 Installing and configuring Unified Messaging
Setting the default e-mail client
After you install Unified Messaging, you must set the default e-mail client.
To set the default e-mail client
1
Click the Windows Start button, point to Settings and click Control Panel.
The Control Panel window appears.
2
Double click the Internet Options icon.
The Internet Properties window appears.
3
Click the Programs tab.
4
In the E-mail list box, make sure the client that is displayed is the e-mail client you are using.
If another e-mail client is displayed, select the correct e-mail client from the E-mail list box,
click the Apply button and click the OK button.
Configuring forwarding or replying mail delivery settings
To ensure you can forward or reply to Unified Messaging messages, you must check one of the
default settings for mail delivery.
1
In your Inbox, click CallPilot Desktop Messaging.
2
Click CallPilot Configuration.
3
Click the Mail tab to display the current mail settings.
4
Check to see if the Include a message header when forwarding/replying check box is not
selected. If you have a fax keycode enabled you can select this check box. If you do not have a
fax keycode enabled do not select this check box.
Note: If the check box is selected and you have a fax keycode enabled, the header
information of the original message appears in a reply or forwarded message. The
message becomes a fax message because the headers are attached as a text
message.
Do not select the Include a message header when forwarding/replying check
box or add text to the message, although the New Text Message button is active, if
you do not have a fax keycode enabled. If you add text or message headers to the
message it does not remain as a voice message. It becomes a fax message.
If the Include a message header when forwarding/replying check box is
selected without the BCM fax keycode the forward/reply message will not be
delivered.
If Include a message header when forwarding/replying check box is not
selected, the subject of a forwarded message contains the CLID information but,
does not include the original sender’s name or the sent time.
NN40160-504
Chapter 3 Installing and configuring Unified Messaging
25
Configuring mail delivery folders for Outlook
Microsoft Outlook is automatically configured when you install Unified Messaging. By default,
CallPilot messages are stored in a separate message store from the Outlook Inbox. Nortel
recommends that subscribers keep their CallPilot messages separate from their Outlook messages.
Keeping CallPilot messages separate makes it easier to prioritize messages and identify message
types.
If the subscriber requests it, you can configure Outlook to store all incoming e-mail and CallPilot
messages in the CallPilot message store.
Note: If you configure the e-mail client to deliver messages to the
CallPilot Inbox, all e-mail messages are stored on the subscriber’s hard
drive. After the message is delivered, the messages no longer resides on
the Exchange server.
To specify where to deliver e-mail messages
1
On the Outlook window, on the Tools menu click Services
or
if you use Outlook XP or 2003, click on the Tools menu and then click E-mail accounts.
The E-mail account window appears.
Select View or Change existing E-mail accounts.
Click Next.
2
Click the Delivery tab.
3
From the Deliver new mail to the following location list, select CallPilot Messaging Store
and click the up arrow to move it to the top of the list.
4
Click the OK button.
Unified Messaging Configuration Guide
26
Chapter 3 Installing and configuring Unified Messaging
Configuring Outlook 2002 and 2003
Outlook 2002 and 2003 handle mail accounts differently than previous versions of Outlook. This
section describes how to configure the Unified Messaging options for Outlook 2002 and 2003.
To set Unified Messaging options
1
In Outlook, on the Tools menu, click E-mail Accounts.
The E-mail Accounts wizard appears.
2
Choose View or change existing e-mail accounts, and then click Next.
3
In the e-mail account list, choose CallPilot Desktop Messaging, and then click Change.
The Desktop Messaging options dialog box appears.
4
Make changes to Unified Messaging settings, as required, and then click the OK button.
5
Click Finish to exit the E-mail Accounts wizard.
Using Outlook 2002 and 2003 as an Internet mail client
In Outlook 2002 and 2003, Corporate mode and Internet Mail do not exist. Instead, the
subscriber can manage all Exchange server, IMAP and POP server, and web-based e-mail
accounts from the same interface.
This section describes how to configure Outlook 2002 and 2003 as an Internet Mail client that
works with Unified Messaging for Internet Mail clients.
If the subscriber uses Unified Messaging with an Exchange server, you should install Unified
Messaging for Outlook on their computer. The Unified Messaging installation program
automatically configures Outlook with the required settings.
To define the CallPilot mailbox settings
1
In Outlook, on the Tools menu click E-mail Accounts.
The E-mail Accounts wizard appears.
2
Select Add a new e-mail account, and then click Next.
The E-mail Servers page appears.
3
Select IMAP, and then click Next.
The Internet E-mail Settings (IMAP) page appears.
4
Specify the settings for the subscriber’s CallPilot mailbox.
•
•
•
NN40160-504
User Information — Type the subscriber’s name and CallPilot address in the boxes.
Enter the address in the form:
<SMTP/VPIM prefix><mailbox number>@<local CallPilot server>
Logon Information — Type the subscriber’s CallPilot mailbox number and password in
the boxes.
Do not select the Log on using Secure Password Authentication (SPA) check box.
Chapter 3 Installing and configuring Unified Messaging
•
27
Server Information — Enter the CallPilot fully qualified domain name (FQDN) for both
the incoming and outgoing servers.
5
Click Next.
A message appears that confirms the changes.
6
Click Finish.
To configure access to the CallPilot Address Book
1
In Outlook, on the Tools menu click E-mail Accounts.
The E-mail Accounts wizard appears.
2
Select Add a new directory or address book, and then click the Next button.
3
Select Internet Directory Service (LDAP) and then click the Next button.
4
In the Server Name box, type the CallPilot FQDN.
5
In Logon Information, select This server requires me to log on check box.
6
Enter the user’s username and password in the User Name and Password boxes.
The user name is the mailbox number and the password is the mailbox password.
7
Click the More Settings button.
A message appears that says that the account you created will not start until you restart
Outlook.
8
Click the OK button.
9
Under the Search tab in the Search Base box, type ou=users,ou=callpilot.
10 Click the OK button.
11 Click the Next button.
A message appears that confirms the changes.
12 Click the Finish button.
To configure text formatting
1
In Outlook, on the Tools menu click Options.
2
Click the Mail Format tab.
3
In the Message Format section, select Plain Text.
4
Click OK.
Unified Messaging Configuration Guide
28
Chapter 3 Installing and configuring Unified Messaging
Configuring Novell GroupWise
This section describes how GroupWise is integrated with CallPilot. For information on how to use
GroupWise to address, compose, open, delete, and perform other CallPilot operations, refer to the
CallPilot 4.0 Desktop Messaging User Guide for Novell GroupWise.
Note: If the subscriber uses Novell GroupWise, the subscriber must have Windows
Messaging 4.0 installed on their computer. Windows Messaging is usually installed
when Windows is installed on a computer. However, if Windows Messaging 4.0 is not
installed, the GroupWise installation gives you these options:
• Install the complete Windows Messaging system.
• Leave Windows Messaging as is.
Install the Complete Windows Messaging system even if Windows Messaging
is already installed. This ensures that the GroupWise option is available during
Unified Messaging installation.
After you install GroupWise, you must configure it for Unified Messaging.
Removing the CallPilot Message Store
When you install Unified Messaging on the computer of a subscriber who uses GroupWise, the
CallPilot Message Store folder is added to the subscriber’s GroupWise mailbox.
You or the subscriber can use this procedure to remove the CallPilot Message Store from
GroupWise.
To remove the CallPilot Message Store
1
Click the Windows Start button, point to Settings and click Control Panel.
The Control Panel window appears.
2
Click the Add/Remove Programs icon.
The Add/Remove Programs Properties dialog box appears.
3
In the list select CallPilot Unified Messaging for Novell GroupWise.
4
Click the Remove button.
The dialog window opens to confirm the deletion.
5
Click OK.
To configure GroupWise for Unified Messaging
1
Start GroupWise.
2
On the Tools menu click CallPilot, point to CallPilot Configuration, and click CallPilot
Configuration Menu.
The CallPilot Unified Messaging dialog box appears.
NN40160-504
Chapter 3 Installing and configuring Unified Messaging
29
3
In the Server box, enter the Business Communications Manager system name or IP address.
4
In the SMTP/VPIM prefix box enter the SMTP/VPIM prefix of the subscriber’s address. If
the Network Messaging option is not enabled, leave this box blank. If Network Messaging is
installed, enter the value in CallPilot Manager, in the Digital Networking Properties page, in
the Local Prefix box.
5
In the Mailbox box, enter the subscriber’s mailbox number.
6
On the Mail tab, select Manually at Check for new messages (Automatically/Manually), if
the subscriber uses ISDN or dial-up. This option saves on toll charges by not continuously
checking for new messages on the Business Communications Manager system.
7
On the Mail tab, select Include original message header when forwarding or replying, if
you have a fax keycode enabled. This adds header information to each forward or reply, so that
Unified Messaging messages are consistent with other e-mail messages.
Do not select Include original message header when forwarding or replying, if you do not
have fax enabled because the message will not be sent.
If you do not select Include original message header when forwarding or replying, the
forwarded message contains the CLID information, but does not include the original sender’s
name or sent time.
Note: When you choose to include the original message header, when you forward
or reply to a Unified Messaging message, the Business Communications Manager
treats the voice message as a fax.
8
On the Mail tab, select Include cover page when forwarding fax.
If this option is selected, the user will be able to choose and set a default cover page from a list
of available cover pages.
9
Select the Remember password check box if the subscribers do not want to enter their
password each time they log on.
10 Click the Address Book tab.
11 In the Path box enter the location of the local CallPilot address book.
12 From the Order list box, select the order in which you want the names to be displayed in the
address book.
13 Select the Remind me to download address book every __ day(s) if subscribers want to
download addresses automatically from the system. The default is every 20 days. Subscribers
can change the number of days, if they wish. If subscribers do not want to download the
address book, do not select this check box.
14 If you want to download the address book now, click the Download now button. Subscribers
can click this button whenever they want to download the address book.
15 Click the Apply button.
16 Click the Audio tab.
17 Select the Choose audio device before each audio session check box if the subscribers do not
use either the telephone or computer to listen to their messages on a regular basis.
Unified Messaging Configuration Guide
30
Chapter 3 Installing and configuring Unified Messaging
18 Click the Download file before playing check box if subscribers want to download messages
before they play them. After the message downloads, subscribers can play the message
additional times without delay, and use GroupWise to forward it to another CallPilot
subscriber.
19 From the Audio device setting, select either Computer or Telephone as the playback and
recording device. If you select Telephone, enter a telephone number and click Add. All
telephone numbers are stored, which is useful if the subscriber listens to or records messages
from multiple locations.
20 Click the Apply button.
21 Click the Volume Control tab.
22 Select the default speaker and microphone volumes from this tab. The microphone level can be
changed only from this dialog box. The subscriber can change the volume level and the
volume control on the player from this dialog box. The selected volume level is used for future
player sessions.
23 Click OK to save your changes and close the dialog box.
Configuring Lotus Notes
Updating the Mail database
In Lotus Notes, the Mail database design determines which messages appear in the Notes message
list. There are two ways to update the database design for Desktop Messaging:
•
•
automatic update: this updates the database automatically when you install Unified
Messaging (recommended).
manual update: you or the subscriber must update the database manually after you install
Desktop Messaging.
Nortel recommends the automatic update option. It provides the optimal configuration for message
storage, is compatible with customized database designs, and does not require any manual updates
to the database design.
Updating the database automatically
To automatically update the Mail database, select the Update Lotus Notes Databases option when
you install Unified Messaging. When the installation is complete, Unified Messaging is ready to
use and does not require any manual changes to the Mail database.
When you use this update method, Lotus Notes stores CallPilot messages in a separate folder. This
configuration lets users easily prioritize CallPilot messages since they are not mixed with other
e-mail messages.
NN40160-504
Chapter 3 Installing and configuring Unified Messaging
31
Updating the database manually
You should update the database design manually only if:
•
•
•
the subscriber wants CallPilot messages stored in the same Inbox as their Lotus Notes e-mail
messages
the subscriber’s database design has not been customized, and the subscriber does not intend
to customize the database design in the future
you are familiar with modifying Lotus Notes database design
To perform a manual update, you must replace the current database design using a CallPilot
template. Replacement of the database design removes any customization in the current database
design.
To update the Mail database design manually
1
Start Lotus Notes.
2
On the Help menu select About Notes Desktop.
Make a note of the version of Lotus Notes.
3
Click the Mail database. The Mail database has the subscriber’s name and the envelope icon.
4
On the File menu, click Database, and then click Replace Design.
The Replace Database Design dialog box appears.
5
Select Template Server.
The Template Server window appears.
6
Select Local, and then click OK.
7
Select the Show advanced templates check box.
8
From the list box, select the version of CallPilot Mail for the version of Lotus Notes that you
use.
9
Click Replace.
A message appears that asks you to confirm your request to change the database view.
10 Click Yes.
Removing password prompts
By default, Lotus Notes prompts for a Notes password when you access an application linked to
Lotus Notes. This means that when Unified Messaging for Lotus Notes is installed, subscribers
must enter their Notes password twice: when they start Lotus Notes, and the first time they access
the Unified Messaging folder during the Lotus Notes session. To remove the Lotus Notes
password prompt for Unified Messaging, subscribers must follow this procedure.
Unified Messaging Configuration Guide
32
Chapter 3 Installing and configuring Unified Messaging
To remove the Lotus Notes password prompt for Unified
Messaging
Lotus Notes 5.0:
1
In Lotus Notes, on the File menu click Tools and click User ID.
The Enter Password dialog box appears.
2
Type your Notes password, and then click the OK button.
The User ID dialog box appears.
3
Select the Don’t prompt for a password from other Notes-based programs option, and
then click the OK button.
Lotus Notes 6.0:
1
In Lotus Notes, on the File menu, click Security and click User Security.
2
Type your Notes password, and then click the OK button.
3
Select the Don’t prompt for a password from other Notes-based programs option, and
then click the OK button.
Configuring Internet Mail clients
CallPilot Unified Messaging supports these Internet Mail clients:
•
•
Outlook Express
Outlook in Internet mail mode
You need the following information to configure your Internet mail client:
•
•
•
the FQDN or IP address of the Business Communications Manager system
the subscriber’s CallPilot mailbox number and password
the SMTP/VPIM prefix of the Business Communications Manager system. If you use
Message Networking, include this prefix. Enter the value from the Local Prefix box of the
Digital Networking Properties page in CallPilot Manager.
You can provide this information to subscribers if you want them to configure the client.
Configuring Outlook Express or Outlook in
Internet Mail mode
If your Internet Mail client is Microsoft Outlook Express or Outlook, use the following
procedures. Depending on the Internet client you use, the options you see can be slightly different.
To configure an IMAP account on Outlook or Outlook Express
1
Start Outlook.
2
On the Tools menu:
NN40160-504
Chapter 3 Installing and configuring Unified Messaging
•
•
33
if you use Outlook 2000, select Services
if you use Outlook 2002 or 2003, select E-Mail Accounts
The Internet Accounts screen appears.
3
Click Add, and then click the Mail option.
The Internet Connection Wizard starts up.
4
In the Display name box, type your name.
5
Click the Next button.
The Internet Connection Wizard - Internet E-mail Address screen appears.
6
In the E-mail address box, type the subscriber’s CallPilot mail address in the form:
[email protected]
SMTP/VPIM prefix
•
•
•
mailbox number
FQDN of Business
Communications
Manager
1416555 is the SMTP/VPIM prefix. If you use Message Networking, include this prefix.
6003 is the CallPilot mailbox number.
voiceuser.callpilot.com is the FQDN of the Business Communications Manager system. If
your network does not use DNS, enter <hostname>.localdomain as the FQDN (where the
host name is that of the Business Communications Manager system).
7
Click the Next button.
The E-Mail Server Names screen appears.
8
From the list box, choose IMAP as the incoming mail server type.
9
In the Incoming mail server box, type your FQDN.
10 In the Outgoing mail server box, type your FQDN.
11 Click the Next button.
The Internet Mail Logon screen appears with the subscriber’s IMAP account name displayed.
12 In the Password box, type the subscriber’s CallPilot mailbox password.
Do not select the Log on using Secure Password Authentication (SPA) check box.
13 Click the Next button.
The Internet Connection Wizard - Internet Mail Logon screen appears.
14 In the Account name box, type the subscriber’s SMTP/VPIM prefix and mailbox number.
15 In the Password box, type the subscriber’s mailbox password.
16 Click the Next button.
The Internet Connection Wizard - Congratulations screen appears.
17 Click the Finish button and close the Internet Accounts screen.
A message appears that asks if you want to download folders from the mail server you added.
Unified Messaging Configuration Guide
34
Chapter 3 Installing and configuring Unified Messaging
18 Select the Yes button to download the folder list for the IMAP account that you just created
or
select the No button if you do not want to download the folder list at this time.
Tip: To make changes to your new IMAP account, select the account name and click
Properties to display the Properties page.
19 Click the OK button.
To configure an LDAP directory service for Outlook Express or
Outlook
Depending on the Internet client you use, the options you see can be slightly different.
1
Start Outlook.
2
On the Tools menu, click Accounts.
The Internet Accounts screen appears.
3
Click the Directory Service tab.
4
Click the Add button and click Directory Service.
The Internet Connection Wizard starts.
5
In the Internet directory (LDAP) server box, type the FQDN or IP address of the Business
Communications Manager system.
6
Select the This server requires me to log on check box. Then enter the Account Name or
User Name and Password.
The user name or account name is the mailbox number. The password is the mailbox
password.
7
Click the Next button.
The Internet Connection Wizard - Check E-mail Addresses screen appears.
8
If the subscriber wants to check for addresses in the CallPilot LDAP directory when they
address messages, select Yes.
9
Click the Next button.
The Internet Connection Wizard - Congratulations screen appears.
10 Click the Finish button.
The Internet Accounts screen appears.
11 Click the Properties button, and then click the Advanced tab.
12 If your network is slow, move the slide bar under Search timeout toward Long to increase the
timeout.
13 If the subscriber expects to do directory searches that return more matches than the number
shown, increase the number in the Maximum number of matches to return box.
14 In the Search base box, type the search base for the CallPilot directory.
The search base is ou=users,ou=callpilot.
15 Click the OK button.
The Internet Accounts screen appears again.
NN40160-504
Chapter 3 Installing and configuring Unified Messaging
35
16 If the subscriber wants to check for addresses in the CallPilot LDAP directory, click the Set
Order button. The Directory Services Order screen appears. If necessary, use the Move Up or
Move Down buttons to position the CallPilot LDAP directory in the search order.
17 Click the OK button.
The Internet Accounts screen appears.
18 Click the Close button.
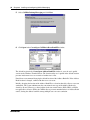
To configure special settings for Outlook Express or Outlook in
Internet Mail mode
1
2
Select the settings for the type of Outlook the subscriber uses.
•
If the subscriber uses Outlook Express:
a
On the Tools menu, click Options.
The Options screen appears.
b
Click the Send tab.
c
From Mail sending format, select Plain Text.
d
Click the Plain Text Settings button.
The Plain Text Settings screen appears.
e
From Message format, select MIME.
f
From the Encode text using list box, select None.
g
Click the OK button.
•
If the subscriber uses Outlook 98:
a
On the Tools menu, click Options.
b
Click the Mail Format tab.
c
From Send in this message format, select Plain Text.
d
Click the OK button.
If the subscriber has addresses from the CallPilot LDAP directory in their Outlook Express
personal address book:
•
•
•
•
In the Address Book, right-click the recipient’s name.
Select Properties, and then select the Name tab.
The Properties screen appears.
Select the Send E-Mail using plain text only check box.
Click the OK button.
Unified Messaging Configuration Guide
36
Chapter 3 Installing and configuring Unified Messaging
To test the Outlook Express or Outlook in Internet Mail mode
IMAP account
1
Use your telephone to log on to your CallPilot mailbox.
2
Compose a test voice message and send it to the subscriber.
3
Have the subscriber check that the message appears in their Outlook or Outlook Express
Inbox.
NN40160-504
Chapter 3 Installing and configuring Unified Messaging
37
Installing Unified Messaging in a Citrix Thin Client
environment
The system administrator of a Citrix Thin Client environment must install and configure Unified
Messaging on the Windows Terminal Server before users can access it. Unified Messaging should
only be installed on the Windows Terminal Server; do not install Unified Messaging on the client
computer.
Supported Platforms
Unified Messaging in the Citrix Thin Client environment is supported on the Business
Communications Manager platform.
Unified Messaging supports the following Thin Clients:
•
•
•
Citrix Metaframe Presentation Server 4.0 on Windows 2003 Server (All Editions)
Citrix Metaframe XP on Windows 2000 Server (All Editions) and Windows 2003 Server
Citrix Metaframe Presentation Server 3.0 on Windows 2003 Server
Citrix Thin Clients must be running Windows 2000, or Windows XP.
Installing Unified Messaging on the Windows Terminal Server
Installing Unified Messaging in a Citrix Thin Client environment is a straightforward process. It is
nearly identical to installation in a standard desktop client environment. Deviations from the
standard environment are detailed in this section.
The common desktop exceptions to the installation process for a standard environment include:
For Microsoft Outlook and Novell GroupWise: The installer automatically disables the Update
default mail profile feature. This feature is not applicable to the Windows Terminal Server.
For Lotus Notes: The installer automatically disables the Update Lotus Notes mail database and
Update Lotus Notes Personal Address Book features. These features are not applicable to the
Windows Terminal Server.
To update the users mail databases, the Lotus Notes/Domino server administrator must run the
LNSERVER.EXE installation program on the Lotus Notes/Domino Server. The administrator can
then use the installed utility application to update selected user mail databases with CallPilot
design elements. For more information refer to, “Updating the mail database manually” on page
46.
To enable the CallPilot address book, the Lotus Notes/Domino Server administrator must populate
and maintain the CallPilot Public Address book on the server. The administrator may choose to
call NMLNADBK.EXE as a scheduled task to automate the CallPilot Public Address Book
update. For more information refer to,“To set up the automatic update utility” on page 47.
Unified Messaging Configuration Guide
38
Chapter 3 Installing and configuring Unified Messaging
Configuring Unified Messaging in a Citrix Thin Client environment
When publishing applications on the Windows Terminal Server, the system administrator should
manually update the program's command line. This is required to provide access to the Nortel Fax/
Nortel Fax Batch printers.
This step may be skipped if access to the Nortel Fax/Nortel Fax Batch printers is not required. This
step may also be skipped when publishing the Window's desktop.
Providing access to the Nortel Fax/Nortel Fax Batch printers
1
Add double quotes around the original command line (if not already present).
“C:\Lotus\Notes\notes.exe”
2
Add the following text in front of the quoted command line for any application from which
you wish to print (not just Lotus Notes):
"C:\Program Files\Nortel\CallPilot\fax\daemon" -P (or in some cases -A)
The command line should now read:
"C:\Program Files\Nortel\CallPilot\nda\daemon" -A“C:\Lotus\Notes\notes.exe”
(the use of -A in this example, as opposed to -P, is explained below)
Note: The default installation location is “C:\Program
Files\Nortel\CallPilot.” However, this may have been altered by the
system administrator when CallPilot was installed.
NN40160-504
Chapter 3 Installing and configuring Unified Messaging
39
The -P option should work for most applications. However, if an application still does not work
with the Nortel Fax/Nortel Fax Batch printers, use the option -A instead of -P. Lotus Notes
requires -A instead of -P.
The -P and -A options are both used by daemon.exe to monitor the original application for print
requests. The -P option instructs daemon.exe to monitor only the original application. The -A
option instructs daemon.exe to monitor the original application as well as any secondary
applications created by the original. The -A option is more CPU intensive and should only be used
when the -P option does not work.
Printing faxes
The system administrator must set up permission for each user to print faxes:
•
•
•
Make the user a member of the administration or a power user group.
or
Give the user modify permissions for the CallPilot or nda folder and subfolders.
or
Manually create a user folder in the nda directory.
Citrix Thin Client Configuration overview
Citrix Thin Client support allows users to access most of the features of the Unified Messaging
Client in a Windows Terminal Server environment running Citrix software. This environment
provides a single point of administration for all users in the network.
When the system administrator installs Unified Messaging on the Windows Terminal Server, users
only need to perform minor (if any) configuration changes to use the application.
Once Unified Messaging has been configured, using it in a Citrix Thin Client environment is
nearly identical to using it in a Standard Desktop Client environment.
One of the few limitations of the Citrix Thin Client environment is the inability to adjust the
client’s speaker volume and microphone level. Adjusting these settings only affects the Windows
Terminal Server. Therefore, the speaker volume and microphone level controls are disabled in the
CallPilot Audio Player.
Configuration differences from the standard Desktop Client environment are detailed in the
following sections.
Configuring Microsoft Outlook
The Citrix Administrator performs the following steps so Citrix users can automatically configure
Unified Messaging using Microsoft Outlook.
1
Publish an application and call it CallPilot Desktop client or another name of their choice.
2
Configure the Command Line field for the application to:
C:\"Windows directory"\system32\nmdcinst.exe -i -default
Unified Messaging Configuration Guide
40
Chapter 3 Installing and configuring Unified Messaging
and
Working Directory to: C:\"Windows directory"\system32
3
Save the application.
Once the administrator had installed Unified Messaging on the Windows Terminal Server, each
Citrix Thin Client user must add Unified Messaging to their client computer's mail profile.
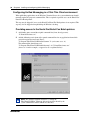
Automatic Configuration
Users can automatically add Unified Messaging to their default e-mail profile. Users click on the
published application that the Citrix Administrator created.
After the Citrix users run the published application, Microsoft Outlook is configured for CallPilot
and they do not run the application again.
Citrix users can also manually configure their Outlook profile.
Manual Outlook 2002 (XP) and 2003 Configuration
The user can manually add Unified Messaging to any e-mail profile in Outlook.
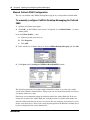
To manually configure Unified Messaging
1
Open the mail control panel applet.
2
In the Mail Setup dialog box, click E-mail Accounts to add CallPilot to the current e-mail
profile, or click Show Profiles to choose another profile.
If you click Show Profiles, then:
a
Select the profile you wish to use.
b
Click Properties.
c
Click E-mail Accounts.
NN40160-504
Chapter 3 Installing and configuring Unified Messaging
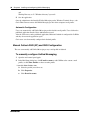
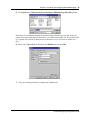
3
In the E-mail Accounts dialog box, select Add a new e-mail account and click Next.
4
Select Additional Server Types and click Next.
41
Unified Messaging Configuration Guide
42
Chapter 3 Installing and configuring Unified Messaging
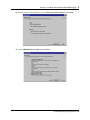
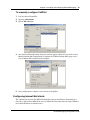
5
Select CallPilot Desktop Messaging and click Next.
6
Click Open in the Create/Open CallPilot Address Book File window.
The default location in the Create/Open Address Book File window is set to the user's profile
section on the Windows Terminal Server. The location of the user’s profile in the default location
prevents inadvertent access or overwrite of another user’s files.
Nortel does not recommend changing the default location of the Address Book file. If the Address
Book location is changed, conflict with other users can occur.
Initially, changing the location of the Address Book File to a location shared by all users can seem
worthwhile. The system administrator then can maintain one copy of the Address Book to be
shared by all users. However, a shared address book can contain entries (SDLs, BDLs, or PDLs)
not applicable to all users. While the CallPilot Server prevents unauthorized use of Address Book
entries, sharing the address book file among multiple users can cause confusion.
NN40160-504
Chapter 3 Installing and configuring Unified Messaging
43
Since the address book files for all users are stored on the same computer, users need to be aware
of how secure their data is. The level of security depends upon how the Windows Terminal Server
has been configured by the system administrator. Click Open in the Click Open in the Create/
Open CallPilot Message Store File window.
Nortel does not recommend changing the default location of the Message Store file. If the user
changes the location of the Message Store file, it can conflict with another user. The location of the
user’s profile in the default location prevents inadvertent access or overwrite of another user’s files.
7
Enter your CallPilot Mailbox Number in the Mailbox field and click OK.
8
Download the CallPilot Address Book (if prompted).
9
If you choose to download the Address Book, click OK to when the download is complete.
10 Close any remaining windows to complete the configuration.
Unified Messaging Configuration Guide
44
Chapter 3 Installing and configuring Unified Messaging
Manual Outlook 2000 Configuration
The user can manually add CallPilot Desktop Messaging to any e-mail profile in Outlook 2000.
To manually configure CallPilot Desktop Messaging for Outlook
2000
1
Open the mail control panel applet.
2
Click Add... to add CallPilot to the current e-mail profile, or click Show Profiles… to choose
another profile.
If you click Show Profiles…, then:
a
Select the profile you wish to use.
b
Click Properties.
c
Click Add.
3
In the Add Service to Profile dialog box, Select CallPilot Desktop Messaging and click OK.
4
Click Open in the Create/Open CallPilot Address Book File window.
The default location in the Create/Open Address Book File window is set to the user's profile
section on the Windows Terminal Server. This prevents one user from inadvertently accessing or
overwriting another user's files.
Nortel does not recommend changing the default location of the Address Book file. If the user
changes the location of the Address Book file, changing location can conflict with another user.
Since the address book files for all users are stored on the same computer, users need to be aware
of how secure their data is. The level of security depends upon how the Windows Terminal Server
has been configured by the system administrator.
NN40160-504
Chapter 3 Installing and configuring Unified Messaging
5
45
Click Open in the Click Open in the Create/Open CallPilot Message Store File window.
Nortel does not recommend changing the default location of the Message Store file. If the user
changes the location of the Message Store file, it can conflict with another user. The location of the
user’s profile in the default location prevents inadvertent access or overwrite of another user’s
files.
6
Enter your CallPilot Mailbox Number in the Mailbox field and click OK.
7
Close any remaining windows to complete the configuration.
Unified Messaging Configuration Guide
46
Chapter 3 Installing and configuring Unified Messaging
Configuring Lotus Notes
The administrator must install Unified Messaging on the Windows Terminal Server and update the
mail databases on the Domino server. Once this is done, Citrix Thin Client users can run the
CallPilot-enabled Lotus Notes client.
When Lotus Notes Client starts for the first time after server configuration is completed, Unified
Messaging detects the updated mail database, makes all required modifications in Lotus Notes
client initialization file (NOTES.INI) and prompts the user to finalize the configuration by
restarting the Lotus Notes client.
Note: The administrator must download
CallPilotLotusServerTools.exe, from the Business Communications
Manager web page, to manually update the mail databases.
The administrator can use the Lotus Notes Server Tools to:
• place CallPilot messages within the Lotus Notes Inbox with
e-mail messages
• update the user mail database on the Lotus Notes Server
• configure the automatic update utility as a scheduled task to
update the CallPilot address book stored on the Notes server
Updating the mail database manually
A Lotus Notes administrator can manually update one or more mail databases from the Lotus
Notes server by running an update utility. By running the update utility, you can add the Unified
Messaging folders and views to the user's mail database without affecting any previous
customization to the database.
Alternatively, a Lotus Notes administrator or user can replace the database design. Replacement of
the mail database removes all customization to the database. Administrators and users should only
replace the database under special circumstances. Users may consider replacing database design
only if they want CallPilot messages to be placed within the Lotus Notes Inbox, along with e-mail
messages.
To update the database design from the Lotus Notes server
1
Download the CallPilotUnifiedMessagingLotusServertools.exe from the Business
Communications Manager web page.
2
Run CallPilotUnifiedMessagingLotusServertools.exe from the Lotus server. This installs
LNSERVER.EXE files on the Lotus server and automatically runs LNSERVER.EXE.
3
Start Update database design. From the Start menu, choose Programs > Nortel CallPilot
Unified Messaging > Update Database Design.
The Update CallPilot mail databases dialog box appears.
4
Select Add CallPilot components, and then click OK.
The Select database(s) dialog box appears.
NN40160-504
Chapter 3 Installing and configuring Unified Messaging
5
47
Select mail files to update, and then click Open.
To add the CallPilot database to the Lotus Notes workspace
1
Run LNSERVER.EXE.
An empty callpilot.nsf is copied to the Lotus Notes server.
2
From the Lotus Notes workspace, choose File > Database > Open.
The Open Database dialog box appears.
3
Open the Lotus Notes database from the Server.
Ensure that you open the database from the Server, not locally.
4
In the database list, find CallPilot Address Book database (filename: callpilot.nsf)
5
Click Select or Open.
6
Click the Add Icon to add the icon to the Server Workspace.
The new icon appears on the Lotus Notes server workspace.
7
Click the icon, then open the address book.
8
Choose View > CallPilot (People).
9
Choose Actions > Download CallPilot Address Book
Note: To download the address book, you must have a valid CallPilot
mailbox and password. Contact your System Administrator if you do not
have a password.
10 If the Download CallPilot Address Book command is disabled on the actions menu, complete
the following steps:
a
Open the callpilot.nsf file in Designer Mode.
b
Select Actions > Download CallPilot Address Book.
c
Select Edit > Properties.
d
Ensure the Hide Action if Formula is True check box is not selected.
e
Close the Properties window.
The Download CallPilot Address Book command should be available.
To set up the automatic update utility
1
Run LNSERVER.EXE if it has not already been run.
To avoid entering the Lotus Notes password multiple times, configure Notes to share the Notes
password with Notes programs. For more information, see “Password prompts” on page 48.
2
Open the Public Address Book.
3
Navigate to Folders and Views/Servers/Program.
Unified Messaging Configuration Guide
48
Chapter 3 Installing and configuring Unified Messaging
4
Select Program, and then click Add Program.
The Program page appears.
5
Type nmlnadbk.exe in the Program name box. Ensure the Command line box is empty.
6
Set Enabled/disabled to ENABLED.
7
Select the time and frequency that you want the update utility to run.
8
Click Save, and then close the dialog box.
Notes updates the address book based on the specified schedule.
Password prompts
By default, Lotus Notes prompts for a Notes password when you access an application linked to
Lotus Notes. When Unified Messaging for Lotus Notes is installed, you must enter the Notes
password twice - when you start Notes, and the first time you access the Unified Messaging folder
during the Notes session. If desired, users can disable the Notes password prompt for the Desktop
Messaging folder.
To disable the Notes password prompt for Unified Messaging
1
In Notes, choose File> Tools> User ID.
The Enter Password dialog box appears.
2
Type your Notes password, and then click OK.
The User ID dialog box appears.
3
Check the option: Don't prompt for a password from other Notes based programs.
4
Click OK.
Configuring Novell GroupWise
The administrator must first install Unified Messaging on the Windows Terminal Server. Once
this is done, each Citrix Thin Client user must add Unified Messaging to their client computer
Novell Default Settings mail profile.
Automatic Configuration
Users can automatically add Unified Messaging to their Novell Default Settings mail profile by
choosing Start-> Programs-> CallPilot Desktop Messaging-> Add CallPilot to Default Mail
Profile.
The automatic Novell GroupWise configuration is only available when the Windows Terminal
Server administrator has published the Window's desktop. Otherwise, all users must manually
configure Novell GroupWise.
Manual Configuration
Users can manually add Unified Messaging to their Novell Default Settings mail profile.
NN40160-504
Chapter 3 Installing and configuring Unified Messaging
49
To manually configure CallPilot
1
Log on to Novell GroupWise.
2
Open the address book.
3
Choose File->Services.
4
Once the Novell Default Settings Properties window appears, follow the steps in the section
Manual Outlook 2000 Configuration to configure the CallPilot Desktop Messaging service,
even if Outlook XP is installed on the computer.
5
Once configuration is complete, close and restart GroupWise.
Configuring Internet Mail clients
The administrator must install CallPilot Desktop Messaging on the Windows Terminal Server.
Once this is done, Internet Mail Client users can follow the same instructions for using CallPilot as
the standard Windows environment users.
Unified Messaging Configuration Guide
50
Chapter 3 Installing and configuring Unified Messaging
Feature Limitations
There are some Unified Messaging feature limitations when you use a Citrix Thin Client.
Microsoft Outlook
Users of CallPilot Desktop Messaging have the ability to toggle between the CallPilot and
Standard E-mail form. This setting is maintained in the HKEY_CLASSES_ROOT registry key.
In a Citrix Thin Client environment, all client computers refer to the same
HKEY_CLASSES_ROOT registry key on the Windows Terminal Server.
As such, only the system administrator can toggle between the Standard Email and CallPilot
forms, and the form they pick will apply to all users. The CallPilot installer will default to the
CallPilot form.
In a Citrix Thin Client environment, all client computers must add CallPilot Desktop Messaging to
their e-mail program. In a Standard Desktop environment, this is handled automatically by
installation.
Lotus Notes
Users of the Lotus Notes CallPilot Desktop client must use the CallPilot Public Address Book
located on the Lotus Notes/Domino Server.
Audio Player
There is a slight delay when the user clicks CallPilot Player buttons. The user will not be able to
adjust the speaker volume from the CallPilot Audio player, CallPilot form, or CallPilot
configuration. The user will not be able to use the CallPilot Audio Player microphone to record
messages.
Fax Application
If the system administrator has installed CallPilot Desktop Messaging for more than one client
(Outlook, Notes, GroupWise, Internet Mail) on the Windows Terminal Server, the Compose Fax
dialog will list all available desktop clients that can be used to send the fax. This option is "sticky",
meaning that the last option chosen is the first option shown the next time around.
In a Citrix Thin Client environment, this option is still "sticky", but it is controlled by all client
machines. The last option chosen by any client machine will be the first option shown the next
time regardless of the client machine.
Tracing
Running CPTrace won't show trace statements unless the system administrator has enabled
CPTrace on the Windows Terminal Server.
NN40160-504
Chapter 3 Installing and configuring Unified Messaging
51
Localization
While CallPilot Desktop Messaging supports several languages, only one language can be
installed at a time. This prevents multiple languages from being installed on the Windows
Terminal Server. All CallPilot users in a Citrix Thin Client environment must use the same
language. This language can be non-English.
Installation
The system administrator must manually modify the command line of all published applications to
provide access to the Nortel Fax / Nortel Fax Batch printers. Failure to do so prevents Citrix users
from printing to the Nortel Fax / Nortel Fax Batch printers.
Security
The user does not have direct control over the file level access privileges of their CST file. This
may leave their CST files (and the messages they contain) playable or viewable by other users if
the Windows Terminal Server system administrator has not properly secured these files.
Windows XP
The Windows Terminal Server requires a Windows 2000 Server OS. Windows XP is not a server
OS and will not be supported as a Windows Terminal Server running Citrix Metaframe software.
Windows XP will be supported as a thin client running Citrix ICA software.
Unified Messaging Configuration Guide
52
Chapter 3 Installing and configuring Unified Messaging
NN40160-504
53
Chapter 4
Troubleshooting
This chapter is about:
•
•
•
•
•
•
•
•
Troubleshooting during installation
Troubleshooting logon problems
Troubleshooting Lotus Notes logon problems
Troubleshooting after logging on
Internet Mail client error messages
Accessing Unified Messaging online Help
Using Unified Messaging Support Tools
CPTrace
This chapter discusses problems that subscribers can experience with Unified Messaging. The
troubleshooting information is divided into problems and suggested solutions. Based on the
expertise of subscribers, you can ask them to do some of the troubleshooting procedures.
If the suggested solution does not correct the problem, contact your Nortel representative.
The problems discussed here apply to all clients unless otherwise noted. Perform the suggested
procedures from the desktop computer, or, where noted, the Business Communications Manager
or administration client.
Troubleshooting during installation
Before you begin to install Unified Messaging for Microsoft Outlook, GroupWise, or Lotus Notes,
you require:
•
•
•
the subscriber’s CallPilot mailbox number
the fully qualified domain name of the Business Communications Manager
the SMTP/VPIM prefix of the BCM
Note: Before you install Unified Messaging, make sure the Integrated Client (Microsoft
Outlook, GroupWise, or Lotus Notes) is working properly.
To obtain the Unified Messaging version number
1
If the subscriber cannot log on, but you require the CallPilot version number, navigate to:
windows\system\nmdcva.exe
2
Right-click the file and select Properties.
The Properties page appears.
Unified Messaging Configuration Guide
54
Chapter 4 Troubleshooting
3
Select the Version tab.
The version number for Unified Messaging is displayed.
Microsoft Outlook default mail client
You see the error message when you install Unified Messaging: “Either Outlook is not the default
mail client or there is no default mail client to fulfill the current request.” If Outlook is installed on
the subscriber’s computer but they do not want Outlook as the default mail client, the subscriber
can change to another client after Unified Messaging is installed.
To define Outlook as the default mail client:
1
Click the Windows Start button, point to Settings and click Control Panel.
The Control Panel window appears.
2
Double-click the Internet Options icon.
The Internet Properties dialog box appears.
3
Click the Programs tab.
4
From the E-mail list box, select Microsoft Outlook.
5
Click the OK button.
No authorization to perform this operation
Subscribers must have Manager or Designer access control of the mail database to install Lotus
Notes Unified Messaging. The Lotus Notes administrator sets this control on the server for each
subscriber. The default is Manager access.
To determine the level of access control for a subscriber
1
From the subscriber’s Lotus Notes Mail database, click File, click Database, and click Access
Control.
2
Click the subscriber’s name in the displayed list.
The subscriber’s access control level appears in the Access box. The choices are Manager,
Designer, Editor, Author, Reader, Depositor, and No Access.
For a subscriber to install Unified Messaging, Manager or Designer must be displayed.
3
If neither Manager nor Designer is selected:
— you must temporarily give the subscriber Manager or Designer access
or
— the Lotus Notes administrator must manually update the Mail database from the server for
each subscriber who needs CallPilot access.
This update creates a new view, CallPilot Unified Messaging, in Lotus Notes.
NN40160-504
Chapter 4 Troubleshooting
55
To update a CallPilot subscriber Mail database from the server:
1
Install CallPilot Unified Messaging on the Lotus Notes server computer by running Server,
setup.exe.
2
Start Update database design.
3
To locate the Update database design program, click Start, point to Programs, point to Nortel
CallPilot Desktop and click Update database design.
4
From Update CallPilot Mail databases, select Add CallPilot components or Remove
CallPilot components.
5
Click OK.
6
From the Select database(s) dialog box, select one or a group of mail files to update.
7
Click the OK button.
Fax Printer Driver does not install
If a subscriber is installing Unified Messaging and tries to install the Fax Printer Driver, the fax
driver installation fails after the subscriber is prompted for the administrator user name and
password. (Unified Messaging still installs correctly.) This failure occurs if the client PC is
running Windows 2000 with SP4 or later, and the subscriber performing the installation does not
have administrator privileges.
To resolve this, you must alter the security policy of the subscriber performing the installation to
allow the user to impersonate a client after authentication. Refer to the online Microsoft
Knowledge Base article Q821546 for more information.
Unified Messaging Configuration Guide
56
Chapter 4 Troubleshooting
Troubleshooting logon problems
Invalid credentials
The subscriber sees messages such as “Invalid credentials. Please retry” or “The server could not
be located. Please Retry.”
1
On the subscriber’s computer, check that Unified Messaging is configured with the proper
settings. Verify that the following information is correct:
•
•
•
mailbox number
fully qualified domain name (FQDN) or IP address of the BCM
the SMTP/VPIM prefix of the BCM
2
Check that you can log on from the telephone using the same mailbox number and password.
3
Verify that you have network connectivity to the BCM.
For example, issue a network command to the BCM exactly as it appears in your Unified
Messaging configuration. Try to ping using the DOS prompt, and ensure that you receive a
valid response from the BCM. If you do not have network connectivity to the BCM, you are
not able to access Unified Messaging.
4
Ensure that DNS is configured on this computer. Under TCP/IP properties, select the DNS tab.
Ensure that a DNS server is listed. Verify that it is the correct IP address for the DNS server.
5
Check with the DNS administrator whether the server name is in the DNS server. Verify that
the correct host name is configured in the DNS server.
6
The following actions can be taken to resolve this situation:
•
•
NN40160-504
Properly configure the CallPilot FQDN in the DNS server.
Refer to “Configuring environments without a DNS” on page 14 for instructions on
configuring CallPilot Unified Messaging in an environment with no DNS server.
Chapter 4 Troubleshooting
57
No desktop capabilities
The subscriber tries to log on and sees this message:
If this occurs, make sure that:
•
•
you have enabled enough desktop messaging keycodes. If there are not enough keycodes
enabled the subscriber will be able to log in to the mailbox through the telephone interface but
not the desktop.
there are enough mailbox keycodes enabled to support the number of mailboxes that are
initialized in the system. If you have used all the mailboxes available on your system the
subscriber will not be able to log on to the mailbox from the telephone or desktop.
CallPilot Logon Failure
The subscriber sees a message that the computer is not connected to the network.
Tell the subscriber to contact their network administrator.
Unified Messaging Configuration Guide
58
Chapter 4 Troubleshooting
Vista Windows Mail purge messages fail due to Microsoft
limitations
To keep and show deleted messages in your Inbox
1
From the menu bar, navigate to Tools > Options > Advanced.
2
Select the Use the Deleted Items Folder with IMAP accounts.
Deleted items remain in your Inbox.
3
While in your Inbox, navigate to View > Current View.
4
Select the Show Deleted Messages check box.
Deleted items are shown in your Inbox.
Troubleshooting Outlook 2002 problems
The following issues can arise when Unified Messaging and Outlook 2000 work together. These
issues should be resolved with a Microsoft Outlook service release patch.
Sending messages
When a subscriber who uses Outlook 2002 creates a CallPilot message in the CallPilot window,
Outlook does not automatically send the message when the subscriber clicks the Send button.
To send the message, the subscriber must click the Send/Receive button on the Outlook toolbar.
To fix this issue, Nortel recommends subscribers install Outlook 2002 SP 1 from Microsoft.
Accessing CallPilot support tools in Outlook 2002
This section describes how to use CallPilot support tools specific to Unified Messaging for
Outlook 2002.
To reset the CallPilot Message Store in Outlook 2002
1
On the subscriber’s computer, press the Ctrl and Shift keys.
2
In Outlook, on the Tools menu, click Send/Receive, Accounts, CallPilot Desktop
Messaging.
3
Continue to press the Ctrl and Shift keys until the CallPilot Reset Mailbox dialog box
appears.
4
Click Reset Mailbox.
NN40160-504
Chapter 4 Troubleshooting
59
To access the Outbox Fix utility in Outlook 2002
1
In Outlook, on the Tools menu click E-mail accounts.
The E-mail Accounts wizard appears.
2
Select View or change existing e-mail accounts, and then click Next.
3
In the e-mail account list, select CallPilot Unified Messaging.
4
While you press the Ctrl and Shift keys, click Change.
The CallPilot Outbox Fix dialog box appears.
5
Click Fix outbox.
Unified Messaging Configuration Guide
60
Chapter 4 Troubleshooting
Troubleshooting Lotus Notes logon problems
When Unified Messaging is installed, Unified Messaging appears under Folders and Views. In the
Personal Name and Address Book on Local database, two new views are created:
•
•
Groups (CallPilot)
People (CallPilot)
Note: In Lotus Notes 5.0 these views are accessible only from the View menu. In Lotus
Notes 5.0 subscribers must log on to CallPilot before they can download the address
book.
In Lotus Notes 6.0 these views are accessible from the Contacts menu.
Subscribers cannot see CallPilot Unified Messaging
When the subscriber logs on, they do not see Unified Messaging.
1
Verify that the subscriber is in Folders and Views.
2
If they do not see Unified Messaging and they are in Folders and Views, ask the subscriber to
uninstall the current version of CallPilot, and then reinstall it. When they reinstall, tell them to
make sure that when they reach the Ready to Install window they select the Update Lotus
Notes databases check box.
Note: Even if the subscriber does not select the check box, you can manually update the
Mail database design.
Replace the Mail database design only if you have not customized Lotus Notes. If you
replace the database design, any customization is removed.
You require Manager- or Designer-level access to update the Mail database design.
Replacing the Mail database design
The Lotus Notes administrator can replace the Mail database design from the Lotus Notes server.
To update the Mail database design
1
If you use Lotus Notes 5.0, copy the file cpmail50.ntf for Lotus Notes 5.0 into the notes/data
directory on the Lotus Notes server.
If you use Lotus Notes 6.0, run LNSERVER.EXE to copy the cpmail60nltf file.
2
Use File > Database > Open to add the mail database icon that you are going to update.
3
Select this icon.
4
Select File > Database > Replace design.
5
In the Replace Database Design window, select the Show advanced templates check box.
NN40160-504
Chapter 4 Troubleshooting
6
61
Make sure that:
•
•
the Inherit future design changes check box is selected
Hide formulas and LotusScript is not selected
7
Select CallPilot Mail (R5.0) or (R6.0), depending on which version of Lotus Notes you use.
8
Click Replace.
9
Press F9 to refresh the window and display the names.
No entries in CallPilot Personal Name and Address Book
While in the Personal Name and Address Book window, the subscriber selects People
(CallPilot) and does not see any entries in the CallPilot Address Book.
Ask the subscriber to download the CallPilot Address Book manually and update the Personal
Address Book template.
To manually download the CallPilot Address Book:
1
Make sure that Address Book—People (CallPilot) window is the active window.
2
On the Actions menu, select Download CallPilot Address Book.
The dynamic link library nNOTES.dll could not be found in the specified
path
1
On your desktop, right-click the Lotus Notes icon, select Properties, and then click the
Shortcut tab.
2
Examine the properties of your Lotus Notes shortcut.
3
Verify the path in the Start in box.
Note: Usually, when Lotus Notes creates a shortcut, it puts a working directory in this box.
4
Add or update the path.
You download the CallPilot address book and 0 entries are found
1
Check the CallPilot Address Book search base.
Search base is configured under Actions > CallPilot Desktop Messaging > CallPilot
Desktop Messaging. Select the Address Book tab.
2
Verify that the search base is exactly as it is configured on the CallPilot Administration Client.
Unified Messaging Configuration Guide
62
Chapter 4 Troubleshooting
Troubleshooting after logging on
The CallPilot address book is empty
Lotus Notes subscribers must log on to CallPilot before they can download the address book.
1
Make sure that your Address Book—People (CallPilot) window is the active window.
2
On the Actions menu, click Download CallPilot Address Book.
3
On the View menu, click Refresh.
4
Make sure the CallPilot Address Book has been downloaded.
Outlook and GroupWise clients:
1
Click Download CallPilot Address Book.
2
If it responds with 0 entries found, verify that the search base is correct.
The subscriber has message access problems
The subscriber has modified the settings so that they are now correct, but the subscriber still
cannot access messages.
If the subscriber modified the settings while Unified Messaging was open, close and reopen
Unified Messaging so that the settings take effect.
The subscriber has problems sending messages
When the subscriber sends a message, it arrives in the recipient’s Outlook mailbox, but it does not
arrive in the CallPilot message mailbox.
1
Ensure that when you address the message, you locate the recipient’s address in the CallPilot
Address Book. If the recipient is defined in your Personal Address Book, then ensure that the
Personal Address Book entry is a CallPilot address.
2
To ensure that the recipient is defined as a CallPilot Address type, highlight the name, click
Properties, and verify that the Address Type=CallPilot.
3
Before you send the message, in the To field, highlight the Recipient, click Properties, and
verify that the Address Type=CallPilot.
Messages remain in the subscriber’s Outbox
On Microsoft Outlook, messages remain in the mail client outbox (not the CallPilot Message Store
outbox). This problem can be caused by the migration of messages from one server to another
while maintaining the same Outlook client.
Remove the Exchange server, then re-add it to the subscriber’s profile.
NN40160-504
Chapter 4 Troubleshooting
63
To fix the Outbox
1
On the subscriber’s computer, on the Tools menu click Services.
The Services dialog box appears.
2
Select CallPilot Desktop Messaging.
3
Press the Ctrl + Shift keys, and click Properties.
The CallPilot Outbox Fix dialog box appears.
4
Click the Fix outbox button.
The subscriber cannot send messages
The subscriber cannot send messages to fax, AMIS or digital networking subscribers.
1
Make sure that the subscriber is addressing the message correctly. Refer the subscriber to
“Address Formats” in their online Help.
2
Ensure that the subscriber has the capability to send messages to fax, AMIS and digital
networking subscribers. Security concerns can restrict subscribers from sending messages to
these types of subscribers.
3
For fax addresses, ensure that you can dial the number the subscriber is specifying from the
subscriber’s phone set. Set-based restrictions can prevent the call from completing.
The subscriber cannot send a CallPilot message
The subscriber cannot send a CallPilot message. When the subscriber clicks Send, an error
message appears that says, “Error. Failed to send message.”
•
•
Ask the subscriber to check that their mailbox is not full. If their mailbox is full, they cannot
send messages until some messages are deleted.
Ask the subscriber to check the format of the message address. If the FQDN after the at (@)
symbol does not match the FQDN of the BCM configured to this mailbox, the message is
rejected.
Unified Messaging Configuration Guide
64
Chapter 4 Troubleshooting
•
Ask the subscriber to verify that no attachment is empty. An empty attachment causes the
entire message to be rejected. Delete the empty attachment and try sending the message again.
Verify that you can ping the BCM:
1
At the DOS prompt, type:
ping <Business Communications Manager FQDN>
2
If the response is “request timed out,” then type:
ping <Business Communications Manager IP address>
Note: If there is a reply, then the BCM FQDN has not been properly configured to your
Domain Name System (DNS). Contact your DNS administrator for assistance.
3
If there is no reply, verify that the BCM can be reached on your LAN. Contact your IS
administrator for help.
4
Verify that the BCM is up and running.
Non-delivery notification
The subscriber receives non-delivery notifications for messages.
1
Ask the subscriber to verify that they have a valid attachment type.
2
Ask the subscriber to make sure that their mailbox is not full.
3
Ask the subscriber to make sure that they are addressing the message correctly. See “Address
Formats” in the online Help.
4
Ask the subscriber to ensure that they are attaching only TIFF-F, VBK, WAV, or TXT files to
their messages. Unified Messaging does not accept any other file types.
5
If the subscriber is sending to a remote location, ask the subscriber to verify that the address is
valid and still exists.
6
For fax machines, ensure that the fax number is valid and the machine is accepting faxes.
7
Ensure that the subscriber has the capability to dial the number. Refer to the CallPilot
Manager Set Up and Operation Guide.
8
Verify that the remote server is responding by issuing a network command on the BCM.
Internet Mail clients cannot send or receive WAV files.
“Unknown” appears in the Sender field
In some messages, the subscriber sees a name or phone number in the Sender field. In other
messages, the subscriber sees “Unknown.”
If the caller’s phone system has Calling Line ID, CLID information appears in the Sender field for
messages that are created when people phone you and you are not available. If CLID information
is not provided, it appears as “Unknown.” For messages that are sent by people using Networking,
if the sender’s name is not provided to the CallPilot system, the Sender field appears as
“Unknown.”
NN40160-504
Chapter 4 Troubleshooting
65
The subscriber has problems with faxing
•
•
•
If the error message states that the message cannot be sent because part of the media cannot be
converted, or because the media is not supported at the recipient’s system, ensure that the
subscriber only sends attachments that are TIFF-F, WAV, VBK, or text files.
Ensure that the subscriber and the recipients can send and receive fax (TIFF-F) messages.
Also, ensure that all TIFF files are TIFF-F files created using the Nortel Fax Printer. Not all
TIFF files are class F.
Ask the subscriber to check that their mailbox is not full. If, when they log on to Unified
Messaging or the telephone, they receive a message that their mailbox is full, they cannot send
any messages until they delete some messages to create space in their mailbox.
The subscriber has problems with fax reception
People do not receive faxes sent by the subscriber, or the subscriber does not receive faxes sent to
them.
•
•
Verify that the subscriber has a mailbox Class of Service with fax capability.
Make sure that the people the subscriber is sending faxes to can receive faxes. For more
information, refer to the Unified Messaging Quick Reference Guide.
The subscriber has problems receiving replies
People receive the subscriber’s CallPilot messages, but the subscriber does not receive their
replies.
1
On the Actions menu, select CallPilot Configuration.
2
Click Properties.
3
Ensure that the SMTP/VPIM prefix is specified correctly.
Deleted messages remain in the subscriber’s mailbox
When a subscriber deletes messages using Unified Messaging, the messages are still in the
subscriber’s mailbox when they access the mailbox using the telephone.
If the deleted messages are still in a Deleted Items folder in the CallPilot Message Store, the
messages remain in the subscriber’s CallPilot mailbox. To remove the messages from both
mailboxes, the subscriber must permanently delete them from the Deleted Items folder.
The subscriber cannot delete messages
When the subscriber tries to delete the messages permanently, the messages remain.
Subscribers cannot delete messages using Unified Messaging while they are logged on to their
mailbox from their telephone.
Ask the subscriber to end the telephone mailbox session and then try to delete the messages from
Unified Messaging.
Unified Messaging Configuration Guide
66
Chapter 4 Troubleshooting
Messages no longer on server
The subscriber receives the error message: “This message could not be found on the server.
Messages must exist on the server in order to be played via the telephone. Use computer to play
this file. Port failed.”
Voice messages that are saved to the subscriber’s computer are no longer in the CallPilot Inbox.
The subscriber cannot play these messages from the telephone. To listen to these messages, the
subscriber must use computer speakers or headphones.
Voice message does not play on telephone
The subscriber tries to play a voice message from the telephone. The subscriber answers the
telephone when it rings but the message does not play.
1
Ask the subscriber to say something like “hello,” to initiate message playback.
2
Ask the subscriber to check the CallPilot player Status bar. If it states Open Pending, the
subscriber should hang up the telephone. Then click Computer on the player, and click telset
playback. The phone rings again.
3
Tell the subscriber that if the Status bar still says Open Pending, hang up again, wait three to
five minutes, then try to play the message again. If this problem persists, contact your Nortel
Customer Technical Support.
4
The number of outcalling channels used by the CallPilot telset player is determined by the
number of outcalling channels configured in CallPilot Manager. Ensure that this number is
greater than zero and that the other channels are not currently in use. For information about
configuring outcalling channels, refer to the CallPilot Manager Set Up and Operation Guide.
NN40160-504
Chapter 4 Troubleshooting
67
The Message Waiting Indicator is active but there is no new message
The subscriber’s telephone Message Waiting Indicator is activated but there is no new message in
the subscriber’s Desktop Inbox. This discrepancy can occur because messages are downloaded
from the BCM with the same frequency as e-mail messages (this applies only to Lotus Notes
subscribers).
1
To adjust the frequency, on the File menu, select Tools.
2
Click User Preferences and click Mail.
3
Change the Check for mail every __ minutes setting.
4
If you want to check for mail immediately, on the Actions menu, select Refresh CallPilot
Message List.
A reply to a message sent from Eudora is rejected on an AMIS network
A reply to a message cannot be sent over an AMIS network. The message is rejected because
autotext is placed at the start of the message.
1
Open the Eudora.ini file using a text editor, such as Notepad.
2
Under the [Settings] statement, add these lines:
ReplyAllAttribution=
ReplyAttribution=
3
On the File menu, click Save to save the settings.
Unified Messaging does not work properly for subscribers who use
ICQ Express with Outlook
Unified Messaging is incompatible with the ICQ Express add-on for Microsoft Outlook. Advise
the subscriber to remove the ICQ Express add-on. Removing this add-on does not affect the
operability of ICQ, it only removes the ICQ content from Outlook.
To remove the ICQ Express add-on:
1
Start Microsoft Outlook.
2
On the Tools menu, select Options.
3
Click the Other tab and select Advanced Options.
4
Click the COM Add-Ins button.
5
Select ICQ Express and click the Remove button.
Unified Messaging and ICQ will now both operate as expected.
Unified Messaging Configuration Guide
68
Chapter 4 Troubleshooting
In sent messages, digits or symbols appear instead of
language-specific symbols
The only character sets that are supported are us-ascii and ISO-8859-1. The messaging client must
be configured to use ISO-8859-1 character encoding, usually displayed as the option Western
(ISO-8859-1) or Western European ISO in most e-mail applications. This does not restrict users in
other countries from using text messaging; it only limits which character sets can be used to
compose and send these messages.
Internet Mail client error messages
Unified Messaging Internet Mail clients display error codes when a problem occurs. Table 1
describes Unified Messaging error codes.
Table 1 Internet Mail client error messages
Code
Error message
6
Your message did not reach some or all of the intended recipients.
16
The message was not delivered because an undefined problem occurred.
17
There is a problem with the specified address. Please verify the address.
18
The external telephone number used in addressing the message could not be dialed.
Please verify the telephone number.
19
The mailbox or telephone number is invalid. Please confirm the address.
20
The address is invalid. Please verify the destination system.
22
The mailbox address was at one time valid, but mail is no longer being
accepted. Please confirm the address.
23
The mailbox exists, but something at the destination mailbox caused your message
not to be received. Please try sending the message again later.
24
The recipient did not receive the message because the recipient did not instruct the
service to play the message (by pressing the appropriate telephone key).
25
The mailbox exists, but is not accepting messages at this time because it may be
temporarily disabled. Please try sending this message again later.
26
The recipient’s mailbox is full. Please try sending this message again later.
27
The message length exceeds the administrative limit for the sender's mailbox.
28
The address is a mailing list and could not be expanded.
29
The message was not delivered because a system problem occurred.
30
The system storage has been exceeded. Please try sending this message again
later.
31
The recipient’s system is not accepting messages. Please try sending this message
again later.
32
Some features in the message are not supported. For example, you may not be able
to send a message with this media.
NN40160-504
Chapter 4 Troubleshooting
69
Code
Error message
33
Recipients are not able to receive messages with a private tag. Please try sending
the message again without the private tag.
35
The system does not allow messages that are this large. (NOTE: The maximum
message length is 30 minutes.)
36
A problem occurred in the network. Please try sending the message again later.
37
An outgoing connection could not be made with the destination. Please try sending
the message later.
38
A problem occurred during the transmission of your message.
39
A directory server was unavailable. Please try again later or contact your
Administrator.
40
The network was congested or the telephone line was busy. Please try sending the
message later.
41
The number of attempts to deliver the message has exceeded the system maximum.
Please try sending the message again later.
42
An error occurred during the transmission of your message.
43
This message was addressed to too many recipients. Please reduce the number of
recipients and try sending the message again.
44
There was a problem with the content of your message. Please re-create the
message and send it again.
45
The message contains media which cannot be delivered. The recipient may not be
able to receive a message with this media.
46
The voice portion of the mixed media message was delivered. The recipient can only
receive this part of the message.
47
The fax portion of the mixed media message was delivered. The recipient can only
receive this part of the message.
48
Some media contained in your message was not converted successfully. Some of the
recipients did not receive the message.
49
A security measure or policy prevented the delivery of the message. Please contact
your administrator.
50
The recipient(s) could not be reached. Please consult with your administrator for
assistance.
51
Legislative policy restricts the delivery of messages at this time. Consult with your
administrator on the best time to send the message.
52
The recipient(s) could not be reached. Please consult with your administrator for
assistance.
92
Invalid mailbox number/password.
94
User does not have desktop capability. Please contact your administrator.
95
95 Invalid mailbox number/password. Please contact your administrator.
97
Invalid mailbox number/password. Maximum number of invalid login attempts
occurred. Please contact your administrator.
Unified Messaging Configuration Guide
70
Chapter 4 Troubleshooting
Code
Error message
98
Invalid mailbox number/password. Maximum number of invalid login attempts in this
session occurred. Please restart your login session.
100
Invalid login. Cannot access system resources. Try again later.
101
Too many login failures.
102
Too many authentication failures.
105
Autologout; your session has been idle for too long. You are no longer connected to
the server. Please log in again to send and receive new messages.
107
Mailbox error.
108
Your mailbox is almost full.
110
Your password has expired. Please change your password.
111
The temporary password assigned to you by the administrator must be changed.
Please change your password.
123
The 'Login' authentication method is disabled. Please contact your administrator.
124
The ‘Challenge-Response’ authentication method is disabled. Please contact your
administrator.
125
Your mailbox is full. Delete messages you no longer require.
133
Remote Notification was turned off by the person who answered the notification call.
It has now been turned back on.
134
Remote Notification was turned off. It has now been turned back on.
135
Remote Notification has been turned off. Please ensure that the number is correct,
and review your notification setup before turning notification back on.
136
Your password will expire in n day(s) [where n
NN40160-504
is the number of days]
Chapter 4 Troubleshooting
71
Replacing the mail database in Lotus Notes
Replace the Lotus Notes mail database only if:
•
•
•
a subscriber wants CallPilot messages to be stored in the same Inbox as their Lotus Notes
e-mail messages
the subscriber’s database design has not been customized, and the subscriber does not intend to
customize the database design in the future
you are familiar with modifying the Lotus Notes database design
Caution: Risk of data loss
Replacing the database design removes any customization in the current
database design. If the mail database is customized, update the database instead
of replacing it.
You can replace the mail database from the subscriber’s workstation or from the Notes server.
To replace the database design from the user’s computer
1
Log on to Lotus Notes on the subscriber’s workstation.
2
Make a note of the version of Lotus Notes. Choose Help > About Notes Desktop.
3
Select the mail database icon.
4
Choose File > Database > Replace Design.
The Replace Database Design dialog box appears.
5
Click Template Server.
The Template Server dialog box appears.
6
Select Local, and then click OK.
7
Check the Show advanced templates box.
8
From the list, select CallPilot Mail (R5.0) or (6.0), depending on the version of Lotus Notes.
9
Make sure that:
•
•
Inherit future design changes is selected
Hide formulas and LotusScript is NOT selected
10 Click Replace.
A message appears that asks you to confirm that you want to change the database’s view.
11 Click Yes.
To replace the database design (Notes server)
1
Install Unified Messaging on the Lotus Notes server computer.
2
Start Lotus Notes.
3
Choose File > Database > Open.
Unified Messaging Configuration Guide
72
Chapter 4 Troubleshooting
4
Select the mail database icon.
5
Choose File > Database > Replace design.
The Replace Database Design dialog box appears.
6
Select the Show advanced templates check box.
7
Select CallPilot Mail (R4.5), CallPilot Mail (R4.6), or CallPilot Mail (R5.0), as required.
8
Make sure that:
•
•
9
Inherit future design changes is selected
Hide formulas and LotusScript is NOT selected
Click Replace.
Repeat steps 3 through 9 for each database that you must update.
10 Press F9 to refresh the window and display the names.
NN40160-504
Chapter 4 Troubleshooting
73
Accessing Unified Messaging online Help
Unified Messaging for Microsoft Outlook, Novell GroupWise, and Lotus Notes provides standard Help.
Note: To access Internet Mail client Help, on the Messaging Administration menu click
Internet Mail Client Administration.
Internet Mail client Help contains Help for the CallPilot interface. Use the manufacturer’s
online Help for questions about your Internet Mail client.
To access online Help
From Microsoft Outlook:
•
From your Inbox, on the Help menu, select CallPilot Desktop Messaging Help.
From Novell GroupWise:
•
From your Inbox, on the Help menu, select CallPilot Desktop Messaging Help.
From Lotus Notes:
•
From your Inbox, on the Actions menu, select CallPilot Help Topics.
Unified Messaging Configuration Guide
74
Chapter 4 Troubleshooting
Using Unified Messaging Support Tools
Resetting the CallPilot message store for Microsoft Outlook
This feature is available only for subscribers who use Microsoft Outlook. Resetting the CallPilot
message store removes invalid or corrupt messages from the inbox.
Lotus Notes and GroupWise clients can reset their mailboxes by choosing the Refresh CallPilot
Message List option.
To reset CallPilot message store for Microsoft Outlook 2000
1
Press Ctrl + Shift.
2
On the Tools menu, click Send and Receive, and then click CallPilot Transport.
3
Press Ctrl + Shift until the CallPilot Reset Mailbox dialog box appears.
4
Select the Reset Mailbox button.
All CallPilot messages are purged from the subscriber's mailbox, and the CallPilot message
headers that are stored for the subscriber are downloaded again. The messages disappear and
then reappear one by one. All message caching is lost.
Note: The messages are not deleted from CallPilot. The messages are removed
from the client computer cache. The messages are downloaded again from BCM
to the client computer.
This feature is intended for system administrators and CallPilot product support.
NN40160-504
Chapter 4 Troubleshooting
75
CPTrace
You can use CPTrace to collect information about problems with any of the desktop clients that
run CallPilot. You save this information to a log file that you can analyze to determine the cause of
the problem.
Problems you can look for include:
•
•
•
•
trouble connecting to the Business Communications Manager system
CallPilot player problems
address book problems
problems with message compose, reply, forward, delete and notification
To use CPTrace, you must understand Unified Messaging functionality and the corresponding
components on the IMAP server.
Note: Running CPTrace affects how CallPilot works. It is possible that you will not be
able to reproduce problems while CPTrace is running.
CPTrace.exe is installed with each desktop client in the \Program Files\Nortel\<client directory>:
•
•
•
for Microsoft Outlook, in nmdc
for Lotus Notes, in nmin
for GroupWise, in nmgw
Using CPTrace
To use CPTrace, double-click the CPTrace.exe in the corresponding desktop client directory.
Unified Messaging Configuration Guide
76
Chapter 4 Troubleshooting
CPTrace settings
The CPTrace settings are stored in the Windows registry. The existing settings are used each time
you run CPTrace.
Table 2 CPTrace Settings
CPTrace Settings
Descriptions
IMAP/SMTP
Logs all IMAP/SMTP traffic
Desktop client
Logs internal Outlook, Lotus Notes and GroupWise traffic
Audio Player
Logs Audio player traffic
File
File writes logs to a file. Check this box and type a file name and
extension to maintain the log. You can include a directory path such
as c:\my player. When you close CPTrace with the File check box
selected, the Desktop client continues to write information to the file
selected. This slows down the Desktop operation slightly.
The log file never gets larger than 1MB. When the file size reaches
1MB, 10 percent of the file is purged, starting with the oldest data.
If you select the File check box and close CPTrace, you receive a
warning that File tracing is still enabled and you are asked whether
you want to leave file tracing on. Click Yes to leave file tracing enabled.
Window
Window writes logs to the display window.
Erase
Erase deletes the log file from the directory you defined for it. A
message appears that asks you to confirm the deletion.
Clear
Clears the display window
Save
A Save As dialog box appears that you can use to save the trace to a
text file. The default file name is CPTrace.txt. This file is stored in a
temporary directory.
Always on top
Check this box to keep the CPTrace tool on top of other windows.
NN40160-504
77
Index
A
D
Access, to BCM 16
Accessing Help 73
Domain Name System (DNS) 64
configuring environments without a DNS 14
B
E
BCM, voice format 9
Entering
domain name (IP address only) 15
C
CallPilot 150, voice format 9
CallPilot Address Book
setting up in Outlook (Internet mail mode) 27
setting up in Outlook Express 27
CallPilot Unified Messaging. See Unified Messaging
CallPilot, Message Store 28
Citrix
configuring Lotus Notes 46
configuring Microsoft Outlook 39
configuring Novell Groupwise 48
fax batch printers 38
feature limitations 50
installing Unified Messaging 37
Lotus Notes update database design 46
Microsoft Outlook,manual configuration 40
Novell Groupwise,manual configuration 48
supported platforms 37
CLAN IP address 32
Configuring
access to BCM 16
Citrix Thin Client 38
environments without a DNS 14
GroupWise 28
IMAP account on Outlook/Express 32
Internet mail clients 32
IP address only 15
LDAP directory service for Outlook/Express 34
Lotus Notes 30
Outlook Express or Outlook (Internet Mail mode)
32
special settings for Outlook Express or Outlook
(Internet Mail mode) 35
Unified Messaging 24
configuring servers for Unified Messaging 13
CPTrace 75
Error message
No authorization to perform this operation 54
Error messages 68
Estimated installation time, Unified Messaging 17
Eudora Pro 9
F
Fax requirements 19
feature limitations,Citrix 50
Format, voice 9
Fully Qualified Domain Name (FQDN) 56
G
G711 9
G723.1 9
Groupware, definition 8
GroupWise 8
CallPilot Message Store 28
configuring 28
H
Help, accessing 73
I
ICQ 67
IMAP
configuration settings 14
server 13
server name 33
testing Outlook Express or Outlook (Internet Mail
mode) IMAP account 36
IMAP clients
error messages 68
IMAP clients, definition 9
Installation requirements 17
Installing
Unified Messaging Configuration Guide
78
Index
Citrix configuration 39
Unified Messaging, estimated installation time 17
installing
Unified Messaging 20
Microsoft Outlook (Internet mail mode)
configuring access to CallPilot Address Book 27
Integrated clients 8
definition 8
Lotus Notes 8
Novell GroupWise 8
Outlook 2000 8
Outlook 2002 8
Microsoft Outlook 2002
configuring text formatting options 27
specifying e-mail settings 26
Internet mail
configuring clients 32
configuring Outlook Express or Outlook (Internet
Mail mode) 32
configuring special settings for Outlook Express or
Outlook (Internet Mail mode) 35
testing Outlook Express or Outlook (Internet Mail
mode) IMAP account 36
Internet Mail clients
error messages 68
Microsoft Outlook Express
configuring access to CallPilot Address Book 27
My LDAP server requires me to log on 34
N
Netscape Messenger 9
Novell Groupwise
Citrix configuration 48
O
Online Help, address formats 63
Outlook 2000 8, 9
Internet mail clients 9
definition 9
Eudora Pro 9
Netscape Messenger 9
Outlook 2002 9
Outlook Express 9
Outlook XP 9
Outlook 2002 8, 9
Internet Message Access Protocol. See IMAP
printing faxes,Citrix 38
IP addresses 14
R
L
Outlook Express 9
Outlook Express or Outlook (Internet Mail mode)
configuring 32
Outlook XP 9
P
Reset CallPilot Message store 74
LDAP
configuration settings 14
configuring directory services 34
directory name 34
directory services 34
server 14
S
Lightweight Directory Access Protocol. See LDAP 14
Simple Mail Transfer Protocol. See SMTP 14
Lotus Notes 8
Citrix configuration 46
configuring 30
mail database, replacing 71
SMTP
server 14
server name 33
M
SMTP/VPIM prefix 17, 29, 32, 53
Mail database, replacing 71
Support tool
CPTrace 75
reset CallPilot message store 74
for Microsoft Outlook 74
Message waiting indicator 67
Microsoft
Outlook (Internet mail mode) 9
Outlook Express 9
Microsoft Outlook
NN40160-504
Servers
IMAP 13
LDAP 14
SMTP 14
SMTP/VPIM 56
Supported integrated clients 8
Supported Internet mail clients 9
Index
supported platforms in Citrix 37
W
T
Windows Messaging 4.0 18, 28
79
Timeout 34
Troubleshooting
after logging on 62
after successful logon
Outlook 62
Outlook and GroupWise 62
during installation 53
logon failures 56
obtaining the version number 53
Unified Messaging support tools 74
update CallPilot user Mail database for administrator
55
troubleshooting
Unified Messaging 53
U
Unified Messaging
about 7
configuring 24
configuring in Citrix Thin Client Environment 38
configuring servers 13
data network security 13
hardware requirements 7
installing 20
installing in Citrix Thin Client Environment 37
online Help 73
optional hardware requirements 8
requirements 17
software requirements 8
supported IMAP Internet clients 9
supported integrated clients 8
supported Internet mail clients 9
troubleshooting 53
uninstalling 19
windows terminal server 37
Unified Messaging support tools 74
uninstalling
Unified Messaging 19
Uninstalling earlier version of Unified Messaging 19
User installation
fax requirements 19
V
Voice format 9
VPIM 14
Networking 14
Unified Messaging Configuration Guide
80
Index
NN40160-504